接入层交换机配置文档大全
综合数据网小区接入各型交换机配置模板
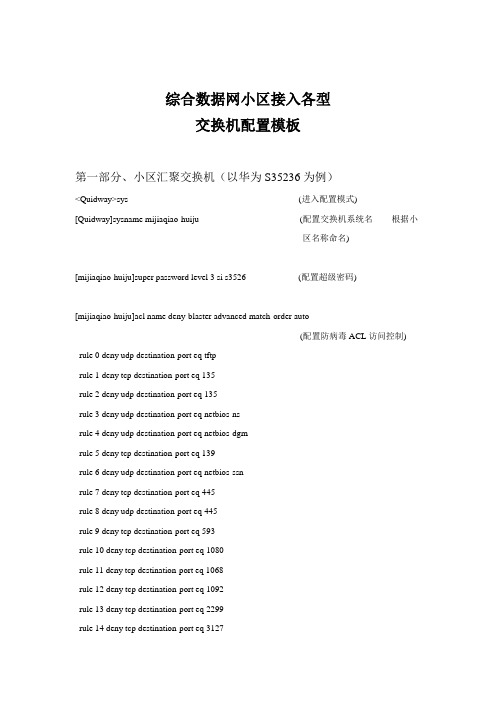
综合数据网小区接入各型交换机配置模板第一部分、小区汇聚交换机(以华为S35236为例)<Quidway>sys (进入配置模式) [Quidway]sysname mijiaqiao-huiju (配置交换机系统名----- 根据小区名称命名)[mijiaqiao-huiju]super password level 3 si s3526 (配置超级密码)[mijiaqiao-huiju]acl name deny-blaster advanced match-order auto(配置防病毒ACL访问控制) rule 0 deny udp destination-port eq tftprule 1 deny tcp destination-port eq 135rule 2 deny udp destination-port eq 135rule 3 deny udp destination-port eq netbios-nsrule 4 deny udp destination-port eq netbios-dgmrule 5 deny tcp destination-port eq 139rule 6 deny udp destination-port eq netbios-ssnrule 7 deny tcp destination-port eq 445rule 8 deny udp destination-port eq 445rule 9 deny tcp destination-port eq 593rule 10 deny tcp destination-port eq 1080rule 11 deny tcp destination-port eq 1068rule 12 deny tcp destination-port eq 1092rule 13 deny tcp destination-port eq 2299rule 14 deny tcp destination-port eq 3127rule 15 deny udp destination-port eq 3127rule 16 deny tcp destination-port eq 3128rule 17 deny udp destination-port eq 3128rule 18 deny tcp destination-port eq 3332rule 19 deny tcp destination-port eq 4444rule 20 deny tcp destination-port eq 4899rule 21 deny udp destination-port eq 4899rule 22 deny tcp destination-port eq 5554rule 23 deny udp destination-port eq 5554rule 24 deny tcp destination-port eq 9996rule 25 deny tcp destination-port eq 10168rule 26 permit ip[mijiaqiao-huiju]packet-filter ip-group deny-blaster (将ACL在全局启用)[mijiaqiao-huiju]vlan 1270 (若交换机下联不可网管的交换机)[mijiaqiao-huiju-vlan1270] port e0/10 (该端口下联不可网管交换机,单独配置使其只属于vlan1270)[mijiaqiao-huiju]vlan 4000(属于管理vlan,一个三层下的所有二层设备都应只属于该管理vlan ,且各个三层设备的管理vlan应不同) [mijiaqiao-huiju-vlan 4000]int vlan 4000[mijiaqiao-huiju-Vlan-interface4000]ip add X.X.X.X 255.255.X.X(配置管理地址,且该地址应统一由分公司规划,每台设备的管理地址不能重复)[mijiaqiao-huiju-Ethernet0/1]des upto-SGS-s8016-e10/0/1(该端口是上联省公司s8016的e10/0/1,应对端口进行相应的描述)[mijiaqiao-huiju-Ethernet0/1]port link trunk (将上连口的工作模式设置成trunk模式)[mijiaqiao-huiju-Ethernet0/1]port trunk per vlan 1260 to 1299 4000(透传vlan个数为下联所有交换机包涵的所有用户vlan 和管理vlan,该汇聚交换机透传了vlan 1260到vlan 1299以及管理vlan 4000)[mijiaqiao-huiju-Ethernet0/1]b 20 (配置广播风暴抑制,只在上联/下联端口进行配置) [mijiaqiao-huiju]int e0/X (该端口下联华为交换机,X为交换机下联端口号)[mijiaqiao-huiju-Ethernet0/X]des downto-XXX-X#(该端口下联XXX小区的X楼,比如米家桥小区1号楼:downto-mijiaqiao-1#) [mijiaqiao-huiju-Ethernet0/X]port link trunk[mijiaqiao-huiju-Ethernet0/X]port trunk per vlan X to X 4000 (透传vlan个数为下联所有楼道交换机包涵的所有用户vlan 和管理vlan,X为透传的vlan ID)[mijiaqiao-huiju-Ethernet0/X]b 20 (配置广播风暴抑制,只在上联/下联端口进行配置)[mijiaqiao-huiju]ip route 0.0.0.0 0.0.0.0 X.X.X.1(配置静态路由,在此配置的地址与前面管理地址的相似,如管理地址是10.20.252.10,配置的静态路由地址为10.20.252.1)[mijiaqiao-huiju]snmp-agent (配置snmp网管协议) [mijiaqiao-huiju]snmp-agent local-engineid 800007DB00E0FC16F6236877[mijiaqiao-huiju]snmp-agent community read public[mijiaqiao-huiju]snmp-agent community write private[mijiaqiao-huiju]snmp-agent sys-info location BeiJing China[mijiaqiao-huiju]snmp-agent sys-info version v2c[mijiaqiao-huiju]snmp-agent target-host trap address udp-domain 172.29.191.10 params securityname public[mijiaqiao-huiju]snmp-agent trap enable standard[mijiaqiao-huiju]snmp-agent trap enable vrrp[mijiaqiao-huiju]snmp-agent trap enable bgp[mijiaqiao-huiju]snmp-agent trap source Vlan-interface4000 (与该三层交换机的管理vlan一致)[mijiaqiao-huiju]user-int vty 0 4 (配置远程登录,所有三层设备密码一样)[mijiaqiao-huiju-ui-vty0-4]set auth pa si s3526<mijiaqiao-huiju>sa (保存配置文件)y第二部分、小区楼道交换机(以华为S2016为例)1、直接接用户的楼道交换机<Quidway>sys(进入配置模式)[Quidway]sysname mijiaqiao-1#(配置交换机系统名----- 根据小区名称命名,比如米家桥小区1号楼)[mijiaqiao-1#]super password level 3 si s2403 (配置超级密码)[mijiaqiao-1#]vlan 1260(配置用户vlan,应统一由分公司规划,且不能重复使用)[mijiaqiao-1#-vlan1260]port e0/2 to e0/9[mijiaqiao-1#]vlan 1261[mijiaqiao-1#-vlan1261]port e0/10 to e0/16[mijiaqiao-1#]vlan 4000(属于管理vlan,一个三层下的所有二层设备都应只属于该管理vlan ,且各个三层设备的管理vlan应不同)[mijiaqiao-1#-vlan 4000]int vlan 4000[mijiaqiao-1#-Vlan-interface4000]ip add X.X.X.X 255.255.X.X(置管理地址,且该地址应统一由分公司规划,每台设备的管理地址不能重复) [mijiaqiao-1#]int e0/X(该端口上联汇聚交换机,如s3526)[mijiaqiao-1#-Ethernet0/X]des upto-s3526-e0/2(该端口是上联汇聚交换机的e0/2,应对端口进行相应的描述)[mijiaqiao-1#-Ethernet0/X]port link-type trunk (将上连口的工作模式设置成trunk模式)[mijiaqiao-1#-Ethernet0/X]port trunk permit vlan 1260 to 1261 4000(透传vlan个数为该交换机包涵的所有用户vlan 和管理vlan)[mijiaqiao-1#-Ethernet0/X]b 20 (配置广播风暴抑制,只在上联/下联端口进行配置) [mijiaqiao-1#]ip route 0.0.0.0 0.0.0.0 X.X.X.1(配置静态路由,在此配置的地址与前面管理地址的相似,如管理地址是10.20.252.10,配置的静态路由地址为10.20.252.1)[mijiaqiao-1#]snmp-agent local-engineid 800007DB00E0FC2D6F586877[mijiaqiao-1#]snmp-agent community read public[mijiaqiao-1#]snmp-agent community write private[mijiaqiao-1#]snmp-agent sys-info contact HuaWei BeiJing China[mijiaqiao-1#]snmp-agent sys-info location BeiJing China[mijiaqiao-1#]snmp-agent sys-info version v2c[mijiaqiao-1#]snmp-agent target-host trap address udp-domain 172.29.191.10 params securityname public[mijiaqiao-1#]snmp-agent trap enable standard[mijiaqiao-1#]user-int vty 0 4 (配置远程登录,所有二层设备密码一样)[mijiaqiao-1#-ui-vty0-4] set auth pass si s2403<mijiaqiao-1#>sa (保存配置文件)y2、既接用户又下联交换机的楼道交换机(以华为S2016为例)<Quidway>sys (进入配置模式) [Quidway]sysname mijiaqiao-1# (配置交换机系统名----- 根据小区名称命名,比如米家桥小区1号楼)[mijiaqiao-1#]super password level 3 si s2403 (配置超级密码)[mijiaqiao-1#]vlan 1260(配置用户vlan,应统一由分公司规划,且不能重复使用,1260到1261是本机的用户vlan,1262是下联交换机的用户vlan)[mijiaqiao-1#-vlan1260]port e0/3 to e0/10[mijiaqiao-1#]vlan 1261[mijiaqiao-1#-vlan1261]port e0/11 to e0/16[mijiaqiao-1#]vlan 4000(属于管理vlan,一个三层下的所有二层设备都应只属于该管理vlan ,且各个三层设备的管理vlan应不同)[mijiaqiao-1#-vlan 4000]int vlan 4000[mijiaqiao-1#-Vlan-interface4000]ip add X.X.X.X 255.255.X.X(配置管理地址,且该地址应统一由分公司规划,每台设备的管理地址不能重复) [mijiaqiao-1#]int e0/X (该端口上联汇聚交换机,如s3526)[mijiaqiao-1#-Ethernet0/X]des upto-s3526-e0/1(该端口是上联汇聚交换机的e0/1,应对端口进行相应的描述)[mijiaqiao-1#-Ethernet0/X]port link-type trunk (将上连口的工作模式设置成trunk模式)[mijiaqiao-1#-Ethernet0/X]port trunk permit vlan 1260 to 1262 4000(透传vlan个数为该交换机包涵的所有用户vlan 和管理vlan)[mijiaqiao-1#-Ethernet0/X]b 20 (配置广播风暴抑制,只在上联/下联端口进行配置) [mijiaqiao-1#]int e0/2 (该端口下联华为s2008交换机)[mijiaqiao-1#-Ethernet0/2]des downto-XXX-X#(该端口下联XXX小区的X楼,比如米家桥小区2号楼:downto-mijiaqiao-2#) [mijiaqiao-1#-Ethernet0/2]port link trunk (将上连口的工作模式设置成trunk模式)(透传vlan个数为下联交换机包涵的所有用户vlan 和管理vlan)[mijiaqiao-1#-Ethernet0/1]b 20 (配置广播风暴抑制,只在上联/联端口进行配置) [mijiaqiao-1#]ip route 0.0.0.0 0.0.0.0 X.X.X.1(配置静态路由,在此配置的地址与前面管理地址的相似,如管理地址是10.20.252.10,配置的静态路由地址为10.20.252.1)[mijiaqiao-1#]snmp-agent (配置snmp网管协议) [mijiaqiao-1#]snmp-agent local-engineid 800007DB00E0FC2D6F586877[mijiaqiao-1#]snmp-agent community read public[mijiaqiao-1#]snmp-agent community write private[mijiaqiao-1#]snmp-agent sys-info contact HuaWei BeiJing China[mijiaqiao-1#]snmp-agent sys-info location BeiJing China[mijiaqiao-1#]snmp-agent sys-info version v2c[mijiaqiao-1#]snmp-agent target-host trap address udp-domain 172.29.191.10 params securityname public[mijiaqiao-1#]snmp-agent trap enable standard[mijiaqiao-1#]user-int vty 0 4 (配置远程登录,所有二层设备密码一样)[mijiaqiao-1#-ui-vty0-4] set auth pass si s2403<mijiaqiao-1#>sa (保存配置文件)y3、格林耐特(16口)TiNet>enableTiNet#config t (进入配置模式)TiNet(config)# host mijiaqiao-1#(配置交换机系统名----- 根据小区名称命名,比如米家桥小区1号楼)TiNet(config)#ipadd X.X.X.X 255.255.X.X X.X.X.X(配置管理地址,且该地址应统一由分公司规划,每台设备的管理地址不能重复,蓝色的部分为网关,配置与华为交换机类似)TiNet(config)#vlan 4000 (属于管理vlan,一个三层下的所有二层设备都应只属于该管理vlan ,且各个三层设备的管理vlan应不同)TiNet(config-if-vlan-4000)#sw int e 0/1 (将端口与管理vlan 绑定)exTiNet(config)#ip vlan 4000 (将ip与管理vlan 绑定)exTiNet(config)#vlan 1260 (配置用户vlan,应统一由分公司规划,且不能重复使用) TiNet(config-if-vlan-1260)#sw int e 0/1 to e 0/8exTiNet(config)#int e 0/2sw acc vlan 1260exTiNet(config)#int e 0/3sw acc vlan 1260TiNet(config)#int e 0/4 sw acc vlan 1260exTiNet(config)#int e 0/5 sw acc vlan 1260exTiNet(config)#int e 0/6 sw acc vlan 1260exTiNet(config)#int e 0/7 sw acc vlan 1260exTiNet(config)#int e 0/8 sw acc vlan 1260exTiNet(config)#vlan 1261 sw int e 0/1 e 0/9 to e 0/16 exTiNet(config)#int e 0/9 sw acc vlan 1261exTiNet(config)#int e 0/10 sw acc vlan 1261exTiNet(config)#int e 0/11 sw acc vlan 1261exTiNet(config)#int e 0/12 sw acc vlan 1261TiNet(config)#int e 0/13sw acc vlan 1261exTiNet(config)#int e 0/14sw acc vlan 1261exTiNet(config)#int e 0/15sw acc vlan 1261exTiNet(config)#int e 0/16sw acc vlan 1261exTiNet(config)#int e 0/1 (该端口上联汇聚交换机,如s3526)sw mode trunk (将上连口的工作模式设置成trunk模式)exTiNet(config)#snmp community public ro permit (配置snmp网管协议)TiNet(config)#snmp host 10.199.255.254 version 2c snmpexTiNet(config)#sa (copy run st ) (保存配置文件)y重要说明:1、上述配置中标为红体字的交换机的管理vlan、管理的ip地址、用户vlan都是有变化的,主要由分公司统一规划。
三层交换机的连接和配置

01
命令行接口是三层交换机最常 用的配置方式,通过CLI可以执 行各种配置命令,对交换机进 行全面配置。
ห้องสมุดไป่ตู้
02
CLI的命令结构通常由命令关键 字、参数和选项组成,用户需 要根据需求输入相应的命令。
03
常用的CLI命令包括查看配置、 修改配置、保存配置等,用户 需要熟练掌握这些命令的使用 方法。
配置文件
三层交换机的连接和 配置
目录
• 三层交换机概述 • 三层交换机的连接方式 • 三层交换机的配置基础 • 三层交换机的VLAN配置 • 三层交换机的IP配置 • 三层交换机的路由配置 • 三层交换机的安全配置
01
三层交换机概述
什么是三层交换机
定义
三层交换机是一种具备数据链路层和 网络层功能的交换机,能够实现路由 和交换两种功能。
详细描述
配置端口安全后,交换机将只允许与已绑定MAC地址 和IP地址的设备通信,从而防止非法设备接入网络。
IP源保护的配置
总结词
IP源保护是一种防止IP欺骗的安全机制,通过验证数据 包的源IP地址是否合法来确保通信安全。
详细描述
配置IP源保护后,交换机将检查数据包的源IP地址是否 与目的IP地址匹配,如果不匹配则丢弃该数据包,以防 止IP欺骗攻击。
详细描述
在配置三层交换机的IP地址时,需要选择一个未被使用的IP地址,并确保该IP地址在该网络中是唯一 的。IP地址的分配应考虑到网络的规划和管理需求。
子网掩码的配置
总结词
子网掩码用于划分IP地址的网络部分和主 机部分,帮助确定设备所属的子网。
VS
详细描述
子网掩码是一个32位的值,用于标识IP地 址的网络部分和主机部分。通过将IP地址 与子网掩码进行按位与运算,可以确定设 备所属的子网。子网掩码的配置应与网络 规划保持一致。
完整word版交换机路由器配置总结
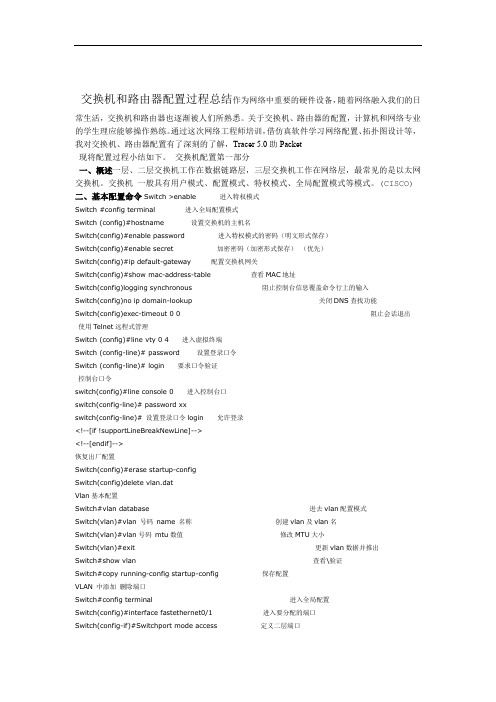
交换机和路由器配置过程总结作为网络中重要的硬件设备,随着网络融入我们的日常生活,交换机和路由器也逐渐被人们所熟悉。
关于交换机、路由器的配置,计算机和网络专业的学生理应能够操作熟练。
通过这次网络工程师培训,借仿真软件学习网络配置、拓扑图设计等,我对交换机、路由器配置有了深刻的了解,Tracer 5.0助Packet现将配置过程小结如下。
交换机配置第一部分一、概述一层、二层交换机工作在数据链路层,三层交换机工作在网络层,最常见的是以太网交换机。
交换机一般具有用户模式、配置模式、特权模式、全局配置模式等模式。
(CISCO) 二、基本配置命令Switch >enable 进入特权模式Switch #config terminal 进入全局配置模式Switch (config)#hostname 设置交换机的主机名Switch(config)#enable password 进入特权模式的密码(明文形式保存)Switch(config)#enable secret 加密密码(加密形式保存)(优先)Switch(config)#ip default-gateway 配置交换机网关Switch(config)#show mac-address-table 查看MAC地址Switch(config)logging synchronous 阻止控制台信息覆盖命令行上的输入Switch(config)no ip domain-lookup 关闭DNS查找功能Switch(config)exec-timeout 0 0 阻止会话退出使用Telnet远程式管理Switch (config)#line vty 0 4 进入虚拟终端Switch (config-line)# password 设置登录口令Switch (config-line)# login 要求口令验证控制台口令switch(config)#line console 0 进入控制台口switch(config-line)# password xxswitch(config-line)# 设置登录口令login 允许登录<!--[if !supportLineBreakNewLine]--><!--[endif]-->恢复出厂配置Switch(config)#erase startup-configSwitch(config)delete vlan.datVlan基本配置Switch#vlan database 进去vlan配置模式Switch(vlan)#vlan 号码name 名称创建vlan及vlan名Switch(vlan)#vlan号码mtu数值修改MTU大小Switch(vlan)#exit 更新vlan数据并推出Switch#show vlan 查看\验证Switch#copy running-config startup-config 保存配置VLAN 中添加删除端口Switch#config terminal 进入全局配置Switch(config)#interface fastethernet0/1 进入要分配的端口Switch(config-if)#Switchport mode access 定义二层端口vlan把端口分给一个号vlan acces Switch(config-if)#SwitchportSwitch(config-if)#switchport mode trunk 设置为干线Switch(config-if)#switchport trunk encapsulation dot1q 设置vlan 中继协议Switch(config-if)#no switchport mode 或( switchport mode access) 禁用干线Switch(config-if)#switchport trunk allowed vlan add 1,2 从Trunk中添加vlansSwitch(config-if)#switchport trunk allowed vlan remove 1,2 从Trunk中删除vlanSwitch(config-if)#switchport trunk pruning vlan remove 1,2 ;从Trunk中关闭局部修剪查看vlan信息Switch#show vlan brief 所有vlan信息查看vlan信息Switch#show vlan id 某个vlan信息注:Switch#show int trunk 查看trunk协议注:可以使用default interface interface-id 还原接口到默认配置状态Trunk开启(no)——将端口设置为永久中继模式关闭(off)——将端口设置为永久非中继模式,并且将链路转变为非中继链路企望(desirable)——让端口主动试图将链路转换成中继链路自动(auto)——使该端口愿意将链路变成中继链路交换机显示命令:switch#show vtp status 查看vtp配置信息switch#show running-config 查看当前配置信息switch#show vlan 查看vlan配置信息switch#show interface 查看端口信息switch#show int f0/0 查看指定端口信息switch#dir flash: 查看闪存switch#show version 查看当前版本信息switch#show cdp cisco设备发现协议(可以查看聆接设备)switch#show cdp traffic 杳看接收和发送的cdp包统计信息switch#show cdp neighbors 查看与该设备相邻的cisco设备switch#show interface f0/1 switchport 查看有关switchport的配置switch#show cdp neighbors 查看与该设备相邻的cisco设备三、模拟配置(一个实例)地址、子网掩码、默认网关配置截图IP机PC图一:图二:模拟网络拓扑结构图图三:全局模式下对交换机进行配置图四:查看VLAN当前配置信息第二部分路由器配置一、环境搭建(借鉴网上的材料,通过自己配置也实现了同样的功能)添加一个模块化的路由器,单击Packet Tracer 5.0的工作区中刚添加的路由器,在弹出的配置窗口上添加一些模块:图五默认情况下,路由器的电源是打开的,添加模块时需要关闭路由器的电源,单击图一箭头所指的电源开关,将其关闭,路由器的电源关闭后绿色的电源指示灯也将变暗。
2. 接入层交换机配置

配置管理
接入层交换机配置
认识接入层以太网交换机: 交换机的基本配置
④ 交换机VLAN创建,删除
switch#vlan database ;进入VLAN设置 switch(vlan)#vlan 2 ;创建VLAN 2 switch(vlan)#vlan 3 name vlan3 ;创建VLAN 3并命名
(1)通过Console端口配置
接入层交换机配置
认识接入层以太网交换机: 交换机的配置途径
(1)通过Console端口配置
接入层交换机配置
认识接入层以太网交换机: 交换机的配置途径
(2)通过Telnet访问
接入层交换机配置
认识接入层以太网交换机: 交换机的配置途径
(3)通过其它方法访问 ① 利用SecureCRT软件登录 ② 利用HTTP访问
当在不同的模式下,CLI界面中会出现不同的提示符。
接入层交换机配置
认识接入层以太网交换机: 交换机的基本配置
接入层交换机配置
认识接入层以太网交换机: 交换机的基本配置
基本配置方法
① 设置主机名:
switch>enable;进入特权模式 switch#config terminal;进入全局配置模式 switch(config)#hostname csico ;设置交换机 的主机名为csico
接入层交换机配置
认识接入层以太网交换机: 启动交换机
交换机相当于一台特殊的计算机,同样有CPU、存 储介质和操作系统,只不过这些都与PC机有些差别而已。
交换机也由硬件和软件两部分组成,软件部分主要 是IOS操作系统,硬件主要包含CPU、端口和存储介质。
对于还未配置的交换机,在启动时会询问是否进行 配置,此时可键人“yes”进行配置,若不想配置,可 键入“no”,在任何时刻,可按Ctrl+C组合键,终止配 置。
交换机基本配置Word版

交换机基本配置实训目的:掌握交换机的配置模式,掌握交换机的基本配置命令拓扑图:实训步骤:1.按照拓扑图正确连接设备2.登录到逻辑机架(设备)username:注册用户名password:注册用户密码3.配置交换机准备知识:模式访问方式提示符退出方法描述用户EXEC 在交换机上启动一个会话Switch> 输入logout或quit使用该模式完成基本的测试和系统信息显示功能特权EXEC 在用户EXEC模式下,输入enable命令Switch# 输入disable或exit使用该模式来检验所输入的命令,配置一些命令。
全局配置在特权EXEC模式下,输入configure命令Switch(config)#退回到特权EXEC模式,输入exit、end或ctrl-z使用该模式配置用于整个交换机的参数接口配置在全局配置模式下,输入interface命令以及特定的端口号Switch(config-if)#退回到全局配置模式,输入exit;退回到特权EXEC模式,输入end或ctrl-z使用该模式为以太网接口配置参数●进入第14级特权模式,以便对交换机进行配置,输入在命令为:>enable 14(问题1:交换机的特权模式有多少级别?有什么意义?分别如何进入?)提示输入14级别的密码password,输入123456,则进入第14级特权模式,注意提示符的变化●在>下使用?,查看在第14级特权模式下可以进行的命令。
操作以下几个:Switch# show versionSwitch# show running-config (每次对交换机配置后,都使用该命令,以检查配置是否正确)Switch# show startup-configSwitch# show ip interfaceSwitch# show vlanShow running-config●配置交换机的基本信息:重要提示:配置网络设备时,首先要完成的任务之一就是防止未授权的访问。
交换机的安装与配置

中继器
集线器
网桥
交换机
相关知识
01.
中继器
02.
中继器(REPEATER) 是对信号进行再生
03.
和还原的网络设备,是 OSI 参考模型的物
04.
理层连接设备。适用于完全相同的两类网
05.
络的互连,主要功能是通过对数据信号的重
06.
新发送或者转发,来扩大网络传输的距离。
中继器是最简单的网络互联设备,主要完成物理层的功能,
核心层
汇聚层
接入层
网络规划图
接入层的设计 接入层位于网络拓扑结构的最底层,接入层交换机用于连接终端用户,端口密度一般比较高,并且应配备高速上连端口。一般可采用二层交换机。
汇聚层的设计 汇聚层交换机用于汇聚接入层交换机的流量,并上连至核心层交换机,一般采用三层交换机。这类交换机一般具有一定数量的高速端口,以提供较高的数据吞吐能力
否则三层交换模块根据路由信息向B站广播一个
ARP请求,B站得到此ARP请求后向三层交换模
块回复其MAC地址,三层交换模块保存此地址并
回复给发送站A,同时将B站的MAC地址发送到二
层交换引擎的MAC地址表中。从这以后,当A向
B发送的数据包便全部交给二层交换处理,信息
得以高速交换。由于仅仅在路由过程中才需要三
项目:交换机的安装与配置
项目描述:要求设计一个结构清晰、易于扩展的交换机互联方案,满足校园网的规模的扩大及功能的增加,并一段时间内保持先进性。还要防止因单点失效造成全网瘫痪,即使出现单点失效也要将影响减到最小,可通过交换机的配置实现以上的目标。
项目分析 为了实现网络系统建设目标,使骨干网络系统具有良好的扩展性和灵活的接入能力,并且易于管理、易于维护,在组网设计上采用3层结构化设计方案:接入层、汇聚层和核心层。
交换机和路由器基本配置
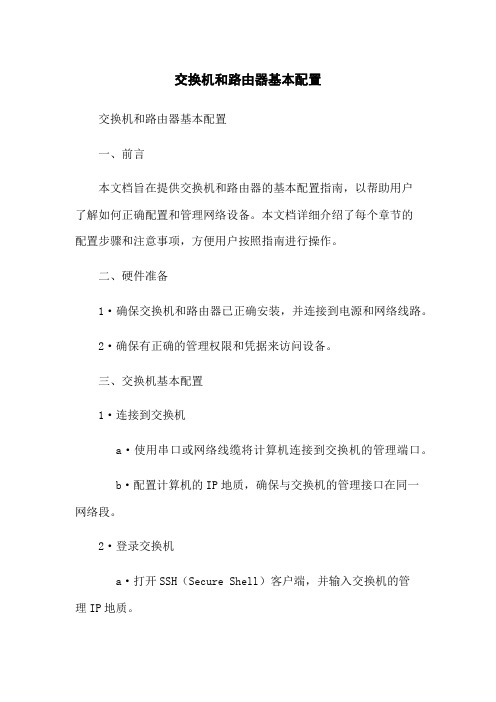
交换机和路由器基本配置交换机和路由器基本配置一、前言本文档旨在提供交换机和路由器的基本配置指南,以帮助用户了解如何正确配置和管理网络设备。
本文档详细介绍了每个章节的配置步骤和注意事项,方便用户按照指南进行操作。
二、硬件准备1·确保交换机和路由器已正确安装,并连接到电源和网络线路。
2·确保有正确的管理权限和凭据来访问设备。
三、交换机基本配置1·连接到交换机a·使用串口或网络线缆将计算机连接到交换机的管理端口。
b·配置计算机的IP地质,确保与交换机的管理接口在同一网络段。
2·登录交换机a·打开SSH(Secure Shell)客户端,并输入交换机的管理IP地质。
b·使用正确的用户名和密码登录交换机。
3·配置基本参数a·配置交换机的主机名,确保唯一性并易于识别。
b·配置管理VLAN,以便远程管理设备。
c·配置SNMP(Simple Network Management Protocol)参数,以实现对交换机的监控和管理。
4·创建和配置VLANa·创建VLAN并指定相应的VLAN ID。
b·将端口分配给相应的VLAN。
c·配置VLAN接口的IP地质,以实现不同VLAN之间的通信。
5·配置STP(Spanning Tree Protocol)a·启用STP机制,以防止网络环路导致的数据包洪泛。
b·配置根桥和边界端口,以优化网络拓扑。
6·配置端口安全a·配置端口安全以限制与特定MAC地质相关联的设备的接入。
b·配置端口安全阈值,以控制允许接入的设备数量。
7·配置QoS(Quality of Service)a·配置QoS以实现对网络流量的优先级分类和限制。
b·配置流量控制策略,以保证重要数据的传输质量。
接入层交换机配置标准设置学习
接入层交换机配置标准,依据东风汽车有限公司-网络标准。
需要配置以下几点:1.在所有Cisco网络设备上激活cdp协议;2.启用Network Time Protocol 使时间统一、同步;3.启用logging 将网络设备的日志信息存放到指定的网络设备上,有助于管理;4.配置SNMP 目的在于支持HP OVO网络管理软件的实施;5.在接入层交换机仅限于启用VTP mode client 模式;在所有汇聚层交换机上,VTP模式定义为Server,并采用VTP Password进行保护;6.启用802.1Q,限于接入层与汇聚层,并所有Trunk的Native VLAN从VLAN1 改为一个我们预先定义好的VLAN,利于提高网络安全性和便于故障诊断,所有的非Trunk端口,都要设置“trunk off”7.在接入层交换机上使用RSTP协议;8.在汇聚层交换机上激活 BPDU Guard功能;9.接入层交换机上要配置STP Root Guard和Loop Guard Features,在接入层交换机上使用STP UplinkFast功能;10.在所有接入层交换机的上联光纤端口上激活UDLD功能;11.在所有的接入层交换机的上行光纤接口上激活风暴控制功能;参照“PV研发大楼拓扑结构示意图20061110.vsd”并模拟配置如下:首先配置2台4506以2台实体机3750代替;1运用show version、show ip int brief,查看版本序列号以及端口是否正常;2.更改hostmane enable password vty3.划分管理VLAN ,添加IP地址,网关;4.设置4506-1的G2口与3750-2的G2口相连,即802.1q Trunk模式设置4506-1的G3-6口与3750-2的G3-6口做EtherChannel5.激活RSTP协议;6. 激活PortFast BPDU Guard和Loop Guard激活Loop Guard功能以下例子显示如何在全局方式下激活Loop Guard:Router# configure terminalRouter(config)# spanning-tree loopguard defaultRouter(config)# ^ZRouter# show spanning-tree interface fastTthernet 4/4 detailPort 196 (FastEthernet4/4) of VLAN0010 is forwardingPort path cost 1000, Port priority 160, Port Identifier 160.196.Designated root has priority 32768, address 00d0.00b8.140a Designated bridge has priority 32768, address 00d0.00b8.140a Designated port id is 160.196, designated path cost 0Timers: message age 0, forward delay 0, hold 0Number of transitions to forwarding state:1The port is in the portfast mode by portfast trunk configuration Link type is point-to-point by defaultBPDU filter is enabledLoop guard is enabled by default on the portBPDU:sent 0, received 0以下例子显示如何配置Loop Guard : Router# configure terminalEnter configuration commands, one per line. End with CNTL/Z. Router(config)# interface fastEthernet 4/4 Router(config-if)# spanning-tree guard loop Router(config-if)# ^Z7. UDLD 功能,一般使用在光纤上不支持RJ45接口。
配置接入层交换机

S2126#c opy running-config startup-config
S2126# write memory
S2126# write //将当前运行的参数保存到flash中用于系统初始化是初始化参数
S2126# delete flash:config.text //永久性的删除flash中配置的文件
S2126 (config-if)# exit
07)查看交换机的配置信息
S2126# show ip interfaces
//查看交换机接口信息
S2126# show interfaces vlan 1
//查看管理VLAN1信息
S2126# show running-config
//查看配置信息
08)保存/删除交换机配置信息
(4)按下面要求对交换机进行配置,网络拓扑结构如图3-1-6所示,要求如下。 1)设置enable密码为admin。 2)创建VLAN10、VLAN20、VLAN30;分别命名为yuwen、shuxue和yingyu。 3)将Fa0/1-5加入VLAN10、Fa/6-10加入VLAN20、Fa/11-20加入VLAN30。 4)在电脑PC1中ping电脑PC2和PC3的IP,检测网络连通性。 5)在电脑PC3中ping电脑PC2的IP、ping电脑PC4的IP,检测网络连通性。 6)导出配置文件为T1-4.text。
//配置交换机的Telnet登录密码为xxhua
Switch(config)# enable secret level 15 0 xxh
//配置交换机的特权密码为xxh
(3)配置交换机允许Telnet登录
为了使交换机允许通过Telnet进行远程配置,而不需要每次都通过本地进行配置,这就需要对交换机进行一系列 的配置,步骤如下。
接入交换机及其配套件参数
接入交换机及其配套件参数1工作环境要求1.1* 本品目网络交换机设备作为接入层网络交换设备及备用设备,接入到学院原有的计算机网络系统中。
学院原有计算机网络系统由CISCO设备组成,网络中设置了多个VLAN,学院核心交换机6509(VTP Server)使用VTP协议统一发布VLAN配置信息,使所有工作于VTP客户模式的交换机的VLAN信息同步。
本品目网络交换机设备将配置为VTP Client模式,由VTP协议同步全学院的VLAN配置。
1.2* 本品目的网络交换机设备将由学院原有系统的CiscoWork2000软件进行统一网络管理。
在学院原有计算机网络系统中,管理人员能通过CDP协议发现邻居交换机信息以及线路接口位置,通过管理软件能查询所有网络终端用户的接线端口位置(User Tracking)。
并对交换机的重要功能故障(网络端口、电源、风扇等工作状态)进行实时监视和邮件报警。
通过这些功能实现网络故障快速定位和修复。
若投标设备不兼容以上功能,则必须配套提供上述相应功能的网管软件和服务器1.3环境条件:• 工作温度: 32 至104°F (0 至40°C)• 存储温度: -40 至167°F (-40 至75°C)•相对湿度: 10%至90 %, 非凝固2规格2.1本品目设备是接入层交换机,分别配置8/24/48个10M/100M自适应电口;不少于2个千兆光电复用上联接口;2.2配置2个多模光纤转发模块2.3处理能力2.3.1交换容量≥16G2.3.2转发速率≥6.5Mpps2.3.3支持IPv6和IPv4协议。
2.3.4支持PVRST+可以在每个VLAN生成树的基础上实现快速生成树重新收敛,而不需要部署生成树实例;PVST+可以在冗余连接上实现第二层负载2.3.5每个交换机或者堆叠最多可以支持255个VLAN,每个交换机最多可以支持128个生成树实例。
2.3.6支持带有VLAN分配功能的IEEE 802.1x可以为某个特定的用户提供一个动态的VLAN,而无论用户连接到什么地方。
h3c接入层交换机设置

h3c接入层交换机设置system-viewSystem View: return to User View with Ctrl+Z.[H3C]local-user h3c /*建立telnet登录用户*/New local user added.[H3C-luser-h3c]password simple h3c /*设置telnet用户登录密码*/[H3C-luser-h3c]service-type telnet /*设置用户服务类型为telnet*/[H3C-luser-h3c]level 3 /*设置用户服务权限为最高*/[H3C-luser-h3c][H3C-luser-h3c][H3C-luser-h3c]quit /*退出到系统视图*/[H3C][H3C]sysname wxjdc /*交换机命名为 wxjdc */[wxjdc]user-interface vty 0 4 /*进入用户配置模版固定值*/[wxjdc-ui-vty0-4]authentication-mode scheme /*设置用户配置模版验证模式 */[wxjdc-ui-vty0-4][wxjdc-ui-vty0-4]quit /*退出到系统视图*/[wxjdc]vl 20 /*建立VLAN 20*/[wxjdc-vlan20][wxjdc-vlan20][wxjdc-vlan20]port Ethernet 1/0/1 to e 1/0/48 /*把1/0/1至1/0/48划入VLAN20*/[wxjdc-vlan20]interface GigabitEthernet1/1/1 /*进入 Gi 1/1/1接口下*/[wxjdc-vlan20]port access vlan 20 /*把Gi 1/1/1划入VLAN20*/[wxjdc-vlan20][wxjdc-vlan20]interface Vlan-interface 20 /*进入VLAN 20 三层接口*/[wxjdc-Vlan-interface20]ip add 10.136.47.111 255.255.255.0/24 /*配置VLAN 20 三层接口地址*/[wxjdc-Vlan-interface20][wxjdc-Vlan-interface20][wxjdc-Vlan-interface20]qu[wxjdc]ip route-static 0.0.0.0 0.0.0.0 10.136.47.254 /*配置默认路由至Vlan 20的网关地址*/[wxjdc]qutelnet 127.0.0.1 /*测试telnet配置是否成功*/Trying 127.0.0.1 ...Press CTRL+K to abortConnected to 127.0.0.1 ...*************************************************************** ****************** Copyright(c) 2004-2006 Hangzhou Huawei-3Com Tech. Co., Ltd. ** Without the owner's prior written consent, ** no decompiling or reverse-engineering shall be allowed. * *************************************************************** *****************Login authenticationUsername:h3cPassword:%Apr 2 00:06:36:900 2000 wxjdc SHELL/5/LOGIN:- 1 - h3c(127.0.0.1) in unit1 login%Apr 2 00:06:36:997 2000 wxjdc SHELL/5/LOGIN:- 1 - h3c(127.0.0.1) in unit1 loginsySystem View: return to User View with Ctrl+Z.[wxjdc][wxjdc]qu%Apr 2 00:06:50:187 2000 wxjdc SHELL/5/LOGOUT:- 1 - h3c(127.0.0.1) in unit1 logoutThe connection was closed by the remote host!sySystem View: return to User View with Ctrl+Z.[wxjdc]完整配置:[wxjdc]dis cu#sysname wxjdc#radius scheme system#domain system#local-user h3cpassword simple h3cservice-type telnetlevel 3#vlan 1#vlan 20interface Vlan-interface20ip address 10.136.47.31 255.255.255.0 #interface Aux1/0/0#interfaceEthernet1/0/1port access vlan 20#interface Ethernet1/0/2port access vlan 20#interface Ethernet1/0/3port access vlan 20#interface Ethernet1/0/4port access vlan 20#interface Ethernet1/0/5port access vlan 20#interface Ethernet1/0/6port access vlan 20#interface Ethernet1/0/7port access vlan 20#interface Ethernet1/0/8#interface Ethernet1/0/9 port access vlan 20#interface Ethernet1/0/10 port access vlan 20#interface Ethernet1/0/11 port access vlan 20#interface Ethernet1/0/12 port access vlan 20#interface Ethernet1/0/13 port access vlan 20#interface Ethernet1/0/14 port access vlan 20#interface Ethernet1/0/15 port access vlan 20#interface Ethernet1/0/16 port access vlan 20#interface Ethernet1/0/17 port access vlan 20#interface Ethernet1/0/18#interface Ethernet1/0/19 port access vlan 20#interface Ethernet1/0/20 port access vlan 20#interface Ethernet1/0/21 port access vlan 20#interface Ethernet1/0/22 port access vlan 20#interface Ethernet1/0/23 port access vlan 20#interface Ethernet1/0/24 port access vlan 20#interface Ethernet1/0/25 port access vlan 20#interface Ethernet1/0/26 port access vlan 20#interface Ethernet1/0/27 port access vlan 20#interface Ethernet1/0/28#interface Ethernet1/0/29 port access vlan 20#interface Ethernet1/0/30 port access vlan 20#interface Ethernet1/0/31 port access vlan 20#interface Ethernet1/0/32 port access vlan 20#interface Ethernet1/0/33 port access vlan 20#interface Ethernet1/0/34 port access vlan 20#interface Ethernet1/0/35 port access vlan 20#interface Ethernet1/0/36 port access vlan 20#interface Ethernet1/0/37 port access vlan 20#interface Ethernet1/0/38#interface Ethernet1/0/39 port access vlan 20#interface Ethernet1/0/40 port access vlan 20#interface Ethernet1/0/41 port access vlan 20#interface Ethernet1/0/42 port access vlan 20#interface Ethernet1/0/43 port access vlan 20#interface Ethernet1/0/44 port access vlan 20#interface Ethernet1/0/45 port access vlan 20#interface Ethernet1/0/46 port access vlan 20#interface Ethernet1/0/47 port access vlan 20#interface Ethernet1/0/48#interface GigabitEthernet1/1/1port access vlan 20#interface GigabitEthernet1/1/2#interface GigabitEthernet1/1/3#interface GigabitEthernet1/1/4#undo irf-fabric authentication-mode#interface NULL0#voice vlan mac-address 0001-e300-0000 mask ffff-ff00-0000 #ip route-static 0.0.0.0 0.0.0.0 10.136.47.254 preference 60#user-interface aux 0 7user-interface vty 0 4authentication-mode scheme。
接入层交换机配置

C2960-9F-up#show running-configBuilding configuration...Current configuration : 10054 bytes!! Last configuration change at 02:00:32 UTC Tue Oct 26 2010 by liujunjie ! NVRAM config last updated at 23:51:51 UTC Wed Sep 1 2010 by liujunjie !version 12.2no service padservice timestamps debug datetimeservice timestamps log datetimeno service password-encryption!hostname C2960-9F-up!enable secret 5 $1$vPXp$Sa4uHCN37NDywGx1ahNb9/!username cisco password 0 scpitmaaa new-modelaaa authentication login default group tacacs+ localaaa authentication enable default group tacacs+ enableaaa authentication dot1x default group radiusaaa authorization consoleaaa authorization exec default group tacacs+ localaaa authorization commands 15 default group tacacs+ localaaa authorization network default group radiusaaa accounting exec default start-stop group tacacs+aaa accounting commands 15 default start-stop group tacacs+aaa accounting connection default start-stop group tacacs+!aaa session-id commonvtp mode transparentip subnet-zero!no ip domain-lookup!!!dot1x system-auth-controlno file verify auto!spanning-tree mode pvstspanning-tree extend system-idno spanning-tree vlan 202!vlan internal allocation policy ascending !vlan 10-11,77!vlan 88name vlan88!vlan 101name HQSR1!vlan 103name HQSR3!vlan 105name HQSR5!vlan 188name internet!vlan 199name HQDCSW!vlan 200name HQPR!vlan 201name HQGMO!vlan 202name HQHR!vlan 203name HQFINANCE!vlan 204name HQDEVELOP!vlan 205name HQINV!vlan 206name HQ-PROJ-MANAGER!vlan 207name HQ-PROJ-BUDGET !vlan 208name HQLAW!vlan 209name HQADMIN!vlan 210name HQIT!vlan 225name HQGUEST!vlan 226name HQOFFICE!vlan 231name BRLEADER!vlan 232name BRHR!vlan 233name BRFINANCE!vlan 236name BROFFICE!vlan 299name HQSW!vlan 1101name RTSR1!vlan 1103name RTSR3!vlan 1105name RTSR5!vlan 1200name RTPR!vlan 1201name RTGMO!vlan 1202name RTHR!vlan 1203name RTFINANCE!vlan 1205name RTINV!vlan 1206name rtproject!vlan 1210name RTIT!vlan 1225name RTGUEST!vlan 1226name RTOFFICE!vlan 1232name MALLHR!vlan 1233name MALLFINANCE!vlan 1236name MALLOFFICE!vlan 1299name RTSW!interface FastEthernet0/1 switchport access vlan 226 switchport mode access spanning-tree portfast!interface FastEthernet0/2switchport access vlan 226 switchport mode access spanning-tree portfast!interface FastEthernet0/3 switchport access vlan 226 switchport mode access dot1x pae authenticator dot1x port-control auto spanning-tree portfast!interface FastEthernet0/4 switchport access vlan 226 switchport mode access dot1x pae authenticator dot1x port-control auto spanning-tree portfast!interface FastEthernet0/5 switchport access vlan 226 switchport mode access dot1x pae authenticator dot1x port-control auto spanning-tree portfast!interface FastEthernet0/6 switchport access vlan 226 switchport mode access dot1x pae authenticator dot1x port-control auto spanning-tree portfast!interface FastEthernet0/7 switchport access vlan 226 switchport mode access dot1x pae authenticator dot1x port-control auto spanning-tree portfast!interface FastEthernet0/8 switchport access vlan 226 switchport mode access dot1x pae authenticator dot1x port-control autospanning-tree portfast!interface FastEthernet0/9 switchport access vlan 226 switchport mode access dot1x pae authenticator dot1x port-control auto spanning-tree portfast!interface FastEthernet0/10 switchport access vlan 226 switchport mode access dot1x pae authenticator dot1x port-control auto spanning-tree portfast!interface FastEthernet0/11 switchport access vlan 226 switchport mode access dot1x pae authenticator dot1x port-control auto spanning-tree portfast!interface FastEthernet0/12 switchport access vlan 226 switchport mode access dot1x pae authenticator dot1x port-control auto spanning-tree portfast!interface FastEthernet0/13 switchport access vlan 225 switchport mode access dot1x pae authenticator dot1x port-control auto spanning-tree portfast!interface FastEthernet0/14 switchport access vlan 226 switchport mode access spanning-tree portfast!interface FastEthernet0/15 switchport access vlan 225switchport mode accessdot1x pae authenticatordot1x port-control auto spanning-tree portfast!interface FastEthernet0/16 switchport access vlan 225 switchport trunk native vlan 199 switchport mode trunk spanning-tree portfast!interface FastEthernet0/17 switchport access vlan 225 switchport trunk native vlan 199 switchport mode trunk spanning-tree portfast!interface FastEthernet0/18 switchport access vlan 225 switchport trunk native vlan 199 switchport mode trunk spanning-tree portfast!interface FastEthernet0/19 switchport access vlan 202 switchport mode access spanning-tree portfast!interface FastEthernet0/20 switchport access vlan 202 switchport mode access spanning-tree portfast!interface FastEthernet0/21 switchport access vlan 225 switchport mode accessdot1x pae authenticatordot1x port-control auto spanning-tree portfast!interface FastEthernet0/22 switchport access vlan 225 switchport mode accessdot1x pae authenticatordot1x port-control auto spanning-tree portfast!interface FastEthernet0/23 switchport access vlan 225 switchport mode access dot1x pae authenticator dot1x port-control auto spanning-tree portfast!interface FastEthernet0/24 switchport access vlan 225 switchport mode access dot1x pae authenticator dot1x port-control auto spanning-tree portfast!interface FastEthernet0/25 switchport access vlan 225 switchport mode access dot1x pae authenticator dot1x port-control auto spanning-tree portfast!interface FastEthernet0/26 switchport access vlan 225 switchport mode access dot1x pae authenticator dot1x port-control auto spanning-tree portfast!interface FastEthernet0/27 switchport access vlan 225 switchport mode access dot1x pae authenticator dot1x port-control auto spanning-tree portfast!interface FastEthernet0/28 switchport access vlan 225 switchport mode access dot1x pae authenticator dot1x port-control auto spanning-tree portfast!interface FastEthernet0/29 switchport access vlan 225 switchport mode access dot1x pae authenticator dot1x port-control auto spanning-tree portfast!interface FastEthernet0/30 switchport access vlan 225 switchport mode access dot1x pae authenticator dot1x port-control auto spanning-tree portfast!interface FastEthernet0/31 switchport access vlan 226 switchport mode access spanning-tree portfast!interface FastEthernet0/32 switchport access vlan 225 switchport mode access dot1x pae authenticator dot1x port-control auto spanning-tree portfast!interface FastEthernet0/33 switchport access vlan 225 switchport mode access dot1x pae authenticator dot1x port-control auto spanning-tree portfast!interface FastEthernet0/34 switchport access vlan 225 switchport mode access dot1x pae authenticator dot1x port-control auto spanning-tree portfast!interface FastEthernet0/35 switchport access vlan 225 switchport mode accessdot1x pae authenticatordot1x port-control auto spanning-tree portfast!interface FastEthernet0/36 switchport access vlan 225 switchport mode accessdot1x pae authenticatordot1x port-control auto spanning-tree portfast!interface FastEthernet0/37 switchport access vlan 225 switchport mode accessdot1x pae authenticatordot1x port-control auto spanning-tree portfast!interface FastEthernet0/38 switchport access vlan 225 switchport mode accessdot1x pae authenticatordot1x port-control auto spanning-tree portfast!interface FastEthernet0/39 switchport access vlan 225 switchport mode accessdot1x pae authenticatordot1x port-control auto spanning-tree portfast!interface FastEthernet0/40 switchport access vlan 225 switchport trunk native vlan 199 switchport mode trunk spanning-tree portfast!interface FastEthernet0/41 switchport access vlan 225 switchport mode accessdot1x pae authenticatordot1x port-control auto spanning-tree portfast!interface FastEthernet0/42 switchport access vlan 225 switchport mode accessdot1x pae authenticatordot1x port-control auto spanning-tree portfast!interface FastEthernet0/43 switchport access vlan 225 switchport trunk native vlan 199 switchport mode trunk spanning-tree portfast!interface FastEthernet0/44 switchport access vlan 225 switchport mode accessdot1x pae authenticatordot1x port-control auto spanning-tree portfast!interface FastEthernet0/45 switchport access vlan 225 switchport mode accessdot1x pae authenticatordot1x port-control auto spanning-tree portfast!interface FastEthernet0/46 switchport access vlan 1226 switchport mode accessdot1x pae authenticatordot1x port-control auto spanning-tree portfast!interface FastEthernet0/47 switchport access vlan 225 switchport mode accessdot1x pae authenticatordot1x port-control auto spanning-tree portfast!interface FastEthernet0/48 switchport access vlan 225switchport mode accessdot1x pae authenticatordot1x port-control autospanning-tree portfast!interface GigabitEthernet0/1!interface GigabitEthernet0/2switchport mode trunk!interface Vlan1no ip addressno ip route-cache!interface Vlan199ip address 10.1.99.16 255.255.255.0no ip route-cache!ip default-gateway 10.1.99.251no ip http serveraccess-list 1 permit 10.2.10.0 0.0.0.255access-list 1 permit 10.1.1.0 0.0.0.255access-list 1 permit 10.1.100.0 0.0.0.255access-list 10 permit 10.1.1.15snmp-server community scppub RO 10snmp-server host 10.1.1.15 version 2c scppubtacacs-server host 10.1.1.7 key scpitmtacacs-server directed-requestradius-server host 10.1.1.4 auth-port 1645 acct-port 1646 key scpkey radius-server source-ports 1645-1646!control-plane!!line con 0line vty 0 4access-class 1 inpassword 123line vty 5 15!ntp clock-periodntp server 10.1.99.252endC2960-9F-up#。
接入层交换机配置文档

接入层交换机配置文档开机过程:这里需要输“no”才能进入用户模式“>”(第一次开机才会出现)配置交换机:进入用户模式后输入“enable”进入特权模式(命令可以用“tab”键补全)在特权模式下可使用show命令后面可以跟具体的参数在特权模式下输入“conf treminal”进入全局模式,也叫配置模式在全局模式下可以实现用户名、密码、设备名称、路由等配置,还可以创建vlan、进入vlan 接口、进入物理接口。
//创建用户名和密码,这个用户名和密码是远程登陆时候需要用到的:用户名:cisco 密码:cisco//这是从特权模式进入到全局模式需要用的密码,这个密码无论远程登陆或者console线连接登陆都是需要的(密码是密文的)密码:cisco 配置设备名称://在全局模式下配置本设备名称:“hostname 后加设备名称”(JR=接入、JHJ=交换机、LTBGL=炼铁办公楼、C3560=交换机型号)划分Vlan://首先全局模式创建相应的vlan:vlan 2进入vlan 2 :int vlan 2开启vlan 2 :no shutdown然后进入物理端口,配置需要划分vlan的端口,例如把f0/1口划分到vlan 2里//全局模式下进入f0/1口:interface f0/1把此端口划分到vlan 2:switchport access vlan 2把此端口模式设置成访问模式:switchport mode access开启此端口:no shutdowm还可以同时将多个端口划分到同一个vlan里,全局模式下进入多个端口:interface range f0/1 - 24例如:配置trunk链路//全局模式下进入需要配置trunk模式的端口:interface range g0/1 -2封装dot1q协议:switchport trunk encapsulation dot1q设置trunk模式:switchport mode trunk开启端口:no shutdown配置管理地址://全局模式下进入vlan 1的端口模式:interface vlan 1添加一个ip地址:ip address 10.99.21.1 255.255.255.128开启此端口:no shutdown(这个地址是远程登陆的telnet地址)配置线程模式:线程模式是远程登陆端口,如果不开启此端口,那么就无法远程登陆。
交换机配置大全很全哦

中兴100A交换机配置解说KM38XIANWUZHAN-2403H-01#sh runhostname KM38XIANWUZHAN-2403H-01enable password level 15 7 7`M3#DSOOMK#!B9IaT+NQradius-server host defaultaaa authentication Default radius next localaaa accounting Default enable offlineinterface Aux0/0vlan 1vlan 33vlan 34vlan 35vlan 36 按照无线部给的资料创建相应的vlanvlan 3901!vlan 3902!interface Vlan-interface3901ip address 172.16.22.26 255.255.255.0(找到交换机上面的管理VLan 更改它的Id号和ip address)!interface Ethernet0/1!interface Ethernet0/2!interface Ethernet0/3!interface Ethernet0/4!interface Ethernet0/5!interface Ethernet0/6!interface Ethernet0/7!interface Ethernet0/8!interface Ethernet0/9!interface Ethernet0/10!interface Ethernet0/11!interface Ethernet0/12!interface Ethernet0/13!interface Ethernet0/14!interface Ethernet0/15!interface Ethernet0/16!interface Ethernet0/17switchport mode trunk 将选择的端口设置为trunk 模式switchport trunk allowed vlan 33 3902 允许对应的Ap 上面的管理VLAN和业务VLAN 通过!interface Ethernet0/18switchport mode trunk 将选择的端口设置为trunk 模式switchport trunk allowed vlan 34 3902 允许对应的Ap 上面的管理VLAN和业务VLAN 通过!interface Ethernet0/19switchport mode trunkswitchport trunk allowed vlan 35 3902!interface Ethernet0/20switchport mode trunkswitchport trunk allowed vlan 36 3902!interface Ethernet0/21switchport access vlan 33!interface Ethernet0/22interface Ethernet0/23switchport access vlan 35!interface Ethernet0/24switchport access vlan 3902 配置一个口在交换机新配的VLAN3902下面,通过交换机更改,也就是当通过网线改好以后,启动VLAN enable后,找一根网线,插的此端口上面,配置write flash reboot上面这两个!interface Ethernet0/25switchport mode trunkswitchport trunk allowed vlan all!interface Ethernet1/1switchport mode trunkswitchport trunk allowed vlan all!interface NULL0!ip route 0.0.0.0 0.0.0.0 172.16.22.1 preference 60 配置网关最后一位都是1!snmp-serversnmp-server enable traps snmpsnmp-server engineid 800007DB00E0FC0F64086877snmp-server community public rosnmp-server community private rwsnmp-server host 61.138.192.72 SNMPv1!交换机配置步骤:1.划分vlan2.找到原来交换机上面的管理地址换成新的IP地址3.把对应的端口改成trunk 模式,并允许Ap上面的管理VLAN和业务VLAN通过4.在交换机上面配置一个端口在交换机的业务VLAN上面,如上面的3902下面5.配置网关与局里面的测试,与无线部的配合,通过电脑登到交机上面,ping 它的网关,如果能通就告诉无线部的不是那对线,如果ping 不通就明是这对线,叫无线部的人插到新的bass 上面,在交换机上面配置好新的管理地址以后,再ping 新的网关看能不能通,如果能通就说明可以了。
接入交换机常见安全配置

适用场景:1-24口下联PC用户,25口下联二层网管交换机,26口上联汇聚交换机堆叠环境中,若未指定优先级,则是根据它们的MAC地址(mac小的为主机)来确定谁是主机。
优先级为越大越好,围1-10。
出场默认为1。
1、系统时间同步:如果客户有使用ntp/sntp进行全网统一的时间配置的需求,可在设备上做Ruijie(config)#hostname TSG#5750 //给交换机命名Ruijie(config)#sntp enable //首先开启sntp 服务Ruijie(config)#sntp server 210.72.145.44 //配置服务器IP地址,此为国家授时中心服务器IP地址Ruijie(config)#sntp interval 36000// 配置sntp交互的时间间隔若客户无需配置SNTP功能,则配置单台设备系统时间命令如下Ruijie#clock set 20:30:50 3 20 2011 //配置系统时间配置方法:2、系统远程管理规配置远程登录方式一:采用两级密码方式Ruijie(config)#enable password test4321 //特权密码配置Ruijie(config)#line vty 0 35Ruijie(config-line)#password test//telnet远程登录密码配置Ruijie(config-line)#exitRuijie(config)#service password-encryption //对所配置的密码进行加密方式二:采用用户名密码方式Ruijie(config)#username admin privilege 15 password test4321//用户名和密码配置Ruijie(config)#line console 0 //进入console口配置模式Ruijie(config-line)#password ruijie//配置console口登录密码Ruijie(config-line)#login //配置console口登录模式Ruijie(config-line)#exitRuijie(config)#line vty 0 35 //进入远程登录接口配置模式Ruijie(config)#login local //启用本地认证模式Ruijie(config)#exitRuijie(config)#service password-encryption //对所配置的密码进行加密SNMP远程管理Ruijie(config)#snmp-server munity ycrmyy rw额外安全措施措施一:限制远程管理源地址Ruijie(config)#access-list 99 permit host 192.168.1.100 //配置控制列表,严格限定允许ipRuijie(config)#line vty 0 35Ruijie(config-line)#access-class 99 in措施二:限制SNMP管理源地址Ruijie(config)#access-list 99 permit host 192.168.1.100 //配置控制列表,严格限定允许ipRuijie(config)#snmp-server munity ruijie rw 99措施三:使用加密管理协议,使用SSH管理,禁用Telnet协议Ruijie(config)#no enable service telnet-server //禁用telnet管理Ruijie(config)#enable service ssh-server //启用SSH管理Ruijie(config)#crypto key generate dsa //设置ssh加密模式Ruijie(config)#line vty 0 35Ruijie(config-line)#transport input ssh //远程登录接口启用SSH管理措施四:使用加密管理协议,使用SNMPv3Ruijie(config)#access-list 99 permit host 192.168.1.100 //配置控制列表,严格限定允许ipRuijie(config)#snmp-server user ruijie Group1 v3 auth md5Ruijie123 access 99 //启用snmpv3措施五:配置登录警告信息Ruijie(config)#banner logincWarning :Unauthorized access are forbidden!Your behavior will be recorded!c3、设置设备日志记录Ruijie(config)#logging on //启用日志记录功能Ruijie(config)#logging count //打开日志信息统计功能Ruijie(config)#service sysname //在日志报文中添加系统名称Ruijie(config)#log trap debugging //所有级别的日志信息将发给syslog serverRuijie(config)#service sequence-numbers //在日志报文中添加序列号Ruijie(config)#service timestamps debug datetime // 启用debug 信息时间戳,日期格式Ruijie(config)#service timestamps message-type datetime //启用日志信息中的时间戳Ruijie(config)#logging server 172.16.250.10 //将日志信息发送给网络上的Syslog SeverRuijie(config)#logging file flash:log.txt 1000000//将日志信息根据指定的文件名创建文件,记录到扩展FLASH上,文件大小会随日志增加而增加,但其上限以配置的max-file-sizeRuijie(config)#logging buffered 40960 //将日志记录到存缓冲区Ruijie#terminal monitor //允许日志信息显示在VTY 窗口上4、配置下联PC端口环路检测Ruijie(config)#rldp enable //启用rldp功能Ruijie(config)#errdisable recovery interval 120 // 设定故障关闭端口恢复时间为120sRuijie(config)#interface range fastethernet 0/1-24 //进入下联接口Ruijie(config-if-range)#rldp port loop-detect shutdown-port ////环路检测触发处理方法为关闭端口,防止产生数据包泛洪影响整个网络5、防arp欺骗场景一:静态ip分配方式下防arpRuijie(config)#interface FastEthernet 0/1//进入下联接口Ruijie(config-if)#switchport port-security //打开端口安全功能Ruijie(config-FastEthernet 0/1)#switchport port-security maximum 3 //配置最大MAC地址数Ruijie(config-FastEthernet 0/1)#switchport port-security mac-address 001a.a900.0001 //交换机一个端口只能是合法的mac接入Ruijie(config-FastEthernet 0/1)#switchport port-security binding 192.168.10.1 //交换机一个端口只能是合法的IP接入Ruijie(config-FastEthernet 0/1)#switchport port-security bind 001a.a900.0001 vlan 10 192.168.10.1 //交换机端口只能是合法的IP且合法的MAC接入Ruijie(config-if-range)#arp-check //打开ARP检查功能,配合端口安全功能防止ARP欺骗备注:此场景中,交换机一个端口最大只能接入3台主机,但其中有一台主机是合法保障的。
- 1、下载文档前请自行甄别文档内容的完整性,平台不提供额外的编辑、内容补充、找答案等附加服务。
- 2、"仅部分预览"的文档,不可在线预览部分如存在完整性等问题,可反馈申请退款(可完整预览的文档不适用该条件!)。
- 3、如文档侵犯您的权益,请联系客服反馈,我们会尽快为您处理(人工客服工作时间:9:00-18:30)。
接入层交换机配置文档开机过程:
这里需要输“no”才能进入用户模式“>”(第一次开机才会出现)
配置交换机:
进入用户模式后输入“enable”进入特权模式(命令可以用“tab”键补全)
在特权模式下可使用show命令后面可以跟具体的参数
在特权模式下输入“conf treminal”进入全局模式,也叫配置模式
在全局模式下可以实现用户名、密码、设备名称、路由等配置,还可以创建vlan、进入vlan 接口、进入物理接口。
//创建用户名和密码,这个用户名和密码是远程登陆时候需要用到的:用户名:cisco 密码:cisco
//这是从特权模式进入到全局模式需要用的密码,这个密码无论远程登陆或者console线连接登陆都是需要的(密码是密文的)密码:cisco
配置设备名称:
//在全局模式下配置本设备名称:“hostname 后加设备名称”
(JR=接入、JHJ=交换机、LTBGL=炼铁办公楼、C3560=交换机型号)
划分Vlan:
//首先全局模式创建相应的vlan:vlan 2
进入vlan 2 :int vlan 2
开启vlan 2 :no shutdown
然后进入物理端口,配置需要划分vlan的端口,例如把f0/1口划分到vlan 2里
//全局模式下进入f0/1口:interface f0/1
把此端口划分到vlan 2:switchport access vlan 2
把此端口模式设置成访问模式:switchport mode access
开启此端口:no shutdowm
还可以同时将多个端口划分到同一个vlan里,
全局模式下进入多个端口:interface range f0/1 - 24
例如:
配置trunk链路
//全局模式下进入需要配置trunk模式的端口:interface range g0/1 -2
封装dot1q协议:switchport trunk encapsulation dot1q
设置trunk模式:switchport mode trunk
开启端口:no shutdown
配置管理地址:
//全局模式下进入vlan 1的端口模式:interface vlan 1
添加一个ip地址:ip address 10.99.21.1 255.255.255.128
开启此端口:no shutdown
(这个地址是远程登陆的telnet地址)
配置线程模式:
线程模式是远程登陆端口,如果不开启此端口,那么就无法远程登陆。
//全局模式下进入线程模式:line vty 0 4
(注:线程模式一共有16个分别是0-15,这里只需要开启5个,也就是说这台交换机可以同时允许5个用户远程登陆进来)
使配置的用户名、密码生效:login local
指定时间服务器:
让此台交换机的时间与核心交换机同步
设置日志时间与本地时间同步:
保存配置:
全局模式下输入“end”退回到特权模式:end
保存配置命令:write
如若不保存交换机在重启或断电后会丢失上次的配置。
清空交换机配置命令:
特权模式下运行
两种方法都是清空你手动输入的所有命令(慎用!!!)。
