mbu870使用说明书
Pyle PPHP8MBA 无线蓝牙流式迷你音箱说明书
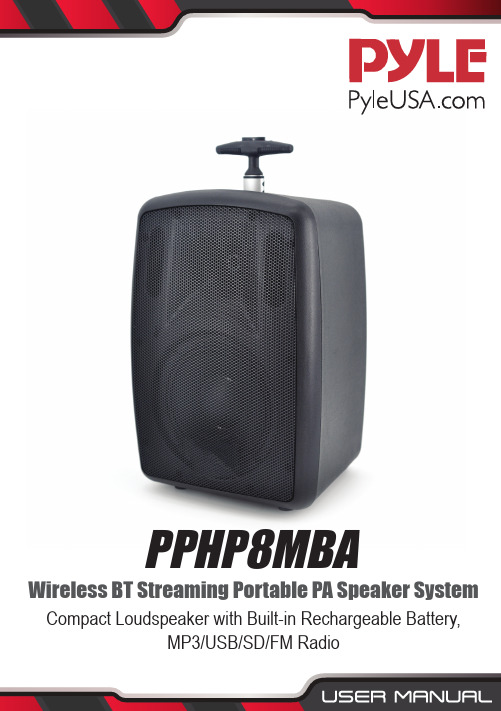
PPHP8MBA Wireless BT Streaming Portable PA Speaker SystemCompact Loudspeaker with Built-in Rechargeable Battery,MP3/USB/SD/FM RadioIn order to achieve the best performance of your product, please read this instruction manual carefully before using, and keep it for future reference.IMPORTANT SAFETY INSTRUCTIONS - SAVE THESE INSTRUCTIONS WARNING:When using electric products, basic precautions should always be followed, including the following:• Read all instructions before using the product.• Do not use this product near water, i.e. a bathtub, sink, web basement, or swimming pool.• This product, in combination with other headphones and speakers, may be capable of producing sound levels that could cause permanent hearing loss. Do not operate for long periods of time at a high-volume level or any level that is uncomfortable. If you experience any hearing lossor ringing in the ears, consult a doctor.• The product should be located away from heat sources such as radiators, heat resistors, or any other product that produces heat.• The product should be connected to a designated power supply described in these instructions.• The power supply cord should be unplugged when left unused for a long period of time.• Care should be taken so that objects do not fall or liquids are not spilled into the enclosure through its openings.• The product should be serviced by quality personnel when:1. The power supply cord or plug has been damaged2. Objects have fallen, or liquid has been spilled in the product3. The product has been exposed to rain4. The product does not appear to operate normally or exhibits a marked change in performace5. The product has been dropped, or the enclosure damaged• Do not attempt to service the product beyond that described in theuser-maintenance instructions. All other servicing should be performed by quality service personnel.INSTRUCTIONBefore connecting the speaker, make sure the system is o and the controls on the minimum level. On the contrary the system could damage:1. Plug the AC plug to electric power and to the speaker.2. Plug the microphone on the “MIC” input with a 6.3 connector or Canon.3. Plug an auxiliary system (CD,DECK,MP3,DVD.etc) on “LINE IN” input4. Turn on the systems. A green LED light up on the speaker to indicate it is on.5. Set the volume on the middle level on the MIC and LINE IN input.6. Increase little by little the master volume7. Set TREBLE/BASS controls to equalize the sound.CAUTION• Instructions are intended to alert the user to the risk of injury or material damage, should the unit be used improperly.• Material damage refers to damage or other adverse effects caused withrespect to the home and all its furnishings, as well as to domestic animals or pets.BLUETOOTH OPERATING PROCEDURESStep 1:Push the bottom “MODE”, until to nd “ BLUE “ on the displayStep 2:Turn on smart phone bluetooth function, search for speaker box Blue connect --- “Bluetooth” , no password to nalize the connection of Bluetooth between smart phone and speaker box.Step 3:Once the Bluetooth is connected between smart phone and speaker box, play the music on the smart phone, then please enjoy the big power sound from speaker box!CHARGING OPERATING PROCEDURESStep 1:Please refer to point 7. Power indicator (Ampli er control), when the red LED ashes, the battery power is low, please stop playing music and press switch to OFF mode.Step 2:Put the AC adaptor to DC IN 15V for charging, the red LED will be ONStep 3:When the battery is fully charged, the blue LED will be ON, please unplug the AC adaptor .CONTROLS1. USB Display2. USB and SD socket3. Previous song/channel, long press this button to reduce the volume4. Play/Pause5. Next song/channel, long press this button to increase the volume6. MODE: USB/SD/FM/BLUETOOTH/AUX function of conversion7. Power IndicatorGREEN LED: ONCHARGING: Red LED light on (Low battery, red LED will ash) FULL: Blue LED light on8. MICROPHONE INPUT 1:Balanced microphone Connector9. MICROPHONE INPUT 2:Balanced microphone connector10. AUX INPUTAllows cassette recorder or CD player to the Main output.11. DC IN 15V12. MICROPHONE VOLUME LEVELAllows you to increase or decrease the volume level.13. ECHOAllows you to increase or decrese the ECHO level14. TREBLE15. BASS16. VOLUMEAllows you to increase or decrease the volume level.17. ON/OFF SWITCHPowers the device ON/OFF.REMOTE CONTROL1. MP3 ON/OFF2. MODE: USB / Bluetooth function of Conversion3. Loudspeaker mute4. Play/Pause5. EQ6. KEY number for selecting the music7. Last song8. Next song9 & 10. Reduce/increase the volume11. REPEAT ONE/ALL.12. USB Connect function of ConversionPPHP8MBAWireless BT Streaming Portable PA Speaker SystemCompact Loudspeaker with Built-in Rechargeable Battery,MP3/USB/SD/FM RadioSystem Features:• Versatile High-Powered Mobile Cabinet Speaker System• Rugged, Durable & Reliable Sound• Bluetooth Wireless Music Streaming Ability• Built-in Rechargeable Battery• Includes Wired Handheld Microphone• Speaker System: 8'' Subwoofer• 2-Way Full Range Audio Projection• Built-in Digital Audio Amplifier• USB Flash Drive & SD Memory Card Readers• FM Radio with Digital LCD Display• Connect & Stream Audio from External Devices• (2) 1/4’’ Microphone Inputs• RCA (L/R) Stereo Line Input Jacks• Charging LED Indicator Lights• Rear Panel Button Control Center• Heavy Duty Engineered ABS Housing• Convenient Extendable Carry Handles & Rolling Wheels• Master Volume, Mic Volume, Treble, Bass Setting• Perfect for Karaoke, Crowd Control, Public Gathering Events Bluetooth Wireless Streaming:• Instantly Stream Music from Your Bluetooth Devices• Works with All Your Favorite Bluetooth Devices(iPhone, Android, Smartphone, iPad, Tablet, PC, etc.)• Bluetooth Version: 2.1• Bluetooth Network Name: ‘BLUE’• Wireless Range: Up to 100' ft.What's in the Box:• Portable PA Speaker• Wired Handheld Microphone• Remote Control• Power AdapterTechnical Specs:• Power Output: 360 Watt MAX• Speaker Style: Molded Cabinet• Magnet: 12 Oz• Voice Coil: 0.75’’ -inch• Ampli er Class: D• Impedance: 4 Ohm• T.H.D.: <1%• Sensitivity: 92dB (+/-2dB)• Mic Input Level: <15mV• Line Input/Output Level: >250mV• Frequency Response: 70-20kHz• Digital Audio File Compatibility: MP3, WMA• Maximum SD/USB Flash Memory Support: 32GB• Remote Battery: Requires (1) x ‘CR20-25’ Button Cell, Included • PA Speaker Rechargeable Battery: 12.1V Lead Acid, 3000mAh • Power: DC 15V• Dimensions (L x W x H): 13.4’’ x 10.4’’ x 18.9’’ -inches• Sold as: 1。
打印机安装说明OKI microlineML8100F

目录
1 使用前须知............................................................................................................. 11
各部分的名称和功能 .................................................................................................................. 12 关于安置的场所 .......................................................................................................................... 13 关于电源 ...................................................................................................................................... 15 使用时的注意事项 ...................................................................................................................... 17 发生故障或异常时 ...................................................................................................................... 19 打印机的维护 .............................................................................................................................. 20 打印机的运输 .............................................................................................................................. 21
小天鹅 MB80V570WD MB85V70WD MB85V170WD 全自动洗衣机 使用说明书
35691010111213141414..............................................................................................................................................................................................................................................................................................................................................10目录使用说明服务指南快速入门安装说明安全警示2安装洗衣机快速入门安全警示.................................................控制面板操作说明个性化洗衣程序的设置洗衣过程的操作其它功能的说明清洁保养................................................故障的诊断...........................................规格及技术参数..................................售后服务................................................包 修 卡.......................................................各部件名称本说明书适应多个机型,部分内容请对照所购机型查阅!智能配网介绍各部件名称安装说明安全警示快速入门安装说明使用说明服务指南卡簧排水管组件螺钉注:如排水管出厂时已经安装在机器上,则附件没有卡簧和排水管泡沫底垫洗衣机安放地面必需坚实、平整不平会造成洗衣桶倾斜,出现撞击箱体现象。
真善美绣花机MB电子说明书
真善美绣花机MB电子说明书
作业安全程序
1、开启电源总开关,不要打开电源开关盖;
2、开启机器电源开关,不可用其它物品及布碎去抹马达,要注意马达有不良反应;
3、机器皮带运转,如有不良反应,立即停机,请维修员检查;
4、开启手动拉杆开关,手指及其它物品不可放近机器槽沟旁边;
5、穿好线,线拉不动,不可用力拉;
6、铺好布碎;
7、加油;
8、断线穿线;
9、倒针,补针;
10、切线不断;
11、裁片松脱。
停止作业
停止作业后应先关设备上的电源开关,然后切断主电源开关。
维修、保养要求
用刷子清除灰尘及线屑,清洁机头夹线器,清理导轨内杂物,定期加机油。
电源注意事项
1、当不使用机器时,关闭电源开关并拔下插头;
2、当维修机器或拆下盖子时,必须拔下插头,断开电源;
3、只能使用普通家用电源作为机器电源。
使用其它电源可能会引起火灾、触电或损坏机器。
4、在如下情况下,请务必关闭主电源开关,拔出电源线插头:当离开机器时;使用机器之后;使用过程中断电时;当由于连接不良或连接断开,机器无法运转时;电暴过程中。
5、请勿使用拖线板接插电源,或与其它电气设备共用多插孔适配器,否则可能会引起触电。
6、请勿用湿手触摸电源线插头。
否则可能会引起触电。
7、当拔出电源线插头时,请先关闭主电源开关。
拔出电源线插头时,请务必抓住插头部分。
直接拉电源可能会损坏电源线,引起火灾或触电。
RemoDAQ-8000快速入门及851X,852X用户手册V1.1

V1.1 2008.11.20RemoDAQ-8000快速入门RemoDAQ-8510族模块RemoDAQ-8520族模块用户手册北京集智达智能科技有限责任公司目录I RemoDAQ-8000快速入门 (2)1设备连接 (2)1.1 设备基本需求 (2)1.2 设备连接 (2)2 RemoDAQ-8000工具软件安装及应用 (4)2.1 RemoDAQ-8000工具软件安装 (4)2.2 RemoDAQ-8000工具软件使用 (4)3 修改模块地址 (5)4 修改波特率和校验和 (7)II RemoDAQ-8510 (8)1 概述 (8)1.1 RemoDAQ-8510管脚功能和说明 (8)1.2 RemoDAQ-8510A管脚功能和说明 (9)2 接线 (9)2.1 RemoDAQ-8510与RemoDAQ-8000系列模块连接 (9)2.1 RemoDAQ-8510A与RemoDAQ-8000系列模块连接 (9)III RemoDAQ-8520/R/A/AR (10)1 概述 (10)1.1 RemoDAQ-8520/R管脚功能和说明 (10)1.2 RemoDAQ-8520A/AR管脚功能和说明 (11)2 跳线设置 (11)3 接线 (12)3.1 RemoDAQ-8520/R与8000系列模块连接 (12)3.2 RemoDAQ-8520A/AR模块连接 (12)I RemoDAQ-8000快速入门1设备连接1.1 设备基本需求z装有WIN 98/2000/XP 任一操作系统PC机一台,RemoDAQ-8000光盘一张z RemoDAQ-8520 RS-232/485转换器1个z RemoDAQ-8000系列I/O模块若干(以8018为例) z DB9 电缆(一头针一头孔)1条z24VDC 电源1个1.2 设备连接计算机、模块与电源接线图如图1所示:计算机与RemoDAQ -8520连接:计算机一侧(DB9 孔) RemoDAQ-8520 (DB9 针) PIN2--------------------------------------------PIN2PIN3--------------------------------------------PIN3PIN5--------------------------------------------PIN5 RemoDAQ-8520/RemoDAQ-8018/电源连接:RemoDAQ-8520 RemoDAQ-8018 24VDC电源PIN1(DATA+)----------------------------PIN7(DATA+)PIN2(DATA-)---------------------------- PIN8(DATA-)PIN9(+Vs) --------------- PIN9(+Vs)------------ 24V+PIN10(GND)------------- PIN10(GND)--------- GND24V GND2 RemoDAQ-8000工具软件安装及应用2.1 RemoDAQ-8000工具软件安装在光盘E:\RemoDAQ-8000系列\RemoDAQ-8000_Utility 目录下,双击SETUP进行安装,安装完成后,在桌面上会出现:RemoDAQ-8000_Utility图标。
用友U8使用说明

用友U8使用说明(总42页) -CAL-FENGHAI.-(YICAI)-Company One1-CAL-本页仅作为文档封面,使用请直接删除用友软件U850实际操作教程1 用友软件安装1.1 用友ERP-U8应用的系统运行环境:1.2 用友ERP-U8的系统安装用友ERP-U8应用系统采用三层架构体系,即逻辑上分为数据库服务器、应用服务器和客户端。
(1)单机应用模式。
既将数据库服务器、应用服务器和客户端安装在一台计算机上。
(2)网络应用模式但只有一台服务器。
将数据库服务器和应用服务器安装在一台计算机上,而将客户端安装在另一台计算机上。
(3)网络应用模式且有两台服务器。
将数据库服务器、应用服务器和客户端分别安装在不同的三台计算机上。
1.2.2 安装步骤:这里介绍第一种安装模式的安装步骤。
建议学员采用此种安装模式。
第一步,首先安装数据库SQL Server2000,最好是个人版,此版在多个操作系统上适用。
并要记好SA密码。
装完后,重启系统,并启动SQL Server 服务管理器。
第二步,安装用友ERP-U8系统。
(1)将用友ERP-U8管理软件光盘放入服务器的共享光盘中,打开光盘目录,双击Setup.exe文件,显示ERP-U8管理软件安装欢迎界面如图1-1所示。
图1-1 ERP-U8管理软件安装-欢迎界面(2)单击【下一步】进入“安装授权许可证协议”界面,如图1-2所示。
图1-2 U8管理软件安装-许可证协议界面(3)单击【是】,接受协议内容进入“客户信息确认”界面,如图1-3所示。
图1-3 U8管理软件安装-客户信息界面(4)输入用户名和公司名称,用户名默认为本机的机器名,单击【下一步】进入“选择目的地位置”界面,如图1-4所示。
图1-4 U8管理软件安装-选择目的地位置界面(5)选择安装程序安装文件的文件夹,可以单击【浏览】修改安装路径和文件夹,单击【下一步】进入“选择安装类型”界面,如图1-5所示。
三星j708说明书

确保使用紧急服务
在某些地区或情况中,可能无法用手机进行紧 急呼叫。去偏远或未开发的地区旅行之前,拟 定代用的紧急服务人员联系方法。
电池安全
有关电池的信息
类型 时间 通话时间 待机时间
标准电池 (800mAh)
最长 7.0 小时 最长 310 小时
(充足电的电池) 在下列情况下待机时间减少:
手机简介
10
配件介绍 ........................................................ 10
手机部位图 .................................................... 11
按键 ................................................................ 12
保护电池和充电器以防损坏
• 不要将电池放到温度非常低或非常高 (0° C/32° F 以下或 45° C/115° F 以上)的地 方。否则会降低电池的寿命和充电容量。
• 防止电池接触金属物体,否则可能使电池 “+”极和 “-”极连接,致使电池暂时或永 久损坏。
• 切勿使用损坏的充电器或电池。
小心妥善处理手机
参照 — 具有相关信息的页面。例如: 12 页 (表示 “见 12 页”)。
ii
使用本选
项或功能表的次序。例如:按下
< 功能表 > → 信息 → 发信息 (表示
功能表,下一步信息,下一步发信
息)。
[ ] 方括号 — 手机按钮。例如:[ ] (表示开 / 关机 / 功能表退出键)。
安全和使用信息
UNI800B 使用说明书

2 技术参数...............................................................................................................................................................8
4 显示面板及按键说明.........................................................................................................................................12
4-1 上电显示 ....................................................................................................................................................13 4-2 状态指示光标 ............................................................................................................................................13 4-3 前面板按键说明.........................................................................................................................................13 4-4 后面板说明 ................................................................................................................................................14
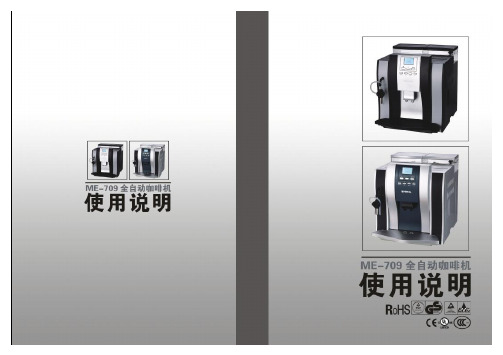
美侬咖啡机使用说明书 ME709中文使用说明书
移 去 豆 箱 盖 , 并 用 适 量 ( 最 多200克 ) 的 咖啡豆放入豆箱。
从水箱中取出附件
装入咖啡豆
ME-709 全自动咖啡机
取 下 机 器 上 的 水 箱 (8) , 取 走 水 箱 盖 , 装入 约3/4容 量 的纯 净 水, 水 箱 底部 的阀门作用为放水流出。将水箱放回 机器时,正对能自动打开的阀门轻压 水箱,然后盖好水箱盖 。
ME-709 全自动咖啡机
机器各部件说明
8 7 6 5 4 3 2 1
9
10
11
12
16
Байду номын сангаас15
14
13
图1
使用说明书
1 废水盒 2 电源线 3 奶沫器 4 奶沫器旋钮 5 咖啡出口
6 控制面板 7 保温板 8 水箱 9 加粉盖 10 加粉口
11 粗细调节钮 12 豆箱 13 酿造门 14 酿造核心 15 接渣盘
1.3.2 防沙石保护
选好后的咖啡豆可能含有一些杂质,咖啡研磨机内置有防沙石装置,避免机器受到 意外损坏。如果沙石进入咖啡研磨机,你会听到一些比通常情况更大的杂音,如果遇到 这种情况,最好立即关闭机器电源。确认研磨机被沙石堵住,请联系厂商授权的经销商 进行维修,不要自行处理。
1.4 本机的规格参数
额定电压 额定功率 产 品 尺 寸 ( 长X宽X高 ) 整机净重 接渣盘 电源线外露长度 温度控制方式 咖啡粉量调节 咖啡粉粗细调节 水箱容量 豆箱容量 蒸汽/热水金属管 咖啡出口部件 过热保护 水泵压力 符合标准
第一次使用前建议 给机器排水
使用说明书 07/08
3.3 操作机器酿造咖啡
3.3.1 酿造单杯和双杯咖啡
可以通过选择控制面板上的“单杯”
brother MFC-8880DN使用说明书
2 装入纸张和原稿
11
装入纸张和打印介质 .......................................................................................................... 11 将纸张装入标准纸盒 ................................................................................................... 11 将纸张装入多功能纸盒 (MP 纸盒 ) .............................................................................................................. 12 非打印区域.................................................................................................................. 14
获取 Brother 技术支持 ( 适用于 Windows®)......................................................................... 5 操作面板概述 ....................................................................................................................... 6
XM708型智能调节器说明书

PID 调节状态。视系统状况的不同,自整定需要的时间可从数秒至数小时不等。若需重新启动自整定,则将
参数 CtrL 设置为 2 即可。
⑶ 设置参数:按 SET 键并保持约 2 秒钟,等 PV 窗显示出参数提示符(如 Loc、HiAL 等)后再放开,这时
SV 窗显示参数的数值。再按 SET 键,仪表将依次显示各参数(提示符和数值),按
热电偶断线),则 SV 窗闪动显示“orAL”,此时仪表将自动停止控制输出。
二、技术规格
输入规格:热电偶:K、S、E、J、T、B、N 等。 热电阻:Pt100、Cu50 等。 电 阻:0~80Ω、0~400Ω等。 电 压:0~20mV …… 0~1V→输入阻抗≥5MΩ, 0~5V→输入阻抗≥100KΩ。 电 流:4~20mA、0~20mA 等→输入电阻≤250Ω 0~10mA→输入电阻≤500Ω。
1~5V(4~20mA)输入
06
B(0~1800℃)
20
Cu50(-50~150℃) 34
0~5V(0~20mA)输入
07
N(0~1300℃)
21 Pt100(-200~600℃) 35 ~20~20mV 电压输入
08 Wre5-26(0~2300℃) 22~25
备用
36 -100~100mV 电压输入
oL限制MV下限,oH限制MV上限。两个参数的范围为0~100%。 5、报警输出定义参数ALP
—3—
ALP = A×1+B×2+C×4+D×8+E×16 A、B、C、D分别代表上限报警、下限报警、正偏差报警、负偏差报警四种报警方式。 当 A、B、C、D 数值为 0 时,表示此报警方式在 AL1 位置输出。当 A、B、C、D 数值为 1 时,表示此 报警方式在 AL2 位置输出。 当 E=0 时,报警时在 SV 显示窗交替显示报警符号,如 HIAL、LoAL,能迅速了解仪表报警原因; E=1 时,报警时在 SV 显示窗不交替显示报警符号(但 orAL 除外)。 6、正反作用选择参数 SYS SYS=0为仪表反作用调节,如加热控制;SYS=1为仪表正作用调节,如制冷控制。 7、仪表通讯设定参数( Addr、bAud ) (1) Addr 也用于设定仪表的通讯地址,有效范围是 0~63,在同一条通讯线路上的仪表应分别设置一个不 同的 Addr 值以便仪表之间相互区别。 (2)bAud 表示仪表的通讯波特率,有效范围是300~9600bit/s。 8、超调抑制参数 SF(Loc=367) 对于滞后时间比较长的控制对象,适当加大 SF,可以减小系统超调,减少输出变化的频率。SF 设置范围 为 0.1~1.0,建议不要超过 0.5。 9、给定值限定参数SVL、SVH(Loc=1135) 用于限定 SV 窗口的给定值的手动设定范围。
Canon PowerLite Pro Z9870UNL 3LCD 3-chip 项目机说明书

Large VenueSPECIFICATION SHEET3x Brighter Colors 1, and reliable performance — 3LCD, 3-chip technology One measurement of brightness is not enough — look for both high color brightness and high white brightness. The PowerLite Pro Z9870UNL has:Color Brightness: 8700 lumens 2White Brightness: 8700 lumens 2Widescreen performance — native WUXGA (1920 x 1200) resolution supports Full HD for presentations, videos, digital signage and moreSeven optional lenses with lens shift — including short-, wide-, rear- and long-throw lenses designed with a change-out lever for easy installationFlexible installation for an immersive experience in any setting — built-in Curved Edge Blending, Portrait Mode projection, and 360-degree installation Get twice the brightness and power — optional stackable frame makes it easy to install two projectors for unbelievable brightness, plus 3D support Versatile connectivity — supports the latest connectivity options, including HDBaseT™, HDMI™, DVI and 3G-SDIDual-lamp design with lamp select/relay function — get both power savings and projector redundancy; includes an innovative liquid cooling system for added reliabilityPowerLite ®Pro Z9870UNL WUXGA 3LCD ProjectorThe bright, large-venue installation projector withFull HD performance.Projector shown with lens.Lens sold separately.Large VenuePowerLite ® Pro Z9870UNL WUXGA 3LCD ProjectorEPSON, EasyMP and PowerLite are registered trademarks, EPSON Exceed Your Vision is a registered logomark and Better Products for a Better Future is a trademark of Seiko Epson Corporation. PrivateLine is a registered trademark, FineFrame is a trademark and Epson Connection is a service mark of Epson America, Inc. SmartWay is a service mark of the U.S. Environmental Protection Agency. All other product and brand names are trademarks and/or registered trademarks of their respective companies. Epson disclaims any and all rights in these marks. Copyright 2014 Epson America, Inc. Com-SS-Oct-13 CPD-41394 6/14 Epson America, Inc.3840 Kilroy Airport Way, Long Beach, CA 90806Epson Canada Limited185 Renfrew Drive, Markham, Ontario L3R 6G3 www.epson.caInterfacesWireless LAN port: 802.11 b/g/n (optional – module sold separately)SpecificationsProjection System High-aperture Epson ®3-chip, 3LCD technologyProjection Method Front/rear/ceiling mountLCD Driving Method Epson Poly-silicon TFT Active Matrix Pixel Number 2,304,000 pixels x 3LCDs Color Brightness 2Color Light Output: 8700 lumens White Brightness 2White Light Output: 8700 lumensAspect Ratio Native 16:10, (supports 4:3, 16:9, 5:4)Native Resolution WUXGA (1920 x 1200)Contrast Ratio (Normal, Dynamic Mode) Up to 15,000:1Color Reproduction 1.07 billion colors Lamp TypeNormal:380 W x 2 UHE Portrait:304 W x 2 UHE Lamp Life 3Normal:Up to 4000 hours (ECO Mode)Up to 2500 hours (Normal Mode)Portrait:Up to 1000 hours (Normal Mode)Brightness Uniformity (typical) 90%Pixel Arrangement Cross stripeProjection LensScreen Throw Ratio Range 1.74 – 2.82 (standard lens)Size (projected distance) 60" – 500"Type Powered zoom/focusF-number 1.65 – 2.51 (standard lens), lens not included Focal Length 36 mm – 57.35 mm (standard lens)Zoom Ratio Optical zoom 1 – 1.61 (standard lens)Lens Shift (powered)Vertical: ±60%Horizontal: ±18%Keystone CorrectionVertical: -30 degrees to +30 degrees Horizontal: -30 degrees to +30 degreesVideoVideo StandardsAnalog: NTSC/NTSC4.43/PAL/M-PAL/N-PAL/PAL60/SECAM HDMI: 480i/576i/480p/576p/720p/1080i/1080p DVI-D: 480i/576i/480p/576p/720p/1080i/1080p SD-SDI: 480i/576iHD-SDI: 720p/1080i/1080p@303G-SDI: 1080p@60SDI: 480i/576iVideo Processing 3D Y/C separation, 3D noise reduction, mosquito noise reductionDCDi ® – Directional Correlational DeinterlacingMotion-compensated Interlace-Progressive conversion (2:2, 3:2 film detection)Super ResolutionFineFrame™ interpolation 8:8 Pull-down processing Closed captioningNetworkingConnectivityWired: Integrated 100 MbpsWireless Security: WPA-PSK (TKIP/AES) / WPA2-PSK (TKIP/AES)E-mail Notification Via network Message Broadcasting SNMP Web Control Secure HTTPNetworking (continued)Remote Control and ManagementEasyMP ® Monitor, network projection, multi-projection, AMX ® Device Discovery, Crestron ® Integrated Partner and Crestron RoomView ®, Extron ® IP Link and XTP , PJLinkOther FeaturesOperating Temperature32 ° to 122 °F (0 ° to 50 °C) — Normal32 ° to 104 °F (0 ° to 40 °C) — Above 4900 feetPower Supply Voltage 100 – 240 V ±10%, 50/60 Hz AC Power Consumption 821 W (ECO Mode)995 W (Normal Mode)2.7 W standby (Communication on)0.26 W standby (Communication off)Fan Noise35 dB (ECO Mode)48 dB (Normal Mode)Security Kensington ®-style lock provision, anchor (metal) bar for security lock or cable, handles attached to body for cable wrapDimensions (W x D x H)Including Feet (with standard lens) 29.17" x 21.01" x 10.04"Excluding Feet (with standard lens) 29.17" x 21.02" x 7.76"Weight 58 lb with standard lensRemote ControlFeatures Brightness, contrast, tint, saturation, sharpness, input signal, sync, tracking, position, zoom, focus, lens shift, shutter, ID, source search, split screen Operating AngleFront:Right/left ± 60 degreesUpper/lower -45 to +15 degrees Rear:Right/left ± 60 degreesUpper/lower -40 to +15 degrees Operating Distance 98 ftECO FeaturesRoHS compliant Recyclable product 4Epson America, Inc. is a SmartWay SM Transport Partner 5SupportThe Epson Connection SMPre-sales support U.S. and Canada 800-463-7766Internet website Projector ProgramsThree-year projector limited warranty, 90-day limited lamp warranty, Epson Road Service Program and PrivateLine ®dedicated toll-free support (U.S. and Canada only)What’s in the BoxPowerLite Pro Z9870UNL projector, power cable, computer cable, projector remote control, batteries, user manual CD, Quick Setup Sheet, monitor and control CDOrdering Information Product Name Product Code PowerLite Pro Z9870UNL projectorV11H611920AccessoriesProduct CodeStandard zoom lens (ELPLS04) V12H004S04Long-throw zoom lens (ELPLL07)V12H004L07Middle-throw zoom lens 1 (ELPLM06)V12H004M06Middle-throw zoom lens 2 (ELPLM07)V12H004M07Rear-projection wide lens (ELPLR04)V12H004R04Wide zoom lens (ELPLW04)V12H004W04Short-throw zoom lens (ELPLU02) V12H004U02Mount Installation frame (ELPMB44) V12H681010Flush ceiling mount bracketV12H003B25Mount bracket with extended pipe V12H003B26False ceiling plate kit ELPMBP02Wireless LAN module V12H418P12Kensington security lockELPSL01Hardware remote control cable set V12H005C28Replacement remote control2157388Replacement lamp single (ELPLP81)V13H010L81Dual lamp kit (lamp x 2) (ELPLP82)V13H010L82Replacement portrait lamp single (ELPLP83) V13H010L83Dual lamp kit (lamp x 2) (ELPLP84)V13H010L84Replacement air filter set (ELPAF46)V13H134A461Compared to leading 1-chip DLP business and education projectors based on NPD data, July 2011 through June 2012. Color brightness (color light output) measured in accordance with IDMS 15.4. Color brightness will vary depending on usage conditions.2Color brightness (color light output) and white brightness (white light output) will vary depending on usage conditions. Color light output measured in accordance with IDMS 15.4; white light output measured in accordance with ISO 21118.3Lamp life will vary depending upon mode selected, environmental conditions and usage. Lamp brightness decreases over time.4See our website for convenient and reasonable recycling options at /recycle5SmartWay is an innovative partnership of the U.S. Environmental Protection Agency that reduces greenhouse gases and other air pollutants and improves fuel ef ciency.DVI-DRS-232CLAN HDBaseTHDMIVideoS-VideoComputer RemoteMonitor Out BNCServicePowerSDIWireless LAN Port。
洗衣机HWM70-FD10829用户手册说明书
User manual Washing machine2LegendWarning – Important Safety informationGeneral information and tipsEnvironmental informationDisposalHelp protect the environment and human health. Put the packaging in applicable containers to recycle it. Help to recycle waste of electrical and electronic ap-pliances. Do not dispose appliances marked with this symbol with the household waste. Return the productto your local recycling facility or contact your municipalThank you for purchasing a Haier Product.Please read these instructions carefully before using this appliance. The instructions con-tain important information which will help you get the best out of the appliance and ensure safe and proper installation, use and maintenance.Keep this manual in a convenient place so you can always refer to it for the safe and proper use of the appliance.If you sell the appliance, give it away , or leave it behind when you move house, make sure you also pass this manual so that the new owner can become familiar with the applian ce and safety warnings.WARNING!of it. Remove the door catch to prevent children and pets to get closed in the appliance.1-Safety information (4)2-Product description (7)3-Control panel (8)4-Programmes (11)5-Daily use (12)6-Eco-friendly washing (17)7-Care and cleaning (18)8-T roubleshooting (21)9-Installation (24)10-T echnical data (28)3-ing safety hints!:WARNING!▶Make sure there is no transport damage.▶Make sure all transport bolts are removed.▶Remove all packaging and keep out of children´s reach.▶Handle the appliance always with at least two persons because it is heavy.Daily use▶This appliance can be used by children aged from 8 years and above and persons with reduced physical, sensory or mental ca-pabilities or lack of experience and knowledge if they have been given supervision or instruction concerning use of the appliance in a safe way and understand the hazards involved.▶Keep away children under 3 years of age from the appliance un-less they are constantly supervised.▶Children shall not play with the appliance.▶Do not let children or pets come close to the appliance when the door is open.▶Store washing agents out of reach of children.▶-vent laundry from being entangled. If necessary, use an appropri-ate bag or net.▶Do not press or use the appliance when barefoot or with wet or damp hands or feet.▶Do not cover or encase the appliance during operation or after-wards to allow any moisture or dampness to evaporate.▶Do not place heavy objects or sources of heat or damp on top of the appliance.▶Do not use or store flammable detergent or dry cleaning agent in close vicinity to the appliance.▶Do not use any flammable sprays in close vicinity to the appliance.▶Do not wash any garments treated with solvents in the appliance without having dried them previously in the air.4WARNING!Daily use▶Do not remove or insert the plug in the presence of flammable gas▶Do not hot wash f oam rubber or sponge-li ke materials.▶Do not wash any laundry which is polluted with flour.▶Do not open detergent drawer during any wash cycle.▶Do not press the door during the washing process, it gets hot.▶Do not open the door if the water level is visib ly over the porthole.▶Do not force the door to open. The door is tted with a self-lock device and will open shortly after the washing procedure is ended.▶undertaking any routine maintenance and disconnect the appli-ance from the electrical supply to save electricity and for safety. ▶Hold the plug, no t the cable, when unplugging the applian ce. Maintenance / cleaning▶Make sure children are supervised if they carry out cleaning and maintenance.▶Disconnect the appliance from the electrical supply be fore un-dertaking any routine maintenance.▶Keep the lower part of the porthole clean and open door and de-tergent drawer if appliance is not in use to prevent odours.▶Do not use water spray or steam to clean the appliance.▶Replace a damaged supply cord only by the manufacturer, its ser-▶Do not try to repair the appliance by yourself. In case of repair please contact our customer service.Installation▶The appliance should be placed in a well-ventilated place. Ensurea location which allows opening the door fully.▶Never install the appliance outdoors in a damp place, or in an area which may be prone to water leaks such as under or near a sink unit. In the event of a water leak cut power supply and allow the machine to dry naturally.56Intended useThis appliance is intended for washing machine-washable laun-dry only. Anytime follow the instructions given on the label of each garment label. It is designed exclusively for domestic use inside the house. It is not intended for commercial or industrial use.use may cause hazards and loss of of all warranty and liability claims.WARNING!Installation▶Install or use the appliance only where the temperature is above 5 °C.▶Do not place the appliance directly on a carpet, or close to a wall or furniture.▶Do not install the appliance in direct sunlight or in the near of heat sources(e.g. stoves, heaters).▶Make sure that the electrical information on the rating plate agrees with the power supply. If it does not, contact an electri-cian.▶Do not use multi-plug adapters and extension cables.▶Make sure only the delivered electric cable and hose set are used. ▶Make sure not to damage the electric cable and the plug. If dam-aged have it replaced by an electrician.▶Use a separate earthed socket for the power supply which is easy accessible after installation. The appliance must be earthed.▶no leakage.2.1 Picture of appliance2.2 AccessoriesNote:-Detergent /Softener drawer Control panel Worktop Door handle cover Adjustable f eetWarranty Card3-Control panel1 Detergent /Softener drawer2 “Power“ button3 Programme selector4 “Start/Pause“ button 5“T emp.”6“Spin”7 “Delay”8“Extra rinse” 9 Extra rinse indicator10 Delay indicator11 Display12 Programme indicator3-0Function buttons:Indicator93.2 “Power“ buttonPress this button (Fig. 3-2) gently to switch on, the display is shining. Press it again for about 2 seconds to-vated after a while machine will shut down automati-cally.3.5 Function buttonsThe function buttons (Fig. 3-5) enables additional op-tions in the selected programme before programme start. T he related indicators are displayed.3.4 “Start/Pause“ buttonPress this button (Fig. 3-4) gently to start or inter-rupt the currently displayed programme. During pro-gramme interruption the digits on the display are blink -ing.3.3 Programme selectorPress one of these buttons (Fig. 3-3) sequentially until the indicator of the desired programme lights up, and the default settings are displayed.3.5.1-Function button “ E x t r a r i n s e .“In conjunction with the “Temp.” button, the child 3.5.2-Function bu tton “Temp.”Press this button (Fig. 3-5.2) to change the washing temperature of the programme. If no value is illumi -nated the water will not heated.Press this button (Fig. 3-5.1) to rinse the laundry more intense with fresh water. This is recommended for people with sensitive skin. One or two additional rinse cycles are available.pressed, when the child lock is activated. The change is not running.3.7 Indicatorscorresponding function/programme is activated.3.8 DisplayThe display (Fig. 3-8) shows following information: ▶Washing time ▶End time delay▶Error codes and service information5.3 Preparing laundry▶Sort out clothes according to fabric (cotton, syn-thetics, wool or silk) and to how dirty they are (Fig. 5-3). Pay attention to the care labelling of wash-ing labels.▶Separate white clothes from coloured ones. they fade or run.▶Empty pockets (keys, coins, etc.) and removeharder decorative objects (e.g. brooches).▶-a wash bag to care for this delicate laundry (hand or dry cleaning would be better).▶Close zippers, velco fastener and hooks, makesure the buttons are sewn on tightly.▶hem, delicate underwear (Dessous) and small items such as socks, belts, bras, etc. in a wash bag.▶Unfold large pieces of fabric such as bed sheets,bedspreads etc.▶T urn jeans and printed, decorated or color-inten-sive textiles inside out; possibly wash separately.5.1 Power supplyConnect the washing machine to a power supply (240V/50Hz; Fig. 5-1). Please refer also to section INST ALLA TION.5.2 Water connection▶Before connecting check the cleanliness and clar-ity of the w ater inlet. ▶Tun on the tap (Fig.5-2).Note: TightnessBefore use check for leakage in the joints between the tap and the inlet hose by turning on the tap.CAUTION!Non-textile, as well as small, loose or sharp-edged items may cause malfunctions and damage of clothes and appliance.12Care chart5.4 Loading the appliance▶Put in the laundry piece by piece▶Don‘t overload. Note the different maximum load according to programmes! Rule of thumb for maximum load: Check if you can put a hand upright on top of load.▶Close the door carefully. Make sure that no pieces of laundry are pinched.135.5 Selecting detergent▶▶Use only machine w ash approved detergent.▶▶Mind always detergent manufacturer recommendations.▶Do not use dry cleaning agents such as trichloroethylene and similar products.L = gel-/liquid de tergent P = powder detergent O = optional _ = noIf using liquid detergent, it is not recommended to activate the time delay.We recomment by using:▶Laundry p owder: 20°C to 90°C* (best use:: 40-60°C)▶Color detergent: 20°C to 60°C (best use: 30-60°C)▶Wool/delicate detergent: 20°C to 30°C (= best use:)* Choose 90 °C wash temperature only for special hygienic r equirements.145.7 Switch on the appliancePress the “Power“- button to switch on the applian ce (Fig. 5-7). T he Display is shining.5.8 Select a programmeT o get the best washing results, select a programme type.Press button or (Fig. 5-8) sequentially until the in-dicator of the desired programme lights up, and the default settings are displayed.<>1. At programme cycle end END is displayed.2. 3. Remove laundry as soon as possible to go easy on it and to prevent more wrinkling. 4. 5. Unplug the power cord.6. Open the door to prevent formation of moisture and odours. Let it open while not used.T o interrupt a running programme press gently “Start/Pause“. The LED in the button is flashing. Press it again to resume operation.T o cancel a running programme and all its individual settings1. Press “Start/Pause” button to interrupt the running programme.2.3.4. Select a new programme and start it.5.12 After washing5.10 Start wash programmePress “Start/Pause“ button (Fig. 5-10) to start. Appli -ance operates according to present settings. Changes are only possible by cancelling the programme.5.11 Interrupt - cancel wash programme5.13 Activate or deactivate the buzzerThe acoustic signal can be deselected if necessary: 1. Switch on the appliance.2. Select the SPIN programme.3. Press the “Extra rinse“button and “Temp.”“Spin” button button at the same time forabout 3 sec bEEP OFF ” will be displayed and the buzzer will be deactivated.For activating the buzzer press these two buttons at the same time again. “bEEP ON ” will be displayed.16onds. ”177.1 Cleaning the detergent drawerT ake always care there▶7.4 Cleaning the drum▶Remove accidentally washed metal parts such aspins, coins, etc. from the drum (Fig. 7-4) becausethey cause rust stains and damage.▶Use a non-chloride cleaner for removing ruststains.Observe the warning hints of the cleaningagent manufacturer.▶Do not use any hard objects or steel wool for clean-7-3.21. Turn of and unplug the machine (Fig. 7-6.1).2. Open service flap. You can either use a coin or a screwdriver (Fig. 7-6.2).3. Provide a flat container to catch leach water (Fig. 7-6.3). There could be bigger amounts!4. Pull the drainhose out and hold its end above the container (Fig. 7-6.3).5. T ake the sealing plug out of the drainhose (Fig. 7-6.3).6. After complete drainage close drainhose (Fig. 7-6.4). and push it back into the machine.7.Unscrew and remove counter clockwise the pump flter (Fig.7-6.5).8. Remove contaminants and dirt (Fig.7-6.6).WARNING!hot! Before any action please ensure water has cooled down.for instanvce if the appliance: ▶doesn´t drain the water. ▶doesn´t spin.▶cause unusual noise while running.197.6 Pump filterCAUTION!▶Pump filter sealing has to be clean and unhurt. If the lid is not full tightened, water can escape.▶The filter must be in place, or it may lead to leakage.9. Clean carefully pump filter, e.g. using running water (Fig. 7-6.7).10. Refx it thoroughly (Fig. 7-6.8). 11.Close service flap.208.2 T roubleshooting with display codeof a problem please check all shown possibilities and follow below instructions before you contact an after sales service. See CUSTOMER SERVICE.WARNING!▶Before maintenance, deactivate the appliance and disconnect the mains plug from the mains socket.▶improper repairs can cause considerable consequential damages..▶ A damaged power cable should only be replaced by the manufacturer, its service8.1 Information codesFollowing codes are displayed only for information referring to the washing cycle. No measures must be performed.8.3 T roubleshooting without display codeShould the error messages reappear even after the taken measures, switch off the appli -ance, disconnect the power supply and contact the customer service.8.4 In case of power failureThe current programme and its setting will be saved. When power supply is restored operation will be re-sumed.In case of power failure during programme run door opening is mechanically blocked. If the laundry is to be removed, the water level must not be visible in the glass door. - Danger of scalding!▶Lower the water level according to step 1 to 6 of chapter CARE AN CLEANING (PUMP FIL TER). ▶Pull lever (A) beneath serviceflap (Fig. 8-4) until door is unlocked by a gentle click. ▶Fix all parts and close the service flap.239.1 Preparation▶T ake the appliance out of the packaging.▶Remove all packaging material including polystyrene base, keep them out of childrens reach. While opening the package, water drops may be seen on plastic bag and port-hole. T his normal phenomenon results from water tests in the f actory. 9.3 Dismantle the transportation boltsThe transportation bolts are designed for clamping anti-vibration components inside the appliance during transportation to prevent inner damage.1. Remove the back cover (Fig. 9-3.1).2. Remove all 4 bolts on the rear side and take outplastic spacers (A) from inner side of the machine (Fig. 9-3.2).Note: Packaging disposalKeep all packaging materials out of children´s reach and dispose them in an environmen-tally friendly manner.9.2OPTIONAL: Adjusting the bottom coverboardWhen opening the package, you will find a bottom cover(A) The board is used for reducing noise after covering the bottom of the cabinet.241. Lay the washing machine down to its side, port-hole pointing upwards, bottom side towards op-2. Place the bottom cover.Screw the bolts throughthe f our holes on the board on to the tub firmly.upright again.9.5 Aligning the applianceAdjust all feet (Fig. 9-5) to achieve a complete level position. This will minimize vibrations and thus noise during use. It will also reduce wear and tear. We recom-mend to use a spirit level for adjustment. Floor should be as stable and flat as possible.1. Loose the locknut (1) by using a wrench.2. Adjust the high by turning the foot (2).3. Tighten locknut (1) against the housing.9-5If the machine is to be moved to a distant location, replace the transportation bolts re-moved before installation to prevent damage:1. Remove the blanking plugs. 2. Remove the back cover3. Insert the plastic spacers and the transportation bolts.4. Tighten the bolts with a spanner.5.Replace the back cover.25Following connections are possible: 9.6.1 Drain hose to sink▶edge of a sink with adequate size (Fig. 9-6.1). ▶Protect the U-support sufficiently against slip -ping. 9.6.2 Drain hose to waste water connection▶vent-hole must be minimum 40 mm.▶Put the drain hose for approx. 80 mm in thewastewater pipe.▶Attach the U-support and secure it sufficiently(Fig. 9-6.2). 9.6 Drain Water ConnectionFix the water drain hose properly to the piping. The hose has to reach at one point a height between 80 and 100 cm above the appliance bottom line! If possible keep always drain hose fixed to the clip at the appliance back. WARNING!▶Use only the supplied hose set for the connection. ▶Never reuse old hose sets!▶Only connect to cold water supply.▶Before connection, check whether the water is clean and clear.CAUTION!▶The drain hose should not be submerged in water and should be securely fixed and leak-free. If the drain hose is placed on the ground or if the pipe is at a height of less than 80 cm, the washing machine will continuously drain while being filled (self-si -phoning).▶Drain hose is not to be extended. If necessary contact after sales service.9.6.3 Drain hose to sink connection▶The junction must lie above the siphon▶ A spigot connection is usually closed by a pad (A).That must be removed to prevent any disfunc-tion (Fig. 9-6.3).▶Secure the drain hose with a clamp.269.8 Electrical ConnectionBefore each connection check if:▶power supply, socket and fusing are appropriate tothe rating plate.▶the power socket is earthed and no multi-plug or extension are used.▶the power plug and socket are strictly according.Put the plug into the socket (Fig. 9-8).WARNING!▶dry and leak free!▶T ake care these parts are never to be crushed, kinked, or twisted▶If the supply cord is damaged, it must be replaced by the service agent (see warranty card) in order to avoid a hazard. .9.7 Fresh Water ConnectionMake sure that the gaskets are inserted.1. Connect the water inlet hose with the angled endto the appliance (Fig. 9-7.1). Tighten the screw joint by hand.2. The other end connect to a water tap with a 3/4“thread (Fig. 9-7.2).272810.2 Standards and DirectivesThis product meets the requirements of all applicable EC directives with the correspon -ding harmonised standards, which provide f or CE marking.8 1 0 2 3 2 5 0 _ 1 0 V 9 2 8 0 1 D F -0 7 M W H。
纽曼 A70系列播放器 说明书

纽曼之音A70 系列用户手册VM 86前言感谢您选用本公司生产的MP3播放器!为了使您尽快轻松自如的操作您的MP3播放器,我们随机配备了内容详尽的用户手册,您可以获取有关产品介绍、使用方法等方面的知识。
使用您的MP3播放器之前,请仔细阅读我们随机提供的所有资料,以便您能更好地使用该产品。
在编写本手册时我们非常认真和严谨,希望能给您提供完备可靠的信息,然而难免有错误和疏漏之处,请您给予谅解并由衷地欢迎您批评和指正。
如果您在使用该产品的过程中发现什么问题,请及时拨打我们的服务热线,感谢您的支持和合作!本公司对于因软件、硬件的误操作、产品维修、电池更换或其它意外情况所引起的个人数据资料的丢失和损坏不负任何责任,也不对由此而造成的其它间接损失负责,请随时备份您的数据资料到您的台式(笔记本)计算机上。
同时我们无法控制用户对本手册可能造成的误解,因此,本公司将不对在使用本手册过程中可能出现的意外损失负责,并不对因使用该产品而引起的第三方索赔负责。
本手册中的信息如有变更,恕不另行通知。
本手册信息受到版权保护,其任何部分未经本公司事先书面许可,不准以任何方式影印和复制。
●产品及产品颜色款式请以购买的实物为准。
●本公司保留对本手册、保修卡及其相关资料的最终解释权。
1★不要在特别热、冷、多尘或潮湿的环境中使用播放器。
★使用时不要让播放器摔落、或与硬物摩擦撞击,否则可能会导致播放器表面磨花、电池脱落或其它硬件损坏。
★在下列情况下请更换电池:☆如在正常操作中播放器电池图标为23外观及按键说明一、电池安装推开电池盖,按电池仓内正确极性标示放入一节AAA电池,合好电池盖即可。
“电量不足时,电池符号为5名字、歌手名字和电量指示标志。
暂停:在播放状态下短按播放键为暂停,LCD显示暂停标志“,即停止播放。
注:在停止状态下,为了节能,系统默认自动关机时间为一分钟,即一分钟内没有任何操作,系统将自动关机。
四、复读功能在播放状态下,垂直向下短按M键一次,设置复读起点A,此时LCD显示“A→”,再短按M键一次,设置复读终点“B”,此时LCD显示“A-B”。
万利达MT708说明书

开机充电时话机屏幕电池容量图标自右向左动画显示,电池充满以后电池容量以满格静止显示。 注意:电池在充电期间有轻微发热为正常现象。
电池的使用
电池的性能受多种因素的影响,包括您的无线承载网络配置、信号强度、使用手机时的温度;您 所选择和使用的功能或设置,和手机选择的配件以及您所使用的语音、数据或其它的应用程序模式。
注意:“1”键在待机状态下长按,代表呼叫语音信箱服务中心,此号码需要预先设定语音信箱号 码。
*、#键在不同的状态或功能菜单中有不同功能: 在待机界面,长按“#”键开启或退出静音模式。 在数字拨号界面,连续短按或长按“*”键可输入“+”、“P”或“W”字符;其中“P、W”
以方便呼叫分机;“+”用于拨打国际长途。 提示:“W、P会跳出一个视窗询问使 用者是否传送 DTMF。
1
一.安全及注意事项
为了安全、有效地使用您的手机,请您在使用前阅读以下信息: ¾ 在化工厂、加油站、油库以及其它爆炸物附近时,请您关机。 ¾ 使手机远离儿童。 ¾ 在驾车过程时,请使用耳机通话装置以保安全;除非在紧急情况下,否则请您在路旁停车, 再进行通话;特别是不要在高速驾车中使用手机。 ¾ 请勿在飞机上使用移动电话,在登机前请检查手机是否设置了自动开机功能。 ¾ 在医院不要使用移动电话,以免干扰医疗设备的正常运转,导致医疗事故的发生,如果在心 脏起搏器、助听器以及其它一些医疗电子设备附近使用手机时应特别注意,手机可能会干 扰这些设备。 ¾ 非原厂附件和配件,不具有保修资格。 ¾ 请勿自行拆卸手机,若您的手机发生故障,请与我们指定的维修处取得联系。 ¾ 严禁手机在没有装上电池时插上充电器充电;取电池时应关掉手机电源,否则会损坏电话记 忆。 ¾ 充电必须在通风和散热良好的环境下进行,远离易燃、易爆品。 ¾ 为避免消磁,请保持手机远离磁性物质,如磁碟片、信用卡等。 ¾ 确保手机不与任何液体接触,一旦发生此种情况,请拆下电池并与我们指定的维修处取得联 系。 ¾ 避免在温度过高或过低的环境下使用手机,避免将手机暴露在强烈日光下或湿度较高的环境 中。 ¾ 不能用液体或含有强洗涤剂的湿布来清洁您的移动电话。 ¾ 您的手机具有拍照和录音功能,请遵照相关法律法规使用这些功能,擅自拍照和录音可能会 触犯法律和法规。 ¾ 使用手机时请不要扔、放、敲打手机,以免损坏外壳及手机内部元件。 ¾ 不要将旧电池扔进一般生活垃圾中。在有明确规定废旧电池处理的地方,请按照规定的指示
用友U8使用说明

用友软件U850实际操作教程1 用友软件安装1.1 用友ERP-U8应用的系统运行环境:1.2 用友ERP-U8的系统安装1.2.1安装模式用友ERP-U8应用系统采用三层架构体系,即逻辑上分为数据库服务器、应用服务器和客户端。
(1)单机应用模式。
既将数据库服务器、应用服务器和客户端安装在一台计算机上。
(2)网络应用模式但只有一台服务器。
将数据库服务器和应用服务器安装在一台计算机上,而将客户端安装在另一台计算机上。
(3)网络应用模式且有两台服务器。
将数据库服务器、应用服务器和客户端分别安装在不同的三台计算机上。
1.2.2 安装步骤:这里介绍第一种安装模式的安装步骤。
建议学员采用此种安装模式。
第一步,首先安装数据库SQL Server2000,最好是个人版,此版在多个操作系统上适用。
并要记好SA密码。
装完后,重启系统,并启动SQL Server 服务管理器。
第二步,安装用友ERP-U8系统。
(1)将用友ERP-U8管理软件光盘放入服务器的共享光盘中,打开光盘目录,双击Setup.exe文件,显示ERP-U8管理软件安装欢迎界面如图1-1所示。
图1-1 ERP-U8管理软件安装-欢迎界面(2)单击【下一步】进入“安装授权许可证协议”界面,如图1-2所示。
图1-2 U8管理软件安装-许可证协议界面(3)单击【是】,接受协议内容进入“客户信息确认”界面,如图1-3所示。
图1-3 U8管理软件安装-客户信息界面(4)输入用户名和公司名称,用户名默认为本机的机器名,单击【下一步】进入“选择目的地位置”界面,如图1-4所示。
图1-4 U8管理软件安装-选择目的地位置界面(5)选择安装程序安装文件的文件夹,可以单击【浏览】修改安装路径和文件夹,单击【下一步】进入“选择安装类型”界面,如图1-5所示。
图1-5 U8管理软件安装-选择安装类型界面(6)系统提供了五种安装类型,含义如下:数据服务器:只安装数据服务器相关文件。
Uniscan B880 B980 C880 E70 扫描仪 说明书

目录一、扫描仪的安装与设定 (1)拆开扫描仪包装 (1)安装与设定扫描仪 (1)步骤一、扫描仪自动保护锁 (1)步骤二、安装软件 (2)步骤三、连接您的扫描仪和计算机 (3)测试扫描仪 (3)二、扫描仪的使用与维护 (5)使用扫描仪上的功能按键 (5)File 存盘按键 (5)Copy复印按键 (6)SCAN扫描按键 (6)OCR光学文字识别按键 (7)E-Mail电子邮件按键 (7)正负片扫描 (8)安装透扫器 (8)透扫片夹 (8)扫描正负片 (9)扫描正负片之相关注意事项 (11)亮灯控制 (12)维护 (12)三、设定扫描仪按键 (13)设定File按键 (13)设定Copy按键 (14)设定Scan按键 (14)设定OCR按键 (15)设定E-Mail按键 (16)四、Uniscan TWAIN窗口 (18)简介 (18)设定按钮 (19)预览范围 (21)增强工具列 (23)扫描小秘诀 (25)千禧专业版 (26)一、软件说明 (26)二、软件操作 (27)1、软件界面及功能说明 (27)2、操作流程 (29)3、表格的识别与导出 (33)4、倾斜校正 (33)5、调整文本顺序 (33)6、导出单页或多页文本文件 (34)7、分辨率设定与字号大小对照表 (34)8、常见问题 (35)9、取得帮助 (36)附录:规格 (37)一、扫描仪的安装与设定拆开扫描仪包装11. Uniscan 扫描仪2. USB连接线3. 电源变压器4. 用户手册5. 驱动安装光盘:包含扫描仪的驱动程序、附赠的应用软件和完整的使用手册电子文件。
6. 反射稿扫描遮板7. 透扫片夹安装与设定扫描仪步骤一、扫描仪自动保护锁您所购买的扫描仪设计有一自动保护锁,用于搬运过程中保护光学组件。
此自动保护锁开关位于扫描仪机体的正下方(如下图所示),当扫描仪平放在桌面或其它平1请将包装盒和包装材料存放妥当,以备将来您需要长距离搬运本扫描仪时使用。
U870全产品介绍

资料范本本资料为word版本,可以直接编辑和打印,感谢您的下载U870全产品介绍地点:__________________时间:__________________说明:本资料适用于约定双方经过谈判,协商而共同承认,共同遵守的责任与义务,仅供参考,文档可直接下载或修改,不需要的部分可直接删除,使用时请详细阅读内容U870全产品介绍前言用友ERP-U8V870(以下简称U870)作为新产品,预计将在10月25日上市,为了让大家对U870产品有一全面完整的了解,U8业务本部在U861产品功能基础上总结U870新增功能特点,制作了U870全产品介绍手册,本手册覆盖财务会计、供应链、生产制造、管理会计、人力资源、集团应用、决策支持、OA、网络分销、连锁零售、企业应用集成、UAP 等部分,旨在让大家通过此手册认知和了解U870产品的整体功能特点。
每一产品模块介绍主要包含以下内容,本产品主要能处理哪些业务?可以与哪些产品集成应用?可以适应哪些行业应用?面向的适用人员有哪些?有哪些主要功能特点、亮点?本手册可作为业务人员自我学习和方案制作使用,也可为给客户提供产品功能级资料时的素材。
一、U8管理软件平台U8平台 U8平台是U8应用产品的基础,完整的平台功能将会有力地保证U8各产品的顺利开发和应用,保证各种不同的产品在数据、流程和应用上可以无缝集成,界面与操作完全一致。
U870产品的平台功能非常丰富和强大,涉及的范围和内容也相当广泛,她能灵活地帮助使用者实现ERP系统集中协作管理和高度的个性化定制,平台的架构主要包括企业应用门户、系统管理和服务、公共控件及权限管理、EAI(企业应用集成),以及U8工作流系统和应用开发平台UAP。
门户 Portal【门户(Portal)】适用于所有使用ERP-U8的业务人员,以及企业的IT管理人员。
门户是操作员登录后首先看到的界面,通过该界面可以操作有权限的产品模块进行业务处理,可以快速获取ERP系统的消息和任务通知以及各个业务相关的预警信息等内容,门户既是统一的管理入口,也是每个操作员个性化的工作场景。
- 1、下载文档前请自行甄别文档内容的完整性,平台不提供额外的编辑、内容补充、找答案等附加服务。
- 2、"仅部分预览"的文档,不可在线预览部分如存在完整性等问题,可反馈申请退款(可完整预览的文档不适用该条件!)。
- 3、如文档侵犯您的权益,请联系客服反馈,我们会尽快为您处理(人工客服工作时间:9:00-18:30)。
0XJ 465 304
第2页共 22页
旧底图总号底图总号签字日期6测量功能 (16)
7事件记录 (17)
8通讯 (18)
8.1 MODBUS-RTU协议 (18)
8.1.1 物理层 (18)
8.1.2 MODBUS-RTU协议 (18)
8.1.3 报文格式指令 (19)
8.2 其他通讯模块 (20)
附录1MODBUS-RTU通讯地址信息表 (21)
4-1 三相四线(3PT,4CT)接线示意图
外部接线方式必须与装置内部设置的接线方式相同,否则装置的测量数据将出现较大
本装置测量的电压信号和电流信号都必须是交流信号,请勿将直流信号接入信号输入
电压输入:输入电压不要高于产品的额定输入电压,否则应考虑使用
的精度,请使用精度等于或优于装置测量精度的
4-2 功能接线示意图
12
11109876543218
76543218
76543212143
65
87A
B C D
图4-3 背面端子示意图
4-1所示:
表4-1 端子定义
A 排
B 排
C 排 CANL 24V- Un CANH +24V Ua 485+ NO1 Ub 485- COM1 Uc 0V NC1 KR1 NO2 GN
D KR2 COM2 AC(N) KR3 NC2 AC(L) KR4 KR5 KR6 COM
图5-1 面板与主显示界面
面板与主界面说明如下表5-1所示:
表5-1 面板与主显示界面说明
功能
页眉:包含当前显示显示内容提示和当前时间两部分内容
数据窗口:显示数据信息及相应的单位信息
按键功能:从左到右依次为向上翻页、向下翻页、进入主显
示界面和进入主菜单
四个物理按键:按键功能定义为“按键功能”C
竖向滚动条:多页面情况下指示当前页面所处的位置(部分界
面具有此功能)
数据显示界面说明
装置的主界面共有副画面可以显示,分别为:相电压、相电流、有功功率、无功功率、功率因数、开入及开出、通信状态。
用户可根据需求在系统装置-屏幕设置-主页号(0—6)中设置相应的显示界面。
此处数据显示界面以三相电压和频率显示为例,示意图如下图
图5-2 数据显示界面
装置数据显示界面说明如下表5-2所示:
表5-2 数据显示界面说明
功能
页眉:包含当前显示显示内容提示和当前时间两部分内容
数据窗口:显示数据信息及相应的单位信息
按键功能:从左到右依次为向上翻页、向下翻页、进入主显
示界面和进入主菜单
竖向滚动条:多页面情况下指示当前页面所处的位置(部分界
面具有此功能)
装置中出现的按键图标及相应的功能描述在表5-3中列出。
表5-3按键图标及功能描述
按键功能描述
向上移动选项/向前翻页
向下移动选项/向后翻页
向左移动
向右移动
5.3.2 进入和退出编程状态
进入编程状态:在主页面按下“主菜单”进入选择编程设置界面,主菜单界面显示如下图中所示。
选择需要设置的子菜单,输入正确的编程保护密码后便进入编程设置,开始设置(出厂默认的编程密码为
退出编程状态:在已退到编程界面第一层菜单的情况下,
选择“返回”放弃保存更改并退回主页面。
图5-3 主菜单界面
装置主菜单结构采用分层结构的菜单方式,如下图5-4所示:
图5-4 主菜单分层结构示意图 编程菜单介绍
事件记录显示界面及具体说明如下表5-4所示:
5-4 事件记录
零漂校对
零漂校对显示界面及具体说明如下表5-6所示:
表5-6 零漂校对 显示界面
系统设置
系统设置显示界面及具体说明如下表5-8所示:
表5-8 系统设置
具体说明
左图显示“系统设置”界面,其中,
“时间设置”
示;“通信设置”可设置
口和以太网口参数;
以对101、104、MODBUS
约的使能进行设置;
以对LCD
间及主页号进行设置;
可以对装置密码进行设置,
置”可以对装置的检修状态、
地进行投退及恢复出厂设置操作。
采用三相四线的接线方式,可以测量的包括通过基本电量及进一步运算获得的相所示:
表6-1 装置测量电量
名称 符号 单位
相电压 Ua/Ub/Uc [V]
线电压 Uab/Ubc/Uac [V]
相电流 Ia/Ib/Ic [A]
零序电流 3I0 [A]
频率 F [Hz]
每相有功功率Pa/Pb/Pc [W]
每相无功功率Qa/Qb/Qc [Var]
每相功率因数Pfa/Pfb/Pfc ——
总有功功率 Pt [W]
”
别向前和向后翻页,按“返回”回到事件记录主菜单。
遥信变位记录的每页最大可显示
事件记录信息。
”分别向前和向后翻页,“返回”回到事件记录主菜单。
开出控制记录的每页最大可显示
事件记录信息。
