dcm4chePACS基本操作说明
400M核磁简易操作指南(Varian)
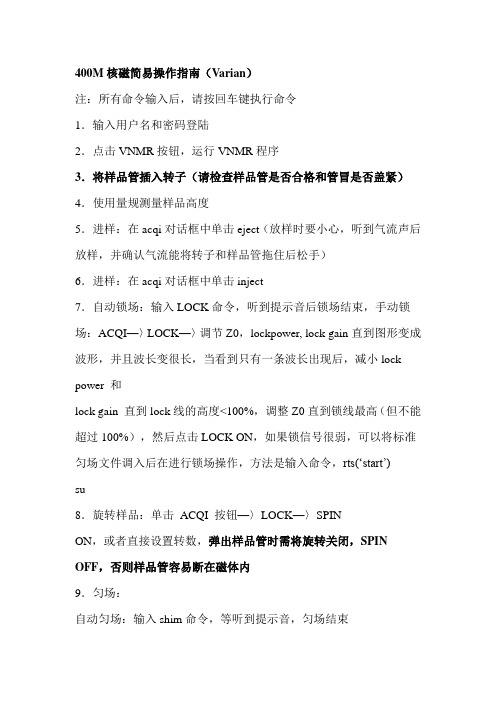
400M核磁简易操作指南(Varian)注:所有命令输入后,请按回车键执行命令1.输入用户名和密码登陆2.点击VNMR按钮,运行VNMR程序3.将样品管插入转子(请检查样品管是否合格和管冒是否盖紧)4.使用量规测量样品高度5.进样:在acqi对话框中单击eject(放样时要小心,听到气流声后放样,并确认气流能将转子和样品管拖住后松手)6.进样:在acqi对话框中单击inject7.自动锁场:输入LOCK命令,听到提示音后锁场结束,手动锁场:ACQI—〉LOCK—〉调节Z0,lockpower, lock gain直到图形变成波形,并且波长变很长,当看到只有一条波长出现后,减小lock power 和lock gain 直到lock线的高度<100%,调整Z0直到锁线最高(但不能超过100%),然后点击LOCK ON,如果锁信号很弱,可以将标准匀场文件调入后在进行锁场操作,方法是输入命令,rts(…start‟)su8.旋转样品:单击ACQI 按钮—〉LOCK—〉SPINON,或者直接设置转数,弹出样品管时需将旋转关闭,SPIN OFF,否则样品管容易断在磁体内9.匀场:自动匀场:输入shim命令,等听到提示音,匀场结束手动匀场:打开ACQI窗口,选择Shim,反复调整Z1C,Z2C(粗调),Z1,Z2(细调),直到锁信号最高,如果锁信号超过100%,逐渐减小Lock Gain,至锁信号到合适位置,调整完成后,点击Close关闭ACQI窗口,如果想保存这次匀场的数据,输入命令:svs(…文件名‟),调入以前的匀场文件,输入命令:rts(…文件名‟)10.开始实验:单击Setup 按钮,选择溶剂、实验,如果需要修改采样次数,输入命令nt=nnn,调整谱宽输入命令sw=nnn(nnn=ppm*400),然后输入ga 开始采样,在采样过程中,如希望暂停采样输入命令sa ,继续采样输入命令ra,完全终止采样输入命令aa采样过程中如果出现“adc overflow”提示,请中断采样,然后输入命令:gain=0,重新采样11.采样完成后,输入命令wft aphxfvsadj查看谱图,如果谱图窗口中为空白,可输入ds命令,显示谱图12.保存数据:输入命令svf(…文件名‟),或svf,然后输入文件名(注意:如果不执行保存数据这个步骤,数据将丢失,文件被保存在data目录下)13.继续实验,请弹出样品管后,重复步骤314.实验结束,首先在acqi对话框中单击LOCK按钮,关闭旋转(spin)和锁(lock),弹出样品管后,输入命令EXIT退出VNMR 程序,然后在桌面上选择EXIT按钮(必须先退出VNMR程序才能退出系统)15.注意:实验过程中请不要更改任何其他设置。
霍尼韦尔DCS操作手册(通用)

霍尼韦尔PKS系统操作手册目录第一章.控制系统介绍 (3)1.Honeywell公司PKS系统概述 (3)2.我公司PKS系统配置 (4)第二章.过程操作 (5)1.画面介绍及操作 (5)1.1.标准画面介绍及操作 (5)1.2.状态行介绍(Unde rstanding the Status Line) (6)1.3.工具栏介绍(Using the Toolbar) (8)1.4.点细目画面及操作 (10)1.5.操作组画面及其操作 (20)1.6.报警功能及其画面操作 (22)1.7.信息摘要及其画面操作 (30)1.8.事件摘要及其画面操作 (32)1.9.警报摘要及其画面操作 (33)1.10.总貌画面 (34)1.11.用户流程图介绍 (34)2.历史数据和趋势操作 (37)2.1.历史数据: (37)2.2.趋势: (38)第一章. 控制系统介绍1.Honeywell公司PKS系统概述DCS系统采用霍尼韦尔的Experion PKS过程知识系统。
Experion PKS 系统是当代最先进的控制系统之一,包含了霍尼韦尔三十年来在过程控制、资产管理、行业知识等方面积累的经验,采用最先进的开放平台和网络技术,为工业企业提供一个统一的、全厂的、自动化过程控制、设备和资产管理、直至生产管理、集成制造等一体化的知识系统体系结构和全系列的解决方案。
Experion PKS系统能满足各种自动化应用要求,为过程控制、SCADA应用和批量控制提供一个开放式控制系统,且满足业界要求的高性能、灵活性、易用性、高可靠性等。
典型Experion PKS系统的体系结构如下图1所示。
图12.我公司PKS系统配置霍尼韦尔提供的系统覆盖范围包括中央控制室、6个现场机柜室,由提供的光纤网络以星形连接方式连接中央控制室和与其关联的各个现场机柜室。
网络图如下图2:图2硬件配置方面,霍尼韦尔公司为神达、昊达公司配置的是PKS系统最新版本R410,其配置如下:l控制器:Experion PKS系统的C300控制器作为DCS主控制器,性能强大,可以与多种IO卡件兼容。
DCM4CHEE使用方法
DCM4CHEE使用方法一、说明:(转载嘟嘟熊的使用声明)dcm4chePACS使用声明及说明**************************************** 宁净(嘟嘟熊)**Email:david_nj@ **QQ:122173984 **Blog: ****************************************---------------------------------说明dcm4chePACS不是我的作品,它是INTERNET网上的一个开源项目(/)。
dcm4chePACS是一个多平台、开源、免费、企业级的PACS服务器,支持DICOM及HL7协议。
遵从MPL/GPL/LGPL许可,类似Mozilla。
dcm4chePACS使用JA V A编写,使用的是J2EE(Java 2 Enterprise Edition)架构.J2EE服务器使用的是开源服务器JBOSS。
数据库使用的是开源数据库MySQL。
你可以使用dcm4chePACS轻松管理上T级别的数据。
(1TB=1000GB=1000,000MB=1000,000,000KB)。
你可以建立磁盘阵列来存储你的数据。
当一个存储设备上的空间使用完毕后,dcm4chePACS 可以自动转到另外的存储设备上。
当然,如果你单台计算机的计算资源有效,你可以使用多台计算机来分摊负荷。
如:一台用于数据库管理,一台用于服务器。
甚至,你可以使用计算机集群(Cluster)来进行管理。
更多的信息,请访问官方网站:/----------------------------------关于你所下载的dcm4chePACS包。
这个包是我已经配置好的dcm4chee服务器(Windows版本)。
dcm4chePACS包里面包括:1. dcm4chee-mysql-2.13.1 : dcm4chee服务系统2. dcm4chee-arr-mysql-3.0.4 : dcm4chee 审计记录系统3. dcm4chee-cdw-2.13.1 : dcm4chee 光盘刻录系统4. jboss-4.2.2.GA : jboss(J2EE) 服务器5. mysql-4.1.22-win32 : mysql数据库服务器6. jdk1.6.0_03 :JA V A虚拟机及类库7. cdrecord : 开源光盘刻录软件8. pacsServer.exe : 用于启动服务器的自动脚本文件9. Readme : 此说明文件----------------------------------启动所需配置dcm4chePACS启动至少需要:CPU >= 550MHZ内存>= 512M硬盘>= 1G----------------------------------服务器的启动及关闭方法启动:双击dcm4chePACS.exe 图标,就可以启动服务器。
基于DCM4CHEE的PACS审计子系统的设计与实现
21 0 0年第 1 1期 C m u e DS f w r n p l c to s op trC o t a ea dA p ia in 工 程技 术
基于 D M4 HE C C E的 P C A S审计子系统的设计与实现
(. 1 浙江大学医学院,杭州
r s l t SF me odFial, c e ea p o ea dts se o ACS. e utwi J t . n l wea hiv ndi r v u i y tm fP h h y m K e w o dsP y r :ACS; DCM 4 CHEE; d t b yse Au s tm i Su
关键 词 :P c ;DC C E ;审计 系统 A S M4 H E
中图分 类号 :F3 29
文献 标识 码 :A
文章 编号 :10 — 59(0 0 1- 09 0 07 99 2 1 ) 1 03— 2
Th sg eDe in& I lme t to f ACS Au i mp e n a i n o P dt S b y t m s d o u s se Ba e n DCM 4 CHEE
经过二 十多年 的发展 ,国外P c 已经 进入 了高速 发展 的实用 As
工作 ,A R R 的核心功 能在 于搜索 。通 过控制 分页 大小 、排序 方法 , 事件 、参与 者 、参与对 象等 各种属 性 ,搜索 符合条 件 的记录并 按
偏好 显示 。 考虑 到系统 功能 的完整 性 , 需要 对记 录执行 删除操 作 ; 另外 由于每 天的访 问记 录持 续不 断增加 ,仅有 查询 已远 远无法 满 足 ,须 提供 分析 统计功 能 。通过对 用户 类型 或名称 的统 计 ,可 以 得 到访 问最频 繁 的用户 :通 过对每 天记 录量 的统计 ,可 以分析 每
DC4快速调试手册

MODROL ELECTRIC CO., LTD.伺服门机驱动系统快速手册IMS-DC20P2B1-A伺服驱动器200V级目录一、驱动器的接线 (1)二、操作与显示界面 (3)三、快速调试 (4)四、参数列表 (9)⏹P1.基本参数 (10)⏹P2.工艺参数 (10)⏹P3.速度参数 (10)⏹P4.时序参数 (11)⏹P5.扭矩参数 (11)⏹U1.状态监视 (12)⏹U2.端子监视 (12)⏹U3.故障记录 (13)⏹U4. 当前故障信息记录 (13)◆OP:系统操作参数 (14)五、运行中快速调整 (15)六、故障列表与解决方法 (17)⏹.电机自学习失败 (18)⏹.参数不合理 (18)一、驱动器的接线1.1驱动与控制回路端子分布与配线控制信号输入与门状态输出端子CN1324端子CN4说明二、操作与显示界面用户通过操作面板可对DC4门机控制器进行参数修改、状态监视与测试运行控制等操作3表重要三、快速调试DC4门机控制器采用全闭环距离控制,通过编码器学习门宽距离,需要进行电机自学习操作,采用参数设置配合内部计算控制减速点与到位。
3.1、电机参数调谐产品配套电机为交流永磁同步电机,使用前必须先进行电机调谐,学习电机磁角度,否则电机运行会出现无力或飞车。
若使用中产品因故障需更换驱动器或电机,请重新进行电机调谐。
调谐流程如图3-1所示:(1)检查外围接线且确保驱动器处于非运行状态;(2)编码器信号检查:使用操作器查看U2.06参数,用手将门板移动至门中部同时观察(3图3.1 电机调谐流程图相关参数设定:3.2、全闭环位置控制介绍全闭环位置控制需要在首次运行前正确自学习门宽距离,铜鼓设置开、关门曲线的参数实现加减速控制和到位的处理。
3.2.1、以本公司电梯控制系统为例说明驱动器相关信号配线3.3、门宽自学习门宽只想学习期间门将执行开关门动作,请确保动作区域内无人员停留,保证安全。
门宽自学习流程如图3.3.1所示:图3.4.1、同步门刀开关门运行曲线3.4.2、异步门刀开关门运行曲线开门曲线 (达到速度上限)关门曲线(未达到速度上限)a)b)c)d)e)f)g)收放门刀动作。
红外球M4新解码器说明书
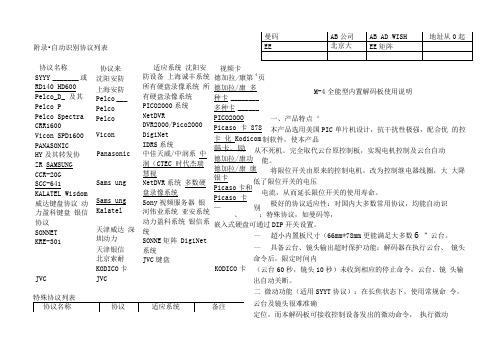
附录•自动识别协议列表 协议名称 SYYY_______ 或 RD140 HD600 Pelco_D_ 及其 Pelco P Pelco Spectra CRR1600 Vicon SPD1600 PANASONIC HY 及其转发协 ZR SAMSUNG CCR-20GSCC-641KALATEL Wisdom 威达键盘协议 动力盈科键盘 银信协议 SONNET KRE-301JVC 协议来 沈阳安防 上海安防 Pelco ___ Pelco Pelco Vicon PanasonicSams ung Sams ungKalatel天津威达 深圳动力 天津银信 北京索耐 KODICO 卡JVC适应系统 沈阳安防设备 上海诚丰系统 所有硬盘录像系统 所有硬盘录像系统 PICO2000系统 NetDVRDVR2000/Pico2000 DigiNet IDRS 系统中佳天威/中润系 中润(CTEC 时代杰瑞慧视NetDVR 系统 多数硬盘录像系统Sony 视频服务器 银河伟业系统 亚安系统 动力盈科系统 银信系统SONNE 矩阵 DigiNet系统JVC 键盘视频卡德加拉/康第4页 德加拉/康 多种卡 ________ 多种卡 ______PICO2OOO Picaso 卡 878卡 化 Kodicom 韩卡、励 德加拉/康功 德加拉/康 康银卡Picaso 卡和Picaso 卡— 别M-4全能型内置解码板使用说明一、产品特点‘本产品选用美国PIC 单片机设计,抗干扰性极强,配合优 的控制软件,使本产品从不死机。
完全取代云台原控制板,实现电机控制及云台自动能。
将限位开关由原来的控制电机,改为控制继电器线圈,大 大降低了限位开关的电压 电流,从而延长限位开关的使用寿命。
极好的协议适应性:对国内大多数常用协议,均能自动识、 ;特殊协议,如曼码等, 嵌入式硬盘可通过DIP 开关设置。
— 超小内置板尺寸(66mm*78mm 更能满足大多数6 ”云台。
道闸软件使用说明
停车场管理系统软件使用培训资料一.登陆软件a)首先,双击软件打开,选择系统管理-系统登录-这是出现一个登陆界面,点击卡号右方的黑色下拉箭头,选择999999卡号点击下方确认,此时,已登陆进软件。
二.增加人事资料a)选择工具栏下方的“请选择子系统”右方的黑色下拉箭头,选择“人事管理系统”,然后再选择工具栏中的文件-人事资料,此时出现一个基本资料对话框,在这里可以选择增加修改删除人事资料,想要增加人事资料,点击增加选项,输入“员工编号、姓名”,此2项必填,其余可选填。
点击保存。
(注意,发卡前需增加要发卡人员的人事资料。
)三.发卡a)选择工具栏中的卡管理-ID卡发行,出现发卡界面,选择上方的手动录入卡号,然后拿蓝牙卡往发行器上刷卡(注意:读取卡号时不要有输入法状态),选择要发行人员的员工编号,选择后出现对应的姓名等信息,修改有效日期后,在有效机号一栏里全选,点击发行。
b)选择工具栏下方的“请选择子系统”右方的黑色下拉箭头,选择“车场管理系统”,然后再选择工具栏中的卡片管理-下载卡号,每发行一张卡,都会有一条信息,点击下方的下载卡号即可。
此时发卡完毕。
(注意:发完卡号,必须来此下载卡号,否则卡无效)。
c)挂失解挂i.挂失:当用户丢失卡片后,需挂失卡片信息,选择工具栏中的卡管理-ID卡挂失解挂指令,输入用户姓名查找,找到后,选择那条信息点击挂失指令。
选择工具栏下方的“请选择子系统”右方的黑色下拉箭头,选择“车场管理系统”,然后再选择工具栏中的卡片管理-卡片挂失,当发出一条挂失指令后,这里就出现一条信息,点击挂失即可。
这时,此卡片挂失成功。
ii.解挂:当用户丢失卡片后,又找到,此时需解挂卡片信息,选择工具栏中的卡管理-ID卡挂失解挂指令,输入用户姓名查找,找到后,选择那条信息点击解挂指令,选择工具栏下方的“请选择子系统”右方的黑色下拉箭头,选择“车场管理系统”,然后再选择工具栏中的卡片管理-卡片恢复,发出一条解挂指令后,这里就出现一条信息,点击解挂即可。
卡斯克道子车库门助手操作指南说明书
Cascade is a Registered Trademark of Cascade Corporationcascade ாcorporationManual Number 6019803 R-3Boxcar Door AssistPageINTRODUCTIONSpecial Definitions1OPERATOR'S GUIDESafety Rules1Boxcar Door Assist2Industrial Lift Trucks3General Setup for Opening Doors4Picking Up, Securing Unit4Opening, Closing Doors5Open Docks5Close Quarters6Disengaging and Stowing7Troubleshooting7Safe Operation and Maintenance8OSHA Regulations8INSTALLATIONTruck Requirements9Electrical Installation10INSPECTION & MAINTENANCEDaily11100-Hour Maintenance11500-Hour Maintenance111000-Hour Maintenance11SERVICEWinch Drive Assembly, Cable Replacement12Sheaves, Cable Guards, Guide Block12Electrical13PARTSProduct Identification16Base Unit16Multi-Clamp Tower Assembly18Narrow Doorway Boom/Sheave Assembly19Recommended Spare Parts back coverPublications back coverContact Cascade back coveri6019803 Rev. 36019803 Rev. 31This Section contains operating instructions for the Cascade Boxcar Door Assist. It will help you avoid common errors which can often cause damage to the equipment or personnel injury.This information is intended to simplify operator under-standing about effective and safe Boxcar Door Assist use and operation. Read this information thoroughly before operating the unit. Be sure you know andunderstand all operating procedures and safety precau-tions. If you have any questions, or don’t understand a procedure, ask your supervisor.Emphasize Safety! Most accidents are caused by operator carelessness or misjudgement. You must watch for poorly maintained equipment and hazardous situations and correct them.This User Manual is for the Cascade Boxcar Door Assist and contains an Operator's Guide, Installation Instructions,Inspection & Maintenance, Service and Parts. All specifica-tions are shown in U.S. and (Metric) units where applicable.Special DefinitionsThe statements shown appear throughout this Manual where special emphasis is required. Read all WARNINGS and CAUTIONS before proceeding with any work.Statements labeled IMPORTANT and NOTE are provided as additional information of special significance or to make the job easier.CAUTION – A statement preceded by CAUTION is information that should be acted upon to prevent machine damage.IMPORTANT – A statement preceded by IMPORTANT is information that possesses special significance .NOTE – A statement preceded by NOTE is information that is handy to know and may make the job easier.Wireless Front View - Fully Optioned Base Unit26019803 Rev. 3DA0057.illCAUTION: Electrical interlocks prevent unsafe operation with unit tilted, raised too high, or overloaded. (Faults reset automatically in 2-10 sec.)Max.6019803 Rev. 33No ridersNo reaching through mastNo standing under load46019803 Rev. 3PERATOR'S GUIDEOPick up or clamp unit and attach safety chainsAdjust forks to slot width1Position roll clamp pads on towers ABOVE fork slotsORRC1217.illDA0018.illDA0019.ill2General setup for opening boxcar doorsPicking up, securing unitDA0002.illWARNING – Remain in truck or stay clear of No Stand Zone when opening or closing boxcar door.Assure cable is rigged parallel to door and floor – do not pull with cable at an angle. Cable under tension is hazardous and may result in equipment damage or bodily injury.DA0042.illNO STAND ZONE -defined by door size,movement rangeWireless Remote ControlHook, CableBoxcar Door Assist UnitCL1958.illPosition bale clamp pads on towers, pads EVEN with bottom of unitDA0023.illConnect power cable to truck or Internal Battery3ORShort Arm on RH side6019803 Rev. 3566019803 Rev. 36019803 Rev. 3786019803 Rev. 3(Specific Regulations from OSHA 1910.178 and 1917.17)(a) General Requirement(4)Modifications and additions which affect capacity and safe operationshall not be performed by the customer or user without manufactur-ers prior written approval. Capacity, operation and maintenance instruction plates, tags or decals shall be changed accordingly.(5)If the truck is equipped with front-end attachments other thanfactory installed attachments, the user shall request that the truck be marked to identify the attachments and show theappropriate weight of the truck and attachment combination at maximum elevation with load laterally centered.(6)The user shall see that all nameplates and markings are in placeand maintained in a legible condition.(e) Safety Guards(2)If the type of load presents a hazard, the user shall equip forktrucks with a vertical load backrest extension in accordance with:(a)(2) All new powered industrial trucks acquired and used by an employer after February 15, 1972 shall meet the design and construction requirements for powered industrial trucksestablished in the “American National Standard for Powered Industrial Trucks, Part II, ANSI B56.1”, except for vehicles intended primarily for earth moving or over-the-road hauling.(l) Operator TrainingOnly trained and authorized operators shall be permitted to operate a powered industrial truck. Methods shall be devised to train operators in the safe operation of powered industrial trucks.(m) Truck Operations(1)Trucks shall not be driven up to anyone standing in front of abench or other fixed object.(2)No person shall be allowed to stand or pass under the elevatedportion of any truck, whether loaded or empty.(3)Unauthorized personnel shall not be permitted to ride onpowered industrial trucks. A safe place to ride shall be provided where riding of trucks is authorized.(4)The employer shall prohibit arms or legs from being placed betweenthe uprights of the mast or outside the running lines of the truck.(5i)When a powered industrial truck is left unattended, loadengaging means shall be fully lowered, controls shall beneutralized, power shall be shut off and brakes set. Wheels shall be blocked if the truck is parked on an incline.(5ii)A powered industrial truck is unattended when the operator is 25feet or more away from the vehicle which remains in his view, or whenever the operator leaves the vehicle and it is not in his view.(5iii)When the operator of an industrial truck is dismounted andwithin 25 feet of the truck still in his view, the load engaging means shall be fully lowered, controls neutralized and the brakes set to prevent movement.(6) A safe distance shall be maintained from the edge of ramps orplatforms while on any elevated dock or platform or freight car.Trucks shall not be used for opening or closing freight doors.(10) A load backrest extension shall be used whenever necessary tominimize the possibility of the load or part of it from falling rearward.(n) Traveling(4)The driver shall be required to slow down and sound the horn atcross isles and other locations where vision is obstructed. If the load being carried obstructs forward view, the driver shall be required to travel with the load trailing.(7i)When ascending or descending grades in excess of 10 percent,loaded trucks shall be driven with the load upgrade.(7iii)On all grades the load and load engaging means shall be tilted back ifapplicable, and raised only as far as necessary to clear the road surface.(o) Loading(1)Only stable or safely arranged loads shall be handled. Caution shall beexercised when handling off-center loads which cannot be centered.(2)Only loads within the rated capacity of the truck shall be handled.(3)The long or high (including multiple-tiered) loads which may affectcapacity shall be adjusted.(4)Trucks equipped with attachments shall be operated as partiallyloaded trucks when not handling a load.(5) A load engaging means shall be placed under the load as far aspossible; the mast shall be carefully tilted backward to stabilize the load.(6)Extreme care shall be used when tilting the load forward or backward,particularly when high tiering. Tilting forward with load engaging means elevated shall be prohibited except to pick upa load. An elevated load shall not be tilted forward except when the load is in a deposit position over a rack or stack. When stacking or tiering, only enough backward tilt to stabilize the load shall be used.(p) Operation of the Truck(1)If at any time a powered industrial truck is found to be in need ofrepair, defective, or in any way unsafe, the truck shall be taken out of service until it has been restored to safe operating condition.(q) Maintenance of Industrial Trucks(1)Any power-operated industrial truck not in safe operatingcondition shall be removed from service. All repairs shall be made by authorized personnel.(5)All parts of any such industrial truck requiring replacement shall bereplaced only by parts equivalent as to safety with those used in the original design.(6)Industrial trucks shall not be altered so that the relative positionsof the various parts are different from what they were when originally received from the manufacturer, nor shall they be altered either by the addition of extra parts not provided by the manufacturer or by the elimination of any parts. Additional counter-weighting of fork trucks shall not be done unless approved by the truck manufacturer.(7)Industrial trucks shall be examined before being placed in serviceand shall not be placed in service if the examination shows anycondition adversely affecting the safety of the vehicle. Such examina-tions shall be made at least daily. When industrial trucks are used on a round-the-clock basis, they shall be examined after each shift.Defects when found shall be immediately reported and corrected.Railroad Facilities (Ref. 1917.17)(h)Before being opened fully, doors shall be opened slightly to ensure thatthe load has not shifted during transit. Special precautions shall be taken if the doors being opened are visibly damaged.(i)If powered industrial trucks are used to open railcar doors, the trucks orthe railcar doors shall be equipped with door opening attachments.Employees shall stand clear of the railcar doors while they are being opened and closed.(j)Only railcar door openers or powered industrial trucks equipped withdoor opening attachments shall be used to open jammed doors.6019803 Rev. 39Truck RequirementsAn IC lift truck with forks or clamp attachment is required topick up the electrically powered Boxcar Door Assist Unit.Paper Roll ClampForks or Clamp Attachment•Forks (2 x 5 x 48 in. L maximum)•Paper Roll Clamp Electrical PowerTruck-Powered Unit – Requires 12V @ 200A or 24V @ 100A DC power from the truck battery or electrical system. Use the No. 2-gauge twin cable andconnectors supplied with the unit (see Page 10 for electrical cable installation).Self-Powered Unit – Contains an internal 12V battery and charger to supply all required power.No truck power connection is required.106019803 Rev. 3Truck-Powered Unit (Steps 1, 2, 4, 5) – Use the No. 2-gauge twin cable, fusebox and connectors supplied with the unit and install as shown. Connect winch power cable to truck and test unit.Self-Powered Unit (Steps 3, 4, 5) – Charge battery using 12V charger supplied. Connect winch power cable to internal battery••secure cable.•Mount fuesbox solidly to truck if possible, or secure with cable ties to prevent movement.Determine location on truck cowl for power connectorcable to truck, or to unit internal battery6019803 Rev. 311DailyCheck items shown each day. Report problems to your supervisor.100-HourComplete the following inspection and maintenance on the Boxcar Door Assist Unit:•Check safety chains, hooks and chain anchors for damage. Replace damaged or missing parts.•Check for loose or missing fasteners. Tighten or replace if necessary.•Check cable sheaves and cable guards for freedom and proper operation. Replace damaged or worn parts.•Check electrical power cable, battery (if equipped)and connectors for damage. Replace damaged or worn parts •Check winch cable/hook by pulling out to full length and assuring there are no frayed or broken strands or kinks in the cable. Replace cable if it does not meet the above inspection criteria.500-Hour•Replace winch cable.1000-Hour•Replace cable sheevesRemote•Connect battery charger to power cable and charge battery for 8 hours.126019803 Rev. 31.0Winch Drive AssemblyThere are no field-servicable items on the winch drive assembly except for the cable/wire rope.1.11side-to-side.2sheaves to the IMPORTANT:3into the slot. 4IMPORTANT: DA0066.ill2.0Blockdescribed below:1new parts as shown.23430 ft.-lbs. (40 Nm).6019803 Rev. 3133.0Electrical3.1Main Power Fuse1Locate Boxcar Door Assist fusebox, which is near truck battery on truck-powered unit or near battery hold-down on self-powered unit.2Remove the cover and replace the fuse as shown.Assure that the stud terminals are reassembled as shown.CAUTION: Assure that the replacement fuse is the correct ampere rating for the winch:12V system – 200 Amp (Part No. 6017353)3.2Power Cable HarnessesCAUTION:Boxcar Door Assist Unit1contactor. CAUTION:damage.2capscrews.3other cables and wires as shown. correct polarity Truckharness on the truck.Power Cable Capscrews,WashersContactor Cover146019803 Rev. 33.3Winch Contactor, Motor Power CablesCAUTION: Before working on the contactor and winch cables, disconnect the power cable.1Remove the cover from the contactor.CAUTION: Covers contain electrical components and wiring – handle carefully to avoid damage.2Disconnect the main power cable harness from the + and – terminals on the winch contactor. Forreassembly, the main power cable is installed on top of the other cables and exits along the RH side(driver’s view) of the contactor (see illustration below).3Disconnect the remaining cables and wire harnesses from the contactor. Remove the contactor from the frame. For reassembly, tighten the contactor cap-screws to 5 ft.-lbs. (8 Nm).4For reassembly, reverse the above procedures with the following exceptions:•Install a new winch contactor.CAUTION: Assure all cables and wires arereconnected properly and with correct polarity .Serious damage may result with the cablesmisconnected. Refer to illustrations and schemat-ics for correct hookup.DA0072.illWINCH POWER CABLE SCHEMATICcontactor are swapped: F1 is connected to F2, and F2 is connected to F1.Electrical power from truck or internal battery.Winch Motor Power CablesCurrent Sensor IMPORTANT: Arrow must point toward negative connection to motor.3.4Circuit Board Controller,Wiring HarnessesCIRCUIT BOARD WIRING HARNESS SCHEMATICCurrent Winch Cover166019803 Rev. 36014809 Rev. 317REF QTY PART NO.DESCRIPTION6024568Base Unit – 12V 6024569Base Unit – 24V 116015241Winch – 12V 6022171Winch – 24V216025812Cable Assembly ▲316020248Knob ▲446001Square Nut, .37554629516Capscrew, .375 x 1.00616024660Spring Tensioner 716019902Platform Weldment 88768538Capscrew, M10 x 3094209043Washer, M10104767614Capscrew, M10 x 201123550Capscrew, .25 x .3751216020238Winch Cover136206321Capscrew, M6 x 16146202346Washer, M61516020229Bumper, Rubber 166202348Washer, M12176768556Capscrew, M12 x 451866020689Bushing 1916020233Brake Pad 204787383Washer, M102112787381Nut, M102226016660Sheave ◆234683162Shim ◆2426020106Pin ◆252682999Eye Pin ◆262787398Washer, M8◆272767961Capscrew, M8 x 16◆2816021248Fairlead Weldment ◆2926021751Safety Chain Assembly 3026021355Safety Chain Assembly3116019453Power Wire Assembly, Base Unit3216019450Power Wire Assembly/Fuseblock, Truck 338206322Washer, M103416021112Controller Assembly 3516021110Cover ■3616024410Circuit Board ■3716025862Wire Harness3816024807Emergency Release Pushbutton 3916026851Current Sensor 4016036925Winch Contactor ▲4126389Lockwasher, .254216021752Guard4316028481Cable Wedge Anchor ●4416026661Remote Transmitter▲Included with Winch.◆Included in Center Sheave Assembly 6021908.■Included with Controller Assembly 6021112.● Included with Cable Assembly 6025812. Reference:SK-7152.15A186014809 Rev. 3TowerREF QTY PART NO.DESCRIPTION6021945Tower Assembly 116020171Tower Weldment 26215419Washer, M2036679082Capscrew, M20 x 35426020627Whip Spring 54787398Washer, M862686119Lockwasher, M872767414Nut, M882765352Capscrew, M8 x 30926020249Rubber Pad1024783608Capscrew, M10 x 161126020224Bar6014809 Rev. 319cBoxcar Door AssistUNITS SERVICED PART NUMBERDESCRIPTION1-56-1920-506016660Sheave w/Bearing 2246021668Cable Guide Block 1246021811Cable/Hook Assembly 1246028481Cable Wedge Anchor 1246026661Wireless Remote1116019450Truck Power Harness/Fuseblock 1116017353200A Fuse (12V)123ECR2032Wireless Remote Battery123Users – Cascade product literature, service literature, parts and videos are available through authorized lift truckdealers. To find the dealer nearest you, contact:Lift Truck Dealers – To order parts, service literature or videos:Boxcar Door AssistPART NO.DESCRIPTION6019803User Manual (Operation, Installation, Service, Parts)679929Tool Catalog673964Literature Index Order Form 6024073Promotional CDContacting CascadeCascade Parts Sales 2501 Sheridan Ave.Springfield, OH 45505Tel: 888-CASCADE (227-2233)FAX: 888-329-0234Recommended Spare Parts© Cascade Corporation 200511-2005Part Number 6019803 R-3North America/South America Cascade CorporationU.S. Headquarters 2201 NE 201stFairview, OR 97024-9718Tel: 800-CASCADE (227-2233)503-669-6300Fax: 888-329-8207EuropeCascade N.V.European Headquarters P,O, Box 30091300 El Almere Damsluisweg 561332 ED Almere The Netherlands Tel: 31-36-5492911Fax: 31-36-5492964。
DCM4CHEE-ARC-5.10.4安装与配置指南
DCM4CHEE-ARC-5.10.4安装与配置指南目录一、安装资源准备 (3)1.1 资源说明 (3)1.2 资源下载 (3)1.3 安装路径 (3)二、环境变量设置 (4)三、安装步骤 (4)3.1 安装JDK Toolkit (4)3.1.1 下载安装包 (4)3.1.2 安装JDK (4)3.3.3 设置环境变量 (6)3.2数据库安装与初始化 (7)3.2.1 MySQL数据库安装 (7)3.2.2 初始化DCM4CHEE数据库 (9)3.3 安装LDAP服务器 (11)3.3.1 安装ApacheDS服务器并启动服务 (11)3.3.2 安装Apache Directory Studio管理工具 (13)3.6 配置LDAP服务器 (14)3.6.1 创建LDAP连接 (14)3.6.2 导入 LDAP模式 (16)3.6.3 修改LDAP分区信息(无需修改) (17)3.6.4 新建LDAP分区 (18)3.6.5 导入DCM4CHEE默认配置 (18)3.6.6 配置 Archive 的应用实体(AE Title) (19)3.6.7 配置DICOM存储路径 (21)3.7 设置WildFly 服务器 (21)3.7.1 安装WildFly服务器 (21)3.7.2 添加DCM4CHEE配置文件 (21)3.7.3 安装DCM4CHEE的JBOOS组件 (21)3.8 启动WildFly服务器 (23)3.8.1 启动WildFly服务器 (23)3.8.2 验证WildFly服务 (23)3.8.3 创建WildFly用户 (24)3.8.4 WildFly配置界面 (26)3.8.5 WildFly网络访问 (26)3.9 配置器数据源 (27)3.9.1 添加JDBC驱动 (27)3.9.2 创建数据源 (27)3.10 创建JMS 消息队列 (28)3.11 managed-executor-services配置 (29)3.12 设置Device Name名称 (30)3.13 部署DCM4CHEE ARCHIVE (30)3.13.1 部署与取消 (30)3.13.2 启动DCM4CHEE (30)3.13.3 验证DCM4CHEE (31)四、DCM4CHEE配置 (31)4.1 DCM4CHEE AEs 配置 (31)4.1.1 使用WEB UI配置 (31)4.1.2 使用LDAP配置 (31)4.2 远程应用实体(AE)配置 (32)4.2.1 通过WEB UI配置 (32)4.2.2 通过LDAP配置 (33)4.3 文件存储路径配置 (35)五、WildFly网络服务 (35)5.1 WildFly网络访问 (35)一、安装资源准备1.1 资源说明1.2 资源下载1.3 安装路径二、环境变量设置三、安装步骤3.1 安装JDK Toolkit3.1.1 下载安装包不管是32位还是64位Win7/Server系统,必须安装32位的JDK,JAI Image IO 1.2 作为JBOSS组件时不支持Win64位系统和Mac OS X系统,若安装成64位JDK,则WADO的图像解析将出现不支持图像解析器的问题。
AACS操作手册
运行程序,登录系统。
(一)输入用户名以及密码。
45秒时间内在密码框中输入正确的用户名与登录密码,直接回车或按验证按钮进入系统,超时则退出。
(二)用户名三类: 管理员、发卡员和操作员。
用户名默认为管理员,发卡员与操作员需要手动输入。
硬件操作(一)启用控制器:如果控制器启用已经勾选,可以在右边框选择以下全部控制器看到选中的控制器。
如果没有启用,则在检测控制器中,选择控制器号,点击启用。
(二)手动开门:在选择以下全部控制器中选择需要开门的控制器,选中后,点击手动开门。
在操作流水中看到门已经打开,开门后控制器能自动上锁。
(三)定时开关门功能:设置门常开,在报警处理中选择班组管制,班组管制界面弹出后,选中需要设置门常开的控制器,在右下框中选择需要设置门常开的是星期几,输入门常开的时间段,软件支持任意设置四个时间段,如需要24小时开门状态,在四个时间段中任选一个时段设置00:01—23:59,按“设置为常开”,操作结果显示在操作流水中。
取消设置,直接按“撤消设置”。
发卡(一)人员信息建立:点击人员信息,进入人员信息界面。
(1)单位:将鼠标放置单位空格处,左键点击,输入单位名称。
如中油昆仑大厦。
(2)部门:将鼠标放置单位空格处,左键点击,输入公司名称。
如北京天然气有限公司。
公司添加,点击增加,部门树就增加一个空格输入项,输入需要增加的公司名称。
添加完后,点击保存。
公司删除,在部门框中选择需要删除的公司名称,点击删除。
操作结果将在操作流水中显示。
注意一旦删除后,公司的所有人员信息将被删除。
(3)人员信息添加:首先选择公司名称,然后在人员信息(编辑状态)边框中点击增加,进入编辑状态,依次输入编号、姓名、性别、年龄、卡号、照片等基本资料,卡号添加为先将鼠标移到卡号的空白处,点击左键,然后将发行卡在发卡器上刷一下,卡号空白处就能读出发行卡的卡号。
编辑完后,点击保存。
人员信息就添加到该公司中。
(4)人员编辑:如果该公司已经建立人员资料,需要变更,则点击编辑。
四挡m4操作方法
四挡m4操作方法
四挡M4 操作方法如下:
1. 确认安全:在使用M4之前,始终要检查武器的安全状态。
将安全挂钩切换到"安全"位置,确保枪管已清空。
2. 装弹:拉开枪栓,插入弹夹并将弹夹插入弹夹口。
将枪栓装回原位并确认弹夹已装好。
3. 瞄准:将眼睛放在瞄准镜上,通过调整瞄准镜上的准星和瞄准框来正确瞄准目标。
将单发/自动选择杆置于所需的位置。
4. 开火:等待瞄准调整到位置后,可以按下扳机进行开火。
如果您需要使用自动射击模式,请将单/自旋钮开关切换到自动模式。
5. 停止射击:松开扳机并将单/自旋钮开关切换到单发模式。
将枪栓拉回并拉出残余弹药。
6. 卸弹:确认武器已变成安全状态。
按下弹夹释放器将弹夹释放。
将弹夹取出并拉开枪栓以卸下空弹药。
7. 清洁和保养:在使用M4后,必须清洁和保养武器。
使用清洁工具清理枪管、
枪机和弹夹。
涂上润滑剂并放置在适当的存储位置。
需要注意的是,正确的M4 操作方法是非常重要的,因为不正确的使用会对自己和他人的安全造成威胁。
因此,建议接受专业的M4操作培训和指导。
DCM4CHEE3( MYSQL) 安装与配置指南
DCM4CHEE3( MYSQL) 安装与配置指南目录一、安装资源 (2)1.1 资源说明 (2)1.2 资源下载 (2)1.3 安装路径 (2)二、设置环境变量 (2)三、安装步骤 (2)3.1 安装JDK Toolkit (2)3.2 安装数据库服务器 (4)3.3 初始化PACS数据库 (6)3.4 解压DCM4CHEE安装包 (7)3.5 部署DCM4CHEE到JBOSS (7)3.5.1 解压JBOSS安装包 (7)3.5.2 安装DCM4CHEE (8)3.5.3 启动DCM4CHEE服务 (8)3.5.4 登录DCM4CHEE (9)四、DCM4CHEE配置 (10)4.1 应用实体配置 (10)4.2 远程应用实体配置 (10)4.3 用户角色管理 (10)4.4 用户管理 (10)五、DCM4CHEE功能测试 (10)5.1 图像存储 (10)5.2 检查查询 (10)5.3 WADO服务 (10)六、常见问题 (10)6.1 WADO服务无法启动 (10)6.2 JBoss AS服务器的安装、卸载或移动问题 (12)6.3 安装无法确定目标路径”的错误提示 (12)6.4 修改默认服务端口 (12)6.5 无法连接数据库 (13)一、安装资源1.1 资源说明1.2 资源下载1.3 安装路径二、设置环境变量三、安装步骤3.1 安装JDK Toolkit根据具体需求选择不同的JDK版本,为了能与DCM4CHEE配置系统工作,需要安装32位JDK版本(64位JDK版本对DICOM图像解析存在问题)。
windows下查看java版本是32位还是64位的命令:java -d32 -version(查看是否有32位)和java -d64 -version(查看是否有64位))JDK安装时,在Windows环境中,可选择解压安装(Zip版)或Windows服务安装器进行安装(Windows Service Installer版),在Linux环境中只能选择解压安装(Zip版)。
PM4S用户手册(中英文)

Power’sun-M4S 用户手册User manualPower’sun-M4S系统主监控The main control Power'sun-M4S system安全指南Safety instructions警告!交流输入必须有良好的接地,以确保安全。
Warning! AC input must be well grounded, to ensure safety.警告!输出线连接要注意极性,接错可能导致用电设备损坏。
Warning! The output line is connected to the attention of polarity, then the wrong maylead to damaged electrical equipment.警告!电源工作时要保证电源前后30cm无阻挡物体,保证电源通风散热良好。
Warning!Power supply to ensure power supply before and after 30cm no blocking object, Ensure good ventilation and heat dissipation power.警告!尽量避免带点连接输出电流,在必须带点连接时要注意确保极性正确,否则会损坏电源和用电设备。
Warning! Try to avoid belt is connected to the output current, In must take some connectionto pay attention to ensure correct polarity, Otherwise it will damage the power supplyand electrical equipment.警告!只有专业人员才能安装PM4S。
Only the professional personnel to install PM4S.Warning!注意:欲获取详细的技术信息,请与当地办事处联系或公司总部联系。
DICOM:Ubuntu14环境下安装dcm4chee+oviyam2.1

DICOM:Ubuntu14环境下安装dcm4chee+oviyam2.1背景:之前博⽂中曾介绍过在Windows7环境下安装部署dcm4chee。
近期公司项⽬需要与部署到Linux系统的远端基于dcm4chee框架的DICOM服务器进⾏交互。
由于⽹络问题,为了提⾼调试效率,就在本地Ubuntu14虚拟机中尝试安装部署了⼀套dcm4chee服务以及oviyam2客户端。
虽然官⽹对dcm4chee在Linux环境的安装介绍⽐较详细,但是在安装过程中还是遇到了许多问题,遂决定记录下来以备以后所⽤。
官⽅说明:中对于Linux环境下的安装步骤与Windows系统相似,包括:1、下载dcm4chee⼆进制包我这⾥下载的是最新的,本地下载路径为/home/zssure/Downloads/dcm4chee-2.18.1-mysql.zip在Ubuntu的Terminal终端中输⼊:sudo unzip dcm4chee-2.18.1-mysql.zip即可完成解压。
2、下载JBoss因为dcm4chee是托管在JBoss AS服务器的应⽤,因此需要下载相应的JBoss服务端。
这⾥为了省去⿇烦,直接在。
本地路径依然是/home/zssure/Downloads/,随后输⼊sudo unzip jboss-4.2.3.GA-jdk6.zip进⾏解压。
3、拷贝JBoss启动必备⽂件到dcm4chee⽬录下这⼀步的主要⽬的是⽅便后续直接在dcm4chee-XXX⽬录下直接启动dcm4chee,⽽不需要将其部署到单独的JBoss⽬录下。
进⼊dcm4chee-2.18.1-mysql/bin⽬录,输⼊sudo ./install_jboss.sh /home/zssure/Downloads/jboss-4.2.3.GA即可完成拷贝。
4、安装数据库与dcm4chee-2.18.1-mysql对应安装mysql数据库。
输⼊sudo apt-get install mysql-server可完成mysql安装,随后按照官⽹指⽰创建pacsdb 数据库即可。
DSC操作说明范文
DSC操作说明范文DSC(Dynamic Stability Control)是一种车辆动态稳定控制系统,能通过传感器监测车辆的各种动态状态,并根据需要通过制动系统和发动机控制系统进行干预,以提高车辆的操控性和稳定性。
DSC的操作说明如下:1.启动DSC系统:在车辆发动后,DSC系统会自动启动。
在仪表盘上会显示DSC系统的状态,一般为ON或OFF。
如果DSC系统处于OFF状态,可以通过按下DSC按钮来启动系统。
2.正常驾驶模式:在正常驾驶模式下,DSC系统会保持开启状态,以提供最佳的稳定性和操控性。
在这种模式下,DSC系统会根据车辆的动态状态监测车辆的滑动、横滚和倾斜等情况,并在必要时通过制动系统和发动机控制系统进行调整,以保持车辆的稳定性。
3.关闭DSC系统:在一些特定的情况下,比如在进行低速驾驶或驶过柔软路面时,可能需要关闭DSC系统。
这可以通过按下车辆控制面板上的DSC按钮来实现。
关闭DSC系统后,系统会停止对车辆进行干预,驾驶员需要自行保持车辆的稳定性。
4.DSC警告灯:如果DSC系统检测到车辆存在异常情况,比如车辆出现侧滑、失控或失速等情况,DSC系统会自动通过仪表盘上的DSC警告灯进行报警。
当看到DSC警告灯亮起时,驾驶员应该立即减速并采取适当的措施以恢复车辆的稳定性。
5.驾驶员的作用:尽管DSC系统能够提供车辆的稳定性和操控性,但驾驶员仍然需要保持警惕并正确操作车辆。
驾驶员应该时刻注意驾驶环境,避免急刹车、急转弯、快速变道等激烈动作,以减少DSC系统的干预。
6.维护DSC系统:为了确保DSC系统的正常运行,驾驶员需要定期检查车辆的制动系统和悬挂系统的状况,并确保轮胎的胎压和磨损状况良好。
此外,驾驶员还需要遵守交通规则,合理使用车辆,以减少DSC系统的干预。
总的来说,DSC系统是一项重要的车辆安全控制系统,它能够提供车辆的稳定性和操控性,并通过制动系统和发动机控制系统进行干预。
在正常驾驶模式下,DSC系统会保持开启状态,并根据车辆的动态状态进行调整。
dcm4che在医疗信息集成中的初步应用
第 29卷 第 4期 2010年 8月
北京生物医学工程 BeijingBiomedicalEngineering
·科学管理与技术交流·
Vol.29 No.4 August 2010
dcm4che在医疗信息集成中的初步应用
汤守国
摘 要 作为临床医 学 影 像 和 对 象 管 理 的 开 源 资 源,dcm4che提 供 了 DICOM 标 准 和 HL7标 准 接 口。dcm4che严格遵循 IHE规范,是医疗信息集成中理想且强大的开发工具,但目 前 相 关 研 究 较 少。 本 文在介绍 IHE规 范 及 医 疗 信 息 集 成 的 基 础 上,介 绍 了 dcm4che开 源 工 具 包 在 医 疗 信 息 系 统 中 的 功 能 特 性和初步应用,其中包括 dcm4che提供的各种接 口 及 功 能 模 块,重 点 介 绍 了 dcm4che对 DICOM、HL7标 准的完美支持,并 利 用 部 分 应 用 实 例 阐 述 了 严 格 遵 循 IHE规 范 的 dcm4che开 源 工 具 包 在 医 疗 信 息 集 成 中的可用性、高效性和可移植性。本项工作为将来 在 医 疗 信 息 集 成 中 大 规 模 运 用 dcm4che提 供 了 研 究 基础。
dcm4chePACS基本操作说明
PACS免费开源系统使用基本说明dcm4chePACS是宁净(嘟嘟熊)为我们提供的PACS服务器,是INTERNET网上的一个开源项目,是一个多平台、开源、免费、企业级的PACS服务器,支持DICOM及HL7协议,数据库使用的是开源数据库MySQL。
可以使用dcm4chePACS轻松管理上T级别的数据。
(1TB=1000GB=1000,000MB=1000,000,000KB)。
还可以建立磁盘阵列来存储你的数据。
当一个存储设备上的空间使用完毕后,dcm4chePACS可以自动转到另外的存储设备上。
当然,如果单台计算机的计算资源有效,可以使用多台计算机来分摊负荷。
如:一台用于数据库管理,一台用于服务器。
甚至,你可以使用计算机集群(Cluster)来进行管理。
更多的信息,请访问官方网站:/,在这里我也只是简单的介绍一下它的基本应用设置,我也在使用中,深奥的地方我也没有弄清楚。
1、首先,释放dcm4chePACS到大的硬盘分区,2、打开服务器,同时出现运行窗口,此窗口不要关闭,出现关闭对话框3、dcm4chePACS使用的是WEB的管理方式,服务器运行后进入IE浏览地址进行系统设置,在IE浏览地址内输入地址:http://localhost:8080/dcm4chee-web/,用户名admin,密码admin,4、进入PACS服务器管理5、点击AE Management,进入终端工作站设置,dcm4chePACS的默认AE Title:DCM4CHEE;Hostname:为工作站的IP段的地址,将服务器及终端工作站设置到一个IP 段(我们设置的是192.168.20.**的IP段),Port:11112运行服务器后设置AE Title,Hostname,Port,我们所设置的AE Title,Hostname,Port 为efilm或其他终端工作站的AE Title,Hostname,Port,这样可以自由索取图像。
CircuitCAM 4.4操作简介.doc
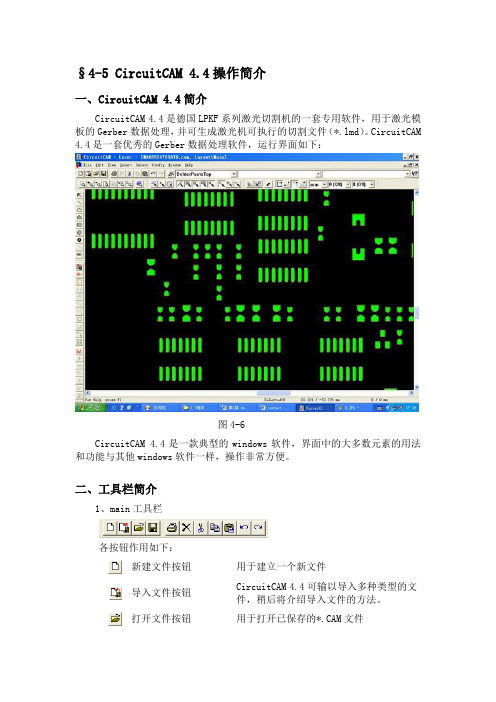
§4-5 CircuitCAM 4.4操作简介一、CircuitCAM 4.4简介CircuitCAM 4.4是德国LPKF系列激光切割机的一套专用软件,用于激光模板的Gerber数据处理,并可生成激光机可执行的切割文件(*.lmd)。
CircuitCAM 4.4是一套优秀的Gerber数据处理软件,运行界面如下:CircuitCAM 4.4是一款典型的windows软件,界面中的大多数元素的用法和功能与其他windows软件一样,操作非常方便。
二、工具栏简介1、main工具栏各按钮作用如下:新建文件按钮用于建立一个新文件导入文件按钮CircuitCAM 4.4可输以导入多种类型的文件,稍后将介绍导入文件的方法。
打开文件按钮用于打开已保存的*.CAM文件图4-6保存文件按钮用于保存文件(要指定文件的保存路径、所给的文件名必须为英文,中文不可识别)。
打印文件按钮打印图形文件,可调节打印比例(放大或缩小)。
删除图形按钮删除选中的图形,选中图形后按Del键也可以删除。
剪切、复制、粘贴按钮用法同其他WINDOWS软件一样。
撤消、重做按钮取消上次的操作;或者再次重新执行上次的操作。
2、图层、D码库、D码选择列表图层选择控制界面为下拉式菜单,用于各层之间的转化、层的各种控制等。
可将指定的层或图形放到某指定的层。
方法是:先选取所要的,使其在可选状态下,再选择所指定的图层,按回车键即可。
按以下方法修改图层属性:①在图层列表中选择要修改属性的图层;②鼠标右键单击图层列表;③在Layer对话框中设置(见下图);④设置完成后单击OK按钮。
Layer对话框中各项作用如下:Visible 可见性设置。
选取为可见,未选取为不可见。
Selectable 图形可选择性设置。
选取为可选,未选取为不可选。
True width 真实宽度显示的设置。
Outline 显示图形外框的设置。
Layer color 层的颜色设置。
Flash color 图形的颜色设置。
西安西核彩桥型气体灭火控制器使用手册新版
JB-MH-CH8500 型气体灭火控制器使用手册(VER1.0)西安西核彩桥实业科技有限公司前言西安西核彩桥实业科技有限公司是专业从事火灾自动探测报警、消防联动控制系统产品和楼宇自动化控制产品的专业化生产厂家,集开发、生产、销售和服务于一体。
企业位于西安市高新技术产业开发区,是陕西省高新技术企业。
公司已通过ISO9001 质量体系认证和中国消防产品质量监督认证。
西安西核彩桥实业科技有限公司是在原军工企业的基础上改制而成的现代化企业,实力雄厚,拥有一流的专业技术队伍和先进的生产加工设备,以优质的产品和遍及全国的销售服务网络服务社会。
成立以来,公司一直本着“品质优良、用户满意、科技创新、持续发展”的质量方针,以人为本,科学管理,产品广泛应用于石油、电信、移动、钢铁、学校等国家重点行业和大型楼宇场馆,并以可靠的产品、优质的服务,良好的信誉赢得了设计部门和用户的好评,产生了良好的社会效益。
公司在自身拥有完备火灾报警系统的同时,积极参与国际市场,与美国盛赛尔公司( SYSTEMSENSOR)有着长期、密切的技术交流与合作,产品完全与盛赛尔公司产品配套,可满足我国及其他国家高、中、低端等不同领域的需求。
目录1. 产品说明⋯⋯⋯⋯⋯⋯⋯⋯⋯⋯⋯⋯⋯⋯⋯⋯⋯⋯⋯⋯⋯⋯⋯31.1 技术规格.⋯⋯⋯⋯⋯⋯⋯⋯⋯⋯⋯⋯⋯⋯⋯⋯⋯⋯⋯⋯. 31.2 技术指标⋯⋯⋯⋯⋯⋯⋯⋯⋯⋯⋯⋯⋯⋯⋯⋯⋯⋯⋯⋯.. 31.3 结构特征.⋯⋯⋯⋯⋯⋯⋯⋯⋯⋯⋯⋯⋯⋯⋯⋯⋯⋯⋯⋯. 42. 使用说明⋯⋯⋯⋯⋯⋯⋯⋯⋯⋯⋯⋯⋯⋯⋯⋯⋯⋯⋯⋯⋯⋯⋯52.1 主机状态指示灯⋯⋯⋯⋯⋯⋯⋯⋯⋯⋯⋯⋯⋯⋯⋯⋯⋯.. 52.2 主机按键⋯⋯⋯⋯⋯⋯⋯⋯⋯⋯⋯⋯⋯⋯⋯⋯⋯⋯⋯⋯.. 62.3 功能⋯⋯⋯⋯⋯⋯⋯⋯⋯⋯⋯⋯⋯⋯⋯⋯⋯⋯⋯⋯⋯⋯.. 62.4 主机操作⋯⋯⋯⋯⋯⋯⋯⋯⋯⋯⋯⋯⋯⋯⋯⋯⋯⋯⋯⋯ (8)3. 安装与接线⋯⋯⋯⋯⋯⋯⋯⋯⋯⋯⋯⋯⋯⋯⋯⋯⋯⋯⋯⋯⋯ (11)3.1 安装尺寸⋯⋯⋯⋯⋯⋯⋯⋯⋯⋯⋯⋯⋯⋯⋯⋯⋯⋯⋯⋯.. 113.2 端子接线示意图⋯⋯⋯⋯⋯⋯⋯⋯⋯⋯⋯⋯⋯⋯⋯⋯⋯.. 123.3 接线说明⋯⋯⋯⋯⋯⋯⋯⋯⋯⋯⋯⋯⋯⋯⋯⋯⋯⋯⋯⋯.. 124. 系统配置⋯⋯⋯⋯⋯⋯⋯⋯⋯⋯⋯⋯⋯⋯⋯⋯⋯⋯⋯⋯⋯⋯⋯134.1 配置说明⋯⋯⋯⋯⋯⋯⋯⋯⋯⋯⋯⋯⋯⋯⋯⋯⋯⋯⋯⋯.. 134.2 配套器件⋯⋯⋯⋯⋯⋯⋯⋯⋯⋯⋯⋯⋯⋯⋯⋯⋯⋯⋯⋯.. 135. 故障分析与排除⋯⋯⋯⋯⋯⋯⋯⋯⋯⋯⋯⋯⋯⋯⋯⋯.⋯⋯⋯.. 146. 产品成套⋯⋯⋯⋯⋯⋯⋯⋯⋯⋯⋯⋯⋯⋯⋯⋯⋯⋯⋯⋯⋯⋯⋯147. 附图⋯⋯⋯⋯⋯⋯⋯⋯⋯⋯⋯⋯⋯⋯⋯⋯⋯⋯⋯⋯⋯⋯⋯⋯⋯161.产品说明JB-MH-CH8500 型气体灭火控制器是我公司按照GB16806-2006 《消防联动控制系统》研制开发的新产品,操作界面简单明了,易于用户操作使用。
- 1、下载文档前请自行甄别文档内容的完整性,平台不提供额外的编辑、内容补充、找答案等附加服务。
- 2、"仅部分预览"的文档,不可在线预览部分如存在完整性等问题,可反馈申请退款(可完整预览的文档不适用该条件!)。
- 3、如文档侵犯您的权益,请联系客服反馈,我们会尽快为您处理(人工客服工作时间:9:00-18:30)。
PACS免费开源系统使用基本说明
dcm4chePACS是宁净(嘟嘟熊)为我们提供的PACS服务器,是INTERNET网上的一个开源项目,是一个多平台、开源、免费、企业级的PACS服务器,支持DICOM及HL7协议,数据库使用的是开源数据库MySQL。
可以使用dcm4chePACS轻松管理上T级别的数据。
(1TB=1000GB=1000,000MB=1000,000,000KB)。
还可以建立磁盘阵列来存储你的数据。
当一个存储设备上的空间使用完毕后,dcm4chePACS可以自动转到另外的存储设备上。
当然,如果单台计算机的计算资源有效,可以使用多台计算机来分摊负荷。
如:一台用于数据库管理,一台用于服务器。
甚至,你可以使用计算机集群(Cluster)来进行管理。
更多的信息,请访问官方网站:/,在这里我也只是简单的介绍一下它的基本应用设置,我也在使用中,深奥的地方我也没有弄清楚。
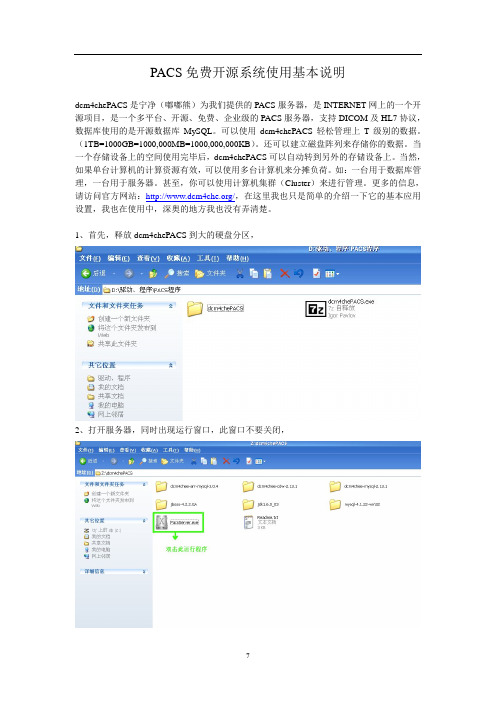
1、首先,释放dcm4chePACS到大的硬盘分区,
2、打开服务器,同时出现运行窗口,此窗口不要关闭,
出现关闭对话框
3、dcm4chePACS使用的是WEB的管理方式,服务器运行后进入IE浏览地址进行系统设置,在IE浏览地址内输入地址:http://localhost:8080/dcm4chee-web/,用户名admin,密码admin,
4、进入PACS服务器管理
5、点击AE Management,进入终端工作站设置,dcm4chePACS的默认AE Title:DCM4CHEE;Hostname:为工作站的IP段的地址,将服务器及终端工作站设置到一个IP 段(我们设置的是192.168.20.**的IP段),Port:11112
运行服务器后设置AE Title,Hostname,Port,我们所设置的AE Title,Hostname,Port 为efilm或其他终端工作站的AE Title,Hostname,Port,这样可以自由索取图像。
也可以利用PACS手动传输图像。
手动传输要选中患者资料框,然后选择终端工作站
AE地址,再点击传输按钮,就可将图像传输至终端工作站。
6、垃圾箱内文件
7、PACS服务器内图像浏览及图像下载,
浏览:
下载:
8、查询:
本人在工作中初步研究的一些基本设置,希望能给大家一些帮助。
