新格林耐特GCOM S8600,5600 OLT 配置
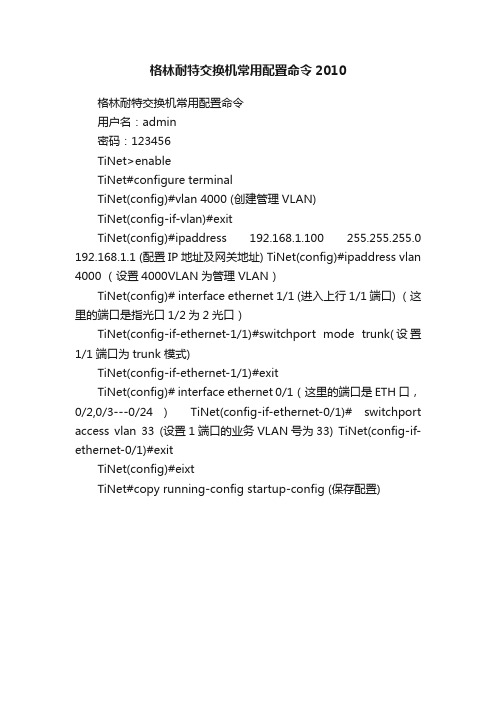
格林耐特交换机常用配置命令2010
格林耐特交换机常用配置命令2010
格林耐特交换机常用配置命令
Net>enable
TiNet#configure terminal
TiNet(config)#vlan 4000 (创建管理VLAN)
TiNet(config-if-vlan)#exit
TiNet(config)#ipaddress 192.168.1.100 255.255.255.0 192.168.1.1 (配置IP地址及网关地址) TiNet(config)#ipaddress vlan 4000 (设置4000VLAN为管理VLAN)
TiNet(config)#eixt
TiNet#copy running-config startup-config (保存配置)
TiNet(config)# interface ethernet 0/1(这里的端口是ETH口,0/2,0/3---0/24) TiNet(config-if-ethernet-0/1)# switchport access vlan 33 (设置1端口的业务VLAN号为33) TiNet(config-if-ethernet-0/1)#exit
TiNet(config)# interface ethernet 1/1 (进入上行1/1端口) (这里的端口是指光口1/2为2光口)
TiNet(config-if-ethernet-1/1)#switchport mode trunk(设置1/1端口为trunk 模式)
TiNet(config-if-ethernet-1/1)#exit
格林耐特交换机配置过程

11.sw int e 0/3(to e 0/8) 用户VLAN与端口捆绑
exit
12.int e 0/1 进入1口
13.des ××××××× 对端口的描述
14.sw mode trunk 设1口为trunk口
show int (查看端口信息) no spanning-tree(关闭生成树)
show statistics int e 0/X (查看端口数据包)
show interface brief(查看端口简洁信息)
19.clear startup-config (统一删除)
20.(config)#interface range eபைடு நூலகம்hernet 0/0/1 to ethernet 0/0/24(批量端口配置)
查看MAC地址:show mac-address-table
15.sw trunk all vlan **** 4051 允许端口通过的VLAN
exit
16.int e 0/3 进入用户口
17.sw acc vlan **** 允许该端口通过的用户VLAN
exit
18.copy run sta 保存配置
show run(查看当前配置信息) reboot(重启交换机) clear int ****(清除端口信息)
格林耐特交换机配置过程及命令:
1.admin 输入用户名
2.123456 输入密码
3.enable 进入特权用户模式
4.ter lan ch 转换成中文模式
5.config terminal 进入全局配置模式
6.host ×××××× 配置交换机名称
格林威尔设备配置及报价

设备类型
安装位 置 基站侧
产品型号
E120M-20
E60V-20 EC8041 GFT1501S-20 GFT1501S-20 GFT1501S-20
V.35/E1光猫 V.35/E1光猫 4E1光协转 光纤收发器 光纤收发器 光纤收发器 光纤收发器 1E1光协转 光纤收发器 单E1EOP设备 (光纤拉远) 客户侧 基站侧 客户侧 客户侧 4E1EOP设备 (光纤拉远) 客户侧 基站侧 客户侧 基站侧
EC8011-FX-20
GFT1501S-20
E1/FE协议转 单E1EOP设备 换器 (本端落地)
EC8011-FE
规格描述
数量 100 100 10 10 100 100 100 100 100
省公司 框选价 ¥ 510 ¥ 518 ¥ 880 ¥ 245 ¥ 245 ¥ 245 ¥ 800 ¥ 245 ¥ 350
¥ 24,500 ¥ 24,500 ¥ 80,000 ¥ 24,500 ¥ 35,000
迷你型光纤收发器,单纤/双纤可选,传输距离20km;光纤接口FC/SC可选, 支持LPT/FEF等功能,支持远端掉电告警。
E1接口75欧姆/120欧姆可选,以太网光接口FC\SC可选,传输距离 20KM
E1接口75欧姆/120欧姆可选,以太网接口全双工/半双工自适应,以太 网接口速率10/100M自适应
总价 ¥ 51,000 ¥ 51,800 ¥ ¥ 8,800 2,450
E1接口75欧姆\120欧姆可选,光接口FC\SC接口可选,电源220V/DC48V可选,光口传输距离20KM
V.35接口成帧/非成帧可调,光接口FC\SC接口可选,电源220V/DC-48V可选, 光口传输距离20KM E1接口75欧姆/120欧姆可选,以太网接口全双工/半双工自适应,以太网接口 速率10/100M自适应 迷你型光纤收发器,单纤/双纤可选,传输距离20km;光纤接口FC/SC可选, 支持LPT/FEF等功能,支持远端掉电告警。 迷你型光纤收发器,单纤/双纤可选,传输距离20km;光纤接口FC/SC可选, 支持LPT/FEF等功能,支持远端掉电告警。 迷你型光纤收发器,单纤/双纤可选,传输距离20km;光纤接口FC/SC可选, 支持LPT/FEF等功能,支持远端掉电告警。
OLT5600设备详细配置
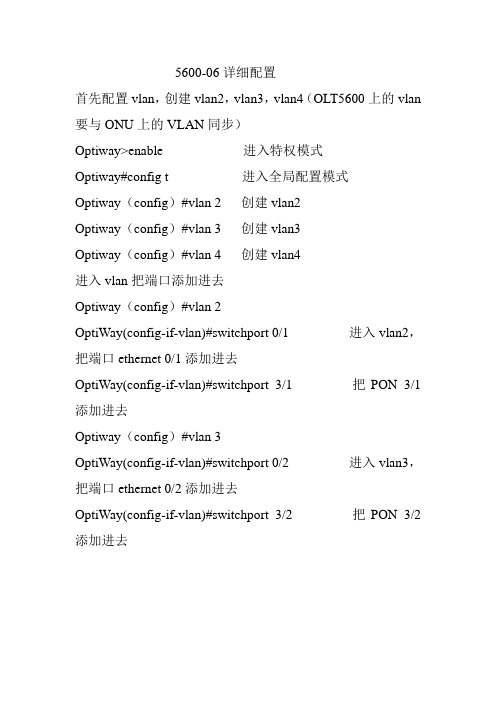
5600-06详细配置首先配置vlan,创建vlan2,vlan3,vlan4(OLT5600上的vlan 要与ONU上的VLAN同步)Optiway>enable 进入特权模式Optiway#config t 进入全局配置模式Optiway(config)#vlan 2 创建vlan2Optiway(config)#vlan 3 创建vlan3Optiway(config)#vlan 4 创建vlan4进入vlan把端口添加进去Optiway(config)#vlan 2OptiWay(config-if-vlan)#switchport 0/1 进入vlan2,把端口ethernet 0/1添加进去OptiWay(config-if-vlan)#switchport 3/1 把PON 3/1添加进去Optiway(config)#vlan 3OptiWay(config-if-vlan)#switchport 0/2 进入vlan3,把端口ethernet 0/2添加进去OptiWay(config-if-vlan)#switchport 3/2 把PON 3/2添加进去查看vlan命令,可以查看到每个端口属于哪个vlan里面,vlan1和vlan4016是默认vlan。
OptiWay#show vlanshow VLAN informationVLAN ID : 1VLAN status : staticVLAN member : e0/1,e0/2,e0/3,e0/4,e1/1,e1/2,e1/3,e1/4,p2/1,p2/2,p2/3,p2/4,p3/1,p3/2,p3/3,p3/4,p4/1,p4/2,p4/3,p4/4,p5/1,p5/2,p5/3,p5/4.Static tagged ports :Static untagged Ports : e0/1,e0/2,e0/3,e0/4,e1/1,e1/2,e1/3,e1/4,p2/1,p2/2,p2/3,p2/4,p3/1,p3/2,p3/3,p3/4,p4/1,p4/2,p4/3,p4/4,p5/1,p5/2,p5/3,p5/4.Dynamic tagged ports :show VLAN informationVLAN ID : 2VLAN status : staticVLAN member : e0/1,p3/1. Static tagged ports :Static untagged Ports : e0/1,p3/1. Dynamic tagged ports :show VLAN informationVLAN ID : 3VLAN status : static VLAN member : e0/2,p3/2. Static tagged ports :Static untagged Ports : e0/2,p3/2. Dynamic tagged ports :show VLAN informationVLAN ID : 4VLAN status : static VLAN member :Static tagged ports :Static untagged Ports :Dynamic tagged ports :show VLAN informationVLAN ID : 4016VLAN status : staticVLAN member : e0/1,e0/2,e0/3,e0/4,e1/1,e1/2,e1/3,e1/4,p2/1,p2/2,p2/3,p2/4,p3/1,p3/2,p3/3,p3/4,p4/1,p4/2,p4/3,p4/4,p5/1,p5/2,p5/3,p5/4.Static tagged ports : e0/1,e0/2,e0/3,e0/4,e1/1,e1/2,e1/3,e1/4,p2/1,p2/2,p2/3,p2/4,p3/1,p3/2,p3/3,p3/4,p4/1,p4/2,p4/3,p4/4,p5/1,p5/2,p5/3,p5/4.Static untagged Ports :Dynamic tagged ports :Total entries: 5 vlan.进入端口打上PVID,使电口和PON口一一对应OptiWay(config-if-ethernet-0/1)#switchport mode access 配置端口模式为接入模式(默认是接入模式OptiWay(config)#interface ethernet 0/1 进入电口ethernet 0/1OptiWay(config-if-ethernet-0/1)#switchport access vlan 2 在ethernet 0/1端口打上PVID2OptiWay(config)#interface ethernet 0/2 进入电口ethernet 0/2OptiWay(config-if-ethernet-0/1)#switchport access vlan 3 在ethernet 0/2端口打上PVID3OptiWay(config)#int pon 3/1 进入PON口3/1OptiWay(config-if-pon-3/1)#switchport access vlan 2 在PON 3/1端口打上PVID2OptiWay(config)#int pon 3/2 进入PON口3/2OptiWay(config-if-pon-3/1)#switchport access vlan 3 在PON3/2端口打上PVID3查看端口的PVID号查看ethernet 0/1的PVIDOptiWay#show interface 0/1Ethernet e0/1 is enabled, port link is downHardware is Fast Ethernet, Hardware address is 00:0a:5a:00:11:05SetSpeed is auto, ActualSpeed is unknown, porttype is 1000FX Priority is 0SFP module existFlow control is disabledPVID is 2Port mode:accessTagged VLAN ID : 4016Untagged VLAN ID : 1-26768868 packets output662913744 bytes, 6551827 unicasts, 47362 multicasts, 169679 broadcasts6223991 packets input5535332026 bytes, 6221603 unicasts, 1195 multicasts, 1193 broadcasts查看ethernet 0/2的PVIDOptiWay#show interface 0/2Ethernet e0/2 is enabled, port link is upHardware is Fast Ethernet, Hardware address is 00:0a:5a:00:11:05SetSpeed is auto, ActualSpeed is full-1000, porttype is 1000FX Priority is 0SFP module existFlow control is disabledPVID is 3Port mode:accessTagged VLAN ID : 4016Untagged VLAN ID : 1,3655589182 packets output272668041450 bytes, 654587938 unicasts, 94281 multicasts, 906963 broadcasts550414950 packets input399122245936 bytes, 550408172 unicasts, 3491 multicasts, 3287 broadcasts查看PON 3/1的PVIDOptiWay#show interface 3/1Ethernet p3/1 is enabled, port link is upHardware is Fast Ethernet, Hardware address is 00:0a:5a:00:11:05SetSpeed is auto, ActualSpeed is full-1000, porttype is 1000FX Priority is 0SFP module existFlow control is disabledPVID is 2Port mode:accessTagged VLAN ID : 4016Untagged VLAN ID : 1-26308883 packets output5550143918 bytes, 6249176 unicasts, 47033 multicasts, 12674 broadcasts6740016 packets input661396402 bytes, 6562026 unicasts, 12020 multicasts, 165970 broadcasts查看PON 3/2的PVIDOptiWay#show interface 3/2Ethernet p3/2 is enabled, port link is upHardware is Fast Ethernet, Hardware address is 00:0a:5a:00:11:05SetSpeed is auto, ActualSpeed is full-1000, porttype is 1000FX Priority is 0SFP module existFlow control is disabledPVID is 3Port mode:accessTagged VLAN ID : 4016Untagged VLAN ID : 1,3550638529 packets output399273680126 bytes, 550579977 unicasts, 46638 multicasts, 11914 broadcasts655847236 packets input272773021033 bytes, 654896206 unicasts, 51436 multicasts, 899594 broadcasts配置设备的管理地址,默认都是vlan1的IP地址OptiWay#conf t 进入全局配置模式OptiWay(config)#interface vlan 1 进入vlan1OptiWay(config-if-vlanInterface-1)#ip address 10.0.100.100 255.255.255.0 设置vlan1的ip地址查看vlan 1 ip也就是设备的管理IP地址的命令OptiWay#show ip interface vlan1Show informations of interfaceThe mac-address of interface is 00:0a:5a:00:11:05Interface name : VLAN-IF1Primary ipaddress : 10.0.100.100/255.255.255.0 Secondary ipaddress : NoneVLAN : 1Address-range : NONEInterface status : UpTotal entries: 1 interface.配置PON 3/1和PON 3/2端口隔离OptiWay#conf tOptiWay(config)#port-isolation 3/1 to 3/2查看端口隔离命令OptiWay#show port-isolationPort isolation downlink port :p3/1,p3/2.There is no port isolation group config. 此命令显示PON 3/1和PON 3/2口隔离查看ONU设备是否注册上OLT5600设备上的命令OptiWay#show ponolt 3 mac 00:13:25:88:00:03onu 3/1/1 index 512 mac 00:0a:5a:12:59:6a llid 0x60000000 OKonu 3/2/1 index 576 mac 00:0a:5a:12:59:69 llid 0x60410000 OKonu 3/2/2 index 577 mac 00:0a:5a:12:59:7b llid 0x60410001 OK此命令可以看出哪些ONU设备已经注册到OLT设备上来,根据MAC就可以对应到ONU设备。
第一部分:EL5600-06硬件配置手册
Optiway EL5600-06 EPON OLT用户手册硬件配置手册1. 产品描述2. 规格及特性3. 安装前的准备4. 安装5. 启动与配置6. 软件升级7. 故障处理8. 可选接口模块9. 附录RJ-45连接器目录第1章产品描述........................................................................................... 1-11.1 Optiway EL5600-06 EPON OLT简介.................................................... 1-11.2 Optiway EL5600-06 EPON OLT典型运用............................................. 1-1第2章规格及特性....................................................................................... 2-22.1 Optiway EL5600-06 EPON OLT外观.................................................... 2-22.2 Optiway EL5600-06 EPON OLT前面板 ................................................ 2-22.2.1 前面板图 ..................................................................................... 2-22.2.2 EPON OLT SFP端口属性 ........................................................... 2-52.3 Optiway EL5600-06 EPON OLT后面板 ................................................ 2-52.3.1 后面板图 ..................................................................................... 2-52.3.2 电源扩展插槽可选电源模块 ........................................................ 2-62.4 Optiway EL5600-06 EPON OLT系统特性............................................. 2-6第3章安装前的准备 ................................................................................... 3-13.1 安全注意事项 ........................................................................................ 3-13.2 检查安装场所 ........................................................................................ 3-13.2.1 温/湿度要求................................................................................. 3-23.2.2 洁净度要求.................................................................................. 3-23.2.3 抗干扰要求.................................................................................. 3-33.3 安装工具和设备..................................................................................... 3-3第4章安装.................................................................................................. 4-14.1 机械安装................................................................................................ 4-14.1.1 安装设备到机架........................................................................... 4-14.1.2 安装设备到工作台....................................................................... 4-24.2 电源及地线连接..................................................................................... 4-34.2.1 交流电源及安装........................................................................... 4-34.2.2 直流电源安装 .............................................................................. 4-34.2.3 地线............................................................................................. 4-44.3 配置口(Console)电缆连接 ................................................................ 4-44.3.1 配置口电缆.................................................................................. 4-44.3.2 配置口电缆连接........................................................................... 4-54.4 安装完成后检查..................................................................................... 4-5第5章启动与配置....................................................................................... 5-15.1 本地终端配置 ........................................................................................ 5-15.1.1 搭建配置环境 .............................................................................. 5-15.1.2 连接配置电缆 .............................................................................. 5-15.1.3 设置终端参数 .............................................................................. 5-15.2 上电启动................................................................................................ 5-65.2.1 上电前的检查 .............................................................................. 5-65.2.2 上电启动 ..................................................................................... 5-7第6章软件升级........................................................................................... 6-1第7章故障处理........................................................................................... 7-17.1 电源系统故障 ........................................................................................ 7-17.2 配置系统故障 ........................................................................................ 7-17.2.1 终端无显示故障处理 ................................................................... 7-17.2.2 终端显示乱码故障处理................................................................ 7-1第8章附录RJ-45 连接器.......................................................................... 8-18.1 RJ-45连接器 ......................................................................................... 8-18.2 网线制作................................................................................................ 8-3第1章产品描述1.1 Optiway EL5600-06 EPON OLT简介OptiWay EL5600-06是惠州侨兴电讯工业有限公司公司自行开发的框式EPON OLT设备,具有高性能、大端口密度、易于安装、便于扩展、成本低廉等特点,一个主控插槽,五块业务卡插槽,并支持混插千兆上行子卡和万兆子卡。
OLT配置方法以及维护手册之欧阳化创编
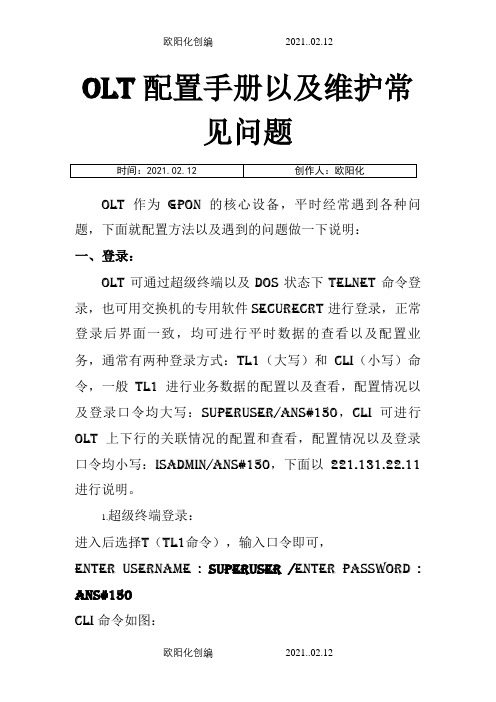
OLT配置手册以及维护常见问题OLT作为GPON的核心设备,平时经常遇到各种问题,下面就配置方法以及遇到的问题做一下说明:一、登录:OLT可通过超级终端以及DOS状态下TELNET命令登录,也可用交换机的专用软件SecureCRT进行登录,正常登录后界面一致,均可进行平时数据的查看以及配置业务,通常有两种登录方式:TL1(大写)和CLI(小写)命令,一般TL1进行业务数据的配置以及查看,配置情况以及登录口令均大写:SUPERUSER/ANS#150,CLI可进行OLT上下行的关联情况的配置和查看,配置情况以及登录口令均小写:isadmin/ans#150,下面以221.131.22.11进行说明。
1.超级终端登录:进入后选择T(TL1命令),输入口令即可,Enter Username : SUPERUSER /Enter Password : ANS#150CLI命令如图:进入后直接输入口令即可。
login: isadmin /password: ans#1502.telnet登录方式:在cmd界面下直接输入telnet d.d.d.d 1023即可登录TL1命令进入后输入口令即可进行操作;在cmd界面下输入telnet d.d.d.d 即可登录cli命令,如图进入后输入口令即可。
3.SecureCRT登录:点击快速链接,选择Telnet协议,主机名称为该OLT的带内管理IP,如221.131.22.11,端口为1023,如图所示:进入后输入口令即可登录TL1命令;同样道理CLI命令如图:输入口令即可登录。
由于是公网设备,对于部分大局点,已经设置了ACL,不允许随便访问,因此需要通过网管的跳登,网管的IP地址为211.142.35.198,登录协议为SSH2,端口:22,用户名:testwlan ,登录密码为:7342gpon@wlan .在如下界面下跳登即可:二、数据的查看以及配置:1.TL1数据的配置总体来说,TL1数据配置分几大类:1.ENT_创建;2.ED_修改;3.DLT_删除;4.RTRV_查询。
烽火OLT开局配置手册
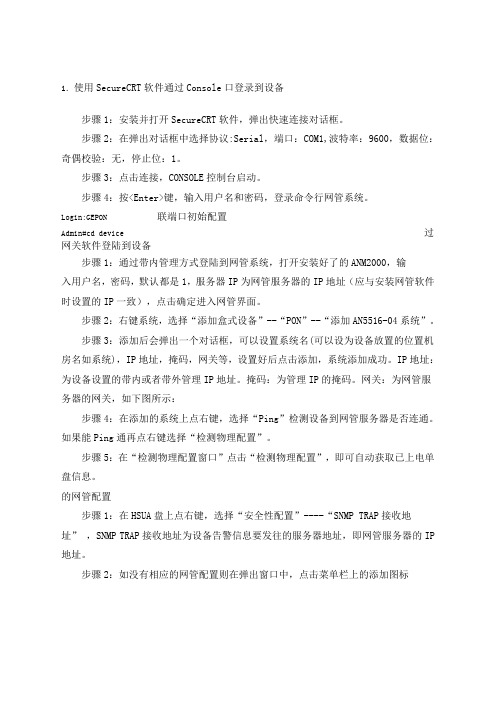
1.使用SecureCRT软件通过Console口登录到设备步骤1:安装并打开SecureCRT软件,弹出快速连接对话框。
步骤2:在弹出对话框中选择协议:Serial,端口:COM1,波特率:9600,数据位:奇偶校验:无,停止位:1。
步骤3:点击连接,CONSOLE控制台启动。
步骤4:按<Enter>键,输入用户名和密码,登录命令行网管系统。
Login:GEPON 联端口初始配置Admin#cd device 过网关软件登陆到设备步骤1:通过带内管理方式登陆到网管系统,打开安装好了的ANM2000,输入用户名,密码,默认都是1,服务器IP为网管服务器的IP地址(应与安装网管软件时设置的IP一致),点击确定进入网管界面。
步骤2:右键系统,选择“添加盒式设备”--“PON”--“添加AN5516-04系统”。
步骤3:添加后会弹出一个对话框,可以设置系统名(可以设为设备放置的位置机房名如系统),IP地址,掩码,网关等,设置好后点击添加,系统添加成功。
IP地址:为设备设置的带内或者带外管理IP地址。
掩码:为管理IP的掩码。
网关:为网管服务器的网关,如下图所示:步骤4:在添加的系统上点右键,选择“Ping”检测设备到网管服务器是否连通。
如果能Ping通再点右键选择“检测物理配置”。
步骤5:在“检测物理配置窗口”点击“检测物理配置”,即可自动获取已上电单盘信息。
的网管配置步骤1:在HSUA盘上点右键,选择“安全性配置”----“SNMP TRAP接收地址”,SNMP TRAP接收地址为设备告警信息要发往的服务器地址,即网管服务器的IP 地址。
步骤2:如没有相应的网管配置则在弹出窗口中,点击菜单栏上的添加图标。
IP地址:填写网管服务器IP。
UDP端口号:默认为162,无法修改,是网管的TRAP 与设备之间所用端口号。
共同体:可根据需要填写此处为public,SNMP版本:可选择SNMP V1或者SNMP V2C中一个,没有特殊要求。
格林耐特供电ONU注册
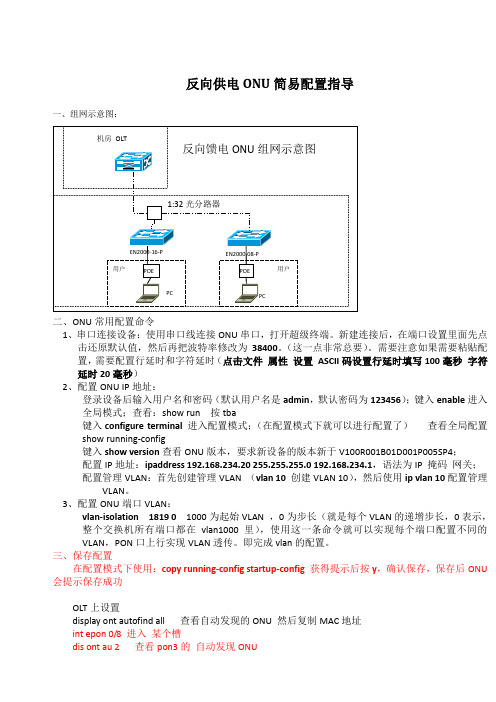
反向供电ONU简易配置指导一、组网示意图:二、ONU常用配置命令1、串口连接设备:使用串口线连接ONU串口,打开超级终端。
新建连接后,在端口设置里面先点击还原默认值,然后再把波特率修改为38400。
(这一点非常总要)。
需要注意如果需要粘贴配置,需要配置行延时和字符延时(点击文件属性设置ASCII码设置行延时填写100毫秒字符延时20毫秒)2、配置ONU IP地址:登录设备后输入用户名和密码(默认用户名是admin,默认密码为123456);键入enable进入全局模式;查看:show run 按tba键入configure terminal进入配置模式;(在配置模式下就可以进行配置了)查看全局配置show running-config键入show version查看ONU版本,要求新设备的版本新于V100R001B01D001P005SP4;配置IP地址:ipaddress 192.168.234.20 255.255.255.0 192.168.234.1,语法为IP 掩码网关;配置管理VLAN:首先创建管理VLAN (vlan 10创建VLAN 10),然后使用ip vlan 10配置管理VLAN。
3、配置ONU端口VLAN:vlan-isolation 1819 01000为起始VLAN ,0为步长(就是每个VLAN的递增步长,0表示,整个交换机所有端口都在vlan1000里),使用这一条命令就可以实现每个端口配置不同的VLAN,PON口上行实现VLAN透传。
即完成vlan的配置。
三、保存配置在配置模式下使用:copy running-config startup-config获得提示后按y,确认保存,保存后ONU 会提示保存成功OLT上设置display ont autofind all 查看自动发现的ONU 然后复制MAC地址int epon 0/8 进入某个槽dis ont au 2 查看pon3的自动发现ONUdisp ont info 4 all 查看1端口ONU 数量及状态ont add 2 4 mac-auth 000A-5A12-7648 snmp ont-linepro file-id 516 desc EN-2000-16 添加ONU quit添加虚端口service-port vlan 1819 epon 0/8/2 ont 4 multi-service user-vlan 1819指定加虚端口号的模板MA5680T(config-if-epon-0/4)#display ont info 1 all 查看1端口下信息MA5680T(config)#display service-port port 0/8/2 ont 4 sort-by port 查看4槽1端口第一个ont信息删除onuMA6680T(config)#undo service-port 733 删除6槽第一个ont虚端口16MA6680T(config)#interface epon 0/8 进入0筐6槽MA6680T(config-if-epon-0/6)#ont delete 2 4 删除3端口第一个ONUMA6680T(config-if-epon-0/6)#display ont info 3 all 查看3端口下信息display service-port epon 0/6/3 ont 21 查看1槽第8个ont信息四、ONU常用查看命令1、查看配置:show running-config2、查看端口:show interface ethernet 0/23、查看VLAN:show vlan 1004、查看端口POE属性:show poe mode interface 如果端口POE属性为enable,则在次端口必须接上供电器,用户才能够上网五、其它常用配置命令VLAN中添加端口:switchport ethernet 0/1;删除VLAN:no vlan 100(VLAN号或者all删除所有VLAN);恢复默认值:clear startup-config(在全局模式下执行,重启后恢复默认值,需要注意IP地址只能修改而不能够回复到默认值);重启设备:reboot;改变端口的PVID:首先进入到第四端口switchport ethernet 0/4,改变第四端口的PVID为1003switchport access vlan 1003需要注意1003 VLAN必须首先建立;返回上一级:exit;改变端口的POE属性:在端口模式下poe mode disable(关闭端口的POE认证属性,用户可以不供电直接接上端口使用,打开为poe mode enable);改变端口为TAG属性:在端口模式下tag_mode tag(或者untag);升级ONU:load application tftp 192.168.2.200 XXX.zblob 需要打开TFTP服务器,IP地址为TFTP 服务器IP地址,文件名需要包括扩展名。
5600 系列机械式热探测器安装手册说明书

Before InstallingThis detector must be installed in compliance with the con-trol panel installation manual and meet the requirements of NFPA 72, and/or the local authority having jurisdiction. Read this manual carefully before using the detector. This manual should be left with the owner/user of this equip-ment.General DescriptionThe 5600 series mechanical heat detector is intended for use in property protection applications, or for non-life-safety installations where smoke detection is not practi-cal or appropriate.in lieu of, or in addition to mechanical heat detectors. The 5600 series consists of both single- and dual-circuit heat detectors featuring fixed temperature thermal sensors or combination fixed temperature/rate-of-rise sensors, with temperature ratings of 135ºF (57ºC) or 194ºF (90ºC).Markings on the exterior of the detector indicate the spe-cific activation method and temperature rating. All models are identified as either 135ºF/57ºC or 194ºF/90ºC. Models equipped with combination fixed temperature/rate-of-rise sensors are marked FX/ROR. Fixed temperature only mod-els are marked FX.NOTE: Refer to NFPA72 guidelines for spacing reductions when ceiling heights exceed 10 feet.Non-Resettable Fixed Temperature SensorThe fixed temperature element reacts to heat by respond-ing to a specific temperature setting (135ºF or 194ºF). The detection method is based on the spring action of a metal contact, held to the metal chamber by a fusible alloy. When the temperature reaches the alloy’s melting point, the metal contact will depress the diaphragm, causing the electrical contact to close the circuit. The circular external heat collector is released from the detector to visually indi-cate that the detector has been activated.NOTE: 5600 series Fixed T emperature models (5603, 5604, 5623, and 5624) are non-resettable, and cannot be tested.Self-Restoring Rate-of-Rise (ROR) SensorThe rate-of-rise element responds to a rapid rise of temper-ature, approximately 15ºF (8.3ºC) per minute. As the tem-perature rises, the air within the sealed chamber expands. Should the chamber air expand faster than it can escape through the calibrated vent, the diaphragm is depressed, and the electrical contact closes the circuit.NOTE: Only the ROR element of 5600 series combination fixed temperature/ROR models (5601, 5602, 5621, and 5622) are self-restoring, and may be tested using a hair dryer or heat gun. When testing the ROR element, to pre-vent the activation of the fixed temperature element, the heat source must not exceed the fixed temperature rating of the detector.Mounting BracketAll 5600 series detectors are equipped with a mounting bracket that includes mounting slots to accommodate single-gang, 31⁄2″ octagonal, and 4″ octagonal electrical boxes, as well as 4″ square boxes equipped with a plas-ter ring (Figure 1). The mounting bracket is reversible to accommodate flush-mount and surface–mount installa-tions (Figure 2).INSTALLATION AND MAINTENANCE INSTRUCTIONS3825 Ohio Avenue, St. Charles, Illinois 601741-800-SENSOR2, FAX: 630-377-64955600 SeriesMechanical Heat DetectorSingle Circuit: 5601, 5602, 5603, 5604Dual Circuit: 5621, 5622, 5623, 5624Table 1. 5600 Series Mechanical Heat Detectors Figure 1. Bracket Mounting LocationsA= 31⁄2″ Octagonal boxB= 4″ Octagonal box C= Single gang box and 4″ square with plaster ringD= Directly to Wall/CeilingS T R IP G A U G EBCDDAABCModel No.CircuitTemperatureRatingThermal SensorUL Maximum Spacing(10-foot ceiling)5601Single 135ºF (57ºC)Fixed T emperature/Rate of Rise 50-feet x 50-feet 5602Single 194ºF (90ºC)Fixed T emperature/Rate of Rise 50-feet x 50-feet 5603Single 135ºF (57ºC)Fixed T emperature 25-feet x 25-feet 5604Single 194ºF (90ºC)Fixed T emperature 25-feet x 25-feet 5621Dual 135ºF (57ºC)Fixed T emperature/Rate of Rise 50-feet x 50-feet 5622Dual 194ºF (90ºC)Fixed T emperature/Rate of Rise 50-feet x 50-feet5623Dual 135ºF (57ºC)Fixed T emperature 25-feet x 25-feet 5624Dual194ºF (90ºC)Fixed T emperature25-feet x 25-feetWiring Installation GuidelinesAll wiring must be installed in compliance with the National Electrical Code, applicable state and local codes, and any special requirements of the local Authority Having Jurisdiction. Proper wire gauges should be used. The conductors used to connect heat detectors to the alarm control panel and accessory devices should be color-coded to reduce the likelihood of wiring errors. Improper connec-tions can prevent a system from responding properly in the event of a fire.The non-polarized screw terminals on the back of the detector will accept 14–22 A WG wire. For best system performance, all wiring should be installed in separate grounded conduit; do not mix fire alarm system wiring in the same conduit as any other electrical wiring. T wisted pair may be used to provide additional protection against extraneous electrical interference.Wire connections are made by stripping approximately 1⁄4″ of the insulation from the end of the feed wire, inserting it into the proper base terminal, and tightening the screw to secure the wire in place.InstallationRemove power from the alarm control unit or initiating device circuits before installing detectors.1. Detach the detector from the mounting bracket byrotating the detector 1⁄4 turn counter-clockwise.2. Orient the mounting bracket properly for either aflush- or surface-mount installation (Figure 2).3. Select the pair of mounting holes suitable for the junc- tion box, (figure 1) and secure the bracket to the box.4. Connect the wires to the detector per Figure 3 orFigure 4, as applicable.5. Place the detector onto the mounting bracket by rotat- ing clockwise. The detector will lock into place with a “click”.6. After all detectors have been installed, apply power to the alarm control unit.7. T est each detector as described in Testing.8. Reset all the detectors at the alarm control unit.9. Notify the proper authorities that the system is in oper- ation.Figure 3. Wiring Diagram – Single Circuit ModelsFigure 4. Wiring Diagram – Dual Circuit Models Testing/MaintenanceThe rate-of-rise mechanism may be subject to reduced sen-sitivity over time. Annual testing of the rate-of-rise opera-tion is therefore recommened.Before testing, notify the proper authorities that mainte-nance is being performed and the system will be temporar-ily out of service. Disable the zone or system undergoing maintenance to prevent any unwanted alarms.Only the ROR element of 5600 series combination fixed temperature/ROR models (5601, 5602, 5621, and 5622) are self-restoring, and may be tested using a hair dryer or heat gun.Figure 2. Reversible Mounting BracketEOLControlSurface–mountFlush–mountControlEOLWhen testing the ROR element, to prevent the activation of the fixed temperature element, the heat source must not exceed the fixed temperature rating of the detector.5600 series fixed(5603, 5604, 5623, and 5624) are non-resettable, and cannot be tested.Specifications:Operating Voltage /Contact Ratings 6 – 125 V AC / 3A (Resistive) 6 – 28 VDC / 1A 125 VDC / 0.3A 250 VDC / 0.1A Maximum InstallationT emperature Models 5601, 5603, 5621, and 5623: 100°F (38°C) Models 5602, 5604, 5622, and 5624:150°F (65.6°C)Alarm T emperature Models 5601, 5603, 5621, and 5623: 135°F (57°C) Models 5602, 5604, 5622, and 5624: 194°F (90°C)Rate-of-Rise Threshold 15°F (8.3°C) per minute(models 5601, 5602, 5621, and 5622 only) Operating HumidityRange 5 to 95% RH non-condensing Input T erminals 14 - 22 A WG Back Box Mounting 31⁄2″ octagonal 4″ octagonal Single gang4″ square with a square to round plaster ring Dimensions withmounting bracket Diameter: 4.57 inches (11.6cm) Height: 1.69 inches (4.3cm)Weight 6 oz. (170 grams)Please refer to insert for the Limitations of Fire Alarm SystemsSystem Sensor warrants its enclosed module to be free from defects in materials and workmanship under normal use and service for a period of three years from date of manufacture. System Sensor makes no other express warranty for this module. No agent, representative, dealer, or employee of the Company has the authority to increase or alter the obligations or limitations of this Warranty. The Company’s obli-gation of this Warranty shall be limited to the replacement of any part of the module which is found to be defective in materials or workmanship under normal use and service during the three year period commencing with the date of manufacture. After phoning System Sensor’s toll free number 800-SENSOR2 (736-7672) for a Return Authorization number, send defective units postage prepaid to: System Sensor, Repair Department, RA #__________, 3825 Ohio Avenue, St. Charles, IL 60174.FCC StatementThis device complies with part 15 of the FCC Rules. Operation is subject to the following two conditions: (1) This device may not cause harmful interference, and (2) this device must accept any interference received, including interference that may cause undesired operation.Note: This equipment has been tested and found to comply with the limits for a Class B digital device, pursuant to Part 15 of the FCC Rules. These limits are designed toprovide reasonable protection against harmful interference in a residential installation. This equipment generates, uses and can radiate radio frequency energy and, if not installed and used in accordance with the instructions, may cause harmful interference to radio communications. However, there is no guarantee that interference will not occur in a particular installation. If this equipment does cause harmful interference to radio or television reception, which can be determined by turning the equipment off and on, the user is encouraged to try to correct the interference by one or more of the following measures:– Reorient or relocate the receiving antenna. – Increase the separation between the equipment and receiver. – Connect the equipment into an outlet on a circuit different from that to which the receiver is connected. – Consult the dealer or an experienced radio/TV technician for help.Please include a note describing the malfunction and suspected cause of failure. The Company shall not be obligated to replace units which are found to be defective because of damage, unreasonable use, modifications, or alterations occurring after the date of manufacture. In no case shall the Company be liable for any consequen-tial or incidental damages for breach of this or any other Warranty, expressed or implied whatsoever, even if the loss or damage is caused by the Company’s negli-gence or fault. Some states do not allow the exclusion or limitation of incidental or consequential damages, so the above limitation or exclusion may not apply to you. This Warranty gives you specific legal rights, and you may also have other rights which vary from state to state.Three-Year Limited Warranty。
新格林耐特配置命令

第一部分:TiNetS2000EI系列配置命令及说明(红色标识为一些常用命令)Username(1-32 chars):adminPassword(1-16 chars):****** /登陆交换机,默认密码123456/ TiNet>enable /进入特权模式/TiNet#configure terminal /进入全局模式/TiNet(config)#1.TINET#terminal language /改变语言模式/例如:TINET#terminal language Chinese /改成中文模式/2. TiNet#clear startup-config /清除配置,恢复出厂默设置/3.TiNet#copy running-config startup-config /保存配置命令/4.TiNet#load ?application 下载应用程序configuration 下载配置文件keyfile 下载SSH密钥文件whole-bootrom 下载全部的bootrom /设备升级命令/5.TiNet(config)#ipaddress 192.168.1.5 255.255.255.0 192.168.1.1/配置交换机IP地址/6.TiNet(config)show ?/ show命令,后可以打问号/Show ipShow macShow interfaceShow vlan7.TiNet(config)#vlan 3901 /建立VLAN3901/TiNet(config-if-vlan)#switchport ethernet 0/1 /把端口1加入该VLAN/TiNet(config)#ip vlan 3901 /定义管理vlan为3901TiNet(config)#no ip vlan 1 / 删除默认管理VLAN 1/8.TiNet(config)#vlan 1001-1512 /批量建立VLAN /9.TiNet(config-if-vlan)#switchport ethernet 0/2 to ethernet 0/8 ethernet 0/11 ethernet0/16/在某一VLAN中或者VLAN段中批量加入端口/10.TiNet(config-if-ethernet-0/16)#tag vlan 1001,1112-1512,4000/端口下批量打tag/11.T iNet(config-if-ethernet-0/1)#switchport mode trunk/改变端口模式,为trunk模式/12.TiNet(config-if-ethernet-0/1)#switchport trunk allowed vlan all/端口为trunk模式,允许所有VLAN通过/13.TiNet(config-if-ethernet-0/2)#switchport access vlan 1001/改变端口PVID/14.TiNet(config)#port-isolation ethernet ?STRING<3-4> 端口号为槽端口号<0-2>/端口号<1-24>TiNet(config)#port-isolation ethernet 0/2 to e 0/16添加端口隔离下行端口成功. /一步隔离,一条命令隔离除上行口以外所有端口/15.TiNet(config)#interface range ethernet 0/2 to ethernet 0/16 /批量端口处理命令/16.TiNet(config-if-range)#bandwidth-control ?egress 出口带宽控制ingress 入口带宽控制/端口限速命令/17.TiNet(config)#show utilization interface /实时查看端口流量占比/Link Utilization Averages Thu Jan 1 00:43:20 1970port link Receive Peak Rx Transmit Peak TxStatus pkts/sec pkts/sec pkts/sec pkts/sec============================================================ ======e0/1 down 0 0 0 0e0/2 down 0 0 0 0e0/3 down 0 0 0 0e0/4 down 0 0 0 0e0/5 down 0 0 0 0e0/6 down 0 0 0 0e0/7 down 0 0 0 0e0/8 down 0 0 0 0e0/9 down 0 0 0 0e0/10 down 0 0 0 0e0/11 down 0 0 0 0e0/12 down 0 0 0 0e0/13 down 0 0 0 0e0/14 down 0 0 0 0e0/15 down 0 0 0 0e0/16 down 0 0 0 0e1/1 down 0 0 0 0====spacebar->toggle screen U->page up D->page down CR->exit====通过空格键来切换回车键结束查看18.TiNet(config)#username change-passwo请输入您的登录密码: ******请输入用户名(4--15位):admin请输入新口令(1--15位):********输入确认口令(1--15位):********用户admin密码修改成功。
新格林耐特配置命令
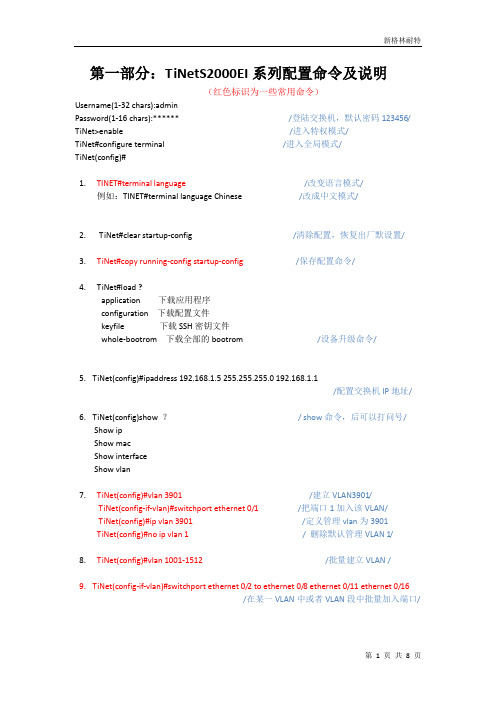
第一部分:TiNetS2000EI系列配置命令及说明(红色标识为一些常用命令)Username(1-32 chars):adminPassword(1-16 chars):****** /登陆交换机,默认密码123456/ TiNet>enable /进入特权模式/TiNet#configure terminal /进入全局模式/TiNet(config)#1.TINET#terminal language /改变语言模式/例如:TINET#terminal language Chinese /改成中文模式/2. TiNet#clear startup-config /清除配置,恢复出厂默设置/3.TiNet#copy running-config startup-config/保存配置命令/4.TiNet#load ?application 下载应用程序configuration 下载配置文件keyfile 下载SSH密钥文件whole-bootrom 下载全部的bootrom /设备升级命令/5.TiNet(config)#ipaddress 192.168.1.5 255.255.255.0 192.168.1.1/配置交换机IP地址/6.TiNet(config)show ?/ show命令,后可以打问号/Show ipShow macShow interfaceShow vlan7.TiNet(config)#vlan 3901 /建立VLAN3901/TiNet(config-if-vlan)#switchport ethernet 0/1/把端口1加入该VLAN/TiNet(config)#ip vlan 3901 /定义管理vlan为3901TiNet(config)#no ip vlan 1 / 删除默认管理VLAN 1/8.TiNet(config)#vlan 1001-1512/批量建立VLAN /9.TiNet(config-if-vlan)#switchport ethernet 0/2 to ethernet 0/8 ethernet 0/11 ethernet 0/16/在某一VLAN中或者VLAN段中批量加入端口/10.TiNet(config-if-ethernet-0/16)#tag vlan 1001,1112-1512,4000/端口下批量打tag/11.T iNet(config-if-ethernet-0/1)#switchport mode trunk/改变端口模式,为trunk模式/12.TiNet(config-if-ethernet-0/1)#switchport trunk allowed vlan all/端口为trunk模式,允许所有VLAN通过/13.TiNet(config-if-ethernet-0/2)#switchport access vlan 1001/改变端口PVID/14.TiNet(config)#port-isolation ethernet ?STRING<3-4> 端口号为槽端口号<0-2>/端口号<1-24>TiNet(config)#port-isolation ethernet 0/2 to e 0/16添加端口隔离下行端口成功. /一步隔离,一条命令隔离除上行口以外所有端口/15.TiNet(config)#interface range ethernet 0/2 to ethernet 0/16 /批量端口处理命令/16.TiNet(config-if-range)#bandwidth-control ?egress 出口带宽控制ingress 入口带宽控制/端口限速命令/17.TiNet(config)#show utilization interface/实时查看端口流量占比/Link Utilization Averages Thu Jan 1 00:43:20 1970port link Receive Peak Rx Transmit Peak TxStatus pkts/sec pkts/sec pkts/sec pkts/sec==================================================================e0/1 down 0 0 0 0e0/2 down 0 0 0 0e0/3 down 0 0 0 0e0/4 down 0 0 0 0e0/5 down 0 0 0 0e0/6 down 0 0 0 0e0/7 down 0 0 0 0e0/8 down 0 0 0 0e0/9 down 0 0 0 0e0/10 down 0 0 0 0e0/11 down 0 0 0 0e0/12 down 0 0 0 0e0/13 down 0 0 0 0e0/14 down 0 0 0 0e0/15 down 0 0 0 0e0/16 down 0 0 0 0e1/1 down 0 0 0 0====spacebar->toggle screen U->page up D->page down CR->exit====通过空格键来切换回车键结束查看18.TiNet(config)#username change-passwo请输入您的登录密码: ******请输入用户名(4--15位):admin请输入新口令(1--15位):********输入确认口令(1--15位):********用户admin密码修改成功。
格林威尔OLT常用命令
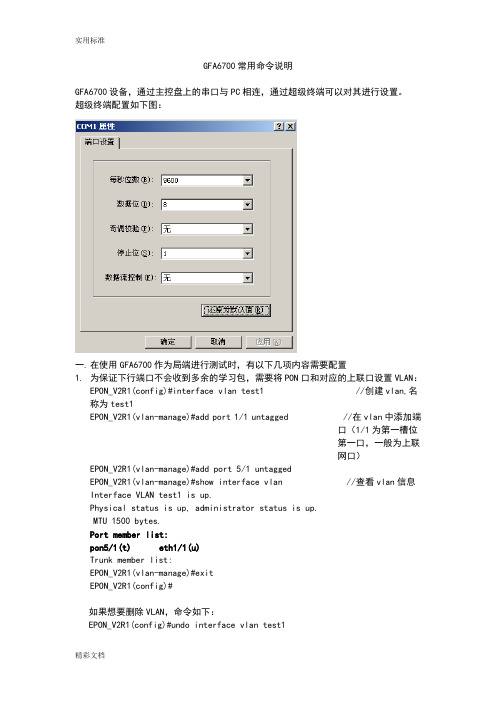
GFA6700常用命令说明GFA6700设备,通过主控盘上的串口与PC相连,通过超级终端可以对其进行设置。
超级终端配置如下图:一.在使用GFA6700作为局端进行测试时,有以下几项内容需要配置1.为保证下行端口不会收到多余的学习包,需要将PON口和对应的上联口设置VLAN:EPON_V2R1(config)#interface vlan test1 //创建vlan,名称为test1EPON_V2R1(vlan-manage)#add port 1/1 untagged //在vlan中添加端口(1/1为第一槽位第一口,一般为上联网口)EPON_V2R1(vlan-manage)#add port 5/1 untaggedEPON_V2R1(vlan-manage)#show interface vlan //查看vlan信息Interface VLAN test1 is up.Physical status is up, administrator status is up.MTU 1500 bytes.Port member list:pon5/1(t) eth1/1(u)Trunk member list:EPON_V2R1(vlan-manage)#exitEPON_V2R1(config)#如果想要删除VLAN,命令如下:EPON_V2R1(config)#undo interface vlan test1或者:EPON_V2R1(config)#interface vlan all2.上行带宽默认只有8M,为达到要求的带宽,在ONU注册上之后,需要进行上行带宽分配:EPON_V2R1(config)#pon 5/3EPON_V2R1(epon-pon5/3)#bandwidth class 2 delay low assured-bw 100000 best-effort-bw 100000 up <ONUID>说明:low assured-bw:保证带宽,ONU最小工作带宽best-effort-bw:最大带宽,动态。
DataMan 8600 快速参考指南说明书

DataMan®8600快速参考指南2017/11/15预防措施激光,不要直视激光束:2级激光产品不遵守这些指示可能导致严重安装Cognex产品时请遵守这些注意事项,以降低受伤或设备损坏的风险︰l为了减少由于过电压、线路噪音、静电放电(ESD)、电涌或其他电源不正常原因造成的损害或故障风险,可以远离高电压电源来确定线缆电路。
l未经负责合规性一方的明确批准,擅自更改或修改可能使用户操作设备的权限失效。
l如果维修圈或折弯半径比电缆直径紧10倍,会降低电缆屏蔽效果或损坏电缆。
折弯半径必须在距接口至少六英寸处开始。
l应遵照本手册中的说明使用该设备。
l所有规格仅供参考,如有更改,恕不另行通知。
1UltraLight2激光瞄准器3触发器(按住读码)4通信模块插入点5指示灯6挂绳钩7扩展的读码尝试按钮8RS-232连接9USB连接10电源插头(24伏,最大1511备用电源连接器(24上标有极性)串行/USB滑件(DMCM-SERIALM-00)以太网滑件(DMCM-ENETM-00)蓝牙滑件(DMCM-BTM-00)无线滑件(DMCM-WLESSM-00)充电基站(DMA-CBASE-01)智能基站(DMA-IBASE-01)智能蓝牙基站(DMA-IBASE-BT-01)智能蓝牙基站(DMA-IBASE-BT-02)基站电源(DMA-24VPWR-xx)读码器电源(DM100-PWR-00)无线读码器电池(DMA-HHBATTERY-01)多电池充电器(DMA-MBC-xx)POE适配器(CPS-24V-POE1)POE适配器(CPS-24V-POE4)壁挂支架(DMA-WALL-8000-00)基站壁挂支架(DMA-IBASE-WALL-00)POE适配器(CPS-AC-POE1A-xx)支架(DM-STAND-00)橡胶衬套(DM8000-SLEEVE-00)读码器RS-232螺旋电缆,2.5米(DM8000-RS232-02)读码器RS-232工业电缆,2.5米(DM8000-RS232IND-02)读码器RS-232螺旋电缆,5米(DM8000-RS232-05)USB螺旋电缆,2.5米(DM8500-USBC-02)以太网电缆,2.5米(DM8000-ECABLE-02)以太网电缆,30米(DM8000-ECABLE-30)以太网电缆,5米(DM8000-ECABLE-05)USB电缆,2.5米(DM8500-USB-00)以太网螺旋电缆,5米DM8000-ECABLEC-05*基站的RJ25(RJ12)至DSUB9电缆,5米DMA-RS232RJ-05*包括DM8000-ECABLE-X的校准电缆长度不应超过50米。
DPtech LSW5600系列以太网交换机安装手册v1.5

DPtech LSW5600 系列以太网交换机安装手册
2.2.4 抗干扰要求 ..................................................................................................................... 2-3 2.2.5 防雷击要求 ..................................................................................................................... 2-3 2.2.6 接地要求 ......................................................................................................................... 2-3 2.2.7 布线要求 ......................................................................................................................... 2-3 2.3 激光使用安全 .................................................................................................................... 2-3 2.4 安装工具 ............................................................................................................................ 2-4
新格林耐特8口交换机精简配置说明.
S2008EI-S交换机手动配置命令最精简方式:一、访问交换机使用超级终端(或者仿终端软件)连接到交换机的Console口,从而通过超级终端来访问系统的命令行接口(CLI)。
批处理配置(把做好的脚本命令一起粘贴到超级终端时的行为):修改串口连接设备:使用串口线连接,打开超级终端。
新建连接后,在端口设置里面先点击还原默认值,然后再把波特率修改为9600。
(这一点非常总要)。
需要注意如果需要粘贴配置,需要配置行延时和字符延时(点击文件属性设置 ASCII码设置行延时填写100毫秒字符延时20毫秒)。
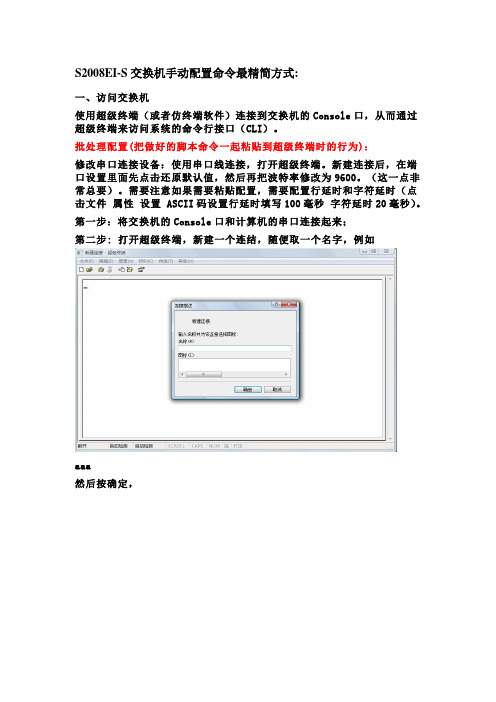
第一步:将交换机的Console口和计算机的串口连接起来;第二步: 打开超级终端,新建一个连结,随便取一个名字,例如aaa然后按确定,然后选择COM口,按确定,端口设置选择为还原为默认值,再确定第二步:此时就可以以看到登录提示信息:Username(1-32 chars):第三步:输入正确的用户名,按回车,在提示下再输入相应密码。
如果是首次登录交换机,就应该使用缺省的用户名admin登录,此时输入登录密码123456,以系统管理员的身份进行操作。
第四步:成功登录交换机后,系统显示如下信息:TiNet>第五步:输入enable回车,系统显示如下信息:TiNet# 说明:特权模式第六步:输入configure terminal回车,系统显示如下信息:TiNet(config)# 说明:配置模式,请在此模式下进行配置TiNet(config)#ipaddress 172.20.100.10 255.255.255.0 172.20.100.1 说明:配置交换机IP地址这样通过IP地址,我们可能在WEB页面配置交换机了,但我们不建议在配置开始就用IP地址去配置,出于安全、稳定性的考虑,交换机的WEB页面并没把全部命令都加进去,还有不少的配置与调试信息都在命令行里。
另外,为了安全考虑,本地交换机的各端口默认VLAN 都不在管理VLAN里,这样,直接用网线接交换机会无法访问。
新格林耐特8口交换机精简配置说明.

S2008EI-S交换机手动配置命令最精简方式:一、访问交换机使用超级终端(或者仿终端软件)连接到交换机的Console口,从而通过超级终端来访问系统的命令行接口(CLI)。
批处理配置(把做好的脚本命令一起粘贴到超级终端时的行为):修改串口连接设备:使用串口线连接,打开超级终端。
新建连接后,在端口设置里面先点击还原默认值,然后再把波特率修改为9600。
(这一点非常总要)。
需要注意如果需要粘贴配置,需要配置行延时和字符延时(点击文件属性设置 ASCII码设置行延时填写100毫秒字符延时20毫秒)。
第一步:将交换机的Console口和计算机的串口连接起来;第二步: 打开超级终端,新建一个连结,随便取一个名字,例如aaa然后按确定,然后选择COM口,按确定,端口设置选择为还原为默认值,再确定第二步:此时就可以以看到登录提示信息:Username(1-32 chars):第三步:输入正确的用户名,按回车,在提示下再输入相应密码。
如果是首次登录交换机,就应该使用缺省的用户名admin登录,此时输入登录密码123456,以系统管理员的身份进行操作。
第四步:成功登录交换机后,系统显示如下信息:TiNet>第五步:输入enable回车,系统显示如下信息:TiNet# 说明:特权模式第六步:输入configure terminal回车,系统显示如下信息:TiNet(config)# 说明:配置模式,请在此模式下进行配置TiNet(config)#ipaddress 172.20.100.10 255.255.255.0 172.20.100.1 说明:配置交换机IP地址这样通过IP地址,我们可能在WEB页面配置交换机了,但我们不建议在配置开始就用IP地址去配置,出于安全、稳定性的考虑,交换机的WEB页面并没把全部命令都加进去,还有不少的配置与调试信息都在命令行里。
另外,为了安全考虑,本地交换机的各端口默认VLAN 都不在管理VLAN里,这样,直接用网线接交换机会无法访问。
GPON OLT产品介绍SmartAX MA5600T系列

HUAWEI TECHNOLOGIES Co., Ltd.
HUAWEI Confidential
Page 14
MA5600T 主要系统规格和关键性能指标
整机性能
性能参数
背板总线 系统二层转发 主控板交换容量 1Tbit/s 包转发率600Mpps SCUL双向交换容量为400Gbits/s
参数描述
ltdpage17huaweiconfidentialma5600tgpon8个优先级队列支持spwrr调度支持gpon线路的sbadba支持cos8021p流优先级缺省为8021p支持对匹配acl规则的数据包设置ip优先级或dscp优先级标记支持8021p优先级remark支持基于流规则的包过滤重定向流镜像流量统计流量监管端口队列调度端口限速优先级策略和vlan更改策略支持基于端口和cos优先级限速支持cos优先级remarkqos支持cos优先级和调度队列的灵活映射huaweitechnologiesco
HUAWEI Confidential
Page 22
SCUB单板模块框图
CPU 维护串口 调试网口 监控串口
PCI 交换芯片
16*GE 业务槽位总线
上行扣板 4*GE 上行槽位总线 4*GE 电子开关
4*GE上行
外部时钟源输入 时钟模块 背板总线接口
HUAWEI TECHNOLOGIES Co., Ltd.
HUAWEI Confidential
Page 15
MA5600T 主要系统规格和关键性能指标
系统业务特性(GPON 接入)
特性 指标
线速二/三层交换 所有端口支持线速转发
最多支持4K 个基于802.1q 的VLAN,范围1-4093
格林GL5600-08P_V100R001B01D002P005SP2命令行参考手册 (2)
OptiWay GL5600-08P(04P)盒式OLT用户手册命令行参考手册第一部分:1. 访问OLT命令2. 端口配置命令3. VLAN配置命令4. ARP配置命令5. DHCP功能配置6. 组播协议配置命令7. ACL配置命令8. QOS配置命令9. STP配置命令10. 802.1x配置11. SNTP客户端配置命令12. Syslog配置命令13. SSH配置命令14. OLT管理和维护命令15. LLDP配置命令16. ERRP配置命令17. PPPoE Plus配置命令18. CFM配置命令19. Flex links配置命令20. EFM配置命令第二部分:21.OLT的PON功能配置22.ONT模板基本配置23.ONT上的语音配置目录第1章访问OLT命令 (1)1.1 访问OLT命令 (1)1.1.1 cls (2)1.1.2 configure terminal (2)1.1.3 enable (2)1.1.4 end (3)1.1.5 exit (4)1.1.6 help (4)1.1.7 hostname (5)1.1.8 interface (6)1.1.9 muser (6)1.1.10 quit (7)1.1.11 show muser (8)1.1.12 show tacacs+ (8)1.1.13 show username (9)1.1.14 stop (9)1.1.15 tacacs+ (10)1.1.16 timeout (10)1.1.17 username (11)1.1.18 username change-password (13)第2章端口配置命令 (1)2.1 以太网端口配置命令 (1)2.1.1 clear interface (2)2.1.2 description (3)2.1.3 duplex (3)2.1.4 flow-control (4)2.1.5 ingress acceptable-frame (5)2.1.6 ingress filtering (6)2.1.7 priority (6)2.1.8 show description (7)2.1.9 show interface (8)2.1.10 show statistics interface (9)2.1.11 shutdown (10)2.1.12 port-control mode (10)2.1.13 show port-control mode (11)2.1.14 speed (12)2.1.15 bandwidth (13)2.1.16 show bandwidth egress (13)2.1.17 switchport default vlan (14)2.1.18 switchport mode (14)2.1.19 switchport trunk allowed vlan (15)2.1.20 switchport hybrid untagged vlan (16)2.1.21 switchport hybrid tagged vlan (17)2.1.22 show statistics dynamic interface (18)2.1.23 show utilization interface (18)2.2 端口镜像配置命令 (19)2.2.1 mirror destination-interface (19)2.2.2 mirror source-interface (20)2.2.3 show mirror (20)2.2.4 no mirror all (21)2.3 端口CAR配置命令 (22)2.3.1 port-car (22)2.3.2 port-car-rate (23)2.3.3 show port-car (23)2.4 端口LACP汇聚配置命令 (24)2.4.1 channel-group (25)2.4.2 channel-group load-balance (25)2.4.3 lacp system-priority (26)2.4.4 lacp port-priority (27)2.4.5 show lacp sys-id (27)2.4.6 show lacp internal (28)2.4.7 show lacp neighbor (28)2.4.8 show statistics channel-group (29)2.4.9 clear channel-group (30)2.4.10 show statistics dynamic channel-group (30)2.4.11 show utilization channel-group (31)2.5 端口利用率告警配置命令 (31)2.5.1 alarm all-packets (32)2.5.2 alarm all-packets threshold (32)2.5.3 show alarm all-packets (33)2.5.4 show alarm all-packets interface (33)2.6 端口shutdown-control配置命令 (34)2.6.1 shutdown-control (35)2.6.2 shutdown-control-recover (35)2.6.3 show shutdown-control (36)2.6.4 no shutdown-control-recover (1)第3章VLAN配置命令 (1)3.1 VLAN 配置命令 (1)3.1.1 description (1)3.1.2 show vlan (2)3.1.3 switchport (2)3.1.4 vlan (3)3.2 GVRP配置命令 (4)3.2.1 gvrp (5)3.2.2 show gvrp (5)3.2.3 show gvrp interface (6)3.2.4 garp permit vlan (7)3.2.5 show garp permit vlan (7)3.3 QinQ命令 (8)3.3.1 dtag (8)3.3.2 dtag mode (9)3.3.3 dtag insert (10)3.3.4 dtag pass-through (10)3.3.5 vlan-swap (11)3.3.6 show dtag (12)3.3.7 show vlan-swap (13)3.4 l2-tunnel配置命令 (13)3.4.1 l2-tunnel (14)3.4.2 show l2-tunnel interface (14)3.4.3 l2-tunnel drop-threshold (15)3.4.4 show l2-tunnel drop-threshold (16)3.5 VPRB配置命令 (16)3.5.1 vprb (16)3.5.2 show vprb (17)第4章ARP配置命令 (17)4.1 ARP配置命令 (17)4.1.1 no arp (18)4.1.2 show arp (18)第5章DHCP功能配置命令 (20)5.1 DHCP功能配置命令 (20)5.1.1 dhcp-relay (20)5.1.2 dhcpserver (21)5.1.3 dhcp-snooping (22)5.1.4 dhcp-snooping trust (22)5.1.5 dhcp-snooping max-clients (23)5.1.6 ip-source-guard (23)5.1.7 ip-source-guard bind ip (24)5.1.8 show dhcp-relay (24)5.1.9 show dhcp-snooping interface (25)5.1.10 show dhcp-snooping vlan (25)5.1.11 show dhcp-snooping clients (26)第6章组播协议配置命令 (1)6.1 静态组播配置命令 (1)6.1.1 multicast mac-address (1)6.1.2 multicast mac-address vlan interface (2)6.1.3 show multicast (3)6.2 IGMP snooping和GMRP配置命令 (3)6.2.1 gmrp (5)6.2.2 igmp-snooping (5)6.2.3 igmp-snooping host-aging-time (6)6.2.4 igmp-snooping max-response-time (6)6.2.5 igmp-snooping fast-leave (7)6.2.6 igmp-snooping group-limit (8)6.2.7 igmp-snooping permit/deny group (8)6.2.8 igmp-snooping route-port forward (9)6.2.9 igmp-snooping multicast vlan (9)6.2.10 show gmrp (10)6.2.11 show gmrp interface (10)6.2.12 garp permit multicast mac-address (11)6.2.13 show garp permit multicast (12)6.2.14 show igmp-snooping (12)6.2.15 igmp-snooping route-port vlan interface (13)6.2.16 no igmp-snooping router-port-age (14)6.2.17 igmp-snooping general-query source-ip (14)6.2.18 igmp-snooping query-max-respon (15)6.2.19 igmp-snooping querier-vlan (15)6.2.20 igmp-snooping query-interval (16)6.2.21 igmp-snooping querier (16)6.2.22 igmp-snooping preview (17)6.2.23 igmp-snooping preview time-once time-interval time-resetpermit-times (17)6.2.24 igmp-snooping preview group-ip vlan interface (18)6.2.25 show igmp-snooping preview (19)6.2.26 igmp-snooping profile (19)6.2.27 profile limit (20)6.2.28 ip range/mac range (20)6.2.29 igmp-snooping profile refer (21)6.2.30 show igmp-snooping profile (22)6.2.31 igmp-snooping record-host (22)6.2.32 igmp-snooping drop query (23)6.2.33 igmp-snooping drop report (23)6.2.34 show igmp-snooping record-host (24)6.2.35 cross-vlan multicast (24)6.2.36 cross-vlan multicast (25)6.2.37 show cross-vlan multicast (25)第7章ACL配置命令 (1)7.1 ACL 配置命令列表 (1)7.1.1 absolute (1)7.1.2 access-group (3)7.1.3 access-list (4)7.1.4 access-list extended (8)7.1.5 access-list link (9)7.1.6 access-list match-order (11)7.1.7 access-list standard (11)7.1.8 { permit | deny } (13)7.1.9 periodic (16)7.1.10 show access-list config (19)7.1.11 show access-list config statistic (20)7.1.12 show access-list runtime (20)7.1.13 show access-list runtime statistic (21)7.1.14 show time-range (22)7.1.15 time-range (23)第8章QOS配置命令 (1)8.1 QoS 配置命令 (1)8.1.1 clear traffic-statistic (1)8.1.2 queue-scheduler (2)8.1.3 queue-scheduler cos-map (3)8.1.4 show qos-info all (4)8.1.5 show qos-info statistic (5)8.1.6 show qos-info traffic-redirect (6)8.1.7 show qos-info traffic-statistic (7)8.1.8 show queue-scheduler (8)8.1.9 show queue-scheduler cos-map (8)8.1.10 port-isolation (8)8.1.11 show port-isolation (9)8.1.12 storm-control (10)第9章STP配置命令 (1)9.1 STP配置命令 (1)9.1.1 show spanning-tree interface (1)9.1.2 spanning-tree (2)9.1.3 spanning-tree cost (3)9.1.4 spanning-tree root-guard (4)9.1.5 spanning-tree forward-time (4)9.1.6 spanning-tree hello-time (5)9.1.7 spanning-tree max-age (6)9.1.8 spanning-tree port-priority (7)9.1.9 spanning-tree mcheck (8)9.1.10 spanning-tree point-to-point (8)9.1.11 spanning-tree portfast (9)9.1.12 spanning-tree transit-limit (9)9.1.13 spanning-tree priority (10)9.1.14 spanning-tree mode (11)9.1.15 spanning-tree remote-loop-detect (11)9.1.16 clear spanning-tree (12)9.2 MSTP配置命令 (13)9.2.1 spanning-tree mst max-hops (14)9.2.2 spanning-tree mst name (15)9.2.3 spanning-tree mst revision (15)9.2.4 spanning-tree mst instance vlan (16)9.2.5 spanning-tree mst instance instance-num priority (17)9.2.6 spanning-tree mst external cost (17)9.2.7 spanning-tree mst instance cost (18)9.2.8 spanning-tree mst instance port-priority (18)9.2.9 spanning-tree mst root-guard (19)9.2.10 show spanning-tree mst config-id (20)9.2.11 show spanning-tree mst instance interface (20)9.2.12 spanning-tree mst config-digest-snooping (21)9.2.13 spanning-tree mst disable instance (21)9.2.14 show spanning-tree mst disabled-instance (22)第10章802.1X配置命令 (1)10.1 域配置命令 (1)10.1.1 aaa (1)10.1.2 access-limit (2)10.1.3 default domain-name enbale (2)10.1.4 domain (3)10.1.5 show domain (4)10.1.6 radius host binding (5)10.1.7 scheme (5)10.1.8 state (6)10.2 RADIUS服务器配置命令 (7)10.2.1 accounting-on (8)10.2.2 acct-secret-key (9)10.2.3 auth-secret-key (9)10.2.4 dnrate-value (10)10.2.5 h3c-cams (10)10.2.6 nas-ipaddress (11)10.2.7 primary-acct-ip (12)10.2.8 primary-auth-ip (12)10.2.9 show radius attribute (13)10.2.10 show radius config-attribute (13)10.2.11 show radius host (14)10.2.12 uprate-value (14)10.2.13 radius 8021p (15)10.2.14 radius accounting (16)10.2.15 radius attribute (16)10.2.16 radius bandwidth-limit (17)10.2.17 radius config-attribute (18)10.2.18 radius host (19)10.2.19 radius mac-address-number (19)10.2.20 radius server-disconnect drop 1x (20)10.2.21 radius vlan (21)10.2.22 realtime-account (21)10.2.23 second-acct-ip (22)10.2.24 second-auth-ip (23)10.2.25 username-format (24)10.3 802.1X配置相关命令 (24)10.3.1 dot1x method (25)10.3.2 dot1x daemon (26)10.3.3 dot1x eap-finish (27)10.3.4 dot1x eap-transfer (28)10.3.5 dot1x max-user (29)10.3.6 dot1x port-control (30)10.3.7 dot1x re-authenticate (31)10.3.8 dot1x re-authentication (32)10.3.9 dot1x timeout re-authperiod (32)10.3.10 dot1x user cut (33)10.3.11 dot1x detect (34)10.3.12 dot1x quiet-period-value (35)10.3.13 show dot1x (35)10.3.14 show dot1x daemon (36)10.3.15 show dot1x interface (36)10.3.16 show dot1x session (37)第11章SNTP客户端配置命令 (1)11.1 SNTP客户端配置命令列表 (1)11.1.1 show sntp client (1)11.1.2 sntp client (2)11.1.3 sntp client authenticate (2)11.1.4 sntp client authentication-key (3)11.1.5 sntp client broadcastdelay (4)11.1.6 sntp client mode (4)11.1.7 sntp client multicast ttl (5)11.1.8 sntp client poll-interval (6)11.1.9 sntp client retransmit (7)11.1.10 sntp client retransmit-interval (8)11.1.11 sntp client valid-server (8)11.1.12 sntp server (9)11.1.13 sntp trusted-key (10)第12章Syslog配置命令 (1)12.1 Syslog配置命令列表 (1)12.1.1 show logging (2)12.1.2 show logging buffered (2)12.1.3 show logging flash (3)12.1.4 show logging filter (3)12.1.5 show debug (4)12.1.6 logging (4)12.1.7 logging sequence-numbers (5)12.1.8 logging timestamps (5)12.1.9 logging monitor (6)12.1.10 logging buffered (7)12.1.11 clear logging buffered (8)12.1.12 logging flash (9)12.1.13 clear logging flash (10)12.1.14 logging host (10)12.1.15 logging facility (11)12.1.16 logging source (12)12.1.17 logging snmp-agent (13)12.1.18 debug (14)12.1.19 upload logging (15)第13章SSH配置命令 (1)13.1 SSH配置命令列表 (1)13.1.1 show ssh (1)13.1.2 show keyfile (2)13.1.3 ssh (2)13.1.4 crypto key generate rsa (2)13.1.5 crypto key zeroize rsa (3)13.1.6 crypto key refresh (3)13.1.7 load keyfile (3)13.1.8 upload keyfile (4)第14章OLT管理和维护命令 (1)14.1 配置文件管理 (1)14.1.1 buildrun mode continue (1)14.1.2 buildrun mode stop (1)14.1.3 clear startup-config (2)14.1.4 copy running-config startup-config (2)14.1.5 copy startup-config running-config (3)14.1.6 show running-config (3)14.1.7 show startup-config (4)14.2 在线加载升级程序 (4)14.2.1 load application ftp (5)14.2.2 load application tftp (6)14.2.3 load application xmodem (6)14.2.4 load configuration ftp (7)14.2.5 load configuration tftp (8)14.2.6 load configuration xmodem (8)14.2.7 load whole-bootrom ftp (9)14.2.8 load whole-bootrom tftp (9)14.2.9 load whole-bootrom xmodem (10)14.2.10 upload configuration ftp (11)14.2.11 upload configuration tftp (11)14.2.12 upload logging ftp (12)14.2.13 upload logging tftp (13)14.3 重启OLT (13)14.3.1 reboot (14)14.4 查看OLT电源状态 (14)14.4.1 show power [ 0 | 1] (14)14.5 设备基本配置和维护 (15)14.5.1 bootp (16)14.5.2 clock set (16)14.5.3 dhcp (17)14.5.4 dlf-forward (18)14.5.5 loopback (19)14.5.6 mac-address-table (20)14.5.7 mac-address-table age-time (21)14.5.8 mac-address-table learning (21)14.5.9 ping (22)14.5.10 show clock (23)14.5.11 show cpu- utilization (23)14.5.12 show dlf-forward (23)14.5.13 show mac-address-table (24)14.5.14 show mac-address-table age-time (25)14.5.15 show mac-address-table learning (25)14.5.16 show memory (26)14.5.17 show system (26)14.5.18 show users (26)14.5.19 show version (27)14.5.20 login-access-list telnet-limit (27)14.5.21 tracert (28)14.5.22 cpu-car (29)14.5.23 show cpu-car (30)14.5.24 show cpu-statistics (30)14.5.25 clear cpu-statistics (31)14.6 SNMP配置 (31)14.6.1 show snmp community (32)14.6.2 show snmp contact (32)14.6.3 show snmp host (33)14.6.4 show snmp notify (33)14.6.5 show snmp location (33)14.6.6 show snmp engineID (34)14.6.7 show snmp group (34)14.6.8 show snmp user (35)14.6.9 show snmp view (35)14.6.10 snmp-server community (36)14.6.11 snmp-server contact (37)14.6.12 snmp-server host (37)14.6.13 snmp-server location (38)14.6.14 snmp-server name (39)14.6.15 snmp-server enable traps (40)14.6.16 snmp-server trap-source (41)14.6.17 snmp-server engineID (42)14.6.18 snmp-server view (43)14.6.19 snmp-server group (44)14.6.20 snmp-server user (45)14.7 管理IP限制配置 (47)14.7.1 login-access-list (47)14.7.2 show login-access-list (48)14.8 CPU使用率告警配置命令 (48)14.8.1 alarm cpu (48)14.8.2 alarm cpu threshold (49)14.8.3 show alarm cpu (50)14.9 防DOS攻击 (50)14.9.1 anti-dos ip fragment (50)14.9.2 show anti-dos (51)第15章LLDP配置命令 (52)15.1 LLDP配置命令 (52)15.1.1 lldp (52)15.1.2 lldp hello-time (53)15.1.3 lldp hold-time (53)15.1.4 lldp { rx | tx | rxtx } (54)15.1.5 show lldp interface [ <interface-list> ] (54)第16章ERRP配置命令 (1)16.1 ERRP配置命令 (1)16.1.1 errp (1)16.1.2 errp hello-timer (2)16.1.3 errp fail-timer (2)16.1.4 errp domain (3)16.1.5 work-mode (3)16.1.6 control-vlan (4)16.1.7 ring role primary-port secondary-port level (5)16.1.8 ring { enable | disable } (6)16.1.9 show errp (6)16.1.10 ring query-solicit (7)第17章PPPoE Plus功能配置命令 (9)17.1 PPPoE Plus功能配置命令 (9)17.1.1 pppoeplus (9)17.1.2 pppoeplus type (9)17.1.3 show pppoeplus (10)第18章CFM配置命令 (11)18.1 CFM配置命令 (11)18.1.1 cfm md (12)18.1.2 cfm md format (12)18.1.3 cfm ma (13)18.1.4 cfm ma format (14)18.1.5 cfm cc interval (14)18.1.6 cfm mep (15)18.1.7 cfm mep state (16)18.1.8 cfm mep cc (17)18.1.9 cfm mep priority (17)18.1.10 cfm mip (18)18.1.11 cfm rmep (18)18.1.12 cfm loopback (19)18.1.13 cfm linktrace (20)18.1.14 show cfm md (21)18.1.15 show cfm ma (21)18.1.16 show cfm mp local (22)18.1.17 show cfm mp remote (22)18.1.18 show/clear cfm cc (22)18.1.19 show/clear cfm cc database (23)18.1.20 show cfm errors (23)第19章Flex links配置命令 (24)19.1 Flex links配置命令 (24)19.1.1 switchport backup (24)19.1.2 channel-group channel-group-number backup (24)19.1.3 switchport backup preemption mode (25)19.1.4 channel group backup preemption mode (25)19.1.5 switchport backup preemption delay (26)19.1.6 channel-group backup preemption delay (27)19.1.7 mac-address-table move update transmit (27)19.1.8 mac-address-table move update receive (28)19.1.9 show mac-address-table move update (28)第20章EFM配置命令 (29)20.1 EFM配置命令 (29)20.1.1 efm (29)20.1.2 efm mode (30)20.1.3 efm pdu-timeout (31)20.1.4 efm link-timeout (31)20.1.5 efm remote-response-timeout (32)20.1.6 efm link-monitor para (32)20.1.7 efm remote-failure (34)20.1.8 efm link-monitor (35)20.1.9 efm variable-retrieval (36)20.1.10 efm remote-loopback (36)20.1.11 efm remote-loopback { ignore | process } (37)20.1.12 show efm status interface (37)20.1.13 show efm summary (38)20.1.14 show efm discovery interface (38)20.1.15 show / clear efm statistics interface (38)第21章 OLT的PON功能配置 (40)21.1 PSG功能配置 (40)21.1.1 PSG功能简介 (40)21.1.2 PSG组配置 (40)21.1.3 PSG组的主背倒换 (41)21.2 PON信息查看 (41)21.3 PON端口复制ONT配置 (42)21.4 PON端口清除ONT配置和信息 (42)第22章 ONT模板基本配置 (43)22.1 ONT管理简介 (43)22.2 OLT 管理ONT基本配置 (43)22.2.1 OLT的PON使能状态 (43)22.2.2 ONT的最小响应时间 (43)22.2.3 自动认证和自动发现 (44)22.3 ONT预配置 (46)22.3.1 绑定SN号 (46)22.3.2 解除SN号绑定 (46)22.3.3 清除ONT的配置 (47)22.4 ONT状态激活/去激活 (48)22.5 ONT类型配置 (48)22.6 ONT基本信息查看 (49)22.6.1 查看已经注册的ONT基本信息 (49)22.6.2 查看ONT本地的一些信息 (50)22.7 ONT上行带宽(DBA)的配置和查看 (51)22.7.1 DBA基本介绍 (51)22.7.2 配置DBA模板 (51)22.7.3 删除DBA模板 (53)22.7.4 查看存在的DBA模板 (54)22.8 ONT基础的配置(tcont, gemport, serviceport) (56)22.8.1 T-CONT绑定DBA模板 (56)22.8.2 T-CONT创建gemport (57)22.8.3 serviceport映射到gemport (58)22.8.4 serviceport创建VLAN (59)22.9 ONT 的以太网端口的基本配置和查看 (60)22.9.1 ONT的以太网的出口限速 (60)22.9.2 ONT的以太网口的VLAN模式 (60)22.9.3 ONT的以太网口在TAG模式下的配置 (61)22.9.4 ONT的以太网口在TRUNK模式下的配置 (62)22.9.5 ONT的以太网口在TRANSLATION模式下的配置 (63)22.10 ONT描述 (64)22.10.1配置ONT描述 (64)22.10.2删除ONT描述 (64)22.10.3显示ONT描述 (65)22.11 清除ONT的配置 (65)22.11.1 直接清除ONT的全部配置 (65)22.11.2 删除serviceport创建的VLAN (66)22.11.2 解除serviceport与gemport的映射关系 (66)22.11.3 去除gemport (67)22.11.4 T-CONT解除绑定的DBA模板 (68)22.12 ONT重启和升级 (68)22.12.1 ONT重启 (68)22.12.2 ONT的镜像升级 (68)22.13 ONT测距 (70)22.14 ONT自动发现配置保存 (70)22.15 ONT对MAC地址学习的限制 (71)22.16 ONT以太网端口流统计开关 (72)22.17查看ONT的端口流量 (72)22.18 ONT组播数量限制功能 (72)22.19 ONT下行流限速 (73)22.19.1 创建下行流限速配置 (73)22.19.2 删除下行流限速配置 (73)22.19.3 查看下行流限速 (74)第23章 ONT上的语音配置 (75)23.1 拨号的规则配置 (75)23.1.1拨号的规则配置 (75)23.1.2 删除拨号配置 (76)23.2 配置语音代理服务器 (77)23.2.1 配置语音代理服务器 (77)23.2.2 删除语音服务器配置 (78)23.3 配置用户IP (79)23.3.1 配置用户IP (79)23.3.2 删除用户配置的IP (80)23.4 配置用户的电话 (80)23.4.1 配置用户的电话 (80)23.4.2 删除用户的电话 (81)23.5 配置用户名和密码 (82)23.5.1配置用户名和密码 (82)23.5.2 删除用户名和密码 (83)第24章 ONT组模式 (84)24.1 ONT组的创建和删除 (84)24.1.1 ONT组创建 (84)24.1.2 ONT组删除 (85)24.2 ONT组成员的添加和删除 (86)24.2.1 ONT组成员添加 (86)24.2.2 ONT组成员删除 (87)24.3 ONT组描述 (87)24.3.1 ONT组描述设置 (87)24.3.2 ONT删除组描述 (88)24.4 查看ONT组信息 (88)24.5 ONT组模式下的配置命令 (89)第1章访问OLT命令1.1 访问OLT命令访问OLT的命令包括:▪cls▪configure terminal▪enable▪end▪exit▪help▪hostname▪interface▪muser▪quit▪show muser▪show tacacs+▪show username▪stop▪tcacac+▪timeout▪username▪username change-password1.1.1 cls该命令用来清空当前屏幕显示。
04、新格林耐特-技术建议书-OLT

2009年中国新联通EPON招标技术建议书深圳市新格林耐特通信技术有限公司二OO九年六月1、综述随着运营商重组的尘埃落定,新移动、新电信和新联通将从原始较为单一的业务模式向全业务模式演进,固定通信业务和移动通信业务的融合已成为各运营商后续发展的重点。
纵观全球领先的13家运营商中,有8家是全业务运营商,全业务运营是运营商企业发展的重要突破点。
传统的固网运营商前期主要以铜缆接入为主,采用DSL的方式为用户提供宽带接入,但DSL方式能够提供的带宽非常有限,无法满足后续业务开展的带宽需求;因此目前运营商均积极推广“光进铜退”,改造现有铜缆接入网,采用光纤接入的方式为用户提供高带宽、全业务的接入平台,意图通过光纤进一步加强客户关系捆绑,并在此基础上进一步布局叠加3G业务,以此抢占全业务经营的市场。
光纤接入从其网络结构可以分为点到点(P2P)模式和点到多点(P2MP)模式;P2P模式以传统的“MC+LAN”模式为主,劣势十分明显:占用大量光缆资源、无法实现统一有效的网络管理、业务提供能力差等;因此目前运营商关注点多为P2MP 方式,也就是PON(无源光网络)模式,采用PON构建的FTTX接入网,可以提供高带宽、全业务接入,并能够充分保障业务的QoS和适应未来网络发展趋势。
PON技术从90年代初就开始出现,最初出现的是基于ATM体制的APON和BPON,这两种技术由于国内没有相应的ATM骨干网络,因而在国内没有规模应用。
2004年以后,EPON和GPON两种新一代的PON技术产生,国内开始对这两种技术加以关注。
从目前统计来看以太网的普及率最高,占全球LAN市场的90%以上;分析数据表明,BPON将在近几年内逐步退出市场。
EPON将成为亚洲PON市场的主流技术,而目前亚洲是全球最大的PON市场。
由于IEEE的EPON标准化工作比ITU-T的GPON标准化工作开展得早,而且IEEE 的关于Ethernet的802.3标准系列已经成为业界的最重要的标准,因此目前市场上已有的G比特级PON产品更多的是遵循EPON标准,严格遵循GPON标准的产品目前基本上还没有,目前市场上还没有成熟的GPON芯片供应;EPON产品较GPON产品更广泛的另一个重要原因是因为EPON标准制定得更宽松,制造商在开发自己的产品时有更大的灵活性;从产业链的角度看,EPON系统最核心部分—PON光发送/接收模块已经较成熟,核心TC控制模块已经规模生产(ASIC化);由于EPON技术最先成熟,并且在日本和韩国快速形成了千万线以上的应用规模。
- 1、下载文档前请自行甄别文档内容的完整性,平台不提供额外的编辑、内容补充、找答案等附加服务。
- 2、"仅部分预览"的文档,不可在线预览部分如存在完整性等问题,可反馈申请退款(可完整预览的文档不适用该条件!)。
- 3、如文档侵犯您的权益,请联系客服反馈,我们会尽快为您处理(人工客服工作时间:9:00-18:30)。
新格林耐特GCOM S8600,5600 OLT 配置1、用户登录Username:Password:2、配置视图模式LY-JT-OLT.MAN.GCOM5600>enLY-JT-OLT.MAN.GCOM5600#3、显示所有PON口ONU状态LY-JT-OLT.MAN.GCOM5600#show onuONU Mac Address DIS(m) RegisterTime Type Software State 0/1/1 00:0a:5a:22:7f:ad 1024 16/01/25 16:23:18 04G2 V200R001B01D001 Up0/1/2 00:0a:5a:22:7f:aa 2649 16/01/25 16:23:14 04G2 V200R001B01D001 Up0/1/3 00:0a:5a:22:7f:ed 2645 16/01/25 16:23:15 04G2 V200R001B01D001 Up0/1/4 00:0a:5a:22:7f:ac 1057 16/01/25 16:23:20 04G2 V200R001B01D001 Up0/1/5 00:0a:5a:22:7f:a9 1067 16/01/25 16:23:16 04G2 V200R001B01D001 Up0/1/6 00:0a:5a:22:7f:a3 1293 16/01/25 16:23:23 04G2 V200R001B01D001 Up0/1/7 00:0a:5a:22:7f:b8 2803 16/01/25 16:23:18 04G2 V200R001B01D001 Up0/1/8 00:0a:5a:22:7f:f0 1201 16/01/27 00:48:55 04G2 V200R001B01D001 Up0/1/9 00:0a:5a:22:7f:c8 1206 16/01/25 16:23:15 04G2 V200R001B01D001 Up0/1/10 00:0a:5a:22:7f:d7 1174 16/01/25 16:23:14 04G2 V200R001B01D001 Up0/1/11 00:0a:5a:22:7f:db 1184 16/01/25 16:23:14 04G2 V200R001B01D001 Up0/1/12 00:0a:5a:22:7f:b9 2851 16/01/25 16:23:16 04G2 V200R001B01D001 Up0/1/13 00:0a:5a:22:7f:a2 1085 16/01/25 16:23:17 04G2 V200R001B01D001 Up0/1/14 00:0a:5a:19:7c:f8 2099 16/01/25 16:23:17 04V2 B01D001P001SP1 Up0/1/15 00:0a:5a:19:16:a1 2089 16/01/25 16:23:26 04V2 B01D001P001SP1 Up0/1/16 00:0a:5a:24:2c:30 - - 2401 - Down 0/1/17 00:0a:5a:27:f2:3f 1248 16/01/25 16:23:13 2401 B01D003P17 Up0/1/18 00:0a:5a:24:2c:34 - - other - Down0/1/19 00:0a:5a:27:f2:d2 1849 16/01/25 16:23:13 2401 B01D003P17 Up0/1/20 00:0a:5a:24:2b:4e - - other - Down0/1/21 00:0a:5a:25:a6:34 1445 16/01/25 16:23:21 2401 B01D003P13 Up0/1/22 00:0a:5a:25:a6:a1 1406 16/01/25 16:23:20 2401 B01D003P12 Up0/1/23 00:0a:5a:29:fb:7b 1496 16/01/27 10:55:10 2401 B01D003P18 Up0/1/24 00:0a:5a:26:7e:10 1465 16/01/25 16:23:19 2401 B01D003P13 Up0/2/1 00:0a:5a:19:18:83 1069 16/01/25 16:23:14 04V2 B01D001P001SP1 Up0/2/2 00:0a:5a:19:79:ff 1049 16/01/25 16:23:22 04V2 B01D001P001SP1 Up0/2/3 00:0a:5a:19:7a:36 1096 16/01/25 16:23:28 04V2 B01D001P001SP1 Up0/2/4 00:1a:a9:ab:fd:4d 1081 16/01/25 16:23:15 other V1.5.2a_ZL0 Up0/2/5 00:0a:5a:17:b8:a0 - - 04V2 - Down 0/2/6 00:0a:5a:15:1b:cb 976 16/01/25 16:23:14 204M B01D001P004SP5 Up0/2/7 00:0a:5a:19:7c:f7 1105 16/01/25 16:23:19 04V2 B01D001P001SP1 Up0/2/8 00:0a:5a:19:7c:50 1032 16/01/25 16:23:14 04V2 B01D001P001SP1 Up0/2/9 00:0a:5a:19:7a:47 1185 16/01/25 16:23:13 04V2 B01D001P001SP1 Up0/2/10 00:0a:5a:23:0a:76 1065 16/01/25 16:23:23 04G2 V200R001B01D001 Up0/2/11 00:0a:5a:22:7f:dc 2739 16/01/25 16:23:16 04G2 V200R001B01D001 Up0/2/12 00:0a:5a:23:0d:59 2670 16/01/25 16:23:17 04G2 V200R001B01D001 Up0/2/13 00:0a:5a:19:7b:7a - - 04V2 - Down 0/2/14 00:0a:5a:19:7a:46 912 16/01/25 16:23:18 04V2 B01D001P001SP1 Up0/2/15 00:0a:5a:23:0a:75 869 16/01/25 16:23:18 04G2 V200R001B01D001 Up0/2/16 00:0a:5a:23:4c:db - - 04G2 - Down 0/2/17 00:0a:5a:23:52:2e 910 16/01/25 16:23:15 04G2 V200R001B01D001 Up0/2/18 00:0a:5a:23:0c:d1 1021 16/01/25 16:23:17 04G2 V200R001B01D001 Up0/2/19 00:0a:5a:23:0c:d0 2715 16/01/25 16:23:23 04G2 V200R001B01D001 Up ....press ENTER to next line, CTRL_C to break, other key to next page....UP:表示在线Down:表示掉线4、显示所有PON口在线ONU状态LY-JT-OLT.MAN.GCOM5600#show ponSlot 0ONU Mac Address LLID Config Description0/1/1 00:0a:5a:22:7f:ad 6000000c OK dongyuanxiaoqu5#0/1/2 00:0a:5a:22:7f:aa 60000003 OK dongyuanxiaoqu6#0/1/3 00:0a:5a:22:7f:ed 60000007 OK dongyuanxiaoqu7#0/1/4 00:0a:5a:22:7f:ac 6000000f OK dongyuanxiaoqu8#0/1/5 00:0a:5a:22:7f:a9 60000009 OK dongyuanxiaoqu12#0/1/6 00:0a:5a:22:7f:a3 60000012 OK dongyuanxiaoqu10#0/1/7 00:0a:5a:22:7f:b8 6000000d OK dongyuanxiaoqu15#0/1/8 00:0a:5a:22:7f:f0 60000006 snGetFail dongyuanxiaoqu16#0/1/9 00:0a:5a:22:7f:c8 60000005 OK dongyuanxiaoqu19#0/1/10 00:0a:5a:22:7f:d7 60000004 OK dongyuanxiaoqu17#0/1/11 00:0a:5a:22:7f:db 60000002 OK dongyuanxiaoqu18#0/1/12 00:0a:5a:22:7f:b9 60000008 OK dongyuanxiaoqu14#0/1/13 00:0a:5a:22:7f:a2 6000000a OK dongyuanxiaoqu9#0/1/14 00:0a:5a:19:7c:f8 6000000b OK HuanChengXiLu36#0/1/15 00:0a:5a:19:16:a1 60000013 OK HuanChengXiLu35#0/1/17 00:0a:5a:27:f2:3f 60000000 snGetFail DongYuanXiaoQu_WeiMeiBinGuan0/1/19 00:0a:5a:27:f2:d2 60000001 OK TaiPingXiLu208#0/1/21 00:0a:5a:25:a6:34 60000011 OK XinYiLu11#0/1/22 00:0a:5a:25:a6:a1 60000010 OK RenMingLu0/1/23 00:0a:5a:29:fb:7b 60000014 OK RenMingLu-JinYuBingGuan0/1/24 00:0a:5a:26:7e:10 6000000e OK RenMingLu35#3Zhuang0/2/1 00:0a:5a:19:18:83 60410003 OK X0/2/2 00:0a:5a:19:79:ff 60410011 OK x0/2/3 00:0a:5a:19:7a:36 60410014 OK x0/2/4 00:1a:a9:ab:fd:4d 60410007 PartOK shuiliju-shipinghuiyizhuangwang 0/2/6 00:0a:5a:15:1b:cb 60410002 OK xinyilu-binguan0/2/7 00:0a:5a:19:7c:f7 6041000e OK x0/2/8 00:0a:5a:19:7c:50 60410004 OK x0/2/9 00:0a:5a:19:7a:47 60410001 OK x0/2/10 00:0a:5a:23:0a:76 60410013 OK x0/2/11 00:0a:5a:22:7f:dc 60410009 OK x0/2/12 00:0a:5a:23:0d:59 6041000b OK x0/2/14 00:0a:5a:19:7a:46 6041000c OK x0/2/15 00:0a:5a:23:0a:75 6041000d OK x0/2/17 00:0a:5a:23:52:2e 60410006 OK x0/2/18 00:0a:5a:23:0c:d1 6041000a OK x0/2/19 00:0a:5a:23:0c:d0 60410012 OK x0/2/21 00:0a:5a:23:4b:1f 60410008 OK shuiliju0/2/22 00:0a:5a:23:4c:08 60410005 OK jinmaojusushe0/2/25 00:0a:5a:ff:ff:69 60410000 OK OptiWay0/2/27 00:0a:5a:24:01:5a 60410010 OK XinYiLu13#0/2/30 00:0a:5a:25:a6:e8 6041000f OK x....press ENTER to next line, CTRL_C to break, other key to next page...show pon只显示在线ONU,show onu5、显示某个PON口下ONU状态LY-JT-OLT.MAN.GCOM5600#show pon slot 0 port 1Slot 0ONU Mac Address LLID Config Description0/1/1 00:0a:5a:22:7f:ad 6000000c OK dongyuanxiaoqu5#0/1/2 00:0a:5a:22:7f:aa 60000003 OK dongyuanxiaoqu6#0/1/3 00:0a:5a:22:7f:ed 60000007 OK dongyuanxiaoqu7#0/1/4 00:0a:5a:22:7f:ac 6000000f OK dongyuanxiaoqu8#0/1/5 00:0a:5a:22:7f:a9 60000009 OK dongyuanxiaoqu12#0/1/6 00:0a:5a:22:7f:a3 60000012 OK dongyuanxiaoqu10#0/1/7 00:0a:5a:22:7f:b8 6000000d OK dongyuanxiaoqu15#0/1/8 00:0a:5a:22:7f:f0 60000006 snGetFail dongyuanxiaoqu16#0/1/9 00:0a:5a:22:7f:c8 60000005 OK dongyuanxiaoqu19#0/1/10 00:0a:5a:22:7f:d7 60000004 OK dongyuanxiaoqu17#0/1/11 00:0a:5a:22:7f:db 60000002 OK dongyuanxiaoqu18#0/1/12 00:0a:5a:22:7f:b9 60000008 OK dongyuanxiaoqu14#0/1/13 00:0a:5a:22:7f:a2 6000000a OK dongyuanxiaoqu9#0/1/14 00:0a:5a:19:7c:f8 6000000b OK HuanChengXiLu36#0/1/15 00:0a:5a:19:16:a1 60000013 OK HuanChengXiLu35#0/1/17 00:0a:5a:27:f2:3f 60000000 snGetFail DongYuanXiaoQu_WeiMeiBinGuan0/1/19 00:0a:5a:27:f2:d2 60000001 OK TaiPingXiLu208#0/1/21 00:0a:5a:25:a6:34 60000011 OK XinYiLu11#0/1/22 00:0a:5a:25:a6:a1 60000010 OK RenMingLu0/1/23 00:0a:5a:29:fb:7b 60000014 OK RenMingLu-JinYuBingGuan 0/1/24 00:0a:5a:26:7e:10 6000000e OK RenMingLu35#3Zhuang Total onu entries: 21 .6、查看某个PON口的配置LY-JT-OLT.MAN.GCOM5600#show int pon 0/1Fast Ethernet p0/1 current state: enable, port link is upTime duration of linkup is 3 day 19 hour 19 minute 18 second Hardware address is 00:0a:5a:21:b9:a5SetSpeed is full-1000, ActualSpeed is full-1000Priority is 0Flow control is disabledBroadcast storm control target rate is 2048KbpsPVID is 1Port mode: hybridTagged VLAN ID: 702,1180Untagged VLAN ID: 1Input : 1890374435 packets, 3719068773 bytes1429430 broadcasts, 1615 multicasts, 1888943390 unicasts Output: 2349034693 packets, 2811888069 bytes7425625 broadcasts, 14589645 multicasts, 2327019423 unicasts查看该PON的光功率LY-JT-OLT.MAN.GCOM5600(config-if-pon-0/1)#show opm op diagnosis OPM diagnosis information on PON:PON [2/7] Temperature: 34 CPON [2/7] Voltage : 3.27 VPON [2/7] Bias : 11 mAPON [2/7] TX Power : 5.0853 dBm(3.2250 mW)PON [2/7] RX Power : -17.3518 dBm(0.0184 mW)7、查看某个ONU配置LY-JT-OLT.MAN.GCOM5600#show run onu 0/1/1![ONUMNT]onu 0/1/1onu-binding mac 00:0a:5a:22:7f:adonu-binding type 04g2onu-description dongyuanxiaoqu5#onu-port-isolation ethernet 0/1 to ethernet 0/4onu-vlan-mode tag vlan 702interface pon 0/0exitinterface ethernet 0/1exitinterface ethernet 0/2exitinterface ethernet 0/3exitinterface ethernet 0/4exitexit查看该ONU的光功率LY-JT-OLT.MAN.GCOM5600(onu-0/1/1)#show onu-opm-diagnosisONU: 0/1/1Optical Transceiver Diagnosis :Work Temperature : 53 CSupply Voltage(Vcc) : 3.24 VTX Bias Current : 18 mATX Power(Output) : 1.4556 mW (1.6304 dBm)RX Power(Input) : 0.0090 mW (-20.4576 dBm)8、配置ONULY-JT-OLT.MAN.GCOM5600#configure terminalLY-JT-OLT.MAN.GCOM5600(config)#onu 0/1/1LY-JT-OLT.MAN.GCOM5600(onu-0/1/1)#onu-description dongyuanxiaoqu5# --ONU描述LY-JT-OLT.MAN.GCOM5600(onu-0/1/1)#onu-vlan-mode tag vlan 702 ----ONU4个口端口配置同一VLANLY-JT-OLT.MAN.GCOM5600(onu-0/1/1)#no onu-binding 删除onuLY-JT-OLT.MAN.GCOM5600(onu-0/1/1)interface ethernet 0/1LY-JT-OLT.MAN.GCOM5600(onu-0/1/1-reth-0/1)onu-vlan-mode tag vlan 702 配置单个端口LY-JT-OLT.MAN.GCOM5600(config)#exit --退出配置模式LY-JT-OLT.MAN.GCOM5600#9、查看OLT当前配置LY-JT-OLT.MAN.GCOM5600#show run!LanSwitch BuildRun(NGBN Platform)enableconfigure terminal![EPON]![VLAN]interface range ethernet 0/1switchport mode trunkexitvlan 10description vlanin8505exitvlan 1180description QuLongLu-WeiMeiBinGuangexitvlan 200,322,378-379,400,477,702,713,722,726-727,745,1500exit![DEVICE]interface pon 0/1switchport hybrid tagged vlan 702,1180exitinterface pon 0/2switchport hybrid tagged vlan 378-379,702,745,1500....press ENTER to next line, CTRL_C to break, other key to next page....10、保存配置LY-JT-OLT.MAN.GCOM5600#copy running-config startup-config Startup config in flash will be updated, are you sure(y/n)? [n]yBuilding, please wait...Update startup config successfully.onu-p2p 取消隔离。
