美国形位公差标注规定及意义(中英文对照)
形位公差中英对照及图示

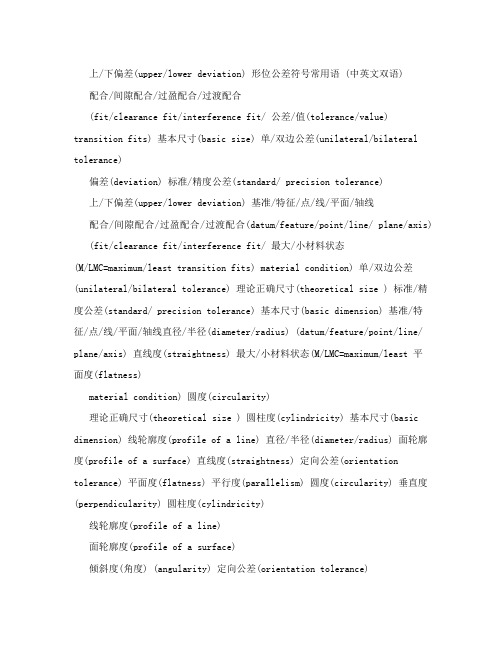
1, 形位公差符号常用语(中英文双语)公差/值(tolerance/value)基本尺寸(basic size)偏差(deviation)上/下偏差(upper/lower deviation)配合/间隙配合/过盈配合/过渡配合(fit/clearance fit/interference fit/ transition fits) 单/双边公差(unilateral/bilateral tolerance)标准/精度公差(standard/ precision tolerance)基准/特征/点/线/平面/轴线(datum/feature/point/line/ plane/axis)最大/小材料状态(M/LMC=maximum/least material condition)理论正确尺寸(theoretical size )基本尺寸(basic dimension)直径/半径(diameter/radius)直线度(straightness)平面度(flatness)圆度(circularity)圆柱度(cylindricity)线轮廓度(profile of a line)面轮廓度(profile of a surface)定向公差(orientation tolerance)平行度(parallelism)垂直度(perpendicularity)倾斜度(角度) (angularity)位置度(position)对称度(symmetry)同轴度(同心度) (concentricity)圆跳动(circular runout)全跳动(total runout)坐标尺寸(coordinate dimensioning)几何尺寸(geometric dimensioning)更多外语资料,尽在拔模斜度(draft angle)分型线(parting line)外圆角/内圆角拔模斜度(rounds/fillets draft)肋材和尖角(rib and corner)顶/测/端视图(top/side/ end view)[标题] 12. 形位公差符号常用语(中英文双语)公差/值(tolerance/value)基本尺寸(basic size)偏差(deviation)上/下偏差(upper/lower deviation)配合/间隙配合/过盈配合/过渡配合(fit/clearance fit/interference fit/ transition fits) 单/双边公差(unilateral/bilateral tolerance)标准/精度公差(standard/ precision tolerance)基准/特征/点/线/平面/轴线(datum/feature/point/line/ plane/axis)最大/小材料状态(M/LMC=maximum/least material condition)理论正确尺寸(theoretical size )基本尺寸(basic dimension)直径/半径(diameter/radius)直线度(straightness)平面度(flatness)圆度(circularity)圆柱度(cylindricity)线轮廓度(profile of a line)面轮廓度(profile of a surface)定向公差(orientation tolerance)平行度(parallelism)垂直度(perpendicularity) Language 倾斜度(角度) (angularity)位置度(position)对称度(symmetry)同轴度(同心度) (concentricity)圆跳动(circular runout)全跳动(total runout)坐标尺寸(coordinate dimensioning)几何尺寸(geometric dimensioning)拔模斜度(draft angle)分型线(parting line)外圆角/内圆角拔模斜度(rounds/fillets draft)肋材和尖角(rib and corner)顶/测/端视图(top/side/ end view)2标准变化情况:GB 1182-80代替GB 1182-74GB/T 1182-96 《形状和位置公差 通则、定义、符号和图样表示法》代替GB 1182-80《形状和位置公差 代号及其注法》 ≌ISO 1101GB 1183-80 《形状和位置公差 术语和定义》 ≌ISO 1101增加GB 13319-91《形状和位置公差 位置度公差》代替GB 1184-80附录二GB/T 16671-1996《形状和位置公差 最大实体要求、最小实体要求、可逆要求》≌ISO 2692:1996 3 分类ISO : GB1)形状公差 形状公差、无基准要求 2)轮廓公差 形状或位置公差、有或无基准要求 3)定向公差 位置公差、有基准要求 4)定位公差 位置公差、有基准要求 5)跳动公差 位置公差、有基准要求4,形位公差意义形状公差直线度 直线度是表示零件上的直线要素实际形状保持理想直线的状况。
形位公差符号常用语(中英文双语)
上/下偏差(upper/lower deviation) 形位公差符号常用语 (中英文双语)配合/间隙配合/过盈配合/过渡配合(fit/clearance fit/interference fit/ 公差/值(tolerance/value)transition fits) 基本尺寸(basic size) 单/双边公差(unilateral/bilateral tolerance)偏差(deviation) 标准/精度公差(standard/ precision tolerance)上/下偏差(upper/lower deviation) 基准/特征/点/线/平面/轴线配合/间隙配合/过盈配合/过渡配合(datum/feature/point/line/ plane/axis) (fit/clearance fit/interference fit/ 最大/小材料状态(M/LMC=maximum/least transition fits) material condition) 单/双边公差(unilateral/bilateral tolerance) 理论正确尺寸(theoretical size ) 标准/精度公差(standard/ precision tolerance) 基本尺寸(basic dimension) 基准/特征/点/线/平面/轴线直径/半径(diameter/radius) (datum/feature/point/line/ plane/axis) 直线度(straightness) 最大/小材料状态(M/LMC=maximum/least 平面度(flatness)material condition) 圆度(circularity)理论正确尺寸(theoretical size ) 圆柱度(cylindricity) 基本尺寸(basic dimension) 线轮廓度(profile of a line) 直径/半径(diameter/radius) 面轮廓度(profile of a surface) 直线度(straightness) 定向公差(orientation tolerance) 平面度(flatness) 平行度(parallelism) 圆度(circularity) 垂直度(perpendicularity) 圆柱度(cylindricity)线轮廓度(profile of a line)面轮廓度(profile of a surface)倾斜度(角度) (angularity) 定向公差(orientation tolerance)位置度(position) 平行度(parallelism)对称度(symmetry) 垂直度(perpendicularity)同轴度(同心度) (concentricity) 倾斜度(角度) (angularity)圆跳动(circular runout) 位置度(position)全跳动(total runout) 对称度(symmetry)坐标尺寸(coordinate dimensioning) 同轴度(同心度) (concentricity)几何尺寸(geometric dimensioning) 圆跳动(circular runout)拔模斜度(draft angle) 全跳动(total runout)分型线(parting line) 坐标尺寸(coordinate dimensioning)外圆角/内圆角拔模斜度(rounds/fillets draft) 拔模斜度(draft angle) 肋材和尖角(rib and corner) 分型线(parting line)顶/测/端视图(top/side/ end view) 外圆角/内圆角拔模斜度(rounds/fillets draft)肋材和尖角(rib and corner) 顶/测/端视图(top/side/ end view) 标题] 12. 形位公差符号常用语 (中英文双语) 公差/值(tolerance/value) properties 基本尺寸(basic size)偏差(deviation)游泳待四、容易拼写错的数字 14. tear (tore, torn) 撕9. discover—discovery发4. twelfth第十二5. twentieth碎 16.wear( wore; 现 10. bury—burial埋葬第二十 worn) 穿/戴 11. conclude—conclusion 得出结四、亲属称呼17.hold (held, 论 12. arrive—arrival 到达2. niece (女性晚辈)3. nephew (男held ) 18.make 13. weigh—weight 重性晚辈) 4. cousin (同辈兄弟姐妹) 5.(made, made) 量 14. 五、以下动词加-ed 或-ing要双写最19. keep (kept, kept) describe—description 描述后一个字母七、意思相近的词 15. lose—loss 损失 16. 1. regret (regretted, regretting) 1. check (核对)/ examine(检anxious---anxiety 焦虑后悔 3. admit (admitted, 查)/ test(测试) 十二、注意形容词变副词时的拼写变admitting) 承认 4. occur 2. receive(收到) / accept(接化(occurred, occurring) 出现受) 1. beautiful美丽的5. prefer (preferred, preferring) 3. destroy (毁坏;毁灭)/ damage—beautifully 2. possible可宁愿 6. refer (referred, (破坏) 能的—possibly referring) 提到 4. celebrate(庆祝)/ congratulate3. practical实际的7. forget (forgetting ) 忘(祝贺) —practically 4. particular记 8. permit 5. wear sth / dress sb 穿衣特别的—particularly (permitted, permitting)允许八、注意形容词变名词时的拼写变化 5. successful成功的9. equip (equipped, equipping) 装1. long—length 长度2. —successfully 备 wide—width 宽度3. high—height 十三、其它必背单词注意:quarrel, signal, travel中的高度 1. abroad 国外 2. absence n. 缺l可双写(英国英语)也可不双写(美4. strong—strength力量席 (absent adj.) 3. accept 接国英语) 九、以-ic结尾的动词,应先把-ic变受)六、部分过去式和过去分词不规则变为-ick,再加ing或ed 4. accident事故 (accidental adj. 化的动词 1. picnic (picnicked, picnicking) 偶然的,accidentally adv. 偶然地) 1. broadcast (broadcast, broadcast) 野餐 5. achievement成就 (achieve v. 获广播 2. flee (fled, fled) 逃十、个别名词的复数拼写得) 6. address地址 7. 跑 1. German (Germans) 德国人 2. gulf admire钦佩3. forbid (forbade, forbidden) 禁(gulfs) 海湾 3. handkerchief 8.admit承止 4. forgive (forgave, (handkerchiefs) 手帕roof (roofs) 认(admitted) 9. forgiven) 原谅房顶 agreement 协议 5. freeze (froze, frozen) 结冰 4. hero (英雄),potato (土豆),10. agriculture农业 6. hang (作“绞死”讲,是规则的;tomato (西红柿) 等有生命的以-o结(agricultural adj. 农业作“悬挂”讲,其过去式过去分词都尾的名词变复数时要加-es。
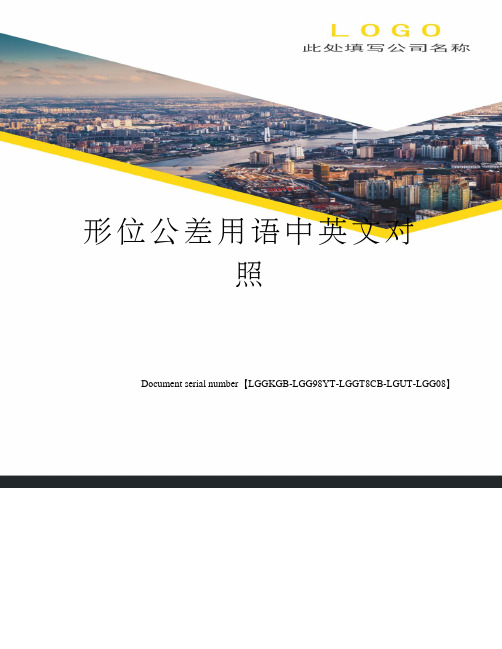
形位公差用语中英文对照

公差/值(tolerance/value)基本尺寸(basic size)偏差(deviation)上/下偏差(upper/lower deviation)配合/间隙配合/过盈配合/过渡配合(fit/clearance fit/interference fit/ transition fits) 单/双边公差(unilateral/bilateral tolerance)标准/精度公差(standard/ precision tolerance)基准/特征/点/线/平面/轴线(datum/feature/point/line/ plane/axis)最大/小材料状态(M/LMC=maximum/least material condition)理论正确尺寸(theoretical size )基本尺寸(basic dimension)直径/半径(diameter/radius)直线度(straightness)平面度(flatness)圆度(circularity)圆柱度(cylindricity)线轮廓度(profile of a line)面轮廓度(profile of a surface)定向公差(orientation tolerance)平行度(parallelism)垂直度(perpendicularity)倾斜度(角度) (angularity)位置度(position)对称度(symmetry)同轴度(同心度) (concentricity)圆跳动(circular runout)全跳动(total runout)坐标尺寸(coordinate dimensioning)拔模斜度(draft angle)分型线(parting line)外圆角/内圆角拔模斜度(rounds/fillets draft) 肋材和尖角(rib and corner)顶/测/端视图(top/side/ end view)公差/值(tolerance/value)2基本尺寸(basic size)偏差(deviation)上/下偏差(upper/lower deviation)配合/间隙配合/过盈配合/过渡配合(fit/clearance fit/interference fit/ transition fits) 单/双边公差(unilateral/bilateral tolerance)标准/精度公差(standard/ precision tolerance)基准/特征/点/线/平面/轴线(datum/feature/point/line/ plane/axis)最大/小材料状态(M/LMC=maximum/least material condition)理论正确尺寸(theoretical size )基本尺寸(basic dimension)直径/半径(diameter/radius)直线度(straightness)平面度(flatness)圆度(circularity)圆柱度(cylindricity)线轮廓度(profile of a line)面轮廓度(profile of a surface)定向公差(orientation tolerance)平行度(parallelism)垂直度(perpendicularity)倾斜度(角度) (angularity)位置度(position)对称度(symmetry)同轴度(同心度) (concentricity)圆跳动(circular runout)全跳动(total runout)坐标尺寸(coordinate dimensioning)几何尺寸(geometric dimensioning)拔模斜度(draft angle)分型线(parting line)外圆角/内圆角拔模斜度(rounds/fillets draft) 肋材和尖角(rib and corner)顶/测/端视图(top/side/ end view)22。
形位公差用语中英文对照
形位公差用语中英文对照Document serial number【LGGKGB-LGG98YT-LGGT8CB-LGUT-LGG08】公差/值(tolerance/value)基本尺寸(basic size)偏差(deviation)上/下偏差(upper/lower deviation)配合/间隙配合/过盈配合/过渡配合(fit/clearancefit/interference fit/ transition fits)单/双边公差(unilateral/bilateral tolerance)标准/精度公差(standard/ precision tolerance)基准/特征/点/线/平面/轴线(datum/feature/point/line/ plane/axis)最大/小材料状态(M/LMC=maximum/least material condition) 理论正确尺寸(theoretical size ) 基本尺寸(basic dimension)直径/半径(diameter/radius)直线度(straightness)平面度(flatness)圆度(circularity)圆柱度(cylindricity)线轮廓度(profile of a line)面轮廓度(profile of a surface) 定向公差(orientation tolerance) 平行度(parallelism)垂直度(perpendicularity)倾斜度(角度) (angularity)位置度(position)对称度(symmetry)同轴度(同心度) (concentricity)圆跳动(circular runout)全跳动(total runout)坐标尺寸(coordinate dimensioning)拔模斜度(draft angle)分型线(parting line)外圆角/内圆角拔模斜度(rounds/fillets draft) 肋材和尖角(rib and corner)顶/测/端视图(top/side/ end view)公差/值(tolerance/value)基本尺寸(basic size)偏差(deviation)上/下偏差(upper/lower deviation)配合/间隙配合/过盈配合/过渡配合(fit/clearance fit/interference fit/ transition fits)单/双边公差(unilateral/bilateral tolerance) 标准/精度公差(standard/ precision tolerance)基准/特征/点/线/平面/轴线(datum/feature/point/line/ plane/axis)最大/小材料状态(M/LMC=maximum/least material condition) 理论正确尺寸(theoretical size )基本尺寸(basic dimension)直径/半径(diameter/radius)直线度(straightness)平面度(flatness)圆度(circularity)圆柱度(cylindricity)线轮廓度(profile of a line) 面轮廓度(profile of a surface)定向公差(orientation tolerance) 平行度(parallelism)垂直度(perpendicularity)倾斜度(角度) (angularity)位置度(position)对称度(symmetry)同轴度(同心度) (concentricity)圆跳动(circular runout)全跳动(total runout)坐标尺寸(coordinate dimensioning)几何尺寸(geometric dimensioning) 拔模斜度(draft angle)分型线(parting line) 外圆角/内圆角拔模斜度(rounds/fillets draft) 肋材和尖角(rib and corner)顶/测/端视图(top/side/ end view)。
形位公差符号常用语 (中英文双语)
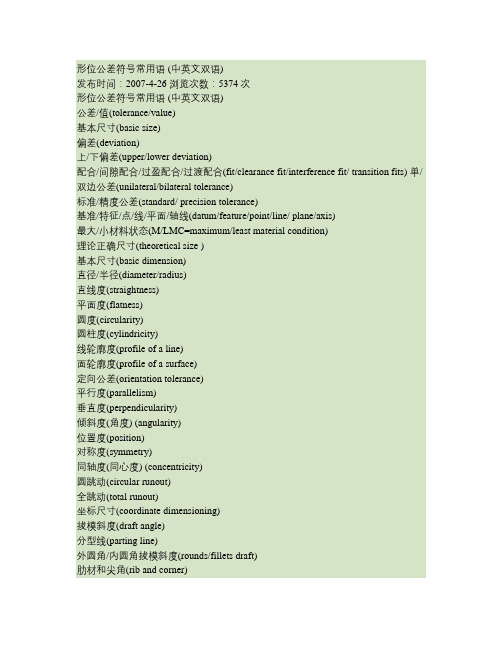
形位公差符号常用语 (中英文双语)发布时间:2007-4-26 浏览次数:5374次形位公差符号常用语 (中英文双语)公差/值(tolerance/value)基本尺寸(basic size)偏差(deviation)上/下偏差(upper/lower deviation)配合/间隙配合/过盈配合/过渡配合(fit/clearance fit/interference fit/ transition fits) 单/双边公差(unilateral/bilateral tolerance)标准/精度公差(standard/ precision tolerance)基准/特征/点/线/平面/轴线(datum/feature/point/line/ plane/axis)最大/小材料状态(M/LMC=maximum/least material condition)理论正确尺寸(theoretical size )基本尺寸(basic dimension)直径/半径(diameter/radius)直线度(straightness)平面度(flatness)圆度(circularity)圆柱度(cylindricity)线轮廓度(profile of a line)面轮廓度(profile of a surface)定向公差(orientation tolerance)平行度(parallelism)垂直度(perpendicularity)倾斜度(角度) (angularity)位置度(position)对称度(symmetry)同轴度(同心度) (concentricity)圆跳动(circular runout)全跳动(total runout)坐标尺寸(coordinate dimensioning)拔模斜度(draft angle)分型线(parting line)外圆角/内圆角拔模斜度(rounds/fillets draft)肋材和尖角(rib and corner)顶/测/端视图(top/side/ end view)标题] 12. 形位公差符号常用语 (中英文双语)公差/值(tolerance/value)基本尺寸(basic size)偏差(deviation)上/下偏差(upper/lower deviation)配合/间隙配合/过盈配合/过渡配合(fit/clearance fit/interference fit/ transition fits) 单/双边公差(unilateral/bilateral tolerance)标准/精度公差(standard/ precision tolerance)基准/特征/点/线/平面/轴线(datum/feature/point/line/ plane/axis) 最大/小材料状态(M/LMC=maximum/least material condition) 理论正确尺寸(theoretical size )基本尺寸(basic dimension)直径/半径(diameter/radius)直线度(straightness)平面度(flatness)圆度(circularity)圆柱度(cylindricity)线轮廓度(profile of a line)面轮廓度(profile of a surface)定向公差(orientation tolerance)平行度(parallelism)垂直度(perpendicularity)字串6倾斜度(角度) (angularity)位置度(position)对称度(symmetry)同轴度(同心度) (concentricity)圆跳动(circular runout)全跳动(total runout)坐标尺寸(coordinate dimensioning)几何尺寸(geometric dimensioning)拔模斜度(draft angle)分型线(parting line)外圆角/内圆角拔模斜度(rounds/fillets draft)肋材和尖角(rib and corner)顶/测/端视图(top/side/ end view)。
形位公差用语中英文对照
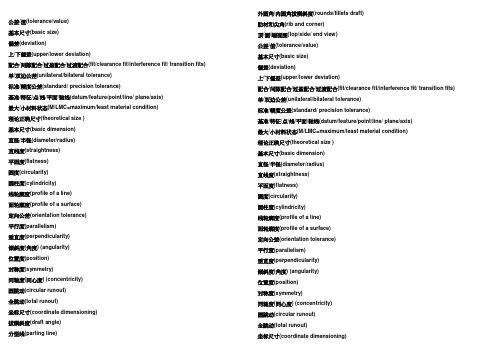
公差/值(tolerance/value)基本尺寸(basic size)偏差(deviation)上/下偏差(upper/lower deviation)配合/间隙配合/过盈配合/过渡配合(fit/clearance fit/interference fit/ transition fits) 单/双边公差(unilateral/bilateral tolerance)标准/精度公差(standard/ precision tolerance)基准/特征/点/线/平面/轴线(datum/feature/point/line/ plane/axis)最大/小材料状态(M/LMC=maximum/least material condition)理论正确尺寸(theoretical size )基本尺寸(basic dimension)直径/半径(diameter/radius)直线度(straightness)平面度(flatness)圆度(circularity)圆柱度(cylindricity)线轮廓度(profile of a line)面轮廓度(profile of a surface)定向公差(orientation tolerance)平行度(parallelism)垂直度(perpendicularity)倾斜度(角度) (angularity)位置度(position)对称度(symmetry)同轴度(同心度) (concentricity)圆跳动(circular runout)全跳动(total runout)坐标尺寸(coordinate dimensioning)拔模斜度(draft angle)分型线(parting line) 外圆角/内圆角拔模斜度(rounds/fillets draft)肋材和尖角(rib and corner)顶/测/端视图(top/side/ end view)公差/值(tolerance/value)基本尺寸(basic size)偏差(deviation)上/下偏差(upper/lower deviation)配合/间隙配合/过盈配合/过渡配合(fit/clearance fit/interference fit/ transition fits) 单/双边公差(unilateral/bilateral tolerance)标准/精度公差(standard/ precision tolerance)基准/特征/点/线/平面/轴线(datum/feature/point/line/ plane/axis)最大/小材料状态(M/LMC=maximum/least material condition)理论正确尺寸(theoretical size )基本尺寸(basic dimension)直径/半径(diameter/radius)直线度(straightness)平面度(flatness)圆度(circularity)圆柱度(cylindricity)线轮廓度(profile of a line)面轮廓度(profile of a surface)定向公差(orientation tolerance)平行度(parallelism)垂直度(perpendicularity)倾斜度(角度) (angularity)位置度(position)对称度(symmetry)同轴度(同心度) (concentricity)圆跳动(circular runout)全跳动(total runout)坐标尺寸(coordinate dimensioning)几何尺寸(geometric dimensioning) 拔模斜度(draft angle)分型线(parting line) 外圆角/内圆角拔模斜度(rounds/fillets draft) 肋材和尖角(rib and corner)顶/测/端视图(top/side/ end view)。
形位公差中英文对照
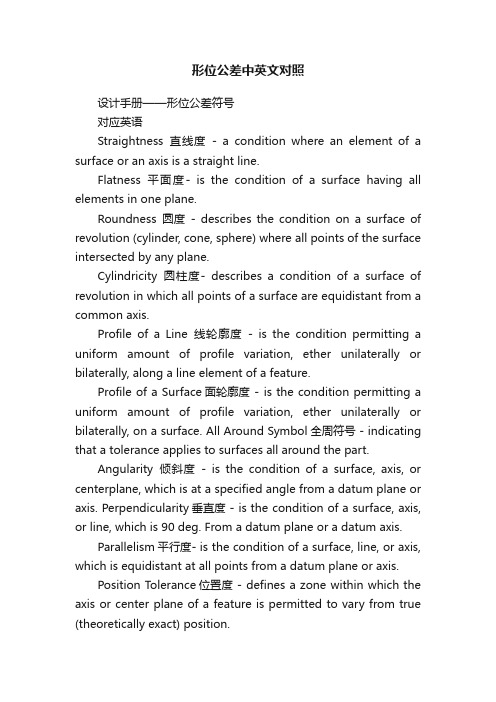
形位公差中英文对照设计手册——形位公差符号对应英语Straightness直线度- a condition where an element of a surface or an axis is a straight line.Flatness平面度- is the condition of a surface having all elements in one plane.Roundness圆度- describes the condition on a surface of revolution (cylinder, cone, sphere) where all points of the surface intersected by any plane.Cylindricity圆柱度- describes a condition of a surface of revolution in which all points of a surface are equidistant from a common axis.Profile of a Line线轮廓度- is the condition permitting a uniform amount of profile variation, ether unilaterally or bilaterally, along a line element of a feature.Profile of a Surface面轮廓度 - is the condition permitting a uniform amount of profile variation, ether unilaterally or bilaterally, on a surface. All Around Symbol全周符号 - indicating that a tolerance applies to surfaces all around the part.Angularity倾斜度- is the condition of a surface, axis, or centerplane, which is at a specified angle from a datum plane or axis. Perpendicularity垂直度 - is the condition of a surface, axis, or line, which is 90 deg. From a datum plane or a datum axis.Parallelism平行度- is the condition of a surface, line, or axis, which is equidistant at all points from a datum plane or axis.Position Tolerance位置度 - defines a zone within which the axis or center plane of a feature is permitted to vary from true (theoretically exact) position.Concentricity同轴度 - describes a condition in which two or more features , in any combination, have a common axis.Symmetry对称度- is a condition in which a feature (or features) is symmetrically disposed about the center plane of a datum feature. Runout圆跳动- is the composite deviation from the desired form of a part surface of revolution through on full rotation (360 deg) of the part on a datum axis.Total Runout全跳动 - is the simultaneous composite control of all elements of a surface at all circular and profile measuring positions as the part is rotated through 360.Maximum Material Condition (MMC) 最大实体要求- is that condition of a part feature wherein it contains the maximum amount ofmaterial within the stated limits of size. That is: minimum hole size and maximum shaft size.Least Material Condition (LMC)最小实体要求- implies that condition of a part feature of size wherein it contains the least (minimum) amount of material, examples, largest hole size and smallest shaft size. It isopposite to maximum material condition.Regardless Of Feature Size (RFS) - the condition where the tolerance of form, runout or location must be met irrespective of where the feature lies within its size tolerance.Projected T olerance Zone延伸公差带- applies to a hole in which a pin, stud, screw, etc., is to be inserted. It controls the perpendicularity of the hole to the extent of the projection from the hole and as it relates to the mating part clearance. The projected tolerance zone extends above the surface of the part to the functional length of the pin, stud, and screw relative to its assembly with the mating part.Tangent Plane相切面- indicating a tangent plane is shown. The symbol is placed in the feature control frame following the stated tolerance.Free State Variations自由状态变形 - is a term used to describe distortion of a part after removal of forces applied during manufacture. Diameter直径- indicates a circular feature when used on the field of a drawing or indicates that the tolerance is diametrical when used in a feature control frame.Basic Dimension基本尺寸 - used to describe the exact size, profile, orientation or location of a feature. A basic dimension is always associated with a feature control frame or datum target. (Theoretically exact dimension in ISO)Reference Dimension参考尺寸- a dimension usually without tolerance,used for information purposes only. It does not govern production or inspection operations. (Auxiliary dimension in ISO) Datum Feature参考特征- is the actual component feature used to establish a datum.Dimension Origin尺寸源- Signifies that the dimension originates from the plane established by the shorter surface and dimensional limits apply to the other surface.Feature Control Frame公差控制框- is a rectangular box containing the geometric characteristics symbol, and the form, runout or location tolerance. If necessary, datum references and modifiers applicable to the feature or the datums are also contained in the box.Conical Taper - is used to indicate taper for conical tapers. This symbol is always shown with the vertical leg to the left.Slope坡度- is used to indicate slope for flat tapers. This symbol is always shown with the vertical leg to the left.Counterbore/Spotface沉孔- is used to indicate a counterbore or a spotface. The symbol precedes the dimension of the counterbore or spotface, with no spaceCountersink埋头孔 - is used to indicate a countersink. The symbol precedes the dimensions of the countersink with no space.Depth/Deep深度- is used to indicate that a dimension applies to thedepth of a feature. This symbol precedes the depth value with no space in between.Square - is used to indicate that a single dimension applies to a square shape. The symbol precedes the dimension with no space between. Number of Places位置数量- the X is used along with a value to indicate the number of times a dimension or feature is repeated on the drawing.Arc Length弧长- indicating that a dimension is an arc length measured on a curved outline. The symbol is placed above the dimension.Radius半径- creates a zone defined by two arcs (the minimum and maximum radii). The part surface must lie within this zone.Spherical Radius球半径 - precedes the value of a dimension or tolerance.Spherical Diameter球直径- shall precede the tolerance value where the specified tolerance value represents spherical zone. Also, a positional tolerance may be used to control the location of a spherical feature relative to other features of a part. The symbol for spherical diameter precedes the size dimension of the feature and the positional tolerance value, to indicate a spherical tolerance zone.Controlled Radius可控半径 - creates a tolerance zone defined by two arcs (the minimum and maximum radii) that are tangent to the adjacent surfaces. Where a controlled radius is specified, the part contour within the crescent-shaped tolerance zone must be a fair curve without flats orreversals. Additionally, radii taken at all points on the part contour shall neither be smaller than the specified minimum limit nor larger than the maximum limit.Between - to indicate that a profile tolerance applies to several contiguous features, letters may designate where the profile tolerance begins and ends. These letters are referenced using the between symbol (since 1994) or the word between on drawings made to earlier versions of the Standard.Statistical Tolerance统计公差- is the assigning of tolerances to related components of an assembly on the basis of sound statistics (such as the assembly tolerance is equal to the square root of the sum of the squares of the individual tolerances). By applying statistical tolerancing, tolerances of individual components may be increased or clearances between mating parts may be reduced. The increased tolerance or improved fit may reduce manufacturing cost or improve the product's performance, but shall only be employed where the appropriate statistical process control will be used. Therefore, consideration should be given to specifying the required Cp and /or Cpk or other process performance indices。
英汉对照-形位公差

形位公差方面的翻译公差/值(tolerance/value)基本尺寸(basic size)偏差(deviation)上/下偏差(upper/lower deviation)配合/间隙配合/过盈配合/过渡配合(fit/clearance fit/interference fit/ transition fits) 单/双边公差(unilateral/bilateral tolerance)标准/精度公差(standard/ precision tolerance)基准/特征/点/线/平面/轴线(datum/feature/point/line/ plane/axis)最大/小材料状态(M/LMC=maximum/least material condition)理论正确尺寸(theoretical size )基本尺寸(basic dimension)直径/半径(diameter/radius)直线度(straightness)平面度(flatness)圆度(circularity)圆柱度(cylindricity)线轮廓度(profile of a line)面轮廓度(profile of a surface)定向公差(orientation tolerance)平行度(parallelism)垂直度(perpendicularity)倾斜度(角度) (angularity)位置度(position)对称度(symmetry)同轴度(同心度) (concentricity)圆跳动(circular runout)全跳动(total runout)坐标尺寸(coordinate dimensioning)拔模斜度(draft angle)分型线(parting line)外圆角/内圆角拔模斜度(rounds/fillets draft)肋材和尖角(rib and corner)顶/测/端视图(top/side/ end view)标题] 12. 形位公差符号常用语 (中英文双语)公差/值(tolerance/value)基本尺寸(basic size)偏差(deviation)上/下偏差(upper/lower deviation)配合/间隙配合/过盈配合/过渡配合(fit/clearance fit/interference fit/ transition fits) 单/双边公差(unilateral/bilateral tolerance)标准/精度公差(standard/ precision tolerance)基准/特征/点/线/平面/轴线(datum/feature/point/line/ plane/axis)最大/小材料状态(M/LMC=maximum/least material condition)理论正确尺寸(theoretical size )基本尺寸(basic dimension)直径/半径(diameter/radius)直线度(straightness)平面度(flatness)圆度(circularity)圆柱度(cylindricity)线轮廓度(profile of a line)面轮廓度(profile of a surface)定向公差(orientation tolerance)平行度(parallelism)垂直度(perpendicularity)字串6倾斜度(角度) (angularity)位置度(position)对称度(symmetry)同轴度(同心度) (concentricity)圆跳动(circular runout)全跳动(total runout)坐标尺寸(coordinate dimensioning)几何尺寸(geometric dimensioning)拔模斜度(draft angle)分型线(parting line)外圆角/内圆角拔模斜度(rounds/fillets draft) 肋材和尖角(rib and corner)顶/测/端视图(top/side/ end view)。
形位公差中英文对照

Symmetry…………………………………………………………………………………………………72 Conversion Chart……………………………………………………………………………………… 73 Surface Texture Definitions…………………………………………………………………………… 74 Surface Texture Symbols………………………………………………………………………………75 Surface Texture…………………………………………………………………………………………75 Conversion of Metric to Inch…………………………………………………………………………77
1
1
几何特性符号
使用参考基准 不用 公差类型 形状 直线度 平面度 圆度 圆柱度 有时用 常用 轮廓 方向 线轮廓度 面轮廓度 倾斜度 垂直度 平行度 位置 位置度 同轴度 对称度 跳动 圆跳动 全跳动
ALWAYS
Geometric Characteristic Symbols
符号
UOLERANCE FORM STRAIGHTNESS FLATNESS
CIRCULARITY (ROUNDNESS)
特性
CHARACTERISTIC
SYMBOL
CYLINDRICITY SOMETIMES PROFILE PROFILE OF A LINE FROFILE OF A SURFACE ORIENTATION ANGULARITY PERPENDICULARITY PARALLELISM LOCATION POSITION CONCENTRICITY SYMMETRY RUNOUT CIRCULAR RUNOUT TOTAL RUNOUT
形位公差中英文对照
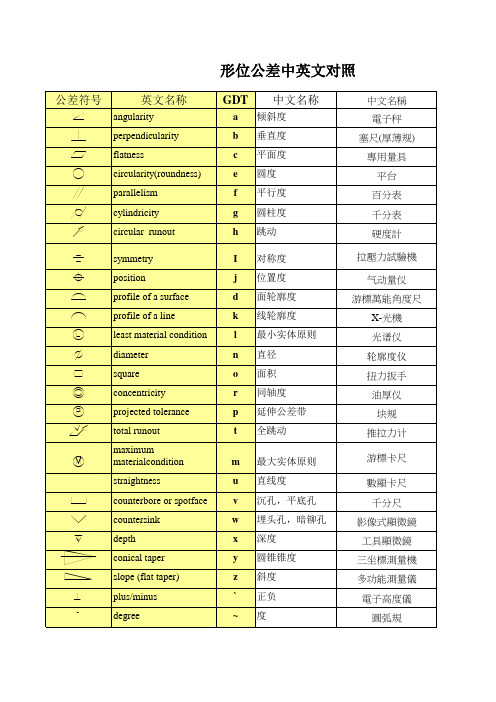
公差符号
a b c e f g h i j d k l n o r p t m u v w x y z ` ~ ^
英文名称
GDT
a b c e f g h I j d k l n o r p t m u v w x y z ` ~ ^
中文名称
倾斜度 垂直度 平面度 圆度 平行度 圆柱度 跳动 对称度 位置度 面轮廓度 线轮廓度 最小实体原则 直径 面积 同轴度 延伸公差带 全跳动 最大实体原则 直线度 沉孔,平底孔 埋头孔,暗铆孔 深度 圆锥锥度 斜度 正负 度 弧長 表面粗糙度
angularity perpendicularity flatness circularity(roundness) parallelism cylindricity circular runout symmetry position profile of a surface profile of a line least material condition diameter square concentricity projected tolerance total runout maximum materialcondition straightness counterbore or spotface countersink depth conical taper slope (flat taper) plus/minus degree arc length Rough
中文名稱 電子秤 塞尺(厚薄规) 專用量具 平台 百分表 千分表 硬度計 拉壓力試驗機 气动量仪 游標萬能角度尺 X-光機 光谱仪 轮廓度仪 扭力扳手 油厚仪 块规 推拉力计 游標卡尺 數顯卡尺 千分尺 影像式顯微鏡 工具顯微鏡 三坐標測量機 多功能測量儀 電子高度儀 圓弧規 針規 深度卡尺 螺紋塞規 目視 粗糙度儀 投影仪 Balance Thickness gage Special gage Platform Dial indicator
- 1、下载文档前请自行甄别文档内容的完整性,平台不提供额外的编辑、内容补充、找答案等附加服务。
- 2、"仅部分预览"的文档,不可在线预览部分如存在完整性等问题,可反馈申请退款(可完整预览的文档不适用该条件!)。
- 3、如文档侵犯您的权益,请联系客服反馈,我们会尽快为您处理(人工客服工作时间:9:00-18:30)。
4
Goeway eBooks
5
82
A note or specification on the drawing should explain how the part is restrained and the force required to facilitate the restraint. A sample note can be found on the drawing below. /
/
4
M5
A
5
Goeway eBooks
6
82
FEATURE CONTROL FRAME / A feature control frame states the requirements or instructions for the features to which it is attached. /
2
82
NUMBER OF PLACES / COUNTERBORE/SPOTFACE / COUNTERSINK/ DEPTH/DEEP/ SQUARE/ ALL AROUND/ DIMENSION NOT TO SCALE ARC LENGTH/ X BETWEEN/ SLOPE/ CONICAL TAPER/ ENVELOPE PRINCIPLE
Unless otherwise specified, all dimensioning and tolerancing applies in a Free State condition with no restraint. Some parts, such as sheet metal, thin metal, plastics and rubber are no rigid in nature. It may be necessary to specify design requirements on the part in a natural or Free State as well as in a restrained condition. The restraint or force on the nonrigid parts is usually applied in such a manner to resemble or approximate the functional or mating requirements. /
1
82
COMMON SYMBOLS/ Shown below are the most common symbols that are used with geometric tolerancing and other related dimensional requirements on engineering drawings. Note the comparison with the ISO standards. Most of the symbology is identical. There are a few symbols that are used in the ASME Y 14.5, 1994 standard that are being proposed for the ISO standards. The symbols marked with an “ x”are new or revised from the previous Y14.5M, 1982 standard. / ISO ASME Y 14.5, 1994 ISO “ x” Y14.5M, 1982 SYMBOL ASME Y14.5M ISO
Note: This is a change from the previous editions of the Y14.5 standard. The definition of the tolerance zone for the former term tangent radius, previously noted by the symbol R, is now meant to apply to a controlled radius (symbol CR). / Y14.5 R CR
FEATURE CONTROL FRAME DIAMETER/ SPHERICAL DIAMETER/ AT MAXIMUM MATERIAL CONDITION AT LEAST MATERIAL CONDITION REGARDLESS OF FEATURE SIZE PROJECTED TOLERANCE ZONE X X X X X FREE STATE/ TANGENT PLANE STATISTICAL TOLERANCE RADIUS/ CONTROLLED RADIUS / SPHERICAL RADIUS/ BASIC DIMENSION/ (theoretically exact dimension in ISO) ISO X DATUM FEATURE * DATUM TARGET TARGET POINT/ DIMENSION ORIGIN
REFERENCE DIMENDION/ (Auxiliary dimension in ISO) /ISO
NONE/
NONE/
(Proposed) NONE/ R CR SR R NONE/ SR
*
( 50 )
( 50 )
1
Goeway eBooks
ห้องสมุดไป่ตู้
If any of the part specifications are to be verified in a free state, the designer may specify this requirement with the words FREE STATE or the free state symbol. The free state symbol is a F in a circle. The free state symbol means that dimensions and tolerances that have the free state symbol applied are checked in the free state and not in the restrained condition. / F
The free state symbol is applied by placing it next to or associating it with the required dimensions and tolerances. If it is applied in a feature control frame, it always follows the feature tolerance and any modifiers.
8x
8x
NONE
NONE
NONE(implied)/
Note: * May be filled or not filled/ RADIUS, CONTROLLED RADIUS/
*
There are two types of radii tolerance that can be applied, the radius and controlled radius. The radius (R) tolerance is for general applications. The controlled radius (CR) is used when it is necessary to place further restrictions on the shape of the radius, as in high stress applications. / R (CR)
Statistical tolerancing is the assignment of tolerances to related components of an assembly on the basis of sound statistics. An example is: the assembly tolerance is equal to the square root of the sum of the squares of the individual tolerances. /
3
Goeway eBooks
4
82
Note:/ FEATURES IDENTIFIED AS STATISTICALLY TOLERANCED SHALL BE PRODUCED WITH
STATISTICAL PROCESS CONTROLS, OR TO THE MORE RESTRICTIVE ARITHMETIC LIMITS. / In some cases, it may be desirable to state only the statistical tolerance and the arithmetic number will not be shown. In this case, a note such as the following must be placed on the drawing. /
FEATURES IDENTIFIED AS STATISTICALLY TOLERANCED STATISTICAL PROCESS CONTROLS. /
SHALL BE PRODUCED WITH
For additional information on statistical tolerancing, see appropriate statistics or engineering design manuals. / NONRIGID PARTS-FREE STATE CONDITION/ -
