Garmin_Custom_Maps佳明自制卫星地图教程
Garmin GPSMAP 62s 用户手册说明书
CAUTION signals a hazard that may cause minor to moderate injury, if you do not follow recommendations.This guide uses INSTALLATION INSTRUCTIONSFOR JEEP REAR BUMPERSTJ P/N 61854, YJ P/N 61857,CJ P/N 61860NOTES: On some TJ and YJ models, it may be necessary to loosen the gas tank skid plate to allow for enough hand room to access the inner bolt hole locationsVI.INSTALLATION1.Remove the rear bumper from vehicle.·On TJ models, discard bumper and mounting hardware.·On YJ models, discard bumper and mounting hardware.·On CJ models, discard bumper and mounting hardware.2.Install new, Warn, rear bumper on vehicle.·On TJ models, use the supplied 3/8" bolts, lockwashers, and washers in all 8 mountinglocations. Torque 3/8" bolts to 35-38 ft lbs. Insert the two spacers, one on each side, between the bottom bumper tab and the bottom of the frame. Install the bottom bumper bolts, using the 2 supplied 7/16" bolts, lockwashers, and washers, torque 7/16" bolts to 42-45 ft lbs.INSTALLATION CONT.NOTE: Some TJ model vehicles may not have all 8 mounting locations on the rear framearea. If all 8 locations are not in the frame, measure the supplied bumper mounting points andSee Figure 1.match these measurements on the frame. Drill the frame holes to 7/16".·On YJ models, use the supplied 3/8" bolts, lockwashers, and washers in all 8 mounting locations. Torque 3/8" bolts to 35-38 ft lbs. Insert the two spacers, one on each side, between the bottom bumper tab and the bottom of the frame. Install the bottom bumper bolts, using the2 supplied 7/16" bolts, lockwashers, and washers, torque 7/16" bolts to 42-45 ft lbs.·On CJ models, use the supplied 3/8" bolts, lockwashers, and washers in all 8 mounting locations. Insert the four spacers between the frame surface and the bumper mountingsurface. It is necessary to space the bumper away from the frame for proper clearance.Torque 3/8" bolts to 35-38 ft lbs. Insert the two spacers, one on each side, between thebottom bumper tab and the bottom of the frame. Install the bottom bumper bolts, using the 2 supplied 7/16" bolts, lockwashers, and washers, torque 7/16" bolts to 42-45 ft lbs.© 2005 Copyright Warn Industries, Inc. All rights reserved.。
Garmin_Custom_Maps佳明自制卫星地图教程
佳明自制卫星地图教程Garmin Custom MapAuthor:ZhuoHwa本教程以谷歌地球(Google Earth)上面的北京故宫卫星图片为例,讲述自制地图的过程。
在使用自制地图之前,请将你的高明手持机的软件(固件)更新至最新版本。
步骤一:将谷歌地球卫星图片制作成JPEG(.jpg)图片。
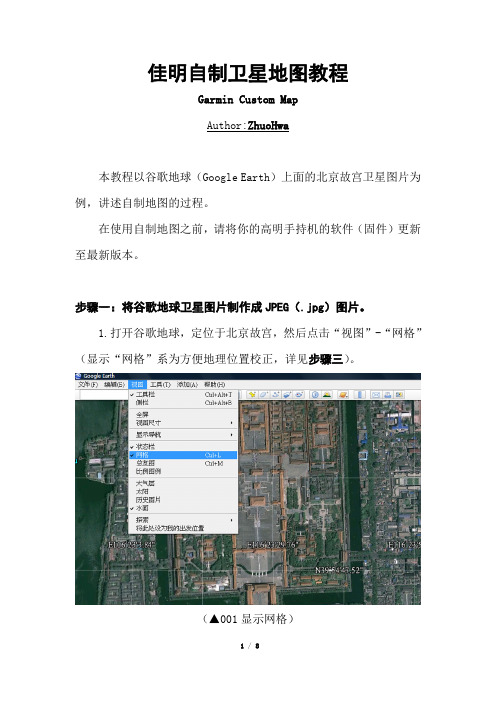
1.打开谷歌地球,定位于北京故宫,然后点击“视图”-“网格”(显示“网格”系为方便地理位置校正,详见步骤三)。
(▲001显示网格)2.通过点击“文件”-“保存”-“保存图像”,将带有网格线的北京故宫卫星图片任意命名后保存为.jpg图片。
(▲002保存图像)(▲003任意命名后保存为jpg图片)步骤二:添加“图像叠加层”。
1.保持谷歌地球的界面不变动,点“添加”-“图像叠加层”。
(▲004添加图像叠加层)2.在出现的“新建地图叠加层”小界面里,对加红圈的各项数据进行填写,其中“链接”项应指向步骤一已制作好的.jpg图片;“位置”项可暂时搁置不理;“绘图次序”项应将数值调至50或以上,以保障自制地图将来始终能显示在手持机地图之上层。
(▲005图像叠加层参数设置)步骤三:对.jpg图片进行地理定位。
1.保持“新建地图叠加层”小界面不关闭,然后用鼠标对叠加在谷歌地球卫星图片之上的.jpg图片进行吻合调整(即用鼠标拽动绿色框框进行上下、左右、大小、旋转等项调整)。
为减少误差,最好系让.jpg图片的网格线与谷歌地球卫星图片上原有的网格线尽量重合。
(▲006调整叠加层)2..jpg图片设置好地理位置后,点击“新建地图叠加层”的“确定”。
然后再点“文件”-“保存”-“将位置另存为”。
(▲007保存自制地图)3.将自制地图任意命名,并且保存为kmz文件。
(▲008保存为kmz文件)步骤四:在手持机上显示自制地图。
1.在手持机的Garmin文件夹项内,新设一文件夹“CustomMaps”,在“CustomMaps”文件夹内再设一文件夹“directory”,即:“/Garmin/CustomMaps/directory”。
garmin eTrex Legend GPS 使用说明书 中文版
eTrex Legend(中文)——传奇使用手册GPS新概念——真正的数字化生活中文输入功能完善超大内存面积计算人性化界面不得用于商业用途目录第一章:序言部分第二章:速查部分1.性能简介2.按键及功能介绍3.电池的安装4.显示屏背景光及对比度设置5.主页页面转换6.地图页面基本情况7.导航页面基本情况8.旅行计算机页面基本情况9.主菜单页面基本情况10.把当前位置标志为航路点11.改变航路点符号12.引导返回到您的起始点第三章:手册部分13.概述14.如何选择“关闭GPS”15.导航方式——概述16.地图页面概述17.地图页面选项概述18.使用移动光标概述19.停止导航20.数据区概述21.设置地图概述22.设置地图操作步骤23.导航页面概述24.设置导航页面操作步骤25.旅行计算机页面概述26.使用主菜单27.存点航路点页面概述28.创建航路点29.设计航路点不得用于商业用途30.查找菜单概述31.查找航路点概述32.查找操作步骤34.查找兴趣点概述37.创建和使用航线概述38.编辑航线39.编辑航路点40/41。
航线使用概述42.航线页面的数据区43.使用航迹概述44.航迹使用操作步骤45.设置页面概述46.单位页面概述47.显示页面概述48.接口页面概述49.系统页面概述50.工具概述51.日历概述52.打猎/捕鱼概述53.面积计算第四章:附录附录A:技术指标附录B:时差表附录C:配件附录D:数据接口附录E:简单故障维修不得用于商业用途第一章序言说明书介绍感谢您购买eTrex Legend(传奇)GPS接收机——我们不停努力的结果,为了可以使您的新型GPS接收机发挥最大的用途,并且了解所有的操作细节,您可以花些时间阅读一下本手册。
手册由四部分组成:一、序言部分二、速查部分介绍了一些Legend的细节、主要操作页面和基本导航方式三手册部分提供了使用Etrex Legend 的所有细节。
四、附录部分包括一些有关附件,说明书,维修向导,主题索引等方面的信息。
Garmin地理数据的提取及简单OZI等高线图的制作
Garmin 地理数据的提取及简单OZI 等高线图的制作一、常用的高程数据简介SRTM (Shuttle Radar Topography Mission ),由美国太空总署(NASA )和国防部国家测绘局(NIMA )联合测量。
2000年2月11日,美国发射的“奋进”号航天飞机上搭载SRTM 系统,共计进行了222小时23分钟的数据采集工作,获取北纬60度至南纬60度之间总面积超过1.19亿平方公里的雷达影像数据,覆盖地球80%以上的陆地表面。
SRTM 系统获取的雷达影像的数据量约9.8万亿字节,经过两年多的数据处理,制成了数字地形高程模型(DEM ),即现在的SRTM 地形产品数据。
此数据产品2003年开始公开发布,经历多修订,目前的数据修订版本为V4.1版本。
该版本由CIAT (国际热带农业中心)利用新的插值算法得到的SRTM 地形数据,此方法更好的填补了SRTM 90的数据空洞。
插值算法来自于Reuter et al.(2007),SRTM 地形数据按精度可以分为SRTM1和SRTM3,分别对应的分辨率精度为30米和90米数据(目前公开数据为90米分辨率的数据)。
Reflection Radiometer(AS-TER) Global Digital Elevation Model(GDEM)的缩写,即先进星载热发射和反射辐射仪全球数字高程模型,是由美国航空航天局( National Aeronau-tics and Space Administration ,简称NASA)与日本经济产业省(Minister of Economy, Trade and Industry ,简称METI)合作开发的新一代全球高程数据,于2009年6月30日向全球推出第1版本(ASTER GDEM V 1)数据。
ASTER GDEM 由22600个1°X 1°的分区数据组成,它包含了北纬83°到南纬83°之间的所有陆地区域,比以往任何地形图都要广得多,达到了地球陆地表面的99%,其高程精度为士20m ,平面精度为士30m 。
Garmin Mobile 高明2010最新版地图更新及安装方法(含破解)
Garmin Mobile 高明2010最新版地图更新及安装方法(含破解)2010.30版地图QSI版(需要破解,解锁码:2126 33)http://u.115.c om/file/f47448adab(去掉com 中间的空格)NT17版(适合手机,需要破解,解锁码同上)http://u.115.c om/file/f5bcf58134(去掉com中间的空格)基础图/zh-cn/download/59d36c5ae7a8bd4c4ea20c79a9d6f72d/gm apbmap%202010.30.rar需要把主图及基础图一起复制到手机内存卡garmin文件夹下才可以正常使用地图主图文件名为:gmapsupp.img 基础图文件名为gmapbmap.img前言:本帖提供的Garmin Mobile XT 5.00.60整合防飘文件、官方V4报警点正式版文件,并且无需修改文件内容、无需修改文件属性,替换、整合了一枚个人认为比较适合Garmin的蓝色车标,当然大家也可以自己下载本帖提供的个性化车标!整合一步到位,方便大家下载及使用!Garmin Mobile XT破解安装后进行导航完全免费,不用GPRS联网,所以不会产生任何费用!Garmin Mobile XT软件是全世界在导航界里排名第一的品牌Garmin Mobile XT刚推出时是配搭他们的接收器Garmin Mobile 10一起售卖的,软件必需要和硬件一起才能运作,不过最近推出的新版本开始可以使用其他的GPS接收器了,除了蓝牙接收器外也可以使用N85等的内置接收器,前题是先把软件解锁,外国的高手就着手破解这个软件了,最近一位叫JetMouse的兄弟成功制作出适合所有版本使用的注册程序,包括S60/UIQ3/PPC/SP版的Garmin Mobile XT也可以以他的程序来把软件解锁了!软件效果预览:下面切入正题注意:在正式安装Garmin之前,最好删除手机里面安装的第三方输入法,不然可能会导致程序的冲突如果你一定要使用第三方输入法,请确保输入法版本是最新版本如果是早期老版本的可能会造成无法使用Garmin或者不能正常使用Garmin 的部分功能!第一步:先下载要用的主程序、地图、解锁算号器1、主程序:Garmin Mobile XT5.00.60(已整合V4报警点文件、防飘文件、一枚汽车图标)Garmin Mobile XT5.00.60.part01.rar (2 MB)Garmin Mobile XT5.00.60.part02.rar (2 MB)Garmin Mobile XT5.00.60.part03.rar (2 MB)Garmin Mobile XT5.00.60.part04.rar (2 MB)Garmin Mobile XT5.00.60.part05.rar (2 MB)Garmin Mobile XT5.00.60.part06.rar (2 MB)Garmin Mobile XT5.00.60.part07.rar (2 MB)Garmin Mobile XT5.00.60.part08.rar (2 MB)Garmin Mobile XT5.00.60.part09.rar (1.53 MB)2、破解程序需要的算号器:garmin_kgen.rar (425.16 KB)3、最新V5版报警点文件:SpeedCameraV5_CHS.rar (589.36 KB)含有两个文件:China_SpeedCamera_CHS.gpi:测速信息文件China_TrafficPeccancyCamera_CHS.gpi:违章照相信息文件升级方法:将内存卡上Garmin--POI文件夹下面的所有文件删除,接着将此压缩包内的两个文件复制到内存卡上Garmin--POI文件夹里面4、Garmin Mobile XT使用手册GarminMobileXT使用手册.part1.rar (2 MB)GarminMobileXT使用手册.part2.rar (1.99 MB)5、地图文件:(包括最新2010.21版新地图及V6.6C老版地图,请大家自行选择)A、2010.21版新地图Garmin隆重推出2010年最新版地图,此版地图覆盖了全国2290个县级行政单位,其中2218个具有详细地图;可导航道路历程达到2350000公里;兴趣点总数超过804万。
Garmin手持式GPS等高线地图的制作教程
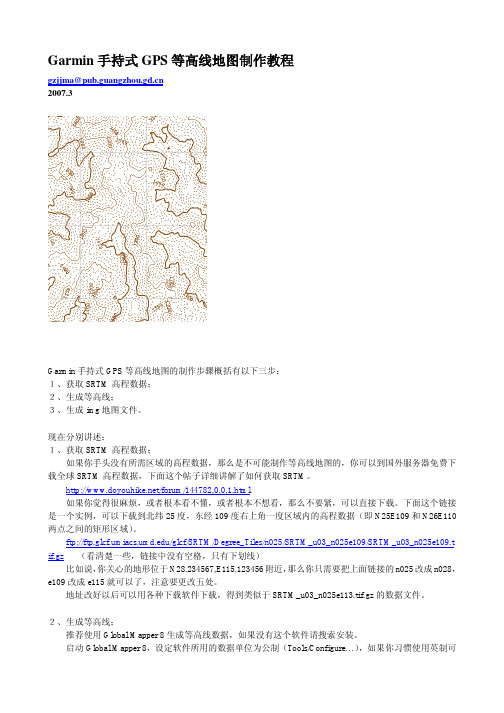
Garmin手持式GPS等高线地图制作教程gzjjma@2007.3Garmin手持式GPS等高线地图的制作步骤概括有以下三步:1、获取SRTM高程数据;2、生成等高线;3、生成img地图文件。
现在分别讲述:1、获取SRTM高程数据;如果你手头没有所需区域的高程数据,那么是不可能制作等高线地图的,你可以到国外服务器免费下载全球SRTM高程数据,下面这个帖子详细讲解了如何获取SRTM。
/forum/144782,0,0,1.html如果你觉得很麻烦,或者根本看不懂,或者根本不想看,那么不要紧,可以直接下载。
下面这个链接是一个实例,可以下载到北纬25度,东经109度右上角一度区域内的高程数据(即N25E109和N26E110两点之间的矩形区域)。
ftp:///glcf/SRTM/Degree_Tiles/n025/SRTM_u03_n025e109/SRTM_u03_n025e109.t if.gz(看清楚一些,链接中没有空格,只有下划线)比如说,你关心的地形位于N28.234567,E115.123456附近,那么你只需要把上面链接的n025改成n028,e109改成e115就可以了,注意要更改五处。
地址改好以后可以用各种下载软件下载,得到类似于SRTM_u03_n025e113.tif.gz的数据文件。
2、生成等高线;推荐使用Global Mapper 8生成等高线数据,如果没有这个软件请搜索安装。
启动Global Mapper 8,设定软件所用的数据单位为公制(Tools/Configure…),如果你习惯使用英制可以不必修改:打开SRTM_u03_n025e113.tif.gz:在File菜单中选择“Generate contours…”详细说一下各项设定,如果你没有特殊要求就可以使用默认设置,主要设置是:1)等高线间距;(在Contour Options选项卡/Contour Interval)2)简化系数;(在Simplification选项卡,往左拉动滑块可以增加细节)3)等高线数据边界;(在Contour Bounds选项卡,可以设定处理所有数据、可视部分数据、或者指定区域数据)一切设定好之后点击“确定”,等待一段时间等高线就生成完毕。
自制GARMIN路由地图
首先将分省mp文件从压缩包解压,这里我以内蒙古为例,解压并更名为05282058.mp文件。
2、用GPSMapEdit打开mp文件,选择菜单File>Map Properties选择标签Levels,选中列表中的Level1,点Remove,下一个Level会上移变为Level1,再点Remove直到只剩下Level0和一个Level1;3、选菜单Tools>Remove Object Duplicates点一下;4、选菜单Tools>Generate Routing Graph>Using Coinciding Nodes of Polylines点一下;5、选菜单Tools>Remove Routing Nodes;6、保存退出GPSMapEdit;7、把mp转为ERSI格式,在DOS状态输入命令:cgpsmapper shp 05282058.mp 然后要等一会儿,生成好多文件啊;8、DOS状态输入命令:maproute maproute.ini 39 还要等一会儿;9、打开mp.mp文件,修改ID=05282058及Name=routeNMG (名字你自己取)并保存到同一文件夹;10、现在可以正式编译了,DOS下输入命令:cgpsmapper ac mp.mp 这回可要等很久啊;11、打开pv.rar文件,解压pv.txt放在同一文件夹下,修改里面pv.txt的FileName,FID,MapsourceName,MapSetName,CDSetName等改成你的,最底下[Files]下的IMG=改为IMG=05282058.img;12、 DOS下输入命令:cpreview pv.txt 很快就建立了几个文件,留下routeNMG.reg,routeNMG.TDB 其他删除;13、用GPSMapEdit打开routeNMG.TDB,点选菜单File>Map Properties在Header标签填上ID:05282058,Name:内蒙古,再点Levels标签,点Insert Before建立两个Levels,双击列表中的Level0,Bits改为12,MapSource zoom range改为5,双击Level1,Bits改为11,MapSource zoom range改为6,完成后选菜单File>Save map as另存为routeNMG.mp文件;14、用记事本或其他文本编辑软件打开刚刚保存的routeNMG.mp,修改 Label=05282058.img 改为Label=0528205815、DOS下输入命令 cgpsmapper routeNMG.mp16、用记事本routeNMG.reg,修改"LOC","BMAP","TDB"的文件路径,完成后储存,再双击导入注册表;17、开启MapSource,你就可以看到列表中的routeNMG地图啦!18、进入nRoute,选两点模拟导航,可以看到已经能正确规划路线啦,呵呵。
OZI等高线地图制作方法及导航应用

(二)启动软件
点击“开始”菜单——点“资源管理器”——在 “我的设备”中选”Storage Card”——选择OZI 1231文件夹点击打开——找到OziExploreCE.exe(前 面有个放大镜的图标),点击它启动软件。
进入菜单选项的主界面(左下图),按箭头 就会轮换出现不同的功能界面,右图为地图界面。
1.找到需要优化地图所在的文件夹; 2.在需要优化的地图前面打上钩; 3.点击Convert Maps,开始压缩地图,完后就得到了 OZI格式地图(见下图红框)。
至此,一幅OZI等高线电子地图就基本制作完成了, 将其拷贝到OZI CE下的Maps文件夹即可定位、导航。 ★如果是Android(安卓)版的OZI,只要把“*.map”及 “*.ozf2”(*.ozfx3) 文件的中文名称改为相同的英文名称 放在同一目录里即可。
(三)基础地理信息
基础地理信息就是可加入地图的水系、道路、村 镇地名等矢量数据,这些矢量数据在网上都能找到, 我主要用的是 Garmin V7.01纠偏地图基础数据,这 个 数 据 可 以 去 小 熊 酷 生 活 网 站 下 载 。
下载解压后的文件是有几十个文件名诸如05283793.img的 文件组成,文件的扩展名是img,是高明地图的格式,要让其 在Global Mapper中变得可用,就需要提取其中的数据,并 另存为MP格式,以方便在Global Mapper里面打开。
6.再次弹出对话框,点击“确定”,OZI生成Map 地图文件,可以看到地图已经在OZI中显示出来了。
地图在OZI中显示出来:
(二)转换成OZI格式地图
OZI地图由2个文件构成,一个是“*.map”文件,保存的是地图定 位及坐标系等信息,另外一个是图像“*.ozf2”(*.ozfx3)文件,可以是 tif、bmp、jpg等图像格式,但如果图像较大的话,打开就会非常缓慢 (尤其是tif文件),因此我们对其进行优化压缩转成OZI的专用格式。
谷歌地球制作Garmin800导航线路
谷歌地球(Google Earth)制作Garmin edge 800导航线路
步骤:
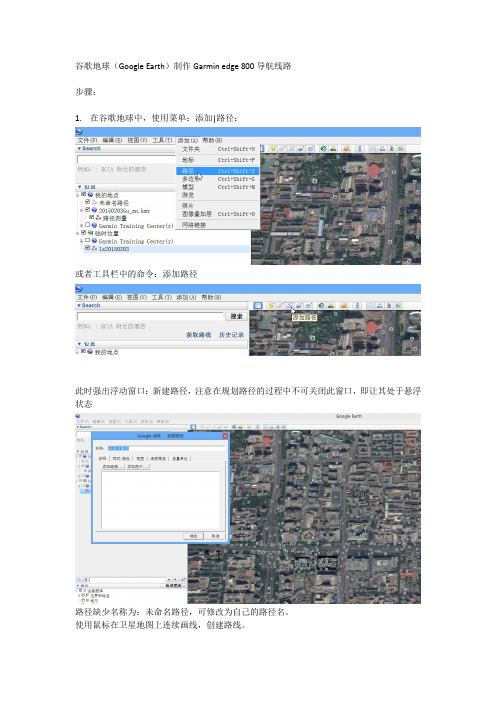
1.在谷歌地球中,使用菜单:添加|路径:
或者工具栏中的命令:添加路径
此时强出浮动窗口:新建路径,注意在规划路径的过程中不可关闭此窗口,即让其处于悬浮状态
路径缺少名称为:未命名路径,可修改为自己的路径名。
使用鼠标在卫星地图上连续画线,创建路线。
在新建路径窗口中,可调整路径的颜色和宽度
在新建路径窗口中,可设置度量单位为:公时
选定该路径,使用右键菜单:将位置另存为谷歌地图文件
格式为kmz或kml
打开garmin BaseCamp, 使用菜单:文件|导入至‘我的收藏’
选择文件类型为kmz或kml,将前面保存的路径文件导入到BaseCamp中。
在Garmin BaseCamp中,可对路线进行修改,如删除或增加航点等。
将Garmin 800码表连接电脑,然后选定该路径名称,使用菜单:设备|发送|将选择发送到设备
在室外,打开Garmin 800,使用命令:菜单|路线,选择并打开该路径,即可按路线导航了。
制作garmin分省地图
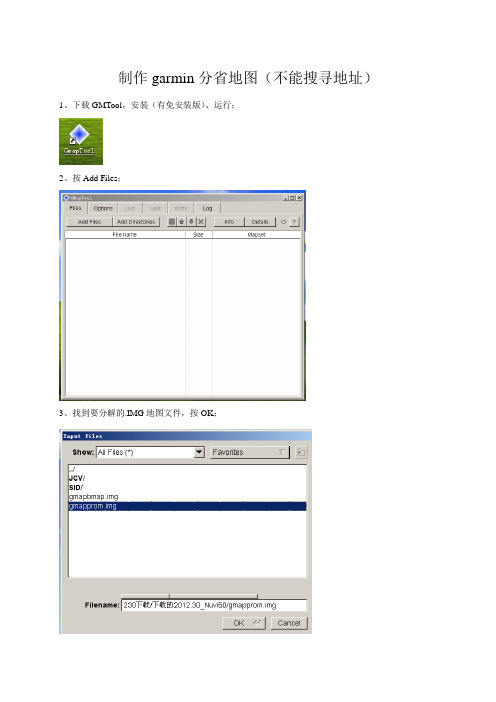
制作garmin分省地图(不能搜寻地址)1、下载GMTool,安装(有免安装版)、运行;
2、按Add Files;
3、找到要分解的.IMG地图文件,按OK;
4、按split后;
5、再按Directory
6、确定一个空的的文件夹后,按OK;
7、分解文件路径确定好后,按Split all;
8、分解后,关闭GMTool;
9、重新运行GmapTool;
10、按Add Files;
11、将前面分解得到文件全部加入后,按OK;
12、加入的文件全选;
13、Ctrl+鼠标左键将要保留的省、市、区地图改为不选;
14、按×,将被选的文件剔除;保留需要省、市、区地图文件,然后按Join;
15、按Output File
16、在Filename输入框内确定连接后的地图文件的名称和保存磁盘(G:/GMAPSUPP.IMG),然后按OK;
17、在Mapset name 输入框输入连接后的地图的名称和版本号,然后按Join all;
18、分省地图连接完成,关闭GmapTool;
19、看到了分省地图文件;
20、1.96G的全国地图,改为北京、天津、河北一省两市地图后不到83M。
21、问题,不能搜寻地址,
遗憾!!。
佳明导航安装多套地图的方法
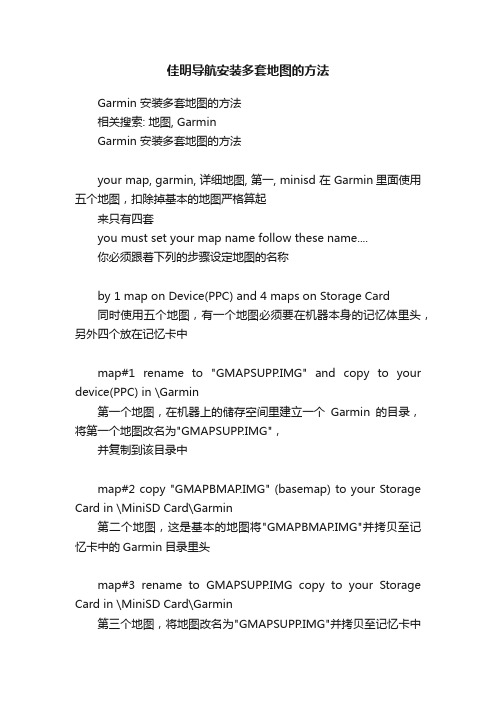
佳明导航安装多套地图的方法Garmin 安装多套地图的方法相关搜索: 地图, GarminGarmin 安装多套地图的方法your map, garmin, 详细地图, 第一, minisd 在 Garmin里面使用五个地图,扣除掉基本的地图严格算起来只有四套you must set your map name follow these name....你必须跟着下列的步骤设定地图的名称by 1 map on Device(PPC) and 4 maps on Storage Card同时使用五个地图,有一个地图必须要在机器本身的记忆体里头,另外四个放在记忆卡中map#1 rename to "GMAPSUPP.IMG" and copy to your device(PPC) in \Garmin第一个地图,在机器上的储存空间里建立一个Garmin的目录,将第一个地图改名为"GMAPSUPP.IMG",并复制到该目录中map#2 copy "GMAPBMAP.IMG" (basemap) to your Storage Card in \MiniSD Card\Garmin第二个地图,这是基本的地图将"GMAPBMAP.IMG"并拷贝至记忆卡中的Garmin目录里头map#3 rename to GMAPSUPP.IMG copy to your Storage Card in \MiniSD Card\Garmin第三个地图,将地图改名为"GMAPSUPP.IMG"并拷贝至记忆卡中的Garmin目录里头map#4 rename to GMAPSUP2.IMG copy to your Storage Card in \MiniSD Card\Garmin第四个地图,将地图改名为"GMAPSUP2.IMG "并拷贝至记忆卡中的Garmin目录里头map#5 rename to GMAPPROM.IMG copy to your Storage Card in \MiniSD Card\Garmin第五个地图,将地图改名为"GMAPPROM.IMG "并拷贝至记忆卡中的Garmin目录里头NOTE Filename.UNL copy to your Storage Card in \MiniSD Card\GarminEx:GMAPSUPP.UNL依各个不同的地图名称建立各别的".UNL"的文字档,并复制至记忆卡中的Garmin目录里头该文字档是存放地图序号用的。
Garmin GPSMAP 64st 用户手册说明书
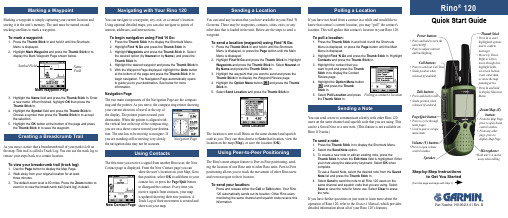
Marking a waypoint is simply capturing your current location and storing it in the unit’s memory. The unit must be turned on and tracking satellites to mark a waypoint.To mark a waypoint:1. Press the Thumb Stick In and hold it until the Shortcuts Menu is displayed.2. Highlight Mark Waypoint and press the Thumb Stick In todisplay the Mark Waypoint Page shown below.Mark Waypoint PageName FieldSymbol Field3. Highlight the Name field and press the Thumb Stick In. Enter a new name. When finished, highlight OK then press the Thumb Stick In.4. Highlight the Symbol field and press the Thumb Stick In. Choose a symbol then press the Thumb Stick In to accept the selection.5. Highlight the OK button at the bottom of the page and press the Thumb Stick In to save the waypoint.As you move, notice that a breadcrumb trail of your path is left on the map. This trail is called a Track Log. You can use the track log to retrace your steps back to a certain location.To view your breadcrumb trail (track log):1. Use the Page button to display the Map Page.2. Walk away from your original location for at least three minutes.3. The default zoom level is 80 miles. Press the Zoom button to zoom in to view the breadcrumb trail (track log) in detail.You can navigate to a waypoint, city, exit, or a contact’s location. Using optional detailed maps, you can also navigate to points of interest, addresses, and intersections.To begin navigation using Find ‘N Go:1. Press the Thumb Stick In to display the Shortcuts Menu.2. Highlight Find ‘N Go and press the Thumb Stick In.3. Highlight Waypoints and press the Thumb Stick In. Select the desired option (by Nearest or by Name ), and press the Thumb Stick In.4. Highlight the desired waypoint and press the Thumb Stick In.5. With the Waypoint Page displayed, highlight the Goto button at the bottom of the page and press the Thumb Stick In to begin navigation. The Navigation Page automatically opens to guide you to your destination. See below for more information.Navigation PageThe two main components of the Navigation Page are the compass ring and the pointer. As you move, the compass ring rotates showing your current direction of travel at the top of the display. The pointer points toward your destination. When the pointer is aligned with the vertical line at the top of the compass ring, you are on a direct course toward your destina-tion. The unit has to be moving to navigate. Ifyou are standing still or moving very slowly,the navigation data may not be accurate.The first time you receive a signal from another Rino user, the New Contact page is displayed. From the New Contact page you canshow the user’s location on your Map, Goto that position, select OK to add them to your contact list, or press the Page/Quit button to disregard the contact. Every time you receive signals from contacts, your map is updated showing their new position. A Track Log of their movement is created andshown on your map.You can send any location that you have available in your Find ‘N Go menu. These may be waypoints, contacts, cities, exits, or any other data that is loaded in the unit. Below are the steps to send a waypoint.To send a location (waypoint) using Find ‘N Go:1. Press the Thumb Stick In and hold it until the Shortcuts Menu is displayed, or press the Page button until the Main Menu is displayed.2. Highlight Find ‘N Go and press the Thumb Stick In. Highlight Waypoints and press the Thumb Stick In. Select Nearest or By Name and press the Thumb Stick In.3. Highlight the waypoint that you want to send and press the Thumb Stick In to display the Waypoint Review page.4.Highlight the Option Menu button and press the Thumb Stick In.5. Select Send Locationand press the Thumb Stick In.Send LocationThe location is sent to all Rinos on the same channel and squelch code as you. They can then choose to Goto that location, view the location on the map (Map ), or save the location (OK ).The Rino’s most unique feature is Peer-to-Peer positioning, send-ing the location of one Rino unit to other Rino units. Peer-to-Peer positioning allows you to track the movement of other Rino users and even navigate to their location. To send your location:Press and release either the Call or Talk button. Your Rino 120 automatically sends out its location. Other Rino users monitoring the same channel and squelch code receive this information.If you have not heard from a contact in a while and would like to know that contact’s current location, you may “poll” the contact’s location. This will update that contact’s location in your Rino 120.To poll a location:1. Press the Thumb Stick In and hold it until the Shortcuts Menu is displayed, or press the Page button until the Main Menu is displayed.2. Highlight Find ‘N Go and press the Thumb Stick In. Highlight Contacts and press the Thumb Stick In.3. Highlight the contact that you want to poll and press the Thumb Stick In to display the Contact Review page.4. Highlight the Option Menu buttonand press the Thumb Stick In.5. Select Poll Location and press the Thumb Stick In.You can send a note to communicate silently with other Rino 120 users on the same channel and squelch code that you are using. This can be a Saved Note or a new note. (This feature is not available on Rino 110 units.)To send a note:1. Press the Thumb Stick In to display the Shortcuts Menu.2. Select the Send Note option.3. To create a new note or edit an existing note, press theThumb Stick In when the Edit Note field is highlighted. Enter your note using the data entry keyboard. Select OK when complete.To use a Saved Note, select the desired note from the Saved Note list and press the Thumb Stick In.4. Select Send to send the note to all Rino 120 users on the same channel and squelch code that you are using. Select Save to save the note for future use. Select Clear to erase the note.If you have further questions or just want to learn more about the operation of Rino 120, refer to the Owner’s Manual , which provides detailed information about all of your Rino 120’s features.Quick Start Guide120Step-by-Step Instructions(Turn this page and begin with Step 1)Part Number 190-00418-01 Rev. BNavigation Page New Contact Page Polling a contact’s location Power button:• Press and hold to turn the unit On/Off• Press to adjust contrast and backlightingCall button:• Press to send out Call Tone • Sends position when released (if enabled)Talk button:• Press and hold to talk • Sends position when released (if enabled)Page/Quit button:• Press to cycle through main pages• Used to quit or escape menu itemsVolume (V) button:• Press to open volume control windowMicrophone:• Hold unit 3–4 inches away when talkingZoom/Map (Z) button:• From the Map Page, press to open Zoom control window • From any other page, press to display Map PageSpeakerThumb Stick• Press In to enter highlighted options and to confirm messages• Move Up, Down, Right or Left to move through lists, highlight fields, on-screen buttons, icons, enter data, or move the map panning arrow • Press In and hold to display Shortcuts Menu.1The Rino 120 operates on three “AA” Alkaline batteries (not included) located in the back of the unit. Rechargeable batteries may also be used. See the Rino 120 Owner’s Manual for setting battery type. The unit is factory set to use Alkaline batteries. Stored data is not lost when the batteries are removed.To install batteries:1. Remove the battery cover on the back of the unit. Turn theD-ring 1/4 turn counter-clockwise and pull the cover off.2. Insert batteries observing the polarity reference molded intothe unit housing. Orient the negative (-) battery terminaltoward the spring.3. Reinstall the battery cover by inserting the bottom hinge clipand closing the cover. Turn the D-ring 1/4 turn clockwise.Notes on battery use:• When replacing batteries, use only new or fully recharged batteries. Rechargeable batteries may typically display lesscapacity than Alkaline batteries.• Do not mix different types of batteries together.• Remove the batteries from the unit if you do not plan to use it for several months. Follow the battery manufacturer’s instruc-tions for proper care and disposal of used batteries.• Extensive use of backlighting, WAAS, and/or FRS or GMRS will significantly reduce battery life.2All of the information you need to operate the Rino 120 can befound on five default main pages (or display screens). Simply pressand release the Page key to cycle through the Radio Page, MapPage, Navigation Page, Trip Computer, and Main Menu Page. Youcan also access the Main Pages by pressing the on-screen Main PageMenu button .Trip ComputerMain Menu Navigation PageWhile these five Main Pages provide you with different types ofinformation, they all share common features like Option Menus anda Main Page Menu. Access the Option Menu and Main Page Menuby using the Thumb Stick to highlight the on-screen button. Thenpress the Thumb Stick In.3Before the Rino 120 can be used for navigation, the GPS receivermust be initialized. Initialization allows the Rino 120 to receiveand store satellite information and begin using the satellites fornavigation. The initialization is automatic and should only take afew minutes.To initialize the unit (acquire satellites):1. Take the Rino 120 outside where it has an unobstructed viewof the sky and turn it on.2. The unit begins to search forsatellite signals. “Tracking Satel-lites” is displayed while the unit isinitializing.The first time you use your Rino120, initialization should take nomore than five minutes.3. When the GPS is initialized and ready for navigation, themessage “3D Accuracy” is displayed on the Radio Page.If for some reason the unit is not able to gather the necessary satel-lite information, refer to the Rino 120 Owner’s Manual.4 Entering DataUse the Thumb Stick like a joystick that youcontrol with your thumb. Move the ThumbStick Up, Down, Right, or Left. Press theThumb Stick In to select an item on thescreen, much like pressing the Enter buttonon a computer keyboard.Sometimes you will need to spell out things using the Thumb Stickand an on-screen keyboard. To enter characters with the on-screenkeyboard, press the Thumb Stick Up, Down, Left, or Right tohighlight the desired character (letter, number, or a space). Press theThumb Stick In to select that highlighted character. Choose Backto delete the character to theleft of the cursor. When youare finished entering charac-ters, highlight OK and pressthe Thumb Stick In.5Select a channel and squelch code to transmit on. Be sure to tell theother members of your group what channel and squelch code youare using so they can communicate with you.To select a channel:1. Highlight the Channel field and pressthe Thumb Stick In.2. Select an available channel andpress the Thumb Stick In to acceptthe selection.To select a squelch code:1. Select the Code field and press theThumb Stick In.2. Select one of the thirty-eight (38)available codes. Press the ThumbStick In to accept the selection.6The My ID (name) and symbol (icon) identify you to otherRino users.To change the unit ID/name:1. Highlight the My ID field and pressthe Thumb Stick In to activate thefield and display the keyboard.2. Highlight Clear, then press theThumb Stick In to clear thedefault ID.3. Enter an ID, or name, up to ten(10) characters long.4. When you have entered your newID, highlight OK and then pressthe Thumb Stick In.To change the user symbol:1. Highlight the face symbol to the right of the My ID field. Pressthe Thumb Stick In to show a list of available face symbols.2. Highlight the desired symbol from the list of selections.3. Press the Thumb Stick In to select that symbol.7The Rino 120 can transmit to and receive messages from other FRSradio users on the same channel and squelch code. To use all of thefeatures of the Rino, communicate with other Rino units.To transmit on your Rino 120:1. Press and hold the Talk button and speak in a normal voiceinto the microphone area on the front of the Rino 120 from adistance of about 3–4 inches.2. When you are finished talking, release the Talk button. Yourlocation is updated on all receiving Rinos.3. If you want to call another user or update your location onanother Rino, press and release the Call or Talk button.8If you need to adjust the volume, press the V (Volume) button onthe front of the unit to display an adjustment slider. To change thevolume, press the Thumb Stick Up or Down to raise or lower theslider. When you have the proper level set, press the V button orpress the Thumb Stick In.If lighting conditions make it hard for you to see the display screen,you can adjust the contrast or turn on the backlight.To turn on the backlight and adjust the screencontrast:1. With the unit on, briefly press and release the Power buttonto display the Backlight and Contrast adjustment.2. Press the Power button or press Up or Down on the ThumbStick to turn the Backlight on or off. A light bulb symbol ap-pears on the top Status Bar when the backlight is on.The backlight remains on until the set timeout period iscompleted or the Power button is pressed again. The unit isfactory set to timeout 15 seconds after the last button press.3. Move the Thumb Stick to Left (Lighter) or Right (Darker) toadjust the contrast.4. Press the Thumb Stick In to close the Backlight and Contrastwindow.Example of an on-screen keyboardTracking Satellite SignalsSelecting the channelMy ID field Symbol fieldMain Page Menu buttonOption Menu button。
如何将GARMIN手持GPS的经纬度模式调成坐标模式

如何将GARMIN手持GPS的经纬度模式调成坐标模式360U190151596211级分类:教育科学被浏览1335次2013.07.01检举360U1904139277采纳率:57%11级2013.07.02Garmin手持机中WGS84坐标转换成BJ54坐标时要设置哪些参数?如何设置?答:可以通过用户自定义的方式来实现。
方法如下:1. 进入"主菜单页面"的"设置"子页面中,按动方向键选择“单位”按输入键进入坐标设置的页面,将"位置格式"的选项改为" User UTM Grid "(自定义坐标格式)。
2. 在出现的参数输入页面中输入相关的参数,包括中央经线,投影比例(该数值为1),东西偏差(该数值为500000),南北偏差(该数值为0)。
3. 按下屏幕上的"存储"按钮后,再将"地图基准"(有的机器称之为"坐标系统")的选项改为"User"(自定义坐标系统)。
4. 在出现的参数输入页面中输入相关参数,包括DX,DY,DZ,DA和DF。
其中DA的数值为-108,DF的数值为0.0000005。
按下屏幕上的"存储"按钮后,机器显示的位置将用北京54坐标来表示了。
如果是80坐标,则DA=-3,DF=0。
5. DX,DY,DZ三个参数因地区而异,具体如何求解可以让首先与本地测绘部门去咨询,如果不给的话,可以通过如下方法来求解:首先知道一个点的已知BJ54坐标(这个他们肯定都有,如果要做工作的话),然后用手持机测此点的坐标(WGS84坐标),通过坐标转换程序,即可求出DX,DY,DZ。
需要注意的是,此程序中的y为6位数,也就是要将Bj54坐标中的前两位(带数)去掉。
如果不知道BJ54坐标的高程,可以输入与WGS84坐标相同的即可。
手把手教你做麦哲伦GPS户外地图
手把手教你制作麦哲伦GPS户外地图Jackhu虽然我们在GPS手持机加载航点,规划航线,但由于户外徒步线千弯百绕,不想城市道路航线规划那么简单。
受航线中航点的限制,只能规划出大致的方向。
但如果GPS手持机装有户外地图,那就不一样了。
可以知道精确的行进方向,随时了解自己所处的地理环境,甚至在准备充分时作无向导穿越,给驴行增添更多的乐趣。
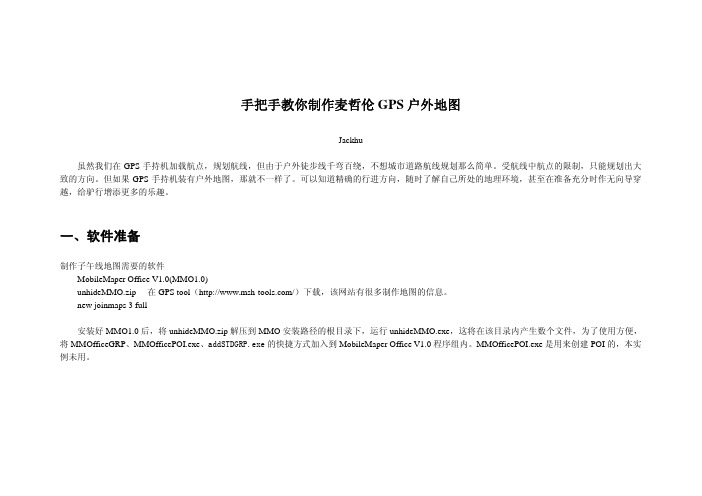
一、软件准备制作子午线地图需要的软件MobileMaper Office V1.0(MMO1.0)unhideMMO.zip 在GPS tool(/)下载,该网站有很多制作地图的信息。
new joinmaps 3 full安装好MMO1.0后,将unhideMMO.zip解压到MMO安装路径的根目录下,运行unhideMMO.exe,这将在该目录内产生数个文件,为了使用方便,将MMOfficeGRP、MMOfficePOI.exe、addSTDGRP.exe的快捷方式加入到MobileMaper Office V1.0程序组内。
MMOfficePOI.exe是用来创建POI的,本实例未用。
二、数据准备基础地理数据如果手头没有基础地理数据,可以从地图出版社的全中国电子地图中矢量化获得。
全中国电子地图数据较旧,但对于驴行的地方不会有太大差别。
它道路分分级比较好,分为高速、国道、省道、县乡路、乡村路。
有的乡村路实际上就是徒步小道,只是精度低。
全中国电子地图是WGS84格式,可以通过经纬度来定位,这对地图的抓图和配准提供了方便,用OziExplorer或GIS软件如Mapinfo,矢量化,得到要制作的地图区域的基础地理数据。
GPS航点、航迹要制作户外地图当然最好徒步线的航点航迹,不少驴友会记录航点航迹,并发布给大家共享。
对得到航线最好先整理一下,去除在原地打转的点,如果记录点过密,可以对其进行抽稀。
如果没有徒步线航迹,也可以利用Google Earth等得到大致的路线,不过这只能是规划线了。
GARMIN佳明eTrex20中文使用手册

4
eTrex 20 中文使用手册
目录
4.3 航线测面积、长度 ............................................................29 4.4 修改测量单位、单价 ........................................................29
5. 全世界任何地区的地图都不可能是完美的,都会有某种程 度的不完整性与不准确性,因此在使用本机时,除了参考 产品内的信息外,使用者也需要自行注意判断与实地的状 态是否相符,上海佳明航电企业管理有限公司将努力持续 改善地图的性能,也欢迎使用者提供正确的信息。
6. 本中文操作说明书仅供使用者参考,若内容或步骤与GPS 接收机本身功能有所相异之处,则以接收机为准,上海佳 明航电企业管理有限公司将不另外通知,若有疑问,欢迎 来电或询问上海佳明航电企业管理有限公司或正式授权的 经销商。
第八章 航线功能...........................47
8.1 创建航线 ............................................................................47 8.2 航线设置 ............................................................................49
投影航点法有些地方可能因为道路阻碍地形受限而导致无法前往进行定位工作此时可以利用其他辅助设备如罗盘等得到目标点与目前位置的相对方位角度再用目视方式推算相对距离etrex20中文使用手册19第三章航点标定与管理有了相对方位及距离本机就可以利用目前位置的坐标推算出目标点的坐标了此种计算的方式称为投影航点法
OruxMaps应用Garmin地图制作及美化方案byepic
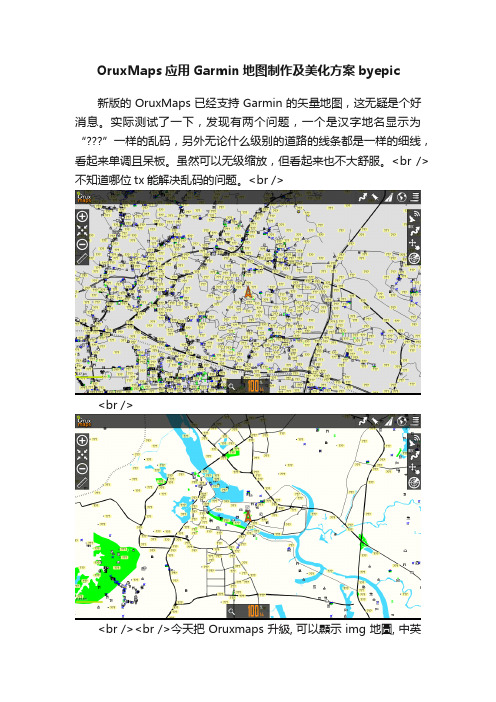
OruxMaps应用Garmin地图制作及美化方案byepic新版的OruxMaps已经支持Garmin的矢量地图,这无疑是个好消息。
实际测试了一下,发现有两个问题,一个是汉字地名显示为“”一样的乱码,另外无论什么级别的道路的线条都是一样的细线,看起来单调且呆板。
虽然可以无级缩放,但看起来也不大舒服。
<br /> 不知道哪位tx能解决乱码的问题。
<br /><br /><br /><br />今天把 Oruxmaps 升級, 可以顯示 img 地圖, 中英文地圖的情況與上面的圖片相同.嘗試用Mapedit 自己動手把騎車的軌跡轉變成道路, 加上英文和數字的 label, 單字折, 它顯示了...部份 poi 如建築物, 是不顯示 label 的.估計不是亂碼, 以是不支持雙字節 (double bit) 漢字.应该是编码问题我记得garmin地图里面的汉字是GB码, android必须用unicode, 大概需要先把img解成MP,然后再转码,再压回img,类似纠偏的流程,谁熟练的可以搞一下. Garmin img 格式是用 codepage 来储存不同语言的文字.Oruxmaps 5.0 用 jgarminimg library 打开 img 文件.jgarminimg 不支持双字节 codepage 或 UTF8.Oruxmaps 支持 Mapsforge 的矢量地图.Mapsforge 是基于OpenStreetMap (OSM) 的一个rendering library./p/mapsforge/大家可以试试下面的 HongKong Macau .map+.xml.用 Oruxmaps 5.0 打开.Oruxmaps 5.0, 徐了十分不好看的红色主调及新icon外, 有很多新功能:- Garmin img 支持: 虽然不能显示地标, 但打开GM+cgpsmapper生成的等高线图效果不错.- 三维地图: 将SRTM的hgt放在oruxmaps/dem内,按3D icon 就可以.利用ASTER+GM输出30m间距的hgt + 14层卫星地图效果比GE更好.- KML图层 (overlay): 不同于kml轨迹输入, 你可以选择显示kml 内不同部分.e.g. 一般kml轨迹会有轨迹(trackl)+地标(poi, waypoint), 输入轨迹时两者都会显示.但作为KML图层, 你可以选显示 track/poi/track+poi.- Lateral daskboard (settings->UI -> Misc UI): 在横放手机时会同时显示地图及雷达/轨迹/Trip computer (用于骑行或自驾). 信息量大!怪不得人工修改img的中文内码为UTF8等后也无效。
GarminGPS破解在中国使用
GarminGPS 破解在中国使用综合发帖模板发帖目的: 教程地图品牌: Garmin测试机型: GARMIN 205W适用系统(可多选): 未知地图国别: 中国 ? 中国支持分辨率(可多选):320X480 未知或其他(请在贴内注明) 资源分类(可多选): 官方主程序 改进主程序 完整资源(主程序+地图) 合集GARmin205w 如何升级?前两天帮领导升级,这种机型早已停产,开始上网查资料,只怪各个帖子都是零碎的信息,搞得云里雾里,只好结合实际自己整理了一个详细的升级教程,希望能对各位需要的朋友有所帮助!1、首先确定机器的版本是大陆205W 我的机器是 BOOT BLK B0931 3.00;X-LOADER B0931 3.00;1.1 怎样看HWID 和PCB 版本?长按(约10秒)屏幕上的电池图标进入diag mode进入DIAG Mode ,点Next ,在最上一行可以看到"Version Infomation Nuvi 2x5W ...",后面的就是PCB 的版本;再点Start Test->More ,可以看到"Inventory"页面,在第一行"BootBLK BDOGDOGTx-00 ..."中的"DOGDOGTx"就是真正的HWID 。
再点Start Test->More ,可以看到"Inventory"页面,在第一行"BootBLK BDOGDOGTx-00 ..."中的"DOGDOGTx"就是真正的HWIDCHN: ver3.00ID:3655520409语言:2.01GPS: 3.10b2、准备升级到台湾固件V3.9(nuvi205WT_v390)2.2 进入台湾GRAMIN 官网()3、升级之前把原来机器和SD卡的内容通通备份到电脑4、首先需要下载USB驱动,并且先安装驱动USBDrivers_23.exe地址:/software/USBDrivers_23.exe连接USB,把nuvi里garmin\voice, garmin\text删除或改名;(我是备份到电脑了)5、断开USB线,让nuvi重新启动;6、将下载的rgn文件用鼠标拖到update.exe上,updater启动后点“USB”;7、8、长按(约10秒)屏幕上的电池图标进入diag mode,此时再重新通过USB线连接到PC,updater.exe即找到nuvi设备,开刷;8、刷好后自动重启。
garmin72坐标设定
对于国内使用北京54坐标或者西安80坐标的用户,只要在自定义坐标中输入相关的参数,就可以方便的在wgs84经纬度坐标与北京
54坐标或者西安80坐标之间进行切换了。有关自定义坐标的方法,请参见附录中“自概念坐标系统”的内容。
自概念坐标系统
坐标系转换方式
gps导航系统所提供的坐标是以wgs84坐标系为根据而建立的,我国目前应用的许多地图却属于北京54坐标系或西安80坐标系。因为不同坐标系之间存在着平移和旋转关系,对于同一点的坐标,可能会有几十米到上百米的差异。因此,如果您不使用wgs84的经纬度坐标,必须进行坐标转换,输入相应的转换参数。
gps72提供了两种测量面积的方式,对于不规则的待测区域,可以使用航迹测面积(请参考4.6.6的相关说明);对于较规则的待测区域,可以使用航线测面积(请参考4.5和4.6.4的相关说明)。如果已知了某个待测区域的边界点的坐标,您就可以通过航线测面积的方法,将边界点所围的面积计算出来。航迹测面积的方法更适合用于测量较大区域的面积,对于较小的区域建议使用航线测面积的方法来测量。
3 用户设备部分:接收gps卫星发射信号,以获得必要的导航和定位信息,经数据处理,完成导航和定位工作。gps接收机硬件一般由主机、天线和电源组成。我们现在所使用的就是用户设备部分。
gps定位原理
gps的基本定位原理是:卫星不间断地发送自身的星历参数和时间信息,用户接收到这些信息后,经过计算求出接收机的三维位置,三维方向以及运动速度和时间信息。目前gps系统提供的定位精度是优于10米,而为得到更高的定位精度,我们通常采用差分gps技术:将一台gps接收机安置在基准站上进行观测。根据基准站已知精密坐标,计算出基准站到卫星的距离改正数,并由基准站实时将这一数据发送出去。用户接收机在进行gps观测的同时,也接收到基准站发出的改正数,并对其定位结果进行改正,从而提高定位精度。
- 1、下载文档前请自行甄别文档内容的完整性,平台不提供额外的编辑、内容补充、找答案等附加服务。
- 2、"仅部分预览"的文档,不可在线预览部分如存在完整性等问题,可反馈申请退款(可完整预览的文档不适用该条件!)。
- 3、如文档侵犯您的权益,请联系客服反馈,我们会尽快为您处理(人工客服工作时间:9:00-18:30)。
佳明自制卫星地图教程
Garmin Custom Map
Author:ZhuoHwa
本教程以谷歌地球(Google Earth)上面的北京故宫卫星图片为例,讲述自制地图的过程。
在使用自制地图之前,请将你的高明手持机的软件(固件)更新至最新版本。
步骤一:将谷歌地球卫星图片制作成JPEG(.jpg)图片。
1.打开谷歌地球,定位于北京故宫,然后点击“视图”-“网格”(显示“网格”系为方便地理位置校正,详见步骤三)。
(▲001显示网格)
2.通过点击“文件”-“保存”-“保存图像”,将带有网格线的北京故宫卫星图片任意命名后保存为.jpg图片。
(▲002保存图像)
(▲003任意命名后保存为jpg图片)
步骤二:添加“图像叠加层”。
1.保持谷歌地球的界面不变动,点“添加”-“图像叠加层”。
(▲004添加图像叠加层)
2.在出现的“新建地图叠加层”小界面里,对加红圈的各项数据进行填写,其中“链接”项应指向步骤一已制作好的.jpg图片;“位置”项可暂时搁置不理;“绘图次序”项应将数值调至50或以上,以保障自制地图将来始终能显示在手持机地图之上层。
(▲005图像叠加层参数设置)
步骤三:对.jpg图片进行地理定位。
1.保持“新建地图叠加层”小界面不关闭,然后用鼠标对叠加在谷歌地球卫星图片之上的.jpg图片进行吻合调整(即用鼠标拽动绿色框框进行上下、左右、大小、旋转等项调整)。
为减少误差,最好系让.jpg图片的网格线与谷歌地球卫星图片上原有的网格线尽量重合。
(▲006调整叠加层)
2..jpg图片设置好地理位置后,点击“新建地图叠加层”的“确定”。
然后再点“文件”-“保存”-“将位置另存为”。
(▲007保存自制地图)
3.将自制地图任意命名,并且保存为kmz文件。
(▲008保存为kmz文件)
步骤四:在手持机上显示自制地图。
1.在手持机的Garmin文件夹项内,新设一文件夹“CustomMaps”,在“CustomMaps”文件夹内再设一文件夹“directory”,即:“/Garmin/CustomMaps/directory”。
2.将制作好的kmz文件直接拷进/Garmin/CustomMaps/directory文件夹内。
3.开启手持机后,与使用其他地图的方法一样,将制作好的kmz
文件选择启用后,自制地图便会出现在地图之上。
(▲最终效果图)
补充说明:
1.不论是纸质地图还是其他电子地图,只要能将它们转化成JPEG (.jpg)图片,就可以按照本教程的步骤二至步骤四的方法,制作成高明手持机自制地图。
2.根据网站提供的现时适应/兼容(Compatibility)自制地图的机种名单如下(这些兼容性机种应理解为英文版机种,至
于简体/繁体机种能否支持,请各位自行测试):
Dakota™ 10
Dakota™ 20
Oregon® 300
Oregon® 400c
Oregon® 400i
Oregon® 400t
Oregon® 450
Oregon® 450t
Oregon® 550
Oregon® 550t
Colorado® 300
3.另外,该网站提到“Garmin Custom Maps work on both PC and Mac®”.意即自制地图可在PC和Mac机上运行。
