理光C2003+2503MP设置之用户工具(发送邮件)
RICOH Aficio MP c2500 c3000 操作说明书
Microsoft®、 Windows® 和 Windows NT® 是 Microsoft Corporation 在美国和 / 或其它国家的注册商标。 TrueType 是 Apple Computer, Inc. 的注册商标。 PostScript® 和 Acrobat® 是 Adobe Systems Incorporated 的注册商标。 PCL 是 Hewlett-Packard 公司的注册商标。 Bluetooth 是 Bluetooth SIG, Inc. (Special Interest Group) 的商标, RICOH Company Limited 经许可可使用 该商标。 PictBridge 是商标。 本手册涉及的其它产品名称只用作识别目的,有可能分别是相应公司的商标。这些商标的任何权利均不 归我们所有。 Windows 操作系统的正规名称如下: • Windows® 95 的产品名是 Microsoft® Windows® 95 • Windows® 98 的产品名是 Microsoft® Windows® 98 • Windows® Me 的产品名是 Microsoft® Windows® Millennium Edition (Windows Me) • Windows® 2000 的产品名称如下:
错误邮件通知 ....................................................................................................... 42 错误报告 (电子邮件) ....................................................................................... 42 服务器产生的错误电子邮件 ............................................................................... 42
理光维修程序修订稿

若未用SP-908-9存储中等尺寸的阈值,不使用此SP。
0~2000纸变少时,发生送纸问题使用此SP。SP1-908上的详细说明,见“纸提升机构”。
6
第1纸盘纸量(小尺寸)
用SP1-908-4对使用选择剩余纸量的限制。
0.1mm/档
+0.0mm
3
头部边缘对位
(双面送纸)
+~
0.1mm/档
+0.0mm
1-002*
1
左右对位
(第1纸盘送纸)
使用修正区域图样调节每个送纸站的印刷左右的对位(SP5-902,。
+~
0.1mm/档
+0.0mm
在输入值之前,用·/*键变换+和-之间触变。规格是2±1.5mm。详细说明见“更换和调节-复印调节”。
7
第2纸盘纸量(中等尺寸)
用SP1-909-5对使用选择剩余纸量的限制。
0:无(空的)
1:接近用完
2:25%
3:75%
在接近用完之前的发生送纸问题时,设定此SP到2或3。
SP1-909上的详细说明,见“纸张提升机构”。
8
第2小纸尺寸的设定
对第2纸盘选择小尺寸阈值。
“0”意思是未使用此设定值。
0:无(未使用)
SP1-908上的详细说明,见“纸张提升机构”。
8
第1小纸尺寸的设定
对第1纸盘选择小尺寸阈值。
“0”意思是未使用此设定值。
0:无(未使用)
1:HLT/A5
2:A4
3:LT
4:DLT
5:A3
SP1-908所使用的尺寸由纸宽度确定。
施乐Docucentre 2003扫描功能设置和使用

施乐Docucentre 2003扫描功能设置和使用一、设置IP地址1.按住<认证(规格设定/登记)>按钮4秒,屏幕上出现连字符闪烁2.使用数字键输入系统管理员ID,默认为11111,按‘启动’键确认3.进入系统设置模式,显示屏显示字母[P]闪烁4.用数字键输入菜单号[102],按‘启动’键确认5.在四个选项中选择[0](STATIC),按‘启动’键确认6.用数字键输入菜单号[103],按‘启动’键确认(IP地址分四部分:xxx.xxx.xxx.xxx)7.用数字键输入IP地址的第一部分,按‘启动’键确认8.用数字键输入菜单号[104],按‘启动’键确认9.用数字键输入IP地址的第二部分,按‘启动’键确认10.用数字键输入菜单号[105],按‘启动’键确认11.用数字键输入IP地址的第三部分,按‘启动’键确认12.用数字键输入菜单号[106],按‘启动’键确认13.用数字键输入IP地址的第四部分,按‘启动’键确认14.子网掩码、网关的设置同上(步骤6-13),对应菜单号107,108,109,110、111,112,113,11415.完成后按<认证(规格设定/登记)>按钮,退出系统设置模式16.重新启动机器,可打印系统配置报告(在机器控制面板上,按住<2>按钮4秒或更长,并同时按<停止键>按钮,可打印系统配置报告)二、建立信箱1.将机器与网络相连,进入系统设置模式,用数字键输入菜单号[124],按‘启动’键确认,输入[1],按启动,(注:此菜单号为启用CentreWare Internet Services)一般机器默认为[启动]2.在客户电脑IE浏览器的URL输入http://xxx.xxx.xxx.xxx进入CentreWareInternet Services主页3.在[属性]标签上的[网络设定]下的[SNMP][WebDA V][SOAP]复选框选中,按[启动]。
RICOH FAX Option Type 3030 操作说明书

FAX Option Type 3030操作说明书传真机参考<高级功能>请在使用本产品前仔细阅读本手册,并将其备在手边以供将来参考之用。
为保证安全和正确的使用,在使用本设备前请务必阅读“一般设定指南”中的安全信息。
传送模式检查和取消传送文件通讯信息其它传送功能接收功能通过计算机发送传真简化操作传真机功能管理员设置解决操作问题附录1234567891011简介本手册包含了设备的详细操作说明和注意事项。
为了您的安全和利益,在使用本设备前请仔细阅读本手册。
请将本手册放在手边便于随时参考。
注意本手册内的某些插图可能与设备本身稍有不同。
在某些国家出售的机型上可能没有某些功能选项。
如需详细信息,请与当地的经销商联系。
本手册中的尺寸采用了两种标示方式。
本机以公制为准。
重要事项本手册的内容若有更改,恕不另行通知。
对于因操作和使用本设备而导致的直接、间接、特殊、偶然或必然损失,本公司概不负责。
商标Microsoft®、Windows®和Windows NT®是Microsoft Corporation在美国和/或其它国家或地区的注册商标。
Adobe®和Acrobat®是Adobe Systems Incorporated的注册商标。
Ethernet是Xerox Corporation的注册商标。
本手册涉及的其它产品名称只用作识别目的,有可能分别是相应公司的商标。
我们对这些商标并不拥有任何权利或全部权利。
注意Windows操作系统的正规名称如下:• Windows® 95的产品名称为Microsoft® Windows 95。
• Windows® 98的产品名称为Microsoft® Windows 98。
• Windows® Me的产品名称为Microsoft® Windows Millennium Edition (Windows Me)。
RICOH MP2550B 3350B 快速传真指南
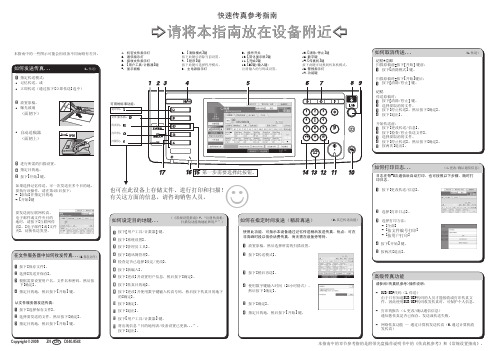
快速传真参考指南
c 请将本指南放在设备附近g
本指南中的章节参考指的是附带光盘操作说明书中的《传真机参考》和《常规设置指南》。
1. 机密文件指示灯
2. 通信指示灯
3. 接收文件指示灯
4. {用户工具/计数器}键
5. 显示面板
6. {清除模式}键
按下此键可清除当前设置。
7. {程序}键
按下此键可选择程序模式。
8. 主电源指示灯9. 操作开关10. {简化显示屏}键11. {开始}键12. {#}键(输入键)
注册输入的号码或设置。
13. {清除/停止}键14. 数字键15. {传真机}键
按下此键可切换到传真机模式。
16. 警报指示灯17. 功能键
本指南中的一些图示可能会因设备不同而略有差异。
也可在此设备上存储文件、进行打印和扫描!有关这方面的信息,请咨询销售人员。
理光MP2553 MP3053 MP3353多功能黑白复印机说明书
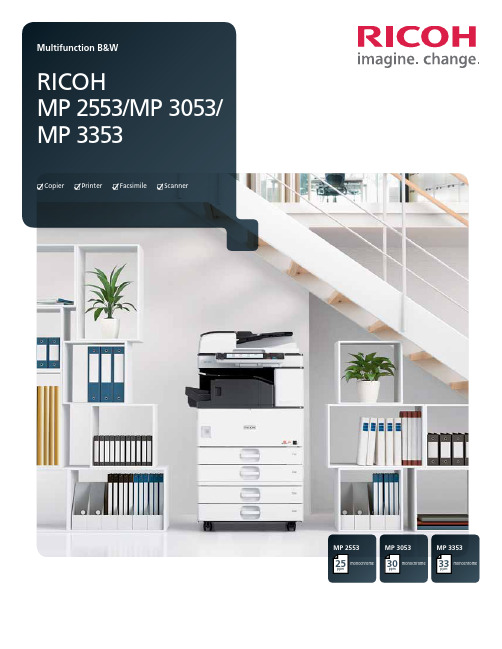
MP 3353ppmmonochrome33MP 2553ppmmonochrome25MP 3053ppmmonochrome30CopierPrinterFacsimileScannerPersonalize your productivityYour organization is unique. So is the way you conduct business. So why handle document management the same way everybody else does? Customize the RICOH® MP 2553/MP 3053/MP 3353 to accommodate your unique workflows. These versatile MFPs help you print, copy, share and secure a wider range of documents in more places, more conveniently. Use it as your information portal and connect to cloud services and applications directly from the operation panel. With a host of advanced document management capabilities packed into a space-saving, eco-friendly design, it’s ideal for any small office or workgroup looking to streamline workflow and enhance output from creation to finish – at sizes up to 11" x 17". Whether it’s used as a primary system or as an integral part of the Ricoh Managed Document Services (MDS) strategy, this customizable MFP helps to enhance productivity and reduce total cost of ownership for any organization.• Produce up to 33 monochrome prints/copies per minute• Connect from anywhere using location-free mobile printing• Designed to simplify workflow and improve productivity without increasing footprint size• Manage more tasks with flexible media handling• Sustain cost-effective operations with energy-saving efficiencyCustomizable everyday convenienceWork the way you want and how you wantImprove productivity anytime, anywhereDon’t let its sleek, compact design fool you. The Ricoh MP 2553/MP 3053/MP 3353 offers incredible power that demands attention.It can recover from sleep mode in less than 10 seconds and can printup to 33 monochrome pages per minute. With the standard 100-SheetAutomatic Reversing Document Feeder (ARDF), users can scan up to79 color or monochrome images per minute. Use the internal finisherto add a professional touch to document sets and streamline workfloweven more – without adding to the small footprint.Empower the mobile workforceTake advantage of wireless technology and bring unprecedentedflexibility to the workplace. The Ricoh MP 2553/MP 3053/MP 3353integrates with Ricoh HotSpot Enterprise, so mobile users can printdirectly to the MFP from laptops, smartphones and tablets withoutcompromising speed, convenience or security. This powerful solution isdesigned to be behind your firewall, does not require print drivers formobile devices and works seamlessly with cost recovery software.Control workflow efficiency withleading-edge technologyThe Ricoh MP 2553/MP 3053/MP 3353 works as smart as you do.Personalize the Home Screen with one-click icons for commonly usedtasks, including copying, scanning and faxing. Use optional embeddedsoftware such as GlobalScan or third-party vendor software to createcustom workflows for your most complicated tasks. Our partnershipswith industry-leading technology innovators allow access to a largeselection of applications for content management and otherbusiness-critical tasks directly from the MFP.Simplify operationsYou can quickly see why the Ricoh MP 2553/MP 3053/MP 3353 is easyto use. For misfeeds, the MFP offers easy-to-follow animated guidesthat help users identify and resolve the source of the problem. Userscan tilt the 9-inch control panel screen for easier viewing and moreconvenient access to system functions. Plus users can preview jobs toensure accuracy prior to printing or scanning.Exceptional, solid performance Print with power, consistentlyThe Ricoh MP 2553/MP 3053/MP 3353 can keep pace with yourentire workgroup’s busy demands without compromising speedor performance. Featuring a powerful 533 MHz processor, upto 1.5 GB RAM and a 250 GB HDD, it integrates seamlessly inalmost any environment—including Windows, Macintosh, Citrix,SAP, UNIX, AS/400 and more. Its icon-driven, one-click presetPCL6 user interface driver simplifies print jobs for crisp outputat up to 600 dpi. Advanced administrative controls allow youto set quotas and limit output for specific users or workgroups.This can help your organization to reduce operating costs whileencouraging more environmental awareness for long-term,sustainable savings.Scan with convenience, quicklyShare critical information efficiently with easy-to-use advancedscanning capabilities. Scan in black-and-white or color in PDF, TIFFor JPEG formats. Then share them immediately via Scan-to-File/Folder/URL/FTP/Email functionality. Compress file sizes for morecomplex scans and send them easily without compromising imagequality. Distributed Scan Management (DSM) offers centralizedscanning that automates many tasks while following specificpreferences, permissions and rules that expedite delivery.Manage more tasks, efficientlyLooking to improve productivity? Spend less time looking for documents.The Ricoh MP 2553/MP 3053/MP 3353 offers optional embeddedOCR, so users can retrieve documents quickly by searching for specificwords in PDF text in up to 14 languages. This convenient feature canalso detect blank pages in large jobs and remove them automaticallyto reduce waste. Plus connect to Ricoh’s optional Integrated CloudEnvironment (ICE) solution and scan documents, share files and printon the go with incredible convenience from the MFP touchscreen.We’ve made it easy to take controlImpressive performance on displayRicoh’s optional 10.1" Wide Super VGA Smart Operation Panelis designed to offer the functionality and performance of today’ssmartphones and tablets. Featuring drag-and-drop, pinch-and-flickfunctionality and swipe scrolling, it allows users to quickly movefrom one task to the next with unprecedented ease. It even includesconvenient widgets for the date and time.Simplicity at its bestRicoh’s new Quick User Interface feature from the optional SmartOperation Panel simplifies the choices for the most frequently usedfunctions for Copy, Scanner and Fax. They can be used with intuitivetouch gestures, such as flicking to select addresses, and pinching tozoom in or pan out on a preview. For workgroups requiring enhancedfeature functionality, it is easy to switch between the Quick UserInterface functions and Ricoh’s traditional user interface. Plus the newpanel also offers advanced Web Browser functionality designed to beon par with today’s mobile devices.Centralized administrative controlsOptimal performance is at your fingertips. Manage, monitor andtroubleshoot your entire Ricoh fleet from the desktop. With WebImage Monitor, IT and technicians can take advantage of a remoteuser interface to view the MFP’s operation panel. Use a Web browserto access system settings and address books. Receive email alertsand real-time updates when supplies are low. And, use @Remote®to automate meter reads, service event notifications and low toneralerts to improve day-to-day efficiency, including firmware updates.Smart, secure document management Protect sensitive informationHow vulnerable is your organization’s data? Security breaches cancompromise critical information at any time and they are expensiveand time-consuming to resolve. Ricoh offers a number of securitytechnologies to help protect your information at every level. TheRicoh MP 2553/MP 3053/MP 3353 includes user authenticationto help prevent unauthorized access to key functions and proprietaryinformation. With this technology, documents can be storedat the MFP and released after authorized users authenticate atthe device with a user log-in name and password or with an IDcard that’s swiped at the optional card reader. The device canalso overwrite data on the hard drive automatically and offersencryption protection to help protect against hackers.Fast, affordable paperless faxingManage fax workflow quickly and conveniently. Send or receivefaxes electronically with Internet Faxing. Or, use LAN faxing totransmit directly from a PC. Super G3 faxing is available as wellfor quick delivery to conventional fax numbers. With the RemoteFax Option, users can send and receive fax documents from anyconnected device in your fleet – even those without fax options– by sending it through the Ricoh MP 2553/MP 3053/MP 3353.This minimizes phone line costs and additional fax boards.Encourage environmental stewardshipWe’re committed to driving sustainable, energy-efficientoperations. That’s why we designed the Ricoh MP 2553/MP 3053/MP 3353 to use less power. Designed to be oneof the lowest typical electricity consumption (TEC) valuesin the industry, it meets all new ENERGY STAR v2.0 criteria.Organizations can also program the device to power on oroff during specified downtimes, including during weekendsor lunch, to conserve even more energy.1234571Navigate from job to job easily via the full-color, 9" tiltable LCD control panel featuring a USB/ SD card slot and a customizable home screen to link to commonly performed jobs.2 Use the standard 100-Sheet Automatic Reversing Document Feeder (ARDF) to efficiently handle one- and two-sided originals for copying, scanning and faxing .3The Ricoh MP 2553/MP 3053/MP 3353 comes standard with 1 x 500- and 1 x 550-sheet paper trays for longer, uninterrupted runs.4A standard 100-Sheet Bypass Tray accommodates a wide range of paper sizes and types.5Use the optional 2 x 550-Sheet Paper Trays (shown) for multiple paper sources on demand. Other options include a one-tray paper bank, 2,000-Sheet Large Capacity Tray and FAC52 Cabinet.6Produce professional documents and minimize outsourcing. The optional 1,000-Sheet Booklet Finisher (shown) provides three destinations for output, and can be used to produce paginated,saddle-stitched, punched and folded booklets. Design your own complete document production solution with other optional finishers including a 1,000-Sheet Stapler Finisher and 500-Sheet Internal Finisher. 7The optional 100-Sheet One-Bin Tray can separate output and simplify document retrieval.All-in-one performance for fast-paced officesRicoh MP 3353 shown with optional BN3090 one-Bin Tray, PB3180 Paper Feed Unit and 1,000-Sheet SR3150 Booklet Finisher.635R3473Ricoh Americas Corporation, 70 Valley Stream Parkway, Malvern, PA 19355, 1-800-63-RICOHRicoh and the Ricoh Logo are registered trademarks of Ricoh Company, Ltd. All other trademarks are the property of their respective owners. ©2013 Ricoh Americas Corporation. All rights reserved. The content of this document, and the appearance, features and specifications of Ricoh products and services are subject to change from time to time without notice. Products are shown with optional features. While care has been taken to ensure the accuracy of this information, Ricoh makes no representation or warranties about the accuracy, completeness or adequacy of the information contained herein, and shall not be liable for any errors or omissions in these materials. Actual results will vary depending upon use of the products and services, and the conditions and factors affecting performance. The only warranties for Ricoh products and services are as set forth in the express warranty statements accompanying them.。
理光复印机故障代码问题处理方法

理规复印机毛病代码问题处理办法之吉白夕凡创作毛病码:SC542清除办法:按黄色键,输入107,再按住红色键不放,真到屏幕出现英文,然后关机重开机.1.依次按黄色清除键-1-0-7-(红色停止键坚持几秒)待液晶屏显示变成英文后开关主电源2.检查热敏电阻.3.检查恒温器(在热辊下方圆形的纽扣)是否凹陷.毛病码:SC390处理办法:将PCU连接处处理之后重新连接,若此毛病仍旧出现,就将TD传感器取下,换一个传感器,重新预制载体,此毛病就能解决.毛病代码E101 嚗光灯毛病E103 电源频率检测毛病E120 /121 扫描架原位毛病E124 扫描架驱动电机毛病E140/141 镜头垂直标的目的原位传感器毛病E142/143 镜头水平标的目的原位传感器毛病E144/145第二把手扫描架原位传感器毛病E191 自动图象浓度传感器调整毛病E302 鼓充电辊漏电E346 显影偏压毛病E351 图象浓度传感器调整毛病E352色粉浓度传感器初始设置毛病E353 传感器样板电压 VSP 异常《超出2.5V》E354 鼓电压值VSG异常《缺乏2.5V》E355 图象浓度传感器上限检测异常E356 图象浓度传感器下限检测异常E405 转印带充电位置毛病E440 主电机毛病E442 感光鼓热敏电阻毛病E501/502 上/下纸盘升降电机毛病E503/504/505 纸盘装置第1/2/3升降电机毛病E506纸盘装置主电机卡住E507 LCT升降电机毛病E522/523双面纸盘端拦板齐纸传感器毛病E524/525 双面纸盘侧拦板齐纸传感器毛病E451 定影器热敏电阻毛病E452定影温度升温毛病E453/454/457 定影温度过热E458 定影灯可复印温度异常E620 主控板-ARDF通讯毛病E621 主控板-纸盘装置通讯毛病E900/901 总计数器毛病进入SP方法节能键107清除/停止键3秒,程序号由三级组成用数字键选择第一和第二程序号,按R/# ,如有第三级程序按+/-,按R/#键要退到上一级按清除/停止键,按三次清除/停止键退出SP方法SP方法表1-001 对位调整规模0-32 尺度=161-003-001至1-003-008 供纸时序调整规模=0-32 尺度=161-008 卡纸检测 0=OFF 1=ON1-103 定影器空转 0=OFF 1=ON 空转两分钟1-104 定影器温度控制 0=ON/OFF控制 1=相位控制1-105-001 定影主灯温度调整尺度=180度1-105-02 节能方法温度调整1-105-03 定影温度副灯调整1-105-XXX 定影温度调整1-106 定影温度显示1-108 强制启动1-902 齐纸板间隔调整(侧档板)1-905 齐纸板间隔调整(后挡板)2-001 鼓充电电压调整(供复印)2-002-XXX 鼓充电电压显示2-03 鼓充电电压调整(供制作VSP样图)2-101-XXX 先端/尾端删边空白调整2-201-XXX 显影偏压调整2-203 显影偏压调整(供制作VSP样图)2-206-XXX 显影偏压显示2-207 强制补粉(显示屏显示“2-208-001 补粉方法选择2-208-002 补粉率(TD传感器补粉方法)2-208-003 补粉率(定量补粉方法)2-214 TD传感器初期设定2-215-XXX TD传感器输出显示2-220 TD传感器初期输出显示2-221 补粉率(检测补粉方法)2-301-XXX 转印电流调整仅供工场使用不要改动设置2-801 搅拌显影剂2-802 鼓充电辊温度2-812 鼓反转调整2-901 鼓充电辊清洁间隔2-902 不使用3-001 ID传感器初期设定3-002 ID传感器初期设定显示3-103-XXX ID传感器输出显示3-105 VL强制检测3-106初期VLP/VLG显示3-107 当前VLP/VLG显示3-111 当前VRP/VRG显示3-112 VR强制检测3-123 鼓初始化3-801 自动过程方法选择3-901 空运转(曝光灯熄灭)3-902 强制过程控制4-001 曝光灯电压调整4-002 曝光灯电压显示4-008 垂直倍率调整4-001-XXX 镜头水平原位调整4-013 扫描架空运转4-101 水平倍率调整4-102 镜头误差校正4-103 聚焦调整4-201 自动ADS增益调整4-202 ADS初期增益显示4-203 ADS实际增益显示4-301 APS传感器功效检查4-302 选购件APS传感器(仅指LT机器)4-303 APS A5/HLT检测4-901 APS尺寸优先(指F4尺寸)4-902 APS 8K/16K检测(仅指A4机器)操纵5-001 全部显示点亮5-002 优先纸路选择5-003 APS优选选择5-004 ADS优选选择5-013 计数器递增/递减选择5-017 最大复印数量(复印限制)5-019-XXX 纸尺寸设定5-101 自动复位时间设定5-102 自动节能时间设定5-103 自动纸盘切换5-104 A3/DLT加倍计数5-106 图象浓度等级校正(ADS校正)5-107-XXX 图象移动白边调整5-108 边框删除白边调整5-110 中央删除白边调整5-113 投币锁按装5-115 双面图象移动(背面白边)5-121 T/C(总数计数器)计数时序5-305 自动关机时间设定5-401 用户代码方法5-402 用户代码计数器检查5-404-XXX 用户代码计数器清除5-405 用户代码号码设定5-407-XXX 用户代码号码清除5-408 已登记用户代码总数显示5-501-001 PM周期设定5-501-002 PM 报警方法设定5-801 内存全5-802-XXX 空运转方法5-803 输入检查方法5-804 输出检查方法5-810 SC复位5-811 仅在日本使用不要改动工场设定5-812 电话号码输入(仅指A156复印机)5-816仅在日本使用不要改动工场设定5-905 APS A4/LT横送优先5-906 手动装订复位时间设定5-907 封页方法选择5-908 图象移动/删除选择5-909 数字键缩放/尺寸被率5-910 操纵指导的语种设定(仅指A156复印机)6-001 SADF自动复位时间设定6-002 AD自由尺寸设定6-003 自由分页选择6-005 双面复印时最终的齐数原稿空白复印6-006-XXX DF对位调整6-009 DF带纸空运转6-010 自动APS选择6-011 厚/薄原稿方法选择6-101分页器装置6-102 分页器堆叠限制6-104 装订张数限制6-107 分页器空运转方法7-001 总运转时间显示7-002 原稿总计数器显示7-003 RDS/CSS复印收费计数器显示.此方法仅用于在日本才提供的一些特殊功效.不过,此方法能显示复印了多少原稿(DF方法+压板方法的总数)7-004 RDS/CSS复印量计数器初期设定.此方法仅用于在日本才提供的一些特殊功效.不过,此方法能显示已复印的复印件张数7-101-XXX 各类纸尺寸的复印总数7-203 鼓计数器7-204-XXX 供纸装置计数器7-205 DF计数器7-206 装订器计数器7-301-XXX 倍率别复印总数7-401 维修呼叫总计数器7-402 维修代码别呼叫总计数器7-501 卡纸总数计数器7-502 纸尺寸别总卡纸数(这实际是复印纸卡纸总数计数器.该计数器并没有按纸尺寸分隔)7-503 原稿卡纸总计数器7-504-XXX 列位置卡纸总数7-505-XXX 列位置原稿卡纸总数7-801-XXX 主ROM版本显示7-803 PM计数器检查7-804 PM 计数器清除7-807-001 SC 计数器清除7-807-002 复印纸卡纸计数器复位7-807-003 原稿卡纸计数器复位7-808 计数器全部清除7-810 复印计数器清除7-811 DF计数器清除7-816-XXX 供纸计数器清除。
Ricoh多功能打印机应用站设置指南说明书
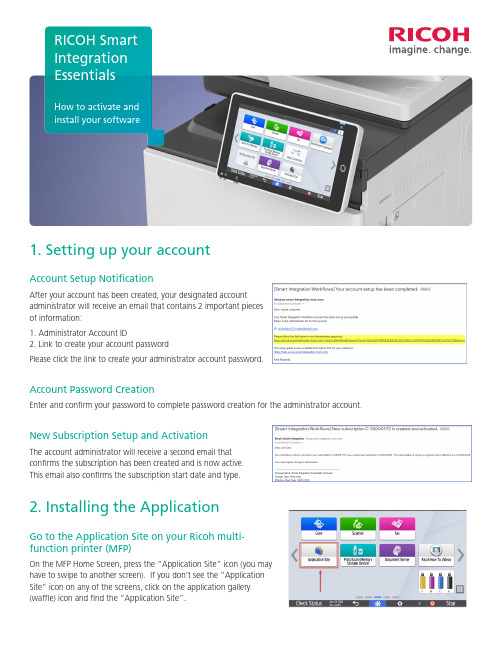
1. Setting up your accountAccount Setup NotificationAfter your account has been created, your designated accountadministrator will receive an email that contains 2 important piecesof information:1. Administrator Account ID2. Link to create your account passwordPlease click the link to create your administrator account password.Account Password CreationEnter and confirm your password to complete password creation for the administrator account.New Subscription Setup and ActivationThe account administrator will receive a second email thatconfirms the subscription has been created and is now active.This email also confirms the subscription start date and type.2. Installing the ApplicationGo to the Application Site on your Ricoh multi-function printer (MFP)On the MFP Home Screen, press the “Application Site” icon (you mayhave to swipe to another screen). If you don’t see the “ApplicationSite” icon on any of the screens, click on the application gallery(waffle) icon and find the “Application Site”.How to activate andinstall your softwareDownload “Smart Integration Apps”Once in the “Application Site”, press the “Smart Integration Apps”then click “Install” twice to install the icon on the Home Screen. Wheninstallation is completed, go to the Home Screen.On the Home Screen, you should now see a “Smart Integration Apps”icon. Please press the Smart Integration Apps icon3. Linking your subscription account to the deviceLogging in with your admin credentials on your MFPAfter you open the application, you will see a screen that informs you that “No tenant information was found”. From here, press “Login” and use the administrator account email address and password that was created in step 1. This action will link the MFP serial number to the subscription ID (Tenant).Applying the license to the deviceThe final step before you can use your RICOH Smart Integration(RSI) Essentials application is to associate your license to the deviceyou wish to use it on. To apply the license to your device, selectthe “Scan to Email” function that is now displaying on your MFP’sSmart Operation Panel.You will receive a prompt that notifies you that the applicationhas a limit on the number of available devices, and that yourremaining available devices is one. Select OK to confirm.4. Start using your applicationThat’s it! Your RSI Essentials application is now fully configured and the‘Scan to Email’ and ‘Print Cloud’ functions are ready for use. For additional information, please visit the Workplace portal or the RSI Help Website.Additional Resources: Workplace (RSI web portal):https:///portal/login.html RSI Help Website:https:// Ricoh USA, Inc., 300 Eagleview Boulevard, Exton, PA 19341, 1-800-63-RICOHRicoh® and the Ricoh logo are registered trademarks of Ricoh Company, Ltd. All other trademarks are the property of their respective owners. ©2020 Ricoh USA, Inc. All rights reserved. The content of thisdocument, and the appearance, features and specifications of Ricoh products and services are subject to change from time to time without notice. Products are shown with optional features. While care hasbeen taken to ensure the accuracy of this information, Ricoh makes no representation or warranties about the accuracy, completeness or adequacy of the information contained herein, and shall not be liablefor any errors or omissions in these materials. Actual results will vary depending upon use of the products and services, and the conditions and factors affecting performance. The only warranties for Ricohproducts and services are as set forth in the express warranty statements accompanying them.。
Win2003-Server-POP3-SMTP邮件服务器搭建详细图解教程

Win2003 Server POP3 SMTP服务器搭建详细图解教程很多企业局域网内都架设了服务器,用于进行公文发送和工作交流。
但使用专业的企业系统软件需要大量的资金投入,这对于很多企业来说是无法承受的其实我们可以通过Windows Server 2003提供的POP3服务和SMTP服务架设小型服务器来满足我们的需要。
一、安装POP3和SMTP服务组件Windows Server 2003默认情况下是没有安装POP3和SMTP服务组件的,因此我们要手工添加。
1.安装POP3服务组件以系统管理员身份登录Windows Server 2003 系统。
依次进入“控制面板→添加或删除程序→添加/删除Windows组件”,在弹出的“Windows组件向导”对话框中选中“电子服务”选项,点击“详细信息”按钮,可以看到该选项包括两部分内容:POP3服务和POP3服务Web管理。
为方便用户远程Web方式管理服务器,建议选中“POP3服务Web管理”。
2.安装SMTP服务组件选中“应用程序服务器”选项,点击“详细信息”按钮,接着在“Internet信息服务(IIS)”选项中查看详细信息,选中“SMTP Service”选项,最后点击“确定”按钮。
此外,如果用户需要对服务器进行远程Web管理,一定要选中“万维网服务”中的“远程管理(HTML)”组件。
完成以上设置后,点击“下一步”按钮,系统就开始安装配置POP3和SM TP服务了。
二、配置POP3服务器1.创建域点击“开始→管理工具→POP3服务”,弹出POP3服务控制台窗口。
选中左栏中的POP 3服务后,点击右栏中的“新域”,弹出“添加域”对话框,接着在“域名”栏中输入服务器的域名,也就是地址“”后面的部分,如“”,最后点击“确定”按钮。
其中“r ”为在Internet上注册的域名,并且该域名在DNS服务器中设置了MX交换记录,解析到Windows Server 2003服务器IP地址上。
打印机扫描及端口设置方法

打印机扫描设置方法
一、理光打印机扫描设置
第一步:设置电脑
1、网络网络和共享中心更改高级共享设置家庭或工作/公用关闭密码保护共享完成
2、电脑的某个盘中新建文件夹并命名右键属性中的共享添加Everyone Everyone 权限级别改为“读取/写入”
共享系统提示“您的文件夹已共享”(此时会提示电脑型号及共享的文件夹名称,设置打印机的扫描时用)完成
第二步:设置打印机
打印机主界面的“通讯簿管理”新编入
更改名称(命名与电脑中设置的共享文件夹名称相同,方便查找,建议用个人名字首字母)文件夹中浏览网络
找到设置扫描的电脑型号输入用户名(如果没改就是administrator)及密码(打开电脑时的密码,没有就不填)
确定测试网络若提示“与PC连接成功”则说明连接成功完成
第三步:扫描
1、扫描设置选彩色、黑白
2、原稿进纸类型选单面原稿、双面原稿
3、发送文件类型/名称选tiff格式、Pdf 格式(Pdf/A表示压缩文件)
4、选择“文件夹”(扫描文件发送处,也就是自己电脑上设置的共享文件夹)按开始键完成
(若是没有装订在一起的多张文件,可放在打印机上盖自动扫描;若是装订的书本则需打开打印机上盖,一张一张手动翻页扫描)
二、惠普打印机扫描设置
1、放入扫描文件
2、电脑打开HP M1530 Scan(装HP打印机驱动时,自动有此软件)
3、选择格式、大小、输出类型、文件类型扫描保存完成
理光打印机端口重设方法
开始所有程序设备和打印机找到打钩的理光打印机选中打印机,鼠标右键打印机属性端口添加端口选择Standard TCP/IP Port 新端口下一步
输入IP地址:192.168.0.200 完成应用确定。
AD与Exchange2003邮件服务器详细设置技术信息
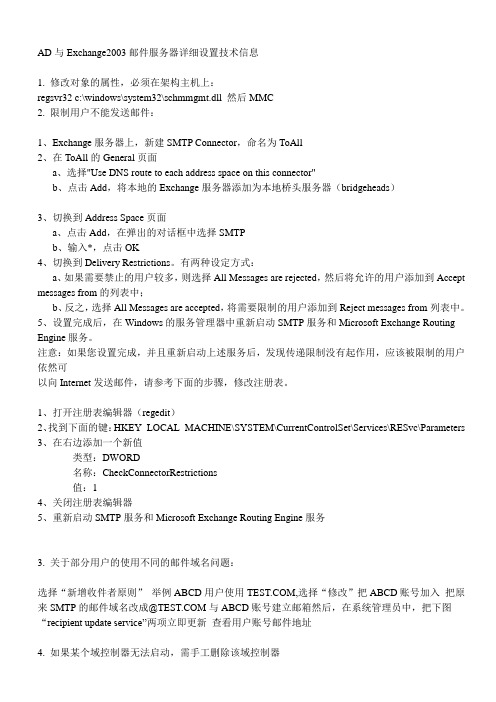
AD与Exchange2003邮件服务器详细设置技术信息1. 修改对象的属性,必须在架构主机上:regsvr32 c:\windows\system32\schmmgmt.dll 然后MMC2. 限制用户不能发送邮件:1、Exchange服务器上,新建SMTP Connector,命名为ToAll2、在ToAll的General页面a、选择"Use DNS route to each address space on this connector"b、点击Add,将本地的Exchange服务器添加为本地桥头服务器(bridgeheads)3、切换到Address Space页面a、点击Add,在弹出的对话框中选择SMTPb、输入*,点击OK4、切换到Delivery Restrictions。
有两种设定方式:a、如果需要禁止的用户较多,则选择All Messages are rejected,然后将允许的用户添加到Accept messages from的列表中;b、反之,选择All Messages are accepted,将需要限制的用户添加到Reject messages from列表中。
5、设置完成后,在Windows的服务管理器中重新启动SMTP服务和Microsoft Exchange Routing Engine服务。
注意:如果您设置完成,并且重新启动上述服务后,发现传递限制没有起作用,应该被限制的用户依然可以向Internet发送邮件,请参考下面的步骤,修改注册表。
1、打开注册表编辑器(regedit)2、找到下面的键:HKEY_LOCAL_MACHINE\SYSTEM\CurrentControlSet\Services\RESvc\Parameters3、在右边添加一个新值类型:DWORD名称:CheckConnectorRestrictions值:14、关闭注册表编辑器5、重新启动SMTP服务和Microsoft Exchange Routing Engine服务3. 关于部分用户的使用不同的邮件域名问题:选择“新增收件者原则”举例ABCD用户使用,选择“修改”把ABCD账号加入把原来SMTP的邮件域名改成@与ABCD账号建立邮箱然后,在系统管理员中,把下图“recipient update service”两项立即更新查看用户账号邮件地址4. 如果某个域控制器无法启动,需手工删除该域控制器步骤:重新启动主域控制器,进入活动目录恢复模式,输入ntdsutil,输入:metadata cleanup 输入:connection 输入:connect to server servername FQDN,输入:quit 输入:select operation target 输入:list sites 输入:select site sitenamber 输入:list domains in site 输入:select domain domainnumber 输入:quit 输入:remove selected domain 输入:quit即可注:域控制器可以在本域中更改名称,但如果跨域改名时,需要先降级然后再升级为新域的控制器5. 恢复AD1、原始恢复用于重建域中的第一个域控制器。
理光维修程序
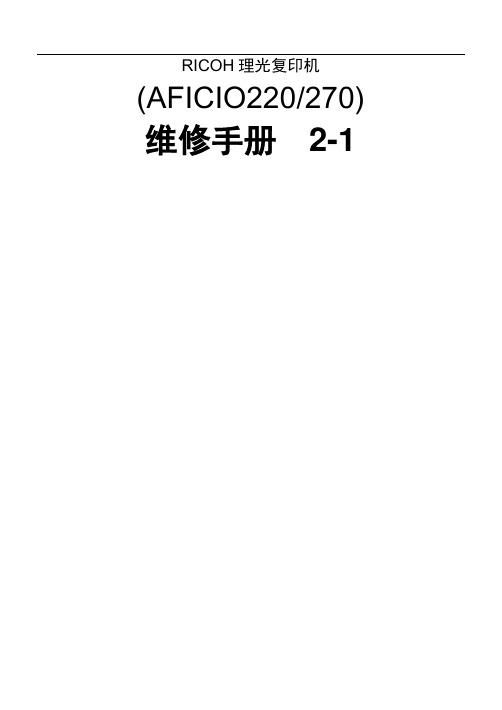
若未用SP-908-9存储中等尺寸的阈值,不使用此SP。
0~2000
1ms/档
300ms
当第1纸盘里的纸变少时,发生送纸问题使用此SP。SP1-908上的详细说明,见“纸提升机构”。
6
第1纸盘纸量(小尺寸)
用SP1-908-4对使用选择剩余纸量的限制。
若不用SP1-909-9存储中等尺寸的阈值,此SP对大于SP1-909-8设定的小尺寸阈值的纸尺寸调节上面的纸提升电机的反转时间。
若用SP-909-9存储中等尺寸的阈值,此SP然后对大于中等尺寸的尺寸调节电机的反转时间。
勿输入大于1200的值。
0~2000
1ms/档
200ms
当从第2纸盘上发生送纸问题时,使用此SP模式。
模式号
功能
设定值
级别1
和2
级别
3
1-910*
1
第3底板压力的调节(一般尺寸)
(可选的PFU)
若不用SP1-910-9存储中等尺寸的阈值,此SP对大于SP1-910-8设定的小尺寸阈值的纸尺寸调节上面的纸提升电机的反转时间。
1ms/档
400ms
当第1纸盘里的纸变少时,发生送纸问题使用此SP。SP1-908上的详细说明,见“纸提升机构”。
模式号
功能
设定值
级别1
和2
级别
3
1-908*
5
第1底板压力的再调节(中等尺寸)
对大于SP1-908-8设定的小尺寸阈值的纸张尺寸、等于和包括SP1-908-9设定的中等尺寸阈值的纸尺寸调节上面的纸张提升正向转动时间。
0:无(空的)
1:接近用完
2:25%
理光常用操作
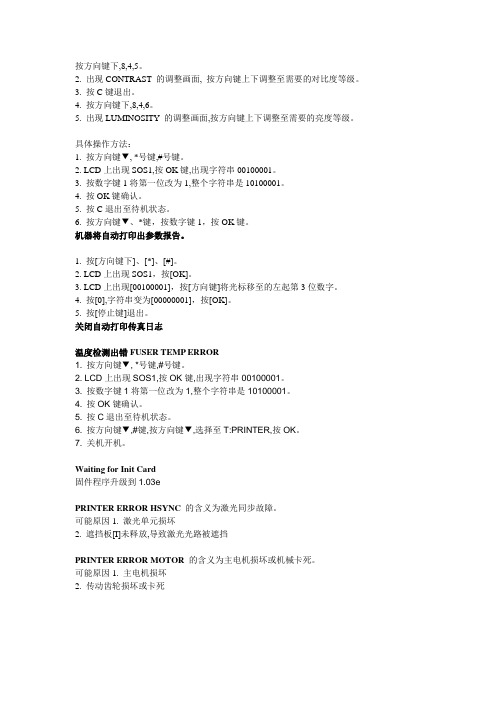
按方向键下,8,4,5。
2. 出现CONTRAST 的调整画面, 按方向键上下调整至需要的对比度等级。
3. 按C键退出。
4. 按方向键下,8,4,6。
5. 出现LUMINOSITY 的调整画面,按方向键上下调整至需要的亮度等级。
具体操作方法:1. 按方向键▼, *号键,#号键。
2. LCD上出现SOS1,按OK键,出现字符串00100001。
3. 按数字键1将第一位改为1,整个字符串是10100001。
4. 按OK键确认。
5. 按C退出至待机状态。
6. 按方向键▼、*键,按数字键1,按OK键。
机器将自动打印出参数报告。
1. 按[方向键下]、[*]、[#]。
2. LCD上出现SOS1,按[OK]。
3. LCD上出现[00100001],按[方向键]将光标移至的左起第3位数字。
4. 按[0],字符串变为[00000001],按[OK]。
5. 按[停止键]退出。
关闭自动打印传真日志温度检测出错FUSER TEMP ERROR1. 按方向键▼, *号键,#号键。
2. LCD上出现SOS1,按OK键,出现字符串00100001。
3. 按数字键1将第一位改为1,整个字符串是10100001。
4. 按OK键确认。
5. 按C退出至待机状态。
6. 按方向键▼,#键,按方向键▼,选择至T:PRINTER,按OK。
7. 关机开机。
Waiting for Init Card固件程序升级到1.03ePRINTER ERROR HSYNC的含义为激光同步故障。
可能原因1. 激光单元损坏2. 遮挡板[I]未释放,导致激光光路被遮挡PRINTER ERROR MOTOR 的含义为主电机损坏或机械卡死。
可能原因1. 主电机损坏2. 传动齿轮损坏或卡死快捷操作步骤:▼21-SETUP/DATE/TIME进入此菜单可以修改机器的时间和日期。
快捷操作步骤:▼54-PRINT/SETUP耗材的剩余量电平调快捷操作步骤:▼80-ADVANCED FCT/CALIBRATION当复印/扫描质量不令人满意时,执行此操作。
RICOH 打印机 操作说明书

i
装载信封 ............................................................................................................... 42
4. 样张打印 / 锁定打印
样张打印 .................................................................................................... 47 打印样张打印文件 ............................................................................................... 47 删除样张打印文件 ............................................................................................... 49 查看错误日志 ....................................................................................................... 50
RPCS -使用打印机属性 ............................................................................. 8 使用打印机属性 ..................................................................................................... 8
电子邮件服务器的配置

电子邮件服务器配置电子邮件是目前上网族最常用的联系方式之一,用户可以使用申请到的免费或收费电子邮箱传递资料和信息,既方便又快捷。
目前有多家互联网企业可以提供电子邮件服务(如网易、搜狐、Google的Gmail 等),这些企业往往会搭建功能足够强劲的邮件服务器为用户提供优质服务。
搭建邮件服务器往往需要借助专用的工具软件(Foxmail Server、Microsoft Exchange 和Imail),不过随着Windows Server 2003系统中内置了POP3(邮局协议)服务组件,用户无需借助第三方工具软件也能够搭建邮件服务器。
本节内容以POP3服务组件和winmail为例,谈谈在局域网中搭建邮件服务器的方法。
POP3组件是Windows Server 2003系统新增加的服务组件,从而结束了Windows 2000 Server系统只能发送而不能接收邮件的缺点。
使用POP3服务组件能够搭建一台适用于中小型局域网的邮件服务器,方便实用。
1. 安装电子邮件服务组件POP3服务组件不是Windows Server 2003(SP2)系统默认安装的组件,用户需要手动添加该组件,操作步骤如下所述:Step1 在“控制面板”窗口中双击【添加或删除程序】图标,在打开的“添加或删除程序”窗口中单击【添加/删除Windows组件】按钮。
Step2 打开“Windows组件向导”对话框,在“组件”列表中选中【电子邮件服务】复选框。
选中该选项后Windows组件向导将安装POP3组件,并安装简单邮件传输协议(SMTP)。
单击【下一步】按钮,如图Step3 Windows组件向导开始安装电子邮件服务组件和远程管理工具,在安装过程中需要插入Windows Server 2003(SP2)的安装光盘或指定系统安装路径。
另外在安装电子邮件服务组件的同时,还会自动安装配置远程管理工具。
完成安装后单击【完成】按钮关闭Windows组件向导。
理光工程打印机使用说明
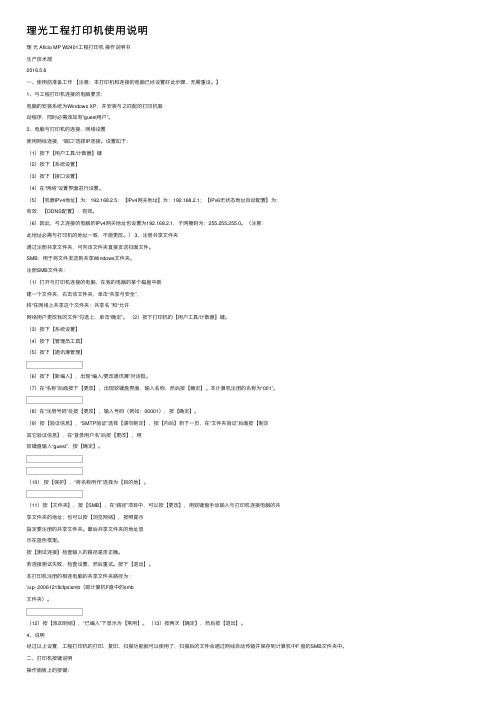
理光⼯程打印机使⽤说明理光 Aficio MP W2401⼯程打印机操作说明书⽣产技术部2016.5.6⼀、使⽤前准备⼯作【注意:本打印机和连接的电脑已经设置好此步骤,⽆需重设。
】1、与⼯程打印机连接的电脑要求:电脑的安装系统为Windows XP,并安装与之匹配的打印机驱动程序,同时必需添加有“guest⽤户”。
2、电脑与打印机的连接,⽹络设置使⽤⽹线连接,“端⼝”选择IP连接。
设置如下:(1)按下【⽤户⼯具/计数器】键(2)按下【系统设置】(3)按下【接⼝设置】(4)在“⽹络”设置界⾯进⾏设置。
(5)【机器IPv4地址】为:192.168.2.5;【IPv4⽹关地址】为:192.168.2.1;【IPv6⽆状态地址⾃动配置】为:有效;【DDNS配置】:有效。
(6)因此,与之连接的电脑的IPv4⽹关地址也设置为192.168.2.1,⼦⽹掩码为:255.255.255.0。
(注意:此地址必需与打印机的地址⼀致,不能更改。
) 3、注册共享⽂件夹通过注册共享⽂件夹,可向该⽂件夹直接发送扫⾯⽂件。
SMB:⽤于将⽂件发送到共享Windows⽂件夹。
注册SMB⽂件夹:(1)打开与打印机连接的电脑,在我的电脑的某个磁盘中新建⼀个⽂件夹,右击该⽂件夹,单击“共享与安全”,将“在⽹络上共享这个⽂件夹:共享名 ”和“允许⽹络⽤户更改我的⽂件”勾选上,单击“确定”。
(2)按下打印机的【⽤户⼯具/计数器】键。
(3)按下【系统设置】(4)按下【管理员⼯具】(5)按下【通讯薄管理】(6)按下【新编⼊】,出现“编⼊/更改通讯簿”对话框。
(7)在“名称”后⾯按下【更改】,出现软键盘界⾯,输⼊名称,然后按【确定】。
本计算机注册的名称为“001”。
(8)在“注册号码”处按【更改】,输⼊号码(例如:00001),按【确定】。
(9)按【验证信息】,“SMTP验证”选择【请勿制定】,按【向后】到下⼀页,在“⽂件夹验证”后⾯按【制定其它验证信息】,在“登录⽤户名”后按【更改】,⽤软键盘输⼊“guest”,按【确定】。
用Win2003配置邮件服务器
用Win 2003配置邮件效劳器一、概述大家知道,邮件系统由POP3效劳、简单邮件传输协议(SMTP)效劳以及电子邮件客户端三个组件组成。
其中的POP3效劳与SMTP效劳一起使用,POP3为用户提供邮件效劳,而SMTP那么用于发送邮件以及邮件在效劳器之间的传递。
电子邮件客户端是用于读取、撰写以及管理电子邮件的。
Windows Server 2003新增的POP3效劳组件可以使用户无需借助任何工具软件,即可搭建一个邮件效劳器。
通过电子邮件效劳,可以在效劳器计算机上安装POP3组件,以便将其配置为邮件效劳器,管理员可使用POP3 效劳来存储和管理邮件效劳器上的电子邮件帐户。
下面的内容是让我们来讨论邮件效劳器的配置与管理。
二、配置POP3邮件效劳器初始安装完毕后,POP3效劳组件并没有被安装。
因此在配置POP3效劳之前,必须首先要安装相应的组件,然后才可以进行诸如身份验证方法的设置、邮件存储区设置、域及邮箱的管理等工作。
POP3 效劳提供三种不同的身份验证方法来验证连接到邮件效劳器的用户。
在邮件效劳器上创立任何电子邮件域之前,必须选择一种身份验证方法。
只有在邮件效劳器上没有电子邮件域时,才可以更改身份验证方法。
1、本地Windows账户身份验证如果邮件效劳器不是活动目录域的成员,并且希望在安装了邮件效劳的本地计算机上存储用户账户,那么可以使用“本地Windows 帐户〞身份验证方法来进行邮件效劳的用户身份验证。
本地Windows账户身份验证将邮件效劳集成到本地计算机的账户管理器(SAM)中。
通过使用平安帐户管理器,在本地计算机上拥有用户账户的用户就可使用与由POP3效劳提供的或本地计算机进行身份验证的相同的用户名和密码。
本地Windows账户身份验证可以支持一个效劳器上的多个域,但是不同域上的用户名必须惟一的。
例如,用户名为webmaster@和webmaster@jscei 的用户不能同时在一个效劳器上存在的。
理光MP C3002多功能一体机操作说明书

6
2. 使用远程传真发送/接收文件
本章介绍如何使用远程传真功能发送和接收传真。
远程传送
在操作之前,请先确认主机器的主电源开关已经打开。 1. 按控制面板左上角的[主页]键。
CMR612
2. 按[主页]屏幕中的[远程传真]图标。
[]
表示出现在本机显示或控制面板上的按键名称。
2
1. 开始使用
本章概述远程传真功能的配置。
远程传真概述
如果可使用远程传真功能连接到具备传真功能的机器(主机器),您就可以从不具备传真功 能的机器(从机器)。发送和接收传真
CJQ612
发送传真的步骤与安装有传真装置的机器相同。传真任务结束时,请确认发送记录上显示的 或报告上打印的结果。 您可以把从带传真功能的主机器接收的文件转发给从机器。
操作说明书
为了安全正确地使用本机器,在使用之前,请务必仔细阅读入门摂的安全信息。
目录
如何阅读本手册....................................................................................................................................... 2 本手册中使用的符号........................................................................................................................... 2
• 打印纸张受限于最高优先级的纸张(正确尺寸打印)(开关 05,位 5)
