科力达K9产品手册范本
XK3118K9使用说明书

XK3118K9电子称重仪表使用说明书2011年06月版●使用前请仔细阅读本产品说明书●请妥善保管本产品说明书,以备查阅宁波柯力电气制造有限公司浙制00000577号仪表使用注意事项▲传感器与仪表的连接必须可靠,传感器的屏蔽线必须可靠接地。
▲在仪表通电状态下,所有连接线不允许进行插拔,防止静电损坏仪表或传感器。
▲传感器和仪表都是静电敏感设备,在使用中必须切实采取防静电措施。
▲在雷雨季节,系统必须落实可靠的避雷措施,防止因雷击造成传感器和仪表的损坏,确保操作人员的人身安全和称重设备及相关设备的安全运行。
▲不得在有可燃性气体或可燃性蒸汽的场合使用,不得在有压力的罐装系统中使用。
▲仪表和传感器须远离强电场强磁场,远离强腐蚀性物体,远离易燃易爆物品。
▲严禁使用强溶剂(如:苯、硝基类油)清洗机壳。
▲不得将液体或其他导电颗粒注入仪表内,以防仪表损坏和触电。
▲本产品非经技术监督部门授权,不得擅自开启铅封,不破坏铅封不能标定。
◆为保证仪表显示清晰和使用寿命,仪表不宜放在阳光直射下使用,放置地点应较平整。
◆仪表不宜放在粉尘及振动严重的地方使用,避免在潮湿的环境中使用。
◆在插拔仪表与外部设备连接线前,必须先切断仪表及相应设备电源。
◆仪表对外接口须严格按使用说明书中所标注的方法使用,不得擅自更改连接。
◆本仪表不允许随意打开,否则不予保修。
非衡器仪表专业人员请不要自行修理以免造成更大的损坏。
◆本仪表自销售之日起一年内,在正常使用环境下,出现非人为故障属保修范围,请用户将产品及保修卡(编号相符),寄往特约维修点或经销商。
◆超过保修期以及人为故障或其他意外损坏,生产厂对仪表实行收费维修。
由于产品功能改进,印刷版可能与实际产品略有差别,请联系公司获取最新电子版亲爱的用户,感谢您选择柯力公司的产品在使用仪表前,敬请仔细阅读使用说明书本公司保留修改说明书的权利1)技术参数执行标准:GB/T 7724-2008 最大检定分度数: n=3000准确度等级: III 误差分配系数: p i =每检定分度值最小输入电压:≥eA/D转换方式:Δ-Σ方式,24bit传感器供桥电压:D C+ 5V;可接1~12个350Ω电阻应变式传感器传感器连接方式:采用6线式(长线自动补偿,补偿距离≤50米)显示:7位LED,7个状态指示灯,3个电量指示灯,1个交流指示灯时钟:可显示年/月/日、时/分/秒,自动闰年、闰月,不受断电影响大屏幕接口:电流环/RS232输出方式,波特率:600bps 传输距离:≤30米串行通讯接口:传输方式:RS232 传输距离:RS232≤30米波特率: 600/1200/2400/4800/9600可选打印接口:标准并行输出接口,可接TPup16微打(英文)、KX-P1121、KX-P1131、LQ300K+Ⅱ、LQ1600K、TM800、LQ-680K、DS-300和LQ-730K/630K/635K等宽行打印机数据贮存数量:车号和皮重:≤200个货号:≤100个称重记录:≤500组使用电源:交流电源:AC110~220V,50~60Hz使用环境使用温度:0℃~40℃使用湿度:≤85%(RH)无冷凝存储环境:存贮温度:-20℃~60℃存贮湿度:≤95%(RH)无冷凝外形尺寸(mm):330 ×220 ×185产品自重(Kg):约452)安装仪表示意图XK3118K9仪表前面板示意图仪表接口示意图传感器与仪表的连接说明脚位名称代号1传感器负激励E-2传感器负反馈F-6传感器正激励E+7传感器正反馈F+8传感器信号输入负S-9传感器信号输入正S+5屏蔽SHIELD 如果使用四芯屏蔽电缆时,必须将正激励与正反馈、负激励与负反馈短接!!!▲传感器与仪表的连接必须可靠,传感器的屏蔽线必须可靠接地。
KDK9说明书

KDK9型矿用多功能控制驱动器使用说明书天地(常州)自动化股份有限公司2008年8月KDK9 型矿用多功能控制驱动器(以下简称驱动器)是矿用隔爆兼本质安全型设备,适用于存在瓦斯、煤尘爆炸危险的环境,可采集输入、输出口状态,并发送到总线上;也可接收总线上的信号,控制该驱动器的输出状态,还具有本安、非安转换功能。
本驱动器既可以与矿用本安型控制机、智能闭锁开关等设备配套使用,也可以单独用于各种机电设备的控制。
1.1 执行标准Q/320400 MZ153-2008 KDK9型矿用多功能控制驱动器。
1.2 防爆型式矿用隔爆兼本质安全型,标志为Exd[ib]I。
1.3 型号意义KD K 9登记序号电控箱矿用电源电控设备及组件1.4 使用环境条件a)环境温度:0~40℃;b)空气相对湿度:不大于95%(+25℃);c)大气压力:80kPa~106kPa ;d)无显著振动和冲击的场合;e)煤矿井下有瓦斯煤尘爆炸危险但周围无腐蚀性气体的环境。
1.5 主要功能a)具有远程控制、就地手动和就地检修调试3种控制方式。
b)具有采集各I/O的状态并发送至总线,还能接收总线命令或本安输入口状态控制继电器接点动作。
c)具有急停闭锁输出控制功能,在皮带急停时,实现对输出口的闭锁。
d)具有未起动闭锁功能:在皮带未起动时,实现对输出口闭锁。
e)具有本安输入信号与非安接点信号转换功能。
f)通讯功能:采用现场总线(CAN)与其它设备进行通讯。
2 主要技术指标2.1 电源a)电压:交流127V、220V、380V、660V,各电压等级对应输入视在功率见表1。
b) 频率:50Hz;c) 电压波动范围:75%~110%。
2.2 信号输入与输出2.2.1 输入2.2.1.1本安输入a)4路本安开关量信号输入:高电平时,信号幅度应不小于2.5V;低电平时,信号幅度应不大于1V;b)1路联锁控制信号输入:在总线控制时,输入信号为频率型方波信号,正常范围:输入为15K~20KHz方波信号,高电平应不小于2.5V,低电平不大于1V;急停范围:小于14KHz方波信号,高电平应不小于2.5V,低电平不大于1V。
CUSK9用户手册
快速操作一、引言二、产品外观三、系统功能四、主要参数五、安装接线六、基本操作七、联网设置八、故障检修九、软件安装十、门禁控制十一、考勤管理一、操作步骤:1、安装接线(参见第页)2、安装软件(参见第页)3、控制器注册-与计算机建立通讯连接(参见第页)4、录入人事资料(参见第页)5、设置通行权限(发送用户信息及权限;参见第页)6、正常使用控制器户手册目录快速操作指南7、下载数据(参见第 页)9、排班(参见第 页)10、统计考勤(参见第 页)四、系统菜单图:引言:感谢您使用本非接触式感应卡门禁考勤管理系统,在使用本系统之 前,请您详细阅读本用户手册,并严格按照手册中的要求来操作。
此用户手册将介绍本系统主要功能及操作使用方法。
本门禁考勤系统采用目前世界上先进的技术 -非接触式感应卡技术(也称射频识别卡(RFID )技术,RFID 卡具有全球卡号唯一、不易仿制的读写磁粉脱落、灰尘等影响所带来的麻烦,而且避免了接触式IC 卡因芯片与读卡器外露而 引起的沾污、接触不良和外物损伤而导致的读卡不良现象, 系统都自动记录下来,管理者可以通过计算机下载调阅门禁控制系统存储的信息资料, 轻松查阅、打印所有的通行事件。
管理软件将根据此原始资料自动统计员工考勤情况、编制考勤报表。
本系统提供了一种智能化的出入口控制及考勤管理方式,适用于需要控制人员出入的通道、商务机构、政府机关以及考勤管理人员较多的企事 业单位。
二、产品外观:二、系统功能:1、 中英文液晶显示屏,带冷色调蓝背光可,修改屏幕显示,读卡时显示持卡人姓名2、 系统自带中英文菜单,可脱机操作,人性化设计3、 存储容量达20000条通行记录,2000张用户卡及密码、100张访客卡4、 读卡,读卡加密码,读卡或密码三种开门模式;每天八个个性化禁行时段;个性化节假日管制功能5、 通行记录类型分为用户进门、用户出门,禁行时段不开门、节假日不开门、紧急状态不开门、非法卡不开门、防潜回不开门,防拆报警、门磁异常报警等不同记 录,可实时区分进入、外出人次数6、 实时监控:可实时监控以上的各种状态以及门的开关状态,实时显示读卡人员的姓名、相片、编号等资料7、 RS485总线联网,布线简易实用,最多可联网 64台8、 新增访客卡及进出防潜回功能9、 主要输入/输出功能:电锁、开门按钮、报警器、门磁、门铃10、 管理软件集门禁、考勤、人事于一体8设置班次及考勤时段(参见第页)11、请假登记及签卡登记(参见第页) 12、查询各类考勤报表(参见第页)二、名词解释: ESC |键、两次 8」键、再长按 ENT 键获取。
科力达风云K9T技术参数
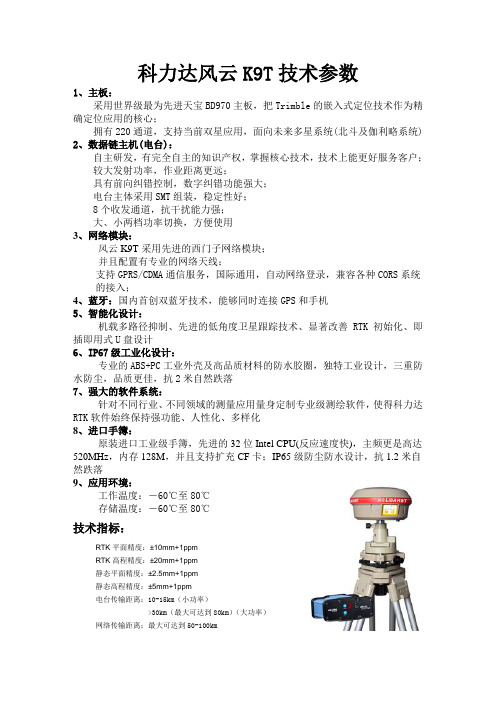
科力达风云K9T技术参数1、主板:采用世界级最为先进天宝BD970主板,把Trimble的嵌入式定位技术作为精确定位应用的核心;拥有220通道,支持当前双星应用,面向未来多星系统(北斗及伽利略系统) 2、数据链主机(电台):自主研发,有完全自主的知识产权,掌握核心技术,技术上能更好服务客户;较大发射功率,作业距离更远;具有前向纠错控制,数字纠错功能强大;电台主体采用SMT组装,稳定性好;8个收发通道,抗干扰能力强;大、小两档功率切换,方便使用3、网络模块:风云K9T采用先进的西门子网络模块;并且配置有专业的网络天线;支持GPRS/CDMA通信服务,国际通用,自动网络登录,兼容各种CORS系统的接入;4、蓝牙:国内首创双蓝牙技术,能够同时连接GPS和手机5、智能化设计:机载多路径抑制、先进的低角度卫星跟踪技术、显著改善 RTK 初始化、即插即用式U盘设计6、IP67级工业化设计:专业的ABS+PC工业外壳及高品质材料的防水胶圈,独特工业设计,三重防水防尘,品质更佳,抗2米自然跌落7、强大的软件系统:针对不同行业、不同领域的测量应用量身定制专业级测绘软件,使得科力达RTK软件始终保持强功能、人性化、多样化8、进口手簿:原装进口工业级手簿,先进的32位Intel CPU(反应速度快),主频更是高达520MHz,内存128M,并且支持扩充CF卡;IP65级防尘防水设计,抗1.2米自然跌落9、应用环境:工作温度:-60℃至80℃存储温度:-60℃至80℃技术指标:RTK平面精度:±10mm+1ppmRTK高程精度:±20mm+1ppm静态平面精度:±2.5mm+1ppm静态高程精度:±5mm+1ppm电台传输距离:10-15km(小功率)>30km(最大可达到80km)(大功率)网络传输距离:最大可达到50-100km。
电子经纬仪说明书
前言
尊敬的用户: 欢迎您购买和使用本公司的产品,向您对本公司产品的
信任表示衷心的感谢! 广东科力达仪器有限公司是一个集科研、生产、销售、
出口为一体的专业测绘仪器公司,有多个测绘仪器制造厂 家,分别生产电子经纬仪、测距仪、全站仪、水准仪、激光 墨线仪及扫平仪、反射棱镜、脚架、对中杆等八大系列近 100 个品种。科力达以测绘仪器国产化为已任,为中国测绘仪器 经销商和用户提供质优价廉的测绘仪器。
生产的多种测距仪联机,组成组合式全站仪,联机和使用均 十分方便。
可与电子记录手簿联接 可与科力达仪器公司或其他公司生产的电子记录手簿
联机,完成野外数据的自动采集。
按键操作简单 仅 6 个功能键即可实现各种测量功能,并且可以将测距
仪的距离数据显示在电子经纬仪的显示器上。
黑暗环境亦可操作 望远镜十字丝和显示屏有照明光源,便于在黑暗环境中
公司倾力打造了遍及全国的销售网络和维修服务中心, 努力提高经销商的销售能力和水平,为他们培养技术和维修 人员等力量,使用户放心,经销商满意。
中国是世界的工厂,中国将成为世界测绘仪器制造王 国,科力达将成为世界测绘仪器生产基地。
本公司生产的测绘仪器具有美观的外形及高质量的功 能与性能。为让您掌握它所有的功能和性能,以便在作业中 应用自如并避免发生故障,我们建议您在使用仪器前仔细阅 读本使用说明书,并请遵守本书每一章节的操作及注意事 项。
·2·
PDF 文件使用 "pdfFactory" 试用版本创建
科力达电子经纬仪操作手册
6.5. 水平角象限鸣响设置....................................................24 6.6. 竖直角的零方向设置....................................................24 6.7. 天顶距与垂直角的测量................................................25 6.8. 斜率百分比....................................................................25 6.9. 望远镜视距丝测距........................................................26 7. 与测距仪及电子手薄联接组合成多功能全站仪...............27 8. 检验与校正 ..........................................................................29 8.1. 长水准器........................................................................29 8.2. 圆水准器........................................................................29 8.3. 望远镜分划板倾斜........................................................30 8.4.视准轴与横轴的垂直度(2C) ...................................31 8.5. 竖盘指标零点自动补偿................................................32 8.6.竖盘指标差(i 角)和竖盘指标零点设置..................32 8.7. 光学对中器....................................................................34 8.8. 其它调整........................................................................35 9. 技术指标 ..............................................................................36 10.错误代码信息表 .................................................................38 11.附件 .....................................................................................39
科力达K9产品手册

科力达GPS 产品系列风云K9产品手册广东科力达仪器有限公司二○○八年六月目录第一章风云K9概述 (1)§1.1关于风云K9 (1)§1.2三大独创 (2)§1.3四大特色 (3)§1.4技术特色 (3)第二章风云K9主机 (5)§2.1主机外型 (5)§2.2接口 (6)§2.3电池的安装方法 (7)§2.4指示灯和蜂鸣器 (8)§2.5按键操作说明 (10)§2.6模式设置举例 (10)§2.6.1 正常工作模式 (10)§2.6.2 状态设置模式和显示模式 (11)第三章风云K9电台 (12)§3.1电台概述 (12)§3.1.1 产品简介 (12)§3.1.2 产品特点 (12)§3.1.3 技术指标 (13)§3.2GDL25电台外型说明 (14)§3.2.1 GDL25电台的面板 (14)§3.2.2 GDL25电台的外型 (15)§3.3GDL25电台使用注意事项 (16)§3.3.1 供电电源 (16)§3.3.2 天线口负载 (17)§3.3.3 电磁环境 (17)§3.3.4 天线选择 (18)§3.3.5 接口电缆 (18)第四章风云K9附件介绍 (19)§4.1风云K9的仪器箱(包) (19)§4.2电池及充电器 (21)§4.3数据链接收天线及发射天线 (21)§4.4各种传输线及电缆 (22)§4.5其他 (24)第五章操作说明 (25)§5.1基准站和移动站安装 (25)§5.2仪器设置 (26)§5.3仪器操作表现 (26)§5.4天线高的量测方法 (27)§5.5作业方法图解 (27)第六章固件升级与频点设置 (30)§6.1固件升级 (30)§6.2K9的电台频点设置 (34)附录A 技术参数 (35)附录B 联系方式 (36)附录C 全国销售及服务网络列表 (37)风云K9产品手册第一章风云K9概述§1.1 关于风云K9广东科力达仪器有限公司一直致力于把国际先进的GPS测绘勘测技术与产品普及到国内测量用户手中。
PPG OPTOMUX Catalog Number 1203-GD9、GK9用户手册说明书

Bulletin 1203Serial Communications Module PPG OPTOMUXCatalog Number 1203-GD9, –GK9User ManualImportant User Information Because of the variety of uses for this equipment and because of thedifferences between this solid-state equipment and electromechanicalequipment, the user of and those responsible for applying this equipmentmust satisfy themselves as to the acceptability of each application and useof the equipment. In no event will Allen-Bradley Company be responsibleor liable for indirect or consequential damages resulting from the use orapplication of this equipment.The illustrations shown in this manual are intended solely to illustrate thetext of this manual. Because of the many variables and requirementsassociated with any particular installation, the Allen-Bradley Companycannot assume responsibility or liability for actual use based upon theillustrative uses and applications.No patent liability is assumed by Allen-Bradley Company with respect touse of information, circuits or equipment described in this text.Reproduction of the content of this manual, in whole or in part, withoutwritten permission of the Allen-Bradley Company is prohibited.This information in this manual is organized in numbered chapters. Readeach chapter in sequence and perform procedures when you are instructedto do so. Do not proceed to the next chapter until you have completed allprocedures.Attentions help you:•identify a hazard•avoid the hazard•recognize the consequencesIMPORTANT: Identifies information that is especially important forsuccessful application and understanding of the product.Summary Information Information for the –GK9 module was added to this manual.This Page Intentionally Left BlankIntroduction Chapter 1. . . . . . . . . . . . . . . . . . . . . . . . . . . . . . . . . . . . . . . .Manual Objectives1-1. . . . . . . . . . . . . . . . . . . . . . . . . . . . . . .Who Should Use This Manual1-1V ocabulary1-1. . . . . . . . . . . . . . . . . . . . . . . . . . . . . . . . . . . . . . . . . . . . . .. . . . . . . . . . . . . . . . . . . . . . . . . . . . . . . . . . . . . . . .Firmware Support1-1Manual Organization1-2. . . . . . . . . . . . . . . . . . . . . . . . . . . . . . . . . . . . . .. . . . . . . . . . . . . . . . . . . . . . . . . . . . . . . . . . . . . . . .Safety Precautions1-2 Product Description Chapter 2. . . . . . . . . . . . . . . . . . . . . . . . . . . . . . . . . . . . . . . .Chapter Objectives2-1Module Description2-1. . . . . . . . . . . . . . . . . . . . . . . . . . . . . . . . . . . . . . .. . . . . . . . . . . . . . . . . . . . . . . . . . . . .SCANport Device Compatibility2-1. . . . . . . . . . . . . . . . . . . . . . . . . . . . . . . . . . . .Configuration Switches2-3 Installation Chapter 3. . . . . . . . . . . . . . . . . . . . . . . . . . . . . . . . . . . . . . . .Chapter Objectives3-1. . . . . . . . . . . . . . . . . . . . . . .Setting Module Configuration Switches3-1. . . . . . . . . . . . . . . . . . . . . . . . . . . . . . . .Factory Switch Settings3-2. . . . . . . . . . . . . . . . . . . . . . . . . . . . . . . . . . . . . . . . .Switch SW13-3Switch SW23-5. . . . . . . . . . . . . . . . . . . . . . . . . . . . . . . . . . . . . . . . .. . . . . . . . . . . . . . . . . . . . . . . . . . . . . . . . . . . . . . . . .Switch SW33-6. . . . . . . . . . . .Enclosed Style Communications Module Dimensions3-7. . . . . . . . . . . . . . . . . . . . . . . . . . . . . . . . . . . . . . . .Cable Connections3-8. . . . . . . . . . . . . . .RS485/RS422/RS232 Connection Examples3-8. . . . . . . . . . . . . . . . . . . . . . . . . . . . . . . .SCANport Link Connection3-9Cable Requirements3-9. . . . . . . . . . . . . . . . . . . . . . . . . . . . . . . . . . .. . . . . . . . . . . . . . . . . . . . . . . . . . . . . . . . .Power Supply Connections3-10Troubleshooting Chapter 4. . . . . . . . . . . . . . . . . . . . . . . . . . . . . . . . . . . . . . . .Chapter Objectives4-1Specifications Chapter 5Chapter Objectives5-1. . . . . . . . . . . . . . . . . . . . . . . . . . . . . . . . . . . . . . . .. . . . . . . . . . . . . . . . . . . . . . . . . . . . . . . . . . . . .Product Specifications5-1. . . . . . . . . . . . . . . . . . . . . . . . . . . . . . . . . . . . .Module Compatibility5-1Index I-1. . . . . . . . . . . . . . . . . . . . . . . . . . . . . . . . . . . . . . . . . . . . . . . . . . . . . . . .iThis Page Intentionally Left Blank. ii1IntroductionManual Objectives The purpose of this manual is to provide you with the necessaryinformation to apply the Serial Communications Module which is availablefor products that include the SCANport t communications port. Describedin this manual are methods for installing, configuring, and troubleshootingthe Serial Communications Module.For information on specific features of Allen-Bradley products mentionedherein, refer to the product user manual.Important: Read this manual in its entirety before installing, operating,servicing, or initializing the Serial Communications Module.Who Should Use This Manual This manual is intended for qualified service personnel responsible forsetting up and servicing of these devices. You must have previousexperience with and a basic understanding of communications terminology,configuration procedures, required equipment, and safety precautions.To make efficient use of this communications module, you must be able toprogram and operate serial communications devices, as well as have abasic understanding of the parameter settings and functions of the device towhich you are communicating.Vocabulary In this manual we refer to the:S Serial Communications Module as communications moduleS Variable Frequency AC Drive (Bulletin 1336 PLUS) as the drive orSCANport deviceS Earth Ground as GNDFirmware Support This manual supports communications module firmware versions 1.xx (the“xx” designator may vary). Features that work with specific firmwareversions will be denoted as such.1-1Manual Organization This manual is divided into the following chapters.Safety Precautions1-22Product DescriptionChapter Objectives In this chapter, you will read about:S Communications module featuresS Location of configuration switchesModule Description This module is designed to be used with the 1336-EN20. It is notcompatible with any other SCANport devices. The serial deviceconfigurations are as follows:SCANport Device Compatibility The SCANport Serial Communications Module is compatible with thefollowing Allen-Bradley devices:2-12-2Figure 2.1Enclosed Style Serial-to-SCANport Communications Module PowerTXAB0490A BOTTOM VIEW AB0491A Switch SW3Switch SW1Switch SW2– Baud Rate Selection – Parity Setting – Speed LimitConfiguration Switches The Serial Communications Module has three DIP Switches: SW1, SW2,and SW3 (Figure 2.1). Switches are set ON or OFF as shown in Figure 2.2.For a detailed explanation of switch configuration, refer to Chapter 3,Installation.Figure 2.2Configuration SwitchesSide View of TypicalSwitchesSwitch Designation asshown in this manualOffOnAB0397AThis Page Intentionally Left Blank.3InstallationChapter Objectives In this chapter you will learn how to:S Mount the communications moduleS Configure the communications moduleS Connect powerS Connect SCANport and serial communications cablesRead this chapter completely before you attempt to install or configureyour communications module. Double check all connections and optionselections before you apply power.Important: Switch selections take effect only on power-up. If you changeselections after power is applied, cycle the power to use the new settings.Setting Module This publication describes switches as being either on or off. If the switch Configuration Switches assembly has the word OPEN printed on it, the word OPEN corresponds toOFF (0).In all cases, each serial device must have a unique address the targetprocessor can recognize.Factory Switch SettingsSwitch SW1Switch SW1 selects:S Communications mode selection (RS232/RS422/RS485) S Communications module addressSW1OFFON87654321Communications Module Address CommunicationsMode Selection AB0398BTable 3.ASwitch SW1 Communications Mode SelectionTable 3.BSwitch SW1 Communications Module Address SelectionSwitch SW2Switch SW2 selects the baud rate, parity, and speed limit.SW2OFFONAB0492B Table 3.CSwitch SW2 Speed Limit SettingsTable 3.DSwitch SW2 Protocol Selection SettingsTable 3.ESwitch SW2 Parity SettingsTable 3.FSwitch SW2 Baud Rate SelectionSwitch SW3Switch SW3 selects Stop Bits.SW3O F F O N87Set to OffAB0493ATable 3.GSwitch SW3-1 – SW3-6 SettingsTable 3.HSwitch SW3 Stop Bit SettingsEnclosed Style CommunicationsModule DimensionsFigure 3.1Enclosed Style Communications Module DimensionsDINRAILAB0406ACable ConnectionsRS485/RS422/RS232 Connection ExamplesFigure 3.2Communications Module9-Pin D-Shell1234 59 8 7 6COMN.C.TXN.C.RXN.C.N.C.N.C.COMRS232 Mode Port Connection DiagramAB0501ACommunications Module9-Pin D-Shell1234 59 8 7 6COMRXDRXDN.C.SHIELDN.C.TXDTXDCOMRS422 Mode Port Connection DiagramAB0502ACommunications Module9-Pin D-Shell1234 59 8 7 6COMN.C.N.C.N.C.SHIELDN.C.TXD/RXDTXD/RXDCOMRS485 Mode Port Connection DiagramAB0503ASCANport Link ConnectionCable RequirementsSCANport cables are available in either male–to–male or male–to–femaleconfiguration. Cables (C) of up to 10 meters (33 feet) can be connectedfrom the master to the SCANport device. If a Port Expander (B1) is used,subtract the cable length from the master to the Port Expander from thecable length used to connect the device to the expander(B1 + C = maximum of 10 meters).3-93-10Power Supply ConnectionsThe enclosed communications module is powered from a separate 24V dc or 115/230V ac power supply (Figure 3.3). With the open-stylecommunications module board mounted in the drive, no separate power supply connections are required.Figure 3.3Typical Power Supply Connection115/230V Typical Connection115V AC Hi 115V AC LowL N GGNDEnclosedCommunications Module24V DC Typical Connection+–GGNDEnclosedCommunications Module24V DC +Power Supply –44-1TroubleshootingChapter ObjectivesUse this chapter to help troubleshoot your serial communications systemusing the LED indicators on the front of the device (Figure 4.1). The communications module is a non-serviceable device that should bereturned to Allen-Bradley for replacement when a major fault exists that is attributable to the communications module itself.Figure 4.1LED LocationsAB0498ASCANport Sts Serial Sts TXRXTable 4.ALED Troubleshooting Table4-25SpecificationsChapter Objectives This chapter provides background information and specifications that youmay need when installing or applying your communications module. Product SpecificationsModule Compatibility This module is intended for use with devices that communicate via RS232,RS422, or RS485 hardware standards using OPTOMUX. It is intended toprovide a means for transmitting messages between these serial-communications devices and Allen-Bradley SCANport devices.5-1This Page Intentionally Left Blank. 5-2IndexCCable Connections, 3-8Cable RequirementsCable length, 3-9Port Expander, 3-9SCANport, 3-9Communications Module Compatibility, 5-1Configuration Switches, 2-3Device Compatibility, 2-1Enclosed Style, 2-2Enclosed Style Dimensions, 3-7 Product Description, 2-1Product Specifications, 5-1Setting Configuration Switches, 3-1 Connection ExamplesRS232, 3-8RS422, 3-8RS485, 3-8ConnectionsCable, 3-8Power Supply, 3-10SCANport Link, 3-9DDIP Switches, Description, 2-3EEnclosed-Style Module Dimensions, 5-1Specifications, 5-1FFactory Switch Settings, Overview, 3-2 FirmwareSupport, 1-1Versions, 1-1LLED Indicators, and Troubleshooting, 4-1 LED Locations, 4-1LED Troubleshooting Table, 4-2MManualAudience, 1-1Objectives, 1-1Organization, 1-2Module Communication Compatibility, 5-1Module Configurations, Factory Switch Settings, 3-2PPower Supply Connections, 3-10Enclosed module, 3-10Open-style module, 3-10SSafety Precautions, 1-2SCANport Link Connection, 3-9Serial Device, Configurations, 2-1Setting Configuration Switches, 3-1Special Terms, 1-1Specifications, 5-1Switch SW1 SettingsAddress Selection, 3-4Communications Mode, 3-3Functions, 3-3Switch SW2 SettingsBaud Rate Selection, 3-5Functions, 3-5Parity Selection, 3-5Speed Limit Settings, 3-5Switch SW3 SettingsFunctions, 3-6Stop Bits, 3-6TTarget processor, and unique addresses, 3-1 TroubleshootingLED Locations, 4-1LED Table, 4-2Reception LED, 4-2SCANport Sts LED, 4-2Serial Sts LED, 4-2Transmission LED, 4-2I-1This Page Intentionally Left Blank. I-2N-1N-2N-3N-4C U T A L O N GD O T TE D L I N E¡We Want Our Manuals to be the Best!You can help! Our manuals must meet the needs of you, the user. This is your opportunity to make sure they do just that.By filling out this form you can help us provide the most useful, thorough, and accurate manuals available. Please take a few minutes to tell us what you think. Then mail this form, FAX it, or send comments via E-Mail.FAX:to your local Allen-Bradley Sales Office or 414/242-8579E-Mail:viaInternetto“**********************”PUBLICATION NAMEPUBLICATION NUMBER, DATE AND PART NUMBER (IF PRESENT)CHECK THE FUNCTION THAT MOST CLEARLY DESCRIBES YOUR JOB.-SUGGEST / RESPONSIBLE FOR THE PURCHASE OF EQUIPMENT -MAINTAIN / OPERATE PROGRAMMABLE MACHINERY -DESIGN / IMPLEMENT ELECTRICAL SYSTEMS -TRAIN/EDUCATE MACHINE USERS-SUPERVISE FLOOR OPERATIONSWHAT LEVEL OF EXPERIENCE DO YOU HAVE WITH EACH OF THE FOLLOWING PRODUCTS?NONELITTLE MODERATEEXTENSIVEPROGRAMMABLE CONTROL ----AC / DC DRIVES ----PERSONAL COMPUTERS ----NC / CNC CONTROLS ----DATA COMMUNICATIONS / LAN---- RATE THE OVERALL QUALITY OF THIS MANUAL BY CIRCLING YOUR RESPONSE BELOW. (1) = POOR (5) = EXCELLENTHELPFULNESS OF INDEX / TABLE OF CONTENTS 12345CLARITY 12345EASE OF USE12345ACCURACY AND COMPLETENESS12345QUALITY COMPARED TO OTHER COMPANIES’ MANUALS 12345QUALITY COMPARED TO OTHER ALLEN-BRADLEY MANUALS 12345WHAT DID YOU LIKE MOST ABOUT THIS MANUAL? WHAT DID YOU LIKE LEAST ABOUT THIS MANUAL?PLEASE LIST ANY ERRORS YOU FOUND IN THIS MANUAL (REFERENCE PAGE, TABLE, OR FIGURE NUMBERS). DO YOU HAVE ANY ADDITIONAL COMMENTS?COMPLETE THE FOLLOWING.NAME COMPANY TITLE DEPARTMENTSTREET CITYSTATEZIPTELEPHONEDATEFOLD HEREFOLD HERENO POSTAGENECESSARYIF MAILEDIN THEUNITED STATES BUSINESS REPLY MAILFIRST CLASSPERMIT NO. 413MEQUON, WIPOSTAGE WILL BE PAID BY ADDRESSEEALLEN-BRADLEYAttn: Marketing CommunicationsP.O. Box 760Mequon, WI 53092-9907SCANport is a trademark of Allen-Bradley Company, Inc.Supersedes July, 1995Copyright 1994, Allen-Bradley Company, Inc. Printed in USA。
K 系列产品 说明书

第2页
目 录
第一章 产品介绍 .............................................................................................................................................. 5 1.1 产品概述............................................................................................................................................. 5 1.2 产品主要功能 ..................................................................................................................................... 5 第二章 开箱检查和线缆连接 ........................................................................................................................... 7 2.1 开箱检查............................................................................................................................................. 7 2.2 硬盘安装.......................................
Tekelek 电器商品说明书

9. WARRANTYThis product carries a 24 month warranty from date of original purchase from Tekelek against any deficiency or fault in manufacture. This does not affect your statutory rights or any warranty offered by the seller if different to Tekelek.This warranty does not cover normal wear and tear, damage cause by negligence, accident, improper use or incorrect installation. Any change or modification made by the purchaser or user to the appliance will invalidate the guarantee, as would any attempted repair.The warranty applies only when the appliance has been operated in accordance with the instructions and connected to an electricity supply which matches that shown in the manual.The warranty will be rendered invalid if the product is resold by the end user. The product must be used solely for domestic purposes. Tekelek Europe Ltd’s obligations are limited to the repair, or at its sole discretion, replacement of the unit.The unit should only be returned to Tekelek upon receiving confirmation from Tekelek that the return will be accepted. Tekelek distributors should get in touch in this regard with their normal sales contact at Tekelek. Other parties should only return the product for warranty assessment via the point of original purchase.8. TROUBLESHOOTINGIf the Tekelek Eco -Water Monitor does not receive or cannot under-stand the RF signal from the Tekelek Eco -Water Transmitter, an error message will be displayed on the Tekelek Eco -Water Monitor . The error message appears as an alternating screen showing ‘Err’ and ‘E:0?’ where ? is a number.Error codes are listed on a label on the rear of your Tekelek Eco -Water Monitor.10. CONTACT INFORMATIONShould you have any queries, please fill in our online enquiry form found under contacts on our website:Tel: +353 (0)61 471511| Fax: +353 (0)61 471685 | E -mail: ***************/****************The technical specifications of the Tekelek Eco -Water Monitor, the contents of this manual, and the images herein are subject tochange without notice.The contents and images in this manual are subject to copyright and may not be reproduced without the permission of TekelekEurope Ltd.89-####-00Error DescriptionTo RectifyE01Received reading is inconsistent- Check that the transmitter is vertical on the tank.- Check positioning of the transmitter (ensure that the transmitter is not too close to the tank sides or internal obstructions.- Ensure that the transmitter is not tightly attached to the tank.- Ensure that the tank is not overfilled and that the bottom of the transmitter is clean.E02Reading not received after 6 hours - Check that the transmitter is within range of the monitor. Try and relocate the monitor to a positionthat is nearer a window. Remember that the transmitter communicates with the monitor using an FM signal and moving the monitor plug from possible metal obstructions can improve the signal. - Ensure the monitor is not too close to, or obstructed by, other electrical appliances.Reading received but void- Check positioning of the transmitter (ensure that the transmitter is not too close to the tank sides or internal obstructions). - Ensure that the transmitter is not too tightly attached to the tank.- Ensure that the tank is not overfilled i.e. there is a minimum of 120mm/5ins free space between the transmitter and water level.- Ensure that the bottom of sensor is clean.- If a bund tank, ensure that the transmitter is located on the inner tank. E04Received Reading greater thantank height- Check the tank height and ensure that this information is correct on the monitor, press the ˄ and ˅ keys together to view your tank configuration. If height is incorrect, enter the SETUP mode by pressing SETUP for 3 secs, press ENTER until you reach screen 5 and adjust the height using ˄ and ˅ keys. Press ENTER to save. Press SETUP to exit Setup mode. Wait 3 hours for updated readings. - Check the transmitter is vertical and the positioning of the transmitter (ensure the transmitter is not too close to the tank sides or internal obstructions. E05 Contact Vendor - This is a hardware fault and requires contact with the vendor. E06Contact Vendor- This is a hardware fault and requires contact with the vendor.1. INTRODUCTIONThank you for selecting the Tekelek Eco -Water Monitor. This revolutionary monitoring system allows consumers to monitor and track their water consumption on a daily, weekly, monthly, and annual basis.The Tekelek Eco -Water product from Tekelek Europe Ltd consists of the Tekelek Eco -Water Transmitter and Tekelek Eco -Water Monitor. The Tekelek Eco -Water Transmitter is easily installed on your storage tank to measure the level water in your tank. It transmits the water level information wirelessly to the Tekelek Eco -Water Monitor which may be located in a convenient location inside your home/office etc.The Tekelek Eco -Water Transmitter uses ultrasonic technology to measure the distance from the Transmitter on top of the tank to the surface of the liquid in your water tank. As the amount of water in your tank decreases the distance measured increases accordingly. The distance information is transmitted wirelessly to the Tekelek Eco -Water Monitor.Litres\Gallons and % waterOnce programmed with information about your water tank’s shape and size, the Tekelek Eco -Water Monitor calculates and displays the amount of water remaining in your tank in litres\Gallons or as a percentage of the tank capacity. In addition (as water is consumed over time) the Tekelek Eco -Water Monitor calculates and displays usage information in-cluding the average amount of litres\gallons used per day, per week, over the last 30 days, and over the last 365 days. Days to Empty (DTE)As the Tekelek Eco -Water Transmitter continuously measures and transmits the water level, the Tekelek Eco -Water Monitor retains this information allowing it to ‘learn’ histori-cal water system usage patterns and so predict the ‘Days to Empty ’ for your tank. With this information you can ensure that you fill your water tank at the correct time – not too soon, and more importantly, not too late. InstallationThe Tekelek Eco -Water Transmitter fits into the standard 32mm/1.25inchs aperture found on most modern water storage tanks and is suitable for use with almost any plastic or metal tank up to 3m/9.8feet tall, including Bunded and Single Skin Water tanks. If your tank is a bunded tank, ensure that you mount the Tekelek Eco -Water Transmitter on the inner tank.As part of the installation the Tekelek Eco -Water Transmitter and Monitor are ‘synchronised’ together to ensure there is no interference from other nearby transmitters.1Eco -Water Monitor Product Manual2. TEKELEK Eco -Water – FEATURES AND FUNCTIONSLEDThe red light above the ENTER key flashes when there is an Alarm condition (see section 6) and on receiving an RF signal from the Tekelek Eco -Water TransmitterDISPLAY - SYMBOLS & INDICATORSThe Tekelek Eco -Water contains a display that conveys a variety of infor-mation during normal use and during its initial setup and configuration for use with your water tank. The display contains three sections (1, 2, & 3) as indicated in the diagram.2 1 LCD Display 11 Error code information 2 MODE key 12 Power/data cable3 DOWN key 13 Manufacturing information4 ENTER key 14 Location feature (see STEP 3 of this installation guide)5 UP key 15 USB connector6 SETUP key 16 Mains power plug7 Alarm Red LED 17 Tekelek Eco -Water Transmitter 8 Wall mount feature 18 Self -tapping screws x 2 9 Beeper aperture 19 Weather seal (Gasket)10RESET button access20Tekelek Eco -Water Transmitter water Level displayTekelek Eco -Water features7. TEKELEK Eco -Water TRANSMITTER BATTERY CHANGEIf the battery in the Tekelek Eco -Water Transmitter needs to be changed the display will provide advance warning by showing the ‘TANK LOW BATTERY’ text below the bar -graph.- Remove the Tekelek Eco -Water Transmitter from the tank and move to a safe location- The battery can be accessed by removing the 4 self -tapping screws from the base of the unit.- Remove the old battery noting the orientation (‘+’ mark facing outwards) and replace it with a new battery, 3V CR2450- Re -assemble, ensuring the O -ring is undamaged and secured in position.- Re -locate the transmitter on the tank.There is no need to re -synchronise the transmitter with the monitor when the transmitter battery is changed.DisposalThe crossed out dustbin on the packaging indicates that this product and its battery shall not be treated as household waste. Proper disposal will help prevent potentially negative consequences for the environment and human health. Formore detailed information about recycling of this product or battery, please contact your local recycling centre or the shop where you purchased the product.6. TEKELEK Eco -Water ALARMS/ INDICATIONSLow Level IndicationsWhen the tank level falls to within 14cm of the bottom of the tank the ‘re -fill’ symbol will flash. When the tank level is such that there is below 10% of the usable volume of water left in the tank, the CURRENT information screen alternates between showing the ‘Ltr.’ (or % or DTE) and ‘Lo’. If the level then drops such that there is below 5% of usable water left:∙ ‘Lo’ is displayed constantly on the CURRENT information screens. ∙ The monitor beeps 5 times, repeating every hour, i.e. 10:00, 11:00, 12:00, 13:00, 14:00... ∙ The RED light flashes.Full IndicationWhen the level in your tank reaches 12 cm from the top of the tank, i.e. from the bottom of the Tekelek Eco -Water Transmitter, the main display will show ‘FULL’.To calculate the volume in your tank the Tekelek Eco -Water Monitor needs to know the shape of your tank. There are three basic shapes as illustrat-ed. Identify the shape that is closest to the shape of your tank. Each Tekelek Eco -Water Monitor is supplied with the default settings as shown. The Tekelek Eco -Water Monitor must then be config-ured to your own tank’s dimensions (see installa-tion guide). Minimum and maximum allowable values for tank dimensions are shown in this table.5. TEKELEK Eco -Water - TANK SETUP74. DISPLAY SCREENS There are two types of information displayed on the Tekelek Eco -Water Monitor:CURRENT information screens – used in normal mode to show the current status of the water level in yourtank. Change between the ‘Ltr.’, ‘%’, ‘Days to empty’, and Clock screens using the ❒ and ♦ keys.For approximately 1 week after the Tekelek Eco -Water is installed, it collects data so that the ‘Average per day’ value may be calculated. During this period the screen will flash ‘---‘ when showing ‘Days to empty’. (In the picture, ‘flashing’ is indicated in red).After this period, the display may continue to show ‘---‘ (but not flashing). This indicates that a meaningful value could not be calculated. This may occur in periods when there is no (or extremely low) usage. The ‘---‘ may be displayed in any of the HISTORICAL infor-mation screens under these conditions.This may also happen if the Tekelek Eco -Water Monitor is been unplugged for some time. When sufficient data has been gathered, the screen will revert to normal after a period from a few hours up to a maximum of 1 week.HISTORICAL information screens showing ‘Water usage – Litres\Gals’. Pressing MODE and ❒/♦ accesses these screens.The Tekelek Eco -Water Monitor will automatically return to the CURRENT information screen after 30s with no keypresses within the HISTORICAL information screens. The maximum value displayed is 19999.61 - Used for SETUP and displays SETUP number, and in normal use displays room temperature.2 - Tank information including a visual bar -graph of the water level in the tank.3 - Information about the remaining usable water in litres\Gals or as a %, the ‘Days to Empty’, and the averageand cumulative use of water in litres\Gals. Time is also displayed here.3TANK TYPEIndicates the tank type being selected.A,B,CA, B, C are types of tank shapes (see diagrams in section 5).ROOM TEMPERATURE The value displayed is the room temperature.20 Numeric display - shows the room temperature in normal mode e.g 20. 3 Shows the SETUP mode number when in SETUP mode, e.g. SETUP mode 3 ˚C & ˚F The value displayed is temperature in degrees Celsius/Fahrenheit. cm\inch The value displayed is in centimetres/inches. SETUPSETUP mode is active.H The value displayed is the tank height. WThe value displayed is the tank width.Monitor Display:Bar graph indicator of liquid level - each bar represents 10% of tank height. .Tekelek Eco -Water Transmitter Display:Tanks 1m/3.3ft. in height or greater - each bar represents 1/10th of the top 1m/3.3ft of the tank. Tanks less than 1m/3.3ft. in height - each bar represents 1/10th of 1m/3.3ftFull Indicates the ‘Full’ level of the bar graph indicator. Liquid Level Indicates the bar graph is showing the liquid level. EMPTYIndicates the ‘Empty’ level of the bar graph indicator.BUND ALARMWhen flashing, there has been a leak into the ‘Bund’ (double skinned tanks). The 10 bars and the RED LED will also be flashing at the same time.TANK LOW BATTERY The transmitter battery needs to be changed.Flashing - The remaining water level in the tank is at 10% or below of tank height Flashing - There is a problem with the RF signal from the transmitter.The temperature is close to or below the limit of operation of the transmitter - the information accuracy may be affected.% The value displayed is the % of usable water remaining in the tank. cm\inchs The value displayed is in centimetres/inches Ltr\GalThe value displayed is in litres/gallons.USB data activity.AVERAGE PER DAY The value displayed is the average per day based on the last 7 days' usage. AVERAGE PER WEEK The value displayed is the average per week based on the last 14 days' usage. DAYS TO EMPTY The value displayed is the estimated number of days of water remaining in the tank. It is computed by dividing the volume of usable water left in the tank LAST 30 DAYS The value displayed is the estimated usage over the last 30 days. LAST 365 DAYSThe value displayed is the estimated usage over the last 365 days.3.PRODUCT INFORMATIONa)DEFINITIONS/GLOSSARY4Tank SizeMin. Depth : 0.5m/1.64feet Max. Depth:3m/9.8feetMax. Tank Volume: 19999L/GalDisplaysMulti-function LCD display including:∙ 10 bar-graph level indication on both Tekelek Eco-Water Monitor and Transmitter*∙ Display of various current and historical values(Tekelek Eco-Water Monitor only)∙ Display control with five control buttons∙ Red LED for low level indication at 5% or less ofusable water remainingAudible Alarm∙ Audible alarm sounds every hour on the hourwhen the tank level is lowMax communication distanceTypically 150m\492feet in normal ‘line of sight’conditionsWireless Communications433MHz FM transmission (EN300-220)Power Supply- Tekelek Eco-Water Transmitter—3V LiMn cell, CR2450- Tekelek Eco-Water Monitor:- Receiver: 5V DC (40mA)- Backup battery: 3V LiMn cell, CR2450Mains Power Supply (incl.) for Tekelek Eco-Water Moni-tor150V-240V, 50-60 Hz, meets EN60950-1 (Eco-WaterMonitor use only—not for use with any other device)Battery LifeTekelek Eco-Water Transmitter: 5 years (estimated life)Tekelek Eco-Water Monitor – Receiver memory back-upbattery: 3yr if device is not plugged in**DimensionsTekelek Eco-Water Transmitter: 140m x 70mm x 40mm55.1inch x 27.5inch x 15.7 inchTekelek Eco-Water Monitor: 120mm x 90mm x 50mm47.2 inch x 35.4inch x 19.6incMax and Min Operation (Transmitter)Operating temperature range: -10°C/50˚F to +60°C/140˚F. C/Operating Humidity : 0 - 95% non-condensingHole size for fitting transmitter: 32mm/1.25inch diameterb)TECHNICAL SPECIFICATIONS:∙Please retain this product manual and the installationguide. It contains practical instructions, technicalspecifications and safety precaution warnings youshould know about.∙The maximum displayed value for all measurements andcomputed values is 19999. If a measurement exceedsthis value, the display will flash. This does not affect datacalculations or alarm functions.∙When used according to recommendations, the TekelekEco-Water monitors the water level in your tank andcalculates and presents figures relating to the remainingwater and the historical usage. The Tekelek Eco-Watermust not be used as verification of a ‘Weights andMeasures’ certified dispensing meter.∙Patents pending or covered by one of the followingpatents: S2003/0882, EP2131164(A1),US2006261966(A1), US7277020(B2), IE20030882(A2) ,S2008/0466, US2009/0303059 A1∙For correct usage calculation, a minimum of 7 daysbetween tank fills is required.∙The Tekelek Eco-Water Monitor is intended to beconnected to a power source continuously. It contains asmall battery to keep time during power cuts. If theTekelek Eco-Water Monitor is left unpowered for anextended period then the battery will deplete andinformation may be lost. When you are not using watersystem, you may unplug the Tekelek Eco-Water andstore it until you wish to use your water system again. Itsback-up battery and internal clock keep track of the daysas they pass. (Cont’d across…)When you next use it, on starting to use your systemagain, the Tekelek Eco-Water will continue monitoringyour water usage.∙When the Tekelek Eco-Water has been unpluggedand is plugged in again, it will start up in ‘Lrn’ mode.Simply press any key to exit.∙When you are receiving a water fill, the Tekelek Eco-Water Transmitter cannot receive a reliable echodue to turbulence within the tank and may cause theTekelek Eco-Water Monitor to temporarily displaysome error messages. Should the tank be filledabove the recommended 95% this will obstruct thetransmitter signal until the water level drops below120mm\4.7inchs from the transmitter. Thetransmitter will be unable to send accurate readingsduring this period.∙The Tekelek Eco-Water owner should note that thefirst fill amount of water into a tank will differ fromthe amount shown on the display. This is due to thefact that the Tekelek Eco-Water Monitor displays thevolume of Usable water available. The Tekelek Eco-Water Monitor in its calculations makes an allow-ance of 8cm\3.1inchs of unusable water in thebottom of the tank due to the location of the bottomoutlet.∙Not suitable for pressurised containers. Only use ontanks vented to the atmosphere.∙Only access the Reset Switch if instructed byTekelek.∙Changes in temperature can result in contractionand expansion of the tank and hence can affect thetank capacity. Such changes may affect your read-ings.c)NOTES:d)GENERAL PRODUCT SAFETY, CARE AND USE GUIDE LINES∙To ensure that you use your product correctly andsafely, please read the warnings, safety precautionsand notes below regarding use of and caring for yourTekelek Eco-Water Monitor and Transmitter.∙Do not use this product where the use of radiofrequency products can cause malfunction in the con-trol devices of other equipment i.e. hospitals, aircraft,etc.∙Do not subject the product to excessive force, shock,dust, temperature or humidity.∙The LCD panel behind the display lens is made of glass,and may break if the unit is dropped, impacted orsubjected to shock.∙Take special care when handling a damaged display, asthe liquid crystals can be harmful to your health.∙ Keep the product away from heat sources i.e.radiators, stoves, heaters, etc.∙ Do not use the Tekelek Eco-Water Monitor in or nearwater or in high moisture areas i.e. Bathroom∙ Do not tamper with the Tekelek Eco-Water Monitor’sinternal components. This will invalidate the warranty.∙ Do not attempt to repair the product yourself. Contactthe retailer or our Customer Service Department.∙ Do not dispose of old batteries as unsorted municipalwaste, do so in accordance with your local wastedisposal regulations.∙ When disposing of this product do so in accordancewith your local waste disposal regulations∙ Do not scratch hard objects against the Tekelek Eco-Water display as this may cause damage5。
K-9可选配件,微维克斯硬度试验机剪子订单号型号及描述说明书
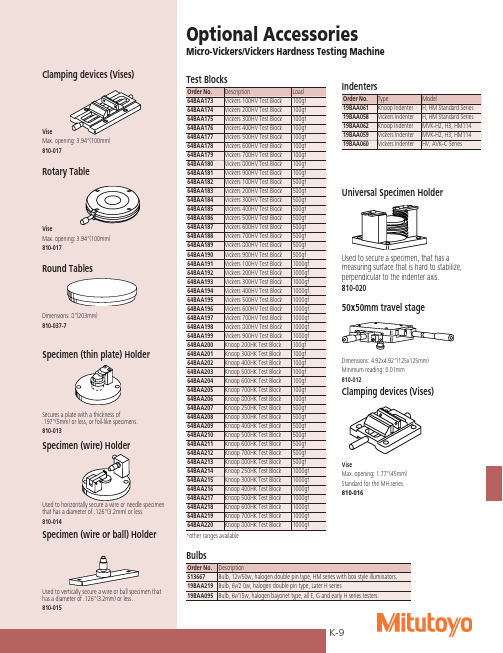
G
steel ball 1471N(150kgf) beryllium copper, phosphor bronze
H
1/8”
588.4N(60kgf) Bearing metal
E
diameter 980.7N(100kgf)
K
steel ball 1471N(150kgf)
L
1/4”
588.4N(60kgf) Plastics, lead
50x50mm travel stage
Dimensions: 4.92x4.92”(125x125mm) Minimum reading: 0.01mm 810-012
Clamping devices (Vises)
Vise Max. opening: 1.77”(45mm) Standard for the MH series. 810-016
Indenters
Order No. 19BAA061 19BAA058 19BAA062 19BAA059 19BAA060
Type Knoop Indenter Vickers Indenter Knoop Indenter Vickers Indenter Vickers Indenter
Model H, HM Standard Series H, HM Standard Series MVK-H2, H3, HM114 MVK-H2, H3, HM114 HV, AVK-C Series
Micro-Vickers/Vickers Hardness Testing Machine
Test Blocks
Order No. 64BAA173 64BAA174 64BAA175 64BAA176 64BAA177 64BAA178 64BAA179 64BAA180 64BAA181 64BAA182 64BAA183 64BAA184 64BAA185 64BAA186 64BAA187 64BAA188 64BAA189 64BAA190 64BAA191 64BAA192 64BAA193 64BAA194 64BAA195 64BAA196 64BAA197 64BAA198 64BAA199 64BAA200 64BAA201 64BAA202 64BAA203 64BAA204 64BAA205 64BAA206 64BAA207 64BAA208 64BAA209 64BAA210 64BAA211 64BAA212 64BAA213 64BAA214 64BAA215 64BAA216 64BAA217 64BAA218 64BAA219 64BAA220
科力达K9mini+RTK测量系统使用手册说明书

K9Mini+RTK测量系统使用手册科力达K9mini+RTK测量系统使用手册第一版广东科力达仪器有限公司二○一六年八月目录目录 (1)第一章概述 (3)§1.1引言 (3)§1.2产品功能 (3)§1.3产品特点 (3)第二章科力达K9mini+测量系统 (6)§2.1整体介绍 (6)§2.2科力达K9mini+主机介绍 (7)§2.2.1主机外型 (7)§2.2.2按键和指示灯 (9)§2.3科力达K9mini+模式查看和切换 (10)§2.3.1按键设置工作模式 (10)§2.3.2(手簿)软件设置工作模式 (11)§2.3.3USB模式配置 (11)§2.3.4无线网络 (12)§2.3.5关闭主机 (13)§2.4科力达K9mini+Web UI网页配置 (13)§2.4.1主界面 (15)§2.4.2主机状态 (16)§2.4.3主机配置 (18)§2.4.4卫星信息 (21)§2.4.5静态数据记录 (22)§2.4.6数据传输 (23)§2.4.7网络设置 (28)§2.4.8电台设置 (32)§2.4.9固件升级 (34)§2.4.10用户管理 (35)§2.4.11用户帮助 (36)§2.5手簿 (36)§2.5.1手簿介绍 (36)§2.5.2蓝牙连接 (41)§2.5.3软件安装及连接 (45)§2.6外挂电台(选配) (49)§2.6.1电台特点 (49)§2.6.2电台外型 (50)§2.6.3电台接口及面板 (50)§2.6.4电台发射天线及Y型电缆 (52)§2.6.5电台使用注意事项 (53)-1--2-§2.7主机配件介绍 (54)§2.7.1仪器箱 (54)§2.7.2电池及充电器 (54)§2.7.3差分天线 (55)§2.7.4数据线 (55)§2.7.5其他配件 (56)第三章作业方案 (57)§3.1静态作业 (57)§3.1.1静态测量简介 (57)§3.1.2作业流程 (58)§3.1.3外业注意事项 (58)§3.1.4GPS控制网设计原则 (59)§3.2RTK作业(电台模式) (59)§3.2.1架设基准站 (60)§3.2.2启动基准站 (61)§3.2.3架设移动站 (62)§3.2.4设置移动站 (63)§3.2.5电台中继设置 (64)§3.3RTK作业(网络1+1模式) (66)§3.3.1基准站和移动站的架设 (66)§3.3.2基准站和移动站的设置 (66)§3.3.3电台路由设置 (68)§3.4RTK作业(网络CORS模式) (69)§3.5天线高量取方式 (71)附录A K9Mini+测量系统主要技术指标 (73)附录B Polar X3手簿技术指标 (76)附录C GDL-20电台技术指标 (77)附录D专业术语注释 (79)附录E联系方式 (81)第一章概述阅读本章,您可以简单了解科力达公司及K9mini+测量系统§1.1引言欢迎使用广东科力达仪器有限公司的GNSS产品。
力科产品手册说明书

力科产品手册关注我们,了解更多信息:LabMaster 10 Zi-A (SDA Models)WaveMaster 8 Zi-B (SDA/DDA 8 Zi-B)带宽20 GHz to 65 GHz 4 GHz to 30 GHz 分辨率8-bit resolution,11-bit with enhanced resolution8-bit resolution,11-bit with enhanced resolution上升时间 6.5 ps to 19.3 ps15.5 ps to 95 ps通道(模拟+数字)Up to 80, 80 + 184, 4 + 18显示15.3" WXGA Touch Screen15.3" WXGA Touch Screen标配存储深度32 Mpts/Ch (64 Mpts/Ch)32 Mpts/Ch (64 Mpts/Ch)最大存储深度†Up to 1024 Mpts Up to 512 Mpts 采样率Up to 160 GS/sUp to 80 GS/sMSO 特性†(数字通道) 3 GHz, 12.5 GS/s,18 Ch3 GHz, 12.5 GS/s,18 Ch触发类型Edge, Width, Glitch, Pattern, Runt, Slew Rate,Interval (Period), Dropout, Qualified, Cascade (Sequence) Trigger,High-speed Serial Trigger †Edge, Width, Glitch, Pattern, Video, HDTV,Runt, Slew Rate, Interval (Period), Dropout, Qualified, Cascade(Sequence) Trigger, High-speed Serial Trigger †串行数据† 触发 (T) 解码 (D)测量/图形 (M)眼图 (E)仅图形 (G)物理层 (P)TD: 80-bit NRZ, 8b/10b, 64b/66b D: 64b66b, 8b/10b, ARINC 429, Audio,CAN, CAN FD, CAN FD Symbolic, DigRF 3G, DigRF v4,ENET, ENET 10G, Fibre Channel, I 2C , LIN,Manchester, MDIO, MIL-STD-1553, NRZ, PCIe, RS-232. SAS, SATA,SENT, SpaceWire, SPI, UART, UniPro, USB 1.0/1.1/2.0,USB 3.2 (Gen1, Gen2, Gen2x2)DP : D-PHY, Fibre Channel, FlexRay, M-PHYDG: AudioTD: 80-bit NRZ, 8b/10b, 64b/66b, RS-232, UARTTD or TDME: 100Base-T1, CAN, CAN FD, CAN FD Symbolic,I 2C , LIN, MIL-STD-1553, SPI,TD or TDxx: Audio (TDG), FlexRay (TDMP)D: DigRF 3G, DigRF v4, ENET, ENET 10G, Fibre Channel,Manchester, MDIO, NRZ, PCIe, SAS, SATA, SENT, SpaceWire, SPMI,UniPro, USB 2.0-HSIC, USB 3.2 (Gen1, Gen2, Gen2x2),64b / 66b, 8b/10b DP : D-PHY, M-PHYDME: ARINC 429, USB 1.0/1.1/2.0串行数据分析Eye Jitter and Noise Analysis (SDAIII-CompleteLINQ), Virtual Probe, Eye Doctor II, PAM4 Signal Analysis, Serial Data Mask,Cable De-Embedding串行数据一致性测试DDR 3/4/5, LPDDR 3/4/5, DisplayPort 1.4, eDP , Automotive Ethernet 100Base-T1, 1000Base-T1 Ethernet 10GBase-T, 10GBase-KR, HDMI 2.1/2.0/1.4b, MIPI M-PHY, PAM4-56G, PCI Express 1.0/2.0/3.0/4.0/5.0, SAS 2/3, SATA, SFI, USB 3.2 (Gen1, Gen2, Gen2x2), USB4/TBT4DDR 2/3/4/5, LPDDR 2/3/4/5, DisplayPort 1.4, eDP , Automotive Ethernet 10Base-T1S, 100Base-T1, 1000Base-T1,Ethernet 10/100/1000Base-T, Ethernet 10GBase-T, 10GBase-KR, HDMI 2.1/2.0/1.4b, MIPI D-PHY, MIPI M-PHY, MOST 50/150, PAM4-56G, PCI Express 1.0/2.0/3.0, SAS 2/3, SATA, SFI,USB 1.1/2.0, USB 3.2 (Gen1, Gen2, Gen2x2), USB4/TBT4应用软件选项Spectrum Analyzer (Single, Dual+Reference), Clock and Clock-Data Jitter Analysis, Automotive Ethernet Debug, CrossSync PHY, DDR Debug Toolkit, Switch-mode Power Supply and Device Analysis, Advanced Customization (Standard with LabMaster 10 Zi-A),EMC Pulse Parameters, Digital Filter Package, Protocol Analyzer Synch (ProtoSync), Advanced Vector Signal Analysis, Vector Signal Analysis, Advanced Optical Recording, Disk Drive Analysis, Disk Drive Measurements, Coherent Optical Analysis,Electrical Telecom Pulse Mask Test外设接口USB Host for Storage, LAN for PC, LXI for PC, GPIB for PC †函数+, -, x, /, FFT, Absolute Value, Average, Copy, Correlation, Derivative, Deskew, Envelope, Enhanced Resolution, Exponent, Floor, Histogram, Integral, Invert, Log, Phistogram, Ptrace Mean, Ptrace Range, Ptrace Sigma, Reciprocal, Rescale, Roof,Segment, Sparse, Square, Square Root, Track, Trend, Zoom尺寸 (HWD)MCM-Zi-A: 277 x 462 x 396 mm(10.9” x 18.2” x 15.6”)LabMaster 10-xxZi Acq. Module:202 x 462 x 660 mm (8.0” x 18.2” x 26”)355 x 467 x 406 mm (14” x 18.4” x 16” )重量MCM-Zi-A: 47 lbs. (21.4 kg)LabMaster 10-xxZi-A Acq. Module - 58 lbs. (24 kg)58 lbs. (26.4 kg)保修3 yr3 yrWavePro HD WaveRunner 8000HD/MDA 8000HDWaveRunner 9000/9000-MS带宽 2.5 GHz to 8 GHz 350 MHz to 2 GHz 500 MHz to 4 GHz 分辨率12-bit resolution,15-bit with enhanced resolution12-bit resolution,15-bit with enhanced resolution8-bit resolution,11-bit with enhanced resolution上升时间57.5 ps to 166 ps1 ns to 235 ps700 ps to 100 ps通道(模拟+数字)4, 4 + 168, 8 + 164, 4 + 16显示15.6” Widescreen Capacitive Touch Screen15.6” Widescreen Capacitive Touch Screen15.4” WXGA Multi-Touch Screen 标配存储深度50 Mpts/Ch 100 Mpts Interleaved50 Mpts/Ch100 / 200 Mpts Interleaved16 Mpts/Ch; M Models: 64 Mpts/Ch32 Mpts Interleaved; M Models: 128 Mpts 最大存储深度†Up to 5 Gpts Up to 5 Gpts Up to 128 Mpts 采样率Up to 20 GS/sUp 10 GS/sUp to 20 GS/s; M Models: Up to 40 GS/s MSO 特性†(数字通道)250 MHz, 1.25 GS/s16 Ch500 MHz, 2.5 GS/s16 Ch250 MHz, 1.25 GS/s,16 Ch触发类型Edge, Width, Glitch, Pattern, Runt, Slew Rate,Interval (Period), Dropout, Qualified,Edge, Width, Glitch, Pattern, Runt, Slew Rate, Interval (Period), Dropout, Qualified,Measurement, WindowEdge, Width, Glitch, Pattern, Video, HDTV, Runt, Timeout, Slew Rate, Interval (Period), Dropout, Qualified, Measurement, Window,Cascade 串行数据† 触发 (T) 解码 (D)测量/图形 (M)眼图 (E)仅图形 (G)物理层 (P)TD or TDME: 100Base-T1, CAN, CAN FD,CAN FD Symbolic, SPMI, I 3C, I 2C , LIN, MIL-STD-1553, RS-232, SENT, PMBus, SMBus, SPI, UART, USB 1.0/1.1/2.0, USB-PDTD or TDxx: Audio (TDG), FlexRay (TDMP)D: DigRF 3G, DigRF v4, ENET, Fibre Channel,Manchester, MDIO, NRZ, PCIe, SATA, SAS,SpaceWire, UniPro, USB 2.0-HSIC,USB 3.2 (Gen1), 8b/10bDP : D-PHY, M-PHY DME: ARINC 429TD or TDME: 100Base-T1, CAN, CAN FD, CAN FD Symbolic, SPMI, I 3C, I 2C , LIN, MIL-STD-1553, RS-232, SENT, PMBus,SMBus, SPI, UART, USB 1.0/1.1/2.0, USB-PD TD or TDxx: Audio (TDG), FlexRay (TDMP) D: DigRF 3G, DigRF v4, D-PHY, ENET, Manchester, MDIO, NRZ, SpaceWire, USB 2.0-HSIC, 8b/10b DME: ARINC 429TD: SATA, 8b/10bTD or TDME: 100Base-T1, CAN, CAN FD, CAN FD Symbolic, SPMI, I 3C, I 2C , LIN, MIL-STD-1553, RS-232, SENT, PMBus, SMBus, SPI, UART, USB 1.0/1.1/2.0, USB-PD TD or TDxx: Audio (TDG), FlexRay (TDMP) D: DigRF 3G, DigRF v4, ENET, Fibre Channel,Manchester, MDIO, NRZ, PCIe, SAS, SpaceWire, UniPro, USB 2.0-HSIC DP : D-PHY, M-PHY DME: ARINC 429 串行数据分析Eye Jitter and Noise Analysis (SDAIII-CompleteLINQ), Virtual Probe, Eye Doctor II,Serial Data Mask, Cable De-EmbeddingEye and Jitter Analysis (SDAIII), Virtual Probe, Eye Doctor II, Serial Data Mask, Cable De-Embedding Eye Jitter, Virtual Probe, Eye Doctor II, SerialData Mask, Cable De-Embedding 串行数据一致性测试DDR 2/3, LPDDR 2/3, Automotive Ethernet 10Base-T1S, 100Base-T1, 1000Base-T1,Ethernet 10/100/1000Base-T , MIPI D-PHY ,MOST 50/150, PCI Express 1.0, USB 1.1/2.0Automotive Ethernet 10Base-T1S, 100Base-T1,1000Base-T1, Ethernet 10/100/1000Base-T , MOST 50/150, USB 1.1/2.0DDR 2/3, LPDDR 2/3, Automotive Ethernet 10Base-T1S, 100Base-T1, 1000Base-T1, Ethernet 10/100/1000Base-T , MIPI D-PHY ,MOST 50/150, USB 1.1/2.0应用软件选项Spectrum Analyzer (Single, Dual+Reference), Clock and Clock-Data Jitter Analysis, DDRDebug Toolkit, Switch-mode Power Supplyand Device Analysis, Three-phase ElectricalPower, Harmonic, and Vector Analysis, Digital Power Management, Advanced Customization, EMC Pulse Parameters, Digital Filter Package,Protocol Analyzer Synch (ProtoSync), Vector Signal Analysis, Advanced Optical Recording, Disk Drive Analysis, Disk Drive Measurements,Electrical Telecom Pulse Mask TestSpectrum Analyzer (Single, Dual+Reference), Clock and Clock-Data Jitter Analysis, Automotive Ethernet Debug, Switch-mode Power Supply and Device Analysis, Three-phase Electrical Power, Harmonic, and Vector Analysis, Digital Power Management, Advanced Customization, EMC Pulse Parameters, Digital Filter Package, Vector Signal Analysis, Three-phase Electrical and Mechanical PowerAnalysis (included with MDA Models)Spectrum Analyzer (Single, Dual+Reference),Clock and Clock-Data Jitter Analysis, DDR Debug Toolkit, Switch-mode Power Supply and Device Analysis, Advanced Customization, EMC Pulse Parameters, Digital Filter Package, Protocol Analyzer Synch (ProtoSync), VectorSignal Analysis, Advanced Optical Recording, Disk Drive Analysis, Disk Drive Measurements,Electrical Telecom Pulse Mask Test 外设接口USB Host for Storage, USB Device for PC, LAN for PC, GPIB for PC†函数+, -, x, /, FFT, Absolute Value, Average, Copy, Correlation, Derivative, Deskew, Envelope,Enhanced Resolution, Exponent, Floor, Histogram, Integral, Invert, Log, Phistogram, Ptrace Mean, Ptrace Range, Ptrace Sigma, Reciprocal, Rescale, Roof,Segment, Sparse, Square, Square Root, Track, Trend, Zoom +, -, x, /, FFT, Absolute Value, Average, Copy, Correlation, Derivative, Deskew, Envelope,Enhanced Resolution, Exponent, Floor, Histogram, Integral, Invert, Log,Phistogram, Ptrace Mean, Ptrace Range, Ptrace Sigma, Reciprocal, Rescale, Roof, Segment, Sparse, Square, Square Root,Track, Trend, Zoom尺寸 (HWD)345 x 445 x 196 mm (13.6” H x 17.5” W x 7.7” D)345 x 445 x 196 mm (13.6” H x 17.5” W x 7.7” D)358 x 445 x 242 mm (14.1” x 17.5” x 9.5”)重量24.4 lbs (11.1kg)24.4 lbs (11.1kg)25.8 lbs. (11.7 kg)保修3 yr3 yr3 yrHDO6000B/ HDO6000B-MSHDO4000A-MS WaveSurfer 4000HD 带宽350 MHz to 1 GHz 200 MHz to 1 GHz 200 MHz to 1 GHz 分辨率12-bit resolution,15-bit with enhanced resolution12-bit resolution,15-bit with enhanced resolution12-bit resolution,15-bit with enhanced resolution上升时间 1 ns to 450 ps 1.75 ns to 450 ps1.75 ns to 450 ps通道(模拟+数字)4, 4 + 16, 4 + 16 + 244, 4 + 16, 4 + 16 + 244, 4 + 16, 4 + 16 + 24显示15.6” Widescreen Capacitive Touch Screen12.1” WXGA Multi-Touch Screen12.1” Widescreen Capacitive Touch Screen标配存储深度50 Mpts/Ch12.5 Mpts/Ch 25 Mpts Interleaved 12.5 Mpts/Ch 25 Mpts Interleaved 最大存储深度†Up to 250 Mpts Up to 50 Mpts Up to 25 Mpts 采样率Up to 10 GS/sUp to 10 GS/sUp to 5 GS/sMSO 特性†(数字通道)250 MHz, 1.25 GS/s 16 Ch 250 MHz, 1.25 GS/s 16 Ch 125 MHz, 500 MS/s16 Ch触发类型Edge, Width, Glitch, Pattern, Video, HDTV, Runt, Timeout, Slew Rate, Interval (Period), Dropout, Qualified, Measurement, Window, CascadeEdge, Width, Glitch, Pattern, Video, HDTV, Runt, Slew Rate, Interval (Period), Dropout, Qualified, Window Edge, Width, Pattern, Video, HDTV, Runt, Slew Rate, Interval (Period), Dropout, Qualified串行数据† 触发 (T) 解码 (D)测量/图形 (M)眼图 (E)仅图形 (G)物理层 (P)TD or TDME: 100Base-T1, CAN, CAN FD, CAN FD Symbolic, SPMI, I 3C, I 2C , LIN, MIL-STD-1553, RS-232, SENT, PMBus, SMBus, SPI, UART, USB-PD TD or TDxx: Audio (TDG), FlexRay (TDMP) D: DigRF 3G, DigRF v4, D-PHY, ENET, Manchester, MDIO, NRZ, SpaceWire, USB 1.0/1.1/2.0, USB-PD, USB 2.0-HSICDME: ARINC 429TD: 100Base-T1, Audio, CAN, CAN FD, FlexRay, SPMI, I 3C, I 2C , LIN, MIL-STD-1553, RS-232, SENT, PMBus, SMBus, SPI, UART,USB-PDD: ARINC 429, DigRF 3G, DigRF v4, D-PHY, ENET, Manchester, MDIO, NRZ, SpaceWire, USB 1.0/1.1/2.0, USB-PD, USB 2.0-HSIC TD: Audio, CAN, CAN FD, LIN, FlexRay, I2C,SPI, UART, RS232串行数据分析Serial Data Mask ––串行数据一致性测试Automotive Ethernet 10Base-T1S, 100Base-T1, 1000Base-T1, Ethernet 10/100/1000Base-T ,MOST 50/150––应用软件选项Spectrum Analyzer (Single, Dual+Reference), Clock and Clock-Data Jitter Analysis, Switch-mode Power Supply and Device Analysis, Three-phase Electrical Power, Harmonic, and Vector Analysis, Digital Power Management, Advanced Customization, EMC Pulse Parameters, Digital Filter Package, Vector Signal Analysis, Electrical Telecom PulseMask TestSpectrum Analyzer (Single), Switch-mode Power Supply and Device Analysis , Electrical Telecom Pulse Mask Test Spectrum Analyzer (Single), Switch-mode Power Supply and Device Analysis ,Arbitrary Waveform Generator, Digital Voltmeter (Included standard with registration)外设接口USB Host for Storage, USB Device for PCLAN for PC, GPIB for PC†函数+, -, x, /, FFT, Absolute Value, Average, Copy, Correlation, Derivative, Deskew, Envelope, Enhanced Resolution, Exponent, Floor, Histogram, Integral, Invert, Log, Phistogram, Ptrace Mean, Ptrace Range, Ptrace Sigma, Reciprocal, Rescale, Roof, Segment, Sparse, Square, Square Root, Track, Trend, Zoom +, -, x, /, FFT, Absolute Value, Average, Derivative, Deskew, Envelope, Enhanced Resolution, Floor, Integral, Invert, Reciprocal, Rescale, Roof, Square, Square Root, Trend, Zoom +, -, x, /, FFT, Absolute Value, Average, Derivative, Deskew, Envelope, Enhanced Resolution, Floor, Integral, Invert, Reciprocal, Rescale, Roof, Square, Square Root,Trend, Zoom尺寸 (HWD)352 mm x 445 mm x 170 mm (13.8” x 17.5” x 6.7”)291.7 x 399.4 x 131.31 mm (11.48”x 15.72”x 5.17“)273 x 380 x 160 mm (10.7” x 14.9” x 6.3”)重量21 lbs (9.8 kg)12.6 lbs (5.71 kg)11.7 lbs (5.3 kg)保修3 yr3 yr3 yrWaveSurfer 3000z T3DSO2000AT3DSO1000 / T3DSO1000A带宽100 MHz to 1 GHz 100 MHz to to 500 MHz100 MHz to 350 MHz 分辨率8-bit resolution,11-bit with enhanced resolution8-bit resolution,11-bit with enhanced resolution8-bit resolution,11-bit with enhanced resolution上升时间 3.5 ns to 430 ps3.5 ns to 800 ps3.5 ns to 1 ns通道(模拟+数字)4, 4+162 or 4, 2 or 4 + 16 2 or 4,2 or 4 + 16显示10.1” Capacitive Touch Screen10.1” CapacitiveTouch Screen 1024 x 6007" 800 x 480标配存储深度10 Mpts/Ch, 20 Mpts Interleaved 100 Mpts/Ch,200 Mpts interleavedT3DSO1000:7 Mpts/Ch, 14 Mpts interleaved,T3DSO1000A:14 Mpts/Ch, 28 Mpts interleaved最大存储深度†Up to 20 Mpts Up to 200 Mpts Up to 28 Mpts采样率Up to 4 GS/s100 MHz models: Up to 2 GS/sUp to 2 GS/sT3DSO1000: Up to 1 GS/s T3DSO1000A: Up to 2 GS/sMSO 特性†(数字通道)125 MHz, 500 MS/s 500 MS/s, 3.3 ns min detectable pulse width250 MHz, 1 GS/s 触发类型Edge, Width, Pattern, TV , Runt, Slew Rate, Interval (Period), Dropout, QualifiedEdge, Pulse, Pattern, Video, Runt, Slope, Interval, Dropout, Window / Zone Edge,Pulse, Pattern, Video, Runt, Slope,Interval, Dropout, Window 串行数据† 触发 (T) 解码 (D)测量/图形 (M)眼图 (E)仅图形 (G)物理层 (P)TD: Audio, CAN, CAN FD, FlexRay, I 2C , LIN,RS-232, SPI, UARTTD: I 2C, SPI, UART- RS232, CAN, LIND: CAN FD, FlexRay, I 2S,MILSTD-1553BTD: I 2C, SPI, UART-RS232, CAN, LIN串行数据分析–––串行数据一致性测试–––应用软件选项Switch-mode Power Supply and Device Analysis , Function Generator , Digital Voltmeter (Included standard withregistration)Arbitrary Waveform Generator, Switchmode Power Supply and DeviceAnalysis, Bode Plot, 10-bit mode, Mask TestArbitrary Waveform Generator, WiFi, BodePlot外设接口USB Host, USB Device, LAN, GPIB, and LXICompatibleUSB Host, USB Device, LAN USB Host, USB Device, LAN 函数+, -, x, /, FFT, Absolute Value, Average, Derivative, Envelope, Floor, Integral, Invert, Reciprocal, Rescale, Roof, SinX/x, Square,Square Root, Trend, Zoom+, -, x, /, FFT, Derivative, Integral, Square Root / Formula Editor+, -, x, /, FFT, Derivative, Integral,Square Root尺寸 (HWD)270 x 380 x 125 mm (10.63” x 14.96” x 4.92”)224 x 352 x 111 mm (8.81” x 13.86” x 4.37”)150 x 312 x 133 mm (5.91"x 12.28" x 5.94")重量10.6 lbs (4.81 kg)7.92 lbs. (3.6 kg)/ 8.6 lbs. (3.9 kg)5.72 lbs. (2.6 kg)保修3 yr3 yr3 yrMDA 8000HD 电机驱动分析仪三相电机功率分析电机驱动工程师需要了解驱动系统运行的每个部分,需要查看控制、传感器、功率器件和功率的波形,需要了解动态事件,并且需要灵活地调试任何异常,电机驱动分析仪可以完成所有工作。
电子经纬仪说明书

仪器中心标志 望远镜调焦旋钮 对中器调焦旋钮
对中器目镜 电子手簿接口
基座脚螺旋·6·望远 Nhomakorabea目镜垂直制动旋钮 垂直微动旋钮 电源开关 照明开关 圆气泡 基座底板
PDF 文件使用 "pdfFactory" 试用版本创建 ÿwÿ
提把
望远镜物镜 长水准器
公司倾力打造了遍及全国的销售网络和维修服务中心, 努力提高经销商的销售能力和水平,为他们培养技术和维修 人员等力量,使用户放心,经销商满意。
中国是世界的工厂,中国将成为世界测绘仪器制造王 国,科力达将成为世界测绘仪器生产基地。
本公司生产的测绘仪器具有美观的外形及高质量的功 能与性能。为让您掌握它所有的功能和性能,以便在作业中 应用自如并避免发生故障,我们建议您在使用仪器前仔细阅 读本使用说明书,并请遵守本书每一章节的操作及注意事 项。
(3) 仪器不使用时,应将其装入箱内,置于干燥处,注意防 震、防尘和防潮。
(4) 若仪器工作处的温度与存放处的温度差异太大,应先将 仪器留在箱内,直到它适应环境温度后再使用仪器。
(5) 仪器长期不使用时,应将仪器上的电池卸下分开存放。 电池应每月充电一次。
(6) 仪器运输应将仪器装于箱内进行,运输时应小心避免挤 压、碰撞和剧烈震动,长途运输最好在箱子周围使用软 垫。
·2·
PDF 文件使用 "pdfFactory" 试用版本创建
科力达电子经纬仪操作手册
6.5. 水平角象限鸣响设置....................................................24 6.6. 竖直角的零方向设置....................................................24 6.7. 天顶距与垂直角的测量................................................25 6.8. 斜率百分比....................................................................25 6.9. 望远镜视距丝测距........................................................26 7. 与测距仪及电子手薄联接组合成多功能全站仪...............27 8. 检验与校正 ..........................................................................29 8.1. 长水准器........................................................................29 8.2. 圆水准器........................................................................29 8.3. 望远镜分划板倾斜........................................................30 8.4.视准轴与横轴的垂直度(2C) ...................................31 8.5. 竖盘指标零点自动补偿................................................32 8.6.竖盘指标差(i 角)和竖盘指标零点设置..................32 8.7. 光学对中器....................................................................34 8.8. 其它调整........................................................................35 9. 技术指标 ..............................................................................36 10.错误代码信息表 .................................................................38 11.附件 .....................................................................................39
科力达电子经纬仪维修手册

科力达电子经纬仪维修手册科力达电子经纬仪操作手册2.5. 仪器与基座的装卸拆卸如有需要,仪器可从三角基座上卸下,先用螺丝刀松开基座锁定钮固定螺丝,然后逆时针转动基座锁定扭约180°,即可使仪器与基座分离.安装将仪器的定向凸出标记与基座定向凹槽对齐,把仪器上的三个固定脚对应放入基座的孔中,使仪器装在三角基座上,顺时针转动基座锁定钮约180°使仪器与基座锁定,再用螺丝刀将基座锁定钮固定螺丝旋紧.3. 键盘功能与信息显示3.1. 键盘符号与功能本仪器键盘具有一键双重功能,一般情况下仪器执行键上方所标示的第一(测角)功能,当按下MODE键后再按其余各键则执行按键下方所标示的第二(测距)功能.R/LCONS显示右旋/左旋水平角选择键.连续按此键,两种角值交替显示.专项特种功能模式键.HOLDMEAS水平角锁定键.按此键两次,水平角锁定;再按一次则解除.测距键.按此键连续精确测距(连接测距仪有效). 在特种功能模式中按此键,显示屏中的光标左移.0 SETTRK水平角置零键.按此键两次,水平角置零.跟踪测距键.按此键每秒跟踪测距一次,精度至0.01m(连接测距仪有效).在特种功能模式中按此键,显示屏中的光标右移. V% 竖直角和斜率百分比显示转换键.连续按此键交替显示.在测距模式状态时,连续按此键则交替显示斜距第一(键上)功能符号操作键第二(键下)功能符号信息显示窗口▲( ),平距( ),高差( ).增量键.在特种功能模式中按此键,显示屏中的光标可上下移动或数字向上增加.MODE▼测角,测距模式转换键.连续按键,仪器交替进入一种模式,分别执行键上或键下标示的功能.减量键.在特种功能模式中按此键,显示屏中的光标可上下移动或数字向下减少.REC望远镜十字丝和显示屏照明键.按键一次开灯照明;再按则关(若不按键,10秒后自动熄灭).记录键.令电子手簿执行记录.PWR 电源开关键.按键开机;按键大于2秒则关机.3.2. 信息显示符号液晶显示屏采用线条式液晶,常用符号全部显示时其位置如图所示:中间两行各8个数位显示角度或距离观测结果数据或提示字符串.左右两侧所示的符号或字母表示数据的内容或采用的单位名称.V 竖直角 % 斜率百分比H 水平角 G 角度单位:格(Gon)(角度采HR 右旋(顺时针)水平角用度及密位时无符号显示).HL 左旋(顺时针)水平角 m 距离单位:米斜距 ft 距离单位:英尺平距电池电量高差 (注:其余符号在本仪器中未采用.)4. 初始设置本仪器具有多种功能项目供选择,以适应不同作业性质对成果的需要.因此,在仪器使用前,应按不同作业需要,对仪器采用的功能项目进行初始设置.4.1. 设置项目(1) 角度测量单位:360°,400gon,6400mil(出厂设为360°).(2) 竖直角0方向的位置:水平为0°或天顶为0°(出厂设天顶为0°).(3) 自动断电关机时间为:30min(分钟)或10min(分钟) (出厂设为30min).(4) 角度最小显示单位:1〃或5〃(出厂设为1〃).(5) 竖盘指标零点补偿选择:自动补偿或不补偿(出厂设为自动补偿).(无自动补偿的仪器此项无效).(6) 水平角读数经过0°,90°,180°,270°象限时蜂鸣或不蜂鸣(出厂设为蜂鸣).(7) 选择不同类型的测距仪联接(出厂设为与科力达ND系联接).4.2. 设置方法(1) 按住CONS键打开电源开关,至三声蜂鸣后松开CONS 键.仪器进入初始设置模式状态,显示器显示:闪烁显示器下一行八个数位分别表示初始设置的内容如下:1 1 1 1 1 1 1 0至0 0 0 0 0 0 0 6(7)(6)(5)(4)(3)(2)(1)数位代码在显示器上行显示的设置内容设置内容字符代码ND 300011011111可与联接的测距仪型号0 S.2L 2A 索佳RED2L(A)系列1 ND3000 科力达,南方ND系列2 P.20 宾得MD20系列3 DI1600 徕卡系列4 S.2 索佳MINI2系列5 D3030 常州大地D3030系列6 TP.A5 拓普康DM系列1 90°BEEP 象限蜂鸣0 DIS.BEEP 象限不蜂鸣1 TLT.ON 竖盘自动补偿器打开0 TLT.OFF 竖盘自动补偿器关闭1 STEP 1 角度最小显示单位1〃0 STEP 5 角度最小显示单位5〃1 30 OFF 自动关机时间30min(分)0 10 OFF 自动关机时间10min(分)1 HOT =0 竖直角水平为0°0 HOT =90 竖直角天顶为0°11 359°59′59〃角度单位:360度01 399.99.99 角度单位:400格(G)00 6399.99 角度单位:6400密位10 359°59′59〃角度单位:360度(2) 按MEAS或TRK键使闪烁的光标向左或向右移动到要改变的数字位.(3) 按或键改变数字,该数字所代表的设置内容在显示器上行以字符代码的形式予以提示.(4) 重复⑵和⑶操作进行其它项目的初始设置直至全部完成.(5) 设置完成后按CONS键予以确认,仪器返回测量模式. l 设置完成后,一定要按CONS键予以确认,把设置存入仪器内,否则仪器仍保持原来的设置.5. 测量准备5.1. 仪器的安置,对中和整平安置三脚架和仪器(1) 选择坚固地面放置脚架之三脚,架设脚架头至适当高度,以方便观测操作.(2) 将垂球挂在三脚架的挂钩上,使脚架头尽量水平地移动脚架位置并让垂球粗略对准地面测量中心,然后将脚尖插入地面使其稳固.(3) 检查脚架各固定螺丝固紧后,将仪器置于脚架头上并用中心联接螺丝联结固定.使用光学对中器对中(1) 调整仪器三个脚螺旋使圆水准器气泡居中.通过对中器目镜观察,调整目镜调焦旋钮,使对中分划标记清晰.(2)调整对中器的调焦旋钮,直至地面测量标志中心清晰并与对中分划标记在同一成像平面内.(3) 松开脚架中心螺丝(松至仪器能移动即可),通过光学对中器观察地面标志,小心地平移仪器(勿旋转),直到对中十字丝(或圆点)中心与地面标志中心重合.(4) 再调整脚螺旋,使圆水准器的气泡居中.(5) 再通过光学对中器,观察在面标志中心是否与对中器中心重合,否则重复(3)和(4)操作,直至重合为止. (6) 确认仪器对中后,将中心螺丝旋紧固定好仪器.l 仪器对中后不要再碰三脚架的三个脚,以免破坏其位置.用长水准器精确整平仪器(1) 旋转仪器照准部让长水准器与任意两个脚螺旋连线平行,调整这两个脚螺旋,使长水准器气泡居中.调整两个脚螺旋时,旋转方向应相反(如图).(2) 将照准部转动90°,用另一脚螺旋使长水准器气泡居中.(3) 重复⑴和⑵,使长水准器在该两个位置上气泡都居中.(4) 在⑴的位置将照准部转动180°,如果气泡居中并且照准部转动至任何方向气泡都居中,则长水准器安置正确且仪器已整平.l 注意观察脚螺旋的旋转方向与气泡移动方向的关系.l 在⑷中,气泡若不居中,应校正长水准器,请参阅后面(8.1)的校正方法.5.2. 望远镜目镜调整和目标照准目镜调整(1) 取下望远镜镜盖.(2) 将望远镜对准天空,通过望远镜观察,调整目镜旋钮,使分划板十字丝最清晰.l 观察目镜时,眼睛应放松,以免产生视差和眼睛疲劳.当光亮度不足难以看清十字丝时,按照明键( )照明.目标照准(1) 用粗瞄准器的准星对准目标.(2) 调整望远镜调焦旋钮,直至看清目标.(3) 旋紧水平与垂直制动旋钮,微调两微动旋钮,将十字丝中心精确照准目标,这时眼睛左右上下轻微移动观察, 若目标与十字丝两影像间有相对移位现象,则应该再微调望远镜调焦旋钮,直至两影像清晰且相对静止时止.l 对较近目标调焦时,顺时针转动调焦旋钮.较远目标则逆时针方向旋转.l 若⑶未调整好,则视差会歪曲目标与十字丝中心的关系,从而导致观测误差.l 用微动旋钮对目标作最后精确照准时,应保持旋钮顺时针方向旋转.如果转动过头,最好返回再重新按顺时针方向旋转旋钮进行照准.l 即使不测竖直角,我们仍建议尽量用十字丝中心位置照准目标.5.3. 打开或关闭电源按键式电源开关操作显示按住PWR键至显示屏显示全部符号,电源打开.2秒后显示出水平角值,即可开始测量水平角.按PWR键大于2秒至显示屏显示OFF 符号后松开,显示内容消失,电源关闭.l 开启电源后显示的水平角为仪器内存的原角值,若不需要此值时,可用"水平角置零"l 若设置了"自动断电"功能,30或10分钟内不进行任何操作,仪器会自动关闭电源并将水平角自动存储起来.5.4. 指示竖盘指标归零(V 0 SET)操作显示开启电源后如果显示"b",提示仪器的竖轴不垂直,将仪器精确置平后"b"消失.仪器精确置平后开启电源ET系列显示"V 0SET"提示应指示竖盘指标归零.将望远镜在盘左水平位置上下转动1~2次,当望远镜通过水平视线时将指示竖盘指标归零,显示出竖盘角值.仪器可以进行水平角及竖直角测量.l 采用了竖盘指标自动补偿归零装置的仪器,当竖轴不垂直度超出设计规定时,竖盘指标将不能自动补偿归零,仪器显示"b",将仪器重新精确置平待"b"消失后,仪器方恢复正常.l 若设置了"自动断电"功能,30或10分钟内不进行任何操作,仪器会自动关闭电源并将水平角自动存储起来.6. 角度测量6.1. 盘左/盘右观测"盘左"是指观测者对着望远镜时,竖盘在望远镜的左边;"盘右"指的是观测者对着望远镜目镜时,竖盘在望远镜的右边(如图所示).取盘左和盘右读数的平均数作为观测值,可以有效地消除仪器相应的系统误差对成果的影响. 因此,在进行水平和竖直角观测时,要在完成盘左观测之后, 中转望远镜180°再完成盘右观测.盘左观测盘右观测6.2. 水平角置"0"(0 SET)将望远镜十字丝中心照准目标A后,按0 SET键两次,使水平角读数为"0°00′00〃".如:照准目标A显示为HR50°10′20〃→ 按两次0 SET键→ 显示目标A方向为HR 0°00′00〃l 0 SET键只对水平角有效.l 除已锁定HOLD键状态外,任何时候水平角均可置"0". 若在操作过程中误按0 SET键盘,只要不按第二次就没关系,当鸣响停止,便可继续以后的操作.6.3. 水平角与竖直角测量(HR,V或HL,V)(1) 设置水平角右旋与竖直角天顶为0°测量方式(HR.V).顺时针方向转动照准部(HR),以十字丝中心照准目标A,按两次0 SET键,目标A的水平角度设置为0°00′00〃, 作为水平角起算的零方向.照准目标A时的具体步骤及显示为:按两次→0 SET→顺时针方向转动照准部(HR),以十字丝中心照准目标B时显示为:B方向竖直角(天顶距)值AB方向间右旋水平角值V 93°20′30〃HR 10°50′40〃V 91°05′10〃HR 50°10′20〃A方向竖直角(天顶距)值A方向水平角已置"0"V 93°20′30〃HR 00°00′00〃(2) 按R/L键后,水平角设置成左旋测量方式(HL.V).逆时针方向转动照准部(HL),以十字丝中心照准目标A,按两次0 SET键将A方向水平角置"0".步骤和显示结果与(1)之A目标相同.逆时针方向转动照准部(HL),以十字丝中心照准目标B时显示为:B方向竖直角(天顶距)值AB方向间左旋水平角值l R/L键对竖直角无效.l 再按R/L键,水平角又由左旋转为右旋方式.l B方向观测完后可继续照准以后各方向,以获得各方向相应的水平角与竖直角值.l (1)和(2)仅列举了盘左观测时的步骤,接着应中转望远镜完成盘右的观测.6.4. 水平角锁定与解除(HOLD)在观测水平角过程中,若需保持所测(或对某方向需予置)水平角时,按HOLD键两次即可.水平角被锁定后,显示左下角"HRL"符号闪烁,再转动仪器水平角也不发生变化.当照准至所需方向后,再按HOLD键一次,解除锁定功能,此时仪器照准方向的水平角就是原锁定的水平角值. l HOLD键对竖直角或距离无效.l 若在操作过程中误按HOLD键,只要不按第二次就没有关系,当鸣响停止便可继续以后的操作.V R091°05′10〃HR 309°49′40〃6.5. 水平角象限鸣响设置(1) 照准定向的第一个目标,按0 SET键两次,使水平角置"0".(2) 将照准部转动约90°,至有鸣响时停止,显示:HR 89°59′20〃.(3) 旋紧水平制动旋钮,用微动旋钮使水平读数显示为:HR 90°00′00〃 ,用望远镜十字丝确定象限目标点方向.(4) 用同样的方法转动照准部确定180°,270°的象限目标点方向.6.6. 竖直角的零方向设置竖直角在作业开始前就应依作业需要而进行初始设置,选择天顶方向为0 或水平方向为0 .(方法参阅初始设置说明)两种设置的竖盘结构如图所示:l 当读数值经过0 ,90 ,180 ,270 各象限时,蜂鸣器鸣响,鸣响从上述值±1′范围开始至±20〃范围停止.l 鸣响可以在初始设置中取消.PDF 文件使用"pdfFactory" 试用版本创建/doc/785763222.html,科力达电子经纬仪操作手册·25·180°540°6.7. 天顶距与垂直角的测量(1) 天顶距:如竖直角选择天顶方向为0°,测得(显示)的竖直角V为天顶距,如图.天顶距=(L+360°-R)/2指标差=(L+R-360°)/2(2) 垂直角:如竖直角选择水平方向为0°,则测得(显示)的竖直角V为垂直角,如图.垂直角=(L±180°-R)/2指标差=(L+R- )/2l 若指标差|i| ≥10〃,则应按本书(8.5和8.6)介绍的方法进行检验与校正.6.8. 斜率百分比在测角模式下测量.竖直角可以转换成斜率百分比.按V%键,显示器交替显示竖直角和斜率百分比.斜率百分比值=H/D×100%PDF 文件使用"pdfFactory" 试用版本创建/doc/785763222.html,科力达电子经纬仪操作手册·26·斜率百分比范围从水平方向至±45°(±50G),若超过此值则仪器不显示斜率值.6.9. 望远镜视距丝测距利用望远镜分划板上的视距丝(上下或左右视距丝)可以测量目标与仪器间的距离,测量精度≤0.4%D.(1) 将仪器安置在A点,标尺竖立(平放)在目标B点.(2) 读出分划板在上下或左右两视距丝在标尺上的截距d.(3) AB两点之间的水平距离D= 100×d.l 此种测距精度不是很高,不可用此法测高精度的距离.7. 与测距仪及电子手薄联接组合成多功能全站仪ET—02/05/05B电子经纬仪有两个数据输入输出接口,可与多种类型的测距仪相联结组成全站仪,再与科力达电子手薄联接则可组成多功能全站仪.(如图)电子经纬仪与测距仪联接组合成全站仪(1) 将电子经纬仪提把的两个固定螺丝松开取下提把.(2) 将测距仪安装到电子经纬仪的连接柱上固紧螺丝.(3) 量取经纬仪与测距仪两横轴中心的间距,调整反射棱镜与觇板两中心的间距与之相一致.作业时,经纬仪视轴照准觇板中心,测距仪视轴照准棱镜中心,使两轴保持平行.(4) 电子经纬仪盘左时物镜侧斜下方接口是与测距仪联结的接口.本仪器与各型号的测距仪相联结时,应选用科力达CE—202系列相应的电缆,详见下表:CE—202 联科力达/南方ND系列测距仪CE—202P 联宾得测距仪CE—202L 联徕卡测距仪CE—202S 联索佳测距仪CE—202D 联常州大地测距仪CE—202T 联拓普康测距仪(5) 开机初始设置,按本书所述初始设置的方法,将所选用的测距仪型号设置为本仪器中使用的测距仪.与科力达测距仪和电子手簿联接(6) 按C O N S键确认初始设置,回到测量模式,盘左上下转动望远镜指示竖盘指标归零,仪器进入测角模式状态.(7) 按M O D E键进入测距模式状态.显示为:(8) 用经纬仪十字丝中心照准觇板中心,用测距仪照准棱镜中心,按测距仪上的测距键进行测距,这时,测距仪测的距离值就被自动显示到电子经纬仪上.如:(9) 连续按V%键,交替显示斜距 ,平距 ,高差 .电子经纬仪与科力达电子手簿的联接设置在仪器对中器目镜下侧的接口,可用科力达CE-201 电缆与科力达电子手簿联接,将仪器观测数据输入电子手簿进行记录.以上两项联接后就组成了能自动数据采集的多功能全站仪.与测距仪联机后的注意事项!l 反射棱镜和觇板两中心的间距应调整到与经纬仪和测距仪两横轴中心的间距相一致.l 作业中如需使用斜距和高差成果时,则在设置测点棱镜站时,应使棱镜中心至地面标志的高度与测站点测距仪中心至地面标志的高度相一致.若两者高度不一致,对所显示的斜距和高差则需计算不等高改正数并进行修正后方可使用(平距则不受影响).l 计算平距,高差时,对竖直角的要求应参阅各测距仪的说明,并按其要求对仪器竖直角的零方向进行初始设置. 科力达ND系列测距仪对竖直角要求采用天顶距.8. 检验与校正8.1. 长水准器检验方法见本书"5.1用长水准器精确整平仪器"一节.校正(1) 在检验的(4)位置,若长水准器的气泡偏离了中心,先用与长水准器平行的脚螺进行调整,使气泡向中心移近一半的偏离量.(2) 剩余的一半用校正针对水准器校正螺丝进行调整.(3) 将仪器旋转180°,检查气泡是否居中.如果气泡仍不居中,重复上述步骤,直至气泡居中.(4) 将仪器旋转90°,用第三个脚螺旋调整气泡居中.重复检验与校正步骤直至照准部转至任何方向气泡均居中为止.8.2. 圆水准器检验长水准器检校正确后,若圆水准器气泡亦居中就不必校正.校正若水泡不居中,用校正针或内六角搬手调整气泡下方的校正螺丝使气泡居中.校正时,应先松开气泡偏移方向对面的校正螺丝(1或2个),然后拧紧偏移方向的其余校正螺丝使气泡居中.气泡居中时,三个校正螺丝的紧固力均应一致.8.3. 望远镜分划板倾斜检验(1) 整平仪器后在望远镜视线上选定一目标点A,用分划板十字丝中心照准A并固定水平和垂直制动旋钮.(2) 转动望远镜垂直微动旋钮,使 A点移动至视场的边沿(A′点).(3) 若A点是沿十字丝的竖丝移动,即A′点仍在竖丝之内的,则十字丝不倾斜不必校正.如图,A′点偏离竖丝中心,则十字丝倾斜,需对分划板进行校正.校正(1) 首先取下位于望远镜目镜与调焦旋钮之间的分划板座护盖,便看见四个分划板座固定螺丝(见8.4的附图).(2) 用螺丝刀均匀地旋松该四个固定螺丝,绕视准轴旋转分划板座,使A′点落在竖丝的位置上.(3) 均匀地旋紧固定螺丝,再用上述方法检验校正结果.(4) 将护盖安装回原位.8.4. 视准轴与横轴的垂直度(2C)检验(1) 距离仪器同高的远处设置目标A,精确整平仪器并打开电源.(2) 在盘左位置将望远镜照准目标A,读取水平角(例: 水平角L=10°13′10〃).(3) 松开垂直及水平制动旋钮中转望远镜,旋转照准部盘右照准同一A点(照准前应旋紧水平及垂直制动旋钮)并读取水平角(例:水平角R=190°13′40〃). (4) 2C=L-(R±180°)= -30〃≥±20〃,需校正.校正(1) 用水平微动旋钮将水平角读数调整到消除C后的正确读数:R+C=190°13′40〃-15〃=190°13′25〃. (2) 取下位于望远镜目镜与调焦旋钮之间的分划板座护盖,调整分划板水平左右两个校正螺丝,先松一侧后紧另一侧的螺丝,移动分划板使十字丝中心照准目标A.(3) 重复检验步骤,校正至 |2C|<20〃符合要求为止.(4) 将护盖安装回原位.8.5. 竖盘指标零点自动补偿检验竖盘采用了液体电容式指标零点自动补偿装置的仪器, 指标零点是否能自动补偿,可用下述简要方法检验: (1) 安置和整平仪器后,使望远镜的指向和仪器中心与任一脚螺旋(X)的联线相一致,旋紧水平制动旋钮. (2) 开机后指示竖盘指标零点,旋紧垂直制动旋钮,仪器显示当前望远镜指向的竖直角值.(3) 朝一个方向慢慢转动脚螺旋(X)至10mm(圆周距)左右时,显示的竖直角由相应随着变化到消失出现"b"信息,表示仪器竖轴倾斜已大于3′,超出竖盘补偿器的设计范围.当反向旋转脚螺旋复原时,仪器又复现竖直角(在临界位置可反复实验观其变化),表示竖盘补偿器工作正常.校正当发现仪器补偿失灵或异常时,应送厂检修.l ET—05B型仪器无竖盘指标零点自动补偿装置,而在电池盒下方有一与仪器中间的长水准器相垂直的管水准器可作检验.该水准器的气泡位置正常与否的检验与校正参照8.1的操作.8.6. 竖盘指标差(i角)和竖盘指标零点设置在完成8.3和8.5的检验项目后再检验本项目.检验(1) 安置整平好仪器后开机,将望远镜照准任一清晰目标得竖直角盘左读数L.(2) 中转望远镜再照准A,得竖直角盘右读数R.(3) 若竖直角天顶为0°,则i=(L+R-360°)/2;若竖直角水平为0°,则i = (L+R-180°)/2或(L+R-540°)/2 (4) 若| i |≥10〃,则需对竖盘指标零点重新设置.校正(竖盘指标零点设置)(1) 整平仪器后,按住 V% 键开机,三声蜂鸣后松开按键,显示:V 0SETSET--1(2) 在盘左水平方向附近上下转动望远镜,待上行显示出竖直角后,转动仪器精确照准与仪器同高的远处任一清晰稳定目标A,按V%键,显示:V 90°20′30〃SET--2(3) 中转望远镜,盘右精确照准同一目标A, 按 V% 键,设置完成,仪器返回测角模式.(4) 重复检验步骤重新测定指标差(i).若指标差仍不符合要求,则应检查校正(指标零点设置)的(1)(2)(3)步骤的操作是否有误,目标照准是否准确等,按要求再重新进行设置.(5) 经反复操作仍不符合要求时,应送厂检修.l 零点设置过程中所显示的竖直角是没有经过补偿和修正的值,只供设置中参考不能作它用.8.7. 光学对中器检验(1) 将仪器安置到三脚架上,在一张白纸上画一个十字交叉并放在仪器正下方的地面上.(2) 调整好光学对中器的焦距后,移动白纸使十字丝交叉位于视场中心.(3) 转动脚螺旋,使对中器的中心标志与十字交叉点重合.(4) 旋转照准部,每转90°,观察对中点的中心标志与十字交叉点的重合度.(5) 如果照准部旋转时,光学对中器的中心标志一直与十子交叉点重合,则不必校正.否则需按下方法进行校正.校正(1) 将光学对中器目镜与调焦旋钮之间的改正螺丝护盖取下.(2) 固定好十字交叉白纸并在纸上标记出仪器每旋转90°时对中器中心标志落点,如图:A,B,C,D点.PDF 文件使用"pdfFactory" 试用版本创建/doc/785763222.html,科力达电子经纬仪操作手册·35·(3) 用直线连接对角点AC和BD,两直线交点为O.(4) 用校正针调整对中器的四个校正螺丝,使对中器的中心目标与O点重合.(5) 重复检验步骤(4),检查校正至符合要求.(6) 将护盖安装回原位.8.8. 其它调整若脚螺旋出现松动相象,可以调整基座上脚螺旋两侧的2个校正螺丝,拧紧螺丝的压紧力到合适的力度为止.9. 技术指标望远镜成像正像放大倍率30×有效孔径 45mm分辨率 3〃视场角1°30′短视距 1.4m视距乘常数 100视距加常数 0视距精度≤0.40%L筒长 157mm角度测量测角方式光电增量式光栅盘直径(水平,竖直) 79mm小显示读数 1〃或 5〃,可选探测方式水平角:双竖直角:02型:双;05型:单测角单位360°/ 400gon/6400mil,可选精度 ET–02:2〃,ET–05/05B:5〃水准器长水准器 30〃/2mm圆水准器8′/2mmPDF 文件使用"pdfFactory" 试用版本创建/doc/785763222.html,科力达电子经纬仪操作手册·37·竖盘零点自动补偿器(05型无此项设置)系统液体电容式,可选工作范围±3′精度 1〃光学对中器成像正像放大倍数3×调焦范围 0.5m~∞视场角5°显示器类型 LCD,双行,线段式数据输入输出接口(2个) RS --232C机载电池电源可充电镍-氢电池电压直流6V连续工作时间 8h使用环境使用环境温度 -20℃~+45℃尺寸及重量仪器外形尺寸160×150×330mm仪器重量 5.2kgPDF 文件使用"pdfFactory" 试用版本创建/doc/785763222.html,科力达电子经纬仪操作手册·38·10. 错误代码信息表当操作仪器不当或仪器内部电路出现故障时,显示屏上会显示错误信息,其内容和处理办法如下表所列:错误代码代码含义及处理方法Err 01水平盘测量出错.关机再开机,若仍出现"Err 01"则需。
科力达K9产品手册范本精选全文完整版

可编辑修改精选全文完整版科力达RTK 产品系列风云K9系列RTK测量系统产品手册科力达仪器二○一五年四月目录第一章风云K9系列RTK概述 (3)§1.1关于风云K9 (3)§1.2二大独创 (3)§1.3四大特色 (4)§1.4技术特色 (4)第二章风云K9系列RTK主机 (6)§2.1主机外型 (6)§2.2接口 (7)§2.3电池的安装方法 (7)§2.4指示灯和仪器设置 (8)§2.5手簿与蓝牙连接 (13)§2.5.1 手簿设置 (13)§2.5.2 连接设置 (17)§2.6网络设置连接 (18)第三章风云K9系列RTK电台 (23)§3.1电台概述 (23)§3.1.1 产品简介 (23)§3.1.2 产品特点 (23)§3.1.3 技术指标 (24)§3.2GDL25电台外型说明 (25)§3.2.1 GDL25电台的面板 (25)§3.2.2 GDL25电台的外型 (26)§3.3GDL25电台使用注意事项 (26)§3.3.1 供电电源 (26)§3.3.2 天线口负载 (27)§3.3.3 电磁环境 (27)§3.3.4 天线选择 (28)§3.3.5 接口电缆 (28)第四章风云K9系列RTK附件介绍 (29)§4.1风云K9系列GPS的仪器箱(包) (29)§4.2电池及充电器 (29)§4.3数据收天线及发射天线 (31)§4.4各种传输线及电缆 (32)§4.5其他 (33)第五章操作说明 (34)§5.1基准站和移动站安装 (34)§5.2仪器设置 (35)§5.3仪器操作表现 (35)§5.4天线高的量测方法 (35)第六章与软件的连接 (37)§6.1数据传输 (37)§6.1.1 磁盘拷贝 (37)§6.1.2 仪器之星的使用 (37)§6.2在线升级方法 (39)§6.3K9系列GPS的注册 (41)附录1 技术参数 (43)附录2 联系方式 (44)第一章风云K9系列RTK概述§1.1 关于风云K9科力达仪器一直致力于把国际先进的GPS测绘勘测技术与产品普及到国测量用户手中。
风云K9静态外业测量简易手册(初稿)

数是否为 0,正常情况历元总数和采集时间都应该为一个大于 0 的整数,否则应该升级风云
K9 接收机主板并将机子内的存储器做格式化操作。
再重新测试。直到风云 K9 可以正常记录静态数据。 3、星历预报和 PDOP 值 在实地施测之前,最好先通过星历预报查看一下当地的 PDOP 值情况。根据 PDOP 值 的情况来确定合适的施测时间。方法如下: 先到网上下载最新的星历数据文件,这里推荐一个定期更新的星历数据下载网站,网址 为 /gps/almanacs.htm。
≤8 5~10 ≥45
≤10 0.2~5 ≥40
选点埋石必须考虑 GPS 接收卫星信号的特点:点位需选在对天通视并较少电磁干扰的
位置,因此宜选择在开阔的地方,远离大功率无线电发射装置(如电视台、电台、微波站等 )
200m 开外;远离高压输电线和微波无线电信号传送通道 50m 开外。
*2、仪器设置
先确定风云 K9 注册码未过期,然后测试风云 K9 是否可以记录静态数据。方法如下:
参阅《风云 K9 使用手册》S§【2.5 按键操作说明】和§【2.6 模式设置举例】将风云
K9 GPS 接收机设置为静态工作模式,置于室外空旷处 10 分钟左右,这样可以让它接受天
上卫星,将采集到的卫星数据记录到机子内存中,这就是静态数据。然后用数据线(七针
Hilka Welded Bottle Jack说明书

1. Make sure the jack and vehicle are on a hard level surface. 2. Always set the vehicle parking brake and block the wheels. 3. Consult the vehicle owner’s manual to ascertain the location of jack points and then position the jack beneath the prescribed lift point. 4. Orange cap covering the release valve must be removed before use. 5. Turn the release valve clockwise to the closed position, but do NOT overtighten. 6. When raising the jack place the handle into the socket and continue to pump up and down until desired vehicle height has been reached. 7. Place jack stands beneath the vehicle at locations recommended by the vehicle manufacturer. 8. Turn the release valve slowly counterclockwise to lower load onto jack stands.
INTRODUCTION
Hilka bottle jacks are produced to conform with European Standards EN 1494/A1:2008 and the Machinery Directive (MD) 2006/42/EC
TM-MK-9K 声音抑制器MK-9K 的运作和维护说明书

TM-MK-9KOPERATION AND MAINTENANCE OF SOUND SUPPRESSORMODEL MK-9KBefore using this suppressor,be certain you have read andunderstand this manual.Manufactured byGEMTECHDiv. of Gemini Technologies, Inc.P.O. Box 140618Boise, Idaho 83714ISSUED: March 2015⇔⇔⇔⇔⇔ WARNING ⇔⇔⇔⇔⇔✍Because sound suppressed weapons make lessnoise than non-suppressed weapons, it is easy to for-get that they are still firearms. It is of vital importanceto remember that a sound suppressed firearm is justas dangerous as a non-suppressed one, and the samesafe handling requirements apply.TM-MK-9KFIRST EDITION August 1992SECOND EDITION August 1993THIRD EDITION November 1994FOURTH EDITION July 1995FIFTH EDITION July 1996SIXTH EDITION April 2005SEVENTH EDITION March 2015Published by:ATI Star PressAntares Technologies, Inc.P.O. Box 140618Boise, Idaho 83714Phone: (208) 939-7222COPYRIGHT NOTICE:©2015 Gemini Technologies, Inc.All rights reserved. The contents of this publication may not be reproduced in any form or by any means in whole or in part without the prior written permission of the copyright owner.TM-MK-9KOPERATIONAL MANUAL FORSOUND SUPPRESSOR MODELMK-9K™ (9mm)Manufactured byGEMTECHDivision of Gemini Technologies, Inc.P.O. Box 140618Boise, Idaho 83714-0618Phone: (208) 939-7222FAX: (208) 939-7804GEMTECH PROPRIETARYThis document contains proprietary information of Gemtech and is sub-mitted to the receiver in confidence. Any reproduction, use and/or dis-closure of this and/or any portion thereof is expressly prohibited with-out the express written permission of GemtechCONTENTS:Important Warning...........................................................................P. 4 General Description........................................................................P. 4 Mounting on Weapons....................................................................P. 5 Basic Principles..............................................................................P. 6 Construction....................................................................................P. 6 Ammunition Notes..........................................................................P. 7 Routine Cleaning.............................................................................P. 8 Field Stripping.................................................................................P. 8 Reassembly....................................................................................P. 8 Servicing the Tri-Lock mount...........................................................P. 9 Reassembly..................................................................................P. 10 Use & Limitations.........................................................................P. 10 Physical Specifications.................................................................P. 10 Repair Process instructions..........................................................P. 10 Warranty Statement......................................................................P. 10 Assembly Sketch.........................................................................P. 11⇔⇔⇔⇔⇔WARNING⇔⇔⇔⇔⇔✍Failure to follow installation and maintenance instructionsdetailed in this manual can result in potential for seriousinjury to the user and damage to the weapon. Firearm soundsuppressors are user attached firearm muzzle devices, and assuch are subject to improper attachment unless the proper proce-dures outlined in this manual are followed.MANUFACTURER’S DISCLAIMERThe manufacturer is not responsible for improper usage of thisproduct. This product is potentially dangerous, and as such it is theuser’s responsibility to understand and implement its proper use. Ifyou do not understand the instructions in this manual, please con-tact the manufacturer for further clarification.Congratulations! You have just obtained the originl, classic 9mm muzzle suppressor designed for the Heckler & Koch MP5 submachine gun. While an older design, the MK-9K remains one of the most efficient 9mm subma-chine gun suppressors available anywhere. Before use, please take a few moments to read this instruction manual. It is not designed for and should never be used on a center fire rifle.GENERAL DESCRIPTIONThe MK-9K suppressor is a coaxial design exhibiting increased effi-ciency as compared to other suppressors of similar external size and ap-pearance. It is designed to mount on the H&K MP5 submachine gun utilizing the HK 3-lug barrel. On special order it can be provided to mount on a 1/2x28 threaded barrel. Suppression efficiency is gained through proper design of the suppressor rather than by using “wipes” or other obstacles touching the bullet in free flight. For this reason, weapon accuracy is not impaired, and accuracy may be actually slightly enhanced by tightening of the group size.⇔⇔⇔⇔⇔ WARNING ⇔⇔⇔⇔⇔✍Failure to follow mounting instructions detailed in this manual can result in potential for serious injury to the user and damage to the weapon.MOUNTING ON WEAPONSAlthough some versions of the HK MP5 submachine gun have muzzle threads, we suggest utilizing the 3-lug mount whenever possible, as it is a superior and more stable mount. For mounting on other weapons, the sup-pressor can be special ordered to mount on a 1/2-28 threaded barrel.The MK-9K using the Tri-Lock 3-lug coupler must never be mounted on a 3-lug threaded barrel without a thread protector in place. Failure to observe this caution may result in misalignment. If there is any question, we can provide a suitable thread protector.When mounting on a threaded barrel, the suppressor should be screwed on hand tight only. It is important to periodically ascertain that the suppres-sor has not unscrewed, which can cause misalignment.We guarantee alignment of the MK-9K suppressor only on original Ger-man 3-lug H&K MP5 barrels, those converted by S&H Arms Co., or on non-3-lug barrels converted by us. Damage caused by misalignment is not cov-ered under the warranty.⇔⇔⇔⇔⇔ DANGER ⇔⇔⇔⇔⇔✍ Before performing any installation or maintenance operation, always remove the magazine from the firearm, open the action, and visually ascertain that the chamber is empty and the weapon unloaded.Failure to do so can result in potential for serious injury to the user and others in the vicinity.GEMTECH TRI-LOCK MOUNTING INSTRUCTIONS1. Be certain the weapon is unloaded, the magazine removed, the safety on,and the bolt locked in the open position.2. Align the grooves in the silencer mount with the lugs on the barrel.3. Pull the silencer onto the barrel against spring tension until the silencercan be rotated counter clockwise while holding the weapon in the firing position.4. Rotate the silencer 60° until it stops and release pressure on the silencer.Rock the silencer to be certain that the lugs have engaged the pocket recesses in the mount.5. Removal is the reverse of installation. It will be necessary to pull the si-lencer rearward in order to rotate it 60° clockwise.SINGLE POINT (THREAD) MOUNTING INSTRUCTIONS1. Be certain that the weapon is unloaded, the magazine removed, the safetyon, and the bolt locked in the open position.2. Screw the suppressor onto the barrel threads, being careful to not cross-thread the suppressor.3. Tighten firmly hand tight. We advocate the use of Blue Loctite to inhibitunscrewing during firing.4. Because silencers using single point thread mounting will unscrew duringuse, it is the shooter’s responsibility to frequently check to be cer-tain that the suppressor remains tightly screwed on the barrel at intervals not to exceed 1 magazine.5. We cannot guarantee alignment on barrels not threaded or gauged by us.We deny liability for injury or damage caused by misalignment or un-screwing of the suppressor.BASIC SUPPRESSION PRINCIPLESThe sound of a firearm discharging is due to the sudden release of high pressure propelling gases. The purpose of a suppressor is to reduce the gas pressure by a combination of increasing the volume for gas expansion, de-creasing gas temperatures, and delaying gas exit from the suppressor.The MK-9K suppressor is a coaxial design unit, consisting of three suppression chambers: the inner rear entrance chamber, the inner front cham-ber, and the outer coaxial chamber. The inner rear chamber diverts pressure into the outer chamber, offering an exceptionally large volume for initial gas pressure reduction, trapping, cooling, and exit delay. The baffle stack (cen-tral core) consists of a steep cone (with a notch in the apex) and a series of precision formed stainless steel baffles. Stainless steel was used for durabil-ity and resistance to gas erosion and corrosion. The baffles are optimally spaced for maximum gas trapping, cooling and delayed gas release into the atmosphere.CONSTRUCTIONThe entire suppressor is constructed from hard anodized aircraft grade aluminum alloys with the exception of the baffles in the central core, which are precision formed from type 18-8 stainless steel for wear resistance and durability. No packing materials or consumable parts are utilized.The suppressor can be partially disassembled for cleaning and routine maintenance. No tools are necessary for this procedure.AMMUNITION NOTES⇔⇔⇔⇔⇔ WARNING ⇔⇔⇔⇔⇔Never use ammunition that does not meet SAAMI specifications.All commercial American made SAAMI specification ammunition is safe, but the origins, storage history, and reason for being surplussed of foreign made ammunition is not available for evaluation. Although foreign made am-munition is usually safe, this is not always the case. Damage from non-American ammunition cannot be covered under warranty.The majority of 9mm ammunition is supersonic, and the projectile trav-eling at velocities above 1,100 fps will produce a ballistic “crack” or “sonic boom”. There are several commercial sources of specially loaded subsonic 9mm ammunition, and for maximum effectiveness, we suggest the use of this type ammunition. Although special 9mm subsonic ammunition has a bullet muzzle velocity below 1,100 fps, the higher bullet weight results in a significantly higher bullet kinetic energy.The majority of subsonic 9mm ammunition is loaded utilizing bullet weights of 147 grain or heavier. Subsonic ammunition utilizing bullet weights of 155 grain or more is apt to be significantly overpressured in some weap-ons, especially the HK MP5. 147 grain FMJ and JHP bullets for 9mm reload-ing are available from a variety of suppliers, including Hornady and Speer. Do not use cast lead bullets. Loading data for 9mm subsonic ammunition is available from a number of sources, including the Speer Supplement (avail-able from Speer for their 147 grain TMC bullets), and from Accurate Arms for use with their powders. However, we caution against any attempt to hand load beyond recommended SAAMI specifications.Commercial subsonic ammunition is available in 158 grain FMJ from Israeli Military Industries and in 147 grain bullet weight from Winchester, Remington, Federal, CCI, and others in both full metal jacket and hollow point styles. We have found that although this ammunition remains subsonic in pistols, it may not remain subsonic in the longer barrel of the Heckler & Koch MP5 submachine gun. The user will need to experiment with different brands. Ammunition with bullet weights over 154 grains is discouraged by H&K. Although some have suggested that the 9mm subsonic cartridge is “downloaded,” we believe users should be aware that this ammunition is anything but an anemic load with kinetic energies and pressures signifi-cantly greater than standard 9mm ball ammunition.Use of corrosive ammunition, and evidence of its use, will void the war-ranty.ROUTINE CLEANINGOur experience suggests that total disassembly for cleaning is not nec-essary, and for this reason the inner core is sealed to maintain optimum positioning of the parts. Field stripping and cleaning should be performed every 2,000 rounds. Because of molten lead splattering from the heat gener-ated by friction with cast bullets and bullet lubricants, ammunition loaded with cast lead bullets should never be used.After field stripping, some cleaning can be performed by immersing the central core of the suppressor in a suitable solvent.Cleaning of the central core is optional and consists primarily of flushing out unburned or partially burned powder residues. There are no perfect sol-vents for the carbon deposited on the internal parts by the burning of the powder. We have found, however, that Varsol automotive parts cleaner or a mixture of 3 parts mineral spirits and 1 part Type A Automatic Transmission Fluid are among the better solvents for suppressor cleaning. We suggest against the use of water-based solvents. Never use solvents containing ammonia, which can damage aluminum parts. This includes Hoppe’s, Sweets, and “GI” bore cleaner. Never use water or water-based solvents, which can damage aluminum. Ultrasonic cleaners have limited value, because they require water-based solvents.⇔⇔⇔⇔⇔CAUTION⇔⇔⇔⇔⇔✍ Always read the warning label on any cleaner or solvent, and remember that virtually all solvents are inherently dangerous and po-tentially toxic. Always use adequate ventilation and both skin and eye protection when using organic solvents.FIELD STRIPPING (Partial Disassembly)Unscrew the front end cap, which is threaded into the central core of the suppressor. This will release the outer tube, which is held in compression by the front end cap and rear mount. A small neoprene “O” ring in a groove in the rear mount provides a gas seal. Remove the outer tube.Unscrew the rear mount from the central core. Do not attempt to disas-semble the central core. At this point the suppressor can be cleaned by immersion.Although complete disassembly of the central core is theoretically pos-sible, we feel that so doing is not necessary and is without merit.We recommend against the use of any water based solvent or cleaning materials.SERVICING THE 3-LUG MOUNTThe Raptor™ 3-lug mount can be easily disassembled for servicing.1.Unscrew the knurled cap from the body.2.Remove the spring-loaded piston from the mount body. Remove the spring. Service consists of:1.Replace the O-rings if necessary. The O-ring in the body can be removedwith a dental pick. O-rings are Viton (neoprene must not be used).2.Thoroughly clean the spring-loaded piston inside and out. Made of stain-less steel, it can be cleaned with red Scotchbrite or fine steel wool moist-ened with WD-40.3. Coat the outside of the piston with grease as well as the inside of theknurled cap. Lightly coat the inside of the mount body. Suitable greases include marine bearing grease, available at stores that sell boat trailers.4. Insert the spring in the mount body followed by the piston (small end first).Replace the cap and screw hand tight. Do not use thread adhesives.It is not unusual for a small amount of grease to be forced through the small vent hole in the knurled cap. This hole is to prevent pressurization of the mount.REASSEMBLYReassembly is the reverse of disassembly. When reassembling the suppressor, we suggest use of a thread lubricant and anti-seize compound, such as a T eflon compound or one of the many quality commercial anti-seize materials.The holes in the wall of central core are in the rear section. After coating the threads with anti-sieze compound, screw the rear mount hand tight into the rear of the central core.Be certain that the Viton “O” ring in the rear mount is intact, and replace if worn or broken. Replacements are available at most well stocked hardware stores or stores selling hydraulic tools and are 1-3/4" x 1/16".Coat the inside of the end of the outer tube with either a lithium based grease or Vaseline in order to facilitate disassembly and reduce binding of the “O” ring. Replace the outer tube and screw in the front end cap to secure all parts in place. This completes the reassembly.NOTES ON USEUse of this suppressor on a centerfire rifle will exceed the design pa-rameters, leading to structural failure of the suppressor and possible injury to the user.Because of the design of this suppressor, heating of the outer tube during fully automatic fire is minimized. If firing the weapon causes the outer tube to heat to the point of being too hot to touch, then the suppressor should be allowed to cool until it can be handled without discomfort before resuming fire. Because of this indication of overheating, we suggest against the use of a protective Nomex cover.PHYSICAL SPECIFICATIONSCaliber9mm Parabellum (only)Length7.5 inch (191 mm)Diameter 2 inch (51 mm)Weight20 ounce (570 gm)LIMITED WARRANTY STATEMENTGemini Technologies, Inc., dba Gemtech, warrants to the initial retail purchaser that Gemtech products will be free of defects in workmanship or material and that the product meets manufacturing specifications at the time of manufacture. This warranty is limited to the repair or replacement of the product. This express limited warranty is exclusive and no other express or implied warranty is otherwise provided.GEMTECH MAKES NO WARRANTY OF MERCHANTABILITY OR FITNESS FOR PARTICULAR PURPOSE.Product technical specifications and/or designs may be changed without notice. This warranty does not cover negligence, misuse, careless or improper handling and/or operation, abuse, unauthorized adjustments orSOUND SUPPRESSOR MODEL MK-9K P. 11 modifications, improper mounting/installation, ordinary wear and tear, the failure to follow manufacturer instructions and/or the use of inappropriate or defective ammunition.Gemtech shall have no liability for incidental or consequential damages and under no circumstances will Gemtech be liable for personal injury, property damage or economic loss.This warranty and disclaimer is subject to all applicable laws some of which may limit these terms.WARRANTY REPAIRS: Return of a Damaged Suppressor If a suppressor is damaged due to a manufacturing defect once it has been fired, it may be returned to Gemtech for repair or replacement. Determination to repair or replace is made solely at our discretion and only after we have had the opportunity to examine and determine that the cause of the damage is due to a manufacturing defect. It is the responsibility of the customer to cover shipping costs and insurance to return the suppressor to Gemtech for inspection or repair. Gemtech will pay any reasonable shipping and insurance costs to return the unit to you.To assure proper legal procedures for any repair returns, fill out and provide a copy of the General Service Form with any packages sent to us. (Visit , navigate to Customer Support/Return and Repair Policies to download the fillable General Service Form.pdf or call 208.939.7222)BATFE no longer requires transfer on a Form 5 to the manufacturer for repair. BATFE does require a letter accompanying the suppressor detailing the repairs or modifications required (satisfied by a completely filled out General Service Form). BATFE also requires proof of ownership satisfied by a photocopy of the front of the owner’s Form 3, 4, or 5.NOTE: BATFE prohibits transferring the serial number to a new outer tube in the case of damage to the tube. Tube damage rendering the suppressor unsafe will require a new suppressor.All Gemtech products are100% manufactured in the United States of America.。
- 1、下载文档前请自行甄别文档内容的完整性,平台不提供额外的编辑、内容补充、找答案等附加服务。
- 2、"仅部分预览"的文档,不可在线预览部分如存在完整性等问题,可反馈申请退款(可完整预览的文档不适用该条件!)。
- 3、如文档侵犯您的权益,请联系客服反馈,我们会尽快为您处理(人工客服工作时间:9:00-18:30)。
科力达RTK 产品系列风云K9系列RTK测量系统产品手册科力达仪器二○一五年四月目录第一章风云K9系列RTK概述 (3)§1.1关于风云K9 (3)§1.2二大独创 (3)§1.3四大特色 (3)§1.4技术特色 (4)第二章风云K9系列RTK主机 (5)§2.1主机外型 (5)§2.2接口 (6)§2.3电池的安装方法 (6)§2.4指示灯和仪器设置 (7)§2.5手簿与蓝牙连接 (12)§2.5.1 手簿设置 (12)§2.5.2 连接设置 (16)§2.6网络设置连接 (17)第三章风云K9系列RTK电台 (22)§3.1电台概述 (22)§3.1.1 产品简介 (22)§3.1.2 产品特点 (22)§3.1.3 技术指标 (23)§3.2GDL25电台外型说明 (24)§3.2.1 GDL25电台的面板 (24)§3.2.2 GDL25电台的外型 (25)§3.3GDL25电台使用注意事项 (25)§3.3.1 供电电源 (25)§3.3.2 天线口负载 (26)§3.3.3 电磁环境 (26)§3.3.4 天线选择 (27)§3.3.5 接口电缆 (27)第四章风云K9系列RTK附件介绍 (28)§4.1风云K9系列GPS的仪器箱(包) (28)§4.2电池及充电器 (28)§4.3数据收天线及发射天线 (30)§4.4各种传输线及电缆 (31)§4.5其他 (32)第五章操作说明 (33)§5.1基准站和移动站安装 (33)§5.2仪器设置 (34)§5.3仪器操作表现 (34)§5.4天线高的量测方法 (34)第六章与软件的连接 (36)§6.1数据传输 (36)§6.1.1 磁盘拷贝 (36)§6.1.2 仪器之星的使用 (36)§6.2在线升级方法 (38)§6.3K9系列GPS的注册 (40)附录1 技术参数 (42)附录2 联系方式 (43)第一章风云K9系列RTK概述§1.1 关于风云K9科力达仪器一直致力于把国际先进的GPS测绘勘测技术与产品普及到国测量用户手中。
风云K9是科力达公司最新研制的一体化蓝牙RTK仪器,其本身具有二大独创和四大特色。
风云K9主机集成了天线、主板、电台、接收天线、蓝牙模块、电池等组件,移动站完全一体化,只需手簿操作即可工作。
风云K9 GPS系统结合了最新的GPS RTK 接收机的先进技术并以精巧的外观,迷人的色彩给你带去时尚的测量模式。
风云K9依靠先进的GPS接收机技术在设计上着重于更高的稳定性,更低的功耗,更小的体积,更轻的重量。
风云K9在防水、防尘方面有独特的设计。
电池和置电台都安放于主机的底部,更有效的防水防尘。
§1.2 二大独创1、Building Block System Structure (BBSS) 积木式结构风云K9的电台以积木嵌套的方式嵌于主机底部,即插即用的积木式模块设计,可以更换成GSM,GPRS数据链模块而无需整机更换,可升级性高。
2、按键操作简单易学只需操作两个按键,就可以实现开机,关机,切换测量模式,仪器初始化等各种操作。
仪器的启动简单到只需开机即可,手簿与主机之间蓝牙自动连接,更加“傻瓜化”和“人性化”。
§1.3 四大特色1、一体化设计与抗干扰的完美结合一体化设计是世界同类产品的潮流,彻底摆脱“线”制,模块化的设计有效解决机器部的干扰问题。
2、专业设计的数传电台,误码率低,方便写频掌握核心的数传电台技术,主体性能达到国外先进水平,方便写频,为客户解决串台问题,误码率在10-7。
3、工业级模具三防设计(防尘、防水、防震)专业的模具、高强度的工业外壳材料以及具有很强防水能力的防水圈,使得K9的野外性能更优越。
4、双接口(USB、串口)高速传输,4G FLASH存。
除了一般仪器用的COM口外,风云K9采用USB的串行口连接技术方便大容量静态数据的传输。
置4G FLASH存,可以满足静态连续一秒间隔采集80小时以上,若采集间隔增大,存贮时间还将成倍增加。
§1.4 技术特色1、科技传承,融会贯通核心的RTK数据链技术,主体性能达到国际先进水平;无线的蓝牙通讯方式;工业级的三防设计等。
先进RTK技术在K9中得到应用,使得主机的稳定性得到有效的保障。
2、设计独到灵巧设计部结构,中置UHF天线使得UHF天线电磁中心和双频天线电磁中心相融合,在减少了串扰的同时又大大改善了主机的结构并减小了体积。
严密的电子屏蔽,更有效的避免串扰。
3、服务今天,面向明天风云K9系统稳定的电台数据通讯模式使其成为RTK测量领域经济、可靠的解决方案,从而服务于当前RTK测量勘测领域。
同时,风云K9可选配的基于VRS网络RTK技术的GPRS、CDMA电台模块的配置能使测量用户自信的面对明日的挑战。
4、注重品质,精益求精设计上注重细节,轻巧无线的接收机单元,重量仅为1.2 kg,使得流动站极为轻巧、便捷;接收机的低功耗使得单块电池就能满足长时间工作。
仪器箱和衬包可拆可分、部空间任意组合方便了测量用户的携带,配备对点器、专业测高尺、专用的工业手薄。
第二章 风云K9系列RTK 主机 §2.1 主机外型图2-1 风云K9主机外型图2-2 风云K9主机底部主机呈扁圆柱形,主机前侧为按键和指示灯面板,仪器底部嵌有电台模块和电池仓部分。
主机在这部分装有置接收电台和GPRS/CDMA 模块。
开关键功能键 指示灯电池盒电台/网络模块连接器安装口§2.2 接口电台,GPRS模块电台接口数据接口图2-3 风云K9系列GPS底部接口(移动站)说明:主机接口如图2-2所示,图中左边接口是电台接口,用来连接主机外置发射电台,为五针接口。
主机右边为数据接口,用来连接电脑传输数据,或者用手簿连接主机时使用。
§2.3 电池的安装方法天线接口电池仓图2-4 电池仓图2-5风云K9系列GPS底部电池安装风云K9系列GPS的电池安放在仪器底部,安装/取出电池的时候翻转仪器,找到电池仓,将电池仓按键按紧即可将电池盖拨开,就可以将电池安装和取出。
§2.4 指示灯和仪器设置图2-6风云K9按键和指示灯指示灯在面板的上方,从左向右依次是“状态指示灯”,“数据链指示灯”,“蓝牙指示灯”,“置电池指示灯”,“卫星指示灯”和“外接电源指示灯”分别指示的作用如下表:1、指示灯及其含义:F STA BT BATP DL SAT PWR电池仓后盖电池数据链灯卫星/蓝牙灯开关键电源灯状态指示灯功能键移动站基准站静态电台GPRS 外接模块设置键F的基本思路:开机决定工作模式以及通讯直联,工作后选择通讯方式。
各灯以及按键代表的含义BAT表示置电池:长亮表示供电正常;闪烁表示电量不足。
PWR表示外接电源:长亮表示供电正常;闪烁表示电量不足。
BT表示蓝牙连接;SAT表示卫星数量;STA在静态模式下表示记录灯;动态模式下表示数据链模块是否正常运作;DL在静态模式下长亮;动态模式下表示数据链模块是否正常运作;F 功能键,负责工作模式的切换以及电台,GPRS模式的切换;P开关键,开关机以及确认。
长按P键3到10秒关机(三声关机),10秒后进入自检(长响,新机要求自检一次)2.仪器设置1)基准站电台发射P+F长按等六个灯都同时闪烁;a:按F键选择本机的工作模式,当BT灯亮按P键确认(如图1)选择基准站工作模式;b:等数秒钟后电源灯正常后长按F键等STA和DL灯闪烁放开F键(听到第二声响后放手即可),按F键SAT,PWR循环闪,当PWR亮按P键确认如图2选择电台传输方式,图1图2基准站正常发射后灯的状况如下:图32)基准站GPRS工作模式P+F长按等六个灯都同时闪烁;a:按F键选择本机的工作模式,当BT灯亮按P键确认(如图4)选择基准站工作模式;b:等数秒钟电源灯正常后,长按F键等STA和DL灯闪烁放开F键(听到第二声响后放手即可),按F键SAT,PWR循环闪,当SAT亮,按P键确认,如图5,选择GPRS传输方式(此时是双发模式,双发模式的意思是网络和外接电台同时发射)。
图4图5基准站正常发射后灯的状况如下注:此时是双发3)移动站.电台模式P+F长按等六个灯都同时闪烁;a:按F键选择本机的工作模式,当STA灯亮按P键确认(如图7)选择移动站工作模式;b:等数秒钟后电源灯正常后长按F键等STA和DL灯闪烁放开F键(听到第二声响后放手即可),按F键DL,SAT,PWR循环闪,当DL亮按P键确认如图8选择电台传输方式。
图7图8工作过程中按一下F键灯的状态如图9所示,表示目前是移动站电台模式(3秒后自动转入工作状态)图9移动站电台模式灯的状况如下发射间隔均匀闪烁发射间隔均匀闪烁4)移动站GPRS模式P+F长按等六个灯都同时闪烁;a:按F键选择本机的工作模式,当STA灯亮按P键确认如图10所示,表示目前是移动站工作模式;b:等数秒钟后电源灯正常后长按F键等STA和DL灯闪烁放开F键(听到第二声响后放手即可),按F键DL,SAT,PWR循环闪,当SAT亮按P键确认如图11选择GPRS通讯方式。
图10图11移动站正常工作后按一下F键灯如下表示移动站GPRS通讯(3秒后自动转入工作状态)图12§2.5 手簿与蓝牙连接§2.5.1 手簿设置蓝牙设置连接需要将主机开机,然后对北极星Polar X3手簿进行如下设置:1、“资源管理器”→“设置”→“蓝牙”。
图 2-5-12、在蓝牙设备管理器窗口中选择“添加新设备”,开始进行蓝牙设备扫描。
如果在附近(小于20m的围)有可被连接的蓝牙设备,在“选择蓝牙设备”对话框将显示搜索结果。
注:整个搜索过程可能持续10秒钟左右,请耐心等待图 2-5-23、选择“S82…”数据项,点击“下一步”按钮,弹出“输入密码”窗口,直接点击“下一步”跳过,出现添加蓝牙界面点击“是”出现“设备已添加”窗口,点击完成。
图 2-5-3图 2-5-44、再回到“蓝牙”界面,选中“COM端口”选项卡,选择“新建发送端口”界面。
图 2-5-55、选择要连接的GPS主机编号,选择“下一步”,在弹出的“端口”界面选择COM0-COM9中的任一项。
单击“完成”。
至此,手簿连接GPS主机蓝牙设置阶段已经完成。