电动汽车整车充电机使用说明书
绿动力DC44 66电动汽车充电器说明书
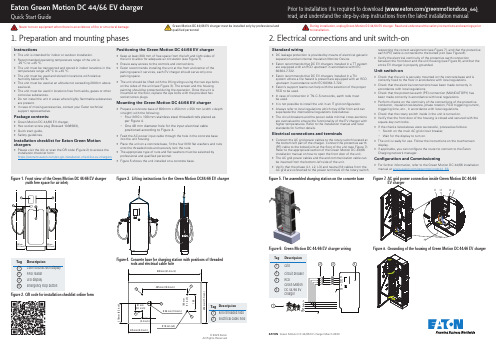
are present. • In case of missing accessories, contact your Eaton technical
Eaton Green Motion DC 44/66 EV charger
Quick Start Guide
Never turn on equipment when there is an evidence of fire or structural damage.
1. Preparation and mounting phases
• The unit should be lifted with the lifting slings using the two eye bolts on the sides of the unit (see Figure 3). The screen and the housing painting should be protected during the operation. Once the unit is mounted on the floor, replace the eye bolts with the provided hex socket screw plugs.
1
3
2
Standard wiring
• DC leakage protection is provided by means of electrical galvanic separation and an internal Insulation Monitor Device.
EVQC30-电动汽车快速充电机使用说明书(许继)
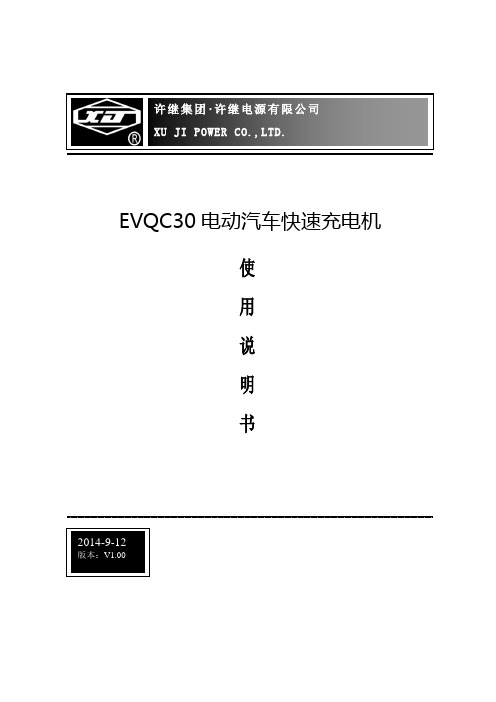
许继集团・许继电源有限公司XU JI POWER CO.,LTD.EVQC30电动汽车快速充电机使用说明书许继电源有限公司2014-9-12版本:V1.001、概述EVQC30系列一体式电动汽车整车直流充电机主要用于电动大巴的日常充电和电动轿车的中快速充电,适合安装于电动汽车充换电站、公共停车场、住宅小区停车场、大型商厦停车场等场所,可为电动汽车动力电池提供直流电能,操作简便,是各类电动汽车的快速充电设备。
2、环境条件a)环境温度:正常工作环境温度-20℃~+50℃,存储温度-40℃~+70℃;b)海拔高度≤2000 m;c)相对温度:5%~95%,无凝结。
充电机外形图信号指示灯人机界面急停按钮键盘与刷卡区充电枪及插座充电枪及插座急停按钮图2 充电机外形图4.3直流充电机接口4.3.1 接口定义充电机与电动汽车充电接口定义应能满足GB/T 20234.3-2011的要求,如下图3所示:SR2非车载充电机189车辆插头R32直流电源正(DC+)直流电源负(DC-)34567设备地( )R418923654车辆插座电动汽车 底盘地( )充电通信CAN_H (S+)充电通信CAN_L (S-)充电连接确认(CCI )充电连接确认(CC2)低压辅助电源正(A+)低压辅助电源负(A-)直流电源正(DC+)直流电源负(DC-)充电通信CAN_H (S+)充电通信CAN_L (S-)充电连接确认(CCI )充电连接确认(CC2)低压辅助电源正(A+)低压辅助电源负(A-)7图3 直流充电机充电接口定义示意图4.3.2 接口要求车辆插头、车辆插座包含了9对触头,其电气参数值及功能定义如表1所示。
表1 触头电气参数值及功能定义触头编号/标识额定电压和额定电流功能定义1-(DC+)750V 125A/250A 直流电源正,连接直流电源正与电池正极2-(DC-)750V 125A/250A 直流电源负,连接直流电源负与电池负极3-()—保护接地(PE),连接供电设备地线和车辆底盘地线4-(S+)30V 2A 充电通信CAN_H,连接非车载充电机与电动汽车的通信线a)5-(S-)30V 2A 充电通信CAN_L,连接非车载充电机与电动汽车的通信线a)6-(CC1)30V 2A 充电连接确认1 7-(CC2)30V 2A 充电连接确认28-(A+)30V 20A 低压辅助电源正,连接非车载充电机为电动汽车提供的低压辅助电源9-(A-)30V 20A 低压辅助电源负,连接非车载充电机为电动汽车提供的低压辅助电源a)非车载充电机控制装置和车辆控制装置应有CAN总线终端电阻,建议为120Ω。
电动汽车直流快速充电机使用说明书
EVQC31-120A500V-D1-G001电动汽车直流快速充电机使用说明书许继电源有限公司XU JI POWER CO.,LTD.目录1 概述 ........................................................ 错误!未定义书签。
1.1 适用范围 .. (1)1.2 型号说明 (1)1.3 产品概述 (1)1.3.1 ................................................................. 产品构成1 1.3.2 ................................................................. 产品原理2 1.4 使用环境 .. (2)1.5 性能参数 (3)1.6 外形结构尺寸 (5)1.7 充电机接口 (5)1.7.1 ................................................................. 接口定义5 1.7.2 ................................................................. 接口要求51.7.3 ............................................................. 触头布置方式62 功能特点 (7)2.1 基本功能 (7)2.2 安全保护功能 (7)2.3 计量消费功能 (8)2.4 通讯功能 (8)2.5 定位功能 (8)2.6 语音提示功能 (8)2.7 历史记录功能 (8)2.8 环控功能 (9)3 操作使用说明 (9)3.1 充电操作流程 (9)3.1.1 ....................................................... 充电卡支付操作流程9 3.1.2 ....................................................... 二维码支付操作流程1 3.1.3 ................................................... 手机验证码支付操作流程1 3.1.4 ..................................................... 账号密码支付操作流程1 3.2 充电信息查询 (13)3.3 充电状态指示灯 (13)3.4 其他操作 (13)3.4.1 ........................................................ 下载手机客户端APP 1 3.4.2 ............................................................. 获取设备信息13.4.3 ............................................................... 充电卡查询1 3.4.4 ............................................................... 充电卡解锁13.5 使用注意事项 (14)4 安装说明 (15)5 异常处理 (16)6 运输、贮存 (18)7 开箱及检查 (18)8 随机文件及附件 (18)9 保修服务 (18)9.1 保修条件 (18)9.2 保修期限 (19)9.3 保修办法 (19)10 原理附图 (33)1概述1.1适用范围EVQC31-120A500V-D1-G001电动汽车直流快速充电机主要用于电动乘用车的快速充电,适合安装于电动汽车充换电站、公共停车场、住宅小区停车场、大型商厦停车场等场所,可为电动汽车动力蓄电池提供直流电能。
杭州铁城电动汽车充电机说明书
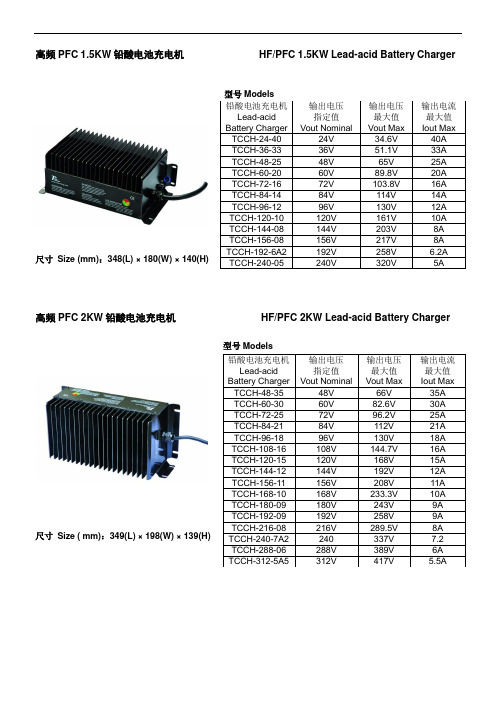
高频PFC 1.5KW 铅酸电池充电机 HF/PFC 1.5KW Lead-acid Battery Charger尺寸 Size (mm):348(L) × 180(W) × 140(H)高频PFC 2KW 铅酸电池充电机 HF/PFC 2KW Lead-acid Battery Charger型号Models尺寸 Size ( mm):349(L) × 198(W) × 139(H)型号Models尺寸Size (mm):357(L) × 254(W) × 179(H)高频PFC 4KW铅酸电池充电机HF/PFC 4KW Lead-acid Battery Charger型号Models尺寸Size (mm): 367(L) × 352(W) × 139(H)型号Models尺寸Size (mm):546(L) × 356(W) × 137(H)高频PFC 8KW铅酸电池充电机HF/PFC 8KW Lead-acid Battery Charger型号Models尺寸Size (mm):357(L) × 254(W) × 377(H)一、产品概述及应用范围本系列充电机适用的电池有富液注水、GEL、AGM、半胶体等铅酸电池。
整机具有重量轻、体积小、充电稳定,效率高、安全可靠等特点。
可以进行浮充、均充自动切换,并具有电池反接、输出短路、输出过载等保护功能。
本系列充电机广泛应用于对电动汽车、叉车、高尔夫球车、电动游览车、电动游船、电动清洁设备和UPS不间断电源、太阳能发电、风力发电及电力通讯铁路系统等的循环充电。
二、技术指标额定输入电压:AC85V~AC265V额定频率:45~65 Hz功率因数:≥0.98满载效率:≥93%机械冲击及抗震等级:符合SAEJ1378要求防护等级:IP46工作温度:-40℃~+55℃存储温度:-40℃~+100℃充电控制:温度补偿控制,绝不过充、欠充充电方式:10条充电曲线可选三、保护特性1、过热保护:当充电机内部温度超过75℃,充电电流自动减少,超过85℃时,充电机保护性关机,温度下降时,自动恢复充电。
电动汽车充电操作规程
电动汽车充电操作规程
随着电动汽车的普及,充电设施也越来越多。
然而,许多车主
对电动汽车的充电操作规程仍然不够了解。
正确的充电操作不仅可
以延长电池寿命,还可以确保充电安全。
下面是一些电动汽车充电
操作规程的建议。
1. 选择合适的充电设施,在充电前,确保选择合适的充电设施。
有些电动汽车需要特殊的充电插头,因此要选择适合自己车型的充
电设施。
2. 检查充电设施,在充电前,要仔细检查充电设施的状态,确
保设施完好无损,没有损坏或者漏电的情况。
3. 连接充电插头,在连接充电插头时,确保插头和充电口对齐,并插入牢固。
在插入插头之前,先确保充电设施已经关闭。
4. 启动充电,连接好充电插头后,按照充电设施的操作说明启
动充电。
在充电过程中,要时刻留意充电设施的状态,确保充电过
程正常进行。
5. 充电完成,当充电完成后,先关闭充电设施,再拔出充电插头。
确保在拔出插头之前,充电设施已经关闭。
6. 注意安全,在充电过程中,要注意安全,避免触碰充电设施或者充电插头,以免发生触电事故。
以上就是电动汽车充电操作规程的一些建议。
正确的充电操作可以确保充电安全,延长电池寿命,同时也有助于节约能源。
希望车主们能够遵守充电操作规程,保障充电安全,为环保出行贡献一份力量。
电动汽车直流快速充电机使用说明书
许继集团・许继电源有限公司XU JI POWER CO.,LTD.EVQC31-120A500V-D1-G001电动汽车直流快速充电机使用说明2016-7-15版本:V1.00目录1 概述 (1)1.1 适用范围 (1)1.2 型号说明 (1)1.3 产品概述 (1)1.3.1 产品构成 (2)1.3.2 产品原理 (3)1.4 使用环境 (3)1.5 性能参数 (3)1.6 外形结构尺寸 (4)1.7 充电机接口 (5)1.7.1 接口定义 (5)1.7.2 接口要求 (6)1.7.3 触头布置方式 (7)2 功能特点 (7)2.1 基本功能 (7)2.2 安全保护功能 (7)2.3 计量消费功能 (8)2.4 通讯功能 (8)2.5 定位功能 (9)2.6 语音提示功能 (9)2.7 历史记录功能 (9)2.8 环控功能 (9)3 操作使用说明 (9)3.1 充电操作流程 (9)3.1.1 充电卡支付操作流程 (9)3.1.2 二维码支付操作流程 (13)3.1.3 手机验证码支付操作流程 (18)3.1.4 账号密码支付操作流程 (22)3.2 充电信息查询 (26)3.3 充电状态指示灯 (28)3.4 其他操作 (28)3.4.1 下载手机客户端APP (28)3.4.2 获取设备信息 (29)3.4.3 充电卡查询 (30)3.4.4 充电卡解锁 (32)3.5 使用注意事项 (33)4 安装说明 (34)5 异常处理 (35)6 运输、贮存 (37)7 开箱及检查 (37)8 随机文件及附件 (37)9 保修服务 (37)9.1 保修条件 (37)9.2 保修期限 (38)9.3 保修办法 (38)10 原理附图 (33)1 概述1.1 适用范围EVQC31-120A500V-D1-G001电动汽车直流快速充电机主要用于电动乘用车的快速充电,适合安装于电动汽车充换电站、公共停车场、住宅小区停车场、大型商厦停车场等场所,可为电动汽车动力蓄电池提供直流电能。
电动汽车直流快速充电机使用说明书
EVQC31-120A500V-D1-G001电动汽车直流快速充电机使用说明书目录1 概述.................................................................................................................................. 错误!未指定书签。
1.1 适用范围.......................................................................................................................... 错误!未指定书签。
1.2 型号说明.......................................................................................................................... 错误!未指定书签。
1.3 产品概述.......................................................................................................................... 错误!未指定书签。
1.3.1 产品构成.......................................................................................................................... 错误!未指定书签。
1.3.2 产品原理.......................................................................................................................... 错误!未指定书签。
新能源充电机的使用流程 (2)
新能源充电机的使用流程1. 准备工作在使用新能源充电机之前,需要先进行一些准备工作。
以下是具体步骤:•安装充电机:将充电机安装在合适的位置上,确保充电机的插头与电源插座相匹配并牢固连接。
•检查供电情况:确认充电机所连接的电源是否正常供电,排除供电不稳定或故障的情况。
•确认车辆型号:根据车辆的型号,选择合适的充电接口和充电线。
•检查车辆状态:确保车辆处于停止状态,并关闭电源开关。
2. 连接车辆和充电机接下来,根据以下步骤,将车辆与充电机连接起来:•打开充电机开关:先打开充电机的开关,确保充电机处于工作状态。
•打开车辆充电接口:根据车辆的型号和充电接口位置,按照车辆的使用手册打开充电接口盖板。
•连接充电线:将充电线插入充电机的插座,确保插头与插座完全贴合并锁定。
•连接车辆接口:将充电线的另一端插入车辆充电接口,确保插头与接口完全贴合并锁定。
3. 开始充电一切准备工作完成后,可以开始进行充电操作。
以下是详细步骤:•选择充电模式:根据需要设置充电模式,例如快充或慢充模式。
•设置充电量:根据需要设置充电量或充电时间。
•开始充电:按下充电机上的开始充电按钮或设置好充电参数后,充电机将开始对车辆进行充电。
•监控充电过程:在充电过程中,可以通过充电机上的显示屏或相关APP监控充电进度和充电状态。
•结束充电:当车辆达到设定的充电量或时间后,充电机会自动停止充电。
•断开连接:先从车辆的充电接口上拔出充电线,然后再从充电机的插座上拔出充电线插头。
4. 注意事项在使用新能源充电机的过程中,需注意以下事项:•安全操作:遵循充电机的操作指南,不得擅自拆解或改装充电机。
•避免操作误区:在操作充电机之前,需要对充电机的使用流程和特性有一定的了解,避免操作上的误区。
•定期检查:定期检查充电机和相关设备的安全性能和运行状况,确保其正常工作。
•室外使用:如需在室外使用充电机,请确保其具备防水、防雷等安全措施。
5. 故障处理在充电过程中,可能会遇到一些故障情况。
汽车充电机使用的工作流程
汽车充电机使用的工作流程1. 准备工作在使用汽车充电机进行充电之前,需要进行一些准备工作,包括如下步骤:•检查车辆充电接口:确保车辆的充电接口符合充电机的规格要求。
•检查充电机连接线:确保充电机连接线完好无损,并且没有明显的磨损或裂纹。
•检查电源插座:确保电源插座的绝缘良好,没有松动或破损。
2. 连接充电机和车辆连接充电机和车辆是进行充电的关键步骤,通常需要按照以下流程进行:1.将充电机连接线插入车辆充电接口中,确保插入牢固,没有松动的现象。
2.将充电机的电源插头插入电源插座中,确保插入稳固,没有松动。
3. 启动充电过程一旦连接完成,就可以启动充电过程了,具体步骤如下:1.启动充电机:按下充电机上的启动按钮或拨动启动开关,使充电机进入工作状态。
2.选择充电模式:根据车辆型号和充电机的支持情况,选择适合的充电模式,如快充模式或慢充模式。
3.设置充电参数:根据实际需要,设置充电参数,如充电电流、充电时间等。
4.确认充电信息:确认充电机显示屏上的充电信息,包括电流、电压等参数是否正常。
5.启动充电:按下充电机上的启动按钮或拨动启动开关,开始充电过程。
4. 监控充电过程在充电过程中,需要不断监控充电情况,以确保充电的正常进行,以下是一些应该注意的事项:•观察充电电流:通过充电机上的显示屏,观察充电电流是否稳定,是否在安全范围内。
•观察充电时间:根据设置的充电时间,观察充电进度,以确保充电完成后及时断电。
•注意安全:在充电过程中,应保持周围环境的安全,避免发生火灾、电击等意外情况。
5. 结束充电过程当充电完成或需要终止充电时,应按照以下步骤进行操作:1.断开电源:先拔掉充电机的电源插头,断开电源供应。
2.断开充电机连接线:然后将充电机连接线从车辆充电接口中拔出。
3.关闭充电机:最后按下充电机上的关闭按钮或拨动关闭开关,停止充电机工作。
6. 检查充电结果充电完成后,应检查充电结果,以确保充电过程的有效性和安全性,以下是一些应注意的事项:•观察充电电池:检查车辆上的充电电池是否显示充电完成的状态。
EVQC30-电动汽车快速充电机使用说明书(许继)资料
许继集团・许继电源有限公司XU JI POWER CO.,LTD.EVQC30电动汽车快速充电机使用说明书许继电源有限公司2014-9-12版本:V1.001、概述EVQC30系列一体式电动汽车整车直流充电机主要用于电动大巴的日常充电和电动轿车的中快速充电,适合安装于电动汽车充换电站、公共停车场、住宅小区停车场、大型商厦停车场等场所,可为电动汽车动力电池提供直流电能,操作简便,是各类电动汽车的快速充电设备。
2、环境条件a)环境温度:正常工作环境温度-20℃~+50℃,存储温度-40℃~+70℃;b)海拔高度≤2000 m;c)相对温度:5%~95%,无凝结。
充电机外形图信号指示灯人机界面急停按钮键盘与刷卡区充电枪及插座充电枪及插座急停按钮图2 充电机外形图4.3直流充电机接口4.3.1 接口定义充电机与电动汽车充电接口定义应能满足GB/T 20234.3-2011的要求,如下图3所示:SR2非车载充电机189车辆插头R32直流电源正(DC+)直流电源负(DC-)34567设备地( )R418923654车辆插座电动汽车 底盘地( )充电通信CAN_H (S+)充电通信CAN_L (S-)充电连接确认(CCI )充电连接确认(CC2)低压辅助电源正(A+)低压辅助电源负(A-)直流电源正(DC+)直流电源负(DC-)充电通信CAN_H (S+)充电通信CAN_L (S-)充电连接确认(CCI )充电连接确认(CC2)低压辅助电源正(A+)低压辅助电源负(A-)7图3 直流充电机充电接口定义示意图4.3.2 接口要求车辆插头、车辆插座包含了9对触头,其电气参数值及功能定义如表1所示。
表1 触头电气参数值及功能定义触头编号/标识额定电压和额定电流功能定义1-(DC+)750V 125A/250A 直流电源正,连接直流电源正与电池正极2-(DC-)750V 125A/250A 直流电源负,连接直流电源负与电池负极3-()—保护接地(PE),连接供电设备地线和车辆底盘地线4-(S+)30V 2A 充电通信CAN_H,连接非车载充电机与电动汽车的通信线a)5-(S-)30V 2A 充电通信CAN_L,连接非车载充电机与电动汽车的通信线a)6-(CC1)30V 2A 充电连接确认1 7-(CC2)30V 2A 充电连接确认28-(A+)30V 20A 低压辅助电源正,连接非车载充电机为电动汽车提供的低压辅助电源9-(A-)30V 20A 低压辅助电源负,连接非车载充电机为电动汽车提供的低压辅助电源a)非车载充电机控制装置和车辆控制装置应有CAN总线终端电阻,建议为120Ω。
充电机使用说明书
充电机的显示与控制一.充电机操作面板功能示意图1.LED显示蓄电池连接正确并正在充电2.LED显示已充电80%3.LED显示已充电100%4.LED显示保持充电状态5.服务接口--------红外通讯接口6.LED显示充电机出现故障7.LED显示蓄电池出现故障8.LED显示检查蓄电池运行情况9.延迟功能键10.停止键,LED显示充电过程中断11.数据信息键12.显示屏-----------显示当前的充电数据,错误代码13.用于显示屏信息的LED管二.充电机安全事项1.警告标志!危险!警告#### 提示人身伤害危险标志充电机或蓄电池损坏标志帮助信息2.必须按蓄电池的型号和容量进行设置调整,不能与不比匹配的蓄电池相连接,否则将导致蓄电池沸腾或爆炸。
3.充电机接头和电瓶接头极性必须连接正确。
4.充电机必须通风良好,以防止过热。
远离各种液体,以防充电机短路。
5.绝对禁止在充电机和蓄电池附近吸烟,避免任何明火和火花。
6.为防止产生电火花,充电过程中切勿拔下插头,否则充电过程中产生的氢氧化合气体有爆炸的危险,因为插头接触时产生的电弧会导致燃烧。
三.充电机的操作1.充电开始------------蓄电池连接到充电机8秒钟后,充电过程自动开始。
充电机在8秒钟内进行自检,如出现错误,将会显示故障代码。
充电过程开始后,在显示屏上产生相应的充电标志,并显示当前的充电电流,且LED(1)点亮2.充电过程-----------LED(2)亮,表示蓄电池已充电80%3.充电检查-----------LED(8)亮,表示充电机自动停止(5分钟),以检查蓄电池。
4.充电完毕----------LED(3)亮,表示蓄电池充电完毕。
5.浮动充电---------LED(1/3/4)亮,表示充电机处于保持充电状态。
如蓄电池充电结束后仍与充电机连接,充电机会自动转换到保持充电模式,保持充电功能会在额定充电结束后,每隔8小时对蓄电池进行浮动充电,每次充电过程中,对蓄电池补充额定容量的0.6%的电量。
绿动力空中电动汽车充电器用户手册说明书
Green Motion Air User manualDISCLAIMER OF WARRANTIES AND LIMITATION OF LIABILITYThe information, recommendations, descriptions and safety notations in this document are based on Eaton Corporation’s (“Eaton”) experience and judgment and may not cover all contingencies. If further information is required, an Eaton sales office should be consulted. Sale of the product shown in this literature is subject to the terms and conditions outlined in appropriate Eaton selling policies or other contractual agreement between Eaton andthe purchaser.THERE ARE NO UNDERSTANDINGS, AGREEMENTS, WARRANTIES, EXPRESSED OR IMPLIED, INCLUDING WARRANTIES OF FITNESS FOR A PARTICULAR PURPOSE OR MERCHANTABILITY, OTHER THAN THOSE SPECIFICALLY SET OUT IN ANY EXISTING CONTRACT BETWEEN THE PARTIES. ANY SUCH CONTRACT STATES THE ENTIRE OBLIGATION OF EATON. THE CONTENTS OF THIS DOCUMENT SHALL NOT BECOME PART OF OR MODIFY ANY CONTRACT BETWEEN THE PARTIES.In no event will Eaton be responsible to the purchaser or user in contract, in tort (including negligence), strict liability or other-wise for any special, indirect, incidental or consequential damage or loss whatsoever, including but not limited to damage or loss of use of equipment, plant or power system, cost of capital, loss of power, additional expenses in the use of existing power facilities, or claims against the purchaser or user by its customers resulting from the use of the information, recommendations and descriptions contained herein. The information contained in this manual is subject to change without notice.2GREEN MOTION AIR ELECTRIC AIRCRAFT CHARGER USER MANUAL MN192008EN June 2023 Content overview1 INTRODUCTION (4)1.1 Scope of the document (5)1.2 Symbols used in this manual (5)2 CAUTIONS (6)2.1 Operating environment and restrictions (6)3 DISCOVER YOUR GREEN MOTION AIR ELECTRIC AIRCRAFT CHARGER (7)3.1 Checking the box contents (7)3.2 Front and back views (7)3.3 Bottom view (8)3.4 Type of cables (8)3.5 Green Motion Air Mobile (9)4 INDICATORS AND USER INTERFACES (10)4.1 LED indicators (10)4.2 Color touchscreen display (11)4.3 Emergency stop button (13)5 HOW TO START AND STOP CHARGING (14)6 SOFTWARE SUITE (15)7 MAINTENANCE (16)7.1 How to put the unit as out of order (16)7.2 Station updates (16)7.3 Cleaning or replacing filters (16)7.4 Disposal (16)8 TROUBLESHOOTING (17)9 FREQUENTLY ASKED QUESTIONS (18)10 TECHNICAL DATA (19)10.1 Rating plate (19)10.2 Technical datasheet (19)11 CONTACT SUPPORT INFORMATION (20)3 GREEN MOTION AIR ELECTRIC AIRCRAFT CHARGER USER MANUAL MN192008EN June 2023 1. Introduct i onThank you for purchasing the Green Motion Air electric aircraft charger. The Green Motion Air offers fast charging speed with high efficiency in a compact design. The charging unit can be delivered as a fully assembled product on a mobile platform (trolley) or mounted on the wall or floor (with the help of afloor-mount pedestal). The Green Motion Air electric aircraft charger is designed for indoor and outdoor use. Before you startThis manual contains important instructions that must be followed during the installation, operation and maintenance of the Green Motion Air electric aircraft charger. All instructions must be read before installing and operating the equipment. This manual should be retained for future reference. Please note that the Green Motion Air electric aircraft charger must only be installed by professional and qualified personnel, i.e. an Eaton technical support representative or a professional installer. There are no user serviceable parts inside the Green Motion Air electric aircraft charger. Failure to observe the above will void the guarantee provided and Eaton cannot be held legally accountable.The contents of this manual are the copyright of the publisher and may not be reproduced (even in extracts) without the prior written approval of Eaton. While every care has been taken to ensure the accuracy of the information contained in this manual, Eaton assumes no liability for any error or omission. Eaton reserves the right to modify the designs of its products. The unauthorized copying and lending of this manual is prohibited.Technical disclaimerAll drawings, descriptions or illustrations contained in this document serve to provide a clear overview and/or technical explanation of the present product and its various components and accessories. In line with our goal to continuously improve the products and the customer service we provide, all specifications contained in this document are subject to change without notice.Legal entityEaton Industries Manufacturing GmbHAddress: Place de la Gare 21345 Le LieuSWITZERLANDWeb: 4GREEN MOTION AIR ELECTRIC AIRCRAFT CHARGER USER MANUAL MN192008EN June 2023 1.1 Scope of the documentThis manual is intended for end-users of Green Motion Air electric aircraft charger. It describes the operating environment, the product and its operating behavior. The document does not cover installation and uninstallation, commissioning guidance and troubleshooting.1.2 Symbols used in this manualHazardous behaviors that could cause serious injuries.Hazardous behaviors that could cause death.Imminent dangers causing serious injuries. Danger of death.Behaviors that could cause minor injuries to people or minor damages to things.An electric shock can be fatal.Avoid touching internal or external parts normally live while the product is powered on.The notes preceded by this symbol relate to technical issues and ease of operation.The EU Directive on Waste Electrical and Electronic Equipment (WEEE).5 GREEN MOTION AIR ELECTRIC AIRCRAFT CHARGER USER MANUAL MN192008EN June 2023 2. Caut i onsBefore carrying out any operations, ensure you have read and understood this manual. Do not make changes and do not carry out maintenance operations not described in this manual. The manufacturer does not accept responsibility for injuries to people and damages to things occurred if the information within this manual hasnot been read and followed.The installation, commissioning, maintenance or retrofitting must be carried out only by professional andqualified personnel.It is strictly prohibited to open the product by unqualified personnel.2.1 Operating environment and restrictionsEach system must be used exclusively for the operations it was designed for and within the operative ranges specified in the nameplate and/or in the relative technical datasheet, in accordance with the national and international safety standards.Any use different from the intended use specified by the manufacturer is to be considered totally inappropriate and dangerous and in this case the manufacturer declines all responsibility.Check the regulations applied by the electricity provider.The unit can be connected to the distribution network in accordance with local rules.The unit should only be used in accordance with the technical specifications.Improper or unauthorized use:Although carefully constructed, like all electrical appliances the unit can catch fire.The unit is intended for indoor or outdoor installation.Recommended operating temperature range of the unit is -25 °C to +45 °CThe unit must be transported and stored in indoor locations in the temperature range -25 °C to +45 °C.The unit must be used in locations free from acids, gases or other corrosive substances.The unit must be used and stored in locations with relative humidity below 95%.The unit must be transported in conditions with relative humidity below 95%.The unit must be used at altitude not exceeding 2000 m above sea level.6GREEN MOTION AIR ELECTRIC AIRCRAFT CHARGER USER MANUAL MN192008EN June 2023 7GREEN MOTION AIR ELECTRIC AIRCRAFT CHARGER USER MANUAL MN192008EN June 2023 3. Discover your Green Motion Air electric aircraft charger3.1 Package contentsThe Green Motion Air electric aircraft charger package contains the following parts:• Aircraft charger • Quick start guide,• Safety guidelines•Electric aircraft charging cable assembly:• GB/T plug,• charging cable,•plug holder.• Screws, cable glands and cable gland cap,•Wall-mount gaskets (four pieces)3.2 Front and back viewsFigure 1. Front and back views of Green Motion Air electric aircraft chargerGreen Motion Air electric aircraft charger is designed for seamless use.35 m m440 m m 45 m mThe Green Motion Air Mobile is factory-preassembled, shipped with the AC power supply cable (15 m), and mounted on a trolley.3.3 Bottom viewFigure 2. Bottom view of Green Motion Air electric aircraft charger3.4 Type of cablesThe Green Motion Air electric aircraft charger is provided with a GB/T cable and connector (plug).The nominal output power of the Green Motion Air electric aircraft charger charger is 22 kW. However, the actual output power may vary due to external factors such as the available grid power, capacity of the electrical installations, and electric aircraft model. For those reasons, Eaton declines any responsibility on the actual power value delivered. Figure 3. Illustration of a GB/T type connector8GREEN MOTION AIR ELECTRIC AIRCRAFT CHARGER USER MANUAL MN192008EN June 2023 The Green Motion Air Mobile electric aircraft charger is shipped as a factory-preassembled kit consisting of a single Green Motion Air unit mounted on a mobile platform (trolley) and equipped with an AC power supply cable (15 m).The AC power supply cable is equipped with a 5-pole IEC 60309-compliant connector (CEE), which allows the unit to be used out of the box without additional installation steps.The connector also has an IP44 ingress protection rating, enabling the unit to be used in all weather conditions (subject to the limitations specified in the technical datasheet).3.5 Green Motion Air MobileFigure 4. Front, top, and angle views of the Green Motion Air Mobile electric aircraft chargerABC9 GREEN MOTION AIR ELECTRIC AIRCRAFT CHARGER USER MANUAL MN192008EN June 2023 10GREEN MOTION AIR ELECTRIC AIRCRAFT CHARGER USER MANUAL MN192008EN June 2023 4. Indicators and user interfacesThe Green Motion Air electric aircraft charger provides three different user interfaces, as shown in Chapter 3:• LED indicator,• Color touchscreen display,•Emergency stop button.T able 2. Summary of LED indicator states4.1 LED indicatorsThe electric aircraft charger is equipped with a LED indicator located on the front door. See Figure 1. Table 2 summarizes all possible LED indicator states that may occur during operation, providing a brief explanation for each.11GREEN MOTION AIR ELECTRIC AIRCRAFT CHARGER USER MANUAL MN192008EN June 2023 During charging, the LED indicator also shows the state of charge (SoC) level of the electric aircraft battery, as illustrated in Figure 5.Figure 5. SoC level indication4.2 Color touchscreen displayThe Green Motion Air electric aircraft charger is equipped with a color touchscreen display located on the front door (refer to Figure 1). The display provides a simple and easy-to-use graphical user interface (GUI) that allows users to configure charging parameters and view alerts and system messages. Figure 6 shows a screenshot from the GUI.ABA list of system alerts and error messages with suggested troubleshooting steps can be found in Chapter 8.12GREEN MOTION AIR ELECTRIC AIRCRAFT CHARGER USER MANUAL MN192008EN June 2023 Figure 6.Green Motion Air GUI overview 125434.3 Emergency stop buttonThe emergency stop button is located on the bottom left side of the Green Motion Air electric aircraft charger, as per Figure 7. Push the button in cases of emergencies.Figure 7. Location of the emergency stop button113 GREEN MOTION AIR ELECTRIC AIRCRAFT CHARGER USER MANUAL MN192008EN June 2023 14GREEN MOTION AIR ELECTRIC AIRCRAFT CHARGER USER MANUAL MN192008EN June 2023 Figure 8. Charge settings screen5. How to start and stop chargingThe product must be verified by the installer before commissioning and switching on the unit for the first time.Before any operation, ensure that the network status icon is colored BLUE (refer to Figure 6). The RED color indicates that the connection with the backend server is broken.You may choose your language by touching the flag icon.Follow these steps to start a charging session:Step 1. E nsure that the unit is ready for use, as indicated by the green LED indicatorStep 2. Set the desired charging mode. • The charging settings screen is available before the connector is plugged in or while charging is paused. It can be accessed via the gear icon (see Figure 6). • If the “rest” charging mode is not set, the aircraft battery will charge up to its maximum capacity.Step 3. Plug the charging cable connector into the electric aircraft charging socket.Step 4. Place the RFID card close to the reader to authenticate (see Figure 9).• This operation can also be performed before plugging the charger connector into the aircraft charging socket. • If the RFID card is recognized, the LED indicator starts flashing blue and shows the state of charge level of the battery.Figure 9.Location of the RFID reader15GREEN MOTION AIR ELECTRIC AIRCRAFT CHARGER USER MANUAL MN192008EN June 2023 6. Software suiteThe Green Motion Air electric aircraft charger can be used in combination with the advanced management solution from Eaton called Charging network manager (CNM). Eaton CNM is an all-in-one software solution designed to control and manage a charging network over OCPP 1.6 JSON. Refer to the Eaton Charging network manager user manual, available on , for further details.By default, the charging session starts automatically after successful authentication and plugging the charging connector into the aircraft charging socket.If the charging cable is not connected and there is no power consumption within two minutes, the current charging session will expire. The user must repeat the authentication process to proceed.If the RFID card is not successfully authorized, the aircraft charger will ignore the current action and no further options will be displayed on the screen.If the charging cable is disconnected from the electric aircraft, the current session will be terminated. A new authentication will be required to start another charging session.Step 5. T o stop the charging session, perform the authentication step once again. The charging session will be paused and the screen will show the available options listed in Table 2.Step 6. U nplug the charging connector from the aircraft charging socket or press the “End” button to finish the charging session. It is also possible to resume the charging session by pressing the “Resume” button (see Figure 10).While the charging session is in progress, the aircraft charger indicates the charging status with a breathing blue light on the LED indicator. When the battery is fully charged, the aircraft charger indicates the fully charged status of the battery with a solid blue light on the LED indicator (refer to Chapter 4 for more information on the LED indicator states).Figure 10.Charge paused screen16GREEN MOTION AIR ELECTRIC AIRCRAFT CHARGER USER MANUAL MN192008EN June 2023 7. Ma i ntenanceInstallation, commissioning, maintenance or retrofitting of the product must be performed by trained and qualified service personnel, responsible for complying with existing standards and local installation regulations.Before starting connection operations, ensure that the external AC mains isolator switch and/or main circuit breaker is switched off (open).Opening the product for any operation can lead to electric shock hazards.In case the unit shows a failure and the emergency stop button is pushed, check the integrity of the unit, cables and connectors before starting the maintenance process.The act of opening the product as well as any configuration changes must be carried out by trained and qualified service personnel, according to the local safety and electrical regulations and laws.Before carrying out any maintenance on the unit, disconnect the unit from the power supply and wait at least ten minutes to allow its components to cool down and any static electricity storage devices to discharge. The enclosure could overheat during its operation or be heated by direct sunlight, and it can cause burns by contact. To avoid burns, please use suitable PPE or wait for the equipment to cool down before accessing it.7.1 How to put the unit as out of orderThe unit can be set as out of order in two ways:1. On-site method: Press the emergency stop button.2. Remote method: Access the Eaton Charging network manager and set the unit as out of order.It is mandatory to install and maintain the units with the latest system updates to enable new features and bug fixes, or the guarantee conditions may be voided.For units that are online, this must be done via the Eaton Charging network manager software platform. Please refer to the Eaton Charging network manager user manual, available on , for further details. For units that are offline, please contact your Eaton service representative using the email address ***********************.7.2 Firmware updates 7.3 Cleaning or replacing filtersCheck the filters on a yearly basis to ensure that they are not obstructed, and they work properly.In case of clogging, filters need to be replaced as soon as possible. Eaton does not recommend using the unit until the filters have been replaced.Before starting any operation, please contact your Eaton service representative via email at ***********************.When the charging station reaches the end of its service life, the end user should contact professional and qualified personnel for disposal instructions. Please refer to /recycling for further details.7.4 DisposalThe EU Directive on Waste Electrical and Electronic Equipment (WEEE) (Directive 2012/19/EU) establishes common rules on the management of electrical and electronic equipment and minimize its impact — from design until disposal — on the environment. As a manufacturer of electrical and electronic equipment, Eaton actively supports the requirements of the WEEE Directive.In compliance with the EU standard EN 50419 for marking of electrical and electronic equipment, we include the crossed-out wheeled bin symbol on our products. This symbol alerts users that these products should be recycled in accordance with local environmentwal regulations and not discarded with household waste. When end users recycle WEEE they are helping to ensure that they are neither incinerated nor sent to landfills, minimizing potential negative impact on human health and the environment.Any device that is no longer needed must therefore be returned to the distributor or disposed to an authorized collection and recycling center in the area. Eaton encourages all its customers and end users to make responsible decisions when it comes to disposing products.Eaton is not responsible for the transportation of the device to the collection point or recycling center.8.Troubleshoot i ngIf there is an issue with the charging unit, an error message will appear on the screen, offering a brief descriptionof the problem with the suggested solution. Some problems are difficult to solve and require an assistance of a qualified professional.If you cannot find a solution to your problem in Table 3, contact your local technical support representative or reach out to Eaton technical support via email at ***********************.T able 3.Meaning of UI messages and troubleshooting steps17 GREEN MOTION AIR ELECTRIC AIRCRAFT CHARGER USER MANUAL MN192008EN June 2023 18GREEN MOTION AIR ELECTRIC AIRCRAFT CHARGER USER MANUALMN192008EN June 2023 9. Frequently asked questionsThis section contains information and procedures for solving possible problems that may occur withthe product.If the problem persists, contact your local installer or your Eaton technical support representative using the email address ***********************.T able 4. Frequently asked questions19GREEN MOTION AIR ELECTRIC AIRCRAFT CHARGER USER MANUAL MN192008EN June 2023 10. Technical dataThe labels must NOT be hidden with foreign objects (rags, boxes, equipment etc.); they must be periodically cleaned and kept always clearly visible.10.1 Rating plateRefer to Figure 11 on where to find the rating plate on the product.The technical specifications shown in this manual do not replace those that appear on the rating plate attached to the product.The labels attached on the product must NEVER be removed, damaged, soiled or hidden for any reason.The information reported on the rating plate:1. Manufacturer2. Model3. Ratings4. Certification marks5. Warnings6. Serial NumberFigure 11. Location of the rating plate10.2 Technical datasheetThe latest version of the technical datasheet can be downloaded from /greenmotionair .CE certification declaration is also available at /greenmotionair . For further information, contact your local Eaton service representative.Should any technical problems arise during the operation of the product, contact your Eaton technical support representative for assistance via email at ***********************.The following information should be provided when contacting the Eaton technical support representative:•Product model and serial number,• Fault messages.To report concerns or problems regarding the charge point’s security, visit this link:https:///us/en-us/company/news-insights/cybersecurity/vulnerabilitydisclosure.html11. Contact support informationEaton is a registered trademark.All trademarks are property of their respective owners.Eaton Industries Manufacturing GmbH Place de la Gare 21345 Le Lieu, Switzerland/greenmotionair© 2023 Eaton All Rights Reserved Publication No. MN192008EN June 2023。
电动汽车充电设备 IC-CPD 用户手册说明书
用户手册电动汽车充电设备 IC-CPD版本 1.0 / 1906在线用户手册 IC-CPD / 35383918(电缆控制和保护设备)2版本 1.0 / 1906目录缩写1. 一般信息电动汽车充电设备 IC-CPD1.一般信息 .......................................... 22.IC-CPD 充电设备概览 ..................... 33.使用的警告、符号和图形 ............. 44.安全说明 .......................................... 65.主要功能 .......................................... 96.用户优势和功能............................ 107.可用的车辆充电口和车辆连接器 .............................................11 8.工业插座可用的电源线 ............... 12 9.家用插座可用的电源线 ............... 1210.ICCB 控制箱的前显示屏 .............. 1411.操作................................................. 1512.故障排除 ........................................ 1513.故障纠正 ........................................ 1514.ICCB 控制箱的背面标签 ............... 1715.维护和保养 .................................... 1816.产品改装 ........................................ 1817.处置................................................. 1918.保修信息 . (19)19.规格 (20)BEV ..........................................纯电动汽车PRCD-S ...............便携式开关漏电保护器EVSE ............................电动汽车供电设备FCC .................................联邦通信委员会ICCB ........................................电缆控制箱IC-CPD .....................电缆控制和保护设备LED .....................发光二极管(指示灯)PHEV ........................插电式混合动力汽车本用户手册以发布时最新的产品信息为准。
EVQC30-电动汽车快速充电机使用说明书(许继)
EVQC30电动汽车快速充电机使用说明书许继电源有限公司1、概述EVQC30系列一体式电动汽车整车直流充电机主要用于电动大巴的日常充电和电动轿车的中快速充电,适合安装于电动汽车充换电站、公共停车场、住宅小区停车场、大型商厦停车场等场所,可为电动汽车动力电池提供直流电能,操作简便,是各类电动汽车的快速充电设备。
2、环境条件a)环境温度:正常工作环境温度-20 C〜+50 C,存储温度-40 C〜+70 C;b)海拔高度w 2000 m ;c)相对温度:5%〜95 %,无凝结。
充电机外形图信号指示灯人机界面急停按钮键盘与刷卡区充电枪及插座4.3直流充电机接口 4.3.1接口定义充电机与电动汽车充电接口定义应能满足 GB/T 20234.3-2011的要求,如下图3所示:图3直流充电机充电接口定义示意图4.3.2接口要求车辆插头、车辆插座包含了9对触头,其电气参数值及功能定义如表1所示 表1触头电气参数值及功能定义图2充电机外形图非车载充电机急停按钮充电枪及插座车辆插头直流电源正(DC+) 直流电源负(DC-) 设备地(.) 充电通信CAN_H (S+) 充电通信CAN_L (S-)充电连接确认(CCI ) 充电连接确认(CC2) 低压辅助电源正(A+)低压辅助电源负(A-)车辆插座电动汽车直流电源正(DC+)直流电源负(DC-) 底盘地(工)充电通信CAN_H ( S+) 充电通信CAN_L ( S-)充电连接确认(CCI )充电连接确认(CC2)低压辅助电源正(A+)低压辅助电源负(A-)车辆插头、车辆插座的触头布置方式如图4和图5所示图4车辆插头触头布置图图5车辆插座触头布置图1、充电机的构成和电气原理充电机主回路包括输入交流进线开关、充电机模块、输出控制接触器和充电接口连接器;二次回路包括“启停”控制继电器、“急停”按钮、直流智能电能表、充电机智能控制器、读卡器、运行状态指示灯和人机交互设备(液晶、键盘或触摸屏(选配))。
EVQC30-电动汽车快速充电机使用说明书(许继)资料
额定电压和额定电流
功能定义
750V 125A/250A 750V 125A/250A
—
30V 2A
30V 2A
直流电源正,连接直流电源正与电池正极 直流电源负,连接直流电源负与电池负极 保护接地 ( PE),连接供电设备地线和车辆 底盘地线 充电通信 CAN_H,连接非车载充电机与电 动汽车的通信线 a) 充电通信 CAN_L,连接非车载充电机与电 动汽车的通信线 a)
2、 功能特点
6.1 交流输入配臵 C 级防雷器,具备防感应雷、防操作过电压的保护功能。
6.2 直流输出配臵直流智能电能表,可以进行直流充电电量计量。
6.3 配臵由单色 LCD、键盘或触摸屏组成的人机操作界面,充电方式可设臵自动充满、 按电量充、按金额充和按时间充;启动方式可选择立即启动和预约启动;充电过程中实 时显示充电方式、时间、电量及费用信息。
30V 2A 30V 2A
30V 20A
充电连接确认 1 充电连接确认 2 低压辅助电源正,连接非车载充电机为电 动汽车提供的低压辅助电源
30V 20A
低压辅助电源负,连接非车载充电机为电
-2-
许继电源有限公司
EVQC30
电动汽车快速充电机使用说明书
动汽车提供的低压辅助电源
a) 非车载充电机控制装臵和车辆控制装臵应有 CAN总线终端电阻,建议为 120Ω。 通信线宜采用屏蔽双绞线,非车载充电机端屏蔽层接地。
后台监控系统,获取并执行后台监控系统的控制命令。通信方式也可以选配
GPRS无线
网络或以太网。
6.8 充电接口连接器具有电磁锁装臵用于防止连接时意外断开,并具备防误操作功能。
6.9 充电机具备断电记录现场数据功能, 可以防止意外断电而丢失充电数据的现象发生。
电动汽车整车充电机使用说明书
电动汽车整车充电机使用说明书许继电动汽车充电站事业部1.概述电动汽车整车充电机可以用来为纯电动汽车充电,蓄电池不用从车上拆卸下来,充电快捷方便。
充电机可与电动车上的电池进行通讯,按照电池的信息,自动、快速、安全地完成充电,无需人在旁边看守和手动操作。
充电机主要由交直流功率变换和直流输出控制两部分组成,按组合形式分为一体式和分体式两种。
一体式充电机指交直流功率变换和直流输出控制两部分组合为一体的形式,适用于室外安装使用。
分体式充电机指交直流功率变换和直流输出控制两部分分立为两个单体的形式,它们之间通过电缆连接组成一套完整的充电机。
分体式充电机中完成交直流功率变换的部分称为整流器柜,一般采用标准机柜形式提供,适用于室内安装;分体式充电机中完成直流输出控制的部分称为直流充电桩,提供用户交互界面和直流输出接口,在室外安装使用。
2.使用环境条件1)工作温度:-10℃~+40℃(室内);-20℃~+50℃(室外)。
2)相对湿度:5%~95%。
3)海拔高度:≤2000米。
特殊地区使用时,根据当地的环境条件确定。
如西北与东北地区的室外工作温度满足-30℃~+50℃。
3.规格型号充电机系统由充电功率模块、充电监控模块和保护开关、接触器、用户终端设备等组成,其型号规格定义如下。
ZCD10-□/□标称输出电压(单位:V,指最高输出电压)额定输出电流(单位:A)产品系列号智能充电机产品系列号定义如下:11――指充电机由ZCD11系列充电模块和ZCDK-11监控模块构成;12――指充电机由ZCD12系列充电模块和ZCDK-12监控模块构成。
4.技术参数1)输入电压:三相五线;电压范围380VAC±20%;频率50HZ±2%2)输入功率因数:≥0.94。
3)输入谐波电流总畸变率:≤27%。
4)额定输出功率:N×10kW(N=1、2、3......)。
5)输出电压范围:100~200V;200~400V;250~500V;350~700V。