7KW交流交流充电桩说明书
交流两用充电桩使用说明
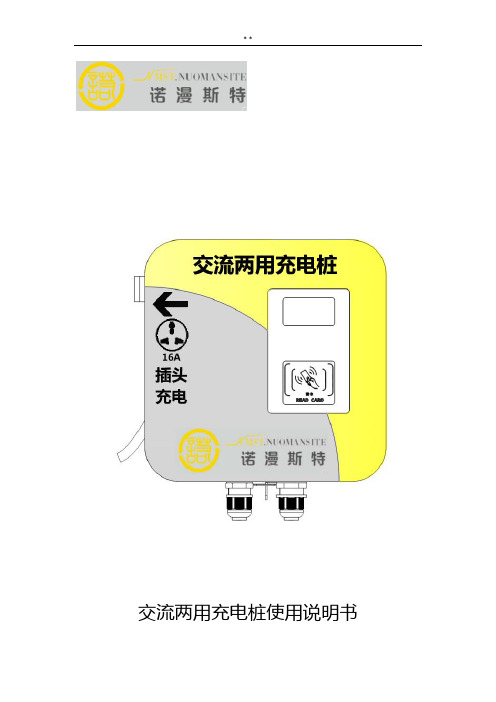
交流两用充电桩使用说明书广西诺漫斯云端电子设备制造有限公司版权所有© 广西诺漫斯云端电子设备制造有限公司。
保留一切权利。
非经本公司书面许可,任何单位和个人不得擅自摘抄、复制本文档的部分或全部内容,并不得以任何形式传播。
商标声明和其他商标均为广西诺漫斯云端电子设备制造有限公司的商标。
文档提及的其他所有商标或注册商标,由各自的所有人拥有。
注意您购买的产品、服务或特性等应受广西诺漫斯云端电子设备制造有限公司商业合同和条款的约束,本文档中描述的全部或部分产品、服务或特性可能不在您的购买或使用范围之内。
除非合同另有约定,广西诺漫斯云端电子设备制造有限公司对本文档内容不做任何明示或默示的声明或保证。
由于产品版本升级或其他原因,本文档内容会不定期进行更新。
除非另有约定,本文档仅作为使用指导,本文档中的所有陈述、信息和建议不构成任何明示或暗示的担保。
文档版本01前言读者对象本文档(本指南)主要适用于以下工程师:●技术支持工程师●维护工程师●工程安装团队符号约定符号说明危险用于警示紧急的危险情形,若不避免,将会导致人员死亡或严重的人身伤害。
警告用于警示潜在的危险情形,若不避免,可能会导致人员死亡或严重的人身伤害。
小心用于警示潜在的危险情形,若不避免,可能会导致中度或轻微的人身伤害。
注意表示有潜在风险,如果不能避免,可能导致设备损坏、数据丢失、设备性能降低或不可预知的结果。
说明表示是正文的附加信息,是对正文的强调和补充。
修改记录修改记录累积了每次文档更新的说明。
最新版本的文档包含以前所有文档版本的更新内容。
文档版本01第一次发布。
注意事项危险● AC交流充电桩应由专业人员、专职管理运行,由专业技术人员进行正确的使用及维护,非专业人员使用前请仔细阅读产品说明书,勿随意进行操作及检修,以免发生危险。
小心●在进行AC交流充电桩作业之前,必须仔细阅读操作的安全注意事项,以及AC交流充电桩的准确连接。
注意●交流充电桩电源上一级须装保护断路器,单相交流桩L相和N相不能反接,否则后果自负。
Hypervolt 家用 7kW 交流电充电桩用户指南说明书
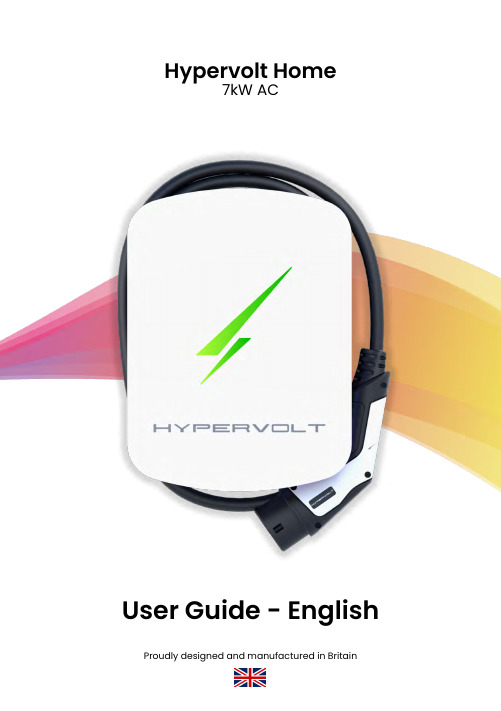
Hypervolt Home7kW ACUser Guide - EnglishSafety Notice 3Legal Notice4Safety Precautions 17Declaration of Conformity Hypervolt ServiceTechnical Sheet242620Get to know your Hypervolt Home 5Using your Hypervolt 7Troubleshooting 11Safety NoticeThe user must read and fully understand the safetyinstructions provided. Disregard of or actions contrary tothe safety information and instructions contained in thismanual and printed on the device may lead to electricshock, fire and/or severe injury and either damage to thevehicle or to the Hypervolt Home device.The installation of the Hypervolt Home device must be performed by a qualified electrician in accordance with the local wiring and building regulations. The relevant information, which is provided in the ‘Installation Guide’, does not relieve the user of responsibility to follow all applicable norms and standards or local regulations that may apply.Any resulting damage from such actions will unfortunately not be covered by your standard warranty.The Hypervolt Home charger device has been designed, developed and manufactured to satisfy requirements, safety dispositions and norms in accordance with the directives presented in the declaration of conformity.Legal NoticeThis document is intended to be used as a referenceguide for the operation of the charger. The product imagesshown are for illustration purposes only and may not be anexact representation of the product.Hypervolt Limited reserves the right to make changesto the specifications and processes of the product anddocumentation at any time and without prior notice.Important information for the correct disposal of the product in accordance with Directive 2012/19/EC.At the end of its useful life, the product should not be disposed of as urban waste.It must be taken to a collection center for special and differentiated disposal or to a distributor that provides this service.Outer LED RingCharging CableCharging PlugStatus light indicators...Blue: Stand-by Green: Charging Purple: Scheduled ChargingRed, flashing: Fault White (ring): Hotspot ModeNo light: Device is off The charger is ready to start a charging session.Charging is in progress.Ready to start charging, waiting for a time you have scheduled.There is an issue with the charging session. Check status in the Hypervolt app.If there are no lights on, check if power is available at the source.No internet - requires configuring a network connection.1Before a charging sessionYou will know your Hypervolt Home 2.0 charger is ready foraction when it displays a solid BLUE light. This indicates thedevice is powered up and ready to connect to your vehicle.To learn more about charging modes and set your preferences, visit the Hypervolt app.23Plug the charging plug into your vehicle’s charge port. Within a few seconds you should hear the safety latch locking the charging connector in place. If the Hypervolt is in Plug and Charge mode the charging session will start right away, and the Hypervolt will display a solid GREEN light toindicate that your vehicle is charging.To end a charging session, use the in-car control to stop the charging or use the Hypervolt app.Scheduling a charging sessionStarting a charging sessionIf you would like to schedulecharging to start later instead of right away: select Schedule Charge mode in the App, set the charging times, and then plug your charger into your vehicle. Once plugged in, your Hypervolt Home will display PURPLE lights. This means it is ready tocharge, but is waiting until the time you have scheduled before starting.No Lights ShowingIf the charger displays no lights you must check if power is available to the device. Check any fuses/switches which your electrician has installed and make sure they are all switched on. If you are sure the device is receiving power but there are no lights showing, contact your installer.In case of...Alert/FaultIn the unlikely event of a fault during your charging session theHypervolt will display a pulsing RED light. With 90% of faults, checking the troubleshooting guide below will resolve the issue in no time. Ifconnected to the internet the Hypervolt charger will have already sent diagnostics information to the HyperCloud, and our tech team has been notified of the issue.In case of...What to do if ...1. The charging station is unlocked in my app but appears off and no lights are onThis could mean that there is no power reaching your Hypervolt charger. It is usually as simple as a circuit breaker that is off or has tripped. Check the circuit breaker in your fuse board/consumer unit and make sure that it is ON. Press the test button on the circuit breaker to test that it works.If you have checked the circuit breakers of your device unit but the Hypervolt charger is still off?Contact your installer.What to do if ...2. The charging cable does not disconnect from the car The Hypervolt Home device is unfortunately not responsible for locking the cable inside your vehicle charge port. It is the electric vehicle which must release the charging port lock in order to allow the cable to be safely disconnected. In this case, the vehicle has not ended the charging session.You must end the charging session from the vehicle before removing the charging cable. Check the vehicle user guide in order to ascertain how this is done for your particular make and model. Although each vehicle has a different technique for ending the charging session, most charge port unlock buttons can be found in the vehicle’s centre console between the two front seats, or by the driver’s door.3. The charging session does not startThere are a few reasons why a charging session might not start: • The vehicle is scheduled to charge at a later time.• The vehicle is fully charged, hence it cannot charge anymore.• The vehicle may have an error, check the vehicle for any messages.• The charging plug is not connected properly, unplug the chargingplug and re-connect.• The charging plug may be dirty or damaged, ensure that it is in good condition.4. The charging session finished earlier than expected and my car battery is not fullCheck whether your vehicle has a maximum charge limit set which prevents the battery charging to full. Some vehicles have this setting in order to reduce charging times and congestion at motorway charging stations, and in some vehicles you are able to remove the limit. Consult your vehicle’s manual.If there is a power outage during your charge session, charging your vehicle will resume automatically as soon as power is available to the Hypervolt.6. The vehicle charges at a lower power than expected Check the specification of your vehicle make and model and verify the maximum power figures for AC Mode 3 charging. Some vehicles have a maximum charging power of less than what the Hypervolt Home can deliver: 32A. If the vehicle always charges at a lower power than specified for its make and model, and has never charged at a higher power, check whether a power limitation has been enabled during your installation.5. The charging time is greater than expectedWhen a vehicle’s charging session is almost complete it is normal for the charging speed and power to begin to decrease.Check your vehicle’s dashboard for an indication of the charging power and whether it is at the level you expect it to be.What to do if ...7. The charger is displaying a pulsing red lightThe Hypervolt Home has detected a problem during your charging session or with your device. If connected to the internet, Hypervolt will have already received diagnostics information and our tech team has been notified of your issue.Check further information on the status of your device in the Hypervolt app.Problem still not solved?Contact us at ********************.ukSafety InstructionsTo ensure a seamless and trouble-free experience whileusing your smart Hypervolt charger, take a minute toread the following safety advice:• Do not operate if physical defects such as cracks, breaks, corrosion, or other damage are observed. In this case, contact us should you have any doubt.• Only an authorised specialist and qualified personnel may open, disassemble, repair, alter or modify your Hypervolt charger.• Do not remove any symbols or parts from the device, including safety symbols, warning notices, rating plates, identification plates or cable markings.• Hypervolt Home chargers can only be used under the operating parameters specified and within -25O C to 40O Cambient temperature.• Do not open the cover in the rain.Safety InstructionsAlways check the charging cable and the contacts for damageand contamination before use.Never use a damaged charging cable.Never use contacts that are dirty or wet.Only connect the plug to a suitable vehicle inlet.After the charging session has ended, simply unplug thecharging plug from your vehicle. Never use excessive forceto disconnect the vehicle connector from the inlet. If you are having trouble removing your charging plug, consult the troubleshooting guide in this manual.Depending on the vehicle, the time to complete the chargingprocess and the duration of unlocking may vary.Depending on the vehicle, the time to complete the chargingprocess and the duration of unlocking may vary.Some vehicles can be started with the charging cable connected. Be sure to unplug before driving off.Never use the charging cable with an extension cable or an adapter unless explicitly allowed to do so.Keep the charging cable out of the reach of children.Be careful with the plug, do not step or drive on it or on the cable.Uncoil the entire cable length from the charger prior toconnecting to vehicle.Safety InstructionsCompatibilityHypervolt Home units are compatible with the Mode 3 charging standard and have been tested with the vehicles listed on our website.328mm101mm 243mmProduct InformationModelHypervolt Home Single Phase, 7kW AC Tethered, IEC 62196/Type 2 OR SAE J1772/Type 15 or 7.5 Meters Mode 3 (EN/IEC 61851)Connection CapacityCharging ConnectorTethered Cable LengthCharging Protocol Electrical Properties7kW, 32A@230V AC230 ± 10% V AC 50 Hz 32 A Internal overcurrent protection (software) plus MCB protection at source Internal 6mA DC fault current detection (compliant to BS 7671:2018)AC Charging Output Input VoltageInput FrequencyInput Current (max)Overcurrent ProtectionRCD Protection Charging power may vary based on vehicle make and model as well as electrical installation setup.Power and energy monitoring as standard; optional MID grade metering is available. Energy MonitoringPhysical Properties328 x 243 x 101mm Wall/Pole mounted White/Grey 5.2 Kg ABS compositeDimensions (H x W x D)Mounting TypeColourShipping WeightUnit Material Environmental Properties-20 to 40 °C Up to 95% RH, non-condensing IP54Operating TemperatureOperating HumidityEnvironmental Protection Standards and ComplianceEN 61000-6-3:2006, EN 61000-6-2:2019Low Voltage Directive (LVD) 2014/35/EU, EN 60950-1:2006 + A11 + A1, EN 60950-22:2006Fully compliant with Amendment 1 of BS7671:2018.EN 61851-1:2019, EN 61851-21:2002, EN 61851-22:2002, IEC 62196-1, BS 7671:2018 + A1:2020EMC ComplianceSafety CompliancePEN Fault ProtectionEV Charging ComplianceCommunicationMulti-colour LED ring and front cover signage Wi-Fi802.11b/g/********Optional OCPP 1.6/2.0State-of-the-art Cryptography Engine for fast and secure WLAN Connections with 256-Bit EncryptionStatus Indication/HMIWiFiGPRS/3G/4GCommunication ProtocolNetwork Security WarrantyAll correctly installed Hypervolt hardware is covered by our thirty six month limited warranty.Any hardware failure should be promptly reported to us. Our support team will investigate and take immediate steps to resolve the issue in a timely and speedy manner.In no event will we accept any liability for loss, costs or damage consequential to the use and/or misuse of our hardware products, except and only to the extent that this is caused by our negligence.Limitation of liabilityHypervolt Limited, Unit 17, Innovation Business Centre, Rainham, RM13 8HZ, UK.Revision 3. Issue date: Nov 2020********************.ukWe of:Hypervolt Limited Unit 17, Innovation Business CentreConsul AvenueRM13 8HZRainhamUnited KingdomHereby declare that:Product Model Name:Hyperpoint Home 2.0Product Model Number:HYPV-2.0-7In accordance with the following legislation:2014/35/EU: The Low Voltage Directive2004/30/EU: The Electromagnetic Compatibility DirectiveIs in conformity with the applicable requirements of the following documents:BS EN 61851-1:2019 - Electric vehicle conductive charging systems. General requirements.BS EN 61851-22:2002 - Electric vehicle conductive charging system. A.C. electric vehicle charging stationBS EN 62196-1:2014 - Plugs, socket-outlets, vehicle connectors and vehicle inlets - Conductive charging of electric vehiclesBS EN 61000-6-2:2019 - Electromagnetic compatibility (EMC). Generic standards. Immunity standard for industrial environmentsBS EN 61000-6-3:2006 - Emission standard for residential, commercial and light-industrial environmentsI hereby declare that the equipment named above has been designed to comply with the relevant sections of the above referenced specifications. Theunit complies with all applicable Essential Requirements of the Directives.Place and date of issue: 15/01/2020, Unit 17, Consul Avenue, RM13 8HZ, Rainham, UKSigned by: Razvan VasiliuPosition: Technical Director Signature:Need assistance or having troublecharging your car?Hypervolt Limited +44 (0)330 122 7420********************.uk We’re here to help!Version 3: Jan 2021Connect with us!Thank you for choosing Hypervolt!。
7kW家用版交流桩安装说明及图示

Refresh the vehicle ,refresh the world.
壁挂安装效果图落地安装效果图
1、材料和工具准备
1)安装工具
工具名称主要作用
十字螺丝刀紧固螺丝
内六角扳手(2.5mm)拆卸面板
斜口钳剪断线缆
绝缘力矩扳手固定膨胀螺栓
铁榔头固定立柱膨胀螺栓
电钻安装立柱膨胀螺栓(壁挂膨胀管)
2)安装材料准备
物料名称物料规格备注
电力电源线3*6mm2 及以上单相电
缆以具体施工长度为准
漏保40A/2P漏电保护器输入配电箱配置
2、设备安装
1)安装注意事项
A)充电桩、走线槽、挂线钩均安装在车位中心线对应的位置;
B)充电桩安装高度为1.1M较佳,具体可视实际场合而定;
步骤一:布线
电源线从下方进线,采用线槽固定;
线槽位于车位的中心线对应位置;
线槽底部离地110cm; 步骤二:打孔固定
取出安装纸板,如图安装纸板距地面
1100mm;
据上面孔位打3-
Ø6*35mm孔,并锁入
膨胀管;
2、设备安装
步骤三:安装及固定1.将设备背后安装孔挂入墙上固定的螺钉上2.拧开上盖底部螺丝,打开上盖,使用螺丝 从内部固定充电桩,如下图所示 步骤四:接线
1.将3x6mm²电源线穿过对应的防水头,并连接到
对应的端子上。
2、设备安装
步骤五:锁紧上盖
1.锁盖: 按图示合上上盖,锁好
底部M4*8防盗螺钉
安装完成效果图。
7kW 壁挂 立柱式交流充电桩 使用说明书

7kW壁挂/立柱式交流充电桩(塑壳电容屏单枪32A)使用说明书V1.1使用前请认真阅读本说明书修订记录版本更新日期说明V1.02022-06-29初版V1.12022-08-17增加电源进线接线要求目录安全提示: (3)1、概述 (4)2、7kW壁挂式交流充电桩 (4)2.1产品概述 (4)2.2执行标准 (5)2.3主要功能特点 (5)2.4特征与参数 (6)3、充电桩充电操作说明 (6)3.1非接触式射频卡刷卡充电 (7)3.2手机端APP扫码充电 (11)3.3手机微信“小程序”扫码充电 (14)4、现场安装条件及需求 (16)5、包装运输及存储 (21)6、订货须知 (21)7、产品保修卡 (22)安全提示:1)警告安装和使用人员应遵守以下原则,确保相关人员的人身及设备安全:☆使用经销商提供的电动汽车专用充电设备充电;☆在任何情况下切勿自行改装、加装和变更任何部件;☆所有使用的工具,其不必要裸露的金属部分应做好绝缘处理,以防裸露的金属部分触碰金属机架,造成短路;☆当充电失败或有异常时请立即停止使用该设备;☆严禁手上沾有水接触插头,严禁触摸电动车充电插座插孔;☆严禁在防护包装或者电动车充电口断开、破裂、打开或者表面有任何损坏状况的情况下使用该设备;☆设备通电前请务必确认输入电压、频率、装置的断路器或熔丝及其它条件都已符合所订规格;☆为了确保充电桩的使用寿命和运行稳定,设备的使用环境应尽可能地保持清洁、恒温和恒湿,不得在有挥发性气体或易燃环境下使用;☆严禁让小孩触摸或使用该设备,在使用时不要让小孩接近。
2)接地说明☆充电桩必须接地良好,如果设备出现故障或者损坏时,接地线已提供最小阻抗电路放电从而减小触电的危险;☆设备接地线接错会有触电的危险,如果不能确认该设备接地是否良好,则请相关专业人士检测。
3)预防措施☆严禁将交流充电连接装置浸没在水中;☆严禁让外物进入充电连接口和插头的末端;☆严禁脚踩充电电缆,拉扯电缆,电缆弯折或打结;☆严禁在打雷闪电的天气使用该设备;☆严禁充电时将设备放在会产生高温的物体附近。
充电桩使用说明书
充电桩使用说明书
篇一:充电桩说明书
(1)满足《国家电网公司电动汽车充电设施建设指
导意见》、《电动汽车充电设施建设典型设计》中对交流充
电装置技术指标的要求;
(2)交流充电桩采用单桩单充式结构,每个充电接口
提供AC220V/7kW的交流供电能力;
(3)具备对充电桩运行状态的综合测控保护能力如运
行状态监测、故障状态监测、充电计量和充电过程的联动控
制、短路保护、过流保护等;
(4)设置指示灯、数码管显示器或触摸屏,显示运行
状态;
(5)设置急停开关、操作按键等必需的操作接口;
(6)预留交流三相四线电子式多功能电能表的表位,
进行交流充电计量;
(7)设置刷卡机,支持IC卡付费方式,并配置打印机,提供票据打印功能;
(8)具备过/欠压报警、充电接口的连接状态判断、联
锁等功能;
(9)提供完善的通讯功能,采用GPRS及以太网接口,可根据需要上传交流充电桩的运行状态参数,接受远程控制
命令。
应遵循的主要标准。
欧 标—7KW交流充电桩说明书——中文版

®电动汽车交流充电桩欧标7KW产品使用说明书良信电器股份有限公司使用产品前请仔细阅读本使用说明书,感谢您使用本系列充电桩目录第一章产品概述 (3)第二章适用范围……………………………………………………………………. .3第三章工作环境……………………………………………………………………. .3第四章功能特点 (3)第五章产品参数 (4)第六章设备的安装方法与安装尺寸图 (5)设备的外形尺 (5)设备的安装 (5)在安装之前请检查包装箱内是否包含以下物件:(以装箱清单为准) (5)安装环境要求 (6)安装方式 (6)安装尺寸图 (6)电缆接入.................................................................................. .. (6)第七章交流充电桩接线方法 (7)6.1 操作区……………………………………………………………………… .. 76.2 操作说明……………………………………………………………… . 8-9第八章储运………………………………………………………………………… 9-107.1 设备的储运 (10)第九章充电桩常见故障与排除方法 (10)第十章充电桩的维护与保修 (11)8.1 充电桩的维护与保养............................................................. (11)第十一章保修条例..................................................11-129.1 客户联 (12)9.1合格证 (12)第一章产品概述电动汽车充电桩的大规模产业化的到来,开创了新能源节能时代的新纪元,良信电器股份有限公司为适应国家新能源电动汽车充电桩的发展和需求,我司率先开发研制了系列电动汽车充电桩配套新产品,此款交流充电桩依据国际标准和欧洲标准:IEC/EN61851-1-2011《电动汽车传导充电系统第1部分:一般要求,适用于交流电源电压》的部分功能进行设计。
7kW 交流充电桩(单相)使用说明书
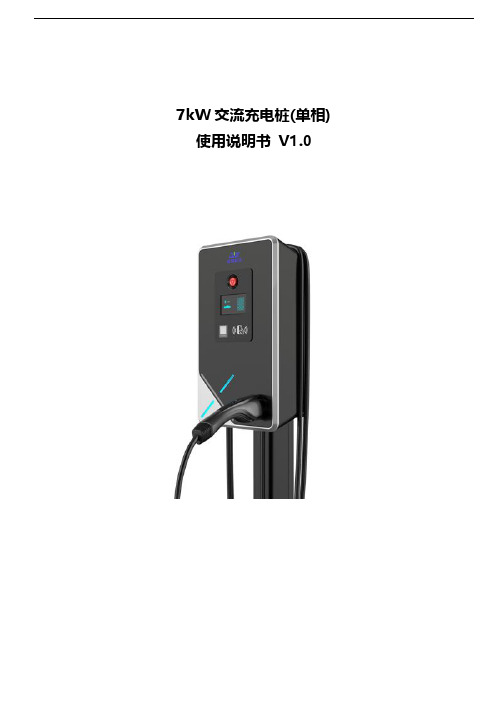
7kW交流充电桩(单相) 使用说明书V1.0目录目录...................................................................................................................... - 1 -安全注意事项 .............................................................................................................. - 2 -第1章产品介绍 ........................................................................................................... - 2 -1.1 产品简介 ........................................................................................................... - 2 -1.2 产品原理框图 ....................................................................................................... - 3 -1.3 主要参数说明 ....................................................................................................... - 3 -1.4 产品特点 ........................................................................................................... - 4 -1.5 产品设计规范 ....................................................................................................... - 4 -1.6 产品结构 ........................................................................................................... - 5 -1.6.1 整体外形图.................................................................................................... - 5 -1.6.2壁挂式安装说明................................................................................................ - 5 -1.6.3立柱式安装说明................................................................................................ - 6 -1.6.4接线说明...................................................................................................... - 6 -第2章操作说明 ............................................................................................................ - 7 -2.1设备上电检查、调试.................................................................................................. - 7 -2.2充电操作............................................................................................................ - 7 -2.2.1 充电连接 ..................................................................................................... - 7 -2.2.2 充电控制 ..................................................................................................... - 7 -2.2.3 充电停止 ..................................................................................................... - 8 -2.2.4 充电结算 ..................................................................................................... - 8 -第3章常见故障处理 ........................................................................................................ - 9 -安全注意事项1)请勿将易燃、易爆或可燃材料、化学物、可燃蒸汽等危险物品靠近充电桩;2)儿童请勿在充电过程中靠近、使用充电桩,以免造成伤害;3)如遇下雨打雷天气,请谨慎充电;4)严禁在充电枪或充电线缆存在缺陷、裂痕、磨损、破裂、充电线缆裸露等情况下使用充电桩,如有发现,请及时联系工作人员;5)请保持充电枪头清洁干燥,如有脏污,请用清洁的干布擦拭,严禁带电时用手触碰充电枪芯;6)请勿试图拆卸、维修、改装充电桩,如有维修、改装需求,请联系工作人员,不正当的操作可能会造成设备损坏、漏水、漏电等情况;7)使用过程中如有什么异常情况,可立即按下急停按钮,切断所有输入输出电源;8)在充电过程中,车辆禁止行驶,只有在静止时才能进行充电;9)混合动力电车请熄火后再进行充电。
7KW交流交流充电桩说明书

首钢自动化信息技术有限公司7KW交流充电桩使用手册首钢自动化信息技术有限公司关于本手册:本手册适用于首自信7KW交流充电桩。
本手册主要介绍了首自信7KW交流充电桩的特点、组成原理、安装、调试、操作与维护等。
安装前敬请认真阅读本手册。
请妥善保管此使用手册,以备查阅。
若遇问题请与首钢自动化信息技术有限公司或驻当地办事处联系。
保修事项:首钢自动化信息技术有限公司承诺:承担在合同或协议规定的保修期内正常使用条件下设备故障的免费维修。
在保修期内,对故障设备进行维修或更换由首钢自动化信息技术有限公司决定。
由技术更新引起的产品功能、性能的变更,不包含在本手册内。
安全标志说明:注意安全标志:表示有危险。
它提示我们注意操作步骤、不正确操作就可能导致产品受到损坏或损毁,只有在完全理解并满足所指条件时,才能进行相关操作。
当心触电标志:表示设备带有危险电压。
它提示我们操作时要注意,不正确操作可能导致触电危险。
电击伤人标志:不要触摸带电元器件;维修模块时请关闭机器开关,用断路保护器,断路开关等断开模块输入电源。
爆炸器件可至伤害标志:当充电机加电时,失效元件可能发生爆炸或导致其它元件爆炸。
在保养充电机时,应戴面罩,穿长袖衣服。
目录安全标志说明: (1)第一章概述 (3)1.简介 (3)2.产品特点 (3)3.使用环境 (4)4.安全 (4)第二章具体功能介绍 (4)1.交流充电桩外形 (4)2.技术指标 (5)3.具体操作简介 (6)3.1充电操作流程框图 (6)3.2触摸屏操作介绍 (7)第三章储运与维护 (9)1.包装、运输及储存 (10)2.维护 (10)第一章概述1.简介首自信7KW交流充电桩是首钢自动化信息技术有限公司根据GB/T 18487.1-2015《电动汽车传导充电系统》中的要求设计生产的智能型交流充电桩。
此充电桩外壳采用冷轧钢板,同时做了防腐喷塑处理,机械强度高、抗扰能力强,且防护等级达IP54满足户外环境安装使用。
- 1、下载文档前请自行甄别文档内容的完整性,平台不提供额外的编辑、内容补充、找答案等附加服务。
- 2、"仅部分预览"的文档,不可在线预览部分如存在完整性等问题,可反馈申请退款(可完整预览的文档不适用该条件!)。
- 3、如文档侵犯您的权益,请联系客服反馈,我们会尽快为您处理(人工客服工作时间:9:00-18:30)。
首钢自动化信息技术有限公司7KW交流充电桩使用手册首钢自动化信息技术有限公司关于本手册:本手册适用于首自信7KW交流充电桩。
本手册主要介绍了首自信7KW交流充电桩的特点、组成原理、安装、调试、操作与维护等。
安装前敬请认真阅读本手册。
请妥善保管此使用手册,以备查阅。
若遇问题请与首钢自动化信息技术有限公司或驻当地办事处联系。
保修事项:首钢自动化信息技术有限公司承诺:承担在合同或协议规定的保修期内正常使用条件下设备故障的免费维修。
在保修期内,对故障设备进行维修或更换由首钢自动化信息技术有限公司决定。
由技术更新引起的产品功能、性能的变更,不包含在本手册内。
安全标志说明:注意安全标志:表示有危险。
它提示我们注意操作步骤、不正确操作就可能导致产品受到损坏或损毁,只有在完全理解并满足所指条件时,才能进行相关操作。
当心触电标志:表示设备带有危险电压。
它提示我们操作时要注意,不正确操作可能导致触电危险。
电击伤人标志:不要触摸带电元器件;维修模块时请关闭机器开关,用断路保护器,断路开关等断开模块输入电源。
爆炸器件可至伤害标志:当充电机加电时,失效元件可能发生爆炸或导致其它元件爆炸。
在保养充电机时,应戴面罩,穿长袖衣服。
目录安全标志说明: ................................................................................................................................ 错误!未定义书签。
第一章概述.................................................................................................................................. 错误!未定义书签。
1.简介.............................................................................................................................................. 错误!未定义书签。
2.产品特点 ...................................................................................................................................... 错误!未定义书签。
3.使用环境 ...................................................................................................................................... 错误!未定义书签。
4.安全.............................................................................................................................................. 错误!未定义书签。
第二章具体功能介绍 ................................................................................................................... 错误!未定义书签。
1.交流充电桩外形 .......................................................................................................................... 错误!未定义书签。
2.技术指标 ...................................................................................................................................... 错误!未定义书签。
3.具体操作简介 .............................................................................................................................. 错误!未定义书签。
充电操作流程框图 ......................................................................................................................... 错误!未定义书签。
触摸屏操作介绍 ............................................................................................................................. 错误!未定义书签。
第三章储运与维护 ....................................................................................................................... 错误!未定义书签。
1.包装、运输及储存 ...................................................................................................................... 错误!未定义书签。
2.维护.............................................................................................................................................. 错误!未定义书签。
第一章概述1.简介首自信7KW交流充电桩是首钢自动化信息技术有限公司根据GB/T 《电动汽车传导充电系统》中的要求设计生产的智能型交流充电桩。
此充电桩外壳采用冷轧钢板,同时做了防腐喷塑处理,机械强度高、抗扰能力强,且防护等级达IP54满足户外环境安装使用。
充电方便,可采用专用IC卡刷卡进行充电,也可采用手机APP扫描二维码操作;采用智能定位导航技术,寻找方便;国标充电接口,适用于各类国标充电口的车型,通用性强;具有短路、防雷、漏电及过载等保护功能,安全性高。
可根据实际使用环境选择落地式安装或壁挂式安装,安装方式灵活简单;可广泛应用于停车场、车库等场所。
2.产品特点1.机体外壳采用冷轧钢板,机械强度高、抗扰能力强,同时做了防腐喷塑处理,不仅美观,而且耐候性强;防护等级达IP54满足户外环境安装使用。
2.前面板配置7英寸液晶触摸屏,800*480分辨率,操作便捷,交互性好。
3.有自动充满、固定金额、固定时间等多个充电模式。
4.采用国标充电插头,适用于各类国标充电口的车型,通用性强。
5.桩端可实现:IC卡管理、充电计量计费、液晶显示及与后台监控系统通讯,通过后台监控系统可实时监控充电桩的运行情况,并可方便与第三方后台系统集成6.机体内配置RS485/以太网/CAN等有线通信接口,并配置GPRS/3G等无线通信接口。
7.具有过欠压保护、过流保护、漏电保护、防雷保护、紧急停机保护等保护功能。
8.寿命≥10000次,MTBF≥30000小时。
3.使用环境1.使用环境:工作环境温度:-20℃~+40℃储存温度:-40℃~+70℃相对湿度:<90%(40±5℃)海拔高度:≤2000m2.工作条件:交流输入:单相三线制―火线L、零线N、保护地线PE。
输入电压:220V±15%,频率:45~55Hz。
4.安全1.绝缘电阻:在正常大气压条件下,相对湿度<90%(40±5℃),试验电压为直流500V时,交流部分对地的绝缘电阻均不低于10MΩ。
2.绝缘强度:交流部分各带电回路对地之间能承受2500V,50Hz的交流电压1min,无击穿、无飞弧现象,漏电流≤30mA。
(外壳漏电为零)。
第二章具体功能介绍1.交流充电桩外形图1是7KW壁挂式交流充电桩外形图。
触摸屏刷卡区(读卡器)充电线缆安装底座防雨罩外形尺寸介绍:310mm ×320mm ×1405mm (宽×深×高) 2.技术指标主要性能及参数表项目 功能参数 规格 220V/7KW交流输入电压单相三线 AC220V±15%/ 频率50Hz ±5Hz急停按钮 充电插头(国标)安装立柱线缆盘绕盘3.具体操作简介充电操作流程框图触摸屏操作介绍1、开机自检界面:设备初始上电触摸屏进入开机自检界面,如下:2、自检完成进入待机界面,此时刷卡可进入下一菜单3、刷卡后进入如下状态,(建议在刷卡操作前将充电枪与车辆充电接口连接好)在此界面选择4、选择“交流充电”选项后进入充电方式选择界面,在此界面下可选择自己需要的充电方式。
(为方便操作这里建议选择模式)。
5、选择好充电方式后进入充电确认界面,此时点击进入充电状态。
6、充电过程中触摸屏可显示充电电量、输出电压及电流等关键数据。
在此状态下充电桩将一直为电动车充电,直至动力电池充满。
(充电过程中可随时刷卡结束本次充电)。
7、充电桩自动充满或刷卡停止后会进入结账界面(见下图),在此界面可显示本次充电电量、充电金额及本次充电用时。
确定以上信息无误后刷卡、击退出结账界面,此时充电桩会退回至待机界面,将充电枪从车辆端拔出放回充电桩指定位置,完成本次充电。
以上为正常充电选择“自动充满”模式充电的整个操作过程。
8、如果在充电过程中遇紧急故障(如输出短路、车辆及充电设备有异常现象),可快速按下急停按钮断开充电桩与电动车间的电气连接,按下急停按钮后触摸屏会显示如下界面。
第三章储运与维护1.包装、运输及储存包装充电桩由塑料袋套装并放置有干燥剂、四周有泡沫支持,外有发泡纸箱包装。
运输产品运输中不应有剧烈振动,撞击和倒置并注意防雨、雪等,防止设备在运输过程中受潮。