加肥猫-Nordri工作室宣传片
娱乐美联英语 猫耳有福了:专门献给猫咪的音乐
小编给你一个美联英语官方免费试听课申请链接:/test/waijiao.aspx?tid=16-73675-0美联英语提供:娱乐英语猫耳有福了:专门献给猫咪的音乐In the long battle for feline affection, cat owners may have some fresh ammunition.在讨好猫咪欢心的持久战中,猫奴们终于又有了新装备。
David Teie, a soloist with the National Symphony Orchestra, recently teamed up with animal scientists to develop “Music for Cats,”a series of whirring, lilting and at times squeaky musical tracks designed for cats’brains and ears.国家交响乐团(National Symphony Orchestra)的独奏乐手大卫·提伊(David Teie)最近与若干动物科学家合作,创作了《给猫咪的音乐》(Music for Cats),这是一系列时而嗡嗡作响、轻快活泼,时而又吱吱嘎嘎的音乐,专门为猫咪的大脑和耳朵设计。
Owners often leave the radio or a playlist on for cats alone in the house, assuming they will share human musical tastes, be it classical, country or the lyrical tones of NPR hosts. But cats’hearing develops differently and “we mindlessly turn on music”for them, said Charles Snowdon, an emeritus professor of psychology atthe University of Wisconsin-Madison who worked with Mr. Teie on the project. With its special instruments and tonal mixing, “Music for Cats”aims to bridge that sensory gap, he said.猫咪的主人们不在家的时候,经常开着收音机或音响,觉得它们也能分享人类的音乐品味,不管是古典、乡村,抑或NPR主持人抑扬顿挫的声音。
游戏设计理论
游戏设计理论——Chris Crawford论题论题1 游戏设计和游戏程序设计根本不是同一回事情。
论题2 比起经典作品,从设计败笔中学习会更容易。
论题3 那些构筑未来的人必须理解过去。
论题4 优秀的游戏不会模拟物理事实,它只是反映情感事实。
论题5 把玩家置于失败的危机关头,但是不要让他失败。
论题6 整个世界都是乐趣,你不需要在岩石下或在洞穴中去寻找它。
论题7 应该像使用公认的其他任何术语一样使用单词“乐趣”(fun),比如、酷(cool)、很棒(far out)、帅(groovy)、或者极为出色(neat-o)等等。
论题8 消除允许玩家逃避游戏挑战的漏洞。
论题9 游戏中的社会推理设计应尽可能抽象化。
论题10 游戏也像故事一样,有冲突才有生命力。
论题11 交互性才是计算机游戏的卖点论题12 回避数据密集性设计,追求过程密集性。
论题13 阅读更多的书籍,可以启发设计师的创造性。
论题14 对更多的事物感到好奇,从另一个角度去观察它、研究它。
论题15 应创造力之需,让思维变得更疯狂。
论题16 图形信息的缺乏与它的存在一样,同样能刺激玩家的想象力。
论题17 逼真的图形必须通过逼真的行为来匹配,如果不能实现后者就要抛弃前者论题18 修饰的逼真性应该与幻想的逼真性匹配。
论题19 改进游戏设计既需要增添特性,也需要精简特性。
论题20 根据游戏的挑战而不是其主题来构思游戏设计论题21 摆脱故事板的束缚。
论题22 工具对意志薄弱的人有着强烈的影响,必须保持警惕。
论题23 除非确实热爱游戏,否则不要在游戏业谋求职位。
论题24 学习尽可能多的知识,尽可能使自己成为名副其实的“多面手”。
论题25 有上百万种游戏思想正在等待人们去实现。
论题26 交互式故事讲述需要的是革命而不是改良。
论题27 为金钱而不要为创造性挑战创作特许产品。
论题28 绝对不要首先建立一种技术,然后再寻找一款游戏来适应它。
论题29 也要玩一下非电子游戏。
动漫营销经典案例——伊利QQ星与机器猫

饰品
•头饰 头饰 •胸针 胸针 •耳环 耳环 •项链 项链 •手机链 手机链 •日用品配饰 日用品配饰
电子产品
•U盘 盘 •移动硬盘 移动硬盘 •电热水壶 电热水壶 •咖啡机 咖啡机 •音乐抱枕 音乐抱枕 •氧吧 氧吧 •鼠标 鼠标 •万年历时计 万年历时计 •手机备份器 手机备份器 •USB系列 系列 •收音机 收音机 • 数码相框
头背景版植入
片头背景植入
上海天络行文化传 www.skyn
度广告植入
深度植入广告形式
上海天络行文化传 www.skyn
商会全程支持
2008年12月中旬,天络行携手伊利,利用哆啦A 2008年12月中旬,天络行携手伊利,利用哆啦A梦的动漫形 月中旬 在金融危机和三聚氰胺的双重危机背影下,举行了伊利QQ QQ星 在金融危机和三聚氰胺的双重危机背影下,举行了伊利QQ星“乳 伊利QQ QQ星 大型招商活动, 新起点 伊利QQ星”大型招商活动,天络行为其操盘量身定做了 创意的哆啦A COSPLAY招商活动 会场异常火爆。 招商活动, 创意的哆啦A梦COSPLAY招商活动,会场异常火爆。在二个小时的 演和演讲中,当场就签定了数额为1.7亿的定货量, 1.7亿的定货量 演和演讲中,当场就签定了数额为1.7亿的定货量,活动大获成
名:多啦A梦笔 多啦A 质:马口铁 格:16.5*2CM 10元 格:5-10元 订量:10000个 订量:10000个 30-35天 期:30-35天 注:
上海天络行文化传 www.skyn
视广告片TVC——创意剧本 视广告片TVC——创意剧本 TVC——
由日本ADK全程策划创意--哆啦A梦QQ星广告脚本
上海天络行文化传 www.skyn
全国知名企业以及媒体主要联系人联系方式全录
传媒 中国证券报 传媒 国际金融报 传媒 新闻晨报 传媒 解放日报集团
传媒 新闻晨报 传媒 社会科学报
传媒 上海电视台
传媒 传媒
社会科学报 社会科学报
传媒 解放日报报业集团
传媒 东方早报
传媒 东方早报 传媒 外滩画报
传媒 传媒
中国证券报 新民晚报
传媒 第一财经日报
传媒 东方早报
传媒 东方早报
传媒 东方早报
传媒 上海英文星报社 传媒 东方早报
传媒 上海法治报 传媒 新闻晨报 传媒 国际金融报
传媒 中国证券报 传媒 新闻晨报
传媒 上海日报
传媒 上海英文星报社
传媒 第一财经日报
传媒 传媒
东方早报 国际金融报
传媒 传媒 传媒
文汇报 经济日报上海记者站 新华通讯社上海分社
传媒 传媒
东方早报 21世纪报系
传媒 新闻晨报
教育
复旦大学管理学院
教育 教育
上海金融与法律研究院 上海财经大学
教育 教育 教育 教育
上海华顿综合经济研究所 上海经济发展研究所 上海华顿综合经济研究所 复旦大学管理学院
教育 教育
上海大学社会学教授 新加坡国立大学东亚研究所
教育 中国社会科学院文学研究所
教育 北京大学
教育 华东师范大学海外中国学研究中心 教育 华东政法学院
教育
上海生物制品研究所
金融 美国友邦保险有限公司上海分公司
金融 金融
兴业证券股份有限公司 荷兰银行有限公司上海分行
金融 上海证券交易所
金融 金融 金融 金融 金融
恒泰证券 中国太平洋财产保险股份有限公司 中国人民财产保险股份有限公司
上海财大保险精算研究中心
《我的老婆是只猫》中影星美院线策划案DOC

《我的老婆是只猫》中影星美院线策划案一、影片基本信息1、中文名:我的老婆是只猫2、外文名:My Wife's A Cat3、出品公司:中国电影股份有限公司中影动画产业有限公司北京中奥影迪动画制作有限公司4、发行:中影数字电影发展(北京)有限公司5、导演:黄军6、编剧:黄军7、出品人:韩三平蔡东青8、配音:周艳泓潘粤明9、片种:动画剧情电影10、类型:爱情童话喜剧家庭11、国别:中国12、发行范围:全国13、上映时间:2013年2月14日14、对白语言:汉语普通话15、发行方式:数字单发16、色彩:彩色17、片长:90分钟18、幅面:35毫米遮幅宽银幕系统19、混音:Dolby SR二、故事梗概精通武艺的黑鼠阿祥与猫妹妹小吉相爱结合,小吉被视作猫族的败类和叛徒,遭到了驱逐,阿祥也遭到了追杀。
根据猫族的规矩,如果小吉和阿祥的婚姻,没能在平安夜之前获得小吉父母的认可,小吉将永远不能回到父母身边。
于是,阿祥和小吉踏上了寻求认同的旅程......简短版老鼠阿祥和猫妹妹小吉,不畏禁忌与安危,一路艰辛守护对彼此的真爱,最终获得了族人的认可,相伴至永远。
三、受众定位市场进入受众转型期从档期来看,《我的老婆是只猫》2月14日上映,处于春节长假的末端,正值情人节当天,将历经本档期电影市场的受众转型。
届时,春节档期最黄金的观影高峰已经度过,随着节假接近尾声和人们节日情绪的回落,市场上观影人群的结构将发生改变,合家欢式观影减少,观众年龄上限将开始下降,受众年龄范围将重新趋于主流观众年龄水平,逐步回归到以18—30岁年轻观众为主导的模式中来,全面向情人节状态靠拢。
影片受众分类除了正确地定位人群,对自身的正确定位,于这部影片来说至关重要。
这是不是一部儿童动画,而是一部以情人节为目标,针对青年乃至成年人的爱情动画片。
与众不同的动画片形式、新颖的高年龄层定位所形成的独特观影效果将成为这部影片立足的核心。
爱情内容针对档期特色,动画片形式和片方的宣传铺垫则让这部影片在营销和推介上比其他影片更加灵活多变,有更广的发挥和创造空间。
Denon AVR-X1700H 7.2通道8K AV接收器说明书

Powering 80W per channel, the Denon AVR-X1700H 7.2 channel 8K AV receiver supports the latest in 3D audio formats, including Dolby Atmos®, Dolby Atmos Height Virtualization T echnology, DTS:X®, and DTS Virtual:X™. It features the latest HDMI specifications such as 8K/60Hz, select 4K/120Hz pass-through, VRR, ALLM, Dolby Vision™, HDR10+, and eARC support. With HEOS® Built-in, stream music wirelessly from Spotify®,Pandora®, Amazon Music HD, TIDAL, Deezer, and more. Works with Amazon Alexa, Google Assistant, Apple Siri, and Josh.ai for seamless voice control.7.2ch 8K AV receiver with 3D audio, voice control, and HEOS ® Built-inHIGHLIGHTSYOUR BENEFITSHigh-performance discrete seven-channel amplifier Delivers maximum performance and 80W per channel to provide the classic and dynamic Denon sound experience.Enjoy 8K quality videoThree 8K inputs and one output allow for 8K/60Hz and 4K/120Hz pass-through. 8K upscaling available on all six HDMI inputs..Supports the latest HDR formats Compatible with HDR10, HDR10+, HLG, Dolby Vision, and Dynamic HDR to provide the greatest picture brightness, clarity and contrast.Enjoy immersive 3D audioCompatible with sources like Dolby Atmos®, Dolby Atmos Height Virtualization, DTS:X®, and DTS Virtual:X™.Enhanced Audio Return Channel (eARC) HDMI supportConnect your eARC HDMI-supported TV through the AVR-X1700H's main HDMI output to allow uncompressed and object-based audio formats like Dolby Atmos and DTS:X to directly send from your smart TV app to your AV receiver.The next generation in movie immersion8K/60Hz pass-through and upscaling, Dynamic HDR, and Quick Media Switching (QMS) give you crystal clear picture quality.Enhanced gaming experiences4K/120Hz pass-through, Variable Refresh Rate (VRR), Auto Low Latency Mode (ALLM), and Quick Frame Transport (QFT) enhance your gaming experience with amazing imaging as well as reduced lag and latency.Works with your favorite voice servicesUse your voice to control the AVR-X1700H and wireless music services as well as Amazon Alexa, Google Assistant, Apple Siri, and Josh.ai.Wireless streaming from the most popular music services Enjoy music services like Spotify®, Pandora®, Amazon Music HD, TIDAL, SiriusXM, Deezer, and more.HEOS® Built-in wireless multi-room music streaming technologyListen from any room for a connected, whole-home audio experience. The AVR-X1700H also works with the newly introduced Denon Home speakers to let you enjoy great Denon sound throughout your home.SINCE 1910 |DEFINING AUDIO EXCELLENCEDENON AVR-X 1700HHey GoogleHEOS logo is trademark or registered trademark in the US and/or other countries. Availability of music services may vary by region. Not all services may be available at time of purchase. Some services may be added or discontinued from time to time based on decisions of the music service providers or others. Visit /music for announcements and details. HEOS app and brand is not affiliated with any manufacturer of any smart phone. The Bluetooth word mark and logos are registered trademarks owned by Bluetooth SIG, Inc. and any use of such marks by D&M Holdings Inc. is under license.Ultimate home theater experience – 8K readyThe AVR-X1700H delivers the ultimate home theater experience with 8K/60Hz pass-through and 4K/120Hz pass-through, as well as support for the latest HDMI specifications. The new AVR-X1700H lets you build the best 4K home theater today and is 8K ready when you are. Enjoy the highest quality 3D audio and video for even the most demanding entertainment needs.Powerful seven-channel amplifier with the latest home cinema specss Featuring discrete high-current amplifiers on all channels, theAVR-X1700H delivers high-power performance of 80W per channel (8 ohms, 20Hz-20kHz, THD: 0.08%, 2 channels driven). Lowimpedance drivers can accommodate a wide range of speakers for balanced, tonal sound.Full 3D audio supportImmerse yourself in 3D audio with Dolby Atmos®, Dolby Atmos Height Virtualization Technology, DTS:X®, and DTS Virtual:X™. Set up a 5.1.2 Dolby Atmos surround system using Dolby Atmos elevation speakers, or dedicated overhead speakers, for theultimate home theater experience. DTS:X gives your movies, games and music a realism unmatched by traditional 5.1 surround sound. Dolby Atmos Height Virtualization Technology and DTS Virtual:X provide immersive audio without height channels, creating virtual height effects in a 7.1, 5.1, or 2.1 speaker arrangement.Advanced 8K hdmi video section to support various HDR formats For the best picture quality available, the AVR-X1700H features an advanced HDMI section (6 in/1 out) with three 8K inputs supporting 8K/60Hz and 4K/120Hz video pass-through sporting 40Gbps. All HDMI inputs feature 4:4:4 Pure Color sub sampling, HDR10, HDR10+, Dolby Vision, Hybrid Log-Gamma (HLG), Dynamic HDR, 3D, and BT.2020 pass-through support for exceptional picture quality. Enjoy 8K upscaling as well as HDCP 2.3 processing to play copy-protected content uninhibite d.HEOS® Built-In multi-room streamingEnjoy your favorite music in any room of your home wirelessly with HEOS® Built-in technology. Play the same song in every room or select a different song for each connected room. Also works with Amazon Alexa, Google Assistant, Apple Siri, and Josh.ai to provide cutting-edge voice control for all your home entertainment. Connect your Denon Home speakers for a whole-home audio experience. HEOS also supports free and premium Spotify, Pandora, Amazon Music HD, TuneIn, SoundCloud, SiriusXM, TIDAL, and more. (Not all music services available in all regions.)Easy setup and automatic HDMI renameThe included AVR-X1700H Quick Start Guide provides simple, clear instructions for how to get started. Once you connect your TV to theAVR-X1700H via HDMI, the exclusive Denon Setup Assistant appears on your TV screen to walk you through setup, step by step. On the back of the AV receiver, a row of color-coded speaker connections is laid out horizontally, making organizing and connecting speaker wires simple. The AVR-X1700H renames HDMI inputs automatically when connected or you can rename manually for your convenience.Audyssey room correctionUsing the featured Audyssey MultEQ XT room acousticmeasurement system and supplied microphone, the AVR-X1700H it precisely analyzes the output of each speaker to optimize every channel. Plus, the additional Audyssey MultEQ Editor app (available for purchase) allows advanced users to go “under the hood” for further adjustment and customization of your audio environment. The app is available for both iOS and Android.Apple AirPlay 2 built-inUse AirPlay 2 to stream Apple music wirelessly to the AV receiver, or group with other AirPlay compatible speakers to fill your home with music.Built-in bluetooth and Wi-Fi capabilityThe heart of your wireless network, the Denon AVR-X1700H is equipped with an advanced dual antenna transceiver system for robust Bluetooth and Wi-Fi wireless streaming even in congested urban environments. Enjoy listening to your favorite audio content wirelessly from your smart devices.Phono input for turntable/vinyl supportWith the built-in phono input, the AVR-X1700H lets you connect your turntable and play vinyl records. Enjoy your vintage collection with exceptional quality and sound.Amazing sound built on 110 years of innovationAs Japan’s first audio electronics manufacturer with a deep legacy of firsts, Denon is the defining audio company of Japan. Founded in 1910, we enable the moments that matter through the relentless pursuit of quality, innovation, and audio performance. We innovate for a better experience.Brilliant color–universal compatibility, HDR10+, and dynamic HDR The AVR-X1700H supports High Dynamic Range video format, HDR10, Dolby Vision, and HLG (Hybrid Log Gamma). Dolby Vision transforms the viewing experiences with astonishing brightness, contrast, and color. HLG offers HDR technology over broadcastcontent for a crisper, cleaner image. The AVR-X1700H also supports HDR10+, which sends dynamic meta data to TV for more realistic images, as well as Dynamic HDR. (Some technologies are not available on all televisions.)Enhanced Audio Return Channel (eARC) supportThe main output of the AVR-X1700H supports eARC (enhanced Audio Return Channel) to enable uncompressed and object-based audiotransmission directly from your smart TV apps to your AV receiver.The latest technology for enhanced movie experiencesWith the new AVR-X1700H, enjoy all your entertainment with latest technology available and watch your movies in unrivaled clarity. Enjoy your movies in 8K with 8K/60Hz pass-through and upscaling, as well the latest in AV receiver technology like Dynamic HDR and Quick Media Switching (QMS), which eliminates video delay in movies.The next generation in gamingEnjoy gaming to its full potential with the new AVR-X1700H. Play with 4K/120Hz pass-through, as well as Variable Refresh Rate (VRR), Quick Frame Transport (QFT), and Auto Low Latency Mode (ALLM), which reduces or eliminates lag and frame tearing for a smoother, lag-free gaming experience.Works with Amazon AlexaControl the AVR-X1700H hands-free with Amazon Alexa and your voice. Adjust the volume, skip to the next track, switch inputs for your different media players, and more—“Just Ask.” Download the HEOS Home Entertainment Skill to enable Amazon Alexa voice commands for your AVR-X1700H, HEOS devices and other select Denon products.Works with Google AssistantStart music in the HEOS app, then ask your Google Assistant to control volume, play, pause, skip tracks, and more.Works with Josh.aiJosh.ai offers flexible voice control for nearly any aspect of your day-to-day experience and entertainment environment. Use voice commands to control the thermostat, lights, home appliances, speakers, AV receiver, and more. Josh.ai is installed by custom integrators and accessed through an app on your phone or tablet. Works with iOS and Android devices.Multi-source, multi-roomWith the Denon AVR-X1700H, it’s possible to enjoy multi-channel surround sound in one room and a separate source or music stream in another. Watch a movie in one room while another family member listens to music in a different zone without interruption.All zone TV audioPlay the audio from your TV to all zones. Enjoy full discrete audio such as Dolby Atmos in the main zone for a totally immersiveexperience while playing the same source in the second zone. The AVR-X1700H supports both HDMI and digital sources for your second zone when set to “Source.”。
16频道真正多频道UHF无线系统产品说明书

16-CHANNEL TRUE DIVERSITY UHF WIRELESS SYSTEMOWNER'S MANUALCopyright 2013, Samson Technologies Corp. v2Samson Technologies Corp.45 Gilpin AveHauppauge, NY 11788Important Safety InformationCAUTION: TO REDUCE THE RISK OF ELECTRIC SHOCK, DO NOTREMOVE COVER (OR BACK). NO USER-SERVICEABLE PARTS IN-SIDE. REFER SERVICING TO QUALIFIED SERVICE PERSONNEL.If you want to dispose this product, do not mix it with general household waste. There is aseparate collection system for used electronic products in accordance with legislation thatrequires proper treatment, recovery and recycling.Private household in the 25 member states of the EU, in Switzerland and Norway may return their used electronic products free of charge to designated collection facilities or to a retailer (if you purchase a similar new one).For Countries not mentioned above, please contact your local authorities for a correct method of disposal.By doing so you will ensure that your disposed product undergoes the necessary treatment, recovery and recycling and thus prevent potential negative effects on the environment and human health.ATTENTIONRISQUE D’ÉLECTROCUTION !NE PAS OUVRIR !WARNINGTO PREVENT FIRE OR SHOCK HAZARD. DO NOT USE THIS PLUG WITH AN EXTENSION CORD, RECEPTACLE OR OTHER OUTLET UNLESS THE BLADES CAN BE FULLY INSERT-ED TO PREVENT BLADE EXPOSURE. TO PREVENT FIRE OR SHOCK HAZARD. DO NOT EXPOSE THIS APPLIANCE TO RAIN OR MOISTURE. TO PREVENT ELECTRICAL SHOCK, MATCH WIDE BLADE PLUG TO WIDE SLOT AND FULLY INSERT.Important Safety Information1. Read these instructions.2. Keep these instructions.3. Heed all warnings.4. Follow all instructions.5. Do not use this apparatus near water.6. Clean only with dry cloth.7. Do not block any ventilation open-ings. Install in accordance with the manufacturer’s instructions.8. Do not install near any heat sourc-es such as radiators, heat registers, stoves, or other apparatus (includ-ing amplifiers) that produce heat.9. Do not defeat the safety purpose of the polarized or grounding type plug. A polarized plug has two blades with one wider than the other. A grounding type plug hastwo blades and a third ground-ing prong. The wide blade or the third prong are provided for your safety. If the provided plug does not fit into your outlet, consult an electrician for replacement of the obsolete outlet.10. Protect the power cord from being walked on or pinched particularly at the plugs, convenience recep-tacles, and at the point where theyexit from the apparatus.11. Only use attachments/accessoriesspecified by the manufacturer.12. Use only with the cart, stand,the apparatus. When a cart isused, use caution when movingthe cart/apparatus combinationto avoid injury from tip-over.13. Unplug the apparatus during light-ening storms, or when unused for long periods of time. 14. Refer all servicing to qualified per-sonnel. Service is required whenthe apparatus has been damaged in any way, such as power supply cord or plug is damaged, liquid has been spilled or objects havefallen into the apparatus has been exposed to rain or moisture, does not operate normally, or has been dropped.15. This appliance shall not beexposed to dripping or splashing water and that no object filled with liquid such as vases shall be placed on the apparatus.16. Caution-to prevent electrical shock, match wide blade plug wide slot fully insert.17. Please keep a good ventilation en-vironment around the entire unit.18. The direct plug-in adapter is used as disconnect device, the discon-nect device shall remain readily operable.19. Batteries (battery pack or batteriesinstalled) shall not be exposed to excessive heat such as sunshine, fire or the like.Table of ContentsIntroduction (6)System Features (7)System Components (7)Guided Tour - CR88 Receiver . . . . . . . . . . . . . . . . . . 8Guided Tour - CB88 Belt Pack Transmitter . . . . . . . . . . . .10Guided Tour - CH88 Handheld Transmitter . . . . . . . . . . . .12Quick Start - Single System Setup . . . . . . . . . . . . . . . .13Quick Start - Multiple System Setup . . . . . . . . . . . . . . .17Rack Mounting . . . . . . . . . . . . . . . . . . . . . . . . .19Concert 88 Channel Plans . . . . . . . . . . . . . . . . . . . .20Troubleshooting . . . . . . . . . . . . . . . . . . . . . . . . .21Specifications (22)5 Concert 88 Wireless SystemIntroductionCongratulations on purchasing the Samson Concert 88 wireless system. The Concert 88 is the ideal solution for the active performer who needs a reliable, great sounding system for wireless applications. Featuring simple operation, with 16 available chan-nels and infrared set for the transmitter channel, the Concert 88 can quickly be up and running out of the box. The Concert 88 system ensures clear, interruption-free performance by combining tone-key with auto-mute. This configuration allows only the transmitter’s audio to pass through the receiver, and mutes the output if there is any interference.The Concert 88 comes in four configurations. The vocal handheld system includes the CH88 handheld transmitter and Q6 dynamic microphone capsule. The CB88 belt pack system can be configured with either the HS5 headset microphone, LM5 lavalier microphone, or a ¼" instrument cable. For travel or permanent installation, the Concert 88 includes a standard 19" rackmount kit.In these pages, you’ll find a detailed description of the features of the Concert 88 wireless system, as well as a guided tour through its control panel, step-by-step instructions for its setup and use, and full specifications. If your wireless system was purchased in the United States, you’ll also find a warranty card enclosed—don’t forget to fill it out and mail it in so that you can receive online technical support and so that we can send you updated information about this and other Samson products in the future. Also, be sure to check out our website () for com-plete information about our full product line.We recommend you keep the following records for reference, as well as a copy of your sales receipt.Receiver Serial number: _________________________________________ Transmitter Serial number: ______________________________________Date of purchase: ______________________________________________Dealer name: __________________________________________________With proper care and maintenance, your Concert 88 wireless system will operate trouble-free for many years. Should your wireless system ever require servicing, a Return Authorization (RA) number must be obtained before shipping your unit to Samson. Without this number, the unit will not be accepted. Please call Samsonat 1-800-3SAMSON (1-800-372-6766) for an RA number prior to shipping your unit. Please retain the original packing materials and, if possible, return the unit in its original carton. If your Concert 88 system was purchased outside of the United States, contact your local distributor for warranty details and service information.67Concert 88 Wireless System System ComponentsSystem FeaturesAll systemsCR88 receiverPower Supply¼" to ¼" audio cableRack Accessories Long rack ear, short rack ear, two receiver adaptor Owner's ManualHandheld systemCH88 handheld transmitter with Q6 dynamic microphone capsuleHeadset systemCB88 belt pack transmitterHS5 headset microphone with mini-XLR connectorLavalier SystemCB88 belt pack transmitterLM5 lavalier microphone with mini-XLR connectorTie clipInstrument SystemCB88 belt pack transmitter¼" to mini-XLR instrument cable•Professional wireless system for use in both live sound and sound contracting applications •True diversity technology maximizes active range (up to 300 feet) and reduces potential interference •16 available channels operating in the UHF band designed for maximum system compatibility in the same location without interference • The CR88 receiver is a half-rack unit that can be used freestanding or can be mounted in any standard 19" rack using the included rack kit, making it easy to integrate into any traveling or fixed installation audio system• Tone-key and auto-mute ensures clear, interruption-free performance allowing only the transmitter’s audio to pass through the receiver, and mutes the output if there is any interference• Up to 300-foot range (line-of-sight)•Up to eight hours of battery life, using two standard AA batteriesGuided Tour - CR88 Receiver1. Antennas - The antenna mountings allow full rotation for optimum placement. Innormal operation, both antennas should be placed in a vertical position. Both antennas can be folded inward for convenience when transporting the CR88. 2. VOLUME Control - This knob sets the level of the audio signal being outputthrough both the balanced and unbalanced output jacks on the rear panel.Reference level is obtained when the knob is turned fully clockwise (to its “10”setting).3. READY Indicator - This indicator lights green when the CR88 is receiving RF sig-nal and the system is ready to use.4. PEAK Indicator - This indicator lights red when the transmitted audio signal isoverloaded.5. LED Display - The 7-segment LED display shows the receiver's current operatingchannel. The CR88 channels are indicated by 0-9 and A-F.6. IR Transmitter - During “IR SET” an infrared light is used to set the transmitterchannel.7. SELECT Button - Press this button to cycle through the receiver's operating chan-nels. Press and hold this button to send the channel information to the transmit-ter via infrared transmission.8. POWER Switch - Use this to turn the CR88 power on and off.89Concert 88 Wireless SystemGuided Tour - CR88 Receiver1. DC Input - Connect the supplied power adapter here, using the strain relief asshown in the illustration below. WARNING: Do not substitute any other kind of power adapter. Doing so can cause severe damage to the CR88 and will void your warranty.2. BALANCED OUTPUT - Use this electronically balanced low impedance (600 Ohm)XLR jack when connecting the CR88 to professional (+4dBu) audio equipment. Pin wiring is as follows: Pin 1 ground, Pin 2 high (hot), and Pin 3 low (cold).3. UNBALANCED OUTPUT - Use this unbalanced high impedance (5K Ohm) ¼" jackwhen connecting the CR88 to consumer (-10dBV) audio equipment. Wiring is as follows: tip hot, sleeve ground.Guided Tour - CB88 Belt Pack Transmitter1. Input Connector - Connect the input device via the mini-XLR connector. The CB88is supplied with either a lavalier, headset microphone or ¼" instrument cable. 2. Status Indicator - This LED displays the operation mode:GREEN Normal OperationRED MuteFlashing GREEN Low Battery3. Power/Mute Switch - Press and hold to turn the unit on or off. Press and releaseto mute or unmute the transmitter.4. Belt Clip - Use this clip to fasten the CB88 transmitter to a belt or guitar strap.5. Battery Cover Release - Push in both sides and pull back to open the CB88 bat-tery cover.6. Antenna - This permanently attached transmitter antenna should be fully extend-ed during normal operation.1011Concert 88 Wireless System 7. Input GAIN Control - This control adjusts the transmitter input sensitivity to workwith microphone and instruments inputs. For optimal performance, using the included screwdriver, set the input GAIN control to where you see the CR88 PEAK indicator start to light under high levels, then turn down slowly until the PEAK light stops lighting. 8. Battery Holder - Insert two standard AA (LR6) batteries here, being sure toobserve the plus and minus polarity markings shown. Although rechargeableNi-Cad batteries can be used, they do not supply adequate current for more than four hours. WARNING: Do not insert the batteries backwards; doing so can cause severe damage to the CB88 and will void your warranty.9. IR Lens - This window is used to capture the infrared signal sent from the CR88during the IR SET to channelize the transmitter.10. Plastic Screwdriver - Designed for use in adjusting the CB88 input GAIN control(See #7 Input GAIN Control).Guided Tour - CB88 Belt Pack TransmitterGuided Tour - CH88 Handheld Transmitter1. Status Indicator - This LED displays the Array operation mode:GREEN Normal OperationRED MuteFlashing GREEN Low Battery2. Power/Mute Switch - Press and hold toturn the unit on or off. Press and releaseto mute or unmute the transmitter.3. Battery Cover - Unscrew the battery covercompartment.4. Battery Holder - Open the battery holderby pressing the tab and lifting the cover.Insert two standard AA (LR6) batterieshere, being sure to observe the plus andrechargeable Ni-Cad batteries can beused, they do not supply adequate cur-Do not insert the batteries backwards;CH88 and will void your warranty.5. Input GAIN Control - This control adjuststhe transmitter input sensitivity. Foroptimal performance, using the includedscrewdriver, set the input GAIN control to where you see the CR88 PEAK indica-tor start to light under high levels, then turn down until the PEAK light stops lighting.6. IR Lens - This window is used to capture the infrared signal sent from the CR88during the IR SET to channelize the transmitter. The battery cover must be open and the IR Lens facing towards the receiver to load the selected channel.7. Plastic Screwdriver - Designed for use in adjusting the CB88 input GAIN control(See #5 Input GAIN Control HH).12Quick Start - Single System SetupIn order for your wireless system to work correctly, both the receiver and transmitter must be set to the same channel.Follow this basic procedure for setting up and using your Concert 88 wireless system:Physically place the CR88 receiver where it will be used, and extend the anten-nas vertically. The general rule of thumb is to maintain “line of sight” between the receiver and transmitter so that the person using or wearing the transmitter can see the receiver.With the Power switch on and the CR88 power off, connect the included powers Select button to change channelQuick Start - Single System SetupWhen using multiple systems, each system must be set to a different operating channel. Transmitter and receiver pairs must be on the same channel plan in order to worktogether (See "Concert 88 Channel Plans" on page 20).When setting an additional transmitter, make sure to close all other transmitter bat-9. Press and h 8. Press button on transmitter to turn onThe CR88 receiver can be installed into a standard 19” rack for transport or per-manent installation using the included rack ears. Follow the simple steps below to mount the CR88:Attach the included rack ears by sliding each rack ear into the groove on either side of the CR88 until they lock into place, and the receiver flush with the front panel.Position the CR88 receiver into an available rack space and slide in until the rack ears are touching the rails of the rack case and are aligned with the rack rail holes.Mount the receiver into the rack using the appropriate size rack screws (not includ-ed). To ensure equal tension and balance when installing the receiver, you should secure screws in a crisscross pattern of opposite corners: top left -> bottom right -> top right -> bottom left.In order to mount two CR88 receiv-ers in one rack space, the system includes a center connection piece. Slide the center connection piece into the groove of each receiver and attach the short rack ears to each receiver. Mount the receivers into the rack using the crisscross pattern described above.Rack MountingGroup C 638-662 MHzGroup D542-566 MHzGroup F*863-865 MHzGroup G*606-630 MHzCh Freq Ch Freq Ch Freq Ch Freq0638.1250542.1250863.050 0606.125 1639.6251543.6251863.250 1607.625 2641.0502545.052863.550 2609.053642.4253546.4253863.750 3610.425 4642.9004546.9004864.050 4610.900 5645.5255549.5255864.250 5613.525 6647.1006551.1006864.550 6615.100 7648.4757552.4757864.750 7616.475 8650.0008554.0008864.950 8618.000 9652.0759556.0759620.075 A654.975A558.975A622.975 B655.975B559.975B623.975 C657.050C561.050C625.050 D658.975D562.975D626.975 E660.425E564.425E628.425 F661.975F565.975F629.975 Concert 88 Channel Plans* Not for use in the USA and Canada. For questions regarding available channels in your area contact your local Samson distributor.20Troubleshooting Issue SolutionsNo Audio Make sure that the transmitter and receiver are both powered on.Ensure the transmitter’s batteries are installed correctly. Check that the transmitter is not muted.Confirm that the CR88 adaptor is correctly connected and plugged into an electrical outlet.Turn on the CR88 receiver.Make sure the CR88 audio output connections are se-curely connected.Ensure that the receiver and transmitter are in line of sight with one another.Check the receiver and audio input device level controls. Ensure that the transmitter and receiver are set to the same operating channel. If unsure, reset the channel by performing an IR set.Distorted Audio The receiver output level or audio input device level may be too high.Check the transmitters batteries, and replace if low.The input gain on the transmitter (CB88) or audio source level may be too high.Audio Dropout The transmitter may be too far away from the receiver. Move it closer to the receiver, or reposition the antennas. Remove any sources that may cause RF interference such as cell phones, cordless phones, lighting equipment, com-puters, metal structures, etc.Receiver will not power on Check the adaptor to ensure it is properly connected and plugged into an outlet providing power.Transmitter will notpower on (LED lightsRED)Replace the transmitter batteries.Unwanted noise or interference If using multiple systems, make sure none of the systems are operating on the same channel. If the problem per-sists, change one or all of the systems channels.21Concert 88 Wireless SystemSpecifications SystemWorking Range 300' (100m) line of sightAudio Frequency Response 50 Hz - 15 kHzT.H.D. (Overall) <1% (@AF 1 kHz, RF 46 dBu) Dynamic Range >100 dB A-weightedSignal to Noise >90 dBOperating Temperature –10°C (14°F) to +60°C (+140°F) Tone Key Frequency 32.768 kHzCB88 Belt pack TransmitterInput Connector Mini-XLR (P3)Input Impedance 1MΩInput Gain Range 38 dBRF Power 10 mW EIRPPower Requirements Two AA (LR6) alkaline batteries Battery Life 8 hoursDimensions (HxLxD) 3.75" x 2.44" x 0.75"96mm x 62mm x 18.5mmWeight 0.2 lb / 93 gCH88 Handheld TransmitterMicrophone Element Q6 DynamicInput Gain Range 28 dBRF Power 10 mW EIRPPower Requirements Two AA (LR6) alkaline batteries Battery Life 8 hoursDimensions (HxØ) 10.23" x 2.1"260mm x 54mmWeight 0.48 lb / 218 gCR88 ReceiverAudio Output Level - Unbalanced +14 dBuAudio Output Level - Balanced +9 dBuAudio Output Impedance - Unbalanced 810 OhmsAudio Output Impedance - Balanced 240 OhmsSensitivity -100 dBm / 30 dB sinadImage Rejection >50 dBOperating Voltage 15 VDC 200mADimensions (LxWxH) 8.25" x 4.9" x 1.75"210mm x 125mm x 44mmWeight 0.85 lb / 388 gAt Samson, we are continually improving our products, therefore specifications and images are subject to change without notice.22This device complies with RSS-210 of Industry & Science Canada.Operation is subject to the following two conditions:(1) this device may not cause harmful interference and (2) this device must accept any interference received, including interference that may cause undesired operation.Hereby, Samson Technologies Corp., declares that this CR88, CH88, CB88 is in compliance with the essential requirements and other relevant provisions of Directive 1999/5/EC. The declaration of conformity may be consulted at/site_media/support/R&TTE_DOC/CONCERT_88_R&TTE_DOC.pdfSamson Technologies45 Gilpin AvenueHauppauge, New York 11788-8816 Phone: 1-800-3-SAMSON (1-800-372-6766)Fax: 631-784-2201。
DIN EN 15085-5
Diese Europäische Norm wurde vom CEN am 26. August 2007 angenommen.
Die CEN-Mitglieder sind gehalten, die CEN/CENELEC-Geschäftsordnung zu erfüllen, in der die Bedingungen festgelegt sind, unter denen dieser Europäischen Norm ohne jede Änderung der Status einer nationalen Norm zu geben ist. Auf dem letzten Stand befindliche Listen dieser nationalen Normen mit ihren bibliographischen Angaben sind beim Management-Zentrum des CEN oder bei jedem CEN-Mitglied auf Anfrage erhältlich.
DIN EN 15085-5
Januar 2008
D
Ersatzvermerk siehe unten
Bahnanwendungen – Schweißen von Schienenfahrzeugen und -fahrzeugteilen – Teil 5: Prüfung und Dokumentation; Deutsche Fassung EN 15085-5:2007
EUROPÄISCHE NORM EUROPEAN STANDARD NORME EUROPÉENNE
Zootopia疯狂动物城中英文对照台词
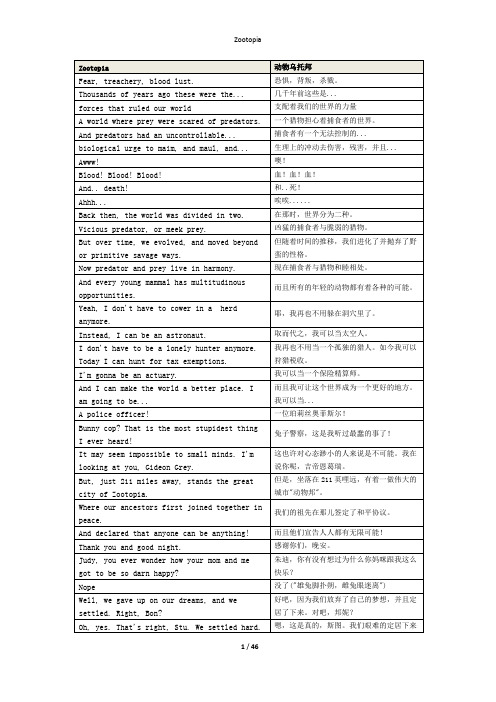
了。
You see, that's the beauty of complacency,Jude.你看,这就是这的好处,朱迪。
If you don't try anything new, you'll neverfail.如果你不尝试新事物,你就永远不会失败。
I like trying, actually.事实上我喜欢尝试。
What your father means, hon, is that it's gonna be difficult, impossible even...亲爱的,你爹地是指,对你而言成为警察可能会很艰难...- for you to become a police officer. -Right. There's never been a bunny cop.- No. - Bunnies don't do that.Well... Then I guess I'll have to be thefirst one.嗯...那么我想我必须是第一个了。
Because I am gonna make the world a betterplace!因为我要让世界变得更美好!Or, heck, you know. You wanna talk about making the world a better place,或者说,哎呀,你知道的。
你说你想让世界变成更好的地方,no better way to do it than becoming acarrot farmer.没有比做拔胡萝卜的更好的了。
Yes! Your dad, me, your 275 brothers andsisters.没错!你爹地、我和你的275个兄弟姊妹。
- We're changing the world. - Yeah.Carrot farming is a noble profession.拔萝卜是一个崇高的职业。
Mindray V Series 病患监控设备操作指南说明书

Mindray® is a registered trademark of Shenzhen Mindray Bio-Medical Electronics Co., Ltd.FilterLine® is a U.S. registered trademark of Oridion Medical Ltd.Microstream® is a U.S. registered trademark of Oridion Medical Ltd.Nellcor™ is a U.S. trademark of Nellcor Puritan Bennett Inc.Oxiband® is a U.S. registered trademark of Nellcor Puritan Bennett Inc.Durasensor® is a U.S. registered trademark of Nellcor Puritan Bennett Inc.OxiMax™ is a U.S. trademark of Nellcor Puritan Bennett Inc.Oxisensor® is a U.S. registered trademark of Nellcor Puritan Bennett Inc.Max-Fast™ is a trademark of Nellcor Puritan Bennett Inc.miniMediCO2® is a trademark or registered trademark of Oridion Medical Ltd.LNCS® is a U.S. registered trademark of Masimo Corp.LNOP® is a U.S. registered trademark of Masimo Corp.Masimo SET® is a U.S. registered trademark of Masimo Corp.Panorama™ is a U.S. trademark of Mindray, Inc.Edwards Vigilance® is a U.S. registered trademark of Edwards Lifesciences LLCCamino® is a registered trademark of Integra LifeSciences Corporation.Somanetics® and INVOS® are registered trademarks of Covidien.Copyright © Mindray DS USA, Inc., 2011-2016. All rights reserved. Contents of this publication may not be reproduced in any form without permission of Mindray DS USA, Inc.Table of ContentsForeword (xv)Warnings (xvi)Cautions (xxii)Notes (xxvi)Indications for Use (xxvii)Applied Parts (xxvii)Unpacking Information (xxviii)Warranty Statements (xxviii)Exemptions (xxix)Service (xxix)Manufacturer’s Responsibility (xxix)Company Contact (xxx)Symbols and Descriptions (xxxi)General Product Description.....................................................................................................................................1-1 General Product Description .............................................................................................................................................................................................1-2 V Series Monitoring Platform..................................................................................................................................................................................1-2Interfacing......................................................................................................................................................................................................................1-2 Key Features.............................................................................................................................................................................................................................1-3 V 12/V 21 Physical Views....................................................................................................................................................................................................1-4 Front View......................................................................................................................................................................................................................1-4Rear View........................................................................................................................................................................................................................1-6Left Side Panel..............................................................................................................................................................................................................1-8Right Side Panel...........................................................................................................................................................................................................1-9 V Dock Physical Views...........................................................................................................................................................................................................1-10 Back View........................................................................................................................................................................................................................1-10Right Side View.............................................................................................................................................................................................................1-11Left Side View................................................................................................................................................................................................................1-11VPS Physical Views......................................................................................................................................................................................................1-12 Getting Started...........................................................................................................................................................2-1 Introduction.............................................................................................................................................................................................................................2-2 Powering Unit On/Off...........................................................................................................................................................................................................2-2 Using the V 21 Touch Pad...................................................................................................................................................................................................2-3 Main Display.............................................................................................................................................................................................................................2-3 System Status Message.............................................................................................................................................................................................2-5Navigation Area...........................................................................................................................................................................................................2-6 Dialogs........................................................................................................................................................................................................................................2-8 List Box............................................................................................................................................................................................................................2-9 Alarm Icons and Messages..................................................................................................................................................................................................2-10 Alarm Icons....................................................................................................................................................................................................................2-10Parameter Messages..................................................................................................................................................................................................2-10 Keyboard Dialog.....................................................................................................................................................................................................................2-11 Using the Keyboard....................................................................................................................................................................................................2-11 Digital Keypad Dialog...........................................................................................................................................................................................................2-12 Using the Digital Keypad..........................................................................................................................................................................................2-12 Message Dialogs.....................................................................................................................................................................................................................2-12 Audio Levels Dialog...............................................................................................................................................................................................................2-13 Configuring Audio Levels.........................................................................................................................................................................................2-14 Battery Levels Dialog.............................................................................................................................................................................................................2-14 Battery Indicator Colors.............................................................................................................................................................................................2-15 System Information...............................................................................................................................................................................................................2-15 Display Setup..............................................................................................................................................................3-1 Introduction.............................................................................................................................................................................................................................3-2Table of ContentsDisplay Options Dialog.........................................................................................................................................................................................................3-2 Navigating to the Display Options Dialog..........................................................................................................................................................3-2Configuring Display Presets....................................................................................................................................................................................3-4Editing a Display Preset.............................................................................................................................................................................................3-9Locking/Unlocking Presets......................................................................................................................................................................................3-10 Temporarily Editing a Locked Display Preset....................................................................................................................................................3-11 Restoring a Temporary Preset.................................................................................................................................................................................3-12 Copying and Pasting a Display Preset.................................................................................................................................................................3-12 Renaming a Preset......................................................................................................................................................................................................3-13 Renaming an Empty Preset......................................................................................................................................................................................3-13 Deleting a Preset..........................................................................................................................................................................................................3-14 Overlapping Waveform.............................................................................................................................................................................................3-14 Changing IBP Waveform Overlap Settings.........................................................................................................................................................3-15 Undoing an IBP Waveform Overlap......................................................................................................................................................................3-15 Displaying NIBP Digital Tile in Large Font..........................................................................................................................................................3-16 Privacy Mode.................................................................................................................................................................................................................3-17 Screen Lock Mode.......................................................................................................................................................................................................3-17 Standby Mode..............................................................................................................................................................................................................3-17 Discharge Mode...........................................................................................................................................................................................................3-17 View All ECG Mode......................................................................................................................................................................................................3-17 Changing Lead/Size....................................................................................................................................................................................................3-18 Touch Screen Calibration.........................................................................................................................................................................................3-18 Display Options Troubleshooting....................................................................................................................................................................................3-20 Mechanical Functions.................................................................................................................................................4-1 Introduction.............................................................................................................................................................................................................................4-2 V 12..............................................................................................................................................................................................................................................4-2 V 12 Docking.................................................................................................................................................................................................................4-2V 12 Undocking............................................................................................................................................................................................................4-3Battery Installation......................................................................................................................................................................................................4-4Battery Removal...........................................................................................................................................................................................................4-6Battery Charge Checking..........................................................................................................................................................................................4-8Module Installation.....................................................................................................................................................................................................4-9Module Indicator Lights............................................................................................................................................................................................4-10 Module Removal..........................................................................................................................................................................................................4-11 V Dock.........................................................................................................................................................................................................................................4-12 V Dock Mounting.........................................................................................................................................................................................................4-12 V Dock Dismounting..................................................................................................................................................................................................4-14 V 21..............................................................................................................................................................................................................................................4-15 V 21 Docking.................................................................................................................................................................................................................4-15 V 21 Undocking............................................................................................................................................................................................................4-16 V Hub..........................................................................................................................................................................................................................................4-17 V Hub Mounting...........................................................................................................................................................................................................4-17 V Hub Dismounting....................................................................................................................................................................................................4-17 Module Installation.....................................................................................................................................................................................................4-17 Module Removal..........................................................................................................................................................................................................4-18 Module Locking...........................................................................................................................................................................................................4-19 Module Unlocking.......................................................................................................................................................................................................4-19 V Hub Status Indicators.............................................................................................................................................................................................4-20 Connecting the V Hub to the V 12/V 21..............................................................................................................................................................4-21 Rolling Stand............................................................................................................................................................................................................................4-23 Thermal Recorder...................................................................................................................................................................................................................4-26 Installing the Thermal Recorder Paper................................................................................................................................................................4-26Table of ContentsMechanical Functions Troubleshooting........................................................................................................................................................................4-28 Module Configuration................................................................................................................................................5-1 Module Status Dialog............................................................................................................................................................................................................5-2 Navigating to the Module Status Dialog............................................................................................................................................................5-3Enabling/Disabling a Module..................................................................................................................................................................................5-3Changing an IBP or Temperature Module Channel........................................................................................................................................5-3Changing VDI Modes.................................................................................................................................................................................................5-4V 12/V 21 V Hub Module Limitations...................................................................................................................................................................5-5V 12/V 21 Module Limitations.................................................................................................................................................................................5-5 VPS Synchronization.............................................................................................................................................................................................................5-6 Buttons on VPS.............................................................................................................................................................................................................5-6VPS Synchronization: Mismatched Patient IDs.................................................................................................................................................5-6VPS Synchronization: Same Patient IDs...............................................................................................................................................................5-7VPS Synchronization Failures..................................................................................................................................................................................5-7 Module Configuration Troubleshooting........................................................................................................................................................................5-8 Patient Management..................................................................................................................................................6-1 Introduction.............................................................................................................................................................................................................................6-2 Patient Info Dialog.................................................................................................................................................................................................................6-2 Navigating to the Patient Info Dialog..................................................................................................................................................................6-2Admitting a Patient.....................................................................................................................................................................................................6-3Patient Demographics ..............................................................................................................................................................................................6-3Patient Room and Bed...............................................................................................................................................................................................6-5Discharging a Patient.................................................................................................................................................................................................6-6Clearing Patient History............................................................................................................................................................................................6-7Placing a Patient in Standby....................................................................................................................................................................................6-7Exiting the Standby Mode........................................................................................................................................................................................6-7 Patient Management Troubleshooting..........................................................................................................................................................................6-8 Alarm Behavior...........................................................................................................................................................7-1 General Alarm Behavior.......................................................................................................................................................................................................7-2 Physiological Alarms.............................................................................................................................................................................................................7-2 Alarm Behaviors...........................................................................................................................................................................................................7-2Alarm Options...............................................................................................................................................................................................................7-2Physiological Alarm Responses..............................................................................................................................................................................7-3 Technical Alarms.....................................................................................................................................................................................................................7-4 Alarm Behaviors...........................................................................................................................................................................................................7-4 Alarms .........................................................................................................................................................................8-1 Alarms ........................................................................................................................................................................................................................................8-2 Navigating to the Alarms Dialogs..........................................................................................................................................................................8-2 Alarm Limits..............................................................................................................................................................................................................................8-2 Configuring Alarm Limits..........................................................................................................................................................................................8-2Factory Default Alarm Limits...................................................................................................................................................................................8-5Auto-Set All Alarms Button......................................................................................................................................................................................8-10Restore All Defaults Button......................................................................................................................................................................................8-10 Alarm Responses....................................................................................................................................................................................................................8-11 Understanding Alarm Levels...................................................................................................................................................................................8-11Characteristics of Visual Alarm Signals................................................................................................................................................................8-11Factory Default Alarm Priorities between Alarm Types.................................................................................................................................8-11Configuring Alarm Levels.........................................................................................................................................................................................8-13Understanding Alarm Response Settings...........................................................................................................................................................8-13Configuring Alarm Response Settings.................................................................................................................................................................8-13Factory Default Alarm Settings...............................................................................................................................................................................8-14 Arrhythmia Alarms.................................................................................................................................................................................................................8-17。
苏州猫的天空之城之营销分析
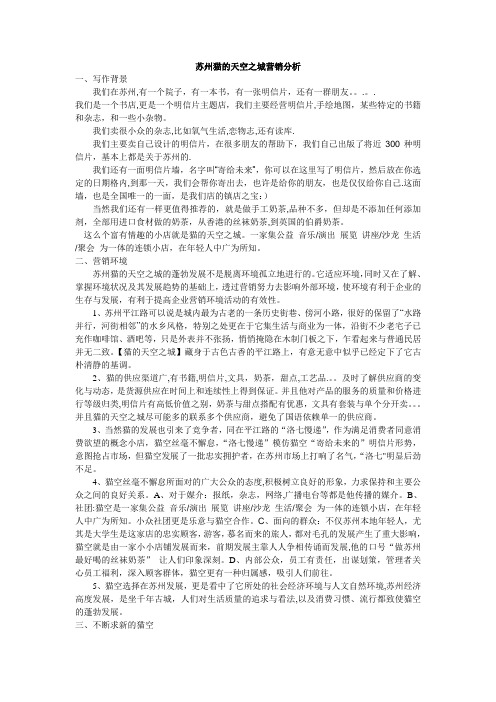
苏州猫的天空之城营销分析一、写作背景我们在苏州,有一个院子,有一本书,有一张明信片,还有一群朋友。
.。
.我们是一个书店,更是一个明信片主题店,我们主要经营明信片,手绘地图,某些特定的书籍和杂志,和一些小杂物。
我们卖很小众的杂志,比如氧气生活,恋物志,还有读库.我们主要卖自己设计的明信片,在很多朋友的帮助下,我们自己出版了将近300种明信片,基本上都是关于苏州的.我们还有一面明信片墙,名字叫“寄给未来”,你可以在这里写了明信片,然后放在你选定的日期格内,到那一天,我们会帮你寄出去,也许是给你的朋友,也是仅仅给你自己.这面墙,也是全国唯一的一面,是我们店的镇店之宝:)当然我们还有一样更值得推荐的,就是做手工奶茶,品种不多,但却是不添加任何添加剂,全部用进口食材做的奶茶,从香港的丝袜奶茶,到英国的伯爵奶茶。
这么个富有情趣的小店就是猫的天空之城。
一家集公益音乐/演出展览讲座/沙龙生活/聚会为一体的连锁小店,在年轻人中广为所知。
二、营销环境苏州猫的天空之城的蓬勃发展不是脱离环境孤立地进行的。
它适应环境,同时又在了解、掌握环境状况及其发展趋势的基础上,透过营销努力去影响外部环境,使环境有利于企业的生存与发展,有利于提高企业营销环境活动的有效性。
1、苏州平江路可以说是城内最为古老的一条历史街巷、傍河小路,很好的保留了“水路并行,河街相邻”的水乡风格,特别之处更在于它集生活与商业为一体,沿街不少老宅子已充作咖啡馆、酒吧等,只是外表并不张扬,悄悄掩隐在木制门板之下,乍看起来与普通民居并无二致。
【猫的天空之城】藏身于古色古香的平江路上,有意无意中似乎已经定下了它古朴清静的基调。
2、猫的供应渠道广,有书籍,明信片,文具,奶茶,甜点,工艺品.。
及时了解供应商的变化与动态,是货源供应在时间上和连续性上得到保证。
并且他对产品的服务的质量和价格进行等级归类,明信片有高低价值之别,奶茶与甜点搭配有优惠,文具有套装与单个分开卖。
GTA5_抢劫最佳人选、刷股流程、实用技巧经验
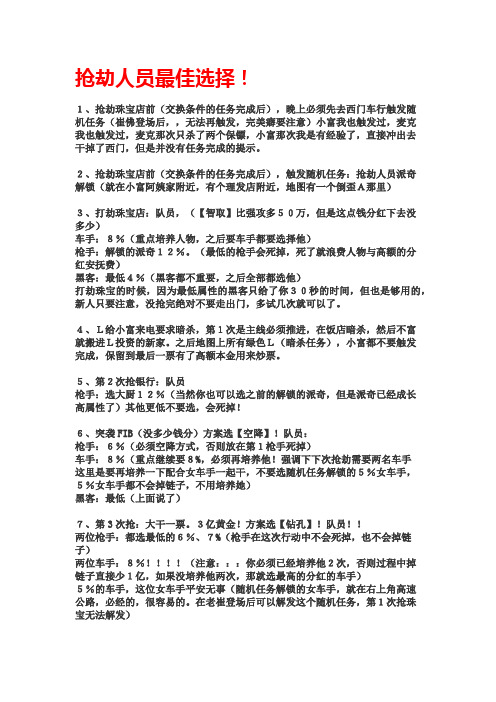
抢劫人员最佳选择!1、抢劫珠宝店前(交换条件的任务完成后),晚上必须先去西门车行触发随机任务(崔佛登场后,,无法再触发,完美癖要注意)小富我也触发过,麦克我也触发过,麦克那次只杀了两个保镖,小富那次我是有经验了,直接冲出去干掉了西门,但是并没有任务完成的提示。
2、抢劫珠宝店前(交换条件的任务完成后),触发随机任务:抢劫人员派奇解锁(就在小富阿姨家附近,有个理发店附近,地图有一个倒歪A那里)3、打劫珠宝店:队员,(【智取】比强攻多50万,但是这点钱分红下去没多少)车手:8%(重点培养人物,之后要车手都要选择他)枪手:解锁的派奇12%。
(最低的枪手会死掉,死了就浪费人物与高额的分红安抚费)黑客:最低4%(黑客都不重要,之后全部都选他)打劫珠宝的时候,因为最低属性的黑客只给了你30秒的时间,但也是够用的,新人只要注意,没抢完绝对不要走出门,多试几次就可以了。
4、L给小富来电要求暗杀,第1次是主线必须推进,在饭店暗杀,然后不富就搬进L投资的新家。
之后地图上所有绿色L(暗杀任务),小富都不要触发完成,保留到最后一票有了高额本金用来炒票。
5、第2次抢银行:队员枪手:选大厨12%(当然你也可以选之前的解锁的派奇,但是派奇已经成长高属性了)其他更低不要选,会死掉!6、突袭FIB(没多少钱分)方案选【空降】!队员:枪手:6%(必须空降方式,否则放在第1枪手死掉)车手:8%(重点继续要8%,必须再培养他!强调下下次抢劫需要两名车手这里是要再培养一下配合女车手一起干,不要选随机任务解锁的5%女车手,5%女车手都不会掉链子,不用培养她)黑客:最低(上面说了)7、第3次抢:大干一票。
3亿黄金!方案选【钻孔】!队员!!两位枪手:都选最低的6%、7%(枪手在这次行动中不会死掉,也不会掉链子)两位车手:8%!!!!(注意:::你必须已经培养他2次,否则过程中掉链子直接少1亿,如果没培养他两次,那就选最高的分红的车手)5%的车手,这位女车手平安无事(随机任务解锁的女车手,就在右上角高速公路,必经的,很容易的。
深圳万象城全楼层品牌数据库
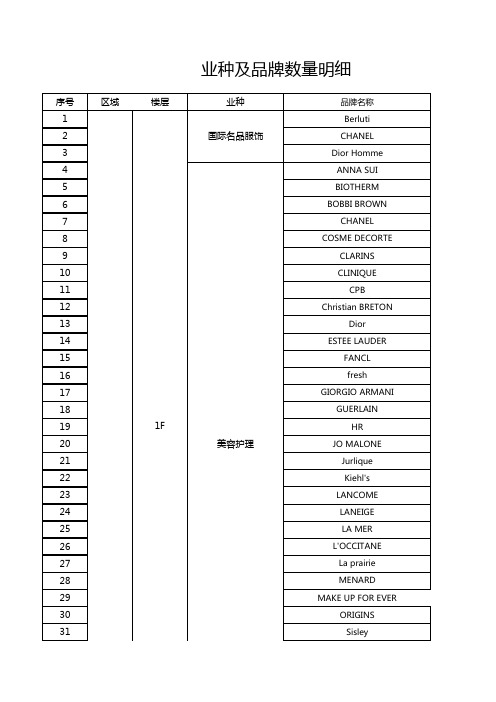
102 103 104 105 106 107 108 109 110 111 112 113 114 115 116 117 118 119 120 121 122 123 124 125 126 127 128 129 130 131 132 133 134 135 136 美食餐饮 旅行箱包 4F 女士时装/饰品
172 173 174 175 176 177 17 188 189 190 191 192 193 194 195 196 197 198 199 200 201 202 203 204 205 206 1F 国际名品服饰 美食餐饮 B1F 女鞋
137 138 139 140 141 142 143 144 145 146 147 148 149 150 151 152 153 154 155 156 157 158 159 160 161 162 163 164 165 166 167 168 169 170 171 辅助业种 6F 女士内衣/饰品 5F 女士内衣/饰品
242 243 244 245 246 247 248 249 250 251 252 253 254 255 256 257 258 259 260 261 262 263 264 265 266 267 268 269 270 271 272 273 274 275 276 男士时装/饰品 4F 男士时装/饰品
丽婴房 十月妈咪 天然素彩 英氏 Adidas baby Agabang Gallery Bonnie baby CAN KIDS FIRST FLAG Hallmark Kingkow baby Oilily Tartine et chocolat GEOX Jeep Naturino New balancce kids Pediped Polo Ralph Lauren 斯凯奇 月星 奥迪 芭比 读书郎 孩之宝 乐高 木马智慧 智高 Artso PAIDI COCOYOYO儿童理发 瑞思学科英语 ADIDAS KIDS allo&Lugh ARMANI JUNIOR
微电影不是长广告——专访玉兰墙纸销售总监王健航
电影这 种免 费、 短小 精 悍 、 活的传 播 形式 , 蜓符 合 成 为业 内最 重 要 的营 销方 式 , 类 品牌 介 业争 十 试 水 各 H
劁 障 米 “ 救命 ” j小脱 。 障房 与 普通 住 宅 代 人 的收视 心卯 , ,i 保 尤其 受到 年 人 的东崃 电影 迅 速 微 小来 就 属 丁两 个 层 次 的客 户群 体 , 此 企 业 还 须 根
内容 是 微 电影 成 功 关键
到 电影 依 然 需 要 内容 为工 。 电影 在 经 历 了井 喷 似 的 微
张艺谋 声 称 自己在 经 历 了这 么多 年之后 , 于认识 是 玉 兰墙纸 与消 费者情 感 沟通 的一种体 现 。 终 ” 疯 j之 后, 们也 渐 渐趋 于理 智 : 于 人 对品牌 或产 品而 言, 做 电影虽 然 省钱 、 传播 、 好 门槛低 , 妤 看才足 王 道 , 电 但 微
仿H
I, 得 J 品I 六使 质化 脱 象 非常严 重 , 纸市 场 2)1 约 仃2 o  ̄ 微 电影 作 品相继 问世 . 1 : 墙 ( 年, I o ot ; .
整 个 家居 ”业 郁面 l 临一个 ‘ 同 有 其 内存 的 必然 他 认为微 电 影 营销 之 所 以大
然 醒悟 。 挽救 婚 娴 爱情 , 爱重 新 ‘ 色 ” 男主 人公 想要 传播 的品牌 有深 刻 的认 识 , 为 为 上 , 剧情 和品牌 结合 紧密 , 开始 寻 找代 表 曾经 美好 爱情 回忆 的墙 纸 的历 程 。 过 才 能策 划好 一部好 的微 电影 。 透 否则就会 走 向两种 极端 ,
者带来 的价 值体 脱 , 这一 点很 重要 , 时候 往 花 费几 有
个月的时 问 、 卜 长 篇大 论 的公 关稿 件 , 不如微 电 几 篇 都
Native Instruments MASCHINE MK3 用户手册说明书
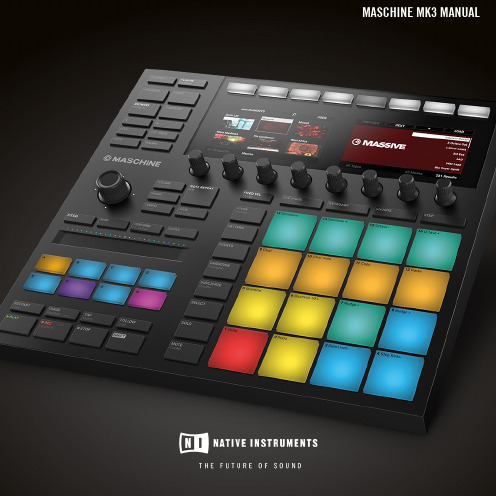
The information in this document is subject to change without notice and does not represent a commitment on the part of Native Instruments GmbH. The software described by this docu-ment is subject to a License Agreement and may not be copied to other media. No part of this publication may be copied, reproduced or otherwise transmitted or recorded, for any purpose, without prior written permission by Native Instruments GmbH, hereinafter referred to as Native Instruments.“Native Instruments”, “NI” and associated logos are (registered) trademarks of Native Instru-ments GmbH.ASIO, VST, HALion and Cubase are registered trademarks of Steinberg Media Technologies GmbH.All other product and company names are trademarks™ or registered® trademarks of their re-spective holders. Use of them does not imply any affiliation with or endorsement by them.Document authored by: David Gover and Nico Sidi.Software version: 2.6.11 (11/2017)Hardware version: MASCHINE MK3Special thanks to the Beta Test Team, who were invaluable not just in tracking down bugs, but in making this a better product.NATIVE INSTRUMENTS GmbH Schlesische Str. 29-30D-10997 Berlin Germanywww.native-instruments.de NATIVE INSTRUMENTS North America, Inc. 6725 Sunset Boulevard5th FloorLos Angeles, CA 90028USANATIVE INSTRUMENTS K.K.YO Building 3FJingumae 6-7-15, Shibuya-ku, Tokyo 150-0001Japanwww.native-instruments.co.jp NATIVE INSTRUMENTS UK Limited 18 Phipp StreetLondon EC2A 4NUUKNATIVE INSTRUMENTS FRANCE SARL 113 Rue Saint-Maur75011 ParisFrance SHENZHEN NATIVE INSTRUMENTS COMPANY Limited 203B & 201B, Nanshan E-Commerce Base Of Innovative ServicesShi Yun Road, Shekou, Nanshan, Shenzhen China© NATIVE INSTRUMENTS GmbH, 2017. All rights reserved.Table of Contents1Welcome to MASCHINE (23)1.1MASCHINE Documentation (24)1.2Document Conventions (25)1.3New Features in MASCHINE 2.6.11 (27)2Basic Concepts (29)2.1Important Names and Concepts (29)2.2Adjusting the MASCHINE User Interface (32)2.2.1Adjusting the Size of the Interface (32)2.2.2Switching between Ideas View and Arranger View (33)2.2.3Showing/Hiding the Browser (34)2.2.4Minimizing the Mixer (34)2.2.5Showing/Hiding the Control Lane (35)2.3Common Operations (36)2.3.1Using the 4-Directional Push Encoder (36)2.3.2Pinning a Mode on the Controller (37)2.3.3Pinning a Mode on the Controller (38)2.3.4Undo/Redo (39)2.3.5List Overlay for Selectors (41)2.3.6Zoom and Scroll Overlays (42)2.3.7Focusing on a Group or a Sound (42)2.3.8Switching Between the Master, Group, and Sound Level (47)2.3.9Navigating Channel Properties, Plug-ins, and Parameter Pages in the Control Area.482.3.9.1Extended Navigate Mode on Your Controller (53)2.3.10Using Two or More Hardware Controllers (56)2.3.11Touch Auto-Write Option (58)2.4Native Kontrol Standard (60)2.5Stand-Alone and Plug-in Mode (62)2.5.1Differences between Stand-Alone and Plug-in Mode (62)2.5.2Switching Instances (63)2.5.3Controlling Various Instances with Different Controllers (64)2.6Preferences (65)2.6.1Preferences – General Page (66)2.6.2Preferences – Audio Page (70)2.6.3Preferences – MIDI Page (74)2.6.4Preferences – Default Page (77)2.6.5Preferences – Library Page (81)2.6.6Preferences – Plug-ins Page (89)2.6.7Preferences – Hardware Page (94)2.6.8Preferences – Colors Page (98)2.7Integrating MASCHINE into a MIDI Setup (100)2.7.1Connecting External MIDI Equipment (100)2.7.2Sync to External MIDI Clock (101)2.7.3Send MIDI Clock (102)2.8Syncing MASCHINE using Ableton Link (103)2.8.1Connecting to a Network (103)2.8.2Joining and Leaving a Link Session (103)2.9Using a Pedal with the MASCHINE Controller (105)2.10File Management on the MASCHINE Controller (105)3Browser (107)3.1Browser Basics (107)3.1.1The MASCHINE Library (107)3.1.2Browsing the Library vs. Browsing Your Hard Disks (108)3.2Searching and Loading Files from the Library (109)3.2.1Overview of the LIBRARY Pane (109)3.2.2Selecting or Loading a Product and Selecting a Bank from the Browser (114)3.2.2.1Browsing by Product Category Using MASCHINE MK3 (118)3.2.2.2Browsing by Product Vendor Using MASCHINE MK3 (119)3.2.3Selecting a Product Category, a Product, a Bank, and a Sub-Bank (119)3.2.3.1Selecting a Product Category, a Product, a Bank, and a Sub-Bank on theController (124)3.2.4Selecting a File Type (125)3.2.5Choosing Between Factory and User Content (126)3.2.6Selecting Type and Mode Tags (127)3.2.7List and Tag Overlays in the Browser (133)3.2.8Performing a Text Search (135)3.2.9Loading a File from the Result List (135)3.3Additional Browsing Tools (140)3.3.1Loading the Selected Files Automatically (140)3.3.2Auditioning Instrument Presets (142)3.3.3Auditioning Samples (143)3.3.4Loading Groups with Patterns (144)3.3.5Loading Groups with Routing (145)3.3.6Displaying File Information (145)3.4Using Favorites in the Browser (146)3.5Editing the Files’ Tags and Properties (152)3.5.1Attribute Editor Basics (152)3.5.2The BANK Page (154)3.5.3The TYPES and MODES Pages (155)3.5.4The PROPERTIES Page (157)3.6Loading and Importing Files from Your File System (158)3.6.1Overview of the FILES Pane (158)3.6.2Using Favorites (160)3.6.3Using the Location Bar (161)3.6.4Navigating to Recent Locations (162)3.6.5Using the Result List (163)3.6.6Importing Files to the MASCHINE Library (166)3.7Locating Missing Samples (168)3.8Using Quick Browse (170)4Managing Sounds, Groups, and Your Project (175)4.1Overview of the Sounds, Groups, and Master (175)4.1.1The Sound, Group, and Master Channels (176)4.1.2Similarities and Differences in Handling Sounds and Groups (177)4.1.3Selecting Multiple Sounds or Groups (178)4.2Managing Sounds (183)4.2.1Loading Sounds (185)4.2.2Pre-listening to Sounds (186)4.2.3Renaming Sound Slots (187)4.2.4Changing the Sound’s Color (187)4.2.5Saving Sounds (189)4.2.6Copying and Pasting Sounds (191)4.2.7Moving Sounds (194)4.2.8Resetting Sound Slots (196)4.3Managing Groups (197)4.3.1Creating Groups (198)4.3.2Loading Groups (200)4.3.3Renaming Groups (201)4.3.4Changing the Group’s Color (201)4.3.5Saving Groups (203)4.3.6Copying and Pasting Groups (205)4.3.7Reordering Groups (208)4.3.8Deleting Groups (209)4.4Exporting MASCHINE Objects and Audio (210)4.4.1Saving a Group with its Samples (211)4.4.2Saving a Project with its Samples (212)4.4.3Exporting Audio (214)4.5Importing Third-Party File Formats (221)4.5.1Loading REX Files into Sound Slots (221)4.5.2Importing MPC Programs to Groups (222)5Playing on the Controller (226)5.1Adjusting the Pads (226)5.1.1The Pad View in the Software (226)5.1.2Choosing a Pad Input Mode (228)5.1.3Adjusting the Base Key (231)5.1.4Using Choke Groups (233)5.1.5Using Link Groups (235)5.2Adjusting the Key, Choke, and Link Parameters for Multiple Sounds (238)5.3Adjusting the Base Key (239)5.4Playing Tools (240)5.4.1Mute and Solo (241)5.4.2Choke All Notes (245)5.4.3Groove (246)5.4.4Level, Tempo, Tune, and Groove Shortcuts on Your Controller (248)5.4.5Tap Tempo (252)5.5Performance Features (253)5.5.1Overview of the Perform Features (253)5.5.2Selecting a Scale and Creating Chords (256)5.5.3Scale and Chord Parameters (256)5.5.4Creating Arpeggios and Repeated Notes (262)5.5.5Swing on Note Repeat / Arp Output (267)5.6Using Lock Snapshots (268)5.6.1Creating a Lock Snapshot (268)5.6.2Using Extended Lock (269)5.6.3Updating a Lock Snapshot (269)5.6.4Recalling a Lock Snapshot (270)5.6.5Morphing Between Lock Snapshots (270)5.6.6Deleting a Lock Snapshot (271)5.6.7Triggering Lock Snapshots via MIDI (272)5.7Using the Smart Strip (274)5.7.1Pitch Mode (274)5.7.2Modulation Mode (275)5.7.3Perform Mode (275)5.7.4Notes Mode (276)6Working with Plug-ins (277)6.1Plug-in Overview (277)6.1.1Plug-in Basics (277)6.1.2First Plug-in Slot of Sounds: Choosing the Sound’s Role (281)6.1.3Loading, Removing, and Replacing a Plug-in (281)6.1.3.1Browser Plug-in Slot Selection (287)6.1.4Adjusting the Plug-in Parameters (290)6.1.5Bypassing Plug-in Slots (290)6.1.6Using Side-Chain (292)6.1.7Moving Plug-ins (292)6.1.8Alternative: the Plug-in Strip (294)6.1.9Saving and Recalling Plug-in Presets (294)6.1.9.1Saving Plug-in Presets (295)6.1.9.2Recalling Plug-in Presets (296)6.1.9.3Removing a Default Plug-in Preset (297)6.2The Sampler Plug-in (298)6.2.1Page 1: Voice Settings / Engine (300)6.2.2Page 2: Pitch / Envelope (302)6.2.3Page 3: FX / Filter (305)6.2.4Page 4: Modulation (307)6.2.5Page 5: LFO (309)6.2.6Page 6: Velocity / Modwheel (311)6.3Using Native Instruments and External Plug-ins (313)6.3.1Opening/Closing Plug-in Windows (313)6.3.2Using the VST/AU Plug-in Parameters (316)6.3.3Setting Up Your Own Parameter Pages (317)6.3.4Using VST/AU Plug-in Presets (322)6.3.5Multiple-Output Plug-ins and Multitimbral Plug-ins (325)7Working with Patterns (326)7.1Pattern Basics (326)7.1.1Pattern Editor Overview (327)7.1.2Navigating the Event Area (333)7.1.3Following the Playback Position in the Pattern (335)7.1.4Jumping to Another Playback Position in the Pattern (337)7.1.5Group View and Keyboard View (338)7.1.6Adjusting the Arrange Grid and the Pattern Length (341)7.1.7Adjusting the Step Grid and the Nudge Grid (344)7.2Recording Patterns in Real Time (349)7.2.1Recording Your Patterns Live (349)7.2.2The Record Prepare Mode (352)7.2.3Using the Metronome (353)7.2.4Recording with Count-in (354)7.2.5Quantizing while Recording (356)7.3Recording Patterns with the Step Sequencer (356)7.3.1Step Mode Basics (356)7.3.2Editing Events in Step Mode (359)7.3.3Recording Modulation in Step Mode (361)7.4Editing Events (361)7.4.1Editing Events with the Mouse: an Overview (362)7.4.2Creating Events/Notes (365)7.4.3Selecting Events/Notes (366)7.4.4Editing Selected Events/Notes (372)7.4.5Deleting Events/Notes (378)7.4.6Cut, Copy, and Paste Events/Notes (381)7.4.7Quantizing Events/Notes (383)7.4.8Quantization While Playing (385)7.4.9Doubling a Pattern (386)7.4.10Adding Variation to Patterns (387)7.5Recording and Editing Modulation (391)7.5.1Which Parameters Are Modulatable? (392)7.5.2Recording Modulation (393)7.5.3Creating and Editing Modulation in the Control Lane (395)7.6Creating MIDI Tracks from Scratch in MASCHINE (401)7.7Managing Patterns (403)7.7.1The Pattern Manager and Pattern Mode (403)7.7.2Selecting Patterns and Pattern Banks (406)7.7.3Creating Patterns (408)7.7.4Deleting Patterns (410)7.7.5Creating and Deleting Pattern Banks (411)7.7.6Naming Patterns (413)7.7.7Changing the Pattern’s Color (415)7.7.8Duplicating, Copying, and Pasting Patterns (416)7.7.9Moving Patterns (419)7.7.10Adjusting Pattern Length in Fine Increments (420)7.8Importing/Exporting Audio and MIDI to/from Patterns (421)7.8.1Exporting Audio from Patterns (421)7.8.2Exporting MIDI from Patterns (422)7.8.3Importing MIDI to Patterns (425)8Audio Routing, Remote Control, and Macro Controls (434)8.1Audio Routing in MASCHINE (435)8.1.1Sending External Audio to Sounds (436)8.1.2Configuring the Main Output of Sounds and Groups (441)8.1.3Setting Up Auxiliary Outputs for Sounds and Groups (446)8.1.4Configuring the Master and Cue Outputs of MASCHINE (450)8.1.5Mono Audio Inputs (456)8.1.5.1Configuring External Inputs for Sounds in Mix View (457)8.2Using MIDI Control and Host Automation (461)8.2.1Triggering Sounds via MIDI Notes (462)8.2.2Triggering Scenes via MIDI (469)8.2.3Controlling Parameters via MIDI and Host Automation (471)8.2.4Selecting VST/AU Plug-in Presets via MIDI Program Change (479)8.2.5Sending MIDI from Sounds (480)8.3Creating Custom Sets of Parameters with the Macro Controls (484)8.3.1Macro Control Overview (485)8.3.2Assigning Macro Controls Using the Software (486)8.3.3Assigning Macro Controls Using the Controller (492)9Controlling Your Mix (494)9.1Mix View Basics (494)9.1.1Switching between Arrange View and Mix View (494)9.1.2Mix View Elements (495)9.2The Mixer (497)9.2.1Displaying Groups vs. Displaying Sounds (498)9.2.2Adjusting the Mixer Layout (500)9.2.3Selecting Channel Strips (501)9.2.4Managing Your Channels in the Mixer (502)9.2.5Adjusting Settings in the Channel Strips (504)9.2.6Using the Cue Bus (508)9.3The Plug-in Chain (510)9.4The Plug-in Strip (511)9.4.1The Plug-in Header (513)9.4.2Panels for Drumsynths and Internal Effects (515)9.4.3Panel for the Sampler (516)9.4.4Custom Panels for Native Instruments Plug-ins (519)9.4.5Undocking a Plug-in Panel (Native Instruments and External Plug-ins Only) (523)9.5Controlling Your Mix from the Controller (525)9.5.1Navigating Your Channels in Mix Mode (526)9.5.2Adjusting the Level and Pan in Mix Mode (527)9.5.3Mute and Solo in Mix Mode (528)9.5.4Plug-in Icons in Mix Mode (528)10Using the Drumsynths (529)10.1Drumsynths – General Handling (530)10.1.1Engines: Many Different Drums per Drumsynth (530)10.1.2Common Parameter Organization (530)10.1.3Shared Parameters (533)10.1.4Various Velocity Responses (533)10.1.5Pitch Range, Tuning, and MIDI Notes (533)10.2The Kicks (534)10.2.1Kick – Sub (536)10.2.2Kick – Tronic (538)10.2.3Kick – Dusty (541)10.2.4Kick – Grit (542)10.2.5Kick – Rasper (545)10.2.6Kick – Snappy (546)10.2.7Kick – Bold (548)10.2.8Kick – Maple (550)10.2.9Kick – Push (551)10.3The Snares (553)10.3.1Snare – Volt (555)10.3.2Snare – Bit (557)10.3.3Snare – Pow (559)10.3.4Snare – Sharp (560)10.3.5Snare – Airy (562)10.3.6Snare – Vintage (564)10.3.7Snare – Chrome (566)10.3.8Snare – Iron (568)10.3.9Snare – Clap (570)10.3.10Snare – Breaker (572)10.4The Hi-hats (574)10.4.1Hi-hat – Silver (575)10.4.2Hi-hat – Circuit (577)10.4.3Hi-hat – Memory (579)10.4.4Hi-hat – Hybrid (581)10.4.5Creating a Pattern with Closed and Open Hi-hats (583)10.5The Toms (584)10.5.1Tom – Tronic (586)10.5.2Tom – Fractal (588)10.5.3Tom – Floor (592)10.5.4Tom – High (594)10.6The Percussions (595)10.6.1Percussion – Fractal (597)10.6.2Percussion – Kettle (600)10.6.3Percussion – Shaker (602)10.7The Cymbals (606)10.7.1Cymbal – Crash (608)10.7.2Cymbal – Ride (610)11Using the Bass Synth (613)11.1Bass Synth – General Handling (614)11.1.1Parameter Organization (614)11.1.2Bass Synth Parameters (616)12Using Effects (618)12.1Applying Effects to a Sound, a Group or the Master (618)12.1.1Adding an Effect (618)12.1.2Other Operations on Effects (627)12.1.3Using the Side-Chain Input (629)12.2Applying Effects to External Audio (632)12.2.1Step 1: Configure MASCHINE Audio Inputs (632)12.2.2Step 2: Set up a Sound to Receive the External Input (635)12.2.3Step 3: Load an Effect to Process an Input (637)12.3Creating a Send Effect (639)12.3.1Step 1: Set Up a Sound or Group as Send Effect (639)12.3.2Step 2: Route Audio to the Send Effect (644)12.3.3 A Few Notes on Send Effects (646)12.4Creating Multi-Effects (647)13Effect Reference (650)13.1Dynamics (651)13.1.1Compressor (651)13.1.2Gate (655)13.1.3Transient Master (659)13.1.4Limiter (661)13.1.5Maximizer (665)13.2Filtering Effects (668)13.2.1EQ (668)13.2.2Filter (671)13.2.3Cabinet (675)13.3Modulation Effects (676)13.3.1Chorus (676)13.3.2Flanger (678)13.3.3FM (680)13.3.4Freq Shifter (681)13.3.5Phaser (683)13.4Spatial and Reverb Effects (685)13.4.1Ice (685)13.4.2Metaverb (687)13.4.3Reflex (688)13.4.4Reverb (Legacy) (690)13.4.5Reverb (692)13.4.5.1Reverb Room (692)13.4.5.2Reverb Hall (695)13.4.5.3Plate Reverb (698)13.5Delays (700)13.5.1Beat Delay (700)13.5.2Grain Delay (703)13.5.3Grain Stretch (705)13.5.4Resochord (707)13.6Distortion Effects (709)13.6.1Distortion (709)13.6.2Lofi (711)13.6.3Saturator (713)13.6.4Analog Distortion (716)13.7Perform FX (718)13.7.1Filter (719)13.7.2Flanger (721)13.7.3Burst Echo (724)13.7.4Reso Echo (726)13.7.5Ring (729)13.7.6Stutter (731)13.7.7Tremolo (734)13.7.8Scratcher (737)14Working with the Arranger (740)14.1Arranger Basics (740)14.1.1Navigating the Arranger (743)14.1.2Following the Playback Position in Your Project (745)14.1.3Jumping to Other Sections (746)14.2Using Ideas View (748)14.2.1Scene Overview (748)14.2.2Creating Scenes (750)14.2.3Assigning and Removing Patterns (751)14.2.4Selecting Scenes (755)14.2.5Deleting Scenes (757)14.2.6Creating and Deleting Scene Banks (758)14.2.7Clearing Scenes (759)14.2.8Duplicating Scenes (759)14.2.9Reordering Scenes (761)14.2.10Making Scenes Unique (762)14.2.11Appending Scenes to Arrangement (763)14.2.12Naming Scenes (764)14.2.13Changing the Color of a Scene (765)14.3Using Arranger View (767)14.3.1Section Management Overview (767)14.3.2Creating Sections (772)14.3.3Assigning a Scene to a Section (773)14.3.4Selecting Sections and Section Banks (774)14.3.5Reorganizing Sections (778)14.3.6Adjusting the Length of a Section (779)14.3.6.1Adjusting the Length of a Section Using the Software (781)14.3.6.2Adjusting the Length of a Section Using the Controller (782)14.3.7Assigning and Removing Patterns (783)14.3.8Duplicating Sections (785)14.3.8.1Making Sections Unique (786)14.3.9Removing Sections (787)14.3.10Renaming Scenes (789)14.3.11Clearing Sections (790)14.3.12Creating and Deleting Section Banks (791)14.3.13Enabling Auto Length (792)14.3.14Looping (793)14.3.14.1Setting the Loop Range in the Software (793)14.4Playing with Sections (794)14.4.1Jumping to another Playback Position in Your Project (795)14.5Triggering Sections or Scenes via MIDI (796)14.6The Arrange Grid (798)14.7Quick Grid (800)15Sampling and Sample Mapping (801)15.1Opening the Sample Editor (801)15.2Recording a Sample (802)15.2.1Opening the Record Page (802)15.2.2Selecting the Source and the Recording Mode (803)15.2.3Arming, Starting, and Stopping the Recording (806)15.2.5Checking Your Recordings (810)15.2.6Location and Name of Your Recorded Samples (813)15.3Editing a Sample (814)15.3.1Using the Edit Page (814)15.3.2Audio Editing Functions (820)15.4Slicing a Sample (828)15.4.1Opening the Slice Page (829)15.4.2Adjusting the Slicing Settings (830)15.4.3Live Slicing (836)15.4.3.1Live Slicing Using the Controller (836)15.4.3.2Delete All Slices (837)15.4.4Manually Adjusting Your Slices (837)15.4.5Applying the Slicing (844)15.5Mapping Samples to Zones (850)15.5.1Opening the Zone Page (850)15.5.2Zone Page Overview (851)15.5.3Selecting and Managing Zones in the Zone List (853)15.5.4Selecting and Editing Zones in the Map View (858)15.5.5Editing Zones in the Sample View (862)15.5.6Adjusting the Zone Settings (865)15.5.7Adding Samples to the Sample Map (872)16Appendix: Tips for Playing Live (875)16.1Preparations (875)16.1.1Focus on the Hardware (875)16.1.2Customize the Pads of the Hardware (875)16.1.3Check Your CPU Power Before Playing (875)16.1.4Name and Color Your Groups, Patterns, Sounds and Scenes (876)16.1.5Consider Using a Limiter on Your Master (876)16.1.6Hook Up Your Other Gear and Sync It with MIDI Clock (876)16.1.7Improvise (876)16.2Basic Techniques (876)16.2.1Use Mute and Solo (876)16.2.2Use Scene Mode and Tweak the Loop Range (877)16.2.3Create Variations of Your Drum Patterns in the Step Sequencer (877)16.2.4Use Note Repeat (877)16.2.5Set Up Your Own Multi-effect Groups and Automate Them (877)16.3Special Tricks (878)16.3.1Changing Pattern Length for Variation (878)16.3.2Using Loops to Cycle Through Samples (878)16.3.3Using Loops to Cycle Through Samples (878)16.3.4Load Long Audio Files and Play with the Start Point (878)17Troubleshooting (879)17.1Knowledge Base (879)17.2Technical Support (879)17.3Registration Support (880)17.4User Forum (880)18Glossary (881)Index (889)1Welcome to MASCHINEThank you for buying MASCHINE!MASCHINE is a groove production studio that implements the familiar working style of classi-cal groove boxes along with the advantages of a computer based system. MASCHINE is ideal for making music live, as well as in the studio. It’s the hands-on aspect of a dedicated instru-ment, the MASCHINE hardware controller, united with the advanced editing features of the MASCHINE software.Creating beats is often not very intuitive with a computer, but using the MASCHINE hardware controller to do it makes it easy and fun. You can tap in freely with the pads or use Note Re-peat to jam along. Alternatively, build your beats using the step sequencer just as in classic drum machines.Patterns can be intuitively combined and rearranged on the fly to form larger ideas. You can try out several different versions of a song without ever having to stop the music.Since you can integrate it into any sequencer that supports VST, AU, or AAX plug-ins, you can reap the benefits in almost any software setup, or use it as a stand-alone application. You can sample your own material, slice loops and rearrange them easily.However, MASCHINE is a lot more than an ordinary groovebox or sampler: it comes with an inspiring 7-gigabyte library, and a sophisticated, yet easy to use tag-based Browser to give you instant access to the sounds you are looking for.What’s more, MASCHINE provides lots of options for manipulating your sounds via internal ef-fects and other sound-shaping possibilities. You can also control external MIDI hardware and 3rd-party software with the MASCHINE hardware controller, while customizing the functions of the pads, knobs and buttons according to your needs utilizing the included Controller Editor application. We hope you enjoy this fantastic instrument as much as we do. Now let’s get go-ing!—The MASCHINE team at Native Instruments.MASCHINE Documentation1.1MASCHINE DocumentationNative Instruments provide many information sources regarding MASCHINE. The main docu-ments should be read in the following sequence:1.MASCHINE Getting Started: This document provides a practical approach to MASCHINE viaa set of tutorials covering easy and more advanced tasks in order to help you familiarizeyourself with MASCHINE.2.MASCHINE Manual (this document): The MASCHINE Manual provides you with a compre-hensive description of all MASCHINE software and hardware features.Additional documentation sources provide you with details on more specific topics:▪Controller Editor Manual: Besides using your MASCHINE hardware controller together withits dedicated MASCHINE software, you can also use it as a powerful and highly versatileMIDI controller to pilot any other MIDI-capable application or device. This is made possibleby the Controller Editor software, an application that allows you to precisely define all MIDIassignments for your MASCHINE controller. The Controller Editor was installed during theMASCHINE installation procedure. For more information on this, please refer to the Con-troller Editor Manual available as a PDF file via the Help menu of Controller Editor.▪Online Support Videos: You can find a number of support videos on The Official Native In-struments Support Channel under the following URL: https:///NIsupport-EN We recommend that you follow along with these instructions while the respective appli-cation is running on your computer.Other Online Resources:If you are experiencing problems related to your Native Instruments product that the supplied documentation does not cover, there are several ways of getting help:▪Knowledge Base▪User Forum▪Technical Support▪Registration SupportYou will find more information on these subjects in the chapter Troubleshooting.1.2Document ConventionsThis section introduces you to the signage and text highlighting used in this manual. This man-ual uses particular formatting to point out special facts and to warn you of potential issues. The icons introducing these notes let you see what kind of information is to be expected:This document uses particular formatting to point out special facts and to warn you of poten-tial issues. The icons introducing the following notes let you see what kind of information can be expected:Furthermore, the following formatting is used:▪Text appearing in (drop-down) menus (such as Open…, Save as… etc.) in the software and paths to locations on your hard disk or other storage devices is printed in italics.▪Text appearing elsewhere (labels of buttons, controls, text next to checkboxes etc.) in the software is printed in blue. Whenever you see this formatting applied, you will find the same text appearing somewhere on the screen.▪Text appearing on the displays of the controller is printed in light grey. Whenever you see this formatting applied, you will find the same text on a controller display.▪Text appearing on labels of the hardware controller is printed in orange. Whenever you see this formatting applied, you will find the same text on the controller.▪Important names and concepts are printed in bold.▪References to keys on your computer’s keyboard you’ll find put in square brackets (e.g.,“Press [Shift] + [Enter]”).►Single instructions are introduced by this play button type arrow.→Results of actions are introduced by this smaller arrow.Naming ConventionThroughout the documentation we will refer to MASCHINE controller (or just controller) as the hardware controller and MASCHINE software as the software installed on your computer.The term “effect” will sometimes be abbreviated as “FX” when referring to elements in the MA-SCHINE software and hardware. These terms have the same meaning.Button Combinations and Shortcuts on Your ControllerMost instructions will use the “+” sign to indicate buttons (or buttons and pads) that must be pressed simultaneously, starting with the button indicated first. E.g., an instruction such as:“Press SHIFT + PLAY”means:1.Press and hold SHIFT.2.While holding SHIFT, press PLAY and release it.3.Release SHIFT.Unlabeled Buttons on the ControllerThe buttons and knobs above and below the displays on your MASCHINE controller do not have labels.1234567812345678The unlabeled buttons and knobs on the MASCHINE controller.For better reference, we applied a special formatting here: throughout the document, the ele-ments are capitalized and numbered, so the buttons above the displays are written Button 1 to Button 8, while the knobs under the displays are written Knob 1 to Knob 8. E.g., whenever you see an instruction such as “Press Button 2 to open the EDIT page,” you’ll know it’s the second button from the left above the displays.1.3New Features in MASCHINE2.6.11The following two new features have been added to MASCHINE 2.6.11 and are only aimed at MASCHINE MK3 users:▪Introduction of the General, Audio, MIDI and Hardware Preferences direct from the MA-SCHINE MK3 controller using the SETTINGS button. For more information on using the Preferences from the hardware, refer to each section of the following chapter: ↑2.6, Prefer-ences.。
麦德好脚本15秒:
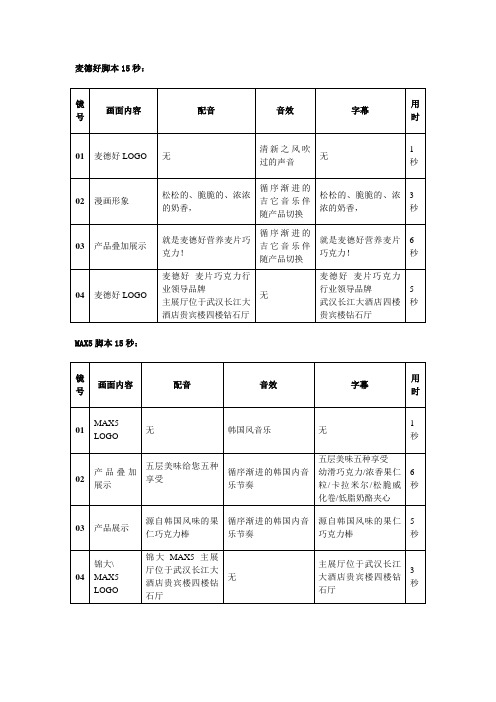
镜号
画面内容
配音
音效
字幕
用时
01
麦德好LOGO
无
清新之风吹过的声音
无
1秒
02
漫画形象
松松的、脆脆的、浓浓的奶香,
循序渐进的吉它音乐伴随产品切换
松松的、脆脆的、浓浓的奶香,
3秒
03
产品叠加展示
就是麦德好营养麦片巧克力!
循序渐进的吉它音乐伴随产品切换
就是麦德好营养麦片巧克力!
6秒
04
麦德好LOGO
6秒
03
产品展示
源自韩国风味的果仁巧克力棒
循序渐进的韩国内音乐节奏
源自韩国风味的果仁巧克力棒
5秒
04
锦大\ MAX5 LOGO
锦大MAX5主展厅位于武汉长江大酒店贵宾楼四楼钻石厅
无
主展厅位于武汉长江大酒店贵宾楼四楼钻石厅
3秒
麦德好麦片巧克力行业领导品牌
主展厅位于武汉长江大酒店贵宾楼四楼钻石武汉长江大酒店四楼贵宾楼钻石厅
5秒
MAX5脚本15秒:
镜号
画面内容
配音
音效
字幕
用时
01
MAX5 LOGO
无
韩国风音乐
无
1秒
02
产品叠加展示
五层美味给您五种享受
循序渐进的韩国内音乐节奏
五层美味五种享受
幼滑巧克力/浓香果仁粒/卡拉米尔/松脆威化卷/低脂奶酪夹心
- 1、下载文档前请自行甄别文档内容的完整性,平台不提供额外的编辑、内容补充、找答案等附加服务。
- 2、"仅部分预览"的文档,不可在线预览部分如存在完整性等问题,可反馈申请退款(可完整预览的文档不适用该条件!)。
- 3、如文档侵犯您的权益,请联系客服反馈,我们会尽快为您处理(人工客服工作时间:9:00-18:30)。
cmd
Microsoft Windows XP [版本5.1.2600]<C>版权所有1985-2001 Microsoft Corp .C:\Documents and Settings\Administrator>cd c:\C:\>search the best PPT designer a ...N atural
O R eposal D i g e s t
eliable
I m aginative eliable D R
Powerpoint Design
For Powerpoint2000/xp/2003/2007
PPT演示文档
模版/
全页面设计
WEB形象设计
样本设计
品牌形象设计/VI
Visual Communication
Nordri为您提供的服务项目团队优势专业优势理念优势Nordri的设计优势
Our Team
年龄:24
我们是开放的团队Array
合作方式,核心成员由资深ACCD/CEAC平面设
计师、插画师、微软MCT认证讲师、专职摄
影师组成。
Nordri设计团队
擅长整合不同门类设计资源,为客户创造价值。
Nordri团队真诚
为您服务
成就一只优秀的表
需要
每一个齿轮精确的运转衔接成就一个优秀的作品
需要
创意与技术完美的结合
NORDRI
完美源自专业精确显于细节
Owen. Jones提出“美的实质是一种平静的感觉,当视觉、理智和感情的各种欲望都得到满足时,心灵就能感受到这种平静。
”Nordri 设计工作室通过优化设计方案,强调最终观者的信息捕获率和视觉体验,努力实现这种平静的感觉Nordri的设计理念
交稿定稿修改
反馈
制作
分析
意向
取联系,通过交流与沟,获取客户的需求,并达成合意向工作流程意向收集资料素材文件/视频/声音动画脚本文件)。
合同签署确定项目费用。
工作拟定进度计划分析确定主体格色彩方案模版(PPT 设计项目, (模版内容包括首页面/内页母版/尾/配色标准)。
您可以在此段与我们充分交流亦参与制作制作与客户进交流沟,及时获得户初稿的各种意见及反馈反馈在充分获客户反馈的基础上,真对待客户的每一条意见,对初稿进行修订和补修改阶经过认真修改后,最终确定作的细节,并完成终稿定以光盘载的形式递交终稿。
相我们的作品已为下一次双方合作立下了坚实的基交稿
76658522970F x :o a E-mail:info Tel :
w
Web: 快给我们留言吧
放映结束,单击鼠标退出。
