SUSE Linux 11安装详细指南
硬盘安装openSUSE Linux 11.4 图文教程
硬盘安装openSUSE Linux 11.4 图文教程本文撰写和软件配置:蔚蓝(winland0704@)/winland0704/home本文介绍在Windows XP和Windows 7下面通过grub引导来硬盘安装openSUSE Linux 11.4操作系统。
一、准备工作:1、下载openSUSE 11.4安装盘可以从国内镜像下载:网易开源镜像:/openSUSE/搜狐开源镜像:/opensuse/中国科学技术大学开源软件镜像:/opensuse/中央音乐学院(教育网):/opensuse/从以上任选一个可用的站点,下载如下子目录/distribution/11.4/iso/ 里面的openSUSE-11.4-DVD-i586.iso 文件。
如果希望安装64bit的Linux,下载openSUSE-11.4-DVD-x86_64.iso其他的ISO统统无视。
将该iso文件下载到一个较大NTFS分区的根目录,比如D:\openSUSE-11.4-DVD-i586.iso 这个名字太长,改名为suse.iso,现在安装盘位置:D:\ suse.iso2、安装虚拟光驱软件等(1)如果没安装虚拟光驱软件,可以装个DAEMON Tools 4.35.5 最新汉化版或者UltraISO软碟通软件。
在Windows 7 下如果安装不好,那么右击exe文件,属性,设置为windows xp模式和管理员身份来运行安装就行了。
(2)在这里要调节文件管理器,显示隐藏文件和系统文件:windows xp下面,打开我的电脑,工具菜单 --->文件夹选项,“查看”栏目里,去掉“隐藏受保护的操作系统文件”前的勾号,选择下面的“显示所有文件和文件夹”,去掉“隐藏已知文件类型的扩展名”前的勾号,再确定。
windows 7 下面,打开“计算机”,在上面“组织”菜单里找到“文件夹和搜索选项”,打开来,同XP里的设置,显示系统文件和隐藏文件和文件扩展名。
RedHat LINUX安装全步骤(附图)
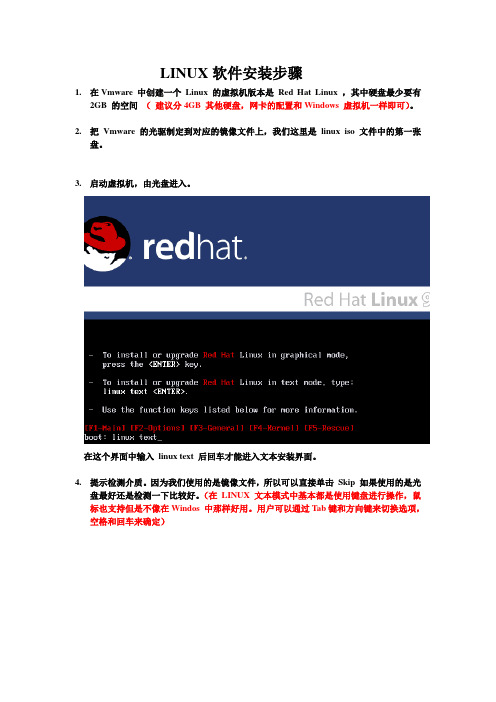
LINUX软件安装步骤1.在Vmware 中创建一个Linux 的虚拟机版本是Red Hat Linux ,其中硬盘最少要有2GB 的空间(建议分4GB 其他硬盘,网卡的配置和Windows 虚拟机一样即可)。
2.把Vmware 的光驱制定到对应的镜像文件上,我们这里是linux iso 文件中的第一张盘。
3.启动虚拟机,由光盘进入。
在这个界面中输入linux text 后回车才能进入文本安装界面。
4.提示检测介质。
因为我们使用的是镜像文件,所以可以直接单击Skip 如果使用的是光盘最好还是检测一下比较好。
(在LINUX 文本模式中基本都是使用键盘进行操作,鼠标也支持但是不像在Windos 中那样好用。
用户可以通过Tab键和方向键来切换选项,空格和回车来确定)如果上面选择的是Skip就会直接跳到第8步。
5.开始检测。
如果是使用的光盘CD 需要先插入CD 后在Test 因为我们使用的是镜像文件所以就可以直接Test6.检测完毕。
选择OK7.提示是否检测其他的盘。
如果你为了保险起见可以继续检测,但是时间可能会长一些。
8.选择语言安装过程,在这里选择英语。
(如果选择的不是英语的话,在以后的一些提示显示中会出现乱码看不懂)9.选择键盘类型,在这里选择us 即可。
10.选择鼠标类型,在Linux 这类操作系统中,经常用到三键鼠标,因此,除了选择鼠标类型外,一般还选中下面的“Emulate 3 Buttons?”,这样同时点击鼠标左右键,代表点击中键。
11.选择安装类型。
在这里我们选择第4个Custom(定制)。
12.准备分区。
在这里选择Autopartition 。
13.这里会让用户选择如何处理硬盘上的原始分区。
因为我们是新建的所以选那个都无所谓,但是如果在已经安装好Windows 的系统上进行安装,一般选择第三项。
意思就是使用硬盘当中没有使用的空间来创建相应的分区。
在下面会让用户选择。
要安装到那个硬盘中,在这里只有一个硬盘sda ,所以直接选择即可。
Suse Linux 11 sp2_HA部署文档
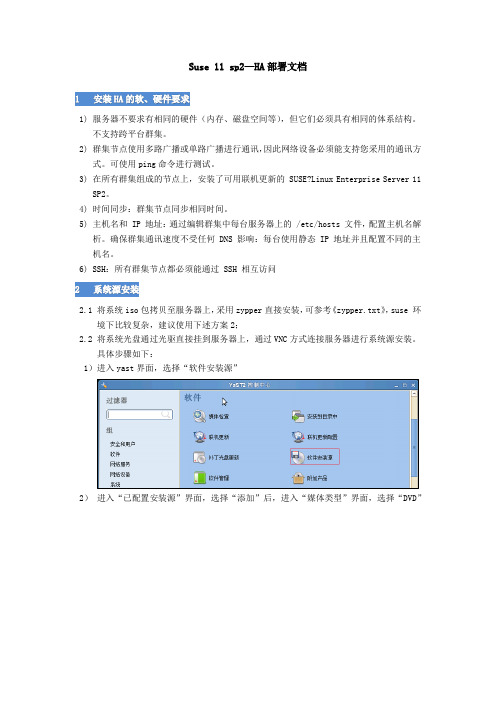
Suse 11 sp2—HA部署文档1安装HA的软、硬件要求1) 服务器不要求有相同的硬件(内存、磁盘空间等),但它们必须具有相同的体系结构。
不支持跨平台群集。
2) 群集节点使用多路广播或单路广播进行通讯,因此网络设备必须能支持您采用的通讯方式。
可使用ping命令进行测试。
3) 在所有群集组成的节点上,安装了可用联机更新的 SUSE?Linux Enterprise Server 11SP2。
4) 时间同步:群集节点同步相同时间。
5) 主机名和 IP 地址:通过编辑群集中每台服务器上的 /etc/hosts 文件,配置主机名解析。
确保群集通讯速度不受任何 DNS 影响:每台使用静态 IP 地址并且配置不同的主机名。
6) SSH:所有群集节点都必须能通过 SSH 相互访问2 系统源安装2.1 将系统iso包拷贝至服务器上,采用zypper直接安装,可参考《zypper.txt》,suse 环境下比较复杂,建议使用下述方案2;2.2 将系统光盘通过光驱直接挂到服务器上,通过VNC方式连接服务器进行系统源安装。
具体步骤如下:1)进入yast界面,选择“软件安装源”2)进入“已配置安装源”界面,选择“添加”后,进入“媒体类型”界面,选择“DVD”3)点击“下一步”,弹出一个提示框,请点击“继续”4)点击继续后,系统就会从系统DVD中读取系统源文件,结束后选择“完成”即可。
3 Suse HA ISO包安装1)下载suse sp2下的关于HA的ISO包,本文档是针对sp2进行梳理,故下载SLE-HA-11-SP2-x86_64-GM-CD1.iso下载地址:http://mirror.excellent.co.id/linux/SLES/2)下载结束后,将iso包拷贝至服务器上,进入yast界面,选择“软件安装源”3)进入“已配置安装源”界面,选择“添加”后,进入“媒体类型”界面,选择“本地ISO镜像”,选择“下一步”4)进入“本地ISO镜像”界面,在“ISO映像路径”处,通过“浏览”选择拷贝的SLE-HA-11-SP2-x86_64-GM-CD1.iso所在路径,“安装源名称”任意添加,也可以为空。
SuSE Linux 11 开启SSH 关闭防火墙 开启FTP
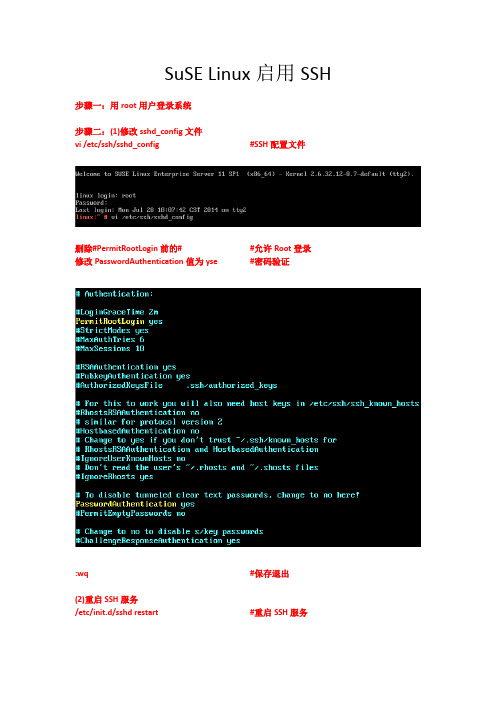
SuSE Linux启用SSH 步骤一:用root用户登录系统步骤二:(1)修改sshd_config文件vi /etc/ssh/sshd_config #SSH配置文件删除#PermitRootLogin前的# #允许Root登录修改PasswordAuthentication值为yse #密码验证:wq #保存退出(2)重启SSH服务/etc/init.d/sshd restart #重启SSH服务步骤三:(1)修改SuSEfirewall2文件vi /etc/sysconfig/SuSEfirewall2 #SuSE防火墙配置文件:wq #保存退出(2)重启防火墙/sbin/rcSuSEfirewall2 restart #重启防火墙——结束SuSE Linux禁用防火墙步骤一:停止防火墙程序/etc/init.d/SuSEfirewall2_setup stop/etc/init.d/SuSEfirewall2_init stop步骤二:禁止开机启动防火墙chkconfig SuSEfirewall2_setup offchkconfig SuSEfirewall2_init off——结束SuSE Linux启用FTP 步骤一:用root用户登录系统步骤二:进入YaSTYaST #进入YaST工具选择Network Services -> Network Services (xinetd)将Network Service Configuration (xinetd) 改为Enable启用ftp服务( server为/usr/sbin/vsftpd的一条)( 按Tab切到[Toggle Status (On or Off)] )选择[Finish] #完成设置选择[Quit] #退出YaST步骤三:修改vsftpd.conf文件vi /etc/vsftpd.conf #FTP配置文件在listen=YES前面加上#在末尾加入下列行write_enable=YES #允许写入local_enable=YES #允许本地用户登录local_umask=022 #默认权限设置ascii_upload_enable=YES #允许上传二进制文件ascii_download_enable=YES #允许下载二进制文件步骤四:修改ftpusers文件vi /etc/ftpusers #FTP用户配置文件在root前面加#:wq #保存退出步骤五:重启FTP服务rcxinetd restart #重启xinetd服务——结束。
SuSE-11下安装oracle10g
图-42
这时发现没有安装unixODBC-devel,那么用yast安装unixODBC-devle安装,在命令行下输入yast–i unixODBC-devel即可,如图-43
图-43
4、接下来检查SuSE的版本,由于oracle10g安装过程中不支持SuSE-11所以这里我们要把SuSE的版本改为9或者10,在这里我们改为9,在命令行下输入vi /etc/SuSE-release,如图-44
图-44
把11改为9,然后保存退出。
5、接着检查/etc/hosts文件,在命令行下输入vi /etc/hosts,如图-45
图-45
把127.0.0.1 localhost改为127.0.0.1localhost.localdomain localhost然后保存退出。
6、接下来修改语言,在命令行下执行vi /etc/sysconfigelangue,如图-46
图-20
选中I Agree to the License Terms,然后选择Next,接着出现图-21所示
图-21
这时选择New Installation选项,然后Next,出现选择时区的界面,如图-22
图-22
选择Asia Beijing然后校准时间,接着Next,出现图-23界面
图-23
由于我们是在虚拟机上安装的,所以选择第二个,如果是在服务器上安装的,那么选择第一个就可以,选择好之后,接着Next,出现图-24界面
图-24
这个时候Software默认安装时不选择开发工具的gcc的,所以我们在选择的时候要安装上,点击Software,出现图-25界面
SUSE Linux Enterprise Server系统概述
2
BREADCRUMBS
内容
1 产品概述 2 技术特点 3 产品路线图 4 使用场景 5 成功案例
2
3
产品概述
3
SUSE专注于企业级关键应用
1992
2001
Linux for Server
MainFrame
小型机
HP 安腾机
X86 Server
15
虚拟化
KVM
支持更多硬件平台:x86, arm64, s390, Power9(技术预览) Qmeu-kvm 3.1
Xen
Xen 4.12
Vagrant: 快速创建和部署虚拟化开发环境
vagrant init SLES-12-SP5 vagrant up vagrant ssh
https:///sles/12-SP5/html/SLES-kgraft/art-kgraft.html
时序要求严 格的大规模
部署
14
SUSE® Linux Enterprise 高可用
• 业务24/7可用: 主/主,主/备
• 虚拟化集群: KVM, Xen
7
SUSE Linux 重点功能特性
组件
操作系统 虚拟化 数据库 中间件 W eb 负责均衡 JD K 目录服务器 缓存技术 内核热补丁 高可用 系统集中管理
SUSE
SU SE Linux Enterprise Server
K V M ,X en, D ocker
内嵌M ysql,M ariaD B ,P ostgres 内嵌tom cat 内嵌A pache,nginx,squid LV S 或者H aP roxy openJD K 和 IB M JD K o penld ap 和389 bcache和lvm cache kgraph
SuseLinux安装图解
Suse Linux安装图解─────初涉SUSE LINUX 原创作者:广云天,希望能通过本书籍给广大需要安装Suse Linux的朋友提供帮助。
SUSE(发音通常是/suzi/,正确应为/zuzy/)是Linux操作系统其中一个发行版,也是德国的一个发行版。
SUSE属于Novell旗下的业务,它同时亦是Desktop Linux Consortium的发起成员之一。
红联Linux论坛是致力于Linux技术讨论的站点,目前网站收录的文章及教程基本能满足不同水平的朋友学习。
红联Linux门户: 红联Linux论坛: /bbs 下载:Linux电子书籍: /linux/linuxdzsj.htm目录SUSE安装进行一SUSE安装进行二SUSE安装进行三SUSE安装进行四SUSE桌面预览成功的画面海量Linux技术文章红联形象logoSUSE安装进行一发布时间:2007-01-25 22:06:48原创作者:广云天我是使用虚拟机安装的。
想到很多人都是装双系统.而且要保存好电脑原来的资料.而且很多人都误删除了资料。
所以我先用虚拟机装了XP.然后在装个OPEN SUSE LINUX.为了方便.下面的LINUX都指OPEN SUSE LINUX .呵呵.废话不说进入正题.第一步放入光碟.不会放光碟?(应该没有这样的人吧?)没有光驱?无语.那你不用看了.自己看着办?搜索一下硬盘安装的方法吧.或者用虚拟机安装.进入了上面的界面.呵呵.按F2选语言.得到以下的界面.我选择的是简体中文.当然你如果喜欢英文或者.自己看着办.随便你.直接回车经过一段时间.出现下面的图片.选是,我接受许可协议.(如果你不接受的话.还能继续安装证明你是牛人.)点下一步.关于包括个别媒体中的附加产品我也不知道是什么意思?水平不够啊.请大家不要拍我的砖.反正我是没选它啦.也没发现有什么不同.选择时区和设置时钟.别说你不会啊.起码WINDOWS装过吧?下一步.呵呵终于进入了重点了.好兴奋哦.这里是由你选择桌面环境的.LINUX常见的有两种环境.一种是KDE,一种是GNOME.正常来说KDE比较慢.GNOME比较快.但是KDE比较漂亮.象Ubuntu好象使用的就是GNOME桌面.你要怎么选自己看着办.呵呵.好象有点罗嗦.我选择的是KDE.因为我接触的第一个LINUX系统使用的就是KDE.呵呵习惯了吧.下一步这是重点.请注意了.如果搞不好.你的资料就没了.我第一次安装就没了30几G的资料.心痛啊.这是没先分个区给LINUX的情况.他默认会把.所有的区都删除掉.因为没区给他用.很多人都直接点下一步.接受他的建议.结果.我的资料啊哭天喊地声不绝于耳.死LINXU害我啊.我打你我打你.如果你没分区给他的话要点更改. 选择更改分区出现以下界面SUSE安装进行二发布时间:2007-01-25 22:13:15选择创建自定义分区设置不过如果你有分区给LINUX的话.会出现以下界面.为了避免麻烦.建议在安装LINUX前.先分个区给LINUX.方法是用WINDOWS的磁盘管理.删除一个区给LINUX用,因为我只分了11G的空间给LINXU.点接受选第一个不要选专家模式.因为很多人都不懂.进入以下界面.选创建自定义分区设置看下图看到了没有.会出现个选项.只格式化我分给他的区.没有格式化我的那个2.4G的WINDOWS分区.所以这一步要看准.还有左边有提示.要多看.点下一步.出现下面这图.选择了正确后变成这样。
戴尔易安信系统管理工具和文档安装指南说明书
Dell EMC Systems Management Tools And Documentation Installation GuideVersion 10.0.1Notes, cautions, and warningsA NOTE indicates important information that helps you make better use of your product.A CAUTION indicates either potential damage to hardware or loss of data and tells you how to avoidA WARNING indicates a potential for property damage, personal injury, or death.© 2010 - 2021 Dell Inc. or its subsidiaries. All rights reserved. Dell, EMC, and other trademarks are trademarks of Dell Inc. or its subsidiaries. Other trademarks may be trademarks of their respective owners.Chapter 1: About (4)OMSA Customer Survey (4)Managed system and management station (4)Systems Management Tools and Documentation software (5)Active Directory Snap-In (5)iDRAC Tools (5)Dell Lifecycle Controller (6)iDRAC Service Module (6)Chapter 2: Installing management station software on Microsoft Windows (7)Installing management station software on Microsoft Windows Server and Hyper-V Server (7)Installing management station software using the CLI mode (7)Uninstalling management station software using the CLI mode (8)Chapter 3: Installing management station software on supported Red Hat Enterprise LinuxServer and SUSE Linux Enterprise Server (9)Contents31AboutThe Systems Management Tools and Documentation Installation Guide provides an overview of the management station software and installation instructions for the same. For information on installing Server Administrator, see the Dell EMC Server Administrator Installation Guide in the Dell EMC Systems Management Tools and Documentation software.Systems Management softwareThe systems management image comprises of the three software's mentioned below:●Systems Management Tools and Documentation●Server Updates●Management ConsoleYou can download the free ISO image of the software's from /Support/Home.For information on systems that support systems management software, supported operating systems, and components, see Dell EMC OpenManage Systems Software Support Matrix at /OpenManageManualsTopics:•OMSA Customer Survey•Managed system and management station•Systems Management Tools and Documentation softwareOMSA Customer SurveySurvey link: https://.Dell Technologies is exclusively surveying OMSA customers, collecting feedback, and implementing suggestions. As a customer, the above link is available for you to take the survey at various phases of OMSA usage such as Windows or Linux based installation, while using the OMSA GUI and CLI, and VMware ESXi.Managed system and management stationDepending on the way, you use the systems management tools, you can classify the systems as:●Managed SystemA managed system is any system that is monitored and managed using Server Administrator or Management Console. AServer Administrator is one of the systems management tools on the Systems Management Tools and Documentation software. You can manage systems running Server Administrator locally or remotely through a supported web browser. For more information about Server Administrator, see the Server Administrator User's Guide on the Systems Management Tools and Documentation software.●Management StationA management station is a laptop, desktop, or server that you use to remotely manage one or more managed systems from acentral location. You can use the following tools:○Intelligent Platform Management Interface (IPMI) Utilities○Integrated Dell Remote Access Controller (iDRAC) tools○Server Administrator Web Server4AboutSystems Management Tools and Documentation softwareThe Systems Management Tools and Documentation software contains the systems management software. The systems management software helps you to manage the systems by monitoring the system components, diagnosing issues, notifying through alerts, and troubleshooting remotely. Systems management software is classified as managed system software and management station software.Managed system softwareThe following applications include the managed system software:●Server AdministratorServer Administrator provides comprehensive one-to-one in-band server managements solutions. You can manage a server locally and remotely using a web browser-based Graphical User Interface (GUI) and Command Line Interface (CLI).When you perform a fresh installation on a system running a 64-bit operating system, a 64-bit version of theManagement station softwareThe following applications include the management station software:Active Directory Snap-InThe Active Directory (AD) Snap-In utility provides an extension snap-in to the Microsoft Active Directory to manage AD objects specific to products on this software.iDRAC ToolsThe iDRAC console is a management station software that provides remote management capabilities for the systems. Youcan remotely connect to the iDRAC global hardware and access the RAC features by using a web browser or the RACADM Command Line Interface (CLI). RACADM CLI is the command-line user interface to the RAC.●RACADM—For more information, see RACADM●IPMI Tools—For more information, see IPMI ToolsYou can install RAC either on the managed system or on the management station.For information about installing RAC on the managed system, see the Server Administrator Installation Guide. For information about installing on the management station, see Installing Management Station Software on Windows. For more information about RAC, see the Remote Access Controller User's GuideFrom OpenManage 9.3, x86 BMC is not available. The BMC x64 version is a part of iDRAC tools.RACADMThe Dell Remote Access Controller Admin (RACADM) utility is a command-line tool that enables remote or local management of Dell Servers using the iDRAC. RACADM provides similar functionality to the iDRAC Graphical User Interface (GUI). The Dell EMC Chassis Management Controller (CMC) can be managed remotely with RACADM. RACADM commands can be run remotely from a management station and/or locally on the managed system. RACADM commands enable you to view the managed system information, perform power operations on the managed system, perform firmware updates, configure settings and more. Because RACADM is run from a command line interface (CLI), system administrators can create scripts that control and update Dell EMC systems in a one-to-many fashion.About5IPMI ToolsIntelligent Platform Management Interface (IPMI) tool is a utility for managing and configuring devices that support the Intelligent Platform Management Interface. IPMI is an open standard for monitoring, logging, recovery, inventory, and controlof hardware that is implemented independent of the main CPU, BIOS, and operating system. The IPMI tool program providesa simple command-line interface to this BMC. It features the ability to read the sensor data repository (SDR) and print sensor values, display the contents of the System Event Log (SEL), print Field Replaceable Unit (FRU) inventory information, read and set LAN configuration parameters, and perform remote chassis power control.This program lets you manage IPMI functions of either the local system, by using a kernel device driver, or a remote system, using IPMI V1.5 and IPMI v2.0.IPMI management of a local system interface requires a compatible IPMI kernel driver to be installed and configured. On Linux, the driver is called Open IPMI and it is included in standard distributions. On Solaris, the driver is called BMC and is includedin Solaris 10. On Windows, it communicates through WMI driver. Management of a remote station requires the IPMI-over-LAN interface to be enabled and configured. Depending on the particular requirements of each system it may be possible to enable the LAN interface using IPMI tool over the system interface.Dell Lifecycle ControllerDell EMC recommends using the Embedded Management, Integrated Dell Remote Access Controller 9 (iDRAC9) with Lifecycle Controller instead of Dell EMC Systems Build and Update Utility (SBUU). SBUU is replaced with Lifecycle Controller onyx4x generation of PowerEdge servers. iDRAC with Lifecycle Controller is an Embedded Systems Management application for operating system deployment and lifecycle management of PowerEdge servers. You can access Dell Lifecycle Controller by pressing <F10> during system boot up. The local GUI of iDRAC9 with Lifecycle Controller enables you to do the following in a pre-OS environment:●Hardware configuration●Operating system and hypervisor deployments●Hardware updates●Hardware diagnostics●Easy maintenance of PowerEdge serversThe Lifecycle Controller is embedded on all 13th and later generation of PowerEdge servers. No tools or downloads are required to use the capabilities of Lifecycle Controller.For more information, see the following documents available at /OpenManageManuals:●Dell Lifecycle Controller Version <Version Number> User's Guide●Dell Lifecycle Controller Remote Services Version <Version Number> Quick Start Guide●Dell Lifecycle Controller Web Services Interface Guide●Lifecycle Controller Integration Best PracticesiDRAC Service ModuleThe iDRAC Service Module is a lightweight optional software application that can be installed on a yx3x and later generation of PowerEdge servers. Using the iDRAC Service Module you can configure the features on the supported operating system. The iDRAC Service Module provides additional Server Management data to iDRAC and presents one-to-many consoles with access to Systems Management data through operating system interfaces.The iDRAC Service Module also complements the iDRAC interfaces such as the GUI, RACADM CLI, and WSMan with additional monitoring features. For more information, see iDRAC Service Module <Version Number> Installation Guide available at /Support/Home.6AboutInstalling management station software onMicrosoft Windows1.Log on with administrator privileges to the system on which you want to install the management station applications.2.Mount the Systems Management Tools and Documentation software onto the DVD drive or download the web installer.You can download the web installer from /Support/Home .3.Run autorun.exe .If you are using the DVD to install, select the management station application that you want to install, and then Install .4.Follow the instructions in the Install Wizard.To install Server Administrator and iDRAC command line tools together, install Server Administrator without the Topics:•Installing management station software on Microsoft Windows Server and Hyper-V ServerInstalling management station software on Microsoft Windows Server and Hyper-V ServerWindows Server or Hyper-V Server operating system does not support a user interface (UI) based installation of the software components. Install the software in CLI mode on Server Core. For more information about Server Core, see the Microsoftwebsite.Log in as a built-in Administrator to install systems management software on Windows Server and Windows clientInstalling management station software using the CLI modeRun the Command Prompt as an administrator to successfully perform tasks using the CLI mode.To install the iDRAC Tools, launch the MSI file using the command:●msiexec /i iDRACTools_x64.msiOn the Systems Management Tools and Documentation software:The iDRACTools_x64.msi file is at SYSMGMT\ManagementStation\windows\iDRACToolsx64.iDRAC tools provide local and remote management capabilities for system that is equipped with iDRAC.To install Active Directory Snap-In, launch the MSI file using the command:●msiexec /i ADSnapIn_x64.msiOn the Systems Management Tools and Documentation software:The ADSnapIn_x64.msi file is at SYSMGMT\ManagementStation\windows\ADSnapInx64.To install the localized version of the management station software, at the command prompt type the following: msiexec / I <management_station_software>.msi TRANSFORMS= <languauge_transform>.mst2Installing management station software on Microsoft Windows 7Replace <language_transform>.mst with the appropriate language file:1031.mst (German)1034.mst (Spanish)1036.mst (French)1041.mst (Japanese)2052.mst (Simplified Chinese)Uninstalling management station software using the CLI mode To uninstall management station software, run the commands as listed in the following table:Table 1. Commands to uninstall management station softwareManagement Station Software CommandiDRAC Tools msiexec /x iDRACTools_x64.msi(or)msiexec /x {769409B5-7D2E-43C8-8525-C3CB782C87B7}Active Directory Snap-in msiexec /x ADSnapIn_x64.msi(or)msiexec /x {C392A19F-8431-405F-85FE-B1112E3046E2}Systems Management msiexec /x SysMgmtx64.msi(or)msiexec /x {C7C2A436-93C9-4934-B841-2AA3D689E2F2}8Installing management station software on Microsoft Windows3 Installing management station software on supported Red Hat Enterprise Linux Serverand SUSE Linux Enterprise ServerOnly iDRAC tools are supported on the Red Hat Enterprise Linux and SUSE Linux Enterprise Server operating systems.On systems running Red Hat Enterprise Linux operating system, DVDs are automounted with the -noexec mount option. You cannot run any executable program from the DVD. Mount the DVD-ROM manually and then run the executable programs.To install iDRAC tools, go to the SYSMGMT/ManagementStation/linux directory and install the BMU RPM specific to the operating system.To install the latest version of iDRAC Tools, do the following:For IPMI:1.Uninstall the existing IPMI tool:a.Query the existing IPMI tool: rpm -qa | grep ipmitoolIf the IPMI tool is already installed, the query returns ipmitool-x.x.xx-x.x.xx.b.To uninstall the IPMI tool:●On systems running Red Hat Enterprise Linux 7.x and 8.x, type rpm –e ipmitool2.iDRACTOOLS\ipmitool\<OS> directory and then type rpm -ivh *.rpm.For RACADM:1.To install RACADM:a.Go to the directory, where the tar.gz of iDRACTools is downloaded.b.Run the tar -zxvf on the tar.gz to unzip the contents into the current directory.c.From the current directory, where you have extracted the files, go to /linux/rac folder.d.To install the RACADM binary, start the script install_racadm.sh.install_racadm.sh script.2.a.Run the command openssl version to find the openssl version installed in the Host operating system.b.Locate the openSSL libraries, which are present in the HOST operating system, for example, ls -l /usr/lib64/libssl*.c.Soft-link the library libssl.so using the ln -s command to the appropriate OpenSSL version present in the Hostoperating system, for example, ln -s /usr/lib64/libssl.so.<version> /usr/lib64/libssl.so.3.To uninstall RACADM, use the uninstall_racadm.sh script.Installing management station software on supported Red Hat Enterprise Linux Server and SUSE Linux Enterprise9Server。
SUSE10 & Oracle 11g安装指南_new
SUSE10 & Oracle 11g安装指南1 概述本指导书用于指导安装SUSE 10、配置FTP和Telnet以及基于SUSE10上的Oracle 11g 的安装。
2 安装前准备工作光盘及安装包收集3 操作步骤本文档安装环境:Lenovo(内存4GB)3.1 安装SUSE101. 系统从光盘引导开始安装选择“Installation”系统开始安装显示“Language”界面。
2. 选择“English(US)”,单击“Next”,显示“License Agreement”界面。
3. 选择“Yes, I Agree to the License Agreement”,单击“Next”,显示“Installation Mode”界面。
4. 在“Select Mode”区域框中选择“New Installation”,单击“Next”,显示“Clock and Time Zone”界面。
5. 设置时间和时区。
a. 根据当地实际情况设置“Region”和“Time Zone”。
b. 在“Hardware Clock Set To”中选择“Local Time”。
c. 单击“Change”按钮设置时间。
d. 单击“Next”。
显示“Installation Settings”界面。
6. 设置分区其它分区可根据需要划分:a) 选择“Change > Partitioning”,显示“SuggestedPartitioning”界面。
b) 选择“Create Custom Partition Setup”,单击“Next”。
c) 选择“Custom partitioning (for experts)”,单击“Next”。
显示“Expert Partitioner”界面。
d) 选择“Create”,弹出“Partition Type”对话框。
e) 选择“Primary partition”创建主分区,单击“OK”,显示设置分区界面。
Rose双机热备软件安装指南共享磁盘阵列方式
ROSE 共享存储双机热备解决方案为什么需要高可用系统随着计算机应用的不断深入,企业对计算机系统的依赖程度也日渐增加。
尤其在一些关键行业的关键应用上,应用的后台核心系统是否具有高可用性能力,已经成为影响一个公司业务成败的关键因素。
高可用性包括保护业务关键数据的完整性和维持应用程序的连续运行等方面。
在这些信息处理系统中保存了大量的关键业务数据,一旦信息发生丢失或破坏,将带来灾难性的影响和损失。
在传统观念中,往往选择价格昂贵的专有计算机系统来提高业务系统运行的稳定性,系统实施及维护成本极高。
而价格较低的单一的PC服务器系统目前还无法满足用户对于安全性及可用性的要求。
在资源有限的情况下,如何保证业务系统的高可用性和数据的安全,已成为众多用户关注的焦点问题。
Rose公司提供的高可用性系统解决方案,为用户提供了具有单点故障容错能力的系统平台。
它采用主服务发生故障时备服务器接管的机制,实现在线故障自动切换,实现系统7×24小时不间断运行,避免停机造成的损失。
?Rose基于共享存储的双机高可用解决方案基于存储共享的双机热备是双机热备的标准方案。
双机系统的两台服务器都与共享存储设备连接,用户的操作系统、应用软件和双机软件分别安装在两台主机的内部存储(硬盘)上,应用服务的数据则存放在共享存储设备上。
两台主机之间通过私有心跳网络连接,随时监控对方的运行状态。
当工作主机发生故障,无法正常提供服务时,备机会及时侦测到故障信息,并根据切换策略及时进行故障转移,由备机接管故障主机上的工作,并进行报警,提示管理人员对故障主机进行维护。
对于用户而言,这一切换过程是全自动、完全透明的,在很短的时间内完成,避免业务的长时间停顿给用户造成不可估量的损失。
由于使用的是共享存储设备,因此两台主机使用的实际上是同一份数据,不用担心数据一致性的问题。
当故障排除后,管理人员可以选择自动或手动将业务切换回原主机;也可以选择不切换,此时维修好的主机就作为备份机,双机系统继续工作。
SUSE Linux 11安装
SUSE Linux 11.0 安装Suse Linux Enterprise Server 11.0安装、配置与管理手册Version 1.01. 安装准备●x86计算机,20G以上硬盘,100M以太网卡,2G以上内存;●安装介质:SuseLinux DVD 2-1;●磁盘驱动程序盘(可选);●磁盘容量规划表(如下表)2. 安装过程2.1 启动机器选择Installation;安装程序加载Linux核心。
2.2 选择语言、键盘,并接受软件许可2.3 检查安装介质(可选)2.4 选择安装类型New Installation2.5 选择时间和时间区域2.6 选择服务器基本场景2.7 安装设置预览●点击“Partitioning”,进行磁盘定制;●点击“Software”进行软件定制。
2.8 配置磁盘PC服务器配臵的本地磁盘通常容量较大,应合理规划容量,并预留一定的空间后续使用。
通常一个磁盘最多可以创建四个主分区或三个主分区和一个扩展分区,而扩展分区又可以创建若干子扩展分区。
每个主分区和扩展分区或扩展分区的子分区构成磁盘物理卷,是组成卷组的最小单位,即扩展卷组空间每次以一个物理卷为单位的,因此每个物理卷的容量不宜太大,建议容量以10G单位。
基于上述原因,建议的磁盘规划如下:(1)创建一个主分区给swap使用;(2)创建一个主分区给boot使用;(3)创建一个主分区给操作系统使用;(4)剩余空间暂不分配,留待以后使用。
2.8.1 选择“Custom Partitioning (for experts)”2.8.2 创建磁盘分区●选择“Hard Disks”;●选中要创建分区的磁盘;●点击“Add”按钮;●选择创建主分区;●此分区给swap使用,按Swap的要求指定容量。
容量可以使用K、M、G描述单位。
例如:512M。
●指定文件系统类型为swap;●比照上述步骤,创建一个主分区给/boot使用;文件系统类型为ext3,MountPoint为/boot;●比照上述步骤,创建一个主分区给/root使用,文件系统类型为0x8e LinuxLVM。
linux系统如何安装软件(详细文字教程)
linux系统如何安装软件 (详细文字教程)在Linux中安装软件时,我们经常要考虑到这样几个个问题:(1).怎样安装软件;(2).软件安装在什么地方;(3).如何卸载删除不要的软件......下面,我们就一起来认识一下这些方面的问题。
一.认识Linu x应用软件安装包通常Linu x应用软件的安装包有三种:1) tar包,如softw are-1.2.3-1.tar.gz。
它是使用UN IX系统的打包工具t ar打包的。
2) rpm包,如softw are-1.2.3-1.i386.rpm。
它是Redh at Linux提供的一种包封装格式。
(现在用的全称叫RPMPackag e Manage r,以前叫Red hat Packag e Manage r)3) dpkg包,如softw are-1.2.3-1.deb。
它是Deba in Linux提供的一种包封装格式。
而且,大多数Lin ux应用软件包的命名也有一定的规律,它遵循:名称-版本-修正版-类型例如:1) softwa re-1.2.3-1.tar.gz 意味着:软件名称:softwa re版本号:1.2.3修正版本:1类型:tar.gz,说明是一个t ar包。
2) sfotwa re-1.2.3-1.i386.rpm软件名称:softwa re版本号:1.2.3修正版本:1可用平台:i386,适用于Int el 80x86平台。
类型:rpm,说明是一个r pm包。
注:由于rpm格式的通常是已编译的程序,所以需指明平台。
在后面会详细说明。
而softw are-1.2.3-1.deb就不用再说了吧!大家自己练习一下。
二、了解包里的内容:一个Linu x应用程序的软件包中可以包含两种不同的内容:1) 一种就是可执行文件,也就是解开包后就可以直接运行的。
SUSE Linux操作系统安装指南
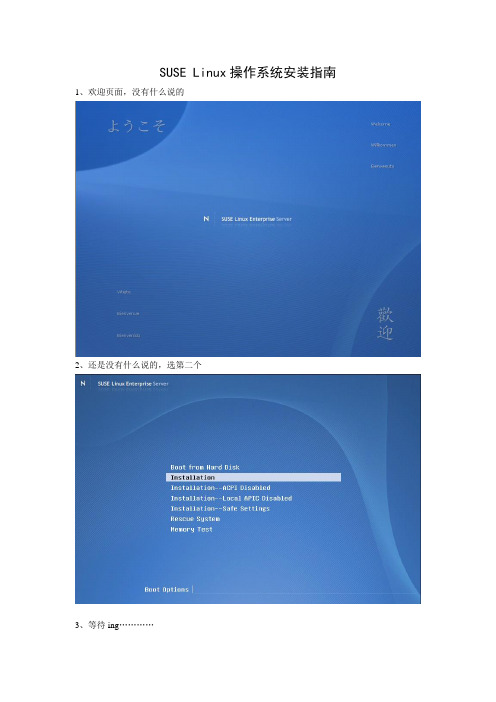
SUSE Linux操作系统安装指南1、欢迎页面,没有什么说的2、还是没有什么说的,选第二个3、等待ing…………4、一般选择英语,如果是国内版本,可以选择中文5、license页面,选择同意,点“next”6、选择第一个全新安装7、这个地方是配置时区,请选择“Asia”、“China”、“Local Time”。
8、进入设置页面了…………9、磁盘设置。
红圈处一个不知道11、选第二个,第一个不知道什么意思。
11、点“Create”12、以后遇到这个页面就选第一个的15%~20%45%~50%。
因为刷库时候表空间可能在这个目录下,所以建议创建空间时候大一点。
另外,空间大小前面一定要加个“+”号,表示从前一个空间向后多少。
不加的话准备哭吧。
15、创建home目录空间,按照红圈处说明的选择。
注意,空间大小一般是磁盘空间大小的40%~45%。
建议创建空间时候比opt目录的空间小一点。
另外,空间大小前面一定要加个“+”号,表示从前一个空间向后多少。
不加的话准备哭吧。
保证最小是内存大小的2倍。
16、点“finish”,没啥说的。
17、磁盘空间创建完了,下面是选择安装的软件。
18、选红圈处的18、所有的东东前面都打勾,但是红圈处的千万不能打勾,否则装oracle的时候准备哭吧。
19、如果出现下面的提示,好象是什么冲突,随便选一个就行,我一般选择最后一个。
不要问我为什么,我也不知道。
20、不明白什么意思,点接受吧,哪位E文好的可以翻译一下。
21、又回到主界面了,选“Accept”22、开始安装了23、安装界面,没有什么说的24、按提示重启吧25、设置root用户的密码,设置之后可能会提示密码简单等错误,不用管他,一路ok。
26、设置域名与主机名,这个地方默认吧,以后可以改。
27、配置网络。
记得将防火墙关掉,否则以后会出现奇怪问题。
尤其是安装ftp与telnet服务的时候。
28、测试网络连接,选no吧。
29、服务配置,包含根证书之类的东东。
Suse_Linux_11_双机集群配置文档

Suse Linux 11 双机集群配置文档一安装前准备1.两台装有suse 11 sp1操作系统的服务器,每台服务器有两块网卡。
2.Suse 11 sp1系统安装碟或者ISO文件。
3.suse 11 sp1 HA 安装碟或者iso文件SLE-11-SP1-HA-x86_64-GM-Media1.iso二安装Heartbeat通过yast2工具添加heartbeat,选择软件—附加产品如图1:图1附加产品安装添加HA应用url勾选“高可用性”安装三Heartbeat配置下面以浙江移动流量服务器双机热备为例,讲述heartbeat的配置。
1. 网卡设置主服务器:bond0 10.70.238.157/26 bond0:0 10.7.8.1备服务器:bond0 10.70.238.158/26 bond0:0 10.7.8.2浮动IP:10.70.238.159/26(之后将对其进行配置)因浙江移动要求主机双线路,所以服务器上两网卡做了bond,两台服务器的bond0:0口用直通线连接作为心跳线2.主机系统配置(1) 在两台服务器上修改/etc/hosts文件,修改内容如下:10.70.238.157 pc-zjdamglk01.site pc-zjdamglk0110.70.238.158 pc-zjdamglk02.site pc-zjdamglk0210.7.8.1 pc-zjdamglk01.site pc-zjdamglk0110.7.8.2 pc-zjdamglk02.site pc-zjdamglk023. 开启同步服务在主服务器上开启同步服务,配置如下:1、启动YaST 并选择杂项> 群集或在命令行中运行yast2 cluster 启动初始群集配置对话框。
2、在通讯通道类别中,配置用于群集节点间通讯的通道。
此信息会写入/etc/ais/openais.conf 配置文件。
通信通道用10.7.8.0网段,组播地址,端口不变。
suselinux安装教程
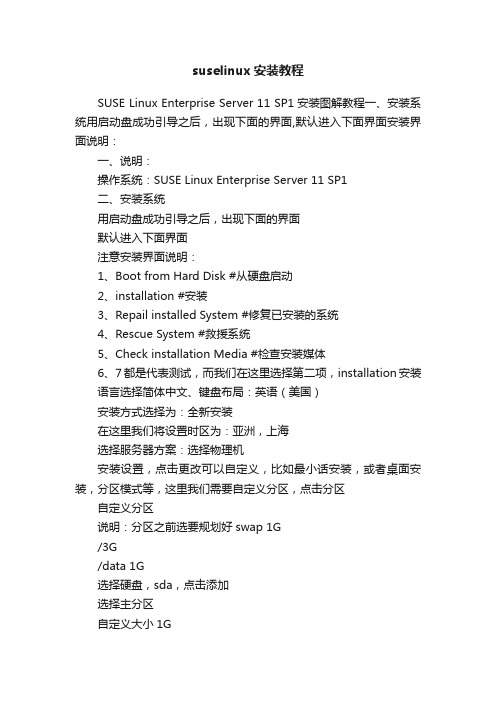
suselinux安装教程SUSE Linux Enterprise Server 11 SP1安装图解教程一、安装系统用启动盘成功引导之后,出现下面的界面,默认进入下面界面安装界面说明:一、说明:操作系统:SUSE Linux Enterprise Server 11 SP1二、安装系统用启动盘成功引导之后,出现下面的界面默认进入下面界面注意安装界面说明:1、Boot from Hard Disk #从硬盘启动2、installation #安装3、Repail installed System #修复已安装的系统4、Rescue System #救援系统5、Check installation Media #检查安装媒体6、7都是代表测试,而我们在这里选择第二项,installation安装语言选择简体中文、键盘布局:英语(美国)安装方式选择为:全新安装在这里我们将设置时区为:亚洲,上海选择服务器方案:选择物理机安装设置,点击更改可以自定义,比如最小话安装,或者桌面安装,分区模式等,这里我们需要自定义分区,点击分区自定义分区说明:分区之前选要规划好swap 1G/3G/data 1G选择硬盘,sda,点击添加选择主分区自定义大小1G文件系统,Swap安装点Swap 继续添加主分区自定义大小3G文件系统:ext3安装点/继续添加扩展分区默认,完成选择扩展分区,继续添加逻辑分区自定义大小,全部剩余空间文件系统:ext3安装点/data接受安装选择我同意安装下一步下一步正在安装系统自动重启。
浪潮服务器安装SUSE Linux 11.x系统配置步骤

浪潮服务器安装SUSE Linux11.x系统配置步骤目录1、光盘引导,加载RAID卡驱动 (2)2、基本设置 (4)3、分区设置 (8)4、软件包选择 (15)1、光盘引导,加载RAID卡驱动RAID卡驱动一般是iso格式,可以将驱动通过UltraISO工具写入到软盘,如果没有软盘可以用浪潮U盘(带虚拟软驱功能),如果也没有浪潮U盘,可以将驱动ISO文件刻成光盘。
1)光盘引导后出现如下安装界面。
把光标移动到Installation上,按F6键,选择Yes,在Installation上回车,开始安装。
如下图:2、基本设置3)选择安装时的键盘和语言。
4)选择全新安装,点下一步5)选择时区6)选择安装到物理机7)选择expert(专家)自定义安装,接下来需要设置的选项有partitioning(分区)、booting(引导),以及software(软件包)。
3、分区设置7-1)点击partitioning进行分区设置。
如下图,选择CustomPartitioning(自定义),点击Next下一步。
在磁盘上点右键选择add partition(新建分区)一般只需要创建一个根分区/和一个交换分区swap就可以了,当然也可以根据实际需要进行设置。
首先创建根分区,这里分区类型选择Primary Partition(主分区)填写分区大小文件系统选择Ext3,挂载点选择/Swap交换分区和其它分区创建方法类似。
7-2)点击booting进行引导设置。
点击Boot Loader Installation选项卡,Boot Loader选择Grub,Boot LoaderLocation保持默认即可。
特别注意:如果用U盘安装系统,请选择BootLoader Installation Details,务必本地磁盘调整为第一位,以免将Grub安装到U盘上导致系统无法启动。
4、软件包选择7-3)点击Software进行软件包设置。
Linux安装驱动更新磁盘使用指南(适用于Lenovo ThinkSystem服务器)说明书
Draft document for reviewApril 1, 2022 9:06 amFront coverUsing Driver Update Disk to Install Linux on Lenovo ThinkSystem ServersIntroduces the Driver Update DiskfeatureDescribes the use of the DUD fileExplains how to build a DUD file under Linux Shows how to confirm that the DUD file is loadedSong ShangClick here to check for updates1577TOC.fm Draft document for review April 1, 2022 9:06 am AbstractDriver Update Disk (DUD) is a feature of Linux operating systems used to install drivers forrequired devices or updated software packages during operating system installation. It iseasy to fix any installation issues and does not require a pre-installed operating system andapplication.This document introduces Driver Update Disk feature, shows users how to build a DUD file,and how to use it on supported Lenovo® ThinkSystem™ servers. This paper is intended forIT specialists and IT administrators who are familiar with Red Hat/SUSE Linux operatingsystem and want to install an older or customized operating system on Lenovo ThinkSystemservers with newer devices.At Lenovo Press, we bring together experts to produce technical publications around topics ofimportance to you, providing information and best practices for using Lenovo products andsolutions to solve IT challenges.See a list of our most recent publications at the Lenovo Press web site:Do you have the latest version? We update our papers from time to time, so checkwhether you have the latest version of this document by clicking the Check for Updatesbutton on the front page of the PDF. Pressing this button will take you to a web page thatwill tell you if you are reading the latest version of the document and give you a link to thelatest if needed. While you’re there, you can also sign up to get notified via email wheneverwe make an update.ContentsIntroduction . . . . . . . . . . . . . . . . . . . . . . . . . . . . . . . . . . . . . . . . . . . . . . . . . . . . . . . . . . . . . . 3Layout of the DUD . . . . . . . . . . . . . . . . . . . . . . . . . . . . . . . . . . . . . . . . . . . . . . . . . . . . . . . . . 3Building a DUD file. . . . . . . . . . . . . . . . . . . . . . . . . . . . . . . . . . . . . . . . . . . . . . . . . . . . . . . . . 4Using the DUD ISO file . . . . . . . . . . . . . . . . . . . . . . . . . . . . . . . . . . . . . . . . . . . . . . . . . . . . . 6Verification. . . . . . . . . . . . . . . . . . . . . . . . . . . . . . . . . . . . . . . . . . . . . . . . . . . . . . . . . . . . . . . 6Resources . . . . . . . . . . . . . . . . . . . . . . . . . . . . . . . . . . . . . . . . . . . . . . . . . . . . . . . . . . . . . . . 6Author. . . . . . . . . . . . . . . . . . . . . . . . . . . . . . . . . . . . . . . . . . . . . . . . . . . . . . . . . . . . . . . . . . . 7Notices. . . . . . . . . . . . . . . . . . . . . . . . . . . . . . . . . . . . . . . . . . . . . . . . . . . . . . . . . . . . . . . . . . 8Trademarks . . . . . . . . . . . . . . . . . . . . . . . . . . . . . . . . . . . . . . . . . . . . . . . . . . . . . . . . . . . . . . 9 2Using Driver Update Disk to Install Linux on Lenovo ThinkSystem ServersIntroductionDriver Update Disk (DUD) is a feature of Linux operating systems used to install drivers forrequired devices or updated software packages during operating system installation.Compared to other update methods, with DUD, it is easy to fix any installation issues anddoes not require a pre-installed operating system and application. The DUD file is a specialformat file that is created based on driver source code provided by hardware componentvendor or updated software packages provided by OS vendor, and is ultimately used by theinstalled system.In general, the OS or hardware component vendor only provides the current standard versionof the DUD file, but if you are using a customized OS or meet the following conditions youneed to make your own DUD file:The OS image does not support new devices and OS/hardware component vendor does not provide DUD files of new devices.You want to use the latest driver or specified version, but it is not in the OS image, or there is no DUD file provided by OS/hardware component vendor.There are some software issues when you install OS via the released image. You can build the fixed package as a DUD file and solve the problem.DUD (also known as Driver Update Programmer, DUP), is supported by the following Linuxdistributions:Red Hat Enterprise Linux 5 and laterSUSE Linux Enterprise Server 9 and laterSecure Boot limitation: On UEFI systems with the Secure Boot technology enabled, thesoftware package cannot be loaded or installed because it is not signed by the OS vendor. Layout of the DUDThe DUD layout depends on different Linux distributions. For SLES, the structure is as followsand shown in Figure1.linux / [ Distribution ] / [ Architecture ]-[ Version ] /# tree linux/linux/••• suse # [ Distribution]••• x86_64-sles15 # [ Architecture ]-[Version]••• dud.config••• inst-sys• ••• lib• ••• modules• ••• 5.3.18-22-default• ••• weak-updates• ••• megaraid_sas• ••• megaraid_sas.ko.new••• install••• megaraid_sas-07.717.02.00-1.x86_64.rpm••• update.post2••• update.preFigure 1 SLES DUD Structure© Copyright Lenovo 2022. All rights reserved.3For RHEL and CentOS, the DUD structure is as follows and shown in Figure2.OEMDRV/ [ rhdd3 & rpms] / [ Arch & Any other architecture file]# tree OEMDRV/ # The storage device MUST labeled “OEMDRV“OEMDRV/••• rhdd3 # DD marker, contains the DUD's description string••• rpms••• x86_64 # Contains RPMs for this arch and acts as package repo••• kmod-megaraid_sas-07.717.02.00_el8.1-1.x86_64.rpm••• repodata••• 3d92d42ad490563…db-other.xml.gz…••• repomd.xmlFigure 2 RHEL / CentOS DUD StructureBuilding a DUD fileThis section demonstrates how to build a DUD file from source code.The requirements to build a DUD file are as follows:Operating system with compilation environment (including gcc, rpmbuild, make,createrepo, mkisofs, etc)Driver source codeOpen source tools:–mkdud - see https:///openSUSE/mkdud–mkdriverdisk.sh - seehttps:///h2onda/9c73da8ddaa0f8dacc41#file-mkdriverdisk-sh –ddiskit - see https:///orosp/ddiskitThe following steps show how to build a DUD file. We are using the Broadcom MegaRAIDdriver for our example.1.Download the source code package from the component vendor website.2.Install the source rpm and review the output to determine the full path to the SPECSdirectory as shown in Figure3.Note: If provided by the IO vendor, it is recommended to install Kernel Module Packages(KMP) for SLES and Kernel Module (KMOD) package for RHEL / CentOS.# rpm -ivvvh megaraid_sas-07.717.02.00-1.src.rpm…D: 0 /usr/src/packages/SOURCES/D: 1 /usr/src/packages/SPECS/Figure 3 Full path to the SPECS directory4Using Driver Update Disk to Install Linux on Lenovo ThinkSystem Servers1577paper.fm - Draft document for review April 1, 20223.Navigate to the SPECS file directory and build the driver using the rpmbuild command asshown in Figure4.localhost:/usr/src/packages/SPECS # rpmbuild -ba megaraid_sas.specExecuting(%prep): /bin/sh -e /var/tmp/rpm-tmp.rge8Yb…Wrote: /usr/src/packages/RPMS/x86_64/megaraid_sas-07.717.02.00-1.x86_64.rpmlocalhost:/usr/src/packages/SPECS #Figure 4 rpmbuild command4.Build DUD/ISO file based on the rpm compiled in Step 3.For SLES:a.Create the DUD file using mkdud:# ./mkdud --dist SLES15SP2 --create SLES15SP2_RAID.dudmegaraid_sas-07.717.02.00-1.x86_64.rpmFigure 5 mkdud commandb.Get the directory “linux” by extracting the dud file:# gzip -dc SLES15SP2_RAID.dud | cpio -dim# lsSLES15SP2_RAID.dud linuxFigure 6 Determine thec.Create the ISO file with the “linux” directory above:# mkdir build # Create a temporary directory# mv linux build/ # Move the directory “linux” into temporary directory.# mkisofs -r -o SLES15SP2_RAID.iso ./build/Figure 7 Creating the ISO imageFor RHEL/CentOS:a.Create the ISO file via tool “mkdriverdisk.sh” using the rpm created in Step 3.# ./mkdriverdisk.sh /root/rpmbuild/RPMS/x86_64/kmod-megaraid_sas-07.717.02.00-1.x86_64.rpm Directory walk startedDirectory walk done - 1 packages…create driver disk to driverdisk_2022-01-12_19:39:42.iso is done!#Figure 8 Creating the ISO5Draft document for review April 1, 2022 - 1577paper.fm Using the DUD ISO fileThis section describes how to use the DUD file under Red Hat/CentOS and SUSE.To install an operating system using the DUD file, use the following steps:1.Burn the DUD ISO into a DVD/CD/USB flash drive or make the ISO image available to thesystem through a virtual disk.2.Boot the installer media and use the appropriate boot parameters for the version of OSyou are installing:–For RHEL/CentOS 6 and 5, use the option dd (driver disk)–For RHEL/CentOS 8 and 7, use the option inst.dd or inst.dd=location wherelocation can be a local storage device or a network location (HTTP, HTTPS or FTPserver). For example:•inst.dd=http://host.fake.domain/path/to/dd.iso•inst.dd=cdrom:/dev/cdromIf you are using inst.dd without a location, you will be asked for the driver file duringboot.–For SUSE, use the option dud=1 or dud=URL where URL can be, for example:•dud=ftp:///PATH_TO_DRIVER•dud=/PATH_TO_DRIVERIf you use dud=1, you will be asked for the URL during boot.3.Select the drivers required to complete the installation.VerificationYou can check the driver information via the command modinfo DRIVER_NAME as shown inFigure9.Figure 9 Verifying the driverIf the output version or file name path is identical to DUD file, the installation is successful. ResourcesRed Hat: How to create a driver update disk (DUD) for installation using USBhttps:///solutions/6078541Red Hat: How to create an anaconda driver disk for RHELhttps:///solutions/1581936Using Driver Update Disk to Install Linux on Lenovo ThinkSystem Servers1577paper.fm - Draft document for review April 1, 2022Red Hat: Where can I download Driver Update Program (DUP) disks?https:///articles/64322SUSE: usagehttps:///doc/Usage/Driver_Kits.htmlNovell: Creating a Driver Update Disk (DUD)https:///developer/creating_a_driver_update_disk_%28dud%29.html CentOS: Preparing for a Driver Update During Installationhttps:///en-US/centos/install-guide/DU-Updating_drivers_during_ins tallation_x86/#sect-driver-updates-during-installation-preparing-x86Driver Update Disks Developer Documentationhttps:///rhinstaller/anaconda/blob/master/dracut/README-driver-updates.mdddiskit repositoryhttps:///orosp/ddiskitAuthorSong Shang is a Linux Engineer in Lenovo Infrastructure Solutions Group, based in Beijing,China.Thanks to the following people for their contributions to this project:David Watts, Lenovo PressAdrian Huang, Lenovo Linux EngineerGary Cudak, Lenovo Lead Architect7© Copyright Lenovo 2022. All rights reserved.Note to U.S. Government Users Restricted Rights -- Use, duplication or disclosure restricted by Global Services Administration (GSA) ADP Schedule Contract 8NoticesLenovo may not offer the products, services, or features discussed in this document in all countries. Consult your local Lenovo representative for information on the products and services currently available in your area. Any reference to a Lenovo product, program, or service is not intended to state or imply that only that Lenovo product, program, or service may be used. Any functionally equivalent product, program, or service that does not infringe any Lenovo intellectual property right may be used instead. However, it is the user's responsibility to evaluate and verify the operation of any other product, program, or service.Lenovo may have patents or pending patent applications covering subject matter described in this document. The furnishing of this document does not give you any license to these patents. You can send license inquiries, in writing, to:Lenovo (United States), Inc.1009 Think Place - Building One Morrisville, NC 27560U.S.A.Attention: Lenovo Director of LicensingLENOVO PROVIDES THIS PUBLICATION “AS IS” WITHOUT WARRANTY OF ANY KIND, EITHER EXPRESS OR IMPLIED, INCLUDING, BUT NOT LIMITED TO, THE IMPLIED WARRANTIES OF NON-INFRINGEMENT, MERCHANTABILITY OR FITNESS FOR A PARTICULAR PURPOSE. Some jurisdictions do not allow disclaimer of express or implied warranties in certain transactions, therefore, this statement may not apply to you.This information could include technical inaccuracies or typographical errors. Changes are periodically made to the information herein; these changes will be incorporated in new editions of the publication. Lenovo may make improvements and/or changes in the product(s) and/or the program(s) described in this publication at any time without notice.The products described in this document are not intended for use in implantation or other life support applications where malfunction may result in injury or death to persons. The information contained in this document does not affect or change Lenovo product specifications or warranties. Nothing in this document shall operate as an express or implied license or indemnity under the intellectual property rights of Lenovo or third parties. All information contained in this document was obtained in specific environments and is presented as an illustration. The result obtained in other operating environments may vary.Lenovo may use or distribute any of the information you supply in any way it believes appropriate without incurring any obligation to you.Any references in this publication to non-Lenovo Web sites are provided for convenience only and do not in any manner serve as an endorsement of those Web sites. The materials at those Web sites are not part of the materials for this Lenovo product, and use of those Web sites is at your own risk.Any performance data contained herein was determined in a controlled environment. Therefore, the result obtained in other operating environments may vary significantly. Some measurements may have been made on development-level systems and there is no guarantee that these measurements will be the same on generally available systems. Furthermore, some measurements may have been estimated through extrapolation. Actual results may vary. Users of this document should verify the applicable data for their specific environment.This document was created or updated on April 1, 2022.Send us your comments via the Rate & Provide Feedback form found at/lp1577TrademarksLenovo and the Lenovo logo are trademarks or registered trademarks of Lenovo in the United States, other countries, or both. These and other Lenovo trademarked terms are marked on their first occurrence in this information with the appropriate symbol (® or ™), indicating US registered or common law trademarks owned by Lenovo at the time this information was published. Such trademarks may also be registered or common law trademarks in other countries. A current list of Lenovo trademarks is available fromhttps:///us/en/legal/copytrade/.The following terms are trademarks of Lenovo in the United States, other countries, or both: Lenovo®Lenovo(logo)®ThinkSystem™The following terms are trademarks of other companies:Linux is a trademark of Linus Torvalds in the United States, other countries, or both.Other company, product, or service names may be trademarks or service marks of others.9。
suse11 sp3快速安装指南中文
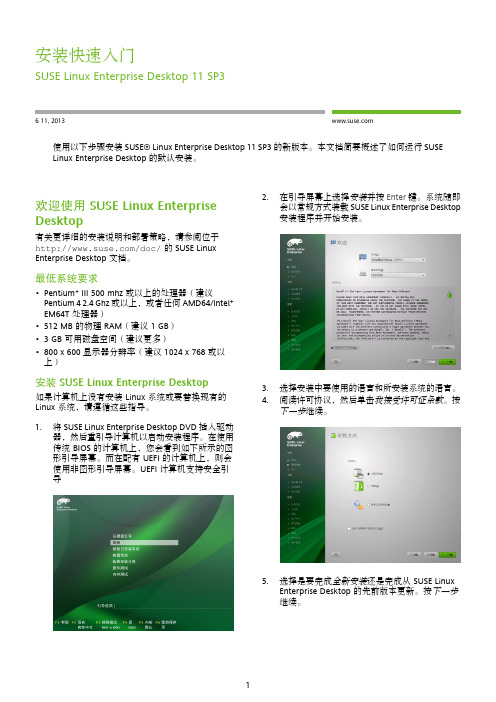
欢迎使用 SUSE Linux Enterprise Desktop
有关更详细的安装说明和部署策略,请参阅位于 /doc/ 的 SUSE Linux Enterprise Desktop 文档。
最低系统要求
• Pentium* III 500 mhz 或以上的处理器(建议 Pentium 4 2.4 Ghz 或以上,或者任何 AMD64/Intel* EM64T 处理器)
0. PREAMBLE
The purpose of this License is to make a manual, textbook, or other functional and useful document "free" in the sense of freedom: to assure everyone the effective freedom to copy and redistribute it, with or without modifying it, either commercially or noncommercially. Secondarily, this License preserves for the author and publisher a way to get credit for their work, while not being considered responsible for modifications made by others.
最低系统要求pentiumiii500mhz或以上的处理器建议pentium24ghz或以上或者任何amd64intelem64t处理器512mb的物理ram建议gb可用磁盘空间建议更多600显示器分辨率建议1024768或以安装suselinuxenterprisedesktop如果计算机上没有安装linux系统或要替换现有的linux系统请遵循这些指导
- 1、下载文档前请自行甄别文档内容的完整性,平台不提供额外的编辑、内容补充、找答案等附加服务。
- 2、"仅部分预览"的文档,不可在线预览部分如存在完整性等问题,可反馈申请退款(可完整预览的文档不适用该条件!)。
- 3、如文档侵犯您的权益,请联系客服反馈,我们会尽快为您处理(人工客服工作时间:9:00-18:30)。
[SUSE][安装]SUSE Linux 11安装详细指南
1.将SUSE Linux 11系统安装盘放入光驱,重新启动电脑;在Dell LOGO界面按F12,选择CD-ROM启动。
我们进入到欢迎界面,选择“Welcome”继续。
2.在弹出的界面,选择“Installation”开始安装。
我们可以在这个界面按F2,通过Language语言选择“简体中文”。
3.界面跳转到简体中文版,进入到语言和键盘布局界面,也可以在该界面再选择语言和键盘布局;选择“我接受许可证条款”。
点击“下一步”继续。
4.此时会出现“媒体检查”页面。
对于采用Novell公司提供的安装光盘的用户,可以直接点击“下一步”跳过启动检查。
但对于需通过网络渠道获得Suse Linux 系统的用户,建议检测一下(点击“启动检查”),不过检测过程这可能需要很长的时间。
5.“系统侦测”阶段。
系统会自动分析硬件设备以确保Suse Linux系统能够完整的安装在计算机上。
6.在系统检测过程完成后,弹出“安装方式”界面,安装模式包括:全新安装、更新以及恢复已安装系统。
我们选择“全新安装”,点击“下一步”继续。
7.“时钟和时区”选择。
请选择默认时区,不要选择“将硬件时钟设置为UTC (H)”。
点击“下一步”继续。
8.进入“创建新用户”界面。
您可以根据自己的需要输入“用户的完整名称”和“密码”等信息,然后点击“下一步”继续。
如果您不想单独设置“Root”密码,推荐选择“对系统管理员使用此密码”。
需要注意,您输入的用户密码或设置root密码长度至少要达到5位,否则系统会提示出“密码过于简单”对话框。
9.“安装设置”- 创建分区。
我们可以使用Suse Linux系统提供的自动分区,不用点击“更改”,点击“下一步”,即可使用Suse的默认分区模式。
也可以根据自己需要进行分区设置。
点击“更改”,选择“自定义分区(仅限专家)”,点击“下一步”继续。
注意:如果您要自定义分区,Linux只能设置3个主分区(本文推荐您设置为一个启动分区,一个交换分区以及一个根分区;您也可以根据实际应用将主分区设置为其他格式),之后只能是逻辑分区。
选中左栏的“硬盘”-“sda”,点击“添加”。
我们首先来介绍如何设置三个主分区,请选择“主分区”,点击“下一步”继续。
请在“自定义大小”处,手动输入需要设置的分区大小。
/boot 启动分区空间设置为100MB-200MB(存放Linux的启动文件),
/swap 分区设置为2G(建议设置为内存容量的2倍),
/ 根分区空间设置为10G以上,也可根据硬盘容量需要设置。
(如果不再设置逻辑分区,根分区可设置为剩余硬盘大小)。
在“格式化分区”选项中,选择“文件系统”为“Ex t3",转入分区安装点为”/boot”
我们在做交换分区时,也是选择“硬盘”-sda,选择主分区,在“格式化分区”选项中,选择“文件系统”为“swap";,转入分区安装点为”swap";。
划分根分区时,依次选择:选择“硬盘”-sda,选择主分区,在“格式化分区”选项中,选择“文件系统”为“Ext3";,转入分区安装点为”/";。
分区完成后,请点击“完成”。
我们也可以根据您的需要选择软件和系统任务。
点击“软件”,选择“更改”即可进入“Software Selection and System Tasks”界面。
如:在“开发”下勾选“C/C++编译器和工具”。
(如不安装,可能将导致一些驱动或程序无法编译。
请确保勾选该项。
)点击“确定”。
10.安装许可协议。
点击安装。
此时会相应弹出多个“确认包许可证”对话框,请依次点击“我同意”。
12. 安装系统所需要的包已经导入完毕,点击安装即可进入系统安装界面。
安装过程可能需要较长的一段时间,敬请耐心等待。
13.安装完毕后,系统重新启动:
SUSE Linux Enterprise 11系统准备阶段已经完成,接下来就是安装过程的最后一个阶段-配置阶段。
14.Novell 客户中心配置阶段,由于系统还没有联网,建议您选择“稍后配置”。
点击“下一步”继续。
15.写入系统配置。
请等待几分钟,当写入系统配置完成后,点击“下一步”继续。
16.安装已完成。
请点击“完成”。
17. 安装完成后,重启SUSE Linux系统,在系统启动项中选择“SUSE Linux Enterprise Desktop……”。
SUSE Linux Enterprise 11开始进行加载,在进入系统之前需要键入安装过程中设定的的用户名和密码。
输入用户名和密码之后,我们进入到SUSE Linux Enterprise 11的默认绿色桌面了。
