三星K2200固件升级说明2
固件升级重要说明Q23HWVersionV2.0

固件更新说明:Q23HWVersionV2.0首版固件VER:0.1.4,用户可在开机后选择进入设置—系统设置—产品信息查看本机固件版本号。
(本版固件仅适用于Q23HWVersionV2.0,此机型的机身底部丝印和说明书上均标注有HWVersionV2.0字样,请避免与机型Q23混淆。
)固件升级注意事项:-请用户认准固件再升级。
错刷固件将导致产品损坏,由此导致的问题只能由用户负责。
-升级前务必备份好机器内的重要数据,升级过程中很可能会格式化可移动盘,升级完成后原有的数据将全部丢失,无法恢复。
-升级前确认机器电量充足,最好是充满电再做升级,避免因为电量不足导致升级失败。
-升级过程中不能按复位键,升级过程中不能有升级要求以外的操作,以免因操作按键导致升级失败。
-没有问题的产品没必要升级固件,只有用户手上的播放器有固件更新说明中说明的问题时,固件升级才能解决问题。
-请避免升级操作不当导致升级失败,按升级方法操作,如有问题请联系经销商的售后部门协助升级。
升级方法一:1、将从蓝魔公司网站下载的Q23HWVersionV2.0最新固件压缩包解压缩到任意一个文件夹。
压缩包中应包含固件升级说明、Q23HWVersionV2.0软件Firmware.img、升级工具文件夹和DRIVER文件夹。
2、双击运行用户升级工具夹中的文件RKDeviceManage.exe3、点击固件信息后的按钮,在此处选择电脑中文件Q23HWVersionV2.0固件Firmware.img所在路径后,升级工具显示界面如下:4、把Q23HWVersionV2.0关机,插入USB线连接电脑。
(如果您是第一次升级本播放器,关机状态下,连接电脑后电脑系统会弹出驱动安装的请求,驱动程序在本压缩包的Driver文件夹内,根据电脑提示选择安装驱动。
)5、点击【升级】或【修复】,开始固件升级,用户可以在升级工具的相关窗口查看升级进度。
升级可能会擦除机内的所有数据,请注意升级前备份机内的重要文件。
SINAMICS S210 固件更新指南说明书
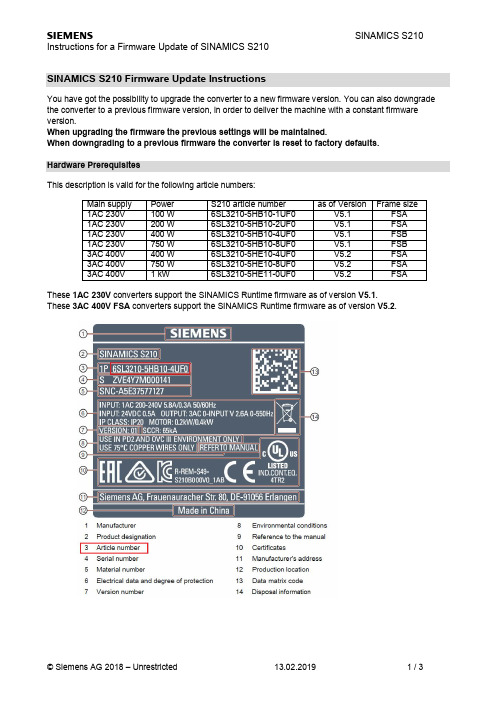
SINAMICS S210 Firmware Update InstructionsYou have got the possibility to upgrade the converter to a new firmware version. You can also downgrade the converter to a previous firmware version, in order to deliver the machine with a constant firmware version.When upgrading the firmware the previous settings will be maintained.When downgrading to a previous firmware the converter is reset to factory defaults.Hardware PrerequisitesThis description is valid for the following article numbers:Main supply Power S210 article number as of Version Frame size1AC 230V100 W6SL3210-5HB10-1UF0V5.1FSA1AC 230V200 W6SL3210-5HB10-2UF0V5.1FSA1AC 230V400 W6SL3210-5HB10-4UF0V5.1FSB1AC 230V750 W6SL3210-5HB10-8UF0V5.1FSB3AC 400V400 W6SL3210-5HE10-4UF0V5.2FSA3AC 400V750 W6SL3210-5HE10-8UF0V5.2FSA3AC 400V 1 kW6SL3210-5HE11-0UF0V5.2FSA These1AC 230V converters support the SINAMICS Runtime firmware as of version V5.1.These3AC 400V FSA converters support the SINAMICS Runtime firmware as of version V5.2.Memory cards for the Firmware UpdateA SD-memory card is required for the firmware update.Either you can use a memory card which is already plugged into the converter or a new memory card. Alternatively you can order a memory card with software on which the desired firmware is already installed.Card type Article numberEmpty SD-Card6SL3054-4AG00-2AA0SD-Card with Firmware V5.16SL3054-4FB00-2BA0SD-Card with Firmware V5.1 SP1 6SL3054-4FB10-2BA0SD-Card with Firmware V5.1 SP16SL3054-4FB10-2BA0-Z F01with Extended Safety LicenseSD-Card with Firmware V5.26SL3054-4FC00-2BA0SD-Card with Firmware V5.26SL3054-4FC00-2BA0-Z F01with Extended Safety LicenseThese SD-Cards can also be used to store the licenses for functions which require licensing. (e. g. Extended Safety License). It is not possible to use standard SD-card for this purpose.NoteThe integrated card reader only supports SD-cards up to a memory capacity of 2 GB.SDHC- or SDXC-cards are not supported.Preparing the SD-card for the Firmware UpdateIn order to install the software on the SD-card a SD-card reader is required in the PC/PG.If you are using a SD-card with preinstalled firmware then you can directly proceed with the firmware update. Backup of the SD-cardIf you like to install software on a SD-card which is already plugged into the converter, then switch the converter off and eject the SD-card.Before installing new software on this SD-card it is absolutely necessary to save all directories/files of the SD-card on your PC/PG. This especially applies to the installed licenses (directory KEYS, if available). Preparing the SD-cardAfter backing up the SD-card content on the PC/PG you can delete all files from the memory card (if a directory KEYS exists it does not need to be deleted).Extract the ZIP-file with the firmware which you like to install onto the SD-card.Copy the directory KEYS from the backup on your PC/PG back onto the SD-card (in case the directory KEYS was available and has been deleted before).Firmware UpdateAttention:Please do not turn off the power supply of the converter during the update process and do not disconnect the motor (if it is connected)!Doing so could lead to faulty components.Please proceed as follows to perform a Firmware-Upgrade or –Downgrade:1. Switch the converter off.2. Insert the prepared SD-card into the converter and turn the converter on.3. The new firmware will be installed – this can take up to 5 minutes and more.The update has finished when both LEDs are blinking red synchronously every second.4. Switch the converter off and remove the memory card as needed.5. Switch the converter back on. The firmware of the connected DriveCliq-components will be updated.This requires and additional power off/on (RDY-LED is blinking fast in yellow; refer to alarmmessages in the webserver).6. Verify that the new firmware version was installed correctly. The firmware version is displayed on theHome page of the webserver below the converter symbol.7. Commission the converter if necessary.8. In case the memory card shall remain plugged into the converter, save the parameters in thewebserver so that the actual configuration is stored on the memory card as well.Extract LED-StatesPlease find further information concerning the LED states in the manual.Interesting Links:SINAMICS S210 Firmwarehttps:///cs/de/en/view/109744577SINAMICS S210 PROFINET GSDMLhttps:///cs/de/en/view/109752524。
HT2200升级说明
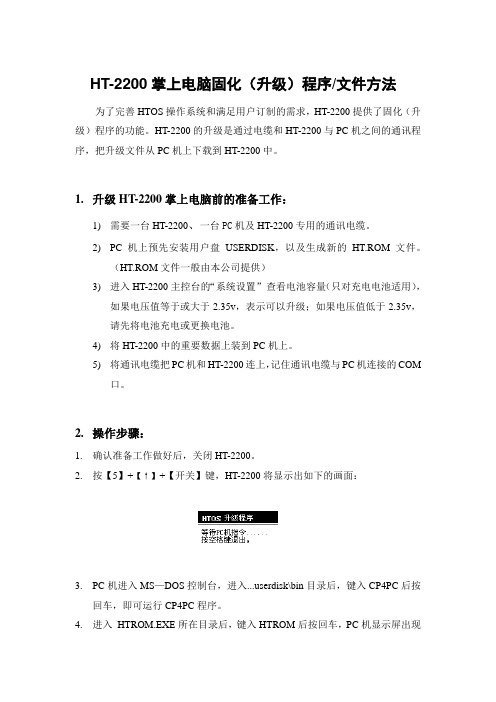
HT-2200掌上电脑固化(升级)程序/文件方法为了完善HTOS操作系统和满足用户订制的需求,HT-2200提供了固化(升级)程序的功能。
HT-2200的升级是通过电缆和HT-2200与PC机之间的通讯程序,把升级文件从PC机上下载到HT-2200中。
1.升级HT-2200掌上电脑前的准备工作:1)需要一台HT-2200、一台PC机及HT-2200专用的通讯电缆。
2)PC机上预先安装用户盘USERDISK,以及生成新的HT.ROM文件。
(HT.ROM文件一般由本公司提供)3)进入HT-2200主控台的“系统设置”查看电池容量(只对充电电池适用),如果电压值等于或大于2.35v,表示可以升级;如果电压值低于2.35v,请先将电池充电或更换电池。
4)将HT-2200中的重要数据上装到PC机上。
5)将通讯电缆把PC机和HT-2200连上,记住通讯电缆与PC机连接的COM口。
2.操作步骤:1.确认准备工作做好后,关闭HT-2200。
2.按【5】+【↑】+【开关】键,HT-2200将显示出如下的画面:3.PC机进入MS—DOS控制台,进入erdisk\bin目录后,键入CP4PC后按回车,即可运行CP4PC程序。
4.进入HTROM.EXE所在目录后,键入HTROM后按回车,PC机显示屏出现如下界面:5.按PC机键盘的【C】键,选择与电缆连接的PC机COM口,【1】表示COM1,【2】表示COM 2。
COM口缺省设置为COM 1。
6.按PC机键盘的【U】键,在指定的位置输入“HT.ROM”,按【回车】键,再按【U】键,就开始升您的机器了,整个升级过程大约要3分多钟,升级完成后,PC机显示如图:7.如果需要对多台HT-2200升级,请改换另一台HT-2200,并进入升级状态。
按PC机键盘的【U】键,HT-2200即进入升级状态。
8.升级完成后,HT-2200显示如图:按HT-2200键盘的【空格】键退出升级状态,系统自动复位。
三星K2200维修手册

版权© 1995-2013 三星所有权保留。
4-1
4.故障排除
4.2 了解状态 LED 指示灯
状态 LED 的颜色表示打印机当前状态。
LED 状态
状态 关闭
绿色
红色
电 源 / 蓝色 唤醒
闪烁 照亮 闪烁
照亮
照亮 关闭
说明 •本机脱机。 •本机处于节电模式。 当背景灯闪烁时,本机正在接收或打印数据。 •本机联机并可以使用。 •出现小错误,并且机器正在等待清除错误。检查显示信 息。当清除问题时,机器继续运行。 •墨盒内所剩的墨粉不多了,估计墨盒接近使用期限,订
4-17
பைடு நூலகம்
4.故障排除
深度 1
深度 2 低碳粉量提示
大页面计数
4.5.3.技术模式菜单说明
深度3 碳粉 OPC 单元 总计 1 总计 2
深度4 [1-30]% [1-30]%
信息>报告 •配置 它显示了当前的打印机状态,软件版本,硬件版本,纸张设置等等。 •供应品信息 它显示了耗材的寿命状态和墨粉的使用状态。 •使用计数器 包含已打印的页面总数。 •故障信息 它显示了打印机体内可能发生的各种故障。同样也可以保存历史故障并记录故障次数。
从托盘2中拾取纸张(可选)
101-0050 0050-Registration
驱动定位辊。
101-0130 0130-T2 Feed Mot
T2进纸电机开/关。
101-0131 0131-T2 Feed Slow
T2进纸电机慢开/关。
102-0010 0010-Tray1 Empty
检测主BLDC电机是否以正常速度运转。
100-0120 0120-Exit Mot Fwd
(转小语)三星手机详细的刷机教程
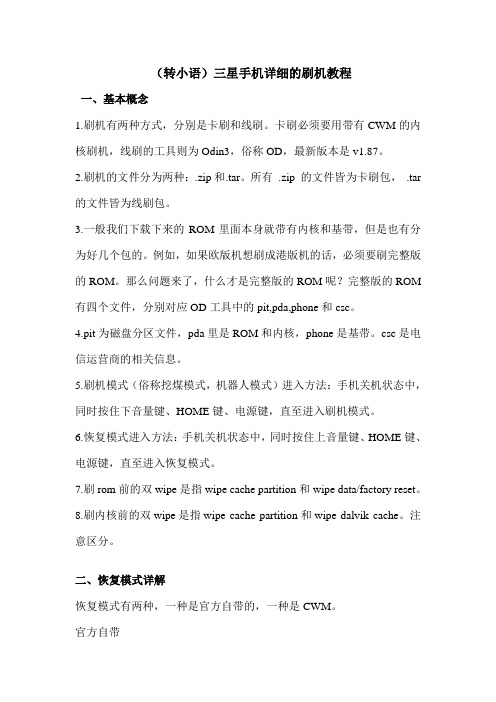
(转小语)三星手机详细的刷机教程一、基本概念1.刷机有两种方式,分别是卡刷和线刷。
卡刷必须要用带有CWM的内核刷机,线刷的工具则为Odin3,俗称OD,最新版本是v1.87。
2.刷机的文件分为两种:.zip和.tar。
所有.zip 的文件皆为卡刷包,.tar 的文件皆为线刷包。
3.一般我们下载下来的ROM里面本身就带有内核和基带,但是也有分为好几个包的。
例如,如果欧版机想刷成港版机的话,必须要刷完整版的ROM。
那么问题来了,什么才是完整版的ROM呢?完整版的ROM 有四个文件,分别对应OD工具中的pit,pda,phone和csc。
4.pit为磁盘分区文件,pda里是ROM和内核,phone是基带。
csc是电信运营商的相关信息。
5.刷机模式(俗称挖煤模式,机器人模式)进入方法:手机关机状态中,同时按住下音量键、HOME键、电源键,直至进入刷机模式。
6.恢复模式进入方法:手机关机状态中,同时按住上音量键、HOME键、电源键,直至进入恢复模式。
7.刷rom前的双wipe是指wipe cache partition和wipe data/factory reset。
8.刷内核前的双wipe是指wipe cache partition和wipe dalvik cache。
注意区分。
二、恢复模式详解恢复模式有两种,一种是官方自带的,一种是CWM。
官方自带进入方法:上音量键+HOME键+电源键官方的恢复模式只能用来清除数据(平时说的双wipe 就是进这模式) reboot system now:重启手机apply sdcard/update.zip:升级SD卡中的update.zipwipe data 清除数据相当于恢复出厂设置wipe cache 清除缓存,一些软件的遗留记录CWM 恢复模式:可刷如第3方内核获得,现在已经更新到5.0以上了。
注意AB内核系列是触摸的。
进入方法:上音量键+HOME键+电源键功能强大的第三放恢复模式,可以用来刷美化包,刷ROM,刷内核,刷机带,备份系统等。
K2200固件升级说明
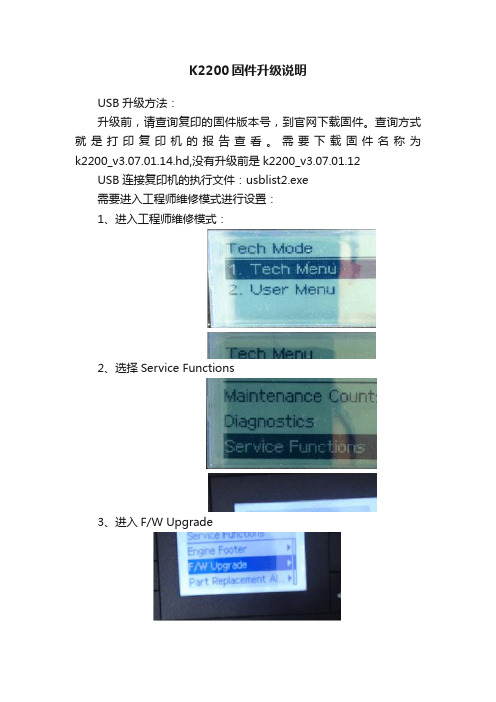
K2200固件升级说明
USB升级方法:
升级前,请查询复印的固件版本号,到官网下载固件。
查询方式就是打印复印机的报告查看。
需要下载固件名称为k2200_v3.07.01.14.hd,没有升级前是k2200_v3.07.01.12 USB连接复印机的执行文件:usblist2.exe
需要进入工程师维修模式进行设置:
1、进入工程师维修模式:
2、选择Service Functions
3、进入F/W Upgrade
4、打开端口选择on
5、保持在工程师模式,使用电脑将下好的固件更新文件拖拽到usblist2.exe文件
6、电脑提示文件传输完后,复印会出现100%走条,会自动完成升级固件步骤,关机重启。
7、升级完成后,需要进入到工程师维修模式进行设置:
8、进入工程师维修模式:
9、选择Service Functions
10、选择SFE 菜单
11、选择数字5
12、将状态改为ON
13、退出工程师维修模式,关机并重新开机。
设备就绪后该问题即可解决。
三星固件说明

伊朗:THR
爱尔兰:3IE,VDI
以色列:CEL,PCL,PTR
意大利:GOM,HUI,ITV,OMN,TIM,VOM,WIN,XET,FWB
象牙海岸:IRS,SIE
牙买加:JBS,JCN,JCW
日本:DCM,SBM,VFK
约旦:LEV
哈萨克斯坦:EST,KCL,KMB,KZK,SKZ
坦桑尼亚:SOL
突尼斯:ABS,RNG
土耳其:BAS,KVK,TUR,TLP
乌克兰:KVR,SEK,UMC
阿拉伯联合酋长国:MID,ARB,XSG,ITO
英国:O2I,O2U,ORA,TMU,TSC,VOD,XEU,VIR,H3G,CPW,BTU
美国:AWS,DOB,TMB,CLW
乌兹别克斯坦:UZB
举例:比如你输入*#272*IMEI#后,在Sales Code栏显示为BRI,即为销售往台湾的机器,即为台版。
安卓版本标识:
区域 / 语言:
ZC = 国行零售版
ZH = 香港
ZT = 台湾
ZN = 联通定制版
ZM = 移动定制版
ZS = 港台版
XX = 澳大利亚,比利时,法国,得过,匈牙利,意大利,西班牙,英国(欧洲自由市场国家)
XF = 保加利亚,克罗地亚,罗马尼亚
定制版运营商标识:
AE = 法国SFR
AI = 意大利Tim
AM = 沃达丰
AN = 德国E-Plus
AO = O2
AS = 荷兰KPN
AU = 澳大利亚Mobilkom
BB = 葡萄牙Tmn
BF = 葡萄牙Optimus
Samsung TV 软件更新指南说明书
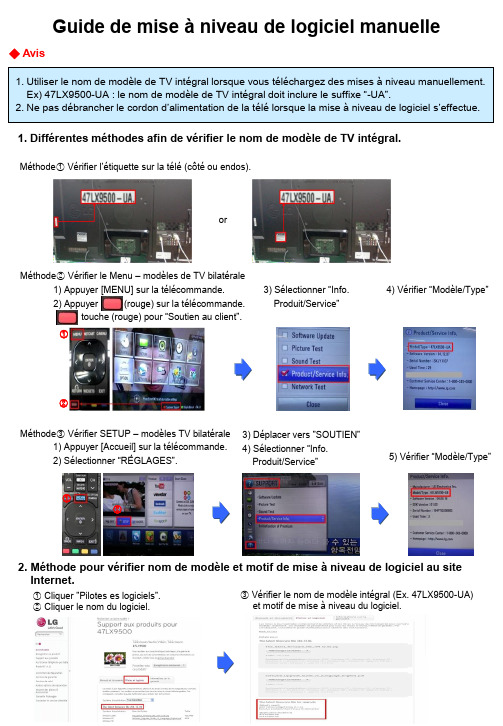
Guide de mise à niveau de logiciel manuelle◆ Avis1. Utiliser le nom de modèle de TV intégral lorsque vous téléchargez des mises à niveau manuellement. Ex) 47LX9500-UA : le nom de modèle de TV intégral doit inclure le suffixe “-UA”.2. Ne pas débrancher le cordon d’alimentation de la télé lorsque la mise à niveau de logiciel s’effectue.1. Différentes méthodes afin de vérifier le nom de modèle de TV intégral.Méthode①Vérifier l’étiquette sur la télé (côté ou endos).orMéthode② Vérifier le Menu – modèles de TV bilatérale1) Appuyer [MENU] sur la télécommande.2) Appuyer (rouge) sur la télécommande.touche (rouge) pour “Soutien au client”. 3) Sélectionner “Info.Produit/Service”4) Vérifier “Modèle/Type”1) Appuyer [Accueil] sur la télécommande.2) Sélectionner “RÉGLAGES”. 3) Déplacer vers ”SOUTIEN”4) Sélectionner “Info.Produit/Service”5) Vérifier “Modèle/Type”Méthode③ Vérifier SETUP – modèles TV bilatérale2. Méthode pour vérifier nom de modèle et motif de mise à niveau de logiciel au site Internet.① Cliquer ”Pilotes es logiciels”.② Cliquer le nom du logiciel. ③ Vérifier le nom de modèle intégral (Ex. 47LX9500-UA) et motif de mise à niveau du logiciel.①②①②1 Télécharger mises à niveau de logiciel① Sélectionner votre pays suite à accéder . ② Cliquer “Assistance”.③ Remplissez votre nom de modèle.Ex. 47LX9500④Cliquer “Continuer”.⑤ Cliquer le nom de modèle.⑥Cliquer ”Pilotes es logiciels”.⑦ Cliquer le nom de mise à niveau de logiciel le plus récent. ⑧ Vérifier le nom de modèle intégral et motif de mise à niveau du logiciel.2 Télécharger une mise à niveau de logiciel à une clé USB. Insérez la clé USB dans une prise USB du téléviseur.3 Emplacement prises USB : côté ou endos① Cliquer la touche “Télécharger ce fichier” afin de le sauvegarder à l’ordinateur.② Dézipper le fichier du logiciel.③ Insérer une clé USB dans une prise USB de votre ordinateur. ④ Créer un dossier à la clé USB et nommez-le “LG_DTV”.⑤ Sauvegarder le fichier du logiciel au dossier “LG_DTV”.or 4 Exécuter la mise à niveau du logiciel.① Si le message suivant apparaît, sélectionnez la touche “Démarrer”.② Suite au démarrage, le message suivant apparaîtra.1) Veuillez attendre alors que la mise à niveau est copiée à la télé.※ Ne retirez pas la clé USB alors que ce message s’affiche à l’écran. ※ Ne pas débrancher l’alimentation si le message est toujours affiché.2) Exécuter la mise à niveau du logiciel.※ Ne pas débrancher l’alimentation si ce message est toujours affiché.3) Suite à la terminaison de la mise à niveau, ce message s’affichera.La télé redémarrera automatiquement après 5 secondes, prête pour utilisation. Note:※ Si le logiciel courant au téléviseur s’avère le même ou plus récent que celui sur la clé USB, le menu de mise à niveau du téléviseur s’abstiendra d’ouvrir.※ Certains périphériques USB risquent ne pas être compatible avec la TV.“Cliquez ”。
三星K2200K2200ND放大缩小功能A3缩放为A4操作步骤教学文稿
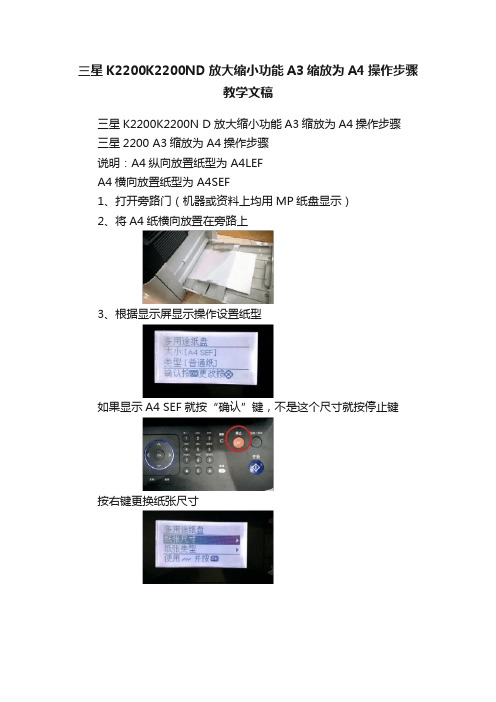
三星K2200K2200ND放大缩小功能A3缩放为A4操作步骤
教学文稿
三星K2200K2200N D 放大缩小功能A3缩放为A4操作步骤
三星2200 A3缩放为A4操作步骤
说明:A4纵向放置纸型为 A4LEF
A4横向放置纸型为 A4SEF
1、打开旁路门(机器或资料上均用MP纸盘显示)
2、将A4纸横向放置在旁路上
3、根据显示屏显示操作设置纸型
如果显示A4 SEF就按“确认”键,不是这个尺寸就按停止键
按右键更换纸张尺寸
选择为A4 SEF
点击“确认”键,显示“已保存”。
4、按功能键“缩放扩放”键
选择到70%
按确认键后显示“已保存”
5、按复印键后可从旁路走出A4的缩小复印件。
重点说明:
旁路走完纸后再加入纸张,请将进纸口塑料板手动压下或把旁路关好后再打开方能继续放纸。
纸盒设置与旁路设置纸张方式同理。
K1升级说明v
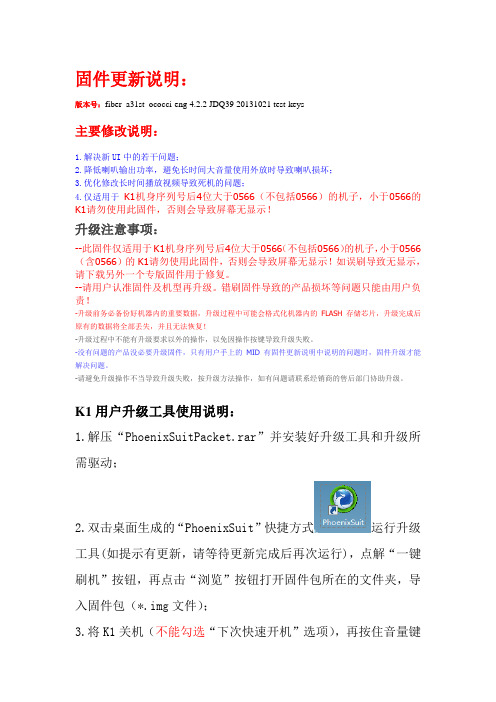
固件更新说明:版本号:fiber_a31st_ococci-eng 4.2.2 JDQ39 20131021 test-keys主要修改说明:1.解决新UI中的若干问题;2.降低喇叭输出功率,避免长时间大音量使用外放时导致喇叭损坏;3.优化修改长时间播放视频导致死机的问题;4.仅适用于K1机身序列号后4位大于0566(不包括0566)的机子,小于0566的K1请勿使用此固件,否则会导致屏幕无显示!升级注意事项:--此固件仅适用于K1机身序列号后4位大于0566(不包括0566)的机子,小于0566(含0566)的K1请勿使用此固件,否则会导致屏幕无显示!如误刷导致无显示,请下载另外一个专版固件用于修复。
--请用户认准固件及机型再升级。
错刷固件导致的产品损坏等问题只能由用户负责!-升级前务必备份好机器内的重要数据,升级过程中可能会格式化机器内的FLASH存储芯片,升级完成后原有的数据将全部丢失,并且无法恢复!-升级过程中不能有升级要求以外的操作,以免因操作按键导致升级失败。
-没有问题的产品没必要升级固件,只有用户手上的MID有固件更新说明中说明的问题时,固件升级才能解决问题。
-请避免升级操作不当导致升级失败,按升级方法操作,如有问题请联系经销商的售后部门协助升级。
K1用户升级工具使用说明:1.解压“PhoenixSuitPacket.rar”并安装好升级工具和升级所需驱动;2.双击桌面生成的“PhoenixSuit”快捷方式运行升级工具(如提示有更新,请等待更新完成后再次运行),点解“一键刷机”按钮,再点击“浏览”按钮打开固件包所在的文件夹,导入固件包(*.img文件);3.将K1关机(不能勾选“下次快速开机”选项),再按住音量键不放,通过USB线连接到电脑,即可自动进入升级模式,请用户根据自身情况选择是否强制格式化内置存储,并升级固件。
升级成功之后,拔掉USB线并按电源键3秒即可开机。
4.也可以在开机状态下,打开K1的调试模式并用USB连接到电脑,然后点击“立即升级”,之后在弹出的提示框点击点击“是”,稍后即可升级好固件(如用此方法不能进行升级,请按照关机升级的操作步骤进行升级)。
三星专属刷机工具 Odin 使用教程
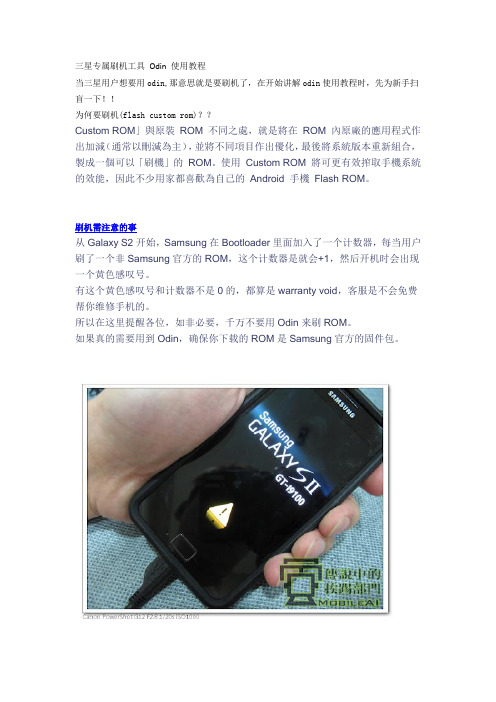
三星专属刷机工具Odin 使用教程当三星用户想要用odin,那意思就是要刷机了,在开始讲解odin使用教程时,先为新手扫盲一下!!为何要刷机(flash custom rom)??Custom ROM」與原裝ROM 不同之處,就是將在ROM 內原廠的應用程式作出加減(通常以刪減為主),並將不同項目作出優化,最後將系統版本重新組合,製成一個可以「刷機」的ROM。
使用Custom ROM 將可更有效搾取手機系統的效能,因此不少用家都喜歡為自己的Android 手機Flash ROM。
刷机需注意的事从Galaxy S2开始,Samsung在Bootloader里面加入了一个计数器,每当用户刷了一个非Samsung官方的ROM,这个计数器是就会+1,然后开机时会出现一个黄色感叹号。
有这个黄色感叹号和计数器不是0的,都算是warranty void,客服是不会免费帮你维修手机的。
所以在这里提醒各位,如非必要,千万不要用Odin来刷ROM。
如果真的需要用到Odin,确保你下载的ROM是Samsung官方的固件包。
在使用odin前,必须把USB Debugging(USB调试) 打勾1) 首先进入Setting(设定) -> Applications(应用程序) -> Development(开发),把USB Debugging(USB调试) 打勾。
下载Odin开始咯~~先来一张通俗易懂的大致图:按照图中所标识的1、2、3、4来进行刷机前的准备与操作进入以下步骤前先将你的手机进入刷机模式放在一旁准备,至于如何进入刷机模式请按下列操作进行:关机状态下。
同时按住“音量向下键+Home键+电源键”,然后你的手机就会出现下面的图案就说明已经进入刷机模式了!如果是S2 或 note 的话同时按住“音量向下键+Home键+电源键”,等荧幕出现画面后,快速按一下音量向上键,才能进入download mode...否则手机会直接开机.以上是galaxy s 进download mode 的模样。
读写三星固件教程
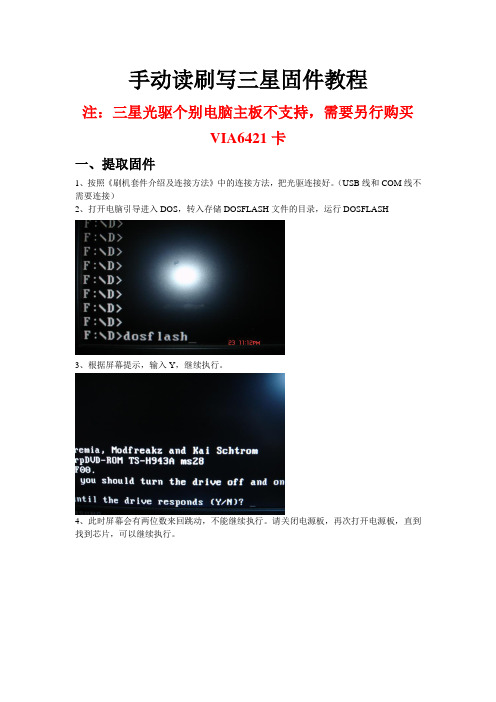
手动读刷写三星固件教程注:三星光驱个别电脑主板不支持,需要另行购买VIA6421卡一、提取固件1、按照《刷机套件介绍及连接方法》中的连接方法,把光驱连接好。
(USB线和COM线不需要连接)2、打开电脑引导进入DOS,转入存储DOSFLASH文件的目录,运行DOSFLASH3、根据屏幕提示,输入Y,继续执行。
4、此时屏幕会有两位数来回跳动,不能继续执行。
请关闭电源板,再次打开电源板,直到找到芯片,可以继续执行。
5、根据屏幕提示,选择光驱所在接口(下面这张图片光驱接的SATA口对应的是0)6、根据提示输入R,回车,输入备份固件名,回车。
此时开始备份三星光驱内固件。
(DOSFLASH1.7版本有5个提示:[R]备份固件,[W]写入固件,[E]清除固件,[LITEON K]备份建兴固件,[LITEON E]清除建兴固件)(下面这张图片中,输入的备份固件名为SX.BIN。
名称可以自己定义,但是后缀名必须是.BIN,请记住你备份的固件名,默认保存在DOSFLASH同一目录内)二、合并破解固件。
(把原机的KEY写入破解固件中)1、重新开机进入WINDOWS,运行JungleFlasher v0.1.75 Beta,1)FirmwareTool 32 (合并固件页面)2)Open Source Firmware (打开包含KEY的固件,也就是刚提取出的固件)3)Open Target Firmware (打开破解固件)4)Spoof Source to Target (点击进行合并)5)Save to File (保存合并后的固件)三、写入固件(三星光驱不需要清除固件,可以直接写入)1、把刚才合并后的破解固件放入DOSFLASH同一目录下。
2、打开电脑引导进入DOS,转入存储DOSFLASH文件的目录,运行DOSFLASH3、根据屏幕提示,输入Y,继续执行。
4、此时屏幕会有两位数来回跳动,不能继续执行。
请关闭电源板,再次打开电源板,直到找到芯片,可以继续执行。
samsung k2200打印机使用说明.ppt
返回
A3纸盘改A4纸盘设置
• 利用方向和OK键按顺序完成以下操作 • 菜单—系统设置-纸张设置-纸张尺寸-纸
盒 1-A4 SEF-OK-返回
返回
A4纸盘改A3纸盘设置
• 利用方向和OK键按顺序完成以下操作 • 菜单—系统设置-纸张设置-纸张尺寸-纸
盒 1-A3 -OK-返回
返回
A4身份证ID双面打印 1
返回
A3打印
• 一、看纸盘设置状态 • 是否A3
故障排除
• 二、看纸张装入是否正确
• 三、确认完成
返回
A3-A3复印
• 一、看纸盘设置状态 • 必须 A3
故障排除
• 二、看纸张装入是否正确
• 三、确认完成
返回
A3-A4缩印
• 一、看纸盘设置状态 • 必须 A4
• 二、看纸张装入是否正确
• 三、确认完成
返回
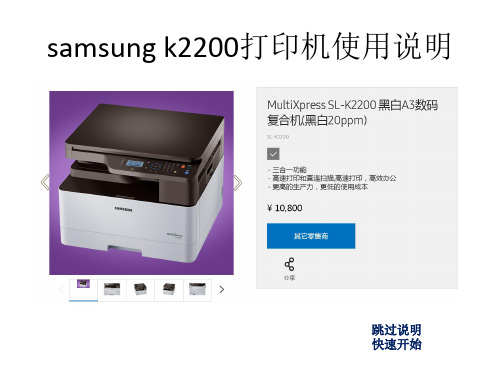
samsung k2200打印机使用说明
跳过说明 快速开始
产品配置
跳过说明 快速开始
正确选择纸盒状态
• A4状态 • A3状态
跳过说明 快速开始
正确装入纸张到玻璃台
• 正确装入A4纸张
• 正确装入A3纸张
跳过说明 快速开始
正确装入纸张到纸盒
• 正确装入A4纸张
• 正确装入A3纸张
跳过说明 快速开始
• 一、看纸盘设置状态 • 是否A4 • 二、看纸张装入是否正确是否横向装入A4
返回
A4身份证ID双面打印 2
• 三、按下ID复印键
• 四、正面放入身份证到玻璃盘 • 注意:反面向上
返回
A4身份证ID双面打印 3
• 五、反正面放入身份证到玻璃盘 按下OK键
电脑硬件固件升级与刷新方法
电脑硬件固件升级与刷新方法我相信对于很多电脑玩家来说,硬件固件升级与刷新这个词已经不再陌生。
随着科技的进步,电脑硬件的固件版本也在不断更新,这些更新旨在提供更好的性能和稳定性。
但是,有时候固件的升级和刷新可能会变得复杂和混乱,让一些用户感到困扰。
在本文中,我将向大家介绍一些简单易懂的电脑硬件固件升级与刷新的方法,希望能够帮到大家。
1.了解什么是硬件固件首先,我们需要了解什么是硬件固件。
硬件固件是指预先存储在电脑硬件中的一组软件指令或数据,它们控制硬件的操作和功能。
通常情况下,硬件固件包括BIOS(基本输入输出系统)和UEFI(统一可扩展固件接口)。
2.为什么要升级硬件固件升级硬件固件有几个主要的原因。
首先,升级固件可以修复可能存在的漏洞和错误,提供更好的安全性和稳定性。
其次,固件升级还可以增加新功能和改进现有功能,让硬件能够更好地适应新的软件和系统。
最后,固件升级还可以提高硬件的性能和效能。
3.备份重要数据在进行任何硬件固件升级或刷新之前,请务必备份重要的数据。
虽然大多数固件升级过程不会影响数据,但我们也无法排除意外发生的可能性。
所以,为了避免数据的丢失和损坏,务必提前备份。
4.查询厂商网站在进行硬件固件升级之前,最好查询硬件厂商的官方网站。
通常,厂商会在网站上发布最新的固件版本和升级步骤。
这些信息可以帮助你确保选择正确的固件版本,并且了解如何正确进行升级操作。
5.使用厂商提供的工具一些硬件厂商提供了专门的工具来升级硬件固件。
这些工具通常会自动检测硬件并下载适合的固件版本。
在运行这些工具之前,请确保你的电脑已经连接到互联网,并且关闭其他可能引起干扰的软件。
6.使用内置固件更新功能除了厂商提供的工具外,一些电脑硬件(如显卡和主板)还提供了内置的固件更新功能。
你可以在设备管理器或BIOS设置中找到这些选项。
通过这些选项,你可以直接下载和升级硬件固件。
7.刷新固件当硬件固件出现故障或错误时,可能需要执行固件刷新操作。
三星K2200固件更新手册2
三星K2200固件更新手册2目录1. 简介2. 准备工作3. 更新固件步骤4. 常见问题解答5. 结论1. 简介本手册旨在向用户提供三星K2200多功能一体机的固件更新步骤。
固件更新是保持设备正常运行和提升性能的重要环节。
2. 准备工作在进行固件更新之前,您需要完成以下准备工作:- 确保K2200多功能一体机稳定连接电源;- 将K2200多功能一体机与计算机连接好,确保可以正常传输数据;3. 更新固件步骤请按照以下步骤更新K2200多功能一体机的固件:1. 打开计算机上的固件更新工具;2. 将K2200多功能一体机连接到计算机;3. 在固件更新工具中选择“设备连接”,确保K2200多功能一体机被识别;5. 选择“开始更新”以开始固件更新;6. 等待固件更新完成,并确保设备处于连接状态;7. 更新完成后,重新启动K2200多功能一体机。
4. 常见问题解答Q: 更新固件是否会影响已存储的数据?A: 更新固件不会影响已存储的数据。
然而,为了避免任何风险,我们建议在更新固件之前备份您的数据。
Q: 如何确定固件更新是否成功?A: 固件更新成功后,您将看到K2200多功能一体机显示屏上的确认信息。
此外,在更新过程中,固件更新工具也会显示更新进度。
Q: 如果固件更新失败怎么办?A: 如果固件更新失败,请重新启动K2200多功能一体机和计算机,并确保再次按照准备工作和更新步骤进行操作。
如果问题仍然存在,请联系三星客服获取进一步的支持。
5. 结论固件更新是保证三星K2200多功能一体机正常运行和提升性能的重要步骤。
通过按照本手册提供的步骤进行操作,您可以轻松更新K2200多功能一体机的固件,并确保设备的稳定性和性能提升。
如有任何疑问,请随时联系三星客服寻求帮助。
感谢您的阅读!。
三星Knox E-FOTA企业固件更新一商品说明书
Samsung Knox E-FOTA One 4/16/21 Samsung Knox Enterprise Firmware-Over-The-Air One (Samsung E-FOTA or Solution) is a business solution that allows Customers to manage firmware versions on Samsung mobile devices to maximize efficiencies. The latest security patches can be deployed to devices on a schedule set by the Customer. Alternatively, IT admins can test updates before deployment, helping to ensure compatibility between in-house apps and new OS versions.Service Description (SD)1. GeneralThe Solution consists of the following components: (i) a downloadable application (App) that is managed using (ii) a Samsung web-based server (collectively the Solution). An optional Customization Set-up Service is also available.1.1. Samsung E-FOTAUse of the Solution enables enterprise IT administrators to remotely deploy OS versions and security updates to subscribed devices without requiring user interaction. It enables Forced Updates (pushed updates that do not require user interaction), Selective OS Version (devices locked to a specific OS version until the Customer is ready to deploy the latest OS version), and Scheduled Updates that help reduce interruptions by scheduling firmware updates. Customers use a web-based console to control how and when firmware updates are performed on subscribed mobile devices that have downloaded the App.Using the Solution, a Customer's IT administrators can push firmware updates from a Samsung Business-To-Business (B2B) FOTA server to subscribed devices.Samsung E-FOTA may be used with Samsung Knox-supported devices with Android 7 and later OS installed. Out-of-box experience (OOBE) installation may be used with devices that have Android 9 and later OS installed.1.2. Samsung Customization Set-up Service (Optional)Optional Samsung Customization Set-up Service is provided directly by Samsung. This service helps Customers configure their Samsung E-FOTA service. Samsung experts work to understand the Customer's business requirements, then develop an appropriate configuration within the Samsung E-FOTA portal.1.3. Important Information•All fees paid for the Solution are non-refundable.•Users may download the App onto one device per subscription.•The Solution is only available to enterprises in the U.S. and end users download the App in the U.S. Customer is responsible for all uses of the Solution outside the U.S. •The Solution is available only to Customers with a qualified AT&T business orgovernment agreement (Enterprise Agreement) and a Foundation Account Number (FAN).•Users' devices must be subscribed to an AT&T wireless service and activated on an eligible AT&T data plan on a compatible device with a high-speed connection.•The Solution's administrative interface is accessed via a Web portal and requires a n Internet connection.•AT&T reserves the right to (i) modify or discontinue the Solution in whole or in part and/or (ii) terminate the Solution at any time without cause.•Additional hardware, software, service and/or network connection may be required to access the Solution.•Use of the Solution requires download of application software to user devices from a n app store or from a third-party site. AT&T is not licensing or furnishing the software. •The Solution is subject to the terms and conditions of the Knox E-FOTA Terms & Conditions located at https:///admin/#/terms, as it may be amended from time to time. See the Knox E-FOTA Terms & Conditions section below for additional information.•Exclusive Remedy - Customer's sole and exclusive remedy for any damages, losses, claims, costs and expenses arising out of or relating to use of the Solution will be termination of service.1.4. Data PrivacyCustomer Personal Data may be transferred to or accessible by (i) AT&T personnel around the world (ii) third-parties who act on AT&T's or AT&T’s supplier’s behalf as subcontractors; and (iii) third-parties (such as courts, law enforcement or regulatory authorities) where required by law. Customer will only provide or make Customer Persona l Data accessible when Customer has the legal authority to do so and for which it has obtained the necessary consents from its end users and will camouflage or securely encrypt Customer Personal Data in a manner compatible with the Solution. As used in this Service Guide, the term Customer Personal Data includes, without limitation, name, phone number, email address, wireless location information or any other information tha t identifies or could reasonably be used to identify Customer or its end users. Customer is responsible for providing end users with clear notice of AT&T’s and Customer’s collection and use of Customer Personal Data obtained via the Solution, including, without limitation, end user device location information, and for obtaining end user consent to that collection and use. Customer may satisfy its notification requirements as to AT&T by advising end users in writing that AT&T and its suppliers may collect and use Customer Personal Data by providing for end user review the relevant links to the Product Brief or other sales information that describes the Solution and to AT&T’s Privacy Policy at /gen/privacy-policy?pid=2506. Customer is responsible for notifying end users that the Solution provides E-FOTA capabilities and has control over what updates are provided, including how and when.1.5. Knox E-FOTA Terms & ConditionsCustomer must agree to the terms of the Knox E-FOTA Terms & Conditions before the first use of the Solution. The Knox E-FOTA Terms & Conditions is an agreement between Customer and Samsung, to which AT&T is not a party. If Customer does not accept the terms of the Knox E-FOTA Terms & Conditions, it must not use the Solution.2. Offer Elements (Service Components)The Solution includes subscriptions to the Samsung E-FOTA App, use of the Samsung FOTA B2B server, Samsung Maintenance and Technical Support. Optional Professiona l Services are also available.2.1. Subscriptions (Samsung E-FOTA App)The App is made available to users’ devices from a commercial app store.2.2. Technical SupportSamsung E-FOTA subscriptions include Samsung Maintenance and Technical Support in the US only. Samsung technical support is accessible online or by phone. Samsung's portal provides 24-hour access to FAQs, Knowledge Base, documentation, ticket submission and tracking. Customers can submit tickets to the Samsung Technica l Support team through the web portal. A phone number is provided to Customers to rea ch the Samsung Technical Support team, who are available from 8am to 8pm CST, 24x7x365.2.3. Samsung Professional ServicesSamsung provides a range of Professional Service to support individual AT&T Customers' requirements, which are charged on an individual case basis. Please contact an AT&T Account Executive for further information.3. GlossaryPricing (P)1. BillingBilling for the Solution shall be as stated below.•Subscriptions are available for one-year or two year terms, billed in advance as one-time non-recurring charges (NRCs).•Professional Services are invoiced on a non-recurring, individual case basis.•All fees paid are non-refundable.•All prices exclude applicable taxes, fees and surcharges.2. Rate Table SEFOTA-LIC-MRC: Samsung E-FOTA – Licenses and Support –Annual Charge – Per Device3. Rate Table SEFOTA-LIC-NRC: Samsung E-FOTA – Optional Support - Non-Recurring。
一种基于在线升级固件的三星LED显示器故障维修方法
一种基于在线升级固件的三星LED显示器故障维修方法内容摘要:三星LED显示器常会出现黑屏的“通病”故障,本文针对该故障进行硬件检测,通过对测试结果和故障现象以及相关资料的分析,找出了故障原因,并给出了一种基于在线升级固件的故障维修方法,成功修复显示器。
关键字:三星显示器远程控制在线升级固件驱动程序 I2C总线三星显示器是目前市场上比较先进的显示器,特别是LED显示器因其外观清秀、显示清晰、色彩鲜艳,在家庭和工作中得到了广泛应用。
然而LED显示器使用一段时间后会出现黑屏现象,导致显示器不能正常使用,大量用户反映这是该品牌显示器的一个多发故障,是三星LED显示器的一个“通病”。
一、故障现象三星显示器这种“通病”是该品牌SA200、SA300、SA330、SA350、SA450、SA550等类型LED显示器经常会出现的故障。
故障现象为显示器加电时,显示器黑屏,这时显示器不能显示计算机信号,除了电源按键可以使用外,其它按键都无反应,先是屏幕左上角出现一个“数字”小框飘来飘去,随后会出现“检测信号线”的字样,屏幕画面如图1所示。
图1 显示器故障现象本文总结此类显示器的维修方法,以三星S23A300B显示器为例,简要介绍其维修过程。
二、硬件检修(一)显示器拆卸在对显示器进行拆卸前,断开信号连接线,关闭显示器,拔掉电源线,准备正确的拆卸工具。
拆卸显示器流程如图2所示。
图2 拆卸显示器流程图(二)检修方法拆开后盖,接上信号线和电源线,加电,对电路板关键部位进行检测。
控制电路板测试流程如图3所示,控制电路板及关键测试部位如图4所示。
图3 控制电路板检测流程图图4 控制电路板及关键测试部位图检修过程如下:第1步:检测MCU (微控单元)震荡电路是否正常。
检测晶体X401两管脚波形,波形输出振荡正常,说明振荡电路正常。
第2步:检测视频信号是否有输入。
在R108、R110和R112电阻上测试RGB 输入信号,检测有RGB 信号输入,说明视频信号输入正常。
70款三星手机固件升级推送,升级改善卡顿、发热、续航!
70款三星手机固件升级推送,升级改善卡顿、发热、续航!在采购一款手机的时,大家总能看到手机参数介绍里写着安卓5.1类似的数值,这是什么呢?大家都比我聪明,知道这是谷歌公司发布的安卓版本号!对,你的手机是安卓几点几呢?更高的版本号,可以有更好体验,更好的系统优化,更好的电源管理,更多功能的实现等。
当你购买了一款手机,用一段时间后慢慢觉得卡顿、发烫、续航不行了,而你往往可以通过升级系统来修复这些bug呢?这个时候手机的固件更新升级就显得尤为重要,这些都要看厂家是否负责任。
三星在2016年2月对旗下70余款手机推送了最新的固件。
那么固件升级之后的三星手机到底有什么样的变化呢?今天小编就对更新升级后的三星手机来进行系统体验介绍,来看看进行固件之后的三星手机系统体验会有哪些提升。
首先来为大家普及下固件升级,固件升级的本质是固件升级,包括驱动、系统、功能、应用等的升级,和硬件没有直接关系。
固件升级更多的是保证将升级包下载,并且安装至终端,在智能时代,固件升级云升级将成为智能终端的标准配置。
而国内厂商采用的OTA推送升级,只是单纯意义上的空中下载技术,而三星针对旗下70款手机推出了系统更新,并且升级方式就是采用固件升级,与国内厂商习惯的OTA升级相比,固件升级属于全量升级,而OTA属于增量升级,三星做为国际大厂,升级固件也一定是全面性的升级。
此次大范围三星手机的固件升级,手机系统内的UI界面没有太大的变化,保持了三星一贯简洁灵巧的拟物风格,但是在体验中还是能很明显的感受到系统有更好的优化体验,简单来说就是更新固件之后的三星手机系统更加的流畅,值得一提的是界面与界面之间的切换的流畅度相比之前更加的顺滑流畅,老版本中不跟手的现象不复存在。
在更新前的体验上,大家经常会发现,配置很高的手机运行微博、淘宝、京东等app时也有偶尔卡顿掉帧的现象,让你使用时心情烦透了,这并不是手机的配置不够,只是这些apps日积月累的侵占着手机系统内存,让系统内存越来越少,导致卡顿!但也不乏有手机对某款app优化的不够好的情况,导致单纯性的运行运算卡顿,这些都是可以通过固件升级来优化的!三星手机在更新了固件后,可以优化网络切换机制,改善移动中的使用体验,优化RAM碎片整理机制,还可以检测并告警过度占用资源的应用,总之要远远好于更新之前的体验,让手机运行的更加无比流畅!系统优化带来的是直观的体验感受,而此次固件升级,三星手机带来最大的变化就是系统中的“智能管理器”。
- 1、下载文档前请自行甄别文档内容的完整性,平台不提供额外的编辑、内容补充、找答案等附加服务。
- 2、"仅部分预览"的文档,不可在线预览部分如存在完整性等问题,可反馈申请退款(可完整预览的文档不适用该条件!)。
- 3、如文档侵犯您的权益,请联系客服反馈,我们会尽快为您处理(人工客服工作时间:9:00-18:30)。
二、USB升级步骤:升级的电脑必须先安装USB打印驱动复印机需开启USB升级选项
进入维修模式:依次按下“菜单# 1 9 3 4 菜单”
选择第一项按右键
选择到Service Functions按右键
选择到F/W Upgrade 按右键
按上下键选中ON
然后按OK 键,屏幕显示“Saved”
此时可不退出维修模式,如果机器有操作或自动添加墨粉等动作,请打开前门完成升级操作。
在电脑端,将升级文件K2200_V3.07.01.24.HD 用鼠标左键按住不放并拖动到升级程序usblist2.exe上然后松开鼠标左键,程序开始自动升级。
升级完成后,复印机将自动重启。
升级完成后请打印出配置页,检查目前机器
的版本号。
三、2200ND 可以直接用网络升级(网络升级不用执行第二项)
找到复印机的IP地址,然后用IE浏览器输入完整的IP地址后回车。
在打开的网页右上角点击登陆
输入用户名admin ,密码sec00000
点击浏览按钮,选择下载的K2200_V3.07.01.24.HD
根据提示一直点击下一步直到复印机升级完成后自动重启。
