Winform之TextBox边框底色重绘实例
WinForm控件之【TextBox】

WinForm控件之【TextBox】基本介绍⽂本控件,提供多⾏⽂本编辑和密码字符掩码功能。
常设置属性ForeColor:此组件的前景⾊,⽤于显⽰⽂本;BorderStyle:指⽰编辑控件是否应带有边框或边框类型;Lines:多⾏编辑中的⽂本⾏,作为字符串值的数组;MaxLength:指定可以在编辑控件中输⼊的最⼤字符数;PasswordChar:指⽰将为单⾏编辑控件的密码输⼊显⽰的字符;Multiline:控制编辑控件的⽂本是否能够跨越多⾏;ScrollBars:定义控件滚动条的⾏为;WordWrap:指⽰多⾏编辑控件是否⾃动换⾏;Enabled:指⽰是否启⽤该控件,true为启⽤状态⽤户可编辑,false为禁⽤状态⽤户不可编辑;Name:指⽰代码中⽤来标识该对象的名称;Text:获取或设置多格式⽂本框中的⽂本;事例举例相关代码//控件提⽰信息变量string strUser = "长度不低于四个字符", strPwd = "长度不低于六个字符,由字母和数字组成";#region⽤户密码控件设置提⽰信息相关事件private void txt_user_Enter(object sender, EventArgs e){TextBox tb = (TextBox)sender;if (tb.Text.Equals(strUser)){tb.Text = string.Empty;tb.ForeColor = System.Drawing.SystemColors.WindowText;}}private void txt_user_Leave(object sender, EventArgs e){TextBox tb = (TextBox)sender;if (string.IsNullOrWhiteSpace(tb.Text)){tb.Text = strUser;tb.ForeColor = System.Drawing.SystemColors.ScrollBar;}}private void txt_pwd_Enter(object sender, EventArgs e){TextBox tb = (TextBox)sender;if (tb.Text.Equals(strPwd)){tb.Text = string.Empty;tb.ForeColor = System.Drawing.SystemColors.WindowText;tb.PasswordChar = '*';}}private void txt_pwd_Leave(object sender, EventArgs e){TextBox tb = (TextBox)sender;if (string.IsNullOrWhiteSpace(tb.Text)){tb.Text = strPwd;tb.ForeColor = System.Drawing.SystemColors.ScrollBar;tb.PasswordChar = '\0';}}#endregion//登录private void btn_login_Click(object sender, EventArgs e){if (string.IsNullOrWhiteSpace(txt_user.Text) || txt_user.Text.Equals(strUser)){MessageBox.Show("⽤户名不能为空!", "系统提⽰", MessageBoxButtons.OK, MessageBoxIcon.Warning);return;}else{if (txt_user.Text.Length < 4){MessageBox.Show("⽤户名长度不能低于四个字符!", "系统提⽰", MessageBoxButtons.OK, MessageBoxIcon.Warning);return;}}if (string.IsNullOrWhiteSpace(txt_pwd.Text) || txt_pwd.Text.Equals(strPwd)){MessageBox.Show("密码不能为空!", "系统提⽰", MessageBoxButtons.OK, MessageBoxIcon.Warning);return;}else{if (txt_pwd.Text.Length < 6){MessageBox.Show("⽤户名长度不能低于六个字符!", "系统提⽰", MessageBoxButtons.OK, MessageBoxIcon.Warning);return;}string strRegex = "[0-9]";if (!System.Text.RegularExpressions.Regex.IsMatch(txt_pwd.Text, strRegex)){MessageBox.Show("密码必须存在数字,请确认!", "系统提⽰", MessageBoxButtons.OK, MessageBoxIcon.Warning);return;}strRegex = "[a-zA-Z]";if (!System.Text.RegularExpressions.Regex.IsMatch(txt_pwd.Text, strRegex)){MessageBox.Show("密码必须存在字母,请确认!", "系统提⽰", MessageBoxButtons.OK, MessageBoxIcon.Warning);return;}}MessageBox.Show("登录成功!", "系统提⽰", MessageBoxButtons.OK, rmation);}//退出private void btn_exit_Click(object sender, EventArgs e){this.Close();}。
winform richtextbox使用
winform richtextbox使用下面是一个关于使用WinForm RichTextBox 控件的1500-2000 字的文章。
WinForm RichTextBox 使用指南引言WinForm 是一个功能强大的桌面应用程序开发框架,它提供了许多可视化控件来帮助开发人员快速构建应用程序。
其中之一就是RichTextBox 控件,它允许我们在应用程序中创建和编辑格式化文本。
本文将详细介绍如何使用WinForm RichTextBox 控件,并提供一些实用的示例来帮助您更好地理解。
什么是WinForm RichTextBox 控件?WinForm RichTextBox 控件是一个可用于显示和编辑文本的控件。
与标准文本框控件相比,它具有更多的功能,例如可以支持不同的字体、字号和颜色,还可以插入图片和超链接等。
它是一个非常灵活和强大的工具,可以满足各种文本编辑需求。
1. 创建一个WinForm 应用程序首先,我们需要创建一个新的WinForm 应用程序来使用RichTextBox 控件。
打开Visual Studio,并选择新建项目。
在弹出的对话框中选择“Windows 应用程序”模板,然后点击“下一步”。
在下一个对话框中,输入应用程序的名称并选择一个保存位置。
最后,点击“创建”按钮,即可创建一个新的WinForm 应用程序。
2. 在窗体上添加RichTextBox 控件一旦应用程序创建完成,我们可以在窗体上添加RichTextBox 控件。
在Visual Studio 的设计器中打开窗体,然后从工具箱中拖动一个RichTextBox 控件到窗体上的合适位置。
3. 设置RichTextBox 控件的属性-在设计时,我们可以通过设置控件的各种属性来自定义RichTextBox 控件的外观和行为。
例如,我们可以设置控件的Name 属性,以便在代码中引用它。
我们还可以设置控件的大小和位置,以确保它适合窗体布局。
Visual C++调整对话框背景颜色代码
【例Ex_BkColor】调整对话框背景颜色①用MFC AppWizard(exe)创建一个默认的对话框应用程序Ex_BkColor。
②将对话框的标题设为“调整对话框背景颜色”。
删除“TODO: 在这里设置对话控制。
”静态文本控件和[取消]按钮,将[确定]按钮标题改为“退出”。
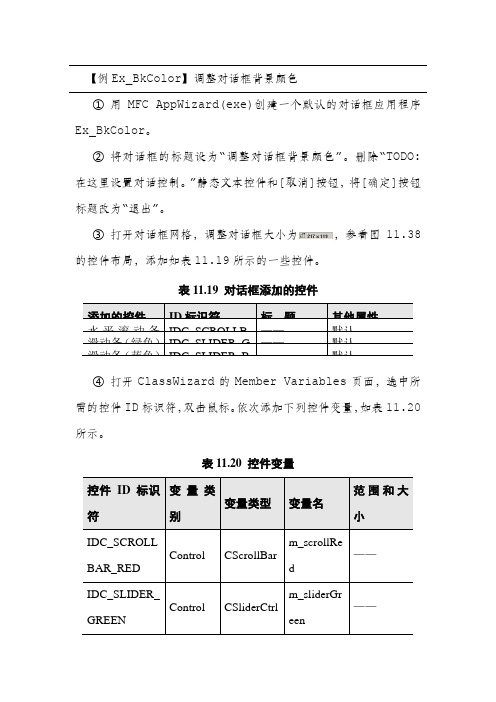
③打开对话框网格,调整对话框大小为,参看图11.38的控件布局,添加如表11.19所示的一些控件。
表11.19 对话框添加的控件④打开ClassWizard的Member Variables页面,选中所需的控件ID标识符,双击鼠标。
依次添加下列控件变量,如表11.20所示。
表11.20 控件变量⑤为CEx_BkColorDlg类添加两个成员变量,一个是int型m_nRedValue,用来指定RGB中的红色分量,另一个是画刷CBrush 类对象m_Brush,用来设置对话框背景所需要的画刷。
在OnInitDialog中添加下列初始化代码:BOOL CEx_BkColorDlg::OnInitDialog(){CDialog::OnInitDialog();…// TODO: Add extra initialization herem_scrollRed.SetScrollRange(0, 255);m_sliderBlue.SetRange(0, 255);m_sliderGreen.SetRange(0, 255);m_nBlue = m_nGreen = m_nRedValue = 192;UpdateData( FALSE );m_scrollRed.SetScrollPos(m_nRedValue);return TRUE; // return TRUE unless you set the focus to a control}⑥用MFC ClassWizard为CEx_BkColorDlg类添加WM_HSCROLL消息映射,并添加下列代码:void CEx_BkColorDlg::OnHScroll(UINT nSBCode, UINT nPos, CScrollBar* pScrollBar){int nID = pScrollBar->GetDlgCtrlID();// 获取对话框中控件ID值if (nID == IDC_SCROLLBAR_RED) { // 若是滚动条产生的水平滚动消息switch(nSBCode){case SB_LINELEFT: m_nRedValue--;// 单击滚动条左边箭头break;case SB_LINERIGHT: m_nRedValue++;// 单击滚动条右边箭头break;case SB_PAGELEFT: m_nRedValue -= 10;break;case SB_PAGERIGHT: m_nRedValue += 10;break;case SB_THUMBTRACK: m_nRedValue = nPos;break;}if (m_nRedValue<0) m_nRedValue = 0;if (m_nRedValue>255) m_nRedValue = 255;m_scrollRed.SetScrollPos(m_nRedValue);}Invalidate(); // 使对话框无效,强迫系统重绘对话框CDialog::OnHScroll(nSBCode, nPos, pScrollBar);}⑦用MFC ClassWizard为CEx_BkColorDlg类添加WM_CTLCOLOR消息映射,并添加下列代码:HBRUSH CEx_BkColorDlg::OnCtlColor(CDC* pDC,CWnd* pWnd, UINT nCtlColor){UpdateData(TRUE);COLORREF color = RGB(m_nRedValue, m_nGreen, m_nBlue);m_Brush.Detach(); // 使画刷和对象分离m_Brush.CreateSolidBrush(color); // 创建颜色画刷pDC->SetBkColor( color ); // 设置背景颜色return (HBRUSH)m_Brush; // 返回画刷句柄,以便系统使此画刷绘制对话框}代码中,COLORREF是用来表示RGB颜色的一个32位的数据类型,它是Visual C++中一种专门用来定义颜色的数据类型。
『转载』C#winform中dataGridView的重绘(进度条,虚线,单元格合并等)

『转载』C#winform中dataGridView的重绘(进度条,虚线,单元格合并等)原⽂转载⾃:最近⽐较浅的研究了⼀下dataGridView的重绘,发现⾥⾯还是有很多东西可以学习的,摘录如下(其实就是在dataGridView1_CellPainting写⼀些代码)主要代码:1int top = 0;2int left = 0;3int height = 0;4int width1 = 0;5///<summary>6///窗体的重绘事件7///</summary>8///<param name="sender"></param>9///<param name="e"></param>10private void dataGridView1_CellPainting(object sender, DataGridViewCellPaintingEventArgs e)11 {12/** 表头处理*************************************/13if (e.RowIndex == -1)14 {15if (e.ColumnIndex == 0 || e.ColumnIndex == 1 || e.ColumnIndex == 2 || e.ColumnIndex == 3 || e.ColumnIndex == 4 || e.ColumnIndex == 5)16 {17 top = e.CellBounds.Top;18 left = e.CellBounds.Left - 1;19 height = e.CellBounds.Height;20 width1 = e.CellBounds.Width;21 Rectangle rect1 = new Rectangle(left, top, width1, e.CellBounds.Height);22//表头第⼀列23if (e.ColumnIndex == 0)24 {25using (Brush backColorBrush = new SolidBrush(Color.Blue))26 {27//抹去原来的cell背景28 e.Graphics.FillRectangle(backColorBrush, rect1);29 }30 }31//表头第⼆列32else if (e.ColumnIndex == 1)33 {34using (Brush backColorBrush = new SolidBrush(Color.Orange))35 {36//抹去原来的cell背景37 e.Graphics.FillRectangle(backColorBrush, rect1);38 }39 }40//表头第三列41else if (e.ColumnIndex == 2)42 {43using (Brush backColorBrush = new SolidBrush(Color.Orange))44 {45//抹去原来的cell背景46 e.Graphics.FillRectangle(backColorBrush, rect1);47 }48 }49//表头第四列50else if (e.ColumnIndex == 3)51 {52using (Brush backColorBrush = new SolidBrush(Color.Orange))53 {54//抹去原来的cell背景55 e.Graphics.FillRectangle(backColorBrush, rect1);56 }57 }58//表头第五列59else if (e.ColumnIndex == 4)60 {61using (Brush backColorBrush = new SolidBrush(Color.Blue))62 {63//抹去原来的cell背景64 e.Graphics.FillRectangle(backColorBrush, rect1);65 }66 }67//表头第六列68else if (e.ColumnIndex == 5)69 {70using (Brush backColorBrush = new SolidBrush(Color.Blue))71 {72//抹去原来的cell背景73 e.Graphics.FillRectangle(backColorBrush, rect1);74 }75 }76using (Pen gridLinePen = new Pen(Color.Green , 1))77 {78//绘出上线79 e.Graphics.DrawLine(gridLinePen, left, top, left + width1, top);80//绘出下线81 e.Graphics.DrawLine(gridLinePen, left, top + height, left + width1, top + height); 82//绘出左线83 e.Graphics.DrawLine(gridLinePen, left, top, left, top + height);84string columnValue = "";85//计算绘制字符串的位置86if (e.ColumnIndex == 0)87 {88 columnValue = "零件号";89 }90else if (e.ColumnIndex == 1)91 {92 columnValue = "8:00--11:59";93 }94else if (e.ColumnIndex == 2)95 {96 columnValue = "12:00--16:59";97 }98else if (e.ColumnIndex == 3)99 {100 columnValue = "18:00--30:59";101 }102else if (e.ColumnIndex == 4)103 {104 columnValue = "进度";105 }106else if (e.ColumnIndex == 5)107 {108 columnValue = "进度率";109 }110 SizeF sf = e.Graphics.MeasureString(columnValue, e.CellStyle.Font);111float lstr = (width1 - sf.Width) / 2;112//float rstr = sf.Height/2;113float rstr = (height - sf.Height) / 2;114//画出⽂本框115116if (columnValue != "")117 {118 e.Graphics.DrawString(columnValue, e.CellStyle.Font,119new SolidBrush(Color.White),120 left + lstr,121 top + rstr,122 StringFormat.GenericDefault);123 }124 }125 e.Handled = true;126 }127128 }129/** 内容处理*************************************/130else131 {132if (e.ColumnIndex == 0 || e.ColumnIndex == 1 || e.ColumnIndex == 2 || e.ColumnIndex == 3 || e.ColumnIndex == 4 || e.ColumnIndex == 5) 133 {134 top = e.CellBounds.Top;135 left = e.CellBounds.Left - 1;136 height = e.CellBounds.Height;137 width1 = e.CellBounds.Width;138 Rectangle rect1 = new Rectangle(left, top, width1, e.CellBounds.Height);139//内容第⼀列140if (e.ColumnIndex == 0)141 {142using (Brush backColorBrush = new SolidBrush(Color.LightGreen))143 {144//抹去原来的cell背景145 e.Graphics.FillRectangle(backColorBrush, rect1);146 }147 }148//内容第⼆列149else if (e.ColumnIndex == 1)150 {151using (Brush backColorBrush = new SolidBrush(Color.White))152 {153//抹去原来的cell背景154 e.Graphics.FillRectangle(backColorBrush, rect1);155 }156 }157//内容第三列158else if (e.ColumnIndex == 2)159 {160using (Brush backColorBrush = new SolidBrush(Color.White))161 {162//抹去原来的cell背景163 e.Graphics.FillRectangle(backColorBrush, rect1);164 }165 }166//内容第四列167else if (e.ColumnIndex == 3)168 {169using (Brush backColorBrush = new SolidBrush(Color.White))170 {171//抹去原来的cell背景172 e.Graphics.FillRectangle(backColorBrush, rect1);173 }174 }175//内容第五列176else if (e.ColumnIndex == 4)177 {178using (Brush backColorBrush = new SolidBrush(Color.LightGreen))179 {180//抹去原来的cell背景181 e.Graphics.FillRectangle(backColorBrush, rect1);182 }183 }184//内容第六列185else if (e.ColumnIndex == 5)186 {187using (Brush backColorBrush = new SolidBrush(Color.LightGreen))188 {189//抹去原来的cell背景190 e.Graphics.FillRectangle(backColorBrush, rect1);191 }192 }193using (Pen gridLinePen = new Pen(Color.Green, 1))194 {195//绘出左线196 e.Graphics.DrawLine(gridLinePen, left, top, left, top + height);197198 }199//绘出进度率的线200if (e.ColumnIndex == 1 || e.ColumnIndex == 2 || e.ColumnIndex == 3)201 {202string str = e.Value.ToString();203int index =stIndexOf ("/");204int widths = Convert.ToInt32(Convert.ToDouble(str.Substring(0, index)) / Convert.ToDouble(str.Substring(index + 1)) * width1);205if (widths > width1)206 {207 widths = width1;208 }209using (Pen gridLinePen = new Pen(Color.Blue, Convert.ToInt32(height / 3)))210 {211212 e.Graphics.DrawLine(gridLinePen, left, top + height / 2 + Convert.ToInt32(height / 3), left + widths, top + height / 2 + Convert.ToInt32(height /3)); 213214 }215 }216//画出上下线,中线和单元格的数据217using (Pen gridLinePen = new Pen(Color.Green , 1))218 {219float[] BlueValues = { 1, 1,1, 1 };220 gridLinePen.DashPattern = BlueValues;221//绘出上线222 e.Graphics.DrawLine(gridLinePen, left, top, left + width1, top);223//绘出下线224 e.Graphics.DrawLine(gridLinePen, left, top + height, left + width1, top + height);225if (e.ColumnIndex == 1 || e.ColumnIndex == 2 || e.ColumnIndex == 3)226 {227228//绘出中线229 e.Graphics.DrawLine(gridLinePen, left, top + height / 2, left + width1, top + height / 2);230 e.Graphics.DrawLine(gridLinePen, left + width1/4, top + height / 2, left + width1/4, top + height);231 e.Graphics.DrawLine(gridLinePen, left + width1 / 2, top + height / 2, left + width1 / 2, top + height);232 e.Graphics.DrawLine(gridLinePen, left + width1*3 / 4, top + height / 2, left + width1*3 / 4, top + height);233 }234235string columnValue =e.Value.ToString () ;236 SizeF sf = e.Graphics.MeasureString(columnValue, e.CellStyle.Font);237float lstr = (width1 - sf.Width) / 2;238//float rstr = sf.Height/2;239float rstr = (height/2 - sf.Height) / 2;240//画出⽂本框数据241if (columnValue != "")242 {243 e.Graphics.DrawString(columnValue, e.CellStyle.Font,244new SolidBrush(Color.Black),245 left + lstr,246 top + rstr,247 StringFormat.GenericDefault);248 }249 }250 e.Handled = true;251 }252 }253 }例图如下:。
用滚动条调整TextBox的背景颜色

用滚动条调整TextBox的背景颜色创建如图1的程序界面:图1步骤如下:1、在VB6.0窗口界面的左边工具栏中,使用Lable()创建土1中的四个标签,并分别命名为红Red、绿Green、蓝Blue以及大小等。
2、使用TextBox(),创建一个文本框,命名为TextBackColor,值为空。
3、使用Hscrollbar()、Vscrollbar()创建图1中的水平及竖直滚动条,并分别命名为HsbRed、HsbGreen、HsbBlue及VSbsize等。
由于三原色的大小取值为0-255,故将三个滚动条的Max值设为255。
同样,竖直滚动条显示上述所创建文本框的显示大小,故设其Caption为100%。
4、上述创建的结果如图2。
图2以下对相应控件进行编程:1、双击红色滚动条,弹出程序代码窗口如图3。
图32、下拉菜单中选中HsbRed(对象)及Change(过程),输入Private Sub HsbRed_Change()TextBackColor.BackColor=RGB(HsbRed.Value,HsbGreen.Value,HsbBlue.Value) End Sub3、下拉菜单中选中HsbRed及Scroll也输入上面的代码:Private Sub HsbRed_Scroll()TextBackColor.BackColor=RGB(HsbRed.Value,HsbGreen.Value,HsbBlue.Value) End Sub4、同理,在绿色与蓝色滚动条中输入相应代码。
这样,通过滚动条控制文本框背景色的目的达到了。
5、下拉菜单中选择“通用”选项,定义全局全量,用来储存文本框的原始尺寸,输入:Dim Iwidth As IntegerDim Iheight As Integer6、下拉菜单中选中Vsbsize及Change(Scroll)用来改变文本框尺寸的竖向滚动条,输入如下代码:Change事件:Private Sub VsbSize_Change()TextBackColor.Width=Iwidth*(VsbSize.Value/100)TextBackColor.Height=Iheight*(VsbSize.Value/100)Lblsize.Caption=VsbSize.Value&"%"End SubScroll事件:Private Sub VsbSize_Scroll()TextBackColor.Width=Iwidth*(VsbSize.Value/100)TextBackColor.Height=Iheight*(VsbSize.Value/100)Lblsize.Caption=VsbSize.Value&"%"End Sub7、下拉菜单选择Form及Load,输入以下代码:Private Sub Form_Load()Iwidth=TextBackColor.WidthIheight=TextBackColor.HeightLblsize.Caption="100%"End Sub8、调试,结果如图4。
C#Winform使用扩展方法实现自定义富文本框(RichTextBox)字体颜色

C#Winform使⽤扩展⽅法实现⾃定义富⽂本框(RichTextBox)字体颜⾊在利⽤C#开发Winform应⽤程序的时候,我们有可能使⽤RichTextBox来实现实时显⽰应⽤程序⽇志的功能,⽇志⼜分为:⼀般消息,警告提⽰和错误等类别。
为了更好地区分不同类型的⽇志,我们需要使⽤不同的颜⾊来输出对应的⽇志,⽐如:⼀般消息为绿⾊,警告提⽰的⽤橙⾊,错误的⽤红⾊字体。
在原⽣Winform的RichTextBox中,是没有这种设置选项的。
如需实现以上描述的功能,我们可以使⽤.NET的静态扩展⽅法来处理。
实现扩展⽅法的类和⽅法本⾝都必须是静态的,如果你对扩展⽅法还不是太了解,建议先查阅相关⽂档资料。
我这⾥就把实现改变RichTextBox字体颜⾊的扩展⽅法贴出:using System;using System.Collections.Generic;using System.Drawing;using System.Linq;using System.Text;using System.Threading.Tasks;using System.Windows.Forms;namespace DocDetector.Core.Extensions{public static class RichTextBoxExtension{public static void AppendTextColorful(this RichTextBox rtBox, string text, Color color, bool addNewLine = true){if (addNewLine){text += Environment.NewLine;}rtBox.SelectionStart = rtBox.TextLength;rtBox.SelectionLength = 0;rtBox.SelectionColor = color;rtBox.AppendText(text);rtBox.SelectionColor = rtBox.ForeColor;}}}写好扩展⽅法后,使⽤就⾮常简单了,如下:rtxtLog.AppendTextColorful("Your message here",Color.Green);好了,⼤功告成!试⼀下,正常的看到的RichTextBox输出的⽂字是否是绿⾊的呢?PS:如果是红绿⾊盲就得另说了,哈哈~~~希望本⽂所述对⼤家的WinForm程序设计有所帮助。
C#winform动态添加控件之GroupBox和TextBox

C#winform动态添加控件之GroupBox和TextBox ⼀、添加GroupBox控件1.实例化并显⽰1//实例化GroupBox控件2 GroupBox groubox = new GroupBox();3 = "gbDemo";4 groubox.Text = "实例";5//设置上和左位置6//groubox.Top = 50;7//groubox.Left = 50;8//通过坐标设置位置9 groubox.Location = new Point(12, 12);10//将groubox添加到页⾯上11this.Controls.Add(groubox);⼆、在GroupBox控件中添加TextBox控件1.实例化并显⽰//实例化TextBox控件TextBox txt = new TextBox(); = "txtDemo";txt.Text = "txt实例";//将TextBox在GroupBox容器中显⽰//txt.Parent = groubox;//将TextBox在GroupBox容器中显⽰groubox.Controls.Add(txt);2.置于顶层和置于底层1//置于顶层2 txt.BringToFront();3//置于底层4 txt.SendToBack();3.添加事件1//添加Click单击事件2 txt.Click += new EventHandler(btn_Click);34 }56//定义Click单击事件7private void btn_Click(object sender, EventArgs e)8 {9 MessageBox.Show("事件添加成功");10 }三、添加多个1.动态添加多个1//添加控件2public void AddGroupBox()3 {4string name = "gbox";5for (int i = 0; i < 3; i++)6 {7 GroupBox gbox = new GroupBox();8 = name + i;9 gbox.Text=name+i;10 gbox.Width = 300;11 gbox.Height = 100;12 gbox.Location = new Point(32, 20 + i * 150);13this.Controls.Add(gbox);14//调⽤添加⽂本控件的⽅法15 AddTxt(gbox);16 }17 }18//添加⽂本控件19public void AddTxt(GroupBox gb)20 {21string name = "txt";22for (int i = 0; i < 3; i++)23 {24 TextBox txt = new TextBox();25 =+ name + i;26 txt.Text =+"|"+ name + i;27 txt.Location = new Point(12, 15 + i * 30);28 gb.Controls.Add(txt);29 }30 }实例:1using System;2using System.Collections.Generic;3using ponentModel;4using System.Data;5using System.Drawing;6using System.Linq;7using System.Text;8using System.Windows.Forms;910namespace Select_ListBox11 {12public partial class Form2 : Form13 {TextBox txt = new TextBox();14public Form2()15 {16 InitializeComponent();17 }1819private void Form2_Load(object sender, EventArgs e)20 {21 AddGroupBox();22////实例化GroupBox控件23//GroupBox groubox = new GroupBox();24// = "gbDemo";25//groubox.Text = "实例";26////设置上和左位置27////groubox.Top = 50;28////groubox.Left = 50;29////通过坐标设置位置30//groubox.Location = new Point(12, 12);31////将groubox添加到页⾯上32//this.Controls.Add(groubox);3334////实例化TextBox控件35//TextBox txt = new TextBox();36// = "txtDemo";37//txt.Text = "txt实例";38////将TextBox在GroupBox容器中显⽰39////txt.Parent = groubox;40////将TextBox在GroupBox容器中显⽰41//groubox.Controls.Add(txt);4243////置于顶层44//txt.BringToFront();45////置于底层46//txt.SendToBack();47////添加Click单击事件48//txt.Click += new EventHandler(btn_Click);4950 }5152////定义Click单击事件53//private void btn_Click(object sender, EventArgs e) 54//{55// MessageBox.Show("ss");56//}5758//添加控件59public void AddGroupBox()60 {61string name = "gbox";62for (int i = 0; i < 3; i++)63 {64 GroupBox gbox = new GroupBox();65 = name + i;66 gbox.Text=name+i;67 gbox.Width = 300;68 gbox.Height = 100;69 gbox.Location = new Point(32, 20 + i * 150);70this.Controls.Add(gbox);71//调⽤添加⽂本控件的⽅法72 AddTxt(gbox);73 }74 }75//添加⽂本控件76public void AddTxt(GroupBox gb)77 {78string name = "txt";79for (int i = 0; i < 3; i++)80 {81 TextBox txt = new TextBox();82 =+ name + i;83 txt.Text =+"|"+ name + i;84 txt.Location = new Point(12, 15 + i * 30);85 gb.Controls.Add(txt);86 }87 }88 }89 }效果:第⼀次在博客园⾥写学习记录,新⼿上路,请多指教。
Winform美化

Winform美化⾸先,我们先来实现主界⾯的扁平化 此处分为两个步骤,第⼀步是更改winform⾃带的MainForm窗体属性,第⼆步是添加窗体事件。
将主窗体FormBorderStyle更改为None,这样就得到了⼀个⽆边框的窗体(winform⾃带边框太丑。
)调节背景⾊,建议找到⾃⼰喜欢的颜⾊,然后使⽤取⾊器(我⽤的是按键精灵⾃带的取⾊板)取得想要的RGB参数,输⼊到BackColor 属性之中在主窗体的Mouse_Down中添加如下事件,实现窗体随意拖动:[DllImport("user32.dll")]public static extern bool ReleaseCapture();[DllImport("user32.dll")][DllImport("user32.dll")]public static extern bool SendMessage(IntPtr hwnd, int wMsg, int wParam, int lParam);public const int WM_SYSCOMMAND = 0x0112;public const int SC_MOVE = 0xF010;public const int HTCAPTION = 0x0002;/// <summary>/// 为了是主界⾯能够移动/// </summary>/// <param name="sender"></param>/// <param name="e"></param>private void MainForm_MouseDown(object sender, MouseEventArgs e){ReleaseCapture();SendMessage(this.Handle, WM_SYSCOMMAND, SC_MOVE + HTCAPTION, 0);}添加最⼩化、退出事件的按钮,背景⾊BackColor和字体⾊Forecolor设置为与界⾯颜⾊较为搭配的,将按钮的FlatStyle设置为Popup,它会⾃⼰随着界⾯风格调整哦~~最⼩化和退出的代码如下:this.WindowState = FormWindowState.Minimized;this.Close();到此为⽌主窗体的美化以及基本功能实现完毕窗体基本控件实现美化tabcontrol美化 通过tabcontrol的drawitem事件,来达到改变tabpage字体、字体颜⾊以及背景⾊的⽬的private void tabControl1_DrawItem(object sender, DrawItemEventArgs e){SolidBrush back = new SolidBrush(Color.FromArgb(45, 45, 48));SolidBrush white = new SolidBrush(Color.FromArgb(122, 193, 255));Rectangle rec = tabControl1.GetTabRect(0);e.Graphics.FillRectangle(back, rec);Rectangle rec1 = tabControl1.GetTabRect(1);e.Graphics.FillRectangle(back, rec1);StringFormat sf = new StringFormat();sf.Alignment = StringAlignment.Center;for (int i = 0; i < tabControl1.TabPages.Count; i++){Rectangle rec2 = tabControl1.GetTabRect(i);e.Graphics.DrawString(tabControl1.TabPages[i].Text, new Font("微软雅⿊", 9), white, rec2, sf);}}DataGridview美化通过设置ColumnHeadersDefaultCellStyle,来改变列标题的背景、字体和颜⾊通过设置DefaultCellStyle,来改变单元格背景、字体和颜⾊通过设置RowHeadersDefaultCellStyle,来改变⾏标题的背景、字体和颜⾊ProgressBar美化 很多⼈反映winform的进度条设置BackColor和ForeColor属性,不会产⽣效果,进度条颜⾊不会变。
重写TextBox重绘控件

//鼠标状态
this._IsMouseOver = true ;
//如果启用HotTrack,则开始重绘
//如果不加判断这里不加判断,则当不启用HotTrack,
//鼠标在控件上移动时,控件边框会不断重绘,
private Color _BorderColor = Color.FromArgb(0xA7,0xA6,0xAA);
/// <summary>
/// 热点边框颜色
/// </summary>
private Color _HotColor = Color.FromArgb(0x33,0x5E,0xA8);
if(this._HotTrack)
{
//重绘
this.Invalidate();
}
base.OnGotFocus (e);
this.Invalidate();
}
}
/// <summary>
/// 热点时边框颜色
/// </summary>
[ Category("外观"),
/// <summary>
Байду номын сангаас /// 是否启用热点效果
/// </summary>
[ Category("行为"),
Description("获得或设置一个值,指示当鼠标经过控件时控件边框是否发生变化。只在控件的BorderStyle为FixedSingle时有效"),
}
/// <summary>
/// 获得操作系统消息
C#自定义重绘TextBox
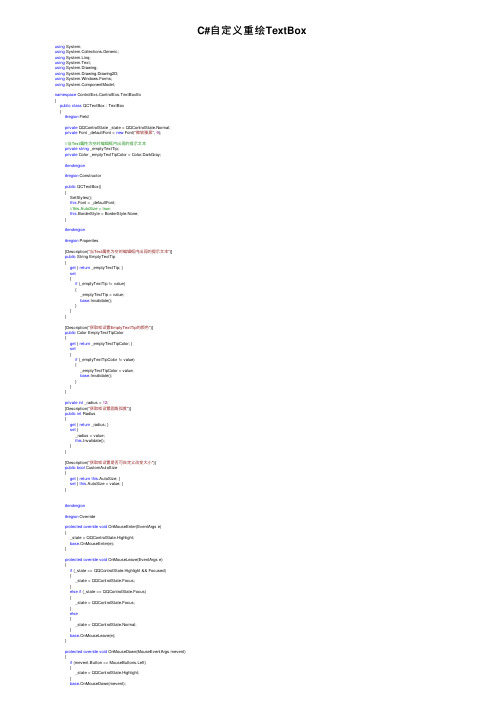
C#⾃定义重绘TextBox using System;using System.Collections.Generic;using System.Linq;using System.Text;using System.Drawing;using System.Drawing.Drawing2D;using System.Windows.Forms;using ponentModel;namespace ControlExs.ControlExs.TextBoxEx{public class QCTextBox : TextBox{#region Fieldprivate QQControlState _state = QQControlState.Normal;private Font _defaultFont = new Font("微软雅⿊", 9);//当Text属性为空时编辑框内出现的提⽰⽂本private string _emptyTextTip;private Color _emptyTextTipColor = Color.DarkGray;#endregion#region Constructorpublic QCTextBox(){SetStyles();this.Font = _defaultFont;//this.AutoSize = true;this.BorderStyle = BorderStyle.None;}#endregion#region Properites[Description("当Text属性为空时编辑框内出现的提⽰⽂本")]public String EmptyTextTip{get { return _emptyTextTip; }set{if (_emptyTextTip != value){_emptyTextTip = value;base.Invalidate();}}}[Description("获取或设置EmptyTextTip的颜⾊")]public Color EmptyTextTipColor{get { return _emptyTextTipColor; }set{if (_emptyTextTipColor != value){_emptyTextTipColor = value;base.Invalidate();}}}private int _radius = 12;[Description("获取或设置圆⾓弧度")]public int Radius{get { return _radius; }set {_radius = value;this.Invalidate();}}[Description("获取或设置是否可⾃定义改变⼤⼩")]public bool CustomAutoSize{get { return this.AutoSize; }set { this.AutoSize = value; }}#endregion#region Overrideprotected override void OnMouseEnter(EventArgs e){_state = QQControlState.Highlight;base.OnMouseEnter(e);}protected override void OnMouseLeave(EventArgs e){if (_state == QQControlState.Highlight && Focused){_state = QQControlState.Focus;}else if (_state == QQControlState.Focus){_state = QQControlState.Focus;}else{_state = QQControlState.Normal;}base.OnMouseLeave(e);}protected override void OnMouseDown(MouseEventArgs mevent){if (mevent.Button == MouseButtons.Left){_state = QQControlState.Highlight;}base.OnMouseDown(mevent);}protected override void OnMouseUp(MouseEventArgs mevent){if (mevent.Button == MouseButtons.Left){if (ClientRectangle.Contains(mevent.Location)){_state = QQControlState.Highlight;}else{_state = QQControlState.Focus;}}base.OnMouseUp(mevent);}protected override void OnLostFocus(EventArgs e){_state = QQControlState.Normal;base.OnLostFocus(e);}protected override void OnEnabledChanged(EventArgs e){if (Enabled){_state = QQControlState.Normal;}else{_state = QQControlState.Disabled;}base.OnEnabledChanged(e);}protected override void WndProc(ref Message m){//TextBox是由系统进程绘制,重载OnPaint⽅法将不起作⽤base.WndProc(ref m);if (m.Msg == Win32.WM_PAINT || m.Msg == Win32.WM_CTLCOLOREDIT){WmPaint(ref m);}}protected override void Dispose(bool disposing){if (disposing){if (_defaultFont != null){_defaultFont.Dispose();}}_defaultFont = null;base.Dispose(disposing);}#endregion#region Privateprivate void SetStyles(){// TextBox由系统绘制,不能设置 erPaint样式SetStyle(ControlStyles.AllPaintingInWmPaint, true);SetStyle(ControlStyles.OptimizedDoubleBuffer, true);SetStyle(ControlStyles.ResizeRedraw, true);SetStyle(ControlStyles.SupportsTransparentBackColor, true);UpdateStyles();}private void WmPaint(ref Message m){Graphics g = Graphics.FromHwnd(base.Handle);//g.SmoothingMode = SmoothingMode.AntiAlias;//去掉 TextBox 四个⾓g.InterpolationMode = InterpolationMode.HighQualityBicubic;g.SmoothingMode = SmoothingMode.AntiAlias;SetWindowRegion(this.Width, this.Height);if (!Enabled){_state = QQControlState.Disabled;}switch (_state){case QQControlState.Normal:DrawNormalTextBox(g);break;case QQControlState.Highlight:DrawHighLightTextBox(g);break;case QQControlState.Focus:DrawFocusTextBox(g);break;case QQControlState.Disabled:DrawDisabledTextBox(g);break;default:break;}if (Text.Length == 0 && !string.IsNullOrEmpty(EmptyTextTip) && !Focused){TextRenderer.DrawText(g, EmptyTextTip, Font, ClientRectangle, EmptyTextTipColor, GetTextFormatFlags(TextAlign, RightToLeft == RightToLeft.Yes)); }}private void DrawNormalTextBox(Graphics g){using (Pen borderPen = new Pen(Color.LightGray)){//g.DrawRectangle(borderPen, new Rectangle(ClientRectangle.X, ClientRectangle.Y, ClientRectangle.Width - 1, ClientRectangle.Height - 1));g.DrawPath(borderPen, DrawHelper.DrawRoundRect(ClientRectangle.X, ClientRectangle.Y, ClientRectangle.Width - 1, ClientRectangle.Height - 1, _radius)); }}private void DrawHighLightTextBox(Graphics g){using (Pen highLightPen = new Pen(ColorTable.QQHighLightColor)){//Rectangle drawRect = new Rectangle(ClientRectangle.X, ClientRectangle.Y, ClientRectangle.Width - 1, ClientRectangle.Height - 1);//g.DrawRectangle(highLightPen, drawRect);g.DrawPath(highLightPen, DrawHelper.DrawRoundRect(ClientRectangle.X, ClientRectangle.Y, ClientRectangle.Width - 1, ClientRectangle.Height - 1, _radius));//InnerRect//drawRect.Inflate(-1, -1);//highLightPen.Color = ColorTable.QQHighLightInnerColor;//g.DrawRectangle(highLightPen, drawRect);g.DrawPath(new Pen(ColorTable.QQHighLightInnerColor), DrawHelper.DrawRoundRect(ClientRectangle.X, ClientRectangle.Y, ClientRectangle.Width - 1, ClientRectangle.Height - 1, _radius)); }}private void DrawFocusTextBox(Graphics g){using (Pen focusedBorderPen = new Pen(ColorTable.QQHighLightInnerColor)){//g.DrawRectangle(focusedBorderPen,new Rectangle(ClientRectangle.X,ClientRectangle.Y,ClientRectangle.Width - 1, ClientRectangle.Height - 1));g.DrawPath(focusedBorderPen, DrawHelper.DrawRoundRect(ClientRectangle.X, ClientRectangle.Y, ClientRectangle.Width - 1, ClientRectangle.Height - 1, _radius));}}private void DrawDownTextBox(Graphics g){using (Pen focusedBorderPen = new Pen(ColorTable.QQHighLightInnerColor)){//g.DrawRectangle(focusedBorderPen,new Rectangle(ClientRectangle.X,ClientRectangle.Y,ClientRectangle.Width - 1, ClientRectangle.Height - 1));g.DrawPath(focusedBorderPen, DrawHelper.DrawRoundRect(ClientRectangle.X, ClientRectangle.Y, ClientRectangle.Width - 1, ClientRectangle.Height - 1, _radius));}}private void DrawDisabledTextBox(Graphics g){using (Pen disabledPen = new Pen(SystemColors.ControlDark)){//g.DrawRectangle(disabledPen,new Rectangle( ClientRectangle.X,ClientRectangle.Y, ClientRectangle.Width - 1,ClientRectangle.Height - 1));g.DrawPath(disabledPen, DrawHelper.DrawRoundRect(ClientRectangle.X, ClientRectangle.Y, ClientRectangle.Width - 1, ClientRectangle.Height - 1, _radius));}}private static TextFormatFlags GetTextFormatFlags(HorizontalAlignment alignment, bool rightToleft){TextFormatFlags flags = TextFormatFlags.WordBreak |TextFormatFlags.SingleLine;if (rightToleft){flags |= TextFormatFlags.RightToLeft | TextFormatFlags.Right;}switch (alignment){case HorizontalAlignment.Center:flags |= TextFormatFlags.VerticalCenter | TextFormatFlags.HorizontalCenter;break;case HorizontalAlignment.Left:flags |= TextFormatFlags.VerticalCenter | TextFormatFlags.Left;break;case HorizontalAlignment.Right:flags |= TextFormatFlags.VerticalCenter | TextFormatFlags.Right;break;}return flags;}#endregionpublic void SetWindowRegion(int width, int height){System.Drawing.Drawing2D.GraphicsPath FormPath = new System.Drawing.Drawing2D.GraphicsPath();Rectangle rect = new Rectangle(0, 0, width, height);FormPath = GetRoundedRectPath(rect, _radius);this.Region = new Region(FormPath);}private GraphicsPath GetRoundedRectPath(Rectangle rect, int radius){int diameter = radius;Rectangle arcRect = new Rectangle(rect.Location, new Size(diameter, diameter));GraphicsPath path = new GraphicsPath();// 左上⾓path.AddArc(arcRect, 180, 90);// 右上⾓arcRect.X = rect.Right - diameter;path.AddArc(arcRect, 270, 90);// 右下⾓arcRect.Y = rect.Bottom - diameter;path.AddArc(arcRect, 0, 90);// 左下⾓arcRect.X = rect.Left;path.AddArc(arcRect, 90, 90);path.CloseFigure();return path;}}}public enum QQControlState{///<summary>///正常状态///</summary>Normal = 0,///<summary>/// /⿏标进⼊///</summary>Highlight = 1,///<summary>///⿏标按下///</summary>Down = 2,///<summary>///获得焦点///</summary>Focus = 3,///<summary>///控件禁⽌///</summary>Disabled = 4///<summary>///实现仿QQ效果控件内部使⽤颜⾊表///</summary>internal class ColorTable{public static Color QQBorderColor = Color.LightBlue; //LightBlue = Color.FromArgb(173, 216, 230)public static Color QQHighLightColor =RenderHelper.GetColor(QQBorderColor,255,-63,-11,23); //Color.FromArgb(110, 205, 253) public static Color QQHighLightInnerColor = RenderHelper.GetColor(QQBorderColor, 255, -100, -44, 1); //Color.FromArgb(73, 172, 231); }internal class DrawHelper{public static GraphicsPath DrawRoundRect(int x, int y, int width, int height, int radius){GraphicsPath gp = new GraphicsPath();gp.AddArc(x, y, radius, radius, 180, 90);gp.AddArc(width - radius, y, radius, radius, 270, 90);gp.AddArc(width - radius, height - radius, radius, radius, 0, 90);gp.AddArc(x, height - radius, radius, radius, 90, 90);gp.CloseAllFigures();return gp;}///<summary>///绘制圆⾓矩形///</summary>///<param name="rect">矩形</param>///<param name="radius">弯曲程度(0-10),越⼤越弯曲</param>///<returns></returns>public static GraphicsPath DrawRoundRect(Rectangle rect, int radius){int x = rect.X;int y = rect.Y;int width = rect.Width;int height = rect.Height;return DrawRoundRect(x, y, width - 2, height - 1, radius);}///<summary>///得到两种颜⾊的过渡⾊(1代表开始⾊,100表⽰结束⾊)///</summary>///<param name="c">开始⾊</param>///<param name="c2">结束⾊</param>///<param name="value">需要获得的度</param>///<returns></returns>public static Color GetIntermediateColor(Color c, Color c2, int value){float pc = value * 1.0F / 100;int ca = c.A, cr = c.R, cg = c.G, cb = c.B;int c2a = c2.A, c2r = c2.R, c2g = c2.G, c2b = c2.B;int a = (int)Math.Abs(ca + (ca - c2a) * pc);int r = (int)Math.Abs(cr - ((cr - c2r) * pc));int g = (int)Math.Abs(cg - ((cg - c2g) * pc));int b = (int)Math.Abs(cb - ((cb - c2b) * pc));if (a > 255) { a = 255; }if (r > 255) { r = 255; }if (g > 255) { g = 255; }if (b > 255) { b = 255; }return (Color.FromArgb(a, r, g, b));}public static StringFormat StringFormatAlignment(ContentAlignment textalign){StringFormat sf = new StringFormat();switch (textalign){case ContentAlignment.TopLeft:case ContentAlignment.TopCenter:case ContentAlignment.TopRight:sf.LineAlignment = StringAlignment.Near;break;case ContentAlignment.MiddleLeft:case ContentAlignment.MiddleCenter:case ContentAlignment.MiddleRight:sf.LineAlignment = StringAlignment.Center;break;case ContentAlignment.BottomLeft:case ContentAlignment.BottomCenter:case ContentAlignment.BottomRight:sf.LineAlignment = StringAlignment.Far;break;}return sf;}///<summary>///绘图对像///</summary>///<param name="g">绘图对像</param>///<param name="img">图⽚</param>///<param name="r">绘置的图⽚⼤⼩、坐标</param>///<param name="lr">绘置的图⽚边界</param>///<param name="index">当前状态</param>///<param name="Totalindex">状态总数</param>public static void DrawRect(Graphics g, Bitmap img, Rectangle r, Rectangle lr, int index, int Totalindex){if (img == null) return;Rectangle r1, r2;int x = (index - 1) * img.Width / Totalindex;int y = 0;int x1 = r.Left;int y1 = r.Top;if (r.Height > img.Height && r.Width <= img.Width / Totalindex){r1 = new Rectangle(x, y, img.Width / Totalindex, lr.Top);r2 = new Rectangle(x1, y1, r.Width, lr.Top);g.DrawImage(img, r2, r1, GraphicsUnit.Pixel);r1 = new Rectangle(x, y + lr.Top, img.Width / Totalindex, img.Height - lr.Top - lr.Bottom);r2 = new Rectangle(x1, y1 + lr.Top, r.Width, r.Height - lr.Top - lr.Bottom);if ((lr.Top + lr.Bottom) == 0) r1.Height = r1.Height - 1;g.DrawImage(img, r2, r1, GraphicsUnit.Pixel);r1 = new Rectangle(x, y + img.Height - lr.Bottom, img.Width / Totalindex, lr.Bottom);r2 = new Rectangle(x1, y1 + r.Height - lr.Bottom, r.Width, lr.Bottom);g.DrawImage(img, r2, r1, GraphicsUnit.Pixel);if (r.Height <= img.Height && r.Width > img.Width / Totalindex){r1 = new Rectangle(x, y, lr.Left, img.Height);r2 = new Rectangle(x1, y1, lr.Left, r.Height);g.DrawImage(img, r2, r1, GraphicsUnit.Pixel);r1 = new Rectangle(x + lr.Left, y, img.Width / Totalindex - lr.Left - lr.Right, img.Height);r2 = new Rectangle(x1 + lr.Left, y1, r.Width - lr.Left - lr.Right, r.Height);g.DrawImage(img, r2, r1, GraphicsUnit.Pixel);r1 = new Rectangle(x + img.Width / Totalindex - lr.Right, y, lr.Right, img.Height);r2 = new Rectangle(x1 + r.Width - lr.Right, y1, lr.Right, r.Height);g.DrawImage(img, r2, r1, GraphicsUnit.Pixel);}elseif (r.Height <= img.Height && r.Width <= img.Width / Totalindex) { r1 = new Rectangle((index - 1) * img.Width / Totalindex, 0, img.Width / Totalindex, img.Height); g.DrawImage(img, new Rectangle(x1, y1, r.Width, r.Height), r1, Graph else if (r.Height > img.Height && r.Width > img.Width / Totalindex){//top-leftr1 = new Rectangle(x, y, lr.Left, lr.Top);r2 = new Rectangle(x1, y1, lr.Left, lr.Top);g.DrawImage(img, r2, r1, GraphicsUnit.Pixel);//top-bottomr1 = new Rectangle(x, y + img.Height - lr.Bottom, lr.Left, lr.Bottom);r2 = new Rectangle(x1, y1 + r.Height - lr.Bottom, lr.Left, lr.Bottom);g.DrawImage(img, r2, r1, GraphicsUnit.Pixel);//leftr1 = new Rectangle(x, y + lr.Top, lr.Left, img.Height - lr.Top - lr.Bottom);r2 = new Rectangle(x1, y1 + lr.Top, lr.Left, r.Height - lr.Top - lr.Bottom);g.DrawImage(img, r2, r1, GraphicsUnit.Pixel);//topr1 = new Rectangle(x + lr.Left, y,img.Width / Totalindex - lr.Left - lr.Right, lr.Top);r2 = new Rectangle(x1 + lr.Left, y1,r.Width - lr.Left - lr.Right, lr.Top);g.DrawImage(img, r2, r1, GraphicsUnit.Pixel);//right-topr1 = new Rectangle(x + img.Width / Totalindex - lr.Right, y, lr.Right, lr.Top);r2 = new Rectangle(x1 + r.Width - lr.Right, y1, lr.Right, lr.Top);g.DrawImage(img, r2, r1, GraphicsUnit.Pixel);//Rightr1 = new Rectangle(x + img.Width / Totalindex - lr.Right, y + lr.Top,lr.Right, img.Height - lr.Top - lr.Bottom);r2 = new Rectangle(x1 + r.Width - lr.Right, y1 + lr.Top,lr.Right, r.Height - lr.Top - lr.Bottom);g.DrawImage(img, r2, r1, GraphicsUnit.Pixel);//right-bottomr1 = new Rectangle(x + img.Width / Totalindex - lr.Right, y + img.Height - lr.Bottom,lr.Right, lr.Bottom);r2 = new Rectangle(x1 + r.Width - lr.Right, y1 + r.Height - lr.Bottom,lr.Right, lr.Bottom);g.DrawImage(img, r2, r1, GraphicsUnit.Pixel);//bottomr1 = new Rectangle(x + lr.Left, y + img.Height - lr.Bottom,img.Width / Totalindex - lr.Left - lr.Right, lr.Bottom);r2 = new Rectangle(x1 + lr.Left, y1 + r.Height - lr.Bottom,r.Width - lr.Left - lr.Right, lr.Bottom);g.DrawImage(img, r2, r1, GraphicsUnit.Pixel);//Centerr1 = new Rectangle(x + lr.Left, y + lr.Top,img.Width / Totalindex - lr.Left - lr.Right, img.Height - lr.Top - lr.Bottom);r2 = new Rectangle(x1 + lr.Left, y1 + lr.Top,r.Width - lr.Left - lr.Right, r.Height - lr.Top - lr.Bottom);g.DrawImage(img, r2, r1, GraphicsUnit.Pixel);}}///<summary>///绘图对像///</summary>///<param name="g">绘图对像</param>///<param name="obj">图⽚对像</param>///<param name="r">绘置的图⽚⼤⼩、坐标</param>///<param name="index">当前状态</param>///<param name="Totalindex">状态总数</param>public static void DrawRect(Graphics g, Bitmap img, Rectangle r, int index, int Totalindex){if (img == null) return;int width = img.Width / Totalindex;int height = img.Height;Rectangle r1, r2;int x = (index - 1) * width;int y = 0;r1 = new Rectangle(x, y, width, height);r2 = new Rectangle(r.Left, r.Top, r.Width, r.Height);g.DrawImage(img, r2, r1, GraphicsUnit.Pixel);}///<summary>///得到要绘置的图⽚对像///</summary>///<param name="str">图像在程序集中的地址</param>///<returns></returns>public static Bitmap GetResBitmap(string str){Stream sm;sm = FindStream(str);if (sm == null) return null;return new Bitmap(sm);}///<summary>///得到图程序集中的图⽚对像///</summary>///<param name="str">图像在程序集中的地址</param>///<returns></returns>private static Stream FindStream(string str){Assembly assembly = Assembly.GetExecutingAssembly();string[] resNames = assembly.GetManifestResourceNames();foreach (string s in resNames){if (s == str){return assembly.GetManifestResourceStream(s);return null;}}public class Win32{#region Window Constpublic const int WM_KEYDOWN = 0x0100;public const int WM_KEYUP = 0x0101;public const int WM_CTLCOLOREDIT = 0x133;public const int WM_ERASEBKGND = 0x0014;public const int WM_LBUTTONDOWN = 0x0201;public const int WM_LBUTTONUP = 0x0202;public const int WM_LBUTTONDBLCLK = 0x0203;public const int WM_WINDOWPOSCHANGING = 0x46;public const int WM_PAINT = 0xF;public const int WM_CREATE = 0x0001;public const int WM_ACTIVATE = 0x0006;public const int WM_NCCREATE = 0x0081;public const int WM_NCCALCSIZE = 0x0083;public const int WM_NCPAINT = 0x0085;public const int WM_NCACTIVATE = 0x0086;public const int WM_NCLBUTTONDOWN = 0x00A1;public const int WM_NCLBUTTONUP = 0x00A2;public const int WM_NCLBUTTONDBLCLK = 0x00A3;public const int WM_NCMOUSEMOVE = 0x00A0;public const int WM_NCHITTEST = 0x0084;public const int HTLEFT = 10;public const int HTRIGHT = 11;public const int HTTOP = 12;public const int HTTOPLEFT = 13;public const int HTTOPRIGHT = 14;public const int HTBOTTOM = 15;public const int HTBOTTOMLEFT = 0x10;public const int HTBOTTOMRIGHT = 17;public const int HTCAPTION = 2;public const int HTCLIENT = 1;public const int WM_FALSE = 0;public const int WM_TRUE = 1;#endregion#region Public extern methods[DllImport("gdi32.dll")]public static extern int CreateRoundRectRgn(int x1, int y1, int x2, int y2, int x3, int y3); [DllImport("user32.dll")]public static extern int SetWindowRgn(IntPtr hwnd, int hRgn, Boolean bRedraw);[DllImport("gdi32.dll", EntryPoint = "DeleteObject", CharSet = CharSet.Ansi)] public static extern int DeleteObject(int hObject);[DllImport("user32.dll")]public static extern int SendMessage(IntPtr hWnd, int Msg, int wParam, int lParam); [DllImport("user32.dll")]public static extern bool ReleaseCapture();#endregion}。
[C#.net]ListBox对Item进行重绘,设置背景色和前景色
![[C#.net]ListBox对Item进行重绘,设置背景色和前景色](https://img.taocdn.com/s3/m/e2f68d607ed5360cba1aa8114431b90d6c858938.png)
[C#.net]ListBox对Item进⾏重绘,设置背景⾊和前景⾊别的不多说了,上代码,直接看⾸先设置这⾏,或者属性窗⼝设置,这样才可以启动⼿动绘制,参数有三个Normal: ⾃动绘制OwnerDrawFixed:⼿动绘制,但间距相同OwnerDrawVariable:⼿动绘制,间距不同listBox1.DrawMode= DrawMode.OwnerDrawFixed然后在DrawItem事件中写绘制代码e.Graphics.FillRectangle(new SolidBrush(color), e.Bounds);//绘制背景e.Graphics.DrawString(listBox1.Items[e.Index].ToString(), e.Font, new SolidBrush(e.ForeColor), e.Bounds);//绘制⽂字e.DrawFocusRectangle();//绘制聚焦框其中绘制聚焦框没啥效果,貌似需要是ComboBox仅在DropDownStyle=DropDownList时有效如果设置为了OwnerDrawVariable,则还需要设置MeasureItem事件,⽤于返回每⾏的⾼度(e.ItemWidth = 260)。
如果是绘制虚线,则pen需要设置DashStyle或者DashPattern(优先级⾼)。
1private void lstLog_DrawItem(object sender, DrawItemEventArgs e)2 {3if (e.Index >= 0)4 {5 e.DrawBackground();6 Brush myBrush = Brushes.Black; //前景⾊7 Color bgColor = Color.White; //背景⾊8if(lstLog.Items[e.Index].ToString().Contains("成功"))9 {10 bgColor = Color.RoyalBlue;11 }12if (lstLog.Items[e.Index].ToString().Contains("失败"))13 {14 bgColor = Color.Magenta;15 }16//绘制背景17 e.Graphics.FillRectangle(new SolidBrush(bgColor), e.Bounds);18//绘制⽂字19 e.Graphics.DrawString(lstLog.Items[e.Index].ToString(), e.Font, myBrush, e.Bounds, StringFormat.GenericDefault);20//绘制聚焦框21 e.DrawFocusRectangle();22 }23 }。
控件重绘

重绘NSButton(转)2010-06-03 12:11首先大家看Apple关于NSButton的描述,NSButton跟NSWindow一样,它的外观形式也是委托给NSButtonCell来处理的,自身只包含逻辑代码。
所以重绘NSButton就是重绘NSButtonCell啦,然后把NSButton的cell设置位你自己的cell就好了。
1)重绘目标首先观察一下系统NSButton的行为和外观表现,可以发现默认Button(快捷健设置为return)是有一个一闪一闪的效果,鼠标点击其他非默认button的时候同window上默认button的蓝色消失,同时被点中button变成蓝色。
放开鼠标,默认button恢复蓝色背景并闪烁,被点击button变白色。
重绘一个控件最好是不要改变其默认行为,也最好不要违反Apple的关于界面设计的建议文档。
所以我们的目标是重绘出来的button是灰色渐变背景,默认button有一个黄色的圈圈围在周围,不闪烁。
被点中的button显示黄色圈圈,默认button黄色圈圈消失。
效果如下图:鼠标未按下效果鼠标按下效果2)渐变背景NSButtonCell的重绘方法很简单,重写下面的方法即可。
逻辑就是1)检测当前button的类型(普通button,checkbox,radiobutton等)2)画button的基本形状和颜色3)如果当前button被click了,那么显然的画一个黄色的圈圈上去4)如果没有被click,那么检测是否为默认button,如果是,并且当前window没有被click的其他button,那么为自己画一个黄色的圈圈,否则不画。
// buttoncell有一个私有方法来标示当前button的类型// 这里只列出关心的三种类型t ypedef enum KAButtonType{KACheckBox = 3,KARadioButton = 4,KARoundButton = 7};- (void)drawWithFrame: (NSRect)cellFrame inView: (NSView *)controlView{switch ([self _buttonType]) { // buttonCell的私有函数,可以确定button类型,10.4/10.5/10.6都可用case KACheckBox:[self drawCheckInFrame:cellFrame isRadio:NO]; // 画checkbox的形状,这里忽略不画b reak;case KARadioButton:[self drawCheckInFrame:cellFrame isRadio:YES];// 画radiobutton的形状,这里忽略不画break;default:switch ([buttonCell bezelStyle]) { // 这就是button啦,默认的形状,这个参数可以在IB里设置,// 所以button的类型必须为NSRoundedBezelStyle,当然你可以改为其他的case NSRoundedBezelStyle:[self drawRoundedButtonInFrame: cellFrame inView: controlView];break;case NSRegularSquareBezelStyle:[self drawHyperLinkButtonInFrame: cellFrame];break;default:break;}break;}// 画Button的图片哦// Comment by yoyokko// if [buttonCell _normalImage] is nil, that to say there is a missing // field in nib file for this check box -->// NSButtonCell uses function <(int)_buttonType> to determine button type.// After hacking, I found that 3==Checkbox, 4==Radio, 7==RoundedButton if([buttonCell _buttonType] == KARoundButton){if([buttonCell imagePosition] != NSNoImage) {[self drawImage: [buttonCell image] withFrame: cellFrame inView: [buttonCell controlView]];}}}// 查询当前window上有没有被click的button- (void)travelSubViews: (NSView*)view{NSArray *items = [view subviews];NSEnumerator *enumerator = [items objectEnumerator];id anObject = nil;while (anObject = [enumerator nextObject]){if ([anObject isKindOfClass: [NSButton class]]){NSButtonCell *buttonCell = [anObject cell];NSBezelStyle buttonStyle = [buttonCell bezelStyle];if ([buttonCell isHighlighted] &&(buttonStyle == NSRoundedBezelStyle || buttonStyle == NSTexturedRoundedBezelStyle)){[self setMIsFound: YES];break;}}else{[self travelSubViews: anObject];}}}// 画渐变的button和黄色圈圈-(void)drawRoundedButtonInFrame:(NSRect)frame inView: (NSView *)controlView {NSRect textFrame;//Adjust Rect so strokes are true and//shadows are visibleframe.origin.x += .5f;frame.origin.y += .5f;frame.size.height -= 1;frame.size.width -= 1;//Adjust Rect based on ControlSize so that//my controls match as closely to apples//as possible.switch ([buttonCell controlSize]) {default: // Silence uninitialized variable warnings for textFramefields.case NSRegularControlSize:frame.origin.x += 4;frame.origin.y += 4;frame.size.width -= 8;frame.size.height -= 12;textFrame = frame;break;case NSSmallControlSize:frame.origin.x += 4;frame.origin.y += 4;frame.size.width -= 8;frame.size.height -= 11;textFrame = frame;textFrame.origin.y += 1;break;case NSMiniControlSize:frame.origin.y -= 1;textFrame = frame;textFrame.origin.y += 1;break;}//Create PathNSBezierPath *path = [[NSBezierPath alloc] init];[path appendBezierPathWithRoundedRect: frame cornerRadius:6.0f];if([buttonCell isEnabled]){// draw inner part of button first// 画button的灰色渐变部分[self drawShadingWithStartingColor: [self colorVlaueWithRed: 239 green: 239 blue: 239]//[NSColor blackColor]withEndingColor: [self colorVlaueWithRed: 93 green: 93 blue: 93]//[NSColor whiteColor]inBezierPath: path];// draw focus ring second// 当当前button被click时,画那个黄色的圈圈// if the button is highlighted, then draw a ring around the button if([buttonCell isHighlighted]) // 当button被click时,isHighlighted 返回YES{[[self colorVlaueWithRed: 246 green: 186 blue: 55] set];[path setLineWidth: 3.0f];[path stroke];}else{// button没有被click,那就检查是否为默认的button// otherwise, check if it is a default buttonid btnControl = [buttonCell controlView];if ([btnControl respondsToSelector: @selector(keyEquivalent)] && [[btnControl keyEquivalent] isEqualToString: @"\r"]){// 如果是默认buttonNSView *superView = controlView;NSView *tempView = nil;for (tempView = superView; tempView != nil; tempView = [tempView superview])superView = tempView;// 找到当前window的contentviewif (superView){[buttonCell setMIsFound:NO];[buttonCell travelSubViews: superView];}// 看当前window中有没有被click的button,没有就把自己这个默认button画一个黄圈if (![buttonCell mIsFound]){[[self colorVlaueWithRed: 246 green: 186 blue: 55] set]; [path setLineWidth: 3.0f];[path stroke];}[buttonCell setMIsFound:NO];}}}else{// button 没有enable[self drawShadingWithStartingColor: [self colorVlaueWithRed: 220 green: 220 blue: 220]//[NSColor blackColor]withEndingColor: [self colorVlaueWithRed: 112 green: 112 blue: 112]//[NSColor whiteColor]inBezierPath: path];}[path release];// 画button的text,这里忽略不画if([buttonCell imagePosition] != NSImageOnly) {[self drawTitle: [buttonCell attributedTitle] withFrame: textFrame inView: [buttonCell controlView]];}}至此,所有绘制的代码工作都已经完成了,包括黄色圈圈和点击其他button的行为都写好了~但这样做会有一个问题……3)更改系统默认画黄色圈圈的行为释下面一段代码的行为,这个很重要,否则会出现非常巧妙的bug……很奇妙,困扰了我两个星期的bug,恨哪~- (void)heartBeat:(CDAnonymousStruct7 *)fp8{id btnControl = [self controlView];if ([btnControl respondsToSelector: @selector(keyEquivalent)] && [[btnControl keyEquivalent] isEqualToString: @"\r"])// && !oneButtonClicked) {[btnControl setNeedsDisplay:YES];}}首先探索一下系统默认button的一闪一闪的行为是怎么做的,blabla一大堆,经过hack 发现,每个程序在起来之后都会启动一个叫做HeartBeat的线程。
winform界面特效470多例

winform界⾯特效470多例⼀共470多例winform 界⾯特效的源码。
实例030 窗⼝颜⾊的渐变实例说明在程序设计时,可以通过设置窗体的BackColor属性来改变窗⼝的背景颜⾊。
但是这个属性改变后整个窗体的客户区都会变成这种颜⾊,并且⾮常单调。
如果窗体的客户区可以向标题栏⼀样能够体现颜⾊的渐变效果,那么窗体风格将会另有⼀番风味。
本例设计了⼀个颜⾊渐变的窗体。
效果如图1.30所⽰。
技术要点C#中可以通过Color.FromArgb( )⽅法返回⼀种颜⾊,下⾯详细介绍⼀下该⽅法。
Color.FromArgb( )⽅法⽤来返回Color的颜⾊值,该⽅法语法结构如下:public static FromArgb (int red,int green,int blue)参数说明如下。
l red:新Color的红⾊分量值。
有效值为从0~255。
l green:新Color的绿⾊分量值。
有效值为从0~255。
l blue:新Color的蓝⾊分量值。
有效值为从0~255。
l 返回值:此⽅法创建的Color。
该函数就是⽤3种不同的⾊值来返回⼀个颜⾊,⽽稍微的调整某⼀种颜⾊值就可以使整体的颜⾊发⽣细微的变化,在窗体中⾄上⽽下每⾏填充⼀种稍微调整后的颜⾊,这样整体看来就会产⽣渐变的效果。
可以利⽤窗体的Graphics对象对窗体进⾏绘图,该对象可以完全操控窗体的客户区。
注意:颜⾊值在0~255之间。
实现过程(1)创建⼀个项⽬,将其命名为Ex01_30,默认窗体为Form1。
(2)在Form1窗体中添加Button⽤来使颜⾊渐变;添加TextBox控件⽤来输⼊颜⾊RGB值。
(3)主要程序代码。
触发重新绘制事件的实现代码如下:private void button2_Click(object sender, EventArgs e){InvokePaintBackground( );this.Hide( );this.Visible=true;}重新绘制窗体背景颜⾊的实现代码如下:protected override void OnPaintBackground(PaintEventArgs e){int y, dy;y = this.ClientRectangle.Location.Y;dy = this.ClientRectangle.Height / 256;for (int i = 255; i >= 0; i--){Color c = new Color( );c = Color.FromArgb(Convert.ToInt32(textBox1.Text.ToString( )), i,Convert.ToInt32(textBox2.Text.ToString( )));SolidBrush sb = new SolidBrush(c);Pen p = new Pen(sb, 1);e.Graphics.DrawRectangle(p,this.ClientRectangle.X, y, this.Width,y+dy);y = y + dy;}}举⼀反三根据本实例,读者可以开发以下程序。
Winform改变Textbox边框颜色
Winform改变Textbox边框颜⾊[csharp]1. using System;2. using System.Collections.Generic;3. using ponentModel;4. using System.Data;5. using System.Drawing;6. using System.Linq;7. using System.Text;8. using System.Windows.Forms;9. using System.Runtime.InteropServices;10.11. namespace TextDemo12. {13. public partial class Form3 : Form14. {15. public Form3()16. {17. InitializeComponent();18. }19.20. /// <summary>21. /// 添加⼀个继承⾃textbox的新类,重写WndProc⽅法,在重写的⽅法⾥重绘边框就可以了22. /// </summary>23. /// <param name="m"></param>24. protectedoverridevoid WndProc(ref Message m)25. {26. base.WndProc(ref m);27. borderDrawer borderDrawer1 = new borderDrawer();28. borderDrawer1.DrawBorder(ref m, this.Width, this.Height);29. }30. }31.32.33.34. #region 第⼀种⽅法,使⽤时必须把⽂本框的BorderStyle为FixedSingle才能使⽤35. [ToolboxItem(true)]36. publicclass TextBoxXP : System.Windows.Forms.TextBox37. {38. /// <summary>39. /// 获得当前进程,以便重绘控件40. /// </summary>41. /// <param name="hWnd"></param>42. /// <returns></returns>43. [System.Runtime.InteropServices.DllImport("user32.dll")]44. staticextern IntPtr GetWindowDC(IntPtr hWnd);45. [System.Runtime.InteropServices.DllImport("user32.dll")]46. staticexternint ReleaseDC(IntPtr hWnd, IntPtr hDC);47.48. /// <summary>49. /// 是否启⽤热点效果50. /// </summary>51. privatebool _HotTrack = true;52.53. /// <summary>54. /// 边框颜⾊55. /// </summary>56. private Color _BorderColor = Color.Black;58. /// <summary>59. /// 热点边框颜⾊60. /// </summary>61. private Color _HotColor = Color.FromArgb(0x33, 0x5E, 0xA8);62.63. /// <summary>64. /// 是否⿏标MouseOver状态65. /// </summary>66. privatebool _IsMouseOver = false;67.68. #region 属性69. /// <summary>70. /// 是否启⽤热点效果71. /// </summary>72. [Category("⾏为"),73. Description("获得或设置⼀个值,指⽰当⿏标经过控件时控件边框是否发⽣变化。
c#实现文本框下拉框效果!(Winform)

c#实现文本框下拉框效果!(Winform)using System;using System.Collections.Generic;using System.Text;using System.Windows.Forms;using System.Data.SqlClient;namespace NewApp{class AutoComplete{List<TextBox> _CompleteObjectList = new List<TextBox>();Dictionary<string, AutoCompleteStringCollection> _Source = new Dictionary<string, AutoCompleteStringCollection>();SqlConnection conn = new SqlConnection("Data Source=.;Initial Catalog=TestDB;Integrated Security=True");public AutoComplete(){conn.Open();SqlCommand cmd = new SqlCommand("select * from AutoComplete", conn);SqlDataReader read = cmd.ExecuteReader();while (read.Read()){string key = read["name"].ToString();if (!_Source.ContainsKey(key))_Source.Add(key, new AutoCompleteStringCollection());_Source[key].Add(read["str"].ToString());}read.Close();conn.Close();}public void AddAll(Control item){for (int i = 0; i < item.Controls.Count; i++){Control var = item.Controls[i];if (var.GetType().Equals(typeof(TextBox))){Add(var as TextBox);}}}public void Add(TextBox text){_CompleteObjectList.Add(text);text.Leave += new EventHandler(text_Leave);text.AutoCompleteMode = AutoCompleteMode.SuggestAppend;text.AutoCompleteSource = AutoCompleteSource.CustomSource;if (!_Source.ContainsKey()){_Source.Add(, new AutoCompleteStringCollection());}text.AutoCompleteCustomSource = _Source[];}public void Delete(TextBox text){_CompleteObjectList.Remove(text);}public void DeleteAll(Control item){for (int i = 0; i < item.Controls.Count; i++){Control var = item.Controls[i];if (var.GetType().Equals(typeof(TextBox))){Delete(var as TextBox);}}}public void AutoCompleteClear(){foreach (AutoCompleteStringCollection var in _Source.Values){ var.Clear(); }SqlCommand cmd = new SqlCommand("Delete AutoComplete", conn);conn.Open();cmd.ExecuteNonQuery();conn.Close();}void text_Leave(object sender, EventArgs e){TextBox text = sender as TextBox;if (text.Text == "")return;string key = ;if (!_Source.ContainsKey(key)){_Source.Add(key, new AutoCompleteStringCollection());}if (!_Source[key].Contains(text.Text)){SqlCommand cmd = new SqlCommand("insert into AutoComplete select '" + key.Replace("'", "''") + "', '" + text.Text.Replace("'", "''") + "'", conn);conn.Open();cmd.ExecuteNonQuery();_Source[key].Add(text.Text);conn.Close();}}}}。
winform学习之----重新绘制边框方法延伸

winform学习之----重新绘制边框⽅法延伸⽅法1、 Pen pen1 = new Pen(Color.FromArgb(233, 149, 87));e.Graphics.DrawRectangle(pen1, new Rectangle(0, 0, this.Width - 1, this.Height - 1));⽅法2、 Rectangle myRectangle = new Rectangle(0, 0, this.Width, this.Height);ControlPaint.DrawBorder(e.Graphics, myRectangle,Color.FromArgb(0, 0, 0), 2, ButtonBorderStyle.Solid,Color.FromArgb(0, 0, 0), 2, ButtonBorderStyle.Solid,Color.FromArgb(0, 0, 0), 2, ButtonBorderStyle.Solid,Color.FromArgb(0, 0, 0), 2, ButtonBorderStyle.Solid);对⽐:⼀、Winform Panel边框⽅法⼀:每边能设置不同的颜⾊、宽度和样式 1、拖⼀个 Panel控件到主窗体中,保持默认名称 panel1,BorderStyle 选择 Fixed3D。
2、双击 Panel1,打开后台代码⽂件,在 panel1_Paint(object sender, PaintEventArgs e) ⽅法中添加如下代码: private void panel1_Paint(object sender, PaintEventArgs e) { ControlPaint.DrawBorder(e.Graphics, panel1.ClientRectangle, Color.White, 1, ButtonBorderStyle.Solid, //左边 Color.White, 1, ButtonBorderStyle.Solid, //上边 Color.DimGray, 1, ButtonBorderStyle.Solid, //右边 Color.DimGray, 1, ButtonBorderStyle.Solid);//底边 } 每边共有三个参数,分别为:边框颜⾊、宽度和样式;如果把 1 改为 0,则覆盖原来的边框,否则颜⾊搭配得当将出现凹凸边框效果,⽰例运⾏效果如图1所⽰:图1 如果 BorderStyle 选择 None,则⼜是另外⼀种效果(边框内突起)。
Winform之TextBox边框底色重绘实例

TextBox边框及底色重绘实例本实例通过继承TextBox类对TextBox边框及底色进行重绘,本实例实现了TextBox四个边的边框重绘,其他单边的重绘可依照此方式进行扩展。
先来看一下具体效果。
1.设计时TextBox边框线。
2.新增的属性用于对边框底色及边框宽度进行设置,FocusHotTrack=false时不对TextBox进行重绘,即此时就是MS提供的TextBox。
3.运行时效果界面具体代码如下:Windows API :[DllImport("User32.dll")]public static extern IntPtr GetWindowDC(IntPtr hWnd);[DllImport("User32.dll")]public static extern IntPtr ReleaseDC(IntPtr hWnd, IntPtr hdc);注:此处API可用可不用。
实现类:说明:重绘TextBox边框实现过程是:将TextBox加入到一个Panel中,当获取焦点时在Panel 上绘制一个矩形框,同时绘制一个1像素的TextBox边框。
添加Panel的用途是为TextBox绘制外边框,因为当TextBox边框线大于1像素的时候,会覆盖编辑区,引起绘制的边框的变形,为了能根据需要设定边框线的宽度,使用Panel来添加外边框线。
using System;using System.Collections.Generic;using ponentModel;using System.Drawing;using System.Linq;using System.Text;using System.Threading.Tasks;using System.Windows.Forms;namespace Sam.WinUI.Controls{/// <summary>/// </summary>public class RTextBox : System.Windows.Forms.TextBox{/// <summary>/// 是否启用焦点,默认不启用/// </summary>private bool _IsFocusHotTrack = true;/// <summary>/// 获取焦点时背景色/// </summary>private Color _FocusBackColor = Color.MistyRose;/// <summary>/// 获取焦点时边框色/// </summary>private Color _FocusBorderColor = Color.DarkOrange;/// <summary>/// 失去焦点背景色/// </summary>private Color _LostBackColor;/// <summary>/// 失去焦点边框色/// </summary>private Color _LostBorderColor = Color.Transparent;/// <summary>/// 边框线宽度/// </summary>private int _BorderWidth = 1;/// <summary>/// 组件的父容器/// </summary>private Panel _ParentContainer = null;/// <summary>/// 是否启用热点/// </summary>[Category("行为"),Description("获得或设置一个值,指示当鼠标经过控件时控件边框是否发生变化。
winform控件重绘

winform控件重绘C#定义控件的可以分为三种:
1 复合控件:将标准控件组合起来
class MyControl:UserControl{}
⽐如可以重载OnLayout()函数 ->重写控件的布局
使⽤ Browsable注解和DesignerSerializationVisibility注解可以在控件属性⾯板中显⽰属性对于已经存在的⽗类属性,重写时可以加上override。
2 扩展控件:继承于标准控件
class MyControl:Button{}
3 ⾃定义控件: 完全地⾃定义⼀个控件
class MyControl:Control{}
继承于Control类,就可以从头到尾定制⼀个控件
通常我们重写OnPaint()⽅法,实现控件的绘制。
⼀般需要先调⽤base.OnPaint()⽅法,使⽤Graphics来绘制。
在OnPaint中绘制时,要提供相关坐标,该坐标是以控件⾃⾝的左上⾓为(0,0)坐标。
OnPaint⼀般绘制前景,⽽背景绘制我们可以放到OnPaintBackground中。
图⽚的绘制时,使⽤DrawImage⽅法绘制。
WinForm开发picturebox图像重绘(picturebox显示图片)代码分享

WinForm开发picturebox图像重绘(picturebox显⽰图⽚)
代码分享
应⽤场景与实现⽅式
应⽤场景:在开发⼀个图像切割程序,需要对图像切割⽅式做⼀直直观的展⽰。
⽐如将⼀张尺⼨为2048*1024的原图按8*4切割⽅式切割为尺⼨为256*256的切⽚,在原图上绘制分割线来表⽰。
实现代码:
①在空⽩背景上绘图
复制代码
代码如下:
Bitmap bitmap = new Bitmap(2048, 1024);
Graphics graphic = Graphics.FromImage(bitmap);
//此处使⽤GDI+在graphic对象上绘图...
graphic.Dispose();
pictureBoxMain.Image = bitmap;
pictureBoxMain.SizeMode = PictureBoxSizeMode.Zoom;
②以现有图⽚为背景绘图
复制代码
代码如下:
Image objImage = Image.FromFile(@"..\..\Resouce\Image\backImage.jpg");
Graphics graphic = Graphics.FromImage(objImage);
//此处使⽤GDI+在graphic对象上绘图...
graphic.Dispose();
pictureBoxMain.Image = bitmap;
pictureBoxMain.SizeMode = PictureBoxSizeMode.Zoom;
代码段的最后⼀句,设置SizeMode属性可以让图⽚保持长宽⽐例来显⽰。
[DForm]我也来做自定义Winform之另类标题栏重绘
![[DForm]我也来做自定义Winform之另类标题栏重绘](https://img.taocdn.com/s3/m/864a20856aec0975f46527d3240c844769eaa048.png)
[DForm]我也来做⾃定义Winform之另类标题栏重绘据说得有楔⼦按照惯例,先来⼏张样例图(注:为了展⽰窗⼝阴影效果,截图范围向外扩展了些,各位凭想象吧)。
还要来个序其实,很多年没写过Winform了,前端时间在重构我们公司⾃⼰的呼叫中⼼系统,突然就觉得客户端好丑好丑,对于我这种强迫症晚期患者来说,界⾯不好看都不知道怎么写代码的,简直就是种折磨,还是满清⼗⼤酷刑级别那种。
很多⼈推荐WPF,不过个⼈对WPF没啥感觉,⽽且据说也⽆法⽀持2.0,还是采⽤Winform技术来搞吧。
终于第⼀节做Winform⽪肤,我了解的⽆⾮有2种⽅式。
1.采⽤纯图⽚模式:由专业美⼯设计各种样式的图⽚,进⾏窗⼝背景图⽚设置2.采⽤GDI+纯代码绘制:参照美⼯设计的各种样式的图⽚,使⽤C#代码绘制出来第⼀种⽅式很简单,但是可复⽤性不⾼,性能上⾯应该也会有⼀些影响,如果图⽚太⼤,窗⼝拖动等引起的重绘时,会明显有闪烁等情况。
第⼆种⽅式很复杂,但是效率和复⽤性⾼,开放各种扩张属性之后,可以适⽤于⼤部分场景。
以前⽤了很多次第⼀种⽅案,每次新做APP,都得重新设计界⾯,很不便利。
这次,我准备采⽤第⼆种⽅案来做⼀个公⽤的⽪肤。
关于GDI+,我只能算⼀个新⼈,不做具体的介绍,这⾥只讲我的⼀些实现⽅式,计划项⽬完成后,开源到github。
绘制标题栏做⾃定义界⾯,绕不开⼀个问题就是绘制标题栏。
每个Winform窗体,可以分为两个部分:⾮客户区域和客户区域。
⾮客户区域:表⽰⽆法由我们程序猿绘制的部分,具体包括:窗⼝标题栏,边框客户区域:表⽰由我们程序猿绘制的部分,也就是窗体内容,平时我们拖控件都是拖到客户区域⼀般⾃定义窗⼝的实现⽅式⽆⾮以下种1.设置窗⼝为⽆边框窗⼝,顶部放⼀个Panel,设置Panel.Dock=Top,然后在Panel⾥⾯绘制logo、标题、按钮等元素。
2.拦截窗⼝消息,重写WndProc⽅法,拦截窗⼝标题绘制消息,由⾃⼰⼿⼯绘制很多⼈会为了简便,采⽤第⼀种⽅式,不过缺点⽐较明显,对于我来说,最主要的⼀点就是真正的实现界⾯,⾥⾯的控件元素Dock会受到影响,不利于客户区域布局。
- 1、下载文档前请自行甄别文档内容的完整性,平台不提供额外的编辑、内容补充、找答案等附加服务。
- 2、"仅部分预览"的文档,不可在线预览部分如存在完整性等问题,可反馈申请退款(可完整预览的文档不适用该条件!)。
- 3、如文档侵犯您的权益,请联系客服反馈,我们会尽快为您处理(人工客服工作时间:9:00-18:30)。
TextBox边框及底色重绘实例本实例通过继承TextBox类对TextBox边框及底色进行重绘,本实例实现了TextBox四个边的边框重绘,其他单边的重绘可依照此方式进行扩展。
先来看一下具体效果。
1.设计时TextBox边框线。
2.新增的属性用于对边框底色及边框宽度进行设置,FocusHotTrack=false时不对TextBox进行重绘,即此时就是MS提供的TextBox。
3.运行时效果界面具体代码如下:Windows API :[DllImport("User32.dll")]public static extern IntPtr GetWindowDC(IntPtr hWnd);[DllImport("User32.dll")]public static extern IntPtr ReleaseDC(IntPtr hWnd, IntPtr hdc);注:此处API可用可不用。
实现类:说明:重绘TextBox边框实现过程是:将TextBox加入到一个Panel中,当获取焦点时在Panel 上绘制一个矩形框,同时绘制一个1像素的TextBox边框。
添加Panel的用途是为TextBox绘制外边框,因为当TextBox边框线大于1像素的时候,会覆盖编辑区,引起绘制的边框的变形,为了能根据需要设定边框线的宽度,使用Panel来添加外边框线。
using System;using System.Collections.Generic;using ponentModel;using System.Drawing;using System.Linq;using System.Text;using System.Threading.Tasks;using System.Windows.Forms;namespace Sam.WinUI.Controls{/// <summary>/// </summary>public class RTextBox : System.Windows.Forms.TextBox{/// <summary>/// 是否启用焦点,默认不启用/// </summary>private bool _IsFocusHotTrack = true;/// <summary>/// 获取焦点时背景色/// </summary>private Color _FocusBackColor = Color.MistyRose;/// <summary>/// 获取焦点时边框色/// </summary>private Color _FocusBorderColor = Color.DarkOrange;/// <summary>/// 失去焦点背景色/// </summary>private Color _LostBackColor;/// <summary>/// 失去焦点边框色/// </summary>private Color _LostBorderColor = Color.Transparent;/// <summary>/// 边框线宽度/// </summary>private int _BorderWidth = 1;/// <summary>/// 组件的父容器/// </summary>private Panel _ParentContainer = null;/// <summary>/// 是否启用热点/// </summary>[Category("行为"),Description("获得或设置一个值,指示当鼠标经过控件时控件边框是否发生变化。
只在控件的BorderStyle为FixedSingle时有效"),DefaultValue(true)]public bool FocusHotTrack{get { return _IsFocusHotTrack; }set{this._IsFocusHotTrack = value;//在该值发生变化时重绘控件,下同//在设计模式下,更改该属性时,如果不调用该语句,//则不能立即看到设计试图中该控件相应的变化this.Invalidate();}}/// <summary>/// 获取焦点时背景色/// </summary>public Color HotBackColor{get { return this._FocusBackColor; }set{this._FocusBackColor = value;this.Invalidate();}}/// <summary>/// 获取焦点时边框色/// </summary>public Color HotBorderColor{get { return this._FocusBorderColor; }set{this._FocusBorderColor = value;this.Invalidate();}}/// <summary>/// 失去焦点时背景色/// </summary>public Color LostBackColor{get { return this._LostBackColor; }set{this._LostBackColor = value;this.Invalidate();}}/// <summary>/// 失去焦点时背景色/// </summary>public Color LostBorderColor{get { return this._LostBorderColor; }set{this._LostBorderColor = value;this.Invalidate();}}/// <summary>/// 边框线宽度/// </summary>[DefaultValue(1)]//[EditorBrowsable(EditorBrowsableState.Never),Browsable(false)] public int BorderWidth{get { return this._BorderWidth; }set{this._BorderWidth = value;this.Invalidate();}}public RTextBox():base(){this.BorderStyle = System.Windows.Forms.BorderStyle.FixedSingle;this._LostBackColor = this.BackColor;this.SetStyle(ControlStyles.OptimizedDoubleBuffer, true);this.SetParentContainer();}/// <summary>/// 设置TextBox添加父容器/// </summary>private void SetParentContainer(){this._ParentContainer = new Panel();this._ParentContainer.Controls.Add(this);}/// <summary>/// Windows消息处理函数/// </summary>/// <param name="m"></param>protected override void WndProc(ref Message m){base.WndProc(ref m);//0xf:WM_PRINT 0x133:WM_CTLCOLOREDITif (m.Msg == 0xf || m.Msg == 0x133){ResetBorderColor(m.HWnd);}}/// <summary>/// 重绘边框/// </summary>/// <param name="hWnd"></param>internal void ResetBorderColor(IntPtr hWnd){//根据颜色和边框像素取得一条线System.Drawing.Pen pen = new Pen(this._LostBackColor, this._BorderWidth);//得到当前的句柄IntPtr hdc = Win32.GetWindowDC(hWnd);if (hdc.ToInt32() == 0){return;}if (pen != null){if (_IsFocusHotTrack){if (this.Focused){pen.Color = this._FocusBorderColor;this.BackColor = this._FocusBackColor;}else{pen.Color = this._LostBorderColor;this.BackColor = this._LostBackColor;}//绘制边框System.Drawing.Graphics g = this.Parent.CreateGraphics();g.SmoothingMode = System.Drawing.Drawing2D.SmoothingMode.AntiAlias;g.DrawRectangle(pen,this.Location.X-1,this.Location.Y-1,this.Size.Width+1, this.Size.Height+1);this.CreateGraphics().DrawRectangle(new Pen(pen.Color,1), 0, 0, this.Size.Width - 1, this.Size.Height - 1);pen.Dispose();}}//释放Win32.ReleaseDC(hWnd, hdc);}/// <summary>/// 获取焦点/// </summary>/// <param name="e"></param>protected override void OnGotFocus(EventArgs e){if(this._IsFocusHotTrack){this.Parent.Invalidate();}base.OnGotFocus(e);}/// <summary>/// 失去焦点/// </summary>/// <param name="e"></param>protected override void OnLostFocus(EventArgs e){if(this._IsFocusHotTrack){this.Parent.Invalidate();}base.OnLostFocus(e);}/// <summary>/// 鼠标进入控件编辑区/// </summary>/// <param name="e"></param>protected override void OnMouseEnter(EventArgs e){if (this.Focused){this.Parent.Invalidate();this.Invalidate();}base.OnMouseEnter(e);}/// <summary>/// 鼠标离开编辑区/// </summary>/// <param name="e"></param>protected override void OnMouseLeave(EventArgs e){if (this.Focused){this.Parent.Invalidate();}base.OnMouseLeave(e);}}}。