Android自定义Button按钮显示样式
Android编程自定义AlertDialog样式的方法详解
Android编程⾃定义AlertDialog样式的⽅法详解本⽂实例讲述了Android编程⾃定义AlertDialog样式的⽅法。
分享给⼤家供⼤家参考,具体如下:开发的时候,通常我们要⾃定义AlertDialog来满⾜我们的功能需求:⽐如弹出对话框中可以输⼊信息,或者要展⽰且有选择功能的列表,或者要实现特定的UI风格等。
那么我们可以通过以下⽅式来实现。
⽅法⼀:完全⾃定义AlertDialog的layout.如我们要实现有输⼊框的AlertDialog布局custom_dialog.xml:<?xml version="1.0" encoding="utf-8"?><LinearLayout xmlns:android="/apk/res/android"android:layout_width="match_parent"android:layout_height="wrap_content"android:background="@drawable/dialog_bg"android:orientation="vertical"><TextViewandroid:id="@+id/title"android:layout_width="match_parent"android:layout_height="wrap_content"android:background="#00ffff"android:gravity="center"android:padding="10dp"android:text="Dialog标题"android:textSize="18sp" /><EditTextandroid:id="@+id/dialog_edit"android:layout_width="match_parent"android:layout_height="wrap_content"android:hint="请输⼊内容"android:minLines="2"android:textScaleX="16sp" /><LinearLayoutandroid:layout_width="match_parent"android:layout_height="40dp"android:orientation="horizontal"><Buttonandroid:id="@+id/btn_cancel"android:layout_width="match_parent"android:layout_height="match_parent"android:layout_weight="1"android:background="#00ffff"android:text="取消" /><Viewandroid:layout_width="1dp"android:layout_height="40dp"android:background="#D1D1D1"></View><Buttonandroid:id="@+id/btn_comfirm"android:layout_width="match_parent"android:layout_height="match_parent"android:layout_weight="1"android:background="#00ffff"android:text="确定" /></LinearLayout></LinearLayout>原来在代码中使⽤:AlertDialog.Builder builder = new AlertDialog.Builder(MainActivity.this);View view = View.inflate(getActivity(), yout.custom_dialog, null);builder.setView(view);builder.setCancelable(true);TextView title= (TextView) view.findViewById(R.id.title);//设置标题EditText input_edt= (EditText) view.findViewById(R.id.dialog_edit);//输⼊内容Button btn_cancel=(Button)view.findViewById(R.id.btn_cancel);//取消按钮Button btn_comfirm=(Button)view.findViewById(R.id.btn_comfirm);//确定按钮//取消或确定按钮监听事件处理AlertDialog dialog = builder.create();dialog.show();这样,我们就可以弹出⼀个我们⾃定义的Dialog。
Android开发第七讲RadioButton(单选按钮)

Android开发第七讲RadioButton(单选按钮)⽬录Android 开发第七讲 RadioButton (单选按钮)⼀⼂重构代码之前我们响应按钮事件都是直接通过匿名内部类的⽅式. new⼀个对象来实现OnClick⽅法.现在因为按钮较多.所以新建内部类,实现接⼝为 View.OnClickListener 并且实现⾥⾯的OnClick⽅法代码如下:package com.ibinary.myapplication;import androidx.annotation.NonNull;import androidx.appcompat.app.AppCompatActivity;import android.content.Intent;import android.os.Bundle;import android.sax.StartElementListener;import android.view.View;import android.widget.Button;// Alt + Shift + Entery 引⼊此包public class MainActivity extends AppCompatActivity {// 声明Button ⼀会使⽤如果找不到则引⼊这个包 Alt+Shift+Enterprivate Button m_BtnText;private Button m_BtnEditView;private Button m_ButtonView;private Button m_RadioButtonView;protected void onCreate(Bundle savedInstanceState) {super.onCreate(savedInstanceState);setContentView(yout.activity_main);m_BtnText = (Button) findViewById(R.id.Btn_Text);m_BtnEditView = (Button) findViewById(R.id.EdtView1);m_ButtonView = (Button) findViewById(R.id.m_BtnView);m_RadioButtonView = (Button) findViewById(R.id.RadioButton_Id);SetListener();}private void SetListener(){MyOnClick myOnClick = new MyOnClick();m_BtnText.setOnClickListener(myOnClick);m_BtnEditView.setOnClickListener(myOnClick);m_ButtonView.setOnClickListener(myOnClick);m_RadioButtonView.setOnClickListener(myOnClick);}// 实现接⼝,在街⼝⾥⾯判断private class MyOnClick implements View.OnClickListener{@Overridepublic void onClick(View view) {Intent intent = null;switch (view.getId()){case R.id.Btn_Text://跳转到TextView中intent = new Intent(MainActivity.this,TextViewActive.class);break;//跳转到Button页⾯case R.id.m_BtnView:intent = new Intent(MainActivity.this,MyButton.class);break;//跳转到ExtView页⾯case R.id.EdtView1:intent = new Intent(MainActivity.this,EdtActive.class);break;//跳转到RadioButton页⾯case R.id.RadioButton_Id:intent = new Intent(MainActivity.this,RadioActivity.class);break;}if (intent == null) {return;}startActivity(intent);}}}⼆⼂RadioButton属性与xml编写2.1 RadioButton属性RadioButton是继承⾃TextView 所以⼀些属性是可以⽤的.单独定义⼀个RadioButton不会有效果的.原因是.两个RadioButton以上. 都属于⼀个分组.当这个分组中定义了两个 RadioButton的时候.那么你点击RadioButton1 那么RadioButton2就是未选中状态.看下如下xml描述常⽤属性android:checked = "true" 默认选中,使⽤这个属性那么其他的RadioButton必须设置IDandroid:button="@null" 去掉按钮属性,不使⽤⼩园框,⾃定义⼀个<?xml version="1.0" encoding="utf-8"?><RelativeLayout xmlns:android="/apk/res/android"xmlns:app="/apk/res-auto"xmlns:tools="/tools"android:layout_width="match_parent"android:layout_height="match_parent"android:padding="15dp"><!-- 使⽤RadioButton必须放到⼀个分组⾥⾯--><RadioGroupandroid:id="@+id/rg_1"android:layout_width="match_parent"android:layout_height="wrap_content"android:orientation="horizontal"><!-- RadioButton放到⾥⾯--><RadioButtonandroid:id="@+id/rd_1"android:layout_width="100dp"android:layout_height="40dp"android:text="男"android:textSize="20sp"></RadioButton><RadioButtonandroid:id="@+id/rd_2"android:layout_width="100dp"android:layout_height="40dp"android:text="⼥"android:textSize="20sp"></RadioButton></RadioGroup></RelativeLayout>界⾯则为下,选择男,则⼥就是未选中,否则就是相反因为他们在⼀个组⾥⾯.所以只能单选2.2 RadioButton实现⾃定义实现⾃定义还是使⽤ android:background属性,来制定⼀个选择状态的xml. 来实现⾃定义的选中和未选中但是前提要设置 android:button="@null"才可以.状态选择器XML如下<?xml version="1.0" encoding="utf-8"?><selector xmlns:tools="/tools"xmlns:android="/apk/res/android"tools:ignore="MissingDefaultResource"><!-- 状态选择器 android:state_checked = true代表选中--><item android:state_checked="true"><!-- 如果是选中,那么我们使⽤shape画⼀个--><shape><!-- 设置实⼼颜⾊,并且设置圆⾓--><solid android:color="#ff0000"></solid><corners android:radius="10dp"></corners></shape></item><!-- 否则设置为绿⾊--><item android:state_checked="false"><!-- 如果是未选中,那么我们使⽤shape画⼀个--><shape><!-- 设置描边形式,并且设置圆⾓--><stroke android:width="1dp" android:color="#0ca30c"></stroke><corners android:radius="10dp"></corners></shape></item></selector>xml如下布局如下<!-- ⾃定义--><RadioGroupandroid:id="@+id/rg_2"android:layout_width="match_parent"android:layout_height="100dp"android:orientation="horizontal"android:layout_below="@id/rg_1"android:layout_marginTop="1dp"><!-- RadioButton放到⾥⾯--><RadioButtonandroid:id="@+id/rd_3"android:layout_width="100dp"android:layout_height="40dp"android:button="@null"android:background="@drawable/selector_radiobutton"android:text="男1"android:textSize="20sp"></RadioButton><RadioButtonandroid:id="@+id/rd_4"android:layout_width="100dp"android:layout_height="40dp"android:button="@null"android:background="@drawable/selector_radiobutton"android:text="⼥1"android:textSize="20sp"></RadioButton></RadioGroup>请注意selector_radiobutton ⽂件名⼀定⼩写.实现效果如下⾃定义了⼀个实现效果三⼂RadioButton的监听事件既然是单选那么单选之后肯定会有监听事件package com.ibinary.myapplication;import androidx.appcompat.app.AppCompatActivity;import android.os.Bundle;import android.widget.RadioButton;import android.widget.RadioGroup;import android.widget.Toast;public class RadioActivity extends AppCompatActivity {private RadioGroup m_rg1;@Overrideprotected void onCreate(Bundle savedInstanceState) {super.onCreate(savedInstanceState);setContentView(yout.activity_radio);m_rg1 = (RadioGroup)findViewById(R.id.rg_1);//响应Checked Listenerm_rg1.setOnCheckedChangeListener(new RadioGroup.OnCheckedChangeListener() {@Override//两个参数,⼀个是组,⼀个是选中的ID. 可以通过组⾥⾯的finviewById找到当前是哪个Idpublic void onCheckedChanged(RadioGroup radioGroup, int i) {RadioButton RaButton = radioGroup.findViewById(i);Toast.makeText(RadioActivity.this, RaButton.getText(), Toast.LENGTH_SHORT).show(); }});}}只需要设置事件,实现 RadioGroup.OnCheckedChangeListener() 即可.。
自定义Button样式

⾃定义Button样式(注:以前不知道这⼀点,还闹个笑话,在Timers4Me中⾃定义TimePicker控件的时候,下载了相应的源码和资源,看到它的图⽚,我还很纳闷,为什么最后多了个.9,并且图⽚还有⼏条⿊线⼏个点,还特意让美⼯对图⽚做了处理,将多余的部分去掉。
)本例中,⽤到以下图⽚:* 按钮可以点击,但处于没有点击状态下的⿊⾊XX.9格式背景图⽚* 按钮可以点击,被点击下的状态的橙⾊的XX.9格式背景图⽚* 按钮不可⽤状态下的XX.9格式的背景图⽚上⾯的三张图⽚,需要放到项⽬中/res/drawables⾼中低密度中任何⼀个⽂件夹下2.下⾯我们需要定义按钮处于不同状态下的样式:在/res/drawables/⽬录下⾼中低任何⼀个⽂件夹下,新建xml⽂件,名字可以⾃⼰取,这⾥我命名为custom_button.xml,在不同的状态下会引⽤相应的图⽚:1. <?xml version="1.0" encoding="utf-8"?>2. <selector xmlns:android="/apk/res/android">3.4. <item android:state_enabled="false" android:drawable="@drawable/btn_background_red" />5. <item android:state_pressed="true" android:state_enabled="true"6. android:drawable="@drawable/btn_background_orange" />7. <item android:state_focused="true" android:state_enabled="true"8. android:drawable="@drawable/btn_background_orange" />9. <item android:state_enabled="true" android:drawable="@drawable/btn_background_black" />10. </selector>这⾥定义还是要按照规定的顺序来的,如果把最后⼀项放到第⼀条,那么只要按钮可⽤状态下,第⼀条条件成⽴,下⾯的就不会执⾏了。
Android定制RadioButton样式三种实现方法

Android定制RadioButton样式三种实现⽅法三种⽅法复制代码代码如下:<?xml version="1.0" encoding="utf-8"?><selector xmlns:android="/apk/res/android"><!-- 未选中-><itemandroid:state_checked="false"android:drawable="@drawable/tabswitcher_long" /><!--选中-><itemandroid:state_checked="true"android:drawable="@drawable/tabswitcher_short" /></selector>在布局⽂件中使⽤复制代码代码如下:<RadioGroup...><RadioButton...android:button="@null"android:background="@drawable/radio"/></RadioGroup>ndroid:button="@null" 去除RadioButton前⾯的圆点android:background="@drawable/radio" 使⽤定义的样式复制代码代码如下:@Overridepublic boolean onTouchEvent(MotionEvent event) {if(event.getActionMasked() == MotionEvent.ACTION_DOWN){this.setBackgroundResource(com.wxg.tab.R.drawable.main_bg);}else if(event.getActionMasked()== MotionEvent.ACTION_DOWN) {this.setBackgroundResource(com.wxg.tab.R.drawable.hui);}return super.onTouchEvent(event);}去除RadioButton前⾯的圆点adioButton.setButtonDrawable(android.R.color.transparent);,在JAVA代码中使⽤ radioButton.setBackgroundResource(R.drawable.radio);调⽤。
android floatingactionbutton用法

android floatingactionbutton用法FloatingActionButton是一个轻型控件,通常用于应用程序的主要操作。
它是一个圆形按钮,可以悬浮在屏幕上,并在用户点击时显示相关的操作选项。
使用FloatingActionButton时,你需要首先在布局文件中添加一个FloatingActionButton视图:```xml<android.support.design.widget.FloatingActionButtonandroid:id="@+id/fab"android:layout_width="wrap_content"android:layout_height="wrap_content"android:src="@drawable/ic_add"android:layout_gravity="bottom|end"android:layout_margin="@dimen/fab_margin" />```然后,在你的Activity或Fragment的代码中,你可以使用以下代码来设置FloatingActionButton的点击事件监听器:```javaFloatingActionButton fab = findViewById(R.id.fab);fab.setOnClickListener(new View.OnClickListener() {@Overridepublic void onClick(View view) {// 在这里处理FloatingActionButton的点击事件}});```你还可以根据需要设置FloatingActionButton的外观和行为。
例如,你可以设置按钮的背景色、图标、大小和位置等等。
WPF自定义控件与样式-自定义按钮(Button)

WPF⾃定义控件与样式-⾃定义按钮(Button)⼀、前⾔程序界⾯上的按钮多种多样,常⽤的就这⼏种:普通按钮、图标按钮、⽂字按钮、图⽚⽂字混合按钮。
本⽂章记录了不同样式类型的按钮实现⽅法。
⼆、固定样式的按钮固定样式的按钮⼀般在临时使⽤时或程序的样式⽐较固定时才会使⽤,按钮整体样式不需要做⼤的改动。
2.1 普通按钮-扁平化风格先看效果:定义Button的样式,详见代码:<Style x:Key="BtnInfoStyle" TargetType="Button"><Setter Property="Width" Value="70"/><Setter Property="Height" Value="25"/><Setter Property="Foreground" Value="White"/><Setter Property="BorderThickness" Value="0"/><Setter Property="Background" Value="#43a9c7"/><Setter Property="Template"><Setter.Value><ControlTemplate TargetType="Button"><Border x:Name="border" Background="{TemplateBinding Background}" BorderBrush="{TemplateBinding BorderBrush}" BorderThickness="{TemplateBinding BorderThickness}" SnapsToDevicePixels <TextBlock Text="{TemplateBinding Content}" Foreground="{TemplateBinding Foreground}" VerticalAlignment="Center" HorizontalAlignment="Center"/></Border><ControlTemplate.Triggers><Trigger Property="IsMouseOver" Value="True"><Setter TargetName="border" Property="Background" Value="#2f96b4"/></Trigger><Trigger Property="IsPressed" Value="True"><Setter TargetName="border" Property="Background" Value="#2a89a4"/></Trigger></ControlTemplate.Triggers></ControlTemplate></Setter.Value></Setter></Style>引⽤⽅法:<Grid Background="White"><StackPanel Orientation="Horizontal" Margin="10" VerticalAlignment="Top"><Button Style="{StaticResource BtnInfoStyle}" Content="信息" Margin="5 0"/></Grid>上述代码实现了Button按钮的扁平化样式,如果你想调整颜⾊风格,通过修改Background的值可实现默认颜⾊,⿏标经过颜⾊以及⿏标按下颜⾊。
Android开发之FloatingActionButton悬浮按钮基本使用、字体、颜色用法示例
Android开发之FloatingActionButton悬浮按钮基本使⽤、字体、颜⾊⽤法⽰例本⽂实例讲述了Android开发之FloatingActionButton悬浮按钮基本使⽤、字体、颜⾊⽤法。
分享给⼤家供⼤家参考,具体如下:这⾥主要讲:FloatingActionsMenu⾃定义样式以及title调整FloatingActionButton的基本⽅法看⼀下效果图:这⾥使⽤的是:com.getbase.floatingactionbutton.FloatingActionsMenu先说下它的配置:在app/build.gradle 添加以下代码依赖:圆形悬浮按钮implementation 'com.android.support:design:28.0.0'implementation 'com.getbase:floatingactionbutton:1.10.1'title 字体以及颜⾊的设置:FloatingActionButton默认⽆法显⽰⽂字的情况,所以这⾥需要对其配置样式;在res/value/style中添加:<!--Here is the style of floatingactionbutton's title--><style name="floatingActionsMenu_fab_style"><item name="android:background">@drawable/fab_label_background</item> //⽂字背景的样式<item name="android:textColor">@color/text_color</item> //⽂字的颜⾊</style>这⾥是我的res/value/color的配置:<!--floatingactionbutton's coclor--><color name="white">#ffffff</color><color name="text_color">#000000</color>然后就到了最重要的部分这⾥我们在drawable中添加⾃定义消灭了⽂件⽤于配置⽂字样式:<?xml version="1.0" encoding="utf-8"?><shape xmlns:android="/apk/res/android"android:shape="rectangle" ><!-- 填充的颜⾊ --><solid android:color="#FFffffff" /><!-- 设置按钮的四个⾓为弧形 --><!-- android:radius 弧形的半径 --><corners android:radius="25dip" /><!-- padding:Button⾥⾯的⽂字与Button边界的间隔 --><paddingandroid:bottom="15dp"android:left="20dp"android:right="20dp"android:top="15dp" /><!--设置描边--><strokeandroid:width= "10dp"android:color= "#00000000" /></shape>完成这些步骤之后只需在布局⽂件中调⽤即可:这⾥是我的布局⽂件:<com.getbase.floatingactionbutton.FloatingActionsMenuandroid:id="@+id/multiple_actions"android:layout_width="wrap_content"android:layout_height="wrap_content"fab:fab_expandDirection="down"fab:fab_labelStyle="@style/floatingActionsMenu_fab_style"><com.getbase.floatingactionbutton.FloatingActionButtonandroid:id="@+id/action_a"android:layout_width="wrap_content"android:layout_height="wrap_content"fab:fab_size="mini"fab:fab_title="按钮⼀" /><com.getbase.floatingactionbutton.FloatingActionButtonandroid:id="@+id/action_b"android:layout_width="wrap_content"android:layout_height="wrap_content"fab:fab_size="mini"fab:fab_title="按钮⼆" /><com.getbase.floatingactionbutton.FloatingActionButtonandroid:id="@+id/action_c"android:layout_width="wrap_content"android:layout_height="wrap_content"fab:fab_size="mini"fab:fab_title="按钮三" /></com.getbase.floatingactionbutton.FloatingActionsMenu>设置⽅法如代码第六⾏所⽰FloatingActionButton基本使⽤:/*设置三个悬浮按钮的监听事件*///final FloatingActionButton actionA = (FloatingActionButton) findViewById(R.id.action_a);actionA.setOnClickListener(new View.OnClickListener() {@Overridepublic void onClick(View view) {//空}});//跳转到 FromPointToPoint 活动final FloatingActionButton actionB = (FloatingActionButton) findViewById(R.id.action_b);actionB.setOnClickListener(new View.OnClickListener() {@Overridepublic void onClick(View view) {startActivityForResult(new Intent(MainActivity.this,FromPointToPoint.class),0x1);}});//弹出提⽰final FloatingActionButton actionC = (FloatingActionButton) findViewById(R.id.action_c);actionC.setOnClickListener(new View.OnClickListener() {@Overridepublic void onClick(View view) {Toast.makeText(MainActivity.this,"dianjile",Toast.LENGTH_SHORT).show();}});更多关于Android相关内容感兴趣的读者可查看本站专题:《》、《》、《》、《》、《》及《》希望本⽂所述对⼤家Android程序设计有所帮助。
Android中ImageButton自定义按钮的按下效果的代码实现方法
【原创】Android中ImageButton自定义按钮的按下效果的代码实现方法,附网上2种经典解决方法。
首先看看网上的2种方法:【以下为引用网络,来源:/thread-7931-1-1.html】使用Button时为了让用户有“按下”的效果,有两种实现方式:1.在代码里面。
view plaincopy to clipboardprint?imageButton.setOnTouchListener(new OnTouchListener(){@Overridepublic boolean onTouch(View v, MotionEvent event) {if(event.getAction() == MotionEvent.ACTION_DOWN){//更改为按下时的背景图片v.setBackgroundResource(R.drawable.pressed);}else if(event.getAction() == MotionEvent.ACTION_UP){//改为抬起时的图片v.setBackgroundResource(R.drawable.released);}return false;}});imageButton.setOnTouchListener(new OnTouchListener(){@Overridepublic boolean onTouch(View v, MotionEvent event) {if(event.getAction() == MotionEvent.ACTION_DOWN){//更改为按下时的背景图片v.setBackgroundResource(R.drawable.pressed);}else if(event.getAction() == MotionEvent.ACTION_UP){//改为抬起时的图片v.setBackgroundResource(R.drawable.released);}return false;}});imageButton.setOnTouchListener(new OnTouchListener(){@Overridepublic boolean onTouch(View v, MotionEvent event) {if(event.getAction() == MotionEvent.ACTION_DOWN){//更改为按下时的背景图片v.setBackgroundResource(R.drawable.pressed);}else if(event.getAction() == MotionEvent.ACTION_UP){//改为抬起时的图片v.setBackgroundResource(R.drawable.released);}return false;}});imageButton.setOnTouchListener(new OnTouchListener(){@Overridepublic boolean onTouch(View v, MotionEvent event) {if(event.getAction() == MotionEvent.ACTION_DOWN){//更改为按下时的背景图片v.setBackgroundResource(R.drawable.pressed);}else if(event.getAction() == MotionEvent.ACTION_UP){//改为抬起时的图片v.setBackgroundResource(R.drawable.released);}return false;}});2.用XML文件实现。
Android开发带图标的按钮
Android开发带图标的按钮除了Android系统自带的Button按钮一万,还提供了带图标的按钮ImageButton。
要制作带图标的按钮,首先要在布局文件中定义ImageButton,然后通过setImageDrawable方法来设置要显示的图标。
注意:我们可以在布局文件中就直接设置按钮的图标,如android:src="@drawable/icon1"我们也可以在程序中设置自定义图标imgbtn3.setImageDrawable(getResources().getDrawable(R.drawable.icon2));我们还可以使用系统自带的图标imgbtn4.setImageDrawable(getResources().getDrawabl(android.R.drawable.sym_call_incoming)) ;设置完按钮的图标后,需要为按钮设置监听setOnClickListener,以此捕获事件并处理下面的例子讲述的是由4个图标按钮组成的布局,其中三个按钮的图标是自定义的,第四个按钮的图标是系统的,当点击按钮1的时候,弹出dialog,当点击按钮2的时候,点击确定后,可以将按钮2的图标变成按钮3的图标,当点击按钮3的时候,按钮3的图标变成了系统打电话的图标,点击按钮4,显示一个提示dialogjava代码:package org.loulijun.imagebutton;import android.app.Activity;import android.app.AlertDialog;import android.app.Dialog;import android.content.DialogInterface;import android.os.Bundle;import android.view.View;import android.widget.Button;import android.widget.ImageButton;import android.widget.TextView;public class ImageButtonTest extends Activity {/** Called when the activity is first created. */TextView textview;ImageButton imgbtn1;ImageButton imgbtn2;ImageButton imgbtn3;ImageButton imgbtn4;@Overridepublic void onCreate(Bundle savedInstanceState) {super.onCreate(savedInstanceState);setContentView(yout.main);textview=(TextView)findViewById(R.id.textview);//分别取得4个ImageButton对象imgbtn1=(ImageButton)findViewById(R.id.imagebutton1);imgbtn2=(ImageButton)findViewById(R.id.imagebutton2);imgbtn3=(ImageButton)findViewById(R.id.imagebutton3);imgbtn4=(ImageButton)findViewById(R.id.imagebutton4);//分别为ImageButton设置图标//imgbtn1已经在main.xml布局中设置了图标,所以就不在这里设置了(设置图标即可在程序中设置,也可在布局文件中设置)imgbtn2.setImageDrawable(getResources().getDrawable(R.drawable.icon));//在程序中设置图标imgbtn3.setImageDrawable(getResources().getDrawable(R.drawable.icon2));imgbtn4.setImageDrawable(getResources().getDrawable(android.R.drawable.sym_call_incoming) );//设置系统图标//下面为各个按钮设置事件监听imgbtn1.setOnClickListener(new Button.OnClickListener(){@Overridepublic void onClick(View v) {// TODO Auto-generated method stubDialog dialog=new AlertDialog.Builder(ImageButtonTest.this).setTitle("提示").setMessage("我是ImageButton1").setPositiveButton("确定",new DialogInterface.OnClickListener() {@Overridepublic void onClick(DialogInterface dialog, int which) {// TODO Auto-generated method stub//相应的处理操作}}).create();dialog.show();}});imgbtn2.setOnClickListener(new Button.OnClickListener(){@Overridepublic void onClick(View v) {// TODO Auto-generated method stubDialog dialog=new AlertDialog.Builder(ImageButtonTest.this).setTitle("提示").setMessage("我是ImageButton2,我要使用ImageButton3的图标").setPositiveButton("确定",new DialogInterface.OnClickListener() {@Overridepublic void onClick(DialogInterface dialog, int which) {// TODO Auto-generated method stubimgbtn2.setImageDrawable(getResources().getDrawable(R.drawable.icon2));}}).create();dialog.show();}});imgbtn3.setOnClickListener(new Button.OnClickListener(){@Overridepublic void onClick(View v) {// TODO Auto-generated method stubDialog dialog=new AlertDialog.Builder(ImageButtonTest.this).setTitle("提示").setMessage("我是ImageButton3,我想使用系统打电话的图标").setPositiveButton("确定",new DialogInterface.OnClickListener() {@Overridepublic void onClick(DialogInterface dialog, int which) {// TODO Auto-generated method stubimgbtn3.setImageDrawable(getResources().getDrawable(android.R.drawable.sym_action_call));}}).create();dialog.show();}});imgbtn4.setOnClickListener(new Button.OnClickListener(){@Overridepublic void onClick(View v) {// TODO Auto-generated method stubDialog dialog=new AlertDialog.Builder(ImageButtonTest.this).setTitle("提示").setMessage("我是使用的系统图标").setPositiveButton("确定",new DialogInterface.OnClickListener() {@Overridepublic void onClick(DialogInterface dialog, int which) {// TODO Auto-generated method stub//相应的处理操作}}).create();dialog.show();}});}}。
android自定义radiobutton样式文字颜色随选中状态而改变

android⾃定义radiobutton样式⽂字颜⾊随选中状态⽽改变主要是写⼀个 color selector在res/建⼀个⽂件夹取名colorres/color/color_radiobutton.xml1<selector xmlns:android="/apk/res/android">2<item android:state_checked="true" android:color="@color/color_text_selected"/>3<!-- not selected -->4<item android:color="@color/color_text_normal"/>5</selector>程序使⽤:1 //layout/main.xml2<?xml version="1.0" encoding="utf-8"?>3<LinearLayout xmlns:android="/apk/res/android"4 android:layout_width="fill_parent"5 android:layout_height="fill_parent"6 android:orientation="vertical">7<RadioGroup8android:id="@+id/radiogroup_personal_condition"9 android:layout_width="wrap_content"10 android:layout_height="wrap_content"11 android:orientation="horizontal">12<RadioButton13android:id="@+id/radiobutton_1"14 android:layout_width="wrap_content"15 android:layout_height="wrap_content"16 android:background="@drawable/selector_radio"17 android:button="@null"18 android:checked="true"19 android:gravity="center"20 android:text="⽬录"21 android:textColor="@color/color_radiobutton"22 android:textSize="@dimen/font_size"23 android:textStyle="bold"/>24<RadioButton25android:id="@+id/radiobutton_2"26 android:layout_width="wrap_content"27 android:layout_height="wrap_content"28 android:background="@drawable/selector_radio"29 android:button="@null"30 android:gravity="center"31 android:text="书签"32 android:textColor="@color/color_radiobutton"33 android:textSize="@dimen/font_size"34 android:textStyle="bold"/>35</RadioGroup>36</LinearLayout>附录,点击radio改变radio图⽚1<?xml version="1.0" encoding="utf-8"?>2<selector xmlns:android="/apk/res/android">3<item android:state_checked="true" android:drawable="@drawable/ic_radio_checkon"/>4<!-- not selected -->5<item android:drawable="@drawable/ic_radio_checkoff"/>67</selector>。
Flutter悬浮按钮FloatingActionButton使用详解

Flutter悬浮按钮FloatingActionButton使⽤详解⽬录1、普通⽤法2、修改悬浮按钮位置3、修改悬浮按钮⼤⼩4、去除悬浮按钮切换动画5、⼀般的⾃定义悬浮按钮样式6、彻底的⾃定义悬浮按钮样式1、普通⽤法floatingActionButton: FloatingActionButton(child: Icon(Icons.add),onPressed: (){print('不要啊~');},),2、修改悬浮按钮位置继承FloatingActionButtonLocation类,重写对应⽅法⾃定义位置import 'package:flutter/material.dart';class CustomFloatingActionButtonLocation extends FloatingActionButtonLocation {FloatingActionButtonLocation location;double offsetX; // X⽅向的偏移量double offsetY; // Y⽅向的偏移量CustomFloatingActionButtonLocation(this.location, this.offsetX, this.offsetY);@overrideOffset getOffset(ScaffoldPrelayoutGeometry scaffoldGeometry) {Offset offset = location.getOffset(scaffoldGeometry);return Offset(offset.dx + offsetX, offset.dy + offsetY);}}使⽤floatingActionButtonLocation:CustomFloatingActionButtonLocation(FloatingActionButtonLocation.endFloat, 0, -DpUtils.setWidth(20)),3、修改悬浮按钮⼤⼩floatingActionButton: SizedBox(height: 100.0,width: 100.0,child:FloatingActionButton(child: Icon(Icons.add),onPressed: () {},),),4、去除悬浮按钮切换动画继承FloatingActionButtonAnimator类并重写对应的⽅法import 'package:flutter/material.dart';class NoScalingAnimation extends FloatingActionButtonAnimator{double _x;double _y;@overrideOffset getOffset({Offset begin, Offset end, double progress}) {_x = begin.dx +(end.dx - begin.dx)*progress ;_y = begin.dy +(end.dy - begin.dy)*progress;return Offset(_x,_y);}@overrideAnimation<double> getRotationAnimation({Animation<double> parent}) {return Tween<double>(begin: 1.0, end: 1.0).animate(parent);}@overrideAnimation<double> getScaleAnimation({Animation<double> parent}) {return Tween<double>(begin: 1.0, end: 1.0).animate(parent);}}使⽤floatingActionButtonAnimator: NoScalingAnimation(),5、⼀般的⾃定义悬浮按钮样式@overrideWidget build(BuildContext context) {return Scaffold(floatingActionButton: FloatingActionButton(child: Container(child: Column(mainAxisAlignment: MainAxisAlignment.center,crossAxisAlignment: CrossAxisAlignment.center,children: <Widget>[Image.asset("images/float_button.png",width: DpUtils.setWidth(32),height: DpUtils.setWidth(32),),Text("悬浮按钮",style: TextStyle(fontWeight: FontWeight.bold,fontSize: DpUtils.setSp(20), color: Colors.white),),],),),elevation: 0,onPressed: () {_doSome();},backgroundColor: Colors.black,heroTag: "floatHome",),))}6、彻底的⾃定义悬浮按钮样式其实,floatingActionButton 可以直接传⼊普通的widget。
WPF自定义漂亮的按钮样式

WPF⾃定义漂亮的按钮样式⾸先打开 Microsoft Visual Studio 2008 ,新建⼀个WPF项⽬,在上⾯随便放⼏个按钮:然后给各个按钮设置不同的背景颜⾊:设置好之后就是这样啦:然后我们就开始在 App.xaml ⽂件中定义按钮样式了:定义的样式代码如下:以下为引⽤的内容:<Application x:Class="WPFButton.App"xmlns=""xmlns:x=""StartupUri="Window1.xaml"><Application.Resources><!--定义按钮样式--><Style TargetType="Button"><Setter Property="Foreground" Value="Black"/><!--修改模板属性--><Setter Property="Template"><Setter.Value><!--控件模板--><ControlTemplate TargetType="Button"><!--背景⾊--><Border x:Name="back" Opacity="0.8" CornerRadius="3"><Border.BitmapEffect><OuterGlowBitmapEffect Opacity="0.7" GlowSize="0" GlowColor="{Binding RelativeSource={RelativeSource TemplatedParent}, Path=(Button.Background).(SolidColorBrush.Color)}" /></Border.BitmapEffect><Border.Background><LinearGradientBrush StartPoint="0,0" EndPoint="0,1.5"><GradientBrush.GradientStops><GradientStopCollection><GradientStop Color="{Binding RelativeSource={RelativeSource TemplatedParent}, Path=(Button.Background).(SolidColorBrush.Color)}" Offset="0"/><GradientStop Color="{Binding RelativeSource={RelativeSource TemplatedParent}, Path=(Button.Background).(SolidColorBrush.Color)}" Offset="0.4"/><GradientStop Color="#FFF" Offset="1"/></GradientStopCollection></GradientBrush.GradientStops></LinearGradientBrush></Border.Background><!--前景⾊及边框--><Border x:Name="fore" BorderThickness="1" CornerRadius="3" BorderBrush="#5555"><Border.Background><LinearGradientBrush StartPoint="0,0" EndPoint="0,1"><GradientBrush.GradientStops><GradientStopCollection><GradientStop Color="#6FFF" Offset="0.5"/><GradientStop Color="#1111" Offset="0.51"/></GradientStopCollection></GradientBrush.GradientStops></LinearGradientBrush></Border.Background><!--按钮内容--><ContentPresenter x:Name="content" HorizontalAlignment="Center" VerticalAlignment="Center" Content=" {TemplateBinding Content}"><ContentPresenter.BitmapEffect><DropShadowBitmapEffect Color="#000" Direction="-90" ShadowDepth="2" Softness="0.1" Opacity="0.3" /><DropShadowBitmapEffect Color="#000" Direction="-90" ShadowDepth="2" Softness="0.1" Opacity="0.3" /> </ContentPresenter.BitmapEffect></ContentPresenter></Border></Border><!--触发器--><ControlTemplate.Triggers><!--⿏标移⼊移出--><Trigger Property="IsMouseOver" Value="True"><Trigger.EnterActions><BeginStoryboard><Storyboard><DoubleAnimation To="6" Duration="0:0:0.2" Storyboard.TargetName="back" Storyboard.TargetProperty=" (Border.BitmapEffect).(OuterGlowBitmapEffect.GlowSize)" /><ColorAnimation To="#AFFF" BeginTime="0:0:0.2" Duration="0:0:0.2" Storyboard.TargetName="fore" Storyboard.TargetProperty="(Border.Background).(LinearGradientBrush.GradientStops)[0].(GradientStop.Color)" /><ColorAnimation To="#3FFF" BeginTime="0:0:0.2" Duration="0:0:0.2" Storyboard.TargetName="fore" Storyboard.TargetProperty="(Border.Background).(LinearGradientBrush.GradientStops)[1].(GradientStop.Color)" /></Storyboard></BeginStoryboard></Trigger.EnterActions><Trigger.ExitActions><BeginStoryboard><Storyboard><DoubleAnimation Duration="0:0:0.2" Storyboard.TargetName="back" Storyboard.TargetProperty=" (Border.BitmapEffect).(OuterGlowBitmapEffect.GlowSize)" /><ColorAnimation Duration="0:0:0.2" Storyboard.TargetName="fore" Storyboard.TargetProperty=" (Border.Background).(LinearGradientBrush.GradientStops)[0].(GradientStop.Color)" /><ColorAnimation Duration="0:0:0.2" Storyboard.TargetName="fore" Storyboard.TargetProperty=" (Border.Background).(LinearGradientBrush.GradientStops)[1].(GradientStop.Color)" /></Storyboard></BeginStoryboard></Trigger.ExitActions></Trigger><!--按钮按下弹起--><Trigger Property="IsPressed" Value="True"><Trigger.EnterActions><BeginStoryboard><Storyboard><DoubleAnimation To="3" Duration="0:0:0.1" Storyboard.TargetName="back" Storyboard.TargetProperty=" (Border.BitmapEffect).(OuterGlowBitmapEffect.GlowSize)" /><ColorAnimation To="#3AAA" Duration="0:0:0.1" Storyboard.TargetName="fore"Storyboard.TargetProperty="(Border.Background).(LinearGradientBrush.GradientStops)[0].(GradientStop.Color)" /><ColorAnimation To="#2111" Duration="0:0:0.1" Storyboard.TargetName="fore"Storyboard.TargetProperty="(Border.Background).(LinearGradientBrush.GradientStops)[1].(GradientStop.Color)" /></Storyboard></BeginStoryboard></Trigger.EnterActions><Trigger.ExitActions><BeginStoryboard><Storyboard><DoubleAnimation Duration="0:0:0.1" Storyboard.TargetName="back" Storyboard.TargetProperty=" (Border.BitmapEffect).(OuterGlowBitmapEffect.GlowSize)" /><ColorAnimation Duration="0:0:0.1" Storyboard.TargetName="fore" Storyboard.TargetProperty=" (Border.Background).(LinearGradientBrush.GradientStops)[0].(GradientStop.Color)" /><ColorAnimation Duration="0:0:0.1" Storyboard.TargetName="fore" Storyboard.TargetProperty=" (Border.Background).(LinearGradientBrush.GradientStops)[1].(GradientStop.Color)" /></Storyboard></BeginStoryboard></Trigger.ExitActions></Trigger><!--按钮失效--><Trigger Property="IsEnabled" Value="False"><Setter Property="Foreground" Value="#B444"/><Trigger.EnterActions><BeginStoryboard><BeginStoryboard><Storyboard><DoubleAnimation To="0" Duration="0:0:0.3" Storyboard.TargetName="back" Storyboard.TargetProperty=" (Border.BitmapEffect).(OuterGlowBitmapEffect.GlowSize)" /><DoubleAnimation To="1" Duration="0:0:0.1" Storyboard.TargetName="content"Storyboard.TargetProperty="(ContentPresenter.BitmapEffect).(DropShadowBitmapEffect.Opacity)" /><DoubleAnimation To="-135" Duration="0:0:0.1" Storyboard.TargetName="content"Storyboard.TargetProperty="(ContentPresenter.BitmapEffect).(DropShadowBitmapEffect.Direction)" /><ColorAnimation To="#FFF" Duration="0:0:0.3" Storyboard.TargetName="content"Storyboard.TargetProperty="(ContentPresenter.BitmapEffect).(DropShadowBitmapEffect.Color)" /><ColorAnimation To="#D555" Duration="0:0:0.3" Storyboard.TargetName="fore"Storyboard.TargetProperty="(Border.BorderBrush).(SolidColorBrush.Color)" /><ColorAnimation To="#CEEE" Duration="0:0:0.3" Storyboard.TargetName="fore"Storyboard.TargetProperty="(Border.Background).(LinearGradientBrush.GradientStops)[0].(GradientStop.Color)" /><ColorAnimation To="#CDDD" Duration="0:0:0.3" Storyboard.TargetName="fore"Storyboard.TargetProperty="(Border.Background).(LinearGradientBrush.GradientStops)[1].(GradientStop.Color)" /></Storyboard></BeginStoryboard></Trigger.EnterActions><Trigger.ExitActions><BeginStoryboard><Storyboard><DoubleAnimation Duration="0:0:0.1" Storyboard.TargetName="back" Storyboard.TargetProperty=" (Border.BitmapEffect).(OuterGlowBitmapEffect.GlowSize)" /><DoubleAnimation Duration="0:0:0.1" Storyboard.TargetName="content" Storyboard.TargetProperty=" (ContentPresenter.BitmapEffect).(DropShadowBitmapEffect.Opacity)" /><DoubleAnimation Duration="0:0:0.1" Storyboard.TargetName="content" Storyboard.TargetProperty=" (ContentPresenter.BitmapEffect).(DropShadowBitmapEffect.Direction)" /><ColorAnimation Duration="0:0:0.1" Storyboard.TargetName="content" Storyboard.TargetProperty=" (ContentPresenter.BitmapEffect).(DropShadowBitmapEffect.Color)" /><ColorAnimation Duration="0:0:0.1" Storyboard.TargetName="fore" Storyboard.TargetProperty=" (Border.BorderBrush).(SolidColorBrush.Color)" /><ColorAnimation Duration="0:0:0.1" Storyboard.TargetName="fore" Storyboard.TargetProperty=" (Border.Background).(LinearGradientBrush.GradientStops)[0].(GradientStop.Color)" /><ColorAnimation Duration="0:0:0.1" Storyboard.TargetName="fore" Storyboard.TargetProperty=" (Border.Background).(LinearGradientBrush.GradientStops)[1].(GradientStop.Color)" /></Storyboard></BeginStoryboard></Trigger.ExitActions></Trigger></ControlTemplate.Triggers></ControlTemplate></Setter.Value></Setter></Style></Application.Resources></Application>看了先不要头⼤,我们先看看最终效果,然后回过头来再解释代码:这是常规样式这个是⿏标移到上⾯时的样式这个是⿏标点击时的样式还有就是按钮失效时的样式效果还算不错吧,下⾯来讲解代码喽,头晕的同学可以现在就收拾东西回家了哈。
Android开发-Button属性设置

Android Button属性设置android:id 为控件指定相应的IDandroid:text 指定控件的文本,置尽量使用strings.xmlandroid:grivity 指定控件的基本位置,比如举重,居右,android:padding 指定控件的内边距,控件当中的内容android:singleLine 如果设置为真的话,则将控件的内容在同一行当中显示android:layout_above 将该空间的底部至于给定ID的空间之上android:layout_below:将该控件的顶部至于给定ID的控件之下android:layout_toLeftOf:将该控件的右边缘和给定ID的控件的左边缘对其android:layout_toRightOf 将该控件的左边缘和给定的ID的控件的右边缘对齐android:layout_alignBaseLine 该控件的baseline和给定ID的控件的Baseline对齐android:layout_alignBottom 将该控件的底部边缘与给定ID控件的底部边缘android:layout_alignLeft 将该控件左边缘与给定ID控件的左边缘对齐android:layout_alignRight 将该控件的右边缘与给定ID控件的右边缘对齐android:layout_alignTop 将给定控件的顶部边缘与给定ID控件的顶部对齐android:alignParentBottom 如果该值为true 则将该控件的底部和父控件的底部对齐android:layout_alignParentLeft 如果该值为true则将该控件的左边与父控件的左边对齐android:layout_alignParentRight 如果该值为true则将该控件的右边与父控件的右边对齐android:layout_alignParentTop 将控件的顶部与父控件的顶部对齐android:layout_centerHorizontal 如果值为真,该控件将被至于水平方向的中央android:layout_centerInParent 将被至于父控件水平方向和垂直都居中android:layout_centerVertical 将被至于垂直方向的中央第一类:属性值为true或falseandroid:layout_centerHrizontal 水平居中android:layout_centerVertical 垂直居中android:layout_centerInparent 相对于父元素完全居中android:layout_alignParentBottom 贴紧父元素的下边缘android:layout_alignParentLeft 贴紧父元素的左边缘android:layout_alignParentRight 贴紧父元素的右边缘android:layout_alignParentTop 贴紧父元素的上边缘android:layout_alignWithParentIfMissing 如果对应的兄弟元素找不到的话就以父元素做参照物第二类:属性值必须为id的引用名“@id/id-name”android:layout_below 在某元素的下方android:layout_above 在某元素的的上方android:layout_toLeftOf 在某元素的左边android:layout_toRightOf 在某元素的右边android:layout_alignTop 本元素的上边缘和某元素的的上边缘对齐android:layout_alignLeft 本元素的左边缘和某元素的的左边缘对齐android:layout_alignBottom 本元素的下边缘和某元素的的下边缘对齐android:layout_alignRight 本元素的右边缘和某元素的的右边缘对齐第三类:属性值为具体的像素值,如30dip,40pxandroid:layout_marginBottom 离父控件底边缘的距离android:layout_marginLeft 离父控件左边缘的距离android:layout_marginRight 离父控件右边缘的距离android:layout_marginTop 离父控件上边缘的距离EditText的android:hint设置EditText为空时输入框内的提示信息。
button用法

button用法Button用法Button是一个非常常用的UI控件,它通常被用来触发特定的操作或者事件。
使用Button可以使应用程序看起来更加交互和易用。
Button的基本用法很简单。
我们可以使用XML或Java代码来创建Button实例,然后将其添加到界面上。
下面是一个简单的例子:XML代码:```<Buttonandroid:id="@+id/my_button"android:layout_width="wrap_content"android:layout_height="wrap_content"android:text="Click me" />```Java代码:```Button myButton = (Button) findViewById(R.id.my_button); myButton.setOnClickListener(new View.OnClickListener() {@Overridepublic void onClick(View v) {// Do something when the button is clicked}});```在这个例子中,我们首先在XML文件中定义了一个Button实例,设置了它的ID、宽度、高度和文本。
然后我们在Java代码中获取了这个Button实例,并为它添加了一个ClickListener,当用户点击这个Button时会触发这个ClickListener,并执行相应的操作。
除了基本用法,Button还有许多高级使用方式。
下面是一些常见的用法:1. 设置Button的样式我们可以通过设置Button的样式来改变它的外观和行为。
Button的样式通常有以下几种:- 普通样式:这是Button的默认样式。
它有一个背景颜色和文本颜色,并且可以被点击。
materialbutton用法
materialbutton用法MaterialButton是Android Material Design的一部分,是Button的一种强化版本。
它提供了各种样式和效果,可以帮助开发者轻松打造美观且有吸引力的按钮。
本文将介绍MaterialButton的一些用法。
一、添加MaterialButton首先,在布局文件中添加MaterialButton:```xml<com.google.android.material.button.MaterialButtonandroid:id="@+id/button"android:layout_width="wrap_content"android:layout_height="wrap_content"android:text="MaterialButton" />```二、修改背景颜色MaterialButton提供了多种背景颜色,如以下几种:```xml<com.google.android.material.button.MaterialButtonandroid:id="@+id/button"android:layout_width="wrap_content"android:layout_height="wrap_content"android:backgroundTint="@color/colorPrimary"android:text="Primary" /><com.google.android.material.button.MaterialButtonandroid:id="@+id/button"android:layout_width="wrap_content"android:layout_height="wrap_content"android:backgroundTint="@color/colorSecondary"android:text="Secondary" /><com.google.android.material.button.MaterialButtonandroid:id="@+id/button"android:layout_width="wrap_content"android:layout_height="wrap_content"android:backgroundTint="@color/colorAccent"android:text="Accent" />```三、设置按钮样式除了背景颜色外,MaterialButton还提供了多种按钮样式。
【Android开发API】用户界面-按钮 - Buttons
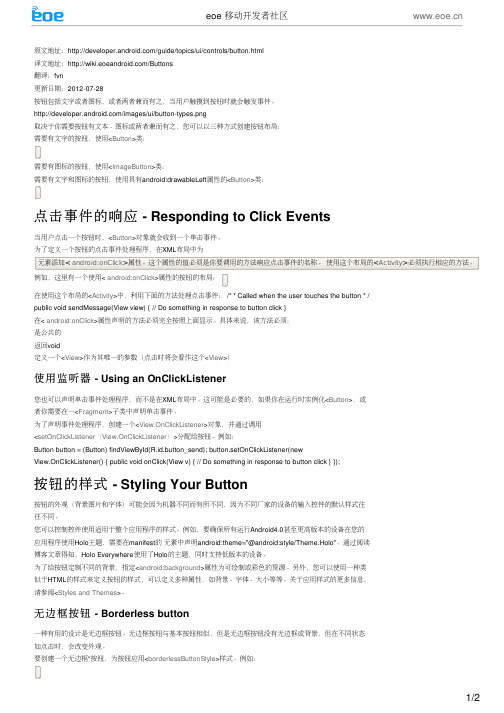
需要有图标的按钮,使用
需要有文字和图标的按钮,使用具有
点击事件的响应
当用户点击⼀个按钮时,
为了定义⼀个按钮的点击事件处理程序,在
元素添加< android:onClick>属性。
这个属性的值必须是你要调用的方法响应点击事件的名称。
使用这个布局的<Activity>必须执行相应的方法。
例如,这里有⼀个使用< android:onClick>属性的按钮的布局:
在使用这个布局的<Activity>中,利用下面的方法处理点击事件: /* * Called when the user touches the button * /
public void sendMessage(View view) { // Do something in response to button click }
在< android:onClick>属性声明的方法必须完全按照上面显示。
具体来说,该方法必须:
是公共的
返回void
定义⼀个<View>作为其唯⼀的参数(点击时将会看作这个<View>)
使用监听器 - Using an OnClickListener
布局中。
这可能是必要的,如果你在运行时实例化
对于此Drawable
©eoe
本文链接。
AndroidStudio之RadioButton
AndroidStudio之RadioButton•基本⽤法 RadioButton 单选按钮,就是只能够选中⼀个,所以我们需要把 RadioButton 放到 RadioGroup 按钮组中,从⽽实现单选功能! 另外我们可以为外层 RadioGroup 设置 orientation 属性然后设置 RadioButton 的排列⽅式,竖直排列或者⽔平排列。
<?xml version="1.0" encoding="utf-8"?><RelativeLayout xmlns:android="/apk/res/android"android:layout_width="match_parent"android:layout_height="match_parent"android:gravity="center_horizontal"android:padding="10dp"><Buttonandroid:id="@+id/btnpost"android:layout_width="wrap_content"android:layout_height="wrap_content"android:layout_below="@id/radioGroup"android:text="提交"android:textSize="20sp"/><RadioGroupandroid:id="@+id/radioGroup"android:layout_width="wrap_content"android:layout_height="wrap_content"android:layout_below="@id/tv_1"android:orientation="horizontal"><RadioButtonandroid:id="@+id/rb_1"android:layout_width="wrap_content"android:layout_height="wrap_content"android:checked="true"android:text="男"/><RadioButtonandroid:id="@+id/rb_2"android:layout_width="wrap_content"android:layout_height="wrap_content"android:text="⼥"/></RadioGroup><TextViewandroid:id="@+id/tv_1"android:layout_width="wrap_content"android:layout_height="wrap_content"android:text="请选择性别"android:textSize="20sp"/></RelativeLayout>•获得选中的值 有两种⽅式可以获取。
floatingactionbutton 样式

floatingactionbutton 样式FloatingActionButton(简称FAB)是一种常见的Android用户界面元素,它通常用于提供快捷动作或导航操作。
它是一个圆形的按钮,浮动在应用界面的特定位置,以便用户可以随时轻松访问。
FAB的样式非常重要,因为它不仅需要吸引用户的注意力,还需要与应用的整体设计风格一致。
在本文中,我们将一步一步地介绍如何创建和定制FAB的样式。
第一步:引入依赖库在使用FAB之前,我们需要在项目的Gradle文件中引入依赖库。
打开项目的build.gradle文件,然后在dependencies块中添加以下代码:implementation 'com.google.android.material:material:1.4.0'这个库包含了许多Google Material Design组件,包括FloatingActionButton。
第二步:在布局文件中添加FAB在布局文件的适当位置添加FloatingActionButton元素。
例如,如果我们要在主界面上添加一个FAB,可以在activity_main.xml文件中添加以下代码:xml<com.google.android.material.floatingactionbutton.FloatingAction Buttonandroid:id="@+id/fab"android:layout_width="wrap_content"android:layout_height="wrap_content"android:layout_gravity="bottom end"android:src="@drawable/ic_add"app:backgroundTint="@color/fab_color"app:elevation="@dimen/fab_elevation" />在这个示例中,我们使用了FAB的基本属性。
自定义ToggleButton的样式

⾃定义ToggleButton的样式1.案例效果图选中未选中2.准备相关的资源2.1准备图⽚(⼀般放在drawable-hdpi⽬录下)toggle_btn_checked.png toggle_btn_unchecked.png2.2准备透明的颜⾊<color name="transparent">#00000000</color>3.样式⽂件(toggle_button.xml)3.1样式⽂件位置通常在drawable⽬录下定义3.2样式代码<selector xmlns:android="/apk/res/android"><!-- 选中样式 --><item android:drawable="@drawable/toggle_btn_checked" android:state_checked="true"/><!-- 未选中样式 --><item android:drawable="@drawable/toggle_btn_unchecked" android:state_checked="false"/></selector>4.应⽤样式(main.xml)<ToggleButtonandroid:layout_width="wrap_content"android:layout_height="wrap_content"android:background="@color/transparent"android:button="@drawable/toggle_button"android:text=""android:textOff=""android:textOn="" />4.1 为了只显⽰图⽚需要设置text、textOff、textOn属性的内容为空字符串4.2 为了充分显⽰出图⽚,背景设置为透明的颜⾊ #00000004.3 为了显⽰图⽚按钮,在button属性上应⽤样式4.4 控件的宽度和⾼度属性设置为"wrap_content",图⽚资源最好放在drawable-hdpi⽬录下才能完全显⽰图⽚(⾼分辨率下)。
- 1、下载文档前请自行甄别文档内容的完整性,平台不提供额外的编辑、内容补充、找答案等附加服务。
- 2、"仅部分预览"的文档,不可在线预览部分如存在完整性等问题,可反馈申请退款(可完整预览的文档不适用该条件!)。
- 3、如文档侵犯您的权益,请联系客服反馈,我们会尽快为您处理(人工客服工作时间:9:00-18:30)。
Xml代码
<?xml version="1.0" encoding="utf-8"?>
<selector xmlns:android="/apk/res/android">
<item android:state_pressed="true" android:drawable="@drawable/play_press" />
<item android:state_focused="true" android:drawable="@drawable/play_press" />
<item android:drawable="@drawable/play" />
</selector>
我这里获取焦点跟点击时显示的是同一张图片,必须严格照上面的顺序写,不可倒。
android:background="@drawable/button_style"
></Button>
最终效果图:
再加上一种自定义样式方法,上面的是用图片,其实我们可以直接通过定义xml文件来实现不同的样式:
在上面的源代码基础上,只需要修改button_style文件,同样三种状态分开定义:
Android自定义Button按钮显示样式
2011-08-19 13:09:27 我来说两句 收藏 我要投稿 [字体:小 大]
现在的用户对APP的外观看得很重要,如果APP内所有元件都用Android默认样式写,估计下面评论里就有一堆在骂UI丑的。今天学习自定义Button按钮样式。Button样式修改的是Button的背景(Background)属性。
android:right="10dp" android:bottom="10dp" />
</shape>
</item>
</selector>
gradient 主体渐变 startColor开始颜色,endColor结束颜色 ,angle开始渐变的角度(值只能为90的倍数,0时为左到右渐变,90时为下到上渐变,依次逆时针类推)
<stroke android:width="1dip" android:color="#f403c9" />
<corners android:radius="5dip" />
<padding android:left="10dp" android:top="10dp"
stroke 边框 width 边框宽度,color 边框颜色
corners 圆角 radius 半径,0为直角
padding text值的相对位置
android:angle="270" />
<stroke android:width="1dip" android:color="#f403c9" />
<corners android:radius="2dp" />
<corners android:radius="2dp" />
<padding android:left="10dp" android:top="10dp"
android:right="10dp" android:bottom="10dp" />
<padding android:left="10dp" android:top="10dp"
android:right="10dp" android:bottom="10dp" />
</shape>
</item>
</shape>
</item>
<item android:state_focused="true">
<shape>
<gradient android:startColor="#ffc2b7" android:endColor="#ffc2b7"
<shape>
<gradient android:startColor="#0d76e1" android:endColor="#0d76e1"
android:angle="270" />
<stroke android:width="1dip" android:color="#f403c9" />
<item>
<shaped:startColor="#000000" android:endColor="#ffffff"
android:angle="180" />
首先写一个定义Button样式的XML文件:
新建Android XML文件,类型选Drawable,根结点选selector,文件名就buton_style吧。
程序自动给我们刚刚建的文件里加了selector结点,我们只需要在selector结点里写上三种状态时显示的背景图片(按下、获取焦点,正常)。
Xml代码
<?xml version="1.0" encoding="utf-8"?>
<selector xmlns:android="/apk/res/android">
<item android:state_pressed="true">
接下来只要在布局时写Button控件时应用到Button的Background属性即可。
Xml代码
<Button android:id="@+id/button1"
android:layout_width="wrap_content" android:layout_height="wrap_content"
