雨燕维修手册(英文)-中_部分4
InRow RC维修手册

设置常规配置 . . . . . . . . . . . . . . . . . . . . . . . . . . . . . . . . . . . . . . . . . . . . 11
制冷单元配置 . . . . . . . . . . . . . . . . . . . . . . . . . . . . . . . . . . . . . . . 11
运行和维护
InRow®RC
ACRC100 ACRC103
This manual is available in English on the enclosed CD. Dieses Handbuch ist in Deutsch auf der beiliegenden CD-ROM verfügbar. Deze handleiding staat in het Nederlands op de bijgevoegde cd. Este manual está disponible en español en el CD-ROM adjunto. Ce manuel est disponible en français sur le CD-ROM ci-inclus. Questo manuale è disponibile in italiano nel CD-ROM allegato. 本マニュアルの日本語版は同梱の CD-ROM からご覧になれます。 Instrukcja Obsługi w jezyku polskim jest dostepna na CD. O manual em Português está disponível no CD-ROM em anexo. Данное руководство на русском языке имеется на прилагаемом компакт-диске. 您可以从包含的 CD 上获得本手册的中文版本。 您可以从附属的CD上获得本手册的中文版本。
雨燕使用说明书
篇一:雨燕保养使用手册2013雨燕车主保养使用手册时尚外形的小车可以说是日系车中的擅长领域,Swift雨燕便是于2004年巴黎车展中正式亮相的小型车款。
自04年11月日本上市开始后,去年陆续在中国、匈牙利、印度等地上市,成为不折不扣的铃木世界战略小车。
良好的经济性受到了不少车友的追捧。
但也有部分车友对雨燕引擎、动力方面的表现持否定的观点。
在此收集整理出众多雨燕车主在实际使用感受中对雨燕的优缺点的评价,能客观的反映出雨燕的优势和不足,给所有喜爱雨燕的车友一个参考。
雨燕保养以及使用细节一、走合保养期新车里程在最初的0-100公里时,发动机等运动件表面还较粗糙,其内摩擦阻力大,如不控制车速、负荷、温度,机件就会发生急剧的磨损。
因此,在最初的1000-2000公里磨合期内,必须严格按规定行驶。
磨合良好的汽车,其使用寿命、可靠性及经济性将大大提高。
磨合保养期内基本规范要求:1、不能以最大油门过度行驶(建议车速60-80公里/小时);2、各档发动机转速均不能超过最高转速的3/4;3、汽车最好不要满载;4、经常使用不同档位,以利于各零部件之间的均匀磨合;5、磨合后期可将车速逐渐提高到最高允许速度(各档位车速范围见使用手册);6、出现任何异常现象,立即向专门人员请教。
注意:磨合后期(1500-2500公里),必须到就近的长安铃木特约维修站进行首次强制保养!以后视情况每6000-10000公里进行一次例行保养。
二、出车前的准备起动前1、检查汽车有无漏水、漏油现象;2、检查机油油位及清洁度;3、检查发动机冷却液、制动液、洗涤液液位(必要时添加);4、检查皮带张紧度(必要时调整);5、检查轮胎气压及磨损状况。
起动汽车后1、检查仪表、信号灯、操纵开关是否正常;2、检查发动机及运动附件是否正常,有无异响;3、汽车怠速是否正常。
注意:用户自己在保养车辆时请仔细阅读随车使用手册!三、行驶中注意事项1、冷机起动后,应让发动机预热3-5分钟,最初以中、低速行驶,发动机水温正常后才能高速行驶;2、从经济性及发动机寿命、环保等方面考虑要尽量使用高档行驶,因为此时在同样车速下,发动机的转速最低;3、当车下陡坡或长坡时,要挂上适当的低速档,用发动机辅助制动。
LEAF维修手册

以下是日产LEAF维修手册,故障诊断、检查等均是通过输入车型代码、现象等在以下内容中检索相应原理。
维修手册(正文)
一 总括 本手册的阅读方法 本手册的阅读方法 故障诊断 配线图 标准螺栓·螺母的紧固扭矩 简称用语表 汽车概要 汽车概要 车型记号说明 车辆识别信息 主要装备 车载工具
八 空调 通风系统 系统/配件概要 加热器·空调系统 系统/配件概要 加热器·空调控制系统 系统/配件概要 加热器·空调控制系统 自动空调 系统/配件概要
九 车身·汽车安全 内饰 系统/配件概要 仪表板 系统/配件概要 座椅 系统/配件概要 门·锁 系统/配件概要 安全控制
系统/配件概要 玻璃·车窗系统
以往规格
(无数字·标识)
8/30
ESM - Electronic Service Manual
新规格
(无数字·标识)
螺母:
强度类别 (强度)
识别
以往规格
(无数字·标识)
新规格
参考: · 有时数字显示在螺母侧面。 · 有时数字·标识显示在带法兰螺母的法兰上表面。
(无数字·标识)
小螺丝·自攻螺丝·螺丝
基准值:检查、调整时的容许范围
限度值:检查、调整时不得超过的最高值或最低值
标识
意思
(触电标识)
取下有高电压或可能有高电压的部件、接头等时的错误操作可能导致触电
(绝缘手套)
检查·维护高电压部件时使用
检查·维护高电压部件时使用 (绝缘安全靴/耐电橡胶鞋垫) (无法准备绝缘安全靴时,使用耐电橡胶鞋垫)
检查·维护架高车辆高电压部件时使用
维修手册英文版
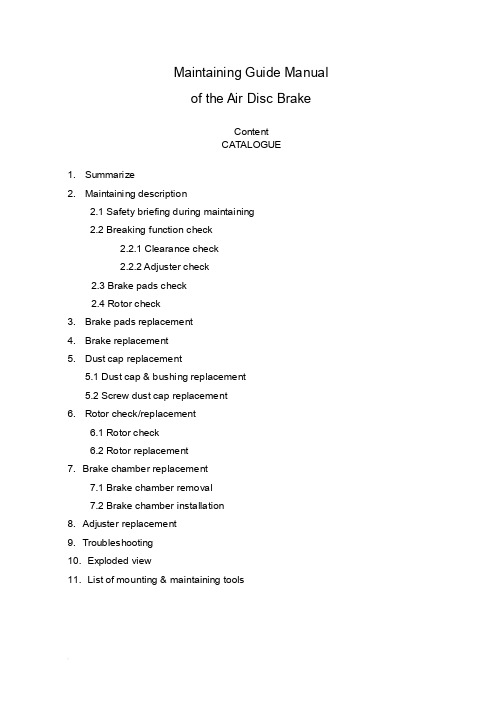
Maintaining Guide Manualof the Air Disc BrakeContentCATALOGUE1. Summarize2. Maintaining description2.1 Safety briefing during maintaining2.2 Breaking function check2.2.1 Clearance check2.2.2 Adjuster check2.3 Brake pads check2.4 Rotor check3. Brake pads replacement4. Brake replacement5. Dust cap replacement5.1 Dust cap & bushing replacement5.2 Screw dust cap replacement6. Rotor check/replacement6.1 Rotor check6.2 Rotor replacement7. Brake chamber replacement7.1 Brake chamber removal7.2 Brake chamber installation8. Adjuster replacement9. Troubleshooting10. Exploded view11. List of mounting & maintaining toolsBrief introduction of YOUFINYOUFIN was established on May 20th, 1998. It is a Sino-Foreign joint-venture enterprise registered in Wuhan Economic and T echnological Development Zone with multi-investors among which private investors dominate. It is a professional company engaged in manufacturing disc brakes and serving the principal automobile manufacturers by providing modularized supply. The main prod ucts cover hydraulic disc brakes and air disk brakes in close to thirty sizes.YOUFIN developed the air disc brake autonomously and patented the product. So far we are the only manufacturer in China that can mass produce air discs to be used in long distance coaches and inner city buses. It is evaluated that the quality of our products is close to the advanced international level in field use. The product development is part of the National T orch Plan and is also sponsored by the Small and Medium-sized Enterprise T echnical Innovation Foundation of Chinese Ministry of S&T.Our Air Disc Brake products are on an absolute leading position in China and the same international level as far as the key technology is concerned.1. SummarizeYOUFIN Air Disc Brake has four sizes (16’’, 17.5’’19.5’’, 22.5’’). It can satisfy different vehicles. The brakes have compact structure; automatically wear compensation and can easily changing the brake pad.2. Maintaining descriptionSafety briefing during maintainingIt’s most important to ensure safety driving and breaking by goodcharacteristics of the brake.Observe brake pad and rotor wear limits. When they warned already to assigned smallest thickness, it need replace immediately, otherwise, it may cause the accident. The pads scorches, grinds or greases must replace immediately.Every pad on each bridge must replace at the same time.When services the brake, the vehicle must park in smooth gound and the wheel withstand with the block/ stone prevent rolls.Note:●Must guarantee it does not occur with careless brake. When replace brakepad don’t make the brake, otherwise, it will hurts the body!●Do not use the compressed air or other cleaning up equipment clean thebrake, in order to avoid injures the body.●Be sure your hands and fingers place outside the caliper, in order to avoidinjures the body.●When moves and installs the brake should have some assistance, avoids ittoo heavy to hurts the body.●When take off the brake to make maintenance, it must fix on the clamp withhigh strength bolt, in order to avoid hurts the body.●Only allowed genuine YOUFIN kits and pads permitted by YOUFIN. Duringthe first 50 miles driving after new pad replacement, should avoid promptlybrake and brake at a long distance, Prevent overhigh temperature.●Allowed genuine YOUFIN kits and brake pads permitted by YOUFIN.●Only can use the recommendation kits in service. Screws the bolt/nutaccording to the request moment of force.Brake Function checkClearance checkProcess:●T ake off the hexagon bolt (39), loosen the pad retainer (38).●Remove pad retainer (38) from caliper.●Remove 3pcs of pad clip (37).●Move the cable (40) to the side.●Push the caliper towards the wheel and check the clearance with tune-upgauge.0.5mm ≤ clearance ≤ 1.2mmNote: Insert tune-up gauge between the caliper (1) and the brake pad (35). Should check the adjuster while the clearance is out of standard.Adjuster checkProcess:●Remove the rubber cap (12).●Turn hexagon head (22) clockwise by wrench to ensure clearance larger than3mm. (Or remove the brake pad and the push board)Note:a. Need enough room (3mm<clearance) for turn adjuster preventing un-fit.b. Never force to adjust the hexagon head (22) and/or the adjuster!Push the pressure arm 5 times in small increments and observe the hexagon head (22). While the adjuster is in good condition, hexagon head (22) must rotate clockwise.c. As the regulated quantity increase, rotation angle decreases.If the adjuster hexagon head (22):a) Not running at allb) Only running at first pushc) Running, but stopped in the middleWhile considers adjuster failed. Y ou should replace the brake on the basis of section 4 or change the adjuster in accordance with section 8.●Keep the clearances at 1mm (section 3) after adjuster check is finished.●Reinstall the rubber cap (12).Brake pads wearing check●Scorches, grinds and greased brake pad must replaces immediately.●Brake pads at the same bridge must replace at the same time.●Brake pad and pad clip must replace at the same time.Rotor checkProcess:●Remove the brake pad according to section 3.●T est thickness of the rotor.Note: Observe the brake pads and the rotor attrition situation. Excessive attrition of the rotor and the brake pads will reduce their potency and causes the brake fail!CAUTION: Rotors on the same bridge must replace at the same time. Single side rotor replacement is unacceptable. Recommend installs new brake pads whilereplace the new rotors.Rotor Dimension limitsRotor jumpiness (↗) check:2.4.1 Process:●Installs division indicator on the bracket (dial guage).●Measure jumpiness (↗) through turns the wheel. Jumpiness (↗) should lessthan 0.15.●Replaces the rotor to satisfy the request of section 6.●Modified brake pad should fulfil the specific requirements in section 3.2.4.2 Rotor test:At each change of Pads check the Rotor for grooves and cracks.The diagram at the right shows possible conditions of the surface.A = Small cracks spread over the surface are allowedB = Cracks less than 0.02in. (0.5mm) wide, running in a Radial direction, are allowedC = Grooves (circumferential) less than 0.06in. (1.5mm) wide are allowedD = Cracks in the vanes are not allowed and the Rotor MUST BE REPLACED.a = Pad contact area3. Brake Pad replacementNote: Do not use the pipe spanner/ board die! Keep your hands and fingers outside the caliper avoid the hurts of body!Brake Pad dismantle process:●T ake off hexagon bolt (39) from the Pad Retainer with spanner.●Remove the pad retainer from caliper (1).●T ake off the pad clip (37), which is above the pads (35,36) and push board (19).●Remove the sensor on brake pad.●T ake off the push board (19) & the brake pads (35,36).●Adjust hexagon head to make tappet back to the initial position.●Clean the pad groove & push board and anchor surface with brush.Note: Don’t hurt the dust cap (5 & 10). Be sure of no grease on installation surface!●Check the adjuster on the basis of section 2.2.2.Note: Fix the key while checking & turning the adjuster cap to avoid screw rotate.●Check the rotor according to section 2.4.3.2 Brake pad installing process:●Need enough room between the caliper & the rotor to insert brake pad.●Insert push board (19) at the place the caliper combine with the adjust screw.Note: Push board must on the bracket supporting surface. Adjust screw pin must in groove. Otherwise it will do harm to Adjuster mechanism. Ensure the dust cap untwisted by rotate the adjust screw.●Insert the cable sensor to pad groove. Fix cable on bearing (40).Note: The sensor contactor must face the brake disc and installs at the correctposition. Attention the wire trend to prevents the friction.●Insert new pad (36) at side of the push board.●Push caliper toward the wheel until the pad touch the rotor.Insert the brake padat wheel side.Note: Don’t adjust hexagon head violently.Note: Turn the adjuster counter-clockwise to decrease the clearance between pads.Don’t install the retainer before adjustment.Note: Check the rubber cap (12), be sure it is correctly seated.4. Brake replacementNote: Don’t use pipe wrench. Ensure your hands and fingers outside the caliperavoid hurt your body!Note: The Brake will supplies in assembly.CAUTION: The left brake and the right brake cannot exchange. Arrow direction on the brake is same as the forward direction of the wheel.4.1 Brake removal process:●Remove brake pad (see Section 3).●Release nut on the caliper, take of brake chamber.●Remove brake assessment from the bridge.●Check brake pad on the basis of section 2.3.●Check rotor on the basis of section 2.4.4.2 Brake installing process:●Install the new brake over rotor on the bridge. Screwed bolt with the spanner.Note: The right install order of the bolt is screwed both side symmetry.●T ake down the flange protection cap on the brake chamber.Note:Air chamber installment position. Open the scupper faces the ground, and stops other mouths.●Install brake pad and push board on the basis of section 3.●Install the air chamber and tighten with spanner.●Adjust the clearance.5. Guide Pin dust cap replacementNote: Do not use the pipe spanner/ board die! Keep your hand & finger outside the caliper, in order to avoid injuries.Note: When replaces all dust cap of guide bushing, section 5.1 & 5.2 should unify to avoids repetitive work. Single bushing replacement according to 5.1 and 5.2 corresponding work orders.5.1. Dust cap & bushing replacement●T ake off the brake pad according to section 3.●Loosen the chamber bolt and remove the brake chamber from caliper.●Remove the caliper assessment from bridge.●T ake off the steel cap (11) from guide bushing (8 & 9) by suitable tools.Dismantle caliper (1) from the bracket (2).Note: Don’t hurt the hole, the lid while open the steel cap with tools.●Loosen the bolt (6 & 7); separate the caliper (1) from the bracket (2).Note: When caliper moves, it may hurt body.●Cleaning up the bracket bonding plane●Take off the guide pin (8&9) on caliper (1). Then remove the dust cap (5).●Presses out bushing 4 with mandril from caliper1.●Cleans up the guide pin hole of caliper.Installing process:●Long guide pin hole must press in two new bushings. Short guide pin holepress in one.●Guarantee the size in drawing.●Greases between them and the bushing●Install new dust cap in the guide pin hole.Note: Cleans up the guide pin hole and grease the edge of dust cap before install for easy installation. Ensure the dust cap installs steadily, without crease and inside the ring groove of the caliper.●Install long/short guide pin to each hole and dust cap upside set in guide pinring groove.●Put the caliper (1) on the bracket (2) and plug guide pin (8&9) in guide hole.●Plug new bolt (6&7) (long one for pin 8, short one for pin 9) and screwed onbracket (2) with spanner.Note: Assembly must be careful, don’t damage the dust cap (5). First, screws bolt on long pin (8), and then screws bolt on short pin (9).When service maintenance, remove the guide pin (8&9) and replace by new bolt (6&7)!●Move the caliper on guide pin (8,9) forward and backward to check whether thecaliper can move freely.●Put on new copper cap on caliper (1) hole and push it in with correct kits. Note: Avoids the hurts of surface.●Raising the guide pin dust cap (5) carefully for cancel the air pressure.●Install brake across the rotor on bridge. Screwed bolt with the spanner.Note: Correct install process of the hexagon bolt.●Install brake pads and adjust clearance. Implemented section 3, notice theexplanation.●Cleaning the install flange on caliper and grease inside the pressure arm ballsocket before reinstall the brake chamber.●Install the brake chamber and screwed with spanner.Note: After the installation of brake chamber, the lowest chamber hole face theground must open, other mouths stop up.5.2. Screw dust cap replacementNote: If only replace the screw dust cap, does not need to remove the caliper andthe air chamber.Process:●Remove brake pad and push board according to section 3.●Push the caliper towards to brake chamber.●T ake off screw dust cap (10) from the ring groove on adjust screw (21).●T ake down from dust cap base with screwdriver.●Check screw thread.●Turning the adjust bolt for 30mm clockwise with the spanner.●Inspection thread corrosion and whether is damaged.●Turning it clockwise, feeling its lubrication and check the adjust screw thread.●Clean the base of caliper dust cap (10). (Arrow pointed)●Push new dust cap (10) on adjust screw. Install it on the base with kits. Observes itinstalls whether arrived.●Grease on the edge of dust cap (10) and install it on the base of adjust screw (21).Note: Guarantees the dust cap steadily in place and does not have the corrugation in the adjust screw ring groove.Installation process:●Install the brake pad and adjust the clearance (see Section 3).6. Rotor check/replacement6.1 Rotor check Check the rotor (Section 2.4) If the rotor reached the minimumthickness, it must be replaced.6.2 Rotor replacementNote: Generally recommend use new brake pad while install new/machined rotor.6.2.1 Uninstall the rotor:●R emove the brake pad. (see section 3)●T ake off the brake chamber. (see section 7)●T ake down brake from bridge. (see section 4)●T ake off the wheel and the rotor.(Refer to V ehicle Manufacture’srecommendations)6.2.2 Rotor installation:●I nstall the wheel and rotor. (refer to V ehicle Manufacture’s recommendations)●D egrease the rotor.●T urn the wheel and check the installed rotor (Section 2.4).●A djust ABS sensor refer to V ehicle Manufacture’s recommendations.●I nstall the brake (see Section 4).●I nsert pad (see Section 3).●I nstall brake chamber (see Section 7).7. Brake chamber replacementNote: Don’t use pipe wrench! Ensure your hands and fingers outside the caliperavoid hurts body!Note: Can only use the chamber assigned by the Vehicle Manufacture.7.1. Brake chamber removal:●Bleeds off the compressed air.●Remove the upper air pipe of brake chamber.●Remove the chamber from caliper.7.2. Brake chamber installation:Note: According to the brake installment position, only can open the scupperunderneath.●Cleans the sealing plane of the pressure are ball socket (arrow) and caliper beforethe brake chamber installation.●Screwed the chamber mounting nut alternately with spanner in torque ratingrequired by the air chamber supplier.●Connection the air pipe.Note: Never twist the braking line, place it originally avoid fiction with other sets.While exist air leak, finds the leakage and check the connection.●Function and performance examination.8. A djuster replacement8.1 A djuster removal●Remove brake pad (see Section 3).●Remove brake chamber (see Section 7).●T ake off brake (see Section 4).●T ake off upper bolt by hexagon wrench.●Remove adjuster and other parts in the caliper.Note: Don’t hurt the screw dust cap.8.2 A djuster installation●Grease inside the caliper.●Put the return spring (18) at each side.●Install the needle assembly and the adjuster.●Puts the washer and top head, screwed the bolt with spanner according to theopposite angle principle.Note: Guarantee the bolt tighted the moment of force.9. Troubleshooting11. List of mounting & maintaining toolsYOUFIN is in the process of logo replacement, new logo will put into practice gradually. It with the original logo is still the YOUFIN’s product. Final interpret right for the logo belongs to YOUFIN.。
【大全】汽车维修手册大全好好收藏
【大全】汽车维修手册大全好好收藏【关键字】大全汽车维修手册大全下载地址:上海通用别克陆尊维修手册F50日产风雅维修手册/sort03/sort0147/down-406.htmlC11颐达维修手册中文/sort03/sort0147/down-410.html2005 凯迪拉克XLR 维修手册/sort03/sort0147/down-415.html 2005 凯迪拉克CTS 维修手册/sort03/sort0147/down-416.html 柯斯达维修手册/sort03/sort0147/down-467.html丰田花冠维修手册/sort03/sort0147/down-471.html2007别克林荫大道维修手册/sort03/sort0147/down-499.html 奥迪A4维修手册免费下载/sort03/sort0147/down-781.html 别克维修手册/sort03/sort0147/down-784.html丰田花冠维修手册下载/sort03/sort0147/down-787.html景程维修手册/sort03/sort0147/down-851.html依维柯汽车维修手册/sort03/sort0147/down-1110.html东风雪铁龙赛纳轿车维修手册/sort03/sort0147/down-1111.html别克荣誉维修手册/sort03/sort0147/down-1112.html毕加索维修手册/sort03/sort0147/down-1113.html奥迪A6维修手册-下册/sort03/sort0147/down-1114.html奥迪A6维修手册-上册/sort03/sort0147/down-1115.html爱利舍维修手册/sort03/sort0147/down-1116.htmlA6维修手册2005年/sort03/sort0147/down-1117.html2005 凯迪拉克CTS 维修手册/sort03/sort0147/down-1118.html北京JEEP维修手册/sort03/sort0147/down-1119.html奥迪C6A6维修手册/sort03/sort0147/down-1124.html2003款AUDI A8中文维修手册/sort03/sort0147/down-一汽奥迪A6L维修手册2005(C6)/sort03/sort0147/down-1234.html 新皇冠维修手册/sort03/sort0147/down-1236.html 新广本维修手册/sort03/sort0147/down-1237.html新M3维修手册/sort03/sort0147/down-1239.html维修手册_丰田亚洲龙下/sort03/sort0147/down-1240.html维修手册_丰田亚洲龙上/sort03/sort0147/down-1241.html威驰维修手册/sort03/sort0147/down-1242.html上海雪佛兰乐骋維修手冊/sort03/sort0147/down-1245.html 上海大众高尔维修手册(2003) /sort03/sort0147/down-1246.html瑞风英文维修手册/sort03/sort0147/down-1248.html瑞风第三版发动机维修手册2006 /sort03/sort0147/down-1250.html瑞风第三版底盘维修手册2006 /sort03/sort0147/down-1251.html瑞风第二版发动机维修手册2006 /sort03/sort0147/down-1252.html日产FUGA(Y50)风雅维修手册/sort03/sort0147/down-1256.html普利马维修手册/sort03/sort0147/down-1258.html克莱斯勒土星原厂手册/sort03/sort0147/down-1262.html克莱斯勒彩虹原厂维修手册/sort03/sort0147/down-1264.html 凯迪拉克XLR /sort03/sort0147/down-1265.html花冠维修手册/sort03/sort0147/down-1266.html花冠NZE12.ZZE12维修手册/sort03/sort0147/down-1267.html国产奥迪A6、帕萨特全车维修手册/sort03/sort0147/down-1270.html丰田特锐修理手册-最终版 B /sort03/sort0147/down-丰田特锐修理手册-最终版 A /sort03/sort0147/down-1275.html丰田陆地巡洋舰3400维修手册(下册)/sort03/sort0147/down-1276.html丰田陆地巡洋舰3400维修手册(上册)/sort03/sort0147/down-1277.html2002款stream时韵维修手册/sort03/sort0147/down-1324.html04MY富士森林人原厂维修手册/sort03/sort0147/down-1325.html爱利舍维修手册/sort03/sort0147/down-1329.html东风雪铁龙赛纳维修手册/sort03/sort0147/down-1336.html 福特05款领航员维修手册/sort03/sort0147/down-1337.html 雷诺RENAULT维修手册/sort03/sort0147/down-1339.html 新皇冠原厂维修手册包括电路/sort03/sort0147/down-1346.html雪铁龙赛纳维修手册(电路图部分) /sort03/sort0147/down-1347.html一汽A6L维修手册2005(C6)/sort03/sort0147/down-1348.html翼豹维修手册中文版/sort03/sort0147/down-1349.html悦达千里马维修手册/sort03/sort0147/down-1350.html福克斯维修手册/sort03/sort0147/down-1352.html双龙爱腾SUV-ACTYON维修手册/sort03/sort0147/down-1355.html奇瑞东方之子维修手册(部分) /sort03/sort0147/down-1356.html奇瑞T11维修手册(瑞虎SUV)/sort03/sort0147/down-1357.html凯美瑞原厂维修手册06 /sort03/sort0147/down-1358.html嘉年华维修资料/sort03/sort0147/down-1360.html富士森林人05、06原厂维修手册/sort03/sort0147/down-1361.html丰田特锐维修手册/sort03/sort0147/down-1362.html东风雪铁龙凯旋电器手册-原厂2006-10 /sort03/sort0147/down-1364.html东风雪铁龙毕加索轿车维修手册/sort03/sort0147/down-1365.html大捷龙中文维修手册/sort03/sort0147/down-1367.html北京现代特拉卡T erracan维修手册/sort03/sort0147/down-1368.html宝来Bora A4维修手册/sort03/sort0147/down-1370.html一汽大众速腾维修手册/sort03/sort0147/down-1438.html丰田皇冠CROWN维修手册——原厂扫描2004 /sort03/sort0147/down-1439.html东南新菱帅台湾版JT(Virage) /sort03/sort0147/down-1440.html东南凌绅维修手册/sort03/sort0147/down-1441.html东风日产(骐达颐达)维修手册/sort03/sort0147/down-1444.html东风本田CR-V维修手册/sort03/sort0147/down-1447.html2006 ODYSEEY奥德赛维修手册/sort03/sort0147/down-1450.html2005 ODYSEEY奥德赛维修手册/sort03/sort0147/down-1451.html2002 ODYSEEY奥德赛维修手册/sort03/sort0147/down-1453.html欧洲汽车自动变速器维修手册/sort03/sort0147/down-1626.html夏利2000金夏利环保夏利轿车维修手册/sort03/sort0147/down-1632.html哈飞赛马全车维修手册/sort03/sort0147/down-1643.html奥迪A4 01V型自动变速器前轮驱动和全轮驱动维修手册/sort03/sort0147/down-1649.html 雪佛兰开拓者汽车维修手册/sort03/sort0147/down-1658.html夏利2000维修手册/sort03/sort0147/down-1661.html帕萨特B5维修手册/sort03/sort0147/down-1696.html中华轿车维修手册/sort03/sort0147/down-1701.html奇瑞QQS11维修手册/sort03/sort0147/down-1712.html奇瑞QQ6维修手册/sort03/sort0147/down-1713.html奇瑞A113维修手册/sort03/sort0147/down-1715.html凯迪拉克维修手册/sort03/sort0147/down-1716.html广州飞度轿车维修手册(1.3L) /sort03/sort0147/down-1717.html大众途安维修手册(英文版) /sort03/sort0147/down-1719.html 2007款凯美瑞原厂维修手册B(英文)/sort03/sort0147/down-1724.html 2007款凯美瑞原厂维修手册A (英文)/sort03/sort0147/down-1725.html2003雅阁Accord维修手册/sort03/sort0147/down-1726.html 丰田supra维修手册/sort03/sort0147/down-1732.htmlNISSAN全系列乘用车维修保养手册/sort03/sort0147/down-1745.html羚羊世纪星轿维修手册/sort03/sort0147/down-1972.html上海雪弗兰乐驰维修手册/sort03/sort0147/down-1973.htmlAQ015变速器维修手册/sort03/sort0147/down-2111.htmlb11东方之子维修手册/sort03/sort0147/down-2112.html保时捷968维修手册/sort03/sort0147/down-2114.html东方之子的变速箱维修手册/sort03/sort0147/down-2115.html 东南菱帅维修手册/sort03/sort0147/down-2116.html比亚迪F3维修手册/sort03/sort0147/down-2123.html湖汽_长丰猎豹汽车维修手册/sort03/sort0147/down-2130.html花冠维修手册/sort03/sort0147/down-2131.html吉利自由舰维修手册/sort03/sort0147/down-2132.html凯迪拉克维修手册/sort03/sort0147/down-2133.html轩逸维修手册/sort03/sort0147/down-2140.html雪佛兰开拓者汽车维修手册/sort03/sort0147/down-2141.html 起亚电路维修手册/sort03/sort0147/down-2192.html奔驰BENZS320维修手册/sort03/sort0147/down-2211.html 《A55 江淮瑞风维修手册》/sort03/sort0147/down-2218.html 1985款丰田卡车及四轮驱动汽油机车维修手册/sort03/sort0147/down-2224.html 东风雪铁龙毕加索轿车结构与维修/sort03/sort0147/down-2225.html凌志LS400维修手册/sort03/sort0147/down-2229.html帕萨特领驭空调维修手册/sort03/sort0147/down-3240.html欧宝电路维修手册/sort03/sort0147/down-3242.html雷诺风景维修手册/sort03/sort0147/down-3243.html奔驰S600维修手册/sort03/sort0147/down-3246.html保时捷卡宴维修手册/sort03/sort0147/down-3247.html07款新猎豹CS6车间维修手册/sort03/sort0147/down-4361.html东风悦达起亚福瑞迪/sort03/sort0147/down-4362.html比亚迪F3DS15-41型变速器结构图册/sort03/sort0147/down-4616.html比亚迪F3安全气囊维修手册/sort03/sort0147/down-4617.html比亚迪F3变速器维修手册/sort03/sort0147/down-4618.html 比亚迪F3车身附件维修手册/sort03/sort0147/down-4619.html比亚迪F3车身维修手册/sort03/sort0147/down-4620.html比亚迪F3外饰维修手册/sort03/sort0147/down-4621.html比亚迪F3维修手册/sort03/sort0147/down-4622.html丰田普瑞维亚PREVIA 维修手册/sort03/sort0147/down-6655.html07款三菱LANCER EVOLUTION IX 维修手册/sort03/sort0147/down-7089.html 2005年斯巴鲁翼豹维修手册中文版/sort03/sort0147/down-7098.html2006飞度FIT维修手册增补版/sort03/sort0147/down-7099.html99年NISSAN(Y61)维修手册/sort03/sort0147/down-7104.htmlNISSAN_日产骐达电子维修手册TIIDA(DFL7160) /sort03/sort0147/down-7105.html PASSATB5维修手册/sort03/sort0147/down-7106.htmlVOLVOS80维修手册/sort03/sort0147/down-7107.html北京现代途胜使用手册/sort03/sort0147/down-7108.html北京现代雅坤特使用手册/sort03/sort0147/down-7109.html昌河铃木北斗星维修手册/sort03/sort0147/down-7111.html长安CM8原厂维修手册/sort03/sort0147/down-7112.html长安福特嘉年华维修手册/sort03/sort0147/down-7117.html长安福特蒙迪欧维修手册/sort03/sort0147/down-7118.html朝阳柴油机_4102-c3a-c3b维修手册/sort03/sort0147/down-7128.html朝阳柴油机_4102C3C至C3G系列维修手册/sort03/sort0147/down-7129.html朝阳柴油机_电控发动机常见故障的检/sort03/sort0147/down-7130.html道奇锋哲Avenger中文维修手册/sort03/sort0147/down-7131.html东风雪铁龙凯旋原厂维修手册/sort03/sort0147/down-7134.html福特蒙迪欧维修手册/sort03/sort0147/down-7167.html广州本田飞度维修手册/sort03/sort0147/down-7169.html花冠Corolla 2004维修手册/sort03/sort0147/down-7173.html 卡迪拉克英文版维修手册/sort03/sort0147/down-7174.html凌志LS430电器维修手册/sort03/sort0147/down-7175.html 羚羊世纪星轿车维修手册/sort03/sort0147/down-7176.html尼桑Y61 99-3电子维修手册/sort03/sort0147/down-7177.html尼桑Y61电子维修手册/sort03/sort0147/down-7178.html欧宝电路维修手册/sort03/sort0147/down-7179.html欧蓝德2004维修手册/sort03/sort0147/down-7181.html帕杰罗06英文版维修手册/sort03/sort0147/down-7182.html 奇瑞瑞麒2维修手册/sort03/sort0147/down-7183.html起亚电路维修手册/sort03/sort0147/down-7186.html日产俊逸维修手册/sort03/sort0147/down-7187.html日产尼桑A33电子维修保养手册/sort03/sort0147/down-7188.html日产尼桑B14电子维修保养手册/sort03/sort0147/down-7189.html日产尼桑D22电子维修保养手册01年/sort03/sort0147/down-7190.html日产尼桑D22电子维修保养手册98年/sort03/sort0147/down-7191.html日产尼桑E25电子维修保养手册/sort03/sort0147/down-7192.html日产尼桑N16电子维修保养手册/sort03/sort0147/down-7193.html日产尼桑T30电子维修保养手册/sort03/sort0147/down-日产尼桑U13电子维修保养手册/sort03/sort0147/down-7195.html日产尼桑W41电子维修保养手册/sort03/sort0147/down-7196.html日产尼桑Y61电子维修保养手册01年/sort03/sort0147/down-7197.html日产尼桑风度A32电子维修保养手册/sort03/sort0147/down-7200.html上汽荣威750维修手册【上】/sort03/sort0147/down-7203.html上汽荣威750维修手册【中】/sort03/sort0147/down-7202.html上汽荣威750维修手册【下】/sort03/sort0147/down-7201.html双龙汽车维修手册/sort03/sort0147/down-7204.html天籁电子维修手册/sort03/sort0147/down-7206.html原厂丰田凯美瑞维修手册/sort03/sort0147/down-7209.html原厂威驰维修手册/sort03/sort0147/down-7217.html丰田锐志2005原厂维修手册/sort03/sort0147/down-9082.html广州本田honda维修手册/sort03/sort0147/down-10866.html 途安维修手册(无电路图)/sort03/sort0147/down-13851.html 宝马315-323i 维修手册/sort03/sort0147/down-14412.html 本田CRV维修手册/sort03/sort0147/down-14413.html长安之星微型汽车维修手册(上) /sort03/sort0147/down-14421.html长安之星微型汽车维修手册(下) /sort03/sort0147/down-14422.html依维柯汽车与长安微型汽车维修手册/sort03/sort0147/down-北京现代酷派汽车电路维修手册(上) /sort03/sort0147/down-14440.html北京现代酷派汽车电路维修手册(中) /sort03/sort0147/down-14439.html北京现代酷派汽车电路维修手册(下) /sort03/sort0147/down-14438.html别克世纪、皇朝汽车维修手册(电控发动机)上/sort03/sort0147/down-14442.html 别克世纪、皇朝汽车维修手册(电控发动机)下/sort03/sort0147/down-14441.html 长安1.6L发动机维修手册/sort03/sort0147/down-14443.html长安MF514A01手动变速器维修手册/sort03/sort0147/down-14444.html道奇捷龙汽车维修手册/sort03/sort0147/down-14451.html菲亚特汽车维修手册/sort03/sort0147/down-14453.html广州本田飞度汽车车身电器维修手册/sort03/sort0147/down-14454.html广州本田飞度汽车空调暖风系统维修手册/sort03/sort0147/down-14455.html捷达前卫轿车维修手册/sort03/sort0147/down-14457.html奇瑞瑞虎汽车电路维修手册/sort03/sort0147/down-14458.html通用鲁米娜汽车维修手册/sort03/sort0147/down-14465.html 本田雅阁轿车悬挂系统检修手册/sort03/sort0147/down-14518.html比亚迪F6维修手册(部分)/sort03/sort0147/down-14519.html丰田霸道原厂维修手册/sort03/sort0147/down-14521.html丰田佳美2.2/3.0轿车维修手册(上) /sort03/sort0147/down-14522.html丰田佳美2.2/3.0轿车维修手册(下) /sort03/sort0147/down-14523.html2003 赛欧SGM7160 SL SC 系列中文维修手册/sort03/sort0147/down-14672.html 江铃汽车T系列汽油欧Ⅲ维修手册/sort03/sort0147/down-14684.html江淮瑞风英文维修手册/sort03/sort0147/down-14711.html上海POLO轿车维修手册/sort03/sort0147/down-14714.html 上海大众GOL(2003)维修手册(下) /sort03/sort0147/down-14781.html上海大众GOL(2003)维修手册(上) /sort03/sort0147/down-14782.html比亚迪F0电喷系统维修手册/sort03/sort0147/down-14947.html雨燕维修手册/sort03/sort0147/down-14989.html吉利金刚原厂维修手册/sort03/sort0147/down-15103.html雪弗兰科西佳轿车维修手册(上)/sort03/sort0147/down-15134.html雪弗兰科西佳轿车维修手册(下)/sort03/sort0147/down-15133.html日产汽车D22 98-10维修手册(增补2) /sort03/sort0147/down-15240.html日产汽车D22 98-10维修手册/sort03/sort0147/down-15241.html日产汽车E25维修手册/sort03/sort0147/down-15242.html日产汽车N16维修手册/sort03/sort0147/down-15243.html .14/List_feizhuliu/3387407_70_1.html二月六号后更新维修手册请进入网站下载更多汽车维修手册、维修电路图到精通维修下载站下载此文档是由网络收集并进行重新排版整理.word可编辑版本!。
雨燕使用说明书

篇一:雨燕保养使用手册2013雨燕车主保养使用手册时尚外形的小车可以说是日系车中的擅长领域,Swift雨燕便是于2004年巴黎车展中正式亮相的小型车款。
自04年11月日本上市开始后,去年陆续在中国、匈牙利、印度等地上市,成为不折不扣的铃木世界战略小车。
良好的经济性受到了不少车友的追捧。
但也有部分车友对雨燕引擎、动力方面的表现持否定的观点。
在此收集整理出众多雨燕车主在实际使用感受中对雨燕的优缺点的评价,能客观的反映出雨燕的优势和不足,给所有喜爱雨燕的车友一个参考。
雨燕保养以及使用细节一、走合保养期新车里程在最初的0-100公里时,发动机等运动件表面还较粗糙,其内摩擦阻力大,如不控制车速、负荷、温度,机件就会发生急剧的磨损。
因此,在最初的1000-2000公里磨合期内,必须严格按规定行驶。
磨合良好的汽车,其使用寿命、可靠性及经济性将大大提高。
磨合保养期内基本规范要求:1、不能以最大油门过度行驶(建议车速60-80公里/小时);2、各档发动机转速均不能超过最高转速的3/4;3、汽车最好不要满载;4、经常使用不同档位,以利于各零部件之间的均匀磨合;5、磨合后期可将车速逐渐提高到最高允许速度(各档位车速范围见使用手册);6、出现任何异常现象,立即向专门人员请教。
注意:磨合后期(1500-2500公里),必须到就近的长安铃木特约维修站进行首次强制保养!以后视情况每6000-10000公里进行一次例行保养。
二、出车前的准备起动前1、检查汽车有无漏水、漏油现象;2、检查机油油位及清洁度;3、检查发动机冷却液、制动液、洗涤液液位(必要时添加);4、检查皮带张紧度(必要时调整);5、检查轮胎气压及磨损状况。
起动汽车后1、检查仪表、信号灯、操纵开关是否正常;2、检查发动机及运动附件是否正常,有无异响;3、汽车怠速是否正常。
注意:用户自己在保养车辆时请仔细阅读随车使用手册!三、行驶中注意事项1、冷机起动后,应让发动机预热3-5分钟,最初以中、低速行驶,发动机水温正常后才能高速行驶;2、从经济性及发动机寿命、环保等方面考虑要尽量使用高档行驶,因为此时在同样车速下,发动机的转速最低;3、当车下陡坡或长坡时,要挂上适当的低速档,用发动机辅助制动。
第4课 维修手册
• Hint :if the pressure drops,check the hoses,
radiator or water pump for leaks。If no
external leaks are found, check the heater
core , the cylinder block and the head。
(二)学习新知识
• • • • • • • • • 1、重点词汇 Coolant 冷却液,冷却剂 Radiator 散热器,水箱 Thermostat 节温器 Reservoir 储液罐 Deposit 沉积物 Rust 生锈, Scale 水垢 Con学习
• Heat always moves from a hot object to a
cooler object,so the cooling system transfers
heat from the engine to the circulating coolant。
• 热量总是从高温物体向低温物体转移,因
此,冷却系统将发动机的热量传递给循环
的冷却液。
• The temperature control and heat transfer are
based on the pressure of the system and
coolant circulation。
• 温度控制和热传递是根据系统压力和冷却
(一)温习已学知识
• • • • • • • • • • Air induction system computer ground sensor ground Electronic control system Electronic fuel injection Fuel delivery system Handheld tester Inspection procedure Port fuel injection Rotor solenoid
2018-2019-1.5雨燕说明书-推荐word版 (9页)
本文部分内容来自网络整理,本司不为其真实性负责,如有异议或侵权请及时联系,本司将立即删除!== 本文为word格式,下载后可方便编辑和修改! ==1.5雨燕说明书篇一:关于雨燕保养费用总结关于雨燕保养费用总结对于YY保养费用都是我们最关心问题,身边很多哥们在保养的时候,都被4s收了超额费用,或者增加很多不必要的保养项目,感觉很有必要对雨燕保养费用做个总结。
以下内容是我从各地儿收集的信息来给大家看看参考参考总的来说,雨燕,特别是 1.3雨燕的保养费用还是比较便宜的,特别是和大众、通用、丰田、日产等合资品牌比。
但4S有些保养件价格偏贵,而且有些项目并非必须或者很早去做。
以下分别列出一些可以节约开支的地方。
(本文分析以1.3雨燕为基础)一.保养周期。
所有4s都说雨燕保养周期是5000公里。
但实际上保养手册中规定的强制周期是10000公里或者6个月。
保修期内达到这个强制周期必须到指定的4s去保养,否则视同弃保。
这意味着:1.对于自带高级机油如美孚1号或者灰壳的车友,完全可以适当延长保养周期。
2. 对于用普通矿物机油的车友,可以选择5000公里在其他地方换机油机滤,1万公里再到4s做保养。
当然,这是理论上的分析,具体是否可以实行,还需要看各地4s的态度和车友沟通的结果。
毕竟中国的国情所限,很多正当的规定并非能够顺利执行。
节约总结:至少可以节约50元。
二.保养配件。
除了机滤本身比较便宜外,4s保养配件价格和网上价格差距通常在2到3倍。
例如,1. 空气滤芯,4s价格在70元,网上价格通常在20到30块之间,差价2-3倍。
雨燕的空气滤芯非常好换,不用工具,只需要打开4个卡子即可换。
建议自买自换。
1. 汽油滤芯,原厂为索菲玛品牌,此品牌淘宝价格通常在35元左右,4s价格在110元左右,差价在3倍多。
2. 机油滤芯,原厂15元左右,网上有10元左右的滤芯,差价不大,可以继续用原厂滤芯。
但对于延长换油周期的朋友,可以考虑用Denso等好品牌的滤芯。
【推荐】铃木雨燕,说明书,pdf-推荐word版 (7页)

本文部分内容来自网络整理,本司不为其真实性负责,如有异议或侵权请及时联系,本司将立即删除!== 本文为word格式,下载后可方便编辑和修改! ==铃木雨燕,说明书,pdf篇一:家用实用小车铃木雨燕解析铃木雨燕是一款定位于A0级的紧凑型小车,价位低、时尚的设计及较低的油耗,让它变成了新时代家用及操控两不误的实用车型。
谁说外形不重要!一款想要给消费者留下深刻印象的车,一定要有自己的特色及设计风格。
力求消费者从看到它的那一刻开始,它的形象就会深深地印在脑海中。
雨燕在这点上并不例外,其经典的外形设计完全能够赢得大多数消费者的青睐,而与时俱进的细节特征则保证了它能够始终站在时尚的前沿。
相对来说,合资及自主品牌旗下的小型车利润都不算高,但是小型车市场中的竞争却愈演愈烈,特别是合资自主品牌车型的出现,让一些合资车企都感受到了不小的压力。
作为长安铃木的主力车型,雨燕肩负着拉高品牌销量的重任,因此适时的升级改款必不可少。
相比于老款车型,雨燕在保留经典外形设计的同时,对一些细节之处进行了重新设计,新车型采用了大尺寸蜂窝形进气格栅和带有银边锋锐造型的雾灯,全新多辐灵动轮毂充满动感气息,后保险杠以及后雾灯造型同样有所改变,让原本就时尚可爱的雨燕变得更新颖,更富有朝气。
长安铃木雨燕的轴距为2390mm,因此车内空间对于雨燕来说是个不小的考验。
在试驾过程中,我首先坐进雨燕的后排试乘,看着并不宽敞的腿部空间却没有让我的膝盖顶到前排座椅后背,而头部空间也算是够用,不过余量都不算大,想必如果后排坐上3个身材娇小的女士,乘坐感还是比较舒服的,但如果是像笔者这样膀大腰圆的壮汉,那就有些难为雨燕了。
当我换乘到驾驶员座椅时,立刻觉得车内空间宽敞了不少,不但头部空间完全够用,而且在保证前排乘员腿部空间的前提下,并没有过分“压榨”后排乘员那原本就不富裕的空间。
雨燕使用的是麦弗逊式独立前悬架和纵臂扭力梁式半独立后悬架,虽然后悬并非独立悬架,不过千万不要低估雨燕的操控表现,沉稳的转向盘配合铃木工程师精心调校的悬架,依然让驾驶者在高速过弯或者变线时镇定自若。
雨燕1.3说明书_1
雨燕1.3说明书篇一:雨燕保养使用手册20XX雨燕车主保养使用手册时尚外形的小车可以说是日系车中的擅长领域,Swift 雨燕便是于20XX年巴黎车展中正式亮相的小型车款。
自04年11月日本上市开始后,去年陆续在中国、匈牙利、印度等地上市,成为不折不扣的铃木世界战略小车。
良好的经济性受到了不少车友的追捧。
但也有部分车友对雨燕引擎、动力方面的表现持否定的观点。
在此收集整理出众多雨燕车主在实际使用感受中对雨燕的优缺点的评价,能客观的反映出雨燕的优势和不足,给所有喜爱雨燕的车友一个参考。
雨燕保养以及使用细节一、走合保养期新车里程在最初的0-100公里时,发动机等运动件表面还较粗糙,其内摩擦阻力大,如不控制车速、负荷、温度,机件就会发生急剧的磨损。
因此,在最初的1000-20XX 公里磨合期内,必须严格按规定行驶。
磨合良好的汽车,其使用寿命、可靠性及经济性将大大提高。
磨合保养期内基本规范要求:1、不能以最大油门过度行驶(建议车速60-80公里/小时);2、各档发动机转速均不能超过最高转速的3/4;3、汽车最好不要满载;4、经常使用不同档位,以利于各零部件之间的均匀磨合;5、磨合后期可将车速逐渐提高到最高允许速度(各档位车速范围见使用手册);6、出现任何异常现象,立即向专门人员请教。
注意:磨合后期(1500-2500公里),必须到就近的长安铃木特约维修站进行首次强制保养!以后视情况每6000-10000公里进行一次例行保养。
二、出车前的准备起动前1、检查汽车有无漏水、漏油现象;2、检查机油油位及清洁度;3、检查发动机冷却液、制动液、洗涤液液位(必要时添加);4、检查皮带张紧度(必要时调整);5、检查轮胎气压及磨损状况。
起动汽车后1、检查仪表、信号灯、操纵开关是否正常;2、检查发动机及运动附件是否正常,有无异响;3、汽车怠速是否正常。
注意:用户自己在保养车辆时请仔细阅读随车使用手册!三、行驶中注意事项1、冷机起动后,应让发动机预热3-5分钟,最初以中、低速行驶,发动机水温正常后才能高速行驶;2、从经济性及发动机寿命、环保等方面考虑要尽量使用高档行驶,因为此时在同样车速下,发动机的转速最低;3、当车下陡坡或长坡时,要挂上适当的低速档,用发动机辅助制动。
【优质文档】铃木雨燕说明书-word范文 (7页)
本文部分内容来自网络整理,本司不为其真实性负责,如有异议或侵权请及时联系,本司将立即删除!== 本文为word格式,下载后可方便编辑和修改! ==铃木雨燕说明书篇一:雨燕保养使用手册201X雨燕车主保养使用手册时尚外形的小车可以说是日系车中的擅长领域,Swift雨燕便是于201X年巴黎车展中正式亮相的小型车款。
自04年11月日本上市开始后,去年陆续在中国、匈牙利、印度等地上市,成为不折不扣的铃木世界战略小车。
良好的经济性受到了不少车友的追捧。
但也有部分车友对雨燕引擎、动力方面的表现持否定的观点。
在此收集整理出众多雨燕车主在实际使用感受中对雨燕的优缺点的评价,能客观的反映出雨燕的优势和不足,给所有喜爱雨燕的车友一个参考。
雨燕保养以及使用细节一、走合保养期新车里程在最初的0-100公里时,发动机等运动件表面还较粗糙,其内摩擦阻力大,如不控制车速、负荷、温度,机件就会发生急剧的磨损。
因此,在最初的1000-201X公里磨合期内,必须严格按规定行驶。
磨合良好的汽车,其使用寿命、可靠性及经济性将大大提高。
磨合保养期内基本规范要求:1、不能以最大油门过度行驶(建议车速60-80公里/小时);2、各档发动机转速均不能超过最高转速的3/4;3、汽车最好不要满载;4、经常使用不同档位,以利于各零部件之间的均匀磨合;5、磨合后期可将车速逐渐提高到最高允许速度(各档位车速范围见使用手册);6、出现任何异常现象,立即向专门人员请教。
注意:磨合后期(1500-2500公里),必须到就近的长安铃木特约维修站进行首次强制保养!以后视情况每6000-10000公里进行一次例行保养。
二、出车前的准备起动前1、检查汽车有无漏水、漏油现象;2、检查机油油位及清洁度;3、检查发动机冷却液、制动液、洗涤液液位(必要时添加);4、检查皮带张紧度(必要时调整);5、检查轮胎气压及磨损状况。
起动汽车后1、检查仪表、信号灯、操纵开关是否正常;2、检查发动机及运动附件是否正常,有无异响;3、汽车怠速是否正常。