用宏批量调整word中图片版式 大小 方向
Word采用宏命令批量调整照片大小方法
Word采用宏命令批量调整照片大小方法
Word采用宏命令批量调整照片大小方法
1.点击“视图”菜单,找到“宏”。
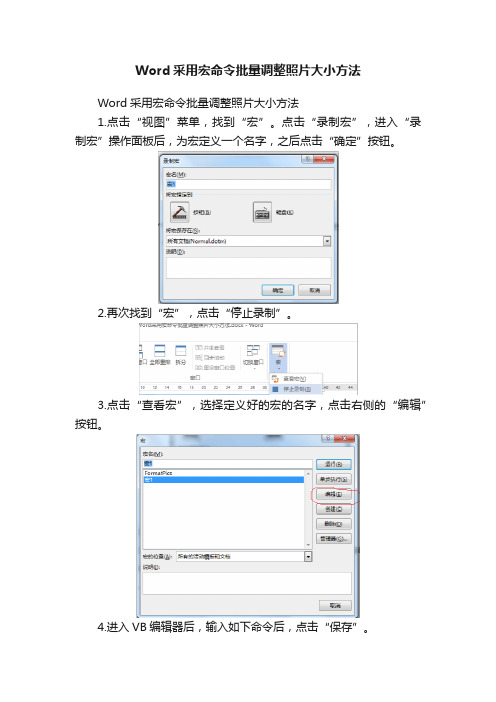
点击“录制宏”,进入“录制宏”操作面板后,为宏定义一个名字,之后点击“确定”按钮。
2.再次找到“宏”,点击“停止录制”。
3.点击“查看宏”,选择定义好的宏的名字,点击右侧的“编辑”按钮。
4.进入VB编辑器后,输入如下命令后,点击“保存”。
5.若照片有不同的大小要求,可在命令中的“()”内调整照片的宽度及高度。
6.将照片批量插入到WORD文档中,要求照片必须为“嵌入式”。
7.点击“宏”,进入操作面板后点击“运行”按钮,宏命令就得到了
执行,插入到文档中的图片就会按照在宏命令中设置的大小进行批量调整。
Word批量修改图片大小
Word批量修改图片大小湖北宜昌张梁桂一、固定长宽篇本篇介绍把word中的所有图片按固定的长和宽进行修改.1、打开word,工具-宏-宏(或者直接按Alt+F8)进入宏的界面,如下面所示,输入一个宏名(如setpicsize),宏名自己起,能记住就行.2、宏名起好后,单击“创建”进入Visual Basic 编辑器,将如下代码复制到Visual Basic 编辑器窗口Sub setpicsize() '设置图片大小Dim n'图片个数On Error Resume Next '忽略错误For n = 1 To ActiveDocument.InlineShapes.Count 'InlineShapes类型图片ActiveDocument.InlineShapes(n).Height = 400 '设置图片高度为 400pxActiveDocument.InlineShapes(n).Width = 300 '设置图片宽度 300pxNext nFor n = 1 To ActiveDocument.Shapes.Count 'Shapes类型图片ActiveDocument.Shapes(n).Height = 400 '设置图片高度为 400px ActiveDocument.Shapes(n).Width = 300 '设置图片宽度 300pxNext nEnd Sub3、返回word,工具-宏-宏(或者直接按Alt+F8),再次进入宏的界面,选择刚才编辑好的宏,并单击“运行”按钮,就可以了!(图片多时,可能会花一些时间)二、比例缩放篇本篇介绍把word中的所有图片按比例进行缩放.具体操作同固定长宽篇,只是代码部分稍有修改.代码如下:Sub setpicsize() '设置图片大小Dim n'图片个数Dim picwidthDim picheightOn Error Resume Next '忽略错误For n = 1 To ActiveDocument.InlineShapes.Count 'InlineShapes类型图片picheight = ActiveDocument.InlineShapes(n).Heightpicwidth = ActiveDocument.InlineShapes(n).WidthActiveDocument.InlineShapes(n).Height = picheight * 1.1 '设置高度为1.1倍ActiveDocument.InlineShapes(n).Width = picwidth * 1.1 '设置宽度为1.1倍Next nFor n = 1 To ActiveDocument.Shapes.Count 'Shapes类型图片picheight = ActiveDocument.Shapes(n).Heightpicwidth = ActiveDocument.Shapes(n).WidthActiveDocument.Shapes(n).Height = picheight * 1.1 '设置高度为1.1倍ActiveDocument.Shapes(n).Width = picwidth * 1.1 '设置宽度为1.1倍Next nEnd SubSub Test()'处理所有的图形和嵌入式图形,锁定长宽比,宽度都变成4厘米'好像只有嵌入式图形可以加上边框Dim Shp As Shape, InlineShp As InlineShapeDim Bder As BorderDim oldWith As Single, iScale As SingleWith ActiveDocumentFor Each Shp In .ShapesShp.LockAspectRatio = msoTrueoldWith = Shp.WidthShp.Width = 4 * 28.35iScale = Shp.Width / oldWithShp.Height = Shp.Height * iScaleNextFor Each InlineShp In .InlineShapesInlineShp.LockAspectRatio = msoTrueoldWith = InlineShp.WidthInlineShp.Width = 4 * 28.35iScale = InlineShp.Width / oldWithInlineShp.Height = InlineShp.Height * iScaleFor Each Bder In InlineShp.BordersWith Bder.LineStyle = wdLineStyleSingle.LineWidth = wdLineWidth050pt.Color = wdColorAutomaticEnd WithNextNextEnd WithEnd Sub。
批量处理和单个处理word图片大小和比例的宏
设定单个图片大小的宏:Sub 宏5()Selection.InlineShapes(1).LockAspectRatio = msoFalse '解除纵横比锁定Dim h!, w!h = Selection.InlineShapes(1).Heightw = Selection.InlineShapes(1).WidthSelection.InlineShapes(1).Height = 627 '设置图片高度为627px Selection.InlineShapes(1).Width = 407 '设置图片宽度407pxEnd Sub设定单个图片比例的宏:Sub 宏3()Selection.InlineShapes(1).LockAspectRatio = msoFalse '解除纵横比锁定Dim h!, w!h = Selection.InlineShapes(1).Heightw = Selection.InlineShapes(1).WidthSelection.InlineShapes(1).Height = h * 1.25 '设置图片高度比例为125%Selection.InlineShapes(1).Width = w * 0.77 '设置图片宽度比例为77% End Sub批量设定图片大小的宏:Sub setpicsize() '设置图片大小Dim n '图片个数On Error Resume Next '忽略错误For n = 1 To ActiveDocument.InlineShapes.Count 'InlineShapes类型图片ActiveDocument.InlineShapes(n).LockAspectRatio = msoFalse ActiveDocument.InlineShapes(n).Height = 400 '设置图片高度为400pxActiveDocument.InlineShapes(n).Width = 300 '设置图片宽度300pxNext nFor n = 1 To ActiveDocument.Shapes.Count 'Shapes类型图片Selection.InlineShapes(n).LockAspectRatio = msoFalse ActiveDocument.Shapes(n).Height = 400 '设置图片高度为400px ActiveDocument.Shapes(n).Width = 300 '设置图片宽度300px Next nEnd Sub批量设定图片比例的宏Sub 宏1()Dim n '图片个数Dim picwidthDim picheightOn Error Resume Next '忽略错误For n = 1 To ActiveDocument.InlineShapes.Count 'InlineShapes类型图片ActiveDocument.InlineShapes(n).LockAspectRatio = msoFalse picheight = ActiveDocument.InlineShapes(n).Heightpicwidth = ActiveDocument.InlineShapes(n).Width ActiveDocument.InlineShapes(n).Height = picheight * 1.1 '设置高度为1.1倍ActiveDocument.InlineShapes(n).Width = picwidth * 1.1 '设置宽度为1.1倍Next nFor n = 1 To ActiveDocument.Shapes.Count 'Shapes类型图片Selection.InlineShapes(n).LockAspectRatio = msoFalse picheight = ActiveDocument.Shapes(n).Heightpicwidth = ActiveDocument.Shapes(n).Width ActiveDocument.Shapes(n).Height = picheight * 1.1 '设置高度为1.1倍ActiveDocument.Shapes(n).Width = picwidth * 1.1 '设置宽度为1.1倍Next nEnd Sub。
批量调整word 图片大小
批量调整word 图片大小我知道通过宏可以批量完成一个word中所有图片大小的修改,在次与大家共享,也希望可以给大家参考。
1、Alt+F8调出宏编辑窗口2、点创建按钮,创建新宏,setpicsize,内容如下:Sub setpicsize()'设置图片大小' 宏在2008-3-31 由hero_thm 录制'Dim j '计数图片个数For j = 1 To ActiveDocument.InlineShapes.Count '文件中图片总个数,图片类型为inlineshapes ActiveDocument.InlineShapes(j).Height = 362 '设置高度ActiveDocument.InlineShapes(j).Width = 481.87 '设置宽度Next jEnd Sub3、保存退出,点运行setpicsize宏,word中所有的图片统一调整为宽17cm,高12.77cm Sub setpicsize()'设置图片大小' 宏在2008-3-31 由hero_thm 录制'Dim j '计数图片个数For j = 1 To ActiveDocument.InlineShapes.Count '文件中图片总个数,图片类型为inlineshapes If ActiveDocument.InlineShapes(j).Width > 480 ThenActiveDocument.InlineShapes(j).Width = 400 '设置宽度End IfNext jEnd Subggggggggggggggggggggggggggggggggggggg小一最近在复习高数,复习材料当然是下载的电子版的了,嘿嘿!不过~~这材料居然~~所有复杂的式子都是图片形式的,光是这样小一也就忍了,关键高数嘛~~式子会比较复杂,这些图片做的又那么小,根本看不清啊!按住Ctrl+滚轮倒是可以放大,但是这样不是很方便,而且~~小一还想打印出来呢,怎么办呢?总不能一个图片一个图片的修改吧……声明:小一下面要说的“批量修改word里的图片大小”的方法需要使用到宏,所以~~最好对VB有所了解!当然~~这不是必需的,只要跟着小一的图文教程走,不知道什么是宏,不知道什么是VB也可以!word批量修改图片大小——固定长宽篇这部分要说的是把word中的所有图片修改成固定的并且相同的长和宽!1、打开word,工具-宏-宏(或者直接按Alt+F8)进入宏的界面,如下面所示,输入一个宏名,宏名自己起,能记住就行!2、宏名起好了,单击“创建”进入Visual Basic 编辑器,输入如下代码并保存Sub setpicsize() '设置图片大小Dim n'图片个数On Error Resume Next '忽略错误For n = 1 To ActiveDocument.InlineShapes.Count 'InlineShapes类型图片ActiveDocument.InlineShapes(n).Height = 400 '设置图片高度为 400pxActiveDocument.InlineShapes(n).Width = 300 '设置图片宽度 300pxNext nFor n = 1 To ActiveDocument.Shapes.Count 'Shapes类型图片ActiveDocument.Shapes(n).Height = 400 '设置图片高度为 400pxActiveDocument.Shapes(n).Width = 300 '设置图片宽度 300pxNext nEnd Sub3、返回word,工具-宏-宏(或者直接按Alt+F8),再次进入宏的界面,选择刚才编辑好的宏,并单击“运行”按钮,就可以了!(图片多时,可能会花一些时间)word批量修改图片大小——按比例缩放篇这部分要说的是把word中的所有图片按比例缩放!具体操作同上,只是代码部分稍做修改,代码如下:Sub setpicsize() '设置图片大小Dim n'图片个数Dim picwidthDim picheightOn Error Resume Next '忽略错误For n = 1 To ActiveDocument.InlineShapes.Count 'InlineShapes类型图片picheight = ActiveDocument.InlineShapes(n).Heightpicwidth = ActiveDocument.InlineShapes(n).WidthActiveDocument.InlineShapes(n).Height = picheight * 1.1 '设置高度为1.1倍ActiveDocument.InlineShapes(n).Width = picwidth * 1.1 '设置宽度为1.1倍Next nFor n = 1 To ActiveDocument.Shapes.Count 'Shapes类型图片picheight = ActiveDocument.Shapes(n).Heightpicwidth = ActiveDocument.Shapes(n).WidthActiveDocument.Shapes(n).Height = picheight * 1.1 '设置高度为1.1倍ActiveDocument.Shapes(n).Width = picwidth * 1.1 '设置宽度为1.1倍Next nEnd Sub虽然小一的代码不是好代码,但确实能解决小一的问题,瞬间就把word文档里所有图片放大了1.1倍,各种公式、坐标轴都比原来清楚多了,可以拿去打印出来了。
VBA操作WORD(五)批量调整图片大小、居中设置
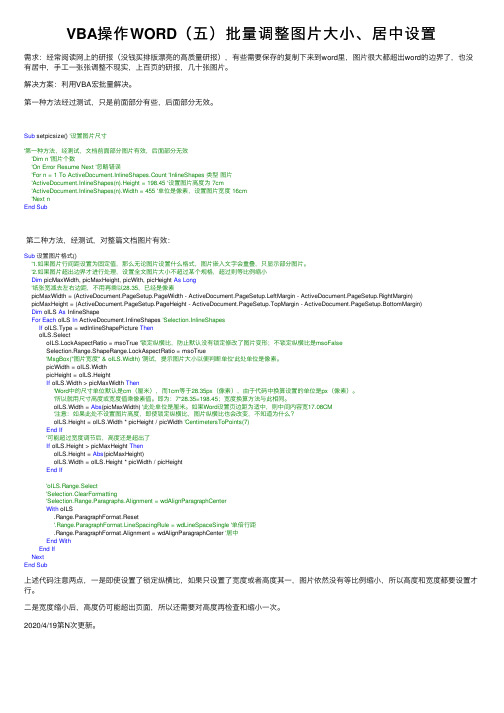
VBA操作WORD(五)批量调整图⽚⼤⼩、居中设置需求:经常阅读⽹上的研报(没钱买排版漂亮的⾼质量研报),有些需要保存的复制下来到word⾥,图⽚很⼤都超出word的边界了,也没有居中,⼿⼯⼀张张调整不现实,上百页的研报,⼏⼗张图⽚。
解决⽅案:利⽤VBA宏批量解决。
第⼀种⽅法经过测试,只是前⾯部分有些,后⾯部分⽆效。
Sub setpicsize() '设置图⽚尺⼨'第⼀种⽅法,经测试,⽂档前⾯部分图⽚有效,后⾯部分⽆效'Dim n '图⽚个数'On Error Resume Next '忽略错误'For n = 1 To ActiveDocument.InlineShapes.Count 'InlineShapes 类型图⽚'ActiveDocument.InlineShapes(n).Height = 198.45 '设置图⽚⾼度为 7cm'ActiveDocument.InlineShapes(n).Width = 455 '单位是像素,设置图⽚宽度 16cm'Next nEnd Sub第⼆种⽅法,经测试,对整篇⽂档图⽚有效:Sub设置图⽚格式()'1.如果图⽚⾏间距设置为固定值,那么⽆论图⽚设置什么格式,图⽚嵌⼊⽂字会重叠,只显⽰部分图⽚。
'2.如果图⽚超出边界才进⾏处理,设置全⽂图⽚⼤⼩不超过某个规格,超过则等⽐例缩⼩Dim picMaxWidth, picMaxHeight, picWith, picHeight As Long'纸张宽减去左右边距,不⽤再乘以28.35,已经是像素picMaxWidth = (ActiveDocument.PageSetup.PageWidth - ActiveDocument.PageSetup.LeftMargin - ActiveDocument.PageSetup.RightMargin)picMaxHeight = (ActiveDocument.PageSetup.PageHeight - ActiveDocument.PageSetup.TopMargin - ActiveDocument.PageSetup.BottomMargin)Dim oILS As InlineShapeFor Each oILS In ActiveDocument.InlineShapes 'Selection.InlineShapesIf oILS.Type = wdInlineShapePicture ThenoILS.SelectoILS.LockAspectRatio = msoTrue '锁定纵横⽐,防⽌默认没有锁定修改了图⽚变形;不锁定纵横⽐是msoFalseSelection.Range.ShapeRange.LockAspectRatio = msoTrue'MsgBox("图⽚宽度" & oILS.Width) '测试,提⽰图⽚⼤⼩以便判断单位'此处单位是像素。
如何在word2007中统一修改多个图片的大小
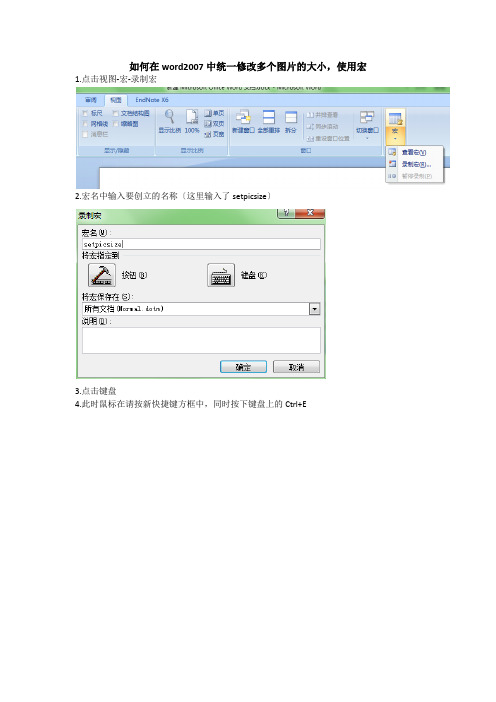
如何在word2007中统一修改多个图片的大小,使用宏1.点击视图-宏-录制宏
2.宏名中输入要创立的名称〔这里输入了setpicsize〕
3.点击键盘
4.此时鼠标在请按新快捷键方框中,同时按下键盘上的Ctrl+E
〔关闭之后,同时按下Ctrl+E操作即可。
但偶不知怎样操作,遂进入第5步〕
5.停顿录制宏
6.查看宏,点击右侧编辑
7.在该窗口中编辑代码即完成宏的创立
此次统一修改图片的代码为:
sub setpicsize()
dim n
on error resume next activedocument.inlineshapes(n).height=400
activedocument.inlineshapes(n).width=300
next n
activedocument.inlineshapes(n).height=400
activedocument.inlineshapes(n).width=300
next n
end sub
作为菜鸟,借鉴了网上各位大侠的意见,总结此文档。
虽然不够权威,但尚能解决问题。
与君共勉~。
批量设置word 里图片的大小及版式的技巧
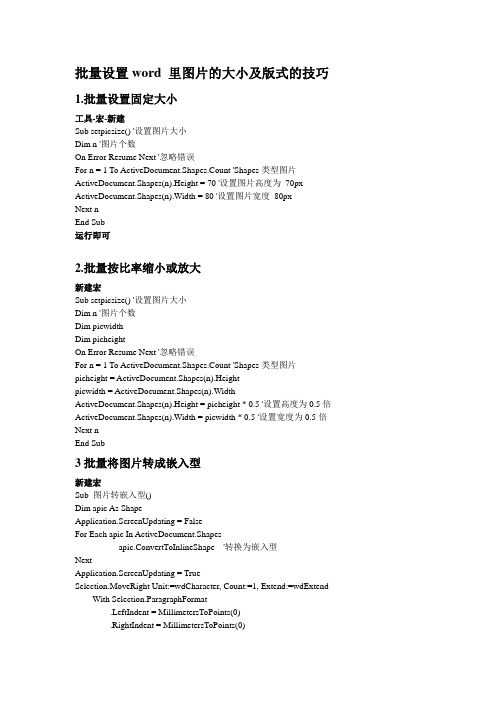
批量设置word 里图片的大小及版式的技巧1.批量设置固定大小工具-宏-新建Sub setpicsize() '设置图片大小Dim n '图片个数On Error Resume Next '忽略错误For n = 1 To ActiveDocument.Shapes.Count 'Shapes类型图片ActiveDocument.Shapes(n).Height = 70 '设置图片高度为70px ActiveDocument.Shapes(n).Width = 80 '设置图片宽度80pxNext nEnd Sub运行即可2.批量按比率缩小或放大新建宏Sub setpicsize() '设置图片大小Dim n '图片个数Dim picwidthDim picheightOn Error Resume Next '忽略错误For n = 1 To ActiveDocument.Shapes.Count 'Shapes类型图片picheight = ActiveDocument.Shapes(n).Heightpicwidth = ActiveDocument.Shapes(n).WidthActiveDocument.Shapes(n).Height = picheight * 0.5 '设置高度为0.5倍ActiveDocument.Shapes(n).Width = picwidth * 0.5 '设置宽度为0.5倍Next nEnd Sub3批量将图片转成嵌入型新建宏Sub 图片转嵌入型()Dim apic As ShapeApplication.ScreenUpdating = FalseFor Each apic In ActiveDocument.Shapesapic.ConvertToInlineShape '转换为嵌入型NextApplication.ScreenUpdating = TrueSelection.MoveRight Unit:=wdCharacter, Count:=1, Extend:=wdExtend With Selection.ParagraphFormat.LeftIndent = MillimetersToPoints(0).RightIndent = MillimetersToPoints(0).SpaceBefore = 6.SpaceBeforeAuto = False.SpaceAfter = 6.SpaceAfterAuto = False.LineSpacingRule = wdLineSpaceSingle.Alignment = wdAlignParagraphCenter.WidowControl = False.KeepWithNext = False.KeepTogether = False.PageBreakBefore = False.NoLineNumber = False.Hyphenation = True.FirstLineIndent = MillimetersToPoints(0).OutlineLevel = wdOutlineLevelBodyText.CharacterUnitLeftIndent = 0.CharacterUnitRightIndent = 0.CharacterUnitFirstLineIndent = 0.LineUnitBefore = 0.LineUnitAfter = 0.AutoAdjustRightIndent = True.DisableLineHeightGrid = False.FarEastLineBreakControl = True.WordWrap = True.HangingPunctuation = True.HalfWidthPunctuationOnTopOfLine = False.AddSpaceBetweenFarEastAndAlpha = True.AddSpaceBetweenFarEastAndDigit = True.BaseLineAlignment = wdBaselineAlignAuto End WithEnd Sub4.批量将图片转四周型新建宏Sub 图片版式转换四周型()Dim apic As Variant, shapeType As WdWrapTypeOn Error Resume NextFor Each apic In ActiveDocument.InlineShapesapic.ConvertToShapeWith oShapeoShape.WrapFormat.Type = 0 '四周型oShape.WrapFormat.AllowOverlap = False '不允许重叠End WithNextEnd Sub。
批量处理word文档图片大小
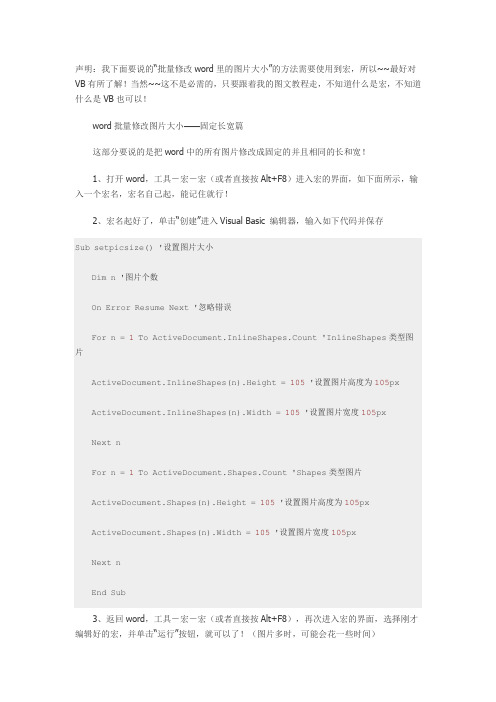
声明:我下面要说的“批量修改word里的图片大小”的方法需要使用到宏,所以~~最好对VB有所了解!当然~~这不是必需的,只要跟着我的图文教程走,不知道什么是宏,不知道什么是VB也可以!word批量修改图片大小——固定长宽篇这部分要说的是把word中的所有图片修改成固定的并且相同的长和宽!1、打开word,工具-宏-宏(或者直接按Alt+F8)进入宏的界面,如下面所示,输入一个宏名,宏名自己起,能记住就行!2、宏名起好了,单击“创建”进入Visual Basic 编辑器,输入如下代码并保存Sub setpicsize() '设置图片大小Dim n '图片个数On Error Resume Next '忽略错误For n = 1 To ActiveDocument.InlineShapes.Count 'InlineShapes类型图片ActiveDocument.InlineShapes(n).Height = 105 '设置图片高度为105px ActiveDocument.InlineShapes(n).Width = 105 '设置图片宽度105pxNext nFor n = 1 To ActiveDocument.Shapes.Count 'Shapes类型图片ActiveDocument.Shapes(n).Height = 105 '设置图片高度为105pxActiveDocument.Shapes(n).Width = 105 '设置图片宽度105pxNext nEnd Sub3、返回word,工具-宏-宏(或者直接按Alt+F8),再次进入宏的界面,选择刚才编辑好的宏,并单击“运行”按钮,就可以了!(图片多时,可能会花一些时间)word批量修改图片大小——按比例缩放篇这部分要说的是把word中的所有图片按比例缩放!具体操作同上,只是代码部分稍做修改,代码如下:Sub setpicsize() '设置图片大小Dim n '图片个数Dim picwidthDim picheightOn Error Resume Next '忽略错误For n = 1 To ActiveDocument.InlineShapes.Count 'InlineShapes类型图片picheight = ActiveDocument.InlineShapes(n).Heightpicwidth = ActiveDocument.InlineShapes(n).WidthActiveDocument.InlineShapes(n).Height = picheight * 1.1 '设置高度为1. 1倍ActiveDocument.InlineShapes(n).Width = picwidth * 1.1 '设置宽度为1.1倍Next nFor n = 1 To ActiveDocument.Shapes.Count 'Shapes类型图片picheight = ActiveDocument.Shapes(n).Heightpicwidth = ActiveDocument.Shapes(n).WidthActiveDocument.Shapes(n).Height = picheight * 1.1 '设置高度为1.1倍ActiveDocument.Shapes(n).Width = picwidth * 1.1 '设置宽度为1.1倍Next nEnd Sub虽然我的代码不是好代码,但确实能解决我的问题,瞬间就把word文档里所有图片放大了1.1倍,各种公式、坐标轴都比原来清楚多了,可以拿去打印出来了,呼呼!。
用宏批量调整中图片版式大小方向

用宏批量调整中图片版式大小方向集团标准化工作小组 #Q8QGGQT-GX8G08Q8-GNQGJ8-MHHGN#Sub 图片对齐()= False '关闭屏幕更新Dim nOn Error Resume Next(n).SelectorizontalPosition = _wdRelativeHorizontalPositionMarginwdRelativeVerticalPositionMarginNext= True '恢复屏幕更新End SubSub 图片大小()On Error Resume NextDim mywidthDim myheight= False '关闭屏幕更新mywidth = Val(InputBox(Prompt:="单位为厘米(cm);如果输入为0,则图片保持原始纵横比,宽度根据输入的高度数值自动调整;", Title:="请输入图片宽度", Default:="0")) * myheight = Val(InputBox(Prompt:="单位为厘米(cm);如果输入为0,则图片保持原始纵横比,高度根据输入的宽度数值自动调整;", Title:="请输入图片高度", Default:="0")) *'------------------------------------------------------------------'调整嵌入式图形Dim pic As InlineShapeFor Each pic InIf mywidth = "0" Then= myheight=ElseIf myheight = "0" Then= mywidth=Else= mywidth= myheightEnd IfNext'调整浮动式图形Dim tu As ShapeFor Each tu InIf mywidth = "0" Then= myheightElseIf myheight = "0" Then= mywidthElse= msoFalse= mywidth= myheightEnd IfNext= True '恢复屏幕更新End SubSub 浮于文字上方()Dim oShape As Variant, tu As Shape, i= False '关闭屏幕更新On Error Resume Next'调整嵌入图形为浮于文字上方,并旋转90度 For Each oShape InSet oShape =(i).SelectWith oShape. = 3' (去除.Zorder行. = shapeType四周形. = wdWrapTight紧密形改为.ConvertToInlineShape嵌入形).ZOrder 4 '4浮于文字上方 5衬于下方.Rotation = -90#End WithNext'调整其它图形为浮于文字上方,并旋转90度For Each tu In(i).SelectWith tu. = 3 ' (去除.Zorder行. = shapeType四周形. = wdWrapTight紧密形改为.ConvertToInlineShape嵌入形).ZOrder 4 '4浮于文字上方 5衬于下方.Rotation = -90#End WithNext= True '恢复屏幕更新End SubSub 浮于文字上方()Dim oShape As Variant, i= False '关闭屏幕更新On Error Resume NextFor Each oShape InSet oShape =(i).Select '选中图片With oShape.ZOrder 4 '选中图片版式调为浮于文字上方.Rotation = -90# '选中图片向左旋转90度End WithNext= True '关闭屏幕更新End SubSub 连续()Call 浮于文字上方Call 图片大小Call 图片对齐End SubSub 版式转换()Dim oShape As Variant, shapeType As WdWrapTypeOn Error Resume NextIf MsgBox("Y将图片由嵌入式转为浮动式,N将图片由浮动式转为嵌入式", 68) = 6 ThenshapeType = Val(InputBox(Prompt:="请输入图片版式:0=四周型,1=紧密型, " & vbLf & _"3=衬于文字下方,4=浮于文字上方", Default:=0))For Each oShape InSet oShape =With oShapeSelect Case shapeTypeCase 0, 1. = shapeTypeCase 3. = 3.ZOrder 5Case 4. = 3.ZOrder 4Case ElseExit SubEnd Select. = FalseEnd WithNextElseFor Each oShape InNextEnd IfEnd SubSub 图片方向()Dim nOn Error Resume Next(n).IncrementRotation -90# Next nEnd Sub。
(完整word版)用宏批量调整word中图片版式、大小、方向
(完整word版)用宏批量调整word中图片版式、大小、方向Sub 图片对齐() (1)Sub 图片大小() (1)Sub 浮于文字上方() ................................................................................................... 错误!未定义书签。
Sub 浮于文字上方() . (4)Sub 连续() (4)Sub 版式转换() (4)Sub 图片方向() (5)Sub 图片对齐()Application.ScreenUpdating = False '关闭屏幕更新Dim nOn Error Resume NextFor n = 1 To ActiveDocument.Shapes.CountActiveDocument.Shapes(n).SelectSelection.ShapeRange.RelativeHorizontalPosition = _wdRelativeHorizontalPositionMarginSelection.ShapeRange.RelativeVerticalPosition = _wdRelativeVerticalPositionMarginSelection.ShapeRange.Left = wdShapeRightSelection.ShapeRange.Top = wdShapeBottomSelection.ShapeRange.LockAnchor = False/doc/6c8516769.html,youtInCell = TrueSelection.ShapeRange.WrapFormat.AllowOverlap = FalseSelection.ShapeRange.WrapFormat.Side = wdWrapBothNextApplication.ScreenUpdating = True '恢复屏幕更新End SubSub 图片大小()On Error Resume NextDim mywidthDim myheightApplication.ScreenUpdating = False '关闭屏幕更新mywidth = Val(InputBox(Prompt:="单位为厘米(cm);如果输入为0,则图片保持原始纵横比,宽度根据输入的高度数值自动调整;", Title:="请输入图片宽度", Default:="0")) * 28.35myheight = Val(InputBox(Prompt:="单位为厘米(cm);如果输入为0,则图片保持原始纵横比,高度根据输入的宽度数值自动调整;", Title:="请输入图片高度", Default:="0")) * 28.35'------------------------------------------------------------------'调整嵌入式图形Dim pic As InlineShapeFor Each pic In ActiveDocument.InlineShapesIf mywidth = "0" Thenpic.Height = myheightpic.ScaleWidth = pic.ScaleHeightElseIf myheight = "0" Thenpic.Width = mywidthpic.ScaleHeight = pic.ScaleWidthElsepic.Width = mywidthpic.Height = myheightEnd IfNext'调整浮动式图形Dim tu As ShapeIf mywidth = "0" Thentu.Height = myheightElseIf myheight = "0" Thentu.Width = mywidthElsetu.LockAspectRatio = msoFalsetu.Width = mywidthtu.Height = myheightEnd IfNextApplication.ScreenUpdating = True '恢复屏幕更新End SubSub 浮于文字上方()Dim oShape As Variant, tu As Shape, iApplication.ScreenUpdating = False '关闭屏幕更新On Error Resume Next'调整嵌入图形为浮于文字上方,并旋转90度For Each oShape In ActiveDocument.InlineShapesSet oShape = oShape.ConvertT oShapeActiveDocument.InlineShapes(i).SelectWith oShape.WrapFormat.Type = 3' (去除.Zorder行.WrapFormat.Type = shapeType四周形.WrapFormat.Type = wdWrapTight紧密形改为.ConvertToInlineShape嵌入形).ZOrder 4 '4浮于文字上方5衬于下方.Rotation = -90#End WithNext'调整其它图形为浮于文字上方,并旋转90度ActiveDocument.Shapes(i).SelectWith tu.WrapFormat.Type = 3' (去除.Zorder行.WrapFormat.Type = shapeType四周形.WrapFormat.Type = wdWrapTight紧密形改为.ConvertToInlineShape嵌入形).ZOrder 4 '4浮于文字上方5衬于下方.Rotation = -90#End WithNextApplication.ScreenUpdating = True '恢复屏幕更新End SubSub 浮于文字上方()Dim oShape As Variant, iApplication.ScreenUpdating = False '关闭屏幕更新On Error Resume NextFor Each oShape In ActiveDocument.InlineShapesSet oShape = oShape.ConvertT oShapeActiveDocument.InlineShapes(i).Select '选中图片With oShape.ZOrder 4 '选中图片版式调为浮于文字上方.Rotation = -90# '选中图片向左旋转90度End WithNextApplication.ScreenUpdating = True '关闭屏幕更新End SubSub 连续()Call 浮于文字上方Call 图片大小Call 图片对齐End SubSub 版式转换()Dim oShape As Variant, shapeType As WdWrapTypeOn Error Resume NextIf MsgBox("Y将图片由嵌入式转为浮动式,N将图片由浮动式转为嵌入式", 68) = 6 Then shapeType = Val(InputBox(Prompt:="请输入图片版式:0=四周型,1=紧密型, " & vbLf & _"3=衬于文字下方,4=浮于文字上方", Default:=0)) For Each oShape In ActiveDocument.InlineShapesSet oShape = oShape.ConvertT oShapeWith oShapeSelect Case shapeTypeCase 0, 1.WrapFormat.Type = shapeTypeCase 3.WrapFormat.Type = 3.ZOrder 5Case 4.WrapFormat.Type = 3.ZOrder 4Case ElseExit SubEnd Select.WrapFormat.AllowOverlap = FalseEnd WithNextElseFor Each oShape In ActiveDocument.ShapesoShape.ConvertToInlineShapeNextEnd IfEnd SubSub 图片方向()Dim nOn Error Resume NextFor n = 1 To ActiveDocument.Shapes.Count ActiveDocument.Shapes(n).IncrementRotation -90# Next nEnd Sub。
word在用宏批量设置图片大小-word宏设置图片大小
word在用宏批量设置图片大小:word宏设置图片大小最近发现,以前存了很多图片在word,但图片的很大,有的很小,规格都不一样,堆在文档里面很难看,为了美观,下面给大家分享Word中利用宏批量设置图片大小的操作方法,欢迎大家来到学习。
Word用宏批量设置图片大小的方法大家看看我是怎么样利用宏批量修改word中所有图片大小,先打开存有图片的word。
在打开的文档中,选择在工具菜单中选择宏--宏。
随后弹出宏对话框,在宏名中输入setpicsize。
宏名起好了,单击创建按钮进入Visual Basic 编辑器,输入如下代码Sub setpicsize() '设置图片大小Dim n '图片个数On Error Resume Next '忽略错误For n = 1 To ActiveDocument.InlineShapes.Count 'InlineShapes 类型图片ActiveDocument.InlineShapes(n).Height = 400 '设置图片高度为400pxActiveDocument.InlineShapes(n).Width = 300 '设置图片宽度300pxNext nFor n = 1 To ActiveDocument.Shapes.Count 'Shapes类型图片ActiveDocument.Shapes(n).Height = 400 '设置图片高度为400pxActiveDocument.Shapes(n).Width = 300 '设置图片宽度300pxNext nEnd Sub关闭入Visual Basic 编辑器,返回word,重新选择工具--宏--宏(或者直接按Alt+F8),再次进入宏的界面,在弹出的宏名中选择”setpicsize”,最后点击运行---确认即可快速地批量修改word中所有图片大小,注意这里把图片大小都修改成Height = 400,Width = 300,这个规格大家可以需要改变的~感谢您的阅读!。
word宏实现批量处理照片大小方法word办公 数码 电脑资料
word宏实现批量处理照片大小方法word办公数码电脑资料Word批量怎么处理图片大小呢,如果一个word文档中有几百张图片我们如果一张张去处理很麻烦,下面我们一起来看利用word宏实现批量处理照片大小,北街最近需要写的文档越来越多了,根据公司文档标准性,我要使用正规的格式和样式做一些图文混排的 Word ,例如使文档中的每一幅图片大小一致。
下面的方法就是告诉大家 Word 批量处理统一图片大小的方法。
使用方法:把代码复制到 Visual Biscal 器中,再回到 Word 界面,运行“宏”命令。
Sub setpicsize() '设置图片大小Dim n '图片个数On Error Resume Next '忽略错误For n = 1 To ActiveDocument.InlineShapes.Count'InlineShapes类型图片ActiveDocument.InlineShapes(n).Height = 400 '设置图片高度为400pxActiveDocument.InlineShapes(n).Width = 300 '设置图片宽度300pxNext nFor n = 1 To ActiveDocument.Shapes.Count 'Shapes类型图片ActiveDocument.Shapes(n).Height = 400 '设置图片高度为 400px ActiveDocument.Shapes(n).Width = 300 '设置图片宽度 300px Next nEnd Sub操作步骤如下:1. 翻开要统一图片大小的 Word 文档,点击“工具”-“宏”-“Visual Biscal 器,按比例缩放的方法和上面的是一样的,只是代码变化一下,过程就不熬述。
VBA 代码如下:Sub setpicsize() '设置图片大小Dim n '图片个数On Error Resume Next '忽略错误For n = 1 To ActiveDocument.InlineShapes.Count'InlineShapes类型图片ActiveDocument.InlineShapes(n).Height = 400 '设置图片高度为400pxActiveDocument.InlineShapes(n).Width = 300 '设置图片宽度300pxNext nFor n = 1 To ActiveDocument.Shapes.Count 'Shapes类型图片ActiveDocument.Shapes(n).Height = 400 '设置图片高度为 400px ActiveDocument.Shapes(n).Width = 300 '设置图片宽度 300px Next nEnd Sub。
自动调整word文档中的图片大小及版
批量设置word 里图片的大小及版式的技巧1.批量设置固定大小工具-宏-新建Sub setpicsize() '设置图片大小Dim n '图片个数On Error Resume Next '忽略错误For n = 1 To ActiveDocument.Shapes.Count 'Shapes类型图片ActiveDocument.Shapes(n).Height = 70 '设置图片高度为70px ActiveDocument.Shapes(n).Width = 80 '设置图片宽度80pxNext nEnd Sub运行即可2.批量按比率缩小或放大新建宏Sub setpicsize() '设置图片大小Dim n '图片个数Dim picwidthDim picheightOn Error Resume Next '忽略错误For n = 1 To ActiveDocument.InlineShapes.Count 'InlineShapes 类型图片picheight = ActiveDocument.InlineShapes(n).Heightpicwidth = ActiveDocument.InlineShapes(n).WidthActiveDocument.InlineShapes(n).Height = picheight * 0.7 '设置高度为0.7倍ActiveDocument.InlineShapes(n).Width = picwidth * 0.7 '设置宽度为0.7倍Next nFor n = 1 To ActiveDocument.Shapes.Count 'Shapes类型图片picheight = ActiveDocument.Shapes(n).Heightpicwidth = ActiveDocument.Shapes(n).WidthActiveDocument.Shapes(n).Height = picheight * 0.7 '设置高度为0.7倍ActiveDocument.Shapes(n).Width = picwidth * 0.7 '设置宽度为0.7倍Next nEnd Sub3批量将图片转成嵌入型新建宏Sub 图片转嵌入型()Dim apic As ShapeApplication.ScreenUpdating = FalseFor Each apic In ActiveDocument.Shapesapic.ConvertToInlineShape '转换为嵌入型NextApplication.ScreenUpdating = TrueSelection.MoveRight Unit:=wdCharacter, Count:=1, Extend:=wdExtend With Selection.ParagraphFormat.LeftIndent = MillimetersToPoints(0).RightIndent = MillimetersToPoints(0).SpaceBefore = 6.SpaceBeforeAuto = False.SpaceAfter = 6.SpaceAfterAuto = False.LineSpacingRule = wdLineSpaceSingle .Alignment = wdAlignParagraphCenter .WidowControl = False.KeepWithNext = False.KeepTogether = False.PageBreakBefore = False.NoLineNumber = False.Hyphenation = True.FirstLineIndent = MillimetersToPoints(0) .OutlineLevel = wdOutlineLevelBodyText .CharacterUnitLeftIndent = 0.CharacterUnitRightIndent = 0.CharacterUnitFirstLineIndent = 0.LineUnitBefore = 0.LineUnitAfter = 0.AutoAdjustRightIndent = True.DisableLineHeightGrid = False.FarEastLineBreakControl = True.WordWrap = True.HangingPunctuation = True.HalfWidthPunctuationOnTopOfLine = False.AddSpaceBetweenFarEastAndAlpha = True.AddSpaceBetweenFarEastAndDigit = True.BaseLineAlignment = wdBaselineAlignAutoEnd WithEnd Sub4.批量将图片转四周型新建宏Sub 图片版式转换四周型()Dim apic As Variant, shapeType As WdWrapTypeOn Error Resume NextFor Each apic In ActiveDocument.InlineShapesapic.ConvertToShapeWith oShapeoShape.WrapFormat.Type = 0 '四周型oShape.WrapFormat.AllowOverlap = False '不允许重叠End With Next End Sub。
Word宏:Word中的图片批量统一大小及同比例缩放(图)
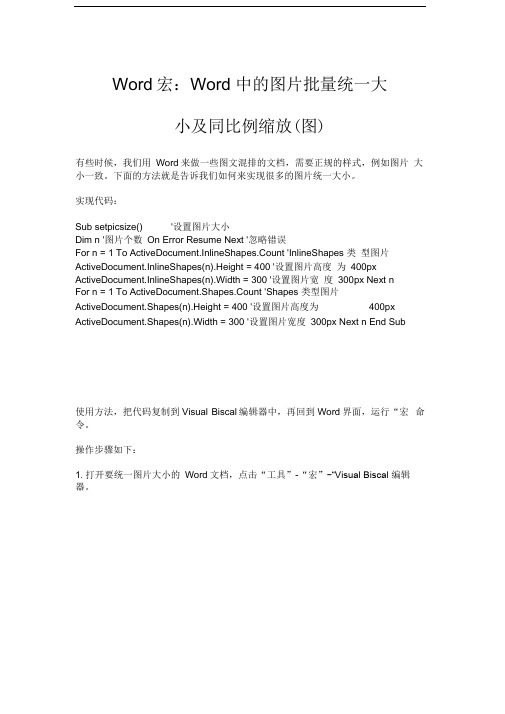
Word宏:Word 中的图片批量统一大小及同比例缩放(图)有些时候,我们用Word来做一些图文混排的文档,需要正规的样式,例如图片大小一致。
下面的方法就是告诉我们如何来实现很多的图片统一大小。
实现代码:Sub setpicsize() '设置图片大小Dim n '图片个数On Error Resume Next '忽略错误For n = 1 To ActiveDocument.InlineShapes.Count 'InlineShapes 类型图片ActiveDocument.InlineShapes(n).Height = 400 '设置图片高度为400px ActiveDocument.InlineShapes(n).Width = 300 '设置图片宽度300px Next nFor n = 1 To ActiveDocument.Shapes.Count 'Shapes 类型图片ActiveDocument.Shapes(n).Height = 400 '设置图片高度为400px ActiveDocument.Shapes(n).Width = 300 '设置图片宽度300px Next n End Sub使用方法,把代码复制到Visual Biscal编辑器中,再回到Word界面,运行“宏命令。
操作步骤如下:1.打开要统一图片大小的Word文档,点击“工具”-“宏”-“Visual Biscal 编辑器。
工具Q 〕 表格窗口⑭ 兆助徂J Xdabt TDFQB3 M&t ■砒 注粹©共享工作区如… 修订(I ) Ctrl+Shi f t+E 比簸并合并文措如… 保护主梢(£),•.联机协作僵J信函与邯件(1)2)插入normal 工程"模块”。
拼写和谩法窈一 一. 信息检素(M ). . - A1L+单击 谱舌田) 字数恭计地),一. 自动第写摘腰(Jp.-.语音始FT J n lift 寻;1。
- 1、下载文档前请自行甄别文档内容的完整性,平台不提供额外的编辑、内容补充、找答案等附加服务。
- 2、"仅部分预览"的文档,不可在线预览部分如存在完整性等问题,可反馈申请退款(可完整预览的文档不适用该条件!)。
- 3、如文档侵犯您的权益,请联系客服反馈,我们会尽快为您处理(人工客服工作时间:9:00-18:30)。
Sub 图片方向
() .....................................................
Sub 图片对齐()
Application.ScreenUpdating = False '关闭屏幕更新
Dim n
On Error Resume Next
ActiveDocument.Shapes(n).Select
orizontalPosition = _
wdRelativeHorizontalPositionMargin
wdRelativeVerticalPositionMargin
Next
Application.ScreenUpdating = True '恢复屏幕更新
End Sub
Sub 图片大小()
On Error Resume Next
Dim mywidth
Dim myheight
Application.ScreenUpdating = False '关闭屏幕更新
祭楷瑤??慖?湉異?硯倨潲灭?尽单位为厘米(cm);如果输入为0,则图片保持原始纵横比,宽度根据输入的高度数值自动调整;?吠瑩敬?请输入图片宽度, Default:=
祭敨杩瑨?嘠污?灮瑵潂?牐浯瑰?单位为厘米(cm);如果输入为0,则图片保持原始纵横比,高度根据输入的宽度数值自动调整;?吠瑩敬?请输入图片高度, Default:=
'------------------------------------------------------------------
'调整嵌入式图形
Dim pic As InlineShape
For Each pic In ActiveDocument.InlineShapes
If mywidth =
pic.Height = myheight
pic.ScaleWidth = pic.ScaleHeight
ElseIf myheight =
pic.Width = mywidth
pic.ScaleHeight = pic.ScaleWidth
Else
pic.Width = mywidth
pic.Height = myheight
End If
Next
'调整浮动式图形
Dim tu As Shape
For Each tu In ActiveDocument.Shapes
If mywidth =
tu.Height = myheight
ElseIf myheight =
tu.Width = mywidth
Else
tu.LockAspectRatio = msoFalse
tu.Width = mywidth
tu.Height = myheight
End If
Next
Application.ScreenUpdating = True '恢复屏幕更新
End Sub
Sub 浮于文字上方()
Dim oShape As Variant, tu As Shape, i
Application.ScreenUpdating = False '关闭屏幕更新
On Error Resume Next
'调整嵌入图形为浮于文字上方,并旋转90度
For Each oShape In ActiveDocument.InlineShapes
Set oShape = oShape.ConvertToShape
ActiveDocument.InlineShapes(i).Select
With oShape
.WrapFormat.Type = 3' (去除.Zorder行.WrapFormat.Type = shapeType四周形.WrapFormat.Type = wdWrapTight紧密形改为.ConvertToInlineShape嵌入形)
.ZOrder 4 '4浮于文字上方5衬于下方
.Rotation = -90#
End With
Next
'调整其它图形为浮于文字上方,并旋转90度
For Each tu In ActiveDocument.Shapes
ActiveDocument.Shapes(i).Select
.WrapFormat.Type = 3 ' (去除.Zorder行.WrapFormat.Type = shapeType四周形.WrapFormat.Type = wdWrapTight紧密形改为.ConvertToInlineShape嵌入形)
.ZOrder 4 '4浮于文字上方5衬于下方
.Rotation = -90#
End With
Next
Application.ScreenUpdating = True '恢复屏幕更新
End Sub
Sub 浮于文字上方()
Dim oShape As Variant, i
Application.ScreenUpdating = False '关闭屏幕更新
On Error Resume Next
For Each oShape In ActiveDocument.InlineShapes
Set oShape = oShape.ConvertToShape
ActiveDocument.InlineShapes(i).Select '选中图片
With oShape
.ZOrder 4 '选中图片版式调为浮于文字上方
.Rotation = -90# '选中图片向左旋转90度
End With
Next
Application.ScreenUpdating = True '关闭屏幕更新
End Sub
Sub 连续()
Call 浮于文字上方
Call 图片大小
Call 图片对齐
End Sub
Sub 版式转换()
Dim oShape As Variant, shapeType As WdWrapType
On Error Resume Next
If MsgBox(Y将图片由嵌入式转为浮动式,N将图片由浮动式转为嵌入式, 68) = 6 Then 桳灡呥灹??慖?湉異?硯倨潲灭?尽请输入图片版式:0=四周型,1=紧密型, & vbLf & _
=衬于文字下方,4=浮于文字上方, Default:=0))
For Each oShape In ActiveDocument.InlineShapes
Set oShape = oShape.ConvertToShape
With oShape
Select Case shapeType
Case 0, 1
.WrapFormat.Type = shapeType
Case 3
.WrapFormat.Type = 3
.ZOrder 5
.WrapFormat.Type = 3
.ZOrder 4
Case Else
Exit Sub
End Select
.WrapFormat.AllowOverlap = False
End With
Next
Else
For Each oShape In ActiveDocument.Shapes
oShape.ConvertToInlineShape
Next
End If
End Sub
Sub 图片方向()
Dim n
On Error Resume Next
ActiveDocument.Shapes(n).IncrementRotation -90# Next n
End Sub。
