simple-spring-memcached统一缓存的使用实例
SpringBoot与Redis缓存集成实践

SpringBoot与Redis缓存集成实践一、引言随着现代应用程序的复杂性不断增加,缓存成为提高系统性能和响应速度的重要手段之一。
而SpringBoot与Redis的集成可以帮助我们更加高效地实现缓存功能。
本文将介绍SpringBoot与Redis缓存集成的实践,从配置Redis、使用RedisTemplate进行缓存操作以及解决缓存穿透与缓存雪崩等问题进行探讨。
二、配置Redis1. 引入依赖在pom.xml文件中添加SpringDataRedis的依赖:```xml<dependency><groupId>org.springframework.boot</groupId><artifactId>spring-boot-starter-data-redis</artifactId></dependency>```2. 配置Redis连接参数在application.properties或application.yml文件中配置Redis连接参数:```spring.redis.host=127.0.0.1spring.redis.port=6379spring.redis.database=0spring.redis.password=```其中,host为Redis服务器的IP地址,port为端口号,database为数据库索引,password为连接密码(如果有设置)。
3. 配置RedisTemplate在SpringBoot的配置类中,通过@Bean注解创建一个RedisTemplate的实例,并设置相关参数,例如连接工厂、序列化器等:```java@Configurationpublic class RedisConfig {@Beanpublic RedisTemplate<String, Object>redisTemplate(RedisConnectionFactory redisConnectionFactory) {RedisTemplate<String, Object> redisTemplate = new RedisTemplate<>();redisTemplate.setConnectionFactory(redisConnectionFactory);redisTemplate.setKeySerializer(new StringRedisSerializer());redisTemplate.setValueSerializer(newGenericJackson2JsonRedisSerializer());return redisTemplate;}}```在上述代码中,我们使用了StringRedisSerializer对key进行序列化,使用了GenericJackson2JsonRedisSerializer对value进行序列化。
使用spring自带的cache
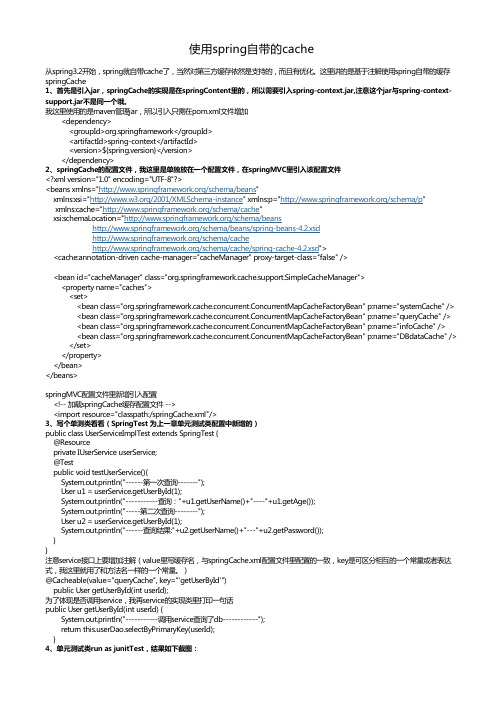
结合测试类发现,显然第二次调用没有进service实现类5、下面补充几个概念@Cacheable、@CachePut、@CacheEvict 注释介绍通过上面的例子,我们可以看到 spring cache 主要使用两个注释标签,即 @Cacheable、@CachePut 和 @CacheEvict,我们总结一下其作用和配置方法。
表 1. @Cacheable 作用和配置方法@Cacheable 的作用主要针对方法配置,能够根据方法的请求参数对其结果进行缓存@Cacheable主要的参数value缓存的名称,在 spring 配置文件中定义,必须指定至少一个例如:@Cacheable(value=”mycache”) 或者@Cacheable(value={”cache1”,”cache2”}key缓存的 key,可以为空,如果指定要按照 SpEL 表达式编写,如果不指定,则缺省按照方法的所有参数进行组合例如:@Cacheable(value=”testcache”,key=”#u serName”)condition缓存的条件,可以为空,使用 SpEL 编写,返回 true 或者 false,只有为 true 才进行缓存例如:@Cacheable(value=”testcache”,condition =”#userName.length()>2”)表 2. @CachePut 作用和配置方法@CachePut 的作用主要针对方法配置,能够根据方法的请求参数对其结果进行缓存,和 @Cacheable 不同的是,它每次都会触发真实方法的调用@CachePut主要的参数value缓存的名称,在 spring 配置文件中定义,必须指定至少一个例如:@Cacheable(value=”mycache”) 或者@Cacheable(value={”cache1”,”cache2”}key缓存的 key,可以为空,如果指定要按照 SpEL 表达式编写,如果不指定,则缺省按照方法的所有参数进行组合例如:@Cacheable(value=”testcache”,key=”#us erName”)condition缓存的条件,可以为空,使用 SpEL 编写,返回 true 或者 false,只有为 true 才进行缓存例如:@Cacheable(value=”testcache”,condition =”#userName.length()>2”)表 3. @CacheEvict 作用和配置方法@CachEvict 的作用主要针对方法配置,能够根据一定的条件对缓存进行清空@CacheEvict 主要的参数value缓存的名称,在 spring 配置文件中定义,必须指定至少一个例如:@CachEvict(value=”mycach e”) 或者@CachEvict(value={”cache1”,”cache2”}key缓存的 key,可以为空,如果指定要按照 SpEL 表达式编写,如果不指定,则缺省按照方法的所有参数进行组合例如:@CachEvict(value=”testcach e”,key=”#userName”)condition缓存的条件,可以为空,使用 SpEL 编写,返回 true 或者 false,只有为 true 才清空缓存例如:@CachEvict(value=”testcach e”,condition=”#userName.lengt h()>2”)allEntries是否清空所有缓存内容,缺省为 false,如果指定为 true,则方法调用后将立即清空所有缓存例如:@CachEvict(value=”testcach e”,allEntries=true)beforeInvoca tion 是否在方法执行前就清空,缺省为 false ,如果指定为 true ,则在方法还没有执行的时候就清空缓存,缺省情况下,如果方法执行抛出异常,则不会清空缓存例如:@CachEvict(value=”testcach e”,beforeInvocation=true)。
spring+redis实现数据的缓存
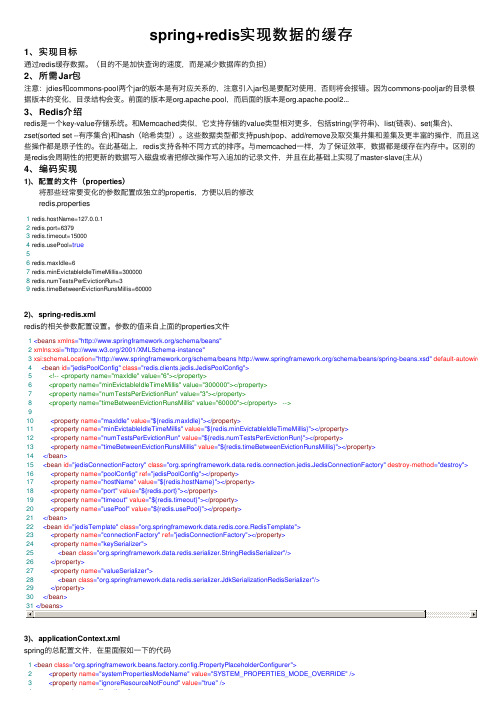
314<property name="locations">5<list>67<value>classpath*:/META-INF/config/redis.properties</value>8</list>9</property>10</bean>1112<import resource="spring-redis.xml"/>4)、web.xml设置spring的总配置⽂件在项⽬启动时加载1<context-param>2<param-name>contextConfigLocation</param-name>3<param-value>classpath*:/META-INF/applicationContext.xml</param-value><!----> 4</context-param>5)、redis缓存⼯具类ValueOperations ——基本数据类型和实体类的缓存ListOperations ——list的缓存SetOperations ——set的缓存HashOperations Map的缓存1import java.io.Serializable;2import java.util.ArrayList;3import java.util.HashMap;4import java.util.HashSet;5import java.util.Iterator;6import java.util.List;7import java.util.Map;8import java.util.Set;910import org.springframework.beans.factory.annotation.Autowired;11import org.springframework.beans.factory.annotation.Qualifier;12import org.springframework.context.support.ClassPathXmlApplicationContext;13import org.springframework.data.redis.core.BoundSetOperations;14import org.springframework.data.redis.core.HashOperations;15import org.springframework.data.redis.core.ListOperations;16import org.springframework.data.redis.core.RedisTemplate;17import org.springframework.data.redis.core.SetOperations;18import org.springframework.data.redis.core.ValueOperations;19import org.springframework.stereotype.Service;2021@Service22public class RedisCacheUtil<T>23{2425 @Autowired @Qualifier("jedisTemplate")26public RedisTemplate redisTemplate;2728/**29 * 缓存基本的对象,Integer、String、实体类等30 * @param key 缓存的键值31 * @param value 缓存的值32 * @return缓存的对象33*/34public <T> ValueOperations<String,T> setCacheObject(String key,T value)35 {3637 ValueOperations<String,T> operation = redisTemplate.opsForValue();38 operation.set(key,value);39return operation;40 }4142/**43 * 获得缓存的基本对象。
Springboot使用cache缓存过程代码实例
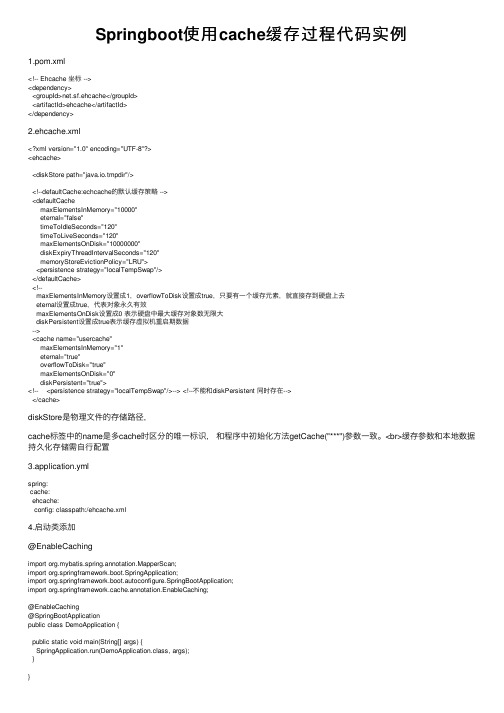
Springboot使⽤cache缓存过程代码实例1.pom.xml<!-- Ehcache 坐标 --><dependency><groupId>net.sf.ehcache</groupId><artifactId>ehcache</artifactId></dependency>2.ehcache.xml<?xml version="1.0" encoding="UTF-8"?><ehcache><diskStore path="java.io.tmpdir"/><!--defaultCache:echcache的默认缓存策略 --><defaultCachemaxElementsInMemory="10000"eternal="false"timeToIdleSeconds="120"timeToLiveSeconds="120"maxElementsOnDisk="10000000"diskExpiryThreadIntervalSeconds="120"memoryStoreEvictionPolicy="LRU"><persistence strategy="localTempSwap"/></defaultCache><!--maxElementsInMemory设置成1,overflowToDisk设置成true,只要有⼀个缓存元素,就直接存到硬盘上去eternal设置成true,代表对象永久有效maxElementsOnDisk设置成0 表⽰硬盘中最⼤缓存对象数⽆限⼤diskPersistent设置成true表⽰缓存虚拟机重启期数据--><cache name="usercache"maxElementsInMemory="1"eternal="true"overflowToDisk="true"maxElementsOnDisk="0"diskPersistent="true"><!-- <persistence strategy="localTempSwap"/>--> <!--不能和diskPersistent 同时存在--></cache>diskStore是物理⽂件的存储路径,cache标签中的name是多cache时区分的唯⼀标识,和程序中初始化⽅法getCache("***")参数⼀致。
使用SpringCache设置缓存条件操作

使⽤SpringCache设置缓存条件操作⽬录Spring Cache设置缓存条件原理@Cacheable的常⽤属性及说明Root对象@CachePut的常⽤属性同@CacheableCache缓存配置1、pom.xml2、Ehcache配置⽂件3、配置类4、⽰例Spring Cache设置缓存条件原理从Spring3.1开始,Spring框架提供了对Cache的⽀持,提供了⼀个对缓存使⽤的抽象,通过在既有代码中添加少量它定义的各种 annotation,即能够达到缓存⽅法的返回对象的作⽤。
提供的主要注解有@Cacheable、@CachePut、@CacheEvict和@Caching,具体见下表:注解说明@Cacheable 可以标注在类或⽅法上:标注在⽅法上表⽰该⽅法⽀持数据缓存;标在类上表⽰该类的所有⽅法都⽀持数据缓存。
具体功能:在执⾏⽅法体之前,检查缓存中是否有相同key值的缓存存在,如果存在对应的缓存,直接返回缓存中的值;如果不存在对应的缓存,则执⾏相应的⽅法体获取数据,并将数据存储到缓存中。
@CachePut可以标注在类或⽅法上,表⽰⽀持数据缓存。
具体功能:在⽅法执⾏前不会检查缓存中是否存在相应的缓存,⽽是每次都会执⾏⽅法体,并将⽅法执⾏结果存储到缓存中,如果相应key值的缓存存在,则更新key对应的value值。
@CacheEvict可以标注在类或⽅法上,⽤于清除相应key值的缓存。
@Caching可以标注在类或⽅法上,它有三个属性cacheable、put、evict分别⽤于指定@Cacheable、@CachePut和@CacheEvict当需要在类上或⽅法上同时使⽤多个注解时,可以使⽤@Caching,如:@Caching(cacheable=@Cacheable("User"), evict = {@CacheEvict("Member"), @CacheEvict(value = "Customer", allEntries = true)})@Cacheable的常⽤属性及说明如下表所⽰:@Cacheable属性说明key表⽰缓存的名称,必须指定且⾄少要有⼀个值,⽐如:@Cacheable(value=“Dept”)或@Cacheable(value={“Dept”,“Depts”})condition表⽰是否需要缓存,默认为空,表⽰所有情况都会缓存。
SpringCache的简介和使用
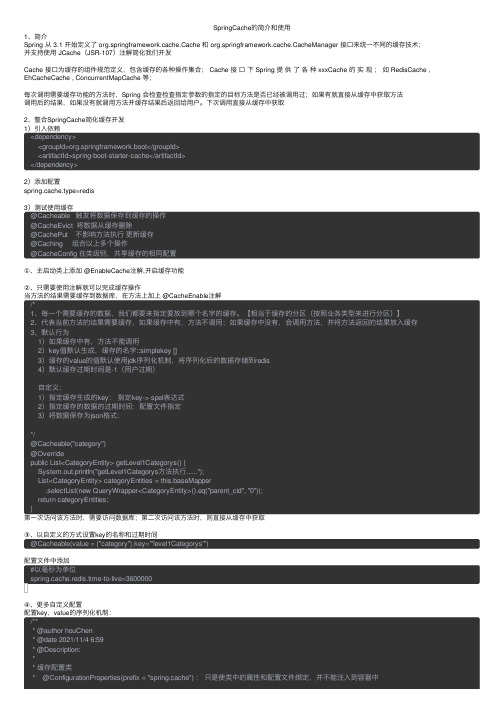
SpringCache的简介和使⽤1、简介Spring 从 3.1 开始定义了 org.springframework.cache.Cache 和 org.springframework.cache.CacheManager 接⼝来统⼀不同的缓存技术;并⽀持使⽤ JCache(JSR-107)注解简化我们开发Cache 接⼝为缓存的组件规范定义,包含缓存的各种操作集合; Cache 接⼝下 Spring 提供了各种 xxxCache 的实现;如 RedisCache ,EhCacheCache , ConcurrentMapCache 等;每次调⽤需要缓存功能的⽅法时,Spring 会检查检查指定参数的指定的⽬标⽅法是否已经被调⽤过;如果有就直接从缓存中获取⽅法调⽤后的结果,如果没有就调⽤⽅法并缓存结果后返回给⽤户。
下次调⽤直接从缓存中获取2、整合SpringCache简化缓存开发1)引⼊依赖<dependency><groupId>org.springframework.boot</groupId><artifactId>spring-boot-starter-cache</artifactId></dependency>2)添加配置spring.cache.type=redis3)测试使⽤缓存@Cacheable 触发将数据保存到缓存的操作@CacheEvict 将数据从缓存删除@CachePut 不影响⽅法执⾏更新缓存@Caching 组合以上多个操作@CacheConfig 在类级别,共享缓存的相同配置①、主启动类上添加 @EnableCache注解,开启缓存功能②、只需要使⽤注解就可以完成缓存操作当⽅法的结果需要缓存到数据库,在⽅法上加上 @CacheEnable注解/*1、每⼀个需要缓存的数据,我们都要来指定要放到哪个名字的缓存。
memcached集成spring配置及使用

xmlns:context="/schema/context"
xmlns:jaxws="/jaxws"
</property>
<propertyname="nagle">
<value>${memcache.nagle}</value>源自</property>
<propertyname="socketTO">
<value>${memcache.socketTO}</value>
</property>
</bean>
this.memCachedClient = memCachedClient;
}
public String getMemCachedTest(String str) {
//从缓存中取数据
String value = (String) memCachedClient.get(str);
// memCachedClient.flushAll();
return string;
}
}
<constructor-arg>
<value>memCachedPool</value>
</constructor-arg>
<propertyname="servers">
<list>
<value>${memcache.server}</value>
Spring缓存注解@Cacheable、@CacheEvict、@CachePut使用
Spring缓存注解@Cacheable、@CacheEvict、@CachePut使⽤从3.1开始,Spring引⼊了对Cache的⽀持。
其使⽤⽅法和原理都类似于Spring对事务管理的⽀持。
Spring Cache是作⽤在⽅法上的,其核⼼思想是这样的:当我们在调⽤⼀个缓存⽅法时会把该⽅法参数和返回结果作为⼀个键值对存放在缓存中,等到下次利⽤同样的参数来调⽤该⽅法时将不再执⾏该⽅法,⽽是直接从缓存中获取结果进⾏返回。
所以在使⽤Spring Cache的时候我们要保证我们缓存的⽅法对于相同的⽅法参数要有相同的返回结果。
使⽤Spring Cache需要我们做两⽅⾯的事:n 声明某些⽅法使⽤缓存n 配置Spring对Cache的⽀持和Spring对事务管理的⽀持⼀样,Spring对Cache的⽀持也有基于注解和基于XML配置两种⽅式。
下⾯我们先来看看基于注解的⽅式。
1 基于注解的⽀持Spring为我们提供了⼏个注解来⽀持Spring Cache。
其核⼼主要是@Cacheable和@CacheEvict。
使⽤@Cacheable标记的⽅法在执⾏后Spring Cache将缓存其返回结果,⽽使⽤@CacheEvict标记的⽅法会在⽅法执⾏前或者执⾏后移除Spring Cache中的某些元素。
下⾯我们将来详细介绍⼀下Spring基于注解对Cache的⽀持所提供的⼏个注解。
1.1 @Cacheable@Cacheable可以标记在⼀个⽅法上,也可以标记在⼀个类上。
当标记在⼀个⽅法上时表⽰该⽅法是⽀持缓存的,当标记在⼀个类上时则表⽰该类所有的⽅法都是⽀持缓存的。
对于⼀个⽀持缓存的⽅法,Spring会在其被调⽤后将其返回值缓存起来,以保证下次利⽤同样的参数来执⾏该⽅法时可以直接从缓存中获取结果,⽽不需要再次执⾏该⽅法。
Spring在缓存⽅法的返回值时是以键值对进⾏缓存的,值就是⽅法的返回结果,⾄于键的话,Spring⼜⽀持两种策略,默认策略和⾃定义策略,这个稍后会进⾏说明。
SpringBoot整合Redis案例缓存首页数据、缓解数据库压力
SpringBoot整合Redis案例缓存⾸页数据、缓解数据库压⼒⼀、硬编码⽅式1、场景由于⾸页数据变化不是很频繁,⽽且⾸页访问量相对较⼤,所以我们有必要把⾸页数据缓存到redis中,减少数据库压⼒和提⾼访问速度。
2、RedisTemplateJedis是Redis官⽅推荐的⾯向Java的操作Redis的客户端,⽽RedisTemplate是Spring Data Redis中对Jedis api的⾼度封装。
Spring Data Redis是spring⼤家族的⼀部分,提供了在srping应⽤中通过简单的配置访问redis服务,对reids底层开发包(Jedis, JRedis, and RJC)进⾏了⾼度封装,RedisTemplate提供了redis各种操作、异常处理及序列化功能,⽀持发布订阅,并对spring cache进⾏了实现。
3、 引⼊redis<!-- spring boot redis缓存引⼊ --><dependency><groupId>org.springframework.boot</groupId><artifactId>spring-boot-starter-data-redis</artifactId></dependency><!-- lecttuce 缓存连接池--><dependency><groupId>mons</groupId><artifactId>commons-pool2</artifactId></dependency>4、添加redis连接配置spring:redis:host: ipport: 端⼝号(默认6379)database: 1password: #默认为空lettuce:pool:max-active: 20 #最⼤连接数,负值表⽰没有限制,默认8max-wait: -1 #最⼤阻塞等待时间,负值表⽰没限制,默认-1max-idle: 8 #最⼤空闲连接,默认8min-idle: 0 #最⼩空闲连接,默认05、 配置Redis/*** 我们⾃定义⼀个 RedisTemplate,设置序列化器,这样我们可以很⽅便的操作实例对象。
程序员看了不后悔一步一步轻松实现SpringBoot整合Redis缓存

程序员看了不后悔一步一步轻松实现SpringBoot整合Redis缓存前言随着技术的发展,程序框架也越来越多,非常考验程序的学习能力,但是框架的产生在程序员开发过程中也提供很多便利,框架可以为程序员减少许多工作量,比如spring boot 、mybatis等都可以提高开发人员的工作效率,今天就来聊聊spring boot与redis 的整合。
一、基本概况为什么使用缓存缓存是在内存中存储的数据备份,当数据没有发生本质变化时就可以直接从内存中查询数据,而不用去数据库查询(在磁盘中)CPU读取内存的速度要比读取磁盘快,可以提高效率Redis缓存Remote Dictionnary Server(远程数据服务),是一款内存高速缓存数据库。
五种常用数据类型: String(字符串)、List(列表)、Set(集合)、Hash(散列)、ZSet(有序集合)可持久化:一边运行,一边向硬盘备份一份,防止断电等偶然情况,导致内存中数据丢失二、搭建Redis环境1.下载Redis平台限制不能贴链接,自行去官网下载哈!2.设置Redis开机自启在解压好的文件夹下输入cmd命令window下安装Redis服务redis-server --service-install redis.windows.conf检查安装是否成功搜索服务点击设置为开机自启三、新建SpringBoot项目新建好项目的童鞋可以自动跳过添加web依赖选择数据库依赖选择项目位置,点击finish四、使用StringRedisTemplate操作Redis1.pom.xml文件引入坐标<!--redis依赖包--> <dependency><groupId>org.springframework.boot</groupId> <artifactId>spring-boot-starter-data-redis</artifactId> </dependency>2.在appliaction.properties配置redis数据库连接信息#redis配置#Redis服务器地址spring.redis.host=127.0.0.1#Redis服务器连接端口spring.redis.port=6379#Redis数据库索引(默认为0)spring.redis.database=03.在SpringbootdemoApplicationTests中测试操作Redis@SpringBootTestclass SpringbootdemoApplicationTests {@Autowired StringRedisTemplate stringRedisTemplate; //操作key-value都是字符串,最常用@Test public void test01(){ //字符串操作stringRedisTemplate.opsForValue().append("msg","coder"); //列表操作stringRedisTemplate.opsForList().leftPush("mylist","1"); stringRedisTemplate.opsForList().leftPush("mylist","2"); }}对于Redis的五大常用数据类型都提供了方法String(字符串)、List(列表)、Set(集合)、Hash(散列)、ZSet(有序集合)stringRedisTemplate.opsForValue();[String(字符串)]stringRedisTemplate.opsForList();[List(列表)]stringRedisTemplate.opsForSet();[Set(集合)]stringRedisTemplate.opsForHash();[Hash(散列)]stringRedisTemplate.opsForZSet();[ZSet(有序集合)]使用RedisDesktopManager可视化工具查看结果StringTemplate类中方法存取的key-value值是String类型,RedisTemplate中key-value值是Object类型,RedisTemplate是StringTemplate父类下面就用RedisTemplate实现从MySQL数据库取出数据放到Redis缓存五、使用RedisTemplate操作Redis1.项目目录结构2.建立与数据库相关的类建表的sql脚本application.properties配置文件MySQL及Redis连接的相关配置User类采用ORM思想,属性和数据库字段对应package com.thinkcoder.bean;import java.io.Serializable;importjava.util.Date;/*** @ClassName User * @Author Think-Coder * @Data 2020/5/27 10:35* @Version 1.0 */public class User implements Serializable { private Integer id; private String username; private Date birthday; private String sex;private String address; //getter和setter方法 public Integer getId() {returnid;} public void setId(Integer id) {this.id = id;} public StringgetUsername() {return username;} public void setUsername(String username){ername = username;} public Date getBirthday() {return birthday;}public void setBirthday(Date birthday) {this.birthday = birthday;} publicString getSex() {return sex;} public void setSex(String sex) {this.sex = sex;}public String getAddress() {return address;} public void setAddress(Stringaddress) {this.address = address;} //重写toString方法 @Override publicString toString() { return "User{" + "id=" + id +", username='" + username + '\'' + ", birthday=" + birthday + ", sex='" + sex + '\'' + ", address='" + address + '\'' + '}'; }}UserMapper类使用注解方法操作数据库@Mapperpublic interface UserMapper {@Select("SELECT * FROM user WHERE id =#{id}") User findById(int id);}3.MyRedisConfig自定义序列化类,将存储在Redis的对象序列化为json格式,不会产生乱码@Configuration@EnableAutoConfigurationpublic class MyRedisConfig {@Beanpublic RedisTemplate<Object, User> redisTemplate(RedisConnectionFactory redisConnectionFactory){ RedisTemplate<Object, User> template = newRedisTemplate<>(); template.setConnectionFactory(redisConnectionFactory);Jackson2JsonRedisSerializer<User> ser = newJackson2JsonRedisSerializer<>(User.class);template.setDefaultSerializer(ser); return template; }}4.工具类RedisUtil类//工具类中使用Autowired注解需要加上Compoent@Componentpublic class RedisUtil{@Autowired RedisTemplate redisTemplate; //key-value是对象的 //判断是否存在key public boolean hasKey(String key){ returnredisTemplate.hasKey(key); } //从redis中获取值 public Object get(String key){ return redisTemplate.opsForValue().get(key); } //向redis插入值 public boolean set(final String key,Object value){ boolean result = false; try{ redisTemplate.opsForValue().set(key,value); result = true; }catch (Exceptione){ e.printStackTrace(); } return result; }}5.sevice包代码IUserService@Servicepublic interface IUserService {//根据id查用户信息 UserfindById(int id);}UserService实现类@Servicepublic class UserServiceImpl implements IUserService {User user;@Autowired UserMapper userMapper; @Autowired private RedisUtil redisUtil; @Override public User findById(int id) { String key = "user"+id;if(redisUtil.hasKey(key)) { user = (User)redisUtil.get(key); System.out.println("查询的是缓存"); }else{ user =userMapper.findById(id); System.out.println("查询的是数据库"); System.out.println(redisUtil.set(key,user) ? "插入成功" : "插入失败"); } return user; }}erController类@RestControllerpublic class UserController {@Autowired IUserService userService; @GetMapping("/user/{id}") public UserfindById(@PathVariable("id") Integer id){ User user =userService.findById(id); return user; }}7.测试打开浏览器输入下方url查看控制台输出Redis Desktop Manager显示结果六、总结整体来说,操作Redis是两个类,RedisTemplate类和StringTemplate类,为父子关系,提供的方法正好对应操作Redis数据类型的指令,所以要把数据类型及常用的指令练熟。
详解Spring缓存注解@Cacheable,@CachePut,@CacheEvict使用

详解Spring缓存注解@Cacheable,@CachePut,@CacheEvict使⽤注释介绍@Cacheable@Cacheable 的作⽤主要针对⽅法配置,能够根据⽅法的请求参数对其结果进⾏缓存@Cacheable 作⽤和配置⽅法参数解释examplevalue 缓存的名称,在 spring 配置⽂件中定义,必须指定⾄少⼀个例如:@Cacheable(value=”mycache”)@Cacheable(value={”cache1”,”cache2”}key 缓存的 key,可以为空,如果指定要按照SpEL 表达式编写,如果不指定,则缺省按照⽅法的所有参数进⾏组合@Cacheable(value=”testcache”,key=”#userName”)condition 缓存的条件,可以为空,使⽤ SpEL 编写,返回 true或者 false,只有为 true 才进⾏缓存@Cacheable(value=”testcache”,condition=”#userName.length()>2”)实例@Cacheable(value=”accountCache”),这个注释的意思是,当调⽤这个⽅法的时候,会从⼀个名叫 accountCache 的缓存中查询,如果没有,则执⾏实际的⽅法(即查询数据库),并将执⾏的结果存⼊缓存中,否则返回缓存中的对象。
这⾥的缓存中的 key 就是参数 userName,value 就是Account 对象。
“accountCache”缓存是在 spring*.xml 中定义的名称。
@Cacheable(value="accountCache")// 使⽤了⼀个缓存名叫 accountCachepublic Account getAccountByName(String userName) {// ⽅法内部实现不考虑缓存逻辑,直接实现业务System.out.println("real query account."+userName);return getFromDB(userName);}@CachePut@CachePut 的作⽤主要针对⽅法配置,能够根据⽅法的请求参数对其结果进⾏缓存,和 @Cacheable 不同的是,它每次都会触发真实⽅法的调⽤@CachePut 作⽤和配置⽅法参数解释examplevalue 缓存的名称,在spring 配置⽂件中定义,必须指定⾄少⼀个@CachePut(value=”my cache”)key 缓存的key,可以为空,如果指定要按照SpEL 表达式编写,如果不指定,则缺省按照⽅法的所有参数进⾏组合@CachePut(value=”testcache”,key=”#userName”)缓存的条件,可以为空,使⽤condition SpEL 编写,返回true 或者false,只有为 true 才进⾏缓存@CachePut(value=”testcache”,condition=”#userName.length()>2”)参数解释example实例@CachePut 注释,这个注释可以确保⽅法被执⾏,同时⽅法的返回值也被记录到缓存中,实现缓存与数据库的同步更新。
spring中的缓存--Caching
spring中的缓存--Caching1.spring从3.1开始⽀持缓存功能。
spring ⾃带的缓存机制它只在⽅法上起作⽤,对于你使⽤其他持久化层的框架来讲,是没有影响的,相对来讲这种缓存⽅式还是不错的选择。
2.提供缓存的接⼝:org.springframework.cache.Cache ;org.springframework.cache.CacheManager这两个接⼝都在context中,⼀个是⽤来提供缓存的,⼀个是⽤来提供管理缓存的。
3.缓存是使⽤键值对的形式存在的,对应Java中就要使⽤Map<K,V>这种数据结构来处理,推荐使⽤java.util.concurrent.ConcurrentMap来存放。
4.注解:在上⾯的注解中我们常⽤到的有@Cacheable,@CacheEvict,@CachePut这3个,我们⽬前也只学这3个5.@Cacheable:⽤来定义缓存的。
常⽤到是value,key;分别⽤来指明缓存的名称和⽅法中参数,对于value你也可以使⽤cacheName,在查看源代码是我们可以看到:两者是指的同⼀个东西。
@CacheEvict:⽤来清理缓存。
常⽤有cacheNames,allEntries(默认值false);分别代表了要清除的缓存名称和是否全部清除(true代表全部清除)。
@CachePut:⽤来更新缓存,⽤它来注解的⽅法都会被执⾏,执⾏完后结果被添加到缓存中。
该⽅法不能和@Cacheable同时在同⼀个⽅法上使⽤。
6.对于@Caching注解来讲,如果有两种不同的需求,都是放在同⼀个⽅法上,这种需求如果只是使⽤@CacheEvict或者@CachePut是⽆法实现,因为他们不能多样化的作⽤在同⼀个⽅法上。
可以使⽤@Caching()});@Caching源代码如下:7.下⾯我们来看看CacheManager这个接⼝,源代码如下:不难看出,最终⽬的还是⽤来获取Cache这个对象的,⽽我们缓存的数据都放在Cache中,部分源代码如下:8.上⾯的⼀些基本的东西都已说完,下⾯看看怎么配置,让缓存真正的起作⽤:来看看官⽅⽂档给的写法,⾥⾯重要的是spring-cache.xsd其中的注解添加完,你就可以中代码中使⽤了:在使⽤spring中缓存时,我们⼀般选择SimpleCacheManager这个类。
SpringBoot中使用Redis的完整实例

SpringBoot中使⽤Redis的完整实例⼀.在SpringBoot中使⽤Redis的⼀套军体拳1.导包<dependency><groupId>org.springframework.boot</groupId><artifactId>spring-boot-starter-data-redis</artifactId><version>2.2.0.RELEASE</version></dependency>2.导⼊⼯具类package com.cbsd.util;import java.util.concurrent.TimeUnit;import org.springframework.beans.factory.annotation.Autowired;import org.springframework.data.redis.core.HashOperations;import org.springframework.data.redis.core.ListOperations;import org.springframework.data.redis.core.RedisTemplate;import org.springframework.data.redis.core.SetOperations;import org.springframework.data.redis.core.ValueOperations;import org.springframework.data.redis.core.ZSetOperations;import ponent;import com.alibaba.fastjson.JSON;/*** redisTemplate封装** @author gxp*/@Componentpublic class RedisUtil {// private Logger logger = LoggerFactory.getLogger(this.getClass());@Autowiredprivate RedisTemplate<String, Object> redisTemplate;@Autowiredprivate ValueOperations<String, String> valueOperations;@SuppressWarnings("unused")@Autowiredprivate HashOperations<String, String, Object> hashOperations;@SuppressWarnings("unused")@Autowiredprivate ListOperations<String, Object> listOperations;@SuppressWarnings("unused")@Autowiredprivate SetOperations<String, Object> setOperations;@SuppressWarnings("unused")@Autowiredprivate ZSetOperations<String, Object> zSetOperations;/** 默认过期时长,单位:秒 */public final static long DEFAULT_EXPIRE = 60 * 60 * 24;/** 不设置过期时长 */public final static long NOT_EXPIRE = -1;public void set(String key, Object value, long expire){valueOperations.set(key, toJson(value));if(expire != NOT_EXPIRE){redisTemplate.expire(key, expire, TimeUnit.SECONDS);}}public void set(String key, Object value){set(key, value, DEFAULT_EXPIRE);}public <T> T get(String key, Class<T> clazz, long expire) {String value = valueOperations.get(key);if(expire != NOT_EXPIRE){redisTemplate.expire(key, expire, TimeUnit.SECONDS);}return value == null ? null : fromJson(value, clazz);}public <T> T get(String key, Class<T> clazz) {return get(key, clazz, NOT_EXPIRE);}public String get(String key, long expire) {String value = valueOperations.get(key);if(expire != NOT_EXPIRE){redisTemplate.expire(key, expire, TimeUnit.SECONDS);}return value;}public String get(String key) {return get(key, NOT_EXPIRE);}public void delete(String key) {redisTemplate.delete(key);}/*** Object转成JSON数据*/private String toJson(Object object){if(object instanceof Integer || object instanceof Long || object instanceof Float || object instanceof Double || object instanceof Boolean || object instanceof String){ return String.valueOf(object);}return JSON.toJSONString(object);}/*** JSON数据,转成Object*/private <T> T fromJson(String json, Class<T> clazz){return JSON.parseObject(json, clazz);}}3.在SpringBoot的配置⽂件中配置redis的服务器(1).yml配置⽂件中spring:redis:open: true # 是否开启redis缓存 true开启 false关闭database: 0host: redis服务器地址port: redis服务器端⼝号password: redis服务器密码 # 密码(默认为空)timeout: 15000 # 连接超时时长(毫秒)jedis:pool:max-active: 1000 # 连接池最⼤连接数(使⽤负值表⽰没有限制)max-wait: -1 # 连接池最⼤阻塞等待时间(使⽤负值表⽰没有限制)max-idle: 10 # 连接池中的最⼤空闲连接min-idle: 5 # 连接池中的最⼩空闲连接(2).properties配置⽂件中#### 连接redis⾮关系型数据库配置spring.redis.host=redis服务器地址spring.redis.password=redis服务器密码,默认为空spring.redis.port=redis服务器端⼝号spring.redis.timeout=20000 //超时时间spring.redis.database=6spring.redis.lettuce.pool.min-idle=0spring.redis.lettuce.pool.max-idle=3000spring.redis.lettuce.pool.max-wait=10000spring.redis.lettuce.pool.max-active=30004.使⽤还是补上使⽤的⽅法吧1.存⼊数据的⽅法/**** @param key 同理map的key,可以根据对应的key取到对应的值* @param value 要存⼊redis的数据* @param expire 超时时间,就是数据会在redis⾥⾯存多久,可以不传,就是永不超时*/public void set(String key, Object value, long expire){valueOperations.set(key, toJson(value));if(expire != NOT_EXPIRE){redisTemplate.expire(key, expire, TimeUnit.SECONDS);}}2.取出数据的⽅法/**** @param key 存⼊数据时,设置的key,根据可以取到对应的数据* @return*/public String get(String key) {return get(key, NOT_EXPIRE);}3.还有个删除就是调⽤delete⽅法,跟get⽅法⼀样传⼀个key过去,就可以删除对应的数据了到此这篇关于SpringBoot中使⽤Redis的⽂章就介绍到这了,更多相关SpringBoot使⽤Redis内容请搜索以前的⽂章或继续浏览下⾯的相关⽂章希望⼤家以后多多⽀持!。
SpringBoot项目中使用redis缓存的方法步骤

SpringBoot项⽬中使⽤redis缓存的⽅法步骤本⽂介绍了SpringBoot项⽬中使⽤redis缓存的⽅法步骤,分享给⼤家,具体如下:Spring Data Redis为我们封装了Redis客户端的各种操作,简化使⽤。
- 当Redis当做数据库或者消息队列来操作时,我们⼀般使⽤RedisTemplate来操作- 当Redis作为缓存使⽤时,我们可以将它作为Spring Cache的实现,直接通过注解使⽤1.概述在应⽤中有效的利⽤redis缓存可以很好的提升系统性能,特别是对于查询操作,可以有效的减少数据库压⼒。
具体的代码参照该2.添加引⽤在build.gradle加⼊compile('org.springframework.boot:spring-boot-starter-data-redis')SpringBoot会⾃动引⼊redis相关的jar包。
加⼊该引⽤后,需要在本地安装redis并启动,否则程序启动时会报错。
3.通过注解启⽤缓存在SpringBoot中启⽤redis⾮常简单,只需要在Application主类上添加@EnableCaching注解,之后在需要启⽤缓存的查询⽅法上添加@Cacheable注解。
@SpringBootApplication@EnableCachingpublic class DemoApplication implements CommandLineRunner{...查询接⼝:public interface TestRepository extends JpaRepository<Test, Integer> {@Cacheable(value = "testCache")public Test findOne(Integer id);}实体类需要实现Serializable接⼝,否则程序会报错,因为⽆法把java对象序列化到redis中。
springboot缓存管理器(CacheManager)讲解——超详细!!!

springboot缓存管理器(CacheManager)讲解——超详细⼀、引⼊随着java的慢慢学习,缓存的使⽤也越来越多。
我们使⽤缓存⼤多数是通过api的⽅式来操作,厉害的⼈也可以⾃⼰⾃定义注解来简化操作,但是看完这篇博客,以后操作注解就不会辣么⿇烦了。
因为spring中提供了CacheManager接⼝和⼀些注解⽅便我们来操作。
在我们接触的缓存⼤致两种,本地缓存与中间件缓存。
spring对常⽤的缓存都进⾏了⼀些封装。
可以通过ctrl+h查看CacheManager的继承类,主要有SimplerCacheManager(内部⼀个CurrentMap)与RedisCacheManager、EhCacheManager等。
⼆、demo操作技巧在⾃⼰动⼿写demo之前,希望能知道⼀些基础知识。
我们操作缓存是需要CacheManager与以下四种注解配合的:1. EnableCache开启Cache注解功能。
2. Cacheable根据键从缓存中取值,存在获取到后直接返回。
键不存在则执⾏⽅法,将返回结果放⼊到缓存中。
3. CachePut根据键从缓存中取值,⽆论如何,⽅法都会被执⾏,且返回值存⼊缓存中4. CacheEvict执⾏⽅法后,删除缓存中数据以上四种注解,除去第⼀个写在类上,后⾯三个都是写在⽅法上,常⽤的参数如下:1. value/cacheNames定义缓存的名字2. 定义缓存的名字3. keykey 属性是来指定缓存数据所使⽤的的 key,默认使⽤的是⽅法调⽤传过来的参数作为 key4. condition、unless⽀持SqEl表达式,都是判断条件,是否使⽤缓存案列:@Cacheable(cacheNames="test",,key = "#test = 3")此时给注解表⽰会获取键值为test::3的key,如果不存在,就执⾏⽅法,将结果放⼊缓存中。
simple-spring-memcached-3.0.x注解详解
simple-spring-memcached-3.0.x注解详解simple-spring-memcached-3.0.x 注解详解@CacheName: 指定缓存实例注解@CacheKeyMethod:缓存key生成注解---------------------------------读取-------------------------------------------@ReadThroughAssignCache(assignedKey = "SomePhatKey", namespace = "Echo", expiration = 3000): 读取指定key缓存@ReadThroughSingleCache(namespace = SINGLE_NS, expiration = 0):读取单个缓存@ReadThroughMultiCache(option = @ReadThroughMultiCacheOption(generateKeysFromResult = true)):读取多个缓存@ReadThroughMultiCacheOption(generateKeysFromResult = true) 读取多个缓存操作generateKeysFromResult 通过结果生成key---------------------------------更新-------------------------------------------@UpdateAssignCache(assignedKey = "SomePhatKey", namespace = "Echo", expiration = 3000): 指定key更新缓存@UpdateSingleCache(namespace = SINGLE_NS, expiration = 2): 更新单个缓存(namespace 命名空间, expiration 失效时间单位秒)@UpdateMultiCache(namespace = "Bravo", expiration = 300): 更新多个缓存---------------------------------失效-------------------------------------------@InvalidateAssignCache(assignedKey = "SomePhatKey", namespace = "Echo") : 指定key失效缓存@InvalidateSingleCache(namespace = SINGLE_NS):失效单个缓存@InvalidateMultiCache(namespace = "Delta") : 失效多个缓存---------------------------------参数-------------------------------------------@ParameterDataUpdateContent: 标记方法的参数作为更新内容。
SpringBoot设置并使用缓存的步骤
SpringBoot设置并使⽤缓存的步骤⼏个缓存注解的作⽤:@Cacheable:将⽅法的返回结果根据key指定的键保存在缓存中,以后要获取相同的数据直接从缓存中共获取cacheNames/value:指定Cache组件名称key:指定缓存时使⽤的key,默认使⽤⽅法参数值,可以使⽤#a0、#p0、#参数名等,⽀持SpEL表达式,root可省略keyGenerator:指定key的⽣成器的组件id,如⾃定义的KeyGeneratorcacheManager:指定缓存管理器cacheResolver:指定缓存解析器condition:指定在哪种条件下缓存,如condition = “#id>=1”在参数>=1时缓存unless:指定该条件为真时不缓存sync:指定是否使⽤异步模式@CachePut:不管缓存中是否有需要的数据,都会执⾏该注解标注的⽅法,并将结果更新到缓存,属性见上@CacheEvit:执⾏⽅法后,清除key指定的缓存allEntries:默认为false,值为true,删除所有缓存beforeInvocation:默认为false,值为true,在⽅法调⽤之前清除缓存@CacheConfig:定义⼀些通⽤或公共的规则,如cacheNames、keyGenerator等可使⽤的SpEL表达式:使⽤缓存的步骤:(1)创建⼀个Spring Boot应⽤,勾选Cache、Web、MySQL、Mybatis模块,在主程序类上添加注解,开启基于注解的缓存@MapperScan(basePackages = "com.youngpain.cache.mapper")@SpringBootApplication@EnableCaching(2)创建JavaBean,和数据库中的表对应,并配置数据源spring:datasource:url: jdbc:mysql://localhost:3306/mybatis_databaseusername: rootpassword: 1741248769driver-class-name: com.mysql.jdbc.Driverredis:host: 39.108.114.57#开启驼峰命名法mybatis:configuration:map-underscore-to-camel-case: truelogging:level:com.youngpain.cache.mapper: debug(3)创建mapper接⼝进⾏增删改查操作/*** 部门表的增删改查操作*/public interface DepartmentMapper {@Insert("insert into department(id,depart_name,depart_build) values(#{id},#{depart_name},#{depart_build})")void insertDepartment(Department department);@Delete("delete from department where id=#{id}")void deleteDepartment(Integer id);@Update("update department set depart_name=#{departName},depart_build=#{departBuild} where id=#{id}")void updateDepartment(Department department);@Select("select * from department where id=#{id}")Department getDepartmentById(Integer id);}(4)创建service@Service@CacheConfig(cacheNames = {"departs"})public class DepartmentService {@AutowiredDepartmentMapper departmentMapper;@Cacheable(key = "#a0.id")public void insertDepartment(Department department) {departmentMapper.insertDepartment(department);}@CacheEvict(key = "#p0")public void deleteDepartment(Integer id) {departmentMapper.deleteDepartment(id);}@CachePut(key = "#a0.id")public Department updateDepartment(Department department) {departmentMapper.updateDepartment(department);return department;}@Cacheable(key = "#id", condition = "#p0>=1")public Department getDepartmentById(Integer id) {return departmentMapper.getDepartmentById(id);}}(5)创建controller@Controllerpublic class DepartmentController {@AutowiredDepartmentService departmentService;@GetMapping("/index")public String index() {return "index";}@GetMapping("/deleteDepart/{id}")public String deleteDepart(@PathVariable("id") Integer id, Model model) {model.addAttribute("condition", "delete");Department delete = departmentService.getDepartmentById(id);model.addAttribute("department", delete);departmentService.deleteDepartment(id);return "success";}@PostMapping("/updateDepart")public String updateDepart(Department department, Model model) {model.addAttribute("condition", "update");Department update = departmentService.updateDepartment(department);model.addAttribute("department", update);return "success";}@GetMapping("/getDepart/{id}")public String getDepartmentById(@PathVariable("id") Integer id, Model model) {model.addAttribute("condition", "delete");Department get = departmentService.getDepartmentById(id);model.addAttribute("department", get);return "success";}}(6)测试结果:@Cacheable:第⼀次查询数据,控制台发出sql语句,之后再查询直接从缓存中获取@CachePut:调⽤⽅法修改某个数据后,再次查询该数据是从缓存中获取的更新后的数据@CacheEvict:调⽤该⽅法后,再次查询某个数据需要重新发出sql语句查询ps:之前只是⽤markdown记笔记,今天第⼀次⽤markdown写⽂章,写起来好舒服啊QAQ总结以上就是这篇⽂章的全部内容了,希望本⽂的内容对⼤家的学习或者⼯作具有⼀定的参考学习价值,谢谢⼤家对的⽀持。
springredis整合及操作

springredis整合及操作Redi+Spring整合前言Redi是一个key-value存储系统。
和Memcached类似,它支持存储的value类型相对更多,包括tring(字符串)、lit(链表)、et(集合)、zet(ortedet--有序集合)和hah(哈希类型)。
这些数据类型都支持puh/pop、add/remove及取交集并集和差集及更丰富的操作,而且这些操作都是原子性的。
在此基础上,redi支持各种不同方式的排序。
与memcached一样,为了保证效率,数据都是缓存在内存中。
区别的是redi会周期性的把更新的数据写入磁盘或者把修改操作写入追加的记录文件,并且在此基础上实现了mater-lave(主从)同步。
Redi是一个高性能的key-value数据库。
redi的出现,很大程度补偿了memcached这类key/value存储的不足,在部分场合可以对关系数据库起到很好的补充作用。
它提供了Java,C/C++,C#,PHP,JavaScript,Perl,Object-C,Python,Ruby,Erlang等客户端,使用很方便。
Redi支持主从同步。
数据可以从主服务器向任意数量的从服务器上同步,从服务器可以是关联其他从服务器的主服务器。
这使得Redi可执行单层树复制。
存盘可以有意无意的对数据进行写操作。
由于完全实现了发布/订阅机制,使得从数据库在任何地方同步树时,可订阅一个频道并接收主服务器完整的消息发布记录。
同步对读取操作的可扩展性和数据冗余很有帮助。
redi的官网地redi.iopring+redi集成实例1.所需jar文件pring-data-redi-1.4.2.RELEASE.jar、jedi-2.5.2.jar2.pring配置redi我们需要创建一个新的CacheManagerbean来管理redi缓存,Redi 不是应用的共享内存,它只是一个内存服务器,因此我们需要将应用连接到它并使用某种“语言”进行交互,因此我们还需要一个连接工厂。
springboot+springcache实现两级缓存(redis+caffeine)

springboot+springcache实现两级缓存(redis+caffeine)spring boot中集成了spring cache,并有多种缓存⽅式的实现,如:Redis、Caffeine、JCache、EhCache等等。
但如果只⽤⼀种缓存,要么会有较⼤的⽹络消耗(如Redis),要么就是内存占⽤太⼤(如Caffeine这种应⽤内存缓存)。
在很多场景下,可以结合起来实现⼀、⼆级缓存的⽅式,能够很⼤程度提⾼应⽤的处理效率。
内容说明:1. 缓存、两级缓存2. spring cache:主要包含spring cache定义的接⼝⽅法说明和注解中的属性说明3. spring boot + spring cache:RedisCache实现中的缺陷4. caffeine简介5. spring boot + spring cache 实现两级缓存(redis + caffeine)缓存、两级缓存简单的理解,缓存就是将数据从读取较慢的介质上读取出来放到读取较快的介质上,如磁盘-->内存。
平时我们会将数据存储到磁盘上,如:数据库。
如果每次都从数据库⾥去读取,会因为磁盘本⾝的IO影响读取速度,所以就有了像redis这种的内存缓存。
可以将数据读取出来放到内存⾥,这样当需要获取数据时,就能够直接从内存中拿到数据返回,能够很⼤程度的提⾼速度。
但是⼀般redis是单独部署成集群,所以会有⽹络IO上的消耗,虽然与redis集群的链接已经有连接池这种⼯具,但是数据传输上也还是会有⼀定消耗。
所以就有了应⽤内缓存,如:caffeine。
当应⽤内缓存有符合条件的数据时,就可以直接使⽤,⽽不⽤通过⽹络到redis中去获取,这样就形成了两级缓存。
应⽤内缓存叫做⼀级缓存,远程缓存(如redis)叫做⼆级缓存spring cache当使⽤缓存的时候,⼀般是如下的流程:从流程图中可以看出,为了使⽤缓存,在原有业务处理的基础上,增加了很多对于缓存的操作,如果将这些耦合到业务代码当中,开发起来就有很多重复性的⼯作,并且不太利于根据代码去理解业务。
- 1、下载文档前请自行甄别文档内容的完整性,平台不提供额外的编辑、内容补充、找答案等附加服务。
- 2、"仅部分预览"的文档,不可在线预览部分如存在完整性等问题,可反馈申请退款(可完整预览的文档不适用该条件!)。
- 3、如文档侵犯您的权益,请联系客服反馈,我们会尽快为您处理(人工客服工作时间:9:00-18:30)。
simple-spring-memcached统一缓存的使用实例如何在一个中型的Java应用中使用Memcached缓存数据不是个简单的问题。
当某个缓存数据需要在多个系统间共享和失效时,必须要有统一的规划才能保证不出错。
经过各种实践,目前系统在使用Memcached缓存数据全部采用Simple-Spring-Memcached框架来完成,并统一规划各系统Spring和Cache key的配置。
下面对在使用过程中需要注意的点做一个详细说明:Cache整体规划目前我们系统中有两个不同的Memcached服务器:1session memcached服务器:主要存储用户的session2app memcached服务器: 主要用于缓存应用数据由于应用所有的缓存数据都放在app缓存上,为避免各应用的缓存数据出现冲突,必须规划好它们的命名空间。
所幸Simple-Spring-Memcached支持namespace的概念,因此对各应用的namespace前缀规定如下:应用namespace前缀goodscenter goodscentertrade tradeuic uic这个namespace在生成key时,将放在最前面,稍后会有例子详述。
同一个应用中存在许多需要缓存的对象,因此约定namespace前缀之后再加上缓存对象的类名。
例子如下:应用缓存对象完整的namespace 最终生成的keytrade TcRate (id为42) trade:TcRate trade:TcRate:12goodscenter GoodsDo(id为42) goodscenter:GoodsDo goodscenter:GoodsDo:12key的生成规则Simple-Spring-Memcached提供的针对单个对象的注解接口提供了两种key生成方式,详情见此文3AssignCache类注解通过assignKey指定cache的key4SingleCache类注解通过ParameterValueKeyProvider注解指定生成key的方法对于第一种只要求必须保证key不与其它的冲突,且namesapce符合规则。
第二种时,约定缓存的数据对象必须实现有带CacheKeyMethod的cacheKey方法,参考实现如下:@CacheKeyMethodpublic String cacheKey() {return this.getId();}目前@CacheKeyMethod只支持返回String的方法,需要改造成可接受Long,Integer 型的。
当前必须有单独的方法来作为缓存Key的生成器真实存放到Memcached的key的生成规则是:namespace:key。
如goodscenter的id为42的domain对象GoodsDo,按上述方式生成的key为:goodscenter:GoodsDo:42spring配置说明关于Simple-Spring-Memcached具体XML配置如下:<beans xmlns="/schema/beans"xmlns:xsi="/2001/XMLSchema-instance"xmlns:aop="/schema/aop"xmlns:context="/schema/context"xsi:schemaLocation="/schema/beans/schema/beans/spring-beans-3.0.xsd/schema/context/schema/context/spring-context.xsd/schema/aop/schema/aop/spring-aop-3.0.xsd"><import resource="classpath:simplesm-context.xml"/><aop:aspectj -autoproxy/><context:annotation -config/><bean name="appCache" class="com.google.code.ssm.CacheFactory"><property name="cacheClientFactory"><beanclass="com.google.code.ssm.providers.xmemcached.MemcacheClientFactoryImpl"/> </property><property name="addressProvider"><bean class="com.google.code.ssm.config.DefaultAddressProvider"><!--memcached服务器ip:port 可以是多个,格式为:127.0.0.1:11211,192.168.100.11:11211--><property name="address" value="{memcached.server}"/></bean></property><property name="configuration"><!-- memcached连接器的配置,具体的配置项参考这个类 --><beanclass="com.google.code.ssm.providers.XMemcachedConfiguration"><!--是否使用一致性哈希--><property name="consistentHashing" value="true"/><!--连接池--><property name="connectionPoolSize" value="10"/><property name="optimizeGet" value="true"/></bean></property><property name="cacheName"><!-- 该Memcached配置的Cache名称一个应用中存在多个Memcached时,各个配置的cacheName必须不同。
如果该值未设,系统默认为default --><value>appCache</value></property></bean></beans>Java代码中使用说明a. 注解方式使用直接使用注解来处理缓存及失效非常简单,下面是相应的例子:读取缓存:EventGoodsServiceClientImpl.java@Override@ReadThroughSingleCache(namespace = "goodscenter:EventGoodsDo", expiration = 60)@CacheName("appCache")public EventGoodsDo queryEventGoodsDo(@ParameterValueKeyProvider(order = 0) long goodsId, @ParameterValueKeyProvider(order = 1) long eventId) {return getRemoteServiceBean().queryEventGoodsDo(goodsId, eventId);更新缓存:EventGoodsDaoImpl.java@BridgeMethodMappings(value = {@BridgeMethodMapping(erasedParamTypes={Object.class},targetParamTypes ={com.hqb360.promotion.dao.entity.EventGoods.class},methodName = "update")})public class EventGoodsDaoImpl<EventGoods> extendsBaseDaoImpl<EventGoods> implements EventGoodsDao<EventGoods> {@Overridepublic DaoStatementName getDaoStatementName() {return new DefaultDaoStatementName() {public String getDomainName() {return "EventGoods";}};}@Override@InvalidateSingleCache(namespace = "goodscenter:EventGoodsDo")@CacheName("appCache")public void update(@ParameterValueKeyProvider EventGoods obj) throws DataAccessException {super.update(obj);}EventGoods.java@CacheKeyMethodpublic String getCacheKey() {return goodsId + CACHE_ID_SEPARATOR + eventId;}public static final String CACHE_ID_SEPARATOR = "/";上述代码需要注意的点5多个方法参数都作为cacheKey时,ParameterValueKeyProvider必须指明其order 值6多个方法参数作为cacheKey时,参数之间在/ 号分隔7EventGoodsDaoImpl类中的update方法参数接收的是一个泛型对象,因此必须在该类上配置BridgeMethodMappings。
