Ubuntu_10.04下编译Android源码
Vlc for android 源码在Ubuntu下编译
Vlc for android 源码在Ubuntu下编译1.Android是在Java基础上开发的,所以先配置好Java代码能够运行的环境,再配置好Android代码运行的环境。
(1)下载好Java jdk,记得是Linux版本的,而且区分32位和64位,然后解压缩安装。
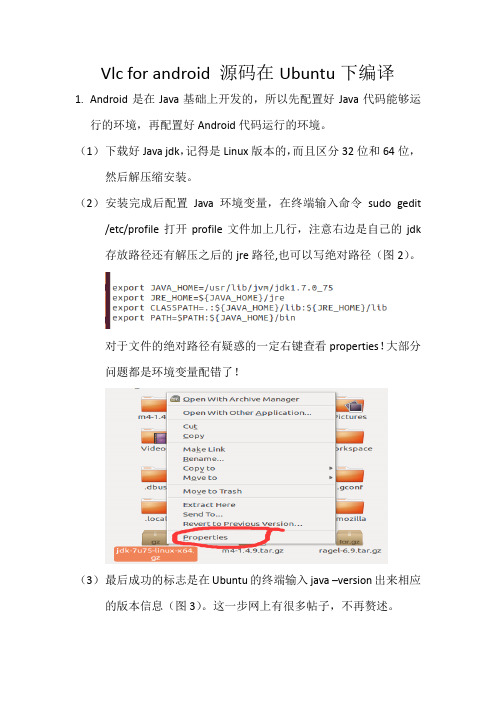
(2)安装完成后配置Java环境变量,在终端输入命令sudo gedit /etc/profile打开profile文件加上几行,注意右边是自己的jdk 存放路径还有解压之后的jre路径,也可以写绝对路径(图2)。
对于文件的绝对路径有疑惑的一定右键查看properties!大部分问题都是环境变量配错了!(3)最后成功的标志是在Ubuntu的终端输入java –version出来相应的版本信息(图3)。
这一步网上有很多帖子,不再赘述。
(4)配好Java运行环境之后就是配置Android了,下载好Android 的sdk和ndk解压缩之后修改环境变量即可。
注意:一般技术贴强调了ANDROID_SDK(sdk存放的绝对路径),ANDROID_NDK(ndk存放的绝对路径)还有PATH(sdk下的platform-tools和tools的绝对路径)这三个环境变量,但是我按照他们的方法却一直出错(这个帖子是良心好贴啊,有图有真相/s/blog_858820890101ekpc.html),后来在PATH之后把sdk,ndk的路径又附上去了才出来了正确结果,就是帖子里讲到的emulator –version和ndk-build检验成功!2.到这里我们走了万里长征的一小小步!可以开始来编译我们的源码了。
有一些帖子还说了编译源码前要安装的很多其他的东西,apache-ant (or ant), autoconf, automake, autopoint, cmake, gawk (or nawk), gcc, g++, libtool, git,m4, patch, pkg-config, ragel, /deng0zhaotai/article/details/37901557但是!不安装也可以大胆的去编译源码了,因为在编译过程中他会一步一步告诉你缺什么,缺什么就补上什么就好了。
Ubuntu下Android源码修改、编译及运行、launcher定制

环境Linux 版本:Ubuntu 11.04 (可由10.10的版本进行升级)64位系统GCC版本:gcc version 4.5.2Java版本:java version "1.6.0_26"下载android源码前注意:1、保证Ubuntu系统中的容量在80G左右,以保证足够的空间来存放android源码以及编译后的相关文件。
2、保证Ubuntu系统进行Internet访问。
联网方法:采用拨号进行连接。
相关操作步骤如下所示:1、虚拟机→设置→硬件→网络适配器→网络连接→桥接2、启动Ubuntu系统,打开终端(在普通用户下),输入相关命令如下:$ pppoeconf //打开后输入上网账号跟密码,确认保存$ sudo pon dsl-provider //上网连接命令经过这两个步骤后就可以进行上网了。
Android源码编译所依赖的tools01.$ sudo apt-get update02.$ sudo apt-get -y install git-core03.$ sudo apt-get -y install gnupg04.$ sudo apt-get -y install sun-java6-jdk flex05.$ sudo apt-get -y install bison06.$ sudo apt-get -y install gperf07.$ sudo apt-get -y install libsdl-dev08.$ sudo apt-get -y install libesd0-dev09.$ sudo apt-get -y install libwxgtk2.6-dev10.$ sudo apt-get -y install build-essential11.$ sudo apt-get -y install zip12.$ sudo apt-get -y install curl13.$ sudo apt-get -y install libncurses5-dev14.$ sudo apt-get -y install zlib1g-dev15.$ sudo apt-get -y install valgrind注意:(如果是32bit的系统的话,则要更改几个Android.mk文件)01./external/clearsilver/cgi/Android.mk02./external/clearsilver/java-jni/Android.mk03./external/clearsilver/util/Android.mk04./external/clearsilver/cs/Android.mk用gedit打开,修改m64为m32即可另外将build/core/main.mk中的ifneq (64,$(findstring 64,$(build_arch)))修改为:ifneq (i686,$(findstring i686,$(build_arch)))对于32位系统所出现的问题,解决方法:Error1:make: ***[out/host/linux-x86/obj/STATIC_LIBRARIES/libutils_intermediates/RefBase.o] error 1在terminal中输入$ gedit frameworks/base/libs/utils/Android.mk将LOCAL_CFLAGS += -DLIBUTILS_NATIVE=1 $(TOOL_CFLAGS)修改为:LOCAL_CFLAGS += -DLIBUTILS_NATIVE=1 $(TOOL_CFLAGS) –fpermissiveError2:make: *** [out/host/linux-x86/obj/EXECUTABLES/obbtool_intermediates/Main.o] error 1此处编译错误是由于ubuntu 11.10采用了GCC4.6.1导致的修改源码目录下/build/core/combo/HOST_linux-x86.mk并将以下语句:HOST_GLOBAL_CFLAGS+= -D_FORTIFY_SOURCE=0修改为:HOST_GLOBAL_CFLAGS+= -U_FORTIFY_SOURCE -D_FORTIFY_SOURCE=0Android源码下载1、安装repo安装过程步骤如下所示:Repo下载安装1、$ mkdir ~/bin //在home目录下创建bin文件夹2、$ PATH=~/bin:$PA TH //环境变量设置3、$ curl https:///dl/googlesource/git-repo/repo > ~/bin/repo //repo下载4、$ chmod a+x ~/bin/repo //权限设置,保证repo可执行Repo client初始化1、$ mkdir Android //创建Android目录,用于存放下载的android源码2、$ cd Android //进入到Android目录3、$ repo init -u https:///platform/manifest //指定URL清单,指定包含在Android源代码的各种存储库将被安置在工作目录中当然也可以指定android版本,使用如下命令:$ repo init -u https:///platform/manifest -b android-4.0.1_r1Android源码文件获取$ repo sync注意:在Android源码下载过程中凡出现问题,可以进入Android源码下载的相关官方网站/source/downloading.html 进行查看。
ubuntu安装及android源码编译环境搭建
ubuntu安装及android源码编译环境搭建为了能够编译和运行 Android 源码,我们需要在 Ubuntu 系统中搭建相应的开发环境。
下面是 Ubuntu 安装及 Android 源码编译环境搭建的详细步骤:一、Ubuntu 系统的安装2.将ISO文件写入USB或DVD中,制作启动盘。
3.在计算机上将系统引导到USB活动盘或DVD上,并启动系统。
4. 在启动菜单中选择安装 Ubuntu,按照提示完成安装过程。
二、系统更新和软件安装1.安装后,运行系统更新以获取最新的软件包和安全修复程序。
可以在终端中运行以下命令:```sudo apt updatesudo apt upgrade```2.安装开发工具和编译器。
可以在终端中运行以下命令:```sudo apt install build-essentialsudo apt install openjdk-8-jdksudo apt install pythonsudo apt install gitsudo apt install curlsudo apt install gnupg```1. 配置 Git 个人信息,可以在终端中运行以下命令:```git config --global "Your Name"``````chmod a+x ~/bin/repo```3. 配置 PATH 环境变量,这样在终端中就可以使用 Repo 了。
打开`~/.bashrc` 文件,并在末尾添加以下内容:```export PATH=~/bin:$PATH```4.执行以下命令使配置生效:```source ~/.bashrc```1. 创建一个空文件夹作为 Android 源码存放的目录,并在终端中进入该目录。
```repo init -u <URL> -b <branch>````````````repo sync```5.开始编译。
在Ubuntu上下载、编译和安装Android最新源代码
在Ubuntu上下载、编译和安装Android最新源代码在Ubuntu上下载、编译和安装Android最新源代码官⽹内容:Initializing a Build EnvironmentThe "Getting Started" section describes how to set up your local work environment, how to use Repo to get the Android files, and how to build the files on your machine. To build the Android source files, you will need to use Linux or Mac OS. Building undernot currently supported.Note: The source download is approximately 6GB in size. You will need 25GB free to complete a single build, and up to 80GB (or more) for a full set of builds.For an overview of the entire code-review and code-update process, see Life of a Patch.Setting up a Linux build environmentThe Android build is routinely tested in house on recent versions of Ubuntu LTS (10.04), but most distributions should have the required build tools available. Reports of successes or failures on other distributions are welcome.Note: It is also possible to build Android in a virtual machine. If you are running Linux in a virtual machine, you will need at least 16GB of RAM/swap and 30GB or more of disk space in order to build the Android tree.In general you will need:Python 2.4 -- 2.7, which you can download from .JDK 6 if you wish to build Gingerbread or newer; JDK 5 for Froyo or older. You can download both from .Git 1.7 or newer. You can find it at .Detailed instructions for Ubuntu 10.04+ follow.Installing the JDKThe Sun JDK is no longer in Ubuntu's main package repository. In order to download it, you need to add the appropriate repository and indicate to the system which JDK should be used.Java 6: for Gingerbread and newer$ sudo add-apt-repository "deb / lucid partner"$ sudo apt-get update$ sudo apt-get install sun-java6-jdkJava 5: for Froyo and older$ sudo add-apt-repository "deb /ubuntu hardy main multiverse"$ sudo add-apt-repository "deb /ubuntu hardy-updates main multiverse"$ sudo apt-get update$ sudo apt-get install sun-java5-jdkInstalling required packages64-bit (recommended)$ sudo apt-get install git-core gnupg flex bison gperf build-essential zip curl zlib1g-dev libc6-dev lib32ncurses5-dev ia32-libs x11proto-core-dev libx11-dev lib32readline5-dev lib32z-dev libgl1-mesa-dev g++-multilib mingw32 tofrodos python-markdown libxm On newer versions of Ubuntu such as 11.10 you may need to do the following:$ sudo ln -s /usr/lib/i386-linux-gnu/libX11.so.6 /usr/lib/i386-linux-gnu/libX11.so32-bit (experimental)$ sudo apt-get install git-core gnupg flex bison gperf build-essential zip curl zlib1g-dev libc6-dev libncurses5-dev x11proto-core-dev libx11-dev libreadline6-dev libgl1-mesa-dev tofrodos python-markdown libxml2-utilsConfiguring USB AccessUnder GNU/linux systems (and specifically under Ubuntu systems), regular users can't directly access USB devices by default. The system needs to be configured to allow such access.The recommended approach is to create a file /etc/udev/rules.d/51-android.rules (as the root user) and to copy the following lines in it.must be replaced by the actual username of the user who is authorized to access the phones over USB.# adb protocol on passion (Nexus One)SUBSYSTEM=="usb", ATTR{idVendor}=="18d1", ATTR{idProduct}=="4e12", MODE="0600", OWNER="<username>"# fastboot protocol on passion (Nexus One)SUBSYSTEM=="usb", ATTR{idVendor}=="0bb4", ATTR{idProduct}=="0fff", MODE="0600", OWNER="<username>"# adb protocol on crespo/crespo4g (Nexus S)SUBSYSTEM=="usb", ATTR{idVendor}=="18d1", ATTR{idProduct}=="4e22", MODE="0600", OWNER="<username>"# fastboot protocol on crespo/crespo4g (Nexus S)SUBSYSTEM=="usb", ATTR{idVendor}=="18d1", ATTR{idProduct}=="4e20", MODE="0600", OWNER="<username>"# adb protocol on maguro (Galaxy Nexus)SUBSYSTEM=="usb", ATTR{idVendor}=="04e8", ATTR{idProduct}=="6860", MODE="0600", OWNER="<username>"# fastboot protocol on maguro (Galaxy Nexus)SUBSYSTEM=="usb", ATTR{idVendor}=="18d1", ATTR{idProduct}=="4e30", MODE="0600", OWNER="<username>"Those new rules take effect the next time a device is plugged in. It might therefore be necessary to unplug the device and plug it back into the computer.This is known to work on both Ubuntu Hardy Heron (8.04.x LTS) and Lucid Lynx (10.04.x LTS). Other versions of Ubuntu or other variants of GNU/linux might require different configurations.Setting up a Mac OS X build environmentTo build the Android files in a Mac OS environment, you need an Intel/x86 machine running MacOS 10.6 (Snow Leopard).Android must be built on a case-sensitive file system because the sources contain files that differ only in case. We recommend that you build Android on a partition that has been formatted with the journaled file system HFS+. HFS+ is required to successfully OS applications such as the Android Emulator for OS X.Creating a case sensitive disk imageIf you want to avoid partitioning/formatting your hard drive, you can use a case-sensitive disk image instead. To create the image, launch Disk Utility and select "New Image". A size of 25GB is the minimum to complete the build, larger numbers are more future-Using sparse images saves space while allowing to grow later as the need arises. Be sure to select "case sensitive, journaled" as the volume format.You can also create it from a shell with the following command:# hdiutil create -type SPARSE -fs 'Case-sensitive Journaled HFS+' -size 40g ~/android.dmgThis will create a .dmg (or possibly a .dmg.sparsefile) file which, once mounted, acts as a drive with the required formatting for Android development. For a disk image named "android.dmg" stored in your home directory, you can add the following toyour ~/.bash_profile to mount the image when you execute "mountAndroid":# mount the android file imagefunction mountAndroid { hdiutil attach ~/android.dmg -mountpoint /Volumes/android; }Once mounted, you'll do all your work in the "android" volume. You can eject it (unmount it) just like you would with an external drive.Installing required packagesInstall XCode from the Apple developer site. We recommend version 3.1.4 or newer, i.e. gcc 4.2. Version 4.x could cause difficulties. If you are not already registered as an Apple developer, you will have to create an Apple ID in order to download.Install MacPorts from .Note: Make sure that /opt/local/bin appears in your path BEFORE /usr/bin. If not, addexport PATH=/opt/local/bin:$PATHto your ~/.bash_profile.Get make, git, and GPG packages from MacPorts:$ POSIXLY_CORRECT=1 sudo port install gmake libsdl git-core gnupgIf using Mac OS 10.4, also install bison:$ POSIXLY_CORRECT=1 sudo port install bisonReverting from make 3.82There is a bug in gmake 3.82 that prevents android from building. You can install version 3.81 using MacPorts by taking the following steps:Edit /opt/local/etc/macports/sources.conf and add a line that saysfile:///Users/Shared/dportsabove the rsync line. Then create this directory:$ mkdir /Users/Shared/dportsIn the new dports directory, run$ svn co --revision 50980 /repository/macports/trunk/dports/devel/gmake/ devel/gmake/Create a port index for your new local repository:$ portindex /Users/Shared/dportsFinally, install the old version of gmake with$*************************Setting a file descriptor limitOn MacOS the default limit on the number of simultaneous file descriptors open is too low and a highly parallel build process may exceed this limit.To increase the cap, add the following lines to your ~/.bash_profile:# set the number of open files to be 1024ulimit -S -n 1024Downloading the Source TreeInstalling RepoRepo is a tool that makes it easier to work with Git in the context of Android. For more information about Repo, see Version Control.To install, initialize, and configure Repo, follow these steps:Make sure you have a bin/ directory in your home directory, and that it is included in your path:$ mkdir ~/bin$ PATH=~/bin:$PATHDownload the Repo script and ensure it is executable:$ curl https:///dl/googlesource/git-repo/repo > ~/bin/repo$ chmod a+x ~/bin/repoThe SHA-1 checksum for repo is e1fd3bef059d152edf4d0522590725d317bc637fInitializing a Repo clientAfter installing Repo, set up your client to access the android source repository:Create an empty directory to hold your working files. If you're using MacOS, this has to be on a case-sensitive filesystem. Give it any name you like:$ mkdir WORKING_DIRECTORY$ cd WORKING_DIRECTORYRun repo init to bring down the latest version of Repo with all its most recent bug fixes. You must specify a URL for the manifest, which specifies where the various repositories included in the Android source will be placed within your working directory.$ repo init -u https:///platform/manifestTo check out a branch other than "master", specify it with -b:$ repo init -u https:///platform/manifest -b android-4.0.1_r1When prompted, please configure Repo with your real name and email address. To use the Gerrit code-review tool, you will need an email address that is connected with a registered Google account. Make sure this is a live address at which you can receive mes The name that you provide here will show up in attributions for your code submissions.A successful initialization will end with a message stating that Repo is initialized in your working directory. Your client directory should now contain a .repo directory where files such as the manifest will be kept.Getting the filesTo pull down files to your working directory from the repositories as specified in the default manifest, run$ repo syncThe Android source files will be located in your working directory under their project names. The initial sync operation will take an hour or more to complete. For more about repo sync and other Repo commands, see Version Control.Verifying Git TagsLoad the following public key into your GnuPG key database. The key is used to sign annotated tags that represent releases.$ gpg --importCopy and paste the key(s) below, then enter EOF (Ctrl-D) to end the input and process the keys.-----BEGIN PGP PUBLIC KEY BLOCK-----Version: GnuPG v1.4.2.2 (GNU/Linux)mQGiBEnnWD4RBACt9/h4v9xnnGDou13y3dvOx6/t43LPPIxeJ8eX9WB+8LLuROSVlFhpHawsVAcFlmi7f7jdSRF+OvtZL9ShPKdLfwBJMNkU66/TZmPewS4m782ndtw7lFhpHawsVAcFlmi7f7jdSRF+OvtZL9ShPKdLfwBJMNkU66/TZmPewS4m782ndtw78tR1cXb197Ob8kOfQB3A9yk2XZ4ei4ZC3i6wVdqHLRxABdncwu5hOF9KXwCgkxMDu4PVgChaAJzTYJ1EG+UYBIUEAJmfearb0qRAN7dEoff0FeXsEaUA6U90sEoVks0ZwNj96SA8BL+a1OoEUUfpMhiHyLuQSftxisJxTh+2QclzDviDyaTrkANjdYY7p2cq/HMdOY7LJlHaqtXmZxXjjtw5Uc2QG8UY8aziU3IE9nTjSwCXeJnuyvoizl9/I1S5jU5SA/9WwIps4SC84ielIXiGWEqq6i6/sk4I9q1YemZF2XVVKnmI1F4iCMtNKsR4MGSa1gA8s4iQbsKNWPgp7M3a51JCVCu6l/8zTpA+uUGapw4tWCp4o0dpIvDPBEa9b/aF/ygcR8mh5hgUfpF9IpXdknOsbKCvM9lSSfRciETykZc4wrRCVGhlIEFuZHJvaWQgT3BlbiBTb3VyY2UgUHJvamVjdCA8aW5pdGlhbC1jb250cmlidXRpb25AYW5kcm9pZC5jb20+iGAEExECACAFAknnWD4CGwMGCwkIBwMCBBUCCAMEFgIDAQIeAQIXgAAKCRDorT+BmrEOeNr+AJ42Xy6tEW7r3KzrJxnRX8mij9z8tgCdFfQYiHpYngkI2t09Ed+9Bm4gmEO5Ag0ESedYRBAIAKVW1JcMBWvV/0Bo9WiByJ9WJ5swMN36/vAlQN4mWRhfzDOk/Rosdb0csAO/l8Kz0gKQPOfObtyYjvI8JMC3rmi+LIvSUT9806UphisyEmmHv6U8gUb/xHLIanXGxwhYzjgeuAXVCsv+EvoPIHbY4L/KvP5x+oCJIDbkC2b1TvVk9PryzmE4BPIQL/NtgR1oLWm/uWR9zRUFtBnE411aMAN3qnAHBBMZzKMXLWBGWE0znfRrnczI5p49i2YZJAjyX1P2WzmScK49CV82dzLo71MnrF6fj+Udtb5+OgTg7Cow+8PRaTkJEW5Y2JIZpnRUq0CYxAmHYX79EMKHDSThf/8AAwUIAJPWsB/MpK+KMs/s3r6nJrnYLTfdZhtmQXimpoDMJg1zxmL8UfNUKiQZ6esoAWtDgpqt7Y7sKZ8laHRARonte394hidZzM5nb6hQvpPjt2OlPRsyqVxw4c/KsjADtAuKW9/d8phbN8bTyOJo856qg4oOEzKG9eeF7oaZTYBy33BTL0408sEBxiMior6b8LrZrAhkqDjAvUXRwm/fFKgpsOysxC6xi553CxBUCH2omNV6Ka1LNMwzSp9ILz8jEGqmUtkBszwoG1S8fXgE0Lq3cdDM/GJ4QXP/p6LiwNF99faDMTV3+2SAOGvytOX6KjKVzKOSsfJQhN0DlsIw8hqJc0WISQQYEQIACQUCSedYRAIbDAAKCRDorT+BmrEOeCUOAJ9qmR0lEXzeoxcdoafxqf6gZlJZlACgkWF7wi2YLW3Oa+jv2QSTlrx4KLM==Wi5D-----END PGP PUBLIC KEY BLOCK-----After importing the keys, you can verify any tag with$ git tag -v TAG_NAMEBuilding the SystemThe basic sequence of build commands is as follows:InitializeInitialize the environment with the envsetup.sh script. Note that replacing "source" with a single dot saves a few characters, and the short form is more commonly used in documentation.$ source build/envsetup.shor$ . build/envsetup.shChoose a TargetChoose which target to build with lunch. The exact configuration can be passed as an argument, e.g.$ lunch full-engThe example above refers to a complete build for the emulator, with all debugging enabled.If run with no arguments lunch will prompt you to choose a target from the menu.All build targets take the form BUILD-BUILDTYPE, where the BUILD is a codename referring to the particular feature combination:Build name Device Notesfull emulator fully configured with all languages, apps, input methodsfull_maguro maguro full build running on Galaxy Nexus GSM/HSPA+ ("maguro")full_panda panda full build running on PandaBoard ("panda")and the BUILDTYPE is one of the following:Buildtype Useuser limited access; suited for productionuserdebug like "user" but with root access and debuggability; preferred for debuggingeng development configuration with additional debugging toolsFor more information about building for and running on actual hardware, see Building for devicesBuild the CodeBuild everything with make. GNU make can handle parallel tasks with a -jN argument, and it's common to use a number of tasks N that's between 1 and 2 times the number of hardware threads on the computer being used for the build. E.g. on a dual-E5520 mac CPUs, 4 cores per CPU, 2 threads per core), the fastest builds are made with commands between make -j16 and make -j32.$ make -j4Run It!You can either run your build on an emulator or flash it on a device. Please note that you have already selected your build target with lunch, and it is unlikely at best to run on a different target than it was built for.Flash a DeviceTo flash a device, you will need to use fastboot, which should be included in your path after a successful build. Place the device in fastboot mode either manually by holding the appropriate key combination at boot, or from the shell with$ adb reboot bootloaderOnce the device is in fastboot mode, run$ fastboot flashall -wThe -w option wipes the /data partition on the device; this is useful for your first time flashing a particular device, but is otherwise unnecessary.For more information about building for and running on actual hardware, see Building for devicesEmulate an Android DeviceThe emulator is added to your path automatically by the build process. To run the emulator, type$ emulatorUsing ccacheccache is a compiler cache for C and C++ that can help make builds faster. In the root of the source tree, do the following:$ export USE_CCACHE=1$ export CCACHE_DIR=/<path_of_your_choice>/.ccache$ prebuilt/linux-x86/ccache/ccache -M 20GYou can watch ccache being used by doing the following:$ watch -n1 -d prebuilt/linux-x86/ccache/ccache -sOn OSX, you should replace linux-x86 with darwin-x86.Troubleshooting Common Build ErrorsWrong Java VersionIf you are attempting to build froyo or earlier with Java 1.6, or gingerbread or later with Java 1.5, make will abort with a message such as************************************************************You are attempting to build with the incorrect versionof java.Your version is: WRONG_VERSION.The correct version is: RIGHT_VERSION.Please follow the machine setup instructions at/download************************************************************This may be caused byfailing to install the correct JDK as specified on the Initializing page. Building Android requires Sun JDK 5 or 6 depending on which release you are building.another JDK that you previously installed appearing in your path. You can remove the offending JDK from your path with:$ export PATH=${PATH/\/path\/to\/jdk\/dir:/}Python Version 3Repo is built on particular functionality from Python 2.x and is unfortunately incompatible with Python 3. In order to use repo, please install Python 2.x:$ apt-get install pythonGmake Version 3.82There is a bug in make version 3.82 on Mac OS that prevents building Android.TODO: what the error looks like with GNU make 3.82 on older builds that don't explicitly detect it.Follow the instructions on the Initializing page for reverting GNU make from 3.82 to 3.81.Case Insensitive FilesystemIf you are building on an HFS filesystem on Mac OS X, you may encounter an error such as************************************************************You are building on a case-insensitive filesystem.Please move your source tree to a case-sensitive filesystem.************************************************************Please follow the instructions on the Initializing page for creating a case-sensitive disk image.No USB PermissionOn most Linux systems, unprivileged users cannot access USB ports by default. If you see a permission denied error, follow the instructions on the Initializing page for configuring USB access.If adb was already running and cannot connect to the device after getting those rules set up, it can be killed with adb kill-server. That will cause adb to restart with the new configuration.Building for devicesThis page complements the main page about Building with information that is specific to individual devices.The only supported phone with the current release is the GSM/HSPA+ Galaxy Nexus, a.k.a. "maguro". GSM/HSPA+ Galaxy Nexus is currently the recommended device to use with the Android Open-Source Project.In addition, PandaBoard a.k.a. "panda" is supported in the master branch only, but is currently considered experimental. The specific details to use a PandaBoard with the Android Open-Source Project are in the file device/ti/panda/README in the source tree. Nexus S, a.k.a. "crespo", and Nexus S 4G, a.k.a. "crespo4g", are supported with gingerbread, but can't currently be used with newer versions of the Android Open-Source Project.Nexus One a.k.a. "passion" is obsolete, was experimental in gingerbread and unsupported, and can't be used with newer versions of the Android Open-Source Project.Android Developer Phones (ADP1 and ADP2, a.k.a. "dream" and "sapphire") are obsolete, were experimental and unsupported in froyo, and can't be used with newer versions of the Android Open-Source Project.Building fastboot and adbIf you don't already have those tools, fastboot and adb can be built with the regular build system. Follow the instructions on the page about building, and replace the main make command with$ make fastboot adbBooting into fastboot modeDuring a cold boot, the following key combinations can be used to boot into fastboot mode, which is a mode in the bootloader that can be used to flash the devices:Device Keysmaguro Press and hold both Volume Up and Volume Down, then press and hold Powercrespo Press and hold Volume Up, then press and hold Powercrespo4g Press and hold Volume Up, then press and hold Powerpassion Press and hold the trackball, then press Powersapphire Press and hold Back, then press Powerdream Press and hold Back, then press PowerAlso, on devices running froyo or later where adb is enabled, the command adb reboot bootloader can be used to reboot from Android directly into the bootloader with no key combinations.Unlocking the bootloaderIt's only possible to flash a custom system if the bootloader allows it.This is the default setup on ADP1 and ADP2.On Nexus One, Nexus S, Nexus S 4G, and Galaxy Nexus, the bootloader is locked by default. With the device in fastboot mode, the bootloader is unlocked with$ fastboot oem unlockThe procedure must be confirmed on-screen, and deletes the user data for privacy reasons. It only needs to be run once.On Nexus One, the operation voids the warranty and is irreversible.On Nexus S, Nexus S 4G, and Galaxy Nexus, the bootloader can be locked back with$ fastboot oem lockObtaining proprietary binariesStarting with IceCreamSandwich, the Android Open-Source Project can't be used from pure source code only, and requires additional hardware-related proprietary libraries to run, specifically for hardware graphics acceleration.Official binaries for Nexus S, Nexus S 4G, Galaxy Nexus, and PandaBoard can be downloaded from Google's Nexus driver page, which add access to additional hardware capabilities with non-Open-Source code.There are no official binaries for Nexus One, ADP2 or ADP1.Extracting the proprietary binariesEach set of binaries comes as a self-extracting script in a compressed archive. After uncompressing each archive, run the included self-extracting script from the root of the source tree, confirm that you agree to the terms of the enclosed license agreement, binaries and their matching makefiles will get installed in the vendor/ hierarchy of the source tree.There's an additional step on Nexus S 4G. Build the signapk tool with$ make signapkThen reassemble the proprietary applicatons with$ vendor/samsung/crespo4g/reassemble-apks.shCleaning up when adding proprietary binariesIn order to make sure that the newly installed binaries are properly taken into account after being extracted, the existing output of any previous build needs to be deleted with$ make clobberPicking and building the configuration that matches a deviceThe steps to configure and build the Android Open-Source Project are described in the page about Building.The recommended builds for the various devices are available through the lunch menu, accessed when running the lunch command with no arguments:Device Branch Build configurationmaguro android-4.0.1_r1full_maguro-userdebugpanda master full_panda-engcrespo android-2.3.6_r1full_crespo-userdebugcrespo4g android-2.3.7_r1full_crespo4g-userdebugpassion android-2.3.6_r1full_passion-userdebugsapphire android-2.2.2_r1full_sapphire-userdebugdream android-2.2.2_r1full_dream-userdebugFlashing a deviceSet the device in fastboot mode if necessary (see above).Because user data is typically incompatible between builds of Android, it's typically better to delete it when flashing a new system.$ fastboot erase cache$ fastboot erase userdataAn entire Android system can be flashed in a single command: this writes the boot, recovery and system partitions together after verifying that the system being flashed is compatible with the installed bootloader and radio, and reboots the system.$ fastboot flashallOn maguro, panda, crespo, crespo4g, sapphire and dream (but not on passion), the commands above can be replaced with a single command$ fastboot -w flashallNexus S, Nexus S 4G and Galaxy Nexus Bootloader and Cell Radio compatibilityOn Nexus S, Nexus S 4G, and Galaxy Nexus, each version of Android has only been thoroughly tested with on specific version of the underlying bootloader and cell radio software. However, no compatibility issues are expected when running newer systems with bootloaders and radio images according to the following tables.Nexus S (worldwide version "XX"):Android Version Preferred Bootloader Preferred Radio Also possible2.3 (GRH55)I9020XXJK1I9020XXJK82.3.1 (GRH78)I9020XXJK1I9020XXJK82.3.2 (GRH78C)I9020XXJK1I9020XXJK82.3.3 (GRI40)I9020XXKA3I9020XXKB1All previous versions2.3.4 (GRJ22)I9020XXKA3I9020XXKD1All previous versions2.3.5 (GRJ90)I9020XXKA3I9020XXKF1All previous versions2.3.6 (GRK39F)I9020XXKA3I9020XXKF1All previous versionsNexus S (850MHz version "UC"):Android Version Preferred Bootloader Preferred Radio Also possible2.3.3 (GRI54)I9020XXKA3I9020UCKB22.3.4 (GRJ22)I9020XXKA3I9020UCKD1All previous versions2.3.5 (GRJ90)I9020XXKA3I9020UCKF1All previous versions2.3.6 (GRK39C)I9020XXKA3I9020UCKF1All previous versions2.3.6 (GRK39F)I9020XXKA3I9020UCKF1All previous versionsNexus S (Korea version "KR"):Android Version Preferred Bootloader Preferred Radio Also possible2.3.3 (GRI54)I9020XXKA3I9020KRKB32.3.4 (GRJ22)I9020XXKA3M200KRKC1All previous versions2.3.5 (GRJ90)I9020XXKA3M200KRKC1All previous versions2.3.5 (GRJ90)I9020XXKA3M200KRKC1All previous versionsAndroid Version Preferred Bootloader Preferred Radio Also possible2.3.6 (GRK39F)I9020XXKA3M200KRKC1All previous versionsNexus S 4G:Android Version Preferred Bootloader Preferred Radio Also possible2.3.4 (GRJ06D)D720SPRKC5D720SPRKC92.3.4 (GRJ22)D720SPRKC5D720SPRKD8All previous versions2.3.5 (GRJ90)D720SPRKC5D720SPRKE5All previous versions2.3.7 (GWK74)D720SPRKE1D720SPRKH1 (*)All previous versionsGalaxy Nexus (GSM/HSPA+):Android Version Preferred Bootloader Preferred Radio Also possible4.0.1 (ITL41D)PRIMEKJ10I9250XXKK1If you're building a new version of Android, if your Nexus S, Nexus S 4G or Galaxy Nexus has an older bootloader and radio image that is marked as being also possible in the table above but is not recognized by fastboot, you can locally delete the bootloader and version-baseband lines in device/samsung/crespo/board-info.txt or device/samsung/crespo4g/board-info.txt ordevice/samsung/maguro/board-info.txt(*) As a note, radio version D720SPRKH1 for Nexus S 4G sometimes erroneously reports version D720SPRKE1. If this is the case for your Nexus S 4G, you can locally modify the version-baseband line in device/samsung/crespo4g/board-info.txt accordingly.⼀. 环境准备。
Android_4.2_源码下载和编译环境安装及Android_4.2_源码编译
Android 4.2源码的下载和编译环境的安装及源码的编译Google于2012.11.14发布了Android4.2的源码,下面把本人在ubuntu10.04 的64位系统上下载源码,和编译源码做个记录备份,也供有需要的人参考,若是在下载编译安装Android源代码遇到问题,可加QQ群交流: 217706590,难免有错,敬请见谅,还忘勿吝啬指出。
源代码下载、编译环境安装、源代码编译和运行模拟器的可能出现的一些错误在本文最后一章节,若出现类似错误,可以参考。
1、源码的下载源代码的下载,首先需要安装以下软件:curl 和git-core1.1安装curl:在终端中执行:sudo apt-get install curl1.2安装git-core1.2.1在用户目录下新建bin文件在终端中执行:mkdir ~/bin将~/bin添加环境变量,作用是:要将git软件下载安装在此目录,在别的目录运行可能会找不到此软件,所以要添加到环境变量中在终端中执行:PA TH=~/bin:$PATH1.2.2安装git-core在终端中执行:curl https:///dl/googlesource/git-repo/repo§> ~/bin/repo给repo执行权限:chmod a+x ~/bin/repo1.3 下载源代码1.3.1进入要源代码将要保存的目录如我的源代码保存在:、/opt/android/src在终端中执行:cd /opt/android/src 进入到src目录中1.3.2 获取repo最新的配置repo init -u https:///platform/manifest§若是执行错误则用以下命令:~/bin/repo init -u https:///platform/manifest§1.3.3 下载源代码对于下载不同版本的android,指定一个manifest分支(即只指明android对应的版本),使用-b参数(即下载某个版本的源代码),如:对于4.2的版本,将命令修改为repo init -u https:///platform/manifest§ -b android-4.2_r1若是执行错误则用以下命令:~/bin/repo init -u https:///platform/manifest§ -b android-4.2_r1 执行以上命令后,会在/opt/android/src目录中生成一个.repo的目录,此目录保存了将要下载的源代码的相关信息同步获取源码#~/bin/repo sync如果中间出现中断,这个很正常,你可以再次输入~/bin/repo sync 命令来进行下载。
ubuntu下编译android源码错误解决记录
数据库系统管理制度数据库系统管理制度是指为了保障数据库系统的安全、稳定和高效运行,而制定的一系列规章制度和管理措施。
合理的数据库系统管理制度可以提高数据库系统的可靠性,保护数据的安全性,防止数据丢失和泄露,提高数据的完整性、一致性和可用性。
以下是数据库系统管理制度的一些要点:一、数据库系统管理的基本原则1.安全原则:确保数据库系统的安全,防止数据被非法拷贝、篡改或泄露。
2.稳定原则:保证数据库系统的稳定运行,防止系统故障和服务中断。
3.效率原则:提高数据库系统的运行效率,保证用户可以快速访问和处理数据。
4.合规原则:遵守相关法律法规和企业规定,保护用户隐私和敏感数据。
二、数据库系统管理的组织机构和职责1.数据库管理员(DBA)的职责:负责数据库系统的安装、配置、备份和恢复,监控系统性能,并对系统进行优化,管理用户的账号和权限,解决数据库系统相关的问题。
2.安全管理员的职责:负责数据库系统的安全策略和控制策略的制定和执行,制定用户权限管理规则,监控和审计数据库系统的访问和活动,检查和处理安全漏洞。
3.运维人员的职责:负责日常维护工作,包括系统巡检、性能监控、问题排查和解决,数据库备份和恢复等。
三、数据库系统管理的技术标准和流程1.数据库系统的选择和部署标准:根据业务需求和安全要求,选择合适的数据库系统,并根据标准化的部署流程进行安装和配置。
2.数据库系统的备份和恢复标准:制定定期备份数据库和日志的策略,保证数据不丢失,同时确保备份的可靠性和完整性。
3.数据库系统的安全管理标准:建立用户权限管理体系,对数据库用户进行分类和授权,限制用户的访问权限,定期修改密码,确保数据库系统的安全性。
4.数据库系统的性能管理标准:监控数据库系统的性能指标,定期进行性能优化,包括索引优化、SQL语句优化、硬件升级等,提高数据库系统的响应速度和并发能力。
5.数据库系统的故障处理标准:建立故障处理流程,监控系统运行状态,及时发现和解决故障,确保系统可用性。
在Ubuntu上下载、编译和安装Android最新内核源代码(Linux Kernel)
在前一篇文章提到,从源代码树下载下来的最新Android源代码,是不包括内核代码的,也就是Android源代码工程默认不包含Linux Kernel代码,而是使用预先编译好的内核,也就是prebuilt/android-arm/kernel/kernel-qemu文件。
那么,如何才能DIY自己的内核呢?这篇文章一一道来。
一. 首选,参照前一篇在Ubuntu上下载、编译和安装Android最新源代码准备好Android源代码目录。
二. 下载Linux Kernel for Android源代码。
1. 使用GIT工具下载,执行以下命令:USER-NAME@MACHINE-NAME:~/Android$ mkdir kernelUSER-NAME@MACHINE-NAME:~/Android$ cd kernelUSER-NAME@MACHINE-NAME:~/Android/kernel$ git clonegit:///kernel/common.git同样是经过漫长的等待后,在kernel目录下有一个common目录,Linux内核代码就在这里了。
2. 下载完成后,可以查看下载的内核代码版本:USER-NAME@MACHINE-NAME:~/Android/kernel$ cd commonUSER-NAME@MACHINE-NAME:~/Android/kernel/common$ git branch android-2.6.363. 下载完Android的Linux内核代码后,会发现在arch/arm/configs下没有模拟器要使用的硬件配置文件goldfish_defconfig,而这个配置文件是编译内核代码时需要用到的,因此,需要checkout goldfish版本:USER-NAME@MACHINE-NAME:~/Android/kernel/common$ git branch -a * android-2.6.36remotes/origin/HEAD -> origin/android-2.6.36remotes/origin/android-2.6.35remotes/origin/android-2.6.36remotes/origin/archive/android-2.6.25remotes/origin/archive/android-2.6.27remotes/origin/archive/android-2.6.29remotes/origin/archive/android-2.6.32remotes/origin/archive/android-gldfish-2.6.29remotes/origin/archive/android-goldfish-2.6.27选择android-gldfish-2.6.29:USER-NAME@MACHINE-NAME:~/Android/kernel/common$ git checkoutremotes/origin/archive/android-gldfish-2.6.29下载完毕后,就能在arch/arm/configs下看到goldfish_defconfig这个文件了。
安卓系统源码编译

安卓源码编译1、编译环境的搭建操作系统推荐安装64位的ubuntu10.04,其他版本的ubuntu也可以安装,但是可能出现一些莫名其妙的Bug。
系统安装结束之后,还需要安装一些编译源码需要的工具和依赖包。
具体内容如下:确认下列软件安装成功并且版本号正确:1.1 gcc4.4,而不是gcc4.6,如果是4.6,需要安装gcc4.4,命令如下:sudo apt-get install gcc-4.4sudo apt-get install g++-4.4cd /usr/binls -l gcc*sudo mv gcc gcc.baksudo ln -s gcc-4.4 gccls -l g++*sudo mv g++ g++.baksudo ln -s g++-4.4 g++gcc -vg++ -v1.2 python2.5-2.7,ubuntu10.04版本,默认的python版本是2.6。
1.3 JDK版本是1.6.0,而不是openJDK,1.4 安装git sudo apt-get install git-core gnupg1.5 一些依赖包的安装:Ubuntu系统版本不同,所需要安装的依赖包也不同,具体情况如下所述:u buntu 10.04(64位)$ sudo apt-get install git-core gnupg flex bison gperf build-essential \zip curl zlib1g-dev libc6-dev lib32ncurses5-dev ia32-libs \x11proto-core-dev libx11-dev lib32readline5-dev lib32z-dev \libgl1-mesa-dev g++-multilib mingw32 tofrodos python-markdown \libxml2-utils xsltprocubuntu 11.10(64位)$ sudo apt-get install libx11-dev:i386ubuntu 12.04(64位)$ sudo apt-get install git-core gnupg flex bison gperf build-essential \zip curl libc6-dev libncurses5-dev:i386 x11proto-core-dev \libx11-dev:i386 libreadline6-dev:i386 libgl1-mesa-glx:i386 \libgl1-mesa-dev g++-multilib mingw32 openjdk-6-jdk tofrodos \python-markdown libxml2-utils xsltproc zlib1g-dev:i386$ sudo ln -s /usr/lib/i386-linux-gnu/mesa/libGL.so.1 /usr/lib/i386-linux-gnu/libGL.so1.6 调试工具的安装sudo apt-get install valgrind2、安卓系统源码编译依次执行如下命令:source build/envsetup.shlunch full-engmake -j4建议:最后一条命令使用make showcommands,这样可以显示编译命令,使得编译的时候,屏幕没有输出的时候,不会感觉无聊。
自我总结Ubuntu10.04搭建Android环境全过程
宿主PCCPU:Dual-Core 2.00GHz内存:2GBOS:Win 7 Ultimate, 32-bit虚拟机VMware Workstation 7.1.1 build-282343虚拟机OSubuntu-10.04.3-server-i386安装过程:问题:打开虚拟机电源时弹出提示"serial0: Unable to launch virtual printer proxy: 系统找不到指定的文件. 设备将要被断开连接。
"解决:百度资源得知,这个是虚拟机里面的报错。
只要在设置里面关闭掉虚拟打印机连接时启动就可以解决参照/Forum/651151.试图运行"sudo apt-get install sun-java6-sdk",提示无法找到软件包sun-java6-sdk参照/ubuntu-10-04-android-dev-environment/comment-page-1/#comment-25302.下载、安装jdk1.6、eclipse,如下3.-7.3.下载jdk:"sudo wget -c /otn-pub/java/jdk/6u25-b06/jdk-6u25-linux-i586.bin"4.修改jdk-6u25-linux-i586的可执行权限:"chmod +x jdk-6u25-linux-i586.bin"(最简单的方法是赋予所有权限:chmod 777 jdk-6u25-linux-i586.bin)5.命令"./jdk-6u25-linux-i586.bin"报错参照/ubuntu-10-04-android-dev-environment/comment-page-1/#comment-25306.下载好eclipse后进行tar解压"tar zxvf ...",提示:gzip: stdin: not in gzip formattar: Child returned status 1tar: 由于前次错误,将以上次的错误状态退出参照/thread-2099407-1-1.html7.运行"rpm -q gizp"查看gizp安装包,提示"软件包 gizp 尚未安装"参照/viperchaos/archive/2011/08/23/2151333.html8.运行"sudo apt-get install eclipse"安装eclipse参照/ubuntu-10-04-android-dev-environment/comment-page-1/#comment-25309.下载Android SDK"sudo wget /android/android-sdk_r10- linux_x86.tgz",并进行tar解压"tar zxvf android-sdk_r10-linux_x86.tgz",重命名"mv android-sdk-linux_x86 android-sdk"10.下载Android Platform-tools"sudo wget/android/repository/platform-tools_r03-linux.zip",进行unzip解压"unzip platform-tools_r03-linux.zip”至目录android-sdk,重命名"mv platform-tools_r03-linux platform-tools"11.下载 Android 2.3 Platform"sudo wget /android/repository/android-2.3_r01-linux.zip"(/android-3.0_pre_r01-linux.zipnux.zip),解压"unzip android-2.3_r01- linux.zip"至目录android-sdk/platforms12.上面8.中安装的eclipse,可以在Ubuntu图形界面的Applications中运行13.下载JDK 1.6"sudo wget /otn-pub/java/jdk/6u25-b06/jdk-6u25-linux- i586.bin",进行chmod修改权限"sudo chmod 777 jdk-6u25-linux-i586.bin",重命名"mv jdk-6u25-linux-i586.bin jdk-6u25.bin",安装"sudo ./jdk-6u25.bin"显示错误./jdk-6u25.bin: 1: cannot open html: No such file./jdk-6u25.bin: 2: cannot open head: No such file./jdk-6u25.bin: 3: cannot open title: No such file./jdk-6u25.bin: 3: Request: not found./jdk-6u25.bin: 4: cannot open META: No such file./jdk-6u25.bin: 5: cannot open link: No such file./jdk-6u25.bin: 6: cannot open link: No such file: not foundbin: 7:./jdk-6u25.bin: 8: cannot open body: No such file./jdk-6u25.bin: 9: cannot open div: No such file./jdk-6u25.bin: 10: cannot open table: No such file./jdk-6u25.bin: 11: cannot open tr: No such file./jdk-6u25.bin: 12: Syntax error: redirection unexpected14.百度"Ubuntu 10.04中无法安装jdk" ??参照/ubuntu-10-04-android-dev-environment/comment-page-1/#comment-253015.配置环境变量"sudo gedit /etc/environment"提示"sudo: gedit: command not found",百度"sudo: gedit: command not found"参照/viewtopic.php?t=89160"16.使用vi配置环境变量"sudo vi environment"并在games后面添加":~/app_soft/android-sdk/platform-tools "保存退出17. "adb devices"验证Android SDK的配置,报错未找到 'adb' 命令,您要输入的是否是:命令 'cdb' 来自于包 'tinycdb' (main)命令 'gdb' 来自于包 'gdb' (main)命令 'aub' 来自于包 'aub' (universe)命令 'dab' 来自于包 'bsdgames' (universe)命令 'zdb' 来自于包 'zfs-fuse' (universe)命令 'mdb' 来自于包 'mono-debugger' (universe)命令 'tdb' 来自于包 'tads2-dev' (multiverse)命令 'pdb' 来自于包 'python' (main)命令 'jdb' 来自于包 'openjdk-6-jdk' (main)命令 'ab' 来自于包 'apache2-utils' (main)adb:找不到命令参照/ViewArticle1363.aspx18.重新配置环境变量,检测环境变量是否设置成功:注销重新登录后输入"adbdevices"验证Android SDK的配置,提示:* daemon not running. starting it now on port 5037 ** daemon started successfully *表示成功配置好Android SDK工具目录。
Ubuntu下Android源码修改编译及运行launcher定制
Ubuntu下Android源码修改编译及运行launcher定制在Ubuntu下进行Android源码的修改、编译和运行,以及定制launcher,需要以下步骤:1.安装必要的软件和依赖项:在Ubuntu终端中输入以下命令来安装必要的软件和依赖项:```sudo apt-get updatesudo apt-get install git-core gnupg flex bison gperf build-essential \zip curl zlib1g-dev gcc-multilib g++-multilib libc6-dev-i386 \lib32ncurses5-dev x11proto-core-dev libx11-dev lib32z-dev ccache \libgl1-mesa-dev libxml2-utils xsltproc unzip``````mkdir ~/android-sourcecd ~/android-sourcerepo sync```3.修改源码:进入源代码的根目录:```cd ~/android-source```进行所需的修改,如添加新功能、修改界面等。
4.编译源码:在源码目录下执行以下命令以编译源码:```. build/envsetup.shlunchmake````lunch`命令会提示选择要编译的目标平台和设备,选择相应的选项后执行`make`命令进行编译。
5. 运行Android模拟器或设备:在源码目录下执行以下命令来运行Android模拟器或设备:```emulator```或者连接一台Android设备并执行以下命令:```adb devicesadb shell```6. 定制Launcher:Launcher是Android系统的主屏界面,可以对其进行定制以满足特定需求。
以下是一些定制Launcher的方法:- 修改源码中Launcher的布局和样式:可以修改源码中的布局文件和样式文件来改变Launcher的外观。
ubuntu安装及android源码编译环境搭建

a. sudo apt-get install git-core gnupg flex bison gperf build-essential \
zip curl zlib1g-dev libc6-dev lib32ncurses5-dev ia32-libs \
d. 编译完成
编译完成时,会在源码目录生成out文件夹,还有system.img等文件,如
Target system fs image: out/target/product/generic/obj/PACKAGING/systemimage_unopt_intermediates/system.img
通过这一步选择系统默认的jdk
这样,再在shell中输入代码:
java -version 时,就会显示系统使用的java是sun的java。
3. 搭建编译环境(可参考文档 /source/initializing.html)
update-alternatives --install /usr/bin/javac javac /home/yourname/JDK/jdk1.6.0_24/bin/javac 300
通过这一步将我们安装的jdk加入java选单。
然后执行代码:
update-alternatives --config java
假设安装位置总共有的大小为120G,则在其上建立三个分区:
a. swap 分区:swap格式,4G
b. /home 区:Ext3格式,73G
c. / 挂载区:Ext3格式,43G
3. 剩余步骤按照指引即可。
二、android源码编译环境搭建
(假设安装ubuntu的用户名是yourname)
Ubuntu下编译Android及安装
Ubuntu环境下编译Android源码及安装本次实验环境为Ubuntu10.04、Android版本为2.1,采用的是ARM9 Mini6410开发板自带的Android源码。
其它版本尚未测试,不过原理类似。
第一步:准备JDK环境Android源码有部分是用Java编写的,所以编译Android源码前,必须安装Java类库,即JDK。
编译Android源码需要JDK1.5版(主要是需要其中的javadoc),1.6版是不兼容的。
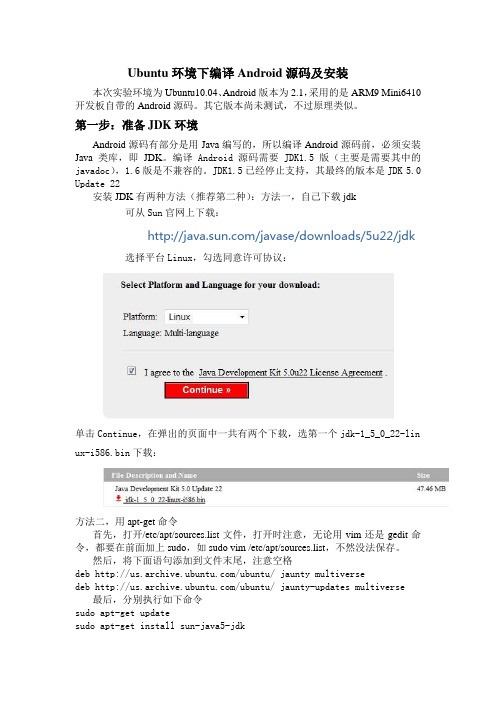
JDK1.5已经停止支持,其最终的版本是JDK 5.0 Update 22安装JDK有两种方法(推荐第二种):方法一,自己下载jdk可从Sun官网上下载:/javase/downloads/5u22/jdk 选择平台Linux,勾选同意许可协议:单击Continue,在弹出的页面中一共有两个下载,选第一个jdk-1_5_0_22-lin ux-i586.bin下载:方法二,用apt-get命令首先,打开/etc/apt/sources.list文件,打开时注意,无论用vim还是gedit命令,都要在前面加上sudo,如sudo vim /etc/apt/sources.list,不然没法保存。
然后,将下面语句添加到文件末尾,注意空格deb /ubuntu/ jaunty multiversedeb /ubuntu/ jaunty-updates multiverse 最后,分别执行如下命令sudo apt-get updatesudo apt-get install sun-java5-jdk因为,要从网上下载安装包,所以时间可能比较长,请耐心等待。
安装过程中,会弹出一个许可证说明书,按Tab切换,选择Yes,等待安装完成即可。
第二步:安装编译所需的包分别执行一下命令(注意空格):sudo apt-get install git-core flex bison gperf libesd0-dev zipsudo apt-get install libwxgtk2.6-dev zlib1g-dev build-essential libstdc++6sudo apt-get install tofrodos x-dev libx11-dev libncurses5-dev第三步:编译源码首先,解压源码,本例中源码路径为/home/user/Android/android-2.1-fs-20100815.tar.gz ,切换到源码包目录执行sudo tar xzvf android-2.1-fs-20100815.tar.gz ,在当前目录会生成一个Android文件夹,里面存放着解压出来的所有源码。
Ubentu编译Android源码(AOSP)
Ubentu编译Android源码(AOSP)前⾔:⼀直想要编译⼀下Android 源码,之前去google 看,下载要下载repo。
当时很懵逼,repo 是个什么?(repo 是⼀个python 脚本,因为Android 源码git 仓库太多,帮助管理git 仓库的,你不需要知道⾥⾯什么实现。
会⽤就⾏。
)然后往下看,看到⽹上说,编译Android AOSP 只能⽤Ubuntu,当时⾃⼰的⼼也哇哇凉啊。
⾃⼰只有⼀个⼯作的电脑,⾃⼰的电脑配置太低。
看⽹上说,还要200G 的空间。
(有⼀个拦路虎)之前⾃⼰给⾃⼰的windos 安装过双系统,但是好像⼀直启动不了。
现在想想,应该是因为当时没有设置引导盘的顺序吧。
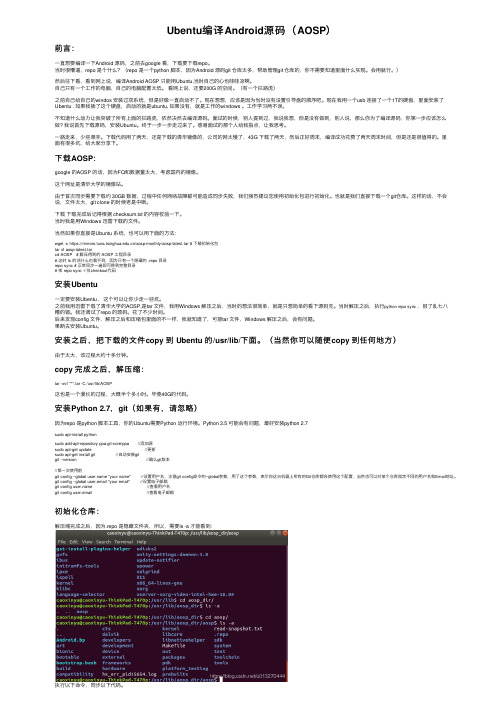
现在我⽤⼀个usb 连接了⼀个1T的硬盘,⾥⾯安装了Ubentu . 如果我插了这个硬盘,启动的就是ubuntu, 如果没有,就是⼯作的windows 。
⼯作学习两不误。
不知道什么动⼒让我突破了所有上⾯的拦路虎,依然决然去编译源码。
⾯试的时候,别⼈提到过,我说我想,但是没有做到,别⼈说,那么你为了编译源码,你第⼀步应该怎么做? 我说⾸先下载源码,安装Ubuntu。
终于⼀步⼀步⾛过来了。
感谢⾯试的那个⼈给我指点,让我思考。
⼀路⾛来,少些艰⾟。
下载代码⽤了两天,还是下载的清华镜像的,公司的⽹太慢了,43G 下载了两天,然后正好周末,编译成功花费了两天周末时间,但是还是很值得的。
⾥⾯有很多坑,给⼤家分享下。
下载AOSP:google 的AOSP 的话,因为FQ和数据量太⼤,考虑国内的镜像。
这个⽹址是清华⼤学的镜像站。
由于⾸次同步需要下载约 30GB 数据,过程中任何⽹络故障都可能造成同步失败,我们强烈建议您使⽤初始化包进⾏初始化。
也就是我们直接下载⼀个git仓库。
这样的话,不会说,⽂件太⼤,git clone 的时候⽼是中断。
下载下载完成后记得根据 checksum.txt 的内容校验⼀下。
当时我是⽤Windows 迅雷下载的⽂件。
Ubuntu下编译Android源码并运行Emulator 2

Ubuntu下编译Android源码并运行Emulator 2//apt-get autoremove sun-java5-jdk//apt-get install nautilus-open-terminalandroid源码的编译安装虚拟机时建议设置空间为16G左右,否则后面编译源代码可能会导致空间不够编译环境:Ubuntu8.101、安装一些环境sudo apt-get install build-essential //sudo apt-get install makesudo apt-get install gccsudo apt-get install g++ //sudo apt-get install libc6-devsudo apt-get install patch //sudo apt-get install texinfo //sudo apt-get install libncurses-dev //sudo apt-get install git-core gnupg //sudo apt-get install flex bison gperf libsdl-dev libesd0-dev libwxgtk2.6-dev build-essential zip curl sudo apt-get install ncurses-devsudo apt-get install zlib1g-devsudo apt-get install valgrindsudo apt-get install python2.5安装java环境sudo apt-get install sun-java5-jdk不要用sun-java6-jdk,否则会有问题2、设置环境变量vim ~/.bashrc在.bashrc中新增或整合PA TH变量,如下#java 程序开发/运行的一些环境变量在home/你的用户名/.bashrc中加入下面一些,有些是后面运行编译后的模拟器而用的export JA VA_HOME=usr/lib/jvm/java-1.5.0-sunexport JRE_HOME=usr/lib/jvm/java-1.5.0-sun/jreexport PA TH=$PATH JA V A_HOME/binexport PA TH=$PATH:~/mydroid/out/host/linux-x86/binexport ANDROID_PRODUCT_OUT=~/mydroid/out/target/product/genericexport CLASSPATH=.{JA V A_HOME}/lib JRE_HOME/lib CLASSPATHexport JA VA_PATH=${JA V A_HOME}/bin{JRE_HOME}/binHOME_BIN=~/bin/export PA TH=${PATH}{JA V A_PA TH}{JRE_PATH}{HOME_BIN};3、安装repo(用来更新android源码)创建~/bin目录,用来存放repo程序,如下:$ cd ~$ mkdir bin注意:下载后的.repo也许并不在这个文件夹中,请返回上一级目录找到后拷贝至此下载repo脚本并使其可执行:$ curl /repo >~/bin/repo$ chmod a+x ~/bin/repo4、下载android源码并更新之$ mkdir mydroid$ cd mydroid方式一建议不要用repo来下载(android源码超过1G,非常慢),直接在网上下载http: ///bbs/pub/cupcake.tar.gz。
Ubuntu 10.04(64位)下载并编译 Android 2.2 源码
Ubuntu 10.04(64位)下载并编译Android 2.2 源码[只有11条命令]为了方便,我把所有操作写成了命令,按顺序(软件安装--源码下载--编译)执行成功即可:1. sudo apt-get install git-core gnupg flex bison gperf build-essential zip curl zlib1g-dev gcc-multilib g++-multilib libc6-dev-i386 lib32ncurses5-dev ia32-libs x11proto-core-devlibx11-dev lib32readline5-dev lib32z-dev java-common unixodbc2. sudo apt-get install sun-java6-jdk3. cd4. mkdir -p software/bin5. curl /repo >software/bin/repo6. chmod a+x software/bin/repo7. mkdir -p software/android/src/new8. cd software/android/src/new9. repo init -u git:///platform/manifest.git -b froyo10. repo sync11. make -j4=========================================================== ======================================================== 1.前言本文叙述了如何从零开始搭建基于Google官方Android 2.2.1(froyo)源码的开发环境,包括如何下载源代码、编译源代码,以及在模拟器中运行编译生成的镜像。
文中开发机是基于Ubuntu 10.04的,同样适用于其他版本的Ubuntu。
Ubuntu 10.04下编译Android源码全过程
Ubuntu 10.04下编译Android源码全过程一、获取Android源代码Git是Linux Torvalds(Linux之父)为了帮助管理Linux内核开发而开发的一个开放源码的分布式版本控制软件,它不同于Subversion、CVS这样的集中式版本控制系统。
在集中式版本控制系统中只有一个仓库(Repository),许多个工作目录(Working Copy),而在Git这样的分布式版本控制系统中(其他主要的分布式版本控制系统还有BitKeeper、Mercurial、GNU Arch、Bazaar、Darcs、SVK、Monotone等),每一个工作目录都包含一个完整仓库,它们支持离线工作,本地提交可以稍后提交到服务器上。
因为Android是由Kernel、Dalvik、Bionic、Prebuilt、build等多个项目组成,如果我们分别使用Git来逐个获取显得很麻烦,所以Android项目编写了一个名为Repo的Python的脚本来统一管理这些项目的仓库,使得项目的获取更加简单。
在Ubuntu 8.04上安装Git只需要设定正确的更新源,然后使用apt-get就可以了,apt-get是一条Linux命令,主要用于自动从互联网的软件仓库中搜索、安装、升级、卸载软件或操作系统。
apt-get命令一般需要root权限执行,所以一般跟着sudo命令。
sudo apt-get install git-core curl这条命令会从互联网的软件仓库中安装git-core和curl。
其中curl是一个利用URL语法在命令行方式下工作的文件传输工具,它支持很多协议,包括FTP、FTPS、HTTP、HTTPS、TELENT等,我们需要安装它从网络上获取Repo脚本文件。
curl /repo >~/bin/repo这句命令会下载repo脚本文件到当前主目录的/bin目录下,并保存在文件repo中。
Ubuntu下编译Android源码并运行Emulator2
Ubuntu下编译Android源码并运行Emulator2Ubuntu下编译Android源码并运行Emulator2在Ubuntu上编译和运行Android源码并运行Emulator需要一些准备工作和步骤,下面是详细的步骤说明。
准备工作:1.安装必要的依赖项:- Java Development Kit (JDK): 通过运行`sudo apt-get install openjdk-8-jdk`命令安装Java开发工具包。
- Git: 运行`sudo apt-get install git`命令安装Git。
- 必要的库和工具: 运行`sudo apt-get install libx11-dev libxext-dev libxi-dev libxrender-dev libxtst-dev libxt-dev libcups2-dev libncurses5-dev libgnome2-0 libgnomeui-0 libgtk2.0-0 libatk1.0-0 libbonoboui2-0 libcairo2 libfontconfig1-devlibxslt-dev libxml2-dev libcurl4-openssl-dev libusb-1.0-0-dev libgtk2.0-bin libdbus-1-dev libdbus-glib-1-dev libgconf2-dev libnss3-dev automake libtool pkg-config`命令安装必要的库和工具。
2. 安装Repo及相关工具:编译源码:1. 初始化环境:运行`. build/envsetup.sh`命令初始化环境。
2. 选择目标设备:运行`lunch`命令选择目标设备,例如选择"2.修改设备名-eng"即选择修改设备名为eng类型的目标设备。
3. 编译源码:运行`make -j4`命令开始编译源码,-j4参数可以指定并行编译的线程数,可以根据系统配置适当调整。
ubuntu10.4编译funambol android源码

Ubuntu10.4编译funambol android源码近来看到互联网的云服务正火起来,各大互联网企业都在为自己的客户提供一个数据的存储,而又想让数据在各在平台之间同步。
现在最出名的同步协议要数syncml协议了,于是想研究一个syncml同步协议,于是下载到了funambol的android的源码来看看。
但没想到要经历这么多不可思议的的编译过程,由于本人很少linux下的开发经验,所以难免。
下面来说说自己的编译经历,希望可以为像我一样的菜鸟提供一些帮助。
下载后的android源码有个叫README.txt,里面说了大概的编译需要的条件和编译过程,但事情不要像你想象的这么简单。
首先你要安装1.sun java 1.6 SDK这个不多说了通过sudo apt-get install sun-java6-jdk可以安装,安装后配置相关环境变量。
2.Apache Ant这个也可以通过sudo apt-get install ant安装3.Ant-Contrib Task这个从/下载4.JavaCC 4.0注意这个工具,这不是javac,一开始本人粗心,以为是javac,搞了半天才知道这是javacc是一个java语法分析生成器,通过sudo apt-get install javacc 也搞定。
5.Android SDK这个不多说了,安装后配置sdk环境变量6.Subversion client这个既然已经下载了源码,就可以先不用了。
以后要新的代码再说吧。
开始编译吧,我们编译是用ant来完成的,打开一个终端并进入到源码的根目录,输入ant就可就可以了。
但先简单说ant这个工具,ant是为了避免写太多的makefile之类的,它是通过编写build.xml和build.properties来进行一些配置。
执行ant命令时,它会自动查找build.xml,如果找不到会说是Buildfile: build.xml does not exist!Build failed.我们下载的源码目录里有一个build.properties.example文件,把它复制一份并修改文件名为build.xml,build.proerties.exampl也用一样的方法。
- 1、下载文档前请自行甄别文档内容的完整性,平台不提供额外的编辑、内容补充、找答案等附加服务。
- 2、"仅部分预览"的文档,不可在线预览部分如存在完整性等问题,可反馈申请退款(可完整预览的文档不适用该条件!)。
- 3、如文档侵犯您的权益,请联系客服反馈,我们会尽快为您处理(人工客服工作时间:9:00-18:30)。
Ubuntu 10.04下编译Android源码全过程一、获取Android源代码(hao!)Git是Linux Torvalds(Linux之父)为了帮助管理Linux内核开发而开发的一个开放源码的分布式版本控制软件,它不同于Subversion、CVS这样的集中式版本控制系统。
在集中式版本控制系统中只有一个仓库(Repository),许多个工作目录(Working Copy),而在Git这样的分布式版本控制系统中(其他主要的分布式版本控制系统还有BitKeeper、Mercurial、GNU Arch、Bazaar、Darcs、SVK、Monotone等),每一个工作目录都包含一个完整仓库,它们支持离线工作,本地提交可以稍后提交到服务器上。
因为Android是由Kernel、Dalvik、Bionic、Prebuilt、build等多个项目组成,如果我们分别使用Git来逐个获取显得很麻烦,所以Android项目编写了一个名为Repo的Python的脚本来统一管理这些项目的仓库,使得项目的获取更加简单。
在Ubuntu 8.04上安装Git只需要设定正确的更新源,然后使用apt-get就可以了,apt-get是一条Linux命令,主要用于自动从互联网的软件仓库中搜索、安装、升级、卸载软件或操作系统。
apt-get命令一般需要root权限执行,所以一般跟着sudo命令。
sudo apt-get install git-core curl这条命令会从互联网的软件仓库中安装git-core和curl。
其中curl是一个利用URL语法在命令行方式下工作的文件传输工具,它支持很多协议,包括FTP、FTPS、HTTP、HTTPS、TELENT等,我们需要安装它从网络上获取Repo脚本文件。
curl /repo >~/bin/repo这句命令会下载repo脚本文件到当前主目录的/bin目录下,并保存在文件repo中。
最后我们需要给repo文件可执行权限chmod a+x ~/bin/repo接下来我们就可以利用repo脚本和Git、curl软件获取Android的源代码了:)首先建一个目录,比如~/android。
然后使用下面命令获取源码:repo init –u git:///platform/manifest.git这个过程会持续很长的时间(笔者下载了一天),下载完毕后会看到repo initialized in /android这样的提示,说明本地的版本库已经初始化完毕,并且包含了当前最新的sourcecode。
如果我们想拿某个分支版本的代码,而不是主线代码,需要使用-b参数指定branch的名字,比如:repo init –u git:///platform/manifest.git –b cupcake如果我们只是想获取某一个project的代码,比如kernel/common,就不需要repo脚本了,直接使用Git工具即可,如果仔细研究repo脚本会发现,repo 脚本其实就是组织Git工具去获取各个Project并把它们组织到同一个项目Android内。
git clone git:///kernel/common.git我们上面使用repo脚本获取了各个项目,那么接下来就需要把整个Android 代码树同步到本地,如下:repo sync project1 project2 …笔者使用repo sync命令直接同步全部项目到本地。
二、源码编译全部同步完毕后,进入到Android目录下,使用make命令编译,你会发现出现如下错误提示:host C: libneo_cgi <= external/clearsilver/cgi/cgi.c external/clearsilver/cgi/cgi.c:22:18: error: zlib.h: No such file or directory这个错误是因为我们缺少zlib1g-dev,需要使用apt-get命令从软件仓库中安装,如下:sudo apt-get install zlib1g-dev同理,我们还需要依次安装如下软件sudo apt-get install flexsudo apt-get install bisonsudo apt-get install gperfsudo apt-get install libsdl-devsudo apt-get install libesd0-devsudo apt-get install libncurses5-devsudo apt-get install libx11-dev以上软件全部安装完毕后,运行make命令再次编译Android源码。
这个时候你会发现出现很多java文件无法编译的错误,打开Android的源码我们可以看到在android/dalvik/libcore/dom/src/test/java/org/w3c/domts下有很多java源文件,这意味着编译Android之前需要先安装JDK。
首先从sun官方网站下载jdk-6u16-linux-i586.bin文件并安装它。
在Ubuntu 8.04中,/etc/profile文件是全局的环境变量配置文件,它适用于所有的shell。
在我们登陆Linux系统时,首先启动/etc/profile文件,然后再启动用户目录下的~/.bash_profile、~/.bash_login或~/.profile文件中的其中一个,执行的顺序和上面的排序一样。
如果~/.bash_profile文件存在的话,一般还会执行~/.bashrc文件。
所以我们只需要把JDK的目录放到/etc/profile里即可,如下:JAVA_HOME=/usr/local/src/jdk1.6.0_16PATH=$PATH:$JAVA_HOME/bin:/usr/local/src/android-sdk-linux_x86-1.1_r1/ tools:~/bin然后重新启动一下机器,输入java –version命令,提示如下信息代表配置成功:java version "1.6.0_16"Java(TM) SE Runtime Environment (build 1.6.0_16-b01)Java HotSpot(TM) Client VM (build 14.2-b01, mixed mode, sharing)在编译完整个项目后,终端会出现如下提示:Target system fs image:out/target/product/generic/obj/PACKAGING/systemimage_unopt_intermediates/ system.imgInstall system fs image: out/target/product/generic/system.imgTarget ram disk: out/target/product/generic/ramdisk.imgTarget userdata fs image: out/target/product/generic/userdata.imgInstalled file list: out/target/product/generic/installed-files.txtroot@dfsun2009-desktop:/bin/android#三、源码运行在编译完整个项目后,如果我们需要观看编译后的运行效果,那么就需要在系统中安装模拟器android-sdk-linux_x86-1.1_r1,这个SDK的下载地址为:linux: /android/android-sdk-linux_x86-1.1_r1.zipmac: /android/android-sdk-mac_x86-1.1_r1.zipwindows: /android/android-sdk-windows-1.1_r1.zip解压后需要把/usr/local/src/android-sdk-linux_x86-1.1_r1/tools目录加入到系统环境变量/etc/profile中。
然后找到编译后android的目录文件out,我们发现在android/out/host/linux-x86/bin下多了很多应用程序,这些应用程序就是android得以运行的基础,所以我们需要把这个目录也添加到系统PATH下,在$HOME/.profile文件中加入如下内容:PATH=”$PATH:$HOME/android/out/host/linux-x86/bin”接下来我们需要把android的镜像文件加载到emulator中,使得emulator可以看到android运行的实际效果,在$HOME/.profile文件中加入如下内容:ANDROID_PRODUCT_OUT=$HOME/android/out/target/product/genericexport ANDROID_PRODUCT_OUT然后重新启动机器。
下面就可以进入到模拟器目录中并启动模拟器cd $HOME/android/out/target/product/genericemulator -image system.img -data userdata.img -ramdisk ramdisk.img总结一下安装过程中的关键点:1:JDK版本必须安装2:利用下面的命令确保所需软件都被正确安装sudo apt-get install flex bison gperf libsdl-dev libesd0-dev libwxgtk2.6-dev build-essential python valgrind curl git3:内存及虚拟内存保证在2GB以上,可以采用命令行free -m查看内存是否足够,如果内存不够终端停滞。
