安全u盘使用说明书(英文版)
Philips 2GB Urban Edition USB Flash Drive 说明书
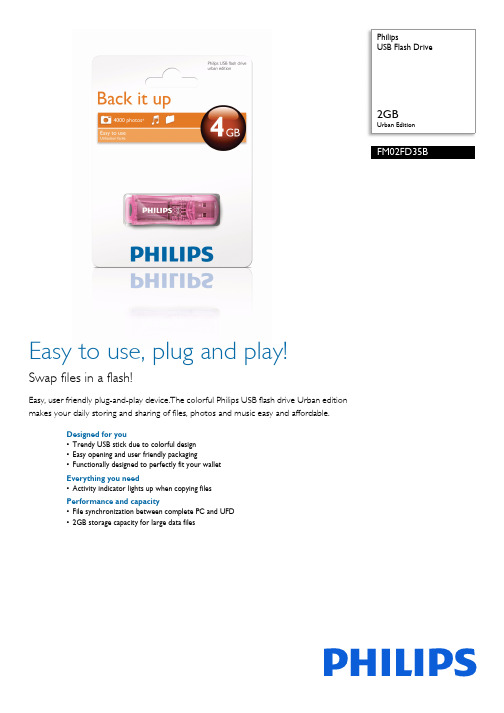
PhilipsUSB Flash Drive2GBUrban EditionFM02FD35B Easy to use, plug and play!Swap files in a flash!Easy, user friendly plug-and-play device.The colorful Philips USB flash drive Urban editionmakes your daily storing and sharing of files, photos and music easy and affordable.Designed for you•Trendy USB stick due to colorful design•Easy opening and user friendly packaging•Functionally designed to perfectly fit your walletEverything you need•Activity indicator lights up when copying filesPerformance and capacity•File synchronization between complete PC and UFD•2GB storage capacity for large data filesIssue date 2017-07-05Version: 2.0.512 NC: 8670 000 68967EAN: 87 12581 56500 8© 2017 Koninklijke Philips N.V.All Rights reserved.Specifications are subject to change without notice. Trademarks are the property of Koninklijke Philips N.V. or their respective Specifications USB Flash Drive 2GB Urban EditionHighlights Trendy colorful design Pick your trendy color; canary yellow, jelly pink, ultraviolet purple, absinthe green, electric blue or sunrise orange to pimp up your daily pursuits of storing and sharing your data and hike up the fun factor Easy opening experience The markings and perforations on the packaging show you the best way to open your packaging and get quickly access to your USB stick without hassle.Activity indicator An appealing glow shows you the drive is properly connected and working, and pulsates faster when copying files to or from its memory.2GB storage capacity A useful 2 GB gives you the capacity to swap and share much larger or more files via the USB port ofyour PC or laptop.Storage Media •Built-in memory type: MLC NAND Flash •Built-in Memory Capacity: 4 GB •Transfer rate: reads max 7MB/s, write max 3MB/s Connectivity •USB:High-speed USB 2.0Software •Carry it Easy: Password protection, File synchronisation, Portable Outlook Express-trial, Favorites Sync-trial, Trace free browsing-trial Accessories •Neck strap: No•Cables:No •Quick start guide:No •User Manual: English, French, German, Spanish, Italian, Dutch, Portugese, Greek, Finnish, Swedish, Russian, Polish, Czech, Slovak, Hungarian, Romanian System Requirements •PC OS: Windows ® Vista, XP, 2000, ME and 98SE; Mac OS 9.0 and higher; Linux 2.4.0 and higher •USB: Free USB port Miscellaneous •Warranty: 2 year。
iSafe 演示文稿
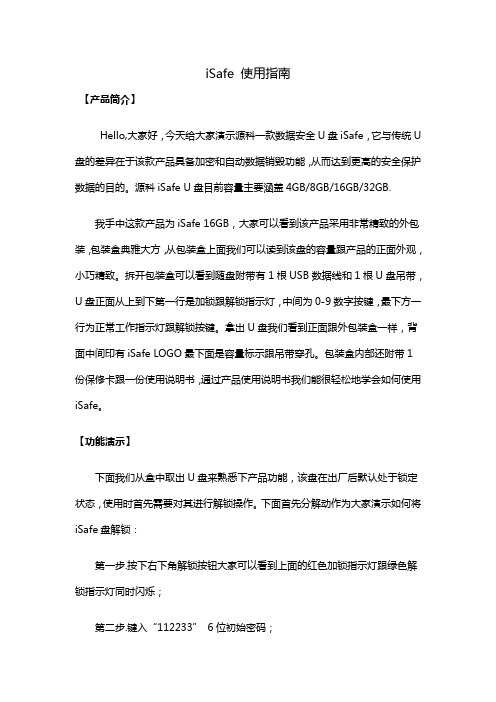
iSafe 使用指南【产品简介】Hello,大家好,今天给大家演示源科一款数据安全U盘iSafe,它与传统U 盘的差异在于该款产品具备加密和自动数据销毁功能,从而达到更高的安全保护数据的目的。
源科iSafe U盘目前容量主要涵盖4GB/8GB/16GB/32GB.我手中这款产品为iSafe 16GB,大家可以看到该产品采用非常精致的外包装,包装盒典雅大方,从包装盒上面我们可以读到该盘的容量跟产品的正面外观,小巧精致。
拆开包装盒可以看到随盘附带有1根USB数据线和1根U盘吊带,U盘正面从上到下第一行是加锁跟解锁指示灯,中间为0-9数字按键,最下方一行为正常工作指示灯跟解锁按键。
拿出U盘我们看到正面跟外包装盒一样,背面中间印有iSafe LOGO最下面是容量标示跟吊带穿孔。
包装盒内部还附带1份保修卡跟一份使用说明书,通过产品使用说明书我们能很轻松地学会如何使用iSafe。
【功能演示】下面我们从盒中取出U盘来熟悉下产品功能,该盘在出厂后默认处于锁定状态,使用时首先需要对其进行解锁操作。
下面首先分解动作为大家演示如何将iSafe盘解锁:第一步.按下右下角解锁按钮大家可以看到上面的红色加锁指示灯跟绿色解锁指示灯同时闪烁;第二步.键入“112233”6位初始密码;第三步.再次按下解锁按键,这时我们会发现红色加锁指示灯熄灭绿色解锁指示灯闪烁,这时候该盘处于解锁状态。
接着为大家演示该U盘的正常使用,我们将处于解锁状态的iSafe盘插入电脑USB端口,这时我们会发现iSafe正面左下角蓝色指示灯常亮,绿色解锁指示灯由闪烁状态转为常亮状态,打开计算机我们会发现该U盘已经被识别到,容量为15.3GB,我们可以像普通U盘一样对其进行数据读取跟擦出。
下面我们在电脑桌面创建一个文件夹并将其copy到iSafe U盘中,当完成数据处理后我们点击右下角安全删除硬件并弹出媒体,弹出iSafe。
从USB端口拔出U盘,所有iSafe指示灯全部熄灭,U盘自动加锁。
u盘杀毒专家usbkiller原u盘病毒专杀工具使用手册
U盘杀毒专家-USBKiller校园版使用手册什么是U盘病毒?U盘病毒是一种新型的病毒,主要是通过U盘等移动设备传播的病毒。
目前主要被发现的U 盘病毒有:auto.exe病毒、U盘文件夹病毒、U盘exe文件病毒、美女病毒等。
当病毒可以通过U盘(MP3、手机存储卡、移动硬盘)传播感染的时候,我们统称其为U盘病毒。
当你把感染了这种病毒的U盘插进电脑,一旦打开U盘,电脑就会感染上病毒。
同样,当你把没有病毒的U盘插进感染了U盘病毒电脑时,U盘也会立刻感染上病毒。
使的电脑和u盘交叉传播。
一般病毒还会检测插入的U盘,并对其实行感染操作,导致一个新的病毒U盘的诞生。
由于U盘、移动硬盘等USB存储设备越来越广泛应用于在不同电脑之间数据传输,他们已经成为各种病毒、木马重要的攻击和感染对象,成为新的病毒传播手段。
我已经安装了主流杀毒软件,还要安装U盘杀毒专家吗?目前由于病毒种类繁多,一些主流的杀毒软件厂商不可能及时分析每一类型的病毒,所以造成正版杀毒软件无法查杀这些病毒,而U盘杀毒专家专注于U盘病毒的查杀,拥有完善的病毒举报机制,能及时收到病毒样本并进行分析,只要用户更新病毒库,即可保证免受U 盘病毒的困扰。
USBKiller开发团队成员均具有多年病毒分析经验,开发出具有自主知识产权SuperClean杀毒引擎,能高效清除上千种顽固U盘病毒,包括其它杀毒软件无法清除的病毒。
软件曾在电脑报、计算机应用文摘、电脑爱好者等报刊杂志上被介绍及推广使用。
软件在半年的时间里得到广泛网友的支持,在华军、天空、新浪等知名下载网站均达到了30万以上的下载量,在多特和绿色软件联盟均达到了惊人的150万以上下载量,如果没有大家的信任和支持,恐怕是很难做到的。
为什么要在学校机房安装U盘杀毒专家校园版?①学校机房机器感染频率高:在学校里面,经常会使用U盘、移动硬盘、MP3、手机存储卡等移动存储设备。
这些设备一方面方便了数据交换,另一方面往往会引起病毒的交叉感染:如果有一台电脑中了U盘病毒,那么插进过这台电脑的移动存储设备都会感染上病毒,任何其他电脑使用这些移动存储设备同样会感染上病毒。
Nationz安全优盘使用说明书V1.80
安全优盘使用说明书用“芯”捍卫安全Nationz 安全优盘 使用说明书国民技术拥有本文档的最终解释权-1-安全优盘使用说明书声明 本说明书所包含的内容均受到《中华人民共和国著作权法》及其他相关法律、法规的保护。
未经国民技术股 份有限公司的同意或授权,任何组织或个人均不得以任何手段或形式对其进行修改、篡改或使用。
★ 特别提醒 ★ ◆此优盘为安全优盘,请用户妥善保管好密码及密码提示问题,否则可能导致数据永久丢失。
◆格式化工具必须先拷贝在 PC 上使用,不可在优盘直接使用。
概述nationz安全优盘是采用了nationz全自主知识产权的“仙人球”系列32位安全处理器芯片作为主控芯片, 外挂闪存芯片实现安全移动存储功能。
与目前市场上通用的基于上层软件认证的安全机制不同,该方案采用的是硬件的双向认证的安全机制,闪存 芯片上的数据经过安全主控芯片纯硬件加密,可以充分的保证数据的安全。
安全优盘最多可以分为三个区:工具区、普通盘和加密盘。
工具区是一个大小固定的只读区,用来存放登 陆加密盘的工具,当加密盘大小设置为零的时候,工具区就不存在了。
普通盘是公共存储区,无需输入用户密码 即可访问。
加密盘则必须输入正确用户密码之后才能访问。
加密盘具有以下特点: 登录加密盘 登出加密盘 修改密码 设置密码保护 通过密保清除密码 格式化 说明:用户工具不支持 Win98 以下操作系统及非管理员模式下使用使用说明初次使用注意事项1、初次使用加密优盘,需等待上盘稳定后才能使用登录工具进行登录加密优盘等操作; 2、登录工具不支持无显卡 PC、MAC 系统、LINUX 系统、和 Windows 以下版本操作系统; 3、登录工具初始密码为空,未设置密码保护;密码保护设置 OK 后,要通过密码提示问题清空密码;国民技术拥有本文档的最终解释权-2-安全优盘使用说明书1 登录加密盘只有通过密码才能访问加密盘,加密盘出厂初始密码默认为空。
苹果手机U盘数据管理工具iDiskk Player使用说明书
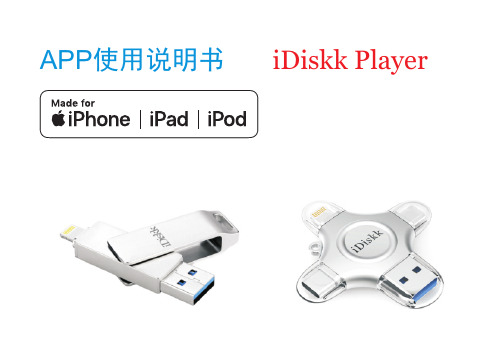
APP使用说明书iDiskk Player本说明书适用的配件产品:U018U022U006备注:1.这里的“配件产品”,包括苹果U盘和苹果读卡器产品,一般简称“U盘”。
2.苹果设备:指苹果生产的iPod/iPhone/iPad, 以下简称“手机”3.内部存储:是苹果设备的内部存储空间。
存储在内部存储中的文件,会占用苹果设备的可用空间。
以下简称“手机空间”。
4.外接存储:指外接于苹果设备接口的外接存储设备,以下简称“U盘”。
支持的文件类型:音乐文件:M4A,CAF,AIFF,ASF,AAC,mp3,wav图片文件: TIF,JPEG,JPG,PNG,GIF,BMP视频文件: M4V,MP4,MOV,WMV,RMVB,DIVX,MKV,FLV,VOB,MPG,4K-MP4,3G2,3GP文档文件: DOC,PDF,PPTX,PPT,VCF,TXT,RTF,pages,numbers,key,HTML,XLSX,XLSPlayer1.插入U盘后,按照提示安装iDiskk ,再点击允许连接U盘2.通过AppStore搜索下载Player3.请在AppStore中搜索:iDiskk ,下载安装。
管理图片、管理视频、拍照/录像、管理音乐、备份照片和视频、备份通讯录、管理文件、设置,共8项主要功能。
可以直接管理手机或U盘中的图片查看——手机相册/U盘图片查看图片,有三种模式可选:详细信息模式、缩略图模式、按日期归类模式。
详细信息模式 缩略图模式 按日期归类模式手机相册图片的三种查看模式(查看U盘中的图片,需要正常连接U盘,并点右下方的“iDiskk Player”图标,查看时也同样是这三种模式)注意:查看U盘图片时,iDiskk 会自动将U盘中全部目录内的全部图片综合到一起,Player因此,查看状态,不能获取图片的目录信息。
复制/删除/分享——手机相册/U盘图片(只说明详细信息模式,其他两种模式操作基本相同)复制/删除/分享1.复制相册图片到手机空间(Documents)选“内部存储” 选“Documents” 可以在“Documents”中,新建文件夹粘贴图片2.复制相册图片到U 盘(外接存储)选“外接存储”可以在外接存储中新建文件夹粘贴图片复制成功3.复制U 盘图片到手机空间(Documents)正常连接配件与苹果设备,在管理图片状态,选择“iDiskkPlayer”图标,切换到“外接存储”复制的操作与1基本相同。
长城安全U盘用户手册V1_0
长城安全 U 盘使用手册长城安全 U 盘使用说明手册 V1.0桂林长海科技有限责任公司1长城安全 U 盘使用手册版权声 明欢迎您购买使用桂林长海科技有限责任公司的产品。
在第一次安装和使用本产品之前, 请您务必仔细阅读随机配送的所有资料, 这会有助于 您更好的使用本产品。
如果您未按本说明书的说明及要求操作本产品, 或因错误理解等原因 误操作本产品,桂林长海科技有限责任公司将不对由此而导致的任何损失承担责任。
桂林长海科技有限责任公司已经对本说明书进行了严格仔细的校勘和核对, 但我们不能 保证本说明书完全没有任何错误和疏漏。
本说明书中的图片仅供参考, 如果有个别图片与产品的实际显示不符, 请以产品实际显 示为准。
为更好的提供服务, 桂林长海科技有限责任公司公司保留对本说明书中描述的产品和软 件程序及本说明书的内容随时进行改进或修改的权利,恕不另行通知。
桂林长海科技有限责任公司对于因软件、 硬件的误操作、 产品维修或者其他情况引起的 数据资料丢失或损失不负任何责任,也不对由此造成的其他间接损失负责,请随时备份您的数据资料!本说明书内容受著作权法律法规保护,未经桂林长海科技有限责任公司事先书面授权, 您不得以任何方式复制、 抄录本说明书, 或将本说明书以任何形式在任何有线或无线网络中 进行传输、或将本说明书翻译成任何文字。
2长城安全 U 盘使用手册目录1. 简介 ............................................................4 2. 规格、功能说明 ..................................................42.1 规格......................................................................................................................................4 2.2 功能说明..............................................................................................................................43. 系统要求 ........................................................53.1 支持的操作系统..................................................................................................................5 3.2 硬件要求..............................................................................................................................54. 5. 6. 7.注意事项 ........................................................6 图示说明 ........................................................7 软件安装 ........................................................7 注册及功能设置 ..................................................87.1 注册新用户..........................................................................................................................8 7.2 注册指纹信息......................................................................................................................8 7.3 设置指纹加密盘................................................................................................................ 11 7.4 右键快捷菜单....................................................................................................................128. 使用说明 .......................................................188.1 如何使用指纹加密盘功能................................................................................................18 8.2 如何使用 windows 自动登录功能 ...................................................................................19 8.3 如何打开主菜单................................................................................................................19 8.4 如何注册更多的手指或删除已注册的手指....................................................................19 8.5 如何使用文件/文件夹加密/解密功能..............................................................................20 8.6 如何使用网页自动登录功能............................................................................................24 8.7 如何使用屏幕保护锁功能................................................................................................25 8.8 如何使用“机密记事本”功能........................................................................................263长城安全 U 盘使用手册1. 简介现在生活中,为了保护自己的资料不会被别人任意读取、修改、删除,很多地方都需要 使用密码,如 windows 登录,邮箱登录,文件加密等。
产品使用说明书英语
便携式多媒体音响 portable multimedia acoustics使用说明书 user’s manual专注于完美音质的追求?? concentrate on perfect sound pursuit?感谢您使用本公司出品的数码产品,为了让您轻松体验产品,我们随机配备了内容详尽的使用说明,您从中可以获取有关产品的介绍,使用方法等方面的知识。
在您开始使用本机之前请先仔细阅读说明书,以便您能正确的使用本机,如有任何印刷错误或翻译失误望广大用户谅解,当涉及内容有所更改时,恕不另行通知。
一、产品概述 general information本机是一款外观小巧,设计精美、携带方便多媒体小音响,适用于家居、户外旅游、办公室等场所,随时随地享受音乐带来的轻松,为您的电脑、数码音乐播放器、手机等视听产品提供超值完美的音质。
二、功能特点 function overview【mp3播放】直接播放tf卡及u盘mp3文件。
[mp3 player] enable directly playing mp3 files in tf memory card and u disk.【fm收音机】fm数字立体声收音机,电台记忆播放。
(可选机型,功能以实物为准) [fm radio] a fm digital stereo radio; enable mnemonic radio channel playing.【外挂耳机】本机配置标准耳机插孔,可选配耳机聆听音乐。
[ext earphone] a standard earphone jack included; enable listening with earphone.【断点记忆】自动记忆上次退出时的曲目播放。
[memory function] memorize the item played last time automatically.【可充锂电】内置可充电锂电池,环保、节约、实用。
金士顿优盘、储存卡官方说明书

Kingston's CompactFlash cards have a rated error specification of less than one (1) bit in 1,000,000,000,000,000 bits read, or one (1) bit per 1015 bits read.
3.0 Features of Kingston's Flash Storage Products
Kingston's Flash storage devices offer many advantages for both consumer and industrial applications: Flash Storage Device Warranty: Kingston warrants that its Flash storage devices are free from defects in material and workmanship for the period specified below: SD and CF Cards: Lifetime DataTraveler USB Flash Drives: 5 years MobileLite 9-in1, microSD and Media Readers: 2 years For further details, see /company/warranty.asp Solid State: Flash storage devices, as semiconductor storage devices, have no moving parts and thereby are not subject to the mechanical failure issues of hard drives. Their overall data reliability enabled them to dominate the convenience-oriented portable memory products market, operating silently with a zero decibel noise level. Small Physical Size (or Form Factor): Flash storage devices are designed to be easily transported. Convenience is an important criterion, especially for consumer and corporate applications. High Data Reliability: Flash memory is very reliable and many of the Flash storage device types also include Error Correction Code (ECC) checking to detect single-bit errors.
Shield USB 3.0 安全隔离盒 使用手册说明书
Shield USB 3.0 安全隔离盒使用手册_V1.3.1成都卓元科技有限公司(索贝集团成员)目录1、概述 (1)1.1、简介 (1)1.2、接口说明 (1)1.3、包装清单 (1)2、产品连接 (2)2.1、单机使用模式 (2)2.2、网络共享使用模式 (4)3、产品使用配置 (5)3.1、安全盒内置网卡配置 (5)3.2、登录配置界面 (6)3.3、网络设置 (7)3.4、过滤规则配置 (7)3.5、修改密码 (9)3.6、版本信息 (9)4、产品使用 (10)4.1、环境检查 (10)4.2、插入USB存储设备 (10)4.3、拔出USB存储设备 (10)4.4、文件导入 (10)4.5、文件导出 (11)5、固件升级 (12)6、其它事项 (12)7、杀毒软件及防火墙 (13)7.1、Norton Security 杀毒软件配置 (14)7.2、KIS卡巴斯基安全防护软件配置 (16)7.3、Kaspersky Small Office Security卡巴斯基企业安全防护软件配置 (18)1、概述1.1、简介Shield USB 3.0 安全隔离盒为计算机单机进行文件上传时隔离USB存储器与计算机,有效防止US存储器上可能存在的病毒及假冒伪装文件被导入到计算机中。
Shield USB 3.0 安全隔离盒采用非X86架构嵌入式Liunx系统,自身具备抵御病毒侵入的能力;采用白名单及文件特征深度分析机制,可将可疑文件、假冒文件排除,无法进行上传;同时采用文件映射机制,方式不符合设置过滤机制的文件,均不予显示。
1.2、接口说明12345671.3、包装清单∙ShieldUSB3.0主机:1台∙双公头USB连接线:1 根∙电源适配器:12V/3A电源适配器1个∙配套光盘:1张,内涵设备驱动、使用手册∙其它:合格证、保修证注:为确保本设备正常运行,请使用配套USB 线。
2、产品连接2.1、单机使用模式✧按图示进行产品连接✧驱动安装产品使用前,需在使用的计算机上安装该产品的驱动。
Seagate Backup Plus Ultra Touch 移动硬盘说明书
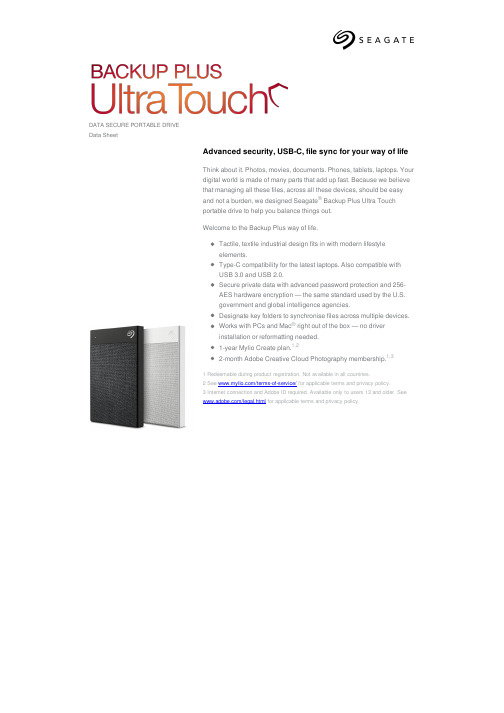
DATA SECURE PORTABLE DRIVE Data Sheet
Advanced security, USB-C, file sync for your way of life
Think about it. Photos, movies, documents. Phones, tablets, laptops. Your digital world is made of many parts that add up fast. Because we believe that managing all these files, across all these devices, should be easy and not a burden, we designed Seagate® Backup Plus Ultra Touch portable drive to help you balance things out.
STHH2000300
2 TB
STHH2000301
2 TB
Colour Black White Black White Black
海盗船 PadlockUserManual 加密U盘说明书
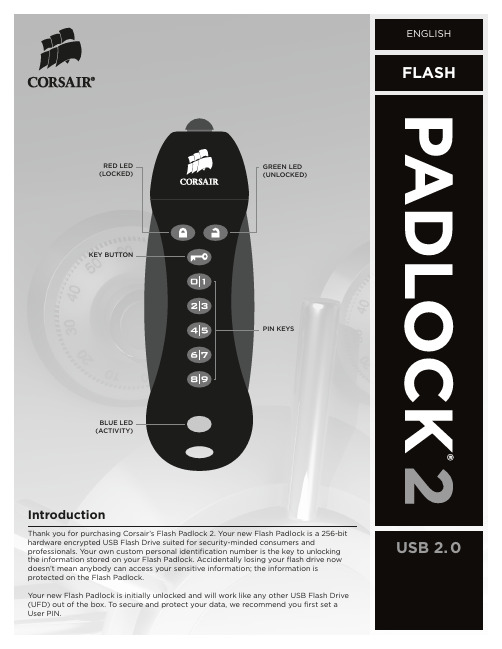
USB 2.0LED IndicatorsYour Flash Padlock comes with three different LED indicators on the top side of the unit. Each LED indicator, whether it’s solid or flashing or appears with another LED indicator all provide feedback to you on the current state of the Flash Padlock. Review chart below to view the definition of each LED display option.All indicators off Drive is in sleep modeGreen LED blink Drive is unlocked and ready for useRed LED blink Drive is lockedRed and green LEDs blink in unison Ready for user PIN inputRed and green LEDs double blink Ready for master PIN inputRed and green LEDs lit Change of PIN initiatedGreen LED lit Drive is connected to USB port and unlockedBlue LED blinking Drive is activeBlue LED lit Drive is connected to USB port and unlockedAlternating red and green LEDs blinking ErrorUser operationSteps below show how users can Set or Change User PIN, and Lock or Unlock your Flash Padlock.Setting User pInYour Flash Padlock comes out of the box without any set User PIN. Until the User PIN is set, your Flash Padlock is unsecure allowing any user access to view your files on the Flash Drive. We recommend you set a custom User PIN immediately upon receipt of your Flash Padlock.1. Press and hold the KEY button for 3 seconds.Both red and green LEDs will illuminate.2. Enter desired PIN using the PIN keys. A user PIN may be 4 to 10 digits long.Both red and green LEDs will blink once andthen remain lit.3. Press and hold KEY button.Both red and green LEDs will blink in unison.4. Re-enter your PIN to confirm.5. Press and release KEY button.Green LED will flash.Unlocking your Flash padlock using a User pInOnce a User PIN is set, all files stored on the Flash Padlock are secure and not viewable. In order to read, or write to your Flash Padlock, you must first unlock the drive with your User PIN.1. Press and release the KEY button.Both red and green LEDS will blink in unison.2. Enter your user PIN using the PIN keys.3. Press and release the KEY button.Green LED will blink for 20 seconds.4. Insert drive into USB port.Green LED will remain lit while unit is connectedto USB port.Note your Padlock will automatically lock if the device hasn’t been inserted into a computer within 20 seconds.2Locking your Flash padlockAfter you use your Flash Padlock, we recommend locking your Flash Padlock to protect your stored files on the Flash drive.1. Remove your Flash Padlock from the USB port.LEDs will turn off.Keeping your Flash padlock UnlockedYour Flash Padlock is designed to automatically lock after removal from USB port. You may want to keep your Flash Padlock from automatically locking if you intend to use your Flash Padlock repeatedly between multiple systems. 1. Unlock your Flash Padlock using directions earlier in Unlock your FlashPadlock.2. Press and hold the KEY button for 3 seconds.Both red and green LEDs will illuminate3. Release KEY button.4. Press and release KEY button.Both red and green LEDs will blink in unison.5. Press and release KEY button.Green LED will blink.change User pInCorsair recommends regularly changing your User PIN in order to prevent unauthorized access to your Flash Padlock.1. Press and release the KEY button.Both red and green LEDS will blink in unison.2. Enter your current user PIN using the PIN keys.3. Press and release the KEY button.Green LED will blink for 20 seconds.4. Press and hold the KEY button for 3 seconds while green LED is blinking.Both red and green LEDs will illuminate.5. Enter new PIN using the PIN keys. A user PIN may be 4 to 10 digits long.Both red and green LEDs will blink once andthen remain lit.6. Re-enter your new PIN to confirm.Both red and green LEDs will blink in unison.7. Press and release KEY button.Green LED will flash.Master pIn FunctionsA second PIN can be created to unlock your Flash Padlock 2, in case you forget the primary user PIN.change User pIn1. Drive must be unlocked and in master mode. Go to unlocking with masterPIN below to unlock drive.2. Double press KEY button. On 2nd press of KEY button, press and holddown KEY button for 3 seconds.Green and red LEDs will illuminate. After 2nd KEY button release, green and red LEDs will blink twice.3. Enter desired master PIN. Master PIN can be 4-10 digits long.4. Press and release KEY button.Green and red LEDs will blink.5. Re-enter master PIN.6. Press and release KEY button.Green LED will double blink if successful.3Unlock with Master pInUnlocking your Flash Padlock with a master PIN will erase the user PIN setting. The content on the drive will not be deleted and the drive will not be secure.1. Double press KEY button.Green and red LEDs will double blink.2. Enter master PIN using PIN keys.3. Press and release KEY button.Green LED will double blink.4. Drive is now unlocked and unsecure and user PIN has been reset.troubleshootingDead BatteryYour Flash Padlock comes with an internal battery. If the internal battery is fully discharged, you may still continue using your Flash Padlock.1. Connect your Flash Padlock to a USB port on any computer.2. Enter a user or master PIN on your Flash Padlock to unlock the drive, while your drive is connected to thecomputer.The internal battery will automatically charge when connected to a USB port on your computer. We recommend keeping your Flash Padlock connected to your computer for 1 hour to fully charge the internal battery.Lost your User pIn? (no Master pIn Set)If you lose your user PIN, you’ll need to reset the Flash Padlock, but all the data on the drive will be completely erased. If you have a Master PIN set, then please proceed to section below to recover use of your drive without erasing your stored data.1. Press and hold KEY and 0/1 buttons simultaneously for 3 seconds.2. notE ALL DAtA WILL BE LoSt Upon coMpLEtIon oF tHIS StEp. Enter 9-1-1 using the PIN keys and thenpress the KEY button. The Flash Padlock will now be unlocked and all data will be lost.3. Connect Flash Padlock to a USB port and format the drive4. Your user PIN has been erased and your Flash Padlock is unlocked. Please set a new PIN to secure your data.Lost your User pIn (Master pIn Set)If your Flash Padlock has a master PIN, you may recover the use of your drive and gain access to your data.1. Double press the KEY button.2. Enter master PIN using key PIN keys.3. notE USEr pIn WILL BE DELEtED Upon coMpLEtIon oF tHIS StEp, BUt tHE DAtA WILL StILL BEAVAILABLE. Press KEY button.4. Your drive will be unlocked and ready for use.We recommend resetting your user PIN to secure the data on your drive. The drive will stay unlocked and your data will not be protected until a user PIN is created.Hacking DetectionAfter 5 unsuccessful user PIN entry attempts, your Flash Padlock will be disabled for 2 minutes. The red LED will blink to indicate the unit has been locked. After 2 minutes, you can attempt to unlock your Flash Padlock.For More InformationYou can find a frequently updated list of questions and answers at /faq. Or, you can visit the support section of our web site at .© 2010, Corsair Memory, Inc. All rights reserved. Corsair, the Corsair logo, and other Corsair marks are owned by Corsair and may be registered. All other trademarks are the property of their respective owners. Corsair assumes no responsibility for any errors that may appear in this manual. Information contained herein is subject to change without notice. 4。
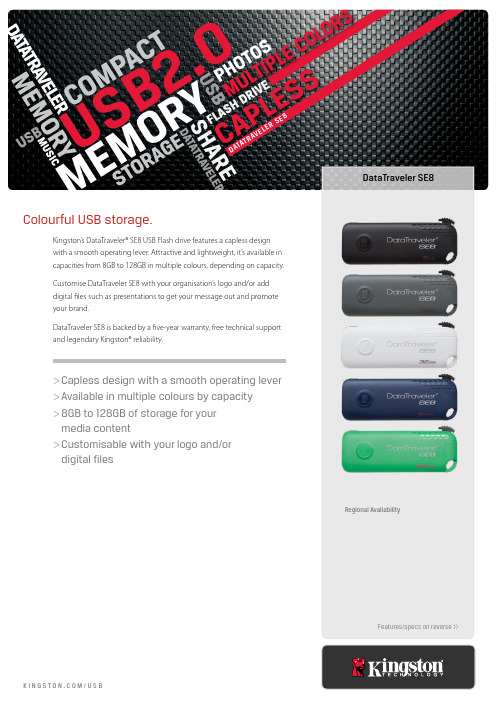
Kingston DataTraveler SE8 USB2.0闪存盘说明书
media content >>Customisable with your logo and/or
USB2.0DATATRAVELER SE8
Colourful USB storage.
Kingston’s DataTraveler® SE8 USB Flash drive features a capless design with a smooth operating lever. Attractive and lightweight, it’s available in capacities from 8GB to 128GB in multiple colours, depending on capacity. Customise DataTraveler SE8 with your organisation’s logo and/or add digital files such as presentations to get your message out and promote your brand. DataTraveler SE8 is backed by a five-year warranty, free technical support and legendary Kingston® reliability.
SPECIFICATIONS >>Capacities2 — 8GB, 16GB, 32GB, 64GB, 128GB >>Dimensions — 60.21mm x 22.41mm x 10mm >>Operating temperature — 0°C to 60°C >>Storage temperature — -20°C to 85°C
Philips Urban Edition 2GB USB Flash Drive 产品说明书
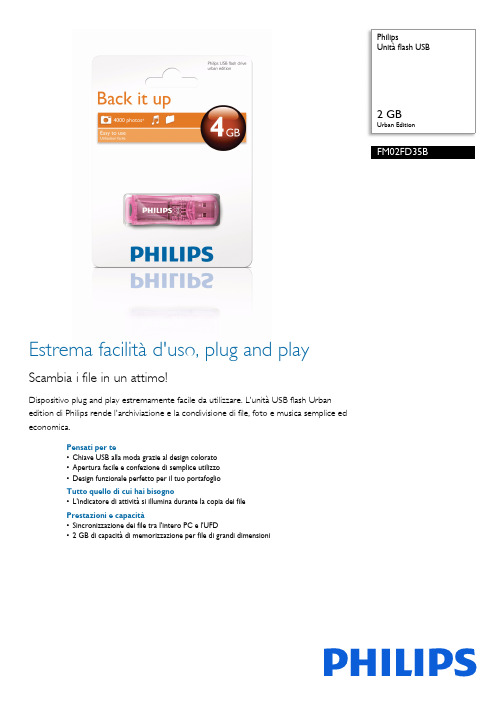
PhilipsUnità flash USB2 GBUrban EditionFM02FD35BEstrema facilità d'uso, plug and playScambia i file in un attimo!Dispositivo plug and play estremamente facile da utilizzare. L'unità USB flash Urbanedition di Philips rende l'archiviazione e la condivisione di file, foto e musica semplice edeconomica.Pensati per te•Chiave USB alla moda grazie al design colorato•Apertura facile e confezione di semplice utilizzo•Design funzionale perfetto per il tuo portafoglioTutto quello di cui hai bisogno•L'indicatore di attività si illumina durante la copia dei filePrestazioni e capacità•Sincronizzazione dei file tra l'intero PC e l'UFD•2 GB di capacità di memorizzazione per file di grandi dimensioniData di rilascio2017-07-06Versione: 2.0.512 NC: 8670 000 68967EAN: 87 12581 56500 8© 2017 Koninklijke Philips N.V.Tutti i diritti riservati.Le specifiche sono soggette a modifica senza preavviso I marchi sono di proprietà di Koninklijke Philips N.V. o dei rispettivi SpecificheUnità flash USB 2 GB Urban EditionIn evidenza Design colorato e alla moda Scegli il tuo colore alla moda: giallo canarino, rosa pastello, viola, verde assenzio, blu elettrico o arancione tramonto per archiviare e condividere i tuoi dati senza tralasciare il divertimento Apertura facile Le guide e le parti perforate della confezione mostrano il metodo più semplice per l'apertura e per accedere rapidamente alla penna USB senza alcun problema.Indicatore di attivitàUn accattivante indicatore luminoso indica quando l'unità è collegata correttamente e in funzione e lampeggia più rapidamente quando è in corso una copia da o sulla memoria.Capacità di memorizzazione da 2 GB La capacità di 2 GB consente di scambiare e condividere file di dimensioni superiori o un maggiornumero di file tramite la porta USB del portatile.Supporto di memorizzazione •Tipo memoria incorporata: MLC NAND Flash •Capacità memoria incorporata: 4 GB •Velocità di trasferimento: velocità di lettura max 7 MB/s, di scrittura max 3 MB/sConnettività•USB: High-Speed USB 2.0Software •Trasporto facile: Protezione tramite password, Sincronizzazione file, Outlook Express portatile - prova, Sincronizzazione Preferiti - prova, Ricerca libera traccia - provaAccessori •Tracolla:No •Cavi: No •Guida rapida: No •Manuale utente: Inglese, francese, tedesco, spagnolo, italiano, olandese, portoghese, greco, finlandese, svedese, russo, polacco, ceco, slovacco, ungherese, romeno Requisiti di sistema •SO PC: Windows ® Vista, XP, 2000, ME e 98SE; Mac OS 9.0 e superiore; Linux 2.4.0 e superiore •USB: Porta USB libera Varie •Garanzia: 2 anni。
闪迪酷炫U盘使用说明
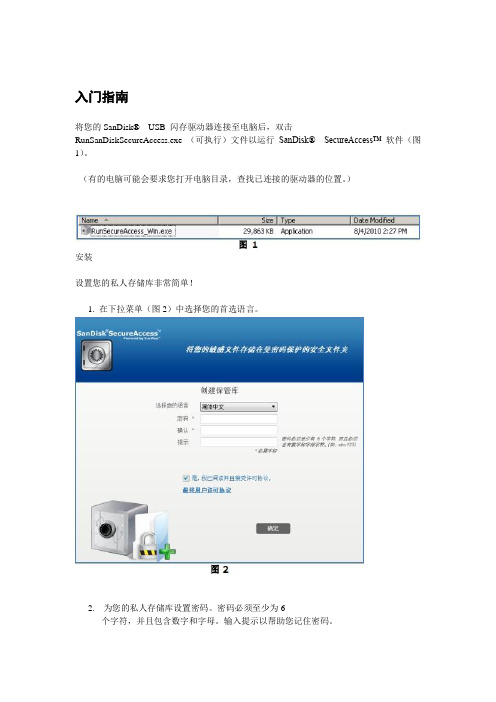
入门指南将您的SanDisk® USB 闪存驱动器连接至电脑后,双击RunSanDiskSecureAccess.exe (可执行)文件以运行SanDisk® SecureAccess™ 软件(图1)。
(有的电脑可能会要求您打开电脑目录,查找已连接的驱动器的位置。
)安装设置您的私人存储库非常简单!1. 在下拉菜单(图2)中选择您的首选语言。
2. 为您的私人存储库设置密码。
密码必须至少为6个字符,并且包含数字和字母。
输入提示以帮助您记住密码。
3. 接受最终用户许可证协议(EULA)注意:务必勾选“安装SanDisk SecureAccess Manager”旁边的复选框以完成设置。
SanDiskSecureAccess Manager 可以每次在您插入SanDisk USB驱动器时自动启动应用程序。
通过右键单击电脑桌面上的私人存储库图标并选择“安装/卸载SanDiskSecureAccess Manager”,您可以随时安装/卸载SanDisk SecureAccess Manager。
4. 单击“确定”现在您可以准备将重要文件和敏感文件放入您的新私人存储库中,并保护这些文件!(图3)将文件或文件夹添加到您的私人存储库中可以使用三种简单的方式将文件和文件夹移动到您的私人存储库中。
选择您要添加的文件,将它们拖放到主屏幕中(图4)。
要手动添加文件,请单击位于主屏幕右上角的“添加档案”按钮,并选择想要添加的文件(图5)。
选择您想要添加至您的私人文件夹的文件,然后拖放到您的电脑屏幕上的存储库图标上。
当您将文件拖放到内部时,存储库将打开。
正在处理图标将确认您的文件正在添加中。
当您看到绿色复选标记时,即可知道您的文件正受到私人存储库的保护(图6)。
在私人存储库中编辑文件您可以随时从SanDisk SecureAccess 主屏幕中查看私人存储库中的文件。
如要编辑存储库中的文件,您必须将文件从加密文件夹中移动到您的电脑上或SanDisk USB闪存驱动器的“公共”空间中。
U盘联盛芯片USBest-UT163量产工具使用手册
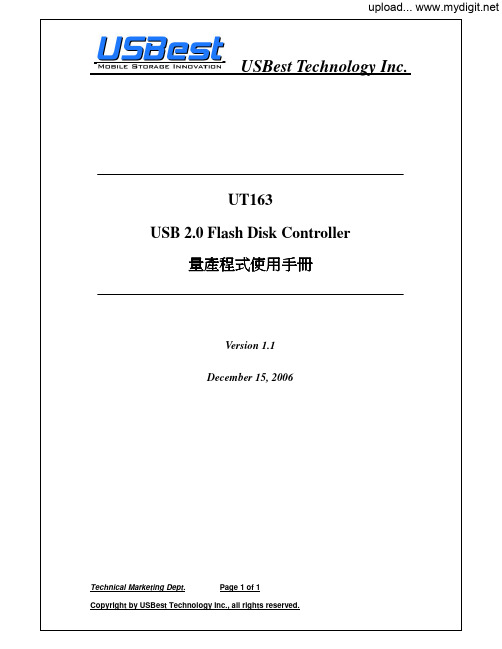
Technical Marketing Dept. Page 2 of 2系統需求 :1. 作業系統: Windows 2000 SP4 above 、Windows XP SP2 above 。
2. 硬體需求: USB 2.0 Host 、USB HUB(非必需) 。
支援多國語言:簡&繁體中文、日文及英文。
程式安裝說明:第一歩:執行右圖所示之 setup 程式。
第二歩:自動安裝程式詢問是否在”開始” 功能表資料夾建立捷徑,你也可選擇 “瀏覽” 將資料夾建立在你想要的路徑下。
Technical Marketing Dept. Page 3 of 3第三歩:程式詢問是否要在桌面上建立捷徑,若要請點選 “Create a desktop icon” ,否則請將選項取消。
第四歩:安裝程式會詢問是否所有設定都正確,如果確認無誤則請點選 “安裝[I]”,若檢查有問題則請點選 “<上一歩[B]”重新設定或者你可點選 “取消”來離開自動安裝程式。
Technical Marketing Dept. Page 4 of 4第五歩:下圖左為安裝過程,下圖右為安裝完成後的畫面。
第六歩:安裝完成後,因為第二及第三歩驟是使用標準設定,所以可在 “程式集” 中找到我們量產程式的資料夾 “MDPT” 及在桌面上找到 “MDPT” icon 的捷徑。
檢視如果有如上所述便表示已完成安裝量產程式,已可進入下一階段進行設定及量產的步驟。
Technical Marketing Dept. Page 5 of 5視窗顯示說明 :選擇此功能按扭時,可將產品 Firmware 版本顯示出來在上圖[FirmwareID]的位置。
選擇此功能按扭時,可將廠商名稱及產品名稱顯示出來在上圖[InquiryStrings]的位置。
選擇此功能按扭時,會顯示產品是否為寫入保護功能在上圖[WriteProtect]位置,以 Yes 和 No 來表示。
安全U盘使用手册

安全U盘使用手册目录安全U盘使用手册 (1)一、安全U盘介绍 (3)1.1术语介绍 (3)1.2功能介绍 (3)1.2.1安全U盘结构 (3)1.2.2功能介绍 (4)二、管理员权限设置 (5)2.1移动存储权限 (5)2.2设置其他管理员权限 (5)三、安全U盘管理 (6)3.1移动存储库 (6)3.2注册安全U盘 (9)3.3移动存储格式化 (12)3.4移动存储日志 (14)3.5安全U盘策略 (15)四、安全U盘使用 (17)4.1安全U盘显示 (17)4.1.1 客户端 (17)4.1.2 非客户端 (18)4.2交互区的使用 (18)4.2.1交互区登入 (18)4.2.2基本操作介绍 (19)4.3保密区的使用 (20)4.4修改安全U盘密码 (20)4.4.1密码强度要求 (20)4.4.2密码修改 (21)五、安全U盘日志管理 (21)5.1日志上传 (21)5.2日志查看 (22)一、安全U盘介绍1.1术语介绍1、XExplorer资源管理器XExplorer资源管理器是用户打开安全U盘交互区的专用工具,此工具出厂设置时即写入到光盘区,支持密码认证。
XExplorer也可以对本地磁盘的文件进行管理,其功能类似于windows资源管理器;2、保密区安全U盘分区之一,属于加密安全区域,在非客户端的机器上无法使用,只用于客户内部交互数据时使用。
在内部使用时及普通的移动存储没有任何区别,支持读写控制,但是在非客户端机器上接入时无法显示盘符。
此盘符在控制台上显示为专用盘保密区;3、隐藏区安全U盘分区之一,属于隐藏的交互区,在计算机磁盘管理分类内无法查看大小以及分区,可以在任何计算机上使用,但是使用时需要通过专用的XExplorer资源管理器进行访问。
此盘符在控制台上显示为专用盘交互区。
1.2功能介绍1.2.1安全U盘结构安全U盘存储分区分为四个分区:普通区、保密区、隐藏区、光盘区。
1、普通区非客户端上接入安全U盘后,会在非客户端机器上新增加一个只有1M左右的盘符,该盘是全空的,只读的,不能做任何写操作。
北信源安全U盘V用户手册
北信源安全U盘V2.0用户手册北京北信源自动化技术有限公司目录1、产品说明 (3)1.1注意事项 (3)1.2产品功能及特点 (7)1.3产品及附件 (8)1.4产品和配置说明 (8)1.5产品性能指标 (9)2、界面说明 (10)3、文件管理 (14)4、管理工具 (18)4.1设置U盘名称 (19)4.2U盘格式化 (20)4.3U盘属性 (21)4.4修改密码 (22)4.5U盘初始化 (23)5、高级管理 (23)5.1日志管理 (24)5.2U盘复位 (25)5.3修改管理员口令 (26)5.4修改用户口令尝试次数 (26)5.5修改配置 (27)1、产品说明1.1注意事项此产品在某些计算机上可能出现无法识别的情况,这是由于 Windows 驱动程序的版本太低或者没有安装最新的补丁造成的。
使用如下操作系统:Windows 2000 Pro Sp4、Server、Adv Server;Windows XP Pro sp2;Windows Server 2003标准版、企业版。
并建议您按如下步骤操作:( 1 )插入安全U盘。
( 2 )在“我的电脑”上点击右键,选择“属性”,选择“硬件标签”。
或在“开始”菜单中选择“管理工具”,双击“系统”图标。
界面如图 1 所示。
( 3 )点击设备管理器按钮,界面如图 2 所示。
双击展开“通用串行总线控制器”。
若设备正常运行,会显示 USB Mass Storage ,则不是驱动问题,可继续下一步操作。
图 1 系统属性图 2 硬件管理器( 4 )在该图标上点击右键,选择“属性”,在“属性”页面选择“更新驱动程序”,如图3所示。
图3更新驱动程序( 5 )弹出硬件更新向导,选择“否,暂时不”,点击“下一步”,如图4 所示。
图 4 新硬件向导( 6 )选择“自动安装软件”,点击“下一步”,如图 5 所示。
图 5 自动安装软件( 7 )若弹出如图 6 所示的 Windows 徽标测试提示,则选择“仍然继续”安装。
安全u盘使用说明书(英文版)

User Manual USB2.0Medisk usage1.New Disk Initial PIN is 112233.2.Press Key button(both red&green LED blink),PIN inputPress key(green LED blink) to confirm disk unlocked,plug into PC and start to use.Once pull out from PC,MeDisk locks automatically.3.Set PIN:After unlock by default PIN,press the key button for 3 seconds(both red&gree LED illuminate),enter a new PINPress Key(red&greee blink in unison),re-enter the PINPress key(green LED inlluminate),the new PIN is accepted and successful.Change PIN same as set PIN. IndicatorsSpecial Features1.If no attaching to Pc within 30seconds,disk will be re-locked.2.When PC in sleep mode,disk also in sleep mode.All indicators will be off.3.After 10 consecutive incorrect PINattemps,disk is reset and data will beerased.Now press key for 3 seconds,resetPIN and plug into PC will requirereformatting.4.Reset:press “9 “and hold the keysimultaneously for 3 seconds.Enter 110 and then press key.Disk will be reset,return todefault state,but PIN has been erased.Forreuse disk,pls set a new PIN and reformatdisk.Notice1.Don’t forget PIN.The losted PIN and datacannot be broken by manufacturefactory.Reuse disk either remember PIN or reset disk.2.Don’t worry about internalbattery.Batterycan be used about 10years.Batter will be charging when pluginto PC.3.PIN required 6-15 digits in length,exceptconsecutive digits”1234567890”or soledigit”888888”.Others1.Without PC to set PIN and unlock thedisk,avoid the PIN stole by hacker.2.MeDisk with zinc alloy shell and advantageof waterproof,dustproof and shock resistant.。
LaCie SAFE Mobile Hard Drive产品说明书
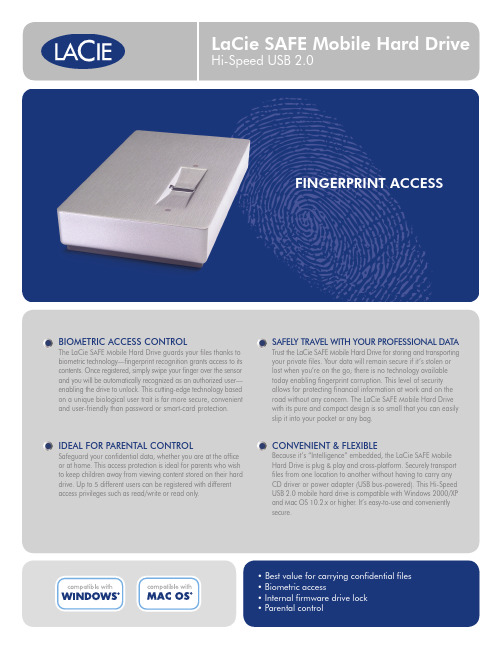
BIOMETRIC ACCESS CONTROLThe LaCie SAFE Mobile Hard Drive guards your files thanks to biometric technology—fingerprint recognition grants access to its contents. Once registered, simply swipe your finger over the sensor and you will be automatically recognized as an authorized user—enabling the drive to unlock. This cutting-edge technology based on a unique biological user trait is far more secure, convenient and user-friendly than password or smart-card protection.SAFELY TRAVEL WITH YOUR PROFESSIONAL DATAT rust the LaCie SAFE Mobile Hard Drive for storing and transporting your private files. Your data will remain secure if it’s stolen or lost when you’re on the go; there is no technology available today enabling fingerprint corruption. This level of security allows for protecting financial information at work and on theroad without any concern. The LaCie SAFE Mobile Hard Drive with its pure and compact design is so small that you can easily slip it into your pocket or any bag.IDEAL FOR PARENTAL CONTROLSafeguard your confidential data, whether you are at the office or at home. This access protection is ideal for parents who wishto keep children away from viewing content stored on their hard drive. Up to 5 different users can be registered with different access privileges such as read/write or read only.CONVENIENT & FLEXIBLEBecause it’s “Intelligence” embedded, the LaCie SAFE Mobile Hard Drive is plug & play and cross-platform. Securely transport files from one location to another without having to carry any CD driver or power adapter (USB bus-powered). This Hi-Speed USB 2.0 mobile hard drive is compatible with Windows 2000/XPand Mac OS 10.2.x or higher . It’s easy-to-use and conveniently secure.• Best value for carrying confidential files • Biometric access• Internal firmware drive lock• Parental control*1GB = 1,000,000,000 bytes. Once formatted, actual available storage capacity varies depending on operating environment (up to 5-10% less).**For standard USB equipped computers, it’s AC adapter free. An optional AC adapter is available for a non-powered USB hub or host adapter (sold separately).© 2007, LaCie. The LaCie logo is a trademark of LaCie. Other product and brand names may be trademarks or registered trademarks of their respective owners. Specifications and appearance are given as guidelines and may change without notice. 071003。
Seagate双面USB3.0保护盘驱动器说明草稿说明书
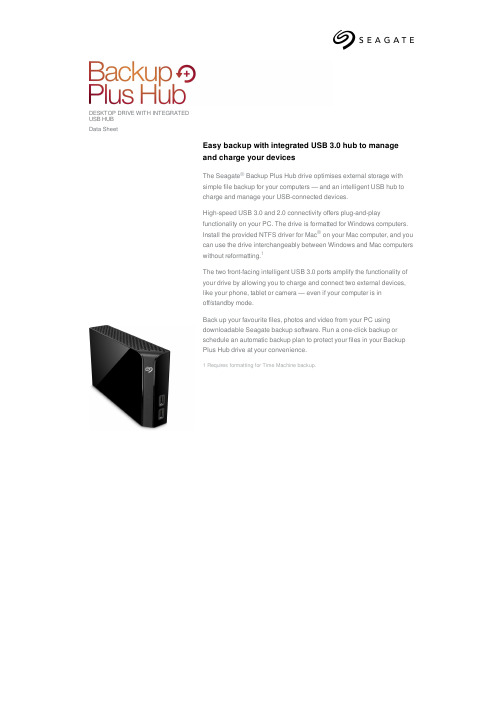
DESKTOP DRIVE WITH INTEGRATEDUSB HUBData SheetEasy backup with integrated USB 3.0 hub to manageand charge your devicesThe Seagate® Backup Plus Hub drive optimises external storage withsimple file backup for your computers — and an intelligent USB hub tocharge and manage your USB-connected devices.High-speed USB 3.0 and 2.0 connectivity offers plug-and-playfunctionality on your PC. The drive is formatted for Windows computers.Install the provided NTFS driver for Mac® on your Mac computer, and youcan use the drive interchangeably between Windows and Mac computerswithout reformatting.1The two front-facing intelligent USB 3.0 ports amplify the functionality ofyour drive by allowing you to charge and connect two external devices,like your phone, tablet or camera — even if your computer is inoff/standby mode.Back up your favourite files, photos and video from your PC usingdownloadable Seagate backup software. Run a one-click backup orschedule an automatic backup plan to protect your files in your BackupPlus Hub drive at your convenience.1 Requires formatting for Time Machine backup.DESKTOP DRIVE WITH INTEGRATED USB HUBSpecificationsRetail Packaging Product Dimensions Pallet Dimensions Length (in/mm) 4.646 in/118 mm40 in/1,016 mm Width (in/mm) 1.614 in/41 mm47.992 in/1,219 mm Depth (in/mm)7.799 in/198.1 mm45.157 in/1,147 mm Weight (lb/kg) 2.341 lb/1.062 kg996.578 lb/452.04 kg QuantitiesBoxes per Master Carton4Master Cartons per Pallet644 month membership to Adobe Photography Creative Cloud plan4。
- 1、下载文档前请自行甄别文档内容的完整性,平台不提供额外的编辑、内容补充、找答案等附加服务。
- 2、"仅部分预览"的文档,不可在线预览部分如存在完整性等问题,可反馈申请退款(可完整预览的文档不适用该条件!)。
- 3、如文档侵犯您的权益,请联系客服反馈,我们会尽快为您处理(人工客服工作时间:9:00-18:30)。
User Manual USB2.0
Medisk usage
1.New Disk Initial PIN is 112233.
2.Press Key button(both red&green LED blink),PIN input
Press key(green LED blink) to confirm disk unlocked,plug into PC and start to use.Once pull out from PC,MeDisk locks automatically.
3.Set PIN:After unlock by default PIN,press the key button for 3 seconds(both red&gree LED illuminate),enter a new PIN
Press Key(red&greee blink in unison),re-enter the PIN
Press key(green LED inlluminate),the new PIN is accepted and successful.
Change PIN same as set PIN. Indicators
Special Features
1.If no attaching to Pc within 30seconds,disk will be re-locked.
2.When PC in sleep mode,disk also in sleep mode.All indicators will be off.
3.After 10 consecutive incorrect PIN
attemps,disk is reset and data will be
erased.Now press key for 3 seconds,reset
PIN and plug into PC will require
reformatting.
4.Reset:press “9 “and hold the key
simultaneously for 3 seconds.Enter 110 and then press key.Disk will be reset,return to
default state,but PIN has been erased.For
reuse disk,pls set a new PIN and reformat
disk.
Notice
1.Don’t forget PIN.The losted PIN and data
cannot be broken by manufacture
factory.Reuse disk either remember PIN or reset disk.
2.Don’t worry about internal
battery.Batterycan be used about 10
years.Batter will be charging when plug
into PC.
3.PIN required 6-15 digits in length,except
consecutive digits”1234567890”or sole
digit”888888”.
Others
1.Without PC to set PIN and unlock the
disk,avoid the PIN stole by hacker.
2.MeDisk with zinc alloy shell and advantage
of waterproof,dustproof and shock resistant.。
