变频电机说明书
安川变频器说明书
安川变频器说明书安川变频器说明书一、前言安川变频器是一种广泛应用于各种机械设备中的电子控制器。
它能够将交流电源等静止的电力信号转换成交变的电力信号,从而控制电动机的转速、功率和方向等参数。
安川变频器不仅可以提高机械设备的工作效率,还可以降低能耗和噪音等方面的问题。
在实际生产和工业制造中,安川变频器具有无可比拟的优势,是一种先进的控制技术。
本说明书主要介绍安川变频器的使用方法、性能指标和故障处理等方面的要点。
通过对说明书的仔细阅读,用户可以更好地了解安川变频器的原理和操作技巧,从而更好地使用和维护设备,保证设备的正常运行和安全性能。
二、安装和使用1.安装位置:安川变频器应安装在通风良好、干燥、清洁、光亮的室内环境中。
避免在嘈杂、潮湿、多灰尘等環境中使用,这样会影响安川变频器的性能和寿命。
2.组装和安装:安装前,应检查所有的部件是否齐全完好,并且各部件之间应连接正确。
安装时应注意电器设备的绝缘保护和接地保护。
安川变频器的安装高度不应超过2000米,否则需要加装高度补偿器,以保证安川变频器的正常运行。
3.连接电源和电缆:连接电源前,应先通电检查各项参数是否符合规范,确认无误后可以进行使用。
安川变频器对电缆的长度和材质等有一定的要求,不同型号的变频器需要使用不同规格和材质的电缆。
在连接电缆时,应注意接线的正确性和位置,避免发生短路或其他安全隐患。
4.使用和维护:在使用安川变频器时,应根据需要进行参数的调整和设备的监控,保持设备的稳定性和优良性能。
同时,也要做好设备的日常维护工作,包括清洁、检查、润滑等方面的处理。
在出现故障情况时,应及时处理并排除故障根源,避免影响设备的正常运行。
三、性能指标安川变频器的性能指标是用来衡量设备能力的重要参考。
以下是安川变频器的主要性能指标:1.额定电压:安川变频器的额定电压一般为AC220V/380V/415V,不同型号的变频器也有可能存在差异。
2.额定功率:安川变频器的额定功率是指电动机的额定功率,一般范围是0.1kW~800kW。
变频器使用说明书(SHUPER)
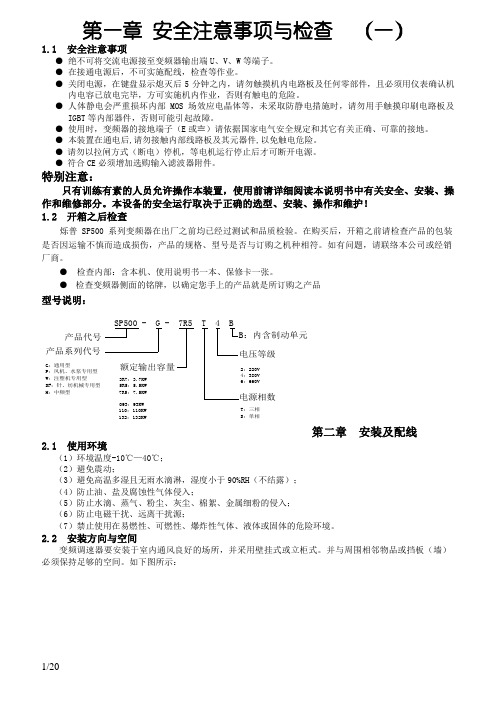
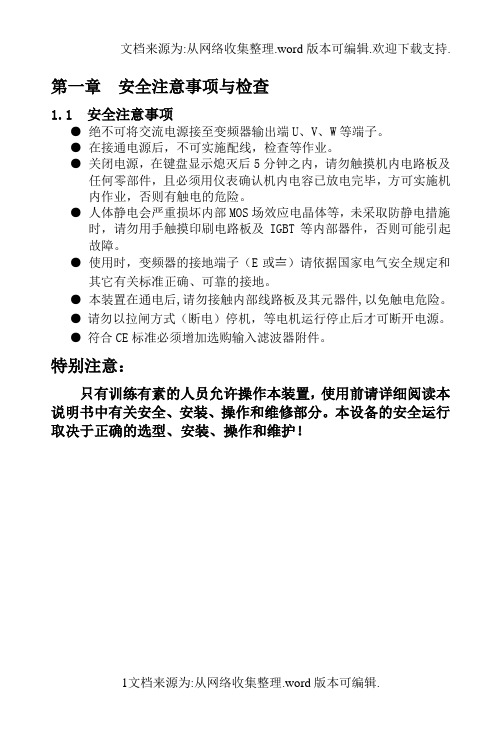
第一章安全注意事项与检查(一)1.1 安全注意事项●绝不可将交流电源接至变频器输出端U、V、W等端子。
●在接通电源后,不可实施配线,检查等作业。
●关闭电源,在键盘显示熄灭后5分钟之内,请勿触摸机内电路板及任何零部件,且必须用仪表确认机内电容已放电完毕,方可实施机内作业,否则有触电的危险。
●人体静电会严重损坏内部MOS场效应电晶体等,未采取防静电措施时,请勿用手触摸印刷电路板及IGBT等内部器件,否则可能引起故障。
●使用时,变频器的接地端子(E或〨)请依据国家电气安全规定和其它有关正确、可靠的接地。
●本装置在通电后,请勿接触内部线路板及其元器件,以免触电危险。
●请勿以拉闸方式(断电)停机,等电机运行停止后才可断开电源。
●符合CE必须增加选购输入滤波器附件。
特别注意:只有训练有素的人员允许操作本装置,使用前请详细阅读本说明书中有关安全、安装、操作和维修部分。
本设备的安全运行取决于正确的选型、安装、操作和维护!1.2 开箱之后检查烁普SP500系列变频器在出厂之前均已经过测试和品质检验。
在购买后,开箱之前请检查产品的包装是否因运输不慎而造成损伤,产品的规格、型号是否与订购之机种相符。
如有问题,请联络本公司或经销厂商。
●检查内部:含本机、使用说明书一本、保修卡一张。
●检查变频器侧面的铭牌,以确定您手上的产品就是所订购之产品安装及配线2.1 使用环境(1)环境温度-10℃—40℃;(2)避免震动;(3)避免高温多湿且无雨水滴淋,湿度小于90%RH(不结露);(4)防止油、盐及腐蚀性气体侵入;(5)防止水滴、蒸气、粉尘、灰尘、棉絮、金属细粉的侵入;(6)防止电磁干扰、远离干扰源;(7)禁止使用在易燃性、可燃性、爆炸性气体、液体或固体的危险环境。
2.2 安装方向与空间变频调速器要安装于室内通风良好的场所,并采用壁挂式或立柜式。
并与周围相邻物品或挡板(墙)必须保持足够的空间。
如下图所示:2.3 配线2.52.6 接线注意事项※ 不可将交流输入电源接到变频器输出端子U ,V W 。
华世丹 数码变频发电机组 使用说明书

数码变频发电机组使用说明书重庆华世丹动力科技股仹有限公司感谢您购买本公司数码变频式发电机●该说明书版权属于本公司所有。
●说明书的仸何内容未经公司书面许可,不许翻录。
●公司保留修改权,恕不另行通知也不承担仸何责仸。
●本书作为发电机的组成部分之一,发电机销售时,本书应随机附带。
●本说明书包括了发电机的操作说明和维修。
使用前请务必认真阅读说明书,否则错误操作可能导致安全隐患或设备损坏。
正确安全的操作将延长数码发电机的使用寿命。
●公司将不断创新和改迚产品的设计和品质。
●本书所有内容与本书印刷时最新的产品一致。
●如有仸何故障,或对发电机有不了解之处,敬请咨询公司售后服务部。
●只要遵照本书操作说明,本公司数码变频发电机是安全可靠的。
务必使用前阅读说明书,否则错误操作将导致产生安全隐患或设备损坏。
*说明书可能因发电机类型不同而不同。
目录1.安全事项 (1)2.安全标签位置.............................. (3)3.零部件识别.......................... . (4)4.操作前检查 (7)5.启动发动机 (11)6.发电机的使用 (15)7.停止发动机 (18)8.维护保养 (19)9.运输/仓储 (26)10.常见故障排除 (30)11.技术规格 (32)12.电气原理图 (34)13.附录 (36)15.售后服务信息 (37)为确保人身和财产安全,请务必认真阅读以下内容。
1、安全事项使用前,汽油加至油箱内红圈位置!使用前,检查机油位!详情请参阅本说明书第8页发动机尾气含一氧化碳,严禁在室内或通风不良处运行发电机。
●发电机运行时,确保提供足够的通风条件。
●发电机运转时和刚停机时消声器很热,小心不要触摸它。
●在特定条件下,汽油枀易燃易爆。
●务必在通风良好处加汽油,加油前请关闭发动机,幵让发动机冷却。
●在加油时,要进离明火。
●加油时如有溢油,立即将溢出的汽油擦拭干净。
变频电机使用维护说明书
变频调速专用异步电动机使用维护说明书大连钰霖电机有限公司一、概述YVP、YVP2系列电机是变频调速电动机,采用独立的全封闭外表轴向轴流风机对电机强迫冷却,外壳防护等级为IP44(YVF)、IP54(YVF2)(也可根据用户要求),冷却方式为IC416,也可按需要制成其它冷却方式。
本系列电机机座中心高、功率、安装尺寸和Y、Y2系列完全一致(外形尺寸与Y、Y2系列不同),安装方式有IMB3、IMB35、IMB5、IMV1等。
可以与国内外同类变频电源装置配套,通用性强,互换性强,运行可靠,维护方便。
电机的使用条件:环境空气温度:随季节而变化,但最高不超过40℃,最低不超过-15℃;海拔高度:不超过1000m;调频范围:3Hz或5Hz~50Hz保证恒转矩运行,50Hz~100Hz保证恒功率运行;电压:380V(1±5%);接法:功率在55kW及以下为Y接,功率在55kW以上为Δ接;工作方式:S1(连续)定子绕组温升限值(电阻法):不超过80K。
二、安装前的准备1、电机开箱前应检查包装是否完整无损,有无受潮的迹象。
2、电机开箱后应小心清除电机上的尘土。
3、检查电机的铭牌数据是否符合要求。
4、仔细检查电机在运输过程中,有无变形或损坏,紧固件是否松动或脱落,试用手转动电机是否灵活。
5、用500V兆欧表测量电阻,其值不应低于0.5MΩ,否则应对定子绕组进行干燥处理。
干燥处理时的温度不允许超过120℃。
三、电机的安装1、电机允许用联轴器、正齿轮及三角皮带轮传动。
如选用小皮带轮,可扩大三角带的传动范围。
双轴伸电机的风扇端,只允许用联轴器传动。
2、采用三角皮带传动时,电机轴中心线与负载中心线平行且要求皮带中心线与轴中心线垂直;采用联轴器传动时电机轴中心线与负载中心线应重合。
3、对立式安装的电机,轴伸除三角皮带轮(或相当于三角皮带轮负载)外不允许再带有其他任何轴向负载装置。
4、电机的安装应保证其良好的通风冷却条件。
变频电机说明书
YTB-S2系列交流电机变频调速器使用说明书概 述YTB-S2系列变频器是我公司在YTB-S1的基础上改进而来,它保持了原有的优点,改善了运行性能, 增加了直流制动功能,及其它附属功能. 使调速更可靠,应用更广泛.,采用先进的SMD 工艺,严格的出厂质检,能够满足用户的多种使用要求.开 箱 检 查1 确认在运输过程中是否造成损坏。
2 检查变频器的铭牌以确定在您手中的产品就是所订货品。
3 检查包装箱内含变频器本体一台,使用说明书一份,出厂合格证一张及其它选购品。
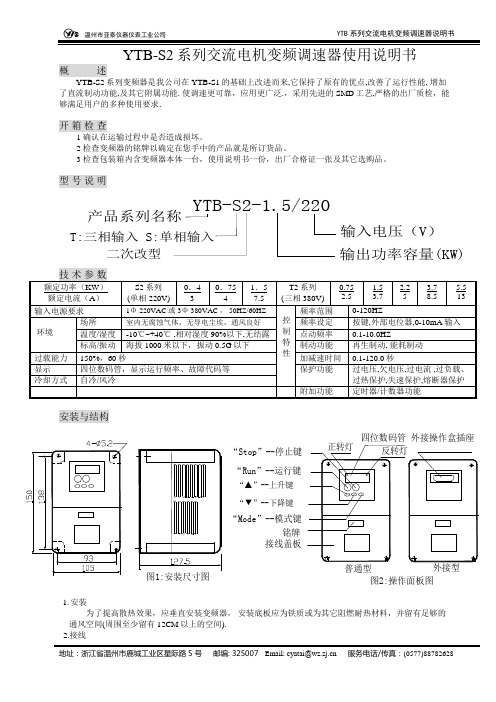
型 号 说 明输出功率容量(KW)输入电压(V)T:三相输入 S:单相输入YTB-S2-1.5/220产品系列名称二次改型技 术 参 数额定功率(KW ) 额定电流(A )S2系列 (单相220V)0.4 30.75 41.5 7.5T2系列(三相380V)0.75 2.5 1.5 3.7 2.2 5 3.7 8.5 5.5 13 输入电源要求 1Φ 220VAC 或 3Φ 380VAC , 50HZ/60HZ 控 制 特 性频率范围0-120HZ 环境 场所 室内无腐蚀气体,无导电尘埃,通风良好 频率设定 按键,外部电位器,0-10mA 输入温度/湿度 -10℃~+40℃ ,相对湿度90%以下,无结露 点动频率0.1-10.0HZ 标高/振动 海拔1000米以下,振动0.5G 以下 制动功能 再生制动, 能耗制动 过载能力 150%,60秒 加减速时间 0.1-120.0秒 显示 四位数码管,显示运行频率、故障代码等 保护功能 过电压,欠电压,过电流 ,过负载、过热保护,失速保护,熔断器保护 冷却方式 自冷/风冷附加功能 定时器/计数器功能安装与结构1. 安装为了提高散热效果,应垂直安装变频器, 安装底板应为铁质或为其它阻燃耐热材料,并留有足够的 通风空间(周围至少留有12CM 以上的空间). 2.接线图1:安装尺寸图铭牌“Mode”--模式键接线盖板图2:操作面板图“▼”--下降键“▲”--上升键“Run”--运行键“Stop”--停止键四位数码管外接型外接操作盒插座普通型正转灯反转灯打开接线盖板,即可看到主接线柱和控制用接线柱。
变频电机使用说明书

钰霖电机YVF变频调速电动机使用维护手册Usage Handbook资料.前言首先感您购买本公司的YVF系列变频调速电动机,请在使用前仔细阅读本手册的各项容,以保证电机的正确使用,不正确的使用将造成不正常的运行,引起故障或降低使用寿命。
产品介绍YVF系列变频调速电动机是在Y2系列电机基础上更新设计的,可广泛使用于各种机械领域,且符合国家和企业的相关技术标准,与国外同类产品水平相当。
到货检查收到您订购的产品后,请开箱检查以下各项,如发现产品有任何问题或不符合您的订购资料.要求,请您与本公司联系。
1.请核对产品的铭牌,确认您订购的规格2.请检查外观有无在运输中受损3.除电机本体及使用说明书外,确认您所订购的附件有无完整4.检查零部件的装配应良好,紧固件应无松动。
搬运和存储4.1本电机产品为精密制造零件,搬运时只允许在其规格的运输吊攀上进行起吊(小规格可以用手搬运),必须轻吊、轻拿、轻放、防止碰撞。
不得在搬运过程中抱持轴承头部。
且在安装调试中对轴承头部要妥善防护,否则将导致运转精度失准。
资料.4.2电机的存储场所应符合以下条件:(1)周围温度:-15度——+40度(2)相对湿度:5%——80%(3)周围环境:不受直晒,周围介质必须无灰尘、腐蚀性气体、可燃气体、油雾、蒸汽、滴水和震动。
并尽量避免含盐较多的场合。
不得放在会发生温度急剧变化而结露和冰冻的地方。
(4)电机不可直接或倒置放在地面上,应放置在合适的台架上,且应放平稳。
(5)如周围环境恶劣则应用塑料薄膜包好进行保管,可在塑料薄膜中加干燥剂防止受潮。
如要长期保存,则应严格封装。
使用环境资料.(1)海拔:1000米以下(2)环境温度:-15度——+40度(3)电动机安装场所必须干燥,清洁。
具有良好的通风不受直晒,周围介质必须、无灰尘、腐蚀性气体、可燃气体、油雾、蒸汽、滴水和震动。
并尽量避免含盐较多的场合。
(4)空气相对湿度:80%以下电机安装(机械安装和电气安装)5.1电机常用机械安装方式:B3底座安装B35底座及法兰安装B5法兰安装下面是安装时的注意事项:(1)电动机的安装应由技术人员来完成安装的基础应有足够强度,电机应放置平稳请勿倒装、斜装或垂直安装(要垂直安装,请在资料.订购时标注)(2)载荷转动部分在安装前要做动平衡校正。
电机变频驱动器数据手册说明书
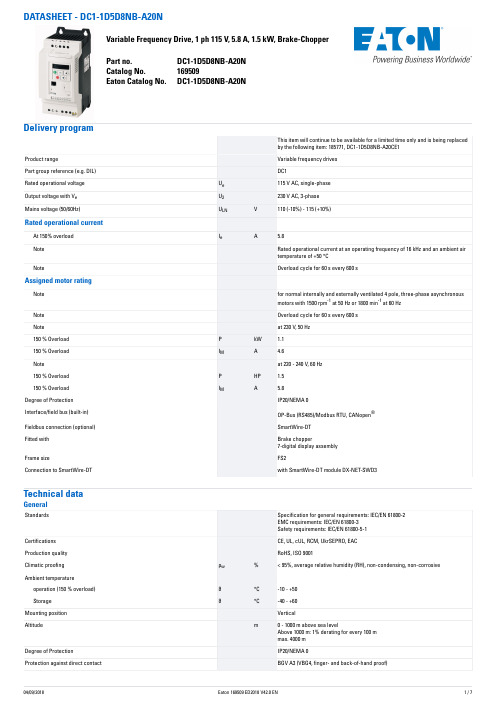
Brake chopper 7-digital display assembly
FS2
with SmartWire-DT module DX-NET-SWD3
Specification for general requirements: IEC/EN 61800-2 EMC requirements: IEC/EN 61800-3 Safety requirements: IEC/EN 61800-5-1
Variable frequency drives
DC1
Ue
115 V AC, single-phase
U2230 ຫໍສະໝຸດ AC, 3-phaseULN
V
110 (-10%) - 115 (+10%)
Ie
A
5.8
Rated operational current at an operating frequency of 16 kHz and an ambient air temperature of +50 °C
Overload cycle for 60 s every 600 s
at 230 V, 50 Hz
P
kW
1.1
IM
A
4.6
at 220 - 240 V, 60 Hz
P
HP
1.5
IM
A
5.8
IP20/NEMA 0
OP-Bus (RS485)/Modbus RTU, CANopen®
SmartWire-DT
CE, UL, cUL, RCM, UkrSEPRO, EAC
RoHS, ISO 9001
ρw
%
< 95%, average relative humidity (RH), non-condensing, non-corrosive
变频器说明书大全
目录一、用户须知 2二、注意事项 3三、系统简介 4四、输出逆变系统 5五、可控整流系统 40 附录一维护与保养 54 附录二、依照EMC导则进行传动装置设计的说明 55一、用户须知1.1该变频调速装置为电力电子器件组成,在运输及安装过程中,尽量避免强烈的震动,尽量垂直运输。
1.2该变频调速装置尽量安装在干燥通风的区域,变频器的散热片距墙壁(或遮挡物)距离应大于1.0米。
1.3长期不用时,应存放在清洁干燥的地方;在井下安装好而不运行的状况下,该设备尽量不停电。
1.4 使用之前,必须详细阅读用户手册。
二、注意事项2.1变频调速装置其隔爆外壳体及本安控制盒的结构和非本安及本安电路的电气参数,在出厂前均已装配调试合格,用户严禁改动变频调速装置壳体的结构和电气参数,以确保本产品的防爆性能、电气性能和本安性能。
2.2设备在带电情况下,严禁松动隔爆壳紧固件,在检修或处理故障时,请注意“断电源后开盖”。
(注:本安接线腔不受此限制)2.3外壳应接地良好。
2.4电源接线隔爆腔在接线时请注意按图接线,不得接错。
2.5装置防爆主腔内进行操作时,手上必须带接地导线或静电环。
2.6装置电源R、S、T停电以后5分钟内禁止对变频器隔爆主腔内的任意电路进行操作,且必须用仪表确认机内电容已放电完毕,方可实施机内作业。
停电以后1分钟内禁止再次给电。
2.7负载运行过程中尽量减少瞬时停电次数。
2.8禁止对变频器主回路及控制回路进行耐压试验,如对与变频有电路联系的相关设备进行耐压试验之前应将与变频相关的电路切断。
2.9测量变频器输出电压时必须使用整流式交流电压表,使用其它非整流式电压表测量高频脉冲电压时,容易产生误操作或显示不准确。
2.10变频器安装应远离大容量变压器及电动机(容量为变频器的10倍以上)。
2.11该系统输出端不可以加装进项电容或阻容吸收装置。
2.12该系统变频器箱与电抗器箱连接必须完全按照相关图纸,以保证反馈电压相序一致。
士林电机 SF 系列变频器 说明书

危險:有受 傷、感 電之 虞 安 裝運 轉之 前請 詳讀 說明 書, 並 依指 示操 作
通電 中及 電源 關閉 後10分鐘 內 請 勿打 開上 蓋 請確 實接 地 注意:有發 生火 災之 虞 請安 裝於 金屬 等不 燃物 之上
说明书导读
导读 士林电机 SF 系列变频器,为符合市面上大部分的应用层面需求,设计了许多复杂的参数 功能,对于初次接触变频器的客户,可能会造成使用上的困扰,因此我们希望读者能够仔细阅 读说明书的每一部分,以便充分掌握此变频器的使用方法。在阅读说明书时,有不明之处,欢 迎来电垂询。 说明书的第 2 章详细列出了士林 SF 系列变频器的规格,2-5 节指导客户安装变频器,并 且强调使用变频器时应注意的安全事项。 第 3 章指导客户如何使用变频器,3-1 节列出了变频器的操作模式;3-2 节说明如何使用 操作器;3-3 节列出了简单的操作步骤。第 4 章对参数作了详细的解释说明。
SF-040-11/15K
323
SF-020-15/18.5K 350
SF-040-18.5/22K 350
L1 (mm) 303 303 303 330 330
W (mm) 200 200 200 230 230
W1 (mm) 186 186 186 214 214
H (mm) 186 186 186 195 195
分辩率
模拟设定
DC 0~5V 信号设定时,分辨率为 1/500; DC 0~10V 或 4~20mA 信号设定时,分辨率为 1/1000。
输出频率 数字设定 最大目标频率的 ±0.01%。
TBVF系列矿用隔爆型永磁同步变频电动机使用说明书力博
T B V F系列矿用隔爆型永磁同步变频电动机使用说明书力博集团标准化工作小组 [Q8QX9QT-X8QQB8Q8-NQ8QJ8-M8QMN]TBVF系列矿用隔爆型永磁同步变频电动机执行标准: ~2-2010Q/SDORA001-2016使用说明书山东欧瑞安电气有限公司2016年03月01日目录1.概述适用范围为了保证设备连续安全可靠使用,特制定本说明书。
本说明书适用于山东欧瑞安电气有限公司生产的TBVF系列矿用隔爆型永磁同步变频电动机的安装使用和维护。
本说明书对有关保存、安装、使用、维护等方面的问题做了详细介绍,其它有关运行及定额的具体情况参见电动机铭牌或标牌。
基础,主回路及辅助的电气连接以及与被驱动设备的接口信息可参见电动机外形图。
请仔细审阅电动机的所有警告提示及铭牌。
电动机只有严格按照外形图及使用维护说明书来安装使用,产品的质量保证才生效。
本说明书可能未完全包括在安装、运行、维护方面可能发生的一切事件,如果所发生的问题未包括在本说明书或外形图中,可直接与山东欧瑞安电气有限公司技术服务部联系。
本系列电动机防爆性能符合《爆炸性气体环境用电气设备第1 部分:通用要求》和《爆炸性气体环境用电气设备第2 部分:隔爆型“d”》的规定。
防爆标志为ExdⅠMb,适用于甲烷或煤尘的爆炸性混合物存在的煤矿井下环境。
本系列电动机可用于驱动各种通用机械,如带式输送机、球磨机、切削机床及其他机械设备,在矿山、建材、机械工业、化工工业、发电厂等各种工矿企业中作原动机用。
执行标准GB/T 191-2008 包装储运图示标志GB 755-2008 旋转电机定额和性能GB/T 13958-2008 无直流励磁绕组同步电动机试验方法GB/T 1029-2005 三相同步电机试验方法GB/T 1993-93 旋转电机冷却方法GB/T 24478-2009 电梯曳引机GB/T 997-2008 旋转电机结构型式、安装型式及接线盒位置的分类GB/T 电工电子产品基本环境试验规程试验Db:交变湿热试验方法GB 爆炸性环境第1部分:设备通用要求GB 爆炸性环境第2部分:由隔爆外壳“d”保护的设备GB 爆炸性环境第3部分:由增安型“e”保护的设备GB/T 旋转电机整体结构的防护等级(IP代码)分级GB/T 10068-2008 轴中心高为56mm及以上电机的机械振动振动的测量、评定及限值GB/ 旋转电机噪声测定方法及限值第3部分:旋转电机噪声测定方法及限值GB 12665-2008 电机在一般环境下使用的湿热试验要求GB/T 电工术语旋转电机GB/T 电工术语爆炸性环境用防爆电气设备GB 4831-1984 电机产品型号编制办法GB4208-2008 外壳防护等级(IP代码)GB/T22669-2008 三相永磁同步电动机试验方法GB/T22711-2008 高效三相永磁同步电动机技术条件GB/T21418-2008 永磁无刷电动机系统通用技术条件MT/T1040-2007 采煤机变频调速装置用YBVF系列行走电动机技术条件AQ1043-2007 矿用产品安全标志标识电动机结构TBVF系列矿用隔爆型永磁同步变频电动机主要有电动机壳体、定子绕组线圈、定子硅钢片、转子永磁体、转子轴、转子轴承及附属设施组成。
Altera DE1变频电机启动器配置说明说明书
2015How to Configure the DE1 Variable Speed Starter for Reversing Motor Starting Applications.ApplicationThe DE1 Variable Speed Starter (VSS) offers the advantages of both a direct online(DOL) starter and a variable frequency drive (VFD) in a single device by providing the ease of use of a DOL starter and the variable motor speed of a variable frequency drive. The DE1 makes it possible to ensure a soft motor start that uses configured time parameters to take a motor to a defined speed with full torque at low motor RPM while avoiding inrush current peaks, enabling users to achieve the energy efficiency and product reliability required for their applications. Additionally, the DE1 can be easily configured for other applications such as basic starting and/or 2 speed applications.OverviewThe DE1 Variable Speed Starter can be quickly configured by using the DXE-EXT-SET configuration module to change default values if required by the application. This module snaps into the face of the DE1 enabling the user to configure Mains Frequency, Ramp Time, Fixed Frequency, Mode Selection and Motor FLA (protection) with only a small screwdriver. While other devices such as DriveConnect software, the DX-KEY-LED keypad, etc. may be used to configure the DE1, examples in this document refer to the use of the DXE-EXT-SET configuration module to provide a straightforward setup procedure when the DE1is to be used for basic motor starting. Additional capabilities and configuration settings for the DE1…may be found in the DE1 User Manual.ContentsDXE-EXT-SET Configuration Module Functionality (2)Transfer parameter values of the DXE-EXT-SET module to the DE1 (3)DE1 Functionality–Mode 0 Terminal Assignment (3)DE1 Functionality–Connection Diagram for a reversing starter application (4)Application Note AP040101EN Variable Speed Starter:Reversing starter application Effective February2015DXE-EXT-SET Configuration Module FunctionalityThe DXE-EXT-SET configuration module is used for configuringthe DE1 during setup operations and is normally removed from theDE1 for RUN operations, as all parameterization informationresides within the DE1.NOTE: The DXE-EXT-SET module can only download thepotentiometer values from the module into the DE1. The DXE-EXT-SET module cannot upload parameters from a DE1 into themodule.The desired parameterization values can be adjusted prior to beingconnected to the DE1. The module is then connected to the DE1that is in the STOP mode and the SET button is pressed to initiate the download. Parameterization values are found in Table 1:Table 1–Parameterization with the DXE-EXT-SET Configuration ModuleDE1 Parameterization DXE-EXT-SETParameter Unit PNU Range Default SettingsRamp sec.P-030.1-30050.1/1/3/5/10/15/30/60/120/180P-040.1-300Mode P-150-900-9Fixed Frequency Hz.P-200-60201-60I motor Amps P-0810%-100% x I e100%10%-100% x I eSupply Frequency Hz.P-0950-606050/60NOTES:∙The DXE-EXT-SET module Ramp parameter sets both Start(P-03)and Stop(P-04)ramp parameters with the same value.∙I e= DE1… Frame Maximum∙I motor= Motor Nameplate FLA, establishes motor protection thresholds.∙I motor potentiometer setting for a 1.9A FLA motor is calculated by the following formula:I motor=Motor Nameplate FLA= 1.9A=0.904=90%DE1-342D1… Rated Current 2.1A∙Supply Voltage parameter P-07is not configurable with DXE-EXT-SET module.External keypad or drivesConnect software is required to change this parameter.Parameter P-07 default values are established by product catalog number when selecting Frame Size and Frequency.Reference Table 2Application Note AP040101EN Variable Speed Starter:Reversing starter application Effective February 2015Table 2–Supply Voltage ParameterizationSupply Voltage Vac P-07200-240 Vac ± 10%23060 Hz DX-KEY,drivesConnect Supply Voltage Vac P-07400-480 Vac ± 10%46060 HzTransfer parameter values of the DXE-EXT-SET module to the DE11.DE1… must be in STOP mode only, with supply voltage applied.2.Press the SET button for 2 seconds. The status LED will flash (green) 3 times for 2seconds.3.Steady green status LED indicates all parameters have been successfully transferredfrom the module to the DE1….4.The operating parameters will be used for Start/Run/Stop profiles in both forward andreverse directions.DE1Functionality–Mode 0Terminal AssignmentThe DE1 has ten (10) terminal assignment profiles. Mode 0 is default and is recommended for basic motor control consisting of a Start ramp, acceleration to motor synchronous speed, and a Stop ramp.Mode 0 terminal assignments are;∙Terminal 1 / digital input 1 FWD (forward)–START/RUN signal-forward∙Terminal 2 / digital input 2 REV (reverse)–START/RUN signal-reverse∙Terminal 3 / digital input 3 FF1 (fixed frequency 1)–not used∙Terminal 4 / digital/analog input 4 f-REF (frequency set point value)–connected to Terminal +10V to provide a reference signal to command the motor to synchronous speed.Application Note AP040101EN Variable Speed Starter:Reversing starter application Effective February2015DE1Functionality–Connection Diagram for a reversing starter applicationFigure 2 illustrates the connections required for operation of the DE1 in a reversing motor start configuration. Terminal 3 is not used in this type of configuration.∙When digital input 1 gets a signal, the DE1 will accelerate the motor in the forward direction with a ramp of 5 seconds (default value) to motor synchronous speed.∙The DE1 will operate at forward synchronous speed as long as digital input 1 remains signaled.∙When the signal is removed from digital input 1, the DE1 will decelerate the motor with a ramp time of 5 seconds (12Hz/second).∙When digital input 2 gets a signal, the DE1 will accelerate the motor in the reverse direction with a ramp of 5 seconds (default value) to motor synchronous speed.∙The DE1 will operate at reverse synchronous speed as long as digital input 2 remains signaled.∙When the signal is removed from digital input 2, the DE1 will decelerate the motor with a ramp time of 5 seconds (12Hz/second).Figure3illustrates the control signal logic.Figure 2: Connection Diagram Figure 3: Signal LogicApplication Note AP040101EN Variable Speed Starter:Reversing starter application Effective February2015Additional HelpIn the US or Canada:please contact the Technical Resource Center at 1-877-ETN-CAREor1-877-326-2273.All other supporting documentation is located on the Eaton web site atEaton1000 Eaton Boulevard Cleveland, OH 44122 USA © 2014EatonAll Rights ReservedPrinted in USAPublication No.AP040101EN April2014Eaton is a registered trademark of Eaton Corporation.All other trademarks are property of their respective owners。
汇川变频器说明书

汇川变频器说明书汇川变频器说明书1. 简介汇川变频器是一种用于调节电机输出转速的装置。
它通过改变电源频率来调整电机转速,以实现对电机的精确控制。
本说明书将介绍汇川变频器的主要特点、工作原理及操作方法。
2. 特点- **精确控制**:汇川变频器可以精确调节电机的转速,以满足不同的工艺需求。
- **高效能**:采用先进的变频技术,汇川变频器能够提供高效能的能源转换,减少能源浪费。
- **稳定可靠**:汇川变频器具有稳定的性能和可靠的工作,能够长时间稳定运行。
- **多功能**:汇川变频器支持多种控制方式,可根据需要进行设置。
- **环保节能**:使用汇川变频器可以减少排放,降低环境污染。
3. 工作原理汇川变频器主要由电源模块、控制模块和输出模块组成。
- 电源模块:负责为整个变频器提供稳定的电源。
电源输入可以根据实际需求,接入不同的电源供应方式。
- 控制模块:通过调节电源频率来改变电机转速。
控制模块根据输入信号,通过逻辑运算和控制算法计算出相应的输出信号。
- 输出模块:将控制模块计算出的输出信号传递给电机,实现对电机转速的精确控制。
输出模块采用先进的功率变换技术,以提供高效能的能源转换。
4. 操作方法汇川变频器的操作方法如下:1. **接线**:将电源线正确地接入电源模块,并将电机线正确连接到输出模块。
2. **设置参数**:按照实际需求,在控制模块的界面上进行参数设置。
根据操作手册的指引,设置合适的电源频率和转速范围。
3. **启动**:根据实际需求,启动汇川变频器并观察电机的转速变化。
电机应该平稳启动,转速应该逐渐达到设定值。
4. **监控**:根据需要,可以使用监控工具来实时监测汇川变频器的运行状态。
监控工具可以显示电机转速、电流等参数。
5. **停止**:当不需要使用汇川变频器时,应将其停止工作。
按照操作手册的指引,正确地停止变频器的运行。
5. 安全事项为了确保安全操作汇川变频器,需要注意以下事项:- 在操作汇川变频器之前,先读取并理解本说明书中的内容。
变频器使用说明书(SHUPER)
第一章安全注意事项与检查1.1 安全注意事项●绝不可将交流电源接至变频器输出端U、V、W等端子。
●在接通电源后,不可实施配线,检查等作业。
●关闭电源,在键盘显示熄灭后5分钟之内,请勿触摸机内电路板及任何零部件,且必须用仪表确认机内电容已放电完毕,方可实施机内作业,否则有触电的危险。
●人体静电会严重损坏内部MOS场效应电晶体等,未采取防静电措施时,请勿用手触摸印刷电路板及IGBT等内部器件,否则可能引起故障。
●使用时,变频器的接地端子(E或〨)请依据国家电气安全规定和其它有关标准正确、可靠的接地。
●本装置在通电后,请勿接触内部线路板及其元器件,以免触电危险。
●请勿以拉闸方式(断电)停机,等电机运行停止后才可断开电源。
●符合CE标准必须增加选购输入滤波器附件。
特别注意:只有训练有素的人员允许操作本装置,使用前请详细阅读本说明书中有关安全、安装、操作和维修部分。
本设备的安全运行取决于正确的选型、安装、操作和维护!1.2 开箱之后检查烁普SP500系列变频器在出厂之前均已经过测试和品质检验。
在购买后,开箱之前请检查产品的包装是否因运输不慎而造成损伤,产品的规格、型号是否与订购之机种相符。
如有问题,请联络本公司或经销厂商。
●检查内部:含本机、使用说明书一本、保修卡一张。
●检查变频器侧面的铭牌,以确定您手上的产品就是所订购之产品第二章安装及配线2.1 使用环境(1)环境温度-10℃—40℃;(2)避免震动;(3)避免高温多湿且无雨水滴淋,湿度小于90%RH(不结露);(4)防止油、盐及腐蚀性气体侵入;(5)防止水滴、蒸气、粉尘、灰尘、棉絮、金属细粉的侵入;(6)防止电磁干扰、远离干扰源;(7)禁止使用在易燃性、可燃性、爆炸性气体、液体或固体的危险环境。
2.2 安装方向与空间变频调速器要安装于室内通风良好的场所,并采用壁挂式或立柜式。
并与周围相邻物品或挡板(墙)必须保持足够的空间。
如下图所示:2.3 配线变频调速器配线,分为主回路及控制回路两部分。
2HP-5HP 变频电机维修手册说明书
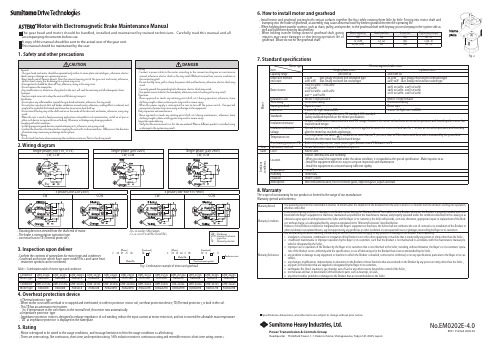
Fig. 2At least 100MΩ when measured with a 500V DC meager between the motor coil and case at normal temperature and humidity after motor hasNormal function when a 1500V, 50/60Hz current is applied between the motor coil and case for 1 minute at normal temperature and humidityT) should be no more than 60°C (no more than 45°Cfor motors with fans) when measured by the prescribedThe warranty period for the new Products shall be 18 months after the shipment of the Products from the seller’s works or 12 months from the Products coming into operation,In the event that any problem or damage to the Product arises during the “Warranty Period” from defects in the Product whenever the Product is properly installed and com-bined with the Buyer’s equipment or machines, maintained as specified in the maintenance manual, and properly operated under the conditions described in the catalog or as otherwise agree upon in writing between the Seller and the Buyer or its customers; the Seller will provide, at its sole discretion, appropriate repair or replacement of the Prod-However, if the Product is installed or integrated into the Buyer’s equipment or machines, the Seller shall not reimburse the cost of: removal or re-installation of the Product orinstallation, connection, combination or integration of the Product in or to the other equipment or machine that is rendered by any person or entity other than the Seller ;insufficient maintenance or improper operation by the Buyer or its customers, such that the Product is not maintained in accordance with the maintenance manual pro-improper use or operation of the Product by the Buyer or its customers that is not informed to the Seller, including, without limitation, the Buyer’s or its customers’ opera-any problem or damage to any equipment or machine to which the Product is installed, connected or combined, or on any specifications particular to the Buyer or its cus-any changes, modifications, improvements or alterations to the Product or those functions that are rendered on the Product by any person or entity other than the Seller ;。
WEG CFW300变频电机驱动说明书
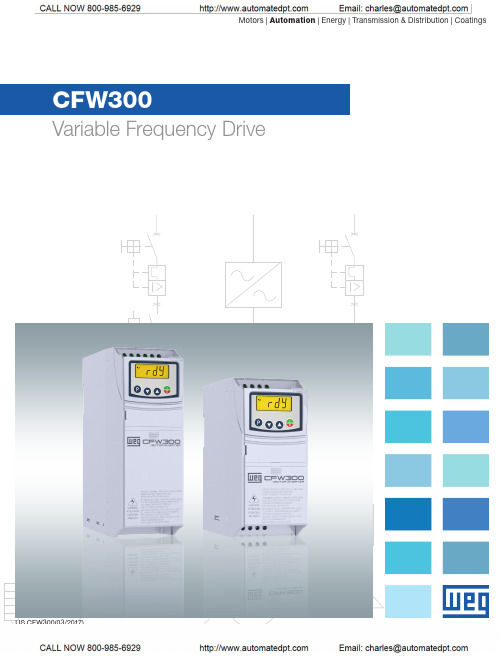
CFW300Variable Frequency DriveMotors | Automation | Energy | Transmission & Distribution | CoatingsUS.CFW300(03/2017)The CFW300 variable frequency drive is a high-performance VFD for three-phase induction motors. It is ideal for applications on machines or equipment that require precise control with easy setup and operation.The CFW300 features a compact size with contactor-style electrical connections (top in / bottom out). The VFD’s performance can be scaled to match the application by selecting WEG vector control (VVW) or scalar control (V/F). The CFW300 includes built-in operator interface (HMI) and SoftPL C with free WPS programming software for custom tailored control schemes. A variety of plug-in option modules for additional I/O and communications protocols may be added to provide extended capabilities, making the CFW300 a flexible and cost effective solution for your variable speed requirements.• Centrifugal pumps • Fans / Blowers • Blenders / Mixers • Centrifuges •Compressors• Conveyors • Roller Tables • Granulators• Commercial Dryers •Rotary FiltersApplications 2 | 1-800-ASK-4WEGData is subject to change without notice.Variable Frequency DrivesCFW300FlexibilitySlot forCommunicationModulesTwo ExpansionSlots for OptionModulesSlot forInput / OutputModulesRemote Keypad (HMI)(CFW300-KHMIR)Flash Memory Module(CFW300-MMF)Download original parameter values tomultiple other CFW300 VFDs without theneed to apply power to the drives.Conformal Coated Circuit BoardsClass 3C2 coating for all circuit boards as standard providesgreater protection against airborne contaminants. Meets IEC60721-3-3 requirements for corrosive environmentsRFI Filter(CFW300-KFA orCFW300-KFB)Category C2 or C3 Reduceselectromagnetic interferenceEasy Cooling FanRemoval andReplacementWEG Automation - Products and Solutions | 3 Data is subject to change without notice.Variable Frequency DrivesCFW300CFW300 Catalog Number Sequence A S 2NB 20S = Single Phase B = 1 or 3 Phase T = Three PhaseSupply Voltage2 = 200-240 VacSupply Phases1 = 110-127 Vac 07P3 = 7.3 Amps 10P0 = 10.0 Amps 15P2 = 15.2 Amps06P0 = 6.0 Amps 04P2 = 4.2 Amps Rated CurrentDB = Dynamic Brake 01P6 = 1.6 Amps 20 = IP20 (Std.)02P6 = 2.6 Amps CFW30002P6FrameOptionsA or BNB = No Brake4 | 1-800-ASK-4WEGData is subject to change without notice.Variable Frequency DrivesCFW300IP20 EnclosureMotor VoltageMotor HP 1Drive Output Amps 2Catalog NumberBraking TransistorFrame SizeDimensions (in.)HxWxDApprox. Weight Lbs. (kG)List PriceMultiplier Symbol230 V a c / 3 P h a s eInput Power Supply: Single-Phase 110-127 Vac 1/4 or 1/3 1.6CFW300A01P6S1NB20No A 6.3 x 2.8 x 5.9 2.0 (0.9) $361 V1 3/4 2.6CFW300A02P6S1NB20No A 6.3 x 2.8 x 5.9 2.0 (0.9) $394 V11 4.2CFW300A04P2S1NB20No A 6.3 x 2.8 x 5.9 2.0 (0.9) $420 V12 6.0CFW300A06P0S1NB20No A 6.3 x 2.8 x 5.9 2.0 (0.9) $507 V1Input Power Supply: Single-Phase 200-240 Vac1/4 or 1/3 1.6CFW300A01P6S2NB20No A 6.3 x 2.8 x 5.9 2.0 (0.9) $323 V1 3/42.6CFW300A02P6S2NB20No A 6.3 x 2.8 x 5.9 2.0 (0.9) $348 V11 4.2CFW300A04P2S2NB20No A 6.3 x 2.8 x 5.9 2.0 (0.9) $371 V12 6.0CFW300A06P0S2NB20No A 6.3 x 2.8 x 5.9 2.0 (0.9) $461 V127.3CFW300A07P3S2NB20No A 6.3 x 2.8 x 5.9 2.0 (0.9) $543 V1310.0CFW300B10P0B2DB20 3Yes B 8.1 x 2.8 x 6.33.0 (1.4) $648 V1Input Power Supply: Three-Phase 200-240 Vac1/4 or 1/3 1.6CFW300A01P6T2NB20No A 6.3 x 2.8 x 5.9 2.0 (0.9) $343 V1 3/4 2.6CFW300A02P6T2NB20No A 6.3 x 2.8 x 5.9 2.0 (0.9) $376 V11 4.2CFW300A04P2T2NB20No A 6.3 x 2.8 x 5.9 2.0 (0.9) $399 V12 6.0CFW300A06P0T2NB20No A 6.3 x 2.8 x 5.9 2.0 (0.9) $484 V127.3CFW300A07P3T2NB20No A 6.3 x 2.8 x 5.9 2.0 (0.9) $571 V1310.0CFW300B10P0B2DB20 3Yes B 8.1 x 2.8 x 6.3 3.0 (1.4) $648 V1515.2CFW300B15P2T2DB20YesB8.1 x 2.8 x 6.33.0 (1.4)$792V1Notes:1) “HP” rating based on “average FLA values”. Use as a guide only.2) Motor FLA may vary with speed and manufacturer. ALWAYS compare motor FLA to Nominal AMPS of drive. 3) CFW300B10P0B2DB20 is capable of Single-Phase input without derating. For other technical data please refer to WEG product manual.Options and AccessoriesTypeCATALOG NUMBER DescriptionApprox. Wt. (lbs.) List Price Multiplier Symbol I/O 1CFW300-IOAR I/O Expansion Module; 1 AI, 1 AO, 3 DOR, +10vdc0.2 $141 V1I/O 1CFW300-IODR I/O Expansion Module; 4 DI, 3 DOR0.2 $108 V1I/O 1CFW300-IOAENC I/O and Encoder Module; 1 AI, 2 AO, +10vdc, 1 Incremental Encoder Input, +5vdc 0.2 $143 V1I/O 1CFW300-IOADR I/O Expansion Module; 1 NTC Sensor Input, 3 DOR0.2 $207 V1RS485 Card CFW300-CRS485RS-485 Module; 1 RS-485 Input (Modbus-RTU), 1 Mini USB for Remote Keypad 0.2 $82 V1USB Card CFW300-CUSB USB Communication Module w/ 2-meter Cable; 1 Mini USB 0.2 $87 V1RS232 Card CFW300-CRS232RS-232 Communication Module (Modbus-RTU); 1 RS2320.2 $82 V1CANopen Card CFW300-CCAN CANopen/DeviceNet Comm. Module; 1 CAN/DeviceNet, External 24vdc Power 0.2 $100 V1Profibus DP Card CFW300-CPDP Profibus DP Communication Module; 1 Profibus DP 9-Pin Connector 0.2 $294 V1Remote Keypad CFW300-KHMIR Remote Keypad; Includes CFW300-CRS485 and 3-meter Cable 0.4 $256 V1Flash Memory Module CFW300-MMF Flash Memory Module for saving program and parameters to/from drive.0.2 $210 V1RFI Filter Kit – Fr. A CFW300-KFA CFW300 RFI Filter Kit – Frame Size A - SINGLE PHASE INPUT MODELS ONLY 0.3 $90 V1RFI Filter Kit – Fr. BCFW300-KFBCFW300 RFI Filter Kit – Frame Size B - SINGLE PHASE INPUT MODELS ONLY0.3$105V1Notes:1) Option card I/O is in addition the standard CFW300 I/O which includes: 4 DI, 1 AI, 1 DOR.WEG Automation - Products and Solutions | 5Data is subject to change without notice.Variable Frequency DrivesCFW300Communications and I/OCFW 300 Option Modules Option Card and I/O TableDI AI AODOR NTCUSBCANRS232RS485ProfiBusEncoder10vdc24vdcStandard I/O (incl.)411CFW300-IOAR 1131CFW300-IODR 43CFW300-IOAENC 2211CFW300-IOADR 31CFW300-CRS48511CFW300-CUSB 1CFW300-CRS2321CFW300-CCAN 1Ext.CFW300-CPDP1DimensionsFrame Size IP20Heightin. (mm)Width in. (mm)Depth in. (mm)Weight Lbs. (kG)A (w/o RFI) 6.3 (157.9) 2.8 (70.0) 5.9 (148.4) 2.0 (0.9)A (w/RFI)7.8 (196.0) 2.8 (70.0)7.5 (190.1) 2.9 (1.3)B (w/o RFI)8.1 (198.9) 2.8 (70.0) 6.3 (158.4) 3.0 (1.4)B (w/ RFI)9.4 (237.0)2.8 (70.0)7.9 (200.1)4.0 (1.8)Vista da base de fixação Vista frontal Vista lateralPHLP Rear view Front view Side View HW D 6 | 1-800-ASK-4WEGData is subject to change without notice.Variable Frequency DrivesCFW300Technical DataPower SupplyVoltage Single Phase110-127 Vac (+10%, -15%)Single Phase or Three Phase 200-240 Vac (+10%, -15%)Frequency50 / 60Hz +/- 2Hz Output Voltage 0-230 Vac Three Phase Frequency 0-400 Hz, 0.1Hz Resolution ControlControl ModesVolts per Hertz (Scalar)Sensorless Voltage VectorSinusoidal PWM (Space Vector Modulation)Switching Frequency 2.5, 5, 10 or 15kHz Frequency Range 0-400 HzOverload Capacity150% for 60 seconds, repeatable every 10 min.Control Inputs 4 programmable isolated digital inputs, NPN or 24Vdc logic (PNP)1 programmable differential analog input; programmable for current or voltage Control Outputs 1 programmable relay output: One NO/NC (Form C) 250 Vac / 0.5 A Communication Field Bus Optional modules for RS-485, RS-232, CANopen, DeviceNet, Profibus-DP, USB SafetyProtectionsMotor over current DC link over voltage Motor overloadDC link under voltage Output phase-to-phase short circuit Drive over temperature Output phase-to-ground short circuit External faultProgramming errorEnclosure Degree of Protection IP20Mounting Surface mounting with screws or DIN rail mountingAmbientTemperature 14 - 122°F (50°C), up to 140°F (60°C) with 2% / 1.8°F (1°C) output current derating Humidity 5-95% Non CondensingAltitude0-3300 ft (1000m)Up to 13,200 ft (4000m) with 1% / 330ft (100m) output current deratingRegulatory Con-formanceEMC Directive 89 / 336 / EEC Electromagnetic compatibility – Industrial Environment EMC Emission and Immunity with optional filter ENC61800-2, 3, 5-1 ENC61800-4-2, 3, 4, 5, 6LVD 73/23/EEC Low Voltage Directive UL 508C, UL 840, UL 50Electrical Equipment standardsSpecial FunctionsLinear and “S” ramp accel and decel, local/remote control, FWD/REV selection, DC braking, manual and auto torque boost, motor slip compensation, electronic pot, two skip frequencies, maximum and minimum adjustable frequency limits, adjustable output cur-rentKeypad4 digit LCD display and 4 keysReadouts for: output frequency (Hz), output current (A), output voltage (V), motor torque (%) in vector mode, DC bus voltage (V), val-ue proportional to frequency (Ex.: RPM), fault and status messagesWEG Automation - Products and Solutions | 7Data is subject to change without notice.Variable Frequency DrivesCFW300。
变频电机使用说明书

饪霖电机YVF变频调速电动机使用维护手册Usage Handbook注童事项使用前请务必仔细阅渎手册,理解各项容,以便正确地安装、连接、使用和维护本手册应妥善保管在实际安装及使用者手中刖百首先感您购买本公司的YVF系列变频调速电动机,谓在使用前仔细阅读本手册的各项容,以保证电机的正确使用,不正确的使用将造成不正常的运行,引起故障或降低使用寿命。
产品介绍WF系列变频调速电动机是在Y2系列电机基础上更新设计的,可广泛使用于各种机械领域,且符合国家和企业的相关技术标准,与国外同类产品水平相当。
到货检查收到您订购的产品后,谓开箱检査以下各项,如发现产品有任何问题或不符合您的订购要求,谓您与本公司联系。
1 •请核对产品的铭牌,确认您订购的规格2•请检査外观有无在运输中受损3•除电机本体及使用说明书外,确认您所订购的附件有无完整4.检査零部件的装配应良好,紧固件应无松动。
搬运和存储4.1本电机产品为精密制造零件,搬运时只允许在其规格的运输吊攀上进行起吊(小规格可以用手搬运),必须轻吊、轻拿、轻放、防止碰撞。
不得在搬运过程中抱持轴承头部。
且在安装调试中对轴承头部要妥善防护,否则将导致运转精度失准。
4.2电机的存储场所应符合以下条件:(D周围温度:・15度——+40度(2)相对湿度:5 —80%(3)周围环境:不受直晒,周围介质必须无灰尘、腐蚀性气体、可燃气体、油券、蒸汽、滴水和農动。
并尽■避免含盐较多的场合。
不得放在会发生温度急剧变化而结18和冰冻的地方。
(4)电机不可直接或倒■放在地面上,应放鬣在合适的台架上,且应放平稳。
(5)如周围环境恶劣则应用塑料薄膜包好进行保管,可在塑料薄膜中加干燥剂防止受潮。
如要长期保存,则应严格封装。
使用环境(1)海拔:1000米以下(2)环境温度:・15度——+40度(3)电动机安装场所必须干燥,清洁。
具有良好的通风不受直晒,周围介质必须、无灰尘、腐蚀性气体、可燃气体、油雰、蒸汽、滴水和農动。
三菱变频器说明书

三菱变频器说明书当变频器用于控制并联的几台电机时,一定要考虑变频器到电动机的电缆的长度总和在变频器的容许范围内。
如果超过规定值,要放大一档或两档来选择变频器。
本文是品才网.精心收集的三菱变频器相关内容,仅供参考!选型方法由于电力电子技术的不断发展和进步,新的控制理论提出与完善,是交流调速传动、尤其是采用性能优异的三菱变频调速传动得到了飞速发展,因此在实际工作中采用三菱变频器+ 变频电机的情况越来越多,因此如何正确选择三菱变频器对机械设备的正常调试运行至关重要,选型方法如下:1、根据机械设备的负载转矩特性来选择三菱变频器在实践中常常将机械设备根据负载转矩特性不同,分为如下三类:(1) 恒转矩负载(2) 恒功率负载(3)流体类负载2、根据负载特性选取适当控制方式的三菱变频器三菱变频器的控制方式主要分为: V/f控制,包括开环和闭环;矢量控制,包括无速度传感器和带速度传感器控制; 直接转矩控制;三种方式的优缺点如下:(1)V/f 开环控制优点:结构简单,调节容易,可用于通用鼠笼型异步电机;缺点:低速力矩难保证,不能采用力矩控制,调速范围小;主要采用场合:一般的风机,泵类节能调速或一台变频器带多台电机传动场合。
(2)V/f闭环控制优点:结构简单,调速精度比较高,可用于通用性异步电机;缺点:低速力矩难保证,不能采用力矩控制,调速范围小,要增加速度传感器;主要采用场合:用于保持压力,温度,流量,PH定值等过程场合。
(3) 无速度传感器的矢量控制优点:不需要速度传感器,力矩响应好、结构简单,速度控制范围较广;缺点:需要设定电机参数,须有自动测试功能;采用场合:一般工业设备,大多数调速场合。
(4)带有速度传感器的矢量控制优点:力矩控制性能良好,力矩响应好,调速精度高,速度控制范围大;缺点:需要正确设定电机参数,需要自动测试功能,要高精度速度传感器;使用场合:要求精确控制力矩和速度的高动态性能应用场合。
(5) 直接转矩控制优点:不需要速度传感器,力矩响应好,结构较简单,速度控制范围较大;缺点:需要设定电机参数,须有自动测试功能;采用场合:要求精确控制力矩的高动态性能应用场合,如起重机、电梯、轧机等。
变频电机和齿轮电机参数设置指南说明书
VARMECA 10Variable speed motors and geared motorse nLEROY-SOMER Ref. 3264 - 4.33/b -1.00PARAMETER-SETTING MANUALVARMECA 10Variable speed motors and geared motorsNOTELEROY-SOMER reserves the right to modify the characteristics of its products at any time in order to incorporate the latest technological developments. The information contained in this document may therefore be changed without notice.LEROY-SOMER gives no contractual guarantee whatsoever concerning the information published in this document and cannot be held responsible for any errors it may contain, nor for any damage resulting from its use.CAUTIONIt is imperative that the equipment is supplied via an isolating device and a circuit-breaking device (power contactor) which can be controlled by an external safety system (emergency stop, fault detector).The VARMECA 10 motor is fitted with safety devices which, in the event of a fault, control stopping and thus stop the motor. The motor itself can become jammed for mechanical reasons. Voltage fluctuations, and in particular power cuts, may also cause the motor to stop.The removal of the causes of the shutdown can lead to restarting, which may be dangerous for certain machines or installations. In such cases, it is essential that the user takes appropriate precautions against the motor restarting after an unscheduled stop. VARMECA 10 is a component designed to be integrated in an installation or an electrical machine. It is the responsibility of the user to take all necessary precautions to ensure that the system complies with current standards.For safety reasons, LEROY-SOMER prohibits the use of VARMECA 10 for lifting applications.LEROY-SOMER declines all responsibility in the event of the above recommendations not being observed.PARAMETER-SETTING MANUALVARMECA 10Variable speed motors and geared motorsLEROY-SOMER Ref. 3264 - 4.33/b -1.00to material or physical damage as well as constituting a fire hazard.1 - GeneralDepending on their degree of protection, VARMECA 10 motors may contain moving parts, as well as hot surfaces, during operation.Unjustified removal of protections, incorrect use, faulty installation or inappropriate operation could represent a serious risk to personnel, animals and equipment.For further information, consult the manual.All work relating to transportation, installation, commissioning and maintenance must be performed by experienced, qualified personnel (see IEC 364 or CENELEC HD 384, or DIN VDE 0100 and national specifications for installation and accident prevention).In these basic safety instructions, qualified personnel means persons competent to install, mount, commission and operate the product and possessing the relevant qualifications.2 - UseVARMECA 10 motors are components designed for integration in installations or electrical machines.When integrated in a machine, commissioning must not take place until it has been verified that the machine conforms with directive 89/392/EEC (Machinery Directive).It is also necessary to comply with standard EN 60204, which stipulates in particular that electrical actuators (which include VARMECA 10) cannot be regarded as circuit-breaking devices and certainly not as isolating switches. Commissioning can take place only if the requirements of the Electromagnetic Compatibility Directive (89/336/EEC, modified by 92/31/EEC) are met.VARMECA 10 motors meet the requirements of the Low Voltage Directive 73/23/EEC, modified by 93/68/EEC. The harmonised standards of the DIN VDE 0160 series in connection with standard VDE 0660, part 500 and EN 60146/ VDE 0558 are also applicable.The technical characteristics and instructions concerning the connection conditions specified on the nameplate and in the documentation provided must be observed without fail.3 - Transportation, storageAll instructions concerning transportation, storage and correct handling must be observed.The climatic conditions specified in the technical manual must be observed.4 - InstallationThe installation and cooling of equipment must comply with the specifications in the manual supplied with the product. VARMECA 10 motors must be protected against excessive stress. In particular, there must be no damage to parts and/or modification of the clearance between components during transportation and handling. Avoid touching the electronic components and contact parts.VARMECA 10 motors contain parts which are sensitive to electrostatic stress and may be easily damaged if handled incorrectly. Electrical components must not be exposed to mechanical damage or destruction (risks to health!).5 - Electrical connectionWhen work is performed on VARMECA 10 motors which are powered up, national accident prevention specifications must be respected.The electrical installation must comply with the relevant specifications (for example conductor cross-sections, protection via fused circuit-breaker, connection of protective conductor). More detailed information is given in the manual. Instructions for an installation which meets the requirements for electromagnetic compatibility, such as screening, earthing, presence of filters and correct insertion of cables and conductors, are given in the documentation supplied with the VARMECA 10. These instructions must be followed in all cases, even if the VARMECA 10 carries the CE mark. Adherence to the limits given in the EMC legislation is the responsibility of the manufacturer of the installation or the machine.6 - OperationInstallations incorporating VARMECA 10 motors must be fitted with additional protection and monitoring devices as laid down in the current relevant safety regulations : law on technical equipment, accident prevention regulations, etc. Modification of VARMECA 10 motors using control software is permitted.Active parts of the device and live power connections must not be touched immediately after the VARMECA 10 is powered down, as the capacitors may still be charged. In view of this, the warnings fixed to VARMECA 10 motors must be observed.During operation, all doors and protective devices must remain closed.7 - Servicing and maintenanceRefer to the manufacturer’s documentation.SAFETY AND OPERATING INSTRUCTIONS FOR ELECTRICAL ACTUATORS(In accordance with the low voltage directive 73/23/EEC modified by 93/68/EEC)enLEROY-SOMER Ref. 3264 - 4.33/b -1.00PARAMETER-SETTING MANUALVARMECA 10Variable speed motors and geared motorsCONTENTS1 - GENERAL INFORMATION (30)1.1 - Operating principle (30)1.2 - General characteristics (30)1.3 - Weight and dimensions of the CDC-VMA console (30)1.4 - Wiring diagrams (31)2 - COMMISSIONING THE CDC-VMA CONSOLE (37)2.1 - Installation (37)2.2 - Presentation of the keypad (37)2.3 - Read mode (38)2.4 - Parameter-setting mode (38)2.5 - The VARMECA 10 parameters (39)3 - COMMISSIONING THE PEGASE VMA 10 PC PARAMETER-SETTING SOFTWARE (41)3.1 - Connection (41)3.2 - Installing the software (41)3.3 - Use (42)3.4 - The VARMECA 10 parameters (43)4 - TROUBLESHOOTING (46)5 - SUMMARY OF SETTINGS (47)PARAMETER-SETTING MANUALVARMECA 10Variable speed motors and geared motorsGENERAL INFORMATIONLEROY-SOMER Ref. 3264 - 4.33/b -1.001 - GENERAL INFORMATION1.1 - Operating principleThis manual describes access to the parameter settings of the VARMECA 10 (VMA 11 - 12 - 13 - 14) range, using a CDC-VMA console or PEGASE VMA 10 PC software.Combined with the VARMECA 10, these tools can simplify programming, diagnostics and displaying parameters.1.2 - General characteristics1.2.1 - "CDC-VMA console" OPTION CONTENTS OF THE KIT:- 1 power supply unit to connect to single phase mainssupply 230 V - 50/60 Hz.- 1 connection cable (length = 1.5 m) to connect to theVARMECA 10.- 1 console with digital LCD display - 2 lines of 16 characters. - 1 parameter-setting manual.1.2.2 - "PEGASE VMA 10 programmingsoftware" OPTIONCONTENTS OF THE KIT:- 1 connection cable (length = 3m) to connect to theVARMECA 10,- 3 disks for loading the software onto a PC (or 1 CD-ROM). - 1 parameter-setting manual.MINIMUM PC CONFIGURATION:- Pentium 100 MHz.- 8 Mb of RAM.- WINDOWS 95 or 98.1.3 - Weight and dimensions of the CDC-VMA consoleSee the following diagram.PARAMETER-SETTING MANUALVARMECA 10Variable speed motors and geared motorsGENERAL INFORMATIONLEROY-SOMER Ref. 3264 - 4.33/b -1.001.4 - Wiring diagram1.4.1 - Standard configuration (factory setting)e nLEROY-SOMER Ref. 3264 - 4.33/b -1.00PARAMETER-SETTING MANUALVARMECA 10Variable speed motors and geared motorsGENERAL INFORMATION1.4.2 - Configuration option 1: 2 preset speeds - 2 operating directionsAssociated parameter settingPARAMETER-SETTING MANUALVARMECA 10Variable speed motors and geared motorsGENERAL INFORMATIONLEROY-SOMER Ref. 3264 - 4.33/b -1.001.4.3 - Configuration option 2: analogue reference and 3 preset speeds - 1 operating directionAssociated parameter settinge nLEROY-SOMER Ref. 3264 - 4.33/b -1.00PARAMETER-SETTING MANUALVARMECA 10Variable speed motors and geared motorsGENERAL INFORMATION1.4.4 - Configuration option 3: correction of an external reference with the speed control button - 2operating directions - enabling/disabling the control buttonAssociated parameter settingPARAMETER-SETTING MANUALVARMECA 10Variable speed motors and geared motorsGENERAL INFORMATIONLEROY-SOMER Ref. 3264 - 4.33/b -1.001.4.5 - Configuration option 4: 2 preset speeds fixed or proportional to the reference - 1 operatingdirectione nLEROY-SOMER Ref. 3264 - 4.33/b -1.00PARAMETER-SETTING MANUALVARMECA 10Variable speed motors and geared motorsGENERAL INFORMATION1.4.6 - Standard configuration: regulation with the integrated PI loop - PI reference using the localbutton or external reference - 2 operating directions2 - COMMISSIONING THE CDC-VMACONSOLE2.1 - Installation2.1.1 - Checks on receiptWhen you receive your CDC-VMA console, make sure that it has not been damaged during transport. If necessary, report any damage to the delivery company.THE CONSOLE KIT COMPRISES:- the CDC-VMA console- 1 connection cable (length = 1.5 m) with RS 232 socket. - 1 power supply unit 230 V single phase - 50/60 Hz,- 1 parameter-setting manual.2.1.2 - Connection- Open the front cover of the VARMECA 10.- Connect the 20-pin socket on the end of the cable to the connector on the VARMECA 10 rolled cable.- The RS 232 socket on the cable is connected to theconsole socket.2.2 - Presentation of the keypade n2.3 - Read mode - Power up the VARMECA 10.- Connect the 230 V socket on the console power supply unit.- On power-up, the console display is positioned on the 1st parameter PO1 FMIN.The 1st line of the display unit indicates the parameter designation.The 2nd line indicates the parameter value and unit.Theto P29.The2.4 - Parameter-setting modekeys to select theparameter.Themodified, flash.keys.As soon as the value differs from the stored value, the MEM? message appears.When the desired setting value has been reached, it can bestored using theThe MEM? indication disappears. key is used to quit the parameter-setting mode.2.5 - The VARMECA 10 parametersList and description of the parameters which can be accessed by the CDC-VMA consoleDisplay Description Adjustment range inincrements of 1Factory setting P01 F min minimum operating frequency 6 to 30 Hz12 HzP02 REF 0 V - 4 mA calibration of the min. reference0 V or 4 mA0 to 30 Hz12 HzP03 F max maximum operating frequency(according to mini DIP K2 position)32 to 220 Hz50 or 80 HzP04 REF 10 V - 20 mA calibration of the max. reference 32 to 220 Hz50 or 80 HzP05 ACCEL.acceleration rampramp value to pass from 0 to 50 Hz0 to 20 s 3 sP06 DECEL.deceleration rampramp value to pass from 50 to 0 Hz0 to 20 s 3 sP07 STOP MODE stop mode0 = freewheel stop1 = stop according to ramp0 or 11P08 UN MOT (1)voltage applied to the motor from the base frequency(percentage of mains voltage: base 400 V)0 to 100 %100 %P09 FN MOT(1)motor base frequency50 to 150 Hz50 HzP10 U / F (1)selection of voltage/frequency ratio0 = fixed U / Fthe P08 voltage will be applied at the P08 frequency point1 = dynamic U / Fthe voltage adapts automatically to the motor load0 or 1from 0.25 to 1.1 kW1from 1.5 to 7.5 kWP11 BOOST (1)value of voltage applied in low frequencies(percentage of mains voltage)0 to 40 %adapted to themotor according tothe powerP12 OVER BOOST (1)value of voltage during starting phase(percentage of mains voltage)0 to 100 %adapted to themotor according tothe powerP13 F PWM switching frequency0 = 4 kHz1 = 6 kHz2 = 8 kHz3 = 11 kHz0 to 33from 0.25 to 2.2 kW2from 3 to 4kWP14 CONFIG terminal block configuration0 = standard1 = option 1 -2 preset speeds and 2 operatingdirections2 = option 2 - analogue reference and3 presetspeeds - 1 operating direction3 = option 3 - correction of an external referencewith the local button - 2 operating directions4 = option 4 - 2 preset speeds proportional to thereference - 1 operating direction0 to 40P15 VP1-1preset speed 1 in options 1 and 4 6 to 220 Hz50 HzP16 VP2-1 VP1-2preset speed 2 in options 1 and 4 or preset speed 1 inoption 2 6 to 220 Hz60 Hz P17 VP2-2preset speed 2 in option 2 6 to 220 Hz40 Hz P18 VP3-2preset speed 3 in option 2 6 to 220 Hz70 Hz(1) : the voltage/frequency ratio is illustrated at the end of the tableRepresentation of voltage/frequency ratioDisplayDescriptionAdjustment range in increments of 1Factory settingP19 ROTATIONchoice of directions of rotation in the con figuration option 20 = clockwise 1 = anti-clockwise0 to 1P20 SELECT 3terminal 3 assignment0 = speed image output 1 = PI feedback input 0 to 10P21 PI KPRO proportional gain of the PI loop 1 to 10010P22 PI KINT integral gain of the PI loop 1 to 10010P23 F_MOT motor operating frequency0 to 220 Hz P24 I_MOTmotor current (in tenths of an ampere) A/100 to 150% of I nP25 FAULT last fault in memory fault code0 = no fault1 = motor overheating2 = overvoltage3 = overcurrent4 = locked rotor5 = DC bus undervoltage6 = EEPROM7 = serial link8 = power module fault0 to 80P26 STOP Fmin enabling of the STOP USING REFERENCE function0 = disabled 1 = enabledwhen the reference is less than Fmin, it forces the motor to stop0 to 10P27 LOG CDC-VMAconsole software version P28 CAL MOT VARMECA 10 power rating setting code of ratings0 = 0.37 kW 1 = 0.55 kW 2 = 0.75 kW 3 = 0.9 kW 4 = 1.1 kW 5 = 1.5 kW 6 = 1.8 kW 7 = 2.2 kW 8 = 3 kW 9 = 4 kW 10 = 0.25 kW 11 = test12 = special 1.1 kW 13 = 5.5 kW 14 = 7.5 kW 0 to 14adapted to the motor according tothe powerP29access codereserved LEROY -SOMERP123 - COMMISSIONING THE PEGASEVMA 10 PC PARAMETER-SETTING SOFTWARE3.1 - Connection3.1.1 - Checks on receiptWhen you receive your parameter-setting kit, make sure that it has not been damaged during transport. If necessary, report any damage to the delivery company .THE KIT COMPRISES:- 1 connection cable (length = 3m) with RS 232 socket.- 3 disks or 1 CD-ROM,- 1 parameter-setting manual.3.1.2 - Connection- The RS 232 socket on the cable is connected to the RS232 socket on the PC.- The 20-pin socket on the cable connects to the connector on the VARMECA 10 rolled cable.3.2 - Software installation- Start up your PC.- Insert disk n˚1 (or the CD ROM).- Open the "install" file.- Follow the instructions given on the screen, in particular those relating to changing disks.- When the "Installation complete" message appears, click on OK - The PEGASE VMA software is installed.20-pinsocket P E G A S E3.3 - Use- Double-click on the icon- The first window appears.3.3.1 - Detail of the 1st window3.3.2 - Detail of the 2nd window3.3.3 - Detail of the 3rd window (access to parameters)3.4 - The VARMECA 10 parametersDescription of parameters which can be accessed from the PC.Parameter modifications must be made whilst the VARMECA 10 is powered up,but in the "stop" position (run command disabled)DisplayDescriptionAdjustment range in increments of 1Factory setting F max maximum operating frequency (according to mini DIP K2 position)32 to 220 Hz 50 or 80 Hz F min minimum operating frequency6 to 30 Hz 12 HzACCEL acceleration ramp value to pass from 0 to 50 Hz 0 to 20 s 3 s DECEL deceleration ramp value to pass from 50 to 0 Hz 0 to 20 s 3 s U n mot (1) voltage applied to the motor at base frequency (percentage of mains voltage: base 400 V)0 to 100 %100 %F n mot (1) base frequency of motor50 to 150 Hz 50 Hz BOOST (1)value of voltage applied in low frequencies (percentage of mains voltage)0 to 40 %adapted to the motor according tothe power OVERBOOST (1)value of voltage applied during starting phase (percentage of mains voltage)0 to 100 %adapted to the motor according tothe power(1) : the voltage/frequency ratio is illustrated at the end of the tablee nDisplay Description Adjustment range inincrements of 1Factory settingMax. reference point calibration of the max. reference10 V or 20 mA32 to 220 Hz50 or 80 HzMin. reference point calibration of the min. reference0 V or 4 mA0 to 30 Hz12 Hz Stop mode choice of stop mode ramp or freewheel rampauto U / F (1)selection of voltage/frequency ratioNO = fixed U / F ratiovoltage U n mot is applied at the frequency point F n motYES = dynamic U / F ratiothe voltage adapts automatically to the motor loadYES or NONO from 0.25 to 1.1kWYES from 1.5 to 7.5kWF switching switching frequency4, 6 , 8, 11 kHz11 kHz from 0.25 to 2.2 kW 8 kHz from 3 to 4kWTerminal block configuration choice of terminal block configurationoption 1 = 2 operating directions, 2 preset speedsoption 2 = 1 operating direction, 3 preset speeds +referenceoption 3 = correction of an external reference usingthe local buttonoption 4 = 2 preset speeds proportional to thereferencestandard, option 1,option 2, option 3,option 4standardVP1 option 1-4preset speed 1 in configuration options 1 and 40 to 220 Hz50 HzVP2 option 1-4 VP1 option 2preset speed 2 in configuration options 1 and 4or preset speed 1 in configuration option 20 to 220 Hz60VP2 option 2preset speed 2 in configuration option 20 to 220 Hz40 Hz VP3 option 2preset speed 3 in configuration option 20 to 220 Hz70 HzTerminal N˚3 assignment choice of terminal n˚3 assignmentspeed output = analogue output image of the0 - +10 V frequency0 V = stop+10 V = max. frequencyPI input = analogue input 0 to +10 V for the PIfeedbackspeed outputorPI inputspeed outputPI : K proportional PI loop proportional gain setting 1 to 10010 PI : K integral PI loop integral gain setting 1 to 10010Stop by reference enabling of stop by referenceYES = when the reference is less than the minimumfrequency, it forces the motor to stopNO = when the reference is less than the minimumfrequency, the motor operates at the minimumfrequencyYES, NO NO(1) : the voltage/frequency ratio is illustrated at the end of the tableRepresentation of voltage/frequency ratioDisplayDescriptionAdjustment range inincrements of 1Factory settingF mot motor frequency reading0 to 220 Hz readingV bus voltage of the speed controller DC busreading from 0 to 800 V Statusspeed controller statusstop or run Fault speed controller fault indicationPOSSIBLE INDICATIONS:no fault motor overheating overvoltageovercurrent locked rotor bus undervoltageEEPROM serial link module faultNO FAULTVmains V bus 2---------------=OverboostTROUBLESHOOTING 4 - TROUBLESHOOTINGFaults are indicated on the CDC-VMA console by a code from0 to 8.With the PEGASE VMA 10 software the faults are indicatedclearly in the fault window.The table below can be used to analyse faults and specifiesany checks which should be performed.Fault code on CDC-VMA Indication of fault onPEGASE Checks to make, possible causes0NO FAULT1MOTOROVERHEATINGRed LED illuminatedoverheating fault I2t- check if the motor is overloaded(orange LED illuminated)- check the set rating and the motor power- make sure that the boost adjustment (P11) has not been modified2OVERVOLTAGERed LED flashing- check the mains supply voltage- check that the deceleration ramp is long enough for applications with high inertia3OVERCURRENTRed LED illuminated- check that there is no short circuit occurring from a motor winding or on theconnections- check the motor insulation- check that the deceleration ramp is long enough for applications with high inertia- check the set rating and the motor power- internal product fault4LOCKED ROTORRed LED illuminated- check if the motor is overloaded or has stalled (green LED flashing)5BUS UNDERVOLTAGERed LED flashing- check the mains supply voltage6EEPROMRed LED illuminated - make sure that the VARMECA 10 is not affected by interference - internal product fault7SERIAL LINKRed LED illuminated- communication fault between the EEPROM and the controller - product fault8MODULE FAULTRed LED illuminated - very sudden overcurrent (possible causes: see OVERCURRENT fault)- IGBT power module overheating. Check that the unit is not operating at an ambient temperature which is too high- IGBT power module fault. Internal product faultFAULTS CAN ONLY BE CLEARED BY SWITCHING OFF THE VARMECA 10.Fault specific to the use of the CDC-VMA consoleCONSOLE LINK FAULT - Check the connection cable.- Check that the VARMECA 10 is correctly supplied.Fault specific to the use of the software PEGASE VMA 10COMMUNICATION PROBLEM WITH THE VARMECA 10 - Check the connection cable.- Check that the VARMECA 10 is correctly supplied.- Check that the serial port is correctly configured.SUMMARY OF SETTINGS5 - SUMMARY OF SETTINGSThe table below can be used to note the settings entered inthe VARMECA 10 in order to keep a record should areplacement product be needed.Settings made using the CDC-VMA consoleSettings made using the PEGASE VMA 10 software Parameters Value setP01 F MIN P02 REF 0 V -4 mA P03 F MAX P04 REF 10 V - 20 mA P05 ACCEL P06 DECEL.P07 STOP MODE P08 Un MOT P09 Fn MOT P10 U / F P11 BOOST P12 OVERBOOST P13 F PWM P14 CONFIG Parameters Value setP15 VP1-1P16 VP2-1 VP1-2P17 VP2-2P18 VP3-2P19 ROTATION P20 SELECT 3P21 PI K PRO P22 PI K INT P23 F MOT P24 I MOT P25 FAULT P26 STOP Fmin P27 LOG CDC-VMA P28 CAL MOT。
- 1、下载文档前请自行甄别文档内容的完整性,平台不提供额外的编辑、内容补充、找答案等附加服务。
- 2、"仅部分预览"的文档,不可在线预览部分如存在完整性等问题,可反馈申请退款(可完整预览的文档不适用该条件!)。
- 3、如文档侵犯您的权益,请联系客服反馈,我们会尽快为您处理(人工客服工作时间:9:00-18:30)。
YJTG系列变频调速电机说明
一、概述:
YJTG系列变频调速三相异步电机是为适应市场需要,在引进国外先进技术及总结本厂多年生产YJT系列变频调速电机经验的基础上而开发研制的新一代变频调速电机。
在电磁设计方面,对定、转子槽形及绕组形式、接法等进行了调整,使其能适应变频器电源供电的状况,并且,既能保证电机在高频时的过载能力,又能在低频时保持恒转矩输出。
在结构设计方面,安装尺寸与Y系列电机相同,除长度尺寸小外,其它外形尺寸亦与Y系列电机相同,互换性强,便于用户配套使用。
该系列电机采用独立的轴流通风机强迫通风,保证电机在整个频率范围内均具有较好的冷却效果,温升不超过规定值。
YJTG系列变频调速三相异步电机与变频装置构成的调速系统,与其它调速方式相比,节能效果显著,调速性能好,调速范围广,具有噪音低、振动小,可与国内外各种变频器配套的特点,可广泛应用于轻工、纺织、化工、冶金、机床等行业的恒转矩、恒功率调速的场合及风机、水泵等的节能调速,有助于实现调速系统的自动化控制。
YJTG系列电机的4极电机符合《小型变频变压调速电机及电源技术条件》JB/ T7118-93的规定,其它极数的电机符合IEC34-1的规定,也符合GB/T755的规定。
二、型号说明:
以YJTG200L1-6为例:YJTG表示电机型号;200表示中心高(mm);L表示机座长度代号;1表示铁心长度代号;6表示电机极数。
三、使用条件:
1、海拔不超过1000m。
2、环境空气温度随季节而变化,但不超过40℃,最低不超过-15℃。
3、最湿月平均相对湿度为90%,同时该月月平均最低温度不高于25℃。
四、结构形式:
1、外壳防护等级为IP44,也可按用户要求制成IP54。
2、冷却方式为全封闭带轴流通风机冷却(IC416)。
3、根据用户要求可带各种高分辨率的传感器(光电编吗器、旋转变压器及测速发电机)。
4、根据用户要求可带电磁制动器械(通电、失电制动均可)、齿轮减速机等附件。
5、从轴伸端视之,电机接线盒位于机座右侧,也可按用户要求位于机座左侧或顶部。
五、主要技术性能及技术参数:
1、电机为连续工作制。
2、额定电压为380V,额定频率为50HZ。
也可根据用户要求确定额定点的电压和频率。
3、绝缘等级为F级。
4、H80-255中心高,5-50HZ为恒转矩调速,H250-355中心高,3-50HZ为恒转矩调速,50-100HZ为恒功率调速。
也可根据用户要求确定高频范围。
5、过载能力强。
6、低速性能好。
7、280及以下机座号为Y接法,315 355为△接法。
六、订货须知:
1、订货时请注明电机瑾、额定功率、额定电压、额定频率、高频范围(对2极电机尤为重要)、安装形式等。
2、若对电机电压等级、调速特性、绝缘等级、防护等级、安装尺寸等有特殊要
求,请在订货时说明,另行商议。
3、本资料仅供参考。
七、技术数据:
表中数据是电压为380V、频率为50HZ的设计值,仅供参考。
2极电机(50HZ同步转速为3000r/min)。
