w100说明书
Winpad P100中文说明书

平板电脑用户使用手册Tablet computer User’s Manual敬告尊敬的用户:感谢您购买和使用我司的产品,为了您的安全和利益,请您在使用产品前仔细阅读本产品说明书及随机附带的全部资料。
如果您未按照产品说明书操作和使用产品,而导致任何的人身伤害、财产或其他损失,我司将不承担责任。
关于本产品说明书:●说明书版权属于我司所有;●说明书提及的商标、字号属于它们各自的权利拥有者;●说明书内容如同实际产品不一致,以实际产品为准。
如果您对说明书的任何内容或条款存在不明或异议,请在购机后七日内向我司提出书面异议,否则视为您已经同意、理解并接受说明书的全部内容。
目录1.0 注意事项1.1特别提示 (3)1.2平板电脑使用重要提示请务必阅读 (3)1.3注意事项 (4)1.4平板电脑电源使用须知 (5)1.5安全须知 (6)2.0产品概述 (7)2.1简介 (7)2.2部件介绍 (7)2.3开箱和检查 (8)3.0基本使用常识 (9)3.1系统状态指示灯 (9)3.2将电脑停止 (9)3.3按键功能 (9)3.4虚拟触控键盘的操作与使用 (10)3.5显示屏 (10)3.6网卡 (10)4.0 BIOS(基本输入输出系统)设定 (11)4.1使用BIOS Setup的方法 (11)4.2 Main (11)4.3 Main---Boot Features (12)4.5 Boot (13)4.6 Exit (13)5.0 驱动程序安装 (14)6.0 故障分析与处理 (15)6.1声音的问题 (15)6.2硬盘的问题 (15)6.3显示器的问题 (16)6.4内存的问题 (16)特别声明 (17)附录A 产品规格 (18)1.0 注意事项1.1特别提示为了便于理解和引起您的注意,当涉及产品安全或需关注的信息时我们将在本章节或后面的章节中按下列等级和特别的警示用语向您提示,这些特别的警示表示方法如下:【危险】-- 表示对高度危险要警惕【警告】-- 表示对中度危险要警惕【注意】-- 表示对轻度危险要关注【禁止】-- 表示对危险的操作需禁止【提醒】-- 表示安全或其他内容需关注本章节中为您提供的安全信息并不是全部的,为了您的安全和利益,我们会根据需要将部分产品安全信息编排到说明书后面的章节中,不论这些安全信息置于何处,您均应仔细阅读。
W100网络摄像头用户手册说明书
W100Webcam 網路攝影機网络摄像头User Manual 使用說明手冊使用说明手册w100 WebcamAbout this GuideThe content in this document is for information purpose and is subject to change without prior notice. We have made every effort to ensure that this User Guide is accurate and complete. However, no liability is assumed for any errors or omissions that may have occurred.The manufacturer reserves the right to change the technical specifications without prior notice. Regulatory noticesThis document provides country- and region-specific non-wireless and wireless regulatory notices and compliance information for your product. Some of these notices may not apply to your product.CE Regulatory NoticeThe product herewith complies with the requirements of the EMC Directive 2014/30/EU, and the RoHS Directive 2011/65/EU.WEEE NoticeDisposal of Waste Electrical and ElectronicEquipment and/or Battery by users in privatehouseholds in the European UnionThis symbol on the product or on thepackaging indicates that this cannot bedisposed of as a household waste. You mustdispose of your waste equipment and/orbattery by handling it over to the applicabletake-back scheme for the recycling ofelectrical and electronic equipment and/orbattery. For more information aboutrecycling of this equipment and/or battery,please contact your city office, the shopwhere you purchased the equipment oryour household waste disposal service. Therecycling of materials will help to conservenatural resources and ensure that it isrecycled in a manner that protects humanhealth and environment.FCC StatementThis equipment has been tested and found to comply with the limits for a Class B digital device, pursuant to Part 15 of the FCC Rules. These limits are designed to provide reasonable protection against harmful interference in a residential installation. This equipment generates, uses and can radiate radio frequency energy and, if not installed and used in accordance with the instructions,may cause harmful interference to radio communications. However, there is no guarantee that interference will not occur in a particular installation. If this equipment does cause harmful interference to radio or television reception, which can be determined by turning the equipment off and on, the user is encouraged to try to correct the interference by one or more of the following measures:• Reorient or relocate the receiving antenna.• Increase the separation between the equipment and receiver.• Connect the equipment into an outlet on a circuit different from that to which the receiver is connected. • Consult the dealer or an experienced radio/TV technician for help.This device complies with Part 15 of the FCC Rules. Operation is subject to the following two conditions: (1) This device may not cause harmful interference, and (2) this device must accept any interference received, including interference that may cause undesired operation.FCC Caution: Any changes or modifications not expressly approved by the party responsible for compliance could void the user's authority to operate this equipment.1.IntroductionThank you for purchasing this webcam. Thisproduct is designed for various video chatstreaming application via USB interface. 2.Package Contentswebcam User manual3.Product Overview1 Lens 5 USB connector2 Adjustable focus 6 Microphone connector3 Tripod hole 7 Microphone4 Clip base4.Setting up your webcam4.1Place your webcamDesigned for the way you like to make a video call, place the webcam where you want it—on the monitor or the desktop.4.1.1 Grasp the webcam as shownand open clip base with your otherhand. Mount the webcam, makingsure the foot on the clip base isflush with the back of yourmonitor.4.1.3Plug USB connector into USB port, and microphoneconnector into MIC hole (red / )of yourcomputer. Wait for about 1 minute, webcam willinstall automatically..4.2Getting start with video callingTo take advantage of video calling, both you and the person you call must install video-calling application such as SkypeTM, Yahoo! @Messenger, Windows Live@ Messenger or Gmail. As well as a USB camera and video calling application, bothcallers need:• A computer with speaker (or a headset).• A broadband internet connection (e.g., DSL, T1, or cable) Please check your preferred video callingapplication requirements. (Requirements may vary between different applications but usually a minimum of 2Mbps upload speed is required).5.SpecificationsItem DescriptionSensor 0.3MP CMOS sensorCapture Image Size 160x120,176x144, 320x240,352x288, 640x480Frame Rate Max. 30 fps Output Format MJPG, YUY2View Angle D: 50.6°Focus Manually Adjustable Focusing Range 20mm to infinityMicrophone External (connected with computer)Compatibility Windows 10 or higher MAC OS X 10.6 or higherInterface USB2.0, A/VStill Image format BMP/ JPG WorkingTemperature0~40°CPower Consumption <0.5W Dimension 67.5 x 32.5 x 51mm Weight 88gw100網路攝影機有關本手冊本手冊之內容只供參考,並得以隨時變更不需要事先通知。
WLW系列立式真空泵使用说明书
目录一、概述 (1)二、用途 (1)三、附属设备 (1)四、型号、规格、参数 (2)五、结构与工作原理 (2)六、外形与地基尺寸 (4)七、安装 (15)八、操作 (15)九、维护和保养 (16)十、常用配件拆卸与装配 (18)十一、故障排除 (19)十二、易损件 (20)一、概述WLW系列为无油(耐腐)立式往复真空泵,是我厂与科研单位联合开发并经十余年不断改进的成熟产品,其主要优点是(与W型卧式往复泵比较):1、极限真空度高(4.5-15mmHg)2、无油润滑,可获得洁净真空,并利于尾气的洁净回收。
3、节能(33%),节水(50%),节省占地面积(66%)。
4、气阀轴向布置,使用寿命长(4-10倍)。
5、振动小,噪音低。
6、外形简洁美观,操作、维修方便。
7、WLW-B系列采用全无油结构及四氟类密封材料、能耐各类有机溶剂。
8、WLW-F、T系列采用不锈钢、钛材料、能耐各类、酸、碱、有机溶剂腐蚀。
二、用途本厂生产的WLW系列立式往复真空泵广泛应用于制药、化工、食品等行业的真空输送提料、提炼、蒸馏、浓缩、真空包装、干燥、气体解析、尾气回收等场合,是取代W型卧式往复泵、水环式真空泵的理想产品。
三、附属设备1、过滤器:(1)当被抽气体含粉尘或固体物料时。
(2)新安装管道系统(法兰式过滤器,用户根据现场情况向我厂订购)2、冷凝器:(1)当被抽气体含大量可凝性气体时;(2)当被抽气体温度超过65℃时。
3、阻液器:当被抽气体中有大量液体时。
4、中和罐:当被抽气体具有腐蚀性时(WLW-F/T除外)。
5、膨胀节:为避免振动、温差引起管道法兰泄漏,避免管道安装应力。
WLW300及以上型号必须安装。
6、缓冲罐:为避免泵的启动冲击。
7、其它:选用本厂产品时,请详细告之使用情况:(1)被抽介质(酸、碱、溶剂种类)(2)介质温度(3)有无可凝性气体(4)有无粉尘或固体颗粒(5)泵在工艺流程中所处位置和作用(6)所需连续运转的最长时间四、型号、规格、参数1、型号表示方法2、型号、规格、参数(见表4.1、表4.2)3、性能曲线(见图4.1、图4.2)五、结构与工作原理WLW系列为单缸单级双作用活塞泵,2WLW系列为单缸双级双作用活塞泵。
数字无线话筒使用说明书(K歌)
数字⽆线话筒使⽤说明书(K歌)数字⽆线话筒使⽤说明书(K歌)数字⽆线话筒使⽤说明书⼀、⼿持开关机1.将两节5号电池装⼊⼿持并拧紧⽹头(注意电池负极朝下,电池装反将损坏⼿持),向上推开关打开⼿持,此时电源指⽰灯亮,⼿持进⼊开机状态。
如果电源指⽰灯闪烁表⽰电池已耗尽,请更换电池再开机。
2.向下推开关电源指⽰灯熄灭,⼿持关机。
长时间不使⽤话筒请将电池取出。
⼆、接收机连接与开关机(专业)1.将⾳频连接线⼀头插接收机⾳频输出2另⼀头插到⽤户的⾳频设备(如功放、前级等)。
将12V开关电源插⼊220V交流插座,输出直流12V插⼊接收机DCIN,蓝⾊电源指⽰灯亮,接收机进⼊开机状态。
2.按住电源键⼀秒可以开启和关闭接收机电源。
3.断电后重新通电主机将⾃动进⼊开机状态,此时⽆需再按电源键开机。
三、接收机与电脑的连接与开关机(个⼈)1.将USB连接线两头分别插⼊电脑和接收机的USB接⼝。
蓝⾊电源指⽰灯,接收机进⼊开机状态。
电脑⾃动把⾳频输⼊输出设备切换成接收机。
(⾸次使⽤接收机的时候,电脑会⾃动安装驱动,电脑会依次出现图3所⽰的画⾯,直到硬件安装成功)2.将⾳频连接线⼀头插接收机⾳频输出1另⼀头插到⽤户的桌⾯⾳响输⼊端。
3.此时接收机将⾃动成为酷我k歌或QQ等者其他应⽤软件的⾳频输⼊输出设备。
(如果不能使⽤请参见疑难解答)4.按住电源键⼀秒可以开启和关闭接收机电源。
5.断电后重新通电主机将⾃动进⼊开机状态,此时⽆需再按电源键开机。
四、对码1.接收机开机后按功能键进⼊A通道对码状态,电源指⽰灯和A通道的射频指⽰灯亮,此时A通道可以对码,再按功能键进⼊B通道对码状态,电源指⽰灯和B通道射频指⽰灯亮,此时B 通道可以对码。
再按功能键⼜将切换到A 通道,如此循环。
2.按照上⼀步将接收机切换到需要对码的通道,再按电源键,该通道射频指⽰灯闪烁,此时打开任意⼀⽀⼿持,接收机将⾃动与⼿持实现连接,连接成功后该通道射频指⽰灯和⾳频指⽰灯同时亮起⼀秒。
弹簧支吊架100使用说明书
TLS-W100弹簧支吊架试验台使用说明书目录1.简介 (1)2.主机 (1)3.主要技术指标 (1)4.检测设备的工作条件 (2)5.机构整体介绍 (2)6.安装与调试 (3)7.操作与使用 (3)8.维护与保养 (3)9.常见故障及处理方法 (4)10.系统的标定 (4)1简介TLS-W100弹簧支吊架试验台,广泛应用于各种弹簧生产企业及质检部门,能完成压簧、拉簧、扭簧等各项力学性能指标的测试,满足JB/T 8130.1恒力弹簧支吊架和JB/T8130.2变力弹簧支吊架测试要求。
公司多年来一直致力于弹簧等行业产品的力学性能检测仪器的研制和开发,并得到国家各级质检部门及企业的大力支持和帮助。
现产品销往全国各地,是广大弹簧生产企业、大专院校、科研单位、技术监督部门的理想测试设备。
2主机1、采用交流伺服调速电机带动NEUGART伺服控制专用减速机、圆弧同步齿型带、滚珠丝杠副实现加载,运行平稳,效率高、噪音低。
无污染。
性能稳定、可靠,具有过流、过压、超速、过载等保护装置。
调速比可达1:100000。
使用寿命高,操作方便,升降平稳。
2.采用传感器上置,各类试样更换不用爬高方便试样更换。
中横梁开槽方便试样中心调整。
3 主要技术指标3.1最大试验力:1000kN;3.2试验力准确测量范围:200N~1000kN;3.3试验力测量准确度:±1%;3.4位移分辨率:0.01mm;3.5位移速度控制范围:0.01mm/min~200mm/min;3.6有效拉伸行程:≥1000mm;3.7有效试验宽度:1500mm;3.8供电电源:380V;3.9整机外形尺寸:2200×1400×6500mm;3.10整机重量:约12500kg。
4 设备的正常工作条件4.1在室温10℃~35℃范围内,相对湿度不大于80%;4.2在无震动的环境中,周围无腐蚀性介质及电磁场干扰;4.3电源电压的波动范围不应超过额定电压的±10%;4.4主机必须可靠接地;4.5电控部分通风良好。
Sony Ericsson W100i 说明书

Sony EricssonW100i用户指南安装、使用产品前,应阅读使用说明目录更多体验。
更多发现。
(5)使用入门 (6)SIM 卡 (6)PIN 码 (6)开启手机 (8)待机状态 (9)记忆卡 (9)手机概述 (11)屏幕图标 (13)菜单概述 (15)导航 (16)快捷方式 (17)输入文本 (18)通话 (19)通话清单 (20)紧急呼叫 (21)通讯录 (21)呼叫联系人 (22)信息功能 (22)短信 (22)彩信 (23)对话 (24)Walkman™ (24)传送音乐 (25)播放列表 (26)TrackID™ (28)PlayNow 应用商店 (28)视频播放器 (29)收音机 (29)影像 (31)相机和摄像机 (31)传送照片和视频剪辑 (32)蓝牙无线技术 (32)互联网 (34)更多功能 (34)文件管理器 (34)语音信箱 (35)闹铃 (35)铃声与背景 (36)键盘锁 (37)SIM 卡锁 (37)手机锁 (38)故障排除 (39)重新设定 (39)法律信息 (39)使用入门SIM 卡SIM(用户识别模块)卡由网络运营商提供,内含有关用户的订阅服务的信息。
务必在关闭手机并断开充电器和电池(如已插入)后再插拔 SIM 卡。
PIN 码可能需要 PIN 码(个人识别码)才能激活手机中的服务和功能。
PIN 码由网络运营商提供。
每个 PIN 码数字都显示为 *,以紧急号码数字(如 112 或 911)开头的除外。
如果网络可用,您无需输入 PIN 码就可以看到和拨打紧急号码。
如果连续三次输错 PIN 码,SIM 卡就会被锁定。
请参见第 37 页的SIM 卡锁。
1取下电池盖。
2将 SIM 卡滑入其固定卡座,使黄色触片朝下。
1插入电池,保持标签面朝上且接头对准。
2将电池盖滑动到位并锁定。
开启手机手机开机1按住2 PIN 码。
3选择确定。
4选择语言。
5选择是可使用安装向导。
如果您在输入 PIN 码时出错,则可按以从屏幕上删除数字。
Windows 10 平台与产品概述说明书

IoT HoloLens Surface HubWindows DesktopWindows Phone XboxONE CORE OSONE APP PLATFORMONE STORE Windows 10Embedded Platform Convergence JourneyConvergedOS kernelConvergedapp model Windows 10Porting ToolsWindows 10 IoTCostWindows 10 IoT Enterprise [same as Windows 10 Enterprise LTSB]Desktop Shell, Win32 apps, Universal Windows Apps and Drivers2 GB RAM, 16 GB StorageX86PremiumWindows 10 IoT Mobile Enterprise [same as Windows 10 Mobile Enterprise]Modern Shell, Universal Windows Apps and Drivers1 GB RAM, 8 GB storageARMWindows 10 IoT CoreNo Shell, Universal Windows Apps and Drivers256MB RAM, 2GB storageX86 or ARMEntryDevice CapabilitiesUWP appsNatural & rich user experienceOne management & servicing approachUWP for different deviceshttps:///en-us/itpro/windows/manage/lockdown-features-windows-10•Full support of all App models, using C++, C#, Java Script•Full support of 3rd party Appmodels that support UWP . E.g. Qt, Xamarin, Unity•Adaptive Layout and Code allows you to build on App that scales to differnt plattforms•App framework for the Wearable availiable•Samples to demonstrate differnt IOT specific features (e.g. Process launcher)Comprehensive solutions from device to cloudIoT Editions Power a Broad Range of Devices25 years of history in embedded devicesOne Windows platform for all devices Enterprise-ready, OEM-ready, Maker-friendly Designed for today’s IoT environments Scalable solutions from free Windows IoT Core to Windows IoT Enterprise on PC-Like DevicesCloud-Based IoT Services & Solutions Easy to provision, use and managePay as you go, scale as you needGlobal reach, hyper scaleEnd-to-end security & privacy Windows,Mbed, Linux, iOS, Android, RTOS supportAzure IoTEnthusiast Maker Pro Startup OEMMakers find Windows IoT Core easy for learning devices Developers prefer The Windows developer experience for devices Manufacturers trust Windows IoT Core to go to marketLearner Enterprise Innovator EngagementDev ecosystemVolumeTinkerer Complexity →What is Windows IOT Enable Embedded FeaturesEmbedded featuresEmbedded mode is only enabled by default on Window IoT Core and must be enabled on standard Windows and Windows MobileBackground ApplicationsUse of thelowlevelDevice capabilityUse of thesystemManagement capabilitylow-level hardware interfaces like GPIO, SPI, and I2C.(IOT Core only)ProcessLauncher TimeZoneSettings ShutdownManager AllJoyn loopbackRemove limits enforced by the by the resource manager.How to enable featuresDownlaod and install the ADKInstallImmaging and ConfigurationDesigner (ICD)Create a provisioning Packagethat setsAllowEmbeddedMode=YesInstall the packageMore embedded features...(also apply to windows 10 in general now)https:///en-us/itpro/windows/manage/lockdown-features-windows-10IOT Security Security is not optional for Devices!Threats for IOT deviceshttps:///Azure/azure-iot-hub-vs-csDefault Passwords and backdoors in devicesDevices that are notmaintainedUnsafe credential storeUnpatched bugs Secrets in the file systemWeb-based or app-basedconfigurationOpen ports and services (I’m looking at you, raspbian!)Signature VerificationBoot MeasurementsAccess Control Lockdown Code IntegrityNative UEFI Verified OSLoader KernelDriversSystemDrivers3rd PartyDrivers User Login AppsPrepare the Board Generate Certificate Prepare the OS Image andload the image Set Certificates in the Bios and enable secure bootSecure boot need to be enabled in the Bios of a specific device Pre generated certificatesare availiable for testingAddC:\EFI\SetVariable_db.binC:\EFI\SetVariable_kek.binC:\EFI\SetVariable_pk.binSet Bios varibale by usingFWVar.exeBootPrepare the Board Generate Certificate Prepare to OS Image andload the image Shedule bitlockerEnable TPM and also Provision RPMB Pre generated certificatesare availiable for testingAddC:\EFI\DETask.xmlImport DRA.pfxAdd item toOEMCustomization.cmdBootStep 1: Provision the TPMtpm = new TpmDevice(0);// reset TPM to clean previoustry{Debug.WriteLine("Reset TPM...");tpm.Destroy();}catch(Exception ex){Debug.WriteLine("TPM was not initialized!");}Debug.WriteLine("TPM initialized");string id = tpm.GetDeviceId();//HWID is unique for this device.string hwid = tpm.GetHardwareDeviceId();Debug.WriteLine("TPM Hardware ID:"+ hwid);string hmackey = CryptoKeyGenerator.GenerateKey(32);Debug.WriteLine("TPM hmackey:"+ hmackey);//provision the device.tpm.Provision(hmackey, "", hwid);Use Portal orprovisioning appStep 2: Create the device on IOT HubManual Way usingDevice Explorer Ad Device ID here(can be TPM suggested ID)Ad HMAC Key here(generated by the provisioning App)Step 3: Use the IOT Hub in your application (test connection) public static async Task<bool> TestHubConnection(bool sendRestartMessage, string restartMessage){try{TpmDevice myDevice= new TpmDevice(0); // Use logical device 0 on the TPMstring hubUri = myDevice.GetHostName();string deviceId = myDevice.GetDeviceId();string sasToken = myDevice.GetSASToken();if((hubUri.Length== 0) || (sasToken.Length== 0)) return false;}catch(Exception ex){return false;}if(sendRestartMessage){return await SendDeviceToCloudMessageAsync(restartMessage);}return true;}Step 3: Use the IOT Hub in your application (send message) public static async Task<bool> SendDeviceToCloudMessageAsync(string str){try{TpmDevice myDevice= new TpmDevice(0); // Use logical device 0 on the TPMstring hubUri = myDevice.GetHostName();string deviceId = myDevice.GetDeviceId();string sasToken = myDevice.GetSASToken();var deviceClient = DeviceClient.Create(hubUri,AuthenticationMethodFactory.CreateAuthenticationWithToken(deviceId, sasToken), TransportType.Amqp);var message = new Message(Encoding.ASCII.GetBytes(str));await deviceClient.SendEventAsync(message);return true;}catch(Exception ex){return false;}}Step 3: Use the IOT Hub in your application (receive message)public static async Task<string> ReceiveCloudToDeviceMessageAsync(){while(true){TpmDevice myDevice= new TpmDevice(0); // Use logical device 0 on the TPM by defaultstring hubUri = myDevice.GetHostName();string deviceId = myDevice.GetDeviceId();string sasToken = myDevice.GetSASToken();var deviceClient = DeviceClient.Create(hubUri,AuthenticationMethodFactory.CreateAuthenticationWithToken(deviceId, sasToken), TransportType.Amqp);Message receivedMessage = null;receivedMessage = await deviceClient.ReceiveAsync();if(receivedMessage != null){var messageData = Encoding.ASCII.GetString(receivedMessage.GetBytes());await pleteAsync(receivedMessage);deviceClient.Dispose();return messageData;}await Task.Delay(100);}}}Unified Write Filter•The Unified Write Filter (UWF) is a feature to protect physical storage media from data writes.•UWF intercepts all write attempts to a protected volume and redirects those write attempts to a virtual overlay.•improves the reliability and stability of your device and reduces Enable UWF in the Image or Manual Protect the volume Protect Data Volume and add exclusions Make sure that your app save data in an excluded data volume https:///en-us/windows/iot/docs/uwfAdd IOT_UNIFIED_WRITE_FILTER feature id to the OEM Input fileCreate the image\FFU. Read Create a basic image for instructions.uwfmgr.exe filter enable Enables the write filter uwfmgr.exe volume protect c: Protects the Volume C shutdown /r /t 0 Restarts the device to make the write filter settings effectiveProductization Provisioning and UpdateConfigure Windows Update Get The Update Control file Create a provisioning package with Update Control file Prepare to OS Image that include this package From Windows 10 IoTCore 1607 version , IoT Core is free .download Windows 10 IoT Core Pro Update Control File .Windows 10 IoT (Core) Pro SKU provides the capability to control and schedule the windows update. This enables the policies related to Update such as:Update/AllowAutoUpdate , Update/ScheduledInstallDay , Update/ScheduledInstallTime , Update/UpdateServiceUrl .https:///en-us/windows/iot/docs/createiotcoreproManaging Windows 10 IoT Core DevicesWindows 10 IoT Core devices can be managed using a traditional OMA DM MDM server that supports certificate based enrollment or using Azure IoT Hub’s Device Management (currently in preview).Learn more about MDM and Windows 10 here .Learn more about Azure IoT Hub Device Management here.Trigger Action through Management solutionPerform Update(e.g install .cab file) Trigger reboot if requiredThis can be a to check for windowsupdate or an installation of any.ppkg or .cab file to update thesystem using e.g. applyupdate.exeor even trigger a full FFU update.BootInstalling and Servicing apps on Windows 10 IoT Core (Pro) using the StoreMicrosoft makes it easy for OEMs to install and service UWP apps on Windows 10 IoT Core through the Universal Store. All store signed apps on Windows 10 devices are capable of receiving updates directly from the store.Create and UWP App Submit to the Store Preinstall the app in the imageMembers of the Windows Store OEM Preinstall program have special permissions in their Windows Dev Center account that allows a store signed version of an app to be downloaded.Exceptions for apps using Headless mode or restricted Capabilities can be made.https:///en-us/windows/iot/docs/storeUse the zip file of the App package provided by the store. Submit updates to the store.Create and Install Packages manuallyInstall the Tools Set up your environment Create the Package•Windows Assessment and Deployment Kit(Windows ADK)•IoT Core ADK Add-Ons •Edit \IoT-ADK-AddonKit\Tools\setOEM.cmd to set theOEM_NAME•Launch IoTCoreShell.cmd(this one launches in the elevated prompt )•Select the required architecture in the Set Environmentfor Architecture prompt•Install test signing certificates using InstallOEMCerts.This is required only once for the PCCreate a package definition xml file(.pkg.xml file), andspecify the files and reg keys you want to add.Learn more at Specifying components in a package andElements and Attributes of a packageBuild the Package: buildpkg.cmd filename.pkg.xmlThe .cab file will be created in the build directory\IoT-ADK-AddonKit\Build\<arch>\pkgsCreate a package with files and reg keys<?xml version="1.0" encoding="utf-8"?><Package xmlns="urn:Microsoft.WindowsPhone/PackageSchema.v8.00"Owner="OEMName" OwnerType="OEM"ReleaseType="Test" Platform="PlaformName"Component="ComponentName" SubComponent="SubName"><Components><OSComponent><Files><File Source="$(_RELEASEDIR)\test_file1.dll"/><File Source="$(_RELEASEDIR)\toBeRenamed.dat"DestinationDir="$(runtime.system32)\test" Name="test.dat"/></Files><RegKeys><RegKey KeyName="$(hklm.software)\OEMName\test"><RegValue Name="StringValue" Value="Test string" Type="REG_SZ"/><RegValue Name="DWordValue" Value="12AB34CD" Type="REG_DWORD"/><RegValue Name="BinaryValue" Value="12,AB,CD,EF" Type="REG_BINARY"/></RegKey><RegKey KeyName="$(hklm.software)\OEMName\EmptyKey"/></RegKeys></OSComponent></Components></Package>Create an Appx packageUse appx2pkg.cmd or newappxpkg.cmd tool to generate the .pkg.xml file for a given appx file. This tool expects the appx dependencies in the sub directory named “dependencies” in the folder containing the appx file.https:///en-us/windows/hardware/commercialize/manufacture/iot/iot-core-manufacturing-guideDownload and install the Package public async Task StartDownloadandInstall(Uri url){Uri source = url; // new Uri("http://www.pccon.de/test/appupdate/update.main.zip");StorageFile destinationFile = await ApplicationData.Current.LocalFolder.CreateFileAsync("download.zip", CreationCollisionOption.GenerateUniqueName);BackgroundDownloader downloader = new BackgroundDownloader();DownloadOperation download = downloader.CreateDownload(source, destinationFile);await download.StartAsync();await UnzipFile(download.ResultFile.Path);StorageFolder localFolder = ApplicationData.Current.LocalFolder;StorageFolder t = null;try{t = await localFolder.GetFolderAsync("installer");}catch {t = null;}if (t!=null) {await t.DeleteAsync();}StorageFolder f = await localFolder.GetFolderAsync("update.main");await f.RenameAsync("installer");string path = localFolder.Path+ "\\installer\\AppInstall\\appinstall.cmd";string s = "";// REG ADD "HKLM\SOFTWARE\Microsoft\Windows\CurrentVersion\EmbeddedMode\ProcessLauncher" /v AllowedExecutableFilesList /t REG_MULTI_SZ /d"c:\windows\system32\applyupdate.exe\0c:\windows\system32\deployappx.exe\0c:\installer\appinstall.cmd\0c:\Data\Users\DefaultAccount\AppData\Local\Packages \15c8ba7d-b8cc-46ee-84f1-ef0f27753fbe_0wy2ejr5nfw9j\LocalState\installer\AppInstall\appinstall.cmd\0"await App.ViewModel.RunProcess(path, s);}Code Repository Build PackagingFileServerAzureIoT Hub Windows 10 IoT Core deviceExample:End-To-End deployment to Windows 10 IoT Core Devices via VSTS& IoT HubVisual Studio Team Services Build& Release Management Trigger UpdateOEM license requirementsThe process of licensing Windows 10 IoT Core product and the OEM license agreement is provided at Windows 10 IoT Core Commercialization.As part of signing the Windows 10 IoT Core OEM license agreement, you are required to meet these system requirements for the Windows 10 IoT Core device.SMBIOS SupportThe following are the minimum required fields in SMBIOS for IoTCore•(Table 1, offset 04h) System Manufacturer•(Table 1, offset 05h) System Product Name•(Table 1, offset 19h) System SKU•(Table 1, offset 1Bh) System Familyhttps:///en-us/windows/iot/docs/oemlicenserequirementsAnd finally….. Go T o marketUnderstand licensing requirements•See Windows 10 IoT Core Commercialization to understand the licensing requirementsCreate a retail image•Learn how to create a custom image at Windows 10 IoT Core manufacturing guide•Learn how to lockdown your device at Building Secure Devices•Learn how to configure your device for servicing at Service IoTCoreArrange for device manufacturingGet contact info for parts suppliers (SVs/IHVs/ODMs). Contact the supplier directly and follow their process to get components and licenses as necessary. Work directly with your SoC partner to locate an appropriate manufacturer.•See Supported boards and SoCsVielen Dank© 2016 Microsoft Corporation. All rights reserved. BecauseMicrosoft must respond to changing market conditions, it shouldnot be interpreted to be a commitment on the part of Microsoft,and Microsoft cannot guarantee the accuracy of any informationprovided after the date of this presentation. MICROSOFT MAKESNO WARRANTIES, EXPRESS, IMPLIED OR STATUTORY, AS TO THEINFORMATION IN THIS PRESENTATION.。
W100说明书1

W100说明书
一:配件
本音箱采用优良的包装材料,以保证在运输过程中免受损坏。
开箱时请仔细检查配件是否齐全、请按要求填写保修卡,并让本音箱的供应商盖章。
然后请您把保修卡的厂商联按时寄至惠州达为电子有限公司,客户留存联妥善保管,作为今后保修维护的凭证。
主音响1只
低音箱1只(选配)
遥控器1个
电源线一根
3.5mm音频连接线1条
USB 延长线一根
说明书、保修卡及合格证各1份
二:注意事项
三:红外摇控器功能说明
1:开关机
2:功能循环
3:模式转换(WIFI/蓝牙)
4:输入选择(AUX)
5:输入选择(光纤)
6:输入选择(HDMI)
7:输入选择(USB)
8:音量加
9:音量减
10:上一曲
11:下一曲
12:静音
13:3D音效
14:重置/复位
15:播放/暂停
四:主箱体
五:连接设备
六:规格参数
主机名称W100
1 音箱S13-195
W100 100*88*70mm
2 喇叭S13-171 3*8OHM WOOFER
3 高音S13-172 20芯4OHM TW。
MSI PRO 16T 10M Windows 10 Home版商业推荐说明书

PATH TO THE FUTURESelling PointsWindows 10 Home - MSI recommends Windows 11 Profor businessWindows 11'e ÜCRETSİZ Yükseltme1Intel® Celeron® 5205U / Intel® Pentium®Gold 6405UProcessor15.6" LCD Panel LED Backlight (1366*768 ) / SingleTouch (PRO 16T 10M)Fan-less DesignHDD Caddy support 2.5” storageAnti-Glare DisplayCOM Port x 2 / RJ-45 LAN x 2 / USB 3.2 Gen 1 x 4 /USB2.0 x 2 / VGA-out x 1 / Printer Port x 11Yükseltme tarihi, cihaza göre değişiklik gösterebilir.Özellikler ve uygulama kullanılabilirliği, bölgeye göredeğişiklik gösterebilir. Bazı özellikler için belirlidonanımlar gerekir(https:///tr-tr/windows/windows-11-specifications adresine göz atın ...Picture and logos System I/O-Ports1.1x Card Reader2.2x USB 3.2 Gen 1 Type A3.1x DC-in4.1x Parallel Port (Printer Port)5.2x COM port6.1x VGA-out7.2x RJ458.2x USB 2.0 Type A2x USB 3.2 Gen 1 Type A9.10.1x Line-out/Microphone-inSpecificationOperating Systems Windows N/ADisplay Screen Size15.6" (40 cm)Active Display Area (mm)344.132(H)x193.436(V) Curvature FlatPanel Type TNResolution1366x768 (HD)Pixel pitch0.252(H)x0.252(V)Brightness (nits)220Contrast Ratio500:1Signal Frequency31.84~48.24 KHz(H) / 40~60 Hz(V) Response Time (GTG)10 msView Angles45°(H)/45°(V)Surface Treatment Non-glareTouch Screen Single Point Resistive Touch Screen Display Colors262KI/O Ports Lock type KensingtonProcessor CPU model Intel Celeron 5205U CPU Clock 1.9GHzCPU Cores2CPU Cache2MBCPU Threads2Chipset Motherboard Chipset N/AMemory Memory Capacity4GB(4GB*1) Memory Type DDR4 SDRAM Memory Speed1333(2666)MHz Memory Module Form Factor SO-DIMM Memory Slot (Total/Free)2/1Memory Max Capacity Max 32GBStorage Total SSD Storage Capacity256GBTotal HDD Storage Capacity N/AM.2 Slot (1) Installed SSD256GB*1M.2 Slot (1) Interface PCIe GEN3x4 NVMe M.2 Slot (1) Form Factor M.2-2280 M-KEY M.2 slots (Total/Free)1/0HDD (1) RPM N/AHDD (1) Form Factor N/AHDD (1) Interface N/A3.5" Drive Bays (Total/Free)0/2.5" Drive Bays (Total/Free)1/1ODD(Type)N/AODD Height N/AODD Type N/ACommunications LAN Controller Realtek RTL8111H Wireless LAN Controller INTEL/9462.NGWG.NV Wireless LAN standard802.11ac 1x1+BT Bluetooth Version5Audio Audio Codec Realtek ALC233 Audio Support7.1 Channel HD AudioI/O Ports (Front)USB 5Gbps (USB 3.2 Gen 1 Type-A)2I/O Ports (Rear)USB 5Gbps (USB 3.2 Gen 1 Type-A)2 USB 480Mbps (USB 2.0 Type A)2 LAN Ports (RJ45)2 Card Reader1 VGA1 COM Port2 Mic-in/Headphone-out combo (R)1 Printer Port (Parallel)1Power AC Adapter Output65W Battery N/A Battery Whrs N/AIn The Box Power Cord1AC Adaptor1 Warranty Card1Quick Guide3User Manual N/AVESA Mount kit N/A Keyboard SK9626MW Mouse SM9023MWInput Device WebCam1MRegulatory Compliance Storage Operating Temperature Range0° C ~ 35° C ; -20° C ~ 60° C Storage Operating Humidity Range0% ~ 85%;0% ~ 90%CertificationsFCC(Class B)CB/CEUL(CUL)BSMIVCCIRCM(C-Tick)Design Adjustment (Tilt)N/A Adjustment (Swivel)N/A Adjustment (Height)N/A Adjustment (Pivot)N/AProduct Dimension with Stand (WxDxH)Product Dimension with Stand (WxDxH) (mm)N/A Product Dimension with Stand (WxDxH) (inch)N/ADimension & Weight Weight (Net kg)N/AWeight (Gross kg)N/AProduct Dimension with Holder (WxDxH) (mm)399.5 x 69.2 x 313.9 Product Dimension with Holder (WxDxH) (inch)15.73 x 2.72 x 12.36 Inside Carton Dimension with Holder (WxDxH)(mm)N/AInside Carton Dimension with Holder (WxDxH)(inch)N/AInside Carton Dimension with Stand (WxDxH)(mm)N/AInside Carton Dimension with Stand (WxDxH)(inch)N/AOuter Carton Dimension with Holder (WxDxH)(mm)528 x 183 x 393Warranty Warranty24MBarcode Info EAN4719072720438。
红外距离传感器产品参考手册说明书

Laser type and high power narrow beam LED type BGS! Types with sensing distances of 100 mm and 300 mm Industry standard sizeHighly accurate height difference detection through low hysteresisRelatedproductsUniversal voltage typeBGS-2VP.384Higher accuracyBGS-HL,BGS-HDLP.310Transparent object detectionZ3R-QP.404 Selection tableFor the connector type, please purchase an optional JCN series connector cable.Options/AccessoriesConnector cablesL-shapedJCN-SCable length: 2 mJCN-5SCable length: 5 mJCN-10SCable length: 10 mJCN-LCable length: 2 mJCN-5LCable length: 5 mJCN-10LCable length: 10 mProtective mounting bracketUltra-durable 2 mm thick typeRust-resistant stainless steelS ensor is firmly secured using M3 Hexsocket head cap screwsT he bracket is also firmly secured usingM6 screwsLK-S01LK-S02 Meander detection of sheet materials Detection of multi-colored trays Detection of items on stainless steel lines Laser type application 1LED type application 1LED type application 2Straight326Laser, standard type BGS-ZL, BGS-Z seriesLaser types (Class 1) and high power narrow beam LED types are availableIdeal for height difference detection using low hysteresisIndustry standard sizeShort-range type hysteresis ≤ 3% (typical value)Mounting hole pitch: 25.4 mmLaser type (equipped with laser OFF input)High power narrow beam LED light source typeThe spot size of the laser type is ø1 mm at 100 mm (short-range type). Optimal for applications that in which small object detection and high repeat accuracy are required. It is also a Class 1 laser in which eye protection for workers is not necessary.*Classified as Class II in the US FDA standards.A short-range type with a sensing distance of 100 mm that achieves a low hysteresis of ≤ 3%. Demonstrates its strength in small height difference detection.* A mid-range type with a sensing distance of 300 mm that achieves a hysteresis of ≤ 5%.Features an industry standard pitch of 25.4 mm.Features a high power narrow beam LED light source . Because the spot light can be seen clearly even in brightfactories regardless of the LED light, confirmation of detection position is easier than for any other conventional model.*Compared to conventional models: Using LED light source.Laser typeH y s t e r e s i s (%)Sensing distance X (mm)High power narrow beam LED typeH y s t e r e s i s (%)Sensing distance X (mm)Laser, standard type BGS-ZL, BGS-Z seriesSpecifications*2. Classified as Class II in the US FDA standards.*3. D efined with center strength 1/e 2 (13.5%). There may be light leakage outside of the specified spot size. The sensor may be affected when there is a highly reflective object close to the target area.*4. Mounting bracket BEF-W100-A is included with the connector type.Specifications are subject to change without prior notice for product improvement purposes.Laser, standard type BGS-ZL, BGS-Z seriesI/O circuit diagramNPN output typePNP output typeConnector typeConnecting1 to 4 are connector pin No.NotesC onnect frame ground to the earth when the switching regulator is used for power supply. B ecause wiring sensor wires with high-voltage wires or power supply wires can result in malfunctions due to noise, which can cause damage, make sure to wire separately. Avoid using the transient state while the power is on (approx. 100 ms). T he connector direction is fixed as in the drawing to the right when you use L-shaped connector cable. Be aware that rotation is not possible.This product emits a Class 1 (II) visible laser beam that is compliant with IEC/JIS, FDA laser safety standards.Warning and explanation labels are affixed to the sides of the sensor.Laser type: BGS-ZL10 /BGS-ZL30Laser light precautions1 10 to 30 VDC2 Laser OFF input (laser type only)3 0 V4 Control output(Pin con guration)Sensor sideConnector cable sideWarningDo not look directly at the laser or intentionally shine the laser beam in another person’s eyes.Laser, standard type BGS-ZL, BGS-Z seriesDimensionsSensorConnector cable (optional)Cable typeConnector typeJCN-S, JCN-5S, JCN-10SJCN-L, JCN-5L, JCN-10L(Unit: mm)Light ON / Dark ONselection switchOutput indicator (orange)Light ON / Dark ONselection switchø4.7, 4-wire × 0.325 mm 2ø4.7, 4-wire × 0.325 mm 2Laser, standard type BGS-ZL, BGS-Z seriesConnector type (when using BEF-W100-A)(Unit: mm)Mounting bracketCable type (when using BEF-W100-B)Laser, standard type BGS-ZL, BGS-Z seriesTypical characteristic dataBGS-ZL10 Laser typeBGS-ZL30 Laser type③S e n s i n g a r e a Y (m m )④③Distance X (mm)④③D i s t a n c eY (m m )④③Sensing distance X (mm)④③Sensing distance (mm)④③Sensing distance (mm)④③H y s t e r e s i s (%)④③S e n s i n g d i s t a n c e (m m )④W h i t e p a p e rB l a c k p a p e rV e n e e b o a r d C a r d b o a r dB l a c k r u b b e rB l a c k s p o n g ③S e n s i n g a r e a Y (m m )④③D i s t a n c e Y(m m )④③H y s t e r e s i s (%)④Hysteresis51002003001015203025③S e n s i n g d i s t a n c e (m m )④③O p t i c a l p l a n e ④③Sensing distance X (mm)④③Sensing distance (mm)④③Distance X (mm)④③Sensing distance (mm)④White paperGray paper/white paper Black paper/white paperW h i t e p a p e rB l a c k p a p e rV e n e e b o a r dC a r d b o a r dB l a c k r u b b e rB l a c k s p o n gLaser, standard type BGS-ZL, BGS-Z seriesBGS-Z10 LED typeBGS-Z30 LED type③S e n s i n g d i s t a n c e (m m )④③S e n s i n g a r e a Y (m m )④③Distance X (mm)④③D i s t a n c e Y (m m )④③Sensing distance X (mm)④③O p t i c a l p l a n e ④③Sensing distance (mm)④③H y s t e r e s i s (%)④③Sensing distance (mm)④W h i t e p a p e rB l a c k p a p e rV e n e e b o a r dC a r d b o a rdB l a c k r u b b e rB l a c k s p o n g③S e n s i n gd i s t a n ce (m m )④③H y s t e r e s i s (%)④③Sensing distance (mm)④③S e n s i n g a r e a Y (m m )④③D i s t a n c e Y (m m )④③Sensing distanceX (mm)④③Distance X (mm)④1020304050③Sensing distance (mm)④③O p t i c a l p l a n e ④5W h i t e p a p e rB l a c k p a p e rV e n e e b o a r dC a r d b o a r dB l a c k r u b b e rB l a c k s p o n g。
MSI 22XT 10M Windows 10 Home 21.5 英寸 IPS 笔记本电脑说明书
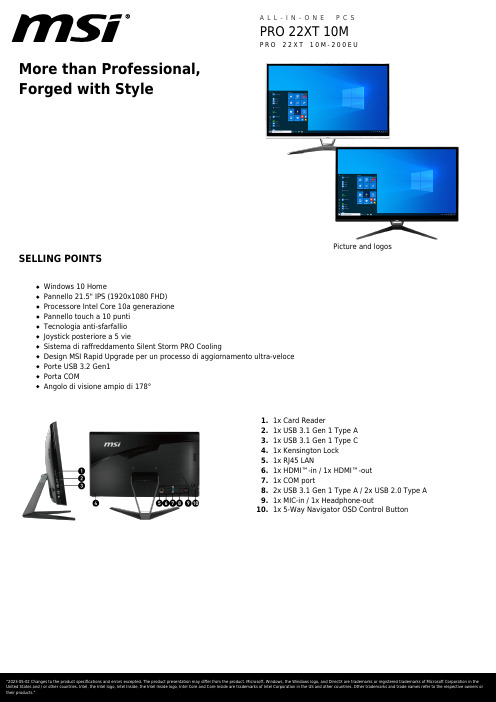
More than Professional,Forged with StylePicture and logos SELLING POINTSWindows 10 HomePannello 21.5" IPS (1920x1080 FHD)Processore Intel Core 10a generazionePannello touch a 10 puntiTecnologia anti-sfarfallioJoystick posteriore a 5 vieSistema di raffreddamento Silent Storm PRO CoolingDesign MSI Rapid Upgrade per un processo di aggiornamento ultra-velocePorte USB 3.2 Gen1Porta COMAngolo di visione ampio di 178°1.1x Card Reader1x USB 3.1 Gen 1 Type A2.3.1x USB 3.1 Gen 1 Type C4.1x Kensington Lock1x RJ45 LAN5.6.1x HDMI™-in / 1x HDMI™-out7.1x COM port8.2x USB 3.1 Gen 1 Type A / 2x USB 2.0 Type A9.1x MIC-in / 1x Headphone-out10.1x 5-Way Navigator OSD Control ButtonSPECIFICATIONBarcode Info EAN4719072806842Model Part No9S6-ACD312-218 MKT Name PRO 22XT 10MMKT Spec PRO 22XT 10M-200EU Color ID1/White-White-WhiteOperating Systems Operating Systems Windows 10 HomeAggiornamento gratuito a Windows 11*Display Screen Size21.5" (55 cm)Active Display Area (mm)476.064(H) ×267.786(V)Curvature FlatPanel Type IPSResolution1920x1080 (FHD)Pixel pitch0.24795(H)X0.24795 (V)Brightness (nits)250Contrast Ratio1000:1Signal Frequency64~83 KHz(H) / 50~75 Hz(V)Response Time (GTG)14msView Angles178°(H)/178°(V)Surface Treatment Non-glareTouch Screen10 Points Projected Capacitive Touch Screen Display Colors16.7MI/O Ports Lock type KensingtonProcessor CPU Number Intel Core i3-10100 CPU Clock 3.6GHzCPU Cores4TDP65WCache 6 MB Intel® Smart Cache Threads8Chipset Chipsets H410Memory Memory Size8GB(8GB*1) Memory Type DDR4 SDRAM Memory Speed1333(2666)MHz Module Type SO-DIMM Memory Slot (Total/Free)2/1Max Capacity Max 32GBStorage SSD Size256GBHDD1 Size N/ASSD Config256GB*1SSD Interface PCIe GEN3x4 w/o DRAM NVMe SSD Form Factor M.2-2280 M-KEYM.2 slots (Total/Free)1/0HDD1 RPM N/AHDD1 Form Factor N/AHDD1 Interface N/A3.5" Drive Bays (Total/Free)0/2.5" Drive Bays (Total/Free)1/1ODD(Type)N/AODD Height N/AODD Type N/ACommunications LAN Realtek RTL8111H WLAN INTEL/3168.NGWG WLAN Version802.11ac 1x1+BT BT Version 4.2Audio Audio Chipset Realtek ALC887 Audio Type7.1 Channel HD AudioI/O Ports (Front)USB 3.2 Gen 1 Type A1 USB 3.2 Gen 1 Type C1I/O Ports (Rear)USB 3.2 Gen 1 Type A (R)2USB 2.0 Type A (R)2RJ452Card Reader1HDMI™ out1x (v1.4) COM Port1HDMI™ in1Power AC Adapter Output120W Battery N/A Battery Whrs N/AIn The Box Power Cord1AC Adaptor1 Warranty Card1Quick Guide3User Manual N/AVESA Mount kit N/A Keyboard SK9626MW Mouse SM9023MWRegulatory Compliance Operating, Storage Temperature0° C ~ 35° C ; -20° C ~ 60° C Operating, Storage Humidity0% ~ 85%;0% ~ 90% Regulatory ComplianceFCC(Class B)CB/CEUL(CUL)BSMIVCCIRCM(C-Tick)Design Adjustment (Tilt)Front 5°/Rear 15°Product Dimension with Stand (WxDxH)Product Dimension with Stand (WxDxH) (mm)500 x 210 x 370 Product Dimension with Stand (WxDxH) (inch)19.69 x 8.27 x 14.57Dimension & Weight Weight (Net kg) 5.82 Weight (Gross kg)8.35 Product Dimension with Holder (WxDxH) (mm)N/A Product Dimension with Holder (WxDxH) (inch)N/A Inside Carton Dimension with Holder (WxDxH) (mm)N/A Inside Carton Dimension with Holder (WxDxH) (inch)N/A Inside Carton Dimension with Stand (WxDxH) (mm)N/A Inside Carton Dimension with Stand (WxDxH) (inch)N/A Outer Carton Dimension with Holder (WxDxH) (mm)N/AWarranty Warranty24M。
W100产品手机用户手册-172页精选文档
VL656C手机用户手册目录VL656C手机用户手册.... 错误!未定义书签。
1. 基本知识 (13)1.1. 简介 (13)1.2. 安全须知 (15)1.3. 安全警告和注意事项 (16)1.3.1. 通用注意事项 (16)1.3.2. 使用手机的注意事项 (20)1.3.3. 使用电池的注意事项 (23)第 1 页1.3.4. 使用充电器的注意事项 (26)1.3.5. 清洁和维护 (29)2. 使用前 (30)2.1. 各部分的名称和说明 (30)2.1.1. 技术参数 (30)2.1.2. 外观示意图(图片仅供参考) (31)2.1.3. 待机图片说明(图片仅供参考) (31)2.1.4. 按键说明 (39)2.2. 安装SIM卡、UIM卡、存储卡 (40)2.2.1. SIM卡或UIM卡 (40)2.2.2. SIM卡或UIM卡的插入和取出 (42)第 2 页2.2.3. 存储卡 (43)2.3. 电池 (43)2.3.1. 安装电池 (43)2.3.2. 充电 (44)2.4. 安全密码 (45)3. 快速使用指南 (48)3.1. 特色功能 (48)3.2. 功能热键 (51)3.3. 拨打电话 (52)3.4. 拒接来电 (54)3.5. 接听电话 (54)第 3 页3.6. 结束通话 (55)3.7. 紧急服务 (55)3.8. 分机速拨 (55)3.9. 已拨电话/未接来电/已接来电/拒接来电56 3.10. ............................ 呼叫转移563.11. ............................ 呼叫等待573.12. ............................ 通话限制573.13. ................................ 关机第 4 页574. 功能菜单 (58)4.1. 功能菜单结构 (58)4.2. 名片夹 (64)4.2.1. 新建 (65)4.2.2. 名片夹查找 (65)4.2.3. 写信息 (66)4.2.4. 拨号 (66)4.2.5. 发送Vcard (66)4.2.6. 删除 (66)4.2.7. 标记 (67)第 5 页4.2.8. 复制 (67)4.2.9. 其他 (67)4.3. 信息服务 (69)4.3.1. 写信息 (69)4.3.2. 收件箱 (74)4.3.3. 发件箱 (76)4.3.4. 草稿箱 (77)4.3.5. 已发信箱 (79)4.3.6. 常用短信 (80)4.3.7. 语音信箱 (80)4.3.8. 小区广播 (82)第 6 页4.3.9. 短信设置 (83)4.3.10. 彩信设置 (86)4.3.11. 信息容量 (89)4.4. 多媒体 (90)4.4.1. 相机 (90)4.4.2. 音频播放器 (97)4.4.3. 视频播放器 (101)4.4.4. 收音机 (102)4.4.5. 录音器 (104)4.4.6. 图片浏览器 (106)4.4.7. 电子书 (107)第 7 页4.4.8. 文件管理 (110)4.5. 通话记录 (113)4.5.1. 已拨电话 (113)4.5.2. 已接来电 (115)4.5.3. 未接来电 (115)4.5.4. 拒接来电 (115)4.5.5. 全部删除 (116)4.5.6. 通话计时 (116)4.5.7. 通话计费 (117)4.5.8. GPRS流量 (117)4.6. 互联星空 (118)第 8 页4.6.1. 输入网址 (118)4.6.2. 主页 (119)4.6.3. 书签 (119)4.6.4. 历史记录 (120)4.6.5. 离线浏览 (121)4.6.6. WAP设置 (121)4.7. 天翼 (125)4.8. 号码百事通 (125)4.9. 情景模式 (126)4.9.1. 标准/无声/会议/户外/寻呼机 (126)4.10. ............................ 客户服务第 9 页1314.11. .............................. 百宝箱1314.11.1 游戏 (131)4.11.2 闹钟 (133)4.11.3 日历日程 (133)4.11.4 计算器 (135)4.11.5 世界时间 (135)4.11.6 倒计时 (136)4.11.7 STK (136)4.11.8 归属地 (137)第 10 页4.12. ................................ 蓝牙1374.12.1 开启蓝牙 (137)4.12.2 本机可见性 (138)4.12.3 配对设备 (138)4.12.4 文件共享设定 (139)4.12.5 我的手机名 (139)4.12.6 帮助 (139)4.13. ................................ 设置1404.13.1 通话设置 (140)第 11 页4.13.2 话机设置 (150)4.13.3 显示设置 (151)4.13.4 安全设置 (153)5 输入法介绍 (155)6 配件 (160)7 维护和保养 (161)8 安全信息 (164)第 12 页1. 基本知识1.1. 简介感谢您选择VL656C彩屏GSM/GPRS数字移动电话。
MSI 22XT 10M Windows 10 Home 商品说明说明书
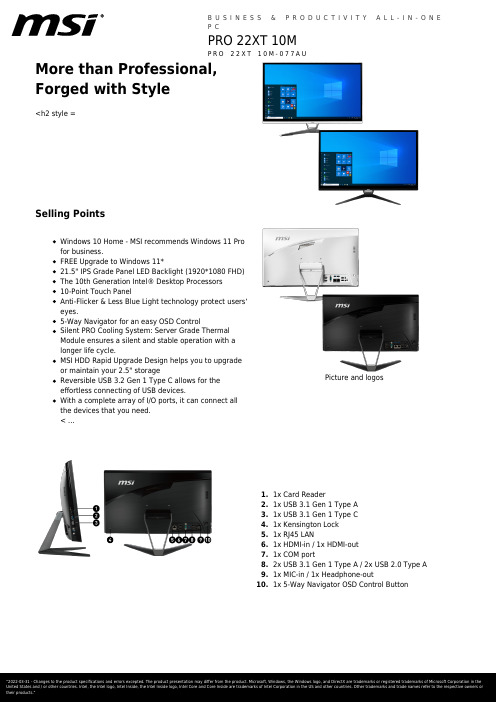
More than Professional,Forged with Style<h2 style =Selling PointsWindows 10 Home - MSI recommends Windows 11 Pro for business.FREE Upgrade to Windows 11*21.5" IPS Grade Panel LED Backlight (1920*1080 FHD)The 10th Generation Intel® Desktop Processors 10-Point Touch PanelAnti-Flicker & Less Blue Light technology protect users‘eyes.5-Way Navigator for an easy OSD ControlSilent PRO Cooling System: Server Grade Thermal Module ensures a silent and stable operation with a longer life cycle.MSI HDD Rapid Upgrade Design helps you to upgrade or maintain your 2.5" storageReversible USB 3.2 Gen 1 Type C allows for the effortless connecting of USB devices.With a complete array of I/O ports, it can connect all the devices that you need.< ...Picture and logos1x Card Reader1.1x USB 3.1 Gen 1 Type A2.1x USB3.1 Gen 1 Type C 3.1x Kensington Lock4.1x RJ45 LAN5.1x HDMI-in / 1x HDMI-out6.1x COM port7.2x USB 3.1 Gen 1 Type A / 2x USB 2.0 Type A 8.1x MIC-in / 1x Headphone-out9.1x 5-Way Navigator OSD Control Button10.SpecificationOperating Systems Windows 10 ProWindow 10 HomeWindow 10 Pro (MSI recommends Window 11 Pro for business)FREE upgrade to Windows 11*CPU Number Intel Core i5-10400CPU Clock 2.9GHzCPU Cores6TDP65WCache12 MB Intel® Smart CacheThreads12Chipsets H410Screen Size21.5" (55 cm)Active Display Area (mm)476.064(H) ×267.786(V)Curvature FlatPanel Type IPSResolution1920x1080 (FHD)Pixel pitch0.24795(H)X0.24795 (V)Brightness (nits)250Contrast Ratio1000:1Signal Frequency64~83 KHz(H) / 50~75 Hz(V)Response Time (GTG)14msView Angles178°(H)/178°(V)Surface Treatment Non-glareTouch Screen10 Points Projected Capacitive Touch ScreenDisplay Colors16.7MMic-in NAHeadphone-out NALock type KensingtonMemory Size8GB(8GB*1)Memory Type DDR4 SDRAMMemory Speed1333(2666)MHzModule Type SO-DIMMMemory Slot(Total)2Memory Slot(Free)1Max Capacity Max 32GBSSD Interface PCIe GEN3x4 w/o DRAM NVMeSSD Form Factor M.2-2280 M-KEYSSD Config512GB*1SSD Size512GBHDD1 Interface N/AHDD1 Form Factor N/AHDD1 Size N/AHDD1 RPM N/AODD(Type)N/AODD Height N/AODD Type N/AM.2 slots(Total)1M.2 slots(Free)02.5" Drive Bays(Total)12.5" Drive Bays (Free)1LAN Realtek RTL8111HWLAN INTEL/3168.NGWGWLAN Version802.11ac 1x1+BTBT Version 4.2Audio Chipset Realtek ALC887Audio Type7.1 Channel HD AudioUSB 2.0 Type A NAUSB 3.2 Gen 1 Type A1USB 3.2 Gen 1 Type C1USB 3.2 Gen 2 Type A NAUSB 3.2 Gen 2 Type C NAUSB 3.2 Gen 2x2 Type C NAMic-inHeadphone-out combo NAUSB 3.2 Gen 2x2 Type C (R)NAUSB 3.2 Gen 2 Type C (R)NAUSB 3.2 Gen 2 Type A (R)NAUSB 3.2 Gen 1 Type C (R)NAUSB 3.2 Gen 1 Type A (R)2USB 2.0 Type C (R)NAUSB 2.0 Type A (R)2RJ452Card Reader1VGA out NAHDMI out1x (v1.4)DP out NAmini DP out NAPS2NACOM Port1DVI-D out NAHDMI in1Mic-inHeadphone-out combo (R)NAPrinter Port (Parallel)NAHeadphone-out (HiFi SPDIF)NAOperating, Storage Temperature0° C ~ 35° C ; -20° C ~ 60° C Operating, Storage Humidity0% ~ 85%;0% ~ 90% Regulatory Compliance FCC(Class B)CB/CEUL(CUL)BSMIVCCIRCM(C-Tick)AC Adapter Output120WBattery N/ABattery Whrs N/AAdjustment (Tilt)Front 5°/Rear 15°Adjustment (Swivel)NAAdjustment (Height)NAAdjustment (Pivot)NAProduct Dimension with Stand (WxDxH) (mm)500 x 210 x 370Product Dimension with Stand (WxDxH) (inch)19.69 x 8.27 x 14.57 Weight (Net kg) 5.82Weight (Gross kg)8.35Product Dimension with Holder (WxDxH) (mm)N/AProduct Dimension with Holder (WxDxH) (inch)N/AN/AInside Carton Dimension with Holder (WxDxH)(mm)N/AInside Carton Dimension with Holder (WxDxH)(inch)N/AInside Carton Dimension with Stand (WxDxH)(mm)N/AInside Carton Dimension with Stand (WxDxH)(inch)N/AOuter Carton Dimension with Holder (WxDxH)(mm)Power Cord1AC Adaptor1Warranty Card1Quick Guide3User Manual N/AVESA Mount kit1Keyboard SK9626MWMouse SM9023MWWarranty36MColor ID1/White-White-WhiteEAN4719072797560。
MSI PRO 16T 10M Windows 10 Home 15.6英寸笔记本电脑说明说明书
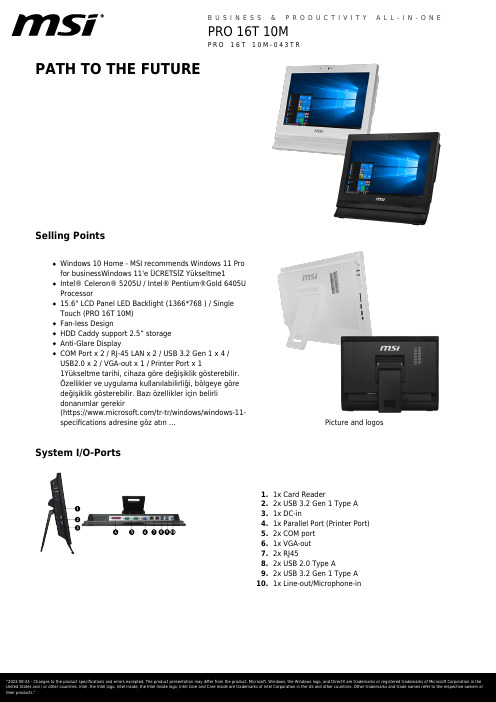
PATH TO THE FUTURESelling PointsWindows 10 Home - MSI recommends Windows 11 Profor businessWindows 11'e ÜCRETSİZ Yükseltme1Intel® Celeron® 5205U / Intel® Pentium®Gold 6405UProcessor15.6" LCD Panel LED Backlight (1366*768 ) / SingleTouch (PRO 16T 10M)Fan-less DesignHDD Caddy support 2.5” storageAnti-Glare DisplayCOM Port x 2 / RJ-45 LAN x 2 / USB 3.2 Gen 1 x 4 /USB2.0 x 2 / VGA-out x 1 / Printer Port x 11Yükseltme tarihi, cihaza göre değişiklik gösterebilir.Özellikler ve uygulama kullanılabilirliği, bölgeye göredeğişiklik gösterebilir. Bazı özellikler için belirlidonanımlar gerekir(https:///tr-tr/windows/windows-11-specifications adresine göz atın ...Picture and logos System I/O-Ports1.1x Card Reader2.2x USB 3.2 Gen 1 Type A3.1x DC-in4.1x Parallel Port (Printer Port)5.2x COM port6.1x VGA-out7.2x RJ458.2x USB 2.0 Type A2x USB 3.2 Gen 1 Type A9.10.1x Line-out/Microphone-inSpecificationOperating Systems Windows Windows 10 ProWindows 11'e ÜCRETSİZ Yükseltme*Display Screen Size15.6" (40 cm)Active Display Area (mm)344.132(H)x193.436(V) Curvature FlatPanel Type TNResolution1366x768 (HD)Pixel pitch0.252(H)x0.252(V)Brightness (nits)220Contrast Ratio500:1Signal Frequency31.84~48.24 KHz(H) / 40~60 Hz(V) Response Time (GTG)10 msView Angles45°(H)/45°(V)Surface Treatment Anti-GlareTouch Screen Single Point Resistive Touch Screen Display Colors262KI/O Ports Lock type KensingtonProcessor CPU model Intel Celeron 5205U CPU Clock 1.9GHzCPU Cores2CPU Cache2MBCPU Threads2Chipset Motherboard Chipset N/AMemory Memory Capacity4GB(4GB*1) Memory Type DDR4 SDRAM Memory Speed1333(2666)MHz Memory Module Form Factor SO-DIMM Memory Slot (Total/Free)2/1Memory Max Capacity Max 32GBStorage Total SSD Storage Capacity128GBTotal HDD Storage Capacity N/AM.2 Slot (1) Installed SSD128GB*1M.2 Slot (1) Interface SATA GEN3M.2 Slot (1) Form Factor M.2-2280 B+M KEY M.2 slots (Total/Free)1/0HDD (1) RPM N/AHDD (1) Form Factor N/AHDD (1) Interface N/A3.5" Drive Bays (Total/Free)0/2.5" Drive Bays (Total/Free)1/1ODD(Type)N/AODD Height N/AODD Type N/ACommunications LAN Controller Realtek RTL8111H Wireless LAN Controller INTEL/9462.NGWG.NV Wireless LAN standard802.11ac 1x1+BT Bluetooth Version5Audio Audio Codec Realtek ALC233 Audio Support7.1 Channel HD AudioI/O Ports (Front)USB 5Gbps (USB 3.2 Gen 1 Type-A)2I/O Ports (Rear)USB 5Gbps (USB 3.2 Gen 1 Type-A)2 USB 480Mbps (USB 2.0 Type A)2 LAN Ports (RJ45)2 Card Reader1 VGA1 COM Port2 Mic-in/Headphone-out combo (R)1 Printer Port (Parallel)1Power AC Adapter Output65W Battery N/A Battery Whrs N/AIn The Box Keyboard Interface USB Mouse Interface USB Power Cord1AC Adaptor1 Warranty Card1Quick Guide2User Manual1VESA Mount kit N/A Keyboard SK9626M Mouse SM9023MInput Device WebCam internal webcamRegulatory Compliance Storage Operating Temperature Range0° C ~ 35° C ; -20° C ~ 60° C Storage Operating Humidity Range0% ~ 85%;0% ~ 90%CertificationsFCC(Class B)CB/CEUL(CUL)BSMIVCCIRCM(C-Tick)Design Adjustment (Tilt)N/A Adjustment (Swivel)N/A Adjustment (Height)N/A Adjustment (Pivot)N/AProduct Dimension with Stand (WxDxH)Product Dimension with Stand (WxDxH) (mm)N/A Product Dimension with Stand (WxDxH) (inch)N/ADimension & Weight Weight (Net kg)N/AWeight (Gross kg)N/AProduct Dimension with Holder (WxDxH) (mm)399.5 x 69.2 x 313.9 Product Dimension with Holder (WxDxH) (inch)15.73 x 2.72 x 12.36 Inside Carton Dimension with Holder (WxDxH)(mm)N/AInside Carton Dimension with Holder (WxDxH)(inch)N/AInside Carton Dimension with Stand (WxDxH)(mm)N/AInside Carton Dimension with Stand (WxDxH)(inch)N/AOuter Carton Dimension with Holder (WxDxH)(mm)528 x 183 x 393Warranty Warranty24MBarcode Info EAN4719072874568。
w100说明书

9
:如果被设置为 0,相当于没有设置继电器报警;
:(例如 Setpoint=2 时)
当 Setpoint=2 并且
继电器均报警。
当 Setpoint=2 并且
Hale Waihona Puke 时,重量值大于为+2 或者小于-2 时, 时,重量值大于+2 时,继电器报警。
当 Setpoint=2 并且
设定点的设置方法:
时,重量值小于-2 时,继电器报警。
3
E:外部触点决定 12 组设定值的选择 EC:外部开关的选择决定 12 组设定值的选择
2.2 显示灯与按键功能
LED
主要功能
净重显示
零点
稳定
Kg
单位
g
单位
W1
W2
W3
第二功能 输入 1 关闭
输入 2 关闭
输入 3 关闭
输出 4 关闭 输出 5 关闭 输出 1 关闭 输出 2 关闭 输出 3 关闭
报警,并且重量值
(上电自动零点标定)(从 0 到满量程的 20%:默认值为 0):上电后,如果
仪表显示值低于这个参数的设定值并且不超过 设定值丢失。禁用此功能,设置为 0.
值,重量值被清零。断电后,零点
:(从 1 到 5,默认值为
)零点追踪
例如:如果参数
设置为 5,
设置为 2,重量值小于或等于 10 时,它将
� 接线端子:传感器输入接口、1 个 RS-232、24VDC 电源输入、模拟量输出 、3 个输 入、5 个输出。
2
� 供给电源:12 - 24 VDC +/- 10% ; 5 W � 操作温度:-20℃~+60℃ � 储存温度:-30℃~+80℃ � 操作湿度:85%相对湿度(无凝结水滴状态) � 机构尺寸:48(W)×96(H)×130(D)mm
林克尼尔电子 LinxGun PROMIG 电源工具说明书
LINCGUN ® PROMIG ™Per ulteriori lingue visitare il nostro sito web:www.lincolnelectric.eu > Support (Supporto) > Operator manuals and spares EU (Manuali dell’operatore e ricambi UE)GRAZIE PER AVERE SCELTO UN PRODOTTO DI QUALITÀ DI LINCOLN ELECTRIC.Versioni con raffreddamento ad acqua:Le torce L I NCGUN ® PROM I G™ Amps sono state progettate per soddisfare la specifica EC 60974-7 per saldatura con elettrodo in acciaio mediante i processi GMAW (Gas Metal Arc Welding) e FCAW (Flux- Cored Arc Welding) con gas schermante. Le torce LI NCGUN ® PROMIG™ sono guidate manualmente e raffreddate ad aria o ad acqua (modelli con “W”).Le torce LG PROMIG possono essere collegate a qualsiasi alimentatore con connettore EURO. Per ottenere prestazioni ottimali si consiglia di utilizzare queste torce con saldatrici, raffreddatori e FREEZCOOL Lincoln Electric.Utilizzare sempre i consumabili originali.W100000267W100000254W100000269W100000272W100000272W100000269W100000253W100000260W100000269W100000262W100000185W100000196W100000244W100000257W100000197W100000270W100000271W100000181W100000251W100000268W100000270W100000190W100000191W100000192W100000181W100000219 W100000220 W100000221W100000198W100000199W100000200 W100000211W100000209W100000228W100000216 W100000217 W100000218W100000187 W100000188 W100000189LG PROMIG 330WW100000251W100000268W100000269W100000222W100000223W100000224W100000187W100000188W100000189W100000198W100000199W100000200W100000209W100000211W100000272W100000262W100000261W100000196W100000253W100000253W100000269W100000185W100000267W100000272W100000260W100000270W100000271W100000197W100000181W100000257W100000244W100000232W100000233W100000234W100000268W100000269W100000235W100000236W100000237W100000187W100000188W100000189W100000198W100000199W100000200W100000235W100000236W100000237W100000210W100000211W100000272W100000203W100000186W100000262W100000261W100000196W100000254W100000253W100000269W100000267W100000185W100000244W100000257W100000181W100000197W100000272Lincoln Electric IberiaAgnieszka Kujacz - KoralewskaProduct Manager Equipment Welding Guns EMEARRimuovere periodicamente e pulire l’ugello, la punta guidafilo e il diffusore del gas. Sostituire l’ugello se danneggiato. L’utilizzo regolare di una sostanza antiadesiva riduce l’aderenza degli spruzzi e ne facilità di rimozione. Pulire la guaina del cavo dopo l’uso di circa 140 kg di elettrodo. Rimuovere il cavo dal trainafilo e posarlo direttamente sul pavimento. Rimuovere la punta guidafilo dalla torcia. Utilizzando un tubo flessibile con aria compressa regolato a una pressione parziale, soffiare delicatamente la guaina del cavo dall’estremità del diffusore del gas.ATTENZIONE!Una pressione eccessiva all’avvio può portare all’aggregazione dello sporco con formazione di un tappo. Piegare il cavo per l’intera lunghezza e pulire con aria compressa il cavo. Ripetere questa procedura finché non esce più sporco.。
GM 4WD 4X4 产品配件清单说明书

2WD 4X4YEAR PART #Fits Does NOT FitNote*82 - 0462602Extreme 99-01*82 - 0462610*82 - 0462602*82 - 0462610Colorado / GMC Canyon**04 - 0662612Extreme Colorado Off-Road / GMC Canyon Off-Road**07-1162615Z-71 Series *82 - 0462602Extreme 99-01*82 - 04626102001 TrailBlazer2002 Trailblazer Jimmy / Blazer *200562610Trailblazer Trailblazer *02-0962611BlazerRemove Plastic skirt on bottom of bumper.*98 - 0162610*02-0962611Lower plastic skirting must be removed*91 - 0162610*02 - 0462611*89 - 9868611 2 dr 4 dr *91 - 9868620 4 dr2 dr*99 - 0468625*73 - 8063001*81 - 8762920*81 - 8763003**88 - 9863005**99 - 0063005Classic Body Style New Body Style **99 - 0063007New Body Style Classic Body Style **01 - 0263007 6 Bolt Hub1500 Heavy Duty (HD) /C3 / Sierra Denali Quadrasteer**03 - 0463009**05 - 0663010Z-71**200763010Old Style New Style **07-1163012New Style Old Style Remove Plastic skirt on bottom of bumper.**01 - 04630081500 (1/2 ton)**05 - 0663******* (1/2 ton)*73 - 8063001*81 - 8762920*81 - 8763003**88 - 9863005**99 - 0063005Classic Body Style New Body Style **99 - 0063008New Body Style Classic Body Style**01 - 0463008 8 Bolt Hub **05 - 0663011 8 Bolt Hub**07-1063014Remove Tow Hooks01 - 0463008Z ESilverado 2500 / Sierra 2500 (3/4 Ton)SNOWPLOW MOUNT GUIDE* = AvailableCHEVROLET/ GMCNOTESGMC EnvoyOldsmobile BravadaPickup 1500 (1/2 Ton)C O M P A C T & M ID S I Z ES-10 PickupTracker / Pontiac Sunrunner /AsunaGMC S-15 / Sonoma Pickup S-Jimmy / S-Blazer Pickup 2500 (3/4 Ton)Silverado 1500 / Sierra 1500 (1/2 Ton)Pickup 1500 HD (Heavy Duty)** 8 Bolt Hub **05 - 0663011 8 Bolt Hub *73 - 8063001*81 - 9163003*81 - 916292092 & Newer =S-Jimmy Blazer **92 - 946300595 & Newer = S-BlazerTahoe**95 - 9863005Suburban / Yukon**92 - 9863005**99 - 0063005Classic Body Style New Body Style**07-1063012Remove Plastic skirt on bumper and bracket **99 - 0063007New Body Style Classic BSMust remove plastic bumper lip to fit **01 - 0563007Must remove plastic bumper lip to fit**07-1063012Remove Plastic skirt on bumper and bracket **05 - 0663010Avalanche 2500**07 - 0863012Remove Plastic skirt on bumper and bracket**02 - 0463008**05 - 0663011**99 - 0063005Classic Body Style New Body Style **99 - 0063008New Body Style Classic BS **01 - 0463008Yukon Denali **05 - 0663011Yukon DenaliCadillac Escalade **99 - 0063005Classic BS New Body StyleCadillac Escalade **07-1063012Van 1500 / 2500*78 - 9662730F U L L -S I Suburban 1500 / Tahoe / Yukon / Yukon XL 1500 Avalanche 2500Suburban 2500 / Yukon XL 2500Suburban 1500 / Tahoe / YukonAvalanche 1500Jimmy / Blazer / Suburban Pickup 2500 HD (Heavy Duty)SNOWPLOW MOUNT GUIDE* = AvailableCHEVROLET/ GMC NOTES2WD 4X4YEAR PART #FitsDoes NOT Fit Note**87 - 9664125**97 - 99641304dr Club Cab *00 - 04641344dr Club Cab*00 - 0464137**05-1064136**98 - 9964130*00 - 0364134*00 - 0364137**04-0964135*75 - 8064303W100/(1/2 ton) /W200 (3/4ton)Military Issue*05 - 0664312Power Ram Pickup *81 - 9364303W150/(1/2 ton) /W250 (3/4ton)**94 - 0164309Remove Tow Hooks**02 - 0564311Offroad CompetitionSRT-10** 06 - 0864313Mega Cab 1500Ram Pickup 1500 (1/2 Ton)**09-1064314Remove Bumper Skirt**94 - 0264309**03 - 0864312Mega Cab 1500Ramcharger*74 - 9364303AW100/ AW150 / Prospector2WD 4X4YEAR PART #Fits Does NOT Fit Note**83 - 9261100**93 - 9761110**98 - 0861122EdgeMay Require Removal ofBumber SkirtBronco II**83 - 9061100*91 - 9461110*95 - 9661115*97 - 01611222dr & 4dr May Require Removal ofBumber Skirt*02 - 06611254dr 2dr / 4dr Sport Trac Explorer 2dr Sport *01 - 03611222002 Explorer 4drMay Require Removal ofBumber Skirt**01 - 0661122May Require Removal ofBumber Skirt **07-1061127*97 - 0161122May Require Removal ofBumber Skirt*200261125Lincoln Aviator*03 - 0561125**72 - 7961501F100, F150 RangerSuperCab**80 - 9161503**92 - 9661510*97 - 03615114dr Crew Cab Lightning / Harley Davidson*97 - 03615124dr Crew Cab STX 61511Dakota Pickup DurangoExplorer 4dr Sport TracF U L L -S I Z EF150 PickupC O M P A C TMountaineer FORD / MERCURYRanger Pickup ExplorerDODGE/ CHRYSLERPower Wagon Pickup Ram Pickup 2500 (3/4 Ton)Ram Pickup 1500 (1/2 Ton)M I D -S I Z E*2004Heritage New Body Style *200461512Heritage New Body Style **200461513New Body StyleHeritage (O.B. Style)**05 - 0761513**200861515**09-1061522New Body Style Lincoln Mark LT **200661513*97 - 9961511New Body Style *97 - 9961512New Body Style*80 - 9161516*92 - 9861517*99 - 0361518**04 - 0761519**08-1061520May Require Removal ofBumber Skirt**78 - 7961501Bronco Ranger XLT,Custom **80 - 9161503Eddie Bauer**92 - 9661510Nite*97 - 0261511*97 - 0261512**03 - 0561514Excursion*00-0561518ISUZU2WD 4X4YEAR PART #Fits Does NOT Fit NotePickup*88 - 9566106*96 - 0062602*96 - 0062610Amigo *90 - 9566106*92 - 9766106*98 - 0066108Trooper **88-9166105*92 - 9766106*98 - 0066109If it has a Bushguard; remove or modifyF250 Pickup Heavy Duty / F250 Super DutyF U L L -S I Z EHombre PickupC O M P A C TExpedition/ Lincoln Navigator Trooper F250 Pickup Light DutyBroncoRodeoSNOWPLOW MOUNT GUIDE* = AvailableCHEVROLET/ GMC NOTESJEEP2WD 4X4YEAR PART #Fits Does NOT Fit NoteScrambler / CJ-8 Pickup*81 - 8564110Comanchee Pickup **86 - 9264105CJ-5 / CJ-7*72 - 8664110Wrangler / YJ *86 - 966411586 & 87 years overlapWrangler / TJ *97 - 0664117UnlimitedWrangler*07-0864119Remove Air DamsLiberty *02 - 0764121CRD Diesel Wagoneer**84 - 9064105Leaf Springs J10/ J20/ Honcho/ Laredo Pickup **79 - 8764100Cherokee/ Wagoneer**79 - 8364100Coil Springs **84 - 9164100Coil Springs**199364102**93 - 9864102**99 - 0464103SB300 won't fit LaredoTrim Package If it has a Bushguard; remove or modify **05-1064104Remove Tow Hooks Commander**06-1064104Remove Tow HooksMAZDA2WD 4X4YEAR PART #FitsDoes NOT Fit Note*86 - 9367610**94 - 9761110**98-0861122May Require Removal ofBumber SkirtNavajo*91 - 9461110NISSAN / INFINITY2WD 4X4YEAR PART #Fits Does NOT Fit Note*83 - 8566605*198666605 4 Headlights 2 Headlights *198666610 2 Headlights 4 HeadlightsHardBody*87 - 9766610**98 - 04666204dr / Desert Runner 2wd**05-1066621*99 - 0466620If it has a Bushguard; remove or modify**05-1066621*86 - 9566610*96 - 0466615If it has a Bushguard; remove or modify **05-1066621May Require Removal ofBumber SkirtInfinity QX4*97 - 0366615If it has a Bushguard; remove or modify F STitan Pickup *04-0866625F SPathfinder Armada*04-0866625Must remove PlasticBumper SkirtSUZUKI2WD 4X4YEAR PART #FitsDoes NOT FitNoteGrand WagoneerXterraC O M P A C TB-series Pickup C O M P A C TF U L L S I Z EGrand Cherokee Pickup PickupC O M P A C TFrontier PickupPathfinder*89 - 98686112dr 4dr *96 - 9868615 4 dr Sport4dr *91 - 98686204dr2dr / 4dr Sport Vitara *99 - 0268625Grand VitaraTOYOTA2WD 4X4YEAR PART #Fits Does NOT FitNote*86 - 9565105Tacoma95 model years overlap *89 - 9565005*95 - 976511595 model years overlap*98 - 0465120Pre-runner 2wd *05-1065121TRD V6 ModelsX-Runner07-08 remove tow hookT-100 Pickup *93 - 9865110*86 - 9565105*96 - 0265120*03-0665122F J Cruiser *07-1065122**99 - 0665111May Require Removal ofPlastic CoverTundra Pickup *07-1065114Sequoia *00 - 0565111Fullsize SUVSequoia*201065114OTHER2WD 4X4YEAR PART #Fits Does NOT FitNoteLandrover Discovery*199969010Series 2SPECIAL MOUNT2WD 4X4YEARPART #Professional Mount**60001Requires Fabricationsitate to call and ask! 1-800-337-2327 or visit our Website at C O M P A C TC O M P A C TF STacoma Pickup Tundra Pickup 4-Runner SidekickPickup。
wisLink工业交换机说明书V

电源:
输入电压 连接 最大功耗
DC220V/110V(自适应) 接线端子 3W
第 1 页 共3页
wisLink W-100 工业交换机装置技术说明书(V1.0)过载电流Leabharlann 护 反向电压输入保护机械特性:
包装及防护等级 尺寸
工作环境:
工作温度 工作相对湿度
抗干扰特性:
抗干扰性能 绝缘耐压标准
支持,最大可承受 2.5 A 支持
抗干扰性能 绝缘耐压标准
10M-14880 pps、100M-148800pps、1000M-1488000pps 4.8Gbps 存储转发 全双工 IEEE802.3x,半双工背压式 8 K、自动学习 < 5ms
v100第一章wislinkw100工业交换机技术说明书第二章wislinkw1600工业交换机技术说明书第三章wislinkw1601工业交换机技术说明书第四章wislinkw1700工业交换机技术说明书第五章wislinkw802工业环网交换机技术说明书第六章wislinkw802m工业环网交换机技术说明书第七章wislinkw802g工业交换机技术说明书第八章wislinkw200光电转换器技术和使用说明书第九章wislinkw2000工业以太网交换机技术说明书第十章wislinkw2400工业交换机技术说明书wislinkw100工业交换机技术说明书版本
如需相关产品、服务和支持的更多信息,请访问金智科技网 站/。
本公司有权对本说明书的内容进行定期变更,恕不另行通知。变更内容将会补充 到新版本的说明书中。
_____________________________________________________________
wisLink W-1600 在设计中考虑工业场合的应用需求和习惯,采用交直流供电方式,直流供电 让交换机和工业设备采用相同的电压输入,增加了可靠性,减少了施工复杂性。采用网线后出线的 方式,使得网线的布置整洁、美观;同时为了方便巡视,wisLink W-1600 前面板设置了显示各个网 口工作状态的灯,使得交换机的工作状态一目了然。由于 wisLink W-1600 针对工业用户,我们在设 计上严格按照 IEC-1613、IEC61000-6-5 以及 IEC61850-3 的标准,以满足工业现场的抗电磁干扰的 需求。在交换性能上,wisLink W-1600 完全满足 RFC2899 规定的交换性能要求。
- 1、下载文档前请自行甄别文档内容的完整性,平台不提供额外的编辑、内容补充、找答案等附加服务。
- 2、"仅部分预览"的文档,不可在线预览部分如存在完整性等问题,可反馈申请退款(可完整预览的文档不适用该条件!)。
- 3、如文档侵犯您的权益,请联系客服反馈,我们会尽快为您处理(人工客服工作时间:9:00-18:30)。
连 续 重 量 传 输 协 议 到 RIP675 , RIP615C 远 程 显 示 器 ( 默 认 : ) � � � 传输速度(2400,,4800,9600,19200,38400,115200,默认:9600) 仪表地址(从 1 到 9;默认:1) 最大传输频率(10-20-30-40-50-60-70-80-100-200-300,默认:0) ; 20Hz 对应的波特率是 2400;40Hz 对应的波特率是 4800; 80Hz 对应的波特率是 9600;100Hz 对应的波特率是 19200; 200Hz 对应的波特率是 38400;300Hz 对应的波特率是 38400; 延迟时间(从 1 到 200mUMAS 称重变送器, 本产品专为产业界高精度磅秤之使用要求的
重量指示仪表,为最有效的机种之一。称重仪表设计为直流和交流两种、工业级高精度 、
高速度 A/D 转换的计量控制仪表。应用场所如如台秤、 地秤、 料斗秤、 轴秤、容器 计量秤以及各种农机用秤、配料秤等等。敝公司衷心期望这种新的称重变送器能为您带来
3
E:外部触点决定 12 组设定值的选择 EC:外部开关的选择决定 12 组设定值的选择 2.2 显示灯与按键功能
LED
主要功能 净重显示 零点 稳定
第二功能 输入 1 关闭 输入 2 关闭 输入 3 关闭 输出 4 关闭 输出 5 关闭 输出 1 关闭 输出 2 关闭 输出 3 关闭
Kg g W1 W2 W3
当所称量的重量超过这个设置的最大重量值时,显示屏上将会显示 如果禁用此功能,设置为 0。 3. 清零设置
或者直接设置,长按 ESC 建 3 秒。 注意:设置了理论标定参数后来执行此操作。 4. 手动零值输入
注意: 只有当它是不可能的重置称重结构时才能执行此操作, 例如它包含的产品不能被卸载。 按照估计的零值设置此参数(从 0 到最大 999999:默认值为 0)
自动设置为零,断电后重新上电参数将恢复默认值。 3.5 单位设置
1.
显示系数
8
通过设置系数
重量显示会有相应的改变。 模式(具体的见输
为了实现单位间的转换,前提条件就是,其中一个输入设置为
出和输入配置) ,当输入被关闭时重量值将根据 系数被修改,但此时必须把单位 改成你想要的显示单位;当输入值打开时将显示标准的重量值。 根据不同的单位选择有不同的含义。 3.6 输入输出设置
(1)手动皮重设置
10
注意:如果是半自动皮重输入是无法进行手动皮重输入的。 (2)半自动皮重设置
以上两种方法均是按右键表示清除皮重,长按 注意:当断电时,以上设置自动恢复默认值。 例如:箱子的重量是 2KG,苹果的重量是 5KG, 预设皮重之后,表上会显示重量为-2,这时短按 果放在箱子里显示 5,长按 3.8 模拟量输出
设定点的设置方法:
如果 组。 输入: 默认 : (1 ) 操作并且显示净重。 (2 ) (3 ) 量值被显示。 (4 ) (5 ) 取一次,而且 (6 ) (7 ) 据可被打印。 3.7 预置皮重 输入 1=
选项被连接,它就可以设置 12 组不同的设定值看,否则只能设置一
,输入 2=
输入 3= 保持输入是关闭的, 仪表上电自动执行半自动去皮
1
第一章
1.1
� � � � � �
特点与规格
主要特点: 可提供直流 24VDC 高精度及高速度计量控制仪表 工业等级标准的设计适用于各种恶劣的工业环境 体积小、不占空间、功能强、性能佳、盘式安装、调试简单 每秒最大可达 300 次的 A/D 转换速度完全适用于高速的动态计量系统 A/D 内部的解析度高达 24bits(16 000 000)个刻度以上 1 个独立的 RS-232 通讯口及 4-20mA、 0-20mA、 0-10V 、 0-5V、 -5-+5V、 -10-+10V O/P 为 W100 的标准配备
0
目
前 第一章 第二章 第三章 第四章 第五章
录
言.......................................................................... 0 特点与规格......................................................... 2 外观功能与安装.................................................. 3 相关系统参数说明.............................................. 6 其他设置.......................................................... 14 报警信号.......................................................... 15
保持输入是关闭的,重量被清零。 保持输入时关闭的,面板上将会显示此时达到的最大值。打开输入当前的重
保持输入是关闭的, 不执行任何操作, 输入状态可以通过远程通讯协议被读取。 保持输入时关闭的,重量值可以根据通讯被传输到 PLC 中,但是只能读 必须是设置为 保持输入是关闭的,重量值将根据设置的显示系数的变化而变化。 如果任意一个通讯口的参数被设置为 ,那么当输入关闭时,数
1.3
�
接线端子:传感器输入接口、1 个 RS-232、24VDC 电源输入、模拟量输出 、3 个输 入、5 个输出。
2
� � � � � 1.4
供给电源:12 - 24 VDC +/- 10% ; 5 W 操作温度:-20℃~+60℃ 储存温度:-30℃~+80℃ 操作湿度:85%相对湿度(无凝结水滴状态) 机构尺寸:48(W)×96(H)×130(D)mm 数字处理规格
输出: 输出默认设置一次为: 操作模式: :常开 :常闭 :通过按键设定报警点; :通过远程控制指令设定报警点; :当重量值显示稳定时,继电器报警; 如果选择 操作模式, :总重量的基础上切换到毛重; :总重量的基础上切换到净重。 :当重量值达到正的设定值或者负的设定值时,继电器都报警; :只有当重量值达到正的设定值时,继电器报警; :只有当重量值达到负的设定值时,继电器报警;
6
3.2
真实值校准
在进行了理论校准和皮重零点设置以后,可以通过这个参数来减小称量值误差。 例如:已知重量是 1500Kg 的重物,通过称重传感器测量表上显示 1499Kg,然后通过改变这 个参数来进行校正。 3.3 滤波
设置这个参数主要是为了获取一个稳定的重量值。 为了重量值更稳定可以增大这个参数值(从 0 到 9:默认值为 4). 从图中可以看出: � � � 通过确认 FILTER 值,可以显示当前被设定的筛选值; 通过改变和确认这个值,重量值被显示并且可以验证其稳定性; 如果稳定性不尽如人意,可以通过修改筛选值来达到你想要的结果。
3s 显示毛重。
键,显示 0,表示皮重清除,将苹
,屏幕上显示 7,松开即显示净重 5
输出方式选择( 4-20 mA, 0-20 mA, 0-10 V, 0-5 V, -10 +10 V, -5 +5 V ;默认值为 4-20 mA) 选择显示是净重还是毛重,默认为 GROSS 和 :对应着物料的量程设置,例如 0-500Kg 对应着相应的模拟量输出,例如4-20mA
9
:如果被设置为 0,相当于没有设置继电器报警; : (例如 Setpoint=2 时)
当 Setpoint=2 并且
继电器均报警。 当 当
时,重量值大于为 +2 或者小于 -2 时,
Setpoint=2 并且 Setpoint=2 并且
时,重量值大于+2 时,继电器报警。 时,重量值小于-2 时,继电器报警。
设置参数 设置预设皮 重 系统参数:
5
第三章
3.1 1. 理论功能标定 理论标定
相关系统参数说明
执行此功能需设置的传感器参数:
:所使用的传感器的量程总和。
例如:如果使用 4 只量程是 1000kg 的传感器,那么这个参数应输入 4000.
:传感器灵敏度(默认值为 2.00000mV/V)
分辨率 2. 最大值设置
线性/模拟输出的线性度:均< 0.01% F.S 热漂移:< 0.0005 % F.S./°C;模拟输出温度漂移:< 0.003 % F.S./°C 传感器激励电压:5VDC /120mA 输入阻抗:10MΩ(min) A/D 转换方式:ΔΣ A/D 解析度:高精度 超过 24bits(16 000 000)以上个刻度 转换速度:最大每秒可达 300 次 显示范围:-999999~+999999 波特率:2400, 4800, 9600, 19200, 38400, 115200 一般规格
单位 单位
每一个亮着的 LED 显示灯代表的是正在被设定的参数而不是此时显示的重量。 注意:为了激活 LED 显示灯的第二功能,在仪表显示重量的时候先按下此键 立即按下 ,然后
4
按键功能: 按键 短按 清零 清除皮重 净重皮重 称重传感器 mV 值 确认 长按 3 秒 进入菜单 取消或者回到之前的菜单 选择被改变的数值或者回到之前的菜单 项 修改被选择的参数或者进入下一个菜单 项
滤波可以使 TLB 获得一个稳定的重量值,如下表所示:
如果你想查看一直在变得峰值即重量最大值,请将 FILTER ON THE WEIGHT 设置为 0 3.4 零点参数设置
7
(从 0 到满量程:默认值 300) (对于微小的重量变化自动清零) :只有当显示重 量值小于这个设定值时,表显才会自动清零,否则将会显示 不能清零,设置这个参数主要是为了复位零点时微小的重量变化。 报警,并且重量值
(上电自动零点标定) (从 0 到满量程的 20%:默认值为 0) :上电后,如果 仪表显示值低于这个参数的设定值并且不超过 设定值丢失。禁用此功能,设置为 0. 值,重量值被清零。断电后,零点