从VMware ESX Server 4升级到ESXi 5
esxi5.0最新补丁安装
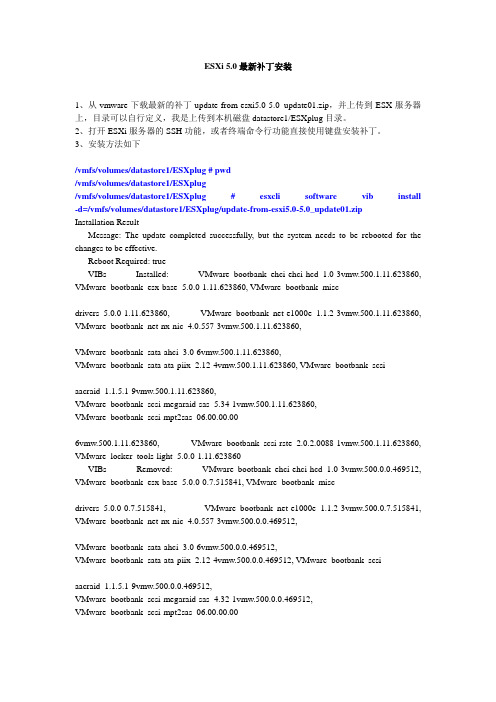
ESXi 5.0最新补丁安装1、从vmware下载最新的补丁update-from-esxi5.0-5.0_update01.zip,并上传到ESX服务器上,目录可以自行定义,我是上传到本机磁盘datastore1/ESXplug目录。
2、打开ESXi服务器的SSH功能,或者终端命令行功能直接使用键盘安装补丁。
3、安装方法如下/vmfs/volumes/datastore1/ESXplug # pwd/vmfs/volumes/datastore1/ESXplug/vmfs/volumes/datastore1/ESXplug # esxcli software vib install -d=/vmfs/volumes/datastore1/ESXplug/update-from-esxi5.0-5.0_update01.zipInstallation ResultMessage: The update completed successfully, but the system needs to be rebooted for the changes to be effective.Reboot Required: trueVIBs Installed: VMware_bootbank_ehci-ehci-hcd_1.0-3vmw.500.1.11.623860, VMware_bootbank_esx-base_5.0.0-1.11.623860, VMware_bootbank_misc-drivers_5.0.0-1.11.623860, VMware_bootbank_net-e1000e_1.1.2-3vmw.500.1.11.623860, VMware_bootbank_net-nx-nic_4.0.557-3vmw.500.1.11.623860,VMware_bootbank_sata-ahci_3.0-6vmw.500.1.11.623860,VMware_bootbank_sata-ata-piix_2.12-4vmw.500.1.11.623860, VMware_bootbank_scsi-aacraid_1.1.5.1-9vmw.500.1.11.623860,VMware_bootbank_scsi-megaraid-sas_5.34-1vmw.500.1.11.623860,VMware_bootbank_scsi-mpt2sas_06.00.00.00-6vmw.500.1.11.623860, VMware_bootbank_scsi-rste_2.0.2.0088-1vmw.500.1.11.623860, VMware_locker_tools-light_5.0.0-1.11.623860VIBs Removed: VMware_bootbank_ehci-ehci-hcd_1.0-3vmw.500.0.0.469512, VMware_bootbank_esx-base_5.0.0-0.7.515841, VMware_bootbank_misc-drivers_5.0.0-0.7.515841, VMware_bootbank_net-e1000e_1.1.2-3vmw.500.0.7.515841, VMware_bootbank_net-nx-nic_4.0.557-3vmw.500.0.0.469512,VMware_bootbank_sata-ahci_3.0-6vmw.500.0.0.469512,VMware_bootbank_sata-ata-piix_2.12-4vmw.500.0.0.469512, VMware_bootbank_scsi-aacraid_1.1.5.1-9vmw.500.0.0.469512,VMware_bootbank_scsi-megaraid-sas_4.32-1vmw.500.0.0.469512,VMware_bootbank_scsi-mpt2sas_06.00.00.00-5vmw.500.0.0.469512, VMware_locker_tools-light_5.0.0-0.7.515841VIBs Skipped: VMware_bootbank_ata-pata-amd_0.3.10-3vmw.500.0.0.469512, VMware_bootbank_ata-pata-atiixp_0.4.6-3vmw.500.0.0.469512,VMware_bootbank_ata-pata-cmd64x_0.2.5-3vmw.500.0.0.469512,VMware_bootbank_ata-pata-hpt3x2n_0.3.4-3vmw.500.0.0.469512, VMware_bootbank_ata-pata-pdc2027x_1.0-3vmw.500.0.0.469512,VMware_bootbank_ata-pata-serverworks_0.4.3-3vmw.500.0.0.469512,VMware_bootbank_ata-pata-sil680_0.4.8-3vmw.500.0.0.469512, VMware_bootbank_ata-pata-via_0.3.3-2vmw.500.0.0.469512, VMware_bootbank_block-cciss_3.6.14-10vmw.500.0.0.469512,VMware_bootbank_esx-tboot_5.0.0-0.0.469512,VMware_bootbank_ima-qla4xxx_2.01.07-1vmw.500.0.0.469512,VMware_bootbank_ipmi-ipmi-devintf_39.1-4vmw.500.0.0.469512, VMware_bootbank_ipmi-ipmi-msghandler_39.1-4vmw.500.0.0.469512, VMware_bootbank_ipmi-ipmi-si-drv_39.1-4vmw.500.0.0.469512,VMware_bootbank_misc-cnic-register_1.1-1vmw.500.0.0.469512,VMware_bootbank_net-be2net_4.0.88.0-1vmw.500.0.7.515841, VMware_bootbank_net-bnx2_2.0.15g.v50.11-5vmw.500.0.0.469512,VMware_bootbank_net-bnx2x_1.61.15.v50.1-1vmw.500.0.0.469512,VMware_bootbank_net-cnic_1.10.2j.v50.7-2vmw.500.0.0.469512, VMware_bootbank_net-e1000_8.0.3.1-2vmw.500.0.7.515841, VMware_bootbank_net-enic_1.4.2.15a-1vmw.500.0.0.469512,VMware_bootbank_net-forcedeth_0.61-2vmw.500.0.0.469512,VMware_bootbank_net-igb_2.1.11.1-3vmw.500.0.0.469512, VMware_bootbank_net-ixgbe_2.0.84.8.2-10vmw.500.0.0.469512,VMware_bootbank_net-r8168_8.013.00-3vmw.500.0.0.469512,VMware_bootbank_net-r8169_6.011.00-2vmw.500.0.0.469512, VMware_bootbank_net-s2io_2.1.4.13427-3vmw.500.0.0.469512, VMware_bootbank_net-sky2_1.20-2vmw.500.0.0.469512,VMware_bootbank_net-tg3_3.110h.v50.4-4vmw.500.0.0.469512,VMware_bootbank_ohci-usb-ohci_1.0-3vmw.500.0.0.469512, VMware_bootbank_sata-sata-nv_3.5-3vmw.500.0.0.469512, VMware_bootbank_sata-sata-promise_2.12-3vmw.500.0.0.469512, VMware_bootbank_sata-sata-sil_2.3-3vmw.500.0.0.469512,VMware_bootbank_sata-sata-svw_2.3-3vmw.500.0.0.469512,VMware_bootbank_scsi-adp94xx_1.0.8.12-6vmw.500.0.0.469512, VMware_bootbank_scsi-aic79xx_3.1-5vmw.500.0.0.469512,VMware_bootbank_scsi-bnx2i_1.9.1d.v50.1-3vmw.500.0.0.469512,VMware_bootbank_scsi-fnic_1.5.0.3-1vmw.500.0.0.469512, VMware_bootbank_scsi-hpsa_5.0.0-17vmw.500.0.0.469512, VMware_bootbank_scsi-ips_7.12.05-4vmw.500.0.0.469512,VMware_bootbank_scsi-lpfc820_8.2.2.1-18vmw.500.0.0.469512,VMware_bootbank_scsi-megaraid-mbox_2.20.5.1-6vmw.500.0.0.469512,VMware_bootbank_scsi-megaraid2_2.00.4-9vmw.500.0.0.469512,VMware_bootbank_scsi-mptsas_4.23.01.00-5vmw.500.0.0.469512, VMware_bootbank_scsi-mptspi_4.23.01.00-5vmw.500.0.0.469512,VMware_bootbank_scsi-qla2xxx_901.k1.1-14vmw.500.0.0.469512,VMware_bootbank_scsi-qla4xxx_5.01.03.2-3vmw.500.0.0.469512, VMware_bootbank_uhci-usb-uhci_1.0-3vmw.500.0.0.469512/vmfs/volumes/datastore1/ESXplug # reboot安装完成以后,需要重启ESXi。
VMware ESXI5.0的安装配置
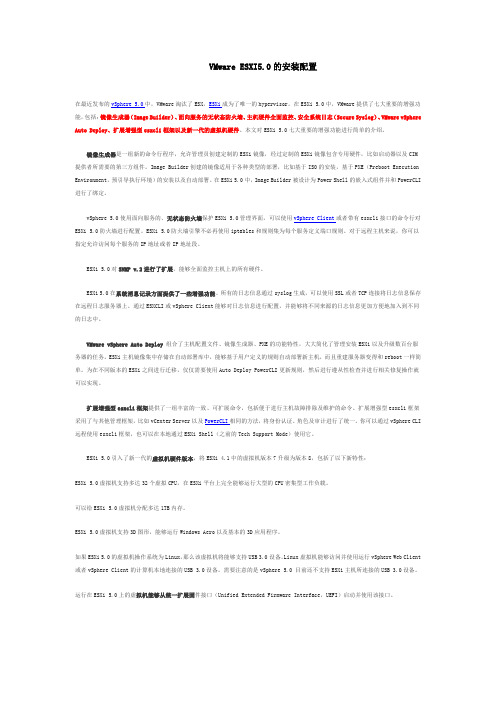
VMware ESXI5.0的安装配置在最近发布的vSphere 5.0中,VMware淘汰了ESX,ESXi成为了唯一的hypervisor。
在ESXi 5.0中,VMware提供了七大重要的增强功能,包括:镜像生成器(Image Builder)、面向服务的无状态防火墙、主机硬件全面监控、安全系统日志(Secure Syslog)、VMware vSphere Auto Deploy、扩展增强型esxcli框架以及新一代的虚拟机硬件。
本文对ESXi 5.0七大重要的增强功能进行简单的介绍。
镜像生成器是一组新的命令行程序,允许管理员创建定制的ESXi镜像,经过定制的ESXi镜像包含专用硬件,比如启动器以及CIM 提供者所需要的第三方组件。
Image Builder创建的镜像适用于各种类型的部署,比如基于ISO的安装,基于PXE(Preboot Execution Environment,预引导执行环境)的安装以及自动部署。
在ESXi 5.0中,Image Builder被设计为Power Shell的嵌入式组件并和PowerCLI 进行了绑定。
vSphere 5.0使用面向服务的、无状态防火墙保护ESXi 5.0管理界面,可以使用vSphere Client或者带有esxcli接口的命令行对ESXi 5.0防火墙进行配置。
ESXi 5.0防火墙引擎不必再使用iptables和规则集为每个服务定义端口规则。
对于远程主机来说,你可以指定允许访问每个服务的IP地址或者IP地址段。
ESXi 5.0对SNMP v.2进行了扩展,能够全面监控主机上的所有硬件。
ESXi 5.0在系统消息记录方面提供了一些增强功能。
所有的日志信息通过syslog生成,可以使用SSL或者TCP连接将日志信息保存在远程日志服务器上。
通过ESXCLI或vSphere Client能够对日志信息进行配置,并能够将不同来源的日志信息更加方便地加入到不同的日志中。
Vmware Vshpere安装操作文档
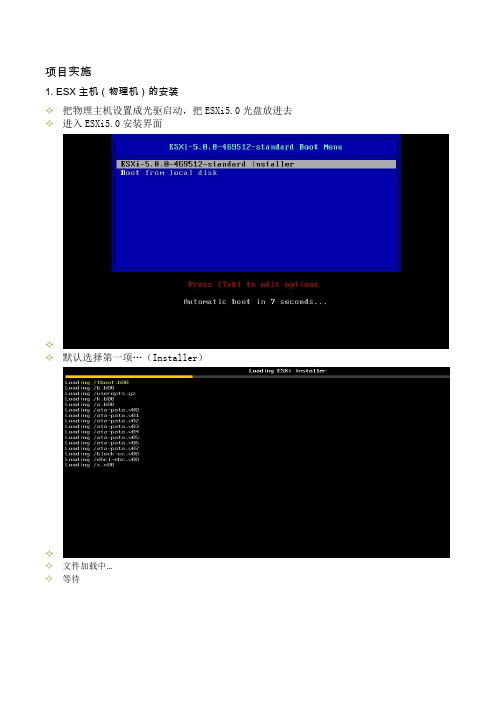
项目实施1. ESX主机(物理机)的安装✧把物理主机设置成光驱启动,把ESXi5.0光盘放进去✧进入ESXi5.0安装界面✧✧默认选择第一项…(Installer)✧✧文件加载中…✧等待✧✧文件加载中….✧等待✧✧回车继续✧✧F11同意协议✧选择安装目标盘;✧✧最好是用裸机安装,全盘都会被清空…✧✧默认语言,推荐用英文✧✧设置管理员密码,两次都必须一样✧✧✧✧回车✧✧F11开始安装✧✧安装中,请等待…✧✧安装完成,把光盘取出来,回车自动重启本机…✧✧安装完成后,直接重启登入ESXi5.0✧✧✧如上图就是ESXi5.0的启动界面;✧Vsphere client对ESXi5.0的控制是通过网络进行的,所以我们必须事先为ESXi5.0配置好IP✧✧按F2输入管理员密码✧✧选择“Configure Management Network”✧✧选择“IP Configuration”✧输入IP地址✧✧选择“DNS Configuration”✧✧输入DNS和主机名✧✧退出并保存(按ESC选择Y)✧✧返回ESXi5.0的登入界面,选择F12并输入密码。
✧✧选择F11进行重启。
✧完成ESXi5.0的安装配置2. VCenter的安装(物理机或虚拟机)VMware vCenter Server 的安装得事先准备好一台Windows 2008 R2的操作系统,这里就跳过操作系统的安装部分。
把光盘放进去,运行光盘。
打开安装界面,选择 Vcenter server选择语言,默认中文(简体)下一步下一步接受---下一步输入相关内容,下一步。
注:单位必须填写选着---使用现有的数据库。
注:如果没有数据库,可以安装Vcenter server自带的数据库下一步输入密码。
默认,下一步默认,下一步默认,下一步默认根据情况选着清单大小默认,安装VMware vCenter Server安装完成。
3. VI Client的安装Vsohere client的安装Vsphere client----点击安装选择安装语言-----选择中文(简体)下一步同意----下一步单位必须填写----下一步安装的位置看个人喜好----下一步安装中,请等待安装完成4.创建虚拟机打开vsphere client-------输入ESXi5.0主机的IP地址、用户名(root默认)、密码(ESXi5.0的密码)登录点击安装此证书或者选择忽略(I)选中ESXi主机------创建新的虚拟机配置虚拟机选择自定义(典型跟自定义根据个人喜好)---下一步输入虚拟机的名称-----下一步选择资源池----下一步选择存储----下一步选择虚拟机版本(默认虚拟机版本:8)----下一步选择操作系统选择CPU个数(根据虚拟机的作用定义)----下一步定义虚拟机内存(根据虚拟机的作用定义)----下一步选择网卡(默认)-----下一步选择SCSI控制器(默认)-----下一步选择磁盘(根据情况选择,这里选择默认)----下一步定义磁盘的大小,并选择磁盘的置备(在不开启FT的情况下,建议选择精简置备,精简置备可以节约存储空间)---下一步默认----下一步确认虚拟机信息-----完成对新创建的虚拟机右击------打开控制台点击启动虚拟机点击-----CD/DVD驱动器1-----连接到本地磁盘上的ISO映像----找到2008的ISO映像然后进行热重启。
VMware ESXi 5.5的安装及设置详细步骤
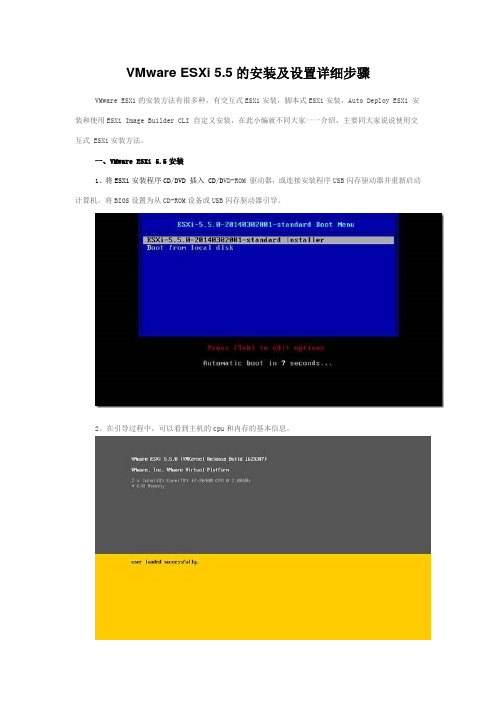
VMware ESXi 5.5的安装及设置详细步骤VMware ESXi的安装方法有很多种,有交互式ESXi安装,脚本式ESXi安装,Auto Deploy ESXi 安装和使用ESXi Image Builder CLI 自定义安装,在此小编就不同大家一一介绍,主要同大家说说使用交互式 ESXi安装方法。
一、VMware ESXi 5.5安装1、将ESXi安装程序CD/DVD 插入 CD/D VD-ROM 驱动器,或连接安装程序USB闪存驱动器并重新启动计算机。
将BIOS设置为从CD-ROM设备或USB闪存驱动器引导。
2、在引导过程中,可以看到主机的cpu和内存的基本信息。
3、在出现的第一个安装引导界面中,点击Enter,确定继续安装。
注意:在“选择磁盘”页面中,选择要在其上安装ESXi的驱动器,然后按 Enter。
按 F1 可获取所选磁盘的相关信息。
选择磁盘时,请勿依赖于列表中的磁盘顺序。
磁盘顺序由 BIOS 确定,并可能顺序不当,连续添加、移除驱动器的系统可能会出现这种问题,如果选择的磁盘中包含数据,则将显示“确认磁盘选择”页面,如果在具有之前的 ESXi 或 ESX 安装或 VMFS 数据存储的光盘上安装,该安装程序可提供多个选择。
如果选择的磁盘位于虚拟 SAN 磁盘组中,则生成的安装将取决于磁盘类型和组大小。
如果选择的是 SSD,则同一磁盘组中的 SSD 和所有基础 HDD 将被清除。
如果选择的是 HDD,并且磁盘组有两个以上磁盘,则只有选定的 HDD 才会被清除。
如果选择的是 HDD 磁盘,并且磁盘组的磁盘不超过两个,则 SSD 和选定的 HDD 将被清除。
4、选择主机的键盘类型,安装后可在直接控制台中更改键盘类型。
5、输入主机的根密码,密码不能留空,但为了确保第一次引导系统时的安全性,请输入不小于7位数的密码,安装后可在直接控制台中更改密码,按F11键开始安装。
6、安装完成后,取出安装 CD、DVD 或 USB 闪存驱动器,按Enter键重新启动。
EXSI5.5
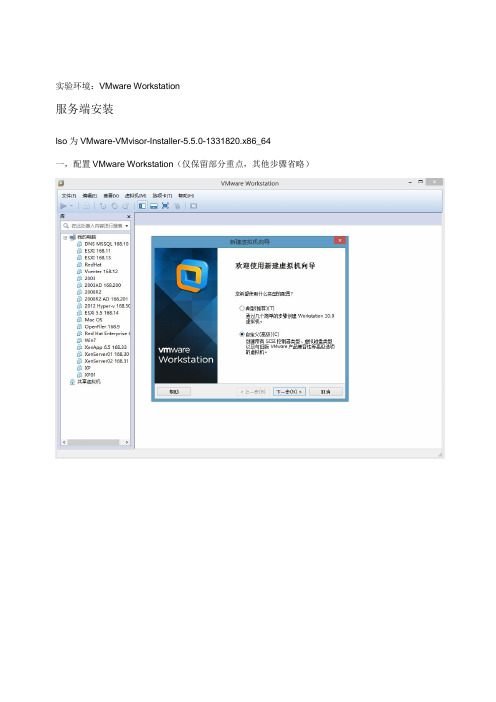
实验环境:VMware Workstation服务端安装Iso为VMware-VMvisor-Installer-5.5.0-1331820.x86_64一,配置VMware Workstation(仅保留部分重点,其他步骤省略)二,启动虚拟机,开始安装ESXI 5.5选择:(Enter)Continue(F11)Accept and Continue图上显示的是硬盘,这里只有一块硬盘,并且是80GB,(Enter)Continue选择默认键盘,US Default即可,(Enter)Continue设置管理员root账号密码,设置好(Enter)Continue我分配了2G内存太小了,要求4G,之前5.1的时候2G是可以的。
关闭虚拟机,重新划分内存。
(F11)Install,开始安装咯,要等上一会安装成功,重启(Enter)Reboot 三、配置ESXI 5.5F2,自定义设置F12,重启关闭等操作选择F2进行设置,需要输入root密码验证Conf igure passwork为修改密码这里我们就设置一个固定IP,其他不设置,其他就在client里面设置吧。
客户端的安装Iso为VMware-viclient-all-5.5.0-1281650输入网址http://192.168.168.14进入客户端下载页面点击下载直接安装就可以了,就不多说了1.登录输入ip和密码2.3.如果安装时间会比较长,感觉像死机一样,这里就点击忽略或取消,经过几次提示后进入4.5.进入后会提示60天试用,开始破解,我这个已经破解所以显示root6.点击ip7.点击配置8.点击已获许可。
9.点击右边的编辑10.点击输入秘钥,输入注册码11.0U26N-6A141-EZ7C8-UR970-3C44Z12.MF01M-88HD0-WZW08-FK07M-3C07K13.4A0YG-0U083-GZY90-289N4-9CD1614.0U2NU-8A195-LZYT9-592QH-02L7315.MA65G-D624M-6ZEZ0-X3C5H-1A62N16.0F0DE-0N21M-FZNL0-PL056-3CRN017.4Z2KQ-D3L1L-CZQV8-XL17H-A3QHK18.1F08Y-2Y1D0-AZX99-5JANM-0C9QU19.5G672-FFL17-DZJL9-U185M-CAA3620.HF08T-4030H-VZPD8-MK254-AAQ1V21.MF4KX-200EL-MZE48-GH9NM-22J7T22.激活后出现root表示成功。
ESXi4.1升级到5.0

在升级vCenter Server前需要备份vCenter Server数据库,以防升级失败后还原vCenterServer数据库。
以Oracle数据库为例,我们可以采用数据库导出的方式将相关数据库表定义及数据导出到dmp文件中。
完成数据库备份后,接下来就可以在原有vCenter Server服务器上运行vCenter Server 5.0的安装程序进行vCenter Server的升级了。
vCenter Server借助vCenter Agent与ESXi主机进行通信,在升级过程中会升级ESXi 主机上的vCenter Agent。
升级的其他过程与全新安装vCenter Server 5.0过程类似,在此不再赘述。
安装vSphere Client管理服务器上原来安装的vSphere Client并不能连接至vCenter Server 5.0或ESXi 5.0,需要重新安装。
卸载原有的vSphere Client 4后,运行最新的vSphere Client 5.0安装程序,就可以安装vSphere Client 5.0了。
如果能够使用安装完成的vSphere Client 5.0连接到vCenter Server 5.0并看到所有ESXi主机以及运行的虚拟机,说明vCenter Server的升级已经成功了。
升级VMware ESXi可以通过多种方式包括VMware Update Manager,交互式,esxcli命令以及vSphere Auto Deploy对ESXi 主机进行升级,本文介绍最为常见的交互式方式对ESXi主机进行升级。
首先将需要升级的ESXi主机上的虚拟机通过vMotion在线迁移到其他ESXi主机。
由于将主机升级到ESXi 5.0 之后,便不能回滚到之前的版本,所以在执行升级前需要备份主机,以便在升级失败时还原原有的ESXi主机。
完成主机备份后,将ESXi 5的安装光盘放入ESXi主机的光驱,重启ESXi主机开启ESXi的升级过程。
VMware ESXi67升级指南
VMware ESXi 升级指南VMware vSphere 6.7VMware ESXi 6.7目录1关于VMware ESXi 升级42vSphere 升级简介5vSphere 升级过程概述53升级ESXi 主机10ESXi 要求10升级ESXi 主机之前18以交互方式升级主机30通过使用脚本安装或升级主机31PXE 引导ESXi 安装程序44使用esxcli 命令升级主机50升级ESXi 主机之后624使用vSphere Auto Deploy 重新置备主机66 vSphere Auto Deploy 简介66准备vSphere Auto Deploy 69重新置备主机745收集日志以对ESXi 主机进行故障排除80关于VMware ESXi 升级1《VMware ESXi 升级》介绍了如何将VMware ESXi™ 升级到当前版本。
目标读者《VMware ESXi 升级》面向需要从早期版本的ESXi 进行升级的所有用户。
这些主题的目标读者为熟悉虚拟机技术和数据中心操作且具有丰富经验的Microsoft Windows 或Linux 系统管理员。
vSphere 升级简介2vSphere 6.7 提供多个用于升级vSphere 部署的选项。
要成功升级vSphere,必须了解升级选项、影响升级过程的配置详细信息以及任务顺序。
vSphere 的两个核心组件是VMware ESXi™和VMware vCenter Server™。
ESXi 是用于创建和运行虚拟机和虚拟设备的虚拟化平台。
vCenter Server 是一种服务,充当连接到网络的ESXi 主机的中心管理员。
您使用vCenter Server 系统将多个主机的资源加入池中并管理这些资源。
vCenter Server Appliance 是预配置的基于Linux 操作系统的虚拟机,并针对运行vCenter Server 系统和vCenter Server 组件进行了优化。
ESX4.1升级到ESXI5.1升级方案
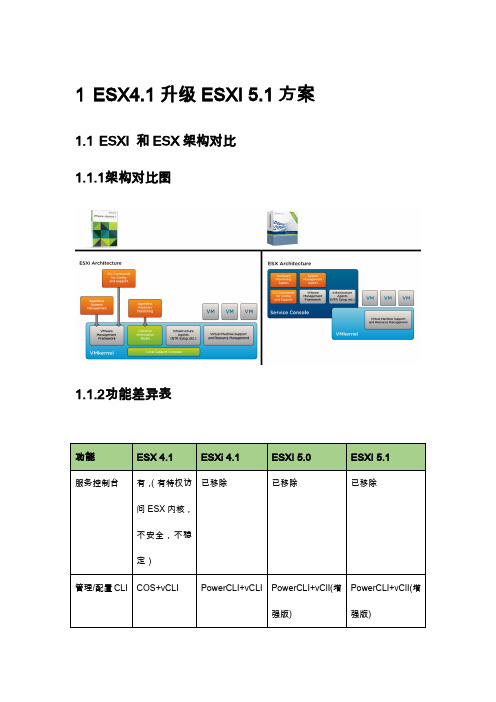
1ESX4.1升级ESXI 5.1方案1.1ESXI 和ESX架构对比1.1.1架构对比图1.1.2功能差异表1.1.3详细架构对比1.VMware ESX 体系结构在原始 ESX 体系结构中,虚拟化内核(称为 vmkernel)使用称为控制台操作系统(简称 COS 或服务控制台)的管理分区来扩充。
控制台操作系统的主要用途是提供主机的管理界面。
在控制台操作系统中部署了各种 VMware 管理代理,以及其他基础架构服务代理(例如名称服务、时间服务和日志记录等)。
在此体系结构中,许多客户都会部署来自第三方的其他代理以提供特定功能,例如硬件监控和系统管理。
而且,个别管理用户还会登录控制台操作系统运行配置和诊断命令及脚本。
2.VMware ESXi 体系结构在 ESXi 体系结构中,移除了控制台操作系统,所有 VMware 代理均直接在vmkernel 上运行。
基础架构服务通过 vmkernel 附带的模块直接提供。
其他获得授权的第三方模块(例如硬件驱动程序和硬件监控组件)也可在 vmkernel 中运行。
只有获得 VMware 数字签名的模块才能在系统上运行,因此形成了严格锁定的体系结构。
通过阻止任意代码在 ESXi 主机上运行,极大地改进了系统的安全性。
3.未来VMware支持方向ESX 目前最新版是4.1UP1 VMware已经不再为此宿主提供升级服务,VMware 从VSphere 5.0开始已经完全不支持ESX架构,全部采用ESXI裸金属架构。
不仅功能不减,反而管理功能增加,性能得到极大的提升,稳定性,安全性得到了很好的保障*备注:VMware强烈建议正在使用ESX架构的用户升级到ESXI架构。
1.2升级方案1.2.1升级流程图1.2.2详细升级步骤第一步升级vCenter Server原有环境的vCenter Server 4.1 没办法直接升级到vCenter5.1;因为从vCenter Server 5.0 开始vmware 要求必须采用64位系统来安装vCenter Server。
美奥技术-VMware ESXi v5版本智能电源保护器扩展(Intelligent Power P
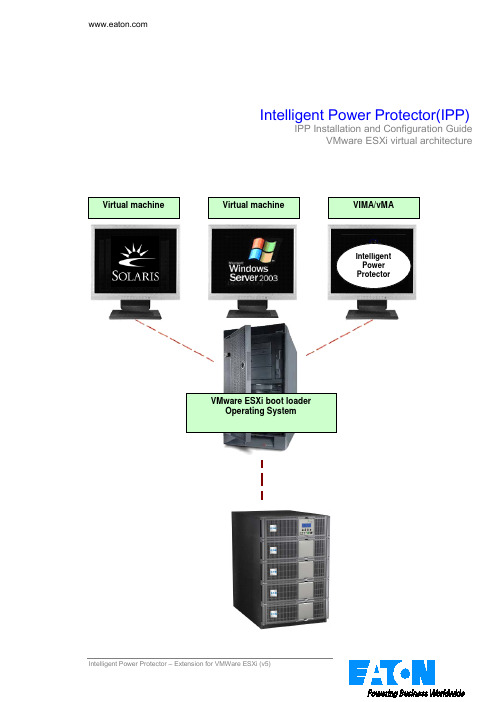
Intelligent Power Protector(IPP)IPP Installation and Configuration GuideVMware ESXi virtual architecture Virtual machine Virtual machine VIMA/vMAVMware ESXi boot loader Operating System Intelligent Power ProtectorIndex1. Introduction (3)2. Eaton offering for VMware (4)3. Installation (5)3.1. Prerequisites (5)3.1.1. VIMA/vMA installation (5)3.1.2. VMware ESXi configuration (5)3.1.3. EATON hardware architecture (7)3.1.4. Network architecture (7)3.2. Installation of IPP in VMware ESXi Server (8)3.3. Using IPP with VMware ESXi (10)3.3.1. Step 1 (Access) (10)3.3.2. Step 2 (Configuration) (10)3.3.3. Step 3 (Operation) (12)4. Appendix (13)4.1. References (13)1. IntroductionEATON is a world first class supplier of hardware and software to optimize business continuity on yourVMware virtual platforms. It means controlling proper boot and shutdown of the virtual machines hostedon a same physical machine, assuring data integrity on each virtual machine.Intelligent Power Protector is a solution to automate various data security functions. IPP providesfollowing features:•Continuously waits for information from the Management Proxy or Management Card connected to the EATON UPS.•Warns administrators and users if AC power fails•Proceeds system shutdown before the end of battery backup power is reached.•Restarts machines when AC power restarts.VMware®ESXi does not have administrative console and hence we cannot install Intelligent PowerProtector (IPP) on that machine. However we can install IPP on VMware Infrastructure Management Assistant VIMA 1.0 or on vSphere Management Assistant (vMA 4.0).Using that we can manage and shutdown the VMware ESXi in case of UPS and power anomalies. We can also configure ESXi to safelysuspend or shutdown guest operating system. This way we can have only one IPP shutdown agent ononly one guest operating system (VIMA, vMA).There are various benefits to install IPP client on the VIMA, vMA instead of each Virtual Machine: •Only one binary of IPP client on the VIMA/ vMA to manage all Virtual Machines.•Dynamic management of virtual machines configuration with a personalized script.This guide will help to install and configure IPP client on VIMA, vMA.IPP client is tested on VMware virtualization server with two guest operating systems (Windows Server2003 R2 & Red Hat 5.4) for electrical power events, shutdown, low battery and reboot.EATON tested virtualization security in a standalone power supply configuration, for system shutdown,electrical shutdown, and reboot.2. Eaton offering for VMwareEaton provides 3 solutions for VMware that are illustrated on the previous architecture diagram: •the first one provides ESX server graceful shutdown. IPP is installed on each ESX operating system.This solution is the best one when:=> vCenter Server is not available for management of hosts=> Number of ESX is Limited(Refer to the IPP Appendix document: User manual extension for VMware ESX 4.0).•the second one provides ESXi * server graceful shutdown. IPP is installed on a VIMA/vMA (one instance of IPP per ESXi).This solution is the best one when=> vCenter Server is not available for management of hosts=> Number of ESXi is Limited(*) paid ESXi version only. Free version cannot be shutdown because of VMware restrictions.(Refer to this document).•the third one is for multiple ESX and ESXi servers (pay version only).It provides following features=> Remote graceful Shutdown of multiple ESX/ESXi servers and hosted VMs.=> ESX/ESXi Remote maintenance (vMotion)=> an IPM Plug-in is created in vCenter=> UPS events are accessible through vCenterThis solution is ideal for biggest infrastructures working through vCenter serverThis solution is described in the IPM user manual.3. InstallationThis guide provides information about installing and configuring IPP on VIMA or vMA. These recommendations guide you through the installation process of IPP as a shutdown agent for VMware ESXi architecture to allow electric continuity.3.1. PrerequisitesHere is the list of prerequisites:1. VMware ESXi Server Machine up and running2. Only ESXi pay version is supported by this integration process3. VMware Infrastructure Management Assistant VIMA 1.0 or vSphere Management Assistant(vMA 4.0 or 5.0) installed as guest.4. vSphere Client installed on different machine to VMware ESXi Server configuration.5. IPP Package6. SSH client for installation and configuration7. SCP Client to upload packages to VIMA/vMA.8. VMware tools installed on each virtual machinesNote:•Through Network connection, the Eaton UPSs are compatible with IPP on ESXi•Through RS232 /USB connection VIMA/vMA don’t provide the compatibility with IPP3.1.1. VIMA/vMA installationPlease visit /support/developer/vima/ for more information aboutdownload and installation of VIMA or vMA on ESXi host machines.3.1.2. VMware ESXi configuration•For the automatic OS boot on startup: you must configure the physical machine to allow automatic OS boot on startup. This setting is present in your machine’s BIOS. For further information, see specific technical hardware documentation.•To allow interactions between physical and virtual machines, VMware tools have to be installed on each virtual machine. For further information, see VMware ESXi Server documentation.•You can configure the automatic startup and shutdown properties of guest operating systems as per requirement. But to work IPP properly, VIMA/vMA needs to be configured as o Automatic Shutdown of VIMA/vMA when ESXi host is going down ando Automatic Startup of VIMA/vMA when ESXi host is startingFollowing procedure will explain about configuration of VIMA/vMA shutdown and startup propertiesFrom the Virtual Infrastructure Client interface select top-most item ESXi host server from lefthand side tree hierarchy, go in the1. Select “Configuration” tab2. Select “Virtual machine startup / shutdown” menu -> Click “Properties” present in right hand cornerFollowing window will appear on screen,Select VIMA/vMA guest machine and click on edit button and configure as shown above Startup SettingsClick Use specified settingsStartup delay – 120 SecondsShutdown SettingsClick Use specified settingsShutdown delay – 120 seconds•For the automatic virtual machine boot of other guest machines on VMware ESXi start-up: From the Virtual Infrastructure Client interface, go in the“Virtual machine startup / shutdown” menu → “Configuration” → “Properties” → “Start and stop VMs with the system”, and tick “enable.”Note: In the « Properties…» page, you also have the possibility to define the Startup Order of your virtual Machines.Start and Stop VMs with the system : EnabledDefault Startup Delay : x SecondsDefault Shutdown Delay : x SecondsStartup Order : Automatic StartupThis configuration is illustrated on the following screenshot:3.1.3. EATON hardware architectureThe prerequisites for Intelligent Power Protector installation are described in the "Intelligent Power Protector – User Manual" chapter: “Installation Prerequisites“. ()For UPS systems compatibility, please refer to the chapter “Appendix -> Compatibility List”3.1.4. Network architectureAll hardware elements must have an operational network configuration that allows them to dialog freely with each other.Note: vMA 5 (Suse OS) does not need any firewall setting, please go to section 3.2Make sure in particular that vMA firewall authorises:•connections on tcp port 4679 and 4680 to enable a remote access for supervision and configuration through Web Browser. These ports are reserved at IANA ().•Connections through TCP port 80. It must be opened as a destination port (for output) on the machine hosting Intelligent Power Protector.•To enable communication between Intelligent Power Protector and Network Management Card (This step is not needed on vMA 5 (Suse OS)) :•sudo iptables -I OUTPUT -p tcp --dport 80 -j ACCEPTsudo iptables -I OUTPUT -p tcp --dport 5000 -j ACCEPTsudo iptables -I INPUT -p tcp --dport 4679 -j ACCEPTsudo iptables -I INPUT -p tcp --dport 4680 -j ACCEPTsudo iptables -I INPUT -p udp --dport 4679 -j ACCEPTsudo iptables -I INPUT -p udp --dport 4680 -j ACCEPTTo enable communication between Intelligent Power Protector and Connect UPSBD/XSlot/PXGX2000.Nota: in this command we propose the –I (insert) option but –A (append) is possible to use as well.It isn’t not exactly the same. Please refer to firewall documentation for the best command for you.(This step is not needed on vMA 5 (Suse OS))•sudo iptables -I INPUT -p udp --dport 161 -j ACCEPTsudo iptables -I INPUT -p udp --dport 200 -j ACCEPTsudo iptables -I INPUT -p udp --dport 2844 -j ACCEPTsudo iptables -I INPUT -p udp --dport 2845 -j ACCEPTsudo iptables -I OUTPUT -p udp --dport 161 -j ACCEPTsudo iptables -I OUTPUT -p udp --dport 200 -j ACCEPTsudo iptables -I OUTPUT -p udp --dport 2844 -j ACCEPTsudo iptables -I OUTPUT -p udp --dport 2845 -j ACCEPT•Save firewall settings using following command(This step is not needed on vMA 5 (Suse OS))service iptables saveTo configure your VMware ESXi Server for the network, please refer to the user manual.3.2. Installation of IPP in VMware ESXi ServerDownload on EATON’s website the latest version of Intelligent Power Protector Console version. It will automatically detect ESXi Server, and will generate shutdown command script (available in the appendix). This shutdownESXi perl script will be installed at <installation folder>/bin/, by default/usr/local/Eaton/IntelligentPowerProtector/bin/•Download the latest version of Intelligent Power Protector, available on EATON’s website, in downloads section “EATON Power Management Software Suite”:/Support/Software-Drivers/default.aspThen:> select “Network solution”.> select VMware as Operating System> download Linux version for ESXi, known as: « Intelligent Power Protector Linux x86 Console «Intelligent Power Protector Linux x86_64 Console», named « ipp-linux-x.x.xxx.x86_64.rpm».•Upload the package on your VIMA/vMA environment, with a SCP Client•Connect with SSH to the vMA. You must have corresponding rights to execute and install programs on VIMA/vMA. Refer to VMware Documentation for further information.Note: If you are not the root user when you start the installer you will be have an error: error: can't create transaction lockSolution: Enter "sudo -s" to get a root console and run the installer again.•Install Intelligent Power Protector by typing:[vma ~]$ rpm -i ipp-linux-x.xx.xxx-x.x86_64.rpmTo configure a personalized package, please refer to Intelligent Power Protector manual. •At the end, connect to Intelligent Power Protector using your web browser by typing : http://<@IP-or-name-of-vMA>:4679/ (for a HTTP access)https://<@ IP-or-name-of-vMA>:4680/ (For a HTTPS access)•You are now in front of Intelligent Power Protector interface.3.3. Using IPP with VMware ESXiAfter IPP installation, follow these 3 steps to use IPP or refer to the IPP User Manual3.3.1. Step 1 (Access)Remote access (for VMware ESXi )•From a remote machine, you can type the following URL in a Web browserhttps://<name or IP address of vMA hosting IPP>:4680/orhttp://<name or IP address of vMA hosting IPP>:4679/•In SSL mode, accept the certificate (by clicking on Yes)•(enter admin as Login / admin as Password and click on the Login button)3.3.2. Step 2 (Configuration)When started, the application automatically performs a Quick scan.•Using the Quick scan operation, you will discover:=> Networked UPSs through broadcast within a few seconds (Network ManagementCards 66102The discovered UPS connected through (Network) are not automatically assigned asthe Power source (You have to select the node and click on the button Set as PowerSource the icon becomes Green )The discovered nodes are displayed in Settings → Auto DiscoveryFor the other nodes, please perform the discovery based on IP address ranges (Range scan) •Using the Range Scan operation you will discover the nodes that are outside of the Network segment and nodes that are not compatible with the ”Quick scan” feature.In the Settings → Shutdown page, assign the IP address of the UPS that powers the local Computer. In the Settings → User List page, assign the access rights through “login and password”Edit the shutdown configuration and use the shutdown type (Script), in the field “Shutdown script” write the line below:•for IPP 1.10:bin/shutdownESXi.pl--server@ServerIP/Name--username Server_username--passwordServer_Password•for IPP 1.20:perl bin/virt_tools/shutdownESXi.pl--server@ServerIP/Name--username Server_username--password Server_PasswordPlease modify the parameters with the right information for your environment@ServerIP/Name : IP of the ESXi Server (like 10.1.0.250)Server_username: Name of an Administrator User of your ESXi ServerServer_Password: Password of the Administrator User write before3.3.3. Step 3 (Operation)•The Views → Power Source menu item (optional) allows you to supervise the current state of the UPS that powers the server running Intelligent Power® ProtectorThe Events → Event List view allows you to view the device events.4. Appendix4.1. References•« Intelligent Power Protector user manual » : downloadable from « Network solution »•References documents for VMware ESX Server are available on VMware website : /support/pubs/vi_pubs.html•References documents for VMware ESX Server are available on VMware Web site: /support/pubs/vi_pubs.html•Please visit /support/developer/vima/ for more information about download and installation of VIMA or vMA on ESX/ESXi host machines.。
升级vCenter Server 4.1到5.0
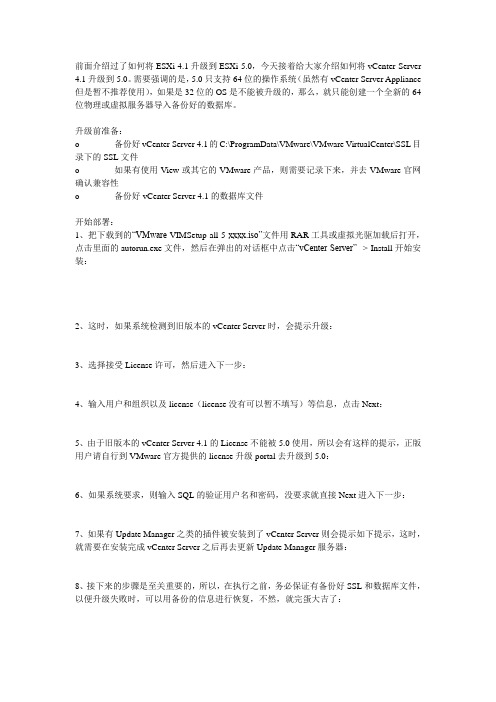
前面介绍过了如何将ESXi 4.1升级到ESXi 5.0,今天接着给大家介绍如何将vCenter Server 4.1升级到5.0。
需要强调的是,5.0只支持64位的操作系统(虽然有vCenter Server Appliance 但是暂不推荐使用),如果是32位的OS是不能被升级的,那么,就只能创建一个全新的64位物理或虚拟服务器导入备份好的数据库。
升级前准备:o 备份好vCenter Server 4.1的C:\ProgramData\VMware\VMware VirtualCenter\SSL目录下的SSL文件o 如果有使用View或其它的VMware产品,则需要记录下来,并去VMware官网确认兼容性o 备份好vCenter Server 4.1的数据库文件开始部署:1、把下载到的“VMware-VIMSetup-all-5-xxxx.iso”文件用RAR工具或虚拟光驱加载后打开,点击里面的autorun.exe文件,然后在弹出的对话框中点击“vCenter Server” -> Install开始安装:2、这时,如果系统检测到旧版本的vCenter Server时,会提示升级:3、选择接受License许可,然后进入下一步:4、输入用户和组织以及license(license没有可以暂不填写)等信息,点击Next:5、由于旧版本的vCenter Server 4.1的License不能被5.0使用,所以会有这样的提示,正版用户请自行到VMware官方提供的license升级portal去升级到5.0:6、如果系统要求,则输入SQL的验证用户名和密码,没要求就直接Next进入下一步:7、如果有Update Manager之类的插件被安装到了vCenter Server则会提示如下提示,这时,就需要在安装完成vCenter Server之后再去更新Update Manager服务器:8、接下来的步骤是至关重要的,所以,在执行之前,务必保证有备份好SSL和数据库文件,以便升级失败时,可以用备份的信息进行恢复,不然,就完蛋大吉了:9、选择“Automatic”选项在所有ESXi/ESX主机上升级vCenter Agent:10、再次确认服务帐户信息是否正确,确认无误之后点击Next:11、如果域DNS对FQDN的解析有问题,则可能会提示如下错误信息,这时,就需要去更正一下解析了:12、确认安装目标文件夹,如果不需要变更则直接Next下一步:13、确认相关vCenter Server的端口等信息后点击Next:14、验证用于Inventory服务的端口号信息:15、由于注册到Inventory的VM需要Tomcat支持,而Tomcat需要JVM,所以,这里需要设定它的Memory:16、然后就可以开始安装了(备注:如果在环境中有大量处于开启状态的VM则,建议勾选临时开启端口数量,以便保障业务不会受到影响):17、完成之后,点击Finish,再去更新下vSphere Client到5.0即可。
使用命令esxcli升级系统
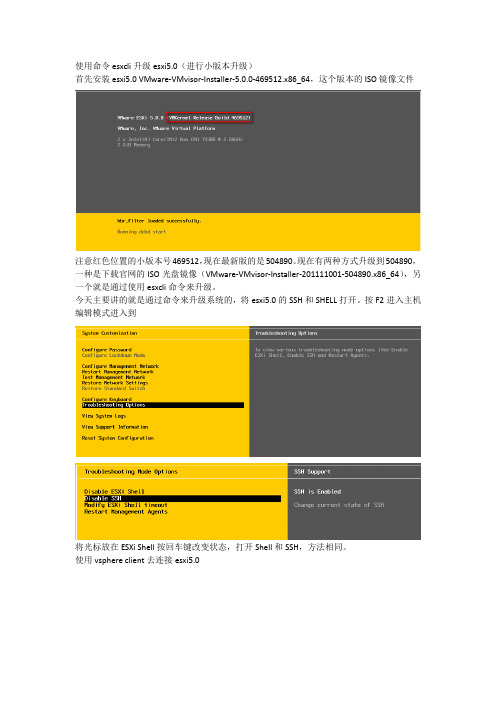
使用命令esxcli升级esxi5.0(进行小版本升级)首先安装esxi5.0 VMware-VMvisor-Installer-5.0.0-469512.x86_64,这个版本的ISO镜像文件注意红色位置的小版本号469512,现在最新版的是504890。
现在有两种方式升级到504890,一种是下载官网的ISO光盘镜像(VMware-VMvisor-Installer-201111001-504890.x86_64),另一个就是通过使用esxcli命令来升级。
今天主要讲的就是通过命令来升级系统的,将esxi5.0的SSH和SHELL打开。
按F2进入主机编辑模式进入到将光标放在ESXi Shell按回车键改变状态,打开Shell和SSH,方法相同。
使用vsphere client去连接esxi5.0进入后将ESXi500-201111001.zip数据包上传到存储上进行升级使用,数据包是从vmware官网上下载的注意两点:红色方框里的提示,已经启用ESX Shell,主机SSH已经启用,看到这里就说明你的ESXi主机上的Shell和SSh启用了。
这点很重要!,浏览存储将文件上传准备上传文件选择文件上传中!已经上传完毕!这个时候将主机进入维护模式,我们要使用命令进行维护了,所以将主机上的所有虚机都要移到别的主机上。
打开以后使用Xshell 4来连接esxi主机输入root键入密码进可以进入了,这里说明一下,我使用的是XShell 4,大家可以使用别的SSH软件。
已经进入了ESXI5.0的主机里面了,进行esxcli命令升级,这里介绍两个esxcli的使用方法esxcli --server=server_name software vib list 进行包查看我们已经看到了所有的包下面使用esxcli --server=server_name software vib install --depot=LOCAL_PATH/DEPOT_NAME进行升级首先确定我们的包的位置,使用ls命令来查看我们已经看到了ESXi500-201111001.zip的包在这里了,这里就是我们的路径,路径非常重要,如果你路径写的不对就不能正常升级,而且必须是绝对路径不能错!这里的esxcli software vib install –d=/vmfs/volumes/datastore1是ESXi500-201111001。
ESX与ESXi比较及升级到ESXi步骤

ESX还是ESXi ?这也是个问题2010-01-29 22:33:58最近和几个集成商的VMware工程师说起我打算用ESXi而不是ESX的时候,他们都很惊讶的说,ESXi不是免费软件吗?就如同当初我们买存储的时候,国内的集成商始终只推荐FC SAN而没考虑过其实Oracle大型数据库也能用NFS,他们似乎总是固执于原来所熟悉的技术,而不去接受新事物。
事情已经发生了变化,现在的ESXi有3个版本,ESXi Free才是那个免费的版本,当然,免费的版本有很多限制和局限,对于小企业或许是个好的起步,但是对于想要构建高可用性的生产环境虚拟平台来说,就显得很不合适。
ESXi的另外2个版本是Embedded和Installable。
Embedded版本是和硬件厂商合作,安装在Flash中的ESXi版本,通常Flash都是集成在主板上,或者是USB Flash。
ESXi Installable则是安装版本的ESXi,是最common的一个ESXi版本。
ESXi Installable不能装在NFS, IP SAN或FC SAN分区,所以,购买硬件时,记得一定要买本地硬盘。
看下面这篇KB,你可以获得ESX和ESXi这2个版本不同之处的详细信息。
/kb/1015000如果你没兴趣仔细看完,那就看我这个初略而且马虎的翻译吧。
(1) Service ConsoleESX有一个Linux的Service Console,可以在其上安装第三方工具和Agent,比如用来监控性能、硬件健康和管理的HP SIM Agent。
ESXi没有Service Console,ESXi表现的更像是一个集成在硬件中的Firmware秘籍:不过ESXi有一个隐藏的命令行界面,在控制台按Alt-F1,然后盲打输入帐号unsupported,会出现密码提示,输入你的root密码就可以进入这个mini console。
其中可以执行一些简单的基本命令和esxcfg-xxxx 的命令。
vSphere 5.0与ESXi 5.0教程
vSphere 5.0与ESXi 5.0教程vSphere 5.0与ESXi 5.0教程vSphere 5.0出来也有一段时间了,人们对它的印象还停留在新的许可上,其实vSphere 5.0有很多方面的改进,如存储。
其包含的唯一hypervisor ESXi 5.0功能也多多。
在本期技术手册中,我们特约虚拟化专家张冀川为您介绍vSphere 5.0与ESXi 5.0的特点、部署与管理等技巧。
了解vSphere 5.0与ESXi 5.0vSphere 5.0的出现,新许可吸引了多数人眼光,其实很多新存储属性才是大家应该了解的。
而且vSphere 5.0中,VMware淘汰了ESX,ESXi成为了唯一的hypervisor。
六问六答:vSphere许可证密钥升级问答解读vSphere 5.0存储新特性ESXi 5.0七大新功能概述配置vSphere 5.0与ESXi 5.0要玩转vSphere 5.0就得配套使用vCenter Server 5.0、vSphere Web Client等。
这些该如何配置你应该掌握。
图解vCenter Server 5.0安装使用vSphere Client进行ESXi主机日志配置使用Auto Deploy安装ESXi 5.0如何置备用于vSphere HA的Auto Deploy主机使用Host Profile置备Auto Deploy主机vSphere Web Client安装实战管理vSphere 5.0与ESXi 5.0管理是重点,也是后续的主要任务。
如何从vSphere 4升级至vSphere 5使用vSphere Client管理ESXi主机访问使用DCUI进行ESXi主机故障诊断使用vSphere Web Client管理vSphere基础设施六问六答:vSphere许可证密钥升级问答VMware 5.0已经发布,用户可以在其官方网站下载vSphere 5.0相关的产品进行60天的免费评估。
Vmware ESXi 5.0 安装与部署
Vmware ESXi 5.0 安装与部署最近我公司部署了虚拟化,采购了两台Dell R710的服务器(CPU:64位双核,主频:2.4GHZ, 32G 内存、硬盘:2块300G做Riad 1、3块2T做Riad 5 、10块网卡),在两台服务器上安装了Vmware Esxi 5.0 ,由于虚拟化方面的知识之前只是使用过一些客户端使用的虚拟机软件而已,摸索到现在,遇到很多问题,查了很多资料,走了很多弯路,随着遇到问题解决问题的过程,对虚拟化系统有所了解了,今天将这些过程写下来,一来做个总结,二来为以后留个参考资料!在Dell PowerEdge R710服务器上安装Vmware ESXi 5.0一、配置Dell PowerEdge R710当拿到两台服务器后,我们开始了准备,但发现其中有一台服务器无法检测到硬盘,根据Dell 随机携带的说明书,通过恢复BIOS初始设置的方法得已解决,为防备今后遇到同样的情况,我将说明书上的解决方法记录了下来!(警告:由于服务器上有Raid 设置,请谨慎使用,误操作恢复默认设置极可能导致丢失数据!)由于偶们的是新机器,没有数据,所以无视了!呵呵1、开机时按F2进入BIOS设定2、分别按CapsuleLock、Num Lock、Scrol Lock点亮键盘上的三个灯3、先按Alt+E组合键,清除NVRAM,再按Alt+F组合键,这时系统会发出“滴”一声,表明BIOS恢复成功,这时集成的阵列卡将会被关闭,必须进入IntegratedDevices中重新开启4、按下ESC选择Save/Exit 将所做的更改保存,重新启动机器,然后系统会自动检测电脑的全部设备,屏幕上会出现Performing Automic IDE Configuration配置Dell Raid阵列卡(警告:在Raid 的操作过程中,有可能导致数据丢失,所以务必请备份数据)1、开机自检时按提示选择Ctrl+R进入配置界面2、按照屏幕下方的虚拟磁盘管理器提示,在VD Mgmt 菜单,按F2展开虚拟磁盘创建菜单,在虚拟磁盘创建窗口,按回车键选择Create New VD创建新的虚拟磁盘3、在RAID Level 选项按回车,可以出现能够支持的RAID 级别,选择好Raid 类型Raid 1(系统)/Raid 5(数据),回车确认4、确认RAID级别以后,按向下方向键,将光标移至Physical Disks 列表中,上下移动光标至需要选择的硬盘位置,按空格键选择(移除)列表中的硬盘,当选择的硬盘树立达到这个RAID 类型所需的要求时,右侧的Basic Setting 的VD Size中可以显示这个RAID的默认容量信息,有X标志的为选中的硬盘5、上述配置确认完成后,按Tab键将光标移至OK处,回车会出现提示,如果是一个全新的阵列,建议进行初始化操作,如果配置阵列的目的是为了恢复之前的数据,则不要进行初始化,按回车确认即可继续6、配置完成后,会返回至VD Mgmt 主界面,将光标移至图中Virtual Disk 0处,按回车,可以看到刚才配置成功的虚拟磁盘信息,查看完成后按ESC键可以返回主界面,在此界面,将光标移至VirtualDisk 0出,按F2键可以展开对此虚拟硬盘操作的菜单7、可以对刚才配置成功的虚拟磁盘Virtual Disk 0 进行初始化(Initialization),一致性校验码(ConsistencyCheck)8、开机按F2,修改CPU工作模式,启用虚拟化技术Virtualization Technology二、开始安装ESXi ,从光盘启动,进入安装界面2、开始拷贝操作系统所需的文件3、正在初始化程序4、按回车键继续5、按F11,接受并同意6、系统正在扫描硬盘7、选择正确的系统硬盘(Raid 1)8、选择默认键盘并按回车9、输入一个密码并确认10、扫描并准备安装11、确认安装的硬盘并按F11进行安装12、正在安装请等待13、按回车键,Reboot14、系统自动重新启动15、第一次安装,重新启动后,会进入下面的界面16、按F2 进入配置界面17、输入用户名root、密码,登录系统18、选择Configure Management network,回车19、配置DNS20、Configure the Custom DNS Suffixes21、按ESC返回到主界面,按Y保存设置22、检查设置,并尝试ping Esxi server 的IP三、使用客户端软件VSphere Client 远程登录ESXi系统安装好Vsphere Client 后,输入用户名/密码登录ESX系统第一次登录界面点击Inventory。
Vmware ESXi5.0补丁升级
Vmware ESXi5.0补丁升级一、升级前的准备工作1、去Vmware官网下载补丁包,地址:/patchmgr/download.portal目前有两种补丁形式第一种:每月提供的补丁包,补丁包名如“ESXi500-201209001”第二种:累积的补丁包,补丁包名如“update-from-esxi5.0-5.0_update01”补丁安装方式:按官方说法先装旧的补丁,再安装新的补丁包,补丁包并不是累积的产生;但若是update(X)则不需要安装其之前旧的补丁。
2、宿主机内虚拟机的准备(1.)关闭要升级主机所有虚拟机,如果不关闭虚拟机,将无法进入主机维护模式。
(2.)如果宿主机内的虚拟机使用“挂起”模式,也可以进入主机维护模式,但升级后虚拟机可能无法启动,只能重置启动,但无法保证虚拟机可以正常启动(3.)另若主机加入了HA,则要从HA移出或停用HA二、补丁升级过程1、首先上传下载到的补丁包,如下图可以利用vSphere Client上传,也可以利用SSH上传至"/vmfs/volumes/datastore1/”目录2、关闭虚拟机,进入主机维护,如下图3、在安装了vSphere Client CLI电脑上运行更新命令C:\Documents and Settings\Administrator>"C:\ProgramFiles\VMware\VMware vSphereCLI\bin\esxcli.exe" –s 172.21.253.2 software vib install –d "[datastore1]/OS/update-from-esxi5.0-5.0_update02.zip"Enter username: rootEnter password:Installation ResultMessage: The update completed successfully, but the system needs to be reboot ed for the changes to be effective.Reboot Required: trueVIBs Installed:VMware_bootbank_ehci-ehci-hcd_1.0-3vmw.500.1.11.623860,VMware_bootbank_esx-base_5.0.0-2.26.914586,VMware_bootbank_esx-tboot_5.0.0-2.26.914586,VMware_bootbank_ipmi-ipmi-si-drv_39.1-4vmw.500.2.26.914586,VMware_bootbank_misc-drivers_5.0.0-2.26.914586,VMware_bootbank_net-be2net_4.0.88.0-1vmw.500.0.7.515841,VMware_bootbank_net-bnx2x_1.61.15.v50.1-2vmw.500.2.26.914586,VMware_bootbank_net-e1000_8.0.3.1-2vmw.500.1.18.768111,VMware_bootbank_net-e1000e_1.1.2-3vmw.500.2.26.914586,VMware_bootbank_net-igb_2.1.11.1-3vmw.500.2.26.914586,VMware_bootbank_net-ixgbe_2.0.84.8.2-11vmw.500.2.26.914586,VMware_bootbank_net-nx-nic_4.0.557-3vmw.500.1.11.623860, VMware_bootbank_net-tg3_3.123b.v50.1-1vmw.500.2.26.914586, VMware_bootbank_sata-ahci_3.0-6vmw.500.1.11.623860,VMware_bootbank_sata-ata-piix_2.12-4vmw.500.1.11.623860, VMware_bootbank_scsi-aacraid_1.1.5.1-9vmw.500.1.11.623860,VMware_bootbank_scsi-lpfc820_8.2.2.1-18vmw.500.2.26.914586, VMware_bootbank_scsi-megaraid-sas_5.34-1vmw.500.1.11.623860, VMware_bootbank_scsi-mpt2sas_06.00.00.00-6vmw.500.1.11.623860, VMware_bootbank_scsi-mptsas_4.23.01.00-5vmw.500.1.18.768111, VMware_bootbank_scsi-rste_2.0.2.0088-1vmw.500.1.11.623860, VMware_locker_tools-light_5.0.0-2.26.914586VIBs Removed: VMware_bootbank_ehci-ehci-hcd_1.0-3vmw.500.0.0.469512, VMware_bootbank_esx-base_5.0.0-0.0.469512,VMware_bootbank_esx-tboot_5.0.0-0.0.469512,VMware_bootbank_ipmi-ipmi-si-drv_39.1-4vmw.500.0.0.469512, VMware_bootbank_misc-drivers_5.0.0-0.0.469512,VMware_bootbank_net-be2net_4.0.88.0-1vmw.500.0.0.469512 VMware_bootbank_net-bnx2x_1.61.15.v50.1-1vmw.500.0.0.469512, VMware_bootbank_net-e1000_8.0.3.1-2vmw.500.0.0.469512, VMware_bootbank_net-e1000e_1.1.2-3vmw.500.0.0.469512,VMware_bootbank_net-igb_2.1.11.1-3vmw.500.0.0.469512, VMware_bootbank_net-ixgbe_2.0.84.8.2-10vmw.500.0.0.469512, VMware_bootbank_net-nx-nic_4.0.557-3vmw.500.0.0.469512, VMware_bootbank_net-tg3_3.110h.v50.4-4vmw.500.0.0.469512, VMware_bootbank_sata-ahci_3.0-6vmw.500.0.0.469512,VMware_bootbank_sata-ata-piix_2.12-4vmw.500.0.0.469512, VMware_bootbank_scsi-aacraid_1.1.5.1-9vmw.500.0.0.469512, VMware_bootbank_scsi-lpfc820_8.2.2.1-18vmw.500.0.0.469512, VMware_bootbank_scsi-megaraid-sas_4.32-1vmw.500.0.0.469512, VMware_bootbank_scsi-mpt2sas_06.00.00.00-5vmw.500.0.0.469512, VMware_bootbank_scsi-mptsas_4.23.01.00-5vmw.500.0.0.469512, VMware_locker_tools-light_5.0.0-0.0.469512VIBs Skipped:VMware_bootbank_ata-pata-amd_0.3.10-3vmw.500.0.0.469512, VMware_bootbank_ata-pata-atiixp_0.4.6-3vmw.500.0.0.469512, VMware_bootbank_ata-pata-cmd64x_0.2.5-3vmw.500.0.0.469512, VMware_bootbank_ata-pata-hpt3x2n_0.3.4-3vmw.500.0.0.469512, VMware_bootbank_ata-pata-pdc2027x_1.0-3vmw.500.0.0.469512, VMware_bootbank_ata-pata-serverworks_0.4.3-3vmw.500.0.0.469512, VMware_bootbank_ata-pata-sil680_0.4.8-3vmw.500.0.0.469512, VMware_bootbank_ata-pata-via_0.3.3-2vmw.500.0.0.469512, VMware_bootbank_block-cciss_3.6.14-10vmw.500.0.0.469512, VMware_bootbank_ima-qla4xxx_2.01.07-1vmw.500.0.0.469512,VMware_bootbank_ipmi-ipmi-devintf_39.1-4vmw.500.0.0.469512, VMware_bootbank_ipmi-ipmi-msghandler_39.1-4vmw.500.0.0.469512, VMware_bootbank_misc-cnic-register_1.1-1vmw.500.0.0.469512, VMware_bootbank_net-bnx2_2.0.15g.v50.11-5vmw.500.0.0.469512, VMware_bootbank_net-cnic_1.10.2j.v50.7-2vmw.500.0.0.469512, VMware_bootbank_net-enic_1.4.2.15a-1vmw.500.0.0.469512, VMware_bootbank_net-forcedeth_0.61-2vmw.500.0.0.469512, VMware_bootbank_net-r8168_8.013.00-3vmw.500.0.0.469512, VMware_bootbank_net-r8169_6.011.00-2vmw.500.0.0.469512, VMware_bootbank_net-s2io_2.1.4.13427-3vmw.500.0.0.469512, VMware_bootbank_net-sky2_1.20-2vmw.500.0.0.469512,VMware_bootbank_ohci-usb-ohci_1.0-3vmw.500.0.0.469512, VMware_bootbank_sata-sata-nv_3.5-3vmw.500.0.0.469512, VMware_bootbank_sata-sata-promise_2.12-3vmw.500.0.0.469512, VMware_bootbank_sata-sata-sil_2.3-3vmw.500.0.0.469512,VMware_bootbank_sata-sata-svw_2.3-3vmw.500.0.0.469512, VMware_bootbank_scsi-adp94xx_1.0.8.12-6vmw.500.0.0.469512, VMware_bootbank_scsi-aic79xx_3.1-5vmw.500.0.0.469512,VMware_bootbank_scsi-bnx2i_1.9.1d.v50.1-3vmw.500.0.0.469512, VMware_bootbank_scsi-fnic_1.5.0.3-1vmw.500.0.0.469512,VMware_bootbank_scsi-hpsa_5.0.0-17vmw.500.0.0.469512,VMware_bootbank_scsi-ips_7.12.05-4vmw.500.0.0.469512,VMware_bootbank_scsi-megaraid-mbox_2.20.5.1-6vmw.500.0.0.469512, VMware_bootbank_scsi-megaraid2_2.00.4-9vmw.500.0.0.469512,VMware_bootbank_scsi-mptspi_4.23.01.00-5vmw.500.0.0.469512,VMware_bootbank_scsi-qla2xxx_901.k1.1-14vmw.500.0.0.469512,VMware_bootbank_scsi-qla4xxx_5.01.03.2-3vmw.500.0.0.469512,VMware_bootbank_uhci-usb-uhci_1.0-3vmw.500.0.0.469512C:\Documents and Settings\Administrator>4、重启ESXI主机。
10分钟 ESXI 从4.0升级到ESXI5.0
10分钟 ESXI 从4.1 迁移(升级)到5.0 (4.0只能挂载FAT格式的USB硬盘)2011-09-08 15:04说明:这是一个单机升级的办法,如多多机升级,会出现usb device格式问题,下文详细阐述!Last night I did an upgrade from vSphereESXi 4.1 to ESXi 5.0 using the ESXi 5 installation CD. The upgrade process was very easy..elapsed time: 10 minutes!^ Current installed OS: VMware ESXi 4.1.0 build 260247- Mount the vSphere 5.0 cd-rom in the host- Boot from CD-Rom drive. - Choose: ESX-5.0.0 Installer in the menu- Press: Enter to continue the installation- Accept the EULA – Press: F11- Select the disk to with the existing ESXi 4.1 installation- The setup detects there’s an older version of vSphere installed, select in the menu what to do:The selected storage device contains an installation of ESXi and a VMFS datastore. Choose whether to upgrade or install and overwrite the existing ESXi installation. Also choose whether to preserve or overwrite the existing VMFS datastore.( ) Upgrade ESXi, preserve VMFS datastore( ) Install ESXi, preserve VMFS datastore( ) Install ESXi, overwrite VMFS datastore- Confirm Upgrade: Press F11 to start the upgrade process- Upgrade is started…- Upgrade Complete!ESXi 5.0.0.has been successfully installed.ESXi 5.0.0 will operate in evaluation mode for 60 days. To us ESXi 5.0.0.after the evaluation period, you must re-apply your licenses to this server. To administer your server, use the vSphere Client or the Direct Control User InterfaceRemove the installation disc before rebootingReboot the server to start using ESXi 5.0.0Final result: Successfully upgraded from ESXi 4.1 to ESXi 5.0… wonderful product!。
VMware-ESXi远程通过命令升级
5)将ESXi主机置为【维护模式】
6)通过SSH登录到ESXi主机
esxcli software sources profile list -d<Offline Bundle的所在路徑>
如图会显示数个profile,请选择要安装的版本(通常都是ESXI-6.0.0-2XXXXXX-standardd)把名字记录下来
Xi
1)下载官方升级包
2)下载完成后将包上传到ESXi可见的存储上,我这里使用的ESXi本地的存储(注:如果有共享存储,建议上传到共享存储上,这样可以避免多次上传),请记得上传目录,后面会用到。
3)打开SSH,选择你的主机> Configuration> Security Profile > Properties > SSH
esxcli software profile update -d <VMware-ESXI-6.0.0-2494585-depot.zip所在的路径> -p<上一步记录下来的profile名称>
7)升级完成,重启ESXi系统
# reboot
8)重启完成,查看升级后的ESXi版本
# vmware -v
9) ESXi主机退出【维护模式】
Vmware ESXI虚拟化5.0版本升级到5.1提示MetadataDownloadError错误
昨天新装了个Vmware ESXI虚拟化,光盘版安装完毕后是5.0版本,需要用SSH连接到ESXI 虚拟化服务器用命令行升级到5.1.
步骤1:先上传升级包ESXi510-201210001.zip到虚拟化存储设备里面
步骤2:设置虚拟化服务器SSH服务为enable
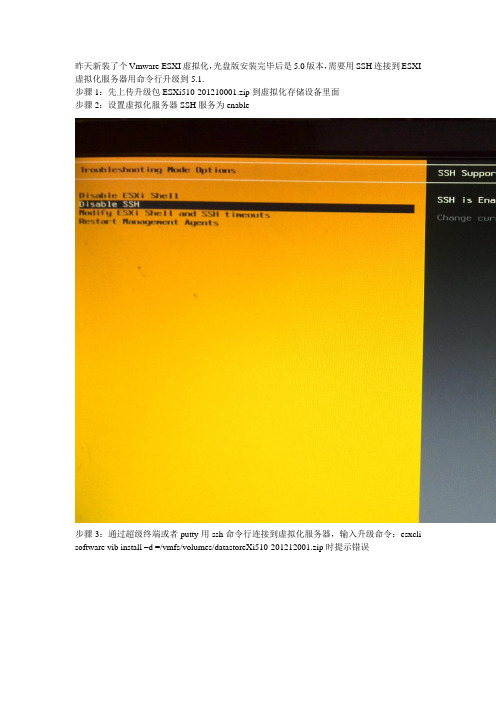
步骤3:通过超级终端或者putty用ssh命令行连接到虚拟化服务器,输入升级命令:esxcli software vib install –d =/vmfs/volumes/datastoreXi510-201212001.zip时提示错误
百度、谷歌了好多贴纸,没有一个正确答案!本以为是上传的更新包有问题!偶然敲击了一下键盘居然成功了!玛丽隔壁原来问题出在这里了:
...........把-d后面的空格删掉就可以顺利安装更新了,输错一个字符效果就不一样!
安装完后的esxi系统和安装前的对比:
安装前输入esxcli software vib list命令查询系统安装的软件包信息
安装后再输入命令esxcli software vib list命令查询系统安装的软件包信息
更新前的系统查看配置里面的硬件健康状况只能看到处理器和软件组件两个子项
更新后的系统再查看发现了多了很多
当然最主要的更新到5.1的ESXI系统可以创建安装windows 2012,ESXI5.0是不能创建windows2012系统的。
- 1、下载文档前请自行甄别文档内容的完整性,平台不提供额外的编辑、内容补充、找答案等附加服务。
- 2、"仅部分预览"的文档,不可在线预览部分如存在完整性等问题,可反馈申请退款(可完整预览的文档不适用该条件!)。
- 3、如文档侵犯您的权益,请联系客服反馈,我们会尽快为您处理(人工客服工作时间:9:00-18:30)。
从VMware ESX Server 4升级到ESXi 5
VMware已经正式发布了vSphere 5的产品组件,其中核心产品—-服务器虚拟化产品,由原来的两个产品VMware ESX Server与VMware ESXi,变成了单一的VMware ESXi 5。
由于VMware ESXi 5去掉了VMware ESX Server中的控制台界面等组件,减小了产品安装包的大小。
如果你网络中使用VMware vSphere 4的产品,可以将其升级到vSphere 5,在
本文中,介绍VMware ESX Server 4.1升级到VMware ESXi 5.0的内容,主要步骤如下:
升级VMware ESX系统。
升级文件系统。
升级虚拟机。
下面将逐一介绍。
1 升级VMware ESX Server 4到ESXi 5
(1)关闭VMware ESX Server 4的主机,使用VMware ESXi 5的光盘启动(或者准备TFTP服务器、从网络安装引导VMware ESXi 5),选择
“ESXi-5.0.0-xxxxxx-standard Installer”,如图1所示。
图1 安装ESXi 5
(2)进入VMware ESXi 的安装程序,如图2所示。
VMware ESXi 5的默认分辨率比较高,应该在1280×1024左右,所以显示的文字较小。
图2 VMware ESXi安装程序
(3)在欢迎界面,按回车键,如图3所示。
图3 欢迎界面
(4)在最终用户许可协议界面(End User License Agreement (EULA),按F11键接受许可协议,如图4所示。
图4 接受许可协议
(5)在选择磁盘进行安装或升级页(Select a Disk to Install or Upgrade),选择原来VMware ESX Server 4系统所在的磁盘,按回车键,如图5所示。
图5 选择ESX系统盘准备升级
(6)如果系统中原有VMware ESX Server,则会弹出“ESX And VMFS Found(找到ESX与VMFS文件系统)”的提示,如果要将VMware ESX Server进行升级,并且保留原VMware ESX Server中的数据库,则选中“Migrate ESX,preserve VMFS datastore *(升级ESX,保存VMFS数据库)”,这样会将原来的ESX Server升级到最新版本,并保留原来的VMFS数据库;如果选择“Install ESXi,preserve VMFS datastore(安装ESXi,保留VMFS数据库)”将会安装新的ESXi 5,并保留原来的VMFS数据库;如果选择“Install ESXi,overwrite VMFS datastore(安装ESXi,覆盖VMFS数据库)”,将安装新的VMware ESXi 5,并覆盖原来的VMFS数据库。
如图6所示。
图6 升级系统并保存原数据库
(7)接下来将要开始升级VMware ESX Server 4。
如果出现图7所示的错误提示,可能的原因有:
ü所升级的VMware ESX Server计算机的CPU数目或内核数小于2(只有1个CPU)。
ü CPU不支持硬件虚拟化技术。
图7 错误提示
(8)如果你是在VMware Workstation虚拟机中做这个实验,请关闭VMware ESX Server 虚拟机,修改虚拟机的配置,将CPU数目修改为2,并且启用“Intel VT-x or AMD-V”选项,如图8所示。
图8 修改CPU选项
【说明】在启用这个选项后,可以在VMware Workstation 8的虚拟机中,安装Windows Server 2008、Windows Server 2008 R2的虚拟机,并且在该虚拟机中安装Hyper-V组件,并完成创建Hyper-V虚拟机、修改Hyper-V虚拟机的操作,只是遗憾的是,不能在虚拟机中,再次启动Hyper-V的虚拟机。
(9)之后,进入“Confirm Migrate”界面,按F11继续,如图9所示。
图9 开始升级
(10)升级的速度很快,只需要几分钟的时间,如图10所示。
图10 开始升级
(11)升级完成之后,按回车键,如图11所示。
图11 升级完成
(12)重新启动计算机后,进入VMware ESXi 5的界面,如图12所示。
图12 安装完成
【说明】我个人比较喜欢VMware ESXi 中,对于管理员来说,修改VMware ESXi的地址是比较方便的事情,可以直接按F12,输入ESXi密码,在网络配置页修改。
不像VMware ESX Server,需要进入命令窗口修改,不好记命令。
在VMware ESXi的控制台中,完成了大多数的功能(修改IP、关机、重启等)。
2 升级文件系统
在将ESX Server升级到ESXi 5之后,运行vSphere client 5客户端程序(在vCenter Server 5中集成,或者从VMware网站下载。
从VMware ESX Server 4.1开始,vSphere Client程序不再在VMware ESX Server中集成),完成VMFS文件系统与虚拟机的升级。
(1)运行vSphere Client 5的安装程序,从5.0开始,增加了“朝鲜语”、“法语”,如图13所示。
以前的vSphere Client 4有“中文、英语、日语、德语”四种语言,现在的版本集成了六种语言。
图13 vSphere Client 5安装语言选择
(2)vSphere Client 5的安装比较简单,选择默认值完成安装,如图14所示。
图14 安装完成
从VMware Client 4.1开始,不再集成VMware Update程序,这个程序已经集成到了vCenter Server中。
(3)运行vSphere Client 5,连接到VMware ESXi,如图15所示。
键入VMware ESXi的IP地址、用户名及密码,如图15所示。
图15 连接到VMware ESXi
(4)在“配置→存储器”中,选中存储,单击“升级到VMFS5”,如图16所示。
图16 升级到VMFS5文件系统
(5)在弹出的“升级到VMFS-5”对话框中,单击“确定”按钮,如图17所示。
图17 确定升级
(6)然后将每一个VMFS-3的存储升级到VMFS-5。
如果系统中己有的存储没有显示在“存储器”列表中,请单击“添加存储器”,将其添加,然后再完成文件系统的升级。
3 升级虚拟机硬件版本
VMware ESX Server 4.x的虚拟机的硬件版本是“6.5-7.x”,与VMware Workstation 6.5及VMware Workstation 7虚拟机的硬件版本相同。
而在VMware ESXi 5中,其虚拟机的硬件版本升级到了8.0,与新发布的VMware Workstation 8虚拟机的硬件版本相同。
在VMware
Workstation 8虚拟机的硬件版本中,将支持64GB内存、8个CPU、2TB的硬盘,而在VMware Workstation 6.5-7.x(虚拟机版本7)中,只支持32GB内存。
(1)关闭准备升级的虚拟机,用鼠标右键单击,在弹出的快捷菜单中选择“升级虚拟硬件”,如图18所示。
图18 升级虚拟硬件
(2)在弹出的“确认虚拟机升级”对话框中,单击“是”按钮,确认升级,如图19所示。
图19 确认虚拟机升级
(3)升级完成后,启动该虚拟机,如图20所示。
最后升级VMware Tools,这些不一一介绍。
图20 启动升级后的虚拟机。
