罗兰R700中文维修手册-工程师专用
MX HomePro MXHP-R700 用户手册说明书
MX HomePro MXHP-R700 Owner’s Manual© 2018 Universal Remote Control Inc. all rights reserved.The information in this manual is copyright protected. No part of this manual may be copied or reproduced in any form without prior written consent fromUniversal Remote Control.Universal Remote Control SHALL NOT BE LIABLE FOR OPERATIONAL, TECHNICAL, OR EDITORIAL ERRORS/OMISSIONS MADE IN THIS MANUAL. The information in this manual is subject to change without prior notice.MXHP-R700 Owner’s Manual © 2018 Universal Remote Control, Inc. URC - Control the Experience is a registered trademark of Universal Remote Control, Inc.Table of ContentsCongratulations (1)Features and Benefits.......................................................................................................1Parts List.............................................................................................................................1Before Getting Started......................................................................................................2Connecting the Lithium Polymer Battery......................................................................2Using the Charging Cradle...............................................................................................2Using the MXHP-R700.......................................................................................................3Displaying the Settings....................................................................................................4Settings Menu.. (5)MX HomePro Editor (13)Specifications (13)Limited Warranty Statement (13)End User Agreement (13)Congratulations!Thank you for purchasing the MXHP-R700 Wi-Fi based remote for your MX HomePro system. This remote offers real-time two-way feedback on compatible smart devices throughout the home or small office space. Controlling and monitoring the home’s devices is as simple as a click on the remote.Features and Benefits:The MX HomePro remote is designed to be the perfect companion to any TV room or bedroom night table. Enjoy the following features:●Quick Connect Wi-FiWhen picked up, the remote automatically connects to Wi-Fi within moments to control the home’s audio/video system and devices.●Two-way Meta-data Feedback:Experience real-time two-way feedback right on the remote’s LCD screen when used with compatible Z-Wave smart devices. Enjoy this same feedback when used with URC’s ever expanding list of 3rd party products.●Button LED Backlighting:Use your remote with ease regardless of lighting conditions thanks to the MXHP-R700’s LED button backlighting.●Pick-Up Sensor:Lifting the remote immediately wakes it up and turns on the LCD screen. It quickly connects to Wi-Fi allowing the user to control their MX HomePro system instantly.●Rechargeable Lithium Polymer Battery:Parts List:Included in the MXHP-R700 box:●MXHP-R700 Wi-Fi Remote●AC Power Adapter●Rechargeable Lithium Polymer Battery●Charging CradleBefore Getting Started:Prior to installing an MX HomePro system, there are a few things to remember:●MX HomePro systems are designed for use on the home’s local network .The hub can be connected to the home network through an Ethernet cable or wirelessly via Wi-Fi.●Adding a TRF-ZW Z-Wave Gateway gives the MX HomePro system access to control the home’s Z-Wave devices such as locks, thermostats, lighting,cameras, and scenes.●Programming is performed via the MX HomePro Editor . The smart home professional must log into this web portal in order to program all applicable MX HomePro devices. Further enhancements may be added, for all inquires please contact URC Technical Support .●This remote communicates exclusively through 2.4 GHz Wi-Fi usingb/g/n signals.Connecting the Lithium Polymer Battery:When getting ready to add the remote to the system or replacing a battery, perform the following steps:1. Press the spring lock down to open the remote cover.2. Place the battery (included) into the compartment making sure to align the contacts on the battery and the remote.3.Replace the ing the Charging Cradle:Connect the 6V DC adapter into the power outlet and into the rear of the charging cradle (also connects to the remote for direct charging). Gently place the MXHP-R700 remote into the cradle. The remote automatically aligns itself to the contacts on the charging base. The status light immediately illuminates:●Red indicates that the remote is charging.●Blueindicates the remote is fully charged.Using the MXHP-R700 (Remote):The Home menu pages display all the programmed activities and devices within the MX HomePro system.To navigate to this, simply press the Home button and use the Up and Down buttons to move throughout the menu.Press any button adjacent to the screen to select an activity or device. Press the Homebutton to return to the previous page and select a new device or activity.The Volume and Mute buttons are alwaysavailable regardless of what screen is displayed.The Home button always displays the Home Menupages.The Up and Down buttons areused to navigate through amenu screen.Displaying the Settings:Entering the Settings Menu is accomplished by pressing and holding the Home and Enter (ENT) buttons simultaneously for three (3) seconds.Use the Up and Down buttons to navigate between items on the Settings Menu. To select, press the button on the side of the LCD screen or the Select (SEL) button when the item is highlighted.Shown below is an expanded view of the MXHP-R700’s Settings Menu, not all options on this image are available on the screen at once.Settings Menu:The following sections cover the sub-menus found within the Settings Menu: Network Settings:This menu displays the network information about the MXHP-R700 and the network it is connected to.From this screen, it is possible to scan for different Wi-Fi networks, select a network to connect to, and enter any custom settings.Base Station (Hub) Setup:This menu displays all of the hubs that are currently connected to the network.Remember, hubs are identified by their Wired MAC Address.This can be found on the underside of a hub (refer to MX HomePro MXHP-H500Owner’s manual).TRF-ZW Z-Wave Accessory Account Info:When using smart home devices that use Z-Wave, it is necessary to log the Accessory Account info onto the remote (see MX HomePro Installation Guide). The Accessory Account info item allows the entry of a URC TRF-ZW account username and password.The screens displayed at the right show how this looks when the Accessory Account information has been entered and verified.Contact your smartinstaller to acquire Z-Wave home lighting,comfort, and security products for use withyour MX HomePro system.Sleep Timer:This setting item allows the user to adjust the amount of time the LCD remains On when not in use.The time can be set independently based on whether the remote is using battery power or is connected to the charger.Selecting an item on this screen allows for the settings of each Sleep Timer value.Once the Sleep Timers are adjusted, press Save . The Go Back button returns the remote’s to the Setup Menu and preserves the last saved setting.Brightness:This item allows the user to adjust the brightness of the LCD screen’s e the “-” and “+” buttons to decrease or increase the LCD’s brightness.Once complete, press Save . Pressing Go Back button returns to the remote’s last saved setting.Button Light:Adjust the brightness of the LEDs that backlight the buttons of the MXHP-R700.Adjust the button light brightness by using the “-” and “+” buttons to do so.Once adjusted, press Save . Pressing Go back reverts to the remote’s lastsaved setting.System:This menu displays data about the remote’s operating system, memory, and other information.Press the More button to view further system information or press Go Back to exitto the previous menu.Power:Displays the remaining battery level of the remote.The low battery warning message can be adjusted from this section. Adjust the battery percentage using the “-” and “+” buttons to do so.Once adjusted, press Save . Pressing Go back reverts to the remote’s last saved setting.Sound:Through this menu, adjusting the sound on button presses can be changed.Press the adjacent hard buttons to increase or decrease the button volume.Once adjusted, press the Save button. Pressing the Go Back button returns to the remote’s last saved setting.Pickup:This menu allows the user to adjust the sensitivity of the remote when reacting to being picked up.Increase or decrease the sensitivity using the “-” and “+” buttons.Once adjusted, press the Save button. Pressing the Go Back button returns to the remote’s last saved settingFirmware Update:Selecting this makes the remote search for any available firmware update. When available, the screen displays as seen on the right. Select Yes to begin the updating the remote’s firmware. Select No to return to the previous menu.When the firmware updates successfully, this screen is displayed as confirmation.Factory Default:Warning!Selecting this options returns the MXHP-R700 to its factory default settings. All programming is lost and the system requires re-programming.Select Yes starts the factory reset process. This should only be done wheninstructed by URC Technical Support or by the smart home professional installer.Selecting No returns the user to the previous screen.Exit:When completed with adjusting any user settings, select Exit to return the remote to normal operation.MX HomePro Editor:To begin programming the system, log into the MX HomePro Editor via:See the MX HomePro Programming Guide for more details.Specifications:LCD: 2 inch screen (240 x 320) LCD Backlighting by LEDDevices: Supports up to 255 devices with text, less with heavy graphics Macro Capability: Up to 255 steps each; however, nesting is allowed Wi-Fi: IEEE 802.11 b/g/nBattery: Lithium polymer 1,960mAhBattery Charging Time: 5 hoursSize: 8.46” H x 2.04” W x 1.02” DBattery Warranty: 90 days Limited Warranty Statement Click on the section title above to read the full terms and conditions of the Limited Warranty Statement. Also available publicly on the URC home page.End User Agreement Click on the section title above to read the full terms and conditions of theEnd User Agreement. Also available publicly on the URC home page.Federal Communication Commission Interference Statement:This equipment has been tested and found to comply with the limits for a Class B digital device, pursuant to part 15 of the FCC Rules. These limits are designed to provide reasonable protection against harmful interference in a residential installation. This equipment generates, uses and can radiate radio frequency energy and, if not installed and used in accordance with the instructions, may cause harmful interference to radio communications. However, there is no guarantee that interference will not occur in a particular installation. If this equipment does cause harmful interference to radio ortelevision reception, which can be determined by turning the equipment off and on, the user is encouraged to try to correct the interference by one more of the following measures:●Reorient or relocate the receiving antenna.●Increase the separation between the equipment and receiver.●Connect the equipment into an outlet on a circuit different from that to which the receiver is connected.●Consult the dealer or an experienced radio/TV technical for help.Warning!Changes or modifications not expressly approved by the manufacturer could void the user's authority to operate the equipment.The manufacturer is not responsible for any Radio or TV interference caused by unauthorized modifications to this equipment. Such modifications could void the user's authority to operate the equipment.FCC Caution:This device complies with Part 15 of the FCC Rules. Operation is subject to the following two conditions:1. This device may not cause harmful interference.2. This device must accept any interference received, including interference thatmay cause undesired operation. Any changes or modifications not expresslyapproved by the party responsible for compliance could void the authority tooperate equipment. The antenna(s) used for this transmitter must not be co-located or operating in conjunction with any other antenna or transmitter. Federal Communication Commissions (FCC)Radiation Exposure Statement:This remote device is approved as a hand-held and hand-operated only portable (relative to hand) device, which is normally operated at 5cm from a person’s body.。
ROLAND终端机

手动终端1 退出键2…5 箭头键6 开始键7 液晶显示器8 连接电缆登录手动终端在手动终端插上后,屏幕上显示曼罗兰图标(命令板)。
例外:手动终端从Leistand 处激活,供墨斗键调零设定之用(菜单5)。
维护操作人员可使用专门的组合键来激活常用的程序选择菜单。
手动终端的三个键必须按顺序按下。
为了将手动终端转换到激活状态,还必须按下给定装置开关盒上的重新设定键。
从Leistand ,可以在程序级“PRODUCTION ”(生产)激活用户功能墨斗键调零设定。
屏幕上出现Program 5(程序5)。
墨斗键电机自动处于激活状态。
显示屏幕的解释:1 ID号,如19。
2 处理槽的ID名,如:R700 Printing Unit 1(R700第一印刷机组)3 载入的ZPD(中央参数文件)的版本,如034 选择范围菜单。
5 显示激活/被动-模式,电机只能在激活状态下进行控制6 在R900第一印刷机组上有2个地址60-67(包括扩展槽)额定值=预设定值;实际值=实时值额定值和实际值显示时显示出值的定义范围内及测量的物理设备。
状态:状态讯息包插下面的意义:READY:定位成功完成。
NEW V ALUE:已经选定了新的预定值STOPPED:定位取消。
在电源接通后,扑通定位电机指示“停”。
因为不可能让定位电机辨识非不明确的实际/额定位置。
ERROR 3:—定位故障步进电机指示出错的实际值;例如存储模块的实际值丢失。
在自动调零时达到最大的传感器时,停止运行。
故障表示前一操作已经做过了。
ERROR 4:—位置错误,时间用完;在步进电机时:电机没有走出传感器的范围。
ERROR 5:—位置错误,超出值的范围;在步进电机时:达到最大传感器处。
ERROR 6:—定位错误,实际值的突然变化;在步进电机的情况下:输出范围出错。
ERROR 7:—模拟总线阻塞。
ERROR 8:—墨斗键/定位电机未辨识。
显示可能的选择菜单:1.周期性通过极限值。
曼罗兰R700 手提终端机用法

R700手提终端机用法
1、请连接手提端机於所需调节器校的机座上。
2、请轻按有关机座上之红色的按钮,约十秒后可做(3)
3、按手提终端机的按键,从左至右,左、上、下、右。
按后可从手提终端机选择各种程序
功能,而较常用程序分别是4和6。
程序4----SLDES:SUCCESSIVE SET 是用在墨匙(刀)交叉走位
(清理墨匙之间的污物)
程序6----POS—MOTRS:INDIV SET 是马达归零,有关马达编号请参考附表.
注意:红色马达较易真走位有须要时请归零
如要把第五座滚筒压力归零。
A、在第五座连接手提终端机。
B、请轻按有关机座上之红色按钮,约十秒后可做(3)
C、选择程序6。
在程序6中选择马达6再按向下键直至手提终端机右下角出现AUTO.CALC后再按STAT键,直至READY出现表示归零完成.
D、关机重开即完成。
Copy Right: Li Tie Qiang。
罗兰R700系统印刷机MMS电路板的维修与分析
37印刷技术 2020/12在印刷企业中,罗兰R700系列印刷机的保有量很大。
该设备自1992年上市至今已经有28年之久,因其高度自动化、印刷质量好、精密性强、坚固耐用等良好特点深受市场认可。
而随着使用年限的增长,罗兰R700系列印刷机的自动化控制系统内部部分元器件参数会发生变化,导致印刷过程中出现各类故障,影响生产,给企业带来经济损失。
常见故障现象罗兰R700系列印刷机的MMS 电路板型号是相同的G35A495070,只是其内部程序不同,发生故障一般出现以下情况:①正常印刷过程中突然报错停机;②停机断电几天后再开机不能进入系统,报错且无法重装磁盘程序;③换MMS 电路板过程中不能装入磁盘程序并报错。
故障分析与维修MMS 电路板是高度集成的多层电路板,该电路板上有14个RAM 随机存储器、17个ROM 只读存储器、1个时钟存储器、几十个各类逻辑电路,其构造复杂,在没有相关资料图纸参考的情况下,发生故障时维修是很大问题。
根据多年的实操经验,笔者总结了一套系统的维修方法,步骤如下。
步骤一维修前要大概分析故障电路板中各元件的基本作用,目测电路板中是否有明显的元件损坏、是否有脱焊和接触不良。
维修电路板时多采用先易后难的方法来判断故障,逐步找出故障点,因为一点小小的问题可能会导致各种各样的故障,所以一定要仔细检测、分析判断。
步骤二若目测没有发现问题,再根据电路特点用万用表检测电感、电阻、电容是否正常,如有异常,要找出产生异常的具体原因,是故障所致还是电路设计所致,而对半导体元件的检测要用万用表二极管档,检测各半导体元件的半导体特性是否存在、正反向阻值是否正常。
有较大差异的元件要从电路板上拆下单独测试,弄清楚有差异的原因,也可以用集成电路测试仪对半导体元件进行测试。
需要说明的是,集成电路测试仪对电路的逻辑功能测试很方便,可以检测逻辑电路的逻辑功能是否正常,但是这种检测方法需要把元件从电路板上拆下来才能进行检测。
罗兰维修手册

罗兰700维修手册机械部分产品培训目录第一章技术数据第二章安装第三章输纸机第四章输纸定位第五章摆动叼纸牙第六章输纸滚筒第七章滚筒第八章传纸器第九章输墨装置第十章润版装置第十一章主传动第十二章收纸装置第十三章润滑——供气第十四章电子部件的信息第十五章上光机组第十六章APL / PPL装版系统1.1 概述1 输纸机2 输纸台3 摆动叼纸牙4 输纸定位滚筒5 压印滚筒6 传纸器7 橡皮滚筒8 印版滚筒9 供墨装置10 润湿装置11 收纸滚筒12 收纸装置1-51.2 规格尺寸,mm纸张(3B幅面)最大740×1040最小340×480图像区域 715×1020印品起点 10-12印刷材料厚度 0.04-0.1R702-R709 15000张/小时最大印刷速度R710 13000张/小时系列747以上的机型(参见第6页)标准印版滚筒印版滚筒直径(滚枕)300印版滚筒下陷0.5印版滚筒直径299印版边缘到印品起始点43印版厚度0.3-0.5印版(长度×宽度) 785×1030包衬纸 755×1030圆周方向套准调整,机动±1轴向方向套准调整,机动±1橡皮滚筒橡皮滚筒直径(滚枕)300橡皮滚筒下陷 2.6橡皮滚筒直径294.8橡皮布(长度×宽度),带夹条。
910×1060包衬纸770×1030面纸 780×1030橡皮布厚度 1.9压印滚筒:压印滚筒直径600滚枕的直径599.31-5选配基础 纸堆高度标准 mm 275 550 主纸堆 1180 1455 1730 输纸机(没有纸台)剩纸纸堆 500 500 500 主纸堆 1080 1355 1630 输纸机(没有纸台)中间纸堆100 100 100纸堆高度144选配基础 纸堆高度标准 kg 275 550 主纸堆 1300 1300 1300 输纸机(没有纸台)剩纸纸堆 450 450 450 主纸堆 1300 1300 1300 输纸机(没有纸台)中间纸堆280 280 280压缩空气供气 操作压力 标准 8巴APL/PPL 换版装置 9巴纸张翻转 10巴1-91-81.4 快速转换(选配项)概述德鲁巴2004展览会上展出了罗兰700的高端机型带有全面快速转换功能。
维修技术手册
氟和强 氟化剂
TSM 部分
640 版本 E
页码 3 、 4
问题 盖子很难转动
可能原因 1)系统带压 2)O形圈发胀 3)液体内部粘稠或呈固态
盖子很难安装
粗滤器顶部周围泄 漏液体
4)O形圈发胀 5)O形圈发没有润滑 6)粗滤器体内没有太多液体 7)O形圈被割断 8)O形圈下有异物
有过度压降
如果不遵守上述预防措施、可能导致严重的人身伤害 或死亡。
2. 粗滤的颗粒直径小于 70 微米(通过 4 英寸可获得 50Х250 网)。
3. 温度低于 -40ºC (-40ºF) 或高于 +204ºC (+400ºF)。 4. 高系统压力应用(见第 2 页表 A)。 5. 高篮差压(见表 A)。 6. 铝质粗滤器处理 1,1,1 - 三氯乙烷、二氯甲烷或卤
将粗滤器设置在一个排液塞可以容易拆下的位置(如果要经 常维护、可以用排放阀替代排放塞)。 根据表 A 的要求、粗 滤器上方要有足够的空间用于拆除滤篮。盖式粗滤器上铸有 指示液流方向的箭头。这些粗滤器没有设计任何类型的反洗 操作。
注:不推荐将粗滤器的开口直立安装、因为这样会增加维护 的难度。
如果不遵守上述预防措施、可能导致严重的人身伤害 或死亡。
维修技术手册 部分
盖式® Simplex
页码 版本
同轴篮式粗滤器
TSM 640
1/4 页 E
目录
介绍................................................................................1 目录................................................................................1 特别须知........................................................................1 安装...............................................................................2 分解...............................................................................2 组装...............................................................................2
罗兰音乐工作室AT系列商品介绍说明书

AJK-001J Roland Organ Classic Vol.1
Organ great Hector Olivera created this DVD for students who wish to learn about classic organs. The lesson covers eight Bach pieces, plus information about organ registration data, pedal markings and musical notation. In the supplemental book, Hector explains about stops, how to play certain ornaments, and important background info for playing these classic works.
49+61 dual-manual keyboard of its elder sibling is
provided, including waterfall keys for the lower
manual. A total of 120 voices are onboard, plus 80
rhythms, harmonic bars, a USB port, and a 40w
Song List Composer: Johann Sebastian Bach 1. Prelude and Fugue No. 1 in C major, BWV 553 2. Prelude and Fugue No. 2 in D minor, BWV 554 3. Prelude and Fugue No. 3 in E minor, BWV 555 4. Prelude and Fugue No. 4 in F major, BWV 556 5. Prelude and Fugue No. 5 in G major, BWV 557 6. Prelude and Fugue No. 6 in G minor, BWV 558 7. Prelude and Fugue No. 7 in A minor, BWV 559 8. Prelude and Fugue No. 8 in B flat major, BWV 560
维修及操作和维修手册(O&M手册)
维修及操作和维修手册(O&M手册)一、维修1.在缺陷责任期内,承包人应免费进行日常的维修工作。
2.所有设备应便于检查、清洁、更换和维修。
设备中相同的部件应具有互换性,设备的互换性应在操作与维修手册中详细描述。
设备的部件(包括印刷电路板等级)应清楚标明组装号、序列号和变更等级。
在进行完工测试时,承包人应给业主代表和监理工程师提供组装件安装在各种设备里的位置记录表。
这种记录表被认为是完工图纸的一部分将用作维修及可靠性评价的基础数据。
设备各部分之间要有可靠的绝缘,这样在维修其中一部分时将不影响其它部分的工作。
二、操作和维修手册(O&M手册)(一)概述1、在系统试运转开始之前1个月内,承包人应提交2份操作和维修手册(初稿)给业主。
并在缺陷责任期开始后不迟于6个星期提交6份操作和维修手册正式稿给业主,但是有些设备的技术资料应事先提供,O&M手册中的重要部分应用中文编写。
2、每种设备应提供2份专用设备手册。
专用设备手册是缩略本,应尽量减少无关的内容,并有详细说明,便于参照使用。
3、操作和维修手册中应对各系统的运行操作做出全面的详细说明。
4、对于系统中的某些设备或部件,如印刷电路板,承包人可直接使用这些设备与部件的生产厂家的资料和手册作为本操作维修手册的一部分,并根据手册的总目录依次汇编,这种文件可保留原有封面。
5、有些设备或部件在本地无法维修,必须送到厂家维修,那么,在O&M手册中应包括这些设备或部件的维修和拆装资料。
6、控制原理图要清楚表示出设备的操作、安装及各部分的连接和各部分间电缆的走向。
全部控制原理图包括部件、接触器的说明、图例和附注,即电流范围、线圈电压等等及继电器的动作线圈、特殊功能的恰当说明。
7、O&M手册应有目录表和专门术语(编写)的章节,为了使用户容易理解O&M手册的内容,应在手册中包括所需的框图、图纸、轮廓图和实际设备或系统的照片,同时,还应包括操作使用该设备的注意事项和设备的安全使用寿命。
R700 保养指引-roland

内容A 飞达B 印刷机组C 收纸D 其它内容Page 3ROLAND 700 保养指引ROLAND 700 保养指引是曼罗兰大中华为我们尊贵的客户提供的又一项增值服务;是在德国ROLAND 700 保养手册重点基础上的小结。
简洁明了的ROLAND 700 保养指引可以帮助客户更好的进行他们的日常维护保养工作。
ROLAND 700 保养指引同时也是客户日常机器维护的一个有利参考。
关于日常保养的细节等请以德国的ROLAND 700 保养手册为准。
步骤:每三个月清理一次飞达吸入压头转动手轮(1)·标记(1)和(2)必须形成一条直线03-05703-103-05701-103-05704-103-05695-1 卸下弹簧(1)和盘子(2)插入辊驱动器(1) 使用辊驱动器(1)卸下控制辊(2)附图Page 403-05705-103-05703-103-05699-1安装控制辊步骤 插入控制辊(2),并转动以使其锁定到位置。
卸下辊驱动器(1)插入盘(2)和弹簧圈(1)步骤:每一个月清洁飞达吸咀一次将纸吸嘴向下拉至其限制挡板清洁送纸吸嘴清洁送纸吸嘴步骤 向下拉领纸吸嘴,直到它们的限制挡板 清洁领纸吸嘴(1)清洁领纸吸嘴附图Page 5输纸器 主盘03-08372-103-05687-1步骤:每三个月清理及上油飞达上落盘链条一次卸下输纸器处的防护装置(1)(传动面A+B,外侧)·露出纸盘链清洁纸盘链(1)彻底吹干纸盘链用刷子给纸盘链(1)(传动面A+B)上油附图Page 6印刷机组 前规电眼04-05711-104-05713-1步骤:每星期清洁前规及侧规电眼一次 清洁前规控制的检测器(1) 清洁溢出印页控制的检测器(1) 清洁双印页控制装置(印页预控制)检测器(1)04-05710-1附图04-05712-1 清洁侧规控制检测器(1)(传动面A+B )。
附图Page 704-05729-1 侧规每星期打油一次润滑侧规04-05718-2 前规每星期打黄油一次前规保养04-06988-1 吊牙每星期打黄油一次附图04-05730-2 吊牙轴每星期打黄油一次吊牙保养Page 804-06989-1每星期打黄油一次附图04-05714-2输纸滚筒每星期打黄油一次输纸滚筒04-06990-1 每星期打黄油一次附图附图Page 904-07042-1 每天打GLS163特别黄油一次04-07445-1每星期清洁缺纸电眼一次清洁输纸定位滚筒(可选件)下的缺页检测器05-05890-1 压印滚筒轴承每天打GLS163特别黄油一次附图附图1Page 10压印滚筒05-05889-1压印滚筒轴每星期打黄油一次附图传纸滚筒传纸滚筒轴每星期打黄油一次附图附图1传纸滚筒轴承每天打GLS163特别黄油一次墨斗06-05893-1附图Page 11墨辊及水辊打油附图附图墨辊架每周打黄油一次附图水辊齿轮须每星期打黄油一次每星期打黄油一次过桥滚轴承须每星期打黄油一次附图附图带墨辊座每月打黄油一次Page 1206-05930-4墨辊须每月用起镜膏及脱钙膏清洗一次附图11-05957-1每个机组吸式过滤器(1)须每月清洗一次,(2)每个机组压力过滤器(纸)若红制跳出须更换附图Page 13每周须清洁水斗电眼一次07-05931-305-05868-2附图1 印刷滚筒2 印刷滚筒的支承环3 胶布滚筒4 胶布滚筒的支承环A 印版厚度B 衬垫薄膜厚度C 垫片厚度D 胶布厚度滚筒衬垫参数Page 1410-07578-1收纸牙排收纸牙排每月打黄油一次11-05954-1 每月清洁收纸过滤器一次收纸链条油甁须每月检查一次是否有足够链条油附图附图附图 收纸盘上落链条须每三个月清洁一次及涂润滑油附图Page 15飞达风泵每月清洁过滤器一次主马达散热风扇须每月清理一次附图高压气泵须每日放水一次高压气泵油过滤器须2000操作小时更新一次附图附图附图Page 16主电箱散热器须每月清洁一次冷水箱过滤包破烂或太脏须立刻更换 冷水箱须每周清洗浮球及过滤网附图附图附图Page 17Page 18R O L A N DPage 19。
罗兰高级功能说明书(通用)
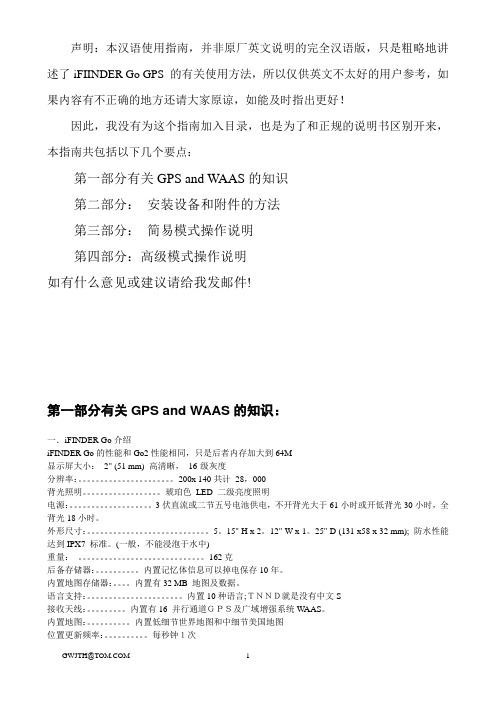
声明:本汉语使用指南,并非原厂英文说明的完全汉语版,只是粗略地讲述了iFIINDER Go GPS 的有关使用方法,所以仅供英文不太好的用户参考,如果内容有不正确的地方还请大家原谅,如能及时指出更好!因此,我没有为这个指南加入目录,也是为了和正规的说明书区别开来,本指南共包括以下几个要点:第一部分有关GPS and WAAS的知识第二部分:安装设备和附件的方法第三部分:简易模式操作说明第四部分:高级模式操作说明如有什么意见或建议请给我发邮件!第一部分有关GPS and WAAS的知识:一.iFINDER Go介绍iFINDER Go的性能和Go2性能相同,只是后者内存加大到64M显示屏大小:2" (51 mm) 高清晰,16-级灰度分辨率:。
200x 140共计28,000背光照明。
琥珀色LED 二级亮度照明电源:。
3伏直流或二节五号电池供电,不开背光大于61小时或开低背光30小时,全背光18小时。
外形尺寸:。
5。
15" H x 2。
12" W x 1。
25" D (131 x58 x 32 mm); 防水性能达到IPX7 标准。
(一般,不能浸泡于水中)重量:。
162克后备存储器:。
内置记忆体信息可以掉电保存10年。
内置地图存储器:。
内置有32 MB 地图及数据。
语言支持:。
内置10种语言;TNND就是没有中文S接收天线:。
内置有16 并行通道GPS及广域增强系统W AAS。
内置地图:。
内置低细节世界地图和中细节美国地图位置更新频率:。
每秒钟1次出事点:。
MOB 采取独特的信息标志来显示而且必要时会自动导航到出事点。
屏幕提醒功能:。
到达/偏离预定路线/通过目的地时都会弹出一个提醒信息手工添加信息点:。
42个信息点(这个42不太明白),1,000 路点(waypoint); 100航线(每条航线可以有最多100 路点)。
航迹:。
可以采集100航迹; 每条上有9,999 点。
罗兰R700中文维修手册-工程师专用
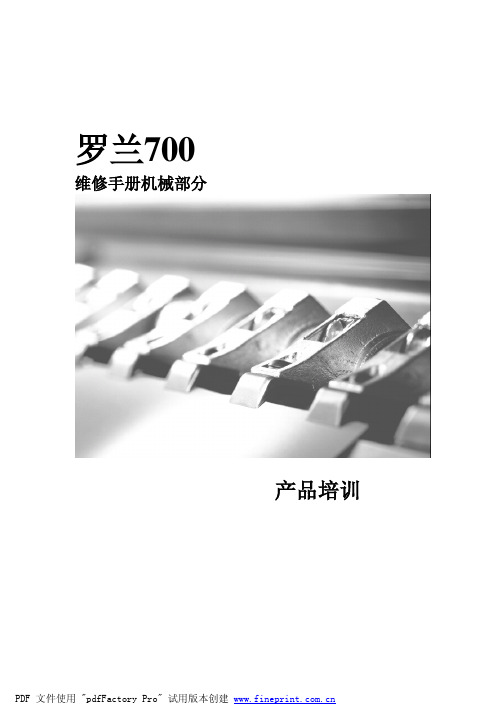
275 1300 450 1300 280
选配基础
550 1300 450 1300 280
压缩空气供气 操作压力
标准 APL/PPL 换版装置
纸张翻转
8巴 9巴 10 巴
PDF 文件使用 "pdfFactory Pro" 试用版本创建
罗兰 700·产品培训·机械部分
8.8
0.15
3 5.9 10 25 50 87 135 220 300 430 580 740 1100 1450
0.20
3.6 7.1 12 30 60 105 165 260 365 520 710 890 1350 1800
最大扭矩,单位 Nm 10.9
0.10 0.15 0.20
3.6 7.1 12 30 59 100 160 250 345 490 660 840 1250 1700
340°
准)
300°
系列732以下的机型(日
本)
系列733以上的机型
14mm 10mm
系列727以下的机型 系列728以上的机型
353°(±0.5°) 叼纸牙关闭
352° 开始绝对值 在0.1mm运动时大约
开始移动 系列747以下的机型
358°(+1°,-0.5°)
352° 开始绝对值
开始移动
在0.1mm运动时大约 系列748以上的机型
300 2.6 294.8 910×1060 770×1030 780×1030 1.9
600 599.3
PDF 文件使用 "pdfFactory Pro" 试用版本创建
罗兰 700·产品培训·机械部分
1-5
纸堆高度
售后服务蓝光BL售后工程师培训手册

(售后服务)蓝光BL售后工程师培训手册售后工程师培训手册(第三版)控制系统部分(故障代码说明)1、ER02:门联锁于电梯运行过程中断开。
现象1:运行过程中,门刀和门轮冲撞把门锁断开。
现象2:如FU16设置为ON时,系统判断门锁是否闭合和关门限位信号有关。
如FU16设为ON时,关门限位不可靠也会造成ER02保护。
现象3:主板检测门锁信号使用了俩路检测,X4为触点输入,X23为门锁回路电压检测,如门锁回路电压不够高,标准要求是AC110V,如低于AC100V时,高压输入不稳定也会造成报ER02的故障。
现象4:ER02故障发生于顶层,曳引机为同步,同步曳引机的抱闸动作延迟时间过长时,容易造成电梯冲上极限,出现该现象时,急停故障前有02故障发生。
(正常到顶层停车时,系统下闸后,使能方向会保持设定的时间,brakeofftime使电梯闸没闭合稳时,变频器仍有力矩输出。
如门锁意外断开,门锁触点把变频器使能切断,造成滑车极限。
现象5:变频门机由于开关门的信号从控制柜直接引线从随行电缆下到轿顶。
如干扰过大时会于运行过程中,门机控制器错误接收到开门指令,误开门造成ER02故障,出现该情况时,能够于轿顶上安装开关门继电器,控制柜先于关门信号驱动轿顶开关门继电器,再由继电器的触点控制门机控制器开关门。
该方法能有效防止开关门信号干扰造成门机误动作。
2、ER03:变频器故障。
现象1:变频器故障,根据故障代码确定故障原因。
现象2:某些变频器由于上电时间过长,超过了系统的上电等待时间,系统报变频器故障,该情况能够不用处理,变频器上电完成后系统将自动恢复。
现象3:如果变频器产生过流保护,而其保护前同壹时间内有ER02或ER10等保护,壹般均是由于前面的保护立即停车造成的,系统其他保护恢复后将自动恢复。
3、ER04:主板检测到的运行方向和给定的运行方向相反。
现象1:如主板编码器输入A、B相反接时,会产生ER04保护,主板编码器输入A、B相对调即可。
曼罗兰R700电子基础培训教程

1维护培训电子部分Roland 7001.1.控制系统LSR ——LeistandrechnerRCI2L ——遥控连接(Leitstand ) SPS ——=PLC 可编程逻辑控制I/O ——输入/输出2维护培训电子部分Roland 7001.2 SPS 级的功能(即:R720)角度功能: 压印滚筒离合压输纸装置/输纸装置供气开关纸张前缘控制前规调整空张控制喷粉装置开关检查样张的取出(从S719取出)3维护培训电子部分Roland 7001.3 工艺级功能(如:R700)1.4 Leistand PC 硬件一览4维护培训电子部分Roland 7001.5. R700上的定义5维护培训电子部分Roland 7001.6. SPS 总线系统一览6维护培训电子部分Roland 7001.7 工艺总线系统一览7维护培训电子部分Roland 7008维护培训电子部分Roland 7001.9 SPS 及工艺总线系统一览电子培训控制台技术 字节结构 标准站,C*(R700)第1页/总1页9电子培训控制台技术 SPS 标准插座 (723系列以上)第1页/总1页3.1.2 SPS回路中的跳线位置站站名名称位置1 输纸装置 -A352 +AB2 收纸装置 -A353 +EA3 通用 -A354 +AC4 输纸装置机器 -A350 +BA5 中央机器 -A350 +CA6 中央机器 -A350 +CB7 中央机器 -A350 +CC8 中央机器 -A350 +CD9 中央机器 -A350 +CE10 中央机器 -A350 +CF11 中央机器 -A350 +CG12 中央机器 -A350 +CH13 收纸装置机器 -A350 +DA14 涂布模块1 -A548 +JA(从系列717来)15 涂布模块1 -A356 +CA(到系列716)15 第二扩展 -A356 +EB(从系列728来)16 上光模块2 -A548 +JB(从系列717来)17 翻转装置 -A459 +KA20 RTR -A359 +AA21 UWR -A358 +AD22 Leitstand从动 -W001 +Fx3.1.3 光纤模块系列713以下的光纤模块系统(以及所有R600的机器)光纤模块:惠普B 37 V 0196 70 (R8=182欧姆),光缆长度2到15B 37 V 0639 70 (R8=52欧姆),光缆长度15到30对于备件(R8可有不同):A 37 V 1253 70 (R8=182欧姆),光缆长度2到15mA 37 V 1254 70 (R8=182欧姆),光缆长度15到28m系列714以上的光纤系统:光缆:对于主开关柜(+Ax)和控制台(+Fx)之间的连接,使用玻璃纤维(桔红色绝缘,标注:SIEMENS)其他连线用塑料纤维(黑色绝缘,标注:SIEMENS)光纤模块:东芝.37V 1005 70,光缆长度任意通用:要查找故障时,可订购测量光纤回路部件衰减状况的维护设备(订货号:0 37X2829 90)电子培训控制台技术有扩展槽的Prozeβ插座第1页/总1页电子培训控制台技术Prozeβ插座和装配插座第1页/总1页ProzeB 架上的插槽4-9…1080…同步电机的定位传动…1079…步进电机的定位传动地址(十六进制)电机号槽R700第一印刷机组R700第二到第n印刷机组输纸机(马贝格)收纸装置上光装置来自系列71760 1 4 周向定位装置…1080… 周向定位装置…1080…输纸头高度…1079…吸风辊…1079…周向定位装置…1080…61 2 5 侧向定位装置…1080… 侧向定位装置…1080…输纸头幅面…1079…传动侧闯纸装置…1079…侧向定位装置…1080…62 3 6 侧规…1080… 斜向定位装置…1080… (输纸机分时)…1079…操作侧闯纸装置…1079…斜向定位装置…1080…63 4 7 匀墨…1080… 匀墨…1080…纸张侧面止动块传动侧…1079… 叼牙开牙凸轮…1079…传动侧计量辊设定…1079…64 5 8 传墨辊墨带宽度…1080… 传墨辊墨带宽度…1080…纸台板…1079…操作侧计量辊设定…1079…65 6 9 压印力…1079… 压印力…1079…纸张侧面止动块操作侧…1079…压印力…1079…电子培训控制台技术Prozeβ插座和装配插座第1页/总1页ProzeB 架上的插槽4-9…1080…同步电机的定位传动…1079…步进电机的定位传动地址(十六进制)电机号槽R300第一印刷机组R300第二到第n印刷机组输纸机(马贝格)收纸装置60 1 4 周向定位装置…1080… 周向定位装置…1080…输纸头高度…1079…吸风辊…1079…61 2 5 侧向定位装置…1080… 侧向定位装置…1080…输纸头幅面…1079…传动侧闯纸装置…1079…62 3 6 侧规…1080… 传墨辊墨带宽度…1080… 输纸机分时…1079…操作侧闯纸装置…1079…63 4 7 匀墨…1080… 传动侧压印力…1080… 纸张侧面止动块传动侧…1079…叼牙开牙凸轮…1079…64 5 8 传墨辊墨带宽度…1080… 操作侧压印力…1080…纸台板…1079…65 6 9 压印力…1079… 纸张翻转装置叼牙开牙凸轮…1080…纸张侧面止动块操作侧…1079…电子培训控制台技术处理插座的供电第1页/总1页电子培训控制台技术处理插座的供电第1页/总1页电子培训控制台技术处理插座的供电第1页/总1页电子培训控制台技术处理插座的供电第1页/总1页电子培训控制台技术处理插座的供电第1页/总1页电子培训控制台技术处理插座的供电第1页/总1页电子培训电子培训电子培训控制台技术电机条件(主电机)第1页/总1页电子培训控制台技术电机条件BKF12 第1页/总1页电子培训控制台技术BKF12接口板(3.9493)第1页/总1页电子培训控制台技术主电机BKF12 第1页/总3页正视图(没有接口板)电子培训RTR(实时处理器)电子培训控制台技术RTR功能R700 第1页/总1页电子培训控制台技术实时处理器(RTR)第1页/总1页电子培训控制台技术实时处理器(RTR)电源板SPS的控制第1页/总1页电子培训UWR(监测器CPU)电子培训控制台技术SPS - I/O – 赋值安全总线系统第1页/总1页电子培训控制台技术UWR功能717系列以上第1页/总1页电子培训控制台技术监测处理器(UWR)716系列以下第1页/总1页电子培训控制台技术监测处理器(UWR)717系列以上第1页/总1页电子培训控制台技术BKF维护参数第1页/总1页控制释放信号(P106)*对于控制器的释放信号,信号边缘有作用的,在笔画里的表示是静止的。
罗兰G-70 高级合成器说明书

G-70 Specifications[Keyboard] 76 key Pro-Action Keyboard with aftertouch[Sound source]■ Max polyphony 128 voices ■ Tones Wave memory 192 MB* 1596 panel tones, 48 Drums kits *16-bit linear equivalent ■ SRX Expansion board slot 1 ■ Multi timbre parts 32 ■ Effect Processors Realtime section: 12 reverb, 6 chorus / 84 multi FX.,Backing(Song/Style): 8 Reverb, 8 Chorus, Harmonic Bar section: Rotary, Vibrato and Overdrive, External AudioInput: 84 effects, Mic Input: Noise Gate, Comp. 9 Reverb, 9 Delay, Harmonist section: 9 Reverb, 9 Delay, 9Chorus, Mastering section: Parametric EQ, Multi Band Comp. ■ Compatibility GM2 / GS / XG Lite [Harmonic Bar (Virtual Tone Wheel technology)]■ Upper1 / Lower1 9 bars; 16’, 5-1/3’, 8’, 4’, 2-2/3’, 2’, 1-3/5’, 1-1/3’, 1’■ Manual bass 2 bars; 16’, 8’■ Percussion On, Off, 2-2/3’, 4’, Slow, Fast ■ Leakage level Min-Max ■ Registrations 8 set [Vocal Harmonist] ■ Mode 4 Modes (Talk, Voice-FX, Auto Pitch, Singer) ■ Programmable Harmony 3 Types (30 Small, 30 Ensemble, 24 Vocoder) [Styles]■ Preset styles 285 styles on 12 families ■ Variation / Intro /Ending/Fill In 4 variations/ 4 Intro/ 4 Ending/ 6 Fill In ■ User Style Composer 8 Tracks with Micro editing ■ One Touch Setting 4 for each Style, programmable [Cover] 30 ALL, 18 Drum,24 Bass (for Song and Styles) [Display] Color Touch Screen with click noise [Player / Recorder]■ Mark/Jump 4 location for each song ■ Sequencer 16 tracks, with micro editing feature [Music Assistant] about 500 presets (programmable)[Data Storage] Floppy Disk: 3.5" HD/DD, Internal SSD (Solid State Disk): 50 MB, PC Card (supports: Microdrive, Compact Flash, Memory Stick, Smart Media *Card adaptor required), Type of files managed: Style, Song (SMF), User Program, MIDI Set, Play List, File.txt[Connectors] PCMCIA Card slot, USB Connector (supports file transfer and MIDI), MIDI Connectors (IN, OUT, THRU), Main Output jack (L/mono,R), Direct Output jack (L,R), Vocal Harmonist Output jack (L, R), Metronome Output jack, Audio Input jack (L, R), Vocal Harmonist Input jack (XLR/TRS, Phone balanced/unbalanced), Hold Footswitch jack, Foot Switch jack, Foot Pedal jack, FC-7 Pedal jack, Video Output jack, Phones jack x 2 [Others]■ Power Consumption 29 W ■ Dimensions 1294,5 (W) x 436,5 (D) x 157 (H) mm, 51 (W) x 17-3/16 (D) x 6-3/16 (H) inches ■ Weight 20.5 kg / 45 lbs. 4 oz. ■ Accessories Owner’s Manual, Power code, Music Stand* The specifications are subject to change without notice.------------------------------------------------------------------------------------------------------------------------------------Maximum Sound Quality------------------------------------------------------------------------------------------------------------------------------------The G-70 is equipped with Roland’s most powerful sound engine ever. With a lightening-fast processor, stellar soundset, 128-voice polyphony, and six realtime performance parts, the G-70 takes sound and performance to new levels of realism. The G-70 uses the largest internal wave ROM in Roland keyboard history — 192 MB — and brings together the most coveted collection of instruments for songwriters and performers. It also boasts one of the latest and most expressive pianos from Roland, derived from the famous Fantom-X series. The G-70’s soundset can be further expanded via Roland’s SRX library.------------------------------------------------------------------------------------------------------------------------------------Authentic, Expressive Feel------------------------------------------------------------------------------------------------------------------------------------The keyboard on the G-70 features a superb weighted professional-action with aftertouch, which has a longer stroke and a more natural, responsive feel. Whether you’ve selected a grand piano, classical guitar, or an accordion sound, you’ll be delighted with the nuance and sensitivity that can be coaxed from this keyboard. Organ players can also tap into the expressive power of the G-70 thanks to its authentic Virtual T oneWheel technology ported from Roland’s popular VK organ range. Nine front-panel sliders correspond to the 3D animated Virtual Harmonic Bars on the G-70’s full-color LCD, providing the feel and response of a real harmonic-bar organ.------------------------------------------------------------------------------------------------------------------------------------Power Arranger------------------------------------------------------------------------------------------------------------------------------------From jazz and pop ensembles to full-scale classical orchestrations, the G-70 puts a concert’s worth of sound under your fingertips. The built-in arranger section includes 285 completely new styles that exploit the full potential of the powerful sound engine. Many of these styles have been recorded using live studio musicians to create top-quality professional backings. The G-70 also includes the Cover and Makeup Tools from the DisCover™series, allowing you to customize instantly any part of your style or song. For added realism, the innovative “Adaptive Chord Voicing” (ACV) Technology enables each accompaniment instrument to play smooth, musically pleasing lines, instead of jumping to awkward intervals each time the chord is changed.------------------------------------------------------------------------------------------------------------------------------------Expand Your Performance------------------------------------------------------------------------------------------------------------------------------------The G-70 offers a powerful lineup of vocal assistant features, including the Vocal Harmonist, with over 90 settings and effects such as Auto Pitch Correct and Vocoder. There are seven independent effects blocks on the G-70, including dedicated sections for the Harmonic Bars, Harmonist, and the External Audio Input. Mastering tools are included for creating polished, professional mixes. Moreover the G-70’s full-color LCD provides easy navigation for performance, and can display 4-stave music scores, chord charts, and lyrics. Chord and lyric data even be viewed on an external TV screen using the video output.------------------------------------------------------------------------------------------------------------------------------------Do It Yourself or Seek Help------------------------------------------------------------------------------------------------------------------------------------The G-70 lets you get personal with your sounds and compositions. Its full 16-track sequencer and internal style composer can be edited in precise detail using the Microscope edit functions, and every sound can be sculpted and saved to your specification. But for those who appreciate technological assistance, the G-70 is loaded with features such as the Music Assistant database, which automatically selects musically correct sounds, styles, tempos, and effects for the hundreds of music titles. The Quick Search and Finder features help expedite the process of finding specific songs, sounds, and styles.------------------------------------------------------------------------------------------------------------------------------------File Exchange & Storage------------------------------------------------------------------------------------------------------------------------------------For fast and easy file exchange, data backup, and MIDI transfer to PC, a USB connector is provided. The G-70 also provides a large 50MB internal memory (Solid State Disk), a floppy disk drive, and a memory card slot that supports many current devices, such as Smart Media and Compact Flash.*Product pictured is a prototype model. Actual product appearance may be subject to change.17 16。
LS-R700 中文操作说明书

电工技师毕业论文 进口罗兰600四色印刷机主电机及调速系统的改装1_

电工技师毕业论文进口罗兰600四色印刷机主电机及调速系统的改装(友情交换罗兰、海德堡系列印刷机维修技术资料:QQ:2554799265)摘要:德产罗兰系列印机主机直流电机损坏后,经常连同调速装置一起损坏,维修费用十分昂贵,用国产三相异步电动机,配用变频器等相关装置后,可代替原直流电动机和直流电机调速系统。
本文详细介绍了改装的具体方案:关键词:电机调速、PLC变频器通迅、变频器、触摸屏、传感器。
引言:二十世纪八十年代,由于中国经济的快速增长,带动了印刷业的飞速发展,东莞的印刷企业机器设备先进、印刷技术几乎能与世界保持同步,印刷质量和产品质量能居世界前列、珠三角地区、已成为国际印刷加工集中地之一,然而在印刷术的发明之邦——中国,又出现了另外一幕人们不愿看见的尴尬现实;国产印机制造技术大大落后于西方发达国家,差距悬殊,不能满足印刷业的需要,沿海经济发达地区,印刷厂商都不愿购置国产印机,八十年代珠三角地区印刷厂商,纷纷通过各种渠道引进国外二手印机,其中以德产罗兰系列印机数量最为庞大。
由于二手印机。
使用时间长,电机绝缘逐渐变差,经常发生主机直流电动机损坏后,连同调速装置一同烧坏。
除调速系统处,单台新直流电动机的报价,对开双色印机以上的主电机均在百万元以上,直流电机损坏后,维修费用也达数万元,且效果不佳。
目前,随着变频器制造技术的成熟,用国产三相异步电动机,配备变频器等相关装置后,代替直流电和机和直流电机调速系统,具备实用性和可行性。
正文:(一)主电机的调速控制方法和触摸屏控制界面详解:1、主电机的调速控制方法。
罗兰系列印机采用的直流调速系统,在变频器技术不成熟的条件下,是一个无懈可击的最优方案,但随着变频调速技术日新月异地发展,变频调速的优点日益显现,大有逐步取代直流电动机调速系统之势,本方案也适应新技术的变化,利用自己的一点有限知识,将其呈出,顺理成章。
变频器调速,维护简单,价格低廉,本方案运用各种软件和/硬件进行控制的最终对象就是一台国产三相鼠笼或异步电动机。
罗兰移动立方训练指南说明书
ROLAND MOBILE CUBETRAINING GUIDEContents1. FEATURES2. QUICK DEMO3. FIVE FEATURES TO KNOW and SHOW4. ACCESSORIES5. INSTRUMENT SETTINGS1. FEATURES∙Ultra portable battery powered stereo all purpose amplifier∙¼” Mic, mono/stereo instrument inputs, plus RCA + 1/8” aux ins.∙Preamp settings for acoustic instruments, stereo instruments (keyboards, drum machines, etc.), stereo audio such as i-pods, computers, multi-track and field recorders, etc.,electric guitar (clean, OD, dist)∙ Chorus effect, plus separate delay/reverb∙Aux, instrument and mic inputs can be used simultaneously∙Powerful Center Cancel function can remove guitar solos or lead vocals for practicing or “playing in the band.”∙1/4” headphones/line output∙Runs on batteries (6 x AA included; 15 hrs continuous at full volume) or optional PSB-1U AC Adapter∙$232 List, $169 MAP2. QUICK DEMOThe Quick Demo is a way to get a customer interested in a product in less than 60 seconds. Because the Mobile Cube is so versatile, there are four Quick Demos, depending on what the customer is looking for. If you can, use Quick Demo 4.Quick Demo 1: Show Audio Sound Quality1. Connect an i-pod or CD player to the AUX input of the Mobile Cube2. Play a song through the Mobile Cube controlling the volume from theaudio unit.Quick Demo 2: Show Acoustic Guitar Sound Quality1. Connect an acoustic guitar to the Mobile Cube’s GUITAR input2. Select A-GUITAR.3. Set the VOLUME to about 5.4. Press the CHORUS button5. Play the guitar.6. Experiment with some DELAY and REVERB sounds. QUICK DEMO 3: Show the Electric Guitar Sounds1. Select E-GUITAR OVERDRIVE or DIST.2. Use some DELAY or REVERB.3. Play some chords or leads.4. Add some CHORUS, and play some more.QUICK DEMO 4: Show “Jam with the Band” Feature1. Connect an audio source, such as an i-pod or CD-player to the AUXinputs. Use a song with a well-known guitar solo or guitar part.2. Connect an acoustic or electric guitar to the GUITAR input.3. Select the appropriate INSTRUMENT setting.4. Press CENTER CANCEL. This will remove the lead guitar from the audio.5. Start the audio and play the guitar part live over the background song. NOTES3. FIVE THINGS TO KNOW and SHOW1. Ultra portable anything, anywhere, any time stereo amplifier2. Accepts almost any kind of input: audio, instruments, mics3. Preset tone settings for large variety of input sources4. Built in effects: guitar OD/DS, chorus, delay, reverb5. “Put you in the band” feature removes vocals or solo for jamming orpracticing to recorded music4. ACCESSORIES1. Roland PSB-1U or PBS-120 AC Adapter2. Roland RH-20, RH-50, RH-200 or other headphones3. Roland ST-100MB or other mic stand5. INSTRUMENT SETTINGSNAME USESA-GUITAR Acoustic guitar, other monoacoustic/electric instrument (horn, flute,autoharp, etc.)KBD/INSTRUMENT NORMAL Stereo keyboard, drum machine, otherstereo instrumentKEYBOARD/INSTRUMENT FAT boosted mids for stereo instruments AUDIO any stereo audio source needingadditional volume control/effects:recorders, i-pods, etc.E-GUITAR CLEAN Electric guitar clean amp soundE-GUITAR OVERDRIVE Overdriven amp sound for rhythmplaying or rock leadsE-GUITAR DISTORTION Heavy distortion sound for rock andmetal tones。
- 1、下载文档前请自行甄别文档内容的完整性,平台不提供额外的编辑、内容补充、找答案等附加服务。
- 2、"仅部分预览"的文档,不可在线预览部分如存在完整性等问题,可反馈申请退款(可完整预览的文档不适用该条件!)。
- 3、如文档侵犯您的权益,请联系客服反馈,我们会尽快为您处理(人工客服工作时间:9:00-18:30)。
维修手册机械部分
产品培训
PDF 文件使用 "pdfFactory Pro" 试用版本创建
罗兰 700·产品培训·机械部分
目
第一章 技术数据 第二章 安装 第三章 输纸机 第四章 输纸定位 第五章 摆动叼纸牙 第六章 输纸滚筒 第七章 滚筒 第八章 传纸器 第九章 输墨装置 第十章 润版装置 第十一章 主传动 第十二章 收纸装置 第十三章 润滑——供气 第十四章 电子部件的信息 第十五章 上光机组 第十六章 APL / PPL装版系统
1-91-8
1.4 快速转换(选配项)
概述
德鲁巴2004展览会上展出了罗兰700的高端机型带有全面快速转换功能。从748系 列开始,我们会提供下列子功能:
快速转换 活件转换 活件 供气
输纸定位 色彩
清洗 版夹
功能 自动活件转换顺序: ·橡皮滚筒和压印滚筒清洗(同时进行)。 ·清洗输墨装置。 ·用全自动换版(APL)或半自动换版(PPL)装置换版。 ·以下一个活件的新的输墨曲线进行设定。
0,20 11 28 56 100 165 550 740 950
PDF 文件使用 "pdfFactory Pro" 试用版本创建 ÿ
罗兰 700·产品培训·机械部分
3.4 设定图:R 700输纸机
284mm输纸流,有机械弹簧吸风系统
表:印刷机-角度数 工艺 分纸吸嘴-运动
压纸脚-运动
递纸吸嘴-运动
挡纸翻拍-运动 系列721以下的机型 递纸轮-运动 气动离合 分纸吸嘴-供气 分纸吸嘴-通风 压纸脚-供气 中部递纸吸嘴-供气 系列722以上还有: 辅助递纸吸嘴和递纸吸嘴 分纸吹风-供气 纸张减速 纸张总行程=57 mm 控制腔室号 02 – 090281 控制腔室号 02 – 085876 控制腔室号 02 – 086468
300 2.6 294.8 910×1060 770×1030 780×1030 1.9
600 599.3
PDF 文件使用 "pdfFactory Pro" 试用版本创建
罗兰 700·产品培训·机械部分
1-5
纸堆高度
输纸机(没有纸台) 输纸机(没有纸台)
纸堆高度
3-7
3.5 飞达时间
系列721以下的 ·将飞达调整到中间位置(中央控制菜单“预 选择”,按F2键再按F3键)。 ·按下“输纸机开”键(发光二极管亮起)。 ·向前点动印刷机,直到离合器(6)啮合上 (发光二极管亮起)。
·向前点动印刷机到第一印刷机组处的走纸 趋势显示器上出现180°。 ·松开万向节上的夹紧耦合件(6)。 ·转动输纸机手轮(4),直到标记(5和7)对上。
0.10 7.9 20 40 70 115 375 500 650
12.9
0.15 5.1 10 18 43 84 148 235 370 500 700 970 1250 1800 2450
12.9
0.15 9.4 24 48 85 140 465 620 800
0.20 6.1 12 21 52 100 177 285 445 610 840 1200 1500 2200 3000
扭矩,单位Nm
最大扭矩(单位Nm),用于粗牙螺纹的导颈螺栓,DIN912,931等:
螺纹级别 摩擦系数
尺寸
M4 M5 M6 M8 M 10 M 12 M 14 M 16 M 18 M 20 M 22 M 24 M 27 M 30
0.10
2.4 4.8 8,3 20 40 69 110 170 245 340 470 590 870 1200
355.4°(+1°,-0.5
°)
352° 开始绝对值
开始移动
在0.1mm运动时大约 系列748以上的机型
358°(+1°,-0.5°)
360°
吸风结束
PDF 文件使用 "pdfFactory Pro" 试用版本创建
罗兰 700·产品培训·机械部分
1.8 一般信息
340°
准)
300°
系列732以下的机型(日
本)
系列733以上的机型
14mm 10mm
系列727以下的机型 系列728以上的机型
353°(±0.5°) 叼纸牙关闭
352° 开始绝对值 在0.1mm运动时大约
开始移动 系列747以下的机型
358°(+1°,-0.5°)
352° 开始绝对值
开始移动
在0.1mm运动时大约 系列748以上的机型
最大的扭矩(单位Nm),用于细颈螺栓:
最大扭矩,单位 Nm
螺纹级别
8.8
10.9
摩擦系数
尺寸
0.10 0.15 0.20 0.10 0.15 0.20
M6 M8 M 10 M 12 M 14 M 20
4.6
5.4
6.4
6.7
8
9.3
12
15
17
17
21
24
23
28
32
34
42
47
41
50
58
60
73
0°结束 9°开始 ~ 81°结束 ~344°开始 ~ 65°结束外部吹嘴 ~ 20°开始 180°结束 ~ 341°开始 180°结束 ~ 145°开始 ~224°结束 180°减速的参考点
PDF 文件使用 "pdfFactory Pro" 试用版本创建
罗兰 700·产品培训·机械部分
PDF 文件使用 "pdfFactory Pro" 试用版本创建 ÿ
罗兰 700·产品培训·机械部分 3-8
系列722以上的机型 ·将飞达调整到中间位置(中央控制菜单“预 选择”,按F2键再按F3键)。 ·按下“输纸机开”键(发光二极管亮起)。 ·向前点动印刷机,直到离合器(6)啮合上 (发光二极管亮起)。
前规
盖规 吸风辊
设定值
说明
84°
系列742以下的机型
300°
系列743以上的机型
150°
160°
系列743以下的机型
160°
系列744以上的机型
180°
输纸机节拍
180°
吸风开始
260°(±1°) 第一控制
260°(±1°) 系列731以下的机型
220°(±1°) 系列732以上的机型
320°
系列732以下的机型(标
85
67
81
95
98
120 140
225 275 320 325 395 470
M 22 M 24
305 370 440 430 530 630 390 480 570 560 675 810
0.10 4.2 8.3 14 35 69 120 190 290 405 570 780 980 1450 1950
更换纸张厚度: ·自动对所有传纸器的叼纸牙高度进行调整。 ·自动对输纸定位滚筒的叼纸牙高度进行调整。 ·新的输纸定位滚筒。 通过中央控制台和点动轮自动对所有消耗空气的相关部件进行气量控制: ·收纸装置纸堆上方25个风扇大部分可以单独调整。 ·收纸装置纸堆上方吹风框中的吹风管。 ·吸风轮。 ·纸张防卷曲装置。 ·印刷机组和上光机组空档间隙处的压印滚筒吹风装置。 ·输纸定位部位的吹风杆和吸风杆。 ·气动侧规,吸风辊。 机动前规调整: ·前规位置(单独调整和联合调整)现在可从中央控制台或从第一印刷机组处的新 操作面板处进行改变。 ·三墨流通用输墨装置。 ·前重后轻油墨分布:通过断开输墨装置后半部分的接触,大多数油墨传递到前两 根靠版墨辊上。对称分布:通过断开输墨装置前半部分的接触,大约50%的油墨传 递到前两根靠版墨辊上,大约50%传递到后两根靠版墨辊上。正常分布:两个分开 点都闭合。 ·新的软件,用于在印刷机停机之后更快地返回到额定的输墨值上。 ·新的软件,用于在新活件开始之时,对墨斗键进行更精确的预设定。 ·清洗剂和清水的喷嘴采用新的较低的位置。 ·更多的喷嘴,可以更均匀地分配清洗剂和清水。 ·清洗刮刀的刚性更好,刮净能力大约为以前的两倍。 ·水管直接连接到普通的自来水管上:不再需要供水水箱。 多功能版夹杆,可用于上光机组和印刷机组。 ·独立的夹紧件,用于有夹条的橡皮布(泛涂上光)。 ·独立的版夹,用于夹紧上光印版(局部上光),分成两个部分,可在轴向方向上 撑紧上光版。 ·压紧辊。
PDF 文件使用 "pdfFactory Pro" 试用版本创建
罗兰 700·产品培训·机械部分
1.5 第一印刷机组的设定
标准印刷机
预检测
设定
前规在最高位置 盖规在最高位置
纸张到达前规 吸风辊 纸张前边缘控制 侧规(供气)
侧规(不供气)
侧规(拉动距离) 摆动叼纸牙 前规和盖规
4.4 8.7 15 37 73 125 200 315 430 615 830 1050 1550 2100
5.3 10 18 44 87 151 240 380 520 740 1000 1250 1900 2550
摩擦系数: 0.10,表面非常好,有润滑 0.15,表面好,有润滑或是干的 0.20,黑色或磷化的表面,干的
8.8
0.15
3 5.9 10 25 50 87 135 220 300 430 580 740 1100 1450
0.20
3.6 7.1 12 30 60 105 165 260 365 520 710 890 1350 1800
最大扭矩,单位 Nm 10.9
0.10 0.15 0.20
3.6 7.1 12 30 59 100 160 250 345 490 660 840 1250 1700
主纸堆 剩纸纸堆
