DataStageV8.5配置连接oracle操作手册
Datastage8.5服务器安装部署手册
执行计划查看优化如何查看执行计划基于ORACLE的应用系统很多性能问题,是由应用系统SQL性能低劣引起的,所以,SQL的性能优化很重要,分析与优化SQL的性能我们一般通过查看该SQL的执行计划,本文就如何看懂执行计划,以及如何通过分析执行计划对SQL进行优化做相应说明。
一、什么是执行计划(explain plan)执行计划:一条查询语句在ORACLE中的执行过程或访问路径的描述。
二、如何查看执行计划1: 在PL/SQL下按F5查看执行计划。
第三方工具toad等。
很多人以为PL/SQL的执行计划只能看到基数、优化器、耗费等基本信息,其实这个可以在PL/SQL工具里面设置的。
可以看到很多其它信息,如下所示2:在SQL*PLUS(PL/SQL的命令窗口和SQL窗口均可)下执行下面步骤1. 工作实质将SQL语句预估的执行计划加载到表plan_table,是对表plan_table 执行了DML操作,故不会执行隐式提交可以对select,insert,update,merge,delete,create table, create index,alter index等加载执行计划到plan_table2. 前提条件需要先创建plan_table,创建方法:@?/rdbms/admin/utlxplan对当前的SQL语句有执行权限以及对依赖的对象有相应操作的权限2.1SQL>EXPLAIN PLAN FORSELECT * FROM SCOTT.EMP; --要解析的SQL脚本SQL>SELECT * FROM TABLE(DBMS_XPLAN.DISPLAY);2.2SQL> SELECT * FROM PLAN_TABLE;2.3SQL> @E:\app\kerry\product\11.2.0\dbhome_1\RDBMS\ADMIN\utlxpls.sql SQL> @E:\app\kerry\product\11.2.0\dbhome_1\RDBMS\ADMIN\utlxplp.sql3:在SQL*PLUS下(有些命令在PL/SQL下无效)执行如下命令:SQL>SET TIMING ON --控制显示执行时间统计数据SQL>SET AUTOTRACE ON --这样设置包含执行计划、脚本数据输出、统计信息SQL>执行需要查看执行计划的SQL语句SQL>SET AUTOTRACE OFF --不生成AUTOTRACE报告,这是缺省模式SQL>SET AUTOTRACE ON EXPLAIN --这样设置包含执行计划、脚本数据输出,没有统计信息SQL>执行需要查看执行计划的SQL语句SQL>SET AUTOTRACE OFF --不生成AUTOTRACE报告,这是缺省模式SQL> SET AUTOTRACE ON --这样设置包含执行计划、统计信息、以及脚本数据输出SQL>执行需要查看执行计划的SQL语句SQL>SET AUTOTRACE OFFSQL> SET AUTOTRACE TRACEONLY --这样设置会有执行计划、统计信息,不会有脚本数据输出SQL>执行需要查看执行计划的SQL语句SQL>SET AUTOTRACE TRACEONLY STAT --这样设置只包含有统计信息SQL>执行需要查看执行计划的SQL语句SET AUTOT[RACE] {ON | OFF | TRACE[ONLY]} [EXP[LAIN]] [STAT[ISTICS]] 参考文档:SQLPlus User’s Guide and Reference Release 11.1注意:PL/SQL Developer 工具并不完全支持所有的SQL*Plus命令,像SET AUTOTRACE ON 就如此,在PL/SQL Developer工具下执行此命令会报错SQL> SET AUTOTRACE ON;Cannot SET AUTOTRACE4:SQL_TRACE可以作为参数在全局启用,也可以通过命令形式在具体SESSION启用4.1 在全局启用,在参数文件(pfile/spfile)中指定SQL_TRACE =true,在全局启用SQL_TRACE时会导致所有进程活动被跟踪,包括后台进程以及用户进程,通常会导致比较严重的性能问题,所以在生产环境要谨慎使用。
Datastage产品安装手册

Datastage产品安装配置手册目录DATASTAGE (1)产品安装配置手册 (1)目录 (1)1. 引言 (2)2. SERVER安装 (2)2.1.S ERVER安装准备 (2)2.1.1. 硬件及软件准备 (2)2.1.2. 创建用户及组 (2)2.1.3. 系统参数设置 (3)2.2.S ERVER安装步骤 (3)2.3.安装完毕,检查后台S ERVER是否启动正常 (15)3. CLIENT安装 (16)4. EESTAGE配置: (16)4.1.配置前准备 (16)4.2.配置过程 (16)4.3.测试 (17)1.引言DataStage EE 7.5.2Server安装在hp unix平台上,Client端安装在Windows平台上。
以下为详细说明其安装步骤。
2.Server安装2.1.Server安装准备2.1.1.硬件及软件准备2.1.2.创建用户及组1.运行sam命令,启动管理界面2.在安装机器上创建dstage组3.创建用户dsadm,属于dstage组和dba组。
dsadm用户要有存取权限2.1.3.系统参数设置1)检查Server端paging space的空间,对于CPU数量少于20个的机器,最好整个Paging Space为500M×CPU数,如机器配置了8个CPU,则推荐至少需要配置4GB的Paging Space空间。
2)检查核心参数,不符合要求则针对操作系统进行如下调整(使用sam):3)检查参数Maximum number of PROCESSES allowed per user,设置Datastage允许运行的最大进程数,推荐设置到较大的值,如:8192。
2.2.Server安装步骤确保以超级用户root进入系统(非常重要)如果是硬盘包,则执行命令:gunzip 2105-ds-75a-aix.tar.Z进入解压目录Tar xvf 2105-ds-75a-aix.tar进入/解压环境/Ascential.media/aix目录如果是光盘包,则执行命令: Mount /cdrom进入 /cdrom目录1)执行./INSTALL.SH\;1。
Datastage8.5安装手册with_Oracle_repository
Datastage8.5安装⼿册with_Oracle_repository ⽬录1.概述 (1)1.1⽬的 (1)1.2适⽤范围 (1)2.安装环境 (1)2.1软件环境 (1)2.2硬件环境 (1)2.3安装软硬件需求 (2)2.3.1操作系统 (2)2.3.2操作系统内核参数 (2)2.3.3依赖动态链接库 (2)2.3.4内存 (3)2.3.5硬盘 (3)2.3.6知识库 (3)3.安装步骤 (3)3.1创建知识库 (3)3.1.1获取知识库创建脚本 (4)3.1.2获取知识库创建脚本 (4)3.2C++编译器安装 (4)3.3D A TASTAGE S ERVER安装 (4)3.3.1介质上传及解压 (4)3.3.2启动安装程序 (4)3.3.3使⽤浏览器登陆安装界⾯ (5)3.3.4安装前浏览信息 (5)3.3.5软件许可协议 (6)3.3.6防⽕墙检查 (7)3.3.7早期安装需求检查 (8)3.3.8指定Information Server安装⽬录 (9)3.3.10选择安装软件 (11)3.3.11选择要安装的产品 (12)3.3.12选择要安装的版本 (15)3.3.13集群配置 (15)3.3.14安装Websphere Application Server (17)3.3.15指定Websphere Application Server⽬录 (17)3.3.16为Websphere Application Server分配监听端⼝ (18) 3.3.17Websphere Application Server管理员配置 (19) 3.3.18Infomation Server管理员配置 (21)3.3.19Datastage知识库选择 (21)3.3.20配置Datastage知识库连接 (22)3.3.21Infomation Server代理端⼝配置 (23)3.3.22配置Datastage管理员 (25)3.3.23Infomation Server作业监听端⼝配置 (27)3.3.24Infomation Server多实例设置 (28)3.3.25DS全球化⽀持 (29)3.3.26MQ插件选择 (30)3.3.27SAS组件配置 (31)3.3.28安装过程是否创建⼯程 (32)3.3.29Information Analyzer分析数据库连接配置 (33)3.3.30软件安装软硬件需求检测 (34)3.3.31安装过程相应⽂件 (34)3.3.32安装前摘要 (36)3.3.33开始安装 (36)3.3.34安装完成 (38)3.4D A TASTAGE C LIENT安装 (38)4.DATASTAGE配置 (38)4.1D A TASTAGE S ERVER配置 (38)4.1.2DS系统环境设置 (43)4.2D A TASTAGE C LIENT配置 (43)5.卸载 (44)6.数据库连接访问配置 (45)6.1O RACLE连接配置 (45)6.1.1Oracle客户端安装 (45)6.1.2Datastage⽤户组设置 (47)6.1.3Datastage⽤户环境配置 (47)6.1.4重启服务使得配置⽣效 (47)6.1.5Oracle⽤户权限设置 (49)7.ODBC配置 (50)7.1DSENV配置 (51)7.2ODBC.INI配置 (51)7.3修改UVODBC.CONFIG (52)8.安装验证 (53)8.1基本作业验证 (53)8.2编译器是否正常 (55)8.3O RACLE CONNECTOR验证 (57)9.注意事项 (57)1.概述1.1⽬的本⽂档旨在描述Datastage8.5在Redhat EE 64bit Server5.9安装执⾏步骤,以及注意事项。
新教材DATASTAGE的介绍及基本操作.ppt

Datastage测试
• 问题一:
Datastage的Designer是用来建立和编译job、用来进行数据 的抽取、转换和加载即ETL。(Yes/No) 答案一: Yes,Designer使用拖拽的方式将设计元素(习惯上叫stage) 拖拽到设计区域中,经过建立和编译,Job就可以执行,用 来进行数据的抽取、转换和加载。
安装操作员版本的Datastage,需要有Datastage 的Director的许可。
一个工程关联着一个目录,这个工程目录用来存储jobs、 Datastage项目和元数据。在做任何操作前都要先打开这个 工程,即登录这个工程。
工程是自包含的很多的工程可以在同一时间被打开,在 各自单独的环境打开。可以在它们之间导入或导出项目。
多用户可以在同一时间使用一个工程中工作,但是 Datastage禁止在同一时间由多个用户访问同一个job。
• 3,到期时间。 • 4,授权代码。
在许可信息中,这个信息必须被正确输入 的。
课件
安装向导会指导通过以下步骤进行:
• 1,输入许可信息。 • 2,指定服务器的路径。 • 3,选择程序的文件夹。 • 4,创建一个新的工程或升级已经存在的工
程。
课件
安装Datastage
课件
首先安装Datastage Server端,鼠标点击 软件会自动安装,安装过
• 在Windows系统中安装Datastage服务端。 • 建立一个Datastage的工程。 • 安装Datastage的客户端。
课件
Datastage 的服务端要首先安装,之后才 可以安装Datastage 客户端,服务端能都安 装在WinNT、Windows2000或者UNIX系统中, 这个模块将介绍在Windows环境下进行安装。
DATASTAGE使用实用指南
DATESTAGE 使用实用指南1.DataStage官方文档学习笔记1.1通过右键添加link鼠标右键点击起始stage,按住右键移动鼠标到目标stage。
还有一种方法就是把鼠标放在起始stage的边缘等到变为一个小圆圈里面有一个叉的时候拖动鼠标到目标stage。
1.2DataStage中默认和隐式类型转换时注意的问题当从源向目标映射数据时,如果类型不一致,对于有些类型我们需要在modify或transfomer stage中通过函数进行转换,对于有些系统会自动完成类型转换,在类型转换过程中,注意以下几点:1 在变长到固定长度字符串的默认转换中,parallel jobs用null(ASCII 0)字符来填充剩余长度。
联系到前面做的一个parallel job,当目标是变长时(当时源也是变长,但是好像源的精度要小些),但是字符串实际的长度没有指定的变长那么长的话,系统会自动用空格(ASCII 20)来填充(具体在哪个stage 填充的不知),而且环境变量APT_STRING_PADCHAR的默认值也是空格(ASCII 20)。
2 通过环境变量APT_STRING_PADCHAR可以改变默认的填充字符null(ASCII 0)。
注:联系上面两点,感觉文档讲的与实际不符,难道我们项目的administrator改变了该环境变量的默认值?3 有个PadString 函数可以用来用指定的字符来填充一个变长的字符串到指定的长度。
这个函数的参数不能使固定长度字符串,如果是固定长度的先转化为变长。
1.3Copy Stage作为占位符在job开发中,当你暂时不知道该使用哪个stage时,可以使用copy stage作为占位符,注意不要把Force 属性设为True,在不把Force设为True时,复制将在运行时进行优化。
使用Schema file来指定meta data1 可以通过列定义和schema file两种方式来指定meta data,值得注意的一点是Note that, if you usea schema file, you should ensure that runtime column propagation is turned on. Otherwise the column definitions specified in the stage editor will always override any schema file.即,如果想通过schema file来指定meta data,必须勾上runtime column propagation,否则总是使用列定义来作为meta data。
datastage教程

1、【第一章】datastage简介与工作原理1、简介数据中心(数据仓库)中的数据来自于多种业务数据源,这些数据源可能是不同硬件平台上,使用不同的操作系统,数据模型也相差很远,因而数据以不同的方式存在不同的数据库中。
如何获取并向数据中心(数据仓库)加载这些数据量大、种类多的数据,已成为建立数据中心(数据仓库)所面临的一个关键问题。
针对目前系统的数据来源复杂,而且分析应用尚未成型的现状,专业的数据抽取、转换和装载工具DataStage是最好的选择。
Websphere DataStage 是一套专门对多种操作数据源的数据抽取、转换和维护过程进行简化和自动化,并将其输入数据集市或数据中心(数据仓库)目标数据库的集成工具。
DataStage 能够处理多种数据源的数据,包括主机系统的大型数据库、开放系统上的关系数据库和普通的文件系统等,以下列出它所能处理的主要数据源:大型主机系统数据库:IMS,DB2,ADABAS,VSAM 等开放系统的关系数据库:Informix,Oracle,Sybase,DB2,Microsoft SQL Server等ERP 系统:SAP/R3,PeopleSoft系统等,普通文件和复杂文件系统,FTP 文件系统,XML等IIS,Netscape,Apache等Web服务器系统Outlook等Email系统。
DataStage 可以从多个不同的业务系统中,从多个平台的数据源中抽取数据,完成转换和清洗,装载到各种系统里面。
其中每步都可以在图形化工具里完成,同样可以灵活的被外部系统调度,提供专门的设计工具来设计转换规则和清洗规则等,实现了增量抽取、任务调度等多种复杂而实用的功能。
其中简单的数据转换可以通过在界面上拖拉操作和调用一些DataStage 预定义转换函数来实现,复杂转换可以通过编写脚本或结合其他语言的扩展来实现,并且DataStage 提供调试环境,可以极大提高开发和调试抽取、转换程序的效率。
Datastage控件使用指南
目录1. 引言 (1)2. 常用STAGE使用说明 (1)2.1.S EQUENTIAL F ILE S TAGE (1)2.2.A NNOTATION (4)2.3.C OLUMN E XPORT S TAGE (5)2.4.C HANGE C APTURE S TAGE (7)2.5.C OPY S TAGE (9)2.6.F ILTER S TAGE (10)2.7.F UNNEL S TAGE (11)2.8.T ANSFORMER S TAGE (12)2.9.S ORT S TAGE (13)2.10.L OOK U P S TAGE (14)2.11.J OIN S TAGE (14)2.12.M ERGE S TAGE (16)2.13.M ODIFY S TAGE (17)2.14.D ATA S ET S TAGE (18)2.15.F ILE S ET S TAGE (19)2.16.L OOKUP F ILE S ET S TAGE (21)2.17.O RACLE E NTERPRISE S TAGE (23)2.18.A GGREGATOR S TAGE (24)2.19.R EMOVE D UPLICATES S TAGE (26)2.20.C OMPRESS S TAGE (27)2.21.E XPAND S TAGE (28)2.22.D IFFERENCE S TAGE (29)2.23.C OMPARE S TAGE (31)2.24.S WITCH S TAGE (32)2.25.C OLUMN I MPORT S TAGE (33)3. DATASTAGE MANAGER使用 (35)3.1.导入导出J OB及其它组件 (35)3.2.管理配置文件 (37)4. DATASTAGE ADMINISTRATOR常用配置 (39)4.1.设置T IME O UT时间 (39)4.2.设置P ROJECT的属性 (40)4.3.更新D ATA S TAGE S ERVER的L ICENSE和本地C LIENT的L ICENSE (41)5. DATASTAGE DIRECTOR使用 (41)5.1.察看J OB的状态,运行已经编译好的J OB (41)5.2.将编译好的J OB加入计划任务 (44)5.3.监控J OB的运行情况 (45)1.引言DataStage EE的开发主要由DataStage Designer完成。
datastage入门教程
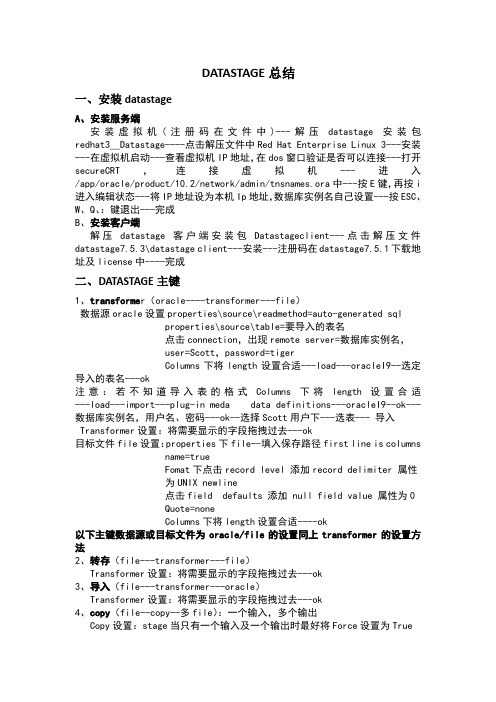
DATASTAGE总结一、安装datastageA、安装服务端安装虚拟机(注册码在文件中)---解压datastage安装包redhat3__Datastage----点击解压文件中Red Hat Enterprise Linux 3---安装---在虚拟机启动---查看虚拟机IP地址,在dos窗口验证是否可以连接---打开secureCRT,连接虚拟机---进入/app/oracle/product/10.2/network/admin/tnsnames.ora中---按E键,再按i 进入编辑状态---将IP地址设为本机Ip地址,数据库实例名自己设置---按ESC、W、Q、:键退出---完成B、安装客户端解压datastage客户端安装包Datastageclient---点击解压文件datastage7.5.3\datastage client---安装---注册码在datastage7.5.1下载地址及license中----完成二、DATASTAGE主键1、transforme r(oracle----transformer---file)数据源oracle设置properties\source\readmethod=auto-generated sqlproperties\source\table=要导入的表名点击connection,出现remote server=数据库实例名,user=Scott,password=tigerColumns下将length设置合适---load---oracleI9--选定导入的表名---ok注意:若不知道导入表的格式Columns下将length设置合适---load---import---plug-in meda data definitions---oracleI9--ok---数据库实例名,用户名、密码---ok--选择Scott用户下---选表--- 导入Transformer设置:将需要显示的字段拖拽过去---ok目标文件file设置:properties下file--填入保存路径first line is columns name=trueFomat下点击record level 添加record delimiter 属性为UNIX newline点击field defaults 添加 null field value 属性为0 Quote=noneColumns下将length设置合适----ok以下主键数据源或目标文件为oracle/file的设置同上transformer的设置方法2、转存(file---transformer---file)Transformer设置:将需要显示的字段拖拽过去---ok3、导入(file---transformer---oracle)Transformer设置:将需要显示的字段拖拽过去---ok4、copy(file--copy--多file):一个输入,多个输出Copy设置:stage当只有一个输入及一个输出时最好将Force设置为TrueOutput下将需要显示的字段拖拽过去---ok5、filter(file--filter---多file):只有一个输入,可以有多个输出Filter设置:stage下properties\where clause=过滤条件--点击whereclause出现output link=slink值(在link orderingzhong看对应值) Output下将需要显示的字段拖拽过去---ok6、join(多oracle---join---file):多表连接Join设置:stage下properties\join keys\key=关联字段,options\join type=连接类型(内、全、左、右连接)Output下将需要显示的字段拖拽过去---ok7、look up(多oracle---look up--file):数据的查询Look up设置:将关联字段连接,再将需要显示的字段拖拽过去8、merge(多file---merge---file):相同数据的合并Merge设置:stage下properties\merge keys\key=字段,sort order=排序Options下unmatched masters mode=保留/删除Output下将需要显示的字段拖拽过去---ok9、funnel(多file---funnel---file):数据的合并Funnel设置:stage下properties\options\funnel type=选择合并方式Output下将需要显示的字段拖拽过去---ok10、aggregator(oracle---aggregator---file):数据的分类、汇总Aggregator设置:stage下properties\grouping keys\group=分组字段点击aggregations\aggregation type出现column for calculation=聚合字段及合方式,可以取最大值,最小值, Sum值,count值等多种聚合方式。
DATASTAGE的介绍及基本操作

1、在‘General'页框中,设置Job监控的一些限制信息 和Director中的其他信息。
2、在‘Permission'页框中,设置并分配开发人员组的 权限 。
3、在‘Tracing' 页框中, 设置或取消服务端进行跟踪 。
? Designer提供一个数据流程的模式,轻松将设置和Job的设计有 机的组成。
? 使用Designer,可以: 1、指定数据如何抽取。
? 2、指定数据的转换规则和进行转换。
? 3、使用参考性质的LookUp到数据集市中编辑数据。
? a)例如,如果销售的记录集包括CustomerID,可以在 CustomerMaster表中使用LookUp查找到Customer的名称。
? 自定义的Routines和Transforms 也在DataStage 中 的Manager 里创建。
DataStage中的Designer
? DataStage中的Designer允许使用熟练地拖拽图标和连线的方式 来表示数据抽取、清洗、转换、整合和加载的过程,并将数据导 入数据仓库的表单之中。
? 问题二:
Datastage的Manager用来执行编译通过的Jobs。(Yes/No )
答案二:
No, Datastage的Manager是用来管理元数据的,如表单结 构,内置和自定义Routines等的,使Datastage用来管理资 源存储的。
? 问题三: Datastage 的Director用来执行编译通过的 Jobs。( Yes/No ) 答案三: Yes ,使用Director来对编译通过的 job进行验证或 者运行,也可以在 jobs运行过程中对其进行监控。
DataStage安装手册

目录1安装及配置21.1ETL工具D ATA S TAGE的安装配置过程21.1.1系统环境21.1.2用户与组21.1.3修改系统参数21.1.4编译器的安装31.1.5 DS软件安装步骤31.1.6停止与启动服务181.1.7 DataStage配置201安装及配置1.1ETL工具DataStage的安装配置过程1.1.1系统环境1.1.2用户与组创建组dstage 和用户dsadm,并且将dstage作为dsadm的默认组,同时将dsadm添加进dba组。
注意:需要给数据库用户对oracle sys.dba_extents表的select权限。
1.1.3修改系统参数将dsadm的参数修改成下列值:fsize -1 (无限制)data 至少128 MB (262144 512-byte blocks)stack 至少32 MB (65536 512-byte blocks)查看当前设置:ulimit -a设置最大进程数,建议为4096当前设置:lsattr -E -l sys0 | grep maxuproc以上修改需要root权限用户,在安装DS之前请确认好,避免多次使用root用户。
1.1.4编译器的安装开发完的所有JOB都需要进行编译,需要安装C++编译器,最低版本要求见系统环境要求部分。
1.1.5DS软件安装步骤Datastage安装过程需要用到root用户,确保以超级用户root进入系统。
如果是硬盘包,则先解压缩包,执行命令:$ tar xvf C915JNA.tar,再进入解压后的出现的文件夹 Ascential.media目录如果是光盘包,则执行命令: $ mount /cdrom ,再进入 /cdrom目录。
运行命令:$ ./install.sh -admin dsadm进入图1所示画面:图1图1提示安装程序检测是否是新安装DataStage, 输入y,继续安装过程,进入画面提示是root安装还是non-root安装,输入y进入图3所示画面:图3图3所示画面提示版权信息,输入n进入图4所示画面:图4图4所示画面提示版本信息,输入n进入图5所示画面图5图5所示画面提示License Agreement, 输入y进入图6所示画面图6图6所示画面提示选择安装文件中压缩包解压缩的临时路径,目标文件夹必须要600M以上的空间,默认路径为/tmp/dsinstall/unpack,改变输入c,输入n则进入图7所示画面:图7图7所示画面输入DataStage licence,包括序列号,CPU个数,有效日期,授权码等信息。
Oracle客户端连接Oracle服务器
Oracle客户端连接Oracle服务器1.配置本地net服务名配置2.用sqlplus连接;3.用toad连接;一、配置本地net服务名第一讲明我们的服务器的IP为60.220.246.53,oracle的SID为czdb。
打开配置本地net服务名向导如下图:点击进入Net Configuration Assistant,显现如下图所示:选择默认的添加,然后下一步,如下图:输入服务名(服务名事实上确实是oracle的SID)czdb,然后点击下一步:选择默认TCP,然后选择下一步:输入主机名(即oracle服务器主机IP)60.220.246.53,然后进入下一步:然后选择,进入下一步:里面的详细信息讲的是密码不对,讲明是连接到了服务器,我们只要改一下用户名和密码就能够了,然后点击更换登录:OK,测试成功;另讲明:查询本用户下的所有表的信息叫数据字典:user_tables;DBA_users; 两类数据字典表dba一样是system用户查表的信息从数据字典里查如:select table_name from user_tables;dual是名义表,不存任何东西.Oracle远程连接数据库总结配置tnsnames.oraOracle代码:1.orCL =2.(DESCRIPTION =3.(ADDRESS_LIST =4.(ADDRESS = (PROTOCOL = TCP)(HOST = 192.168.xx.xx)(PORT = 1521))5.)6.(CONNECT_DATA =7.(SERVICE_NAME = orcl)8.)9.)要紧的参数为HOST、PORT、SERVICE_NAME可能的咨询题:* 连接超时:专门大可能性是windows自带的防火墙开着,屏蔽了1521端口Oracle远程连接数据库总结注:本文讲述了oracle数据库实例连接的配置过程,三个重要的配置文件位于C:\oracle\product\10.1.0\Db_1\NETWORK\ADMIN名目下1. sqlplus sys/oracle@orclsqlnet.ora 文件格式NAMES.DIRECTORY_PATH= (TNSNAMES,HOSTNAME)。
Datastage 配置操作步骤
1部署软件环境DB服务器:22.4.8.7DB客户端:22.4.8.10,22.4.8.11,22.4.8.12,22.4.8.13DataStage主服务器:22.4.8.11DataStage备份服务器:22.4.8.13DataStage节点:22.5.8.10,22.5.8.122创建用户为每台机器创建dstage组和dsadm用户运行smit命令,启动管理界面在安装机器上创建dstage组设置ADMINISTRA TIVE USER 选项为true设置GID设为300创建用户dsadm设置主属为dstage,设置ADMINISTRA TIVE USER 选项为true;设置UID设为300;设置Primary GROUP,Group SET,ADMINISTRATIVE GROUPS:均为dstage;设置Soft FILE size [-1] (无限制)设置Hard FILE size [-1] (无限制)3修改系统参数调整每台机器的最大进程数查看用户进程最大数目:lsattr -El sys0|grep maxuproc如:修改用户进程最大数目:注意:要调整每个Datastage节点的最大进程数用root用户登陆,键入即可。
chdev -l sys0 -a maxuproc=40964DataStage安装4.1上传DataStage介质到服务器上将介质拷贝到终端上,然后ftp到22.4.8.11和22.4.8.13上,将介质放在/Ascential.media 目录下,并赋上所有权限:chmod -R 777 /Ascential.media4.2安装DataStage4.2.1进入/Ascential.media,运行sh ./install.sh –admin dsadm,中间安装过程请参考上线文档,在安装过程中创建工程ETL_ODS.4.2.2配置dsadm用户.profile环境变量,增加如下内容22.4.8.11:# The following three lines have been added by IBM DB2 instance utilities.if [ -f /home/db2inst1/sqllib/db2profile ]; then. /home/db2inst1/sqllib/db2profilefi#ds envexport ETLPLUS_HOME=/home/dsadmexport DSHOME=/home/dsadm/Ascential/DataStage/DSEngineexport APT_ORCHHOME=/home/dsadm/Ascential/DataStage/PXEngineexport DB2HOME=/home/db2inst1/sqllibexportPATH=$PATH:$DSHOME/bin:$DB2HOME/include:/home/dsadm/Ascential/DataStage/PX Engine.753.1/libexportLIBPATH=$LIBPA TH:$DSHOME/lib:$APT_ORCHHOME/lib:/home/dsadm/Ascential/Dat aStage/PXEngine.753.1/lib. $DSHOME/dsenv22.4.8.13:# The following three lines have been added by IBM DB2 instance utilities.if [ -f /home/db2inst1/sqllib/db2profile ]; then. /home/db2inst1/sqllib/db2profilefi#ds envexport ETLPLUS_HOME=/home/dsadmexport DSHOME=/home/dsadm/Ascential/DataStage/DSEngineexport APT_ORCHHOME=/home/dsadm/Ascential/DataStage/PXEngineexport DB2HOME=/home/db2inst1/sqllibexportPATH=$PATH:$DSHOME/bin:$DB2HOME/include:/home/dsadm/Ascential/DataStage/PX Engine.753.1/libexportLIBPATH=$LIBPA TH:$DSHOME/lib:$APT_ORCHHOME/lib:/home/dsadm/Ascential/Dat aStage/PXEngine.753.1/lib. $DSHOME/dsenv22.4.8.10:export DSHOME=/home/dsadm/Ascential/DataStage/DSEngineexport APT_ORCHHOME=/home/dsadm/Ascential/DataStage/PXEngineexport DB2DIR=/opt/IBM/db2/V9.5export DB2INSTANCE=db2inst1export INSTHOME=/home/db2inst1exportPATH=$PATH:$INSTHOME/sqllib/bin:$INSTHOME/sqllib/adm:$INSTHOME/sqllib/misc: $APT_ORCHHOME/lib:$APT_ORCHHOME/binexportDB2PATH=$INSTHOME/sqllib/bin:$INSTHOME/sqllib/adm:$INSTHOME/sqllib/misc exportLIBPATH=$LIBPA TH:$DB2DIR/lib:$INSTHOME/sqllib/lib:$APT_ORCHHOME/lib export ETLPLUS_HOME=/home/dsadm22.4.8.12:export DSHOME=/home/dsadm/Ascential/DataStage/DSEngineexport APT_ORCHHOME=/home/dsadm/Ascential/DataStage/PXEngineexport DB2DIR=/opt/IBM/db2/V9.5export DB2INSTANCE=db2inst1export INSTHOME=/home/db2inst1exportPATH=$PATH:$INSTHOME/sqllib/bin:$INSTHOME/sqllib/adm:$INSTHOME/sqllib/misc: $APT_ORCHHOME/lib:$APT_ORCHHOME/binexportDB2PATH=$INSTHOME/sqllib/bin:$INSTHOME/sqllib/adm:$INSTHOME/sqllib/misc exportLIBPATH=$LIBPA TH:$DB2DIR/lib:$INSTHOME/sqllib/lib:$APT_ORCHHOME/libexport ETLPLUS_HOME=/home/dsadm22.4.8.7:# The following three lines have been added by IBM DB2 instance utilities.if [ -f /home/db2inst1/sqllib/db2profile ]; then. /home/db2inst1/sqllib/db2profilefiexport ETLPLUS_HOME=/progexport DSHOME=/home/dsadm/Ascential/DataStage/DSEngineexport APT_ORCHHOME=/home/dsadm/Ascential/DataStage/PXEngineexport DB2DIR=/opt/IBM/db2/V9.5export DB2INSTANCE=db2inst1export INSTHOME=/home/db2inst1exportPATH=$PATH:$INSTHOME/sqllib/bin:$INSTHOME/sqllib/adm:$INSTHOME/sqllib/misc: $APT_ORCHHOME/lib:$APT_ORCHHOME/binexportDB2PATH=$INSTHOME/sqllib/bin:$INSTHOME/sqllib/adm:$INSTHOME/sqllib/misc exportLIBPATH=$LIBPA TH:$DB2DIR/lib:$INSTHOME/sqllib/lib:$APT_ORCHHOME/libexport DateInfoPath=/gpfsf/DateInfoPath5配置rsh环境。
datastage安装详细文档
Datastage Server安装步骤Datastage安装过程需要用到root用户,确保以超级用户root进入系统(非常重要) 1.准备#创建组$groupadd dstage#创建用户$useradd -g dstage dsadm#修改密码$passwd dsadm#创建安装目录$mkdir -p /home/ap/dsadm#添加目录到用户组$chown -R dsadm:dstage /home/ap/dsadm/2.解压#如果是硬盘包,则先解压缩包,执行命令:$tar xvf C915JNA.tar再进入解压后的出现的文件夹Ascential.media目录如果是光盘包,则执行命令:Mount /cdrom ,再进入/cdrom目录.3.安装(1) 执行./install.sh –admin root(2) 验证dsadm用户环境变量设置,确认输入y,回车:(3) 安装向导画面,输入n,回车(4) 版本更新信息,输入n,回车(5) license agreement,输入y,回车(6) 选择安装文件临时存放目录,此目录必须存在,dsadm用户要有存取权限,且目录必须为空并且有600M的空间,输入c 可以改变临时目录,使用默认临时目录输入n,回车(7) 输入serial number,CPU count,expiration date,enterprise edition code, server code ,回车。
MVS edition code不用输入,注意日期的格式。
(8) 确认serial number,CPU count,expiration date,enterprise edition code, server code是否正确,正确,输入n,回车(9) 根据实际购买RTI Agent,SAS Integration,IMS Source情况,以下三个code可以选择填写,输入n ,回车(10) 确认DataStage Server的安装目录,根据实际情况选择c做更改,指定目录dsadm需有存取权限,确认安装目录后,输入c,回车进行修改(11) 修改正确的DataStage Server的安装目录/home/ap/dsadm,回车(12) 确认DataStage的安装目录已修改成/home/ap/dsadm,输入n,回车(13) 选择语言,输入c,回车进行修改(14) 选择Chinese-Simplified简体中文,输入6,回车(15) 确认已选择6 Chinese-Simplified简体中文,输入n,回车注意:语言一定要修改为CHS(16) 选择相关插件,这样要把所有插件都选择安装,输入a,回车(17) 确认已选择所有插件都安装,输入n,回车(18)DataStage工程存放路径,回车选择默认路径,如需指定确保dsadm有存取权限(19) 创建工程,第一次创建的默认工程不用,随便起个名字,将来在JCI公共组件安装的时候会重新建立工程。
DataStage8.5安装手册
DataStage8.5安装手册DataStage 8.5 安装文档1. 服务器安装前提要求,DataStage 的服务器推荐使用一台全新的干净服务器,全新安装的SUSE Linux Enterprise Server 11,或者Redhat AS 5.4,没有预装任何DB2 和WAS 软件。
rpm -Uvh compat-libstdc++-33-*.rpm rpm -Uvh libXp-1*.rpm rpm -Uvh libXmu-1.0.2-5.x86_64.rpm rpm -Uvh libXmu-1.0.2-5.i386.rpm cat “Add for DataStage" cat "kernel.sem = 250 ***** 32 1024" /etc/sysctl.conf cat "kernel.msgmni = 1024" /etc/sysctl.conf sysctl -p安装步骤如下:DataStage 8.5 的安装介质为InfoSvr_v8.5_Linux64.tar.gz,解压后得到目录is-suite。
在is-suite 下执行./setup,安装程序将启动一个Web 服务,URL 为http://机器IP:8080/ISInstall在浏览器(IE 或者Fixforx)中打开上述URL,例如,待安装的服务器IP 为192.168.5.170,则在浏览器栏输入http://192.168.5.170:8080/ISInstall。
缺省安装界面语言为英文(English),也可以选择中文。
本文档以英文为安装语言。
进入安装界面后,第一个界面选择Next 按钮。
第二个界面如下图所示选择接受License 协议(I accept the terms in the license agreement),然后下一步(Next)。
DataStage8.5服务器安装教程

DataStage8.5服务器安装教程小燕资料铺2021-11-17目录1.文档介绍 (4)2.安装DataStage服务器 (4)2.1.操作系统补丁及其他要求 (4)2.2.Linux主机资源要求 (4)2.3.操作系统磁盘空间要求 (4)2.4.检查安装环境 (5)3.安装步骤 (5)3.1.Orace数据库的安装 (5)3.2.DataStage服务器安装 (7)4.DataStage服务器配置步骤 (26)5.配置字符集 (32)6.DataStage服务器FIXPATCH1更新步骤 (34)7.Oracle Connector配置步骤 (35)7.1.修改dsenv文件 (35)7.2.配置完成后重启DATASTAE、WAS (36)8.安装问题诊断 (37)1.文档介绍本文档内容为安装Datastage8.5的服务器内容,安装内容包括DataStage、WAS、Metadata Repository,其中元数据库安装在Oracle11g上。
2.安装DataStage服务器2.1.操作系统补丁及其他要求系统要求Rhel5.464-bit系统包Rhel5.464-bitC++编译器libgcc-4.1.2-42.el5compat-gcc-c++-7.3.2.96.122compat-libstdc++-7.3-2.96.1222.2.Linux主机资源要求安装DataStage服务器的主机资源至少为为4C、16G。
2.3.操作系统磁盘空间要求2.4.检查安装环境检查C++编译器【root用户】:运行命令:#rpm–qa|grep package_name。
逐个检查需要的补丁包是否安装。
3.安装步骤3.1.Orace数据库的安装以下操作用【root用户】1,关闭防火墙.关闭:chkconfig iptables off查看:chkconfig--list|grep iptables重启生效2,关闭selinux:vi/etc/selinux/config设置selinux=disabledvi/etc/sysconfig/selinux设置selinux=disabled重启生效。
DataStageV8.5配置连接oracle操作手册

DataStageV8.5配置连接oracle操作手册编制:长安铃木信息系统课王川2012-5-7目录1概述 (4)1.1编写目的 (4)1.2系统配置 (4)1.3事前准备 (4)2开始安装客户端 (4)3配置DATASTAGE 环境 (6)4配置测试 (7)文档版本记录版本编号变更内容变更人日期DataStageV8.5配置连接oracle操作手册1概述1.1 编写目的DataStage V8.5 在安装后默认支持DB2 数据库,为了实现抽取ORACLE 数据库,需要配置服务器端。
1.2 系统配置DataStage V8.5Suse linux server sp11.3 事前准备1、安装XFTP:传递文件。
2、开启SSH服务:终端控制。
3、Oracle官网下载11g client。
/technetwork/database/enterprise-edition/downloads/112010-linuxsoft-085393.html2开始安装客户端1、FTP上传linux_11gR2_client.zip ,并解压至TMP目录。
2、创建组和权限。
groupadd oinstall groupadd dbauseradd –g oinstall –G dba –m oracle passwd oraclemkdir –p /home/oracle/chown -R oracle:oinstall /home/oracle/3、修改环境配置文件。
/etc/sysctl.conf 加上如下内容fs.aio-max-nr = 1048576 fs.file-max = 6815744 kernel.shmall = 2097152 kernel.shmmax = 536870912 kernel.shmmni = 4096kernel.sem = 250 32000 100 128 net.ipv4.ip_local_port_range = 9000 65500 net.core.rmem_default = 262144 net.core.rmem_max = 4194304 net.core.wmem_default = 262144 net.core.wmem_max = 1048586 net.ipv4.tcp_wmem = 262144 262144 262144 net.ipv4.tcp_rmem = 4194304 4194304 4194304启动时加载/etc/sysctl.conf/sbin/chkconfig boot.sysctl on使修改的参数立即生效/sbin/sysctl -p4、切换到ORACLE用户下,修改用户配置。
Datastage8.5的配置(通信等问题)
Datastage8.5的配置(通信等问题)Datastage8.5的配置(通信等问题)Datastagelinux版本的服务端、客户端安装完成后需要进行一些配置。
这是以我自己的使用过程遇到的错误进行了一次配置的总结。
有不对的地方请大家指正。
DS版本:8.5x服务端操作系统:linux redhat 5.7客户端操作系统:win7源数据和目标数据库为:oracle下列配置,是在服务端和客户端已经安装成功的情况下。
客户端和服务端的通信。
可能遇到问题:1. Failed to authenticate the current user against the selected service tier:Server [servername] not found.2. Failed to authenticate the current user against the selected service tier:Could not connect to server [servername] on port [portnumber].3. Failed to authenticate the current user against the selected Domain:Invalid user name (username) or password.解决思路,大概如下:一,确保所有的datastage 服务已经开启。
在linux 可使用ps -ef |grep db2 ,ps -ef|grep websphere,ps -ef|grep agent等命令来查看相关服务是否已经启动。
二,客户端配置在windows:C:\WINDOWS\system32\drivers\etc\hosts file 添加(服务器的IP地址,以及计算机名)比如:192.168.26.10 /doc/5018983421.html, dahost三,如果遇到用户名和密码的问题那么使用dsadmin 或者dsadm用户登陆客户端试试,密码是安装时自己设置的,切记。
- 1、下载文档前请自行甄别文档内容的完整性,平台不提供额外的编辑、内容补充、找答案等附加服务。
- 2、"仅部分预览"的文档,不可在线预览部分如存在完整性等问题,可反馈申请退款(可完整预览的文档不适用该条件!)。
- 3、如文档侵犯您的权益,请联系客服反馈,我们会尽快为您处理(人工客服工作时间:9:00-18:30)。
DataStageV8.5配置连接oracle操作手册编制:长安铃木信息系统课王川2012-5-7目录1概述 (4)1.1编写目的 (4)1.2系统配置 (4)1.3事前准备 (4)2开始安装客户端 (4)3配置DATASTAGE 环境 (6)4配置测试 (7)文档版本记录版本编号变更内容变更人日期DataStageV8.5配置连接oracle操作手册1概述1.1 编写目的DataStage V8.5 在安装后默认支持DB2 数据库,为了实现抽取ORACLE 数据库,需要配置服务器端。
1.2 系统配置DataStage V8.5Suse linux server sp11.3 事前准备1、安装XFTP:传递文件。
2、开启SSH服务:终端控制。
3、Oracle官网下载11g client。
/technetwork/database/enterprise-edition/downloads/112010-linuxsoft-085393.html2开始安装客户端1、FTP上传linux_11gR2_client.zip ,并解压至TMP目录。
2、创建组和权限。
groupadd oinstall groupadd dbauseradd –g oinstall –G dba –m oracle passwd oraclemkdir –p /home/oracle/chown -R oracle:oinstall /home/oracle/3、修改环境配置文件。
/etc/sysctl.conf 加上如下内容fs.aio-max-nr = 1048576 fs.file-max = 6815744 kernel.shmall = 2097152 kernel.shmmax = 536870912 kernel.shmmni = 4096kernel.sem = 250 32000 100 128 net.ipv4.ip_local_port_range = 9000 65500 net.core.rmem_default = 262144 net.core.rmem_max = 4194304 net.core.wmem_default = 262144 net.core.wmem_max = 1048586 net.ipv4.tcp_wmem = 262144 262144 262144 net.ipv4.tcp_rmem = 4194304 4194304 4194304启动时加载/etc/sysctl.conf/sbin/chkconfig boot.sysctl on使修改的参数立即生效/sbin/sysctl -p4、切换到ORACLE用户下,修改用户配置。
vi .profile ORACLE_BASE=/home/oracle/ ORACLE_HOME=$$ORACLE_BASE/app/oracle/product/11.2.0/client_1/ ORACLE_SID=keigojoePATH=$ORACLE_HOME/bin:$PATHexport ORACLE_BASE ORACLE_HOME ORACLE_SID PATH5、退出使生效,查看结果。
env | grep ORA6、切换ROOT用户。
cd /etc/security/vi limits.conforacle soft nproc 2047 oracle hard nproc 16384 oracle soft nofile 1024 oracle hard nofile 65536 oracle hard stack 10240cd /etc/pam.d/vi loginsession required /lib/security/pam_limits.socd /etc/vi profileif [ $USER = "oracle" ]; thenif [ $SHELL = "/bin/ksh" ]; then ulimit -p 16384ulimit -n 65536 elseulimit -u 16384 -n 65536 fifi7、切换ORACLE 用户。
export DISPLAY=192.168.7.139:0.0 xhost +cd /tmp/linux_11gR2_client./runInstaller开始界面化安装管理员客户端即可。
3配置Datastage 环境1、编辑dsenv 文件cd /opt/IBM/InformationServer/Server/DSEngine/vi dsenv(1)添加如下内容export ORACLE_HOME=/home/oracle/app/oracle/product/11.2.0/client_1export TNS_ADMIN=/home/oracle/app/oracle/product/11.2.0/client_1/network/admin export LD_LIBRARY_PATH=$APT_ORCHHOME/lib:$LD_LIBRARY_PATH:$ORACLE_HOME/lib:$ ORACLE_HOME/rdbms/libexport PATH=$PATH:$ORACLE_HOME/bin:$APT_ORCHHOME/bin export ORACLE_BASE=/home/oracle/appexport LIBPATH=$ORACLE_HOME/rdbms/lib:$ORACLE_HOME/lib:$LIBPATH(2)root 用户下执行#find /opt -name install.liborchoracle/opt/IBM/InformationServer/Server/StagingArea/Installed/PxOracle/install/install.liborchoracle/opt/IBM/InformationServer/Server/DSComponents/install/install.liborchoracle#find /opt -name libccora*/opt/IBM/InformationServer/Server/StagingArea/Installed/OracleConnector/Server/linux/libccor a11g.so/opt/IBM/InformationServer/Server/StagingArea/Installed/OracleConnector/Server/linux/libccor a10g.so/opt/IBM/InformationServer/Server/DSComponents/bin/libccora11g.so/opt/IBM/InformationServer/Server/DSComponents/bin/libccora10g.so(3)添加关联文件#cd $ORACLE_HOME/lib#ln –s/opt/IBM/InformationServer/Server/StagingArea/Installed/OracleConnector/Server/linux/libccor a11g.so licccora11g.so#ln –s/opt/IBM/InformationServer/Server/StagingArea/Installed/OracleConnector/Server/linux/libccor a10g.so licccora10g.so#export DSHOME=/opt/IBM/InformationServer/Server/DSEngine#export APT_ORCHHOME=/opt/IBM/InformationServer/Server/PXEngine(4)编辑DatastageORACLE 工具的安装文件#vi /opt/IBM/InformationServer/Server/DSComponents/install/install.liborchoracle install_driver() {case $version in9 ) VER='9i';;10|11 ) VER='10g';;0 ) return;; esac 开始安装[root@datastage DSEngine]#/opt/IBM/InformationServer/Server/DSComponents/install/install.liborchoracleInstalling Oracle driver.Installing driver for Oracle Version 10gOracle driver installation is completed.重启服务器,登陆IBM InfoSphere DataStage and QualityStage Designer,使用数据库导入工具验证安装是否成功。
如果打开oracle connector 发现server 没有选择项目,说明需要配置$ORACLE_HOME/network/admin/下的tnsnames.ora 文件。
4配置测试1)测试链接一个实例2)测试读取数据。
