fusion中文帮助
FusionV3融合实例教程

FusionV3实例教程阅读本文之前,您必须已经阅读完<FusionV3用户指南>,并对软件中所涉及到的术语、参数的含义都已了解。
本文我们将通过一个“横向两通道软件融合”的实例,为大家讲解Fusionv3的使用方法。
因为调试人员的大部分工作都集中在FusionCreative(客户端)中,所以本文大部分内容是讲解怎样使用FusionCreative。
本教程配有视频演示录像,便于用户快速理解。
在开始使用FusionCreative之前,首先要确认以下几项工作是否完成(可以按照<FusionV3用户指南>进行):1.在融合机中安装了FusionV3服务器。
2.融合机与调试主机在同一局域网中,并且融合机已经设置了IP地址,本实例中我们设为192.168.0.15。
为了保证两台主机正确联网,可以先测试下两台主机能否互相从“网上邻居”访问。
3.融合机与调试主机的防火墙已经关闭,如果安装有类似“安全卫士360”的防火墙软件,注意需要将我们的程序设置为信任程序。
4.将通过Emial得到的融合软件可执行程序(本例为 “H2XGA.exe”)拷贝至融合主机中安装CudaImageFusionV3Server 时的目录下,默认为“C:\Program Files\CudaImage\”目录下。
5.将加密狗插入融合机的USB接口中,操作系统将正确识别出新硬件,并且任务栏右下角加密狗图标会变成墨绿色,如下图:6.保证融合机的系统时间比较正确。
7.已经在融合机的主卡上接入了一个全高清(1920*1080)显示器,并且使用DVI线连接为佳。
在融合子卡上接入了两台自然分辨率为XGA的投影机。
8.为显示器自定义1792*768分辨率,将两台投影机分辨率设置为1024*768,并按照正确顺序排列显示设备。
两台投影机工作正常运行FusionCreative我们得到如下界面:FusionCreative由五个功能模块构成:显示设置、几何校正、投影机设定工具、色带消隐、运行设置,这五个功能模块依次排列,这也是我们的工作顺序,我们可以按照此顺序,一步一步的完成边缘融合的调试工作。
Fusion详细介绍
Abstractions1. Shared Memory2. Arena (registry of pointers to shared memory)3. Reference Counter4. Skirmish (mutex)5. Call (RPC)6. Reactor (event source)7. Property8. Vector9. ObjectFusion Library vs. Device Fusionees and WorldsSignals and ThreadsWhat is Fusion?Fusion provides an implementation of abstractions needed formulti-threaded/multi-process programming:Fusion 为多线程/进程编程提供了抽象的实现。
Abstractions1. Shared MemoryFusion shared memory is implemented in user space and is based on GNU malloc but mmaps a file on a RAM-based (tmpfs or shmfs) file system as the backing store for a shared heap. The mmap-ing is at the same starting address (0x20000000) in every process, so pointers to shared memory allocations can be passed between processes without translation.(共享内存是基于GNU malloc在用户空间被实现的,并且映射成一个文件(基于RAM-Based tmpfs shmfs 文件系统)作为后台存储的共享堆。
达芬奇fusion使用步骤-概述说明以及解释

达芬奇fusion使用步骤-概述说明以及解释1.引言1.1 概述在达芬奇Fusion使用步骤的概述部分,我们将介绍达芬奇Fusion是什么以及其在视频制作和后期制作中的重要性。
达芬奇Fusion是一款强大的视觉特效和合成软件,它融合了2D和3D图像制作、动画、混合、修复和合成等多种功能,被广泛应用于电影、电视和广告等行业。
作为行业标准之一,达芬奇Fusion具有出色的性能和高度灵活性,可以满足复杂视觉特效制作的需求。
在视频制作和后期制作过程中,达芬奇Fusion扮演着重要角色。
它可以与其他视频编辑软件,如达芬奇调色软件DaVinci Resolve和Adobe Premiere Pro等进行无缝集成,为用户提供更全面的视频后期制作能力。
使用达芬奇Fusion,我们可以通过创建复杂的合成、添加特殊效果、修复图像缺陷、进行图像跟踪和融合等一系列操作,将原始素材转化为令人惊叹的视觉作品。
通过合理运用达芬奇Fusion的功能,我们可以实现电影中的爆炸、超能力效果、科幻场景以及其他各种视觉奇观。
虽然达芬奇Fusion在功能上非常强大,但对于初学者来说,上手可能会有一定的难度。
因此,本文将详细介绍达芬奇Fusion的使用步骤,帮助读者快速掌握这款软件,并能灵活应用于自己的项目中。
在接下来的正文中,我们将详细讲解达芬奇Fusion的各项功能和操作方法。
通过逐步引导,读者将逐渐熟悉达芬奇Fusion的界面和工具,了解常用操作和技巧,并能够通过实践运用到实际项目中。
在结论部分,我们将对本文的内容进行总结,并展望达芬奇Fusion 在未来的发展前景。
由于技术的不断进步,达芬奇Fusion将继续在视觉特效和后期制作领域发挥重要作用,并为用户带来更多创作的可能性。
通过本文的阅读和实践,相信读者将能够掌握达芬奇Fusion的使用步骤,提升自己的视频制作和后期制作能力,并创作出更加出色的视觉作品。
接下来,请跟随我们的步骤,一起进入达芬奇Fusion的精彩世界吧!文章结构部分的内容如下:文章结构本文将按照以下结构进行介绍和讨论达芬奇fusion的使用步骤:1. 引言1.1 概述1.2 文章结构1.3 目的2. 正文2.1 第一个要点2.2 第二个要点3. 结论3.1 总结3.2 展望首先,引言部分将提供对达芬奇fusion使用步骤的整体概述。
fusion中文帮助

fusion中文帮助1、引言2、工具控制调节区3、通用参数控制4、典型调节方式5、动画操作1、引言在DF中,每一个添加到工作流程中的工具都可以根据其自身的特点设置参数或进行调解。
当在工作流程中添加了工具后,它的调节项会出现在屏幕右边的工具调节控制区。
每个控制窗口都有一个卷标;上面显示了工具的名称、一个可供缩小和展开这个控制窗口的按钮(小三角形标志)。
除此之外,每个工具还有两个附加控制项,遮罩控制项(Masks)和修改控制项(Modifiers).这些附属控制项在其自身的窗口可以进行调解设置。
工具控制窗只有在相应的工具被选择的时候才会显示。
2、工具控制调节区最大化调节控制区在控制区的顶端的左面有两个分开的小箭头。
点击这个按钮可以最大化、最小化控制区。
察看工具的参数调节窗双击流程中的工具模块可以察看工具的调节控制窗,点击控制窗中的卷标也可以。
隐藏控制窗隐藏控制窗后,即使点击工具也不会在控制窗口中显示。
方法:在工具或者卷标上点击右键,在随后出现的扩展菜单上去掉“Modes/Show Controls”选择。
要恢复显示,在相同的位置勾选即可。
控制区显示偏好设定默认情况下,DF仅显示被激活工具的控制项。
其他(未被激活)工具的控制项在被激活前一直被隐藏。
这种方式由两个相关设置选项控制,一个是“Auto Control Close”,另一个是“Auto Control Hide”.选择主菜单的File/Perferences,打开General Perferences可以找到以上两个选项。
通过控制卷标选择工具无论什么时候点击某一个工具的卷标,在流程图中对应的工具被激活、并且在调节控制区将显示每一个该工具的调节参数。
这和在流程图中激活工具的结果一样。
工具激活后,它的控制卷标显示为黄色。
通过控制卷标实现在显示窗显示和预演在工具卷标上点击鼠标并将其拖放到显示窗中可以显示工具效果。
按住ALT键,将工具卷标拖放到显示窗中可以进行效果预演。
Mac上玩转VMware Fusion说明书

在Mac上玩转VMwareFusion在Mac上玩转VMware Fusion在同个机器上运行不同操作系统非常酷。
对于一部分人来说,这个功能是必需的。
对于用于Mac的VMware Fusion,用户可以在Mac OS X里运行多个操作系统。
本期TT虚拟化手册提供VMware Fusion在Mac上使用的技巧。
认识VMware Fusion自从首个VMware Fusion版本在2007年发布后,我是它的忠实用户。
它一直存在于我的MacBook Pro中,处理我工作的大部分事务。
VMware Fusion 3用户眼中的Parallels Desktop for MacVMware Fusion 4和Workstation 8的嵌套虚拟化尝鲜VMware Fusion升级与安全如果你考虑对VMware Fusion进行产品升级的话,即使需要耗费一些时间进行配置,也需要注意安全方面的问题。
专家碎碎念:升级到VMware Fusion 4乐与苦VMware Fusion 4安全小窍门VMware Fusion for Mac技巧VMware Fusion for Mac可以让用户在Mac OS X上虚拟多个操作系统,本部分提供的是一些高级功能和性能优化技巧,可以帮助提高虚拟机利用率。
适用于Mac用户的VMware Fusion技巧VMware Fusion for Mac:五个高级用户技巧VMware Fusion 3用户眼中的Parallels Desktop for Mac用于Mac的Parallels Desktop和VMware Fusion 3是Mac OS X里比其他桌面操作系统受欢迎的两种流行方式。
如果你因为IT任务运行VMware Fusion 3,如PowerShell or vSphere Client管理,那么Parallels Desktop for Mac中的一些功能让你对转换蠢蠢欲动。
DigitalFusion中文帮助显示窗
显示窗1、引言2、显示窗的典型模式3、在显示窗显示图像4、显示窗布局5、缩放显示窗6、拖放显示窗中的图像7、查看预演8、在屏幕上控制调节9、A/B切换10、分隔显示图像11、状态栏信息12、显示窗标签13、显示色彩和辅助通道14、特殊工具控制栏15、特效遮罩16、显示范围标示17、像素点(面)调节18、显示正常化19、显示色彩查询台(LUT)20、显示窗个性设置21、显示扩展菜单1、引言DF允许在工作流程中的任何工具产生的效果在显示窗显示。
在任何时候,使用任何不同工具合成的图像都能够在显示窗中显示,而且不限显示数量。
在DF的显示窗中,你也可以添加,更改以及进行路径、垃圾遮罩、遮罩和抠像操作。
默认情况下,DF打开时有两个显示窗分布在屏幕的上方。
选择住菜单中的window/new window选项可以建立一个新的浮动的显示窗。
每个显示窗都有两个图像切换器,A和B。
这些切换器还可以被用来分屏,以便在两个不同的画面之间进行快速比对。
2、显示窗的典型模式左右显示窗DF中主要的显示区域是左右分布的两个显示窗。
它位于工作流程、时间线和样条曲线控制区的上方。
硬件帧缓冲器(上屏)当计算机具备视频硬件支持时,DF可以通过硬件帧缓冲器在外设的NTSC、PAL或者HD监视器上显示图像。
这一点非常重要,因为通过外设监视器你可以查看你合成的图像格式是否正确,图像效果是否和最终要输出的效果是否匹配等。
浮动视窗除了在工作流程上的两个大的显示窗之外,可以不限数量的建立浮动视窗。
在位于屏幕顶端的主菜单栏中选择window/new view可以新建浮动视窗,这一功能和结构可以在layout preferences(布局设定)中。
3、在视窗显示图像显示产看工具有几种方法在显示窗显示工具的输出图像。
当工具模块左上方的小点亮的时候,工具的输出图像将在视窗中显示。
点击工具模块左方的两个小圆点,可以决定工具的输出图像在哪一个视窗中显示。
以拖放方式显示图像自流程图中拖放显示在流程中点击拖放任何工具到显示窗,将显示被拖放工具的输出效果。
Fusion软件介绍

Fusion介绍一:界面介绍我们也可以设置自己喜欢的界面,拖动分割线就可以上下左右移动了,也可以通过“视图控制按钮”来进行。
热键使用:F4键:切换工作区和其他功能与显示窗口的关系。
F5键:进入节点工作区域flowF6键:进入控制台工作区域ConsoleF7键:进入时间线工作区域timelineF8键:进入动画样条线工作区域spline1、菜单栏介绍:File(文件)、Edit(编辑)、View(视图)、Tools(工具)、Script(脚本)Windows(窗口)、Help(帮助)2、工具架介绍:工具架是菜单栏的快捷方式,可以在菜单栏中找到,为了更加快捷而设立,主要由“工具”菜单下的命令组成。
3、时间轴:时间轴主要用来调节时间帧数,拖动黄色的小三角标可以同步渲染时间的长度效果,两边的时间代表总时间长度,内侧的时间代表渲染时间的同步长的。
代表渲染预示开关。
4、属性框:在这里我们可以设置当前的属性参数的各项功能和记录关键帧动画。
5、视图区:合理使用上显示窗口,显示合成面板中的素材原始图像也可以显示合成之后的效果,两个窗口没有什么划分,那个当最终渲染窗口都可以。
显示方法是在你要看到的节点上点击右键在弹出的快捷菜单中点击view on,在其子菜单中可以选择你要显示在那个窗口,当然两个都显示也是可以的;还有一种快速的方法,将你想要显示的节点直接拖拽到视图窗口就可以在窗口中显示了。
双显示区域下方为色彩通道、合成通道、Z通道、路径、遮照控制区和比例关系的控制等。
6、工作区:可以进行各种节点的设置,从头到尾的节点都可以在这里显示出来。
节点可以是输入节点、输出节点、自身的滤镜结点也可以是插件节点。
7、素材管理器:素材管理器主要是为了方便使用而设立的,我们可以将常用的文件放入其中。
它主要分为两部分,一个是我们可以放得文件。
另一个是tools工具。
打开素材管理器的方法有File-〉Bins…;也可以使用快捷键Ctrl+B键打开。
Fusion渲染手册

464
基础篇 第 11 章 影片的输出
2 . 选择菜单命令 T o o l s > O u t p u t > S a v e r ,在当前工具后面添加一个 S a v e r 工具。
11.1.2 被动方式添加
被动方式添加是指在当前工具的后面添加一个 Saver 工具后,将 Saver 工具设为渲染输 出的终端,它只接收输入节点传来的数据,然后根据当前 Saver 工具控制面板中设置,使用 不同的文件名和格式进行最终输出。
11.2.2 Audio(音频)标签面板
Saver 工具除了对流程渲染输出外,还可以用来进行音频抓轨,以便为创作的影片配音, 每个 S a v e r 工具只支持一个音频文件的导入,D i g i t a l F u s i o n 导入的音频文件仅仅能够在时间 线上用来与效果对齐,并不能进行音量和其他调整。
输出标签面板用于设置影片的输出选项,包括输出模式、3:2 下拉法的相位设置,以及 Alpha 通道的存储模式等。
468
基础篇 第 11 章 影片的输出
Exp ort Mo de(输出模式) 单击 E x p o r t M o d e 列表,从中选择 3 : 2 P u l l d o w n 选项,能够使用 3 : 2 下拉法对影片进行输 出,可以将 24 帧的电影胶片素转换成 30 帧的视频素材,系统默认输出模式为 Normal,表示 使用影片流程中的原来设置对影片进行输出。 First Frame(首帧) 当使用 3:2 下拉法输出影片时,首帧列表用以指定 3:2 下拉法中的起始帧,也就是所谓 的 相 位 , 共 有 五 个 选 项 可 供 选 取 , 它 们 分 别 是 A A ( W W S S W )、 B B ( W S S W W )、 B C ( S S W W W )、 CD( SWWWS) 和 DD( WWWSS)。 关于 3:2 下拉法的详细介绍请见“素材的组织和管理”一章。 Save Alpha To Color(将 Alpha 信息保存到颜色通道) 选中 Sa ve A lp ha T o Co lo r 选项时,会将影片的 A lp ha 透明信息保存在图像的 R GB 颜色 通道内,采用这种方法得到的 A l p h a 通道被称为带有背景色的 A l p h a 通道或 P r e m u l t i p l y (预 乘)类型的 Alpha 通道。
FusionCharts图表控件中文版使用手册资料
FusionCharts图表控件中文版使用手册根据网上资料编辑以及个人经验并汇总前言 (3)先谈谈我对FUSIONCHARTS的看法: (3)一、构成FUSION C HARTS的三要素:SWF、DATA.XML、承载图表的载体 (3)二、对于我们还未使用的功能:图表转换成图片或者PDF导出、热点链接 (3)三、重点 (4)FUSIONCHARTS的基本知识部分: (4)一、SWF动画文件 (4)二、XML数据文件 (4)三、HTML(当然也可以使用JSP)嵌入CHARTS文件 (5)四、结合JAVASCRIPT 的应用: (5)五、热点链接:LINK=’’ (5)六、图表数据导出 (6)七、图表导出为PDF或者图片(JPEG和PNG)形式 (6)八、中文编码解决方法: (7)附注FUSION C HARTS详细属性: (7)1、边框及整个背景的属性: (8)2、图表背景属性: (8)3、外部引入LOGO: (9)4、图表名称和轴属性: (9)5、data plot属性 (9)6、数据横纵轴属性 (10)7、图表上的数据显示 (10)8、图表调色板 (10)9、横轴坐标最大值、最小值属性 (10)10、图表内部的div线相关属性 (11)11、图表内部垂直div线的相关属性 (11)12、Zero plan相关属性 (11)13、Anchors相关属性(针对线图) (11)14、tool-tip 属性 (11)15、padding属性 (12)16、数据格式相关属性 (12)17、legend相关属性 (12)18、3D图表属性 (13)19、自定义菜单属性 (13)20、趋势线: (13)21、Styles属性:(eg)定义自定义效果属性,然后在一个对象上进行使用。
(14)按照编程xml构造结构分:(只列举出了几种主要属性,主要用于xmlBuiler) (16)前言先谈谈我对fusionCharts的看法:一、构成fusionCharts的三要素:swf、data.xml、承载图表的载体1、Swf:按照你所设计的图表类型加载相应的.swf文件到你的工程即可(eg:若你想生成一张二维柱状图,那么在你的工程里就必须包含Column2D.swf文件)2、Data.xml:方法一:直接用data.jsp文件替代data.xml文件,写法格式同xml。
达芬奇FUSION表达式大全
达芬奇FUSION表达式大全中文为机翻,仅供参考。
原文地址 /mrjholt/expressions-484626视频编辑和动态图形中的表达世界开辟了一个充满可能性的世界。
在本文中,我将把我在DaVinci Resolve 中发现和试验过的表达式汇总在一起。
这份清单绝不是完整的,而是一份工作文件,我会一次又一次地回来。
当我试验一个表达式时,我养成了将一个文本节点放入合成中并将该表达式添加到样式文本表达式输入中的习惯。
这使我能够以可读格式查看表达式的输出。
然后我可以调整表达式以获得我想要的结果。
另一个提示:在重命名节点之前首先使用表达式,因为重命名节点将更新表达式。
--在简单表达式中放置“ ”将忽略右边的字符。
就像在“ GetPrefs("Comp.FrameFormat.Rate") -- Returns TL FPS”中一样,这是添加提醒的好方法。
带有注释的表达式列表。
没有特别的顺序。
DaVinci Resolve基础time这将返回当前帧。
(在“角度”参数上使用逆时针旋转对象)time-1返回前一帧的值。
(time- n) ( n = 前一帧数计数,因此time-10将是从当前时间回溯 10 帧)-time返回当前帧的负值。
(使用“角度”参数顺时针旋转对象)math.floor(3.5) 向负取整(就是向左取整),3.5取整话就是3或者4。
往左是负往右是正。
3和4两个数是3在左边所以取3。
如果是-3.5,那么-4是在左边,所以取的是-4math.ceil(3.5)向正取整(就是向右取整),3.5取整话就是3或者4。
往左是负往右是正。
3和4两个数4在右边所以取4 math.modf(-3.5)向0取整。
取两个值。
一个整型值,一个浮点值。
返回值为-3和-0.5用在表达式上会取前面一个值也就是-3用在FUSION的表达式上可以不用写math.)abs 将负数转换为正数time/600返回当前帧除以 600(可用于控制速度,数字越大越慢)time*600返回当前帧乘以600(可用于控制速度,数字越大越快)sin(time) 这导致从 -1 到 1 的 14 位小数ceil(sin(time)) 这导致在 2 帧内从 0 到 +1 的进展,因为 ceil 将小数点向上舍入。
Fusion 用户手册说明书
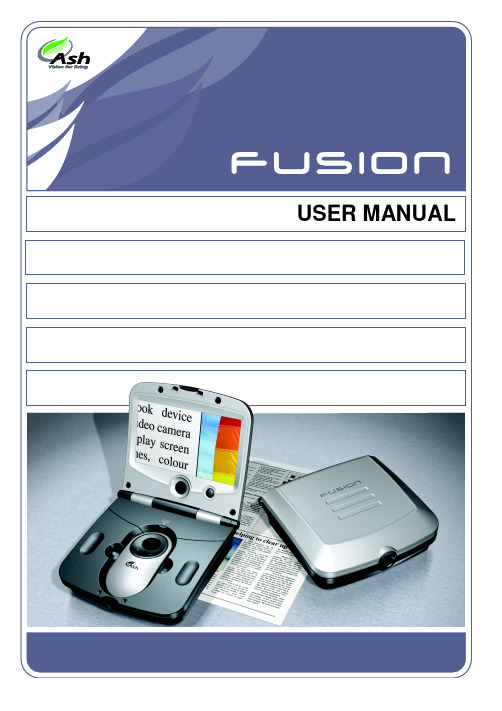
I mportant Instructions for UseThe following instructions and warnings must be observed:•Remove Fusion and its power supply adapter from the carry case during use.•Use only the power supply adapter provided. •Do not use Fusion in a bathroom, near water orother damp conditions.•Do not touch or place anything into the opening in the mouse base.•Do not open Fusion -there are no user serviceable parts inside and opening it will invalidate yourwarranty.•Do not dispose of Fusion by fire. It should berecycled or disposed of in accordance with localordinances.Page 1Table of Contents Installation (3)Mouse Camera (5)Mouse Controls (6)Main Unit Controls (8)Menu (8)Main Menu (10)Display Settings Menu (10)Options Menu (11)Toggle on/off functions Menu (12)Mouse button functions Menu (12)Writing with Fusion (13)Battery (14)Maintenance (16)Technical Description (16)Warranty (17)Page 2InstallationThe Fusion is supplied the following components: o Main unit incorporating the mouse camerao Power supply adapter/chargero Mains cableo Carry caseo Cleaning clothWhen setting up, it is important to choose your workplace carefully to avoid an uncomfortable or awkward position. You should not have to raise your arm to use the mouse; your wrist should be on the resting on the surface. The display should be below•Remove the Fusion main unit from its case and place on the work surface.•Flip open the lid by pressing on the front latch. •Power up the Fusion by pressing the power button, i.e. the right-most button on the frontthe magnified image on the screen. The base of the main unit is fitted with rollers to allow the entire unit to glide easily over what you want to read. Note: the camera “sees” beneath the scroll zoom wheel, bear this in mind when locating what you want to read.Page 4Mouse CameraFusion is great for reading something in a hurry; flip up the lid, turn it on, and off you go. However, for extended reading you will find it easier to use the mouse outside the main unit. To remove the mouse, flip open the cable housing cover, lift out the mouse and unwind the cable.You will find that the mouse is much lighter and more agile, allowing you to get into the binding of books or reading in awkward places.When replacing the mouse, lift the cable housing cover, drop it back into its holder, wind up the cable and close the cover again.Page 5Mouse ControlsScroll-Zoom wheel: The rubberized wheel on the mouse controls the magnification of the camera. Rotating the wheel forward increases the magnification; backwards decreases it. Overview: Rotate the scroll-zoom wheel fully backwards and at the end of the travel you will feel a small click as the camera goes into overview mode. This changes the camera’s focus to allow you to raise the camera above the page and get an overview of where you are reading, or read into awkward places, to write using the mouse or to view objects that are not flat. The magnification level cannot be altered in overview mode.Don’t forget to rotate the scroll-zoom wheel forwards slightly when you return to reading or the image will be out of focus.Buttons: The mouse has two buttons on it, located on the grey ring around the scroll zoom control. The right button controls the display mode; clicking this button will switch between full-color mode, negative and positive reading modes.Page 6•Full-color mode for viewing photographs, images, etc.•Positive mode, an enhanced reading mode where the foreground “ink” is darker than thebackground “paper”.•Negative mode, an enhanced reading mode where the foreground “ink” is brighter than thebackground “paper”.The left button can be programmed to perform a choice of tasks (see “Mouse button functions menu” on page 12).Pressing both buttons together will bring upthe battery symbol indicating the state ofcharge of the battery.Main Unit ControlsPower Button: Press to power-on the unit. Press again to power off. The unit will also be powered off by closing the display lid.The last used settings are stored at power off and are restored when the unit is switched on again.Rotary Knob: The central control knob can be rotated freely in both directions and pressed. Normally it controls the image brightness.MenuPress and hold the rotary knob for three seconds to access the menu. By rotating the knob, you can navigate through the menu, pressing to accept an option.An overview of the menu system appears overleaf. Each sub-menu is explained in the subsequent sections.All sub-menus have an exit icon,orMain MenuPage 9Main MenuOpens Display Settings menu to alter theimage brightness, contrast, etc.Opens the Toggle Function menu to switch onor off various options.Opens the Options menu to set, reset and viewvarious options.Color select. This function will change the“ink” and “paper” colors on the display.Turning the rotary knob clockwise will change the ink; counter-clockwise will change the paper color. The on-screen-display will illustrate an example of your selection; simply press to apply the change. The colors will apply only in the high contrast reading modes, not in the full color mode. Display Settings MenuAll options below bring up a scale on the bottom of the screen to allow adjustment of the particular attribute. Each setting is unique to the mode and camera currently being displayed and will be used when that mode and camera are displayed again. ThePage 10exception to this rule is the backlight level, which is common to all modes.Reset to Factory Defaults. You can restoresettings to a known set of values that produce an image. All previous settings are replaced with the factory default values.Page 11Toggle on/off functions MenuSounds on/off. All sounds (except lowbattery alarms) will be silenced.Battery status indicator on/off. This can alsobe done by pressing both mouse buttonstogether.Mouse button functions MenuThis menu allows you to set the function for the left mouse button.•When using the mouse for writing, it is best to use the full color mode.BatteryThe battery will power the unit for around 3 hours depending on the backlight brightness. So, to extend battery time, use the lowest backlight level you can comfortably read with.A full recharge takes approximately 4hours. Theduring normal use with the power cable attached. The battery cannot “overcharge” and does not have to be fully discharged before recharging.Do not dispose of the battery in a fire or use above 40°C (100°F). Do not disassemble the battery. If the battery is overheated it can release lithium metal which is highly reactive; this could cause a fire or, in extreme circumstances, cause the battery to explode.Page 15MaintenanceWhen Fusion becomes dirty it can be cleaned with a damp cloth and mild detergent. Do not use solvents or abrasive cleaning agents as they can mark the display area. If dust appears on the image use a lens cleaning cloth supplied to clean the mirror of the mouse camera. When cleaning the mirror, be very gentle as the silver surface can scratch very easily. Technical DescriptionThe Fusion unit should not be opened there are no user serviceable parts inside. Refer servicing to Qualified Persons only.Size, Weight 175 x 188 x 96mm, 1.1 kg (6.9”x 7.4”x3.8”, 4 lb11 oz)Power consumption: 15W operating, 35W recharging and operating. Voltage: 100-240V AC, 50/60Hz.Input to Fusion: 12V dc center positive 5ABattery: Custom Li-Ion rechargeable batteries.Typical battery life is 3 hours but will varydepending on the backlight brightness.Screen: High brightness 7” (17.8cm) diagonal TFT display. Magnification 7x - 17x continuous zoom. Overview mode: 1x -10x depending on distance of object Temperature: Storage: -10°C to +40°C. (15°F to 100°F)Operating: +5°C to +35°C (40°F to 90°F)As we strive to constantly improve our products, this information is subject to change without notice.Page 16WarrantyAsh Technologies warrants the equipment, when purchased new, to be free from defects in material and workmanship and will repair or replace at Ash Technologies' discretion, any equipment which exhibits such defects, provided that the equipment has been operated under the proper conditions of installation and has not been tampered with by any persons not authorized by Ash Technologies or its agents and that it is solely serviced by Ash Technologies or its agents. This warranty shall be voided in the event of damage or abuse to the unit caused, in the opinion of Ash Technologies or its agents, by general wear and tear, abuse, neglect, failure to observe stated precautions or by dropping the unit.Batteries and backlighting are warranted for failure within a period of one year. Pixel failures, cracks, scratches or similar damage to the display are specifically excluded from warranty. Non-electrical accessories are specifically excluded from warranty.In no event shall Ash Technologies, or its agents, be liable for special, indirect, incidental or consequential damages; the original user's remedies being limited to repair or replacement.Ash Technologies makes no other or further warranty, express or implied, including and warranty of fitness for a specific purpose or warranty of merchantability.This warranty is valid for a period of TWO YEARS effective from the date of delivery to the customer.Depending on the country of sale, the warranty conditions may differ.Contact your distributor for details.For warranty claims or service during or after warranty period please contact your distributor.Page 17DECLARATION OF CONFORMITYWe, Ash Technologies Ltd., declare under our sole responsibility that this product, Fusion, of the brand Ash Technologies to which this declaration relates, is in conformity with the following standards or other normative documents:EN 60601-1 Medical Electrical Equipment -SafetyEN 60601-1-2:2001 Medical Electrical Equipment – Electromagnetic Compatibility Following the provisions of EMC directive 89/336/EEC and Low Voltage directive 73/23/EEC and the provisions of 93/42/EEC Medical electrical equipment directive.Alan JohnstonEngineering DirectorAsh Technologies Ltd, Naas, Ireland.2nd May 2006Page 18Ash Technologies Ltd. +353-45-88 22 12B5, M7 Business Park, +353-45-88 22 14 Naas, Ireland. email:*************** Made in Ireland web: www.ashtech.ie © Ash Technologies Limited 2006Fusion User Manual English Rev CPage 19。
DigitalFusion中文帮助流程编辑器

D i g i t a l F u s i o n中文帮助流程编辑器(总34页)--本页仅作为文档封面,使用时请直接删除即可----内页可以根据需求调整合适字体及大小--流程编辑器1、引言2、查看、缩放以及拉动流程图3、右键扩展菜单4、添加工具5、联结、分离工具6、插入工具7、置换工具8、删除工具9、选择工具10、移动工具、组织流程图11、群组12、以图片方式显示流程图块13、查看工具14、附加显示信息和状态栏15、复制、粘贴工具16、流程伸缩菜单17、工具项伸缩菜单18、工具项颜色识别以及标识1、引言下图中从左到右所显示的就是flow editor即我们所说的流程编辑(节点编辑器),它是DF的主要工作区。
在这个区域你可以一目了然的看到你的工作项的结构。
每一个工具以矩形方块的方式显示,它们以类似流水线的方式告诉你一个合成项是经过了怎样的过程处理加工而成。
这一工作方式为将所需工具联结在一起提供了极大的灵活性,通过它,你能够将一个工具以分支的方式输出到不同的流水线中,可以将整个工作项分成几个组还能够观察一个或几个指甲大小的工具图像和输出项。
以下图解展示了一个简单的流程,其中包括将素材从磁盘中导入后联结到resize工具(定义输出尺寸大小),最后连接到存储工具以便渲染输出到磁盘。
下图展示了一个比较复杂的流程,它包含了多层的素材和多种分枝实例。
2、查看、改变以及拉动流程图显示流程图在建立一个新的流程时,它是以默认的方式显示的。
由于流程编辑控制器、样条曲线控制器、时间线控制器和注释工具共同存在于工作区域,所以你必须根据需要切换视图。
当软件界面显示的不是流程编辑控制器的时候,你可以通过选择工作区域顶端的“flow”或者在键盘上按“F5”来实现当“flow”被激活时,界面周围的边框显示为黄色。
改变流程工作区域大小要改变流程工作区域的大小,你可以将鼠标放在流程图和显示区域的边缘突起部分,点击并按住鼠标右键上下移动改变显示区和流程区的大小。
Vmware_fusion_5 中文使用手册

VMware Fusion 入门指南 适用于 Mac OS X 的 VMware FusionCN-000933-01您可以在 VMware 网站中找到最新的技术文档,网址为:/cn/products/fusion/support.htmlVMware 网站还提供最新的产品更新。
如果您对本文档有任何意见或建议,请发送至:docfeedback@版权所有 © 200–2012 VMware, Inc. 保留所有权利。
本产品受美国和国际版权法以及知识产权法的保护。
VMware 产品受 /go/patents-cn 上列出的一项或多项专利保护。
VMware 是 VMware, Inc. 在美国和/或其他法律辖区的注册商标或商标。
此处提到的所有其他商标和名称分别是其各自公司的商标。
VMware, Inc.VMware, Inc.3401 Hillview Ave.北京办公室 北京市海淀区科学院南路 2 号Palo Alto, CA 94304融科资讯中心 C 座 8 层上海办公室 上海市徐汇区淮海中路 1010 号嘉华中心 27 楼 2720-2721 室广州办公室 广州市天河北路 233 号中信广场 7401 室VMware, Inc.2VMware Fusion 入门指南73VMware, Inc.目录简介 5虚拟机的定义 5VMware Fusion 有哪些用途? 5VMware Fusion 的系统要求 6安装 VMware Fusion 7升级 VMware Fusion 7启动 VMware Fusion 8启动和运行 9利用“Windows 快捷安装”创建 Windows 虚拟机 9利用 Boot Camp 分区创建虚拟机 10将现有 PC 迁移为虚拟机 11导入现有的 Parallels Desktop 或 Microsoft Virtual PC 7.0 虚拟机 12VMware Fusion 支持的宾客机操作系统 12在虚拟机中使用 Mac 键盘 13挂起虚拟机 14VMware Fusion 资源 144VMware Fusion入门指南VMware, Inc.5 VMware Fusion 入门指南简介利用 VMware Fusion™,您可以在基于英特尔处理器的 Mac 上运行个人电脑 (PC) 应用程序和设备。
达芬奇fusion节点合并-概述说明以及解释

达芬奇fusion节点合并-概述说明以及解释1.引言1.1 概述在影视后期制作中,达芬奇软件是一种非常常见和重要的工具。
它以其强大的色彩校正和特效合成功能而闻名于业界。
然而,虽然达芬奇软件在处理复杂的特效制作方面表现出色,但其节点管理功能相对较弱。
为了解决这个问题,达芬奇公司推出了Fusion节点,这是一个新的节点合并工具。
Fusion节点是一套专门用于合成和特效制作的节点编辑器,它在达芬奇软件中集成,提供了更高级的节点管理和复杂特效合成功能。
本文将对达芬奇软件的Fusion节点合并进行深入研究和探讨。
首先,我们将介绍节点合并的背景和其在影视后期制作中的意义。
紧接着,我们将详细介绍达芬奇软件的Fusion节点,包括其功能和使用方法。
通过本文的阅读,读者将能够更好地了解Fusion节点合并在达芬奇软件中的重要性和应用价值。
此外,我们还将对其优势和应用进行详细分析,并提出对达芬奇软件用户的影响和建议。
接下来,让我们深入探讨节点合并的背景和意义,为读者打开这一全新而充满潜力的领域。
1.2 文章结构本文主要分为引言、正文和结论三个部分来探讨达芬奇软件中的Fusion节点合并。
具体结构安排如下:第一部分为引言,在引言部分我们将概述本文的内容、文章的目的以及整体结构。
首先,我们会简要介绍Fusion节点合并的背景和意义,为读者提供一个对该主题的整体认识。
接着,我们将介绍文章的结构,明确每个章节的主要内容和目标。
第二部分为正文,在正文部分,我们将首先深入探讨节点合并的背景和意义。
我们将解释为什么节点合并在视频编辑和视觉特效中非常重要,并且介绍节点合并的具体应用场景。
随后,我们将详细介绍达芬奇软件中的Fusion节点,包括其功能、特点和用途。
我们将深入探讨Fusion节点在达芬奇软件中的重要性,并阐述其在视频编辑和特效制作中的作用和价值。
第三部分为结论,在结论部分我们将总结Fusion节点合并的优势和应用,强调其在视频编辑和特效制作中的重要性和效果。
VMware Fusion 10.0 使用手册说明书

使用 VMware Fusion 修改日期:2017 年 12 月 21 日VMware Fusion 10.0VMware Fusion Pro 10.0使用 VMware Fusion最新的技术文档可以从VMware 网站下载:https:///cn/您如果对本文档有任何意见或建议,请把反馈信息提交至:**********************版权所有 © 2017 VMware, Inc. 保留所有权利。
版权和商标信息。
VMware, Inc.3401 Hillview Ave.Palo Alto, CA 北京办公室北京市海淀区科学院南路2号融科资讯中心C 座南8层/cn 上海办公室上海市浦东新区浦东南路 999号新梅联合广场 23 楼/cn广州办公室广州市天河北路 233 号中信广场 7401 室/cn目录使用 VMware Fusion61Fusion 入门指南7关于 VMware Fusion7关于 VMware Fusion Pro8Fusion 的系统要求8安装 Fusion9启动 Fusion10使用说明视频10利用 Fusion 在线资源102了解 Fusion11虚拟机和 Fusion 用途11使用 Fusion 界面进行导航和执行操作163配置 Fusion27设置 Fusion 偏好设置27自定 Fusion 屏幕35在 Mac Dock 中保留 Windows 应用程序36将虚拟机应用程序设置为在登录到 Mac 时自动打开36虚拟机软件包的内容36使用虚拟机软件包374创建虚拟机38创建虚拟机38将虚拟机上传到远程服务器50从远程服务器中下载虚拟机50将现有的物理 PC 迁移到虚拟机51导入 Windows 虚拟机55将虚拟机导出为 OVF 格式58安装和使用 VMware Tools59使用 Fusion Pro 克隆虚拟机645使用虚拟机67扫描虚拟机以添加到虚拟机资源库67运行 Fusion 和虚拟机68在 Unity 模式中打开 Windows 应用程序75从应用程序菜单打开 Windows 应用程序76在虚拟机和 Mac 之间移动和共享文件77在 Mac 和 Windows 虚拟机之间共享应用程序79在 Mac Dock 中保留 Windows 应用程序80在开启的虚拟机之间切换81在虚拟机中使用 Mac 输入设备81强制虚拟机抓取键盘和鼠标输入826在 Windows 和 Mac 之间共享文件83支持共享文件夹的客户机操作系统83支持镜像文件夹的客户机操作系统84为虚拟机启用共享文件夹或镜像文件夹84添加或移除镜像文件夹85添加共享文件夹85移除共享文件夹857保护虚拟机87快照87AutoProtect89将虚拟机拷贝到外部介质90在 Mac 上安装 Fusion 的情况下使用 Time Machine918配置虚拟机92Fusion 常规系统设置92将虚拟机设置为随 Fusion 一起启动93设置虚拟处理器和内存93启用默认应用程序95配置键盘与鼠标配置文件96在远程虚拟机上启用 CD/DVD 驱动器97在远程虚拟机上启用软驱98查看服务器或远程虚拟机的状态98配置显示分辨率设置98为虚拟机启用热键101配置独立图形卡管理101为虚拟机设置默认打印机102添加设备103选择启动设备127加密和限制虚拟机127虚拟机兼容性131为虚拟机配置客户机隔离选项132管理高级设置1339使用 vmrun 命令控制虚拟机140使用 vmrun 实用工具141vmrun 命令的语法141在 vmrun 命令中使用鉴定标志142运行 vmrun 命令14310使用 VMware Fusion REST API154使用 VMware Fusion REST API 服务15411升级 Fusion156使用自动更新升级 Fusion156通过下载升级 Fusion157在评估期结束后,将 Fusion 升级到完全许可版本157升级 VMware Tools158卸载 Fusion158强制退出虚拟机进程159使用 VMware Fusion《使用 VMware Fusion》介绍了如何通过 VMware Fusion®来创建、使用和管理虚拟机。
Fusion
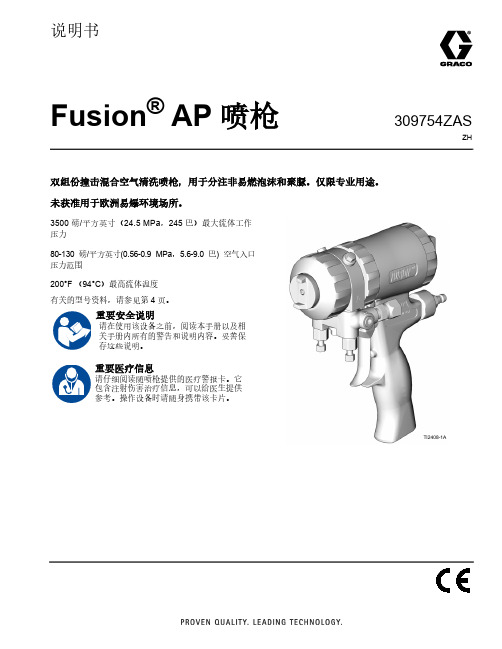
309754ZASZH说明书Fusion ® AP 喷枪双组份撞击混合空气清洗喷枪,用于分注非易燃泡沫和聚脲。
仅限专业用途。
未获准用于欧洲易爆环境场所。
3500 磅/平方英寸(24.5 MPa ,245 巴)最大流体工作压力80-130 磅/平方英寸(0.56-0.9 MPa ,5.6-9.0 巴) 空气入口压力范围200°F (94°C )最高流体温度有关的型号资料,请参见第 4 页。
重要安全说明请在使用该设备之前,阅读本手册以及相关手册内所有的警告和说明内容。
妥善保存这些说明。
重要医疗信息请仔细阅读随喷枪提供的医疗警报卡。
它包含注射伤害治疗信息,可以给医生提供参考。
操作设备时请随身携带该卡片。
TI2408-1A目录相关手册. . . . . . . . . . . . . . . . . . . . . . . . . . . . . . . . . . . 3型号 . . . . . . . . . . . . . . . . . . . . . . . . . . . . . . . . . . . . . . 4圆形喷型喷枪. . . . . . . . . . . . . . . . . . . . . . . . . . . . 4扁平喷型喷枪. . . . . . . . . . . . . . . . . . . . . . . . . . . . 5扁平喷型龙骨墙喷枪. . . . . . . . . . . . . . . . . . . . . . . 6宽大圆形喷型喷枪 . . . . . . . . . . . . . . . . . . . . . . . . 6四软管喷枪. . . . . . . . . . . . . . . . . . . . . . . . . . . . . . 7溅涂喷型喷枪. . . . . . . . . . . . . . . . . . . . . . . . . . . . 7非 1:1 比率喷枪 . . . . . . . . . . . . . . . . . . . . . . . . . . 7警告 . . . . . . . . . . . . . . . . . . . . . . . . . . . . . . . . . . . . . . 8异氰酸酯 (ISO) 的重要信息. . . . . . . . . . . . . . . . . . . . 11异氰酸酯条件. . . . . . . . . . . . . . . . . . . . . . . . . . . 11涂料自燃. . . . . . . . . . . . . . . . . . . . . . . . . . . . . . . 12让 A 组份和 B 组份保持分开 . . . . . . . . . . . . . . . 12异氰酸酯的湿气敏感性. . . . . . . . . . . . . . . . . . . . 12配用 245 fa 发泡剂的泡沫树脂. . . . . . . . . . . . . . 12更换涂料. . . . . . . . . . . . . . . . . . . . . . . . . . . . . . . 12总览 . . . . . . . . . . . . . . . . . . . . . . . . . . . . . . . . . . . . . 13工作原理. . . . . . . . . . . . . . . . . . . . . . . . . . . . . . . 13组件识别. . . . . . . . . . . . . . . . . . . . . . . . . . . . . . . . . . 14安装 . . . . . . . . . . . . . . . . . . . . . . . . . . . . . . . . . . . . . 15接地 . . . . . . . . . . . . . . . . . . . . . . . . . . . . . . . . . . 15设置 . . . . . . . . . . . . . . . . . . . . . . . . . . . . . . . . . . 15可选配置. . . . . . . . . . . . . . . . . . . . . . . . . . . . . . . 17操作 . . . . . . . . . . . . . . . . . . . . . . . . . . . . . . . . . . . . . 19泄压流程. . . . . . . . . . . . . . . . . . . . . . . . . . . . . . . 19活塞保险拴. . . . . . . . . . . . . . . . . . . . . . . . . . . . . 20拧开空气帽. . . . . . . . . . . . . . . . . . . . . . . . . . . . . 20空气管路失压. . . . . . . . . . . . . . . . . . . . . . . . . . . 20冲洗喷枪. . . . . . . . . . . . . . . . . . . . . . . . . . . . . . . 20日常关机. . . . . . . . . . . . . . . . . . . . . . . . . . . . . . . 21维护 . . . . . . . . . . . . . . . . . . . . . . . . . . . . . . . . . . . . . 22预防性维护. . . . . . . . . . . . . . . . . . . . . . . . . . . . . 22所提供的工具配件包. . . . . . . . . . . . . . . . . . . . . . 22清洗喷枪表面. . . . . . . . . . . . . . . . . . . . . . . . . . . 22清理混合室喷嘴 . . . . . . . . . . . . . . . . . . . . . . . . . 23清洗空气帽. . . . . . . . . . . . . . . . . . . . . . . . . . . . . 23清理对撞口. . . . . . . . . . . . . . . . . . . . . . . . . . . . . 23润滑 . . . . . . . . . . . . . . . . . . . . . . . . . . . . . . . . . . 24检查混合室和侧边密封套筒 . . . . . . . . . . . . . . . . 24检查活塞保险拴 . . . . . . . . . . . . . . . . . . . . . . . . . 26检查单向阀. . . . . . . . . . . . . . . . . . . . . . . . . . . . . 26清洗流体歧管. . . . . . . . . . . . . . . . . . . . . . . . . . . 27清理通道. . . . . . . . . . . . . . . . . . . . . . . . . . . . . . .27清洗消声器 . . . . . . . . . . . . . . . . . . . . . . . . . . . . .27检查活塞. . . . . . . . . . . . . . . . . . . . . . . . . . . . . . .28检查空气阀 . . . . . . . . . . . . . . . . . . . . . . . . . . . . .28卸下前端. . . . . . . . . . . . . . . . . . . . . . . . . . . . . . .29安装前端. . . . . . . . . . . . . . . . . . . . . . . . . . . . . . .29故障排除 . . . . . . . . . . . . . . . . . . . . . . . . . . . . . . . . . .30零配件. . . . . . . . . . . . . . . . . . . . . . . . . . . . . . . . . . . .33详图 . . . . . . . . . . . . . . . . . . . . . . . . . . . . . . . . . .35混合室配件包 . . . . . . . . . . . . . . . . . . . . . . . . . . .36扁平喷嘴配件包 . . . . . . . . . . . . . . . . . . . . . . . . .37喷枪修理配件包 . . . . . . . . . . . . . . . . . . . . . . . . .38单向阀滤网配件包. . . . . . . . . . . . . . . . . . . . . . . .38钻头配件包 . . . . . . . . . . . . . . . . . . . . . . . . . . . . .38手柄清理钻头配件包. . . . . . . . . . . . . . . . . . . . . .38钻头配件包 . . . . . . . . . . . . . . . . . . . . . . . . . . . . .39铰刀配件包 . . . . . . . . . . . . . . . . . . . . . . . . . . . . .40附件. . . . . . . . . . . . . . . . . . . . . . . . . . . . . . . . . . . . . .41 Fusion PC 转换配件包 . . . . . . . . . . . . . . . . . . . .41侧边密封配件包 . . . . . . . . . . . . . . . . . . . . . . . . .42侧边密封套筒配件包. . . . . . . . . . . . . . . . . . . . . .42加长喷嘴配件包 . . . . . . . . . . . . . . . . . . . . . . . . .42加长喷嘴密封配件包. . . . . . . . . . . . . . . . . . . . . .42加长喷嘴空气帽配件包 . . . . . . . . . . . . . . . . . . . .42扁平喷型龙骨墙配件包 . . . . . . . . . . . . . . . . . . . .42浇注喷嘴配件包 . . . . . . . . . . . . . . . . . . . . . . . . .43喷枪清理配件包 . . . . . . . . . . . . . . . . . . . . . . . . .43软管适配器配件包. . . . . . . . . . . . . . . . . . . . . . . .43溅涂转换配件包 . . . . . . . . . . . . . . . . . . . . . . . . .43喷枪盖. . . . . . . . . . . . . . . . . . . . . . . . . . . . . . . . .43重新装配喷枪用的润滑剂 . . . . . . . . . . . . . . . . . .43喷枪停机用的润滑脂筒 . . . . . . . . . . . . . . . . . . . .43冲洗歧管. . . . . . . . . . . . . . . . . . . . . . . . . . . . . . .43可调流量帽配件包. . . . . . . . . . . . . . . . . . . . . . . .43溶剂清洗罐配件包. . . . . . . . . . . . . . . . . . . . . . . .44溶剂清洗料桶配件包. . . . . . . . . . . . . . . . . . . . . .44喷嘴清理工具 . . . . . . . . . . . . . . . . . . . . . . . . . . .44循环歧管. . . . . . . . . . . . . . . . . . . . . . . . . . . . . . .44技术参数 . . . . . . . . . . . . . . . . . . . . . . . . . . . . . . . . . .45混合室空气流量 . . . . . . . . . . . . . . . . . . . . . . . . .45 Graco 标准保修 . . . . . . . . . . . . . . . . . . . . . . . . . . . .462309754ZAS相关手册相关手册手册(英语)描述309963Fusion 溶剂清洗配件包309818循环歧管配件包3A5616Fusion 可调流量帽配件包311071龙骨墙泡沫配件包和TP100 配件包3A7314Fusion PC 喷枪说明手册3A7318Fusion PC 转换配件包309754ZAS3型号4309754ZAS型号圆形喷型喷枪圆形喷型混合室的压力和流速*可提供 AW (宽大喷型)混合室附件 请参见第 42 页上的加长喷嘴配件包。
如何使用Fusion360进行CAD和工程设计
如何使用Fusion360进行CAD和工程设计第一章:介绍Fusion360Fusion360是一款由Autodesk开发的全面的3D设计软件,它集成了CAD、CAM和CAE工具,可用于制造业的各个环节。
Fusion360通过云端平台实现多人协作,提供了完整的设计和工程解决方案,并可以与其他软件和硬件集成。
本文将重点介绍如何使用Fusion360进行CAD和工程设计。
第二章:CAD设计基础在使用Fusion360进行CAD设计之前,了解一些基础知识是必要的。
首先,熟悉软件的界面和工具栏,了解不同工具的功能和用法。
其次,了解坐标系和参考平面的概念,这将有助于定位和精确绘制设计。
此外,了解各种绘图命令和绘图对象的属性设置也是非常重要的。
第三章:利用Fusion360进行2D设计Fusion360不仅适用于3D设计,还可以用于2D设计。
在进行2D设计时,可以使用绘图工具创建直线、圆形、弧线等基本图形。
此外,还可以在绘图环境中进行排布和编辑,添加注释和尺寸,并应用不同的草图约束来确保设计的准确性。
第四章:3D建模与装配Fusion360最大的优势之一是其强大的3D建模功能。
可以使用各种建模工具在三维空间中创建几何体,如立方体、圆柱体、圆锥体等。
此外,还可以进行各种操作来修改和编辑建模形状,如拉伸、旋转、移动等。
进行3D装配时,可以将不同的零部件导入并组装起来,通过约束和关系来确保它们之间的正确位置和运动。
第五章:进一步的设计和分析在CAD设计完成后,可以利用Fusion360进行进一步的设计和分析。
例如,可以进行工程分析,如强度和刚度分析,以确保设计的可靠性和性能。
此外,还可以使用Fusion360的虚拟仿真环境进行动力学仿真,预测设计在实际应用中的运动和行为。
第六章:CAM和制造准备Fusion360还提供了CAM工具,可用于将设计转化为可执行的加工路径。
通过选择适当的切削工具、切削条件和切削策略,可以生成高效且准确的加工路径。
fusionconnect-fusion fax-管理员用户指南说明书
Table of ContentsAbout Fusion Fax (3)Logging In (3)Internal Users (4)Creating a New User (4)Profiles (5)Profile Properties – Profile (5)Profile Properties – Cover Sheets (6)Profile Properties – Phone Books (7)Profile Properties – Billing Codes (7)Profile Properties – Fax Options (7)Profile Properties – Security (8)Profile Properties – Notification (8)Profile Table Lookup (8)Cover Sheets (8)Incoming Routing Table (8)Billing Group (9)Phone Number Restrictions (9)Monitor (9)Inbound History (9)Outbound History (9)Outgoing Queue (10)Reports (10)Phone Books (11)About Fusion FaxFusion Fax allows users to manage, send, and receive faxes from an authorized email address or through the Fusion Fax Portal.There are two separate web logins – one for Users and one for Administrators. This guide covers the functionality available to Administrators.Logging InTo log in as an administrator, go to the web site: •Administrator Name: Administrator ID•Password: Administrator Password•Site Name: Site Name IDNote: You must log in as a Site Administrator. If System Administrator is accidently selected, you will not be able to log in to the portal.Once you are logged in, you will be presented with the following screen:Across the top, there are three sections available to administrators: Configuration, Monitor, and Phone Book. Each of these sections will be reviewed in separates section below. Functions within the specific modules are listed down the left hand windowInternal UsersThis section list all user accounts associated with the account. Administrators are able to manage the properties and profile of users.Functions available to the administrator within this menu are:•Add: Add a new User•Remove: Remove User(s)•Switch Profile: change the profile settings between two users•Properties: Change the properties of a User•Change Password: Change the password of a UserNote: The User ID must be selected before the above options will be available. To Switch Profiles, two User IDs must be selectedNote: Users can be filtered using the filter bar. Wildcards (“*”) are required if the match is not exact Creating a New UserTo create a new Fusion Fax user, select from the top of the page. You will then be presented with the following screen:When creating a new user, the administrator is presented following fieldsUser:User:•SMTP Address: user email address•Profile Name: select the profile from the drop down menu. By default, the Basic profile is selected. For more information, please see the Profiles section of this guide.•NT Account: optional fieldPassword:•Auto-generate a password: The system will automatically create a new password for the user •Use this password: Allows the administrator to manually enter a password for the user•Send the password by email: Emails the password directly to the user. Users will receive an automated email from ************************* providing them with their username and password.•User must change password at next logon: The user will be required to change their password the next time they log onto their portal. New passwords created by users must have 8 aminimum characters, including at least 1 upper case letter and 1 numberTime Zone•Time Zone: Allows the administrator to specify the time zone of the userPersonal InformationPersonal information allows the administrator to enter information about the user.Once the information have been entered, select OKProfilesProfiles determine the setting for Users, including cover sheets available, phone books, etc. Administrators have the ability to customize the Profiles available to UsersFunctions within this menu are:•Add: Create a new profile•Add From:•Remove: Delete a profile•Properties: Review the properties of a profileProfile Properties – ProfileProfile Properties include the following sections:•Profile Name: Name of the profile.•Organization Information: This sectionallows the administrator toprepopulate and override userinformation allowing for a consistenttemplate.•Phone Number Information: Thissection overrides the phone numberinformation.•Time Zone: Overrides the User’s TimeZoneProfile Properties – Cover Sheets Administrators can select the cover sheetsavailable to different profiles, in addition to the selecting the default Cover Sheet.•Add: Add a previously created cover sheet to the available cover sheets forthe profile•Remove: Remove the cover sheetfrom the available cover sheets for theprofile•Properties: Properties of the selected cover sheetProfile Properties – Phone Bookso Administrators can select phone books available to different profiles (seePhone Books)Profile Properties – Billing CodesIn this section, administrators can change theprofile properties for:•Sender Billing Codeo Billing Code Requiredo Validate Billing Codeo Disclose Billing Groupo Billing Code Group•Recipient Billing Codeo Billing Code Requiredo Validate Billing Codeo Billing Code Group•System Billing CodeProfile Properties – Fax OptionsThis section allows the administrator to changethe Fax Options for the Profile SettingProfile Properties – SecurityThis section allows the administrator tochange the security options for theProfile SettingThe administrator has several options available, including whether to require cover sheets; and what users can override in terms of company information.NOTE: To allow Users to send faxes directly from an email client, the SMTP message require authentication option must be unchecked.Profile Properties – NotificationThis section determines how notifications are applied for the specified ProfileProfile Table LookupThis section allows the Administrator to look up the different profiles created within the Web Portal Cover SheetsThis section allows the Administrator to manage the cover sheets available for the User profiles. This section contains the following sections:•Add: Add a new cover sheet.o NOTE: see Fusion Cover Sheet Editor Guide for details on creating and editing cover sheets.•Remove: Delete selected cover sheet(s).•Save As: Create a copy of a current cover sheet•Update: Maintain the same name for a selected cover sheet from an updated .cse. file•Rename: Change the name of a selected cover sheetIncoming Routing TableThe incoming routing table determines where new faxes will be sent when they arrive. When selecting this tab, you will see the DID associated with your FusionFax account. To change the properties of the routing, select the DID followed by Propertiessend emails to different email addresseswhen inbound faxes are received. To addanother email address, select Add. Enterthe email information in the Filter Fieldand select Add to List. To Remove a user,select the user and then select Remove.Once the users have been selected, clickon Test Routing Table. Enter the DID andselect Test. The results of where theinbound faxes will be routed are thenlisted.Billing GroupPhone Number RestrictionsThis section allows administrators to set restrictions on fax usage (i.e. No international, etc.) MonitorInbound HistoryThe Inbound History folder provides an overview of all inbound faxes received. Individual faxes can beselected to view details, including:•Fax Properties:•Routed To:•Event Log:Outbound HistoryThe Inbound History folder provides an overview of all inbound faxes received. Individual faxes can be selected to view details, including:•Fax Properties:•Feedback Sent To:•Event Log:Outgoing QueueThis section shows faxes are currently being transmitted. ReportsPhone BooksA Web Phone Book stores contact information about recipients to whom you are addressing faxes. This information can include a contact’s name, fax number, address, company and business address, etc. There are two types of Phone Books:•Public (corporate) Phone Book: assigned by administrators through the profile properties (accessible to all users having this profile).• Personal (private) Phone Book: accessible and manageable only by Users within their Web Portal.Once a new phone book has been selected, contact information can be entered. The default information is:•Display Name: Required field•Company:•Fax: Required fieldAdditional details can be entered by clicking Show Details. The Additional details section has two tabs: •Generalo Display Name: Required Fieldo Phone:o Pager:o Cellular:o Fax: Required Fieldo E-Mail:•Organizational Informationo Job Title:o Company:o Street:o City:o State/Province:o ZIP/Postal Code:o Country:o Billing Code:o Sub Billing Code:Contacts can also be imported from several different contact management programs through the Import Contacts button.。
FUSION 简易中文说明

软件下载地址:/fusion_Install.exe安装步骤如下双击“fusion_DMA_Install.exe”,会打开一个对话框,如下点击确定,会出现第二个对话框,如下图单击解压,在出现的对话框中依次点击确定,NEXT, 即可完成安装。
在软件安装和使用中如遇到问题,请联系我们,谢谢!Blackwood Pro ™ User ’s Manual一. Connection 连接登陆在User Name 里输入用户名后点击“connect ”输入你的用户名和密码,按“OK ”. 在成功登陆后,显示的信息就是控制面版。
退出Blackwood, 点击‘Disconnect ’二:Open windows 打开窗口单击主窗口右上的’open windows’’下箭头是的( ) 就可以打开所有的选项。
三:Defaults 默认设置在主窗口顶部下,单击打开‘Settings’对话框,单击‘Defaults’标签.“Size”下的Lot就是指默认的股数。
1. Size:•Lot Size –设置默认股数.•Max Lot –设置大的默认股数.•Reserve –设置隐藏的默认股数.2. Increment Values:•Size•Small –是指在Order窗口按小的上下箭头股数的数量. 例如: 当把这个数值设为100时,单击小箭头向上或向下,股数则会增加或减少100股.•Big –同上’Small’,•Custom –反应’Market maker’窗口里合计的变化. 例如: 当数值设置为0.10, 单击增加或减少时则为0.10 shares.•Price•Small –同上’Size’.•Big –同上’Size’•Custom –同上’Size’四.Keyboard Setting 键盘设置Display Category下有六个选项:Order Execution ,Quick Lot ,Venue Selection ,Order Type ,Preferences,Open Orders。
- 1、下载文档前请自行甄别文档内容的完整性,平台不提供额外的编辑、内容补充、找答案等附加服务。
- 2、"仅部分预览"的文档,不可在线预览部分如存在完整性等问题,可反馈申请退款(可完整预览的文档不适用该条件!)。
- 3、如文档侵犯您的权益,请联系客服反馈,我们会尽快为您处理(人工客服工作时间:9:00-18:30)。
1、引言2、工具控制调节区3、通用参数控制4、典型调节方式5、动画操作1、引言在DF中,每一个添加到工作流程中的工具都可以根据其自身的特点设置参数或进行调解。
当在工作流程中添加了工具后,它的调节项会出现在屏幕右边的工具调节控制区。
每个控制窗口都有一个卷标;上面显示了工具的名称、一个可供缩小和展开这个控制窗口的按钮(小三角形标志)。
除此之外,每个工具还有两个附加控制项,遮罩控制项(Masks)和修改控制项(Modifiers).这些附属控制项在其自身的窗口可以进行调解设置。
工具控制窗只有在相应的工具被选择的时候才会显示。
2、工具控制调节区最大化调节控制区在控制区的顶端的左面有两个分开的小箭头。
点击这个按钮可以最大化、最小化控制区。
察看工具的参数调节窗双击流程中的工具模块可以察看工具的调节控制窗,点击控制窗中的卷标也可以。
隐藏控制窗隐藏控制窗后,即使点击工具也不会在控制窗口中显示。
方法:在工具或者卷标上点击右键,在随后出现的扩展菜单上去掉“Modes/Show Controls”选择。
要恢复显示,在相同的位置勾选即可。
控制区显示偏好设定默认情况下,DF仅显示被激活工具的控制项。
其他(未被激活)工具的控制项在被激活前一直被隐藏。
这种方式由两个相关设置选项控制,一个是“Auto Control Close”,另一个是“Auto Control Hide”.选择主菜单的File/Perferences,打开General Perferences可以找到以上两个选项。
通过控制卷标选择工具无论什么时候点击某一个工具的卷标,在流程图中对应的工具被激活、并且在调节控制区将显示每一个该工具的调节参数。
这和在流程图中激活工具的结果一样。
工具激活后,它的控制卷标显示为黄色。
通过控制卷标实现在显示窗显示和预演在工具卷标上点击鼠标并将其拖放到显示窗中可以显示工具效果。
按住ALT键,将工具卷标拖放到显示窗中可以进行效果预演。
通过控制卷标查看工具的样条曲线将控制卷标拖放到样条曲线编辑器(Spline Editor), 可以查看所有与该工具相关联的动画参数。
此时该工具的样条曲线被自动选择并呈可编辑状态。
工具重命名将鼠标指针放在卷标上,点击鼠标右键选择扩展菜单中的Rename. 也可以按功能键F2对当前处于激活状态的工具重命名。
3、常用调节控制栏尽管每个工具都有自己特定的参数控制调节,但实际上有些参数调节适用于任何工具。
这些控制项被收集到了几乎所有的工具参数调节栏中。
包含这些通用工具的标志是一个放射性标志,当里面含有工具的时候它是被点亮。
一下工具在这个项目栏中可以找到。
Blend(混合)所有的工具都有这个控制功能(除了loader/creator工具外)。
使用这个控制选项可以对输入到这个工具的未被修改的和修改完成图像进行融合。
当blend值为0。
0时,从这个工具输出的图像和输入到这个工具的图像相同。
Process When Blend Is 0.0 (blend为0。
0时处理)即使工具输入值为0时仍然进行处理。
Apply Mask Inverted(反向遮罩覆盖)这一功能选项可以使这个工具的遮罩通道反向。
这里说指的遮罩通道是指应用到这个工具上的说有的通道的总和。
Multiply By Mask使用这一选项能够使图像遮罩的RGB值增加,这将导致所有没有包括在这招范围的图像像素被设置成黑色。
Object And Material ID Masking(物体和材质属性遮罩)Use object/use material(checkboxes_使用者与素材相互作用的方法)某些3D软件生成的文件格式包含附加的通道。
尤其是RLA和RPF文件格式支持物体和材质属性通道,这个通道能被当作遮罩一样使用以得到相应的效果。
如果当前使用的是这种文件,这种方式(checkboxes)_use object/use meterial决定了文件的任何通道都能被使用。
这种特定的材质属性或物体属性还受到以下控制项的影响。
Pick (For Use Object/Use Material)(挑选)这个控制选项决定使用哪一个材质或物体属性来建立遮罩。
使用这个Pick键,就像使用拾色器(color picker),在显示窗抓取图像的材质和物体。
这些图像或序列文件必须是经过3D软件生成过并包含了通道的才能被使用。
Correct Edges(边缘校正)这一按钮通常被用来处理多层图像中,物体的重叠部分。
当这个控制选项被勾选,图像中重叠的通道将被用来改善工具和使用了辅助通道的遮罩的边缘效果。
关掉这个控制项,重叠的通道被忽略。
“Auxiliary Channels”中有更多的这方面的信息。
Motion Blur(动态模糊)这个选项关系到工具的动态模糊功能。
打开(勾选)这一选项,工具将产生与摄像机快门相类似的运动模糊效果。
Quality(质量)这一选项决定了模糊的取样数值。
设置为2表示DF在一个运动物体的任一边建立两个取样。
大的数值将产生平滑的运动模糊但会耗费更长的生成时间。
Shutter Angle(快门角度)控制摄像机快门角度产生动态模糊效果。
数值越大,效果越明显但也要耗费更多的渲染时间。
一个360度的数值相当于向整个框架打开快门。
高的数值会产生有趣的效果。
Center Bias(模糊中心偏移)更改这一选项将使得运动模糊中心偏移。
这样可以产生运动轨迹效果。
Sample Spread(扩张取样)调解中心取样和第二取样点之间的范围。
Information Tab(信息栏)这个功能相当实用。
特别是当操作者在流程中工作的时候,你可以在这里面输入文本信息进行注释。
当你为一个工具进行了相关的注释说明,一个小小的蓝色标记将显示在控制栏卷标上。
要察看注释,只需将鼠标放在工具模块上即可。
祥见《loader and creator tools》章节4、典型调节控制方式尽管少数工具使用特定的界面元素,但大多数的参数还是通过以下的方式来调节。
这也是DF中常用的、最典型的控制方式。
Slider Controls(滚动控制)滚动调节通常在系统默认的范围内调节数值,当最大获最小默认值不能满足要求时,可以手动输入。
Thumbwheel(滑轮)滑轮控制调节与滚动控制大致相同,但是它不存在最大值和最小值,而且它还可以通过点击滑轮两端的箭头按钮进行微调。
也可以手动输入。
滑轮控制被用来调节角度参数,除此之外没有其他用处。
Range Controls(范围控制)这一控制方式被用来确定数值范围。
拖动控制轨两端的手柄可以设置起始值和终止值,拖动控制轨的中部可以同时调节起始值和终止值。
Checkboxes(互动或关联控制)这一控制功能决定哪一个选项处于被选择调节状态,与DF中的其他控制动作一样,它也可以形成动画。
由于它只能进行开关的动画设置,所以要使这一动画过程平滑就应该在样条曲线编辑控制器中进行调解。
Drop-Down Lists(下拉菜单)下拉菜单通常被用来选择一个设置选项。
这一功能与关联控制(checkboxes)有很多相像的地方。
菜单中的每一选项都有不同的作用。
Color Wheel And Picker(色彩调节轮和拾色器)拾色器The Color Wheel(色彩调节轮)Picking Colors From An Image(从图像中拾色)点击Pick钮,鼠标指针会变成吸管工具,然后移动吸管到图像中,这时取样框的颜色会随着吸管的移动而改变。
当当前的颜色是你想要的时候,松开鼠标即可。
Gradients(渐变)这一控制项用来设置颜色从起始色到结束色的颜色渐变,在渐变栏中,还可以设置关键色。
在任何一个渐变参数选项上点击右键会出现扩展菜单。
菜单中的选项包括动画、与另一个渐变建立连接等等。
还有一个modifier(修改一个特定的渐变),这一功能主要是通过从图像中取样来建立一个自定义的渐变。
典型的渐变控制方式可以选择Linear, Reflect, Square, Cross, Radial and Angle进行渐变设置。
起始(start)和结束( end ) 选项起始和结束控制选项分布在两行,每一行包含x轴和y轴控制。
这一选项决定了从图像的什么地方开始和结束渐变效果。
渐变颜色通过移动条状渐变栏的两个三角形控制钮,可以改变渐变的颜色。
默认情况下只有两种颜色可供选择。
在条形渐变控制栏中还可以设立多个三角形控制钮,每一个都可以定义颜色(类似于关键帧的作用),从而形成独具特色的渐变效果。
要去掉这些添加的按钮,可以直接拖出渐变栏或激活要选择的关键色(三角形按钮),点击渐变栏下面的X钮。
Gradient Interpolation Method(渐变串改方式)这一按钮决定了两个关键色之间的色彩空间。
Offset(补偿/抵消)这项工具将参照起始点和结束点的标记,对渐变色彩进行补偿或抵消。
它绝大多数情况要和repeat选项以及ping-pong选项配合使用。
Once / Repeat / Ping-Pong当offset调节滚轮在渐变起始点和结束点进行调节时,这三个选项被用来设置渐变形式。
1x1, 2x2, 3x3, 4x4, 5x5当渐变色边缘可见或当渐变色被设置了动画时,这五个选项用来设置隐藏像素的精度。
LUT- Look Up Tables(lut察看栏)基于样条曲线方式进行色彩控制,它不但存在于loader和saver工具中,而且存在于色彩曲线,阴影、增益、热点和粒子工具中。
样条曲线可以通过控制手柄调节成特定的形状。
用拖拽的方法可以移动关键点。
点击样条曲线的空置部位,一个新的点会被填加进样条曲线,通过调节,这些曲线可以呈平滑的曲线或直线。
祥见色彩校正章节。
5、动画控制在DF中,将控制操作形成动画相当简单。
这些复杂的控制调节动画不但可以通过使用样条曲线控制器进行修改,而且还可以用表达式来操作。
设置一个控制动画将鼠标指针放在调节工具上,点击右键并从扩展菜单中选择animate。
为控制动画设置关键帧将鼠标指针放置在调节工具上,点击右键并从扩展菜单中选择set a key.取消动画操作在已设置了动画的调节工具上点击右键,选择removing animation。
将一个控制连接到另一个设置了动画的控制上(connect to)在调节项上点击右键,从扩展菜单中选择你要连接的动画控制。
将一个调节控制连接到另一个静态的控制上(publish)在两个工具中的任何一个没有动画设置的情况下,这种方式经常被用到.使用方法:在一个要发布的工具上点击右键,选择pubilsh,然后连接到另一个要连接的控制项上。
Attaching To Modifiers(粘贴修改/附加的修改方式)通过表达式进行调节,例如,将鼠标放在工具上,点击鼠标的右键、选择modify with,然后修改控制参数。
