SAMSUNG Composite USB Driver v4_34_ReleaseNotes
手机MTP安装失败问题解决
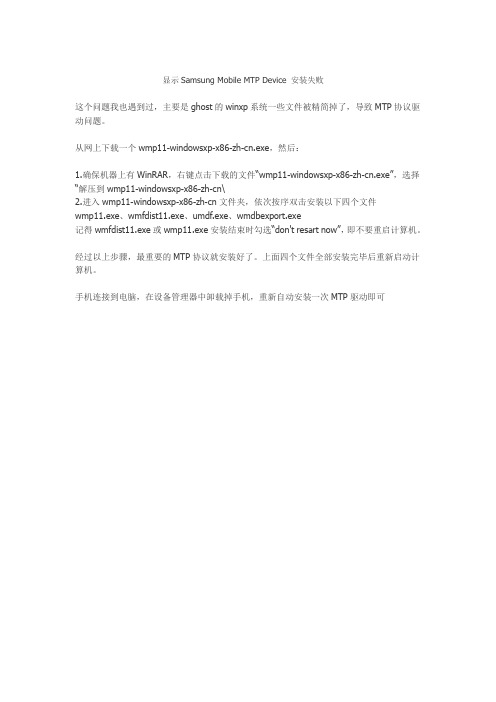
显示Samsung Mobile MTP Device 安装失败
这个问题我也遇到过,主要是ghost的winxp系统一些文件被精简掉了,导致MTP协议驱动问题。
从网上下载一个wmp11-windowsxp-x86-zh-cn.exe,然后:
1.确保机器上有WinRAR,右键点击下载的文件“wmp11-windowsxp-x86-zh-cn.exe”,选择“解压到wmp11-windowsxp-x86-zh-cn\
2.进入wmp11-windowsxp-x86-zh-cn文件夹,依次按序双击安装以下四个文件
wmp11.exe、wmfdist11.exe、umdf.exe、wmdbexport.exe
记得wmfdist11.exe或wmp11.exe安装结束时勾选“don't resart now”,即不要重启计算机。
经过以上步骤,最重要的MTP协议就安装好了。
上面四个文件全部安装完毕后重新启动计算机。
手机连接到电脑,在设备管理器中卸载掉手机,重新自动安装一次MTP驱动即可。
三星 SSD 数据迁移 4.0 用户手册说明书

用户手册版权所有 ©2020三星电子株式会社本用户手册的版权归三星电子所有。
未经授权严格禁止对本资料或其任何部分进行复制、使用或披露,这些行为均违反了版权法。
三星电子保留更改产品、信息和规格的权利,恕不另行通知。
本出版物中提供的材料和信息在出版时被认为是准确且可靠的,但三星电子不保证此处提供的任何材料或信息(无论明示还是暗示)的准确性、完整性或可靠性。
商标和服务标志Samsung徽标是三星电子的商标。
Adobe和 Adobe Acrobat是 Adobe Systems Incorporated的注册商标。
所有其他公司和产品名称可能是其各自公司的商标。
简介Samsung Data Migration软件的设计目的是帮助您迅速、简单、安全地将所有数据从现有的存储设备(如 HD D)迁移到新的 Samsung SSD中。
通过 Samsung Data Migration软件,您可以轻松地将您当前的操作系统、应用程序软件和用户数据迁移到新的 Samsung SSD中。
Samsung Data Migration软件是由 Clonix Co.,Ltd.专为 Samsung Solid State Drive(SSD)的所有者开发和分发的。
注意事项1.在使用本软件克隆源驱动器(如 HDD)的内容时,目标驱动器 (Samsung SSD)上的所有数据将被删除且无法恢复。
因此,如果您希望保留存储在目标驱动器上的任何数据,请提前备份。
2.三星电子对使用本软件造成目标驱动器上的任何数据丢失的情况不承担任何责任,也不负责提供数据恢复服务。
即使克隆失败,源驱动器上存储的数据也不会受到影响。
3.如果您要使用本软件将源驱动器克隆到目标驱动器 (Samsung NVMe SSD),请确保首先安装 Samsung NVMe 驱动程序。
改进功能1.新的型号支持2.克隆兼容性改进系统需求限制1.本软件仅支持用户手册中列出的 Windows操作系统。
I9505ROOT教程
3.双击打开 Odin3_v1.87. 手机如果成功连接电脑ODIN主界面左上方是显示黄色的点击ODIN主界面右边PDA按钮,选取名字是CF-Auto-Root-jflte-jfltexx-gti9505.tar 的文件,
4.之后点start开始刷入
5.ODIN左上角方框读条结束并显示绿色背景的PASS之后,拔掉数据线
最后不行的只能换到第二台电脑上再试
祝亲们一次ROO机状态下进入刷机模式方法如下
方法一 关机状态下 音量下+电源+HOME进入三角感叹号界面之后放手所有按键再单独按一下音量上
方法二 关机状态下 插入我们赠送的挖煤神器就是我们送的那个USB小黑头 成功进入刷机模式是屏幕中间一个小绿人
然后拿掉挖煤神器连上数据线 台式电脑最好插在后面的USB插口 成功率大很
本教程只适用 港版 欧版 亚太版本 I9505 如果你的是I9500或者韩版 日版 美版等其他版本I9505 请不要使用 后果自负
1.安装三星驱动(samsung usb driver)到您的电脑 下载地址如下
/share/link?shareid=225443&uk=3995652982 三星通用驱动下载后直接安装在电脑上 然后重启电脑
出现问题解决方法
1.start开始刷入root 后 没有动静的情况下 就拔掉数据线 手机重进一次刷机模式 换个
USB口再重来
2 连上没反应 肯定是没装驱动 先装驱动再操作提示装了驱动也要再装一次
3 怎么都没法开始就可能是电脑问题了 一是看看是不是你型号的教程 二换数据线 重启电脑
三星 SCX-4100 说明书

本书提供设置机器和安装随机软件所需的信息,有关将机器用作打印机、扫描仪和复印机的全部详细说 明,以及机器的维护和故障排除信息。 此外,它还提供有关使用多功能应用程序的基本说明。Samsung SmarThru 可用于扫描和编辑图像, 以及为复印和发送电子邮件执行扫描操作。
本手册仅供参考。手册中的信息如有变更,恕不另பைடு நூலகம்通知。Samsung Electronics 对因本手册的使用 引起的、或与本手册的使用相关的变更不负任何责任 (无论是直接的还是间接的) 。 © 2004 Samsung Electronics Co., Ltd. 保留所有权利。
HONG KONG INDIA
2862 6001 3030 8282 1600 1100 11
/hk /in
INDONESIA JAPAN MALAYSIA PHILIPPINES SINGAPORE THAILAND
0800-112-8888 0120-327-527 1800-88-9999 1800-10-SAMSUNG (7267864) 1800-SAMSUNG (7267864) 1800-29-3232 02-689-3232
/id /jp /my /ph /sg /th
TAIWAN VIETNAM SOUTH AFRICA U.A.E
0800-329-999 1 800 588 889 0860 7267864 (SAMSUNG) 800SAMSUNG (7267864)
第二章 :
纸张处理
选择打印介质 ............................................................. 2.2 类型、进纸源及容量 ................................................ 2.2 纸张与特殊介质使用原则 .......................................... 2.3 选择出纸位置 ............................................................. 2.4 打印到前出纸盘 (面朝下) ........................................ 2.5 打印到后出纸槽 (面朝上) ........................................ 2.6 向纸盘中装纸 ............................................................. 2.8 使用手动进纸器 ........................................................... 2.9 设置手动进纸器的纸张类型和尺寸 ............................. 2.11
三星复合机错误代码于解决办法

Cover Switch Connector
CN29 Connector 24V1 ˧ No. 2,3,4 Pin 24V enable ˧ No. 28 Pin
ServiceBiblioteka Manual4-31Samsung Electronics
Alignment & Troubleshooting
● Code 01-004
Troubleshooting 4-31 page 4-32 page 4-33 page 4-34 page 4-35 page 4-36 page 4-37 page 4-38 page 4-39 page 4-40 page 4-41 page 4-41 page 4-42 page
4-43 page
Flat
6p Feed/Tray empty
Pickup Solenoid
7p MP empty/MP solenoid
Service Manual
4-32
Samsung Electronics
Alignment & Troubleshooting
● Code 01-005
● Error message Paper jam in tray 1
Error Code 01-000 01-004 01-005 01-006 01-018 01-009 01-010 01-015 01-016 01-017 02-000 02-001 02-006 02-002 02-005 03-000 03-007 03-008 03-009 03-015 04-001 04-002 04-008 08-000 08-001 08-002 08-006 08-003 08-010 08-004 08-006
【参考文档】三星s6怎么连接到电脑-word范文模板 (1页)
【参考文档】三星s6怎么连接到电脑-word范文模板
本文部分内容来自网络整理,本司不为其真实性负责,如有异议或侵权请及时联系,本司将立即删除!
== 本文为word格式,下载后可方便编辑和修改! ==
三星s6怎么连接到电脑
安卓手机想要连接电脑进行传输文件的话,必须得开USB调试模式,三星S6如何USB调试模式?下面我们一起来看看吧!
工具/原料
电脑、S6(SM-G9200)手机、三星专用数据线。
手机连接电脑
1、下载“百度手机助手”;
2、双击“百度手机助手”;
3、点击“快速安装”;
4、助手正在安装,自动安装完成;
5、安装完成后,软件自动打开;
6、用数据线连接电脑和手机,电脑联网的话会自动下载手机驱动,少待片刻手机助手会自动下载三星手机驱动,下载完了打开手机的“USB调试模式”就会连接上电脑的。
XP系统如果没有自动下载驱动的话,请到三星官网下载KIES3(pc 版)并安装。
英特尔外星人M15设备设置和规格说明书

Alienware m15Setup and Specifications Computer Model: Alienware m15Regulatory Model: P79FRegulatory Type: P79F001Notes, cautions, and warningsNOTE: A NOTE indicates important information that helps you make better use of your product.CAUTION: A CAUTION indicates either potential damage to hardware or loss of data and tells you how to avoid the problem.WARNING: A WARNING indicates a potential for property damage, personal injury, or death.© 2018-2019 Dell Inc. or its subsidiaries. All rights reserved. Dell, EMC, and other trademarks are trademarks of Dell Inc. or its subsidiaries. Other trademarks may be trademarks of their respective owners.2019 - 03Rev. A02ContentsSet up your Alienware m15 (5)Create a USB recovery drive for Windows (6)Views of Alienware m15 (7)Right (7)Left (7)Base (8)Display (8)Back (9)Bottom (10)Specifications of Alienware m15 (11)Computer model (11)Dimensions and weight (11)Processors (11)Chipset (11)Operating system (12)Memory (12)Ports and connectors (12)Communications (13)Ethernet (13)Wireless module (13)Audio (13)Storage (14)Keyboard (14)Camera (15)Touchpad (15)Touchpad gestures (15)Power adapter (16)Battery (16)Display (17)Video (17)Computer environment (18)Hybrid power (19)Keyboard shortcuts (20)Alienware Command Center (21)3Getting help and contacting Alienware (22)Self-help resources (22)Contacting Alienware (22)4Set up your Alienware m15NOTE: The images in this document may differ from your computer depending on the configuration you ordered.1 Connect the power adapter and press the power button.2 Create recovery drive for Windows.NOTE: It is recommended to create a recovery drive to troubleshoot and fix problems that may occur withWindows.For more information, see Create a USB recovery drive for Windows.5Create a USB recovery drive for WindowsCreate a recovery drive to troubleshoot and fix problems that may occur with Windows. An empty USB flash drive with a minimum capacity of 16 GB is required to create the recovery drive.NOTE: This process may take up to an hour to complete.NOTE: The following steps may vary depending on the version of Windows installed. Refer to the Microsoft support site for latest instructions.1 Connect the USB flash drive to your computer.2 In Windows search, type Recovery.3 In the search results, click Create a recovery drive.The User Account Control window is displayed.4 Click Y es to continue.The Recovery Drive window is displayed.5 Select Back up system files to the recovery drive and click Next.6 Select the USB flash drive and click Next.A message appears, indicating that all data in the USB flash drive will be deleted.7 Click Create.8 Click Finish.For more information about reinstalling Windows using the USB recovery drive, see the Troubleshooting section of your product's Service Manual at /support/manuals.6Views of Alienware m15Right1USB 3.1 Gen 1 ports (2)Connect peripherals such as external storage devices and printers. Provides data transfer speeds up to 5 Gbps.Left1Security-cable slot (for Noble locks)Connect a security cable to prevent unauthorized movement of your computer.2Network portConnect an Ethernet (RJ45) cable from a router or a broadband modem for network or Internet access.3USB 3.1 Gen 1 port with PowerShareConnect peripherals such as external storage devices and printers.Provides data transfer speeds up to 5 Gbps. PowerShare enables you to charge your USB devices even when yourcomputer is turned off.NOTE: If your computer is turned off or in hibernate state, you must connect the power adapter to charge your devices using the PowerShare port. Y ou must enable this feature in the BIOS setup program.NOTE: Certain USB devices may not charge when the computer is turned off or in sleep state. In such cases,turn on the computer to charge the device.4Headset portConnect headphones or a headset (headphone and microphone combo).7Base1Power button (Alienhead)Press to turn on the computer if it is turned off, in sleep state, or in hibernate state.Press to put the computer in sleep state if it is turned on.Press and hold for 4 seconds to force shut-down the computer.NOTE: Y ou can customize the power-button behavior in Power Options.2Right-click areaPress to right-click.3Left-click areaPress to left-click.4TouchpadMove your finger on the touchpad to move the mouse pointer. Tap to left-click and two finger tap to right-click. Display81Left microphoneProvides digital sound input for audio recording and voice calls.2CameraEnables you to video chat, capture photos, and record videos.3Camera-status lightTurns on when the camera is in use.4Right microphoneProvides digital sound input for audio recording and voice calls.Back1HDMI portConnect to a TV or another HDMI-in enabled device. Provides video and audio output.2Mini DisplayPortConnect to a TV or another DisplayPort-in enabled device. Provides video and audio output.3Thunderbolt 3 (USB Type-C) portSupports USB 3.1 Gen 2, DisplayPort 1.2, Thunderbolt 3 and also enables you to connect to an external display using a display adapter.Provides data transfer rates up to 10 Gbps for USB 3.1 Gen 2 and up to 40 Gbps for Thunderbolt 3.NOTE: A USB Type-C to DisplayPort adapter (sold separately) is required to connect a DisplayPort device.4External graphics portConnect an Alienware Graphics Amplifier to enhance the graphics performance.5Power-adapter portConnect a power adapter to provide power to your computer and charge the battery.9Bottom1Right speakerProvides audio output.2Service Tag labelThe Service Tag is a unique alphanumeric identifier that enables Dell service technicians to identify the hardware components in your computer and access warranty information.3Left speakerProvides audio output.10Specifications of Alienware m15 Computer modelAlienware m15Dimensions and weightTable 1. Dimensions and weightProcessorsTable 2. Processor specificationsChipsetTable 3. Chipset specificationsOperating system•Windows 10 Home (64-bit)•Windows 10 Professional (64-bit) MemoryTable 4. Memory specificationsPorts and connectorsTable 5. External ports and connectors specificationsTable 7. Internal ports and connectors specificationsCommunicationsEthernetTable 8. Ethernet specificationsWireless moduleTable 9. Wireless module specificationsAudioTable 10. Audio specificationsStorageY our computer supports one of the following configurations:•One 2.5-inch hard drives•One M.2 PCIe solid-state drive•One M.2 PCIe solid-state drive and one 2.5-inch hard drive•One M.2 Intel Optane and one 2.5-inch hard drive•Two M.2 PCIe solid-state drivesNOTE: The primary drive of your computer varies depending on the storage configuration. For computers:•with a M.2 drive, the M.2 drive is the primary drive.•without M.2 drive, the 2.5-inch drive is the primary drive.Table 11. Storage specificationsKeyboardTable 12. Keyboard specificationsCameraTable 13. Camera specificationsTouchpadTable 14. Touchpad specificationsTouchpad gesturesFor more information about touchpad gestures for Windows 10, see the Microsoft knowledge base article 4027871 at .Power adapterTable 15. Power adapter specificationsNOTE: Alienware m15 supports Hybrid power feature during heavy loading. For more information, see Hybrid power.BatteryTable 16. Battery specificationsNOTE: Alienware m15 supports Hybrid power feature during heavy loading. For more information, see Hybrid power.DisplayTable 17. Display specificationsVideoTable 18. Discrete graphics specificationsTable 19. Integrated graphics specificationsComputer environmentAirborne contaminant level: G1 as defined by ISA-S71.04-1985 Table 20. Computer environment* Measured using a random vibration spectrum that simulates user environment.† Measured using a 2 ms half-sine pulse when the hard drive is in use.‡ Measured using a 2 ms half-sine pulse when the hard-drive head is in parked position.Hybrid powerThe Hybrid power feature enables your computer to function optimally during the following instances of heavy loading. Examples of heavy loading include:•Graphics and processor-intensive applications and/or gaming•External power loading from devices relying on your computer as a power source such as gaming mice, keyboards, external speakers, and headsetsWhen during instances of heavy loading, system performance is maintained through hybrid power. Hybrid power coordinates the power drawn from the power adapter and battery, allowing power to be drawn from the battery for up to five percent per hour with the power adapter plugged in. This feature is disabled when the battery falls below 20 percent charge.The following table shows the different scenarios and benefits of hybrid power:Table 21. Hybrid power feature descriptionKeyboard shortcutsNOTE: Keyboard characters may differ depending on the keyboard language configuration. Keys used for shortcuts remain the same across all language configurations.NOTE: Y ou can define the primary behavior of the function keys (F1–F12) by changing Function Key Behavior in BIOS setup program.Table 22. List of keyboard shortcutsTable 23. List of Macro keysAlienware Command CenterAlienware Command Center (AWCC) provides a single interface to customize and enhance the gaming experience. The AWCC dashboard displays most recently played or added games, and provides game-specific information, themes, profiles, and access to computer settings. Y ou can quickly access settings such as game-specific profiles and themes, lighting, macros, and audio that are critical to the gaming experience.AWCC also supports AlienFX 2.0. AlienFX enables you to create, assign, and share game-specific lighting maps to enhance the gaming experience. It also enables you to create your own individual lighting effects and apply them to the computer or attached peripherals. AWCC embeds Peripheral Controls to ensure a unified experience and the ability to link these settings to your computer or game.AWCC supports the following features:•FX: Create and manage the AlienFX zones.•Fusion: Includes the ability to adjust game-specific Power Management, Sound Management, and Thermal Management features.•Peripheral Management: Enables peripherals to appear in and be managed in Alienware Command Center. Supports key peripheral settings and associates with other functions such as profiles, macros, AlienFX, and game library.AWCC also supports Sound Management, Thermal Controls, CPU, GPU, Memory (RAM) monitoring. For more information about AWCC, see the Alienware Command Center Online Help.21Getting help and contacting AlienwareSelf-help resourcesY ou can get information and help on Alienware products and services using these online self-help resources: Table 24. Alienware products and online self-help resourcesIn Windows search, typeContacting AlienwareTo contact Alienware for sales, technical support, or customer service issues, see .NOTE: Availability varies by country/region and product, and some services may not be available in your country/ region.NOTE: If you do not have an active Internet connection, you can find contact information about your purchase invoice, packing slip, bill, or Dell product catalog.22。
三星nvme驱动安装方法

三星nvme驱动安装方法
三星NVMe驱动安装方法如下:
1. 打开三星官方网站,找到支持页面或驱动下载页面。
2. 在页面上找到适用于您的操作系统的NVMe驱动程序,并下载到您的计算机上。
3. 双击下载的驱动程序安装包,打开安装向导。
4. 按照向导的指示,选择安装路径和其他安装选项。
5. 点击“安装”按钮开始安装驱动程序。
6. 完成安装后,重新启动计算机。
在重新启动后,您的计算机应该能够识别和使用三星NVMe驱动程序,以提高硬盘性能和可靠性。
请注意,安装驱动程序可能需要管理员权限。
三星Q460笔记本电脑 详情报表
--------[概览]----------------------------------------------------------------------------------电脑型号三星Q460 笔记本电脑操作系统Windows 8 专业版64位( DirectX 11 )处理器英特尔Core i3-2350M @ 2.30GHz 双核主板三星Q460 (英特尔HM65 芯片组)内存 4 GB ( 三星DDR3 1333MHz )主硬盘希捷ST9500325AS ( 500 GB / 5400 转/分)显卡NVIDIA GeForce GT 540M ( 2047 MB / 三星)显示器三星SEC4542 ( 14 英寸) 光驱东芝-三星CDDVDW SU-208AB DVD刻录机声卡瑞昱ALC269 @ 英特尔6Series Chipset 高保真音频网卡瑞昱RTL8168E PCI-E Gigabit Ethernet NIC / 三星--------[ 主板]----------------------------------------------------------------------------------主板型号三星Q460芯片组英特尔HM65 芯片组序列号123490EN400015板载设备Intel(R) Extreme Graphics 3 Controller / 视频设备(启用)板载设备Intel(R) Azalia Audio Device / 音频设备(启用)BIOS Phoenix Technologies Ltd. 03WC制造日期11/14/2011--------[ 处理器]--------------------------------------------------------------------------------处理器英特尔Core i3-2350M @ 2.30GHz 双核速度 2.30 GHz (100 MHz x 23.0) 处理器数量核心数: 2 / 线程数: 4核心代号Sandy Bridge NB生产工艺32 纳米插槽/插座Socket G2 (PGA 988 / BGA 1023)一级数据缓存 2 x 32 KB, 8-Way, 64 byte lines一级代码缓存 2 x 32 KB, 8-Way, 64 byte lines二级缓存 2 x 256 KB, 8-Way, 64 byte lines三级缓存 3 MB, 12-Way, 64 byte lines 特征MMX, SSE, SSE2, SSE3, SSSE3, SSE4.1, SSE4.2, HTT, EM64T, EIST--------[ 硬盘]----------------------------------------------------------------------------------产品希捷ST9500325AS大小500 GB转速5400 转/分缓存8 MB硬盘已使用共533 次,累计1817 小时固件0004SDM1接口SATA II数据传输率300 MB/秒特征S.M.A.R.T, APM, 48-bit LBA, NCQ--------[ 内存]----------------------------------------------------------------------------------DIMM 0: 三星DDR3 1333MHz 4GB 制造日期2011 年12 月型号CE M471B5273CH0-CH9 序列号: 83645B96模块位宽: 64 Bits模块电压: SSTL 1.5V--------[ 显卡]----------------------------------------------------------------------------------显卡英特尔HD Graphics Family 显存1812 MB制造商三星驱动版本9.18.13.280驱动日期20120611主显卡NVIDIA GeForce GT 540M 显存2047 MB--------[ 显示器]--------------------------------------------------------------------------------产品三星SEC4542制造日期2011 年屏幕尺寸14 英寸(31 厘米x 17 厘米)显示比例宽屏16 : 9分辨率1366 x 768 32 位真彩色最大分辨率1366 x 768Gamma 2.20--------[ 光驱]----------------------------------------------------------------------------------产品东芝-三星CDDVDW SU-208AB DVD刻录机缓存/固件: 1536 KB / SC00--------[ 声卡]----------------------------------------------------------------------------------声卡瑞昱ALC269 @ 英特尔6 Series Chipset 高保真音频--------[ 网卡]----------------------------------------------------------------------------------网卡瑞昱RTL8168E PCI-E Gigabit Ethernet NIC制造商三星无线网卡英特尔Centrino Wireless-N 130 BGN--------[ 电池]----------------------------------------------------------------------------------产品三星锂电池电池损耗 2.27%完全充电容量47730 mWh出厂设计容量48840 mWhID SAMSUNG Electronics--------[ PCI设备]-------------------------------------------------------------------------------设备2nd Generation Core Processor DRAM Controller设备ID 0104h制造商Intel制造商ID 8086h类别Bridge / PCI to HOST子系统制造商Samsung子系统ID C0C0144Dh设备2nd Generation Core Processor PCI Express Controller设备ID 0101h制造商Intel制造商ID 8086h类别Bridge / PCI to PCI设备HD Graphics Family设备ID 0116h制造商Intel制造商ID 8086h类别Display / VGA子系统制造商Samsung子系统ID C0C0144Dh设备 6 Series/C200 Series Management Engine Interface设备ID 1C3Ah制造商Intel制造商ID 8086h类别Simple Communication / Other子系统制造商Samsung子系统ID C0C0144Dh设备 6 Series/C200 Series Chipset USB Enhanced Host Controller设备ID 1C2Dh制造商Intel制造商ID 8086h类别Serial / USB 2.0 (EHCI)子系统制造商Samsung子系统ID C0C0144Dh设备 6 Series Chipset HD Audio Controller设备ID 1C20h制造商Intel制造商ID 8086h类别Multimedia / Hi-definition Audio子系统制造商Samsung子系统ID C0C0144Dh设备 6 Series/C200 Series Chipset PCI Express Root Port 1设备ID 1C10h制造商Intel制造商ID 8086h类别Bridge / PCI to PCI设备 6 Series/C200 Series Chipset PCI Express Root Port 4设备ID 1C16h制造商Intel制造商ID 8086h类别Bridge / PCI to PCI设备 6 Series/C200 Series Chipset USB Enhanced Host Controller设备ID 1C26h制造商Intel制造商ID 8086h类别Serial / USB 2.0 (EHCI)子系统制造商Samsung子系统ID C0C0144Dh设备HM65 Express Chipset LPC Interface Controller设备ID 1C49h制造商Intel制造商ID 8086h类别Bridge / PCI to ISA子系统制造商Samsung子系统ID C0C0144Dh设备 6 Series/C200 Series Chipset 6 Port SATA AHCI Controller设备ID 1C03h制造商Intel制造商ID 8086h类别Storage / Serial ATA (AHCI 1.0)子系统制造商Samsung子系统ID C0C0144Dh设备 6 Series/C200 Series Chipset SMBus Controller设备ID 1C22h制造商Intel制造商ID 8086h类别Serial / SMBus Controller 子系统制造商Samsung子系统ID C0C0144Dh设备 6 Series/C200 Series Chipset Thermal Control设备ID 1C24h制造商Intel制造商ID 8086h类别Data Aquisition& Signal Processing / Other子系统制造商Samsung子系统ID C0C0144Dh设备Centrino Wireless-N 130 BGN设备ID 0896h制造商Intel制造商ID 8086h类别Network / Other子系统制造商Intel子系统ID 50058086h Centrino Wireless-N 130 BGN设备RTL8168E PCI-E Gigabit Ethernet NIC设备ID 8168h制造商Realtek制造商ID 10ECh类别Network / Ethernet子系统制造商Samsung子系统ID C0C0144Dh--------[ USB设备]-------------------------------------------------------------------------------描述未识别制造商ID 0AC8产品ID C342类别239 / 2 / 1设备版本USB 2.0描述Textech International Ltd. Mini Optical Mouse制造商ID 15CA产品ID 00C3类别0 / 0 / 0设备? USB Optical Mouse Serial ?版本USB 2.0描述未识别制造商ID 8086产品ID 0189类别224 / 1 / 1设备版本USB 2.0--------[ 其他]----------------------------------------------------------------------------------键盘PS/2 标准键盘鼠标Synaptics PS/2 Port 指点杆鼠标HID-compliant 鼠标摄像头WebCam SCB-1900N--------[ 传感器]--------------------------------------------------------------------------------CPU温度: 45 ℃显卡温度: 42 ℃主硬盘温度: 31 ℃主板温度: 53 ℃--------[ 设备]----------------------------------------------------------------------------------硬件ID: PCI\VEN_8086&DEV_0104&SUBSYS_C0C0144D &REV_09设备类别: 4d36e97d-e325-11ce-bfc1-08002be10318设备名称: 2nd Generation Intel(R) Core(TM) Processor Family DRAM Controller - 0104硬件ID: ACPI\VEN_PNP&DEV_0C09 设备类别: 4d36e97d-e325-11ce-bfc1-08002be10318设备名称: Microsoft ACPI-Compliant Embedded Controller硬件ID: USB\VID_0AC8&PID_C342&REV_0004&MI_00 设备类别: 6bdd1fc6-810f-11d0-bec7-08002be2092f设备名称: USB 视频设备硬件ID: ACPI\VEN_PNP&DEV_0C0A 设备类别: 72631e54-78a4-11d0-bcf7-00aa00b7b32a设备名称: Microsoft ACPI 兼容的控制方法电池硬件ID: ACPI\VEN_PNP&DEV_0C0B 设备类别: 4d36e97d-e325-11ce-bfc1-08002be10318设备名称: ACPI Fan硬件ID: ACPI\VEN_PNP&DEV_0C0B 设备类别: 4d36e97d-e325-11ce-bfc1-08002be10318设备名称: ACPI Fan硬件ID: ACPI\VEN_PNP&DEV_0C0B 设备类别: 4d36e97d-e325-11ce-bfc1-08002be10318设备名称: ACPI Fan硬件ID: ACPI\VEN_PNP&DEV_0C0B 设备类别: 4d36e97d-e325-11ce-bfc1-08002be10318设备名称: ACPI Fan硬件ID: ACPI\VEN_PNP&DEV_0C0B 设备类别: 4d36e97d-e325-11ce-bfc1-08002be10318设备名称: ACPI Fan硬件ID: PRINTENUM\LocalPrintQueue设备类别: 1ed2bbf9-11f0-4084-b21f-ad83a8e6dcdc设备名称: 本地打印队列硬件ID: USB\VID_8086&PID_0189&REV_6919设备类别: e0cbf06c-cd8b-4647-bb8a-263b43f0f974设备名称: Intel(R) Centrino(R) Wireless Bluetooth(R) 3.0 + High Speed Adapter硬件ID: USB\ROOT_HUB20&VID8086&PID1C2D&REV00 04设备类别: 36fc9e60-c465-11cf-8056-444553540000设备名称: USB Root Hub硬件ID: SCSI\Disk_____________ST9500325AS0004设备类别: 4d36e967-e325-11ce-bfc1-08002be10318设备名称: 磁盘驱动器硬件ID: SCSI\CdRomTSSTcorpCDDVDW_SU-208AB_SC0设备类别: 4d36e965-e325-11ce-bfc1-08002be10318设备名称: CD-ROM Drive硬件ID: BTHENUM\{00001103-0000-1000-8000-00805f 9b34fb}_VID&00010001_PID&00e7设备类别: 4d36e96d-e325-11ce-bfc1-08002be10318设备名称: 通过Bluetooth 链接的标准调制解调器硬件ID: BTHENUM\{00001112-0000-1000-8000-00805f 9b34fb}_VID&00010001_PID&00e7设备类别: e0cbf06c-cd8b-4647-bb8a-263b43f0f974设备名称: 耳机音频网关服务硬件ID: PCI\VEN_8086&DEV_1C26&SUBSYS_C0C0144D&REV_04设备类别: 36fc9e60-c465-11cf-8056-444553540000设备名称: Intel(R) 6 Series/C200 Series Chipset Family USB Enhanced Host Controller - 1C26硬件ID: PCI\VEN_8086&DEV_0101&SUBSYS_C0C0144D &REV_09设备类别: 4d36e97d-e325-11ce-bfc1-08002be10318设备名称: Xeon E3-1200/2nd Generation Intel(R) Core(TM) Processor Family PCI Express Root Port - 0101硬件ID: BTHENUM\{00000002-0000-1000-8000-0002ee 000002}_VID&00010001_PID&00e7设备类别: 00000000-0000-0000-0000-000000000000设备名称: Bluetooth 外围设备硬件ID: ACPI\VEN_PNP&DEV_0C0E 设备类别: 4d36e97d-e325-11ce-bfc1-08002be10318设备名称: ACPI Sleep Button硬件ID: ACPI\VEN_PNP&DEV_0F13 设备类别: 4d36e96f-e325-11ce-bfc1-08002be10318设备名称: Synaptics PS/2 Port Pointing Device硬件ID: ACPI\GenuineIntel_-_Intel64_Family_6_Model_42 设备类别: 50127dc3-0f36-415e-a6cc-4cb3be910b65设备名称: Intel Processor硬件ID: ACPI\GenuineIntel_-_Intel64_Family_6_Model_42 设备类别: 50127dc3-0f36-415e-a6cc-4cb3be910b65设备名称: Intel Processor硬件ID: ACPI\GenuineIntel_-_Intel64_Family_6_Model_42 设备类别: 50127dc3-0f36-415e-a6cc-4cb3be910b65设备名称: Intel Processor硬件ID: ACPI\GenuineIntel_-_Intel64_Family_6_Model_42 设备类别: 50127dc3-0f36-415e-a6cc-4cb3be910b65设备名称: Intel Processor硬件ID: BTHENUM\{00001106-0000-1000-8000-00805f 9b34fb}_VID&00010001_PID&00e7设备类别: e0cbf06c-cd8b-4647-bb8a-263b43f0f974设备名称: Obex 文件传输服务硬件ID:HDAUDIO\FUNC_01&VEN_8086&DEV_2805&S UBSYS_80860101&REV_1000设备类别: 4d36e96c-e325-11ce-bfc1-08002be10318设备名称: 英特尔(R) 显示器音频硬件ID: ACPI\VEN_Ther&DEV_malZone设备类别: 4d36e97d-e325-11ce-bfc1-08002be10318设备名称: ACPI Thermal Zone硬件ID: ACPI\VEN_Ther&DEV_malZone设备类别: 4d36e97d-e325-11ce-bfc1-08002be10318设备名称: ACPI Thermal Zone硬件ID: PCI\VEN_10DE&DEV_0DF4&SUBSYS_C0C0144D &REV_A1设备类别:4d36e968-e325-11ce-bfc1-08002be10318设备名称: NVIDIA GeForce GT 540M硬件ID: BTHENUM\{00005601-0000-1000-8000-0002ee 000001}_VID&00010001_PID&00e7设备类别: 00000000-0000-0000-0000-000000000000设备名称: Bluetooth 外围设备硬件ID: BTHENUM\{0000111b-0000-1000-8000-00805f 9b34fb}_VID&00010001_PID&00e7设备类别: 00000000-0000-0000-0000-000000000000设备名称: Bluetooth 外围设备硬件ID: ACPI\VEN_PNP&DEV_0103 设备类别: 4d36e97d-e325-11ce-bfc1-08002be10318设备名称: High precision event timer硬件ID: ROOT\CompositeBus设备类别: 4d36e97d-e325-11ce-bfc1-08002be10318设备名称: 复合总线枚举器硬件ID: ROOT\vdrvroot设备类别: 4d36e97d-e325-11ce-bfc1-08002be10318设备名称: Microsoft 虚拟驱动器枚举器硬件ID: ACPI\VEN_ACPI&DEV_0003 设备类别: 72631e54-78a4-11d0-bcf7-00aa00b7b32a设备名称: Microsoft AC 适配器硬件ID: Root\Spaceport设备类别: 4d36e97b-e325-11ce-bfc1-08002be10318设备名称: Microsoft 存储空间控制器硬件ID: ACPI\VEN_PNP&DEV_0B00 设备类别:4d36e97d-e325-11ce-bfc1-08002be10318设备名称: System CMOS/real time clock硬件ID: root\kdnic设备类别: 4d36e972-e325-11ce-bfc1-08002be10318设备名称: Microsoft 内核调试网络适配器硬件ID: PRINTENUM\{0f4130dd-19c7-7ab6-99a1-980f0 3b2ee4e}设备类别: 1ed2bbf9-11f0-4084-b21f-ad83a8e6dcdc设备名称: 本地打印队列硬件ID: PCI\VEN_8086&DEV_1C16&SUBSYS_C0C0144D &REV_B4设备类别: 4d36e97d-e325-11ce-bfc1-08002be10318设备名称: Intel(R) 6 Series/C200 Series Chipset Family PCI Express Root Port 4 - 1C16硬件ID: ACPI\VEN_PNP&DEV_0000 设备类别: 4d36e97d-e325-11ce-bfc1-08002be10318设备名称: Programmable interrupt controller硬件ID: ACPI\VEN_PNP&DEV_0303 设备类别: 4d36e96b-e325-11ce-bfc1-08002be10318设备名称: PS/2 标准键盘硬件ID: PCI\VEN_8086&DEV_1C20&SUBSYS_C0C0144D &REV_04设备类别: 4d36e97d-e325-11ce-bfc1-08002be10318设备名称: High Definition Audio 控制器硬件ID: USB\VID_0AC8&PID_C342&REV_0004设备类别: 36fc9e60-c465-11cf-8056-444553540000设备名称: USB Composite Device硬件ID: BTHENUM\Dev_78CA048AF1FD设备类别: e0cbf06c-cd8b-4647-bb8a-263b43f0f974设备名称: Bluetooth 设备硬件ID: ACPI\VEN_PNP&DEV_0C0D 设备类别: 4d36e97d-e325-11ce-bfc1-08002be10318设备名称: ACPI Lid硬件ID: BTHENUM\{00005557-0000-1000-8000-0002ee 000001}_VID&00010001_PID&00e7设备类别: 00000000-0000-0000-0000-000000000000设备名称: Bluetooth 外围设备硬件ID: USB\VID_15CA&PID_00C3&REV_0512设备类别: 745a17a0-74d3-11d0-b6fe-00a0c90f57da设备名称: USB 输入设备硬件ID: PCI\VEN_8086&DEV_0896&SUBSYS_50058086& REV_34设备类别: 4d36e972-e325-11ce-bfc1-08002be10318设备名称: Intel(R) Centrino(R) Wireless-N 130硬件ID: PCI\VEN_8086&DEV_1C03&SUBSYS_C0C0144D &REV_04设备类别: 4d36e96a-e325-11ce-bfc1-08002be10318设备名称: 标准SATA AHCI 控制器硬件ID: USB\VID_8087&PID_0024&REV_0000设备类别: 36fc9e60-c465-11cf-8056-444553540000设备名称: Generic USB Hub硬件ID: ACPI\VEN_PNP&DEV_0200 设备类别: 4d36e97d-e325-11ce-bfc1-08002be10318设备名称: Direct memory access controller硬件ID: root\umbus设备类别: 4d36e97d-e325-11ce-bfc1-08002be10318设备名称: UMBus Root Bus Enumerator硬件ID: BTHENUM\{0000110a-0000-1000-8000-00805f9 b34fb}_VID&00010001_PID&00e7设备类别: e0cbf06c-cd8b-4647-bb8a-263b43f0f974设备名称: 音频源服务硬件ID: USB\ROOT_HUB20&VID8086&PID1C26&REV00 04设备类别: 36fc9e60-c465-11cf-8056-444553540000设备名称: USB Root Hub硬件ID: PCI\VEN_8086&DEV_1C3A&SUBSYS_C0C0144D &REV_04设备类别: 4d36e97d-e325-11ce-bfc1-08002be10318设备名称: Intel(R) Management Engine Interface硬件ID: acpiapic设备类别: 4d36e966-e325-11ce-bfc1-08002be10318设备名称: 基于ACPI x64 的电脑硬件ID: ACPI\VEN_PNP&DEV_0A08 设备类别: 4d36e97d-e325-11ce-bfc1-08002be10318设备名称: PCI Express 根复杂硬件ID: HDAUDIO\FUNC_01&VEN_10EC&DEV_0269&S UBSYS_144DC0C0&REV_1001设备类别: 4d36e96c-e325-11ce-bfc1-08002be10318设备名称: Realtek High Definition Audio硬件ID: BTHENUM\{0000111f-0000-1000-8000-00805f9 b34fb}_VID&00010001_PID&00e7设备类别: e0cbf06c-cd8b-4647-bb8a-263b43f0f974设备名称: 免提音频网关服务硬件ID: PCI\VEN_8086&DEV_1C10&SUBSYS_C0C0144D &REV_B4设备类别: 4d36e97d-e325-11ce-bfc1-08002be10318设备名称: Intel(R) 6 Series/C200 Series Chipset Family PCI Express Root Port 1 - 1C10硬件ID: ACPI\VEN_PNP&DEV_0C0C 设备类别: 4d36e97d-e325-11ce-bfc1-08002be10318设备名称: ACPI Power Button硬件ID: ACPI_HAL\PNP0C08设备类别: 4d36e97d-e325-11ce-bfc1-08002be10318设备名称: Microsoft ACPI-Compliant System硬件ID: BTH\MS_BTHBRB设备类别: e0cbf06c-cd8b-4647-bb8a-263b43f0f974设备名称: Microsoft Bluetooth Enumerator硬件ID: BTHENUM\{0000110c-0000-1000-8000-00805f9 b34fb}_VID&00010001_PID&00e7设备类别: e0cbf06c-cd8b-4647-bb8a-263b43f0f974设备名称: AV 远程目标服务硬件ID: PCI\VEN_8086&DEV_1C22&SUBSYS_C0C0144D &REV_04设备类别: 4d36e97d-e325-11ce-bfc1-08002be10318设备名称: SM 总线控制器硬件ID: BTHENUM\{00001105-0000-1000-8000-00805f 9b34fb}_VID&00010001_PID&00e7设备类别: e0cbf06c-cd8b-4647-bb8a-263b43f0f974设备名称: 对象推送服务硬件ID: BTHENUM\{0000112d-0000-1000-8000-00805f 9b34fb}_VID&00010001_PID&00e7设备类别: e0cbf06c-cd8b-4647-bb8a-263b43f0f974设备名称: SIM 访问服务硬件ID: USB\VID_8087&PID_0024&REV_0000设备类别: 36fc9e60-c465-11cf-8056-444553540000设备名称: Generic USB Hub硬件ID: ACPI\VEN_PNP&DEV_0C04 设备类别: 4d36e97d-e325-11ce-bfc1-08002be10318设备名称: Numeric data processor硬件ID: ACPI\VEN_Fixe&DEV_dButton设备类别: 4d36e97d-e325-11ce-bfc1-08002be10318设备名称: ACPI Fixed Feature Button硬件ID: HID\{0000110e-0000-1000-8000-00805f9b34fb} _VID&00010001_PID&00e7&Col01设备类别: 745a17a0-74d3-11d0-b6fe-00a0c90f57da设备名称: 符合HID 标准的用户控制设备硬件ID: MONITOR\SEC4542设备类别: 4d36e96e-e325-11ce-bfc1-08002be10318设备名称: 通用即插即用监视器硬件ID: MMDEVAPI\AudioEndpoints设备类别: c166523c-fe0c-4a94-a586-f1a80cfbbf3e设备名称: 音频终结点硬件ID: BTH\MS_RFCOMM设备类别: 4d36e972-e325-11ce-bfc1-08002be10318设备名称: Bluetooth 设备(RFCOMM 协议TDI)硬件ID: BTH\MS_BTHPAN设备类别: 4d36e972-e325-11ce-bfc1-08002be10318设备名称: Bluetooth 设备(个人区域网)硬件ID: MMDEVAPI\AudioEndpoints设备类别: c166523c-fe0c-4a94-a586-f1a80cfbbf3e设备名称: 音频终结点硬件ID: PCI\VEN_8086&DEV_0116&SUBSYS_C0C0144D &REV_09设备类别:设备名称: Intel(R) HD Graphics 3000硬件ID: BTHENUM\{0000110e-0000-1000-8000-00805f9 b34fb}_VID&00010001_PID&00e7设备类别: 745a17a0-74d3-11d0-b6fe-00a0c90f57da设备名称: Bluetooth 音频/视频远程控制HID硬件ID: BTHENUM\{0000112f-0000-1000-8000-00805f9 b34fb}_VID&00010001_PID&00e7设备类别: e0cbf06c-cd8b-4647-bb8a-263b43f0f974设备名称: 电话簿访问PSE 服务硬件ID: PCI\VEN_10EC&DEV_8168&SUBSYS_C0C0144D &REV_06设备类别:设备名称: RealtekPCIe GBE 系列控制器硬件ID: ACPI\VEN_INT&DEV_0800 设备类别: 4d36e97d-e325-11ce-bfc1-08002be10318设备名称: Intel(R) 82802 Firmware Hub Device硬件ID: PCI\VEN_8086&DEV_1C49&SUBSYS_C0C0144D &REV_04设备类别: 4d36e97d-e325-11ce-bfc1-08002be10318设备名称: Intel(R) HM65 Express Chipset Family LPC Interface Controller - 1C49硬件ID: HID\{0000110e-0000-1000-8000-00805f9b34fb} _VID&00010001_PID&00e7&Col02设备类别: 745a17a0-74d3-11d0-b6fe-00a0c90f57da设备名称: HID-compliant device硬件ID: ACPI\VEN_PNP&DEV_0100 设备类别: 4d36e97d-e325-11ce-bfc1-08002be10318设备名称: System timer硬件ID: PRINTENUM\LocalPrintQueue设备类别: 1ed2bbf9-11f0-4084-b21f-ad83a8e6dcdc设备名称: 本地打印队列硬件ID: ROOT\mssmbios设备类别: 4d36e97d-e325-11ce-bfc1-08002be10318设备名称: Microsoft System Management BIOS Driver硬件ID: PCI\VEN_8086&DEV_1C2D&SUBSYS_C0C0144D &REV_04设备类别: 36fc9e60-c465-11cf-8056-444553540000设备名称: Intel(R) 6 Series/C200 Series Chipset Family USB Enhanced Host Controller - 1C2D硬件ID: root\swenum设备类别: 4d36e97d-e325-11ce-bfc1-08002be10318设备名称: 即插即用软件设备枚举器硬件ID: BTHENUM\{00005005-0000-1000-8000-0002ee 000001}_VID&00010001_PID&00e7设备类别: 00000000-0000-0000-0000-000000000000设备名称: Bluetooth 外围设备硬件ID: PRINTENUM\microsoftmicrosoft_s7d14设备类别: 1ed2bbf9-11f0-4084-b21f-ad83a8e6dcdc设备名称: 本地打印队列硬件ID: HID\VID_15CA&PID_00C3&REV_0512设备类别: 4d36e96f-e325-11ce-bfc1-08002be10318设备名称: HID-compliant mouse硬件ID: ROOT\RDPBUS设备类别: 4d36e97d-e325-11ce-bfc1-08002be10318设备名称: 远程桌面设备重定向程序总线。
三星多功能一体机用户指南说明书
1.簡介主要優勢6功能(依機型)8好用資訊10關於此使用者指南11安全資訊12機器總覽17控制面板概覽20開啟機器21瞭解 LED 22顯示螢幕與有用的按鈕25瞭解快顯鍵盤29安裝驅動程式31重新安裝驅動程式34網路環境37存取網路設定38透過網路安裝驅動程式45無線網路設定(選用)51準備原稿64裝入原稿65選擇列印媒體68將紙張裝入紙匣中69在特殊紙材上列印73設定紙張大小與類型78輸出位置79印表機驅動程式功能81基本列印82開啟列印喜好設定84特殊列印功能91使用直接列印公用程式98變更預設列印設定100將您的機器設定為預設機器101列印到檔案(PRN)102 Mac 列印103 Linux 列印105 Unix 列印107瞭解影印畫面110基本影印112快速影印114 ID 卡片影印115使用特殊影印功能117使用程式設定122瞭解掃描方法125掃描並透過電子郵件傳送126透過 SMB/FTP 掃描與傳送129掃描並傳送到您的電腦133掃描並傳送到 USB/共用資料夾134變更掃描功能設定136使用程式設定139使用啟用 TWAIN 的軟體掃描140利用 Samsung Easy Document Creator 掃描141 MAC 掃描142 Linux 掃描143準備傳真145透過電腦發送傳真146瞭解傳真畫面148發送傳真150接收傳真155調整文件設定157列印傳真報告159使用程式設定160從控制面板設定通訊錄163從 SyncThru™ Web Service 設定通訊錄16710.透過行動裝置使用機器支援的行動應用程式 185Mopria™ 187AirPrint189Samsung Cloud Print 191Google Cloud Print™194關於 SmarThru Workflow197瞭解 SmarThru Workflow 畫面 198工作表單建立畫面 199瞭解共用資料夾畫面 200使用共用資料夾 201瞭解儲存的文件畫面203在 Stored Document 中儲存文件 204瞭解 USB 畫面 205關於 USB 記憶體裝置 206從 USB 記憶體裝置列印207掃描至 USB 記憶體裝置209功能表總覽 212機器設定217存取管理工具237SyncThru™ Web Service 238Easy Capture Manager 244Samsung AnyWeb Print 245Easy Eco Driver246使用 Samsung Easy Document Creator 247使用 Samsung Printer Center 248使用 Samsung Easy Printer Manager 251使用 Samsung 印表機狀態 253使用 Samsung Printer Experience255訂購耗材與配件262可用的耗材263可用的配件264可用的維護零件265儲存碳粉匣266搖勻碳粉267更換碳粉匣269更換廢碳粉盒272安裝配件274監視耗材壽命279清潔印表機280移動和儲存機器的秘訣285避免卡紙的秘訣287清除卡紙288瞭解螢幕訊息302送紙問題307電源與纜線連接問題308列印問題309列印品質問題312影印問題319掃描問題320傳真問題321作業系統問題323規格328法規資訊339著作權3501.簡介這些是機器的主要元件:•主要優勢6•功能(依機型)8•好用資訊10•關於此使用者指南11•安全資訊12•機器總覽17•控制面板概覽20•開啟機器21•瞭解 LED22•顯示螢幕與有用的按鈕25•瞭解快顯鍵盤29友善的環境介面•此機器支援「環保」功能以節省碳粉和紙張(請參閱第 88 頁上的「環保標籤」)。
三星9300如何连接电脑
三星9300如何连接电脑一、通过USB线连接:使用USB线连接三星9300与电脑是最常见的连接方式,适用于传输文件、备份数据以及进行充电等操作。
步骤如下:1.确保三星9300手机和电脑都处于开启状态,并正常工作。
2. 使用原装的USB数据线将手机的Micro USB接口与电脑的USB接口相连。
3.手机连接电脑后,在手机屏幕上会出现一个弹窗,选择"文件传输"选项,或在下拉通知栏中选择"USB连接模式",然后选择"文件传输"。
4.在电脑上,打开文件浏览器,可以看到三星9300手机的存储设备出现在"我的电脑"或"此电脑"等位置。
5.现在您可以通过拖放文件的方式,将文件从电脑传输到三星9300手机,或者将手机上的文件复制到电脑上。
二、通过Wi-Fi连接:通过Wi-Fi连接可以实现无线传输文件和备份数据的功能,方便快捷。
步骤如下:1.确保三星9300手机和电脑都连接到同一个Wi-Fi网络。
2.打开三星9300手机上的"设置"应用,点击"连接与共享",然后选择"打开移动热点与连接"。
3.在"打开移动热点与共享"页面中,选择"打开热点",然后点击右上角的"三个点"图标,选择"连网方式"。
4.选择"Wi-Fi共享",然后在电脑上可用的Wi-Fi网络,找到三星9300手机创建的热点并连接。
5. 在电脑上打开Web浏览器,输入三星9300手机的IP地址,按回车键。
三、通过蓝牙连接:通过蓝牙连接可以实现无线传输小文件的功能,适用于照片、音乐等文件的传输。
步骤如下:1.确保三星9300手机和电脑都支持蓝牙功能,并且已经开启。
2.在三星9300手机上打开"设置"应用,选择"蓝牙",然后点击右上角的开关将蓝牙打开。
[教程] 关于KIES无法与手机链接的看这里
![[教程] 关于KIES无法与手机链接的看这里](https://img.taocdn.com/s3/m/ba416b3b83c4bb4cf7ecd1fd.png)
[教程]关于KIES无法与手机链接的看这里首先KIES需要Windows Media Player11的支持。
没有Windows Media Player11的机器,KIES与手机连接安装驱动时会提示android MTP驱动装不上。
XP系统内一般自带的都是Windows Media Player 9那么就需要安装Windows Media Player11在天朝国内用户大部分使用的都是盗版的XP系统,安装Windows Media Player11需要验证是否正版。
在盗版XP中安装,首先下载Windows Media Player11,使用WINRAR将其解压。
得到一个文件夹,打开文件夹依次运行umdf.exewmdbexport.exewmdbexport.exewmp11.exe无法安装三星手机驱动提示:SAMSUNG Android Composite ADBInterface的解决办法安装三星手机驱动时提示:无法安装这个硬件,安装该软件时出现问题:“SAMSUNG Android Composite ADB Interface”安装设备时,出现了一个错误,安装时发生严重错误,如下图:解决方法:下载附件,解压之后,双击运行即可,然后再重新安装三星手机USB驱动程序。
三星USB驱动下载:/soft/3050.html三星手机USB驱动完整安装包(SAMSUNG USB Driver for Mobile Phones),适合所有三星手机,特别是使用android系统的三星手机,安装完成后记得重启。
测过的手机型号:I9000 I5700 I5508 I5500 I5801 I7500U I9088 I8520 T959 I897 I5510 I400 S 100Galaxy S Pro 盖世Ace S5830 盖世S5660 盖世S5670 M110S (Galaxy S) I91 00 (Galaxy S2) I9300 (Galaxy S3) Galaxy S 4G Galaxy S2 mini Galaxy K Gala xy Q I5800 I6500U I9001 I9003 I9010 I9020 I9023 I9100 I9103 I9200 M580 M100S(Apollo) Vibrant 4G I708 R880就此安装完成。
ifive 刷机教程 -RK3066刷机教程(刷固件rom、刷recovery、卡刷)

一、科普1、什么是固件rom?固件(Firmware)就是写入EROM或EPROM(可编程只读存储器)中的程序,通俗的理解就是“固化的软件”,台港澳称为“韧体”。
更简单的说,固件就是BIOS的软件,但又与普通软件完全不同,它是固化在集成电路内部的程序代码,负责控制和协调集成电路的功能。
(来自百度百科,貌似有点啰嗦)针对ifive,你可以认为他是一个系统。
ifive的固件rom是由rk30xx相关工具打包而成的.img镜像文件2、为什么要刷固件ROM?2.1 可以解决修复非硬件故障导致的当机、FC、开不了机、花屏、卡屏、系统不好用等等问题2.2 升级最新版的操作系统。
2.3 自定义固件rom(对固件精简、优化、升级、集成等)2.4 刷入基友大大制作的(精简、优化、升级、集成等)固件2.5 刷机强迫症2.6 元芳,你怎么看?4.刷ROM有风险吗?有!5、如何降低刷机的风险?认真参阅大大教程的步骤,胆大心细。
7、同一个固件能用在不同型号的设备上吗?不能!8、刷机前需要准备什么?8.1 准备平板电脑一台。
8.2 台式电脑或者笔记本(装有windows系统)。
8.3 数据线。
8.4 相关软件及驱动。
9、刷机前需要注意什么?9.1 注意平板电脑点量充足(最好60%以上)。
9.2 在刷机过程中一定要保持平板数据线与电脑连接正常,不要随意插拔数据线。
9.3 祈祷不要停电10、刷机(Recovery)需要root么?不需要,root是系统的最高权限,针对安装的软件的权限管理。
11、刷机需要多长时间?在点击更新后刷固件需要3~5分钟左右,刷recovery 几秒钟。
12、固件rom里面包含哪些内容?解包后的官方rom包含boot.img,kernel.img,misc.img,recovery.img,system.img及一些配置文件。
13、可以单独刷这些img吗?可以。
17、固件ROM和卡刷包的区别?固件&rom:是img镜像文件,相当于于烧录固化在FLASH(内存盘)上,必须使用相应的刷机工具刷入机器的FLASH 里面。
读写三星固件教程
手动读刷写三星固件教程注:三星光驱个别电脑主板不支持,需要另行购买VIA6421卡一、提取固件1、按照《刷机套件介绍及连接方法》中的连接方法,把光驱连接好。
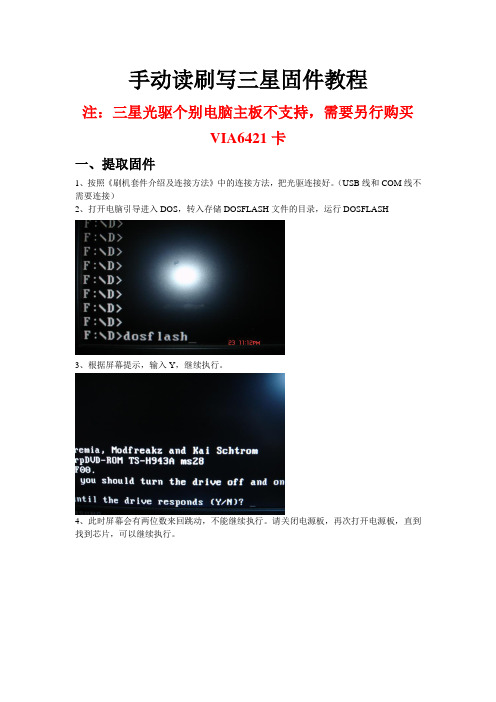
(USB线和COM线不需要连接)2、打开电脑引导进入DOS,转入存储DOSFLASH文件的目录,运行DOSFLASH3、根据屏幕提示,输入Y,继续执行。
4、此时屏幕会有两位数来回跳动,不能继续执行。
请关闭电源板,再次打开电源板,直到找到芯片,可以继续执行。
5、根据屏幕提示,选择光驱所在接口(下面这张图片光驱接的SATA口对应的是0)6、根据提示输入R,回车,输入备份固件名,回车。
此时开始备份三星光驱内固件。
(DOSFLASH1.7版本有5个提示:[R]备份固件,[W]写入固件,[E]清除固件,[LITEON K]备份建兴固件,[LITEON E]清除建兴固件)(下面这张图片中,输入的备份固件名为SX.BIN。
名称可以自己定义,但是后缀名必须是.BIN,请记住你备份的固件名,默认保存在DOSFLASH同一目录内)二、合并破解固件。
(把原机的KEY写入破解固件中)1、重新开机进入WINDOWS,运行JungleFlasher v0.1.75 Beta,1)FirmwareTool 32 (合并固件页面)2)Open Source Firmware (打开包含KEY的固件,也就是刚提取出的固件)3)Open Target Firmware (打开破解固件)4)Spoof Source to Target (点击进行合并)5)Save to File (保存合并后的固件)三、写入固件(三星光驱不需要清除固件,可以直接写入)1、把刚才合并后的破解固件放入DOSFLASH同一目录下。
2、打开电脑引导进入DOS,转入存储DOSFLASH文件的目录,运行DOSFLASH3、根据屏幕提示,输入Y,继续执行。
4、此时屏幕会有两位数来回跳动,不能继续执行。
请关闭电源板,再次打开电源板,直到找到芯片,可以继续执行。
解决手机挖煤模式无法连接odin问题方法

本帖隐藏的内容
1.进入挖煤模式用数据线连接电脑
2.右键我的电脑-属性-硬件-设备管理器-通用串行总线控制器会发现一个***的感叹号
3.右键SAMSUNG Mobile USB CDCComposite Device-属性-设备用法-停用-确定
4.扣电池-再安上去-再次进入挖煤[数据线连着不用动
5.右键SAMSUNG Mobile USB CDCComposite Device-属性-设备用法-启用-确定
这时你会发现那个小感叹号没有了,连接奥丁也有黄格了
这时我刷机后得来的宝贵经验,要尊重他人的劳动成果,不一定适合每一个人也有可能是你的电脑或者USB线的问题。
作者:ssxlove208
三星I9000 超详细图解 解三锁(网络锁) 简单刷官方2.2
本教程转自<机锋网fhs1986>,这里先向他至谢,写出这么精彩的贴子原文如下:================================================ ===========有一些废话要说:(对小白来说很有用)基本了解:(用我的理解方式简单告诉大家)三锁机子:也就是进不了挖煤,刷不了机子,刷不了ROM挖煤:就是进刷手机ROM的画面,刷机模式,看下面的文章里有***机器人拿个铲子。
如何退出挖煤:一直按住开机按钮就可以了首先ROM是什么:ROM就是手机系统,就好比是XP系统一样的数据包,刷ROM就是换手机系统的意思,比如你看你的手机是JH1-2.1的系统,JP什么什么或者JF什么什么或者XX什么什么这里的意思是国家的意思,貌似就是港版,台*湾版,之类的,里面都有中文简体的选项,不用担心没中文,2.1是系统版本信息,就好比电脑是XP还是WI7一样的道理2.1功能少一点但是比较省电稳定,但是支持的功能少一些.....2.2功能多很多比如自带播放器在线看优酷,动态桌面之类的....Odin3刷机工具:这个是用来刷手机用的工具就是刷手机系统用的,就是刷ROM用的刷机工具配件:.pit(配合Odin3刷机工具):这个文件是刷机必须用的配件之一不同的版本用不同的PIT 貌似现在PIT就分2种一种是PIT-521 另一种是PIT-803.PDA(配合Odin3刷机工具):这个文件是刷机必须用的配件之一,一般来说这个就是ROM包也就是手机系统包.PHONE(配合Odin3刷机工具):这个文件是刷机用的配件之一,有所不同的是有时候这个是在PDA包内集成的所以有时候刷机会没有这个单独的配件(一般发布ROM包的作者会说明).CSC(配合Odin3刷机工具):这个文件是刷机用的配件之一,有所不同的是有时候这个是在PDA包内集成的所以有时候刷机会没有这个单独的配件(一般发布ROM包的作者会说明)为什么会有港版官方2.1或者2.2 还有LI大的1.6,1.8,1.9或者是土豆的什么什么版本:答:港版官方是三星官方为港行货定制的版本也就三星公司把鸟语翻译成中文然后就是大家所用的中文官方版本2.1和2.2 就是从2.1升级到了2.2 一般来说越新越好对吧都是这样理解这里不解释了关于LI大和土豆的ROM :是会制作和修改ROM系统包的高手作者,这些制作和编辑ROM 包的高手会编辑语言之类的,ROM包内全是一些我们不懂的数据,但是他们懂,所以一般三星官方最新发布出来的鸟语版本ROM和英文版本的ROM ,他们可以第一时间编辑、汉化,然后打包制作成我们马上可以使用的ROM包,在这里也有区别,LI大的ROM包内有很多实用的工具集成,追求的也是绝大数手机使用者强烈的要求来制作的,刷机比较简单,所需配件一般都在压缩包内,并且每次更新了什么也都会在博客内说明。
可充电USB端口设置

Samsung Mobile Computing
4
2. 设置(3/4) 设置( )
① BIOS Set Up 3) 按↓ 键,并选择“USB Charge In Sleep Mode”一项
Samsung Mobile Computing
5
2. 设置(4/4) 设置( )
① BIOS Set Up 4) “USB Charge In Sleep Mode”初始定为“Disabled”,将其改为“Enabled”即 可 5) 按“F10”保存并退出BIOS设置,系统重启后该功能生效
USB connector
Samsung Mobile Computing
2
2. 设置(1/4) 设置( )
① BIOS Set Up 1) 启动笔记本电脑,在看到启动画面后按F2进入BIOS设置程序
Samsung Mobile Computing
3
2. 设置(2/4) 设置( )
① BIOS Set Up 2) 在BIOS设置程序界面中,选择并进入Advanced(高级选项)菜单
可充电USB端口设置说明 端口设置说明(6) 可充电 端口设置说明
NPC PM 杨
Байду номын сангаас 1.定义 定义
可充电 USB 端口 (Chargeable USB) )
无论该笔记本电脑是否开启或关闭,是否接驳电源,只要其电池有电,它都可 以给您的相关数码设备进行充电 充电对象为可使用USB连线充电的所有数码设备 用户使用数码产品更为方便灵活,受限更小 需要在笔记本电脑BIOS中进行设置 (销售中严禁文字说明标注该功能,只可口述该功能)
Samsung Mobile Computing
6
SRD-476D 视频输入显示器说明说明书

SRD-476DDISPLAy Video Inputs 4 Composite video 0.5-1 Vpp, 75 ohm automatic termination Resolution NTSC : 1280 x 480, 720 x 480 / PAL : 1280 x 576, 720 x 576LiveFrame Rate NTSC : 120fps / PAL : 100fpsResolutionNTSC : 1280 x 480, 720 x 480 / PAL : 1280 x 576, 720 x 576Multi Screen Display1 / 4 / Sequence / PIP PERFORMANCEOperating System EmbeddedLinux RecordingCompressionH.264Record RateNTSC : Up to 120fps@1280 x 480 / PAL : Up to 100fps@1280 x 576 *Play back 60/50fpsNTSC : Up to 120fps@704 x 480 / PAL : Up to 100fps@704 x 576NTSC : Up to 120fps@704 x 240 / PAL : Up to 100fps@704 x 288NTSC : Up to 120fps@352 x 240 / PAL : Up to 100fps@352 x 288ModeNTSC : Manual, Schedule (Continuous / Event), Event (Pre / Post), Time lapse (1~30fps)PAL : Manual, Schedule (Continuous / Event), Event (Pre / Post), Time lapse (1 ~ 25fps)EventVideo loss, Motion (Level 1 ~ 10), Alarm, Tampering (Level 1 ~ 3)Overwrite Modes Selectable (Stop / Continuous)Pre-alarm Up to 30sec (5, 10, 20, 30sec)Post-alarm Up to 6hour (5,10, 20, 30sec, 1, 3, 5, 10, 20min, 1, 2, 3, 4, 5, 6hour)Search &PlaybackSearch ModeDate/Time, Event, Back up, POS, Motion (*All search include preview function)Playback FunctionFast forward / backward (2x, 4x, 8x, 16x, 32x, 64x) *Backward play with i-frame only Slow forward / backward (1/2x, 1/4x, 1/8x)Step forward / backward *Backward play with i-frame onlyNetwork (IPv4)Transmission Speed 4CIF / 2CIF / CIF (NTSC : 120fps, PAL : 100fps)BandwidthUp to 16Mbps Bandwidth ControlSelectableStreamH.264 (4CIF / 2CIF / CIF selectable)Max. Remote Users Search 3 / Live unicast 10 / Live multicast 20Protocol Support TCP/IP , DHCP , PPPoE, SMTP , NTP , HTTP , HTTPS, DDNS, RTP , RTSP , SNMP Monitoring SmartViewer, Webviewer, SSM (CMS)Smart Phone PlatformAndroid, iOSProtocol SupportRTP , RTSP , HTTP , CGI Max. Remote Users Live 2, Search 1StorageInternal HDDUp to 1 SATA HDD DVD Writer (Back up)YesUSB (Back up)2 USB portsFile Format (Back up)BU (DVR player), EXE (Include player), AVI SecurityPassword Protection1 Admin, 10 Group, 10 User per 1 group Data AuthenticationWatermarkINTERFACEMonitorsVGA 1 VGA (1280 x 720, 1280 x 1024, 1920 x 1080)HDMI1 HDMI (1280 x 720, 1280 x 1024, 1920 x 1080)Spot Composite 2CH (Digital spot 1CH / Analog spot 1CH) *Included OSD on screen, Multi mode support Loop Outputs 4CHAudio Inputs / Output4CH line in / 1CH line out CompressionG.711Sampling Rate 8KHzAlarmInputs / Output Terminal 4 inputs (NO/NC) / Terminal 2 relay outputs (NO/NC), Rating : 30V DC / 2A, 250V AC / 0.25A Remote Notification Notification via e-mailConnectionsEthernet1 RJ-45 10/100/1000 Base-TSerial Interface RS-232/RS-485 (Half duplex) for PTZ, Samsung system keyboard USBUSB 2.0, 2 ports (Front / Rear)Application Support Mouse, Remote controllerRS-485 Protocol Samsung-T/E, Pelco-D/P , Panasonic, Phillips, AD, DIAMOND, ERNA, KALATEL, VCL TP , VICON, ELMO, GE Coax ProtocolSamsung CCVC, Pelco-CGENERALElectrical Input Voltage / Current 12V DC adaptor, 4A, 100 ~ 240V AC, 50/60Hz, 48watt Power Consumption Max. 25W (With 1x HDD)EnvironmentalOperating Temperature+0°C ~ +40°C (+32°F ~ +104°F) Operating Humidity 20% ~ 85% RHMechanicalDimensions (WxHxD)215.0 x 88.0 x 351.6mm (8.46" x 3.46" x 13.84")Weight (With hard disks)Approx. 3.3Kg (7.32 lb)LanguageEnglish, French, German, Spanish, Italian, Russian, Polish, Czech, Turkish, Netherlands, Portuguese, Swedish, Danish, Rumania, Serbia, Croatia,Hungary, Greek, Finnish, Norwegian, Korean, Japanese, Chinese (Traditional), Thai, Taiwanese (25 Language)SRD -476D4CH 1280H Real-time Coaxial DVRDimensionsUnit : mm (inch)Key Features• 4CH 1280H real-time DVR• Up to 120(NTSC) / 100(PAL)fps recording rate • HDMI / VGA video output• 4CH audio inputs / 1CH audio output • Max. 1 internal HDD• PTZ control via coaxial cable (Samsung CCVC, Pelco-C)• DVD-RW, Smart phone support (Android / iOS)• Smart searching, Tampering support* The latest product information / specification can be found at 。
- 1、下载文档前请自行甄别文档内容的完整性,平台不提供额外的编辑、内容补充、找答案等附加服务。
- 2、"仅部分预览"的文档,不可在线预览部分如存在完整性等问题,可反馈申请退款(可完整预览的文档不适用该条件!)。
- 3、如文档侵犯您的权益,请联系客服反馈,我们会尽快为您处理(人工客服工作时间:9:00-18:30)。
Date: 8/05/2005
Copyright © 2005 All rights reserved
PROPRIETARY NOTICE AND DISCLAIMER
Unless noted otherwise, this document and the information herein disclosed are proprietary to Moore Computer Consultants, Incorporated, 3520 Krums Corners Road, Ithaca, New York 14850 (“MCCI”). Any person or entity to whom this document is furnished or having possession thereof, by acceptance, assumes custody thereof and agrees that the document is given in confidence and will not be copied or reproduced in whole or in part, nor used or revealed to any person in any manner except to meet the purposes for which it was delivered. Additional rights and obligations regarding this document and its contents may be defined by a separate written agreement with MCCI, and if so, such separate written agreement shall be controlling.
2.2 Network/PDA drivers.......................................................................................................... 3
3. Driver changes between 4.10 and 4.34.2705.................................................................................. 3
All other trademarks and registered trademarks are owned by the respective holders of the trademarks or registered trademarks.
Copyright © 2005 by Moore Computer Consultants, Incorporated
1.1 Scope....................................................................................................................................... 1
1.2 Driver Build Changes.......................................................................................................... 1
Document Release History
Rev I Rev J Rev K
1-14-2005 3-15-2005 8-10-2005
Update for V4.28.2703 Update for V4.32 Update for V4.34.2705
MCCI V4.34.2705 USB Driver Release Notes Engineering Report 950252 Rev.K
2. Driver File Contents ......................................................................................................................... 2
2.1 Serial/Modem drivers.......................................................................................................... 2
3.2 Serial/Modem Driver changes between 4.10 and 4.34.2705.......................................... 8 3.2.1 Bug 1138: Blue Screen on unplug while Internet Access Wizard running. ..... 8 3.2.2 Bug 1142: WHQL Device Path Exerciser works w/o blue screen..................... 9 3.2.3 Bug 1146: Added support for Vendor Specific IOCTLs. .................................... 9 3.2.4 Bug 1147: Add registry key to handle SET_BREAK_ON/OFF. ........................ 9 3.2.5 Bug 1148: WHQL Device Path Exerciser works w/o blue screen................... 10 3.2.6 Bug 1172: Manual Uninstall/Reinstall of VxD Fails on Win 9x Family ......... 10 3.2.7 Bug 1180: Blue Screen if disconnect during DUN connection process........... 11 3.2.8 Bug 1214: Open link prevents hibernation ......................................................... 11 3.2.9 Bug 1217: TX_Empty event notifications lost..................................................... 11 3.2.10 Bug 1218: Modem traffic status not updated ..................................................... 11 3.2.11 Bug 1221: Add support for IRP_MJ_FLUSH_BUFFERS................................... 12
The information in this document is subject to change without notice, and should not be construed as a commitment by MCCI. Although MCCI will make every effort to inform users of substantive errors, MCCI disclaims all liability for any loss or damage resulting from the use of this manual or any software described herein, including without limitation contingent, special, or incidental liability.
MCCI 3520 Krums Corners Road Ithaca, New York 14850 USA Phone +1-607-277-1029 Fax +1-607-277-6844
MCCI V4.34.2705 USB Driver Release Notes
TABLE OF CONTENTS
1. Introduction........................................................................................................................................ 1
3.1 Common code/bus driver changes between 4.10 and 4.34............................................ 3 3.1.1 Added ability to insert missing interfaces to form a consecutive sequence. ... 3 3.1.2 Bug 1115: WHQL Device Path Exerciser blue screen w/Driver Verifier......... 4 3.1.3 Bug 1124: Support more than 4 simultaneous device instances........................ 4 3.1.4 Bugs 1178 & 1215: Independent device removal properties .............................. 4 3.1.5 Bug 1277: Attempt to open non-existent pipe fails ............................................. 5 3.1.6 Bug 1278: Attempt to open an interface without all pipes fails......................... 5 3.1.7 Support multiple driver instances ......................................................................... 5 3.1.8 IRP response processing.......................................................................................... 6 3.1.9 Multifunction installation in Windows XP gold and XP SP1 ............................ 6 3.1.10 Bug 1396: Blue screen running Driver Verifier .................................................... 6 3.1.11 Bug 1399: Blue Screen in Driver Verifier after resume from Standby .............. 6 3.1.12 Bug 1devices due to timelock mechanism. ............................................................................................................................ 7 3.1.13 Generic driver supports GET CONFIGURATION and GET INTERFACE ..... 7 3.1.14 Bug 1481: OS freezes when going to Hibernate/Standby mode....................... 7 3.1.15 Bug 1514: Reduce CPU overhead with multiple devices ................................... 8 3.1.16 Bug 1494: Windows freezes during WHQL 2m_P_hibernate test .................... 8
