烽火交换机配置命令集
烽火交换机常用配置

二、烽火交换机配置:❑接入方式通过Console口进行本地配置带内/带外的telnet或sshWEB页面❑部分有关管理的缺省设置带内ip:192.168.1.1/24带外ip:192.168.2.1/24本机登陆用户名、密码:admin,12345或guest,12345SNMP的只读集合:publicSNMP的读写集合:NETMAN❑Web页面配置根据交换机配置的默认web管理地址通过IE浏览器进行配置以烽火2008mfb为例❑设备缺省的web网管IP地址为192.168.2.1;❑设备缺省的用户名为:admin❑密码为:12345❑选择成员及类型时,可以通过单击代表相应端口类型的字符,选择合适的配置。
其中“-”代表不是该VLAN的成员,“T”代表是该VLAN的成员输出数据包带标识符,“U”代表是该VLAN的成员但输出数据包不带标识符,“T”“U”表示该接口的Pvid时该vlan。
❑查看及保存配置(特权模式下#)❑show running-config 显示当前系统配置❑show startup-config 显示当前配置文件信息❑show version 显示当前设备的版本信息❑show system 显示系统配置❑show interface [<1-64>] 显示端口信息❑show vlan [<1-4094>] 显示vlan信息❑show dynamic-mac AA:BB:CC:DD:EE:FF已知某一mac地址,查找交换机连接端口号❑show logging history 显示历史记录❑show history 显示之前的输入命令❑ls 显示文件系统❑write file 保存配置文件❑show cpu statistic 显示CPU统计信息。
❑1、设置时间❑clock set HH:MM:SS <1-31> <1-12> <2000-2100>❑例:Fengine#clock set 14:28:30 10 9 2009❑2、显示文件系统❑dir❑例:Fengine#dir❑size date time name❑-------- ------ ------ --------❑11387 JAN-01-2000 00:01:16 startcfg❑ 1 files, total space: 11387 bytes❑0 directorys,available space: 2011136 bytes❑3、清空交换机的配置文件erase startup-config用于清空flash上保存的配置文件,但是以前的配置在系统上仍然生效,因此如果希望系统恢复到出厂状态,除了需要清空flash上的配置文件外,还需要重启设备例:Fengine(config)#erase startup-configThis will erase the configuration in the flash memory.Are you sure?(y/n) [y]Erasing configuration.......[OK]❑4、配置交换机系统的名字。
烽火交换机配置命令

烽火交换机配置命令 The manuscript was revised on the evening of 2021烽火交换机配置常用命令一、连接方式:Eth网口链接:设置为地址段——开始——运行——telnet 带内ip:带外ip:二、登陆:Username:admin ------------ 使用着名称:adminPassword :12345 ------------密码:12345三、查看:S200mfb#show run ------------------查看系统运行★会看设备情况很重要show running-config 显示当前系统配置show startup-config 显示当前配置文件信息show version 显示当前设备的版本信息show system 显示系统配置show dynamic-mac AA:BB:CC:DD:EE:FF 已知某一mac地址,查找交换机连接端口号show logging history 显示历史记录show history 显示之前的输入命令write file 保存配置文件show cpu statistic 显示CPU统计信息。
1、设置时间clock set HH:MM:SS <1-31> <1-12> <2000-2100>例:Fengine#clock set 14:28:30 10 9 20092、显示文件系统dir例: Fengine#dirsize date time name-------- ------ ------ --------11387 JAN-01-2000 00:01:16 startcfg1 files, total space: 11387 bytes0 directorys,available space: 2011136 bytes3、清空交换机的配置文件 erase startup-config----------用于清空flash上保存的配置文件,但是以前的配置在系统上仍然生效,因此如果希望系统恢复到出厂状态,除了需要清空flash上的配置文件外,还需要重启设备例: Fengine(config)#erase startup-configThis will erase the configuration in the flash memory.Are you sure(y/n) [y]Erasing configuration.......[OK]四、查看交换机端口情况:S200mfb#show interface-----------查看端口网速,在线情况。
烽火交换机配置命令

port 1-8 pvid 1668
interface vlan 1699
member 9-16 untagged
member 17-18 tagged
quit
port 9-16 pvid 1699
查看配置
sh run
保存配置
write file
清除配置
admin
nbwlan
config
erase startup-config
y
quit
reboot
y 开光口,duplex f Nhomakorabeall speed 100处开百兆口时填100,千兆口时填1000
admin
nbwlan
interface vlan 1699
member 17-18 tagged
quit
下挂AP的VLAN不同时,下挂口1-16改成不同VLAN,如1-8口VLAN 1668,9-16口VLAN1699
interface vlan 1668
member 1-8 untagged
member 17-18 tagged
12345为默认密码,模板中改成nbwlan
hostname jdxintiandi 热点名称信息
interface vlan 1668 管理VLAN,模板中所有的1668处都要修改
ip address 10.140.10.200 255.255.255.192 交换机的ip地址
gateway 10.140.10.193 网关
config
interface ethernet 17
duplex full speed 100
烽火交换机常用命令大全
求烽火交换机常用命令大全q 接入方式通过Console口进行本地配置带内/带外的telnet或sshWEB页面q 部分有关管理的缺省设置本机登陆用户名、密码:admin,12345或guest,12345SNMP的只读集合:publicSNMP的读写集合:NETMANq Web页面配置根据交换机配置的默认web管理地址通过IE浏览器进行配置以烽火2008mfb为例qq 设备缺省的用户名为:adminq 密码为:12345q 选择成员及类型时,可以通过单击代表相应端口类型的字符,选择合适的配置。
其中“-”代表不是该VLAN的成员,“T”代表是该VLAN的成员输出数据包带标识符,“U”代表是该VLAN的成员但输出数据包不带标识符,“T”“U”表示该接口的Pvid时该vlan。
q 查看及保存配置(特权模式下#)q show running-config 显示当前系统配置q show startup-config 显示当前配置文件信息q show version 显示当前设备的版本信息q show system 显示系统配置q show interface [<1-64>] 显示端口信息q show vlan [<1-4094>] 显示vlan信息q show dynamic-mac AA:BB:CC:DD:EE:FF已知某一mac地址,查找交换机连接端口号q show logging history 显示历史记录q show history 显示之前的输入命令q ls 显示文件系统q write file 保存配置文件q show cpu statistic 显示CPU统计信息。
q 1、设置时间q clock set HH:MM:SS <1-31> <1-12> <2000-2100>q 例:Fengine#clock set 14:28:30 10 9 2009q 2、显示文件系统q dirq 例: Fengine#dirq size datetime nameq -------- ------------ --------q 11387 JAN-01-2000 00:01:16 startcfgq 1 files, total space: 11387 bytesq 0 directorys,available space: 2011136bytesq 3、清空交换机的配置文件erase startup-config用于清空flash上保存的配置文件,但是以前的配置在系统上仍然生效,因此如果希望系统恢复到出厂状态,除了需要清空flash上的配置文件外,还需要重启设备例: Fengine(config)#erase startup-configThis will erase the configuration in the flash memory.Are you sure?(y/n) [y]Erasing configuration.......[OK]q 4、配置交换机系统的名字。
烽火汇聚交换机常用配置
一.缺省用户名和密码admin12345二.创建VLANconfig //进入配置模式后vlan 10,12,17,20,30-416,579,601-700,801,921,1000-1050,1201-1224,1301-1324,1401-1424,3999 //批量创建VLANinterface vlan 4000 //单独创建VLANip address 172.31.20.237/24 //给vlan添加IPip route-static 0.0.0.0 0.0.0.0 172.31.20.254 //config模式下缺省路由配置write file //保存当前所有配置三.端口配置Interface gi 1/0/1 to gi 1/0/48 批量进入端口S7800-08(config-eth1)#no shutdown //启用端口S7800-08(config)#interface gigaethernet 6/0/1 //进入端口gigaethernet 6/0/1 S7800-08(config-ge6/0/1)#alias huangtan8220 //设置端口描述1)access 模式:port link-type access;port default vlan 10 // access 模式2)trunk 模式:port link-type trunk;port trunk allow-pass vlan 10,12 //trunk模式3)hybrid 模式:port link-type hybrid;port hybrid vlan 30-416,1000-1050 tagged;port hybrid vlan 3999untagged //hybird模式,内层标为tag,外层标untag(解标) 建议端口使用hybrid模式,端口默认为hybrid模式。
1.Port hybrid vlan 400 tag //更改端口为tag模式2.Port hybrid vlan 399 untag //更改端口为untag模式,并在下一条中配置pvidPort hybrid pvid 399四.启用QinQS7800-08(config)#translation-vlan 1 outer-vlan 30/524 add outer 2008 //规则1:如果是内标为30-524的数据,添加外标2008 ,前提是端口必须先透传30/524VLAN,下行口S7800-08(config-ge6/0/1)#join translation-vlan 1 in //在端口下应用S7800-08(config-ge6/0/1)#port hybrid vlan 2008 untagS7800-08(config-ge6/0/1)#exit //退出至上一层配置界面上行口:S7800-08(config-ge8/0/1)#port hybrid vlan 2008 tag //只透传2008VLAN--------------------------------------------------------------➢基于接口的QinQ配置,对比中兴设备的配置比较案例:vlan qinq session-no 1 customer-port fei_1/13 uplink-port gei_2/1 in-vlan 2013 untag helper-vlan 3999----- translation-vlan 1 outer-vlan 2013 add outer 3999 //中兴设备和烽火设备的vlan翻译规则命令比较interface fei_1/13 --------- interface gigaethernet 6/0/1 //进入端口下join translation-vlan 1 in //在端口下应用之前建立的翻译规则description XSX_ShuiYueSi_DSLAM2_MA5600 ------- alias XSX_ShuiYueSi_DSLAM2_MA5600 //端口描述switchport mode hybrid --------- port link-type hybridswitchport hybrid native vlan 254 -------- port hybrid pvid 254switchport hybrid vlan 2013 tag --------- port hybrid vlan 2013 tagswitchport hybrid vlan 254 untag -------- port hybrid vlan 254 untagswitchport hybrid vlan 3999 untag ---------port hybrid vlan 3999 untagswitchport qinq customer ---------- dot1q tunnel enable上联口中兴设备需要定义uplink,烽火设备无需该配置,将外层标签定义为untag即可。
烽火交换机配置命令集
关于“烽火S2000M交换机”配置以上联交换机为华为S3552G为例,通过配置口或ETH口对烽火交换机进行配置,修改交换机上联口以及对交换机业务端口进行业务VLAN配置。
烽火交换机IP地址划分由数据IT部相关数据制作人员对其分配及进行相关配置。
一,烽火交换机登陆方式:烽火交换机的登陆配置方式有两种,具体是:1,通过交换机上COS口进入烽火交换机搭配配置环境:图1-1 通过串口建立本地配置环境第一步:如图1-1所示,建立本地配置环境,只需要将电脑的串口通过串口电缆与S2000交换机的Console口相连;第二步:在电脑上运行超级终端,设备终端参数为9600bps,8位数据位、1位停止位、无校验和无流控,并选择终端类型为VT100,二进制传输协议为CRC;第三步:S2000第一次上电,自动执行setup命令,设备按照缺省的参数自动启动,直到用户看到Fengine;2,通过交换机上ETH口进人烽火交换机搭配配置环境:图1-2 通过直连网线建立本地配置环境第一步:如图1-2所示,用直连网线将电脑网卡接至交换机的带外网管口(带外网管口位与状态指示灯的左侧,接口旁边有“ETH”字样);第二步:启用超级终端登陆交换机:a,烽火交换机外带网关为192.168.2.1需要将电脑IP地址与交换机外带网关设置为同一网段。
鼠标右键单击桌面上“网上邻居:点击属性,在网上邻居菜单中点击属性,如图1-3;图1-3 本地连接属性b,单击internet 协议(TCP/IP),将IP地址设置为192.168.2.2 (与烽火外带网关设置为同一网段),子网掩码设置为255.255.255.0 ,如图1-4;图1-4 interface 协议(TCP/IP)属性c,点击桌面“开始”-“程序“-“附件”-“通讯”-“超级终端”,进入到超级终端的“连接描述”在名称对话框中随便输个名称列如:123,进入到“连接到”,如图1-5 ;图1-5:连接描述选项框d,进入“连接到”后,点击“连接时使用”选现中的“TCP/IP(winsock),在主机地址中输入:192.168.2.1 点击确定直到用户看到Fengine,如图1-6。
烽火交换机简单配置说明
烽火交换机简单配置与故障排查说明本文档针对烽火网管系列交换机简单配置做以下说明,请每个工作人员仔细阅读,牢固掌握交换机配置使用规范,防止人为使用设备不当造成的网络故障。
一,所有交换机从线路上撤回如果没有损坏,经测试可以复用的,必须经过以下配置放可再投入使用。
步骤1 交换机原有配置清除登录交换机将网线插入交换机外接配置口ETH口,在本地交换机配置网络IP: 192.168.2.5 子网掩码:255.255.255.0 网管默认不输入任何IP,在本地计算机打开IE浏览器在地址栏输入192.168.2.1用户名admin 密码12345界面如下选择左边配置选项系统配置-系统重启-最后选项(rebootToFactoryDault)选择设置系统充气后便还愿为出厂设置。
步骤2 重新再配置交换机-隔离端口首先按原有方式进入交换机配置界面,配置端口隔离Pvlan选择左边配置VLAN配置-私有VLAN配置在pvlan号输入1 除了1口上联口保持-状态其他端口均点选为| 状态如图然后选择设置设备完成后状态如上图,然后保存设置选择系统配置保存配置选择SA VE 后点选设置完毕。
步骤3 加入到小区任何地方,在系统上均要写入楼号单元层等信息。
选择-系统配置-系统信息,在系统名称里如上图写入交换机所在位置信息,写入后点选设置设置完毕后,选择保存配置选择SA VE 点选设置完毕。
二.更换小区主节点交换机配置说明所有小区主节点交换机均配置有管理IP地址,所有更换行为均要通知宽带部63313048 或63313028,新换交换机均要配置原有管理IP地址方可更换。
更换后经专家座席确认管理地址生效后放可离开工作现场。
按上述方法进入交换机管理界面,在系统配置-网络配置中按照上图方法写入相应的管理IP 和网关,写入后点选设置生效。
每个主节点为主管理交换机,相应配置角色为命令行交换机,配置方法如下图在集群管理-全局配置角色选择命令交换机选择确认后选设置生效,然后保存设置,完毕。
烽火交换机常用的基本配置命令&配置案例

最常用的基本配置命令用户名:admin默认密码:123453528#show interface 1 查看端口状态3528#show interface staistics 1 查看端口流量(realtime rate)3528#show vlan all 查看所以VLAN3528#show vlan 151 查看VLAN信息3528#config3528(config)#interface vlan 332 创建vlan 3323528(config)#no vlan 332 删除vlan 3323528(config)#interface ethernet 9 进入某个端口3528(config-eth-9)#join vlan 332 untagged 9端口加入到vlan332 非标记端口3528(config-eth-9)#pvid 332 9端口标记pvid 3323528(config-eth-9)#rate-limit rx 1024 收为1M带宽(数值必须是64的整数倍)例:20480为20M3528(config-eth-9)#rate-limit tx 1024 发为1M带宽(数值必须是64的整数倍)例:20480为20M3528(config-eth-9)#description ...... 端口描述3528(config-eth-9)#shutdown 关闭9号端口no shutdown 开启9号端口3528(config-vlan-332)#description ...... vlan描述3528#write file 保存配置案例:城域网 1.1.1.61 v66(管理vlan) 1.1.1.13 4/业务1/ /业务2/ /拨号用户/(DSLAM) /固定IP用户/V100 V200 V300 V400(打标的原则:A.设备接设备tag,设备接用户untag;B.端口对端打标状态始终与本端口一致,即对端tag,则端口tag,对端untag,则端口untag.C.untag的端口一定要打相应的pvid值)1 在config模式下创建vlan,更改用户名和密码,更改主机名称S3500(config)#hostname HostA更改主机名称HostA (config)#S3500(config)#adduser aaa group administrators password 111增加一个名为“aaa”,密码为111管理员用户S3500(config)#interface vlan 100创建vlan100并进入S3500(config-vlan-100)# interface vlan 200创建vlan200并进入S3500(config-vlan-200)#quit退出vlan200S3500(config)# interface vlan 66,300,400创建vlan300和400,在config模式下创建vlan如果只带1个参数则表示创建这个vlan 并进入,如果跟2个参数,则代表创建连续的多个vlan,vlan号为第1个参数到第2个参数,使用no命令删除,命令行定义跟创建vlan一样2 在vlan配置模式下,绑定vlan的IP地址S3500(config-vlan-66)#ip address 1.1.1.1 255.255.255.255在vlan内绑定IP地址S3500(config-vlan-66)#quit退出vlan配置模式S3500(config)#3 配置网管使用的ACL配置了VLAN IP在以后属于这个VLAN的任意一个端口是不能ping通交换机的,必须要配置ACL并将ACL应用到端口以后才可以在此端口PING通交换机以及telnetS3500(config)# access-list 1创建access-list 1并进入(ACL)S3500(config-acl-1)# rule 1 arp any 1.1.1.1 255.255.255.255此处IP地址为绑定的IP地址S3500(config- acl-1)#rule 1 action traptocpu onlyS3500(config- acl-1)#quit退出S3500(config)#4 在端口配置模式下配置端口信息在举例中交换机,需要在端口上启用ACL,透传vlanS3500(config)#interface ethernet 1进入端口1S3500(config-eth-1)#join vlan 66,100,200,300 tag端口1加入vlan100,200,300,400,为打标端口,此命令格式为join vlan 1,3,5-7,不连续vlan之间用“,”号隔开,连续vlan间用“-”隔开(1,3,5-7表示加入1,3,5,6,7)后面跟tagged或者untagged,定义端口为打标端口(tagged),或者为不打标端口(untagged)。
(烽火)交换机简易操作指南(V1[1].0)
![(烽火)交换机简易操作指南(V1[1].0)](https://img.taocdn.com/s3/m/17f2b413a8114431b80dd802.png)
WLAN项目烽火交换机简易操作指南一.WLAN项目烽火交换机快速登录方法:1.将电脑网线连接到交换机右下角的ETH口(带外网管登录)(1)汇聚交换机S3528F-AC (S3928MF-220)将自己的电脑设置为192.168.0.10 子网掩码255.255.255.0 无网关,无DNS开始—运行—cmd—telnet 192.168.0.1Username: adminPassword: 12345(2)POE交换机S2200ME-PAF-AC将自己的电脑设置为192.168.2.10 子网掩码255.255.255.0 无网关,无DNS开始—运行—cmd—telnet 192.168.2.1Username: adminPassword: 123452.将串口线连接到交换机右上角的CON口(CONSOLE线登录)开始—所有程序—附件—通讯—超级终端每秒位数9600数据位8奇偶校验无停止位1数据流控制无Username: adminPassword: 12345二.以烽火S2216ME-PAF-AC交换机为例,示范烽火POE交换机基本查障命令行以及一些简单的故障检测应对措施:(1)查看交换机各端口对AP的供电功率show pse int可见,交换机1-15口均有功率且基本为3000mW左右即3W左右。
如果某端口功率较其他端口功率过低且工作不正常的话,建议检查如下三点:①AP是否工作正常。
②网线质量、长度方面是否存在问题。
③是否已经安装了AP自带供电模块。
(2)查看交换机各端口状态以上可见,交换机1-15口均为UP状态,同时上联口为18口也UP。
如果某端口物理连接上已经有AP,但端口未UP,建议检查如下三点:①AP是否工作正常。
②网线质量、长度方面是否存在问题。
③如未使用AP自带供电模块,请show pse int查看是否使能了POE交换机供电功能(3)关闭1-16端口供电功能(4)打开1-16端口供电功能(5)查看交换机各端口连接AP的MAC地址㈠如果有未能学习到某端口AP的MAC地址的情况,建议检查如下两点:①AP是否工作正常。
烽火交换机常用的基本配置命令配置案例

烽⽕交换机常⽤的基本配置命令配置案例最常⽤的基本配置命令⽤户名:admin默认密码:123453528#show interface 1 查看端⼝状态3528#show interface staistics 1 查看端⼝流量(realtime rate)3528#show vlan all 查看所以VLAN3528#show vlan 151 查看VLAN信息3528#config3528(config)#interface vlan 332 创建vlan 3323528(config)#no vlan 332 删除vlan 3323528(config)#interface ethernet 9 进⼊某个端⼝3528(config-eth-9)#join vlan 332 untagged 9端⼝加⼊到vlan332 ⾮标记端⼝3528(config-eth-9)#pvid 332 9端⼝标记pvid 3323528(config-eth-9)#rate-limit rx 1024 收为1M带宽(数值必须是64的整数倍)例:20480为20M 3528(config-eth-9)#rate-limit tx 1024 发为1M带宽(数值必须是64的整数倍)例:20480为20M 3528(config-eth-9)#description ...... 端⼝描述3528(config-eth-9)#shutdown 关闭9号端⼝no shutdown 开启9号端⼝3528(config-vlan-332)#description ...... vlan描述3528#write file 保存配置案例:城域⽹ 1.1.1.61 v66(管理vlan) 1.1.1.13 4/业务1/ /业务2/ /拨号⽤户/(DSLAM) /固定IP⽤户/V100 V200 V300 V400(打标的原则:A.设备接设备tag,设备接⽤户untag;B.端⼝对端打标状态始终与本端⼝⼀致,即对端tag,则端⼝tag,对端untag,则端⼝untag.C.untag的端⼝⼀定要打相应的pvid值)1 在config模式下创建vlan,更改⽤户名和密码,更改主机名称S3500(config)#hostname HostA更改主机名称HostA (config)#S3500(config)#adduser aaa group administrators password 111增加⼀个名为“aaa”,密码为111管理员⽤户S3500(config)#interface vlan 100创建vlan100并进⼊S3500(config-vlan-100)# interface vlan 200创建vlan200并进⼊S3500(config-vlan-200)#quit退出vlan200S3500(config)# interface vlan 66,300,400创建vlan300和400,在config模式下创建vlan如果只带1个参数则表⽰创建这个vlan 并进⼊,如果跟2个参数,则代表创建连续的多个vlan,vlan号为第1个参数到第2个参数,使⽤no命令删除,命令⾏定义跟创建vlan⼀样2 在vlan配置模式下,绑定vlan的IP地址S3500(config-vlan-66)#ip address 1.1.1.1 255.255.255.255在vlan内绑定IP地址S3500(config-vlan-66)#quit退出vlan配置模式S3500(config)#3 配置⽹管使⽤的ACL配置了VLAN IP在以后属于这个VLAN的任意⼀个端⼝是不能ping通交换机的,必须要配置ACL并将ACL应⽤到端⼝以后才可以在此端⼝PING通交换机以及telnetS3500(config)# access-list 1创建access-list 1并进⼊(ACL)S3500(config-acl-1)# rule 1 arp any 1.1.1.1 255.255.255.255此处IP地址为绑定的IP地址S3500(config- acl-1)#rule 1 action traptocpu onlyS3500(config- acl-1)#quit退出S3500(config)#4 在端⼝配置模式下配置端⼝信息在举例中交换机,需要在端⼝上启⽤ACL,透传vlanS3500(config)#interface ethernet 1进⼊端⼝1S3500(config-eth-1)#join vlan 66,100,200,300 tag端⼝1加⼊vlan100,200,300,400,为打标端⼝,此命令格式为join vlan 1,3,5-7,不连续vlan之间⽤“,”号隔开,连续vlan间⽤“-”隔开(1,3,5-7表⽰加⼊1,3,5,6,7)后⾯跟tagged或者untagged,定义端⼝为打标端⼝(tagged),或者为不打标端⼝(untagged)。
烽火交换机常用命令大全

求烽火交换机常用命令大全q 接入方式通过Console口进行本地配置带内/带外的telnet或sshWEB页面q 部分有关管理的缺省设置带内ip:192.168.1.1/24带外ip:192.168.2.1/24本机登陆用户名、密码:admin,12345或guest,12345SNMP的只读集合:publicSNMP的读写集合:NETMANq Web页面配置根据交换机配置的默认web管理地址通过IE浏览器进行配置以烽火2008mfb为例q 设备缺省的web网管IP地址为192.168.2.1;q 设备缺省的用户名为:adminq 密码为:12345q 选择成员及类型时,可以通过单击代表相应端口类型的字符,选择合适的配置。
其中“-”代表不是该VLAN的成员,“T”代表是该VLAN的成员输出数据包带标识符,“U”代表是该VLAN的成员但输出数据包不带标识符,“T”“U”表示该接口的Pvid时该vlan。
q 查看及保存配置(特权模式下#)q showrunning-config 显示当前系统配置q showstartup-config 显示当前配置文件信息q show version 显示当前设备的版本信息q show system 显示系统配置q show interface [<1-64>] 显示端口信息q show vlan [<1-4094>] 显示vlan信息q show dynamic-mac AA:BB:CC:DD:EE:FF已知某一mac地址,查找交换机连接端口号q show logginghistory 显示历史记录q show history 显示之前的输入命令q ls显示文件系统q writefile 保存配置文件q show cpustatistic 显示CPU统计信息。
q 1、设置时间q clock set HH:MM:SS <1-31> <1-12> <2000-2100>q 例:Fengine#clock set 14:28:30 10 9 2009q 2、显示文件系统q dirq 例: Fengine#dirq size datetime nameq -------- ------------ --------q 11387 JAN-01-2000 00:01:16 sta rtcfgq 1 files, total space: 11387 bytesq 0 directorys,available space: 2011136 bytesq 3、清空交换机的配置文件erase startup-config用于清空flash上保存的配置文件,但是以前的配置在系统上仍然生效,因此如果希望系统恢复到出厂状态,除了需要清空flash 上的配置文件外,还需要重启设备例: Fengine(config)#erase startup-configThis will erase the configuration in the flash memory.Are you sure?(y/n) [y]Erasing configuration.......[OK]q 4、配置交换机系统的名字。
烽火5006-20 配置命令大全
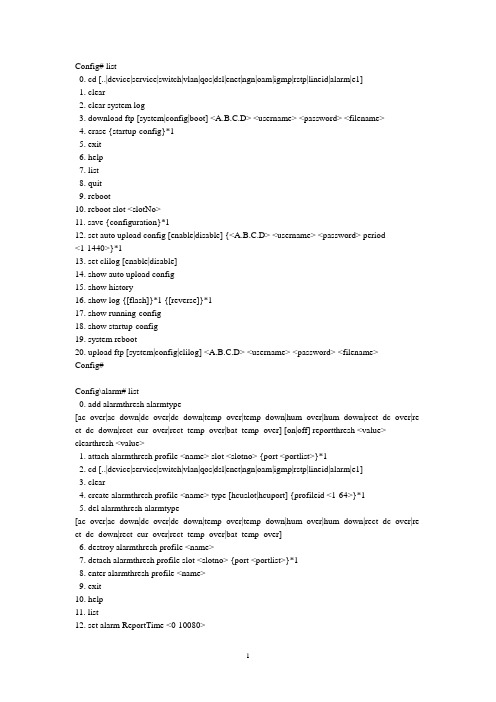
Config# list0. cd [..|device|service|switch|vlan|qos|dsl|enet|ngn|oam|igmp|rstp|lineid|alarm|e1]1. clear2. clear system log3. download ftp [system|config|boot] <A.B.C.D> <username> <password> <filename>4. erase {startup-config}*15. exit6. help7. list8. quit9. reboot10. reboot slot <slotNo>11. save {configuration}*112. set auto upload config [enable|disable] {<A.B.C.D> <username> <password> period<1-1440>}*113. set clilog [enable|disable]14. show auto upload config15. show history16. show log {[flash]}*1 {[reverse]}*117. show running-config18. show startup-config19. system reboot20. upload ftp [system|config|clilog] <A.B.C.D> <username> <password> <filename>Config#Config\alarm# list0. add alarmthresh alarmtype[ac_over|ac_down|dc_over|dc_down|temp_over|temp_down|hum_over|hum_down|rect_dc_over|re ct_dc_down|rect_cur_over|rect_temp_over|bat_temp_over] [on|off] reportthresh <value> clearthresh <value>1. attach alarmthresh profile <name> slot <slotno> {port <portlist>}*12. cd [..|device|service|switch|vlan|qos|dsl|enet|ngn|oam|igmp|rstp|lineid|alarm|e1]3. clear4. create alarmthresh profile <name> type [hcuslot|hcuport] {profileid <1-64>}*15. del alarmthresh alarmtype[ac_over|ac_down|dc_over|dc_down|temp_over|temp_down|hum_over|hum_down|rect_dc_over|re ct_dc_down|rect_cur_over|rect_temp_over|bat_temp_over]6. destroy alarmthresh profile <name>7. detach alarmthresh profile slot <slotno> {port <portlist>}*18. enter alarmthresh profile <name>9. exit10. help11. list12. set alarm ReportTime <0-10080>13. set alarm threshold <0-65534>14. set alarmthresh alarmtype[ac_over|ac_down|dc_over|dc_down|temp_over|temp_down|hum_over|hum_down|rect_dc_over|re ct_dc_down|rect_cur_over|rect_temp_over|bat_temp_over] [on|off] reportthresh <value> clearthresh <value>15. show ReservedInformation16. show alarm all17. show alarm count18. show alarm delayreporttime19. show alarm threshold20. show alarmthresh profile [<name>|all]21. show alarmthresh profile attaching slot <slotno> {port <portlist>}*122. show current alarm23. show current alarmthresh profile24. show current event25. show current event reverse26. show current status27. show history28. show history Alarm29. show start-up [current|history] alarm30. show start-up current event31. show trapBasisInformationConfig\alarm#Config\device# list0. add manage acl [enable|disable] ip <A.B.C.D> mask <A.B.C.D>1. add static route destination <A.B.C.D> gateway <A.B.C.D> {mask <A.B.C.D>}*12. auto auth card [<cardNo>|all]3. cd [..|device|service|switch|vlan|qos|dsl|enet|ngn|oam|igmp|rstp|lineid|alarm|e1]4. clear5. config card <cardNo> type [POTS|ETH|ADSL|VDSL|E1|POTS32]6. delete TrapReceiver ip <ip>7. delete manage acl [<index>|all]8. delete static route destination <A.B.C.D> gateway <A.B.C.D>9. delete static route destination <A.B.C.D> mask <A.B.C.D>10. erase except manage11. exit12. help13. hostname <hostname>14. list15. remove card [<cardNo>|all]16. restart auto negotiation slot <1-4> port [<1-16>|all]17. rms register ok slot <1-4>18. send olt info19. set Snmp Community read <readCommunity> write <writeCommunity>20. set TrapReceiver ip <ip> community <community>21. set system name <readCommunity>22. set aging time <0-65535>23. set alarmDebug [enable|disable]24. set auto save [enable|disable] {interval <minutes>}*125. set cpu thresh <value> memory thresh <value> {slot <slotNo> }*126. set dhcp client [enable|disable]27. set dhcp option60 [enable|disable]28. set dhcp option60 base [<baseString>|null] extension [<extString>|null]29. set dns server primary <A.B.C.D> {secondary <A.B.C.D>}*130. set environment temperature threshold min <0-100> max <0-100>31. set eth [ingress|egress] policy disable slot <1-4> port [<1-16>|all]32. set eth auto-neg disable speed [10m|100m] duplex [half|full] slot <1-4> port [<1-16>|all]33. set eth auto-neg enable slot <1-4> port [<1-16>|all]34. set eth egress policy enable cir <0-100000> pir <0-100000> slot <1-4> port [<1-16>|all]35. set eth flow control [enable|disable] slot <1-4> port [<1-16>|all]36. set eth ingress policy enable cir <1-100000> cbs <cbs> ebs <ebs> slot <1-4> port [<1-16>|all]37. set eth loopback [enable|disable] slot <1-4> port [<1-16>|all]38. set fan_control_auto <0-1>39. set fan_speed_force <1-4>40. set fan_start_run_temperature <20-40> fan_step <5-20> speed_degree <1-4>41. set ge1 [enable|disable]42. set hardware_debug_enable <0-1>43. set hcu [enable|disable]44. set heartbeat slot [<slotNo>|all] [enable|disable]45. set isolation [enable|disable] slot <slotNo>46. set low_consumption_enable <0-1>47. set mcu port [<1-3>|all] ingress [enable|disable] {cir <0-1000000> cbs <cbs> ebs <ebs>}*1 egress [enable|disable] {cir <cir> pir <pir>}*148. set mcu port ge1 auto-negotiation [enable|disable] {speed [10M|100M|1000M] duplex[half|full]}*149. set msc alive check slot [<1-4>|all] [enable|disable] {time <300-86400>}*150. set mtu <mtuSize>51. set optical_compensation Rxpower <value> Txpower <value>52. set power_supply_mode <0-1> backup_battery <0-1>53. set rms [enable|disable]54. set rms manual join slot <1-4>55. set slot <1-4> port <portlist> [enable|disable]56. set snmpDebug [enable|disable] printModule <1-100>57. set stdSnmpDebug [enable|disable]58. set syscontact <.contact>59. set syslocation <.location>60. show Snmp Community61. show std portEnable status slot <slot> port <port>62. show system name63. show TrapReceiver64. show [cpu|memory] usage65. show aging time66. show auth card [<cardNo>|all]67. show auto save info68. show boot version69. show cpu memory thresh {slot <slotNo> }*170. show dhcp config71. show dhcp state72. show environment73. show environment alarm threshold74. show environment temperature threshold75. show eth loopback slot <1-4> port [<1-16>|all]76. show eth port config slot <1-4> port [<1-16>|all]77. show ge1 port state78. show hardware info79. show hcu para80. show heartbeat {slot <slotNo>}*181. show history82. show hostname83. show ip84. show isolation {slot <slotNo>}*185. show line card info86. show line card status87. show line card time88. show linecard port state slot <1-4> port <portlist>89. show manage acl {<index>}*190. show mcu port config91. show mcu port rate info92. show msc alive check {slot <1-4>}*193. show olt info94. show rms enable95. show rms register info {slot <1-4>}*196. show running time97. show slot <1-4> [cpu|mem] usage98. show snmp cmd counter99. show static route100. show syscontact101. show syslocation102. show system info103. show upgrade status slot [<slotNo>|all]104. show usr_define_alarm105. show version {slot <slotNo>}*1106. upgrade slot <slotlist> boottype [ADSL|VDSL|ETH|POTS|E1|POTS32] server <A.B.C.D> user <user> password <pwd> filename <filename>107. upgrade slot <slotlist> filetype [ADSL|VDSL|ETH|POTS|E1|POTS32] server <A.B.C.D> user <user> password <pwd> filename <filename>108. verity rms olt ip <A.B.C.D> slot <oltSlotNo> pon <ponNo> onu mac <onuMac> ip<A.B.C.D>Config\device#Config\dsl# list0. [create|destroy] adsl line profile <name>1. [create|destroy] alarm profile <name>2. [create|destroy] pvc profile <name>3. [create|destroy] vdsl line profile <name>4. [create|destroy] vdsl pbo profile <name>5. [create|destroy] vdsl psd profile <name>6. [create|destroy] vdsl service profile <name>7. [create|destroy] vdsl vn profile <name>8. attach adsl line profile <name> slot <slotNo> port <portlist>9. attach alarm profile <name> slot <slotNo> port <portlist>10. attach pvc profile <name> slot <slotNo> port <portlist>11. attach vdsl line profile <name> slot <slotNo> port <portlist>12. attach vdsl pbo profile <name> slot <slotNo> port <portlist>13. attach vdsl psd profile <name> slot <slotNo> port <portlist>14. attach vdsl service profile <name> slot <slotNo> port <portlist>15. attach vdsl vn profile <name> slot <slotno> port <portlist>16. cd [..|device|service|switch|vlan|qos|dsl|enet|ngn|oam|igmp|rstp|lineid|alarm|e1]17. clear18. detach adsl line profile slot <slotNo> port <portlist>19. detach alarm profile slot <slotNo> port <portlist>20. detach pvc prifile slot <slotNo> port <portlist>21. detach vdsl line profile slot <slotNo> port <portlist>22. detach vdsl pbo profile slot <slotNo> port <portlist>23. detach vdsl psd profile slot <slotNo> port <portlist>24. detach vdsl service profile slot <slotNo> port <portlist>25. detach vn noise profile slot <slotNo> port <portlist>26. enter adsl profile <name>27. enter alarm profile <name>28. enter pvc profile <name>29. enter vdsl line profile <name>30. enter vdsl pbo profile <name>31. enter vdsl psd profile <name>32. enter vdsl service profile <name>33. enter vdsl vn profile <name>34. exit35. help36. list37. set adsl egress max-snrm <0-31> min-snrm <0-31>38. set adsl ingress max-snrm <0-31> min-snrm <0-31>39. set adsl interleave delay up <0-63> down <0-63>40. set adsl line transmode [all|gdmt|adsl2|adsl2+|t1413]41. set adsl min inp up <1-18> down <1-18>42. set adsl min rate ingress <0-100000> egress <0-100000>43. set adsl snrm up <value> down <value>44. set adsl toneblackout {start <0-511> end <0-511>}*8 {start <0-511> end <0-511>}*845. set alarm fe_param lossthres <0-900> lofsthres <0-900> esthres <0-900> sesthres <0-900> uasthres <0-900> lprsthres <0-900>46. set alarm ne_param lossthres <0-900> lofsthres <0-900> esthres <0-900> sesthres <0-900> uasthres <0-900> lolsthres <0-900>47. set bit swap up [enable|disable] down [enable|disable]48. set dpbo electron length <value> scalara <value> scalarb <value> scalarc <value> mus<value>49. set dpbo frequency min freq <0-2048> max freq <32-6956>50. set dsl profile print [debug|msg] [enable|disable]51. set egress psd index <1-40> tone <value> value <value>52. set egress vn index <1-32> tone [<33-859>|<1216-1961>|<2793-4081>] level <value>53. set ingress psd index <1-16> tone [<7-32>|<880-1196>|<1981-2773>] value <value>54. set ingress vn index <1-16> tone [<7-32>|<880-1196>|<1981-2773>] level <value>55. set line type [nochannel|fast|interleave|fastorinterleave|fastandinterleave]56. set perf cal [device|anms]57. set perf print [debug|msg|msc] [enable|disable]58. set port loopback slot <1-4> port <portlist> [enable|disable] mode[local|remote|reserved|analog|digital|atm]59. set port test slot <1-4> port <portlist> mode [selftest|delttest] action [start|end]60. set powermode [l0mode|l3mode|l2mode|l2andl3mode] l0time <0-65535> l2time <0-65535> l2atprt <0-15> l2rate <0-1024>61. set psd shape <0-42>62. set pst slot <1-5> port <1-32> up <value> down <value>63. set pvc [enable|disable] interface <interface>64. set rate ingress mode [fixed|adaptatstart|adaptatruntime] egress mode[fixed|adaptatstart|adaptatruntime] ingress max rate <64-200000> ingress min rate <0-200000> egress max rate <64-200000> egress min rate <0-200000>65. set rate up mode [fixed|adaptatstart|adaptatruntime] down mode[fixed|adaptatstart|adaptatruntime] up rate <64-100000> down rate <64-100000>66. set rfi {start <0-4095> end <0-4095>}*8 {start <0-4095> end <0-4095>}*867. set service interleave delay up <0-63> down <0-63>68. set service min inp up <1-18> down <1-18>69. set service snrm egress target snrm <value> snrm mode [userdefine|infinity] {max snrm<value> min snrm <value>}*170. set service snrm ingress target snrm <value> snrm mode [userdefine|infinity] {max snrm<value> min snrm <value>}*171. set slot <1-5> [perf|envir|cpumem] [enable|disable]72. set standard profile [8a|8b|8c|8d|12a|12b|17a|30a|all]73. set tx power up <value> down <value>74. set upbo mode [manual|auto|disable] electron length <value> us0a <value> us0b <value> us1a <value> us1b <value> us2a <value> us2b <value> us3a <value> us3b <value>75. set vdsl mode [ptm|atm|adapt]76. set vdsl toneblackout {start <0-4095> end <0-4095>}*877. set vpi <value> vci <value> {vpi <value> vci <value>}*778. show adsl line attaching slot <slotNo> port <portlist>79. show adsl line profile {<name>}*180. show alarm attaching slot <slotNo> port <portlist>81. show alarm profile {<name>}*182. show current adsl line profile name83. show current alarm profile name84. show current pvc profile name85. show current vdsl line profile name86. show current vdsl pbo profile name87. show current vdsl psd profile name88. show current vdsl service profile name89. show current vdsl vn profile name90. show dsl port status slot <1-4> port <portlist>91. show dsl profile running-config92. show history93. show perf cal94. show perf slot <1-5>95. show pst slot <1-5> port <1-32>96. show pvc attaching slot <slotNo> port <portlist>97. show pvc profile {<name>}*198. show pvc status interface <interface>99. show vdsl line attaching slot <slotNo> port <portlist>100. show vdsl line profile {<name>}*1101. show vdsl pbo attaching slot <slotNo> port <portlist>102. show vdsl pbo profile {<name>}*1103. show vdsl psd attaching slot <slotNo> port <portlist>104. show vdsl psd profile {<name>}*1105. show vdsl service attaching slot <slotNo> port <portlist>106. show vdsl service profile {<name>}*1107. show vdsl vn attaching slot <slotNo> port <portlist>108. show vdsl vn profile {<name>}*1Config\dsl#Config\e1# list0. add slot <1-4> e1 <1-4> stmno <1-18> stme1no <1-63> jitterbuf <4-64>1. cd [..|device|service|switch|vlan|qos|dsl|enet|ngn|oam|igmp|rstp|lineid|alarm|e1]2. clear3. debug snmp [on|off]4. delete slot <1-4> e1 <1-4>5. exit6. help7. list8. set slot <1-4> e1 <1-4> loop_status [enable|disable] loop_type <1-2>9. show e1 running-config10. show e1loop slot <1-4> e1 <1-4>11. show e1service slot <1-4> e1 <1-4>12. show historyConfig\e1#Config\enet# list0. cd [..|device|service|switch|vlan|qos|dsl|enet|ngn|oam|igmp|rstp|lineid|alarm|e1]1. clear2. exit3. help4. list5. show historyConfig\enet#Config\igmp# list0. [create|destroy] igmp profile <name>1. add prejoin group <groupaddress>2. cd [..|device|service|switch|vlan|qos|dsl|enet|ngn|oam|igmp|rstp|lineid|alarm|e1]3. clear4. debug [on|off] {[snmp]}*15. delete prejoin group {<A.B.C.D>}*16. exit7. help8. list9. set auto_upload ftp [enable|disable] {<A.B.C.D> <username> <password> period<1-1440>}*110. set clear igmp debug info11. set clear record12. set force_leave slot <slot> port <portlist> group <A.B.C.D>13. set group <A.B.C.D> bandwidth <0-30000> delay <0-300>14. set group <A.B.C.D> svlan [<1-4085>|null] stpid [<1-65534>|null] scos [<0-7>|null] cvlan [<1-4085>|null] ctpid [<1-65534>|null] ccos [<0-7>|null]15. set group <A.B.C.D> vlan <vid> {cvlan [<vid>|null]}*116. set group default vlan <vid> {cvlan [<vid>|null]}*117. set igmp [enable|disable]18. set igmp agetime <0-65535>19. set igmp error [on|off]20. set igmp max bandwidth <0-1000000>21. set igmp mode [control|proxy|snooping|disable]22. set igmp parameters[robustness|gen_query_interval|gen_query_respons|last_query_interval|last_query_count|last_quer y_respons|agetime|leavemode] <0-65535>23. set igmp preview count <1-16> during <1-254> interval <1-254> reset <1-254> total <1-254> {<gruoupaddress>}*124. set igmp profile <name> [add|delete] {<GroupAddress> [preview|normal]}25. set igmp proxy debug [enable|disable]26. set igmp proxy ip <A.B.C.D>27. set igmp record [enable|disable]28. set igmp record ignore_time <0-60> generate_interval <1-60>29. set igmp slot <slot> port <port> {[control] [enable|disable]}*1 {[bandwidth] <0-100000>}*1 {[max_group] <0-256>}*1 {[leave_mode] <0-1>}*1 {[profile] <porifle>}*130. set igmp uplink vlan [enable|disable]31. set ipv6 multicast [enable|disable] slot <1-4>32. set linecard igmp mode [disable|snooping|control] slot <1-4>33. set mcu leavemode [enable|disable]34. set signal_svlan <value> stpid <value> scos <value> cvlan <value> ctpid <value> ccos<value> slot <slot> port <port>35. show auto_upload parameter36. show group default vlan37. show history38. show igmp auth group {<A.B.C.D>}*139. show igmp debug info port <1-8>40. show igmp group bandwidth {<A.B.C.D>}*141. show igmp mode42. show igmp parameters43. show igmp portinfo slot <slot> port <portlist>44. show igmp portvlan slot <slot> port <portlist>45. show igmp preview46. show igmp profile {<name>}*147. show igmp proxy ip48. show igmp record state49. show igmp record time50. show igmp record {<1-128>}*151. show igmp running-config52. show igmp status53. show ipv6 multicast state slot <1-4>54. show linecard igmp mode slot <1-4>55. show marl56. show online group {<A.B.C.D>}*157. show prejoin groupConfig\igmp#Config\lineId# list0. cd [..|device|service|switch|vlan|qos|dsl|enet|ngn|oam|igmp|rstp|lineid|alarm|e1]1. clear2. exit3. help4. list5. set circuit_id accessNodeIdentifier <identifier> ani_rack <0-15> ani_frame <0-31>6. set circuit_id format [<format_str>|ctc|cnc]7. set ipv6 line-identify [enable|disable]8. set option82 [enable|disable]9. set pppoeplus [enable|disable]10. show circuit_id format11. show circuit_id value12. show history13. show option82 status14. show pppoeplus statusConfig\lineId#Config\ngn# list0. [inline|outline] test type [force|no-force] slot <1-4> port [<1-64>|all]1. attach profile <pfname> to slot <1-4> port <1-64> usernumber <1-256>2. cd [..|device|service|switch|vlan|qos|dsl|enet|ngn|oam|igmp|rstp|lineid|alarm|e1]3. clear4. clear discard offhook5. clear test info6. create profile <pfname>7. delete [mgcp|h248] mgc <IpAddrOrDNS> {<IpAddrOrDNS>}*28. delete ipt number [all|<phonenumber>]9. delete pos number [all|<phonenumber>]10. delete profile <pfname>11. exit12. help13. list14. modify mgc <IpAddressOrDNS> to <IpAddressOrDNS> {port <DestPortNum>}*115. reboot ngn-stack16. register MG to <IpAddrOrDNS>17. register port all18. register slot <1-4> port <1-64> {[-] <1-64>}*119. restore ngn param20. set MG_AUTH [enable|disable] {[mg_id] <inputsomething>} {[key] <inputsomething>} {[g_value] <inputsomething>} {[p_value] [default|<inputsomething>]}21. set MWD <0-254>22. set ans {[notify] [yes|no]}*1 {[timeout] <100-1000>}*1 {[am_timeout] <100-1000>}*123. set callerId {[delay] <0-999999>}*1 {[standard] [fsk|dtmf]}*124. set cmd version <version>25. set debug port [none|all]26. set debug slot <1-4> port <1-64>27. set debug_level {<1-9>}*2 {<1-9>}*728. set digitmap timeout {[start|short|long] <1-3600>}*329. set digitmap update [enable|disable] number <1-10>30. set digitmap_matched {[unambiguous] [enable|disable]}*1 {[timeoutDuration]<0-999999>}*131. set ec control [enable|disable]32. set ephemeral name first <firstname> start <0-65535> end <0-65535> step <0-65535> fill [on|off]33. set fax {[t38] [enable|disable]}*1 {[notifyFaxEvent] [enable|disable]}*1 {[event_mode] [normal|onlyV21|allV21]}*1 {[vbd_mode] [enable|disable]}*1 {[encoder_interval] <0-255>}*1 {[decoder_interval] <0-255>}*1 {[codec] [0|4|8|9|15|18|255]}*134. set fmtp {[dtmfAN] [enable|disable]}*1 {[redAN] [enable|disable]}*135. set force {[notifyoffhook] [yes|no]}*1 {[reqid] <0-65535>}*1 {[initphymedia] [yes|no]}*136. set heart word <heartword>37. set hold [yes|no]38. set hotline {[stopdial] [yes|no]}*1 {[notify] [space|nospace|t]}*139. set ipt number <phonenumber> {[type] [A|B|C|D|E|F|G|H]}*1 {[gain] <gainvalue>}*1 {[ec] [enable|disable]}*140. set ipt timer <1-65535>41. set keepAlive [enable|disable] {[interval] <1-86400>}*1 {[max_times] <1-120>}*1 {[send_mode] [time|optimize]}*142. set local port <0-65535>43. set media control {[single_code] [yes|no]}*1 {[single_stream] [yes|no]}*1 {[reply_locdesc] [yes|no]}*144. set mg local_name type [MAC|IP|DOMAIN] {[force_device] [yes|no]}*1 {[mid_have_port] [yes|no]}*1 {<domain_name>}*145. set mgc <IpAddressOrDNS> {port <0-65535>}*146. set mgc back [enable|disable]47. set ngn [signal|rtp] ip <A.B.C.D> mask <A.B.C.D> {gateway <A.B.C.D>}*148. set ngn [signal|rtp] servicename <servicename> svlan tpid <tpidvalue> cos <cosvalue> vid <vid> {cvlan tpid <tpidvalue> cos <cosvalue> vid <vid>}*149. set notify {[initpara] [yes|no]}*1 {[strictpara] [yes|no]}*1 {[minOffHookInterval]<0-65535>}*150. set port reg [enable|disable]51. set pos number <phonenumber> {[type] [A|B|C|D|E|F|G|H]}*152. set pots billing type [16kc|12kc|reverse] pulse voltage <4-26>53. set pots check time offhook <10-400> onhook <200-1000>54. set pots codec gain send <txGain> receive <rxGain>55. set pots impedance mode [600ohm|cplx560ohm|cplx680ohm]56. set pots pulse width <30-2500> interval <30-2500> flash width <30-2500>57. set pots_reg [enable|disable] slot <1-4> port <1-64> {number <1-256>}*158. set profile <pfname> {[silence_mode] [compress|uncompress]}*1 {[soft_noise][enable|disable]}*1 {[second_dial] [normal|2833|outband|2833red]}*1 {[echo_cancel] [enable|disable]}*1 {[gain] <gainvalue>}*1 {[input] <inputGainValue>}*1 {[jitter_Buffer]<0-255>}*1 {[fax_jitter_Buffer] <0-255>}*1 {[packet_interval] [5|10|20|30|40|50|60]}*1 {[fax_rate] [14400|12000|9600|7200|4800|2400]}*1 {[codec_mode] [g711u|g711a|g723|g729]}*159. set reRegMg count <0-999999> maxInterval <0-999999> initInterval <0-999999>60. set reRegUser count <0-999999> maxInterval <0-999999> initInterval <0-999999>61. set reply errno <400-581>62. set retrans {[initial] <100~20000ms>}*1 {[min] <1~1000ms>}*1 {[max]<1000~20000ms>}*1 {[t_max] <1000~60000ms>}*163. set ring {[onMax] <0-999999>}*1 {[offMin] <0-999999>}*164. set roh {[auto_play] [enable|disable]}*1 {[timeout_release] [enable|disable]}*1 {[timeout_setoutofsv] [enable|disable]}*165. set rtp_port start <0-65535> end <0-65535> {step <0-65535>}*166. set screason safechar [yes|no]67. set secDigit {[RFC2833PT] <0-255>}*1 {[RFC2198PT] <0-255>}*168. set send compact [on|off]69. set send delay <0-1000>70. set signal mode {[dt|bt|cw|wt|rdt|spec] on <0-65535> off <0-65535>}*671. set signal timeout {[dt|rt|ri|cw|bt|roh|wt] <1-3600000>}*672. set singleport_username slot <1-4> port <1-64> <username>73. set special ring temp <1-15> {[ring|stop|initRing|initStop] <0-65535>}*474. set task_mutex [enable|disable]75. set transport type [tcp|udp]76. set username slot <1-4> port <1-64> first <prefixname> start <0-65535> number <1-256> {step <1-65535>}*177. set voice_codec default [on|off] {[G711A|G711MU|G723High|G728|G729]}*178. show update digitmap79. show ans_parm80. show reRegMg81. show reRegUser82. show roh_parm83. show task_mutex84. show MG_AUTH85. show MWD86. show RetransportTime87. show backmgc88. show callerId89. show context90. show debug port91. show debug_level92. show default code93. show digitmap_matched94. show discard offhook all95. show discard offhook slot <1-4> port <1-64> {[-] <1-64>}*196. show dsp status97. show ec control98. show ephemeral name_rule99. show ephemeral term100. show errno101. show fax102. show fmtp103. show force104. show heart word105. show history106. show hold107. show hotline108. show inline test result slot <1-4> port [<1-64>|all]109. show ipt110. show ipt timer111. show keepAlive112. show media control113. show mg local_name114. show mgcList115. show ngn ip116. show ngn vlan117. show ngnstatics118. show notify119. show onhook state slot <1-4> {port <1-64>}*1120. show outline test result slot <1-4> port [<1-64>|all]121. show physical term122. show port alloc {[clear]}*1123. show port reg124. show pos125. show pots parameters126. show pots_reg slot <1-4> port <1-64> {number <1-256>}*1 127. show profile [<0-10>|all]128. show protocol type129. show ring130. show rtp information all131. show rtp information slot <1-4> port <1-64> {[-] <1-64>}*1 132. show rtp used。
烽火交换机配置命令
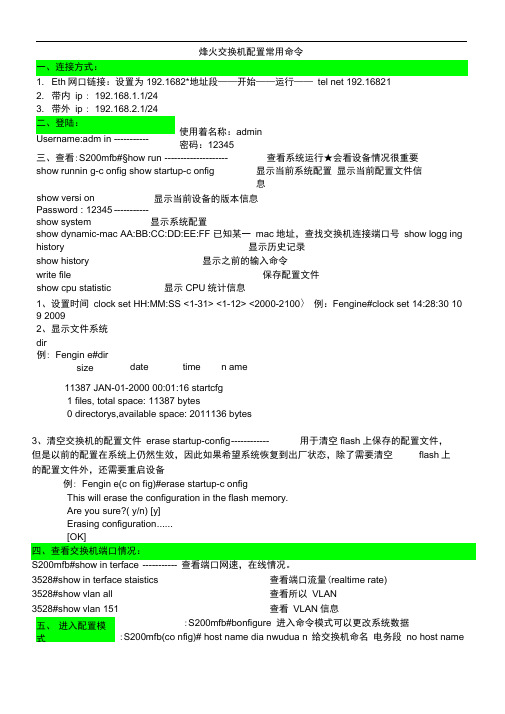
烽火交换机配置常用命令1. Eth 网口链接:设置为192.1682*地址段——开始——运行—— tel net 192.16821 2. 带内 ip : 192.168.1.1/24 Password : 12345 ----------- show system 显示系统配置show dynamic-mac AA:BB:CC:DD:EE:FF 已知某一 mac 地址,查找交换机连接端口号 show logg ing history 显示历史记录 show history 显示之前的输入命令 保存配置文件显示CPU 统计信息 1、设置时间 clock set HH:MM:SS <1-31> <1-12> <2000-2100〉 例:Fengine#clock set 14:28:30 109 20092、显示文件系统 dir11387 JAN-01-2000 00:01:16 startcfg1 files, total space: 11387 bytes0 directorys,available space: 2011136 bytes3、清空交换机的配置文件 erase startup-config ------------ 用于清空flash 上保存的配置文件,但是以前的配置在系统上仍然生效,因此如果希望系统恢复到出厂状态,除了需要清空flash 上的配置文件外,还需要重启设备例: Fengin e(c on fig)#erase startup-c onfigThis will erase the configuration in the flash memory. Are you sure?( y/n) [y] Erasing configuration ...... S200mfb#show in terface ----------- 查看端口网速,在线情况。
烽火交换机配置命令
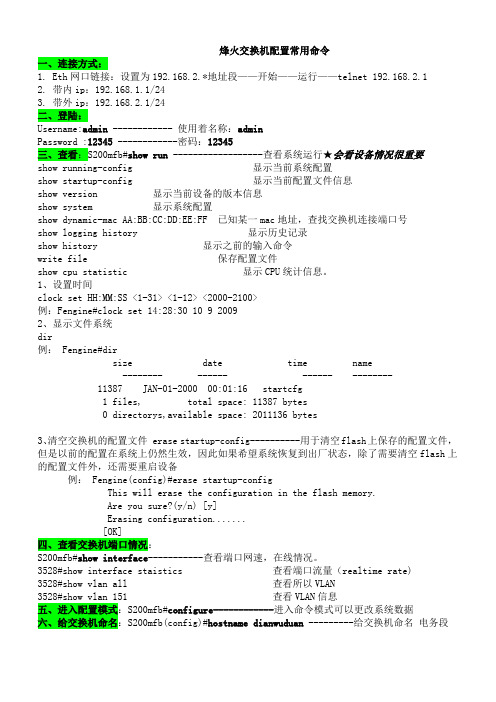
烽火交换机配置常用命令一、连接方式:1.Eth网口链接:设置为192.168.2.*地址段——开始——运行——telnet 192.168.2.12.带内ip:192.168.1.1/243.带外ip:192.168.2.1/24二、登陆:Username:admin ------------ 使用着名称:adminPassword :12345 ------------密码:12345三、查看:S200mfb#show run ------------------查看系统运行★会看设备情况很重要show running-config 显示当前系统配置show startup-config 显示当前配置文件信息show version 显示当前设备的版本信息show system 显示系统配置show dynamic-mac AA:BB:CC:DD:EE:FF 已知某一mac地址,查找交换机连接端口号show logging history 显示历史记录show history 显示之前的输入命令write file 保存配置文件show cpu statistic 显示CPU统计信息。
1、设置时间clock set HH:MM:SS <1-31> <1-12> <2000-2100>例:Fengine#clock set 14:28:30 10 9 20092、显示文件系统dir例: Fengine#dirsize date time name-------- ------ ------ --------11387 JAN-01-2000 00:01:16 startcfg1 files, total space: 11387 bytes0 directorys,available space: 2011136 bytes3、清空交换机的配置文件 erase startup-config----------用于清空flash上保存的配置文件,但是以前的配置在系统上仍然生效,因此如果希望系统恢复到出厂状态,除了需要清空flash上的配置文件外,还需要重启设备例: Fengine(config)#erase startup-configThis will erase the configuration in the flash memory.Are you sure?(y/n) [y]Erasing configuration.......[OK]四、查看交换机端口情况:S200mfb#show interface-----------查看端口网速,在线情况。
2、烽火PoE交换机命令行界面配置

烽火PoE交换机命令行界面配置黄色为需要配置命令青绿为实际配置操作1、串口或者Telnet登入交换机,输入用户名:admin,密码:12345,进入到#模式;Username:adminPassword:*****S2200ME-PAF#2、在#模式下,输入:config,进入到config模式S2200ME-PAF#config%Enter configuration commands.End with Ctrl+Z or command "quit" & "end"S2200ME-PAF(config)#3、进入system模式,输入:systemS2200ME-PAF(config)#systemS2200ME-PAF(config-system)#4、在system模式下,配置管理IP、管理VLAN:ip address 192.168.3.2/24gateway 192.168.3.1management vlan 99S2200ME-PAF(config-system)#ip address 192.168.3.2/24S2200ME-PAF(config-system)#gateway 192.168.3.1S2200ME-PAF(config-system)#management vlan 99S2200ME-PAF(config-system)#quiS2200ME-PAF(config)#然后输入:quit,回到config模式下5、在config模式下,创建管理VLAN、业务VLAN.(如管理VLAN为:99、业务VLAN为:3446)创建管理VLAN:interface vlan 99推出config模式下,输入:quit创建业务VLAN:interface vlan 3446S2200ME-PAF(config)#inter vlan 99S2200ME-PAF(config-vlan-99)#quitS2200ME-PAF(config)#inter vlan 3446S2200ME-PAF(config-vlan-3446)#quit6、上行口透传VLAN,(如上行口为16)进入上行口:int eth 16添加管理VLAN到上行口:join vlan 99 tag添加业务VLAN到上行口:join vlan 3446 tagS2200ME-PAF(config)#inter eth 16S2200ME-PAF(config-eth-16)#join vlan 99 tagS2200ME-PAF(config-eth-16)#join vlan 3446 tagS2200ME-PAF(config-eth-16)#quit7、业务VLAN端口配置,如第1、2口分别接了一台AP,则配置为int eth 1join vlan 3446 untagquitint eth 2join vlan 3446 untagS2200ME-PAF(config)#inter eth 1S2200ME-PAF(config-eth-1)#join vlan 3446 untagS2200ME-PAF(config-eth-1)#quitS2200ME-PAF(config)#inter eth 2S2200ME-PAF(config-eth-2)#join vlan 3446 untagS2200ME-PAF(config-eth-2)#quit8、修改交换名名称(如国光超市):hostname GGCSS2200ME-PAF(config)#hostname GGCSGGCS(config)#quit9、退出到#模式下,查看show runGGCS#show run10、保存配置,在#模式下:save file.,回车,输入“y”GGCS#save file附件:交换机配置脚本,供配置时参考交换机配置脚本打开telnet模式打开程序---WINDOWS程序---打开telent服务器和telent客户端Show vlan 查看vlan信息Show int 2(端口号) 查看端口信息Show int dy 查看交换机上所有maik地址Show system 查看交换机信息Config进入模式Int e 23(端口) 进入端口 no shut 打开端口Int vlan 3635 进入vlanNo vlan 3635 删除3635 vlan信息打开交换机供电Port 2-8(端口) pse enable打开PvidPort 2-8(端口号) pvid 3635(vlan号)172.20.50.24/24 四楼172.20.50.23/24 二楼。
烽火poe交换机命令行界面配置
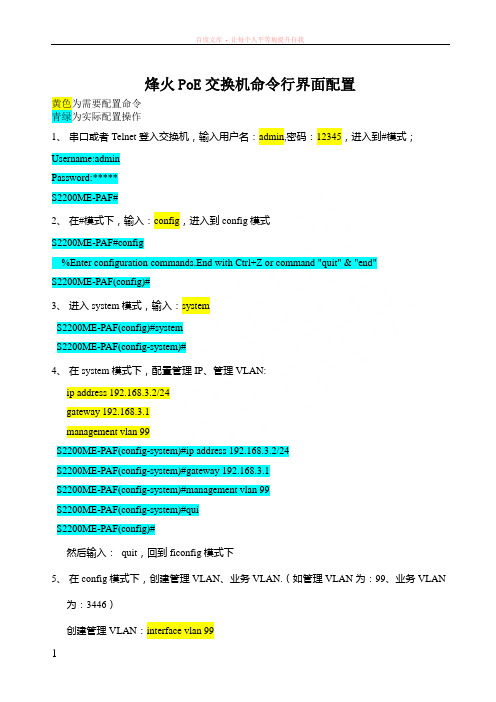
烽火PoE交换机命令行界面配置黄色为需要配置命令青绿为实际配置操作1、串口或者Telnet登入交换机,输入用户名:admin,密码:12345,进入到#模式;Username:adminPassword:*****S2200ME-PAF#2、在#模式下,输入:config,进入到config模式S2200ME-PAF#config%Enter configuration commands.End with Ctrl+Z or command "quit" & "end"S2200ME-PAF(config)#3、进入system模式,输入:systemS2200ME-PAF(config)#systemS2200ME-PAF(config-system)#4、在system模式下,配置管理IP、管理VLAN:ip address 192.168.3.2/24gateway 192.168.3.1management vlan 99S2200ME-PAF(config-system)#ip address 192.168.3.2/24S2200ME-PAF(config-system)#gateway 192.168.3.1S2200ME-PAF(config-system)#management vlan 99S2200ME-PAF(config-system)#quiS2200ME-PAF(config)#然后输入:quit,回到ficonfig模式下5、在config模式下,创建管理VLAN、业务VLAN.(如管理VLAN为:99、业务VLAN为:3446)创建管理VLAN:interface vlan 99推出config模式下,输入:quit创建业务VLAN:interface vlan 3446S2200ME-PAF(config)#inter vlan 99S2200ME-PAF(config-vlan-99)#quitS2200ME-PAF(config)#inter vlan 3446S2200ME-PAF(config-vlan-3446)#quit6、上行口透传VLAN,(如上行口为16)进入上行口:int eth 16添加管理VLAN到上行口:join vlan 99 tag添加业务VLAN到上行口:join vlan 3446 tagS2200ME-PAF(config)#inter eth 16S2200ME-PAF(config-eth-16)#join vlan 99 tagS2200ME-PAF(config-eth-16)#join vlan 3446 tagS2200ME-PAF(config-eth-16)#quit7、业务VLAN端口配置,如第1、2口分别接了一台AP,则配置为int eth 1join vlan 3446 untagquitint eth 2join vlan 3446 untagS2200ME-PAF(config)#inter eth 1S2200ME-PAF(config-eth-1)#join vlan 3446 untagS2200ME-PAF(config-eth-1)#quitS2200ME-PAF(config)#inter eth 2S2200ME-PAF(config-eth-2)#join vlan 3446 untagS2200ME-PAF(config-eth-2)#quit8、修改交换名名称(如国光超市):hostname GGCSS2200ME-PAF(config)#hostname GGCSGGCS(config)#quit9、退出到#模式下,查看show runGGCS#show run10、保存配置,在#模式下:save file.,回车,输入“y”GGCS#save file ? write file附件:交换机配置脚本,供配置时参考交换机配置脚本。
- 1、下载文档前请自行甄别文档内容的完整性,平台不提供额外的编辑、内容补充、找答案等附加服务。
- 2、"仅部分预览"的文档,不可在线预览部分如存在完整性等问题,可反馈申请退款(可完整预览的文档不适用该条件!)。
- 3、如文档侵犯您的权益,请联系客服反馈,我们会尽快为您处理(人工客服工作时间:9:00-18:30)。
关于“烽火S2000M交换机”配置
以上联交换机为华为S3552G为例,通过配置口或ETH口对烽火交换机进行配置,修改交换机上联口以及对交换机业务端口进行业务VLAN配置。
烽火交换机IP地址划分由数据IT部相关数据制作人员对其分配及进行相关配置。
一,烽火交换机登陆方式:
烽火交换机的登陆配置方式有两种,具体是:
1,通过交换机上COS口进入烽火交换机
搭配配置环境:
图1-1 通过串口建立本地配置环境
第一步:如图1-1所示,建立本地配置环境,只需要将电脑的串口通过串口电缆与S2000交换机的Console口相连;
第二步:在电脑上运行超级终端,设备终端参数为9600bps,8位数据位、1位停止位、无校验和无流控,并选择终端类型为VT100,二进制传输协议为CRC;
第三步:S2000第一次上电,自动执行setup命令,设备按照缺省的参数自动启动,直到用户看到Fengine;
2,通过交换机上ETH口进人烽火交换机
搭配配置环境:
图1-2 通过直连网线建立本地配置环境
第一步:如图1-2所示,用直连网线将电脑网卡接至交换机的带外网管口(带外网管口位与状态指示灯的左侧,接口旁边有“ETH”字样);
第二步:启用超级终端登陆交换机:
a,烽火交换机外带网关为192.168.2.1需要将电脑IP地址与交换机外带网关设置为同一网段。
鼠标右键单击桌面上“网上邻居:点击属性,在网上邻居菜单中点
击属性,如图1-3;
图1-3 本地连接属性
b,单击internet 协议(TCP/IP),将IP地址设置为192.168.2.2 (与烽火外带网关设置为同一网段),子网掩码设置为255.255.255.0 ,如图1-4;
图1-4 interface 协议(TCP/IP)属性
c,点击桌面“开始”-“程序“-“附件”-“通讯”-“超级终端”,进入到超级终端的“连接描述”在名称对话框中随便输个名称列如:123,进入到“连接到”,如图1-5 ;
图1-5:连接描述选项框
d,进入“连接到”后,点击“连接时使用”选现中的“TCP/IP(winsock),在主机地址中输入:192.168.2.1 点击确定直到用户看到Fengine,如图1-6。
图1-6:连接到选现框
二,烽火交换机配置:
本列最终以S2016A交换机为列,业务VLAN为2101为列管理VLAN为1为列,对于交换机地址的管理有数据制作网管负责更改。
1,进入烽火交换机,查看自身MAC地址;
Username: admin
Password: 12345
JHJ-FH_001#show version
Fengine JHJ_FH_NanLou2016 with 25930K of memory
System uptime is 0 days 0 hours 0 minutes 0 seconds
Hardware V ersion 1.20
Software V ersion 1.10
System Mac Address00:04:67:91:4E:79 ――本机MAC地址Compiled Jul 31 2006, 14:01:42
Copyright (c) 2000-2005 by FiberHome Networks Co.,Ltd.
2,配置交换机名称,以临汾为列。
以便于在管理及维护;
S2016AMFB#config
S2016AMFB(config)hostname LinFen
3,在烽火交换机上配置上联口,以便于在管理及维护;
S2016AMFB#config
S2016AMFB(config)interface ethernet 1
S2016AMFB(config-eth-1)join valn 1 tagged
S2016AMFB(config-eth-1)quid
S2016AMFB(config)
4,创建业务VLAN及对相应端口划分;
S2016AMFB(config)interface vlan 2101
S2016AMFB(config-vlan-2101)mem 1 tagged
S2016AMFB(config-vlan-2101)mem 15-16 untagged
S2016AMFB(config)interface vlan 1934
S2016AMFB(config-vlan-1934)mem 1 tagged
S2016AMFB(config-vlan-1934)mem 9,11 untagged
S2016AMFB(config-vlan-1934)quid
S2016AMFB(config)
5,在对应端口添加相应描述及pvid ;
S2016AMFB(config)interface Ethernet 9
S2016AMFB(config-eth-9)description NCKD_LinFen_XXX_GuangMao
S2016AMFB(config-eth-9)pvid 1934
S2016AMFB(config-eth-9)no shutdown
S2016AMFB(config-eth-15)description KSDH_LinFen_XXX_GuangMao
S2016AMFB(config-eth-9)pvid 2101
S2016AMFB(config-eth-9)no shutdown
S2016AMFB(config-eth-9)quid
S2016AMFB(config)quid
S2016AMFB#
6,最后一部,添加完相应数据后对其配置进行保存;
S2016AMFB#write file
This will save the configuration to the flash memory.
Are you sure?(y/n) [y] y
Building configuration.....
[OK]
三,命令配置说明:
Username: admin ――登陆名称
Password: 12345 ――登陆密码
show version ――显示版本信息(可查到MAC) config ――进入配置模式
hostname JHJ-FH_LinFen ――配置交换机主机名
interface ethernet x (1-16) ――进入业务端口
join valn 1 tagged ――透传VLAN 1
interface vlan 2101 ――创建VLAN
mem 1 tagged ――1口为tagged模式
mem 15-16 untagged ――15,16为untagged模式description NCKD_LinFen_XXX_GuangMao ――相应端口描述
pvid 1934 ――添加PVID
no shutdown ――开启端口
quid ――退出当前模式
write file ――保存当前配置。
