电子制动实训手册
制动器实训

用于使行驶中的车辆减速或停车,制动器安装在全部的车轮上,通常由驾驶员用脚操纵。
(2)驻车制动系
用于使停驶的汽车驻留原地,通常由驾驶员用手操纵。
3、盘式制动器工作原理
1-转向节或桥壳凸缘2-调整垫片3-活塞4-制动块;5-导向支承销6-钳体
7-轮辐8-回位弹簧9-制动盘10-轮毂凸缘
制动时,油液被压入内、外两轮缸中,经液压作用的活塞朝制动盘方向移动,推动制动块紧压制动盘,产生摩擦力矩而制动。
现象进行检测分析
情感目标培养学生认真严谨、实事求是的科学态度。
培养学生团结合作的精神、辩证思维能力。
培养学生分析问题解决问题的能力,学生乐于讨论与制动器有关的技术性知识
教学要求
1.了解汽车制动系统的作用、分类等基本知识;
2.掌握盘式制动器的结构及各零部件的名称和作用;
3.理解盘式制动器的工作原理;
4.能对盘式制动器和鼓式制动器进行比较分析;
4.拆卸制动分泵(弹簧先拆)取下分泵螺丝帽,拆下分泵螺丝
5.取出刹车片,拆卸制动钳
6.检查制动分泵是否漏油、检查制动盘盘面有无明显沟痕,检查盘面圆跳动
7.拆卸制动盘螺丝取出制动盘,检查制动片厚度是否合适(最小厚度2.0mm)
安装:
1.制动盘安装在轮毂上(安装时注意:制动盘不能倾斜)
2.制动钳支架装在轮毂上,制动分泵复位
科室机电科指导教师:郑丹凤、伍进涛、商杰
项目名称
制动器的拆装
工种
汽修
隶属课程
汽车底盘
教学学时
12
授课时间
教学目的
知识目标:学生能说出汽车制动系统的作用、分类等基本知识
学生能识别盘式制动器、鼓式制动器的结构及各零部件
制动实训报告

一、实训目的本次实训旨在通过实际操作,使学生掌握制动系统的基本原理、组成、结构、工作原理及故障诊断方法,提高学生对制动系统的实际操作能力和故障排除能力。
二、实训时间2021年X月X日至2021年X月X日三、实训地点XXX制动实训室四、实训内容1. 制动系统的基本原理及组成(1)制动系统的基本原理制动系统是汽车的重要组成部分,其主要功能是使汽车在行驶过程中减速或停车。
制动系统通过施加一定的制动力,使汽车减速或停车,以保证行车安全。
(2)制动系统的组成制动系统主要由以下几部分组成:1)制动踏板:驾驶员通过踩下制动踏板来控制制动力的大小。
2)制动总泵:将驾驶员施加的力转换为液压能,传递到制动器。
3)制动分泵:将制动总泵产生的液压能传递到制动器。
4)制动器:将液压能转换为制动力,使汽车减速或停车。
5)传动机构:将制动器产生的制动力传递到车轮。
2. 制动系统的结构及工作原理(1)制动系统的结构制动系统的结构包括:1)制动踏板:驾驶员通过踩下制动踏板来控制制动力的大小。
2)制动总泵:由泵体、活塞、密封件等组成,将驾驶员施加的力转换为液压能。
3)制动分泵:由泵体、活塞、密封件等组成,将制动总泵产生的液压能传递到制动器。
4)制动器:由制动盘、制动鼓、制动片、传动机构等组成,将液压能转换为制动力。
5)传动机构:将制动器产生的制动力传递到车轮。
(2)制动系统的工作原理制动系统的工作原理如下:1)驾驶员踩下制动踏板,使制动总泵的活塞产生位移。
2)制动总泵产生液压能,通过制动管路传递到制动分泵。
3)制动分泵将液压能传递到制动器。
4)制动器将液压能转换为制动力,使汽车减速或停车。
3. 制动系统的故障诊断方法(1)制动系统故障现象1)制动效果差:制动距离过长,制动不稳定。
2)制动跑偏:制动时,汽车向一侧倾斜。
3)制动系统异响:制动时,制动系统有异常响声。
4)制动系统漏油:制动系统有油液泄漏。
(2)制动系统故障诊断方法1)检查制动液:检查制动液是否充足、颜色是否正常。
制动器实训报告

制动器实训报告1. 引言本报告总结了对制动器的实训过程和相关实验结果。
制动器是车辆中非常重要的部件之一,它对于车辆的安全性和性能有着重要的影响。
通过实际操作和实验测量,我们对制动器的原理和工作方式有了更深入的了解。
2. 实训目的本次实训的主要目的是让学生通过实际操作和实验测量,了解制动器的工作原理、组成结构以及其在车辆中的重要作用。
通过实际操作和实验测量,学生可以更好地理解制动器的性能和调整方法,并培养一定的实操能力。
3. 实训内容本次实训主要包括以下内容:3.1 制动器的原理和工作方式首先,我们通过理论课程的学习,对制动器的原理和工作方式进行了回顾。
制动器通过施加摩擦力来减低车辆的速度或停车,其原理是利用摩擦片与摩擦盘之间的摩擦力实现制动效果。
我们学习了刹车片的材料和结构,以及制动系统中液压助力装置的工作原理。
3.2 制动器的组成结构在本次实训中,我们拆解了一台车辆的制动器,并仔细研究了其组成结构。
制动器主要由刹车片、刹车盘、刹车鼓、制动阻尼器和制动液等组成。
我们对各个部件进行了详细的介绍,并了解了它们之间的关联和作用。
3.3 制动器性能调整方法为了使制动器具有更好的性能,我们需要对其进行适当的调整。
在本次实训中,我们学习了制动器性能调整的方法。
这包括对刹车片的磨损程度进行检查和测量,通过调整刹车片的厚度和调整刹车盘与刹车片的间隙来实现制动器性能的调整。
4. 实验结果与讨论在实训过程中,我们进行了一系列实验,并得到了相关的实验结果。
以取样实验为例,我们对一台小型汽车的制动器进行了实验测量,并记录了相应的数据。
通过对数据进行分析,我们得出了以下结论:•制动力随刹车踏板力度的增加而增加,但增幅逐渐减小。
•刹车片磨损程度对制动力的影响显著,磨损较严重的刹车片制动力较小。
通过对实验结果的分析,我们发现实验结果与理论预期相符合,验证了制动器实训的有效性。
5. 总结通过本次制动器实训,我们对制动器的原理、组成结构和性能调整方法有了更深入的了解。
江西华伍制动器培训手册YP系列
17
制动器使用过程中的维护
制动器是一种涉及到机构作业安全的重要部件。在使用过程 中的正确维护,对于保证制动器的正常运行、避免运行故障是十 分重要的。用户应建立相应的科学合理的维护制度。 制动器的维护制度主要有:
(1)点检制度; (2)故障统计和故障分析; (3)常见故障的分析和排除;
■产品质量引起的故障 ■安装不当引起的故障 ■使用维护不当引起的故障 ■关联控制故障
20
3.常见故障分析、排除和预防
一、向制动器发出通电指令后不动作(不释放)
1、造成故障的可能原因、检查及排障方法
a)线路或控制故障从而导致推动器电机不得电
或缺相,可将推动器接线盒盖打开,用万用表测
量检查电机相间电压;如属线路或控制故障,逐
12
4. 行程开关的调整
制动器根据用户要求,可装设各种行程开关或感应式接 近开关用于连锁保护或信号、故障显示。加装的开关在制动 器出厂前已调整好,在使用前应进行相关检查并按主机要求 配接相应的软电缆。注意:此项调整在其它所有调整完成后 进行。
(1)感应式接近开关的调整; (2)机械式行程开关的调整;
13
(1)感应式接近开关的调整
a.衬垫磨损极限感应开关的调整
衬垫磨损极限限位开关, 可实现衬垫磨损到极限时, 自动显示信号或进行连锁保 护(用户无须调整)。
14
b.感应式释放限位开关的调整
手动释放 感应开关 开关座
锁紧螺母
开闸释放 感应开关
感应板
4mm
开关连扳
紧定螺钉
4mm
开闸限位开关调整:在制动器电动释放状态,用卡尺测量开关头至感应板间的距离,应该为 4mm左右,否则柠松开关连扳上的两个锁紧螺母(不要拆下),前后移动开关,使之符合要求,最后拧 紧锁紧螺母。
制动机简略实验操作方法
制动机简略实验操作方法
以下是一种可能的制动机实验操作方法:
1. 将制动机放在实验台上,并确保其稳定。
如果有需要,可以使用夹具或夹紧装置将其固定。
2. 将电源线连接到电源插座,并将另一端插入制动机的电源接口。
确保电源线连接正确并紧固。
3. 检查制动机的控制面板,并确保所有开关及按钮处于关闭状态。
4. 根据实验要求,将需要测量的物体(例如车轮)安装到制动机上。
确保固定牢靠,且和制动机轴线匹配。
5. 打开电源开关,检查仪表板上的电源指示灯是否点亮。
6. 根据实验设计,将所需的测量设备连接到制动机。
例如,可以连接力传感器、速度计等。
确保连接正确并紧固。
7. 根据实验要求,调整制动机的初始参数。
例如,可以通过控制面板设置制动力、刹车时间等参数。
8. 开始进行实验。
根据实验设计执行相应的操作,例如施加制动力、记录数据等。
9. 在实验过程中,根据需要进行必要的调整。
例如,可以调整制动力大小、刹车时间等。
10. 完成实验后,关闭制动机的电源开关,并断开电源线。
11. 根据实验要求,记录实验数据,并进行分析。
可以用于验算、曲线绘制、结果比较等。
请注意,以上仅是一种可能的制动机实验操作方法,实验操作步骤可能因具体实验要求而有所不同。
在进行任何实验之前,请务必阅读实验操作手册,并按照其指导进行操作。
电子制动器怎么操作方法
电子制动器怎么操作方法
电子制动器是一种通过电子控制控制汽车制动的装置,操作方法如下:
1. 确保车辆启动并处于运行状态。
2. 在驾驶过程中,减速或需要停车时,踩下油门踏板。
3. 将脚从油门踏板上抬起,轻轻用脚尖或脚跟踩下制动踏板。
4. 制动踏板踩下的力度和时间可以根据需要来控制车辆的减速和停车。
5. 通过电子控制系统,电子制动器会根据您的制动踏板操作调整刹车力度,以确保车辆的平稳制动和安全停车。
6. 当需要释放制动时,松开制动踏板即可。
需要注意的是,在使用电子制动器时应根据实际情况适当调整制动力度,以避免过度制动或制动不足。
此外,在急刹车或紧急状况下,应用力踩下制动踏板以确保及时停车。
操作时请注意周围的交通情况,以确保安全行驶。
制动技术实训报告

一、实训目的通过本次制动技术实训,旨在使学生了解和掌握汽车制动系统的基本结构、工作原理、故障诊断及维修方法,提高学生的动手实践能力和实际操作技能。
二、实训时间2023年X月X日三、实训地点汽车维修实训室四、实训内容1. 制动系统的基本结构及工作原理2. 制动系统的故障诊断3. 制动系统的拆装与维修五、实训过程1. 制动系统的基本结构及工作原理(1)讲解制动系统的组成,包括制动踏板、制动总泵、制动分泵、制动盘、制动鼓、制动片、制动蹄等。
(2)讲解制动系统的原理,即当驾驶员踩下制动踏板时,制动总泵将液压传递到制动分泵,使制动蹄与制动盘或制动鼓接触,从而产生摩擦力,使车轮减速或停止转动。
2. 制动系统的故障诊断(1)讲解制动系统常见的故障现象,如制动跑偏、制动失灵、制动异响等。
(2)讲解故障诊断的方法,如观察、听诊、检查制动液、检查制动系统部件等。
3. 制动系统的拆装与维修(1)拆装前盘式制动器① 使用两柱式举升机将汽车顶起,并确保汽车稳固。
② 拆下车轮,松开螺栓。
③ 拆下制动盘、制动钳、制动片等部件。
④ 检查制动盘、制动钳、制动片等部件的磨损情况,必要时进行更换。
⑤ 安装新部件,并按照拆卸顺序进行组装。
(2)拆装盘式后制动器① 使用两柱式举升机将汽车顶起,并确保汽车稳固。
② 拆下车轮,松开螺栓。
③ 拆下制动鼓、制动蹄、制动片等部件。
④ 检查制动鼓、制动蹄、制动片等部件的磨损情况,必要时进行更换。
⑤ 安装新部件,并按照拆卸顺序进行组装。
六、实训心得通过本次实训,我对制动系统的基本结构、工作原理、故障诊断及维修方法有了更深入的了解。
以下是我的一些心得体会:1. 制动系统是汽车安全的重要组成部分,对制动系统的了解和掌握至关重要。
2. 在实际操作中,要严格按照操作规程进行,确保安全。
3. 在故障诊断和维修过程中,要注重细节,认真检查每一个部件。
4. 制动系统的拆装与维修需要一定的技巧和经验,要不断积累和实践。
X8制动系统培训手册-PPT课件

5
X8制动系统培训手册
2 前制动器组装前注意事项:
使用的制动液:DOT4或DOT3 前轮盘制动器规格(mm) 制动盘直径301 新制动盘厚度26 制动盘报废厚度24 制动分泵活塞直径φ 42.86 制动块最小厚度4 •当制动盘厚度达到报废值,必须更换制动盘。对未达到报废标准的制动盘进行加工时, •应确保未超过报废值。 扭矩规格N•m 轮胎螺母118±10、制动分泵活塞壳体螺栓72 制动钳固定支架螺栓180±10 制动钳制动软管接头34±5
18
X8制动系统培训手册 (4)驻车制动器拆解(续)
将制动蹄带拉臂总成放到底板(件2)上,并装上拉线总成(件24)。将制动蹄总成(件 11)放到底板(件2)上,把推板弹簧(件34)穿入推板(件33)中,再将调整器(件16) 和推板(件33)装到制动蹄(件11)上。再装上下端回位弹簧(件37)。 将压簧拉杆Ⅰ(件29)、Ⅱ(件28)依次穿入底板(件2)、蹄盖板(32)、压簧(件 31)、压簧座(件30),并压紧压簧座(件30)。 装入上端前置(件35)回位弹簧、后置回位弹簧(件36)。 3、制动器拆卸过程与装配过程相反: 4、安装驻车制动器时不要随便拆散制动器,以避免装错和降低装配质量,当必须拆散时, 应记住零部件的原位: 1)严禁制动鼓和摩擦片的工作面上被涂料和油脂污染。如摩擦片上有微量污染应立刻用 细砂纸轻轻打磨消除。污染面大时,应更换制动蹄,否则将产生制动力严重不足的后果。 2)制动鼓和摩擦片之间应保持正常间隙(0.2 mm ~0.5mm) 3)制动蹄总成中摩擦片只剩下1-1.5mm,更换制动蹄总成。 注意:更换制动蹄总成时,同时对左右轮成对更换,制动蹄要求是同批号的,以保证相同 的摩擦系数。 4)驻车拉线调整,驻车拉线调整应在制动蹄间隙已在正常使用范围内后进行,调整驻车 拉线,使驻车拉线不工作时,驻车拉臂与拉线处于预紧状态,随着制动摩擦片的磨损,需 要通过间隙调整机构来调整。
电动手刹系统用户手册说明书
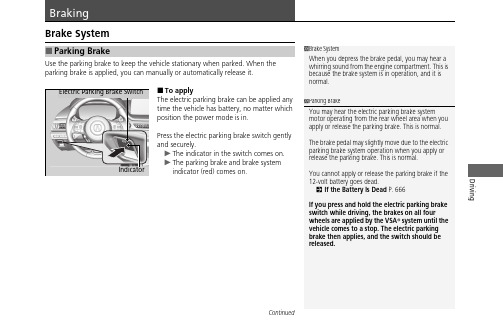
DrivingBrake SystemUse the parking brake to keep the vehicle stationary when parked. When the parking brake is applied, you can manually or automatically release it.■To applyThe electric parking brake can be applied any time the vehicle has battery, no matter which position the power mode is in.Press the electric parking brake switch gently and securely.u The indicator in the switch comes on.u The parking brake and brake system indicator (red) comes on.■Parking Brake1Brake SystemWhen you depress the brake pedal, you may hear a whirring sound from the engine compartment. This is because the brake system is in operation, and it is normal.1Parking BrakeYou may hear the electric parking brake systemmotor operating from the rear wheel area when you apply or release the parking brake. This is normal.The brake pedal may slightly move due to the electric parking brake system operation when you apply or release the parking brake. This is normal.You cannot apply or release the parking brake if the 12-volt battery goes dead.2If the Battery Is Dead P.666If you press and hold the electric parking brake switch while driving, the brakes on all fourwheels are applied by the VSA ® system until the vehicle comes to a stop. The electric parking brake then applies, and the switch should be released.Electric Parking Brake SwitchIndicatoruu Braking u Brake SystemDriving■To releaseThe power mode must be in ON in order torelease the electric parking brake.1.Depress the brake pedal.2.Pull the electric parking brake switch up.u The parking brake and brake systemindicator (red) goes off.Manually releasing the parking brake usingthe switch helps your vehicle start slowly andsmoothly when facing down hill on steep hills.1Parking BrakeIn the following situations, the parking brakeautomatically operates.•When the vehicle stops more than 10 minuteswhile ACC with Low Speed Follow is activated.•When the driver’s seat belt is unfastened whileyour vehicle is stopped automatically by ACC withLow Speed Follow.•When the engine is turned off, except by Auto IdleStop system, while ACC with Low Speed Follow isactivated.•When the vehicle stops with the automatic brakehold system activated for more than 10 minutes.•When the driver’s seat belt is unfastened whileyour vehicle is stopped and brake hold is applied.•When the engine is turned off, except by Auto IdleStop system, while brake hold system is applied.•When there is a problem with the brake holdsystem while automatic brake hold is applied. Electric Parking Brake Switchuu Braking u Brake SystemDriving■Automatic parking brake feature operationIf the automatic parking brake feature has been activated:•The parking brake is applied automatically when you set the power mode to VEHICLE OFF.•To confirm that the parking brake is applied, check if the Parking Brake and Brake System indicator (red) is on.2Activating and deactivating the automatic parking brake feature P.554■To release automaticallyDepressing the accelerator pedal releases the parking brake.Use the accelerator pedal to release the brake when you are starting the vehicle facing uphill, or in a traffic jam.Gently depress the accelerator pedal.When on a hill, it may require more accelerator input to release.u The parking brake and brake system indicator (red) goes off.You can release the parking brake automatically when:•You are wearing the driver’s seat belt.•The engine is running.•The transmission is not in P or N .1Parking BrakeIf the parking brake cannot be released automatically, release it manually.When the vehicle is traveling uphill, the accelerator pedal may need to be pressed farther toautomatically release the electric parking brake.The parking brake cannot be released automatically while the following indicators are on:•Malfunction indicator lamp •Transmission system indicatorThe parking brake may not be released automatically while the following indicators are on:•Parking brake and brake system indicator (amber)•Vehicle Stability Assist TM (VSA ®) system indicator •Anti-lock Brake System (ABS ) indicator •Supplemental restraint system indicatoruu Braking u Brake SystemDriving ■Activating and deactivating the automatic parking brake featureWith the power mode in ON, carry out the following steps to either activate ordeactivate the automatic parking brake feature.1.Put the transmission into P.2.Without depressing the brake pedal, push and release the parking brake switch.u Check that the parking brake and brake system indicator (red) has come on.3.Push and hold the parking brake switch. When you hear a beeping sound, releasethe switch and within 3 seconds push and hold the switch again.4.When you hear a sound indicating that the procedure is completed, release theswitch.u Two beeps indicates that the feature has been activated.u One beep indicates that the feature has been deactivated.u When you have completed activating the feature, the parking brake willremain applied after you turn off the power system.u To confirm that the parking brake is applied, check if the parking brake andbrake system indicator (red) is on.If you need to temporarily deactivate the feature for when putting your vehiclethrough a conveyor type car wash, you can follow the procedure explained below.1.Depress the brake pedal and bring the vehicle to a stop.2.Set the power mode to VEHICLE OFF and then within 2 seconds pull the parkingbrake switch.u Activation and deactivation settings for the feature will not be affected.u Before temporarily deactivating the feature, make sure to first turn off bothACC with Low Speed Follow and the automatic brake hold system.u To confirm that the parking brake is applied, check if the parking brake andbrake system indicator (red) is on.1Parking BrakeIn cold climates, the parking brake may freeze inplace if applied.When parking the vehicle, chock the wheels andmake sure the automatic parking brake feature isdeactivated.Also, when putting your vehicle through a conveyor-type car wash or when having your vehicle towed,deactivate the automatic parking brake feature andleave the parking brake released.uu Braking u Brake SystemDrivingYour vehicle is equipped with disc brakes at all four wheels. The brake assist system increases the stopping force when you depress the brake pedal hard in anemergency situation. The anti-lock brake system (ABS) helps you retain steering control when braking very hard.2Brake Assist System P.5592Anti-lock Brake System (ABS) P.558■Foot Brake1Foot BrakeCheck the brakes after driving through deep water, or if there is a buildup of road surface water. If necessary, dry the brakes by lightly depressing the pedal several times.If you hear a continuous metallic friction sound when applying the brakes, this is caused by the brake wear indicator rubbing on the brake rotor and indicates that the brake pads need to be replaced. Have the vehicle checked by a dealer. If you hear only an occasional squeak or squeal when you initially apply the brake pedal, this may be normal and caused by high frequency vibration of the brake pads against the rotating brake disc.Constantly using the brake pedal while going down a long hill builds up heat, which reduces the brake effectiveness. Apply engine braking by taking your foot off the accelerator pedal and downshifting to a lower gear.Do not rest your foot on the brake pedal while driving, as it will lightly apply the brakes and cause them to lose effectiveness over time and reduce pad life. It will also confuse drivers behind you.uu Braking u Brake SystemDriving Keeps the brake applied after releasing the brake pedal until the accelerator pedal ispressed. You can use this system while the vehicle is temporarily stopped, like attraffic lights and in heavy traffic.■Automatic Brake Hold1Automatic Brake Hold3WARNINGActivating the automatic brake hold systemon steep hills or slippery roads may stillallow the vehicle to move if you removeyour foot from the brake pedal.If a vehicle unexpectedly moves, it maycause a crash resulting in serious injury ordeath.Never activate the automatic brake holdsystem or rely on it to keep a vehicle frommoving when stopped on a steep hill orslippery roads.3WARNINGUsing the automatic brake hold system topark the vehicle may result in the vehicleunexpectedly moving.If a vehicle moves unexpectedly, it maycause a crash, resulting in serious injury ordeath.Never leave the vehicle when braking istemporarily kept by automatic brake holdand always park the vehicle by putting thetransmission in P and applying the parkingbrake.Fasten your seat beltproperly, then start theengine. Press theautomatic brake holdbutton.●The automatic brakehold system indicatoruu Braking u Brake SystemDriving■The system automatically cancels when:•You engage the parking brake.•You depress the brake pedal and put the transmission into P or R .■The system automatically cancels and the parking brake is applied when:•Braking is kept for more than 10 minutes.•The driver’s seat belt is unfastened.•The engine is turned off.•There is a problem with automatic brake hold system.■Turning off the automatic brake hold systemWhile the system is on, press the automatic brake hold button again.u The automatic brake hold system indicator goes off.If you want to turn off automatic brake hold while the system is in operation, press the automatic brake hold button with the brake pedal depressed.1Automatic Brake HoldWhile the system is activated, you can turn off the engine or park the vehicle through the same procedure as you normally do.2When Stopped P.560Whether the system is on, or the system is activated, the automatic brake hold turns off once the engine is off.1Turning off the automatic brake hold systemMake sure to turn off the automatic brake hold system before using an automated car wash.You may hear an operating noise if the vehicle moves while the automatic brake hold system is in operation.Automatic Brake Hold ButtonGoes Offuu Braking u Anti-lock Brake System (ABS)Driving Anti-lock Brake System (ABS)Helps prevent the wheels from locking up, and helps you retain steering control bypumping the brakes rapidly, much faster than you can.The electronic brake distribution (EBD) system, which is part of the ABS, alsobalances the front-to-rear braking distribution according to vehicle loading.You should never pump the brake pedal. Let the ABS work for you by alwayskeeping firm, steady pressure on the brake pedal. This is sometimes referred to as“stomp and steer.”■ABS operationThe brake pedal may pulsate slightly when the ABS is working. Depress the brakepedal and keep holding the pedal firmly down. On dry pavement, you will need topress on the brake pedal very hard before the ABS activates. However, you may feelthe ABS activate immediately if you are trying to stop on snow or ice.ABS may activate when you depress the brake pedal when driving on:•Wet or snow covered roads.•Roads paved with stone.•Roads with uneven surfaces, such as potholes, cracks, manholes, etc.When the vehicle speed goes under 6 mph (10km/h), the ABS stops.■ABS1Anti-lock Brake System (ABS)NOTICEThe ABS may not function correctly if you use a tire ofthe wrong size or type.If the ABS indicator comes on while driving, theremay be a problem with the system.While normal braking will not be affected, there is apossibility that the ABS will not be operating. Haveyour vehicle checked by a dealer immediately.The ABS is not designed for the purpose of reducingthe time or distance it takes for a vehicle to stop: It isdesigned to limit brake lockup which can lead toskidding and loss of steering control.In the following cases, your vehicle may need moredistance to stop than a vehicle without the ABS:•You are driving on rough or uneven road surfaces,such as gravel or snow.•The tires are equipped with tire chains.The following may be observed with the ABS system:•Motor sounds coming from the enginecompartment when the brakes are applied, orwhen system checks are being performed after theengine has been started and while the vehicleaccelerates.•Brake pedal and/or the vehicle body vibration whenABS activates.These vibrations and sounds are normal to ABSsystems and are no cause for concern.uu Braking u Brake Assist SystemBrake Assist SystemDesigned to assist the driver by generating greater braking force when you depressthe brake pedal hard during emergency braking.■Brake assist system operationPress the brake pedal firmly for more powerful braking.When brake assist operates, the pedal may wiggle slightly and an operating noisemay be heard. This is normal. Keep holding the brake pedal firmly down.DrivingDriving When Stopped1.Depress the brake pedal firmly.2.With the brake pedal depressed, press the electric parking brake switch.3.Change the shift position to P.4.Turn off the engine.u The parking brake and brake system indicator (red) goes off in about 30seconds.1Parking Your VehicleDo not park your vehicle near flammable objects,such as dry grass, oil, or timber.Heat from the exhaust can cause a fire.3WARNINGThe vehicle can roll away if left unattendedwithout confirming that Park is engaged.A vehicle that rolls away could cause a crashresulting in serious injury or death.Always keep your foot on the brake pedaluntil you have confirmed that P is shownon the gear position indicator.1When StoppedNOTICEThe following can damage the transmission:•Depressing the accelerator and brake pedalssimultaneously.•Holding the vehicle in place when facing uphill bydepressing the accelerator pedal.•Changing to P before the vehicle stopscompletely.uu Parking Your Vehicle u When StoppedAlways set the parking brake, in particular if you are parked on an incline.1When StoppedIn extremely cold temperatures, the parking brakemay freeze up if applied. If such temperatures areexpected, do not apply the parking brake but, ifparking on a slope, either turn the front wheels sothey will contact the curb if the vehicle rolls down theslope or block the wheels to keep the vehicle frommoving. If you do not take either precaution, thevehicle may roll unexpectedly, leading to a crash.Driving。
制动器实习指导书

一、鼓式制动装置:1、分解:(1)拆去前轮鼓盖,剃平锁紧螺母锁片(或拆下开口销),拧下锁紧螺母,并取下锁片及锁止垫圈。
(2)拧下轮毂轴承调整螺母,从转向节上拉下制动鼓,取出轴承。
(3)取下制动蹄支承销垫板开口销,取下垫板。
拆下复位弹簧,取下制动蹄。
(4)松开支动蹄支承销紧固螺母,取下支承销。
(5)拆下调整臂与推杆的连接销和制动凸轮内端的开口销,取下调整臂总成,调整垫片,和气室支架总成,抽出凸轮轴。
(6)拆下制动气室,拧下地板固定螺栓并取下制动地板。
(7)若是后轮,应先拆下半轴螺栓,取下锥行垫,取出半轴,再拆卸制动器。
2、检修:(1)检查制动鼓工作面是否有裂纹,变形,工作面磨损及圆度误差(不小于0.125毫米),必要时更换。
(2)检查制动蹄及摩擦片有无裂纹,铆钉深度不小于0.80毫米,制动片厚度不小于9毫米,铆钉是否松动,必要时更换。
检查制动蹄支承销与衬套的配合间隙(不超过0.40毫米),必要时更换。
(3)检查制动地板是否变形或裂纹,凸轮轴是否出现裂纹,复位弹簧是否出现裂纹,必要时更换。
3、组装:(1)将制动地板安装到转向节上,再装上支承销,凸轮轴,再将调整臂装到凸轮轴上,然后装上制动蹄,垫板及开口销。
(2)将轮鼓总成安装到转向节轴颈上,装上轮毂外轴承。
(3)然后装上调整螺母,锁止垫圈,锁片及锁止螺母(或开口销)。
再装上轮鼓盖和制动气室。
(4)若是后轮,最后装上半轴。
二、钳式制动装置:1、分解:(1)拆下定位弹簧及制动钳固定螺栓。
(2)取下钳体及摩擦片,拆下制动盘。
2、检修:(1)检查制动盘端面圆跳动误差(小于0.06毫米),或制动盘表面出现明显的磨损台阶及拉伤沟槽,必要时更换。
(2)制动钳体漏油时,应更换总成。
3、组装:(1)装上制动盘,并装好摩擦片。
(2)放好定位弹簧。
(3)安装制动钳体。
三、驻车制动装置:1、分解:(1)先拆除操纵机构各交接削轴的开口销,取下支撑销。
拆除操纵杆的固定螺栓,取下操纵杆。
制动器培训教材

制动器培训教材电⼒液压块式制动器的调整⽅法1.制动⼒矩的调整:根据需要在额定值和50%额定值范围内选择⼀个合适的⼒矩值。
(⽆弹簧座⽰值线的制动器,按照弹簧安装长度值范围内调整)调整⽅法:⽤扳⼿顺时针旋转⼒矩调整螺母时,弹簧⼯作长度变短,制动⼒矩增⼤,反之减⼩。
(a.不能超出⼒矩标牌上规定的范围。
b.弹簧拉杆端部距推动器壳体间隙⼤于10mm..)2.⽡块退距(推动器补偿⾏程)的调整:⽡块退距与推动器的⼯作⾏程成正⽐线性关系。
调整⽅法:顺时针旋转(拧进)制动拉杆将推动器补偿⾏程调整到额定值,调定后将制动拉杆的防松螺母背紧。
3.两侧⽡块退距均等的调整:如发现退距有较严重的不均等现象,则可能是均等装置的螺母松动。
调整⽅法:将制动器闭合,拧紧锁紧螺母即可。
(均等拉杆应处在接近⽔平的位置。
)4.⽡块随位装置的调整:在制动器处于抱闸状态时,旋转⽡块随位调整装置中的螺栓,使其顶端与制动⽡筋板的距离为0.5—1mm之间。
(视其制动器规格⼤⼩)制动器BMG4、BMG8、BM15、BM30调整⽅法1.切断电机和制动器的电源。
2.拆卸风扇罩。
3.移动密封条。
4.*通过向着轴承座转动的⽅式来松开调整套。
5.测量⼯作⽓隙:压板和线圈体之间,使⽤量规,在三个呈120°的交错位置上测量。
6.拧紧六⾓螺母,直到⼯作⽓隙调整正确。
7.*拧紧调整套与线圈体相对,直到⼯作⽓隙已调整正确。
8.⼿动释放装置:通过调节螺母调整锥形弹簧和调节螺母之间的纵向间隙。
电⼒液压推杆块式制动器基础知识1.在调整制动器前必须要切断电源。
2.起升系统为单制动器,调整时必须先将吊钩组落⾄地⾯。
3.起重机常⽤的制动器是常闭式制动器。
4.通常将制动器装在机构的⾼速轴上。
5.制动⽡块摩擦⾯与制动轮实际接触⾯积不⼩于理论值的70%。
6.电⼒液压块式制动器是⼀种通过制动⽡块施压于制动轮上,对旋转机械进⾏减速或停⽌制动的设备。
7.在制动过程中,运动物体的机械能被吸收并在摩擦副表⾯转化为热能向周围散发掉。
34任务3制动系统认识实训

任务三汽车制动系统认识实训一、课前准备(一)汽车认识与维护保养实训室1.实训室分区及桌椅摆放实训场地须包含多媒体教学区(图例中所示)、实际操作区、设备设施摆放区。
以每班30人为例,分为3组。
桌椅摆放同任务一。
2. 整车需要3台整车(每组一台),要求车辆的发动机运转正常。
3.展示台架汽车底盘展示台架3台(每组一台),通过该设备,学生可以学会汽车底盘的基本知识,理解相关理论。
4.电脑、投影仪用于播放PPT、视频和查阅资料用(二)零配件此表所需零部件,详单参考附表(三)信息1.制动系功用在行车过程中能以适当的减速度使汽车速度降低到所需值;使汽车在下坡行驶时保持适当的稳定速度;使汽车可靠的在原地(包括在斜坡上)停驻。
2.制动系要求可靠、稳定、平顺、操作轻便、散热性好、便于调整。
制动系的布置形式•双主缸:两个主缸串联。
当一个失效时另一个可以起作用。
•双管路:避免一套管路失效时整车丧失制动能力。
•助力:减轻驾驶员的制动操纵力。
•断气制动:应用于拖卡车。
避免挂车脱离或管路断裂而使挂车丧失制动能力。
3.根据两制动蹄片对制动鼓产生的径向力的情况,鼓式制动器可分为:•非平衡式。
•平衡式:单向助势双向助势•自动增力式。
4.单向助势•在前后制动蹄上都加上了动力。
制动缸。
各有一个•在汽车前进时制动效能得到很多大提高。
因为两只制动蹄都是助势蹄。
•在后退时就都是减势蹄。
•载重汽车不宜使用这种形式。
因为重车一旦在倾斜度很多的陡坡上停车,很容易造成事故。
5.双向助势称为全浮式车轮制动器。
•制动蹄采用浮动支承。
•所有固定元件都对称布置。
•汽车前进或倒退。
制动蹄都成为增势蹄。
制动性能充分发挥和保证。
6.盘式制动◆摩擦衬块从两侧夹紧和车轮一起旋转的制动盘。
◆特点:散热好,热稳定性好。
不易产生扩张变形。
◆结构组成:制动盘(转动)◆制动钳(固定)◆张开机构(轮缸活塞)二、课程实施(90分钟)(一)开课(5分钟)1.案例有一个客户反应其捷达车刹车效果不良,不知道是怎么回事.问题:刹车效果不良我们应该检查那个系统? 2.学习内容制动系统的定义及功用; 制动系统的组成;制动系统的元件名称、作用及位置; 3.学习目标能够说出制动系统的组成及功用;能够说出制动系统的零部件名称、作用及位置; 能够完整、正确地填写项目单。
电子刹车控制器说明书

Incorrect
D i r e c t i o n o f Trave l
D i r e c t i o n o f Trave l
Leveling the Sensor
After the brake control has been securely mounted the level adjustment must be set.
1. Connect trailer to tow vehicle. 2. Set Power Knob to the 12 o’clock position. 3. Drive tow vehicle and trailer on a dry level
paved surface at 25 mph and apply manual slide knob.
properly there will be very little current flowing through the brake magnets in a static state with the foot pedal depressed. The brake magnets will hum when there is current flowing through them. Anytime the Bi-Colored Light shows any color other than GREEN, there is current flowing through the brake magnets.
Installation Guide
WARNING The Brake Control must be mount-
ed from -20 degrees nose down to 70 degrees nose
电气制动实训报告

一、实训目的1. 理解电气制动的基本原理和分类。
2. 掌握电气制动系统的组成和功能。
3. 学会电气制动设备的安装、调试和故障排除。
4. 提高动手操作能力和实际应用能力。
二、实训时间2023年X月X日至2023年X月X日三、实训地点XX电气实训室四、实训设备1. 电气制动设备一套(包括电机、制动器、控制器等)2. 万用表、示波器、绝缘电阻测试仪等测试工具3. 电线、插座、开关等辅助材料五、实训内容1. 电气制动原理讲解(1)介绍了电气制动的概念、分类和基本原理。
(2)详细讲解了电动机制动过程中的能量转换、制动转矩等关键参数。
2. 电气制动系统组成及功能讲解(1)讲解了电气制动系统的组成,包括电机、制动器、控制器等。
(2)介绍了各部分的功能和作用。
3. 电气制动设备安装与调试(1)根据电气制动系统的设计要求,进行设备安装。
(2)进行电气连接,确保系统正常运行。
(3)调试电气制动系统,使制动性能达到设计要求。
4. 电气制动设备故障排除(1)分析了电气制动设备常见故障及原因。
(2)讲解了故障排除的方法和步骤。
5. 实际操作(1)按照实训指导书的要求,进行电气制动设备的实际操作。
(2)观察制动效果,记录相关数据。
六、实训过程及结果1. 在实训过程中,我们首先了解了电气制动的基本原理和分类,掌握了电气制动系统的组成和功能。
2. 在设备安装与调试环节,我们按照实训指导书的要求,成功完成了电气制动设备的安装和调试。
制动效果达到设计要求,制动转矩稳定。
3. 在故障排除环节,我们分析了电气制动设备常见故障及原因,并掌握了故障排除的方法和步骤。
在实训过程中,我们成功解决了部分故障。
4. 在实际操作环节,我们按照实训指导书的要求,进行了电气制动设备的实际操作。
观察制动效果,记录相关数据,为后续分析提供了依据。
七、实训总结1. 通过本次电气制动实训,我们掌握了电气制动的基本原理和分类,熟悉了电气制动系统的组成和功能。
2. 在设备安装与调试环节,我们提高了动手操作能力,学会了电气制动设备的安装、调试和故障排除。
电气制动实训报告总结
一、实训概述本次电气制动实训是在电气工程系实训室进行的,实训时间为一周。
实训过程中,我们学习了电气制动的基本原理、制动系统的组成、制动器的安装与调试方法等。
通过本次实训,我们掌握了电气制动系统的基本知识和操作技能,为今后的工作打下了坚实的基础。
二、实训任务完成情况1. 学习电气制动基本原理:我们了解了电气制动的工作原理、制动过程、制动力的产生和调节方法等,为后续实训奠定了理论基础。
2. 掌握制动系统组成:实训中,我们熟悉了制动系统的各个组成部分,如制动器、制动轮、制动鼓、制动间隙调整装置等。
3. 学习制动器安装与调试:实训过程中,我们学会了制动器的安装步骤、调试方法以及注意事项,确保制动器安装正确、运行平稳。
4. 实践操作:在实训老师的指导下,我们亲自动手进行制动器的安装、调试和运行,提高了实际操作能力。
5. 故障分析与排除:在实训过程中,我们遇到了一些故障,通过分析故障原因,我们学会了如何排除故障,提高了问题解决能力。
三、实训态度与纪律1. 实训态度:我们认真对待实训,积极参与各项实训活动,努力学习相关知识,不断提高自己的技能水平。
2. 实训纪律:在实训过程中,我们严格遵守实训纪律,保持实训室卫生,确保实训设备安全运行。
四、问题与努力方向1. 问题:在实训过程中,我们发现部分同学对电气制动原理理解不够深入,实际操作能力有待提高。
2. 努力方向:(1)加强对电气制动原理的学习,掌握制动系统的基本知识;(2)提高实际操作能力,熟练掌握制动器的安装、调试和运行;(3)培养团队协作精神,共同解决实训过程中遇到的问题;(4)关注行业动态,了解电气制动技术的发展趋势。
五、实训心得1. 通过本次实训,我们深刻认识到电气制动在工业生产中的重要作用,为今后从事相关工作打下了基础。
2. 实训过程中,我们学会了如何将理论知识与实际操作相结合,提高了自己的动手能力。
3. 实训让我们认识到团队合作的重要性,培养了我们团结协作的精神。
制动系统实训实验报告单

一、实验目的1. 理解汽车制动系统的基本结构和工作原理。
2. 掌握制动系统的拆装、检查与维修方法。
3. 培养实际操作技能,提高安全意识。
二、实验时间2023年X月X日三、实验地点汽车维修实训室四、实验对象金龙6601E2客车五、实验设备1. 两柱式举升机2. 套筒、扳手3. 制动液4. 制动油抽排加注工具5. 刹车片6. ACME便携工控机7. GEMS液压传感器8. ONO SOKKI惯性测量系统六、实验内容1. 制动系统结构认识2. 制动系统拆装3. 制动系统检查与维修4. 制动系统性能测试七、实验步骤1. 制动系统结构认识(1)观察金龙6601E2客车制动系统的整体结构,了解制动系统的组成部分,包括制动踏板、制动总泵、制动分泵、制动盘、制动鼓、制动蹄片、制动软管等。
(2)学习制动系统的基本工作原理,了解制动系统的能量传递过程。
(3)掌握制动系统的拆装方法,为后续实验做好准备。
2. 制动系统拆装(1)使用两柱式举升机将汽车顶起,确保汽车稳定。
(2)拆下车轮,露出制动系统。
(3)按照拆装步骤,依次拆下制动盘、制动鼓、制动蹄片、制动软管等部件。
(4)将拆下的部件进行清洗、检查,确保无损坏。
(5)按照相反的步骤,依次安装制动系统部件。
3. 制动系统检查与维修(1)检查制动系统各部件是否存在磨损、损坏等情况。
(2)对磨损、损坏的部件进行更换或维修。
(3)检查制动液是否充足、清洁,如有问题进行更换。
(4)检查制动系统管路是否畅通,如有堵塞进行清理。
4. 制动系统性能测试(1)使用ACME便携工控机和GEMS液压传感器对制动系统进行性能测试。
(2)测试制动协调时间、充分发出的制动减速度和制动距离等指标。
(3)分析测试结果,评估制动系统的性能。
八、实验结果与分析1. 制动系统结构认识:通过观察金龙6601E2客车制动系统的整体结构,了解了制动系统的组成部分和工作原理。
2. 制动系统拆装:掌握了制动系统的拆装方法,能够独立完成制动系统的拆装工作。
制动机实验指导书

《电力机车制动机》课程实验指导书在学习、掌握DK-1制动机构造、作用原理等相关内容的基础上,适时进行必要的实践训练,是将理论与实践相结合,巩固理论教学成果的有效方法。
本章根据教学大纲的要求,结合实践教学的特点,针对DK-1型电空制动机的构成、综合作用及其试验验收等内容,介绍了相关实验的实验目的、实验设备、实验步骤,并要求读者根据实验记录、实验过程总结实验结果。
实验一DK-1型电空制动机认识实验一、实验目的1.了解DK-1型电空制动机的组成及各部件的名称、用途。
2.熟悉DK-1型电空制动机的基本特点及控制方式。
3.掌握DK-1电空制动机各部件的实际安装位置。
4.掌握基础制动装置的结构,安装位置及作用原理。
二、实验设备1.韶山型电力机车司机操纵台。
2.制动屏柜。
3.基础制动装置。
三、实验步骤1.操纵部分的认识(1)电空制动控制器的用途及安装位置。
①电空制动控制器结构、安装位置。
②电空制动控制器的6个工作位置的作用及操作方法。
(2)空气制动阀的用途及安装位置。
①空气制动阀的安装位置。
②空气制动阀的4个工作位置的作用及操作方法。
③电空转换阀的作用及操作方法。
(3)调压阀53(或54)的用途及安装位置。
①调压阀53(或54)安装位置。
②调压阀53(或54)用途及调整方法。
2.制动屏柜的认识(1)各电空阀的用途及安装位置。
(2)各继电器的用途及安装位置。
(3)各压力开关的用途及安装位置。
(4)调压阀55的用途及安装位置。
(5)转换阀的用途及安装位置。
(6)中继阀的用途及安装位置。
(7)分配阀的用途及安装位置。
(8)紧急阀的用途及安装位置。
(9)电动放风阀的用途及安装位置。
(10)初制风缸、过充风缸、均衡风缸的安装位置。
3.基础制动装置的认识(1)介绍基础制动装置①制动缸的用途及安装位置。
②制动传动装置的用途及安装位置。
③闸瓦装置的用途及安装位置。
四、实验结果1.绘制制动屏柜的布置简图。
2.说明DK—1型电空制动机各组成部分的用途。
- 1、下载文档前请自行甄别文档内容的完整性,平台不提供额外的编辑、内容补充、找答案等附加服务。
- 2、"仅部分预览"的文档,不可在线预览部分如存在完整性等问题,可反馈申请退款(可完整预览的文档不适用该条件!)。
- 3、如文档侵犯您的权益,请联系客服反馈,我们会尽快为您处理(人工客服工作时间:9:00-18:30)。
第一章 ABS防抱死制动系统维修基础
第一节ABS的发展、基本组成、控制方式和分类●理论部分
理论课配图
●实训部分
实训课一实训日期:年月日
1、实训内容:ABS各个元器件识别
2、实训目的:了解ABS制动系统各元件的部件和位置
3、实训所需设备与工具:
4、规范操作流程(分步骤进行):
5、实训结果:
6、实训疑问:
7、实践心得:
8、教师点评:
第二节控制通道和传感器数目分类
理论部分
理论课配图
双制动管路前后布置双制动管路对角布置
a三通道四传感器ABS;b三用道三传感器ABS;c三通道四传感器ABS(对
脚布置)。
a二通道二传感器ABS;b二通道二传感器ABS;
c二通道二传感器ABS; d 二通道二传感器ABS。
实训部分
实训课二实训日期:年月日
1.实训内容:轮速传感器的拆装与检测
2.实训配图:
3.实训目的:
4.实训所需设备与工具:
5.规范操作流程(分步骤进行):
6.实训结果:
7.实训疑问:
8.实践心得:
9.教师点评:
实训课三实训日期:年月日
1.实训内容:常规刹车系统的检查
2.实训目的:掌握常规刹车系统检查项目和方法
3.实训所需设备与工具:
4.规范操作流程(分步骤进行):
5.实训结果:
6.实训疑问:
7.实践心得:
8.教师点评:
实训课四实训日期:年月日
1、实训内容:刹车片的拆装与调整
2、实训目的:熟练掌握刹车片的拆装与调整的操作方法
3、实训所需设备与工具:
4、规范操作流程(分步骤进行):
5、实训结果:
6、实训疑问:
7、实践心得:
8、教师点评:
实训课五实训日期:年月日
1、实训内容:刹车总泵的拆装,刹车踏板的调整。
2、实训目的:掌握刹车总泵的拆装方法和踏板的调整。
3、实训所需设备与工具:
4、规范操作流程(分步骤进行):
5、实训结果:
6、实训疑问:
8、教师点评:
第三节典型调节器的工作过程 理论部分
理论课配图
实训部分
实训课六实训日期:年月日
1、实训内容:ABS的排气和执行元件的测试
2、实训目的:掌握制动系统排气的方法和利用执行元件测试排除制动系统的故障
3、实训所需设备与工具:
4、规范操作流程(分步骤进行):
5、实训结果:
6、实训疑问:
7、实践心得:
8、教师点评:
理论课配图
实训部分
实训课七实训日期年月日
1.实训内容: ABS数据流分析
2.实训目的:利用ABS数据流分析ABS电控系统各个元件的好坏
3.实训所需设备与工具:
4.规范操作流程(分步骤进行):
5.实训结果:
6.实训疑问:
7.实践心得:
8.教师点评:
实训课八实训日期:年月日
1.实训内容:ABS故障码和故障分析
2.实训目的:掌握故障的排除方法
3.实训所需设备与工具:
4.规范操作流程(分步骤进行):
5.实训结果:
6.实训疑问:
8.教师点评:
实训课九实训日期:年月日
1、实训内容:刹车灯的故障排除
2、实训配图
3、实训目的:掌握故障的排除方法
4、实训所需设备与工具:
5、规范操作流程(分步骤进行):
6、实训结果:
7、实训疑问:
8、实践心得:
9、教师点评:
实训课十实训日期:年月日1.实训内容:ABS总成拆装
3、实训目的:掌握总成拆装方法
4、实训所需设备与工具:
5、规范操作流程(分步骤进行):
6、实训结果:
7、实训疑问:
8、实践心得:
9、教师点评:
实训课十一实训日期:年月日
1.实训内容:ABS电路检查
2、实训配图
3、实训目的:掌握电路检查方法
4、实训所需设备与工具:
5、规范操作流程(分步骤进行):
6、实训结果:
8、实践心得:
9、教师点评:
实训课十二实训日期:年月日
1、实训内容:ABS综合故障排除
2、实训目的:掌握故障的排除方法
3、实训所需设备与工具:
4、规范操作流程(分步骤进行):
5、实训结果:
6、实训疑问:
7、实践心得:
8、教师点评:。
