自卸车电动篷布控制器使用说明
自卸车自动篷布常见电机种类

渣土车自卸车自动篷布加盖改装的几种电机
河南禧隆机械常用的5种电机分析介绍
一.蜗轮蜗杆减速电机
河南禧隆机械采用功率为24V 800瓦的涡轮蜗杆电机,实测将近900瓦,内部为100%纯铜线圈机器缠绕,经过测试烧坏的几率几乎为0,并且电机为老款链条电机,个别地区会要求卷蓬安装为链条电机,并且电机安装的部位在车厢的前面安装,链条在驾驶位帽檐侧面链接。
唯一的缺点是需要定期往电机和链条上滴油,并且如果装货过程中挖机或者勾机碰到链条会直接断掉,这种减速电动机,一般用在渣土车摆杆式(或者叫卷筒式)简易自动篷布顶盖上。
二,行星齿轮电机
河南禧隆机械选用的的功率为24V 800瓦,实测将近900瓦。
它的优点就是所占用的安装空间不大,输出扭矩够大,通俗的说就是有劲,可以满足渣土车环保盖的要求。
并且这款电机为齿轮咬合,利用电机齿轮咬合主动齿轮轴,来进行传动,力度更加强大,并且传动更加有劲,它的缺点是当篷布运行到位之后,电机有可能会出现一定的反弹现象。
司机师傅们可根据作业情况选择,或者搭配合适的控制器解决问题。
三,RV减速电机
河南禧隆机械采用功率为24v 800瓦,实测将近900瓦的电机,13米车以下带动完全无压力运行,直拉电机,没有中间部分,在电机机头内圈中有一个电机轴和链轮,直接链条链接上主动齿轮轴的链轮,电机传动两链轮互相吃劲带动传动管,此款电机比行星齿轮电机外观更加美观。
四,内置滚筒电机
该种电机主要用在简易渣土车加盖篷布上,它通过轴套直接和卷篷布的卷轴连接,占用安装空间小,综合成本更低,输出扭矩大,故障率低。
如果是安装渣土车摆杆式简易卷筒篷布的话,这种电机值得推荐使用。
五,微型直拉电机。
控制器操作说明书V2.1.
控制器操作说明书2010年12月V 2.1首先感谢贵公司选用我公司的制冷机组产品.同时感谢您认真阅读本操作说明书。
一、 概述本机组使用的是触摸式操作显示屏。
机组的运行状态和全部操作均在屏幕上进行。
屏幕操作是通过已为该机组设置了各相应的屏幕页面及其按钮,您可以按照您的操作要求轻按各有关的按钮进行实际的操作。
屏幕中的按钮是轻触摸式的,请不使用工具或戴手套操作,以免划伤擦毛屏幕。
本控制器中显示的参数单位:压力:Kpa A 绝压温度:℃电流:A液位:%设备在完全正常的情况下,10分钟内对屏幕无任何操作屏幕的灯光会自动关闭,以延长屏幕使用寿命。
任意触摸一下屏幕立即自动点亮。
屏幕中含有设备的常见故障说明,用户可以随时翻阅。
帮助用户及时查找原因排除故障。
温度巡检仪显示的是主电机的各点温度:CH01 前轴承温度CH02 后轴承温度CH03 A绕组温度CH04 B绕组温度CH05 C绕组温度二、 主界面屏幕的操作说明接通电源后屏幕将显示本说明书封面上的图案,触摸该图案一下,屏幕就显示如下:主界面。
此界面中显示了常用的基本运行参数、机组状态和必要的操作按钮,当出现故障、报警时自动弹出信息条并用文字(走马灯形式)显示相应的内容,蓝色信息属报警(机组不停机),红色信息属故障(机组停机,故障复位也不会自动启动)。
触摸“机组启动”按钮,在屏幕上会弹出如下窗条:♦轻按“能量控制手动”按钮,在主界面的右上角能量位置值的下面将出现“+”、“-”按钮,表示机组运行中能量控制由操作人员人为地增载、减载操作。
但当运行参数超过安全保护设定值,电脑仍会自动强制减载甚至故障停机。
♦轻按“能量控制自动”按钮,“+”、“-”按钮将不出现,表示机组运行中能量控制由电脑自动地增载、减载操作。
♦轻按“本地启动”按钮,请注意:这是真正的启动按钮。
机组由电脑按指定的程序自动控制启动、运行、自动能量调节和液位控制。
♦启动过程:电脑首先检查无任何故障,再检查吸气压力应大于‘压缩机启动压力设定值’、‘高压电机柜允许’、‘停机到启动间隔时间到’等;电脑启动油泵,检查能量位置应小于 5%(否则自动减载)、喷油压差应大于150Kpa;释放主机停机信号,1秒钟后发主机启动命令。
WJ(M-PRO)系列控制器使用说明书
自卸汽车操作规程

自卸汽车操作规程一、引言自卸汽车是一种用于运输散装物料的专用车辆,广泛应用于建筑、矿山、冶金等行业。
为了确保自卸汽车的安全运行,提高工作效率,制定本操作规程,规范自卸汽车的操作流程和注意事项。
二、适用范围本操作规程适用于所有从事自卸汽车操作的人员。
三、定义1. 自卸汽车:指装有自卸装置的专用车辆,能够自动卸载物料。
2. 自卸装置:指安装在自卸汽车车厢上的装置,用于卸载物料。
3. 操作人员:指驾驶自卸汽车并进行卸载操作的人员。
四、操作要求1. 操作前准备1.1 检查自卸汽车的机械部件是否正常,如制动系统、转向系统、卸载装置等。
1.2 检查自卸汽车的液位,如燃油、润滑油、冷却液等。
1.3 检查自卸汽车的电器设备是否正常,如灯光、喇叭、仪表等。
1.4 检查自卸汽车的轮胎是否充气正常,胎面是否磨损严重。
1.5 确保自卸汽车的负载不超过额定载荷,并保持负载均匀分布。
1.6 确保自卸汽车的货物固定牢固,防止在行驶过程中倾倒或滑动。
2. 操作流程2.1 上车前,操作人员应穿戴好安全装备,如安全帽、安全鞋等。
2.2 上车后,调整座椅和后视镜,确保视野良好。
2.3 启动自卸汽车前,确认挂挡位置、手刹状态和转向灵活性。
2.4 启动自卸汽车后,先慢速行驶,检查刹车、转向和仪表是否正常。
2.5 行驶过程中,注意保持安全车距,遵守交通规则,避免超速行驶和猛刹车。
2.6 到达卸货地点后,停车前先拉紧手刹,然后挂空挡,并关闭发动机。
2.7 在卸货前,操作人员应确认卸载区域是否平坦稳固,避免自卸汽车倾倒或陷入。
2.8 卸货时,操作人员应按照卸载装置的操作步骤进行,确保卸载过程平稳顺利。
2.9 卸货后,操作人员应检查自卸汽车的车厢是否清洁,并关闭卸载装置。
3. 安全注意事项3.1 在操作自卸汽车时,严禁使用手机、耳机等影响注意力的设备。
3.2 在行驶过程中,遇到雨雪天气或路面湿滑时,应减速慢行,保持安全距离。
3.3 遇到紧急情况时,操作人员应迅速采取避让措施,确保自身和他人的安全。
渣土车控制器自动篷布控制器使用说明
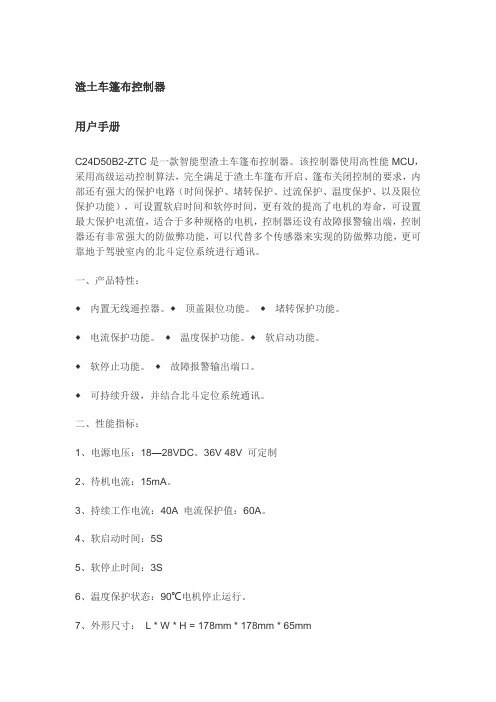
渣土车篷布控制器用户手册C24D50B2-ZTC是一款智能型渣土车篷布控制器。
该控制器使用高性能MCU,采用高级运动控制算法,完全满足于渣土车篷布开启、篷布关闭控制的要求,内部还有强大的保护电路(时间保护、堵转保护、过流保护、温度保护、以及限位保护功能),可设置软启时间和软停时间,更有效的提高了电机的寿命,可设置最大保护电流值,适合于多种规格的电机,控制器还设有故障报警输出端,控制器还有非常强大的防做弊功能,可以代替多个传感器来实现的防做弊功能,更可靠地于驾驶室内的北斗定位系统进行通讯。
一、产品特性:◆内置无线遥控器。
◆顶盖限位功能。
◆堵转保护功能。
◆电流保护功能。
◆温度保护功能。
◆软启动功能。
◆软停止功能。
◆故障报警输出端口。
◆可持续升级,并结合北斗定位系统通讯。
二、性能指标:1、电源电压:18—28VDC。
36V 48V 可定制2、待机电流:15mA。
3、持续工作电流:40A 电流保护值:60A。
4、软启动时间:5S5、软停止时间:3S6、温度保护状态:90℃电机停止运行。
7、外形尺寸:L * W * H = 178mm * 178mm * 65mm8、重量:700g三、安装尺寸图:178*178*65渣土车篷布控制器尺寸四、接线说明:24V+:24V电瓶正极24V-:24V电瓶负极电机1:电机正极电机2:电机负极五、使用说明:1、开关说明:(遥控器和面板同步)单击“关”按键;电机运行,篷布关闭。
单击“开”按键;电机运行,篷布开启。
单击“停”按键;电机停止运行。
注:如篷布的开启与关闭动作正好相反时,可将电机正负极互换,解决问题。
渣土车篷布控制器参数。
电动翻板机使用说明书

电动翻板机使用说明书1. 产品简介电动翻板机是一种用于翻转货物的机械设备,适用于工业生产和物流领域。
本说明书旨在帮助用户正确、安全地使用电动翻板机。
2. 安全须知在操作电动翻板机之前,请务必阅读以下安全须知,并严格遵守:2.1 熟悉机器结构和工作原理,避免擅自拆解或修改设备;2.2 使用前请检查设备是否正常运行,如发现异常请立即停止使用,并联系售后服务部门维修;2.3 操作人员应该接受专业培训,并持有相关操作证件;2.4 在操作过程中,穿戴合适的个人防护装备,包括安全帽、护目镜、耳塞等;2.5 使用设备时,必须确保周围没有其他人员,以防发生意外伤害;2.6 在翻转货物时,请确保货物稳定,避免倾斜或滑动。
3. 设备操作3.1 准备工作3.1.1 确保电动翻板机与电源相连,并处于通电状态;3.1.2 检查设备底座、固定架、翻板支架等部件是否完好;3.2 操作步骤3.2.1 将待翻转的货物放在翻板支架上,并确保货物与设备保持稳定接触;3.2.2 按下控制面板上的按钮,启动电动翻板机;3.2.3 设备开始运行后,可以通过控制面板上的按钮控制翻转方向和速度;3.2.4 当货物翻转到所需位置后,及时停止设备运行,并将货物从翻板支架上取下。
4. 注意事项4.1 使用时请注意设备运行状态,如发现异常噪音或震动等情况,请立即停止使用,并检查设备;4.2 设备需要定期进行维护保养,包括清洁、润滑等;4.3 设备长时间不用时,请切断电源并妥善存放;4.4 在使用过程中发现故障或需要更换零件时,请联系售后服务部门;4.5 未经授权人士禁止擅自操作设备,以免发生安全事故。
5. 常见故障及排查方法故障一:电动翻板机无法正常启动。
解决方法:检查电源是否连接正常,检查开关按钮是否损坏。
故障二:货物翻转不稳定。
解决方法:检查翻板支架是否平整,货物是否摆放稳固。
故障三:设备运行噪音过大。
解决方法:检查设备运转部件是否需要润滑,如有需要,请添加润滑油。
自卸车操作说明
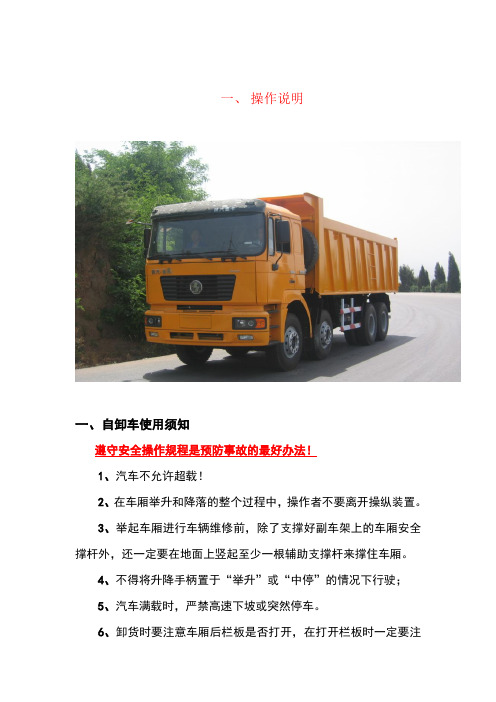
一、操作说明一、自卸车使用须知遵守安全操作规程是预防事故的最好办法!1、汽车不允许超载!2、在车厢举升和降落的整个过程中,操作者不要离开操纵装置。
3、举起车厢进行车辆维修前,除了支撑好副车架上的车厢安全撑杆外,还一定要在地面上竖起至少一根辅助支撑杆来撑住车厢。
4、不得将升降手柄置于“举升”或“中停”的情况下行驶;5、汽车满载时,严禁高速下坡或突然停车。
6、卸货时要注意车厢后栏板是否打开,在打开栏板时一定要注意安全!7、不得在虚土路面上进行举升操作。
8、不得在侧倾路面上进行举升操作。
9、严禁车厢在举升状态下行驶。
10、不得采用惯性“闪”车厢的方式进行倾卸黏性货物,否则会造成拉杆弯曲或油缸及其它部件损坏。
11、使用侧翻自卸车的用户注意,在举升前必须将另一侧的翻转销轴全部拔出,否则会造成自卸车的严重损坏。
为了您的利益,在使用前请认真阅读使用说明书,因不正当操作引起的故障,我公司只为您提供有偿服务。
二、选择合理的车型尊敬的用户,我公司郑重提示,请您根据使用地点、倾卸货物、道路状况等条件选择合理的车型。
1、厢长6m以下的4×2/6×4自卸车为工程自卸,可以在等级公路、矿区道路、建筑工地等道路状况下使用,适合运送砂石、土方、煤炭等松散货物。
2、厢长6m以下的4×2/6×4自卸车需运输矿石等松散货物密度较大时必须选择矿运自卸车。
可以在等级公路、矿区道路、建筑工地等道路状况下使用。
(图1为矿运自卸车)3、厢长6m至7.2m的6×4/8×4自卸车为公路自卸,可以在等级公路、建筑工地等道路状况下使用,适合运送砂石、土方、煤炭等松散货物。
4、厢长7.6m以上的8*4自卸车为拉煤专用自卸,可以在等级公路上使用,适合运送煤炭等低密度松散货物。
5、当长期在低温条件下使用时,请选择带有底板加热功能的自卸车。
图1矿运自卸车三、自卸车上装结构简述自卸车上装主要由副车架、车厢、液压倾卸机构及其附件组成。
电动布料机的遥控操作方法
电动布料机的遥控操作方法
电动布料机的遥控操作方法通常包括以下步骤:
1. 准备:将电动布料机连接到电源插座,并确保遥控器及其电池正常工作。
2. 开机:按下电动布料机上的电源按钮或拔下电动布料机的电源插头,使其处于开机状态。
3. 连接:按下电动布料机上的配对按钮,同时按住遥控器上的配对按钮,直到两者连接成功。
4. 选择模式:遥控器上通常有不同的模式按钮,根据需要选择适合的模式,比如前进、后退、左转、右转等。
5. 控制移动:使用遥控器上的方向控制按钮控制电动布料机的移动方向。
可以按住按钮实现连续移动,也可以分别点击按钮进行单步移动。
6. 调节速度:根据需要调节遥控器上的速度控制按钮,可以加速或减速电动布料机的移动速度。
7. 停止:停止电动布料机的移动,可以通过松开遥控器上的方向控制按钮,或按下停止按钮实现。
请注意,以上是一般的电动布料机遥控操作方法,不同品牌和型号的电动布料机可能存在差异,请按照具体产品说明书或使用手册进行操作。
多美德9100电动遮阳棚硬件操作说明书

Read these instructions carefully. These instructions MUST stay with this product.USASERVICE OFFICE Dometic Corporation 1120 North Main Street CANADADometic Corporation 46 Zatonski, Unit 3Brantford, ON N3T 5L8SERVICE CENTER &DEALER LOCATIONS Please Visit:REVISION BForm No. 3312736.048 09/16(French 3312739.042_B)©2016 Dometic Corporation 9100POWER PATIO AWNINGHARDWARE895(X)(X)1.4(X)0(#) BASEMENT 895(X)(X)2.4(X)0(#) STANDARD 895(X)(X)3.4(X)0(#) REDUCED PITCHFRTAFABRIC ROLLER TUBE ASSEMBLY91(X)(XX)(YY).(XXX)(#)91(X)(XX)(YY).(XXX)(#)LRECORD THIS INFORMATION FOR FUTURE REFERENCE:FRTA Model Number FRTA Serial NumberHardware Model Number Hardware Serial Number Date PurchasedRetailer / Qualified InstallerO P E R A T I N G I N S T R U C T I O N SINTRODUCTION ....................................................................................................................................................................2DOCUMENT SYMBOLS ........................................................................................................................................................2IMPORTANT SAFETY INSTRUCTIONS .. (3)A. Recognize Safety Information ...................................................................................................................................3B. Understand Signal Words ..........................................................................................................................................3C. Supplemental Directives ............................................................................................................................................3D. General Safety Messages .........................................................................................................................................3OPEN AWNING . (4)A. Open Awning .............................................................................................................................................................4FEATURES AND ACCESSORIES .. (4)A. LED Light Strip (If Equipped) .....................................................................................................................................4SET AWNING POSITION . (5)A. Adjust Awning Pitch (Optional) ..................................................................................................................................5B. Prepare Awning To Shed Water .................................................................................................................................5CLOSE AWNING .. (6)A. Close Awning .............................................................................................................................................................6B. Prepare Awning For Travel ........................................................................................................................................7CLOSE AWNING MANUALLY (POWER FAILURE) (7)A. Auxiliary Power Method .............................................................................................................................................7B. Pull Strap Method ......................................................................................................................................................8GENERAL CARE AND USE (9)A. Precautions ................................................................................................................................................................9B. Hardware Maintenance .............................................................................................................................................9C. Fabric Maintenance ...................................................................................................................................................9D. When To Get More Help .. (9)This awning (hereinafter referred to as “awning,” or “product”) is designed and intended for use on RVs with straight sides.For curved sides, please see the separate Hardware List in the Dealer Service Manual for the appropriate model. Use these instructions to ensure correct operation of product.Dometic Corporation reserves the right to modify appearances and specifications without notice.I ndicates additional information that is NOT related to physical injury.I ndicates step-by-step instructions.●This product MUST be [installed / serviced] by a qualified service technician. ●Do NOT modify this product in any way. Modifica -tion can be extremely hazardous. ●IMPACT OR CRUSH HAZARD. This product should be installed in a controlled environment (inside). Do NOT install product during windy conditions, or when wind is expected. Otherwise, product could move unpredictably, become un-stable, and could [detach / bend / collapse]. ●Frequently examine product for imbalance (un-even fit / sagging / loose parts); and signs of wear or damage to wiring (if applicable) and other criti-cal parts. Do NOT use product if adjustments or repairs are necessary.C ritical parts may include awning fabric, cables, arm assemblies, etc. ●Disconnect product from power supply (if ap-plicable), and do NOT operate product when maintenance (such as window cleaning) is being carried out in the vicinity. ●Do NOT allow anyone (including children) with reduced physical, sensory or mental capabilities, or lack of experience and knowledge to use this product, unless they have been given supervision or instruction (concerning use of this product) by a person responsible for their safety. ●Do NOT allow children to play with product or with fixed controls (if applicable). ●Keep remote controls (if applicable) away from children. ●IMPACT OR CRUSH HAZARD. NEVER leave an open awning unattended. Keep awning stowed (closed) when snow, heavy rain, wind, and severe weather conditions are expected. Failure to obey this warning could result in death or serious injury. ●IMPACT OR CRUSH HAZARD. Do NOT allow water to pool, snow to accumulate, or heavy debris on awning fabric. Do NOT hang or place anything on awning. The awning will become unstable, and could bend or collapse. Failure to obey this warning could result in death or serious injury. S12.B1.1 ●FIRE HAZARD. Keep sources of heat and fire (barbecue grills, portable heater, etc.) away from awning. Failure to obey this warning could result in death or serious injury. PINCH HAZARD. Maintain a hori-zontal distance of at least 16″ between fully open awning and any permanent object. Failure to obey this caution could result in injury.objects that may interfere with awning op-This manual has safety information and instructions to help you eliminate or reduce the risk of accidents and injuries.A. Recognize Safety InformationT his is the safety alert symbol. It is used to alert you to potential physical injury hazards. Obey all safety messages that follow this symbol to avoid possible injury or death.B. Understand Signal WordsA signal word will identify safety messages and property damage messages, and will indicate the degree or level of hazard seriousness.indicates a hazardous situation that, if NOT avoided, could result in death or serious in-jury.indicates a hazardous situation that, if NOT avoided, could result in minor or moderate injury.is used to address practices NOT related to physical injury.C. Supplemental DirectivesR ead and follow all safety information and instructions to avoid possible injury or death.Read and understand these instructions be-fore [installing / using / servicing / performing maintenance on] this product.Incorrect [installation / operation / servicing / maintaining] of this product can lead to seri-ous injury. Follow all instructions.The installation MUST comply with all ap-plicable local and national codes, including the latest edition of the following standards:U.S.A.●ANSI/NFPA70, National Electrical Code (NEC) ●ANSI/NFPA 1192, Recreational Vehicles Code CANADA●CSA C22.1, Parts l & ll, Canadian Electri-cal Code ●CSA Z240 RV Series, Recreational VehiclesD. General Safety MessagesFailure to obey the following warn-ings could result in death or serious injury:A. Open Awning1. PINCH HAZARD. Maintain ahorizontal distance of at least 16″ between fullyopen awning and any permanent object. Failureto obey this caution could result in injury.Press and hold toggle to extend (ON) position on (fixed/wired) remote awning switch until aw-ning is fully extended. See (FIG. 1).A wning will automatically stop when but-ton is released no matter how far awningis extended/retracted.2.IMPACT OR CRUSH HAZARD. Do NOT allow awning to remain in over-extend-ed position as this could trap heavy debris, or could cause water to pool or snow to accumu-late on awning fabric. This weight will cause aw-ning to become unstable, and bend or collapse. Failure to obey this warning could result in death or serious injury.Verify valance is in correct position, and adjust if necessary. If awning is over-extended, press toggle down (retract) briefly on (fixed/wired) re-mote awning switch until valance is in correct position. See (FIG. 1) & (FIG. 2).A. LED Light Strip (If Equipped)L ED switch operation and appearance mayvary depending on application.1. T urn LED switch to ON position to illuminateLED light strip.L ED light strip may be used while awningis open or closed.2. Turn LED switch to OFF position when LED lightstrip is not in use.B. Prepare Awning To Shed WaterIMPACT OR CRUSH HAZARD. Do NOT allow water to pool or snow to accumulate on awning fabric. The awning will become unsta-ble, and could bend or collapse. Whenever heavy rain or snow is expected, place awning in stowed (closed) position. Failure to obey this warning could result in death or serious injury.Lowering one arm assembly into water shed posi-tion (to create a slope from other arm assembly) will allow water run-off during light rain.1. W ith awning fully extended, verify top arm as-sembly nearest entry door is fully extended, and that adjustable knob is tightened. See (FIG. 3).2. IMPACT OR CRUSH HAZARD.NEVER disengage adjustable knob during windy conditions, or with water pooled or snow accumulated on awning fabric. This could cause the awning to move unpredictably, become un-stable, and bend or collapse. Failure to obey this warning could result in death or serious injury.Do NOT allow corner of entry door to contact awning fabric. Otherwise, pre-mature wear or tearing of awning fabric could occur.A. Adjust Awning Pitch (Optional)The FRTA (fabric roller tube assembly) will be lower than RV’s awning rail when hardware is fully ex-tended. This pitch (slope) will help accommodate water runoff. If a steeper pitch is desired, the FRTA must be lowered.To lower FRTA:1. With awning fully extended, loosen adjustable knob on adjustable pitch arm assembly (bottom arm). See (FIG. 3).2. PINCH HAZARD. Keep C LEARof openings around adjustable pitch arm assem-bly while adjusting awning pitch (slope). Adjust-able pitch arm assembly (bottom arm) will tele-scope. Failure to obey this caution could result in injury.Do NOT allow corner of entry door to contact awning fabric. Otherwise, pre-mature wear or tearing of awning fabric could occur.Pull top arm assembly down to lower FRTA to desired height. See (FIG. 4).3. While holding top arm assembly in place, tightenadjustable knob to set pitch (slope). See (FIG. 3) & (FIG. 4).4. IMPACT OR CRUSH HAZARD.ALWAYS lower one side of hardware into wa-ter shed position when adjusting awning [pitch / slope]. Otherwise, water could pool on awning fabric. Failure to obey this warning could result in death or serious injury.Repeat steps (1) through (3) for opposite side.M ake sure the top arm assembly that’s farthest from entry door is lowered more than the other. See subsection, “B. Pre-pare Awning To Shed Water” on page (5).4. While holding top arm assembly in place, tightenadjustable knob to set in place. See (FIG. 4).Loosen adjustable knob on adjustable pitch arm assembly (bottom arm) that’s farthest from entry door. See (FIG. 3).L owering the arm assembly that’s nearest entry door could allow door to contact fab-ric. If awning pitch was previously adjust-ed lower, raising arm nearest entry door will provide more fabric clearance.3. PINCH HAZARD. Keep C LEARof openings around adjustable pitch arm assem-bly while adjusting awning pitch (slope). Adjust-able pitch arm assembly (bottom arm) will tele-scope. Failure to obey this caution could result in injury.Pull top arm assembly (farthest from entry door) down until awning slopes approximately 10°, or 9″ minimum from other arm assembly. See (FIG. 4) & (FIG. 5).T his slope requirement is in addition to the slope from RV’s awning rail.A. Close Awning1. L oosen adjustable knobs to allow awning to reset to original position. Then lightly tighten knobs on both arm assemblies to help ensure rattle-free travel. See (FIG. 3).P ull top arm assembly down to verify knob is NOT too tight. Adjustable pitch arm as-sembly MUST still slide as normal. See (FIG. 4).2. PINCH HAZARD. KeepC LEARof arm assemblies while closing awning. Arm as-semblies will [fold / close] against back channel. Failure to obey this warning could result in death or serious injury.Press and hold toggle to retract (ON) position on (fixed/wired) remote awning switch until awning is fully closed. See (FIG. 1) & (FIG. 6).A wning will automatically stop when but-ton is released no matter how far awning is extended/retracted.2. Disable awning for travel to service center:a. Close awning and remove fuse for powersource to awning.b. Retest ignition interlock. See step (1).c. If awning does NOT respond (remains closed), the awning is now disabled. Skip to step (f).d. If awning still operates, pull motor connectorfrom hardware connector to disconnect mo-tor wiring. See (FIG. 7).T he motor connector may be hard to reach when awning is closed. Pull wir-ing at RH top casting until wires dis-engage.e. Repeat step (1) to verify motor is disabled.f. Have awning repaired by a qualified service technician.3. Turn LED light strip (if equipped) OFF beforetravel. See “A. LED Light Strip (If Equipped)” on page (4).4. Verify awning is secure for travel.L ook for loose parts, and any sign of in-stability.B. Prepare Awning For Travel1. IMPACT OR CRUSH HAZARD.Make sure ignition interlock is working correctly before traveling with RV. If awning responds to switch with ignition in O N position, accidental operation during transit could occur. The awning MUST be disabled, then serviced by a qualified service technician. Failure to obey this warning could result in death or serious injury.With awning fully closed, Test ignition interlock system:T esting of ignition interlock system is only applicable to motorhomes.a. With vehicle ignition in ON position, attemptto open awning.b. If awning does NOT respond (remainsclosed), the ignition interlock is functioning. Skip to step (3).c. If awning responds to switch (awning opens), there is a problem with the ignition interlock system. Proceed to step (2).In case of power failure, it may be necessary to close awning manually. There are two methods to close awning manually:Perform procedure under, “A. Auxiliary Power Method” on page (7) first. If this fails, perform procedure under, “B. Pull Strap Method” on page (8).R ule out simple causes for power failure (RV dis-connected from power, blown fuse, low/discharged battery, ignition interlock, etc.) before attempting to close awning manually. After awning is closed manually, it will require service by a qualified service technician.The LED light strip (if equipped) is on a separate circuit from awning motor. If LED lights work, but awning motor does not, check awning motor’s fuse (at fuse panel or converter) before closing awning manually.A. Auxiliary Power MethodWhen awning is in open position and 12 Vdc power has been lost, the awning may be closed by sup-plying auxiliary power (from external source) to aw-ning motor.A 12 Vdc automobile battery may be used as an external power source.1. L oosen adjustable knobs to allow awning to reset to original position. Then lightly tighten knobs on both arm assemblies to help ensure rattle-free travel. See (FIG. 3).2. ELECTRICAL SHOCK HAZARD.Disconnect power from product before access-ing wiring connections. There may be issues mimicking a power failure with electric current still present, or power may return unexpectedly. Failure to obey this warning could result in death or serious injury.Disconnect 120 Vac power from RV, and 12 Vdc power to awning.3. Unplug motor connector from hardware connec-tor (located in upper part of RH arm assembly). See (FIG. 7).3. Insert pull strap (provided) into utility slot of FRTA,and slide to center (of FRTA). See (FIG. 8).4. IMPACT OR PINCH HAZARD.Hold pull strap firmly before removing screw(s) at top casting. The fabric roller tube is under spring tension, which will attempt to close the awning quickly and unexpectedly. Failure to obey this warning could result in death or seri-ous injury.While one person grasps pull strap firmly, remove the (2) screws at top and back of RH top casting. Save for reinstallation later. See (FIG. 8).5. PINCH HAZARD. Keep C LEARof arm assemblies while closing awning. Arm as-semblies will [fold / close] against back channel. Failure to obey this warning could result in death or serious injury.Move pull strap diagonally (to left or right) as awning rolls up. Otherwise, awning fabric may crease or form a bulge, and could permanently stretch fabric.Carefully and slowly awning to roll up (close).6. IMPACT OR CRUSH HAZARD.Reinstall screw(s) at top casting B EFORE trans-porting RV. Otherwise, awning could extend quickly and unexpectedly during transit. Failure to obey this warning could result in death or seri-ous injury.Align holes in RH top casting (where screws were removed), and reinstall the (2) screws to secure awning for travel.D o NOT reattach wiring. Awning will require service by a qualified service technician .4. Connect 16 Gauge (minimum) wire leads (usersupplied) to motor connector, and tape in place (with electrical tape).D o NOT connect to hardware connector.Match wire lead colors to motor wire col-ors (black to black, red to red).5. Disconnect power I MMEDIATE-LY after awning retracts. Otherwise, damage toawning motor could occur.Connect other end of wire leads to the 12 Vdc external power source, until awning retracts to its closed position:a. Connect red wire to positive (+) terminal.T he lead wire connected to positive (+) terminal MUST have a (3 A) in-line fuse installed.b. Connect black wire to negative (-) terminal.Disconnect wire leads from power source once awning fully retracts.T he awning will extend if wire leads are reversed (reversed polarity).6. If awning does not move (after confirming con -nections and charge on external power source), the motor may be defective. Proceed to subsec-tion, “B. Pull Strap Method” on page (8) for alternative method.B. Pull Strap MethodUse this procedure if prior method failed to close awning.T his procedure requires a 5/32″ hex key, and help from at least one other person.1. M ake sure adjustable knobs are only lightly tightened on both arm assemblies. See (FIG. 3).2. Make sure motor connector from hardware con-nector (located in upper part of RH arm assem-bly is unplugged. See (FIG. 7).1. To clean:a. M ix 1/4 cup dish soap and 1/4 cup bleach to 5 gallons of fresh water to use as cleaning solution.b. Do NOT use abrasive or cor-rosive cleaners, mildew removers, or hard bristle brushes on awning fabric.Liberally drench open awning fabric with cleaning solution.c. Close awning, let it soak for 5 minutes, then open awning again.d. Remove solution C OM-PLETELY from awning fabric. Bleach willdegrade awning fabric if NOT completely rinsed off.Thoroughly hose off top and bottom of fabric with clean water.R epeat as necessary to completely re-move solution.e. NEVER close awning (forstorage) when wet. The combination of moisture and dirt could result in mildew, dis-coloration, and stains.Allow awning to dry thoroughly before stow-ing (rolling up).2. To repair a pinhole, or if a spot of coating flakesoff from top layer of vinyl fabric:a. A pply a very small dab of VLP (Vinyl Liquid Patch) on tip of cotton swab.V LP is available from Dometic Cor-poration. Reference part number 3314216.000 when ordering.b. Gently roll cotton swab around pinhole. TheVLP will melt the coating (on fabric) and that will quickly fill in pinhole and blend with all colored vinyls.c. NEVER close (roll up) awning when vinyl liquid patch is wet. Otherwise, damage to other parts of awning fabric (melt-ing through layers) will occur.Allow VLP to dry thoroughly before stowing (rolling up) awning.D. When To Get More HelpIf malfunctions occur (that cannot be corrected by reviewing these instructions), contact a qualified service technician.A slight “travel line” may appear where door roller (if installed) contacts awning fabric. This is considered normal and does NOT af-fect the integrity of awning fabric.A. PrecautionsFailure to obey the following notices could damage product or property:●Do NOT use insecticides or other sprays near aw-ning fabric. These could cause stains, and could adversely affect fabric’s ability to repel water.●Do NOT expose awning to adverse environmental conditions, corrosive agents, or other harmful conditions. ●Do NOT allow corner of entry door to contact aw-ning fabric. Otherwise, premature wear or tearing of awning fabric could occur. ●NEVER close awning (for storage) when wet. The combination of moisture and dirt could result in mildew, discoloration, and stains.I f it is necessary to roll up awning (tem-porarily) while it’s wet, make sure you roll it out and let it dry (as soon as conditions allow) before rolling it up again. ●Do NOT allow dirt, leaves, or other debris to ac-cumulate on awning, which could cause abrasion and stains. Mildew could grow on dirt and organic debris causing permanent discoloration, stains, and odors to awning fabric.B. Hardware Maintenance1. Do NOT use strong chemicals orabrasives to clean parts, as their protective sur-faces will be damaged.Clean awning hardware (as needed) with a mild surface cleaner.2. Do NOT use silicone sprays nearlabels. Otherwise, the label’s adhesive bond to product surfaces could weaken.Apply silicone spray lubricant as needed to keep the fabric roller tube assembly’s moving parts operating smoothly.3. Lubricate all sliding surfaces of arm assemblieswith silicone spray as needed.C. Fabric MaintenanceVinyl fabric offers the advantage of durability and water resistance.W rinkling is a normal characteristic of vinyl. Wrinkling may be more noticeable when re-tracted, and after prolonged periods of stow-age (rolled up). Leave awning open during warm weather to minimize the wrinkling over a period of time.。
实用文库汇编之伸缩雨篷说明书
作者:座殿角作品编号48877446331144215458创作日期:2020年12月20日实用文库汇编之电动伸缩雨篷说明书1、简介:电动伸缩雨篷主要是运用在露天广场,大型池型建筑物、两建筑物中间的大型电动折叠式遮闭系统。
电动伸缩雨篷利用驱动电机直线往返运动带动可伸缩篷布运动,达到遮蔽、开放的效果。
2、结构原理雨篷整体分驱动部分和可伸缩篷布(含弧形顶)两个部分。
驱动部分的一端为动力端,利用电机驱动带动可伸缩篷布展伸,驱动电机沿固定的轨道做往复直线运动。
雨篷另一端固定在池子的一端,另一端在电机的驱动下沿着轨道做直线运动,利用电机的正反转实现开启和关闭池子的功能。
3、特点:(1)可覆盖面积大,根据需要做不同跨度、不同长度的产品。
(2)性价比高,技术成熟,性能稳定可靠。
(3)使用寿命长,可更换篷布,操作方便简单。
(4)开启度可任意调配,更大限度的满足多种操作需求。
(5)马达的扭矩有多种选择,可以满足不同面积的顶棚驱动要求。
(6)篷布面料可选用常规的阳光面料或PVC面料,波长在40-80公分之间为宜。
4、控制方式:电动控制。
5、产品图片:结构框架组合轴测图(图例仅供参考)(1)雨篷展开效果图移动式雨篷在国内有成熟的设计,应用广泛,考虑到结构因素、安全因素、经济性等方面,设计跨度一般在20米左右。
轨道与池子同长,雨篷整体架在池子上方,伸展后完全覆盖池体,收缩后长度约4米左右,覆盖约一个池子宽度,影响暴晒蒸发效果,如下图:作者:座殿角作品编号48877446331144215458 创作日期:2020年12月20日。
自卸车使用说明书
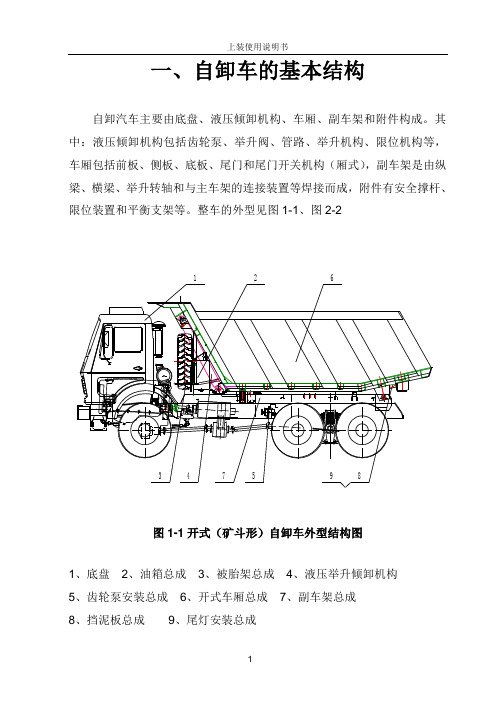
一、自卸车的基本结构自卸汽车主要由底盘、液压倾卸机构、车厢、副车架和附件构成。
其中:液压倾卸机构包括齿轮泵、举升阀、管路、举升机构、限位机构等,车厢包括前板、侧板、底板、尾门和尾门开关机构(厢式),副车架是由纵梁、横梁、举升转轴和与主车架的连接装置等焊接而成,附件有安全撑杆、限位装置和平衡支架等。
整车的外型见图1-1、图2-2图1-1开式(矿斗形)自卸车外型结构图1、底盘2、油箱总成3、被胎架总成4、液压举升倾卸机构5、齿轮泵安装总成6、开式车厢总成7、副车架总成8、挡泥板总成9、尾灯安装总成图1-2厢式自卸车外型机构图1、底盘2、油箱总成3、备胎架总成4、液压举升倾卸机构5、齿轮泵安装总成6、厢式车厢总成7、副车架总成8、挡泥板总成9、尾灯安装总成10、卡锁总成(尾门开关机构)图1-3沙罐车外形机构图1、底盘2、油箱总成3、备胎架总成4、液压举升倾卸机构5、齿轮泵安装总成6、侧防护栏7、副车架总成8、沙罐车车厢总成9、挡泥板总成10、后保险杠总成(一)气控液压倾卸机构1、概述液压倾卸机构主要由气控操纵阀、取力器、齿轮泵传动轴、齿轮泵、气控举升阀、液压缸、油压油箱、液压管路、限位阀等部件构成。
发动机的动力由变速器上的取力器输出、经传动轴驱动齿轮泵,液压油经齿轮泵压入液压缸,从而推动液压缸活塞举升车厢。
在液压油的作用下液压缸活塞会不断上升,当液压系统限位回油时,活塞不再继续上升,此时车厢即处于最大举升角度状态。
其工作原理见图1、图2。
2、液压倾卸机构的主要部件2.1取力器图1 液压举升系统工作示意图图2 气控液压举升机构工作原理图图3 沙罐车气控液压举升机构工作原理图取力器是汽车动力输出装置,可将汽车发动机的部分功率取出,由变速器输出动力,通过传动轴将力传给齿轮泵。
不同的底盘采用的取力器型号不同,请参照相应车型的整车《使用说明书》。
2.2 齿轮泵齿轮泵采用的是中高压齿轮泵,是液压举升系统的动力机构,它将取力器传来的机械能转变为液体的压力动能。
DKM-2铁路道口电动栅栏控制器使用说明
DKM-2铁路道口电动栅栏控制器使用说明DKM-2系列多功能自动控制器是一种用途广泛的多功能交流电机正反向运行自动控制设备。
广泛适用于各类工矿企业、铁路、港口等交通物流仓储等机电设备,以及大型铁路道口电动安全栅栏、车库门、机库门、冷库保温门、隔离门等低速机械往复运动装置的自动控制,为了防止电磁干扰,提高设备的抗干扰能力,DKM-2系列多功能自动门控制器采用全数字化硬件逻辑技术设计制造。
经过多年的实际应用,该产品具有负荷能力大、功能完善、性能能稳定、可靠性很高。
DKM-2系列多功能自动门控制器的自动停机功能可以配用各种传感器(红外光电、力学振动、机械位移、微波超声和磁感应微动开关等)即可以用于常规的设备运动装置限位自动停机,也可以用于安全生产的人员防护自动停机控制。
DKM-2系列多功能自动控制器具有现场手动操作和无线遥控两种操作方式并且控制器主机可以与被控电机使用不同回路的电源,故可以离开现场一定距离安装使用。
配上适当的传感器也可以实现全自动控制功能。
1、电源:使用电源:220VAC /50-60 Hz控制负荷电源:220V/380V2、最大负载功率:三相380V电源:≤10Kw三相鼠笼式电机(直接启动)单相220V电源:≤800W3、控制器自身消耗功率:≤5W4、控制方式:手动、遥控两用,手动控制:机箱面板触摸按键控制无线遥控:采用超高频无线信号经过编码加密传输控制指令,遥控器开阔地控制距离不小于50-100米。
5、自动停机:具有限位自动停机、防碰撞自动停机、防碰撞自动解除功能(可用红外光电、微波、超声、磁性开关或常规行程开关作为控制信号传感器)。
该项功能也可以用于安全防护自动停机控制。
6、外接设施:电铃、警灯、电子显示屏、功率扩展接触器。
7、工作状态显示:开(正向)、关(反向)、停机均有LED(或数码)显示工作状态。
8、使用环境条件:温度:-15―――50℃相对湿度:≤90%无易燃易爆和腐蚀性气体,无强烈电磁干扰源。
智浦36v控制器说明书
智浦36v控制器说明书
一、调速功能
控制器与转把相互结合,实现了电机转动快慢。
二、制动断电
通过刹把制动,断电线则传输制动信号,控制器根据信号停止对电机输出电压。
三、欠压保护
行驶中,电池放电到最低时,控制器会对电池进行欠压保护,如果继续行驶,则会损伤电池。
一般一节12V的电池欠压保护是10.5V,所以36V欠压保护值是31,5V48V保护欠压是42V。
四、过流保护
使用过程中,电池的电流超出会造成控制器烧坏或者是电机电子元件损坏,而设计这个功能主要目的是对电机和控制器进行各保护!
五、限速
现在的电动车设计的速度越来越快,一般都有三挡调速按键,低速25码中速40码高速60码。
六、时速显示
通过仪表显示当时电动车行驶的速度。
七、零启动功能
就是在停止状态下,直接转动转把可以原地起步,所以使用比
较广泛。
- 1、下载文档前请自行甄别文档内容的完整性,平台不提供额外的编辑、内容补充、找答案等附加服务。
- 2、"仅部分预览"的文档,不可在线预览部分如存在完整性等问题,可反馈申请退款(可完整预览的文档不适用该条件!)。
- 3、如文档侵犯您的权益,请联系客服反馈,我们会尽快为您处理(人工客服工作时间:9:00-18:30)。
自卸车电动篷布控制器使用说明
1、使红灯闪烁:同时按下遥控器上的停止键和上键(不松手),等盒上的红灯闪烁时同时松开。
2、调过载电流:按遥控器的上键加电流;按下键减电流。
每按一下加2安或减2安。
在默认的情况下按几下,相应的指示就闪几下停一下(循环显示)。
以便知道加了多少或减了多少。
3、保存:按一下遥控的停止键就保存啦,即可使用。
S、保护时间的调节:(就是过载电流调的过大到头不会停,时间到了也会停。
)时间参考:单程运行时间加2至4秒。
1)同时按遥控器的停止键和下键(不松手),等盒上的红灯闪烁同时松开;2)、?设置时间:按上键加时间按下键减时间,每按一下加两秒或减两秒。
? 3)、保存:按一下停止键即可使用。
?调时间和调电流就第一项不一样,其它的都一样。
4) 更换摇控器:?出厂时遥控器都录过码,可直接使用。
若遥控器损坏或丢失,购到遥控器后需录码才能用。
录码:(不用打开盒子)关闭总电源,在没电的情况下按下盒上的停止键,不松手。
然后,送电,等盒上的红灯亮松开,然后,拿遥控器,按一下任意键,就可录上,即可使用。
4 擦除录码:若车辆互相控制,需要擦除录码。
擦除录码:打开控制器的上盖,连线向下,对应上边中间处有“录码键”字样。
按下此键6秒松开即可擦除。
从新录码即可。
