3M护照阅读仪使用手册(中文)
护照阅读器说明书
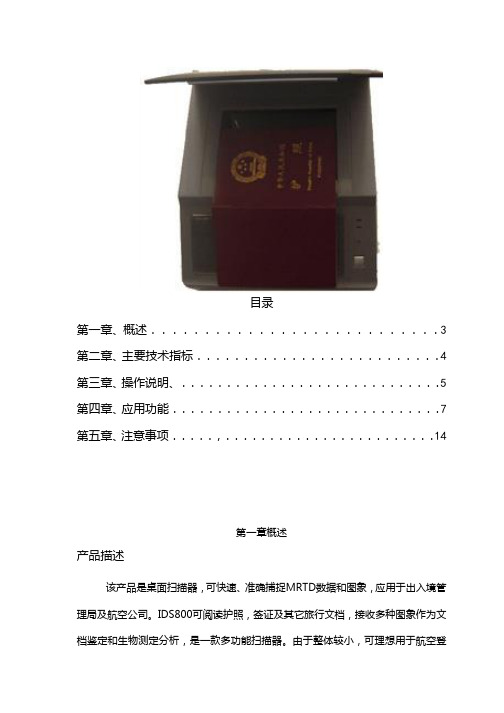
目录第一章、概述...........................3 第二章、主要技术指标..........................4 第三章、操作说明、.............................5 第四章、应用功能..............................7 第五章、注意事项.....,........................14第一章概述产品描述该产品是桌面扫描器,可快速、准确捕捉MRTD数据和图象,应用于出入境管理局及航空公司。
IDS800可阅读护照,签证及其它旅行文档,接收多种图象作为文档鉴定和生物测定分析,是一款多功能扫描器。
由于整体较小,可理想用于航空登记台及出入境管理局工作台。
特征1.可读护照,签证及其他国际民航组织标准旅行文档和机票、身份证。
2.可原色扫描所有旅行文档资料及非国际民航组织护照;使用多种光源扫描图象及文档鉴定,可视的红外线及紫外线。
3.高速USB2.0接口;辅助USB2.0接口网络摄像,指纹扫描器,及其它生物测定装置。
4.弹性软件接口允许主机应用软件选择使用何种照明源、图象类型,图象压缩及洗照片。
5. SDK,弹性软件组件。
功能选项1. 非接触式射频信号分析芯片阅读器,14443国际标准号,A、B 型号兼容图象,解码及阅读芯片。
一次完成操作。
第二章主要技术指标第三章操作说明文件说明:驱动文件夹是设备的驱动程序安装步骤:1. 先安装电子护照驱动程序setup.exe2. 运行“epassportDemo.msi”文件安装或运行“中文多证件识别”文件夹内的内的“adztdemoex.exe”注意: 接上设备后提示找到新设备,请参考下面的驱动安装。
如果安装正常,会在设备管理器中显示。
第四章应用功能1、执行电子护照软件。
弹出如下界面2、点击打开设备。
提示设备初始化成功。
3、功能。
“读护照”先扫描识别护照两行码后感应识别护照芯片信息。
3M使用手册
3Scotch-Grip TMIndustrial Adhesive4799Features•Quick drying with fast strength buildup.•Provides low soak in on most porous substrates.•Dries to a flexible, water resistant bond.•Can be used to bond most EPDM rubber, sponge rubber, rubber sheeting, felt, canvas,linoleum and other lightweight materials to many metals, woods, concrete and many plastics.Handling/Application Information D irections for Use1.Surface Preparation: Surfaces to be bonded must be clean, dry and dust free. Wiping withsolvent such as Scotch-Grip TM Solvent No. 3 will aid in removing oil and dirt.*2.Application Temperature: For best results the temperature of the adhesive and thesurfaces being bonded must be at least 65°F (18°C).3.Application: Stir or agitate well before using.Porous Surface(s): Brush a uniform, generous coat of adhesive on the least poroussurface to be bonded. Assemble the materials immediately with sufficient pressure toensure contact.Non-Porous Surface(s): Apply a uniform coat of adhesive to each surface. Allowadhesive to dry until it is tacky, but does not transfer. Assemble materials withsufficient pressure to ensure contact.4.Cleanup: Excess adhesive may be removed with solvent such as Scotch-Grip TM SolventNo. 2.**Note:When using solvents, extinguish all sources of ignition in the area and follow the manufacturer’s precautions and directions for use when handling such materials.(Supersedes June, 1995)Typical Physical Properties Note:The following technical information and data should be considered representative or typical only and should not be used for specification purposes.Viscosity (approx.)7,500-18,000 cps.Brookfield Viscometer RVF #6 sp. @ 20 rpmSolids (by wt.)28-35%Base SBRColor BlackNet Weight (approx.) 6.6 - 7.0 lbs./gal.Flash Point (closed cup)-14°F (-26°C)Solvent Petroleum Distillate, n-hexane and toluene Note:Appropriate application equipment can enhance adhesive performance. The user is responsible for evaluating application equipment in light of the user’sparticular purpose and method of application.1.Pumping: Use a 5:1 ratio double acting, ball check pump with a 3 inch diameter air motor.All packings and glands in contact with the adhesive should be Teflon®coated.2.Hoses: Material hoses should be nylon lined with a working pressure of 500 psi or greater.3.Brushes: Brushes designed for use with oil based paint may be used.Application Equipment SuggestionsScotch-GripTMIndustrial Adhesive 4799180°PEEL STRENGTH – Canvas/SteelTimeTest Value@ 75°F (24°C)Temp.(lbs./in. width)1 day 75°F (24°C)15.53 days 75°F (24°C)225 days 75°F (24°C)257 days 75°F (24°C)25.52 wk.75°F (24°C)27.53 wk.75°F (24°C)28after 3 wk.-30°F (-34°C)14after 3 wk.150°F (66°C)8.5after 3 wk.180°F (82°C)5Typical Adhesive Performance CharacteristicsNote:The following technical information and data should be considered representativeor typical only and should not be used for specification purposes.Storage: Store product at 60-80°F (16-27°C) for maximum storage life. Higher temperatures reduce normal storage life. Lower temperatures cause increased viscosity of a temporary nature. Rotate stock on a “first in-first out” basis.Shelf Life: When stored at the recommended conditions and kept in the original, unopened container, this product has a shelf life of 1 year from date of shipment.Storage and Shelf Life3Adhesives Division3M Center, Building 220-7E-05St. Paul, MN 55144-10001-800-364-3577 or 612-737-6501T eflon is a registered trademark of E.I. DuPont de Nemours Co.Printed in U.S.A.©3M 199778-6900-2823-4For Additional Product Safety and Health Information, See Material Safety Data Sheet, or call:Recycled Paper 40% pre-consumer 10% post-consumerT o request additional product information or to arrange for sales assistance, call toll free 1-800-362-3550.Address correspondence to: 3M Adhesives Division, 3M Center, Building 220-7E-05, St. Paul, MN 55144-1000. Our fax number is 612-733-9175. In Canada, phone: 1-800-364-3577. In Puerto Rico,phone: 1-809-750-3000. In Mexico, phone: 5-728-2180.For Additional Information 3M MAKES NO WARRANTIES, EXPRESS OR IMPLIED, INCLUDING, BUT NOT LIMITED TO, ANY IMPLIED WARRANTY OF MERCHANT ABILITY OR FITNESS FOR A P ARTICULAR PURPOSE. User is responsible for determining whether the 3M product is fit for a particular purpose and suitable for user’s method of application. Please remember that many factors can affect the use and performance of a 3M Adhesives Division product in a particular application. The materials to be bonded with the product, the surface preparation of those materials, the product selected for use, the conditions in which the product is used, and the time and environmental conditions in which the product is expected to perform are among the many factors that can affect the use and performance of a 3M product. Given the variety of factors that can affect the use and performance of a 3M product, some of which are uniquely within the user’s knowledge and control, it is essential that the user evaluate the 3M product to determine whether it is fit for a particular purpose and suitable for the user’s method of application.Important NoticeIf the 3M product is proved to be defective, THE EXCLUSIVE REMEDY , A T 3M’S OPTION, SHALL BE TO REFUND THE PURCHASE PRICE OF OR TO REP AIR OR REPLACE THE DEFECTIVE 3M PRODUCT . 3M shall not otherwise be liable for loss or damages, whether direct, indirect, special,incidental, or consequential, regardless of the legal theory asserted, including negligence, warranty, or strict liability.Limitation of Remedies and LiabilityThis Adhesives Division product was manufactured under a 3M quality system registered to ISO 9002standards.Refer to Product Label and Material Safety Data Sheet for Health and Safety Information before using this product.Precautionary Information。
3M S20 Multimedia Projector Operator s 说明书
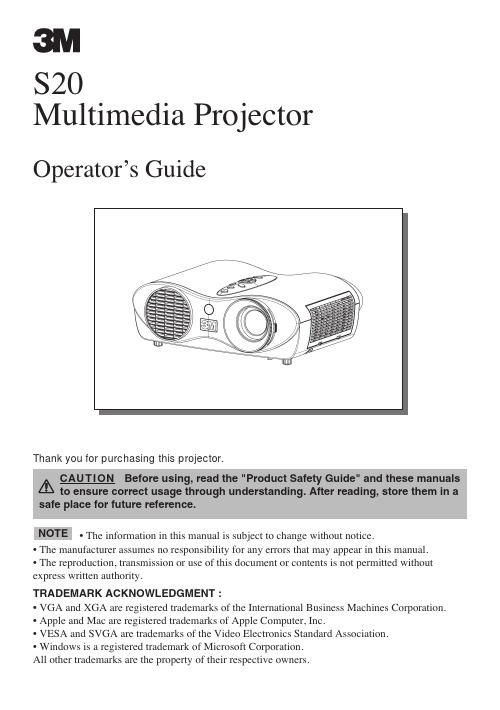
Thank you for purchasing this projector.Before using, read the "Product Safety Guide" and these manuals to ensure correct usage through understanding. After reading, store them in a safe place for future reference.• The information in this manual is subject to change without notice.• The manufacturer assumes no responsibility for any errors that may appear in this manual.• The reproduction, transmission or use of this document or contents is not permitted without express written authority.TRADEMARK ACKNOWLEDGMENT :• VGA and XGA are registered trademarks of the International Business Machines Corporation.• Apple and Mac are registered trademarks of Apple Computer, Inc.• VESA and SVGA are trademarks of the Video Electronics Standard Association.• Windows is a registered trademark of Microsoft Corporation.All other trademarks are the property of their respective owners.Attaching The BaseElevator feetProjector (Front/Right)Turn off the projector, and unplug the power cord. Allow the lamp bulb to cool for at least 45 minutes.After making sure that the projector has cooled adequately, slowly flipover the projector, so that the bottom is facing up.Put the base on the bottom of the projector, as shown in the fugure.Then slide it to the back of theprojector until it locks into position. To remove it, slide the base to the front of the projector pinching the lever of the base.Slowly turn the projector so that the top is facing up.Lever BackBase Bottom ofthe projector• Be careful not to pinch your finger on the occasion of the handling of • Do not hold the base, lens or other project part to move the projector.• Do not use the base to suspend the projector.• Do not push or put anything on the both sides of the top of the projector.Projector (Rear/Left)Control buttonsac inlet- C R /P Rrgb outp ower switchCONTROL portusb portSide View the 16:9 aspect ratioLens centerSide ViewElevator feetAC Inlet Connector Sideapproximately3 meters(on/off)buttonpower indicatorPower switch (STANDBY/ON) buttonvideo button RGB buttonVIDEO buttonZoom knob Focus ring(on/off)buttonpower indicatorPower switch (STANDBY/ON) buttonHIGH VOLTAGE HIGH TEMPERATURE HIGH PRESSUREbreak with aif jolted or scratched, handled while hot, or worn over time. Note that each lamp has a different lifetime, and some may burst or burn out soon after you start using them. In addition, when the bulb bursts, it is possible for shards ofto escape from the• This product contains a mercury lamp; do not put in For product disposal, contact your local government agency or (in the • If the lamp should break (it will make a loud bang when it does), unplugSlide the lamp door into place, and tighten the screw of the lamp door firmly. Turn on the projector, and reset the lamp timer. When the lamp has been replaced after the message of “THE POWER WILL TURN OFF AFTER 0hr.” is displayed, complete the following operation withinbutton, then press the buttonbutton, then press and hold the buttonFilter coverRelease buttonsRelease buttonsAir filterTurn on the projector. While the projector running, press the MENU button tobutton, then press thebutton, then press and hold the button of projector or the RESET button of remote control for 3 seconds.Filter coverRelease buttonsRelease buttonsAir filter Insert a new air filter, and replace the filter cover.Turn on the projector. While the projector running, press the MENU button tobutton, then press thebutton, then press and hold the button of projector or the RESET button of remote control for 3 seconds.LensCaring For The Cabinet And Remote ControlTurn off the projector, and unplug the power cord.If soiling is severe, dip soft cloth in water or a neutral cleaner dilute in water, and wipe lightly after wringing well. Then, wipe lightly with a soft, dry cloth.Filter coverRelease buttons Filter coverTransparent areaRelease buttonsAir filter(Rear side) (Bottom side)1215071329245861073M Austin Center Building A145-5N-016801 River Place Blvd.Austin, TX 78726-90003M Canada P.O. Box 5757London, Ontario N6A 4T13M Mexico, S.A. de C.V.Apartado Postal 14-139Mexico, D.F. 07000Mexico 3M EuropeBoulevard de l'Oise95006 Cerge Pontoise Cedex FranceLitho in Japan© 3M 200478-6970-9379-3Rev. ALet us help you make the most of your next presentation. We offer everything from presentation supplies to tips for better meetings. And we're the onlytransparency manufacturer that offers a recycling program for your used transparencies. For late-breaking news, handy reference and free product samples, call us toll-free in the continental United States and Canada, 24 hours a day, or visit our Internet Website.DN00671 (S20_OG _ENG )Intended UseBefore operating this machine, please read this entire manual thoroughly. The 3MTM Multimedia Projectors are designed, built, and tested for use indoors, using 3M lamps, 3M ceiling mount hardware, and nominal local voltages.The use of other replacement lamps, outdoor operation, or different voltages has not been tested and could damage the projector peripheral equipment and/or create a potentially unsafe operating condition.3M Multimedia projectors and Wall Display Systems are designed to operate in a normal office environment. • 16˚ to 29˚C (60˚ to 85˚ F)• 10- 80 %RH (without condensation) • 0- 1828 m (0-6000 feet) above sea levelThe ambient operating environment should be free of airborne smoke, grease, oil and other contaminates that can affect the operation or performance of the projector.Use of this product in adverse conditions will void the product warranty.。
3M SPEEDGLAS 9002D 产品说明书
3M SPEEDGLAS 9002D 产品说明书焊接前为保护您的安全请在使用SEEDGLAS 9002D之前仔细阅读本说明书。
根据本手册图A:1的说明来安装本产品。
根据个人的需要调节头罩,头带的直径和高度都要进行调节,面罩和面部的角度应该根据图A:2所示进行调节。
所有SPEEDLAS自动变光焊接滤光片可用于电弧焊和气体切割。
电弧焊接包括熔化极气体保护焊(MIG,MAG)、不熔化极气体保护焊(TIG)、手工电焊条电弧焊(SMAW)、等离子弧焊接和吹气碳电弧焊接。
当滤光片处于关机状态时可用于气割或气焊,关机状态遮光号为5-6。
暗态的遮光号标在产品上。
请根据欧洲标准EN379(或者欧洲标准:EN169)选择适合的遮光号。
SPEEDGLAS自动变光焊接滤光片按照产品上所标注的最大遮光号来防护有害的紫外和红外光线。
对紫外和红外光线的防护是永久的,不论是在亮态还是在暗态。
在电池和电子系统故障时,焊工仍然得到紫外和红外光线的防护,这时的遮光号是产品上标注的最大遮光号。
焊接滤光片有两个独立的感光探头,只要有弧光照射,镜片就要变暗。
电源是两个3伏锂电池。
焊接镜片在最后一次弧光照射后约60分钟会自动关机。
注意:SPEEDGLAS 9002D自动变光焊接滤光片必须与原装SPEEDGLAS 9000 焊接面罩、内部保护镜片和外部保护镜片一起使用。
注意:SPEEDGLAS 9002D焊接面罩不适合用于‘仰焊’、激光焊和激光切割。
标识:每一个产品都标有正确的遮光号或者遮光号的范围,在焊接前必须确认选择了正确的遮光号。
眼睛和面部防护的分类分别依据EN379(或EN175)。
产品上标注的其它标识是根据相关欧洲标准制定。
下面是一个举例:注意:上面只是一个例子,有效的分类标注在产品上。
在焊帽和外部保护片上,标有防高速颗粒物冲击分类标识,F代表低速冲击防护(45m/s),B代表中速冲击防护(12m/s),如果产品符合极端温度(-5℃-+55℃)的要求,则会标有T。
3M E-A-R Classic Earplug 用户手册说明书

EnglishFailure to follow these recommendations may severely reduce the amount of hearing protection provided by the earplugs.• E arplugs comply with EN-352 standard of measurement.• A t very high SPLs (above 125 dB SPL, where the limit to attenuation is the eartip itself), the foam eartips provide the most protection.• E artips fit ear canal diameters of 6-13 mm. See Eartip section for details.• T he following applies when the device is turned offor the battery is drained:T he level of noise entering a person’s ear, whena hearing protector is worn as directed, is closely approximated by the difference between theA-weighted environmental noise level and the NRR. Example1. T he environmental noise level as measured at the earis 92 dBA.2. T he NRR is 25 decibels (dB).3. T he level of noise entering the ear is approximatelyequal to 67 dBA.C aution: For noise environments dominated by frequencies below 500 Hz the C-weighted environ-mental noise level should be used. Although hearing protectors can be recommended for protection against the harmful effects of impulsive noise, the Noise Reduction Rating (NRR) is based on the attenuation of continuous noise and may not be an accurate indicatorof the protection attainable against impulsive noise such as gunfire.• E arplugs must be fitted, adjusted and maintained to the manufacturer’s instructions to achieve the expected attenuation and hearing protection.• Use earplugs at all times in noisy surroundings.• M ake certain that the earplugs provide adequate protection for the noisy environment.• E arplugs are reusable. Regularly inspect the earplugs to assure their continued serviceability.• C onnecting cord should not be used where thereis a risk that the connecting cord can be caught up during use.• T his product may be adversely affected by certain chemical substances. Further information shouldbe sought from the manufacturer.• T his earplug is provided with level-dependent attenuation. The wearer should check correct operation before use. If distortion or failureis detected, the wearer should refer to the manufacturer’s advice for maintenance and replacement of the battery.W arning: The output of the level-dependentcircuit of the hearing protector may exceed thedaily limit sound level.• T o determine if the device is working, insert a battery, cup the device in your hand and listen for acoustic feedback (squeal). If feedback is present, the battery is working.FlexibleNeck CordEartipBattery Door Switch#10 BatteriesCleaning ToolFilter Tool and Extra ACCU•Filters ™Protective CaseACCU•Fit ™ EartipsLRG Gray 3-flange 8-13mm Black Foam 8-13mmGlider 8-11mm SM Frost 3-flange 7-11mm SM Long Stem Frost 3-flange 7-11mm LRG Long Stem White 3-flange 8-13mm Beige Foam 6-9mm Selecting an eartip:No two ears are exactly alike. The eartip that is most comfortable is the best choice, but it must seal well to prevent feedback (whistling) and provide proper protection.When changing eartips make sure the eartip fits securely on the stem of the device.Greatest sound reduction is achieved with deeply-sealed f oam eartips1. T he battery compartment is located on the underside of the device.2. Open the battery door.3. R emove the yellow tab from the battery.4. I nsert the batterywith the flat side facing up.5. D o not force the battery into the door.BatteryCompartment#10 BatteryInsertedDoor• M ake sure the eartip is clean. • P ull the ear up and out while inserting.• T wist and push gently until the eartip seals in the ear canal.• W hen using 3-flange eartips,ear canal.no compression is needed; simply push into the ear. Removal• R emove the device witha slow twisting motion.• A fter removal, place earplugsin a clean, protective case.ON/OFF Earplugs turn on and off by opening and closing the battery door. Note: It is not necessary to remove the battery as long as the door is open wide enough to disable the circuit.Dual-Mode SwitchAutomatic Protection + Blast Protection Mode (LO)• No interference with natural hearing; soft and loud sounds are heard naturally • Automatically delivers 15-dB protection when steady-state noise exceeds safe exposure limits • Blast protectionEnhancement + Blast Protection Mode (HI) • Amplifies soft and conversational sounds for improved communication and increased awareness of surroundings • No amplification of loud sounds • Automatic 15-dB hearing protection is not present in HI mode= HI positionBattery Door ON = ClosedOFF = Open= LO positionZinc-Air BatteriesUse commonly-available #10 zinc-air hearingaid batteries. They are easy to find in pharmacies, online, and at various retail locations.• Z inc-air batteries have a long shelf life, but once the tab is removed, battery life is about 9 days for continuous operation.• B attery life is about 2 weeks if the devices are turned off after each use.• O nce the tab is removed, zinc-air batteries may self-discharge in about 4 weeks whether used or not. • T he discharge rate varies with temperatureand humidity.• I t is sometimes possible to prolong the life ofa battery by replacing the tab over the air holes, but results vary.LOBAT™: A ticking sound becomes faster and louder, like the sound of a motorboat when the battery is about to die. After the warning sound first becomes audible, it may be a few hours before the battery dies. Performance and protection do not change while LOBAT is sounding.Each device has a special filter that enhances sound quality and prevents earwax from entering the device. A filter should be changed if the volume decreases or sound quality declines.Filter Removalagainst a hard surface to secure it in place.Simple cleaning with the tool provided will keep the eartips clean and the devices working properly.• Clean after each use. Wipe clean with a damp cloth.• Do not immerse earplugs in water.• D o not clean with harsh chemicals. Alcohol is not recommended.• Use the cleaning tool to pick out or brush off debris.• 3-flange eartips can be removed and cleanedin mild detergent. Dry eartips thoroughly.• Replace 3-flange eartips every 60-90 days.• Replace foam and glider eartips frequently, as needed.• Remove the devices before using hair products.• Do not expose to extreme heat or moisture.• Avoid dropping or hitting on a hard surface.• U se only accessories and spare parts from Etymotic Research, Inc. to ensure continued performance to specification.• Always store earplugs in a clean, protective case.• D o not store other objects, except a neck cord,in the earplug case.11Etymotic will repair or replace defective product at its option if returned within one year of purchase to our designated service facility. This warranty is in lieu of all other warranties, expressed or implied, including, but not limited to, any implied warranty EPAER098630-B ETYMOTIC RESEARCH INC. 61 Martin Lane • Elk Grove Village, IL 60007 ©2014. AccuFit and AccuFilters are trademarks of Etymotic Research, Inc. ETYMOTIC, GunSport•PRO and ACCU•Technology are registered trademarks of Etymotic Research, Inc.Passive AttenuationFrequency (Hz)Mean Attenuation (dB) Standard Deviation (dB) APV (dB) Active Attenuation - Criterion LevelsSwitch positionLO HI。
美国3M生物阅读器操作说明
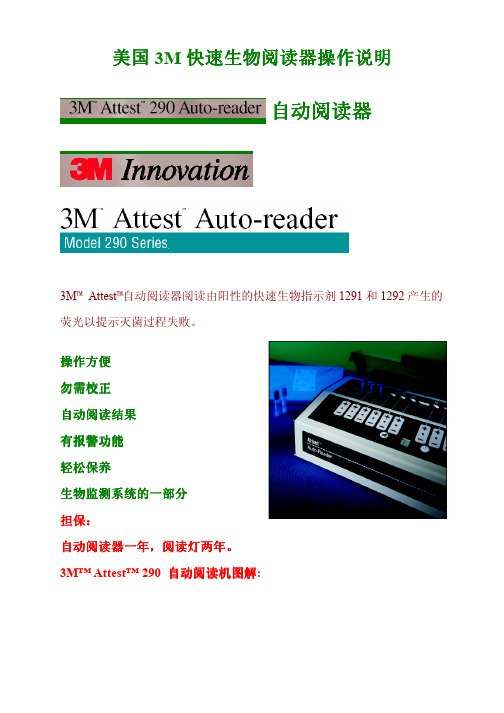
美国3M 快速生物阅读器操作说明自动阅读器3M ™ Attest ™自动阅读器阅读由阳性的快速生物指示剂1291和1292产生的荧光以提示灭菌过程失败。
操作方便 勿需校正 自动阅读结果 有报警功能 轻松保养生物监测系统的一部分 担保担保::自动阅读器一年自动阅读器一年,,阅读灯两年阅读灯两年。
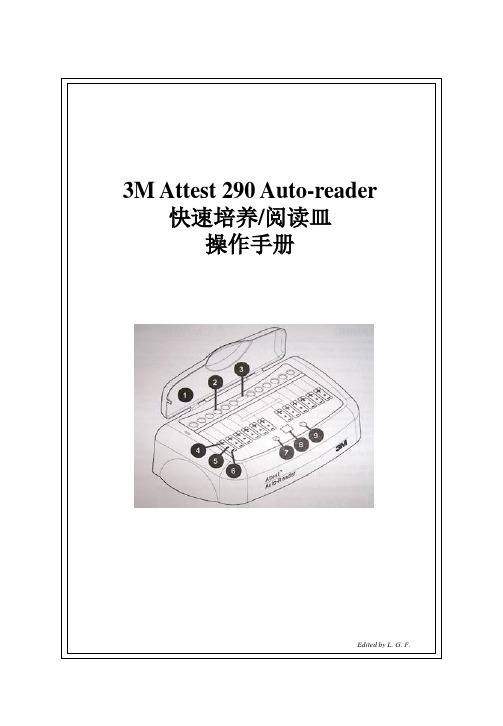
3M™ Attest™ 290 自动阅读机图解:①孔盖②培养/阅读孔③压碎孔④红灯亮阳性⑤黄灯亮指示剂检测中⑥绿灯亮指示剂阴性⑦警告蜂鸣器开/关按钮⑧数字显示面板⑨剩余时间按钮适用范围3M™Attest™ 290是专为自动阅读由3M™ Attset™ 1291(蓝色帽) 和3M™ Attset™ 1292(棕色帽)两种快速生物指示剂产生荧光呈阳性而设计的,可避免人为干扰。
发现荧光表明灭菌过程失败。
其他生物指示剂与本设备不匹配也不能使用。
此机器仅为3M™公司设计、测试并仅能在由3M™公司指定和支持的电源下使用。
使用说明 电源操作连接合适的接地的交流电源,启动机器。
在将生物指示剂放进培养孔前需30分钟的预热时间。
推荐将机器保持此种状态以消除预热过程,当然,如果预知长期不用,则关闭电源。
读取过程警告警告!!始终在操作生物指示剂前将其冷却到室温!每次阅读请按下列步骤:-1、在戴好防护眼镜后,按压以关闭生物指示剂帽。
-2、在压碎孔挤破含培养基的玻璃安瓿。
-3、捏住生物指示剂帽端,在桌面上轻敲小瓶底部,使 培养基湿润在小瓶底部的芽孢片。
为了您的安全为了您的安全,,请注意以下警告:在冷却前压碎或者过多的处理生物指示剂可能会引起玻璃安瓿爆破。
当从灭菌器取出生物指示剂时要戴防护眼镜及手套。
当压碎生物指示剂时要戴防护眼镜。
捏住帽端挤碎和轻敲生物指示剂。
不要用你的手指来压碎生物指示剂,不要在手指间滚动来湿润芽孢片,因为这样可能会导致手指割伤。
-4、将生物指示剂放进合适的培养/阅读孔。
阅读孔有和每一种生物指示剂帽相匹配的颜色代码:就是1291生物指示剂有蓝色的帽子和蓝色的阅读孔匹配,1292生物指示剂有棕色的帽子和棕色的阅读孔匹配。
3M使用指南

3丙烯酸泡绵胶带什么是底胶?3底胶(Primer)•底胶的选择底胶表面-不需要油漆面,电镀面等(ABS,聚氨酯)-C-100/N-200 PVC,尼龙,玻璃ABS,聚氨酯-K-500 EPDM橡胶,聚丙烯,ABS3丙烯酸泡绵胶带底胶的选择底胶 粘结表面 类型 颜色 特点吸潮 透明黄色 耐高温C-100 PVC,PU.PC,ABS,PA吸潮 透明黄色 C-100稀释 N-200 PVC,PU.PC,ABS,PAK-500 EPDM,PP 吸潮 透明黄色G-200 Glass 吸潮 透明无色 涂于胶带表面V-720 PMMA,PVC 吸潮 透明黄色 高初粘力 K-520 EPDM,PP 不吸潮透明黄色 低温性3丙烯酸泡绵胶带操作指南及注意事项?3丙烯酸泡绵胶带•使用–表面的清洁与干燥-可用50/50 的异丙醇水溶液–车体温度-18 ℃以上–建议胶带温度-18 -----43 ℃-压力-2公斤/平方厘米或用6.5公斤的滚筒部件要安装在正确的位置上,定位错误是胶带脱落的原用诸如IPA或汽油的溶剂清洗被灰尘、蜡和油等污染的粘结表面如果粘结面是清洁的,可以剥离部件并重新粘结(不适先试装部件,检查定位,然后剥离离型纸记住不要接触胶面.粘贴的区域施压。
-----要施加足够的压力。
Air1. 胶带,底胶的选择不当-根据不同的粘结表面选择合适的胶和底胶;-标准胶带对汽车油漆表面有优越的粘结力。
-若要粘附塑料,为获得满意的粘结效果,使用底胶是必要的。
2. 没有消除部件表面的可塑剂-部件(特别是软PVC 部件)表面的增塑剂能降低粘结的效果。
3. 低温-丙烯酸泡绵胶带是由有机高分子聚合物制成,因此在低温状态下会变硬而失去粘性-当作业环境温度低于15度时,推荐加热车身和要粘结的部件。
4. 低压力-胶带是没有流动性的,施加适当的压力才能获得足够的浸润面积。
5. 粘结表面污染-部件和胶面污染都会引起粘结失败。
-推荐使用恰当的溶剂清洗粘结表面。
SpectraMaxParadigm全波长多功能测读仪中文操作手册
SpectraMax Paradigm 全波長多功能測讀儀
SpectraMax Paradigm 全波長多功能測讀儀
如果儀器和電腦連接不正常時,圖示欄顯示 可能是因儀器未開機、儀器型號 設定錯誤或連接埠設定錯誤所引起,修改後重新連接正常後則顯示 。 (建議先開啟儀器後再開啟軟體,可直接偵測所使用的儀器) 。
-3-
SpectraMax Paradigm 全波長多功能測讀儀
儀器圖示:依照選擇的機型有不同的圖示。 儀器與電腦連結後,軟體會自行偵測機型, 亦可手動選取。
可填入特定的 Bandwidth 及相應的檢測波長。
ቤተ መጻሕፍቲ ባይዱ
(a) FL
(b) LUM
(3) Plate type: 依實驗需求選擇 6 - 1536 孔微量盤。(內建不同廠牌及格式的微量盤供使用者選擇)。
(4) Read Area: 選擇要測讀的微量孔,反黑則表示待測讀之樣品。可對照 Template 設定選擇預測 微量盤孔,選擇範圍越小儀器讀取速度越快。
- 15 -
SpectraMax Paradigm 全波長多功能測讀儀
可於下方 Standards 中 Sample 欄位編輯樣品名稱及濃度。
- 16 -
SpectraMax Paradigm 全波長多功能測讀儀
點選 Standards 下方 Series,出現以下視窗。
Start from 中 Top、Bottom、Left 與 Right 表示該組樣品從那個方向起始排列。
3M Comply 1233LF Bowie-Dick Test Pack说明书

33M ™Comply ™1233LF Bowie-Dick Test PackIntroductionThe Bowie-Dick test, named after its developers, J. H. Bowie and J. Dick, was first described in a 1963 publication titled The Bowie and Dick Autoclave Tape Test.1 At the time, it was known that the presence of a significant amount of residual air in the sterilizer chamber of vacuum sterilizers, caused by an air leak or inadequate vacuum, would prevent thorough steam penetration into the load contents during the steam exposure phase of the sterilization cycle. However, a method for verifying the proper operation of vacuum sterilizers was not available. The paper by J. H. Bowie and his colleagues described a quick and reliable method for verifying the operation of the vacuum system of vacuum sterilizers. The test described by the authors included at least 25 huckaback towels folded into four layers along their length and then folded in half to give eight thicknesses of cloth. The towels were stacked on top of each other to a height of 10-11 inches. Two 12 inch lengths of 3M ™ 1222 autoclave tape were applied to a 10 × 8 inch sheet of unglazed paper in a St. Andrew’s cross design and the sheet was put in the center of the stack of towels. The stack of towels could be enclosed in a dressing casket (a metal box used in Britain for sterilizing linens), or similar container, or wrapped in fabric. The test was run for 3½ minutes at 134ºC or 12 minutes at 126ºC. In a satisfactory cycle, the tape would show a uniform color change. However, if residual air existed in the sterilizer chamber, an air bubble would form in the center of the towel pack inhibiting the complete development of the indicator tape at the center of the sheet. This test became known as the Bowie-Dick test.Today, the Bowie-Dick test is widely used and recognized as a valuable means of monitoring the performance of vacuum-assisted steam sterilizers. However, several aspects have changed since the original work was done in Britain in the early 1960s. Most of today’s sterilizers operate differently from those used by Bowie and Dick, which drew a single deep vacuum before beginning the sterilization cycle. Prevacuum sterilizers today typically have a series of steaminjections and vacuum excursions, before beginning the sterilization phase, and the vacuum depth is not as great as in the older high vacuum sterilizers. Additionally, manufacturers have developed indicator sheets designed specifically for the Bowie-Dick test. The indicator inks used on these test sheets are similar to that used on autoclave tape. Furthermore, in the U.S., the Bowie-Dick test is run at 132-134ºC (270-273ºF) for 3½ - 4 minutes.The purpose of the prevacuum phase is to remove all the air from the sterilizer chamber. This allows the steam to make contact with all the surfaces in the load. If air is present, steam penetration to all the surfaces in the load will be impeded. Causes of air remaining in the sterilizer chamber include inadequate vacuum (i.e., incomplete air removal), air leaks, or the presence of noncondensable gases in the steam.The Bowie-Dick test is run in an otherwise empty chamber because this is a more rigorous test than if the chamber was full with a normal load. If there were other packs in the chamber, any air present would be distributed throughout all the packs and thus fail to be detected by the indicator sheet in the Bowie-Dick test pack. The test pack should be placed on the bottom shelf of the sterilizer rack, over the drain, because this is the coldest spot in the sterilizer chamber.The Association for the Advancement of Medical Instrumentation(AAMI) provides specific recommendations on the make-up of a Bowie Dick towel pack.2 These include type of towels, type of wrap material, dimensions of the pack, and placement of the test sheet within the test pack. However, variability in these components can contribute to non-uniform test results. Manufacturers eliminated many of these variablesby introducing disposable Bowie-Dick test packs. These disposable packs have been shown to be as effective as towel packs. Disposable test packs are small in size and eliminate the costly labor involved in making towel packs. They are an effective, inexpensive way to assure that a prevacuum sterilizer is operating properly.Equipment ControlEquipment control includes verifying the sterilizer’s physical monitors (e.g., sterilizer printout) for each cycle and monitoring the effectiveness of the sterilizer’s vacuum system each day the sterilizer is used. When using prevacuum cycles, it is critical to know that the sterilizer is removing air efficiently. Monitoring with a Bowie-Dick test pack should be done on a daily basis, prior to running the first full load of the day. If a sterilizer has an inadequate vacuum, air leak, or poor steam quality, air pockets may form inside the sterilizer and compromise sterility by preventing steam penetration into some of the packs in the load. The indicator sheet inside the Bowie-Dick test pack will not develop properly if air remains trapped inside the sterilizer chamber. If a Bowie-Dick test indicates a problem, the sterilizer should be taken out of service until the malfunction is identified and corrected.Product DescriptionThe 3M ™ Comply ™ 1233LF Bowie-Dick Type Test Pack consists of a lead-free steam-sensitive chemical indicator test sheet positioned in a package of layered porous materials. The porous materials are paperboard sheets that have moisture-impervious plastic layers at the top and bottom. These materials are wrapped in a non-woven, disposable wrap secured with a lead-free steam indicator label.The test sheet consists of a lead-free chemical indicator printed on paper as a yellow-colored diagonal pattern and is positioned near the center of the porous pack. The primary test sheet will turn a uniform dark brown/black color, except when air removal failures such as air leaks occur.Indications for UseThe 3M Comply 1233LF Bowie-Dick Type Test Pack is designed for testing air removal efficiency of 132-134°C (270-273°F) dynamic-air-removal steam sterilizers (i.e., prevacuum).Technical Design and Performance CharacteristicsThe 3M Comply 1233LF Bowie-Dick Type Test Pack uses impermeable layers on the top and bottom to direct steam and enhance the aircapture qualities. A precisely controlled pad of porous substrate is used to establish a matrix for the formation of an air bubble and to act as a reservoir of air simulating the towels in a conventional large towel pack. The reticulated foam layer acts as a steam pathway for the control of air bubble alignment and insulates the indicator from radiant heat emanating from the hot surface of the sterilizer chamber. Air is evacuated from the chamber and the test pack during the prevacuum cycle. If an air leak is present, air will bleed back into the chamber as a vacuum is pulled. Since air is much cooler and heavier than steam, it will be forced to the bottom of the chamber near the drain when the steam valves opens. As pressure begins to increase, the air and then the steam enters the pack from the sides and top of the reticulated foam pathway at the top of the pack. The steam pressure compresses the air into a bubble and pushes it toward the bottom of the pack. As the steam pressure increases, the air bubble is squeezed smaller and smaller until the pressure stabilizes.UNPROCESSEDPASSBowie-Dick testsheet shows auniform colorchange to darkbrown/black.Bowie-Dick testsheet shows anon-uniform colorchange. Test sheetresult indicates asmall amount ofresidual air in thechamber.sheet shows anon-uniform colorchange. Test sheetresult indicates alarge amount ofresidual air in thechamber.Comply and 3M are trademarks of 3M. Used under license by 3M subsidiaries and affiliates.Please recycle. Printed in USA.Issued:2/10 © 3M 2010. All rights reserved. 7137HB 70-2010-7556-4 (210.25) DPI3M Health CareInfection Prevention Division3M Center, Building 275-4E-01St. Paul, MN 55144-10001-800-228-3957/infectionprevention3Storage and Shelf LifeStore in a dry (<50% RH) condition at room temperature [15-30°C (59-86°F)] and protect from direct light. Do not store near strong alkaline or acidic products such as cleaning or disinfecting agents. After use the indicator will not change visually within 24 months when stored at above conditions.The 3M ™ Comply ™ 1233LF Bowie-Dick Type Test Pack has a 2-year shelf life from the date of manufacture when stored at recommended conditions. The expiration date is printed on the label that secures the test pack.References1B owie JH, Kelsey JC, and Thompson PR. The Bowie and Dick Autoclave Tape Test . Lancet 1963; 1:586.2A ssociation for the Advancement of Medical Instrumentation.Comprehensive guide to steam sterilization and sterility assurance in health care facilities . ANSI/AAMI ST79:2006, A1:2008 and A2:2009.。
美国3M快速荧光生物阅读器详细说明

设备简介 1、设备功能:3M?Attest? 290 是专为培养和自动阅读经压力蒸汽灭菌的 3M? Attset? 1291、 1292 快速阅读生物指示剂(RBBI)阴性荧光阅读而设计的。探知荧光
表 明 细 菌 存 活 , 灭 菌 失 败 。 The 3M Attest 290G Auto-reader is designed to incubate and automatically read 3M Attest 1291、1292Rapid Readout
010-1 CB UL c-UL CE EMC C-tick
商品描述 提供两种不同阅读器:快速阅读器(蒸汽用),快速阅读器(EO 用);采用嗜热脂肪杆菌芽胞,
枯草杆菌黑色变种芽胞,通过专门的荧光探测器检查其特殊酶的活力
,快速判断灭菌结果。 操作简单 1.无需校正 3M290G 快速生物阅读器不需要花时间进行校正 2.自动阅读生物指示剂结果: 红灯亮表示灭菌失败; 绿灯亮表示灭菌成功。 3.报警器: 为提供检测结果,当检测到阳性结果时,报警器会响,同时红灯会亮。 当指示器最终结果出来之前被拿走时,警报器也会响。 生物指示剂检测系统的组成部分: 与 3M 1292,1296,1296F 和 1294,1298,1298F 快速生物指示剂及标准测试包一同使用。
描述
290 技术参数 290Tech Description
设备名称:自动阅读机 Auto –reader 品牌/型号:美国 3M Attest 290
由美国 3M 公司制造的荧光自动阅读机,型号 290 3M Attest290 Auto-reader is manufactured in USA,3M corp.
一
3M 为医院灭菌提供最安全的保障和监测。3M 为医院的无菌保障提供完善的解决方案。 1、50 年代世界上第一卷用于压力蒸汽指示胶带诞生 2、1965 年最早推出
3M 3000 Series Pak 100 4-Wall Header 说明书
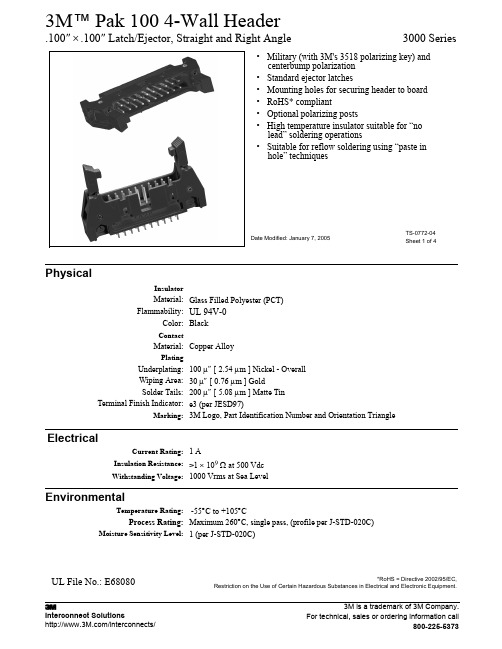
PhysicalElectricalEnvironmental*RoHS = Directive 2002/95/EC,Restriction on the Use of Certain Hazardous Substances in Electrical and Electronic Equipment.InsulatorMaterial:Glass Filled Polyester (PCT)Flammability:UL 94V-0Color:BlackContactMaterial:Copper AlloyPlatingUnderplating:100 µ″ [ 2.54 µm ] Nickel - Overall Wiping Area:30 µ″ [ 0.76 µm ] GoldSolder Tails:200 µ″ [ 5.08 µm ] Matte Tin Terminal Finish Indicator:e3 (per JESD97)Marking:3M Logo, Part Identification Number and Orientation TriangleCurrent Rating: 1 AInsulation Resistance:>1 × 10⁹ Ω at 500 Vdc Withstanding Voltage:1000 Vrms at Sea LevelTemperature Rating: -55°C to +105°CProcess Rating:Maximum 260°C, single pass, (profile per J-STD-020C)Moisture Sensitivity Level: 1 (per J-STD-020C)TS-0772-04Sheet 1 of 4•Military (with 3M's 3518 polarizing key) and centerbump polarization •Standard ejector latches•Mounting holes for securing header to board •RoHS* compliant•Optional polarizing posts•High temperature insulator suitable for “no lead” soldering operations•Suitable for reflow soldering using “paste in hole” techniquesDate Modified: January 7, 2005UL File No.: E68080.025 ±[ 0.64 ]Table 1Pin Quantity3M Part NumberDimensionsPolarization Notches ProvidedABCD103793 1.26 [32.1] 1.105 [28.07] .865 [21.97] .71 [18.0] B C 143314 1.46 [37.2] 1.305 [33.15] 1.065 [27.05] .91 [23.1] B C 163408 1.56 [39.7] 1.405 [35.69] 1.165 [29.59] 1.01 [25.6] A B C 203428 1.76 [44.8] 1.605 [40.77] 1.365 [34.67] 1.21 [30.7] A B C 243627 1.96 [49.8] 1.805 [45.85] 1.565 [39.75] 1.41 [35.8] A B C 263429 2.06 [52.4] 1.905 [48.39] 1.665 [42.29] 1.51 [38.3] A B C 303440 2.26 [57.4] 2.105 [53.47] 1.865 [47.37] 1.71 43.43] A B C 343431 2.46 [62.6] 2.305 [58.55] 2.065 [52.45] 1.91 [48.5] A B C 403432 2.76 [70.2] 2.605 [66.17] 2.365 [60.07] 2.21 [56.1] A B C 503433 3.26 [82.9] 3.105 [78.87] 2.865 [72.77] 2.71 [68.8] A B C 603372 3.76 [95.6] 3.605 [91.57] 3.365 [85.47] 3.21 [81.5] A B C 6437643.96 [100.7]3.805 [96.65]3.565 [90.55]3.41 [86.6]A B CTS-0772-04Sheet 3 of 4Inch± .005± .1± .01Tolerance Unless Noted.0.00.000Inch[ ] Dimensions for Reference only[mm]ø.106 [2.69]orø.116 [2.95](See Note 2)Dia Position 1.100 ± .003[2.54].100 ± .003[2.54].060[1.52].300[7.62]Side to Side StackabilityBRecommended Mounting Hole Pattern(Straight).352[8.94]C L“Y”.035[0.89]C L"Y".41[10.4]Max to Edge of PCBfor Daisy Chainø.106 [2.69]or ø.116[2.95](See Note 2).035[0.89] Dia.029[0.74].100 ± .003[2.54]Position 1.232[5.89]CRecommended Mounting Hole Pattern(Right Angle).100 ± .003[2.54]Ordering InformationNXXXX-XX02RB3M Part Number (See Table 1)Pin Configuration 5 = Right Angle 6 = StraightLatch/Ejector System2 = Short Roll Pin Latch/Ejectors (3M Part # N3505-2)3 = Long Roll Pin Latch/Ejectors (3M Part # N3505-3)Notes:1.Notches A & C will accomodate 3M Polarizing Keys (3M Part #N3518).2.Mounting hardware: From solder side of pc board use #4-24 thread cutting screw (3M Part # 3341-5) and .116 [2.95] dia mounting hole. For right angle version only, #2-56 bolt and nut (3M Part # 3341-6) with .106 [2.69] dia mounting hole may be used.3..112 [2.84] tail length suitable for .062 [1.57] thick pc board.4.Contact tails .0245 [0.622] crowned wire with .0075 [0.191] corner radii & .028 [.072] diagonal.5.Contact your 3M sales representative for custom requirements.Important NoticeAll statements, technical information, and recommendations related to 3M’s products are based on information believed to be reliable, but the accuracy or completeness is not guaranteed. Before using this product, you must evaluate it and determine if it is suitablefor your intended application. You assume all risks and liability associated with such use. Any statements related to the product which are not contained in 3M’s current publications, or any contrary statements contained on your purchase order shall have no force or effect unless expressly agreed upon, in writing, by an authorized officer of 3M.Warranty; Limited Remedy; Limited Liability.This product will be free from defects in material and manufacture for a period of 90 days from the time of purchase. 3M MAKES NO OTHER WARRANTIES INCLUDING, BUT NOT LIMITED TO, ANY IMPLIED WARRANTY OF MERCHANTABILITY OR FITNESS FOR A PARTICULAR PURPOSE. If this product is defective within the warranty period stated above, your exclusive remedy shall be, at 3M’s option, to replace or repair the 3M product or refund the purchase price of the 3M product. Except where prohibited by law, 3M will not be liable for any indirect, special, incidental or consequential loss or damage arising from this 3M product, regardless of the legal theory asserted.3Electronic Solutions Division。
3M Advanced Systems Tester 900AST 产品说明书
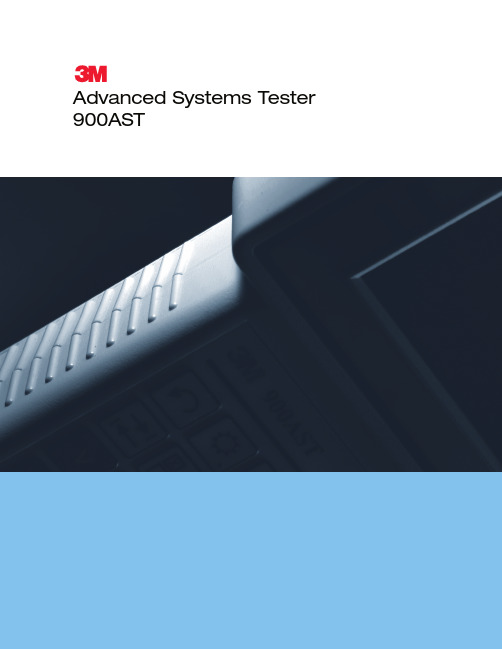
Advanced Systems Tester 900ASTclear skies ahead with the900ast testerThe internal wiring in aircraft is underconstant bombardment from age,vibration and moisture – especially inairplanes that work 12 or more hoursper day in widely varying conditions.With the 3M™A dvanced SystemsTester 900AST, the ability to quicklyand accurately analyze avionics wiringproblems reduces down time andminimizes the significant daily AOG(Aircraft On Ground) expense.comprehensive testing platForm Foraviation wiring systemsThe 900AST tester is a handheld, integrated test set designed specificallyfor locating faults (opens, shorts and intermittents) in the wiring of various transportation classes including that of most military, commercial andprivate aircraft.With the 900AST tester, aviation mechanics can quickly locate faults andverify repairs on various conductor types utilizing the Resistive Fault Location(RFL) and Time Domain Reflectometer (TDR)functions. In addition, the 900AST testersupports a full range of individual tests tocategorize and sectionalize potential problems.A key benefit of the new tester is the abilityto display the distance to a fault in inches or centimeters.The 3M™ Advanced Systems Tester 900AST measures AC and DC voltage, Array conductor and insulation resistance with foreign voltage compensationcapability, and capacitance. It can also conduct soak test measurements– extended period resistance measurements that can expose moisture orcorrosion-induced faults – as well as a four-wire precision contact resistancemeasurement. This multi-functional test set can even simulate a load lampSoak Test and provide an interrupted ID tone for locating a particular wire. Coupledwith its RFL and TDR functions, the 900AST tester is the total solution for avi-onics maintenance wiring problems.Full-Featured perFormance saves time in the FieldThe 900AST tester provides a wide selection of test functions to locateand sectionalize problems:Features and BeneFitsTime Domain Reflectometer Single Trace3M ™ Advanced Systems Tester 900AST Soft Caserugged, weather-resistant designThe handheld 3M ™ Advanced Systems Tester 900AST is housed in a lightweight soft case for portability and ease of use. The unit is weather-resistant, durable and weighs only four pounds with test leads, batteries and soft case included. The protective soft case neatly stores the leads in a zippered pouch, and includes a convenient hook from which to hang the unit during testing.easy to useThe 3M tester is designed for functionality and ease of use. Features include an infra-red communications port for uploading stored measurement results to a PC. A large, backlit, black and white LCD display (2.6 x 2.6 in., 192 x 192 pixel resolution) provides flexibility for a graphical user interface and a user-friendly, icon-based display of test results. If there is ever a question during operation, the new tester has a built-in internal help menu to provide you with the information you need to get back on track.physical speciFicationsenvironmental speciFicationsBuilt to ISO9001/2000 certification for manufacturing facilities. Built to ANSI/IPC A610-C manufacturing standards. All percentage accuracy measurements are based on the reading unless otherwise specified.*Measurement applies current-limited (< 1 mA) 80 V stimulus**Measurement applies pulse amplitude of approximately 60 V peakAerospace and Aircraft Maintenance Department Transportation Business3M Center, Building 220-9W-14St. Paul, MN 55144-1000800/364 3577 or 651/737 6501/aerospace3M is a trademark of 3M CompanyImportant NoticeAll statements, technical information, and recommendations related to 3M’s products are based on information believed to be reliable, but the accuracy or completeness is not guaranteed. Before using this product, you must evaluate it and determine if it is suitable for your intended application. Y ou assume all risks and liability associated with such use. Any statements related to the product which are not contained in 3M’s current publications, or any contrary statements contained on your purchase order shall have no force or effect unless expressly agreed upon, in writing, by an authorized officer of 3M.Warranty; Limited Remedy; Limited Liability.This product will be free from defects in material and manufacture for a period of 12 months from the date of purchase. 3M MAKES NO OTHER WARRANTIES INCLUDING, BUT NOT LIMITED TO, ANY IMPLIED WARRANTY OF MERCHANTABILITY OR FITNESS FOR A PARTICULAR PURPOSE. If this product is defective within the warranty period stated above, your exclusive remedy shall be, at 3M’s option, to replace or repair the 3M product or refund the purchase price of the 3M product. Except where prohibited by law, 3M will not be liable for any loss or damage arising from this 3M product, whether direct, indirect, special, incidental or consequential regardless of the legal theory asserted.Litho in USA.© 3M 2006 60-9700-0062-0 Rev. E10% Post-consumer waste paper。
3M290操作手册
3.拿住瓶帽在桌面轻 敲直到瓶底不的菌 片湿润。
4.打开保护盖将生物 指示剂插入培养/阅 读孔。
5.盖好保护盖等待红 灯或绿灯自动指示 出培养的结果。
第2页
操作说明
在检测完成(红灯+或绿灯-亮)之前,不要将生物指示剂从培养/阅读孔中取出。 注意:如果培养完成前无意中取出指示剂,与此培养/阅读孔对应的所有三色指 示灯(红,绿,黄)全部被点亮同时蜂鸣器报警,显示警告代码C2。此时必须 在10秒钟之内将指示剂重新放回,否则会造成阅读结果的丢失。 警告: 一旦一支指示剂被插入某个培养/阅读孔,就不能将其取出放入另一个孔,否则 也会造成阅读结果的丢失或无效。
剩余时间 当按下“time remaining”键后每个插有生物指示剂 的培养阅读孔的剩余培养时间 会显示出来。显示剩余时间的同时,每个培养/阅读孔的所有三色指示灯会被点 亮。显示剩余时间的过程将从左至右依次进行。剩余时间在一小时以上时,时 间单位为小时,剩余时间在一小时以下时,时间单位为分钟。 温度控制 温度自动控制在60C+/-2C范围内,如果超出允许范围,将显示错误代码。
3M Attest 290 Auto-reader 快速培养/阅读皿 操作手册
Edited by L. G. F.
操作说明
1.保护盖 2.培养/阅读孔 3.压碎孔 4.红灯(+)阳性指示 5.黄灯(o)测试正在进行
6.绿灯(-)阴性指示 7.报警蜂鸣器关闭按钮 8.数字显示面板 9.剩余时间按钮
用法: 3M Attest 290自动培养阅读皿用于培养3M Attest 1292蒸汽灭菌快速读出生物指 示剂。培养温度60C,培养时间3小时,用于蒸汽灭菌。其他的生物指示剂 不能用于此设备。此设备只能使用3M提供的电源。
3M V-Series Air Control Devices使用说明说明书

GENERAL SAFETY INFORMATION Intended UseUSE INSTRUCTIONS AND LIMITATIONS IMPORTANTGeneral DescriptionAssigned Protection Factor (APF)NIOSH ApprovalNIOSH Cautions and LimitationsDispositifs de régulation d'air 3M™ de série V – pièces en option non illustréesNETTOYAGE, INSPECTION ET ENTREPOSAGE3M™ V-Series Air Control Devices – optional parts not shownCLEANING, INSPECTION AND STORAGECleaningListe des pièces illustrées du dispositif V-200 3M™ (Fig. 3)Liste des pièces illustrées du dispositif V-300 3M™ (Fig. 4)Liste des pièces illustrées du dispositif V-400 3M™ (Fig. 5)Volume du compresseurListe des pièces illustrées du dispositif V-100 3M™ (Fig. 2)Compressor Volume3M™ V-100 Illustrated Parts List (Fig. 2)3M™ V-200 Illustrated Parts List (Fig. 3)3M™ V-300 Illustrated Parts List (Fig. 4)3M™ V-400 Illustrated Parts List (Fig. 5)V-Series Air Control DevicesUser Instructions for 3M™ Vortex Cooling Assembly V-100, 3M™Vortemp™ Heating Assembly V-200, 3M™ Air Regulating Valve Assembly V-300 and 3M™ Low Pressure Connector Assembly V-400.IMPORTANT: Keep these User Instructions for referenceDispositifs de régulation d’air de série VDirectives d’utilisation pour l’ensemble de refroidissement V-100 Vortex 3M™, l’ensemble de réchauffement V-200 Vortemp™ 3M™, l’ensemble soupape de régulation d’air V-300 3M™ et l’ensemble connecteur basse pression V-400 3M™IMPORTANT : Conserver ces Directives d’utilisation à titre de référenceDispositivos para control de aire Serie VInstrucciones para Válvula de enfriamiento Vortex 3M™ V-100, Válvula de calentamiento Vortemp™ 3M™ V-200, Válvula reguladora de aire 3M™ V-300 y Conector para baja presión 3M™ V-400.IMPORTANTE: Conserve estas Instrucciones para referencia futuraVálvulas Reguladoras de Ar da Série VInstruções de uso do Conjunto de Refrigeração de Vórtex V-100 da 3M™, Conjunto de Aquecimento V-200 da 3M™ Vortemp™, Conjunto da Válvula Reguladora de Ar V-300 da 3M™ e Conjunto do Conector de Baixa Pressão V-400 da 3M™.IMPORTANTE: Mantenha estas Instruções de Uso para referênciaS- Special or Critical Use Instructions3M™ Supplied Air Hose and Pressure RequirementsDISPOSALTROUBLESHOOTINGTroubleshooting Chart V-100 and V-200Troubleshooting Chart V-300Troubleshooting Chart V-400IMPORTANT NOTICEFOR MORE INFORMATIONDIRECTIVES DE SÉCURITÉ D'ORDRE GÉNÉRAL Usage prévuDIRECTIVES ET RESTRICTIONS D’UTILISATION IMPORTANTDescription d'ordre généralFacteur de protection caractéristique (FPC)Homologation du NIOSHAvertissements et restrictions du NIOSHS – Directives d’utilisation spéciales ou d’importance capitaleTuyau d'air comprimé 3M™ et exigences de pressionTableau 1 – Tableau des pressions pour les dispositifs de régulation d'air 3M™ de série VPièces faciales L-501, L-503, L-505, L-701, L-703, L-705, L-901 et L-905 3MTableau 2 : Tableau des pressions pour les dispositifs de régulation d'air 3M™ de série V utilisés avec les pièces faciales L-501, L-503, L-505, L-701, L-703, L-705, L-901 et L-905 3MEntreposageMISE AU REBUTDÉPANNAGETableau de dépannage pour le dispositif V-300AVIS IMPORTANTPOUR OBTENIR DE PLUS AMPLES RENSEIGNEMENTS/FOR MORE INFORMATION3Lista ilustrada de partes 3M™ V-400 (Fig. 5)Dispositivos para control de aire 3M™ Serie V – No se muestran las partes opcionales.Lista ilustrada de Peças do V-200 da 3M™ (Fig. 3)Lista ilustrada de peças do V-300 da 3M™ (Fig. 4)Lista ilustrada de Partes do V-400 da 3M™ (Fig. 5)Lista ilustrada de partes 3M™ V-200 (Fig. 3)Lista ilustrada de partes 3M™ V-300 (Fig. 4)Volume do CompressorCOMPONENTES DO SISTEMA E PEÇAS DE REPOSIÇÃOLista ilustrada de Peças do V-100 da 3M™ (Fig. 2)AVISO IMPORTANTEPARA MAIS INFORMAÇÕES INFORMACIÓN GENERAL SOBRE SEGURIDADUsoINSTRUCCIONES Y LIMITACIONESIMPORTANTEDescripción generalFactor de protección asignado (APF)Aprobación NIOSHPrecauciones y limitaciones NIOSHS – Instrucciones especiales o importantesRequerimientos de manguera para suministro de aire y presión 3M™Tabla 1 Presión establecida para Dispositivos para control de aire 3M™ Serie WTabla 2: Tabla de presión establecida de Dispositivos para control de aire 3M™ Serie V usadas con Caretas 3M L-501,L-503, L-505, L-701, L-703, L-705, L-901, L-905Volumen del compresorLista ilustrada de partes 3M™ V-100 (Fig. 2)INSPECCIÓN, LIMPIEZA Y ALMACENAMIENTOLimpiezaELIMINACIÓNLOCALIZACIÓN DE AVERÍASTabla de localización de averías V-100 y V-200Tabla de localización de averías V-300Tabla de localización de averías V-400AVISO IMPORTANTEPARA OBTENER MÁS INFORMACIÓNINFORMAÇÕES GERAIS DE SEGURANÇAUso pretendidoIMPORTANTEDescrição geralFatores de Proteção Atribuídos (FPA)Aprovação NIOSHPrecauções e limitações da NIOSHS- Instruções de Uso Crítico ou EspecialMangueira de Ar Fornecido da 3M™ e Requisitos de PressãoTabela 1: Tabela de Regulagem de Pressão para as Válvulas reguladoras de Ar da Série V da 3M™Tabela 2: Tabela de Regulagem de Pressão para as Válvulas reguladoras de Ar da Série V da 3M™ usados com ascoberturas faciais L-501, L-503, L-505, L-701, L-703, L-705, L-901, L-905 da 3MVálvulas reguladoras de ar da série V 3M™ - peças opcionais não mostradasLIMPEZA, INSPEÇÃO E ARMAZENAMENTOLimpezaV-100ArmazenamentoDESCARTESOLUÇÃO DE PROBLEMASTabela de Localização de Danos V-100 e V-200Tabela da Solução de Problemas do V-300Tabela da Solução de Problemas do V-400。
3m-pgm-3000-entryrae-monitor-说明书
10 ppm H 2S, 50 ppm CO)Teflon ®WXELQJand international plug kit Teflon ®WXELQJEntryRAE Model PGM-3000The EntryRAE adds a plug & play PID (photoionization detector) to the standard four-sensor configuration of a confined space monitor (O 2, %LEL, CO and H 2S). The PID’s ability to provide accurate (parts-per-million) broadband detection of a host of common, highly toxic and flammable compounds makes it a necessity in today’s modern industrial environment.• Alkaline battery adapter Monitor only includes:• Monitor• Sensors (choose below)• Lithium-ion rechargeable battery • Tool Kit• Flow Regulator and tubing• Four-gas mix – 34L (50% LEL, 20.9% O 2, 10 ppm H 2S,50 ppm CO)• ProRAE Studio software package • Flow Regulators and tubingOptional Guaranteed Cost of OwnershipAnnual maintenance serviceOptional Accessories Kit adds:Optional Confined Space Kit I (CSK I) adds:• Flow Regulator and tubing• Isobutylene – 34L (100 ppm, balance air)• 4-year repair and replacement guarantee• Hard transport case with pre-cut foam • Tool Kit• Four-gas mix – 34L (50% LEL, 20.9% O 2,– with USB adapter • Computer interface cablesOptional Confined Space Kit II (CSK II) adds:Optional Confined Space Kit III (CSK III) adds:• Isobutylene – 34L (100 ppm, balance air)• Hard transport case with pre-cut foam • Tool Kit• Sampling wand with 10ƍ (3 meters) of self-coiling • 5 external filters• Sampling wand with 10' (3 meters) of self-coiling Teflon ®tubing • Sampling wand with 10' (3 meters) of self-coiling • Hard transport case with pre-cut foam • Tool Kit• Hard transport case with pre-cut foam • Shipping case• User manual • Sampling wand with 10' (3 meters) of self-coiling Teflon ®tubing• Charging cradle with universal wall adapter••••••••••••••••••••••••••••Standard Sensor ConfigurationsGuaranteed Cost of OwnershipExtends warranty and covers replacement of all parts and sensors for 4 years from date of purchase.$809.00SVC-PTC4-046PART NUMBER046-P000-100$1,318.00 046-P000-101$1,533.00 046-P000-103$1,666.00 046-P000-110$1,428.00 046-P100-101$1,644.00 046-P000-111$1,428.00 $1,644.00 046-P000-113$1,776.00 PART NUMBERLIST PRICE Unit with Accessories Kit Unit only, ATEX charging cradle046- P100-104046-P100-100$1,897.00 046- P100-110$1,539.00 PART NUMBERLIST PRICE 046- P100-111$1,754.00 046- P100-114$2,007.00 LEL / O 2 /10.6 eV PID••Unit with Accessories Kit, ATEX charging cradle Unit with CSK III, ATEX charging cradle•Unit with CSK IIIUnit only046-P111-100$1,649.00 046- P111-101$1,864.00 Unit onlyUnit with Accessories Kit 046- P111-104$2,117.00 046- P111-110$1,759.00 046- P111-111PART NUMBERLEL / O 2/ H 2S / CO•$1,974.00 046- P111-114$2,228.00 LIST PRICE•046-P111-000$987.00 046- P111-001$1,203.00 046- P111-002$1,301.00 Unit with Accessories Kit, ATEX charging cradle •Unit onlyUnit with Accessories Kit Unit with CSK I•Unit only, ATEX charging cradle•Unit with CSK IIIUnit only, ATEX charging cradleUnit with Accessories Kit, ATEX charging cradle Unit with CSK III, ATEX charging cradle10.6 eV PIDLEL / O 2 / H 2S / CO / 10.6 eV PIDUnit onlyUnit with Accessories Kit Unit with CSK IIUnit only, ATEX charging cradleUnit with Accessories Kit, ATEX charging cradle Unit with CSK II, ATEX charging cradle••Unit with CSK I, ATEX charging cradle••LIST PRICE $1,313.00 A T E X c h a r g i n g c r a d l e w i t h U n i v e r s a l w a l l c h a r g e rK i t C S K I IK i t C S K I I IK i t C S K I046- P111-010A c c e s s o r i e s K i t046- P111-012U n i v e r s a l w a l l a d a p t e r046- P111-011$1,412.00$1,098.00EntryRAE Lamp cleaning kit (pack of 10)External Filter (pack of 10)$44.00PART NUMBER PRICE $341.00 046-3005-000$39.00 046-0914-000046-0915-000Accessory Kit CSK I $212.00 $309.00 $212.00 $320.00 $461.00 046-3059-000046-3059-001046-0915-200046-0915-100CSK II CSK III $163.00 $72.00 $433.00 023-0102-000$163.00 $168.00 046-3051-000600-0050-004500-0036-100500-0014-010600-0002-000$14.00 046-3007-000$39.00 $245.00 DESCRIPTION Truck Mount 10.6 eV Combination PID lamp/sensor (4R)Alkaline battery pack4-gas calibration mix, 34L aluminum cylinder (50% CH 4, 20.9% O 2, 10 ppm H 2S, 50 ppm CO, bal. N 2)Universal wall charger, 110 VAC to 240 VAC, 12 VDC, with international plug kit Re-chargeable Lithium-ion battery Charging cradle ATEX charging cradle032-0200-000032-0202-000$109.00 %LEL combustibles sensor Oxygen sensor (2-year)Carbon Monoxide sensor Hydrogen Sulfide sensor 046-3022-010014-0212-000$163.00 $28.00 046-1161-000Isobutylene, 34L, 100 ppm (balance air)。
3M+9411+wipe+标准操作程序说明书

PAGE: 1 of 5R EV: 0.0DATE: 03/01/98 DETERMINATION OF METHYL PARATHION IN WIPE SAMPLESBY IMMUNOASSAYCONTENTS1.0 SCOPE AND APPLICATION2.0 METHOD SUMMARY3.0 SAMPLE PRESERVATION, CONTAINERS, HANDLING AND STORAGE3.1 Sample Storage3.2 Immunoassay Kit Storage3.3 Holding Times4.0 INTERFERENCES AND POTENTIAL PROBLEMS5.0 EQUIPMENT/APPARATUS6.0 REAGENTS7.0 PROCEDURES8.0 CALCULATIONS9.0 QUALITY ASSURANCE/QUALITY CONTROL10.0 DATA VALIDATION11.0 HEALTH AND SAFETY12.0 REFERENCES13.0 APPENDICIESA. Figure 1B. Attachment 1PAGE: 2 of 5R EV: 0.0DATE: 03/01/98 DETERMINATION OF METHYL PARATHION IN WIPE SAMPLESBY IMMUNOASSAY1.0 SCOPE AND APPLICATIONThe objective of this standard operating procedure is to provide guidance on the requirements for the analysis of methyl parathion in wipe samples using enzyme-linked immunoassay (ELISA).These are standard (i.e., typically applicable) operating procedures with may be varied or changed as required, dependent upon matrix conditions, equipment limitations or limitations imposed by the procedure. In all instances, the ultimate procedures employed should be documented and associated with the final report.Mention of trade names or commercial products does not constitute U.S. Environmental Protection Agency (U.S.EPA) endorsement or recommendation for use.2.0 METHOD SUMMARYThe methyl parathion plate kit is designed for the laboratory detection of methyl parathion pesticide residues in surface wipe samples. The plate contains polyclonal antibodies on the inside of the ninety-six wells in the plate.These antibodies will bind both methyl parathion and the parathion-enzyme conjugate supplied with the kit. Wipe samples are extracted with methylene chloride, and then diluted. Diluted extracts are added to the plate, followed by the parathion-enzyme conjugate. After a wash step removes unbound compounds, a colorless substrate/chromoge solution is added which produces a blue color inversely proportional to the methyl parathion concentration.3.0 SAMPLE PRESERVATION, CONTAINERS, HANDLING AND STORAGE3.1 Sample StorageFrom the time of receipt and after analysis, extracts and unused samples must be protected from light andrefrigerated at 4C (±2C) for the periods specified by the Task Leader and/or Work AssignmentManager.Samples, sample extracts, and standards must be stored separately in an atmosphere demonstrated to befree of all potential contaminants.3.2 Immunoassay Kit StorageAll plate kit components should be refrigerated at 4C (±2C) when not in use. Allow reagents to cometo room temperature before use. The substrate must never be exposed to sunlight.3.3 Holding TimesExtraction and analysis of wipe samples shall be completed within seven days of sampling.4.0 INTERFERENCES AND POTENTIAL PROBLEMSSolvents, reagents, glassware, and other sample processing hardware may yield artifacts and/or interferences toPAGE: 3 of 5R EV: 0.0DATE: 03/01/98 DETERMINATION OF METHYL PARATHION IN WIPE SAMPLESBY IMMUNOASSAYsample analysis. All these materials must be shown to be free from interferences under the conditions of the analysis by analyzing method blanks. Specific selection of reagents and purification of solvents by distillation in an all glass system may be required.This method does not distinguish between methyl parathion and the following compounds; ethyl parathion, paraoxon, methyl paraoxon, and fenitrothion.5.0 EQUIPMENT/APPARATUS1. Methyl Parathion plate kit (EnviroLogix, or equivalent), containing the following;8 strips of 12 antibody-coated wells each, in plate frame1 vial of Negative Control (methylene chloride)1 vial of 0.1 ppm Methyl Parathion Calibrator (in methylene chloride)1 vial of 1.0 ppm Methyl Parathion Calibrator (in methylene chloride)1 vial of 6.5 ppm Methyl Parathion Calibrator (in methylene chloride)1 bottle of Methyl Parathion-enzyme Conjugate1 bottle of Substrate1 bottle of Stop Solution2. Glass vials for dilution3. Positive-displacement pipetter with disposable tips and plungers for dilution of calibrators and sampleextracts, capable of delivering 15 µL4. Vortex mixer5. Disposable tip, adjustable air-displacement pipette capable of delivering 50-150 µL6. Tape or Parafilm7. Marking pen (indelible)8. Timer9. Optical microplate reader; (Molecular Devices Emax Microplate Reader, coupled with Softmax software,Cat #0200-2011, or equivalent).10. Twelve channel pipette that will measure 50 µL, 100 µL, and 150 µLPAGE: 4 of 5R EV: 0.0DATE: 03/01/98 DETERMINATION OF METHYL PARATHION IN WIPE SAMPLESBY IMMUNOASSAY11. Racked dilution tubes for loading samples into the plate with a 12-channel pipette.12. Orbital plate shaker13. Spectrophotometer6.0 REAGENTS1. Deionized water2. Methylene chloride (glass distilled, suitable for GC)7.0 PROCEDURES1. Calibrators must be prepared at 0 ppm, 0.1 ppm, 1 ppm, and 6.5 ppm methyl parathion in the extractionsolvent. Calibrators and extracts must be diluted 1:1000 prior to analyzing in the ELISA: using apositive-displacement pipet, deliver 15 µL of each calibrator and sample extract into an appropriatelylabeled vial containing 15 mL of water. Mix thoroughly by vortexing.2. Design a plate map incorporating duplicate wells for calibrators and samples. Each plate (or batch) ofsamples should contain the following;1. Duplicate wells of each of the three calibrators, 0.1 ppm, 1.0 ppm, and 6.5 ppm.2. Duplicate wells of the Method Blank, which is the extraction solvent at a 1:1000 dilution.3. Duplicate wells of all samples.4. Fill in any extra wells with more calibrators or dilutions of samples.5. Complete the sample log in the data file. Be sure “Sample ID” is corr ectly entered. This reportwill serve as the only sample analysis log.3. Load calibrators/samples into the plate. Add 50 µL diluted calibrators and samples to duplicate wells ofthe plate, following the plate map designed in step 2.4. Immediately add 150 µL of parathion-enzyme conjugate to each well of the plate, in the same order thatcalibrators and samples were applied. Mix the plate by gently swirling on a flat surface, then cover wellswith tape or Parafilm and incubate for 1 hour.5. Shake the well contents out into a sink or suitable container. Wash the wells by filling to overflowingwith clean deionized water. Shake out as much water as possible. Repeat this wash procedure 4 timesmore, slapping the plate on a paper towel after the last one to remove as much water as possible.PAGE: 5 of 5R EV: 0.0DATE: 03/01/98 DETERMINATION OF METHYL PARATHION IN WIPE SAMPLESBY IMMUNOASSAY6. Immediately add 100 µL substrate solution to each well. Mix gently as above, cover with new tape orParafilm, and incubate for 30 minutes.7. Add 100 µL stop solution to each well, turning the color from blue to yellow. Read the absorbance of thewells at a wavelength of 450 nanometers, subtracting the 650 (or 630) nanometer reading as a referencewavelength. Plot the concentration of the 3 non-zero calibrators on a log scale versus their meanabsorbance (linear scale) to yield a semi-log curve. Multiply results by the volume of extraction solventused in milliliters to convert data to concentration (µg/100 cm2).8. Sample analysis should be repeated if the values of the duplicate varies by more than 50% and thecalculated final concentrations are close to the required Action Level.8.0 CALCULATIONSThe microplate reader calculates a semi-log curve for the three calibrators and reports the methyl parathion concentration in µg/100 cm2, so no calculation is required by the user. An example of the semi-log curve and the concentration output is found in Figure 1.9.0 QUALITY ASSURANCE/QUALITY CONTROLThe limit of quantification (LOQ) for surface wipe samples is 0.1 ppm in the extracts, equivalent to 3 µg/100 cm2, for a sample extracted with 30 mL of solvent. Samples with higher optical density than the lowest calibrator are reported as “<0.1 ppm”, or < 3 µg/100 cm2. Samples with lower optical density than the highest calibrator are reported as “>6.5 ppm”, o r > 195 µg/100 cm2, and should be diluted and reanalyzed.Alternate methods such as GC/MS should be used to confirm 10% of the results.10.0 DATA VALIDATIONThe accuracy of sample IDs, dilution factors, and the linearity of the standards should be reviewed and coutersigned by a peer, preferably one familiar with immunoassay analysis, before submittal of preliminary results.11.0 HEALTH AND SAFETYWhen working with potentially hazardous materials, refer to U.S. EPA, OSHA and corporate health and safety practices. More specifically, refer to ERT/SERAS SOP #3013, SERAS Laboratory Safety Program.12.0 REFERENCESMethyl-Parathion Plate Kit manual, EnviroLogix Inc. (see Attachment 1, Appendix B).。
3M Twist 'n Fill Dispensing System及相关产品说明说明书

glass, mirrors, carpets, floors and walls.Bathroom mirrors, tile, bowls, urinals and fixtures.Prespray and extraction cleaning for colorfast and nylon stain-resistant carpets.Cleaning and stripping for hard floors.3M ™ Glass Cleaner ConcentrateConcentrado de limpieza para vidrios 3M ™3M ™ Speed Stripper Concentrate Concentrado rectificador rápido 3M ™3M ™ Deodorizer — Fresh Scent Concentrate Desodorizante 3M ™ — Concentrado con aroma fresco3M ™ Non-Acid Bathroom Cleaner Concentrate Concentrado de limpieza para baños no ácido 3M ™3M ™ Industrial Degreaser Concentrate Concentrado desengrasante industrial 3M ™3M ™ Disinfectant Cleaner RCT Concentrate Concentrado de limpieza desinfectante de ensayo clínico aleatorizado (RCT) 3M ™3M ™ Food Service Degreaser Concentrate Concentrado desengrasante para áreas de servicios de comidas 3M ™3M ™ Deodorizer — Mountain Spice Concentrate Desodorizante 3M ™ — Concentrado con aroma de montaña3M ™ Heavy Duty Glass Cleaner Concentrate Concentrado de limpieza para vidrios de alta resistencia 3M ™Scotchgard ™ Extraction Cleaner Concentrate Concentrado de limpieza de extracción Scotchgard ™3M ™ General Purpose Cleaner Concentrate Concentrado de limpieza de propósito general 3M ™3M ™ Non-Acid Disinfectant Bathroom Cleaner ConcentrateConcentrado de limpieza para baños desinfectante no ácido 3M ™3M ™ Floor Stripper LO ConcentrateConcentrado LO rectificador de suelos 3M ™Scotchgard ™ Pretreatment Cleaner ConcentrateConcentrado de limpieza para tratamientos previos Scotchgard ™Scotchgard ™ Bonnet Cleaner Concentrate Concentrado de limpieza de capó Scotchgard ™3M™ Sanitizer ConcentrateConcentrado desinfectante 3M ™3M ™ Neutral Quat Disinfectant Cleaner Concentrate Concentrado de limpieza desinfectante cuaternario neutro 3M ™3M ™ Neutral Cleaner LO Concentrate Concentrado LO de limpieza neutro 3M ™3M ™ Deodorizer — Country Day Scent Concentrate Desodorizante 3M ™ — Concentrado con aroma día de campo3M ™ Glass Cleaner and Protector Limpiador y protector de vidrios 3M ™3M ™ 3-in-1 Floor Cleaner Concentrate Concentrado de limpieza para suelos 3 en 1 3M ™3M ™ Peroxide Cleaner ConcentrateConcentrado de limpieza de peróxido 3M ™3M ™ HB Quat Disinfectant Cleaner Concentrate Concentrado de limpieza desinfectante cuaternario HB 3M ™3M ™ Clean & Shine Daily Floor Enhancer Limpiador y Sellador De Pisos Concentrado Para Uso Diario Clean & Shine3M ™ Tile, Grout & Bowl Cleaner ConcentrateConcentrado de limpieza para azulejos y tazas 3M ™Limpieza General: La mayoría de las superficies lavables, como ventanas, cristales, espejos, alfombras, pisos y paredes.Limpieza de Baños: Espejos, azulejos, tazas, mingitorios y accesorios para baños.Limpieza de Alfombras: Limpieza con rociado previo y extracción para alfombras indelebles y de nylon resistente a las manchas.Mantenimientos de Pisos Duros: Limpieza y rectificación para pisos duros.Limpieza del área de Servicios de Comida: Limpieza y desengrase de paredes, pisos, mesas, alfombras y asientos.Restroom CleaningCarpet CleaningHard Floor Maintenance*Product is intended for use on windows, glass, mirrors and other mirrored surfaces. †Food contact sanitizer.1*613192540142026152716†222817*233324345258131123272428253426401*34401241421417*22551213141517*1*41952202023412542344440516822232435252633343540414237816†17*201*2242633343M, Scotchgard and Twist ’n Fill are trademarks of 3M. Used under license in Canada. Green Seal and the Green Seal Certified mark are trademarks of Green Seal, Inc. The Carpet and Rug Institute’s Seal of Approval logo is a trademark of the Carpet and Rug Institute.© 3M 2020. All rights reserved. Please recycle. 70-0710-3629-034-8724-8135-23M Commercial Solutions3M Center, Building 220-12E-04St. Paul, MN 55144-1000Phone 1-800-852-9722Web /facilityThe Carpet and Rug Institute (CRI) Seal of Approval addresses cleaning effectiveness by testing and certifying only those products that meet high performance standards.Products No. 24, 44: Acute toxicity and skin/eye damage met requirements at the as-used dilution, as specified for closed dilution systems.Product No. 8, 34: Skin/eyedamage met requirements at the as-used dilution, as specified for closed dilution systems.Products meet Green Seal ™ Standard GS-37 based on effective performance, concentrated volume, minimized/recycled packaging, and protective limits on: VOCs and human & environmental toxicity. 35。
Sennheiser EZT 3012 诵读器指南说明书

Induction loop EZT 3012Instruction manualImportant safety instructions•Please read this instruction manual carefully and completely before using the product.•Make this instruction manual easily accessible to all users at all times. Always include this instruction manual when passing the product on to third parties.•Do not use the product in situations which require special atten-tion (e.g. when performing skilled jobs).•Always keep the product dry and do not expose it to extreme temperatures.Intended useIntended use includes:•having read this instruction manual, especially the chapter “Important safety instructions”,•using the product within the operating conditions and limita-tions described in this instruction manual.“Improper use” means using the product other than as described in this instructions, or under operating conditions which differ from those described herein.1The EZT3012 induction loopThe EZT3012 induction loop is an accessory for Sennheiser infra-red and RF receivers as well as for conference units of a conference system. The EZT3012 inductively couples the audio signal from the receiver/conference unit to hearing aids.Using the volume control on the receiver the sound may be easily adjusted to suit an individual user’s hearing. This allows hearing aid wearers to take advantage of an interference free, optimum sound quality, wireless, listening experience.Delivery includes1 EZT3012 induction loop1 instruction manual23Preparing the EZT 3012 for use Connecting the induction loop̈Connect the 3.5 mm jack plug of the induction loop to the socket on your receiver or to the corresponding audio output of yourconference unit.3012 to devices that are not defibrillators.̈Connect the induction loop only to Sennheiserdevices.4̈Set your hearing aid to the T-position.If your hearing aid has no T-position, please contact your hearing aid acoustician.Wearing a receiverDepending on the receiver used, you require a lanyard or a clip (see “Accessories” on page 6) in addition to the EZT 3012 induction loop.̈Attach the optional lanyard ³ or the clip · to your RI 830S orRR 840S receiver.Cleaning the EZT3012̈Use a slightly damp cloth to clean the induction loop.56AccessoriesFor the RI 830S and RR 840S receivers, the following accessories are available from your specialist dealer:SpecificationsCat. No.Accessory/spare part528184Clip528185LanyardEZT 3012 induction loopAudio connector3.5 mm stereo jack plug Cable lengthinduction loopconnection cable75cm 40cm Impedance28Ω at 1kHzManufacturer DeclarationsWarrantySennheiser electronic GmbH & Co. KG gives a warranty of 24 months on this product. For the current warranty conditions, please visit our web site at or contact your Sennheiser partner.WEEE DeclarationPlease dispose of this product at the end of its operational Arraylifetime by taking it to your local collection point or recyclingcentre for such equipment.7Sennheiser electronic GmbH & Co. KG Am Labor 1, 30900 Wedemark, Germany Printed in ChinaPubl.04/09532880/A01。
- 1、下载文档前请自行甄别文档内容的完整性,平台不提供额外的编辑、内容补充、找答案等附加服务。
- 2、"仅部分预览"的文档,不可在线预览部分如存在完整性等问题,可反馈申请退款(可完整预览的文档不适用该条件!)。
- 3、如文档侵犯您的权益,请联系客服反馈,我们会尽快为您处理(人工客服工作时间:9:00-18:30)。
ii
© 3M 2006
All rights reserved.
DT-01715D
Reader User Guide
联系方法:
北 美及 亚 太 地 区 1545 Carling Avenue Suite 700 Ottawa, Ontario CANADA K1Z 8P9 telephone: +1 613 722 2070 fax: +1 613 722 2063 web: /security/en 欧洲,中东和非洲 3M United Kingdom PLC 3M Centre Cain Road Bracknell, Berkshire UNITED KINGDOM RG12 8HT telephone: +44 (0) 1344 858 000 fax: +44 (0) 1344 857 865
MACHINE-READABLE TRAVEL DOCUMENT READER USER GUIDE
护照阅读仪使用手册
Ottawa, Ontario CANAD2006
Reader User Guide
DT-01715D
声明
亲爱的客户,您采购的3M鉴定系统,全页护照阅读仪,须在一定条件下使用。 因为由于使用环境的不同,可能导致我们无法控制的情况发生。所以用户需综合评价及 决定采购的产品是否适用于您的需求。 下列叙述表达或暗示的是保修条款(含担保或适用于何种需求): 如果产品损坏,3M中国有限公司是唯一的维修商。负责对产品进行维修及更换配件,出保 修期的收取相应的维修费用。 有限责任声明: 3M或销售商,对非机器本身质量原因造成的损坏,丢失,直接或间接,有 意或无意的损失(含损坏,引起的损失,业务中断,信息丢失,经营成本上升和诉讼费用 等等)不负有责任。无论是否在合同中注明(包括非保修期内的事例)或民事侵权行为 (含疏忽造成的结果)。
技术支持中心:
北美 direct line: +1 613-722-3629 main number: +1 613-7222070 fax: +1 613-722-2063 email: 3M-AiT-gcs@ 英国 direct line: +44 (0) 1344 858 371 main number: +44 (0) 1344 858 000 fax: +44 (0) 1344 858 792
中国: Direct line: 800-820-3312 Fax: 021-64853969
© 3M 2006
All rights reserved.
iii
Reader User Guide
DT-01715D
EMC, USA, and Canada 符合:
FCC 无线电频率的规定:
注意: 此设备依照FCC A级数字装置的第15条款制造和测试。该设备在商业环境下使用时,有设计保护及 屏蔽有害频率。此设备有详细介绍如何使用,设备在使用时会发出无线电频率。在没有适当安装,或没有 按使用说明书要求连接安装状态下,可能会干扰其他无线电频率连接。设备在居民住宅区使用也可能会其 他设备造成干扰,客户需自行调整。 切勿改动设备。未经3M公司允许的改动都是不被许可的。未经授权的改动将不在享有3M公司的保修。
加拿大工业无线电频率规定:
此设备符合加拿大无线电设备A级数字设备规定。 CANADA ID: PENDING
EMC 欧洲规定:
此设备符合欧盟无线电管理规定。
机器后部的安全标贴:
iv
© 3M 2006
All rights reserved.
DT-01715D
Reader User Guide
目录
简 介 …………..................................................................................................................................... 1 安全提示 ................................................................................................................................... 1 使用提示 ............................................................................................................................... 1 信号解释................................................................................................................................. 1 机器特点 .................................................................................................................................... 2 相 关 文 件 ........................................................................................................................................ 4 产品介绍 ......................................................................................................................................... 5 文本窗口 .................................................................................................................................... 6 LEDs 显 示 ............................................................................................................................ ...6 机器后部连接口....................................................................................................................... 6 阅读仪设置 ..................................................................................................................................... 7 主控计算机要求 ......................................................................................................................... 7 阅读仪开箱................................................................................................................................. 7 软件安装 ........................................................................................................................................ 8 连接主控系统 ........................................................................................................................... 10 连接电源.................................................................................................................................... 11 USB和电源线连接................................................................................................................ 11 校验USB驱动安装 ................................................................................................................... 11 USB驱动升级 ........................................................................................................................... 12 开机自检................................................................................................................................... 12 测试阅读及连接....................................................................................................................... 13 阅读种类 ...................................................................................................................................... 14 阅读 单一条码 .................................................................................................................... 15 阅读 2维条码 .................................................................................................................... 15 身份证.................................................................................................................................. 16 护照 .................................................................................................................................... 16 阅读格式文本...................................................................................................................... 17 阅读非标准格式文本 ........................................................................................................ 18 遥控阅读集成电路............................................................................................................. 19 射频阅读 ............................................................................................................................ 20 维护.............................................................................................................................................. 21 清 洁........................................................................................................................................... 21 UV管更换................................................................................................................................ 22
