基于uap2.0项目集成操作手册
用户培训手册_统一权限

统一权限使用手册(管理员)目录1、系统概述 (1)1.1更加稳定、安全、高效的权限管理服务 (1)2、各组件特点 (1)2.1、消息服务(ISC_MS) (1)2.2、权限管理平台(ISC_MP) (3)2.3、接口服务(ISC_SM) (5)2.4、统一认证(ISC_SSO) (6)2.5、审计服务(ISC_AS) (8)2.6、数据同步服务(ISC_SYNC_ADAPTER) (8)2.7、统一认证代理(ISC_SSO_AGENT) (9)2.8、鉴权代理(ISC_SM_AGENT)、缓存服务(ISC_CS) (10)2.9、UAP身份和审计模块(ISC_MANAGE)、工单模块(ISC_WORKFLOW) (11)3、权限管理 (12)3.1、业务角色维护 (12)3.2、组织角色维护 (14)3.3、身份权限维护 (15)4、集成管理 (17)4.1同步结果监控 (17)1、系统概述统一权限平台系统设计的目标是考虑国家电网公司人员身份管理业务的现状及特点,在总体设计上借鉴以往“国网统一身份认证系统典型设计”的成功经验,依托信息化手段着力提高人员身份管理的工作质量和效率,构建一套支撑“总部-网省”两级部署以及总部集中部署版本的统一权限平台系统,实现对人员身份的统一认证、统一管理、统一授权、以及合规性管理、安全审计等模块功能,实现统一管理、流程规范、过程受控、备案审查的目的,从而提升公司人员身份管理的规范性、合理性和安全性。
1.1更加稳定、安全、高效的权限管理服务权限系统2.0版本是针对前期权限系统1.0版本的试点成果,进一步深化应用:1、考虑为业务应用提供满足安全等级保护规定中相应权限管理要求的服务。
2、对访问控制管理方面进行安全加固与性能提升,增加权限测试机制,形成可水平扩展的鉴权体系。
3、全面提升用户体验。
2、各组件特点本节通过对统一权限平台各模块的介绍,阐明各模块的功能特性,以及各模块之间的通信交互过程,以便于实施工程师对统一权限系统的理解。
SMARC 2.0 载板用户指南说明书
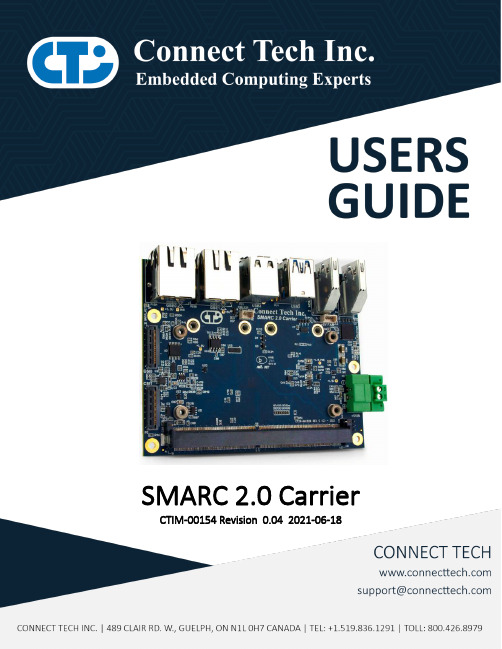
SMARC 2.0 Carrier CTIM-00154 Revision 0.04 2021-06-18TABLE OF CONTENTSTable of Contents (2)Preface (3)Disclaimer (3)Customer Support Overview (3)Contact Information (3)Limited Product Warranty (4)Copyright Notice (4)Trademark Acknowledgment (4)ESD Warning (5)Revision History (5)Introduction (6)Product Features and Specifications (6)Part Numbers / Ordering Information (6)Product Overview (7)Block Diagram (7)Connector Summary & Locations (8)Figure 1 Top view (8)Figure 2 Bottom view (8)Jumper/Switch Summary & Locations (9)Detailed Feature Description (10)SMARC 2.0 Connector (10)Fan Connector (11)Video Output (11)MIPI CSI Video Input (12)MIPI CSI x4/x2 Connector (12)MIPI CSI x2 Connector (13)Network (14)USB (14)Mini-PCIe/mSATA Slots (15)Carrier Control DIP Switch (17)HDMI0 DDC Level Translation Select Jumper (17)I2C Connector (18)RS-232 Serial Connector (18)microSD Card Slot (19)GPIO Connector (19)Power Input (20)External RTC Input (20)System Control Connector (21)Typical Installation (22)Cables (22)PREFACEDisclaimerThe information contained within this user’s guide, including but not limited to any product specification, is subject to change without notice.Connect Tech assumes no liability for any damages incurred directly or indirectly from any technical or typographical errors or omissions contained herein or for discrepancies between the product and the user’s guide.Customer Support OverviewIf you experience difficulties after reading the manual and/or using the product, contact the Connect Tech reseller from which you purchased the product. In most cases the reseller can help you with product installation and difficulties.In the event that the reseller is unable to resolve your problem, our highly qualified support staff can assist you. Our support section is available 24 hours a day, 7 days a week on our website at:/support/resource-center/. See the contact information section below for more information on how to contact us directly. Our technical support is always free.Contact InformationLimited Product WarrantyConnect Tech Inc. provides a two-year Warranty for this product. Should this product, in Connect Tech Inc.'s opinion, fail to be in good working order during the warranty period, Connect Tech Inc. will, at its option, repair or replace this product at no charge, provided that the product has not been subjected to abuse, misuse, accident, disaster or non-Connect Tech Inc. authorized modification or repair.You may obtain warranty service by delivering this product to an authorized Connect Tech Inc. business partner or to Connect Tech Inc. along with proof of purchase. Product returned to Connect Tech Inc. must be pre-authorized by Connect Tech Inc. with an RMA (Return Material Authorization) number marked on the outside of the package and sent prepaid, insured and packaged for safe shipment. Connect Tech Inc. will return this product by prepaid ground shipment service.The Connect Tech Inc. Limited Warranty is only valid over the serviceable life of the product. This is defined as the period during which all components are available. Should the product prove to be irreparable, Connect Tech Inc. reserves the right to substitute an equivalent product if available or to retract the Warranty if no replacement is available.The above warranty is the only warranty authorized by Connect Tech Inc. Under no circumstances will Connect Tech Inc. be liable in any way for any damages, including any lost profits, lost savings or other incidental or consequential damages arising out of the use of, or inability to use, such product.Copyright NoticeThe information contained in this document is subject to change without notice. Connect Tech Inc. shall not be liable for errors contained herein or for incidental consequential damages in connection with the furnishing, performance, or use of this material. This document contains proprietary information that is protected by copyright. All rights are reserved. No part of this document may be photocopied, reproduced, or translated to another language without the prior written consent of Connect Tech, Inc. Copyright © 2021 by Connect Tech, Inc.Trademark AcknowledgmentConnect Tech, Inc. acknowledges all trademarks, registered trademarks and/or copyrights referred to in this document as the property of their respective owners. Not listing all possible trademarks or copyright acknowledgments does not constitute a lack of acknowledgment to the rightful owners of the trademarks and copyrights mentioned in this document.ESD WarningElectroStatic Discharge (ESD). When handling anycircuit board assemblies including Connect TechCOM Express carrier assemblies, it is recommendedthat ESD safety precautions be observed. ESD safebest practices include, but are not limited to:•Leaving circuit boards in their antistaticpackaging until they are ready to be installed.•Using a grounded wrist strap when handlingcircuit boards, at a minimum you should touch agrounded metal object to dissipate any staticcharge that may be present on you.•Only handling circuit boards in ESD safe areas,which may include ESD floor and table mats,wrist strap stations and ESD safe lab coats.•Avoiding handling circuit boards in carpetedareas.•Try to handle the board by the edges, avoidingcontact with components.REVISION HISTORYINTRODUCTIONConnect Tech’s SMARC 2.0 carrier is an extremely small SMARC carrier board ideal for low power IoT applications as users can take advantage of the integrated on-board wireless capabilities found on the SMARC 2.0 modules. The carrier has USB 3.0, USB 2.0, 2x MIPI CSI-2 camera interfaces, HDMI outputs, microSD, and expansion via two mini PCIe Full size slots.Connect Tech’s SMARC 2.0 carrier board supports the latest generation Apollo Lake x86 low-powered processors and exposes next-generation interconnect (USB 3.0, DDI, MIPI-CSI-2).SMARC 2.0 supports an extended temperature range of -40°C to +85°C and offers a very small footprint; ideal for mobile or stationary applications.Product Features and SpecificationsPart Numbers / Ordering InformationPRODUCT OVERVIEW Block DiagramConnector Summary & LocationsFigure 1 Top viewFigure 2 Bottom viewJumper/Switch Summary & LocationsDETAILED FEATURE DESCRIPTIONSMARC 2.0 ConnectorThe processor and chipset are implemented on the SMARC 2.0 Module, which connects to the SMARC 2.0 Carrier via an MXM 3.0 fine pitch connector.Fan ConnectorThe SMARC 2.0 Carrier implements a 4 pin header for the connection of a +5V fan. No PWM control is available from this header.Video OutputThe SMARC 2.0 Carrier implements two HDMI outputs. Both ports are from the SMARC 2.0 module. All connectors are industry standard HDMI Type A upright right angle.MIPI CSI Video InputThe SMARC 2.0 Carrier implements two MIPI CSI camera inputs through 28 pin Hirose ZIF connectors compatible with Basler BCON cables. The pinout of this connector is compatible with Basler MIPI BCON *********************************************************************************. MIPI CSI x4/x2 ConnectorMIPI CSI x2 ConnectorNetworkThe SMARC 2.0 Carrier implements two 10/100/1000 Ethernet interfaces.USBThe SMARC 2.0 Carrier implements a Dual USB3.0 connector and a Dual USB2.0 connector. All ports are direct from the SMARC 2.0 module. All connectors are industry standard USB3.0/USB2.0 Type A right angle.Mini-PCIe/mSATA SlotsThe SMARC 2.0 Carrier implements two expansion slots. One is Mini PCIe only and the other is a dual function Mini PCIe/mSATA socket.The dual purpose functional Mini-PCIe/mSATA socket located at P8 can accept either a Mini PCIe module or an mSATA module. The slot has circuitry that allows for the selection between connecting PCIe lanes or SATA lanes to the connector. This slot also contains a USB 2.0 link as per the Mini PCIe specification.Carrier Control DIP SwitchHDMI0 DDC Level Translation Select JumperSome SMARC module manufacturers do not use 1.8V signal levels for the HDMI DDC interface, for the best and most reliable performance it is required the correct voltage level is used.Note that prolonged use at the incorrect voltage level may cause damage. If you are unsure what logic *****************************************************************************. Customers using the Congatec conga-SA5 will need to set this jumper to 3.3V (position 1-2).I2C ConnectorThe SMARC 2.0 Carrier implements a 3 pin header that connects to the I2C interface from the SMARC 2.0 module.RS-232 Serial ConnectorThe SMARC 2.0 Carrier implements a 9 pin header that connects to the UART0 interface via an RS232 transceiver from the SMARC 2.0 module.microSD Card SlotThe SMARC 2.0 Carrier implements a microSD card connector.GPIO ConnectorThe SMARC 2.0 Carrier implements a 10 pin header that connects to a MaxLinear XRA1200 I2C GPIO expander at address 0x40.Power InputThe SMARC 2.0 Carrier accepts a single power input to power all onboard devices.A single +5V DC (± 5%) input is required for operation.External RTC InputThe SMARC 2.0 Carrier has an optional external RTC input header.System Control ConnectorThe SMARC 2.0 Carrier implements a 10 pin header that connects to several system control signals from the SMARC module.TYPICAL INSTALLATION1.Ensure all external system power supplies are off.2.Install the SMARC module into the MXM connector. Be sure to follow the manufacturer’s directionfor proper heatsink/heat spreader installation and any other cooling instructions from themanufacturer.3.Install the necessary cables for the application. For the relevant cables, see the Cables andAccessories section of this manual.4.Connect the power cable to the SMARC 2.0 Carrier then to the power supply.5.Switch on the power supply. DO NOT power up your SMARC system by plugging in live power. CABLES*******************************************************************************.。
EDIS项目信息集成平台用户手册1.32
中海油EDIS项目信息集成平台(标准版)软件使用操作手册北京厚德思成科技有限公司文档管理信息版本信息审核人校对人目录EDIS项目信息集成平台(标准版) (1)一、登陆 (7)二、页面介绍 (8)三、发文管理 (10)1、概述及流程 (10)2、模块菜单设置 (11)1、待处理 (11)2、流转中 (11)3、我的发文 (12)4、全部发文 (12)3、流程具体操作 (12)1、发文流程---拟稿发文(拟稿人) (12)2、发文流程---领导审批(审批人) (18)3、发文流程---文控插入编号、打印发文,确认签发(文控) (21)4、发文流程---上传回执(文控) (22)5、发文流程结束----自动归档到【文档管理】 (24)4、具体功能操作 (26)1、对发文列表的布局可以进行调整 (26)2、管理员在全部发文和我的发文页面,进行【导出excel清单】操作。
(26)3、可以对发文列表中各列进行隐藏或是显示 (27)4、在全部发文页面,添加全部归档功能。
(27)5、在全部发文页面,添加导出发文功能。
(28)6、全部发文页面,直接成文 (29)四、收文管理 (29)1、概述及流程 (29)2、模块菜单设置 (30)1、待处理 (30)2、流转中 (31)3、我的收文 (31)4、全部收文 (31)3、流程具体操作: (31)1、收文流程---登记收文(文控) (31)2、收文流程----领导审批(审批人) (35)3、收文流程----部门领导处理(处理人) (37)4、收文流程----工程师处理(处理人) (38)5、收文流程结束---自动归档 (39)4、具体功能操作 (40)1、对收文列表的布局可以进行调整 (40)2、可以对收文列表中各列进行隐藏或是显示 (41)3、管理员在全部收文和我的收文页面,进行【导出excel清单】操作。
(41)4、在全部发文页面,添加全部归档功能。
(42)5、在全部收文页面,添加导出收文功能 (42)6、全部收文页面,直接成文 (43)五、版本跟踪 (44)1、概述及流程 (44)2、模块菜单设置 (44)1、专业出图计划 (44)2、专业设置 (45)3、版本号设置 (45)4、项目阶段设置 (45)5、设计文件类别设置 (45)6、设计文件专业审批 (45)7、设计文件EDIS审查 (45)8、本专业未回复图纸文件 (46)9、全部未回复图纸文件 (46)10、图纸审查任务 (46)3、具体操作 (46)1、设置出图计划 (46)2、专业设置 (48)3、版本号设置 (48)4、项目阶段设置 (49)5、设计文件类别设置 (49)6、图纸审查任务菜单页面 (50)4、文件传送单流程具体操作 (50)1、版本跟踪流程-登记文件传送单 (51)2、版本跟踪流程-负责人审批EDIS标准版 (53)3、版本跟踪流程-专业工程师审图 (56)4、版本跟踪流程-回复文件传送单 (57)5、版本跟踪-设置EDIS审查 (58)6、在专业出图计划查看当前文件传送单的状态 (59)7、设计文件归档到之前设置的目录下。
PSM2.0使用手册(V1.0)
功能项
电源管理
支持服务器在通电的情况下执行开机、关机、重启 独立于系统电源或工作状态的支持
控制台重定向 — 提供远程系统键盘、视频和鼠标功能。
远程控制 虚拟设备
用户管理
能显示从开机到系统启动结束的整个过程 能响应键盘操作进入 BIOS 设置界面进行 BIOS 设置 能响应键盘操作进入 PXE 启动并显示启动过程 进入系统后能响应键盘的输入并实时输出 对 WINDOWS 系统可截取系统崩溃最后的画面
深圳市宝德计算机系统有限公司
V1.0
2、CD-ROM Image 可将 ISO 文件虚拟成可移动设备供远程服务器使用。该文件不能大于 800M。
Share host:输入提供 ISO 文件服务器的主机名或者 IP 地址 Path to image:输入 ISO 文件的路径。如:\image\baowang.iso。注意文件所在的分区、文件 夹都必须设置为共享模式。 User/Password:虽然提示为选填。但经试验提供 ISO 文件的服务器必须设置了用户名和密 码并填写后才能使用 ISO 文件。
V1.0
6、Network 可配置 IPMI 的网络设置。
7、Dynamic DNS 配置动态 DNS。
深圳市宝德计算机系统有限公司
V1.0
8、Remote Session 设置远程设备重定向的方式。
UAP操作指南范文

UAP操作指南范文UAP(Universal Automation Platform,通用自动化平台)是一种为企业提供自动化解决方案的平台,可帮助企业优化运营流程,提高工作效率,并减少人工错误。
UAP拥有强大的功能和灵活的配置选项,使企业能够根据其特定需求进行定制。
本操作指南将介绍UAP的主要功能和使用方法,以帮助企业快速上手并开始实现自动化。
一、UAP基础功能1.用户管理:UAP允许管理员创建和管理用户账户,并为不同的角色分配相应的权限。
管理员可以控制用户对不同项目和功能的访问权限。
2.项目管理:UAP采用项目的方式组织任务和工作流程。
管理员可以创建和管理项目,并为每个项目分配相应的团队成员。
项目可以根据需要进行定制,并设置不同的触发器和计划来自动执行任务。
3.任务管理:UAP支持创建和管理各种任务,包括文件处理、数据处理、邮件发送、系统集成等。
管理员可以通过简单的拖放界面配置任务,定义输入和输出的数据格式,并设置任务的触发条件和执行方式。
4.工作流管理:UAP提供了强大的工作流引擎,可以帮助企业自动化复杂的业务流程。
管理员可以根据实际需求创建和管理工作流,并在每个步骤中配置相应的任务和触发器。
工作流可以根据条件和规则自动触发,并支持任务的并行和串行执行。
5.触发器管理:UAP支持多种触发器类型,包括时间触发器、文件触发器、API触发器等。
管理员可以根据需要创建和管理触发器,并将其与任务和工作流关联。
触发器可以根据条件自动触发任务的执行。
6.日志和报表:UAP提供详细的日志和报表功能,记录任务和工作流的执行情况。
管理员可以查看执行日志、错误日志和任务报表,并根据需要导出和分析数据。
二、UAP使用方法1.登录和注册:用户可以使用企业提供的账户登录UAP。
如果是首次登录,用户需要进行注册并设置个人信息和密码。
2.创建项目:管理员登录后,可以创建新的项目。
在项目设置中,可以定义项目的名称、描述和权限。
MAS2.0内部插件开发手册

前言本手册是深圳嘉讯有限公司MAS系统内部插件的开发指导手册。
本手册包括以下几方面内容:文档概述、开发环境、集成环境、如何集成、类关系图、接口说明、如何打包、如何安装。
本手册由深圳嘉讯有限公司产品与解决方案部MAS组提出并归口。
本手册由手册归口部门负责解释。
本手册起草单位:深圳嘉讯有限公司本手册主要起草人:吴江1.范围本手册用于指导嘉讯MAS2.0平台上的内部应用插件开发,嘉讯公司以及嘉讯MAS2.0平台的使用产商共同使用。
其阅读对象为需要采用中国移动代理服务器MAS2.0完成内部应用插件开发的技术人员。
2.引用文件下列文件中的条款通过本手册的引用而成为本手册所遵循的条款。
3.文档概述本手册详细描述了中国移动代理服务器MAS2.0内部应用插件开发原理及过程。
用于指导利用中国移动代理服务器MAS2.0所提供的内部插件管理接口实现客户的二次开发需要,满足客户基于短信、彩信、WAP、USSD、LBS等移动信息化的应用开发。
4.开发环境●JDK:java5●数据库:mysql5.0●应用服务器:Tomcat5.5●类库:嘉讯有限公司提供的插件开发库①●Struts:1.2.7⑥5.集成环境●MAS2.0运行●MAS管理平台环境②●符合规范的插件包⑦6.如何集成1、编写内部插件,确保格式正确,并正确打包⑦2、MAS2.0启动3、在MAS2.0管理平台上新建一个通信类型为‘Inner’的插件,输入相对应的通信能力要求,并确保能通过鉴权③4、然后安装,完成安装后重启MAS2.0平台④5、重启MAS2.0管理平台后到‘配置中心/插件管理’中启动该插件6、如果该插件是有Web界面的话,请到‘应用中心’中即可找到使用入口7.类关系图••••••••••••••••••••••••••••••••••••••••••••••••••••••••••••••••••••••••••••••••••••••••••••••••••••••••••••••••••••••••••••••••••••••••••••••••••••••••••••••••••••••••••••••••••••••••••••••••••••••••••••••••••••••••••••••••••••••••••••••••••••••••••••••••••••••••••••••••••••••••••••••••••••••••••••••••••••••••••••••••••••••••••••••••••••••••••••••••••••••••••••••••••••••••••••••••••••••••••••••••••••••••••••••••••••••••••••••••••••••••••••••••••••••••••••••••••••••••••••••••••••••••••••••••••••••••••••••••••••••••••••••••••••••••••••••••••••••••••••••••••••••••••••••••••••••••••••••••••••••••••••••••••••••••••••••••••••••••••••••••••••••••••••••••••••••••••••••••••••••••••••••••••••••••••••••••••••••••••••••••••••••••••••••••••••••••••••••••••••••••••••••••••••••••••••••••••••••••••••••••••••••••••••••••••••••••••••••••••••••••••••••••••••••••••••••••••••••••••••••••••••••••••••••••••••••••••••••••••••••••••••••••••••••••••••••••••••••••••••••••••••••••••••••••••••••••••••••••••••••••••••••••••••••••••••••••••••••••••••••••••••••••••••••••••••••••••••••••••••••••••••••••••••••••••••••••••••••••••••••••••••••••••••••••••••••••••••••••••••••••••••••••••••••••••••••••••••••••••••••••••••••••••••••••••••••••••••••••••••••••••••••••••••••••••••••••••••••••••••••••••••••••••••••••••••••••••••••••••••••••••••••••••••••••••••••••••••••••••••••••••••••••••••••••••••••••••••••••••••••••••••••••••••••••••••••••••••••••••••••••••••••••••••图1 ••••••••••••••••••••••••••••••••••••••••••••••••••••••••••••••••••••••••••••••••••••••••••••••••••••••••••••••••••••••••••••••••••••••••••••••••••••••••••••••••••••••••••••••••••••••••••••••••••••••••••••••••••••••••••••••••••••••••••••••••••••••••••••••••••••••••••••••••••••••••••••••••••••••••••••••••••••••••••••••••••••••••••••••••••••••••••••••••••••••••••••••••••••••••••••••••••••••••••••••••••••••••••••••••••••••••••••••••••••••••••••••••••••••••••••••••••••••••••••••••••••••••••••••••••••••••••••••••••••••••••••••••••••••••••••••••••••••••••••••••••••••••••••••••••••••••••••••••••••••••••••••••••••••••••••••••••••••••••••••••••••••••••••••••••••••••••••••••••••••••••••••••••••••••••••••••••••••••••••••••••••••••••••••••••••••••••••••••••••••••••••••••••••••••••••••••••••••••••••••••••••••••••••••••••••••••••••••••••••••••••••••••••••••••••••••••••••••••••••••••••••••••••••••••图2●图1反映的是与内部插件相关的类图集合,而这些关联类,会在插件集成到基座后,由基座的IOC容器自动装载,作为一个内部插件必须实现LocalPlugin接口,不同的内部插件可根据需要进行扩展。
嵌入式实时操作系统(μCOS-II)原理与应用-目录与正文-最新版第一部分

目录学习情境一、嵌入式系统概述及集成环境的搭建与使用 (1)一、知识要点:嵌入式系统概述 (1)1.嵌入式系统基本概念 (1)2.嵌入式系统的特点 (2)3.嵌入式系统的应用领域 (3)(1)工业控制领域 (3)(2)信息家电 (4)(3)交通管理、环境监测、医疗仪器 (4)(4)嵌入式Internet应用 (4)(5)军事国防领域 (5)4.嵌入式系统的发展 (6)5.嵌入式系统的开发流程 (7)6.嵌入式系统的调试 (10)(1)在线仿真器(ICE)方式 (10)(2)在线调试器(ICD)方式 (11)(3)监控器方式 (11)7.基于μCOS-Ⅱ的嵌入式系统软件体系结构 (11)二、技能要求:嵌入式系统交叉开发环境的搭建 (2)1.交叉开发环境 (2)2.使用集成开发环境进行软件开发的流程 (2)3.ARM ADS集成开发工具及其组成 (3)(1)ADS集成开发工具 (3)(2)ADS集成开发工具的组成 (3)案例1.ADS 1.2的安装 (4)案例2.ADS集成开发环境的使用 (5)(1)新建工程 (5)(2)配置新建工程 (6)(3)添加文件,完成编译与链接,并生成目标文件.......... 错误!未定义书签。
案例3.其它工具的使用 .............................................................................. 错误!未定义书签。
(1)仿真器的连接与使用................................ 错误!未定义书签。
(2)超级终端的设置及映像下载.......................... 错误!未定义书签。
(3)Source Insight代码编辑器的使用.................... 错误!未定义书签。
学习情境二、嵌入式平台的接口驱动................................................................... 错误!未定义书签。
TongDI V2.0 操作手册说明书

TongTech®东方通数据集成软件TongDI V2.0操作手册2021年07月北京东方通科技股份有限公司地址:北京市海淀区中关村南大街2号数码大厦A座22层客户服务热线:400-650-7088目录1.产品介绍 (1)2.准备工作 (1)2.1 登录系统 (1)2.2 收藏产品 (1)3.项目管理 (1)3.1 项目管理 (1)3.1.1创建项目 (1)3.1.2编辑项目 (4)3.1.3停用/启用项目 (4)3.1.4回收资源 (4)3.1.5进入产品页 (5)3.1.6项目授权 (5)3.1.7申请使用 (6)3.1.8删除项目 (6)3.2 项目申请授权 (6)3.2.1申请授权 (6)3.2.2申请撤回 (8)3.2.3授权查看 (8)3.2.4授权冻结/恢复 (9)3.2.5授权终止 (9)3.3 项目申请管理 (10)3.3.1申请查看 (10)3.3.2申请删除 (10)4.分类管理 (11)5.转换管理 (11)5.1 转换管理页 (11)5.2 转换管理-创建转换 (12)5.2.1转换-转换设置 (14)5.2.2转换-组件视图 (18)5.2.3转换-资源视图 (18)5.2.4转换-转换组件选项 (19)5.2.5转换-转换连接选项 (20)5.2.6转换-转换功能栏 (20)5.3 转换管理-流程操作 (20)5.3.1流程操作-编辑 (20)5.3.2流程操作-复制 (21)5.3.3流程操作-部署 (21)5.3.4流程操作-回滚 (22)5.3.5流程操作-删除 (23)5.3.6流程操作-检出 (23)5.3.7流程操作-检入 (23)5.3.8流程操作-产品版本查看日志 (24)5.3.9流程操作-产品版本详情 (24)5.3.10流程批量部署 (24)5.3.11流程导出 (24)6.任务管理 (25)6.1 任务管理页 (25)6.2 任务管理-创建任务 (25)6.2.1任务-任务设置 (27)6.2.2任务-组件视图 (30)6.2.4任务-任务组件选项 (31)6.2.5任务-任务连接选项 (31)6.2.6任务-任务功能栏 (32)6.3 任务管理-流程操作 (32)6.4 任务管理-任务监控 (32)6.4.1创建带子转换的任务流程 (32)7.场景服务 (34)7.1 异构表-全量同步 (35)7.2 异构表-全库备份 (37)7.3 异构表-触发器场景 (37)7.4 异构表-时间戳(自增序列)场景 (38)7.5 异构表-CDC场景 (39)7.6 同构表-全量同步 (40)7.7 同构表-全库备份 (40)7.8 同构表-触发器场景 (40)7.9 同构表-时间戳(自增序列)场景 (41)7.10 同构表-CDC场景 (41)7.11 接口数据到库表 (41)7.12 接口数据到文件 (43)7.13 场景服务列表-操作 (44)7.13.1场景服务流程-库表类型-编辑 (44)7.13.2场景服务流程-接口类型-编辑 (44)7.13.3场景服务流程-部署 (45)7.13.4场景服务流程-删除 (45)8. CDC任务创建流程 (45)8.1 创建抽取 (45)8.2 启动任务 (46)8.3 停止任务 (47)8.4 编辑任务 (47)9. 示例资源 (47)9.1 典型场景 (47)9.1.1 全量同步-任务列表 (47)9.1.2 全量同步-转换列表 (48)9.1.3 增量同步-任务列表 (48)9.1.4 增量同步-转换列表 (49)9.2 转换组件示例 (49)10. 周期任务开发 (49)10.1 选择项目 (49)10.2 解决方案 (50)10.2.1 创建解决方案 (50)10.3 数据开发流程 (52)10.3.1 创建周期业务流程 (52)10.3.2 新增节点 (52)10.3.3 配置节点 (53)10.3.4 节点调度配置 (58)10.3.5 节点依赖配置 (64)10.3.6 配置流程参数 (65)10.3.7 提交节点任务 (66)10.4 数据处理组件 (66)10.4.1 SparkSQL (66)10.4.2 Shell (67)10.4.3 Spark (68)11. 资源管理 (85)11.1 项目表 (85)11.1.1 创建事实模型 (86)11.1.2 创建视图模型 (90)11.1.3 创建普通维度模型 (92)11.1.4 创建层级维度模型 (94)11.1.5 创建枚举维度模型 (97)11.2 函数管理 (99)11.2.1 新增函数 (99)11.2.2 查看函数 (101)11.2.3 删除函数 (102)11.3 自定义算子 (103)11.3.1创建资源文件夹 (103)11.3.2新增资源 (104)11.3.3查看资源 (104)11.3.4替换资源 (105)11.3.5删除资源 (105)1.产品介绍东方通数据集成软件具备数据集成和数据开发能力,通过管理控制台,实现产品开发的项目管理、任务管理,任务全生命周期的管理,还有任务转换管理、任务监控、任务转换、日志审计等Web 管理功能。
优格科技项目器用户指南说明书

Quick SetupBefore using the projector, make sure you read the safety instructions in the online User’s Guide .Note: Your product may differ from the illustrations on this sheet, but the instructions are the same.Connect the projectorChoose from the following connections. See the sections below or the online User’s Guide for details.ComputerComputer portComputer port, and the sheet). You can also connect an audio cable.HDMI portConnect one end of an HDMI cable to the projector’s HDMI (EX3260) or HDMI/MHL (Pro EX7260) port and the other end to an HDMI port on your computer.USB portConnect the square end of a USB cable to the projector’s USB-B (square) port. Connect the flat end of the cable to any USB port on your computer.Windows Vista ® or later: After turning on the projector, follow the on-screen instructions to install the Epson ® USB Display software (EMP_UDSE.EXE ; only on first connection). If the software screen does not display automatically, open My Computer or Computer , then double-click EPSON_PJ_UD .OS X 10.7.x or higher: After turning on the projector, the setup folder for USB Display appears in the Finder. Double-click USB Display Installer and follow the on-screen instructions to install the Epson USB Display software (only on first connection).Video deviceConnect multiple video devices and use the Source Search button on theprojector or remote control to switch between them.(composite video)Mobile media device (Pro EX7260)Connect tablets, smartphones, and other devices that support the MHL™ standard to the HDMI /MHLport.Streaming deviceSome devices may require an adapter or may not require an MHL cable. Not all features or functions may be supported. Check your device’s documentation for more information.USB deviceConnect a digital camera, USB flash drive, or USB storage device to the projector’s USB-A(flat) port.If you connect a digital camera, USB flash drive, or USB storage device, you can use the projector’s PC Free feature. See the online User’s Guide for details.Turn on your equipment1 Turn on your computer or video source.2Plug in the projector. Thepower light on the projector turns blue.3Open the A/V Mute slide all the way.4 P ress thepower button on the projector or remote control. Theprojector beeps, the Status light flashes blue, and then stays on.Note: To shut down the projector, press the power button twice.5 Use the arrow buttons on the remote control to highlight any of theoptions on the Home screen that appears, then press to select it.You can switch between projection sources and quickly access variousadjustment options from this screen.6 T he default language of the menu system is English. To select anotherlanguage, press the Menu button on the projector or remote control.Select Extended and press . Select Language and press . Selectyour language and press . Press the Menu button to exit the menusystem.Adjust the image1 I f you don’t see an image, press the Source Search button on theprojector or remote control to select the image source.Note: If you still see a blank screen or have other display problems, seethe troubleshooting tips on the back of this sheet.2 T3 E X3260:W (enlarge) buttons on the projector.P ro EX7260: To reduce or enlarge the image, turn the zoom ring.4 To sharpen the image, turn the focus ring.5 I f your image looks like or , you may have placed the projectoroff to one side of the screen at an angle. Place the projector directly infront of the center of the screen, facing the screen squarely. If you can’tmove the projector, use the horizontal keystone slider on the projector tocorrect the image shape.6 Y or ,Using the remote controlInstall the batteries as shown (two AA batteries).Choose which sourceto displayon and offmenusdisplay Access the HomescreenNavigate projectormenusFor more information on using the remote control, see the online User’s Guide.Setting up a wirelessconnectionFollow the steps here to set up the projector for a wireless connection.Note: To project wirelessly with the EX3260, you need the optional wirelessLAN module (part number V12H731P02). You do not need the wireless LANmodule for the Pro EX7260 since the wireless functionality is built-in.Install the optional LAN module (EX3260)1Remove the wireless LAN module cover screw.2 Insert the wireless LAN module into the USB-Aport.3Attach the included wireless LAN module cover and secure it using thescrew you removed.Note: The light on the wireless LAN module turns on when the module is installed and operating. The light flashes when the module is communicating over the network.Select wireless network settings1 Press the Menu button on the remote control.2 Select the Network menu and press.3Select Wireless LAN On as the Wireless Modesetting.4 Select Network Configuration and press .5Select the Wireless LAN menu and press.6Select one of the following as the Connection Mode setting:•Q uick for a direct connection to a computer, tablet, or smartphone. •Advanced to connect your projector to a router or access point.7 Select any other settings on the Wireless LAN menu as necessary. See the online User’s Guide for details.8When you finish selecting settings, select Complete and follow the on-screen instructions to save your settings and exit the menus.Install the optional softwareIf you connected a computer to the projector, you can download and installoptional software to perform various tasks wirelessly, such as monitoring or controlling your projector and projecting from multiple computers.You can download the optional software and its manuals from the Epsonwebsite, as described in “Where to get help” or by installing the projector CD. Note: The projector CD links you to the product’s support page and gives you the option to install links on your desktop to the software manuals. An Internet connection is required.Projecting from a mobile deviceYou can project wirelessly from a mobile device (iOS, Android™, or Chromebook™) using the Epson iProjection™ app and a QR code.1U se the following QR code to download and install the Epson iProjectionapp.2 If you connected the projector to a network wirelessly, make sure to connect your mobile device to the same network.3 P ress the LAN button on the remote control to display a QR code on the projector screen.4 Start Epson iProjection on your mobile device.5Use the QR code reader feature to read the QR code displayed.6Follow the app instructions to connect your device to the projector.For more information on setting up and using this app, visit/projectorapp (U.S.) or www.epson.ca/projectorapp (Canada).TroubleshootingIf you see a blank screen or the No signal message after turning on your computer or video device, check the following:• M ake sure the Status light on the projector is blue and not flashing, andthe A/V Mute slide is open.•P ress the Source Search button on the projector or remote control to switch to the correct image source, if necessary.•P ress the Home button on the projector or remote control to verify the source input and settings.• O n Windows ®7 or later, hold down the Windows key and press P at thesame time, then click Duplicate .• If you’re using a Windows laptop, press the function key on your keyboard that lets you display on an external monitor. It may be labeled CRT/LCD or have an icon such as . You may have to hold down the Fn key while pressing it (such as Fn + F7). Wait a moment for the display to appear.• I f you’re using a Mac laptop, open System Preferences and selectDisplays . Click the Arrangement tab and select the Mirror Displays checkbox.Where to get helpManualsFor more information about using the projector, click the icons on your desktopto access the online manuals (requires an Internet connection). If you don’t seeicons to the manuals, you can install them from the projector CD or go to theEpson website, as described below.Telephone support servicesTo use the Epson PrivateLine® Support service, call (800) 637-7661. This serviceis available for the duration of your warranty period. You may also speak witha support specialist by calling (562) 276-4394 (U.S.) or (905) 709-3839 (Canada).Support hours are 6 AM to 8 PM, Pacific Time, Monday through Friday, and7 AM to 4 PM, Pacific Time, Saturday. Days and hours of support are subject tochange without notice. Toll or long distance charges may apply.Internet supportVisit /support (U.S.) or www.epson.ca/support(Canada) for solutions to common problems. You can download utilities anddocumentation, get FAQs and troubleshooting advice, or e-mail Epson.RegistrationRegister today to get product updates and exclusive offers. You can use the CDincluded with your projector or register online at /webreg.Optional accessoriesFor a list of optional accessories, see the online User’s Guide.You can purchase screens or other accessories from an Epson authorizedreseller. To find the nearest reseller, call 800-GO-EPSON (800-463-7766).Or you can purchase online at (U.S. sales) orwww.epsonstore.ca (Canadian sales).EPSON is a registered trademark, Epson iProjection is a trademark, and EPSON Exceed Your Vision is a registeredlogomark of Seiko Epson Corporation. PrivateLine is a registered trademark of Epson America, Inc.Mac and OS X are trademarks of Apple Inc., registered in the U.S. and other countries.Android and Chromebook are trademarks of Google Inc.General Notice: Other product names used herein are for identification purposes only and may be trademarksof their respective owners. Epson disclaims any and all rights in those marks.This information is subject to change without notice.© 2017 Epson America, Inc., 6/17CPD-53644。
系统集成和主大数据管理系统项目工作说明书(SOW)

上海烟机应用系统集成和主数据管理项目工作说明书Cordys China二零零九年九月目录1项目目标2 2工作说明22.1软件及服务范围22.1.1应用系统集成22.1.1.1ERP与其他系统集成22.1.2主数据管理32.1.3假设条件3 2.2时间进度4 2.3成果交付物与验收标准4 2.4里程碑5 2.5费用支付52.6需求变更过程52.6.1变更依据62.6.2外部变更请求处理流程72.6.3内部变更请求处理流程7 2.7双方责任8 2.8项目组织架构9 2.9假定条件101项目目标在上海烟草机械有限责任公司的范围内,分期实现应用系统集成和主数据管理相关功能,本期项目主要包括ERP与其他系统间的应用系统集成,以及NC系统、ERP、PDM、CRM、EAM、MES、HR与KBS等系统间的主数据管理业务需求。
2工作说明以下所有内容基于9月11日版本的需求文档。
2.1 软件及服务范围2.1.1应用系统集成2.1.1.1ERP与其他系统集成序号应用系统间集成业务描述数据源(表名+字段)中间数据库数据目的地(表名+字段)更新方式详述备注1 编码库与ERP零件编码信息同步服务器:Pdm数据库:codeman表:cd_item服务器:ERP(172.16.2.13)数据库:codeman表:cd_item使用sqlserver 的job实现新增数据同步Job位置:ERP服务器Job名字:同步codeman数据每天一次/4点2 ERP获取MES派工信息和完工信息服务器:MES(172.16.2.31)数据库:FSDBMR派工表:z_sjtu_t_Dispatch质检表:z_sjtu_t_quality服务器:ERP(172.16.2.13)数据库:FSDBMR派工表:z_sjtu_t_Dispatch质检表:z_sjtu_t_quality使用sqlserver 的job实现新增数据同步Job位置:ERP服务器Job名字:MES数据同步每天一次/11点35分3 为MES提供生产订单PICK信息服务器:ERP数据库:FSDBMR表:REPORT_POPICK999服务器:172.16.2.31数据库:FSDBMR派工表:z_sjtu_t_Dispatch使用sqlserver 的job实现新增数据同步Job位置:ERP服务器Job名字:更新REPORT_POPICK999每天二次/11点40分和21点30分4 为Product系统提供库存和在制品信息服务器:ERP数据库:FSDBMR表:FS_ItemInventory和OrderInfo服务器:GJR4525数据库:Pmanage表:ITEM_INVENTORY2、FS_MOInfo和FS_POInfo使用sqlserver 的job实现新增数据同步生成库存和订单信息Job位置:ERP服务器Job名称:订单完成情况、ERP数据同步Job位置:GJR4525服务器Job名称:ERP数据提取每天一次/11点半共4个应用集成接口。
集成开发环境的配置及使用说明
集成开发环境的配置及使用说明本文讲解如何编写MSBuild脚本文件执行编译系统、运行FxCop检查代码、运行NUnit以及NCover进行单元测试、运行SandCastle生成帮助文档四项功能,并如何在集成开发环境中使用。
一、集成开发环境的配置1.1 工具软件准备1.1.1 MSBuild只要安装过VS2005或VS2008后,就可以是路径C:\WINDOWS\\Framework中看到MSBuild的三人版本,本例中使用V3.5。
另外还得从下面的网站下载一个munity.Tasks.msi文件,里面有MSBuild的已经编写好的各种任务。
下载地址如下:/1.1.2 NCoverNCover现有网上使用的主要有两个版本NCover3.1和NCover1.5.8,但由于后者是免费版本,所以本例中使用NCover1.5.8版本,下载地址如下:/download/community1.1.3 其它软件其它软件如下所示:NUnit 2.5.1FxCop 1.36HTML Help CompilerSandcastle Help File Builder v 1.8.0.2以上包括1.1.1和1.1.2的软件均可在Redmine项目管理的集成开发环境的配置的文件管理中下载,此处就不一一给链接了。
下载后均按默认安装即可。
但因为要在命令行中使用MSBuild和FxCopcmd命令,所在在环境变量Path中加入:C:\WINDOWS\\Framework\v3.5;C:\Program Files\Microsoft FxCop 1.36;另外再增加两个新变量:DXROOT C:\Program Files\Sandcastle和HHCEXE C:\Program Files\HTML Help Workshop1.2 编写MSBuild脚本文件关于MSBuild的常用脚本元素之前已在《MSBuild的简单介绍与使用》中说过,这里就不再重复了,只针对每一功能的重要语句进行讲解,详情可以Redmine 项目管理的集成开发环境的配置中下载MyProj.proj文件进行查看。
用友NC_UAP_技术介绍

客户化开发培训-技术介绍用友软件股份有限公司GBU客户化管理与支持部—NC产品发展线路NC 1.0WAS,服务器集群性能提升Portal 后台任务中心信息交换平台集成开发平台新界面风格产业链支持应用平台构件深化2006~2007全球化集团管控动态企业建模多系统多集团多组织架构企业动态建模NCTools 产品化集成开发平台全新UI 及个性化中心整合IUFO 分布式部署2010~NC 2.0NC 3.0NC 5.0NC 5.6NC 6.023********~2000集中财务核算100%Java 实现支持多硬件平台支持多数据库2000~2003高端ERP 集团财务供应链生产制造平台化技术用友中间件J2EE 标准支持2003~2005集中管理协同商务多帐簿全面预算集团资金高性能工作流引擎集团交付元数据管理与业务建模轻量级开发框架企业级信息搜索工作流平台应用集成2008~2009会计平台预警平台访问控制业务流程配置UI 数据缓存数据传输数据交换审批流配置多语言准则消息管理移动管理组织管理表单模板报表模板打印模板表单设计器报表设计器打印设计器查询设计器业务流程设计器规则设计器组织管理工具部署工具客户端安装工具配置工具系统监视器登陆/CA 认证任务调度异常缓存日志工作流规则引擎持久性框架基本算法连接引擎同步SQL 翻译器元数据管理SwingUi 框架SwingUi 控制JSP 框架JSP 标签JavaScriipt 脚本J2EE 服务器(WebSphere/WebLogic/UFIDA Application Server )Portal 服务器Solaris/AIX/Linux/Windows DB2/Oracle/SQL Server/OSCAR胖客户引擎瘦客户引擎基本技术服务操作系统数据库应用模板基本应用服务UAP 应用框架UAP技术框架系统框架UAP 分层结构图强大的建模工具、开发平台、客户化平台跨硬件平台、跨操作系统、跨数据库业务服务总线(ESB )开放的SOA 的框架结构开发模型远程接口Impl 远程接口实现类业务逻辑持久化,数据库操作数值VO类UI类按接口编程---nc.itf.<模块>: 表示该模块定义的接口---nc.impl.<模块>:表示该模块定义的接口实现---nc.vo<模块>: 表示VO的实现---nc.bs.<模块>: 普通的后台应用---nc.ui.<模块>.*: 客户端代码将代码分区域存放---public 接口和公共代码(比如VO和公共算法) ---private 实现和其它实现细节---client 客户端代码---gen 工具生成ejb目录---META-INF 模块配置文件目录代码结构VO是ValueObject的简写,在NC中是一个抽象类,它实现了Cloneable和Serializable接口。
PJ-PU2010系列项目器操作指南说明书
Switching Between Image SourcesPress the Search button or one of the source buttons (remote control), or the Source Search button (projector).Selecting the Lens TypeMake sure the Lens Type setting is correct for the lens you are using.1. P ress the Menu button.2. S elect Extended > Operation >Advanced > Lens Type .N ote: If the Lens Type setting is greyed out, the projector has automatically detected the installed lens and you can skip the remaining steps.3. S elect the lens you are using.4. W hen you’re done, press the Menubutton to exit.Changing Screen TypeSet the Screen Type setting to the screen’s aspect ratio. 1. P ress the Menu button.2. S elect Extended > Display >Screen > Screen Type .3. S elect the screen’s aspect ratio.N ote: The displayed image should matchthe screen’s size and aspect ratio.Turning the Projector On1. T urn on your computer or imagesource.2. R emove the lens cover.3. P ress the On button on theprojector or the remote control. After the status light stays blue, the projector is ready.N ote: If the Direct Power On function is enabled, you can turn the projector on without pressing the On button; just plug it in or flip the switch controlling the outlet to which the projector is connected. To turn on this feature, see the online User’s Guide .4. I f your image does not appear, see“Switching Between Image Sources” or “Troubleshooting.”Changing the Language of the Projector MenusThe default language of the projector’s menu system is English, but you can change it as necessary.1. P ress the Menu button to accessthe projector’s menu system.2. S elect Extended > Language .3. S elect your language.4. W hen you’re done, press the Menubutton to exit.2. P ress the or arrow buttons tomake the adjustment. 3. P ress the Esc button to finish theadjustment.Correcting Image ShapeIf your image is uneven on the sides, you can use the projector’s distortion correction features, such asH/V-Keystone and Quick Corner ®, to adjust the shape. See the online User’s Guide .Making Other Image AdjustmentsFor help on using the projector’sfeatures to improve the image quality, see the online User’s Guide . You can also view information on how to adjust the image color, position, and edges (Edge Blending) when projecting from multiple projectors to create one seamless widescreen image.Turning the Projector OffPress the Standby button to turn the projector off. If you see a confirmation message, press the Standby button again.Note: If the Direct Power On function isenabled, you can unplug the projector or flip the switch controlling the outlet to which the projector is connected instead. To turn on this feature, see the online User’s Guide .With Epson’s Instant Off ® technology, you don’t have to wait for the projector to cool down; just turn it off or unplug it when you’re done.4. W hen you’re done, press the Menubutton to exit.N ote: After changing the screen type, you may need to change the aspect ratio of the projected image depending on the inputsignal. Press the Aspectbutton on the remote control to change the aspect ratio, if necessary.Adjusting Image Position1. P ress the Lens Shift button(remote control) or the Lens button (projector).2. P ress the arrow buttons to adjustthe position of the projected image.3. W hen you’re done, press the Escbutton to finish the adjustment.If the projector is on a table, you can level the image by turning any of the projector’s adjustable feet.Zooming and Focusing1. O n the remote control, press theZoom or Focus button.O n the projector, press the Lensbutton repeatedly until the focus or zoom adjustment screen is shown.TroubleshootingIf you see a blank screen or the message No signal•M ake sure the status light on the projector is blue and not flashing, and the lens cover is removed.•M ake sure the cables are connected correctly. See the online User’s Guide.•Y ou may need to change the image source. See “Switching Between Image Sources.” Also make sure the source device is turned on.If the projector and the notebook don’t display the same image Windows®If you are using a Windows laptop, press the function key on your keyboard that lets you display on an external monitor. It may be labeled CRT/LCD or have an icon such as . You may have to hold down the Fn key while pressing it (such as Fn + F7). Wait a moment for the display to appear.On Windows 7 or later, hold down the Windows key and press P at the same time, then click Duplicate.MacOpen System Preferences and select Displays. Click the Arrangementtab and select the Mirror Displays checkbox.Where to Get Help ManualsFor more information about using the projector, you can view or download the online manuals from the Epson website, as described below.Internet supportVisit /support (U.S.) or www.epson.ca/support (Canada) and search for your product to download software and utilities, view manuals, get FAQs and troubleshooting advice, or contact Epson.Speak to a support representativeTo use the Epson® PrivateLine® Support service, call (800) 637-7661. This service is available for the duration of your warranty period. You may also speak with a projector support specialist by dialing (562) 276-4394 (U.S.) or (905) 709-3839 (Canada).Support hours are 6 amto 8 pm, Pacific Time, Monday through Friday and 7 am to 4 pm, Pacific Time, Saturday. Days and hours of support are subject to change without notice. Toll or long distance charges may apply. Purchase supplies and accessories You can purchase an air filter(V13H134A46), screens, or other accessories from an Epson authorized reseller. To find the nearest reseller, call 800-GO-EPSON (800-463-7766). Or you can purchase online at (U.S. sales) or www.epsonstore.ca (Canadian sales). For a list of optional accessories, see the online User’s Guide.Turn the projector on Illuminate buttons temporarily Automatically adjustcomputer image Change the aspect ratio Open menus assigned by userZoom in or out on part of an imageCorrect image distortion Save and apply presetsPort to connect remotecontrol cableControl one or multiple projectorsDisplay the projector ID andremote ID Use to enter numbers Select color modes Turn the projector offSelect a source Navigate through menu settingsDisplay a test pattern Adjust the image position Open projector menusSelect menu settings Temporarily turn off display and audioMove to next or previous image when projecting from a computer over the networkControl volumeCancel current operation or return to previous menu Display the Info menuSwitch image sourcesFreeze the image Split the screen between two inputs Adjust the focusChange the image sizeReset menu settings to their default valueDisplay the Home screenRemote Control MapEPSON, Instant Off, and Quick Corner are registered trademarks and EPSON Exceed Your Vision is a registered logomark of Seiko Epson Corporation.PrivateLine is a registered trademark of Epson America, Inc.Windows is a registered trademark of Microsoft Corporation in the United States and/or other countries.Mac is a trademark of Apple Inc., registered in the U.S. and other countries.HDBaseT is a trademark of the HDBaseT Alliance.General Notice: Other product names used herein are for identification purposes only and may be trademarks of their respective owners. Epson disclaims any and all rights in those marks. This information is subject to change without notice.© 2021 Epson America, Inc., 4/21CPD-60571。
SG-UAP平台概述与两级技术服务

平台介绍-数据缓存
数据缓存通过内存缓存、磁盘缓存作为存储介质,通过同步、分片、路由实现灵活的集群、数据冗余
• 平台数据缓存服务提供统一的缓存访问接 口API,接口支持以RESTful/JSON方式访 问。
• 数据缓存提供基于Web的配置、管理、监 控界面
• 数据缓存套件服务于平台内其他所有模块, 数据访问层包含数据缓存服务的API
14和已办任务的查询功能24整理课件平台介绍统一权限用户岗位基准组织单元业务组织体系业务组织单元业务组织单元性质角色分组业务角色业务组织角色数据类型数据集功能权限对象业务域组织体系业务系统功能体系基准组织与用户角色体系隶属关系关联关系业务应用系统自嵌套关系25整理课件平台介绍统一权限01基准组织体系管理0102基准组织单元维护0103岗位维护0101用户维护02业务组织体系管理0201业务组织体系分类设置0202业务组织维度设置0203业务组织单元性质设置0204业务组织单元扩展属性设置0
集群
台提供的标准逻辑组件、公共服务代
理构成业务逻辑层
• 持久层提供数据持久化、数据访问能
力
13
平台介绍-核心框架
核心框架
核心框架是统一开发平台的基础开发框架,为平台公共套件、业务应 用系统的开发提供统一的基础设施,屏蔽底层的技术实现,简化具体 功能的开发过程。
核心框架为应用系统提供了分层体系结构,分别是界面层、交互层、 逻辑层和持久层。基础功能包为核心框架提供服务交互、异常、日志、 国际化等通用功能,以接口的形式提供。
稳定易扩展的任务调度 任务调度采用成熟开源项目Quartz(3.5)为基础,扩展实现可视化任 务配置与监控功能,为应用系统提供了稳定、易用的自动化任务执行 支撑。
.
U8UAP开发手册【范本模板】

UAP开发样例指导用友研发中心U8平台技术部〈本文档适用于U871版本〉目录一、摘要 (3)二、样例开发前提 (3)三、建立UAP项目 (3)四、建立表单模型 (5)(一)新建实体 (6)(二)新建实体属性 (8)五、建立表单布局 (14)六、行为对象开发 (15)(一)表单开发 (17)(二)列表开发 (30)(三)生单二次开发 (35)(四)联查报表 (37)(五)联查UAP列表 (38)(六)UAP列表联查U8单据 (38)(七)用户自定义控件开发 (42)(八)U8单据引用UAP档案 (43)七、行为对象注册 (56)功能介绍: (56)使用说明: (56)应用技巧: (58)八、建立数据引擎 (59)功能介绍: (59)使用说明: (60)应用技巧: (81)九、设置过滤条件 (81)功能介绍: (81)使用说明: (82)应用技巧: (86)十、设置栏目 (87)功能介绍 (87)使用说明 (87)应用技巧 (88)十一、权限 (88)功能权限 (88)记录级权限 (89)字段级权限 (90)十二、部署 (91)附录:功能介绍 (92)1、行为对象升级说明 (92)2、LoginInfo 对象介绍 (94)一、摘要本文以U8—ERP中的销售订单为应用原型,介绍了如何通过UAP进行软件开发,文中给出了开发方法和丰富样例.内容包括:UAP表单开发原理UAP项目的建立和导入、导出UAP表单的模型设计和布局设计UAP表单的行为对象开发UAP表单列表设计与开发UAP表单列表的行为对象开发如何对UAP表单的缺省按钮进行扩展性开发如何对UAP表单的缺省按钮进行取代性开发如何为UAP表单增加新的按钮及行为如何用程序代码调用UAP报表如何用程序代码调用UAP表单列表如何在UAP表单中增加权限控制:功能权限、字段权限、记录权限如何为UAP表单开发自定义控件如何开发树形档案如何维护UAP数据引擎如何维护栏目如何维护过滤条件如何调用U8APIU8单据自定义项如何引用UAP档案本文档中使用的示例文件为“销售订单二次开发”,可以通过UAP将该文件导入到帐套中。
OA系统用户手册(项目部用户分册)

中国水电建设集团十五工程局有限公司办公自动化系统(二期)系统用户手册(项目部用户分册)北京中宏立达科技发展有限公司2011年12月水电十五局办公自动化系统(二期)系统用户手册(项目部用户分册)目录第1部分.将word文件转换成CEB版式文件 (1)第2部分.上报文件 (4)第3部分.接收文件 (11)第1部分.将word文件转换成CEB版式文件各子企业在公文上报时需要把WORD格式的文件转换成版式文件并加盖电子印章后上报,1.双击桌面上的“Apabi Maker 3.0”的快捷链接,弹出CEB文件转换器主窗体,如图下图所示。
2.点击弹出一个选择窗口如下图3.点击【转换文件】中的选择已经修改好的word文件再选择“水电模板”如下图:4.点击“确定”开始将word文件转换成CEB文件如下图:5.点击【预览】可以查看转换后的文件如下图第2部分.上报文件1.打开IE.输入办公自动化的网址登录: http://113.140.78.101 如下图2.在用户名中输入自己的中文名子全称.例如:安装公司初始密码:12345678 点击登录进行系统如下图:3.点击按钮弹出文件上报表单4.输入要上报文件的基本信息点“”,如下图5.点击在弹出的窗口中上传我们已经转换后的ceb文件.如下图6.点击【增加】按钮出现以下窗口,在弹出的窗口中点击【浏览】按钮,找到要上报的公文如下图所示点. 添加公文.7.点击【关闭】按钮完成正文上传,回到上报页面.如下图8.点击按钮打开上传的正文如下图9.找到盖章位置,点击进行选择公章如下图所示.10.选择一个公章,点击确定.并将公章拖放到正确位置如下图11.拖放到正确位置以后.点击按钮,弹出输入密码窗口(初始密码为:111111)如下图12.输入密码,点击确定会看到盖章过程如下图:13.如果需要增加附件.可以点击弹出附件管理窗口如下图:14.点击增加,来添加附件如下图:15.点击确定完成附件上传.如下图:16.点击”关闭”完成附件管理.回到上报窗口.点击.完成文件上报如下图:第3部分.接收文件1.当有需要接收文件的时候会在首面的的待收文件列表中显示如下图2.点击文件打开文件如下图:这时可以进行下载,红章打印等操作.前提必须插入电子印章.注意:a)【红章打印】只能打印三份带红章的文件,三份后将无法打印带红章文件;b)【黑章打印】无打印份数限制,但打印出来的文件为黑白文件c)红章打印必须配置彩色打印机。
基于uap2.04的sotower项目移植
基于uap2、04得sotower项目移植一、新建模块项目 (2)(一)新建IAS容器 (2)A、安装UAP Studio-1、1、exe。
(2)B、启动sguap-service (2)C、新建UAP项目 (3)D、增加数据库连接 (4)E、去除统一权限 (4)F、添加模块项目 (5)G、在UAP中引入sguap-server (6)H、Jar包引入 (8)(二)新建IAS模块项目 (10)A、新建模块项目 (10)B、去除统一权限 (11)C、引入jar包 (12)二、将EIC1、0项目移植到uap2、0模块项目 (13)(一)整体目录迁移 (13)(二)Flex前台移植 (13)三、将sotower项目迁移到模块项目 (13)(一)整体目录迁移 (13)(二)配置文件新增与修改 (14)A、修改项目得web、xml文件 (14)A、修改config下得xml文件 (18)B、创建configs文件夹 (18)(三)缓存得修改 (19)(四)修改项目中应用sotower包得java代码 (21)(五)配置文件修改 (22)(六)jar包调整 (22)(七)配置、springBeans文件 (23)(八)前端移植 (24)四、集成Flex (24)(一)Jar包添加 (24)(二)配置模块依赖关系 (25)(三)Spring配置文件 (26)(四)Flex配置文件 (27)(五)Flex程序文件 (28)五、项目移植总结 (29)基于uap2、04得sotower项目移植一. 新建模块项目创建SGUAP容器IAS及模块项目IAS。
(一)新建IAS容器A.安装UAP Studio-1、1、exe。
B.启动sguap-service单独使用一个tomcat将端口设置为8888(其她端口不能与UAP默认tomcat冲突即可,这个瞧个人电脑环境自行配置),将sguap-server1、2在tomcat中启动。
- 1、下载文档前请自行甄别文档内容的完整性,平台不提供额外的编辑、内容补充、找答案等附加服务。
- 2、"仅部分预览"的文档,不可在线预览部分如存在完整性等问题,可反馈申请退款(可完整预览的文档不适用该条件!)。
- 3、如文档侵犯您的权益,请联系客服反馈,我们会尽快为您处理(人工客服工作时间:9:00-18:30)。
基于uap2.0项目集成操作手册
目录
基于uap2.0项目集成操作手册 (1)
一、项目环境准备 (2)
二、搭建环境工程 (2)
1.安装uap2.0 (2)
2.搭建UAP开发环境 (2)
3.安装FlexBuilder (10)
4.搭建FlexBuilder开发环境 (10)
三、SVN取出项目工程 (13)
1.UAP2.0取出项目 (13)
2.FlexBuilde取出项目 (15)
四、配置文件修改 (17)
1.UAP中的OMAS配置修改 (17)
2.FlexBuilder中的Flex配置修改 (23)
3.项目数据库文件修改 (26)
五、项目启动 (28)
1.编译flex文件 .......................................................................... 错误!未定义书签。
2.添加项目到Tomcat (28)
3.修改Tomcat访问路径 (28)
4.启动项目 (30)
一、项目环境准备
1.MyEclipse 6.5
2.Uap2.0安装版及jar包服务器
3.Flex SDK 3;
4.Jdk 1.5
5.svn插件
6.tomcat 5.5 以上版本
7.svn的帐号
二、搭建环境工程
1.安装uap
2.0
点击SGCC_UAP_IDE-2.0.4安装uap2.0。
注意:不要放安装目录放在带中文、特殊字符、多空格的目录,防止以后项目出现不可预计的错误。
2.搭建UAP开发环境
1.取消项目的自动编译
2.设置项目编码为UTF-8
点开windows---Preferences---General---Workspace,查看下右边的Default是否是UTF-8,如果不是点击Other选中UTF-8完成点击OK就可以了。
3.配置uap的Target Platform
3.1将uap2.0的jar包服务器(sguap-server)放在tomcat目录webapps文件
夹下,启动Tomcat。
Tomcat完全启动并且不报错(记住红色标示的端口号),如下所示:
3.2设置uap的Target Platform
打开Window---Preferences---Plug-in Development---Target Platform---Add---Nothing(选择默认)
然后选择Add---Directory---输入location地址:
(http://127.0.0.1:8888/sguap-server/environment/platform/Version2.0.0)端口号和上面的对应,点击finish就可以了。
输入我们上面的location的地址
http://127.0.0.1:8888/sguap-server/environment/platform/Version2.0.0
3.安装FlexBuilder
直接安装即可。
注意:不要放安装目录放在带中文、特殊字符、多空格的目录,防止以后项目出现不可预计的错误。
4.搭建FlexBuilder开发环境
4.1集成svn
4.1.1打开help---Software Upadates---Find and Install;
4.1.2选择Search for new features to install,点击Next进入下一步;
4.1.3点击"New Local Site"按钮,找到解压出来的文件夹(site-1.6.5) → 点击OK,并点
击Finish按钮;
4.1.4在弹出的菜单中,select the features to insteall:在刚加进去的路径Subclipse-site-1.6.5
这一项前打钩,此时会报错,然后展开Subclipse前的加号,去掉Subclipse Integration for Mylyn 3.x(Optional)3.0.0前的钩,错误消失,一直点击next就可以了;
4.2取消FlexBuilde的自动编译
三、SVN取出项目工程
1.UAP
2.0取出项目
1.切换至svn视图
2.新建资源目录
右键新建---资源库位置---输入地址
http://192.168.1.200:8080/svn/03_code_new/trunk/FJ_PROJECT/OMAS 点击Finish即可。
右键导出项目
2.FlexBuilder取出项目
选择svn视图,然后新建资源库位置输入location地址:
http://192.168.1.200:8080/svn/03_code_new/trunk/FJ_PROJECT/OMAS 检出项目即可。
四、配置文件修改
1.UAP中的OMAS配置修改
1.1添加模块项目
找到OMAS项目下的policy.xml文件打开。
相应的将另外一个模块项目加载进来1.2加入模块项目依赖的jar包
1.3将依赖jar包配置到Target Platform
打开window---Preferences
最后点击Finish完成。
1.4移除权限cxf不需要用的类
1.5修改OMAS下的datasource.xml数据库链接文件
1.6访问的web端路径修改
2.FlexBuilder中的Flex配置修改
2.1取消隐藏.flexProperties和.actionScriptProperties文件
点击OK就可以了。
2.2修改.flexProperties
修改flexProperties文件,将serverRoot的路径改成uap项目模块下face路径下。
同理修改另外一个flex文件即可。
2.3修改Output floder路径
同理另外一个flex项目也是这么修改!
3.项目数据库文件修改
3.1OMAS数据库文件修改
3.2模块项目EIC数据库配置修改
3.3模块项目IDSS数据库配置修改
4.FlexBuilder如何使用Debug
五、项目启动
1.添加项目到Tomcat
2.修改Tomcat访问路径
3.1修改OMAS项目的Context root
3.2修改Tomcat的访问路径
3.启动访问项目
4.访问项目后台
地址:http://127.0.0.1:9000/EIC/main.html?frame=NormalFrame。
