Oracle性能分析工具Statpack安装使用详解
安装statspace
应用优化下面我们从技术的角度入手,来探讨数据库优化方面的问题。
通常作为优化Oracle系统的人,或者是DBA,其实很多时候对应用并不很了解甚至可以说是完全不了解,更不要说对应用程序代码的了解。
事实上呢,一个系统运行的快或者慢相信大家都明白,第一重要的是数据库的设计,然后是应用的设计, SQL 语句的编写,最后才是数据库参数的调整和硬件、网络的问题,等等。
所以在我们不了解一个系统的时候来优化数据库应用不是一个轻松的容易的事情。
那么我们第一步应该怎么做呢?通常有两类方法:其中一个方法就是我们常用的,使用statspack来进行诊断系统的瓶颈所在。
在statspack中oracle给出了几乎涵盖oracle大部分重要内容的信息。
另外一种方式,就是trace session。
假如某个session运行很慢或者某个用户的某个查询很慢,那么这个时候我们可以通过trace session的方式来诊断到底是慢在哪里,看究竟执行计划是怎样的,然后在user_dump_dest下根据该session的进程号或者线程号可以找到一个产生的trace文件。
通过使用tkprof格式化文件之后我们就可以看见很多的统计信息,这里包括了执行计划、parse/fetch等步骤消耗cpu的时间。
通常我们是观察query模式下的consistent gets来首先看sql是否使用了索引,然后看执行计划是不是正常,是不是有调整的余地。
当然如果您没有实际做过的话,这些内容说起来很抽象。
这是在不了解应用和程序下针对特定session的诊断和调整过程。
trace session的方式是一种自下而上的方法,从sql入手;而statspack是自顶向下的方法,也就是从宏观上先诊断数据库的瓶颈在哪里,然后从瓶颈入手来做调整,这个习惯上又可以称为通过等待事件(wait event)入手的方法。
2.1 使用statspackstatspack是一个性能诊断工具,首先发布于Oracle8.1.6版本,在8.1.7版本中功能得到加强。
Oracle Statspack分析报告详解
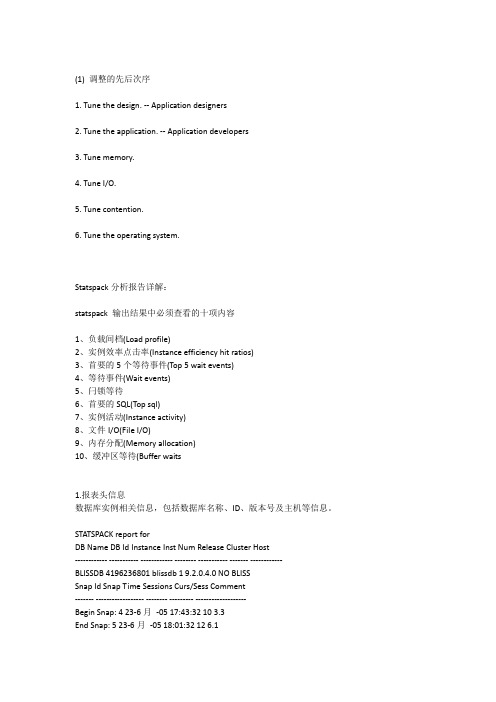
(1) 调整的先后次序1. Tune the design. -- Application designers2. Tune the application. -- Application developers3. Tune memory.4. Tune I/O.5. Tune contention.6. Tune the operating system.Statspack分析报告详解:statspack 输出结果中必须查看的十项内容1、负载间档(Load profile)2、实例效率点击率(Instance efficiency hit ratios)3、首要的5个等待事件(Top 5 wait events)4、等待事件(Wait events)5、闩锁等待6、首要的SQL(Top sql)7、实例活动(Instance activity)8、文件I/O(File I/O)9、内存分配(Memory allocation)10、缓冲区等待(Buffer waits1.报表头信息数据库实例相关信息,包括数据库名称、ID、版本号及主机等信息。
STATSPACK report forDB Name DB Id Instance Inst Num Release Cluster Host------------ ----------- ------------ -------- ----------- ------- ------------BLISSDB 4196236801 blissdb 1 9.2.0.4.0 NO BLISSSnap Id Snap Time Sessions Curs/Sess Comment------- ------------------ -------- --------- -------------------Begin Snap: 4 23-6月-05 17:43:32 10 3.3End Snap: 5 23-6月-05 18:01:32 12 6.1Elapsed: 18.00 (mins)Cache Sizes (end)~~~~~~~~~~~~~~~~~Buffer Cache: 24M Std Block Size: 8KShared Pool Size: 48M Log Buffer: 512K2.负载间档该部分提供每秒和每个事物的统计信息,是监控系统吞吐量和负载变化的重要部分。
Statspack&AWR 安装及使用
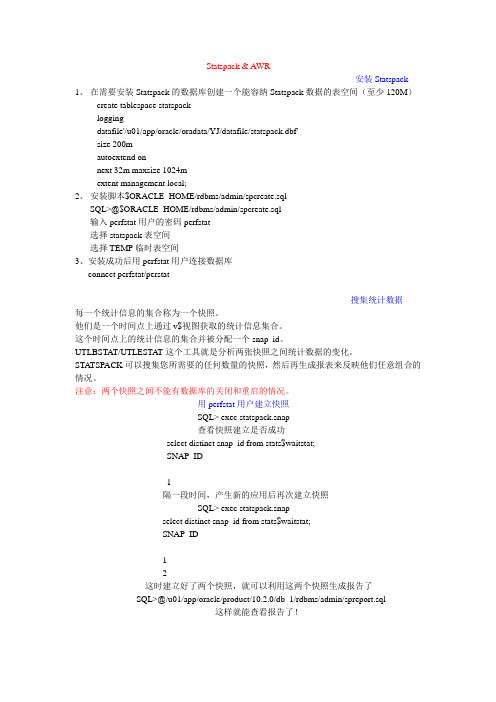
Statspack & A WR安装Statspack 1、在需要安装Statspack的数据库创建一个能容纳Statspack数据的表空间(至少120M)create tablespace statspackloggingdatafile'/u01/app/oracle/oradata/YJ/datafile/statspack.dbf'size 200mautoextend onnext 32m maxsize 1024mextent management local;2、安装脚本$ORACLE_HOME/rdbms/admin/spcreate.sqlSQL>@$ORACLE_HOME/rdbms/admin/spcreate.sql输入perfstat用户的密码perfstat选择statspack表空间选择TEMP临时表空间3、安装成功后用perfstat用户连接数据库connect perfstat/perstat搜集统计数据每一个统计信息的集合称为一个快照。
他们是一个时间点上通过v$视图获取的统计信息集合。
这个时间点上的统计信息的集合并被分配一个snap_id。
UTLBSTA T/UTLESTA T这个工具就是分析两张快照之间统计数据的变化。
STA TSPACK可以搜集您所需要的任何数量的快照,然后再生成报表来反映他们任意组合的情况。
注意:两个快照之间不能有数据库的关闭和重启的情况。
用perfstat用户建立快照SQL> exec statspack.snap查看快照建立是否成功select distinct snap_id from stats$waitstat;SNAP_ID----------1隔一段时间,产生新的应用后再次建立快照SQL> exec statspack.snapselect distinct snap_id from stats$waitstat;SNAP_ID----------12这时建立好了两个快照,就可以利用这两个快照生成报告了SQL>@/u01/app/oracle/product/10.2.0/db_1/rdbms/admin/spreport.sql这样就能查看报告了!STA TSPACK的参数1、最经典的参数就是收集信息的等级,等级越高收集信息越详细,花费时间越长。
Oracle FLEXCUBE 大盘开发工具箱-跟踪更改指南说明书
Development Workbench - Tracking Changes Oracle FLEXCUBE Universal BankingRelease 14.6.2.0.0Part No. F72916-01[November] [2022]1Contents1Preface (3)1.1Audience (3)2Introduction (3)2.1How to use this Guide (3)3View Changes (4)3.1Process Steps (4)4Change Report (8)4.1Process Steps (9)4.2Functionality Demonstration (14)21PrefaceThis document describes the Tracking Changes available in Oracle FLEXCUBE Development Workbench for Universal Banking and guides the developers on how to use this feature1.1AudienceThis document is intended for FLEXCUBE Application developers/users that use Development Workbench to develop various FLEXCUBE components.2Introduction2.1How to use this GuideThe information in this document includes:•Chapter 2 , “Introduction”•Chapter 3 , “View Changes "3•Chapter 4 , “Change Report”3View ChangesView Changes allows the developer to see what exact change has been done in the radxml as part of the various nodes in the Workbench across different releases.Track changes will show various changes done in each node in the radxml. It will highlight the nodes through the color. It shows the modified Data Sources, Data Source Fields, LOVs, Data Blocks, Block Fields, Call forms etc in Blue Color. And it shows the newly added Data Sources, Data Source Fields, LOVs, Data Blocks, Block Fields, Call forms etc in Green Color.The main page of View changes looks like function generation page.Here in this page user is allowed to load a radxml. Then Workbench will show the all the changes done in the radxml across the release and release type accordingly with two different colors.Blue indicates modifiedGreen indicates new.So using View changes in Development Workbench, user can easily identify the changes done in the radxmls across releasesAcross the release and release type.3.1Process StepsThe starting page of the View changes will have only load button enabled and all the other buttons will be disabled at the beginning.4Fig 4.0 Development Workbench - View Changes link.Fig 4.2 Development Workbench - View Changes page.This page will allow user to load the radxml to view the changes in the radxml across releases and release types.Workbench allows viewing the changes done as part of Child or Cluster or Custom Release. Upon loading the Cluster or Custom or Child RAD xml, it shows the Modifications done as part Of Cluster or Custom or Child.5To load the radxml.Fig 4.3 View Changes - loading radxml.After loading the radxml one small window will pop up and will notify the details of the function id Like Function Type, Release Type.Figure notifies that changes done in the radxml as part of Cluster Release will be highlighted6Fig 4.4 View Changes – Notifying the release type in which changes done This will give brief details of what are the changes shown according to the release type. After loading the function id , Workbench will show the screen in the below format with blue andgreen accordingly.7Fig 4.5 Highlighting the Changes done in Cluster ReleaseThis will show the changes in the colors blue and green. Blue indicates modified and green indicates new, so in this function id.One data source is modified (in blue color) while one block is newly added (in green color) as part of cluster release4Change ReportChange Report allows us to view the changes in the provided base and source list of radxml’s, helps to get the changes done in the two radxml’s across releases and releasetypes.8View Changes Report allows the developer to see what exact change has been done in the radxml’s as part of the various nodes in the Development Workbench across two different releases or release types.It is generates reports based on two formatsComparison Types:1.Function specific: Compares Radxml’s Based on the function name2.Parent child: Compares Radxml’s Based on the parent child RelationThese are the nodes which are compared and report is generated based on the differences found in these below nodes of the two radxml’s given in the list Radxml’s. PREFERENCES, MENU_DETAILS, DATASOURCES, COLUMNS, LOVS LOV_DETAILS, DATA_BLOCKS, BLOCK_FIELDS, DATASOURCES_ATTACHED, CUSTOM_ATTRIBUTES, LOV_RETURN_FIELDS,LOV_BIND_VARS, FIELD_EVENTS, LOV_OFF_LINE_BIND_VARS, LOV_OFF_LINE_RETURN_FIELDS, SCREENS, SCREEN_ARGUMENTS, TABS, SECTIONS, PARTITIONS, FIELDSETS, FIELDSET_FIELDS, SUMMARY, SUMMARY_DETAILS, LAUNCHFORMS, CALLFORMS, ACTIONS, WEB_SERVICES.4.1Process StepsView Changes Report process is explained taking STDCUSAC as exampleFrom FCUBS_11.3.0 and FCUBS_11.4.0 Releases.Click on View Change Report Node from Development Workbench landing page .Fig 4.1.1: Development Workbench Landing PageThe following window will be launched9Fig 4.1.2: Development Workbench View Changes Report Screen Source File List: Browse and select the text file containing source file list.10Fig 4.1.3: Selecting source file list text file for View Changes Report Source File list is a text file which contains the absolute path of all the radxml’s to be compared.Fig 4.1.4: Content of source.txt fileThe figure above shows the content of the source.txt file .Here STDCUSAC is the source radxml which has to be compared.If View Changes Report of more than one function_id is required, absolute path of each radxml has to be specified; each in a new line11Base File List: Browse and select the text file containing base file listFig 4.1.5: Selecting base file list text file for View Changes Report Base File list is a text file which contains the absolute path of all the base radxml’s to be Compared (here STDCUSAC is the base radxml)If View Changes Report of more than one function_id is required, absolute path of each base radxml has to be specified; each in a new line12Fig 4.1.6: Content of base.txt fileFile Location: Choose file location as client if the path provided is in the client machine. Comparison Type: Choose Comparison type as Function Specific.Select Changes: Check if required to compare the selected nodes also.Click on Generate button on lower left portion of the screen and wait for the system to do the process.Process time will vary depending on the number of files provided, size of each files etc13Fig 4.1.7: File Status after View Changes ReportAfter Completion of the process, status will be shown in the screen. File status will be generated successfully if comparison is successful.Generated Files:1)Excel Report of Changes: A war file named RAD will be created and will be shown aftersuccessful process of comparing, which will contain Excel files for the particular sourceradxml’s.PANDETIP_FRONTEND_LOG.txt2)Log Files : Following log files will be generatedi) View Comparison Log: This contains the status of all the files Compared.ii) View Comparison Report: This file can be used for troubleshooting.All the nodes will be compared and will be painted in the excel sheet based upon the values of base and source list of radxml’s, the values will be having 3 statusesNEW, MODIIFED, DELETED.Based on this status old and new values will be shown in the view changes report.4.2Functionality DemonstrationIn the above View Changes Report process, STDCUSAC is compared with the latest STDCUSAC. The figure below shows the comparison of STDCUSAC (FCUBS_11.3.0) and STDCUSAC (FCUBS_11.4.0).14This source is part of the FLEXCUBE Software System and is copyrighted byOracle Financial Services Software Limited.All rights reserved. No part of this work may be reproduced, stored in a retrieval system,adopted or transmitted in any form or by any means, electronic, mechanical, photographic, graphic, optic recording or otherwise, translated in any language or computer language,without the prior written permission of Oracle Financial Services Software Limited.Oracle Financial Services Software Limited.10-11, SDF I, SEEPZ, Andheri (East),Mumbai -400096.India.Copyright 2008-2010 by Oracle Financial Services Software Limited. All rights reserved.Fig 4.2.1: STDCUSAC screen copy right clause.Fig 4.2.2: STDCUSAC screen Header.15PREFERENCESFig 4.2.3: STDCUSAC screen Preferences changes from previous release screenThe change report will compare the two function ids and will paint the excel sheet in the format above represented for the preferences node of the radxml’s compared. Preferences will show the difference in the both versions of the releases.The nodes representing here are(PREFERENCES, MENU_DETAILS)16Description:change Report will compare two radxml’s and will form one Dom which will have the nodes which will have the diff between two radxml’s which has old value and new value. Here in preferences, the status is the nodes are modified and the node modified is preferences the property of that node modified is Txn block name Old value is block_cust_account no and new value is null ,STDCUSAC (FCUBS_11.3.0) radxml has no value and STDCUSAC (FCUBS_11.4.0) has block_cust_account as Txn block Similarly for the other screens also the values will be painted as below fig.DATASOURCESFig 4.2.4: STDCUSAC screen Data Sources changes from previous release screen1718 The change report will compare the two function ids and will paint the excel sheet in the format above represented for the Data Sources node of the radxml’s compared. Data Sources will show the difference in the both versions of the releases. The nodes representing here are (DATASOURCES, COLUMNS) Order Changes:Fig 4.2.5: order changes in change report screen On click of this order changes the nodes will also be compared for the order maintained in the radxml of respective releases. Mainly order changes will affect 3 nodes FIELD_ORDER, FIELDSET_ORDER, TAB_ORDER, SEC_ORDER, DATA_BLK_ORDER, BLK_FIELD_ORDER All the orders will be compared between sources and base radxml’s and will bepainted in the excel as below figOne such example Comparing two radxml’s with order changes required in the screen the comparison will include the above nodes in comparing the two radxml’s.Order Changes screen for fieldsets: ArrayFig 4.2.6: order changes painted in excel sheet in change report screen19Development Workbench - Tracking Changes[November] [2022]Version 14.6.2.0.0Oracle Financial Services Software LimitedOracle ParkOff Western Express HighwayGoregaon (East)Mumbai, Maharashtra 400 063IndiaWorldwide Inquiries:Phone: +91 22 6718 3000Fax:+91 22 6718 3001/financialservices/Copyright © 2007, 2022, Oracle and/or its affiliates. All rights reserved.Oracle and Java are registered trademarks of Oracle and/or its affiliates. Other names may be trademarks of their respective owners.U.S. GOVERNMENT END USERS: Oracle programs, including any operating system, integrated software, any programs installed on the hardware, and/or documentation, delivered to U.S. Government end users are "commercial computer software" pursuant to the applicable Federal Acquisition Regulation and agency-specific supplemental regulations. As such, use, duplication, disclosure, modification, and adaptation of the programs, including any operating system, integrated software, any programs installed on the hardware, and/or documentation, shall be subject to license terms and license restrictions applicable to the programs. No other rights are granted to the U.S. Government.This software or hardware is developed for general use in a variety of information management applications. It is not developed or intended for use in any inherently dangerous applications, including applications that may create a risk of personal injury. If you use this software or hardware in dangerous applications, then you shall be responsible to take all appropriate failsafe, backup, redundancy, and other measures to ensure its safe use. Oracle Corporation and its affiliates disclaim any liability for any damages caused by use of this software or hardware in dangerous applications.This software and related documentation are provided under a license agreement containing restrictions on use and disclosure and are protected by intellectual property laws. Except as expressly permitted in your license agreement or allowed by law, you may not use, copy, reproduce, translate, broadcast, modify, license, transmit, distribute, exhibit, perform, publish or display any part, in any form, or by any means. Reverse engineering, disassembly, or decompilation of this software, unless required by law for interoperability, is prohibited.The information contained herein is subject to change without notice and is not warranted to be error-free. If you find any errors, please report them to us in writing.This software or hardware and documentation may provide access to or information on content, products and services from third parties. Oracle Corporation and its affiliates are not responsible for and expressly disclaim all warranties of any kind with respect to third-party content, products, and services. Oracle Corporation and its affiliates will not be responsible for any loss, costs, or damages incurred due to your access to or use of third-party content, products, orservices.20。
ONLLY 系列计算机自动化测试调试(继电保护和计量)系统 说明书

ONLLY®昂立电气世界是相同的,不同的是掌握它的方法时间是相同的,不同的是使用它的效率资源是相同的,不同的是我更善于整合电力是相同的,不同的是它不能储存保护是相同的,不同的是绝大部分时间都处于等待测试是相同的,不同的是始终只与您同时工作尊敬的用户:感谢您使用ONLLY系列计算机自动化测试调试(继电保护和计量)系统,希望本手册能够为您对本公司产品的熟悉和使用提供尽可能详细的帮助信息。
如果仍有未尽之处,或者您需要其他的技术支持和服务,欢迎致电:020-******** 87667331 电力微波:97-3218414也可以访问: 或发E_mail:onllymichael@ onllysimple@企业QQ:199869664 MSN:onllymichael@广州昂立(ONLLY)电气公司广州新普(SIMPLE)电气公司附:本手册适用于ONLLY和SIMPLE品牌的全系列产品,其中包括:A系列(型号:A430 A460 A660 A860)G系列(型号:6108G 4350G 4630G 6630G)以及即将面世的D系列全数字化产品和广州新普(SIMPLE)电气公司生产的A310、A320“准三相计算机自动化测试调试(继电保护和计量)系统”以上产品均为内嵌计算机一体化装置,为便于使用和避免重复,本手册以A460为标准编写,并适用于其余所有型号产品(细节局部略有不同);如果软件升级和更新,增加和更新的内容和功能说明将随最新版本一并发布,您随时可以借助IT网络时代以第一时间获得。
ONLLY®昂立电气声明在保证不影响产品性能和用户使用的情况下,昂立保留改进本手册所有参数的权力,手册中的画面可能有所改变,请以实际画面和实体为准,恕不另行通知。
版权ONLLY®商标为昂立(广州)电气所有,已经在中华人民共和国登记注册(第9类测量仪器设备注册号:1384458);ONLLY系列计算机自动化测试调试( 继电保护)系统的测试软件,已经在中华人民共和国登记软件版权(登记号:2000SR0536),所有权归昂立(广州)电气。
Oracle Analytics Server 产品介绍说明书

产品介绍Oracle Analytics Server 是一款本地部署的自助服务可视化和增强人工智能(AI) 分析平台。
它提供了全方位的功能,包括快速显示数据集的关键洞察的AI,自动推荐分析新元素的数据丰富功能,支持传统和公民数据科学家的机器学习(ML) 功能,以及令人惊叹的数据可视化,可提供具有像素完美报告功能的仪表板。
Oracle Analytics Server 建立在久经考验的现代技术基础上,支持超高的工作负载和复杂部署,同时以较低的总拥有成本为企业的每个用户提供及时的洞察。
企业现在可以通过移动、平板电脑和所有现代浏览器为需要访问分析数据的所有用户提供易于使用的界面,通过导入或混合数据,执行分析或安全地分发报告来实现分析平台的现代化。
客户可以选择自管理本地部署或私有云部署Oracle Analytics Server,可以按计划管理升级,并实施自定义选项,如自定义外观/样式、元数据、消息传送等。
Oracle Analytics Server 是现有 Oracle 商业智能企业版客户的轻松升级选项。
主要特性•自助式数据可视化功能•带有解释的增强分析•数据流中的机器学习•数据丰富能力•强大的地理空间映射和可视化•简便易用的即席查询和分析•像素完美的企业报告•通用企业信息模型Oracle Analytics Server — 功能概览∙增强分析:Oracle Analytics Server 将机器学习和 AI 嵌入了分析过程的每个方面,从而支持深度洞察,让您可以轻松完成分析工作。
该解决方案能够显著增强从智能数据准备到数据探索的整体分析体验,并通过提供基于自然语言处理的现代对话式分析来简化用户体验。
在后台,Oracle Analytics Server 运行聚类、分类和关联以发现洞察。
只需单击一下,即可将这些令人惊叹的可视化效果内置到仪表板中。
∙数据丰富:Oracle Analytics Server 数据丰富功能可自动推荐数据元素,包括时间分析所需的值(月份,星期,工作日等),用于映射的地理空间值,用于对元素进行分类数据中的模式识别,并集成机器学习,通过用于洞察的算法丰富数据集。
ORACLE 7.3.4 for SCO OPENSERVER 505 安装说明
ORACLE 7.3.4 for SCO OPENSERVER 505 安装说明(一)系统要求1、硬件要求:CPU:586以上内存:64M以上硬盘:1000M以上数据库:300M以上2、软件要求:操作系统:SCO UNIX 5.0.5 Oracle for SCO 734(二)安装步骤:一、检查硬件1、查看系统是否符合安装条件2、调整kernel参数# scoadmin -->选Hardware/kernel Manager -->Tune Parament需调整的参数:15.Semaphores(100,300,100)16.Share Data/maximun shared memory 524288-->67108864relink3、reboot二、生成oracle用户和dba组1、建oracle用户和dba组,oracle用户目录为:/oracle2、在/oracle 目录下建以下子目录:tmp3、改变/oracle目录及其所属文件的属性# cd /# chown oracle:dba oracle# cd /oracle# chown -R oracle:dba *# cd /oracle# chmod 777 tmp三、设置oracle环境变量# cd /oracle# vi .profile加入:ORACLE_BASE=/oracle/app/oracle;export ORACLE_BASEORACLE_HOME=$ORACLE_BASE/product/7.3.4;export ORACLE_HOME ORACLE_SID=ora7;export ORACLE_SIDORACLE_TERM=ansi;export ORACLE_TERMLD_LIBRARY_PATH=$ORACLE_HOME/lib;export LD_LIBRARY_PATH TMPDIR=/oracle/tmp;export TMPDIRORACLE_DOC=$ORACLE_HOME/doc;export ORACLE_DOCORA_NLS32=$ORACLE_HOME/ocommon/nls/admin/data;exportORA_NLS32ULIMIT=2297152TERM=ansi;export TERMPATH=$PATH:/opt/bin:/usr/lbinPATH=$PATH:$ORACLE_HOME/bin;export PATH/*普通用户(非ORACLE)再加入export NLS_DATE_FORMAT=YYYYMMDDexport NLS_LANG=AMERICAN_AMERICA.ZHS16CGB231280LIBPATH=$ORACLE_HOME/lib:$LIBPATHexport LIBPATH*/四、安装SCO 关于Oracle 补丁文件进入Software Manager,如列表内没有COFF Linker Supplement (Ver oss459B),须先安装“SCO的Oracle 补丁”,否则安装的过程将出现难以想象的问题。
Oracle数据库工具包用户指南说明书

Package‘ora’October14,2022Version2.0-1Date2014-04-10Title Convenient Tools for Working with Oracle DatabasesAuthor Arni MagnussonMaintainer Arni Magnusson<***************>Depends DBI,ROracleSystemRequirements Oracle clientDescription Easy-to-use functions to explore Oracle databases and import datainto er interface for the ROracle package.License GPL(>=2)NeedsCompilation noRepository CRANDate/Publication2014-04-1015:27:20R topics documented:ora-package (1)desc (2)sql (4)tables (5)views (7)Index10 ora-package Convenient Tools for Working with Oracle DatabasesDescriptionEasy-to-use functions to explore Oracle databases and import data into er interface for the ROracle package.12descDetailsExplore database:tables list tablesviews list viewsExamine table:desc describe table or viewImport data:sql import dataAuthor(s)Arni Magnusson.ReferencesThe official Oracle manuals are available at /technetwork/indexes/ documentation/.See AlsoThe functions that do the actual work are described in the DBI and ROracle packages.desc Describe Oracle TableDescriptionShow the column names of an Oracle table(or view)and various column properties,not unlike the Oracle SQL*Plus DESC command.Also show the number of rows when the table was last analyzed. Usagedesc(table,tolower=TRUE,dots=FALSE,...)Argumentstable Oracle table name,often in the‘owner.table’format.tolower whether output table strings should be lowercased.dots whether underscores in column names should be replaced with dots,converting ‘col_name’to‘’....passed to dbConnect.desc3DetailsThe...argument can be used to set username,password,and/or dbname(see dbConnect).Abbre-vations like user and‘pass’are allowed.The default database name is determined by the environ-ment variable ORACLE_SID,which can be redefined within an R session using Sys.setenv(ORACLE_SID="foo").ValueA data frame with named rows and the following columns:name Oracle column name.Sclass storage mode in R.type Oracle type.len Oracle length.precision Oracle precision.scale Oracle scale.isVarLength whether the variable has varying length in Oracle.nullOK whether the variable can be null.Furthermore,the data frame contains two attributes:rows(the number of rows when the table waslast analyzed)and analyzed(when the table was last analyzed).These attributes are not availablefor all Oracle tables,but are more likely to be available when the main argument table has the fullowner.table format.NoteSee the Oracle manuals for details about type,length,precision,scale,and nulls.See Alsodesc is to Oracle tables as ll(in package gdata)is to R data frames.ora gives an overview of the package.Examples##Not run:desc("dual",tolower=FALSE)desc("all_users")##End(Not run)4sql sql Import Data from OracleDescriptionRun SQL query returning an R data frame.Usagesql(query,tolower=TRUE,dots=TRUE,encoding="unknown",useBytes=TRUE,stringsAsFactors=FALSE,warn=-1,debug=FALSE,...)Argumentsquery string containing SQL query or the name of afile containing a query.tolower whether column names should be lowercased.dots whether underscores in column names should be replaced with dots,converting‘col_name’to‘’.encoding passed to readLines.useBytes passed to gsub.stringsAsFactorswhether to convert string columns to factors.warn sets the handling of warning messages,e.g.when Oracle columns are of type‘LONG’.debug whether to return thefinalized SQL query string,instead of submitting it toOracle....passed to dbConnect.DetailsThe query is not required to end with a semicolon.In fact,semicolons are removed internallybefore submitting the query to Oracle.The arguments encoding and useBytes enable the user to solve character encoding problemswithin the SQL query.If the query contains non-ASCII characters,readLines and gsub(calledby sql)may convert the query to a different encoding than the Oracle database expects.The arguments stringsAsFactors and warn correspond to options with the same names,but thesession options are not used as default values.Therefore,it is necessary to pass stringsAsFactors=TRUEdirectly to sql in order to import string columns as factor.This option-overriding is designed tomake results more predictable and facilitate collaboration between database users.debug=TRUE is helpful for solving problems,and also to save complex queries(possibly to afile)for later use.The...argument can be used to set username,password,and/or dbname(see dbConnect).Abbre-vations like user and‘pass’are allowed.The default database name is determined by the environ-ment variable ORACLE_SID,which can be redefined within an R session using Sys.setenv(ORACLE_SID="foo").ValueData frame containing the imported data,or a simple string if debug=TRUE.See Alsosql is to Oracle tables as read.table is to textfiles.ora gives an overview of the package.Examples##Not run:##1Basic queries#Pass query as a simple stringsql("SELECT username,created FROM all_users WHERE rownum<=10")#Pass query as a multiline stringsql("SELECT extract(year from created)AS year,count(username)AS usersFROM all_usersGROUP BY extract(year from created)")#Pass query as a filewrite(c("SELECT username,created","FROM all_users","WHERE rownum<=10;"),"query.sql")sql("query.sql")##2Review query string,before sending it to Oraclesql(paste0("SELECT username,created FROM all_users WHERE rownum<=",5+5), debug=TRUE)##End(Not run)tables List Oracle TablesDescriptionList all tables in the database belonging to a specific owner or table space. Usagetables(owner="%",table="%",space="%",tolower=TRUE,...)Argumentsowner owner name.table table name.space table space name.tolower whether owner,table,and space output entries should be lowercased....passed to dbConnect.DetailsThe arguments owner,table,and space are passed as patterns that are matched by‘LIKE’,where%means any number of characters and_means exactly one character.Literal%and_are escapedusing two backslashes:"\\%"and"\\_".In other words,the default value"%"matches all strings.The...argument can be used to set username,password,and/or dbname(see dbConnect).Abbre-vations like user and‘pass’are allowed.The default database name is determined by the environ-ment variable ORACLE_SID,which can be redefined within an R session using Sys.setenv(ORACLE_SID="foo"). ValueData frame containingfive columns:owner owner name.table table name.space table space name.rows number of rows when the table was last analyzed.analyzed when the table was last analyzed.NoteThe output is a subset of‘ALL_TABLES’in Oracle,with simplified column names:‘OWNER’‘->owner’‘TABLE_NAME’‘->table’‘TABLESPACE_NAME’‘->space’‘NUM_ROWS’‘->rows’‘LAST_ANALYZED’‘->analyzed’See Alsotables is to Oracle as ll(in package gdata)is to R environments.ora gives an overview of the package.Examples##Not run:#Tables belonging to owner"sys":tables("sys")#Tables whose name contains"map",preceded by at least one character:tables(,"%_map%")#Tables whose name ends with"_map":tables(,"%\\_map")##End(Not run)views List Oracle ViewsDescriptionList all views in the database belonging to a specific owner.Usageviews(owner="%",view="%",tolower=TRUE,...)Argumentsowner owner name.view view name.tolower whether owner and view output entries should be lowercased....passed to dbConnect.DetailsThe arguments owner and view,are passed as patterns that are matched by‘LIKE’,where%meansany number of characters and_means exactly one character.Literal%and_are escaped using twobackslashes:"\\%"and"\\_".In other words,the default value"%"matches all strings.The...argument can be used to set username,password,and/or dbname(see dbConnect).Abbre-vations like user and‘pass’are allowed.The default database name is determined by the environ-ment variable ORACLE_SID,which can be redefined within an R session using Sys.setenv(ORACLE_SID="foo").ValueData frame containing two columns:owner owner name.view view name.NoteThe output is a subset of‘ALL_VIEWS’in Oracle,with simplified column names:‘OWNER’‘->owner’‘VIEW_NAME’‘->view’See Alsoviews is to Oracle as ll(in package gdata)is to R environments.ora gives an overview of the package.Examples##Not run:#Views belonging to owner"sys":views("sys")#Views whose name contains"all",followed by at least one character: views(,"%all_%")#Views whose name begins with"all_":views(,"all\\_%")##End(Not run)Index∗classesdesc,2∗databasedesc,2ora-package,1sql,4tables,5views,7∗utilitiesdesc,2ora-package,1sql,4tables,5views,7dbConnect,3,4,6,7desc,2,2gsub,4options,4ora,3,5,6,9ora(ora-package),1ora-package,1read.table,5readLines,4sql,2,4tables,2,5views,2,710。
WINDOW7下Oracle 11g2 GateWay for sybase的安装和配置
WINDOW7下Oracle 11g2 GateWay的安装和配置一、安装准备根据window7的版本,下载对应的Oracle11gGateWay版本Oracle11gGateWay的版本分为:win32bit下载地址: /otn/nt/oracle11g/112010/win32_11gR2_gateways.zip win64bit下载地址:/otn/nt/oracle11g/112010/win64_11gR2_gateways.zip GateWay对Oracle database的window版本并无特别要求,但GateWay必须与window的版本相符,否则会出现GateWay在调用dg4sybs时,出现找不到系统文件的错误。
本文配置的软件版本如下:OS: window7 64bit 专业版Oracle database : OracleXE 11g2Sybase database : Sybase 15.7Oracle Gateway : Oracle GateWay 11g2 64bitOracle和sybase的数据库安装在同一台机器二、安装过程1)安装Sybase database,安装目录为E:\Sybase_15.72)安装Oracle databse,安装目录e:\oraclexe\app\oracle\product\11.2.03)Oracle database安装使用默认配置,数据库端口15214)安装Oracle GateWay,安装目录e:\oraclexe\app\oracle\product\11.2.0\gateway5)Gateway 安装中要求配置listener,端口使用1522三、配置过程1)Sybase修改sa用户密码,因oracle database link须使用密码方式连接sybase;2)修改Oracle Gateway的init[SID].ora文件e:\oraclexe\app\oracle\product\11.2.0\gateway\dg4sybs\admin\init dg4sybs.ora红色字体部分是连接sybase时使用的SID_NAME,在后续listener.ora和tnsnames.ora 配置中的SID_NAME的均需与此处的红色字体部分相同。
Oracle Analytics Desktop 用户指南说明书

Oracle® AnalyticsOracle Analytics Desktop 用户指南F29318-232023 年 9 月Oracle Analytics Oracle Analytics Desktop 用户指南F29318-23版权所有© 2016, 2023, Oracle 和/或其附属公司。
第一作者:Stefanie Rhone特约作者:Nick FryPete Brownbridge撰稿人:Oracle Analytics development, product managementand quality assurance teamsThis software and related documentation are provided under a license agreement containing restrictions on use and disclosure and are protected by intellectual property laws. Except as expressly permitted in your license agreement or allowed by law, you may not use, copy, reproduce, translate, broadcast, modify, license, transmit, distribute, exhibit, perform, publish, or display any part, in any form, or by any means. Reverse engineering, disassembly, or decompilation of this software, unless required by law for interoperability, is prohibited.The information contained herein is subject to change without notice and is not warranted to be error-free. If you find any errors, please report them to us in writing.If this is software, software documentation, data (as defined in the Federal Acquisition Regulation), or related documentation that is delivered to the U.S. Government or anyone licensing it on behalf of the U.S. Government, then the following notice is applicable:U.S. GOVERNMENT END USERS: Oracle programs (including any operating system, integrated software, any programs embedded, installed, or activated on delivered hardware, and modifications of such programs) and Oracle computer documentation or other Oracle data delivered to or accessed by U.S. Government end users are "commercial computer software," "commercial computer software documentation," or "limited rights data" pursuant to the applicable Federal Acquisition Regulation and agency-specific supplemental regulations. As such, the use, reproduction, duplication, release, display, disclosure, modification, preparation of derivative works, and/or adaptation of i) Oracle programs (including any operating system, integrated software, any programs embedded, installed, or activated on delivered hardware, and modifications of such programs), ii) Oracle computer documentation and/or iii) other Oracle data, is subject to the rights and limitations specified in the license contained in the applicable contract. The terms governing the U.S. Government's use of Oracle cloud services are defined by the applicable contract for such services. No other rights are granted to the U.S. Government.This software or hardware is developed for general use in a variety of information management applications. It is not developed or intended for use in any inherently dangerous applications, including applications that may create a risk of personal injury. If you use this software or hardware in dangerous applications, then you shall be responsible to take all appropriate fail-safe, backup, redundancy, and other measures to ensure its safe use. Oracle Corporation and its affiliates disclaim any liability for any damages caused by use of this software or hardware in dangerous applications.Oracle®, Java, and MySQL are registered trademarks of Oracle and/or its affiliates. Other names may be trademarks of their respective owners.Intel and Intel Inside are trademarks or registered trademarks of Intel Corporation. All SPARC trademarks are used under license and are trademarks or registered trademarks of SPARC International, Inc. AMD, Epyc, and the AMD logo are trademarks or registered trademarks of Advanced Micro Devices. UNIX is a registered trademark of The Open Group.This software or hardware and documentation may provide access to or information about content, products, and services from third parties. Oracle Corporation and its affiliates are not responsible for and expressly disclaim all warranties of any kind with respect to third-party content, products, and services unless otherwise set forth in an applicable agreement between you and Oracle. Oracle Corporation and its affiliates will not be responsible for any loss, costs, or damages incurred due to your access to or use of third-party content, products, or services, except as set forth in an applicable agreement between you and Oracle.目录前言目标读者xvi 文档可访问性xvi 多元化与包容性xvi 相关资源xvi 约定xvii1 Oracle Analytics Desktop 入门关于 Oracle Analytics Desktop1-1安装 Oracle Analytics Desktop1-1在 Windows 上安装机器学习和高级分析1-2在 Mac 上安装机器学习和高级分析1-2打开 Oracle Analytics Desktop1-3从示例工作簿入手1-32 连接到数据源关于数据源2-1管理与数据源的连接2-2创建与数据源的连接2-2编辑数据源连接2-2删除数据源连接2-3数据库连接选项2-3连接 Oracle 数据库2-3连接到 Oracle 分析视图2-4连接到 Oracle Autonomous Data Warehouse 2-5连接到 Oracle Autonomous Transaction Processing2-6连接到 Oracle Fusion Cloud Applications Suite 中的应用程序2-6创建与 Oracle Essbase 的连接2-7连接到 NetSuite 2-7连接到 Oracle Talent Acquisition Cloud2-8iii连接到 Google BigQuery2-8连接到 Dropbox2-9连接到 Google Drive 或 Google Analytics2-9使用 JDBC 连接到数据2-10创建一般 ODBC 连接2-11连接到雪花数据仓库2-113 使用数据集连接到数据什么是数据集?3-2关于打开数据集3-2查看可用连接3-3可用于数据集的数据源3-3关于数据集编辑器3-5从连接创建数据集3-8向数据集添加多个连接3-9将文件添加到从连接创建的数据集3-10使用 SQL 语句向数据集中添加表3-10了解数据集表联接3-11在数据集表之间添加联接3-12禁用数据集中的自动联接3-13修改或修复数据集中的联接3-14当表列不匹配时添加联接3-14从数据集中删除联接3-15在数据源查询中包括数据集表3-16什么是保留粒度?3-16指定确定粒度的表3-18重新排列数据集表的顺序3-18什么是质量洞察?3-19使用质量洞察浏览数据3-23关于移除或还原数据集列3-28移除或还原数据集表的列3-28筛选数据集表3-29指定数据集表是高速缓存还是实时3-30查看数据集表的原始格式设置3-32从文件创建数据集3-32关于数据集的文件3-33使用从计算机上载的文件创建数据集3-33使用从 Dropbox 或 Google Drive 上载的文件创建数据集3-34向数据集添加多个文件3-34基于 Oracle Fusion Cloud Applications Suite 中的主题区域创建数据集3-35iv基于 Oracle Fusion Cloud Applications Suite 中的分析创建数据集3-36从 Essbase 连接创建数据集3-364 扩充和转换数据关于 Oracle Analytics 中的数据扩充和转换4-1扩充和转换数据4-3接受扩充建议4-4转换数据4-5使用替换转换数据4-6使用正则表达式的替换转换示例4-7将文本列转换为日期或时间列4-7调整日期或数字列的显示格式4-8在准备数据时创建收集列4-9配置数据集中的列属性4-9隐藏或删除列4-12还原隐藏或删除的列4-13编辑数据准备脚本4-14将列添加到数据集4-14在工作簿中创建计算的数据元素4-15扩充和转换参考4-15转换建议参考4-15数据概要分析和语义建议4-16语义类型类别4-16语义类型建议4-17可识别的基于模式的语义类型4-17基于引用的语义类型4-17建议的扩充4-18需要达到的阈值4-18定制知识库建议4-19一般定制格式字符串4-195 使用数据流创建数据集关于数据流5-1数据流的数据库支持5-2可以使用哪些步骤来组织和集成数据?5-2数据库分析函数5-5图形分析函数5-6用于训练机器学习模型的数据流步骤5-7使用数据流创建数据集5-7v使用数据流生成或更新数据集5-8重用数据流5-8在数据流中配置增量处理5-8为数据源指定新的数据指示符5-9在数据流中应用增量处理5-9使用一系列数据流处理数据5-10管理数据流5-116 管理数据集数据集类型图标6-1查看数据集列表及其相关信息6-2重新加载数据集的数据6-2关于重新加载数据集的数据6-2重新加载数据集中的单个表6-3重新加载数据集中的所有表6-4重新加载数据集的文件6-5检查数据集的属性6-6重命名数据集及更改其说明6-6复制数据集的对象 ID6-6查看数据集的数据元素6-7下载数据集的源文件6-7复制数据集6-7删除数据集6-87 可视化和分析数据开始构建工作簿并创建可视化7-2在编辑模式下打开工作簿7-2将工作簿配置为在编辑模式下打开7-2处理工作簿的数据集7-3将数据集添加到工作簿7-3替换工作簿中的数据集7-4从工作簿中删除数据集7-4修改工作簿的数据集7-5混合数据集7-6了解混合7-6关于混合数据中的不匹配值7-7混合数据集7-9更改可视化中的数据混合7-10通过添加数据来构建可视化7-10vi用来添加数据的不同方法7-10为所选数据元素创建最佳可视化7-11向可视化添加数据7-11使用分配面板将数据添加到可视化7-14从一个可视化创建另一个可视化7-15修改可视化的工具提示7-15关于可视化类型7-16条形图7-16筛选器和其他可视化类型7-17地理空间图7-17网格图7-17线形图7-18网络图7-18饼图和树状图7-19散点图7-19使用统计分析增强可视化中的数据7-19开始使用统计分析之前7-19可以向可视化添加哪些统计分析?7-21向可视化添加统计分析7-23将参照线添加到可视化7-24使用迷你图检查趋势7-25对可视化中的数据进行排序7-25撤消和重做编辑7-26创建定制错误消息,以在可视化中没有数据时显示7-26关于刷新工作簿的数据7-26刷新工作簿的数据7-27暂停工作簿中的数据查询7-27使用画布属性7-28更新画布属性7-28关于画布布局属性7-28使用画布网格参考线来对齐可视化7-29关于画布中可视化的刷取7-30关于在画布中同步可视化7-30关于画布数据刷新属性7-31复制并粘贴可视化或画布7-31复制并粘贴可视化的数据7-32在画布上处理多个可视化7-32更新画布上多个可视化的常见属性7-32在画布上复制并粘贴多个可视化7-32删除画布上的多个可视化7-33vii更改可视化类型7-33关于可视化属性7-33调整可视化属性7-34设置可视化边框属性7-36设置可视化阴影属性7-36更改表和数据透视表中的显示名称7-36更改可视化中数据点的大小7-37使用条件格式设置突出显示重要数据事件7-37我可以使用条件格式设置做什么?7-37使用现有条件格式规则设置数据格式7-40为数据添加条件格式设置7-40示例—将度量与一组阈值进行比较7-43示例—将度量与目标(或目的)进行比较7-44示例—将度量与复杂表达式值进行比较7-45示例—将度量与值的百分比进行比较7-46向可视化应用颜色7-47关于可视化中的颜色分配7-48访问颜色选项7-48更改调色板7-49为列分配颜色7-50设置列的数值的格式7-51设置可视化的数值格式7-51为可视化设置货币符号7-51向可视化添加注释7-51向可视化添加注释7-52将注释连接到可视化中的数据点7-52显示或隐藏注释的数据点连接器7-53删除注释的数据连接器7-53显示或隐藏可视化的注释7-54在可视化中排序、钻探和选择数据7-55“我的计算”概览7-55基于聚类或非正常值创建计算7-57使用“解释”分析数据7-59什么是“解释”?7-59什么是“洞察”?7-59使用“解释”来发现数据洞察7-60有关可视化中数据问题的警告7-61设置工作簿缩略图7-61设置可视化加载叠加不透明度7-62viii8 筛选数据关于筛选器和筛选器类型8-1数据集如何与筛选器交互8-2数据集数量如何影响筛选器8-2关于自动应用的过滤器8-4筛选工作簿中的数据8-5指定筛选器的选择值8-9从筛选器栏启用或禁用“限制值的方式”设置8-10筛选可视化中的数据8-10定制可视化筛选器的标签8-11禁用可视化列表筛选器的多选功能8-12使用仪表盘筛选器8-12关于仪表盘筛选器8-12使用仪表盘筛选器可视化筛选数据8-13使用滑块仪表盘筛选器筛选可视化以及制作可视化动画概览8-15使用滑块仪表盘筛选器筛选可视化以及制作可视化动画8-19在主筛选器栏与可视化之间更改筛选器范围8-21将可视化用作筛选器8-22应用不同的筛选器类型8-22应用范围筛选器8-22应用前/后 N 个筛选器8-23应用列表筛选器8-24应用日期范围筛选器8-24应用相对时间筛选器8-25使用表达式筛选器筛选数据8-25应用基于规则的筛选器8-26使用基于角色的筛选器概览8-26根据应用程序角色筛选数据集8-29示例一—在工作簿中应用基于角色的简单筛选器8-31示例二—在工作簿中应用多个基于角色的筛选器8-339 创建和使用参数什么是参数?9-1关于系统参数9-1关于参数属性9-2关于修改和删除参数9-3创建参数9-3引用参数的语法9-5将参数绑定到筛选器9-5ix关于将参数绑定到筛选器9-6创建参数并将其绑定到筛选器9-6创建参数并将其绑定到双列类型筛选器9-7将一个参数绑定到筛选器9-8使用参数9-9在筛选器栏中使用参数9-10将参数用作仪表盘筛选器控件9-10在可视化的标题中使用参数9-11将参数用作可视化的轴标签9-12在磁贴可视化的度量标签中使用参数9-13在表达式筛选器中使用参数9-14在计算中使用参数9-15使用分析链接数据操作传递参数值9-15使用 URL 导航数据操作传递参数值9-1610 应用地图背景和地图层来增强可视化效果关于地图背景10-1使用地图背景增强可视化10-2在工作簿中使用不同的地图背景10-2在地图可视化中使用颜色和大小来解释数据值10-3添加定制地图层10-3更新定制地图层10-4切换为使用另一个地图层10-5将多个数据层应用于单个地图可视化10-5将图像用作地图背景并在图像上绘制地图层形状10-5将图像上载为地图背景10-6在上载的图像上绘制定制地图层形状10-6将数据集与在上载的图像上绘制的地图层形状相关联10-7将地图层分配给数据列10-7适用于地图可视化的自动聚焦到数据10-8在地图可视化中配置缩放10-8检查地图可视化的位置匹配10-8在地图可视化上创建热图层10-9在地图可视化上创建聚类层10-10在地图上使用定制图标表示点数据10-10选择地图上的点或区域10-11在地图上使用大小和颜色呈现线条数据10-11使地图层和背景可供用户使用10-12将地图背景用作默认值10-12添加地图背景10-12x添加 Google 地图背景10-12添加百度地图背景10-13添加 Web 地图服务 (Web Map Service, WMS) 背景10-13添加平铺 Web 地图 (XYZ) 背景10-14Web 地图背景故障排除技巧10-15向地图添加数据标签10-1511 使用数据操作创建数据操作以连接可视化画布11-1创建数据操作以从可视化画布连接到外部 URL11-2关于创建 HTTP API 数据操作11-3创建 HTTP 数据操作11-3使用数据操作连接到 Oracle Business Intelligence Publisher 报表11-4关于创建数据操作以连接到 Oracle Business Intelligence Publisher 报表11-4创建数据操作以连接到 Oracle Business Intelligence Publisher 报表11-5在数据操作中创建定制列名以在 Oracle Business Intelligence Publisher 报表 URL 中传递11-5从可视化画布调用数据操作11-6数据操作如何影响筛选器11-612 创建定制数据操作插件关于数据操作插件和数据操作框架12-1数据操作类别12-2数据操作上下文12-3数据操作代码设计12-4数据操作模型类12-4数据操作服务类12-5数据操作代码交互12-7数据操作 plugin.xml 文件示例12-8数据操作插件文件和文件夹12-9选择最适合扩展的数据操作类12-9 AbstractDataAction 类12-10DataActionKOModel 类12-10CanvasDataAction 类12-11EventDataAction 类12-12AbstractHTTPDataAction 类12-12URLNavigationDataAction 类12-13HTTPAPIDataAction 类12-13基于模板生成数据操作插件12-14生成的文件夹和文件12-14扩展数据操作基类12-15选择要覆盖的数据操作继承的方法12-16测试、打包和安装数据操作12-19使用升级处理程序进行 Knockout 模型更改12-20升级数据操作插件12-20数据操作插件文件参考12-21数据操作 plugin.xml 文件示例12-21数据操作 plugin.xml 文件属性部分— tns:obiplugin 12-22数据操作 plugin.xml 文件资源部分— tns:resources 12-22数据操作 plugin.xml 文件扩展部分— tns:extension12-2413 使用其他函数来可视化数据使用工具提示识别内容13-1管理定制插件13-1编写表达式13-2从主页可视化数据13-2查找数据、工作簿和可视化13-3如何为数据编制索引?13-3搜索内容13-3搜索选项13-4搜索提示13-5自动保存更改13-5对页中的项排序13-514 构建演示流什么是演示流?14-1什么是“演示”页的自动模式和手动模式?14-1在“演示”页的自动模式和手动模式之间切换14-2打开工作簿的演示流14-2指定演示流的画布布局14-3重新排列演示流的画布14-3在演示流中复制画布14-3从演示流中删除复制的画布14-4在演示流中隐藏画布14-4在演示流中显示隐藏的画布14-4在演示流中更改可视化在画布上的位置14-5在演示流中重置画布14-5设置演示流的工作簿属性14-5指定工作簿导航14-6显示或隐藏工作簿标题栏14-7修改工作簿标题和文本14-7修改工作簿标题颜色14-7向工作簿标题添加图像14-7在工作簿上显示或隐藏筛选器栏14-8指定用户是否可以与工作簿交互14-8更改可视化在工作簿画布上的对齐方式14-9设置演示流的画布属性14-9在演示流画布上使用筛选器14-9指定用户与画布的交互方式14-10在画布上显示或隐藏可视化14-11在工作簿画布上显示或隐藏注释14-12预览工作簿14-1215 使用 Oracle Analytics 预测模型和 Oracle 机器学习模型创建和使用 Oracle Analytics 预测模型15-1什么是 Oracle Analytics 预测模型?15-1如何选择预测模型算法?15-2使用 Oracle Autonomous Data Warehouse 中的 AutoML 训练预测模型15-4创建和训练预测模型15-5检查预测模型15-6查看预测模型详细信息15-7评估预测模型的质量15-7什么是预测模型的相关数据集?15-7查找预测模型的相关数据集15-11将预测模型添加到工作簿15-11使用提升和增益图表评估机器学习模型15-12使用提升和增益图表概览15-12为提升和增益图表生成预测数据15-13使用提升和增益图表评估机器学习模型15-14在 Oracle Analytics 中使用 Oracle 机器学习模型15-15如何在 Oracle Analytics 中使用 Oracle 机器学习模型?15-15在 Oracle Analytics 中注册 Oracle 机器学习模型15-16检查注册的 Oracle 机器学习模型15-16查看已注册模型的详细信息15-16什么是已注册模型的视图?15-17查看已注册模型的视图列表15-17可视化注册的 Oracle 机器学习模型视图15-18向数据集应用预测模型或已注册的 Oracle 机器学习模型15-1916 导入、导出和共享导入工作簿文件16-1将工作簿或文件夹导出为文件16-2在选中特定画布的情况下共享工作簿 URL16-2从“可视化”或“演示”页导出可视化16-3将可视化的数据导出到 CSV 文件16-3通过电子邮件发送工作簿和文件夹16-4通过电子邮件发送可视化、画布或仪表盘的文件16-4打印可视化、画布或仪表盘16-5A 常见问题Oracle Analytics Desktop 安装常见问题A-1 Oracle Analytics Desktop 工作簿和数据源常见问题A-1 Oracle Analytics Desktop 打印和导出常见问题A-2B 排除可视化问题C 可访问性功能和提示在启动 Oracle Analytics Desktop 时启用可访问性功能C-1可视化的键盘快捷方式C-1数据流的键盘快捷方式C-2D 数据源和数据类型参考支持的数据源D-1关于 Oracle 应用产品连接器D-5认证—支持的数据类型D-5支持的基本数据类型D-5数据库支持的数据类型D-6E 数据准备参考转换建议参考E-1快速数据转换的列菜单选项E-1F 表达式编辑器参考SQL 运算符F-1函数F-3聚合函数F-3分析函数F-6转换函数F-7日期和时间函数F-8日期提取函数F-9显示函数F-12求值函数F-13数学函数F-13运行聚合函数F-15字符串函数F-16系统函数F-19时间序列函数F-19常数F-21类型F-21条件表达式F-21在分析和可视化中使用 CASE 语句的最佳实践F-23 G Oracle Analytics Desktop SDK 参考Oracle Analytics Desktop SDK G-1脚本G-1其他资源G-2创建可视化插件开发环境G-2创建大纲可视化插件G-3创建大纲皮肤或未分类插件G-3开发可视化插件G-4在 SDK 模式下运行 Oracle Data Visualization 并测试插件G-4验证可视化插件G-4构建、打包和部署可视化插件G-5从开发环境中删除插件G-5前言前言了解如何使用 Oracle Analytics Desktop 浏览数据。
Oracle SPARC T5-2服务器入门指南说明书
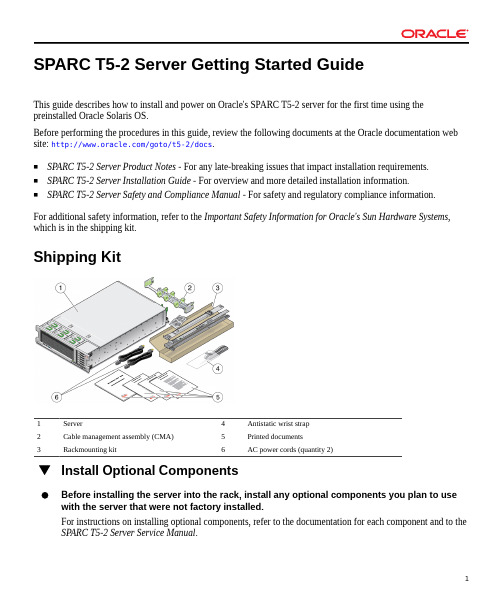
SPARC T5-2 Server Getting Started GuideThis guide describes how to install and power on Oracle's SPARC T5-2 server for the first time using the preinstalled Oracle Solaris OS.Before performing the procedures in this guide, review the following documents at the Oracle documentation web site: /goto/t5-2/docs.■SP ARC T5-2 Server Product Notes - For any late-breaking issues that impact installation requirements.■SP ARC T5-2 Server Installation Guide - For overview and more detailed installation information.■SP ARC T5-2 Server Safety and Compliance Manual - For safety and regulatory compliance information.For additional safety information, refer to the Important Safety Information for Oracle's Sun Hardware Systems, which is in the shipping kit.Shipping Kit1Server4Antistatic wrist strap2Cable management assembly (CMA)5Printed documents3Rackmounting kit6AC power cords (quantity 2)Install Optional ComponentsBefore installing the server into the rack, install any optional components you plan to use with the server that were not factory installed.For instructions on installing optional components, refer to the documentation for each component and to the SP ARC T5-2 Server Service Manual.Install the ServerFor quick installation and configuration, follow these steps. For more detailed information, refer to thecomplete online product documentation set.Caution - Do not apply power until instructed to do so. This server includes a service processor (SP) that configures and boots the host server. To properly configure the host server and view SP messages, do not apply AC power to the server until you make the SP and host networking connections, as described in this guide.1.Place the server in its intended location.For rackmounting and CMA instructions, refer to the SP ARC T5-2 Server Installation Guide.2.Connect a serial cable between the server's SER MGT port and a terminal device.This connection provides the initial communication with the SP. Set up the server to communicate using 9600 baud, 8 bit, no parity, 1 stop bit. For DTE-to-DTE communication, use a RJ-45 cable that is set up for a null modem configuration, in which the transmit and receive signals cross over.3.(Optional) Connect an Ethernet cable between the server's NET MGT port and the networkto which future connections to the SP and host will be made.Configure the server for the first time through the SER MGT port. After the initial configuration, you can set up communication between the SP and host through this Ethernet interface.4.Connect an Ethernet cable between one of the server's NET ports and the network to whichthe server will communicate.5.Connect the power cords to the power supplies and to separate power sources.The server is equipped with two power supplies. Connect them to separate power sources (200 to 240 V AC) to provide power redundancy. The server can operate with one power connection, but having only one power source reduces the redundancy.When the power cords are connected, the SP initializes and the power supply LEDs illuminate. After afew minutes, the SP login prompt displays on the terminal device. At this time, the host is not initialized or powered on.Power On the ServerThe following section describes how to power on the host after installing the server.1.At the terminal device, log in to the SP as root with a password of changeme.After a brief delay, the Oracle Integrated Lights Out Manager (Oracle ILOM) prompt (->) is displayed.For optimal security, change the root password. For more information about administration tasks such as changing passwords, adding accounts, and setting account privileges, refer to the SP ARC T5 Series Servers Administration Guide and the Oracle ILOM documentation at: /goto/ilom/docs By default, the SP is configured to use DHCP to obtain an IP address. If you plan to assign a static IP address to the SP, refer to the SP ARC T5-2 Server Installation Guide for instructions.2.Power on the server and redirect the host output to display on the serial terminal device.-> start /SystemAre you sure you want to start /System (y/n)? y-> start /HOST/consoleAre you sure you want to start /HOST/console (y/n)? ySerial console started.. . .Server initialization takes several minutes to complete.To cancel the server initialization, press the #. (Hash+Dot) keys to return to the Oracle ILOM prompt. Then type: stop /SystemNote - To use an OS other than the preinstalled version, refer to the SP ARC T5-2 Server Installation Guide.3.(Optional) Execute other Oracle ILOM commands while the server initialization continues inthe background.a. To display the Oracle ILOM prompt, press the #. (Hash+Dot) keys.b. To see information about available Oracle ILOM commands, type: helpTo see information about a specific command, type: help command-namec. To return to displaying host output from the server initialization, type: start /HOST/console4.When prompted, follow the onscreen instructions and type the configuration information foryour server.If you are not sure how to respond, accept the default and make changes later when the Oracle Solaris OS is running. After you confirm the configuration information, the server reboots and displays the Oracle Solaris login prompt.5.Log in to the server.You now can enter Oracle Solaris OS commands at the prompt. For more details, refer to the Oracle Solaris11 or 10 OS man pages and documentation at:/goto/solaris11/docs/goto/solaris10/docs6.Consider using Oracle virtualization and datacenter management software.■Oracle VM Server for SPARC is a preinstalled system virtualization feature that provides a discrete logical grouping with its own operating system, resources, and identity within a single computer system.You can run a variety of applications in different logical domains and keep them independent forperformance and security purposes.https:///en/virtualization/■Oracle Enterprise Manager is a data center management tool that provides many features, includinga comprehensive configuration solution for software provisioning, hardware fault analysis, andperformance management./en/enterprise-manager/Check for the Latest OS Updates, Patches, and FirmwareSome server features are enabled only when certain versions of patches or firmware are installed. Install the latest available versions for the best performance, security, and stability.1.Review the product notes for your server.This document describes important product dependencies and late-breaking information.See “Product Documentation Library” on page 6.2.Download the latest available versions from My Oracle Support at:https://Product Documentation LibraryDocumentation and resources for this product and related products are available at /goto/ t5-2/docs.FeedbackProvide feedback on this document at /goto/docfeedback. Documentation AccessibilityFor information about Oracle's commitment to accessibility, visit the Oracle Accessibility Program web site at http: ///pls/topic/lookup?ctx=acc&id=docacc.Access to Oracle SupportOracle customers that have purchased support have access to electronic support through My Oracle Support. For information, visit /pls/topic/lookup?ctx=acc&id=info or visit http://www.oracle. com/pls/topic/lookup?ctx=acc&id=trs if you are hearing impaired.Copyright © 2013, 2016, Oracle and/or its affiliates. All rights reserved.Copyright © 2013, 2016, Oracle et/ou ses affiliés. Tous droits réservés.Part No: E28859-03Mfg. No: 7047746February 2016。
IFS-Application7安装文档(Storage Tier)整理版
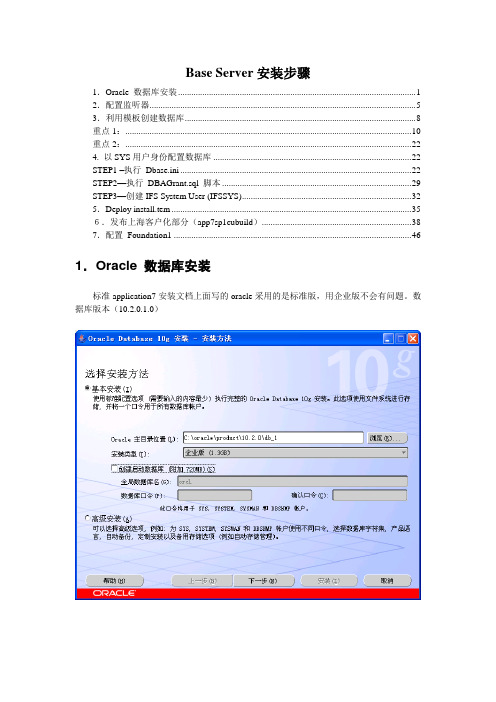
Base Server安装步骤1.Oracle 数据库安装 (1)2.配置监听器 (5)3.利用模板创建数据库 (8)重点1: (10)重点2: (22)4. 以SYS用户身份配置数据库 (22)STEP1 –执行Dbase.ini (22)STEP2—执行DBAGrant.sql 脚本 (29)STEP3—创建IFS System User (IFSSYS) (32)5.Deploy install.tem (35)6.发布上海客户化部分(app7sp1cubuild) (38)7.配置Foundation1 (46)1.Oracle 数据库安装标准application7安装文档上面写的oracle采用的是标准版,用企业版不会有问题。
数据库版本(10.2.0.1.0)2.配置监听器3.利用模板创建数据库安装ifs运行环境,以使用admin工具。
安装完客户端后,利用ifs提供的数据库创建模板创建数据库。
为支持多语言,采用Unicode的模板。
Copy the DBCA template from<F1_home>\Templates\IFSAPP_Windows_Oracle10g_Unicode_Prod.dbt to<ORACLE_HOME>\product\10.2.0\Db_1\assistants\dbca\ templates\.重点1:首先修改IFSAPP_Windows_Oracle10g_Unicode_Prod.dbt文件将nls_length_semantics 的值由CHAR改为BYTE(如果不改,创建数据库的过程中,在添加ORACLE XML数据库时会报错)利用模板创建数据库Chang the size国家字符集就选入图所示的。
重点2:将nls_length_semantics重新改回char:SQL>sqlplus /nologSQL>connect sys/system@prod as sysdbaalter system set nls_length_semantics=char scope=both; scope=both代表立刻生效,不需要启动数据库。
详解oracle9iStatspack的安装和使用数据库-电脑资料
详解oracle9iStatspack的安装和使用数据库-电脑资料以下内容均在window Xp, oracle 9.2.0.1下测试,在 linux / unix 下路径""要换成"/" 1.Statspack的安装sqlplus /nolog conn / as sysdba ——创建一个Statspack表空间,要求80M以上或者使用已经存在的表空间,但必须有80M以上的空闲空间 sqlcreate table以下内容均在window Xp,oracle9.2.0.1下测试,在linux/unix下路径""要换成"/"1.Statspack的安装sqlplus /nologconn / as sysdba——创建一个Statspack表空间,要求80M以上或者使用已经存在的表空间,但必须有80M以上的空闲空间sql>create tablespace statspack datafile ''size 100M AUTOEXTEND ONEXTENT MANAGEMENT LOCAL UNIFORM. SIZE 128K——执行安装脚本,在Oracle_Home dbmsadmin下sql>@? dbmsadminspcreate.sql——创建过程中会让提示输入新建用户perfstat的密码、默认表空间、默认临时表空间,我在这里分别设置为:oracle statspack temp——创建完以后,会自动用perfstat用户连接,可以检查一下sql>show user——如果不是perfstat用户,可以执行下面一条sql>conn perfstat/oracle2.手动使用statspack生成性能报告——抓取快照,必须2次或更过sql>exec statspack.snap——至少两次sql>exec statspack.snap——生成报告,会提示你输入生成报告的考试和结束的快照ID,必须是在同一个没有中断数据库的周期内的连续快照sql>@? dbmsadminspreport.sql——会提示您输入报告的文件名,采用默认也可3.用文本编辑器等打开生成的报告,具体情况具体分析4.如果安装过程出错,怎么纠正必须先用spdrop.sql删除spcreate.sql创建的相关信息sql>conn / as sysdbasql>@? dbmsadminspdrop.sql5.将statspack.snap安装成自动执行,每小时抓取一次快照sql>@? dbmsadminspauto.sql——检查任务中是否有这个任务,并且可以看到job的IDsql>select * from dba_job;——如果不想自动抓取快照,可以删除任务——先记下job的ID,然后执行sql>conn perfstat/oraclesql>exec dbms_remove(n);。
关于statspack以及awr使用
关于Statspack,AWR以及ASH使用Statspack部分Statspack是Oracle 8i以后提供的一个非常好的性能监控与诊断工具。
在数据库管理中,Oracle提供的statspack是一个很强大的工具,通过Statspack,可以收集系统信息,诊断数据库故障,也方便第三方技术支持进行远程阅读和建议。
Oracle Statspack 从Oracle8.1.6开始被引入Oracle,并马上成为DBA和Oracle专家用来诊断数据库性能的强有力的工具。
在oracle10g中被awr取代。
通过Statspack我们可以很容易的确定Oracle数据库的瓶颈所在,记录数据库性能状态。
因此了解和使用Statspack对于DBA来说至关重要。
Statspack的脚本位于$ORACLE_HOME/rdbms/admin目录下。
第一部分statspack安装以及卸载Statspack安装安装statspack至少需要100M表空间,如果需要长期监控,这个表空间应该设置的大一些。
Statspack相关数据不要放到system表空间。
在官方文档中明确指出在system表空间中不支持。
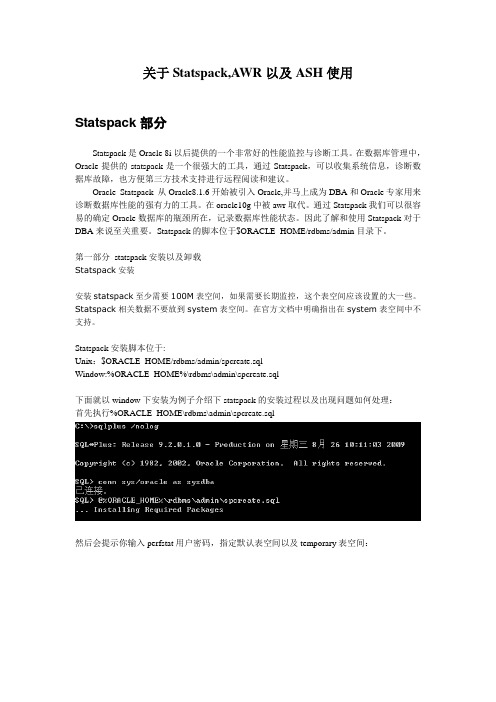
Statspack安装脚本位于:Unix:$ORACLE_HOME/rdbms/admin/spcreate.sqlWindow:%ORACLE_HOME%\rdbms\admin\spcreate.sql下面就以window下安装为例子介绍下statspack的安装过程以及出现问题如何处理:首先执行%ORACLE_HOME\rdbms\admin\spcreate.sql然后会提示你输入perfstat用户密码,指定默认表空间以及temporary表空间:下面白色部分已经明确指出system表空间不支持。
检查当前目录下spcusr.lis,spctab.lis和spcpkg.lis这三个文件,这三个文件记录安装过程所有记录,如果有问题可以使用%ORACLE_HOME\rdbms\admin\spdrop.sql删除后再重新安装1. spcusr -> 建用户和授予权限2. spctab -> 建表同义词索引等记录3. spcpkg -> 建包记录在unix下也可以用batch模式安装:SQL> connect / as sysdbaSQL> define default_tablespace='perfstat'SQL> define temporary_tablespace='temp'SQL> define perfstat_password='perfstat'SQL> @?/rdbms/admin/spcreate.sqlSQL> undefine perfstat_passwordstatspack的卸载Statspack卸载脚本位于:Unix:$ORACLE_HOME/rdbms/admin/spdrop.sqlWindow:%ORACLE_HOME%\rdbms\admin\spdrop.sql下面以window下卸载为例子介绍下statspack的卸载:执行%ORACLE_HOME\rdbms\admin\spcreate.sql执行完毕后,它会提示你去检查当前目录下的spdusr.lis和spdtab.lis文件Statspack数据清理(清理全部数据)当存放statspack的表空间快满的时候需要我们去清理表空间,操作如下:Statspack清理脚本位于:Unix:$ORACLE_HOME/rdbms/admin/sptrunc.sqlWindow:%ORACLE_HOME%\rdbms\admin\ sptrunc.sql下面以window下清理为例子介绍下statspack数据清理:执行%ORACLE_HOME\rdbms\admin\ sptrunc.sqlStatspack数据清理(清理指定数据)当存放statspack的表空间快满的时候需要我们去清理表空间,操作如下:Statspack清理脚本位于:Unix:$ORACLE_HOME/rdbms/admin/sppurge.sqlWindow:%ORACLE_HOME%\rdbms\admin\ sppurge.sql下面以window下清理为例子介绍下statspack数据清理:执行%ORACLE_HOME\rdbms\admin\ sppurge.sql下面会列出能清理的相关时间收集的统计信息:下面提示你输入开始和结束时间点,我们上面的是6,7,8,9,这四个数字代表相应时间,我执行这四次操作是连续做的,时间看起来不明显。
oracle11.2.0.3安装笔记
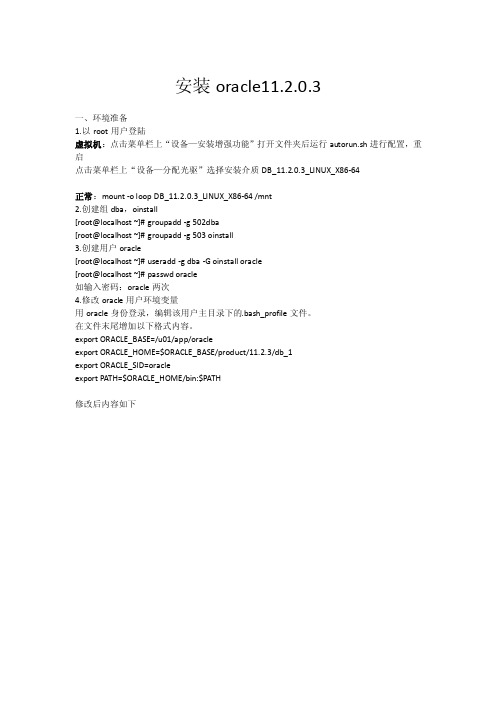
安装oracle11.2.0.3一、环境准备1.以root用户登陆虚拟机:点击菜单栏上“设备—安装增强功能”打开文件夹后运行autorun.sh进行配置,重启点击菜单栏上“设备—分配光驱”选择安装介质DB_11.2.0.3_LINUX_X86-64正常:mount -o loop DB_11.2.0.3_LINUX_X86-64 /mnt2.创建组dba,oinstall[root@localhost ~]# groupadd -g 502dba[root@localhost ~]# groupadd -g 503 oinstall3.创建用户oracle[root@localhost ~]# useradd -g dba -G oinstall oracle[root@localhost ~]# passwd oracle如输入密码:oracle两次4.修改oracle用户环境变量用oracle身份登录,编辑该用户主目录下的.bash_profile文件。
在文件末尾增加以下格式内容。
export ORACLE_BASE=/u01/app/oracleexport ORACLE_HOME=$ORACLE_BASE/product/11.2.3/db_1export ORACLE_SID=oracleexport PATH=$ORACLE_HOME/bin:$PATH修改后内容如下5.创建目录/u01/app/oracle[root@localhost /]# mkdir -p /u01/app/oracle[root@localhost /]# chmod -R 775 /u01/app[root@localhost /]# chown -R oracle:oinstall /u01/app[root@localhost /]#6.执行runInstaller登陆oracle用户,执行/media/20110930_135650/runInstaller会出现以下内容解决办法是:切换到root用户,执行xhost +命令然后再重新回到oracle用户执行/media/20110930_135650/runInstaller 结果如下二、安装oracle以启动OUI开始为第一步1.邮件地址或oracle支持设置。
Oracle Sun Blade Storage Module M2 首次安装、启动和配置指南说明书
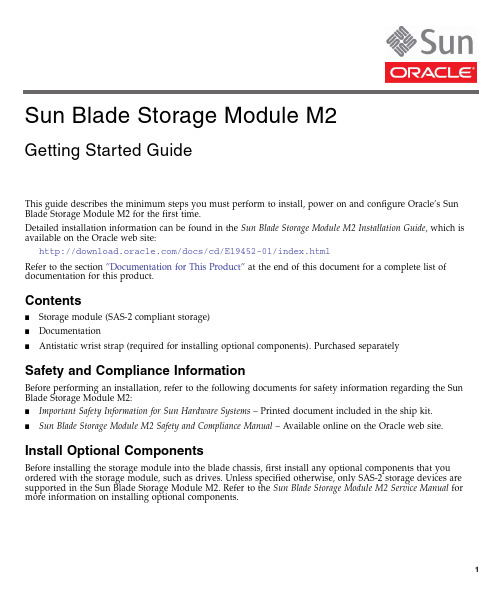
This guide describes the minimum steps you must perform to install,power on and configure Oracle’s Sun Blade Storage Module M2for the first time.Detailed installation information can be found in the Sun Blade Storage Module M2Installation Guide ,which isavailable on the Oracle web site:/docs/cd/E19452-01/index.htmlRefer to the section ”Documentation for This Product”at the end of this document for a complete list of documentation for this product.Contents■Storage module (SAS-2compliant storage)■Documentation■Antistatic wrist strap (required for installing optional components).Purchased separatelySafety and Compliance InformationBefore performing an installation,refer to the following documents for safety information regarding the Sun Blade Storage Module M2:■Important Safety Information for Sun Hardware Systems –Printed document included in the ship kit.■Sun Blade Storage Module M2Safety and Compliance Manual –Available online on the Oracle web site.Install Optional ComponentsBefore installing the storagemodule into the blade chassis,first install any optional components that you ordered with the storage module,such as drives.Unless specified otherwise,only SAS-2storage devices are supported in the Sun Blade Storage Module M2.Refer to the Sun Blade Storage Module M2Service Manual formore information on installing optional components.Sun Blade Storage Module M2Getting Started GuideConfirm a Supported Hardware EnvironmentThe Sun Blade Storage Module M2supports SAS-2.To achieve maximum 6Gb/s performance with SAS-2,all components that make up the chassis SAS-2fabric (server modules,REMs,NEMs,chassis)must support SAS-2.Note –Servers with a SAS-1REM can access their own internal disks and the network portion of the NEM,but cannot access the chassis SAS-2fabric.SAS-1disk blades are not supported in the chassis SAS-2fabric.At the release of this document,the Sun Blade Storage Module M2is supported in the following hardware environment (refer to the storage module documentation on the Oracle web site for up-to-date information).Note –The Sun Blade T6320and T6340server modules are supported for use in the chassis SAS-2environment with a SAS-2REM,but are limited to a maximum 3Gb/s data transfer speed.For an updated list of all compatible hardware that can be used with the storage module,refer to the Sun Blade Storage Module M2Product Notes.Supported Sun BladeServer Modules Supported SAS-2RAID Expansion Modules (REM)Supported Blade ChassisSupported SAS-2Network Express Modules (NEM)Sun Blade T6320(SPARC),with systemfirmware 7.2.8or later.See note below .•Sun Storage 6Gb SAS REM HBA (SGX-SAS6-REM-Z)•Sun Blade 6000Modular System with PCIe 2.0midplane (minimum CMM ILOM firmware required is 3.0.10.15a,included in chassis softwarerelease 3.2.1)•Sun Blade 6000Virtualized Multi-Fabric 10GbE M2NEM Sun Blade T6340(SPARC),with system firmware 7.2.8or later.See note below.•Sun Storage 6Gb SAS REM HBA (SGX-SAS6-REM-Z)•Sun Blade 6000ModularSystem with PCIe 2.0midplane(minimum CMM ILOMfirmware required is 3.0.10.15a,included in chassis softwarerelease 3.2.1)•Sun Blade 6000Virtualized Multi-Fabric 10GbE M2NEM Sun Blade X6270M2(x86)•Sun Storage 6Gb SAS REM RAID HBA (SGX-SAS6-R-REM-Z)•Sun Blade 6000ModularSystem with PCIe 2.0midplane(minimum CMM ILOMfirmware required is 3.0.10.15a,included in chassis softwarerelease 3.2.1)•Sun Blade 6000Virtualized Multi-Fabric 10GbE M2NEM •Sun Storage 6Gb SAS REM HBA (SGX-SAS6-REM-Z)•Sun Blade 6000ModularSystem with PCIe 2.0midplane(minimum CMM ILOMfirmware required is 3.0.10.15b,included in chassis softwarerelease 3.2.2)▼Insert the Storage Module Into the Blade Chassis1.Ensure that your hardware environment supports SAS-2,as described in the previous section.2.If not already done,power on the blade chassis.3.Find a free blade chassis slot and remove the slot filler panel.To maintain proper cooling,install the storage module within 60seconds of removing the filler panel.4.Insert the storage module into the chassis as shown in the following illustration.The storage module can be installed in any free chassis slot.Chassis power will immediately be applied to the storage module.The following power-on sequence will take place:■The storage module green activity LED will blink and then remain steady on as the module is initially discovered by the Chassis Monitoring Module (CMM).■Full discovery of the storage module resources by the CMM can take 3to 5minutes.After full discovery,an “added to SAS-2fabric”event will be added in the CMM Integrated Lights Out Manager (ILOM)event log for the storage module and each of its drives.At this point,you can assign storage module resources to hosts as described in the ”Assign Storage Module Resources”section.Note –A host server module’s REM will not be able to see storage module resources until those resources are assigned on a per-host basis using the Sun Blade Zone Manager feature of the CMM ILOM.Check Storage Module StatusCheck to ensure the storage module is powered-on and that there are no faults.The green storage module activity and disk drive activity LEDs (shown below)should be steady on.Figure Legend1Insert into empty slot.2Push in to engage backplane connection.3Rotate ejectors until they snap into place.4Storage module should be flush withchassis.If you see an amber fault LED,do the following:■For a module fault,try removing and reinstalling the storage module.■For a single disk fault,try removing and reinstalling the disk drive.■For a multiple disk fault,try removing and reinstalling the storage module.Additional event information can be obtained through the CMM ILOM.For more on troubleshooting and servicing your storage module,refer to the Sun Blade Storage Module M2Administrator Guide and the Sun Blade Storage Module M2Service Manual .Upgrade FirmwareOracle recommends that you upgrade your chassis CMM ILOM,SAS-2NEMs,server module REMs,and storage module firmware to the latest version.This will help ensure compatibility with all installed components.To determine the firmware version of chassis devices,login to the CMM ILOM and view the CMM components.For a REM,launch the REM’s BIOS configuration utility available during server boot.For Sun Blade systems,firmware is available as part of a software release for the individual blade product and is posted on the Oracle site (/goto/blades ).More about upgrading storage module firmware can be found in the Sun Blade Storage Module M2Administrator Guide .▼Assign Storage Module ResourcesBefore a host server module can see storage module resources,you must run the Sun Blade Zone Manager from the CMM ILOM to assign storage resources on a per-host basis (this process is also called zoning ).Storage module resources can be assigned to either one host,or divided among several hosts.The blade chassis SAS-2fabric must be fully established and discovered by the CMM.This means that the components that make up the SAS-2fabric (SAS-2NEMs,server modules with SAS-2REMs,and storage modules)must be online with no faults.CMM discovery of storage modules and devices in the chassis can take three to five minutes.Figure Legend1Locate LED button.2Not used.3Module fault LED.4Module status LED.5Disk drive activity LED.6Disk drive fault/locate LED.7Disk drive ready-to-removeLED.1.Log in to the chassis CMM ILOM.You can use either the CMM ILOM web interface(described here),or the CMM ILOM CLI.Both methods are described in the Sun Blade Storage Module M2Administration Guide.2.Select CMM from the left pane and then select the Storage tab.3.Check the Enabled box[see1]for the Sun Blade Zone Manager and then click Save.4.Assign storage module resources to hosts using either the Quick(template-based)or Detailed(customized)setup option[see2]of the Sun Blade Zone Manager.The Sun Blade Zone Manager provides a graphical configuration of the chassis with supported servers and storage modules.Each participating host has its own assignments(called a zoned group).During the assignment process,each group(host and assigned storage)is assigned a unique color[see3].For detailed information on assigning storage module resources to hosts,refer to the Sun Blade Storage Module M2 Administration Guide.Note–Host-to-storage assignments are not complete until you click Save and all affected devices display a green check mark.The configuration window must remain open until this process completes.5.Log out of the CMM ILOM and access the console of a host to which you have assigned storage moduleresources.6.Confirm that assigned storage module resources are discovered and available to the host(a rescan usingthe REM software or a server reboot might be required).If your chassis has two SAS-2NEMs,storage module SAS-2drives will support dual path.7.Create your disk volumes using utilities supported by your server’s REM.For more information on creating volumes,refer to your REM documentation.Install the Operating System and Storage Management SoftwareFor a list of supported operating systems,see the Sun Blade Storage Module M2Installation Guide.For more about storage management options(such as RAID support and storage module monitoring),see the Sun Blade Storage Module M2Administration Guide and your REM documentation.Documentation for This ProductThe following table lists the documentation in the approximate order of the tasks that you might perform when installing a new system.Review the tasks on the left,then refer to the corresponding documentation on the right.You can find the most up-to-date versions of all the documents on the Oracle web site: /technetwork/documentation/oracle-blade-sys-190001.htmlFor translated versions of the documentation,go to the web site and select your language to get the documentation set in your language.Task Document Part Number Review safety information.Safety and Compliance Manual821-0920Important Safety Information for Sun Hardware Systems821-1590 Review any known issues and workarounds.Sun Blade Storage Module M2Product Notes821-0911Sun Blade6000Modular System Product Notes820-0055Sun Blade Storage Module M2Installation Guide821-0913 Insert and power-on the storage module in thechassis for the first time.Sun Blade Storage Module M2Administration Guide821-0914 Manage storage module storage,including host-to-storage assignment,RAID support,troubleshooting,and firmware upgrades.Sun Blade Storage Module M2Service Manual821-0912 Install optional storage module components.Remove and replace hardware components.Diagnose and isolate storage module problems.Copyright©2010, 2011,Oracle and/or its affiliates.All rights reserved.Copyright©2010, 2011,Oracle et/ou ses affiliés.Tous droits réservés.。
Oracle 性能包的安装和调试
Statspack Guide/***必须以用户,或者有权限的用户登陆**internal sysdba***/SQL>conn internal/***检查上相应的位置是否存在需要的工具脚本**server StatsPack***/SQL> host ls /data/oracle/app/oracle/product/8.1.7/rdbms/admin/s*/data/oracle/app/oracle/product/8.1.7/rdbms/admin/shrept.lst/data/oracle/app/oracle/product/8.1.7/rdbms/admin/spauto.sql/data/oracle/app/oracle/product/8.1.7/rdbms/admin/spcpkg.sql/data/oracle/app/oracle/product/8.1.7/rdbms/admin/spcreate.sql/data/oracle/app/oracle/product/8.1.7/rdbms/admin/spctab.sql/data/oracle/app/oracle/product/8.1.7/rdbms/admin/spcusr.sql/data/oracle/app/oracle/product/8.1.7/rdbms/admin/spdoc.txt/data/oracle/app/oracle/product/8.1.7/rdbms/admin/spdrop.sql/data/oracle/app/oracle/product/8.1.7/rdbms/admin/spdtab.sql/data/oracle/app/oracle/product/8.1.7/rdbms/admin/spdusr.sql/data/oracle/app/oracle/product/8.1.7/rdbms/admin/sppurge.sql/data/oracle/app/oracle/product/8.1.7/rdbms/admin/spreport.sql/data/oracle/app/oracle/product/8.1.7/rdbms/admin/sptrunc.sql/data/oracle/app/oracle/product/8.1.7/rdbms/admin/spuexp.par/data/oracle/app/oracle/product/8.1.7/rdbms/admin/spup816.sql/data/oracle/app/oracle/product/8.1.7/rdbms/admin/sql.bsq/data/oracle/app/oracle/product/8.1.7/rdbms/admin/standard.sql/***检查磁盘空间和数据文件的位置,以便决定建立表空间中数据文件的位置**Perfstat***/SQL> desc dba_data_files;Name Null? TypePage: 1Statspack Guide----------------------------------------- -------- ----------------------------FILE_NAME VARCHAR2(513)FILE_ID NUMBERTABLESPACE_NAME VARCHAR2(30)BYTES NUMBERBLOCKS NUMBERSTATUS VARCHAR2(9)RELATIVE_FNO NUMBERAUTOEXTENSIBLE VARCHAR2(3)MAXBYTES NUMBERMAXBLOCKS NUMBERINCREMENT_BY NUMBERUSER_BYTES NUMBERUSER_BLOCKS NUMBERSQL> select file_name from dba_data_files;FILE_NAME--------------------------------------------------------------------------------/data/oracle/app/oracle/product/8.1.7/oradata/o817/system01.dbf/data/oracle/app/oracle/product/8.1.7/oradata/o817/tools01.dbf/data/oracle/app/oracle/product/8.1.7/oradata/o817/rbs01.dbf/data/oracle/app/oracle/product/8.1.7/oradata/o817/temp01.dbf/data/oracle/app/oracle/product/8.1.7/oradata/o817/users01.dbf/data/oracle/app/oracle/product/8.1.7/oradata/o817/indx01.dbf6 rows selected./*****Perfstat StatsPack Perfstat default tablespace创建表空间,在安装工具时需要指定这个表空间为用户的***/SQL> create tablespace PERFSTAT2 datafile '/data/oracle/app/oracle/product/8.1.7/oradata/o817/perfstat01.dbf' size 100M3 AUTOEXTEND ON4 NEXT 5M MAXSIZE 150M;Page: 2Statspack GuideTablespace created.SQL>SQL> alter tablespace perfstat2 default storage(3 INITIAL 50K4 NEXT 50K5 MINEXTENTS 26 MAXEXTENTS 507 PCTINCREASE 0);Tablespace altered.SQL>SQL> host ls $ORACLE_HOME/rdbms/admin/spcreate.sql/data/oracle/app/oracle/product/8.1.7/rdbms/admin/spcreate.sql/***运行来创建工具所需的用户和所有对象,如果创建成功,则出现下列信息:**spcreate StatsPack***/SQL> @/data/oracle/app/oracle/product/8.1.7/rdbms/admin/spcreateCreating Package STATSPACK...Package created.No errors.Creating Package Body STATSPACK...Package body created.No errors.NOTE:SPCPKG complete. Please check spcpkg.lis for any errors.SQL> host grep error *.lisspcpkg.lis:No errors.spcpkg.lis:No errors.spcpkg.lis:SPCPKG complete. Please check spcpkg.lis for any errors.Page: 3Statspack Guidespctab.lis:SPCTAB complete. Please check spctab.lis for any errors.spcusr.lis:SPCUSR complete. Please check spcusr.lis for any errors.spdtab.lis:SPDTAB complete. Please check spdtab.lis for any errors.spdusr.lis:SPDUSR complete. Please check spdusr.lis for any errors.SQL> host grep ora- *.lisSQL>/***如果出现错误,则以身份建立连接**internal然后执行脚本来删除所有刚才建立的用户和该用户的对象**spdrop perfstat然后在重新运行重新安装**spcreate***/SQL>conn internalSQL> @/data/oracle/app/oracle/product/8.1.7/rdbms/admin/spdropSQL> @/data/oracle/app/oracle/product/8.1.7/rdbms/admin/spcreate/***测试是否安装成功:(如果是环境,下面的测试必须连接到需要测试的instance上)***OPS***/SQL> connect perfstat/perfstatConnected.得到快照(每次执行就得到当时的系统性能信息的快照,并且从开始给自动编号)SQL> execute statspack.snap;--1snapPL/SQL procedure successfully completed.SQL> execute statspack.snap;PL/SQL procedure successfully completed.SQL>@/data/oracle/app/oracle/product/8.1.7/rdbms/admin/spreport/***运行脚本来取得两个时间点快照之间的性能报告,运行时会提示输入起始和结束的快照编号,如:***spreport***Specify the Begin and End Snapshot Ids***~~~~~~~~~~~~~~~~~~~~~~~~~~~~~~~~~~~~~~Page: 4Statspack GuideEnter value for begin_snap: 1Begin Snapshot Id specified: 1Enter value for end_snap: 3End Snapshot Id specified: 3Specify the Report Name~~~~~~~~~~~~~~~~~~~~~~~The default report file name is sp_1_3. To use this name,press <return> to continue, otherwise enter an alternative.Enter value for report_name:(另外,为了收集信息,需要在中设置=init.ora timed_statistics true这个参数可以动态的改变:SQL> conn internalConnected.SQL> alter system set timed_statistics=true;System altered.SQL>)***/SQL> host lsapp sp_1_2.lst sp_1_3.lst sqlnet.log test0926.lstSQL>/******也可以用批模式运行报表:connect perfstat/perfstatdefine begin_snap=1define end_snap=2define report_name=batch_run@/data/oracle/app/oracle/product/8.1.7/rdbms/admin/spreport该模式产生的报表名为batch_run.lst***//******自动收集系统信息:Page: 5Statspack Guide(建立文件)UNIX OS: cron crontabNT OS: at命令(需要设置,比如):job_queue_processes>0job_queue_processes=1ORACLE DBMS_JOB***/在中加入一个执行计划:oracleexecute dbms_job.run(<job number>);改变执行计划执行的时间间隔:execute dbms_job.interval(1,'SYSDATE+(1/48)') --每半个小时执行一次每小时(分钟)执行一次1/2460每半小时(分钟)执行一次1/4830每分钟执行一次1/144101/2885每分钟执行一次例如:改变的执行频率:(修改为每分钟执行一次)job30SQL> execute dbms_job.interval(1,'SYSDATE+(1/48)');PL/SQL procedure successfully completed.SQL>查看当前用户所有的:jobSQL> SELECT * FROM USER_JOBS;SQL>查看所有已经收集的快照:SQL> SELECT NAME,SNAP_ID,TO_CHAR(SNAP_TIME,'dd Mon YYYY HH24:mi:ss')2 from stats$snapshot, v$database3 order by snap_id;NAME SNAP_ID TO_CHAR(SNAP_TIME,'DDMONYYYYHH--------- ------- ------------------------------月O817 2 26 9 2002 14:02:17月O817 3 26 9 2002 14:02:29月O817 4 26 9 2002 15:18:43SQL>删除一个执行计划:execute dbms_job.remove(<job number>);Page: 6Statspack Guide/***使用的一个例子是脚本(自动收集系统信息,默认是每小时收集一次)***DBMS_JOB spauto一般,对于业务,建议在典型业务时间点做的收集工作就好了***OLTP snap真的使用,恐怕会给系统造成压力***job收集时间的挑选:比如说每天的上午点到点会出现性能问题,那么就可以根据情况在这段时间更频繁的获取快照*** 1011***/例如:SQL> @/data/oracle/app/oracle/product/8.1.7/rdbms/admin/spautoPL/SQL procedure successfully completed.Job number for automated statistics collection for this instance~~~~~~~~~~~~~~~~~~~~~~~~~~~~~~~~~~~~~~~~~~~~~~~~~~~~~~~~~~~~~~~~Note that this job number is needed when modifying or removingthe job:JOBNO----------1Job queue process~~~~~~~~~~~~~~~~~Below is the current setting of the job_queue_processes init.oraparameter - the value for this parameter must be greaterthan 0 to use automatic statistics gathering:NAME_COL_PLUS_SHOW_PARAM TYPE---------------------------------------------------------------- -------VALUE_COL_PLUS_SHOW_PARAM------------------------------------------------------------------------------job_queue_processes integer3Next scheduled run~~~~~~~~~~~~~~~~~~The next scheduled run for this job is:JOB NEXT_DATE NEXT_SEC---------- --------- ----------------1 26-SEP-02 18:00:00SQL>Page: 7Statspack Guide/***查看快照StatsPackSQL> select * from stats$snapshot;由于太多的旧的快照给系统造成存储(和性能)压力,所以需要定期的移走旧的快照SQL> delete from stats$snapshot2 where snap_id <2;1 row deleted.这样做也可以(自动级连)删除对应的的收集信息,演示如下:sqlSQL> select count(*) from stats$sql_summary;COUNT(*)----------246SQL> delete from stats$snapshot2 where snap_id <2;1 row deleted.SQL> select count(*) from stats$sql_summary;COUNT(*)----------(删除后,相应的语句的记录也清除了)164snap_id sqlSQL>***/收集信息(个人认为,不做也罢,或者根据具体情况决定)/***Optimizer statistics on the PERFSTAT schemaexecute dbms_utility.analyze_schema('PERFSTAT','COMPUTE');execute dbms_stats.gather_schema_stats('PERFSTAT');***/Page: 8Statspack Guide/***改变快照级别()和门限()level threshold一、主要有三种级别(、、):0510level 0 :一般的统计信息:除了的统计信息以外,还包括了语句的收集,会被放在level 5 level 0sql sql stats$sql_summary;除了的统计信息以外,增加了子锁的统计信息,子锁的信息会放在level 10 : level 5stats$latch_children注意:一般不建议使用,它会对系统性能造成很大影响,这个级别需要在level 10oraclesupport指导下进行。
swingbench OracleRAC11g使用方法图解
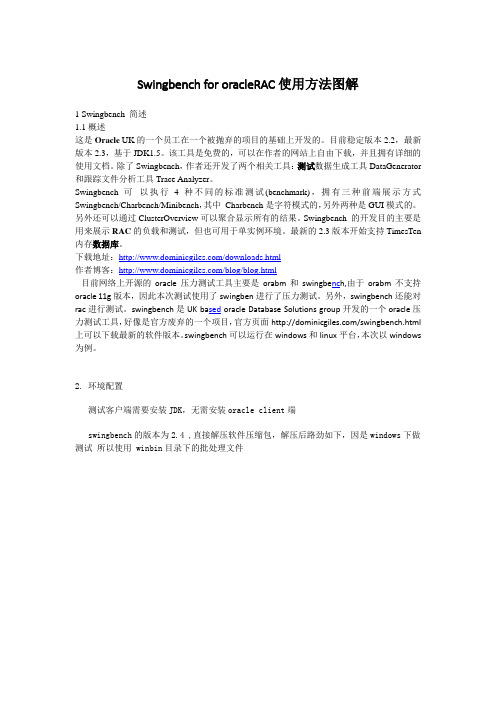
Swingbench for oracleRAC使用方法图解1 Swingbench 简述1.1 概述这是Oracle UK的一个员工在一个被抛弃的项目的基础上开发的。
目前稳定版本2.2,最新版本2.3,基于JDK1.5。
该工具是免费的,可以在作者的网站上自由下载,并且拥有详细的使用文档。
除了Swingbench,作者还开发了两个相关工具:测试数据生成工具DataGenerator 和跟踪文件分析工具Trace Analyzer。
Swingbench 可以执行4种不同的标准测试(benchmark),拥有三种前端展示方式Swingbench/Charbench/Minibench,其中Charbench是字符模式的,另外两种是GUI模式的。
另外还可以通过ClusterOverview可以聚合显示所有的结果。
Swingbench 的开发目的主要是用来展示RAC的负载和测试,但也可用于单实例环境。
最新的2.3版本开始支持TimesTen 内存数据库。
下载地址:/downloads.html作者博客:/blog/blog.html目前网络上开源的oracle压力测试工具主要是orabm和swingbe nc h,由于orabm不支持oracle 11g版本,因此本次测试使用了swingben进行了压力测试。
另外,swingbench还能对rac进行测试。
swingbench是UK ba sed oracle Database Solutions group开发的一个oracle压力测试工具,好像是官方废弃的一个项目,官方页面/swingbench.html 上可以下载最新的软件版本。
swingbench可以运行在windows和linux平台,本次以windows 为例。
2. 环境配置测试客户端需要安装JDK,无需安装oracle client端swingbench的版本为2.4 ,直接解压软件压缩包,解压后路劲如下,因是windows下做测试所以使用 winbin目录下的批处理文件主要使用到的是如下四个bat文件主要的bat文件作用如下:1、bmcompare 用来对比测试结果2、ccwizard 是以CC种子为模板创建的运行测试数据3、clusteroverview 用来启动集群的压力测试,并查看测试结果4、coordinator 用来启动协调服务器5、minibench 用来注册节点到协调服务器6、oewizard 是以OE种子为模板创建运行测试数据7、shwizard 是以SH种子为模板创建运行测试数据8、swingbench 执行基准测试3.测试3.1 创建测试数据swingbench不使用客户数据,而是按自己的规则创建测试数据,(生成的测试数据只能使用一次,测试过后需要再次测试的话,需要重新创建测试数据,这点做的不好)到目标目录下运行oewizard.bat批处理文件,也可以在目录下双机oewizard.bat批处理文件运行会看到如下界面下一步下一步,输入你需要测试的数据库的 //ip/sid 以及sys用户的密码下一步,前三项不需要修改,为swingbench自动创建的schema,只需要修改datafile的存放路径即可。
oracle-11.2.0.3 WIN RAC Bundle 29 安装手册

数据库补丁安装发布日期:2014-02-06目录目录 (3)1.Patch 29安装 (4)安装前重点检查: (4)安装前备份RAC安装目录: (4)1.操作系统版本:Windows server 2008 64bit (4)2.介质准备:p1*******_112030_MSWIN-x86-64.zip (4)3.OPatch工具准备 (4)4.PATCH 29安装 (4)2.Patch 29 补丁回退以及异常处理方案 (6)1、回退db补丁 (6)2、回退grid补丁 (7)3、PSU注册SQL回退 (7)3.安装过程及输出示例 (8)1.Patch 29安装安装前重点检查:确认RAC安装目录剩余空间大于25G,否则打PATCH将失败。
安装前备份RAC安装目录:如果安装失败,需要回退。
此时回退将不会回退到之前已安装Patch等补丁的状态。
回退完成后,将无任何的补丁。
因此打Patch前需要对RAC安装目录进行备份。
1.操作系统版本:Windows server 2008 64bit2.介质准备:p1*******_112030_MSWIN-x86-64.zip3.OPatch工具准备在升级PSU时,需要使用最新版本的OPatch工具,版本为11.2.0.3.0.6即可。
4.PATCH 29安装对于已有数据库的系统,需要先停止数据库和数据库服务,先节点一,再节点二:更新oracle目录,先节点一,再节点二:1)C:\Oracle11.2.3\18075406为PATCH安装介质解压后所在的目录;2)C:\app\SYS-PF-Admin\product\11.2.0\grid为grid软件安装目录;3)C:\app\SYS-PF-Admin\product\11.2.0\dbhome_1为db软件安装目录;安装完两节点验证启动数据库:2.Patch 29 补丁回退以及异常处理方案1、回退db补丁如果需要全部回退,则所有节点执行。
- 1、下载文档前请自行甄别文档内容的完整性,平台不提供额外的编辑、内容补充、找答案等附加服务。
- 2、"仅部分预览"的文档,不可在线预览部分如存在完整性等问题,可反馈申请退款(可完整预览的文档不适用该条件!)。
- 3、如文档侵犯您的权益,请联系客服反馈,我们会尽快为您处理(人工客服工作时间:9:00-18:30)。
Oracle性能分析工具Statpack安装使用详解文件版本:V1.0文件编号:发布日期:2015-03-05编制:程万超审核:批准:修订记录:修订版本号修订人修订日期修订描述V1.0程万超2014-12-17新建简介Oracle Statspack 是用来诊断数据库性能的强有力的工具,通过Statspack 我们很容易的确定Oracle的所有瓶颈,记录数据库的性能状态。
安装步骤一、Statpack原理:1.运行oracle自带脚本,生成一系列的统计表。
2.生成快照,采样。
3.根据快照生成报告。
二、安装准备1.检查部分参数值--job_queue_process:取值范围为0到1000,总共可创建多少个job进程,为了能够建立自动任务,执行数据收集,此参数大于零alter system set job_queue_processess=6;---timed_statistics,设置为true,使收集的时间信息存储在V$sessstats和V$sysstats等动态性能视图中,但会消耗资源,可以在使用Satspack之前设为true,采样过后,把该参数动态修改为false.alter system set timed_statistics=true;2. 脚本使用此功能,需要运行oracle自带脚本,在数据库中生成一系列的表和视图,用于收集各种信息。
脚本位于%oracle_home%\rdbms\admin(224数据库的该目录为/oracle/app/product/10.2.0/Db_1/rdbms/admin)目录下,oracle816下是一组以stat开头的文件,以后的版本是一组以sp开头的文件。
三、安装1.shell中切换到oracle用户:su - oracle2.以sysdba身份登录sqlplus。
9i及以后版本,可以用sys用户以sysdba身份登录:sqlplus / as sysdba(最好转到脚本所有目录%oracle_home%\rdbms\admin,便于执行脚本)3.创建表空间,用于保存采样数据create tablespace perfstat datafile '/oradata/xdgl/perfstat.dbf(表空间存储路径)' size 100m;Statspack的报表数据还是相当占空间的,特别是在多次连续采样的情况下,所以不能太小,最小100M,否则创建对象会失败。
查询表空间:select file_name from dba_data_files;4.运行脚本,安装statspack在sqlplus中执行命令:@%oracle_home%\rdbms\admin\spcreate.sql--脚本会创建用户perfstat,需要指定此用户密码。
输入perfstat_password 的值: perfstat--需要输入用户perfstat使用的表空间:指定新建的表空间即可。
输入default_tablespace 的值: perfstat--需要指定用户perfstat使用的临时表空间。
输入temporary_tablespace 的值: tmp10--安装成功,可以看到如下信息:Creating Package STATSPACK...程序包已创建。
没有错误。
Creating Package Body STATSPACK...程序包体已创建。
没有错误。
NOTE:SPCPKG complete. Please check spcpkg.lis for any errors.--查看错误信息NT下:host find "ORA-" *.LIShost find "err-" *.LISUnix下:grep ORA- *.lisgrep err *.lis如果出现错误,可以运行脚本删除相关内容:@%oracle_home%\rdbms\admin\spdrop.sql (注意:也要在sysdba下运行脚本删除相关对象)然后再重新运行脚本安装。
这个安装过程创建了一系列的表,用于存入采样数据。
查看新建表:select dt.table_name from dba_tables dt where dt.owner='PERFSTAT'conn perfstat/perfstatselect table_name from user_tables;安装完成后,系统会自动切换到perfstat用户下。
四、测试statpack运行statspack.snap可以产生系统快照,运行两次,产生两次快照。
SQL> execute statspack.snap;PL/SQL 过程已成功完成。
SQL> execute statspack.snap;PL/SQL 过程已成功完成。
然后执行脚本@%oracle_home%\rdbms\admin\spreport.sql就可以生成基于两个时间点的报告。
--需要输入起始快照ID和结束快照ID,以及报告文件名。
(快照ID必须存在)Specify the Begin and End Snapshot Ids~~~~~~~~~~~~~~~~~~~~~~~~~~~~~~~~~~~~~~输入begin_snap 的值: 1Begin Snapshot Id specified: 1输入end_snap 的值: 13End Snapshot Id specified: 13输入report_name 的值: e:\s1report.txt--查看产生的快照select t.snap_id,to_char(t.snap_time,'yyyy-mm-dd hh:mi:ss') as S_Time,t.snapshot_exec_time_s from STATS$SNAPSHOT t;五、规划自动任务安装之后,我们就可以设置定时任务,定时采样,收集数据。
使用脚本spauto.sql来定义自动任务。
spauto.sql在关键内容:beginselect instance_number into :instno from v$instance;dbms_job.submit(:jobno, 'statspack.snap;', trunc(sysdate+1/24,'HH'), 'trunc(SYSDA TE+1/24,''HH'')', TRUE, :instno);commit;end;执行spquto,就建立了一个每小时执行一次的数据收集计划。
这个Job任务定义了收集数据(执行statspack.snap)的时间间隔为1小时:一天24小时,1440分钟-->1/24,'HH' 每小时一次1/48,'MI' 每半小时一次1/144,'MI' 每10分钟一次1/288,'MI' 每5分钟一次关于采样间隔,通常建议1小时,如有特殊需要,可以设置更短,如半小时。
但不推荐更短。
因为statpack的执行本身需要消息资源,太短的采样对系统的性能会产生较大的影响(甚至会使statspack的执行出现在采样数据中)六.生成报告同测试一样用perfstat用户连接执行脚本%oracle_home%\rdbms\admin\spreport.sql,输入起始快照ID和结束快照ID,以及报告文件名,生成statspack报告。
注:一次statspack报告不能跨越一次停机,但是之前或之后的连续区间,收集的信息依然有效,你可以选择之前或之后的采样生成report.如果中间停过机,会收到以下错误信息:第 1 行出现错误:ORA-20200: The instance was shutdown between snapshots 1 and 31ORA-06512: 在line 48七、后续处理1,移除定时任务当你完成一个采样报告,你应该及时移除这个job任务。
遗漏一个无人照顾的job是非常危险的……--查看任务并移除任务select job, next_date, next_sec, what from user_jobs;execute dbms_job.remove('ID')2,删除历史数据1),删除采样数据只要删除stat$snapshot数据表中的相应数据,其他表中的数据会相应的级连删除。
select max(snap_id) from stats$snapshot;delete from stats$snapshot where snap_id<=166;删除过程中,你可以看到所有相关的表都被锁定了。
select a.object_id, a.oracle_username, b.object_namefrom v$locked_object a,dba_objects bwhere a.object_id=b.object_id2),truncate统计信息表:使用脚本sptrunc.sql删除所有的采样数据但保留statspack的库结构。
如果有大量数据,直接delete采样数据是非常缓慢的。
使用脚本sptrunc.sql可以快速的删除所有统计信息。
查看脚本,可以看出是用truncate table截掉所有相关的表中的内容。
truncate table STATS$FILESTA TXS;truncate table STATS$TEMPSTA TXS;...delete from STATS$DA TABASE_INSTANCE;3),删除statspack所有数据和各种对象:使用脚本spdrop.sql。
全部删除,不留痕迹!但有表空间在~~八、调整statspack的收集门限statspack有两种类型的收集选项level--级别:控制收集数据的类型threshold--门限:设置收集的数据阀值都保存在表stats$statspack_parameter中1,级别(level)--有三种快照级别,默认值为5--查看当前level级别:select snap_level from stats$statspack_parameter;1)level=0:一般性能统计。
包括等待事件,系统事件,系统统计,回滚段统计,行缓存,SGA,会话,锁,缓冲池统计等等。
2)level=5:在level0的基础上,增加SQL语句的收集。
SQL语句收集结果记录在ststs$sql_summary表中。