oracle rac dbca 图形界面安装
oracle dbca安装实例

oracle dbca安装实例在Oracle数据库中,DBCA(Database Configuration Assistant)是一个强大的工具,用于创建和管理数据库实例。
下面我将从安装Oracle数据库开始,逐步介绍如何使用DBCA来创建数据库实例。
首先,你需要下载并安装Oracle数据库软件。
安装过程中会有一个选项来安装数据库创建助手(DBCA),请确保你选择了这个选项。
安装完成后,你可以通过命令行或图形界面启动DBCA。
启动DBCA后,你将看到一个向导,引导你完成创建数据库实例的过程。
首先,你需要选择创建数据库的方式,包括创建数据库、删除数据库、管理模板等。
在这里,我们选择创建数据库。
接下来,你需要选择创建数据库的类型,包括普通数据库、数据仓库等。
根据你的需求进行选择。
然后,你需要指定数据库的命名和标识信息,包括数据库全局数据库名、数据库唯一名称等。
在这一步,你还可以选择是否创建一个容器数据库。
接着,你需要配置数据库的管理选项,包括数据库的字符集、国家字符集等。
这些选项将影响数据库的全局语言和字符处理能力。
在下一步中,你需要指定数据库的存储选项,包括数据文件、控制文件、日志文件的存储位置和大小等。
这些选项将影响数据库的性能和容量。
最后,你需要设置数据库管理员的凭证和管理选项,包括管理员用户名、密码等。
在这一步,你还可以选择是否创建示例数据库。
完成上述步骤后,DBCA将开始创建数据库实例,这个过程可能需要一些时间,取决于你的配置选项和硬件性能。
总的来说,使用DBCA创建Oracle数据库实例是一个相对简单的过程,但需要谨慎选择各项配置选项,以满足你的实际需求和性能要求。
希望以上内容能够帮助你顺利安装Oracle数据库并使用DBCA创建数据库实例。
oracle 11gr2图文安装rac版
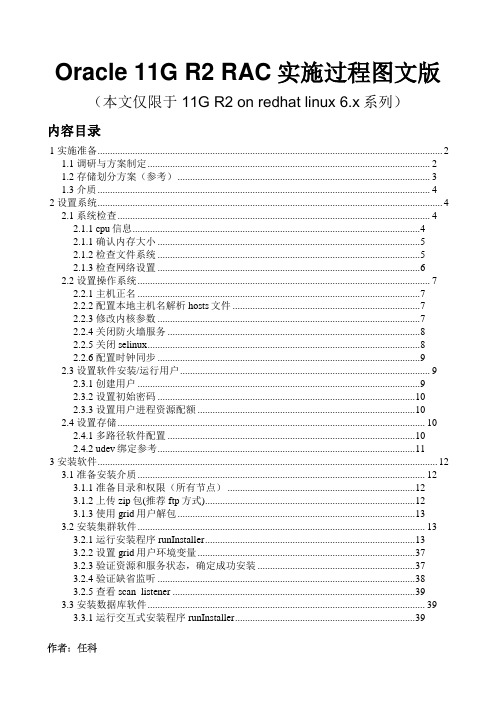
Oracle 11G R2 RAC实施过程图文版(本文仅限于11G R2 on redhatlinux 6.x系列)内容目录1 实施准备 (2)1.1 调研与方案制定 (2)1.2 存储划分方案(参考) (3)1.3 介质 (4)2 设置系统 (4)2.1 系统检查 (4)2.1.1 cpu信息 (4)2.1.1 确认内存大小 (5)2.1.2 检查文件系统 (5)2.1.3 检查网络设置 (6)2.2 设置操作系统 (7)2.2.1 主机正名 (7)2.2.2 配置本地主机名解析hosts文件 (7)2.2.3 修改内核参数 (7)2.2.4 关闭防火墙服务 (8)2.2.5 关闭selinux (8)2.2.6 配置时钟同步 (9)2.3 设置软件安装/运行用户 (9)2.3.1 创建用户 (9)2.3.2 设置初始密码 (10)2.3.3 设置用户进程资源配额 (10)2.4 设置存储 (10)2.4.1 多路径软件配置 (10)2.4.2 udev绑定参考 (11)3 安装软件 (12)3.1 准备安装介质 (12)3.1.1 准备目录和权限(所有节点) (12)3.1.2 上传zip包(推荐ftp方式) (12)3.1.3 使用grid用户解包 (13)3.2 安装集群软件 (13)3.2.1 运行安装程序runInstaller (13)3.2.2 设置grid用户环境变量 (37)3.2.3 验证资源和服务状态,确定成功安装 (37)3.2.4 验证缺省监听 (38)3.2.5 查看scan_listener (39)3.3 安装数据库软件 (39)3.3.1 运行交互式安装程序runInstaller (39)3.3.2 为oracle用户的添加软件环境变量 (47)4 创建数据库 (47)4.1 创建asm diskgroup (47)4.1.1 以grid用户运行asmca工具 (47)4.2 创建数据库zbwshx(在1节点操作) (49)5 应用累计补丁更新PSU (69)5.1 升级补丁工具opatch (69)5.2 补丁1节点软件 (69)5.3 补丁2节点软件 (71)5.4 升级数据库(1节点操作) (71)6 附加脚本(可选) (72)6.1 调整数据库一些缺省设置 (72)6.2 管理集群服务 (73)7 初始化业务环境(举例) (73)1 实施准备1.1 调研与方案制定1.2 存储划分方案(参考)存储要1T1T分配,超过2T会有问题1.3 介质2 设置系统2.1 系统检查2.1.1 cpu信息1 查看物理cpu数shell(root)>cat /proc/cpuinfo |grep physical\ id|sort|uniq2 查看单个cpu coresshell(root)>cat /proc/cpuinfo |grepcpu\ cores|uniq3 查看单个是否超线程shell(root)>cat /proc/cpuinfo |grepcpu\ cores|uniq4 合计cpu coresshell(root)>cat /proc/cpuinfo | grep name | cut -f2 -d: | uniq -c shell(root)>mpstat 12.1.1 确认内存大小物理内存是256Gswap取值算法为物理内存的一倍,当物理内存超过64G,建议>=物理内存,这里32G符合最小2.1.2 检查文件系统/var和/tmp空间至少2G,建议10G/dev/shm共享空间设为物理内存/2 2.1.3 检查网络设置检查1节点public网卡设置检查2节点public网卡设置检查1节点private网卡地址(第一组)检查2节点private网卡设置(第一组)检查1节点 private网卡(第二组)检查2节点private网卡(第二组)2.2 设置操作系统2.1.1 主机正名1节点(全部小写最好了)2节点注意:重新登陆确认改变生效2.1.2 配置本地主机名解析hosts文件shell(root)>vi /etc/hosts#public address192.168.9.101 zbwshx01192.168.9.102 zbwshx02#public vip address192.168.9.103 zbwshx01-vip192.168.9.104 zbwshx02-vip192.168.9.105 zbwshx-cluster-scan(建议3个,用DNS解析)#private group #110.10.11.11 zbwshx01-priv110.10.11.12 zbwshx02-priv1#private group #210.10.12.11 zbwshx01-priv210.10.12.12 zbwshx02-priv2#NTP服务器192.168.5.11 ntpserver2.1.3 修改内核参数1.编辑sysctl.confshell(root)>vi /etc/sysctl.conf#ORACLE SETTINGfs.aio-max-nr = 1048576fs.file-max = 6815744#{shmall}单位pages,命令"echo $((物理内存/$(getconf PAGESIZE)))"(计算:物理内存/4096)kernel.shmall = 67108864#{shmmax},单位bytes,为物理内存一半,echo $((256*1024*1024*1024/2))kernel.shmmax = 137438953472(物理内存/2)kernel.shmmni = 4096kernel.sem = 250 32000 100 128net.ipv4.ip_local_port_range = 9000 65500net.core.rmem_default = 262144net.core.rmem_max = 4194304net.core.wmem_default = 262144net.core.wmem_max = 1048586net.ipv4.ipfrag_high_thresh=524288net.ipv4.ipfrag_low_thresh=393216net.ipv4.tcp_rmem=4096 524288 16777216net.ipv4.tcp_wmem=4096 524288 16777216net.ipv4.tcp_timestamps=0net.ipv4.tcp_sack=0net.ipv4.tcp_window_scaling=1net.core.optmem_max=524287dev_max_backlog=2500sunrpc.tcp_slot_table_entries=128sunrpc.udp_slot_table_entries=128net.ipv4.tcp_mem=16384 16384 16384#多心跳网卡时需要多播技术net.ipv4.conf.default.rp_filter = 0#多播设备eth2,eth4net.ipv4.conf.eth2.rp_filter = 0net.ipv4.conf.eth4.rp_filter = 02.生效shell(root)>modprobesunrpcshell(root)>sysctl -p2.1.4 关闭防火墙服务shell(root)>chkconfig --level 2345 iptables offshell(root)>chkconfig --level 2345 ip6tables offshell(root)>service iptables stopshell(root)>service ip6tables stop2.1.5 关闭selinuxshell(root)>setenforce 0shell(root)>vi /etc/selinux/configSELINUX=disabled2.1.6 配置时钟同步∙配置NTP服务器<非数据库内容,略>∙配置ntp客户端shell(root)>vi /etc/ntp.conf注释掉其他restrict和server条目,增加如下serverntpserverrestrictntpserver mask 255.255.255.255nomodifynotrapnoquery ∙修改ntpd配置文件shell(root)>vi /etc/sysconfig/ntpdSYNC_HWCLOCK=yesOPTIONS="-x -u ntp:ntp -p /var/run/ntpd.pid"∙重启ntpd进程shell(root)>chkconfig --level 2345 ntpd onshell(root)>service ntpd start∙确认握手成功shell(root)>ntpq -p(初次同步需要一定时间)∙检查状态shell(root)>ntpstat2.2 设置软件安装/运行用户2.2.1 创建用户shell(root)>groupadd -g 10501 oinstallshell(root)>groupadd -g 10502 asmadminshell(root)>groupadd -g 10503 asmdbashell(root)>groupadd -g 10504 asmopershell(root)>groupadd -g 10505 dbashell(root)>groupadd -g 10506 opershell(root)>useradd -m -u 10501 -g oinstall -G asmadmin,asmdba,asmoper,dba -d /home/grid -s /bin/bash -c "Grid Infrastructure Owner" gridshell(root)>useradd -m -u 10502 -g oinstall -G dba,oper,asmdba -d /home/oracle -s /bin/bash -c "Oracle Software Owner" oracle2.2.2 设置初始密码shell(root)>password gridshell(root)>password oracle2.2.3 设置用户进程资源配额shell(root)>vi /etc/security/limits.conf#ORACLE SETTINGroot soft nproc 2047root hard nproc 16384root soft nofile 1024root hard nofile 65536root soft stack 10240root hard stack 32768grid soft nproc 2047grid hard nproc 16384grid soft nofile 1024grid hard nofile 65536grid soft stack 10240grid hard stack 32768oracle soft nproc 2047oracle hard nproc 16384oracle soft nofile 1024oracle hard nofile 65536oracle soft stack 10240oracle hard stack 327682.3 设置存储要求:✓同一个lun/vdisk在每个节点上设备名一致✓根据方案,通过scsi_id确认每一个lun/vdisk从存储上划分正确的✓共享模式要求在lun/vdisk在每个节点能同时读写✓RAC安装,lun/vdisk在操作系统上的设备名的属主是grid,组主是asmadmin,权限6602.3.1 多路径软件配置<非数据库内容,略>redhatlinux自带多路径软件multipath的参考文档官方文档:https:///documentation/zh-CN/Red_Hat_Enterprise_Linux/6/html/DM_Multipath/index.html百度搜索文档:/i6241962348353946114/绑定用户组案例:/2014/01/multipath实现设备用户组设置.html2.3.2 udev绑定参考注意:∙如果多路径软件已经实现了设备名绑定、属(组)主设置、权限设置,则不需要再配置udev∙udev不具有多路径failover能力∙本例为scsi磁盘∙∙1.shell(root)>fdisk -l|grep Disk\ /dev/sd根据系统人员告知,设备sda是本地操作系统宿主硬盘,不能使用,剩下的是共享磁盘2.查看scsi_idshell(root)>scsi_id -gvu /dev/sdN3.新建或编辑udev的rule文件shell(root)>vi /etc/udev/rules.d/99-oracle.rules(必须是99)KERNEL=="sd*", SUBSYSTEM=="block", ENV{DEVTYPE}=="disk",ENV{ID_SERIAL}=="36006016010402600126dd2e653ebe511", NAME+="crs_01", OWNER="grid", GROUP="asmadmin", MODE="0660"KERNEL=="sd*", SUBSYSTEM=="block", ENV{DEVTYPE}=="disk",ENV{ID_SERIAL}=="360060160104026004eb5b3db53ebe511", NAME+="crs_02", OWNER="grid", GROUP="asmadmin", MODE="0660"KERNEL=="sd*", SUBSYSTEM=="block", ENV{DEVTYPE}=="disk",ENV{ID_SERIAL}=="360060160104026006edcb7d153ebe511", NAME+="crs_03", OWNER="grid", GROUP="asmadmin", MODE="0660"KERNEL=="sd*", SUBSYSTEM=="block", ENV{DEVTYPE}=="disk",ENV{ID_SERIAL}=="36006016010402600f0b413ee53ebe511", NAME+="fra_data_01", OWNER="grid", GROUP="asmadmin", MODE="0660"KERNEL=="sd*", SUBSYSTEM=="block", ENV{DEVTYPE}=="disk",ENV{ID_SERIAL}=="36006016010402600162f6d1254ebe511", NAME+="zbwshx_data_01", OWNER="grid", GROUP="asmadmin", MODE="0660"4.启动udevshell(root)>udevadm control reload-rulesshell(root)>start_udev3 安装软件3.1 准备安装介质(介质上传到/u01/media/oracle/linux_x64目录)3.1.1 准备目录和权限(所有节点)shell(root)>mkdir -p /u01/media/oracle/linux_x64shell(root)>chown -R grid:oinstall /u01shell(root)>chmod -R g+w /u013.1.2 上传zip包(推荐ftp方式)✓用grid用户上传✓上传grid安装包,database安装包,补丁包,补丁工具✓上传后介质属主grid,组主oinstall3.1.3 使用grid用户解包shell(grid)>cd /u01/media/oracle/linux_x64shell(grid)>unzip p1*******_112040_Linux-x86-64_1of7.zipshell(grid)>unzip p1*******_112040_Linux-x86-64_2of7.zipshell(grid)>unzip p1*******_112040_Linux-x86-64_3of7.zip3.2 安装集群软件3.2.1 运行安装程序runInstallershell(grid)>cd gridshell(grid)>./runInstaller提示:为了把x-windows程序的界面投射到windows终端上,需要执行2个步骤1.在windows上启动本地X11Forward程序,推荐x-manager中的xpassive(端口默认6000,注意firewall)2.在服务器上设定shell环境变量:export DISPLAY=YourIP:0.03.执行xclock测试在DHCP+DNS的环境,需要激活GNS,这里关闭本方案只有一个SCAN IP,使用/etc/hosts解析(也就是说需要将SCAN IP写入到/etc/hosts 下)建立主机之间ssh互信,这样可以免密码互相登陆,oracle安装过程中会把1节点的软件自动复制到2节点。
Oracle客户端安装步骤

Oracle客户端安装详细步骤,分为安装和配置两大块。
一安装1.进入client文件夹,如:“图1”所示。
(图1)2.鼠标双击,运行setup.exe文件。
如:“图2”所示。
(图2)3.耐心等一会,当出现下面界面是,如果你以前没装过Oracle,请单击下一步。
如:“图3”所示。
(图3)4.安装类型,选择管理员,请单击下一步。
如:“图4”所示。
(图4)5.指定你的Oracle想要装的地方,然后请单击下一步如:“图5”所示。
(图5)6. 请您注意了!!!请查看“检查”中的“状态”项,确保“状态”全部是成功。
然后,请单击下一步。
如:“图6”所示。
(图6)7.单击“安装”。
如:“图7”所示。
(图7)8.这是正在安装的时的画面。
如:“图8”所示。
(图8)9.安装完成后将出现下面的画面。
如:“图9”所示。
10.选择“执行典型配置”。
请单击“下一步”。
一直到“完成”。
如:“图10”,“图11”所示。
(图10)(图11)11.安装已经成功,请单击“退出”,并选择“是”。
如:“图12”,“图13”所示。
(图12)(图13)二配置1.如果不配置tasnames.ora文件,将会报错,如“图14”。
(图14)2.复制tasnames.ora文件。
如“图15”所示。
(图15)3.打开安装好的客户端的文件夹,如“图16”所示。
(图16)4.将第2步中复制的文件,粘贴到第3步所打开的文件夹。
如(图17)所示。
(图17)5. 在路径“C:\WINDOWS\system32\drivers\etc”中,打开用记事本打开HOSTS文件,如:“图18”,“图19”所示。
(图18)6.如果在打开的“HOSTS”中,没有下图中的蓝色部分,请你自己添加,后保存。
如:“图20”所示。
(图20)。
oracle rac 安装部署文档
oracle rac 安装部署文档oracle oracle rac搭建][常见问题汇总oracle rac 安装部署文档物理硬件配置需求:oracle 虚拟机需求:oracle rac两节点脚本搭建方法操作系统安装数据库安装oracle rac 图形界面搭建方法(适用于两个节点和多个oracle节点)创建磁盘组安装oracle数据库dbca 创建数据库配置oracle性能测试相关的参数关闭iolog常见问题汇总问题一:oracle在运行过程中,异常中断存储进程(gluster,tgtd等)会导致oracle异常报错ORA-01078。
问题二:查看数据库实例状态的时候报错ORA-01034问题三:删除问题表失败问题四:通过系统镜像安装桌面。
问题五:执行完oracle_install_rac.sh 如果oracleasm 命令未别找到,要先解压rpm文件夹问题六:rac01 和rac02 sid配置成一样的了怎么修改问题七:请求spfile错误问题八:ora 12516报错监听程序找不到符合协议堆栈要求的可用处理程序问题九:问题启动数据库报错 ORA-01078物理硬件配置需求:oracle 虚拟机需求:oracle rac两节点脚本搭建方法操作系统安装1.页面选择部署oracle rac2.选择共享盘创建,单机下一步3.配置虚拟机基本信息,– cpu改成2*16核,– 内存改成96G,– 添加一个网卡,连接心跳交换机– 磁盘添加iso redhat镜像文件– 磁盘设置为80G 预先分配网络配置第一个网口作为虚拟机的公网,第二个网口作为虚拟机的私网网口(连接heartbeat交换机的网口)4.单击下一步,安装redhat操作系统 [以下简略提示4点]1.hostname可以先不改2.创建分区的时候,选择Create Custom Layout自己配置分区大小3.创建分区/boot 分区1024M,swap 分区20480M,剩余的空间分配给/分区4.安装的时候选择带桌面的5.red hat系统安装完成后,按页面提示,安装虚拟机性能优化工具(不安装性能优化工具,会导致测试性能的时候,性能大幅下降)6.安装完成后,将虚拟机关机。
Oracle-RAC以及ASM安装全过程整理

RAC以及ASM安装全过程整理RAC以及ASM安装全过程整理更改主机名第一步:#hostname oratest第二步:修改/etc/sysconfig/network中的hostname第三步:修改/etc/hosts文件设置hosts文件可参考:[root@amdocs01 mapper]# cat /etc/hosts# Do not remove the following line, or various programs# that require network functionality will fail.localhostamdocs02amdocs02-vipamdocs02-priv设置IPeth01eth1绑定裸设备先在逻辑卷组上分出逻辑卷,全部为裸设备,必须包含:逻辑盘:ocrlv ,votelv 是必须的,因为后面安装ASM要用到data01,data02,data03,data04,data05,softlv,oralv可选1、裸设备定义:一块没有分区的硬盘,称为原始设备(RAWDEVICE)或者是一个分区,但是没有用EXT3,OCFS等文件系统格式化,称为原始分区(RAWPARTITION)以上两者都是裸设备2、裸设备的绑定有文件系统的分区是采用mount的方式挂载到某一个挂载点的(目录)而裸设备不能mount,只能绑定到/dev/raw/下的某一个设备名比如/dev/raw/raw13、裸设备的绑定方法先介绍第一种方法:修改/etc/sysconfig/rawdevices,添加以下内容,这里sdd1和sdd2是原始分区名或者原始设备(硬盘)名,raw1和raw2是/dev目录下的原始设备名,编号从raw1到raw8191,也就是最多可以绑定255个裸设备/dev/raw/raw1/dev/sdd1/dev/raw/raw2/dev/sdd2然后修改裸设备的属主和访问权限chown oracle:dba /dev/raw/raw1chown oracle:dba /dev/raw/raw2chmod 660 /dev/raw/raw1chmod 660 /dev/raw/raw2最后使得裸设备生效,并且在机器启动的时候就自动加载执行/sbin/chkconfig rawdevices on保证机器启动的时候裸设备能够加载,这一步很重要裸设备的绑定方法第二种方法,修改文件的方法#!/bin/sh## This script will be executed *after* all the other init scripts. # You can put your own initialization stuff in here if you don't # want to do the full Sys V style init stuff.touch /var/lock/subsys/localraw /dev/raw/raw1 /dev/mapper/vg00-ocrlvraw /dev/raw/raw2 /dev/mapper/vg00-votelvraw /dev/raw/raw3 /dev/mapper/vg00-data01raw /dev/raw/raw4 /dev/mapper/vg00-data02raw /dev/raw/raw5 /dev/mapper/vg00-data03raw /dev/raw/raw6 /dev/mapper/vg00-data04chmod 775 /dev/raw/raw1chmod 775 /dev/raw/raw2chmod 775 /dev/raw/raw3chmod 775 /dev/raw/raw4chmod 775 /dev/raw/raw5chmod 775 /dev/raw/raw6chown oracle:dba /dev/raw/raw1chown oracle:dba /dev/raw/raw2chown oracle:dba /dev/raw/raw3chown oracle:dba /dev/raw/raw4chown oracle:dba /dev/raw/raw5chown oracle:dba /dev/raw/raw6chown oracle:dba /dev/raw/raw7modprobe hangcheck-timer hangcheck-tick=30 hangcheck_margin=1804、裸设备的读写不能用cp等命令操作,写入内容用dd命令,可以参阅相关资料5、清空裸设备相当于格式化啦bs是快的大小,blocksizecount是快的数量,这两者相乘大于裸设备的容量即可ddif=/dev/zeroof=/dev/raw/raw1bs=8192count=12800ddif=/dev/zeroof=/dev/raw/raw2bs=8192count=12800-------另外,注意:rhel4使用udev来管理设备手动修改/dev/raw/raw1不能永久生效要想使得权限持久生效raw/*:root:disk:0660改成raw/*:oracle:dba:0660重启机器如果/dev/下没有/raw/目录,可以自己手工建立。
ORACLE 10g 安装教程[图文]
![ORACLE 10g 安装教程[图文]](https://img.taocdn.com/s3/m/347b923610661ed9ad51f353.png)
ORACLE 10g 安装教程[图文]转载原文链接/blog/451991刚刚接触ORACLE的人来说,从那里学,如何学,有那些工具可以使用,应该执行什么操作,一定回感到无助。
所以在学习使用ORACLE之前,首先来安装一下ORACLE 10g,在来掌握其基本工具。
俗话说的好:工欲善其事,必先利其器。
我们开始吧!首先将ORACLE 10g的安装光盘放入光驱,如果自动运行,一般会出现如图1安装界面:单击“开始安装”,就可以安装ORACLE 10g,一般会检查系统配置是否符合要求,然后出现“Oracle DataBase 10g安装”对话框,如图2所示:在安装Oracle DataBase 10g时可以选择“基本安装”和“高级安装”两种方法。
选择“基本安装”时,“Oracle主目录位置”用于指定Oracle DataBase 10g软件的存放位置;“安装类型”用于指定Oracle产品的安装类型(企业版、标准版和个人版)。
如果选择“创建启动数据库”,那就要指定全局数据库名称和数据库用户的口令。
选择“高级安装”,单击“下一步”,会出现“指定文件对话框”,在源路径显示的是安装产品所在的磁盘路径;目标名称用于资定Oracle 主目录所对应的环境变量,目标路径用于指定安装Oracle软件的目标安装路径。
设置目标名称为:OraDb10g_home1,目标路径为:D:oracleproduct10.1.0db1。
如图3:单击“下一步”,会加载Oracle产品列表,然后出现“选择安装类型”对话框;如图4:选择安装类型时一般选择“企业版”,单击“下一步”,会出现“选择数据库配置”对话框,如图5 :在“选择数据库配置”对话框中可以选择是否要创建启动数据库,如果要创建数据库还要选择建立数据库的类型。
选择“不创建启动数据库”单击“下一步”,会出现“概要”对话框,如图6所示:单击“安装”,就会开始安装Oracle DataBase 10g产品了。
redhat-oracle10g-rac安装说明 By DrMeng

scsi1:0.deviceType = "disk"
scsi1:1.deviceType = "disk"
scsi1:2.deviceType = "disk"
启动节点2,修改ip地址和机器名为rac2,再修改.bash_profile文件将其rac1,改为rac2
二部分:配等效性及ASM
配置Hangcheck计时器
[root@node1 ~]# vi /etc/rc.local
增加:
modprobe hangcheck-timer hangcheck-tick=30 hangcheck_margin=180
1.修改/etc/hosts
127.0.0.1 localhost
配置裸设备
vi /etc/udev/rules.d/60-raw.rules
ACTION=="add", KERNEL=="/dev/sdb1",RUN+="/bin/raw /dev/raw/raw1 %N"
ACTION=="add", ENV{MAJOR}=="8",ENV{MINOR}=="17",RUN+="/bin/raw /dev/raw/raw1 %M %m"
10.10.10.252 rac2-priv
#Virtual
192.168.12.253 rac1-vip
192.168.12.254 rac2-vip
oracleasm-2.6.18-238.el5-2.0.5-1.el5.i686.rpm
oracle11grac安装图解

oracle11grac安装图解(1)安装和配置集群的⽹络基本结构(2)选择⾼级安装(3)将中⽂添加到右侧边框,添加中⽂可避免在使⽤ em 时乱码(4)填写集群名称和scan的解析名称及端⼝,点击next(5)在弹出界⾯,点击add,填写节点2的信息(6)接⼝⽤法,公⽤专⽤(7)为OCR和表决盘选择 ASM 存储⽅式(8)选择crsvol,并填写磁盘组名称,点击下⼀步(9)填写密码(10)不配置IPMI(11)默认组(12)指定安装位置与环境变量中⽬录相同(13)产品清单与环境变量中⽬录相同(14)开始安装(15)执⾏脚本顺序不能错[root@rac1 ~]# /oracle/app/oraInventory/orainstRoot.sh[root@rac2 ~]# /oracle/app/oraInventory/orainstRoot.sh[root@rac1 ~]# /oracle/app/11.2.0/grid/product/db_1/root.sh[root@rac2 ~]# /oracle/app/11.2.0/grid/product/db_1/root.shINS-20802 实⽤程序失败,可忽略创建asm磁盘组在grid ⽤户下,执⾏ asmca,启动 asm 磁盘组创建向导点击create 按钮,在弹出的创建界⾯中填写磁盘组名称,选择外边存储⽅,并勾选成员,选择完毕后点击 ok 选项为外部显⽰符合项。
创建数据库(1)仅安装数据库软件(2)选择全部节点,点击 next(3)将简体中⽂添加到安装选项(4)选择企业版,点击 next(5)保持默认的⽬录,点击 next 应该与环境变量设置相同(6)保持默认的属组信息,点击 next(7)安装过程⾃动进⾏安装检查创建集群数据库实例[oracle@rac1 database]$ dbca(1)选中oracle real application cluters database,下⼀步:(2)创建数据库(3)定制数据库(4)填写全局数据库名和SID,全选节点(5)默认(6)⼝令管理(7)默认(8)指定ASM⼝令(9)⼀直默认,知道字符集选UTF8完成。
AIX7+oracle RAC数据库安装文档

安装工文档目录1.IP地址规划 (3)1.1.AIX系统调试 (4)2.Oracle安装及配置 (15)2.1.Orale安装环境检查 (15)2.2.增加用户和组 (16)2.3.修改环境变量 (17)2.4.配置磁盘 (19)2.5.安装grid (22)2.6.创建ASM盘 (26)2.7.安装database (27)2.8.创建数据库 (30)3.数据库的维护 (40)3.1.查看数据库状态 (41)3.2.数据库常用命令 (45)3.3.ORACLE RAC日常基本维护命令 .............................................................. 错误!未定义书签。
1.基本信息1.1. IP地址规划业务IP地址:1.2. RAC数据库基本信息表1.3. RAC数据库使用对外服务器IP及数据库连接IP:10.1.2.235表空间数据文件创建位置SQL> select file_name from dba_data_files;FILE_NAME--------------------------------------------------------------------------------+DA TA/fwd/datafile/system.256.890142345+DA TA/fwd/datafile/sysaux.257.890142347+DA TA/fwd/datafile/undotbs1.258.890142347+DA TA/fwd/datafile/users.259.890142347+DA TA/fwd/datafile/undotbs2.264.890142709例如create tablespace test datafile ‘+DATA/fwd/datafile/datafiletest.dbf’;2.AIX系统调试1将两块系统磁盘做镜像#smitty extendvg 扩展rootvg,将hdisk1加入到rootvg中按图中所示选择,将hdisk1加入到rootvg中,按回车chvg -Qn rootvg 取消VG中的物理卷限额管理(在VG中只要有任一PV有效,此VG就可用) 运行之后,再用lsvg rootvg查看,QUORUM项的值将是1#smitty mirrorvg 对所选择的VG做镜像。
oracle rac创建实例

oracle rac创建实例Oracle RAC (Real Application Clusters) 是一个高可用、高性能的数据库解决方案,允许多个节点同时访问和管理一个共享的数据库。
在RAC环境中,可以创建多个实例来支持多个节点和负载均衡。
要在Oracle RAC中创建实例,可以按照以下步骤进行操作:1.安装Oracle数据库软件:首先,确保你已经正确安装了Oracle数据库软件,并设置了适当的参数和配置。
2.创建RAC环境:使用Oracle提供的工具和命令来创建RAC环境。
这包括配置集群件、节点和网络设置等。
3.创建数据库:在RAC环境中创建一个新的数据库。
你可以使用Oracle提供的命令行工具(如dbca)或图形界面工具(如Database Configuration Assistant)来完成此操作。
4.创建实例:在数据库中创建新的实例。
这可以通过修改数据库的初始化参数文件(如init.ora或spfile.ora)来完成,并重新启动数据库实例来使更改生效。
在初始化参数文件中,你需要设置以下参数来创建实例:o instance_name:实例的名称o instance_number:实例编号o memory参数:例如sga_target、pga_aggregate_target等,用于分配内存给实例o other相关参数:根据需要设置其他相关参数5.启动实例:使用适当的命令或工具启动新创建的实例。
这通常涉及使用类似于sqlplus / as sysdba的命令连接到数据库,并执行startup命令来启动实例。
6.验证实例:确保新创建的实例成功启动,并且可以在RAC环境中正常运行。
你可以通过执行一些查询或检查数据库的状态来验证实例是否正常工作。
请注意,这只是一个简化的概述,实际操作可能因你的具体环境和需求而有所不同。
Oracle 11gRAC数据库安装(HPUX11.31+ASM without MC-SG)

HPUX11.31+RAC11G数据库安装2011年6月Author: ma.yu@目录1.用户需求: (3)2.安装过程: (4)2.1 系统环境准备,检查两台机器的状况: (4)2.2 网络环境准备: (7)2.3 补丁: (7)2.4 内核参数修改: (7)2.5 创建ORACLE用户: (8)2.6 磁盘分配: (10)2.7 ORACLE 安装前准备: (13)2.8 ORACLE Clusterware安装: (15)2.9 ORACLE RAC database软件安装: (30)2.10 升级11.1.0.6到11.1.0.7: (38)2.11 Listener创建: (53)2.12 dbca创建数据库: (54)1.用户需求:用户需要安装一套数据库RAC:数据库软件:Oracle11g数据库软件版本:11.1.0.6 ,升级到11.1.0.7。
模式:rac数据库sid:MIS数据库ip 规划如下:目前这边硬件环境是两台rx6600 ,操作系统版本:HP-UX B.11.31存贮设备hp storage works P2000,总存储空间2.8T ,这套存储设备供MIS系统使用的磁盘分为四个,分别为1G,800G*3。
2.安装过程:由于用户没有购买SGeRAC,所以在这次的安装过程中,使用Clusterware+RACdatabase+ASM的方式,不使用SGeRAC。
这样的话,所有的非ASM数据都要保存在共享磁盘分区裸设备上,而不是共享的lv 上。
2.1 系统环境准备,检查两台机器的状况:A.检查内存大小,至少>1GB.# /usr/contrib/bin/machinfo | grep -i Memory# /usr/sbin/dmesg | grep "Physical:"16GB.B.交换空间的检查:-If RAM between 1GB and 2GB, then swap space required is 1.5 times the size of RAM-If RAM > 2GB, then swap space required is equal to the size of RAM# /usr/sbin/swapinfo –a16GB。
Oracle RAC One Node 11.2.0.1 ZCM安装与配置指南说明书

ORACLE RAC ONE NODE IN11.2.0.1 SOLUTION FORZCM This document describes the installation & configuration of Oracle RAC One Node in11.2.0.1 for ZCM MEGHA R. BALANADU SR. SOFTWARE ENGINEER EPMTable of Contents (2)Introduction (3)Resource Requirements (4)Installation plan (5)Real Application Cluster -RAC One Node is a RAC enabled single instance database that can be moved around in a cluster. It allows the database instance to be relocated to another node of the cluster with a grace period of maximum 30 minutes. This grace period will allow all the existing transactions in the database to complete. Once the online relocation is initiated all the new client connections will be re-directed to the new node where the instance will be relocating.Oracle RAC One Node is used for Active-Passive cluster scenarios where only one instance is running(active) in any given time and other nodes are passive(stand by) in a cluster. In the event of a first node server failure, all the connections are terminated and are re-established with the new instance on the secondary node within the grace period.Oracle Grid Infrastructure software provides Clusterware files(Crs + voting disks) and Automatic storage management(ASM) packaged together. This is essential for RAC interoperability.HARDWARE RESOURCES1. A blade server with 48GB RAM, 1TB HDD with SCSI, 2 CPUs, quad core2. Oracle VM server 2.2.23. Oracle VM manager 2.2.04. Oracle Linux-Redhat5 x32 bit – 2(node1 and node2)5. Kernel Rpms6. A VM on ESX with Windows/Linux to host ZCM7. A VM on ESX with Linux-Redhat5 to host VM managerSOFTWARE RESOURCES1.Oracle Grid infrastructure software 11.2.0.12.Oracle RAC DB software 11.2.0.13.ZCM 11.2 softwarePRE-INSTALLATION TASKS1.Install Oracle VM server2.2.2 on the above mentioned blade server.2.Install Oracle VM manager 2.2.0. This is used to access the virtual machines created on VMserver3.Download Oracle linux Redhat5 x32 bit iso (OS with enhanced performance and few plugins)4.Through VM manager, import the downloaded iso file to create virtual machines.Note: We can also use templates for the same. Refer Vm managerdocumentation5.Create two virtual machines using Oracle Linux iso each having 3 GB RAM, Swap memory twiceas RAM, 60 HDD (approx- 10 GB for grid+Rac, remaining for shared disks) , 2 NIC cards 1 GB of temp space /tmp eachRoot> grep MemTotal /proc/meminfoRoot>grep MemTotal /proc/swapinfoThese two machines will be the 2 nodes for oracle RACwork ConfigurationThese two machines must have:a. A public IP address for each node, with the following characteristics:– 2 Static IP addresses with hostnames–Resolvable by dns, entry in \etc\hosts , same subnet as virtual and SCAN addressesb. A virtual IP address for each node, with the following characteristics:– 2 Static IP addresses with hostnames–Resolvable by dns, entry in \etc\hosts, same subnet mask as public ip and SCAN addresses.Note: VIP-virtual ip is a public IP address that is attached to the publicinterface of the RAC node. VIP should be used by all clients to communicatewith the database to ensure fast failover during an outagec. A Single Client Access Name (SCAN) for the cluster, with the following characteristics:–Three Static IP addresses with hostnames configured on the domain name server (DNS) so that the three IP addresses are associated with the name provided as the SCAN, and all three addresses are returned in random order by the DNS to the requestor. (Take admin help)–Same subnet as public and virtual ip addessesExample:bash> nslookup blr-srm-clusterServer: 196.96.201.1Address: 196.96.201.1#53Name: Address: 196.96.94.226Name: Address: 196.96.94.227Name: Address: 196.96.94.228Note: Single Client Access Name (SCAN), is used to connect to databaseswithin the cluster irrespective of which nodes they are running on. Bydefault, the name used as the SCAN is also the name of the cluster. Thedefault value for the SCAN is based on the local node name (where DBinstalled)d. A private IP address for each node, with the following characteristics:– 2 Static IP addresses with hostnames–Need not be resolvable by dns, having its own subnet addresses, entery in \etc\hosts file Example of a hosts file127.0.0.1 localhost.localdomain localhost::1 localhost6.localdomain6 localhost6#node24.Select “Product Languages”Make the appropriate selection(s) for your environment.5.Grid Plug and Play InformationSCAN name and Cluster name will the same by default. After clicking next, the OUI will validate the SCAN and cluster information6.Cluster node informationa.Add all the nodes which are to be a part of the cluster with their chosen vips,b.Provide grid username/password,c.Setup SSH connectivity, test SSH connectivity, click Next7.Specify network interface usage:8.Storage option information:Select “Automatic storage management”Specify an ASM passwordSelect “Create”, choose “external redundancy”, specify an appropriate disk name(FRA or RACDB), choose the listed disks and ok. Need to create it twice separately.ExitNote: Please note that the disks will be listed in this console only if they areasm marked.Refer to Section1: step 17Verify the asm disksgrid>cd /u01/app/11.2.0/grid/bin./asmcmda.Select all the list nodes for RAC database,S oftware Location: /u01/app/oracle/product/11.2.0/dbhome_18.Operating system groups:Select the OS groups to be used for the SYSDBA and SYSOPER privileges:Database Administrator (OSDBA) Group:dbaDatabase Operator (OSOPER) Group:oper9.Prerequisites check:The installer will run through a series of checks to determine if both Oracle RAC nodes meet the minimum requirements for installing and configuring the Oracle Database software.Starting with 11g Release 2 (11.2), if any checks fail, the installer (OUI) will create shell scriptprograms called fixup scripts to resolve many incomplete system configuration requirements. If OUI detects an incomplete task that is marked "fixable", then you can easily fix the issue bygenerating the fixup script by clicking the [Fix & Check Again] button.The fixup script is generated during installation. You will be prompted to run the script as root in a separate terminal session. When you run the script, it raises kernel values to requiredminimums, if necessary, and completes other operating system configuration tasks.If all prerequisite checks pass (as was the case for my install), the OUI continues to the Summary screen.10.Summary: Click Finish to start the installation. The installer performs the Oracle Databasesoftware installation process on both Oracle RAC nodes.11.Execute configuartion scripts:After the installation completes, you will be prompted to run the/u01/app/oracle/product/11.2.0/dbhome_1/root.sh script on both Oracle RAC nodes. Open a new console window on both Oracle RAC nodes in the cluster, (starting with the node you are performing the install from), as the root user account.Go back to OUI and acknowledge the "Execute Configuration scripts" dialog window.12.Finish: At the end of the installation, click the [Close] button to exit the OUI.SOFTWARE PATCHING FOR RAC ONE NODEDownload and install Patch 9004119 on all the nodes. This patch install the following scripts which are required for Rac One Noderaconefix Fixes metadata after an Omotion failure or failoverraconeinit Initialize the database to RAC One Noderaconestatus Check the status of RAC One Node databaseSpecify storage type and locations for database files.Specify ASMSNMP Password :Specify the ASMSNMP password for the ASM instance. Recovery configuration:Check the option for “Specify Fast Recovery Area”.For the Fast Recovery Area, click the [Browse] button and select the disk group name14.Creation options: Select “create database” and “ Generate database creation scripts”.ClickFinish to start the database creation process. After acknowledging the database creation report and script generation dialog, the database creation will startClick OK on the "Summary" screen.15.At the end of the database creation, exit from the DBCA.POST INSTALLATION CHECKS AFTER ORACLE RAC INSTALLATION1.Log in Oracle Enterprise Manager(Database control) using DBSNMP user and explorehttps://:1158/emWe can see database and cluster status, create users, check the performance etc2.Re-compile invalid objects:oracle@node1> sqlplus / as sysdbasql>@?/rdbms/admin/utlrp.sql3.Enabling archive log in RAC environment:If the database is in "Archive Log Mode", Oracle will make a copy of the online redo log before it gets reused. A thread must contain at least two online redologs (or online redolog groups).a.Disable the cluster instanceCheck the status after relocationoracle@node1>$ORACLE_HOME/bin/raconestatus RAC One Node databases on this cluster:Database UP Fix Required Current Server Candidate Server Names———— ——- ——————- —————— ——————————orcl Y N node 2 node1 node25.Check the database statussrvctl status database -d orclInstance orcl_2 is running on node26.Since raconeinit renames the instance, we should manually reset the oracle_SID for databaseconnectivity.export ORACLE_SID=orcl_1 : for node1export ORACLE_SID=orcl_2 : for node27. We can use 'racone2rac' script to convert racone nodeback to rac database. It converts back tosingle instance rac database. Later we can use dbca utility to add as many instances as we want.TROUBLE SHOOTING1.Log files can be found ina.Event manager log files: $GRID_HOME/log/hostname/evmdb.Database log files: $GRID_HOME/log/hostname/dbname:$ORACLE_HOME/log/hostname/dbnamec.Cluster ready services log files: $GRID_HOME/log/hostname/dbnamed.Oracle cluster registry(OCR) file logs: $GRID_HOME/log/hostname/cliente.CRS alert logs: $ORA_GRID_HOME/log/<hostname>/alert<nodename>.log2.Error: ora-01219 database not open queries allowed on fixed tables views onlyThis error is seen sometimes, after shutdown/startup local instance and when tried viewingtablesSolution: from localnodesqlplus /as SYSBDASQL> select status from v$instance;STATUS--------OPEN--------MOUNTEDWe still need to manually open database:SQL> alter database open;3.Error ORA-00257: archiver error. Connect internal only, until freedThis is because of less space due to archive redo logsSolution: from localnodeSQL> SELECT * FROM V$RECOVERY_FILE_DEST;if used limit is equal to space_limit, then delete the Archive Log , when it is not needed to free up some spacerman target /RMAN>delete archivelog until time 'SYSDATE-1';4.ORA-00603: ORACLE server session terminated by fatal error or ORA-29702: error occurred inCluster Group Service operationIf the RAC node name is listed for the loopback address, you will receive the following errorduring the RAC installation:” 127.0.0.1 node1 localhost.localdomain localhost”Solution: Remove the database name from loopback address5.ORA-01078: failure in processing system parameters ,LRM-00109: could not open parameter file'/u01/app/oracle/product/11.2.0/dbhome_1/dbs/initorcl_1.ora'Though database is up and running,while trying to connect to database, it connects to an idleinstance. Starting local instance gives the above error.Solution: this error is seen when ORACLE_SID is not set properly.For localnode: Export ORACLE_SID=dbname1(orcl1)6.RAC One node:ORA: 12505: Renaming the instance name results in the OEM-DB Control to return the error: "ORA-12505:TNS:listener does not currently know of SID given in connect descriptor".Solution: Recreate the DB configuration by using dbca utility, reconfigure option. Refer to admin guide7.Rac One Node:Error num: 2. ERROR: Unable to start the new instance of orcl on node2.Run raconefix and run Omotion again.This is error is seen after running Omotion. Since the instance gets renamed with '_'(orcl_1)it is considered as policy managed database, where undo tablespaces has to be done manually unlike admin managed database.Solution: run 'raconefix' scripts to fix this problem and run Omotion again for successful relocation.8.Error: server candidate is not found in the cluster.When Omotion is run, this is seen and just exists without relocation.Solution: Check cluster, crs services, node reachability. If any services are down, restart itroot> $GRID_HOME/crsctl check cluster -allroot> $GRID_HOME/crsctl check crs -n node1,node2root> $GRID_HOME/crsctl check cts -n node1,node2root> $GRID_HOME/srvctl status listener -n node1,node2root> $GRID_HOME/crsctl start cluster -allZCM (ZENWORKS CONFIGURATION MANAGEMENT) INSTALLATION WITH ORACLE RAC1.Create a VM image with windows or linux OS2.Download ZCM 11.2 build and trigger the installationplete the initial steps.4.In the Database selection page, choose 'Oracle' as database for ZCM5.We can new schema or existing schema. For existing schema, we should create a schemabeforehand6.Specify the service name, hostname and port of the databaseCheck the tnsname.ora file under $ORACLE_HOME/network/admin and verify the hostname and service name。
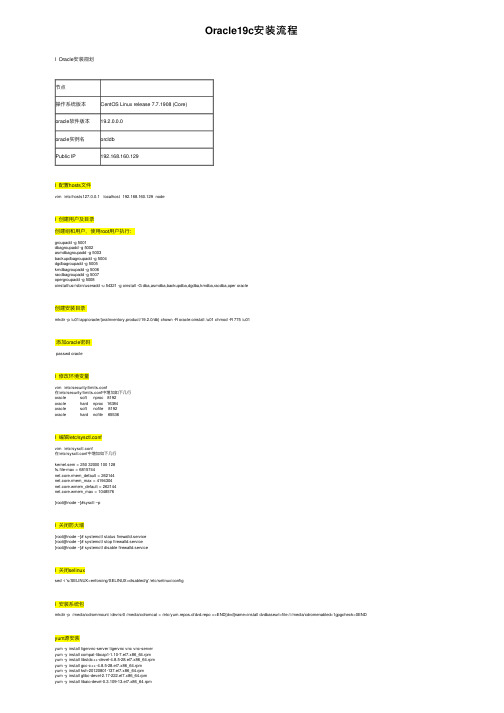
Oracle19c安装流程
Oracle19c安装流程l Oracle安装规划节点操作系统版本CentOS Linux release 7.7.1908 (Core)oracle软件版本19.2.0.0.0oracle实例名orcldbPublic IP192.168.160.129l 配置hosts⽂件vim /etc/hosts127.0.0.1 localhost 192.168.160.129 nodel 创建⽤户及⽬录创建组和⽤户,使⽤root⽤户执⾏:groupadd -g 5001dbagroupadd -g 5002asmdbagroupadd -g 5003backupdbagroupadd -g 5004dgdbagroupadd -g 5005kmdbagroupadd -g 5006racdbagroupadd -g 5007opergroupadd -g 5008oinstall/usr/sbin/useradd -u 54321 -g oinstall -G dba,asmdba,backupdba,dgdba,kmdba,racdba,oper oracle创建安装⽬录mkdir -p /u01/app/oracle/{oraInventory,product/19.2.0/db} chown -R oracle:oinstall /u01 chmod -R 775 /u01添加oracle密码passwd oraclel 修改环境变量vim /etc/security/limits.conf在/etc/security/limits.conf中增加如下⼏⾏oracle soft nproc 8192oracle hard nproc 16384oracle soft nofile 8192oracle hard nofile 65536l 编辑/etc/sysctl.confvim /etc/sysctl.conf在/etc/sysctl.conf中增加如下⼏⾏kernel.sem = 250 32000 100 128fs.file-max = 6815744net.core.rmem_default = 262144net.core.rmem_max = 4194304net.core.wmem_default = 262144net.core.wmem_max = 1048576[root@node ~]#sysctl –pl 关闭防⽕墙[root@node ~]# systemctl status firewalld.service[root@node ~]# systemctl stop firewalld.service[root@node ~]# systemctl disable firewalld.servicel 关闭selinuxsed -i 's/SELINUX=enforcing/SELINUX=disabled/g' /etc/selinux/configl 安装系统包mkdir -p /media/cdrommount /dev/sr0 /media/cdromcat > /etc/yum.repos.d/dvd.repo <<END[dvd]name=install dvdbaseurl=file:///media/cdromenabled=1gpgcheck=0END yum源安装yum -y install tigervnc-server tigervnc vnc vnc-serveryum -y install compat-libcap1-1.10-7.el7.x86_64.rpmyum -y install libstdc++-devel-4.8.5-28.el7.x86_64.rpmyum -y install gcc-c++-4.8.5-28.el7.x86_64.rpmyum -y install ksh-20120801-137.el7.x86_64.rpmyum -y install glibc-devel-2.17-222.el7.x86_64.rpmyum -y install libaio-devel-0.3.109-13.el7.x86_64.rpmyum -y install compat-libstdc++-33-3.2.3-72.el7.x86_64.rpm编辑profile⽂件vim /etc/profile# for oracle setting 在⽂档内加⼊以下内容if [ $USER = "oracle" ]; thenif [ $SHELL = "/bin/ksh" ]; thenulimit -p 16384ulimit -n 65536elseulimit -u 16384 -n 65536fifil 配置oracle环境变量vim /home/oracle/.bash_profileumask 022export ORACLE_BASE=/u01/app/oracleexport ORACLE_HOME=$ORACLE_BASE/product/19.2.0/dbexport ORACLE_SID=orcldbexport ORACLE_TERM=xtermexport ORACLE_OWNER=oracle export TNS_ADMIN=$ORACLE_HOME/network/admin export ORA_NLS33=$ORACLE_HOME/ocommon/nls/admin/data export NLS_LANG="AMERICAN_AMERICA.ZHS16GBK" export LD_LIBRARY_PATH=$O export LIBPATH=$ORACLE_HOME/lib:$ORACLE_HOME/network/lib:/lib:/usr/lib:/usr/local/lib export PATH=$PATH:/sbin:/usr/lbin:/usr/sbin:$JAVA_HOME/bin:$ORACLE_HOME/bin:$ORACLE_HOME/lib:$HOME/bin:$ORACLE_HOME/OPatch:. l 上传Oracle19C安装包(oracle⾝份)以oracle⽤户⾝份通过FTP⽅式上传安装包⾄Linux主机⽬录:cd $ORACLE_HOME (即oracle⽤户的home主⽬录下)cd $ORACLE_HOME/u01/app/oracle/product/19.2.0/dbunzip /u01/app/oracle/product/19.2.0/db/V981623-01 db 19.2.0.0.0.zipl 图形化的安装界⾯。
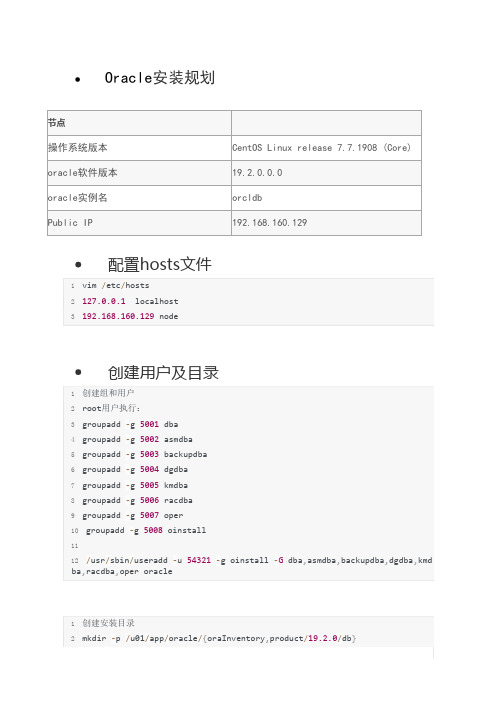
Oracle-19c安装流程
Oracle安装规划节点操作系统版本CentOS Linux release 7.7.1908 (Core) oracle软件版本19.2.0.0.0oracle实例名orcldbPublic IP192.168.160.129配置hosts文件1vim /etc/hosts2127.0.0.1 localhost3192.168.160.129 node创建用户及目录1创建组和用户2root用户执行:3groupadd ‐g 5001 dba4groupadd ‐g 5002 asmdba5groupadd ‐g 5003 backupdba6groupadd ‐g 5004 dgdba7groupadd ‐g 5005 kmdba8groupadd ‐g 5006 racdba9groupadd ‐g 5007 oper10groupadd ‐g 5008 oinstall1112/usr/sbin/useradd ‐u 54321 ‐g oinstall ‐G dba,asmdba,backupdba,dgdba,kmd ba,racdba,oper oracle1创建安装目录2mkdir ‐p /u01/app/oracle/{oraInventory,product/19.2.0/db}3chown ‐R oracle:oinstall /u014chmod ‐R 775 /u011 添加oracle密码2 passwd oracle修改环境变量1vim /etc/security/limits.conf2在/etc/security/limits.conf中增加如下几行3oracle soft nproc 81924oracle hard nproc 163845oracle soft nofile 81926oracle hard nofile 65536编辑/etc/sysctl.conf1vim /etc/sysctl.conf2在/etc/sysctl.conf中增加如下几行3kernel.sem = 250 32000 100 1284fs.file‐max = 68157445net.core.rmem_default = 2621446net.core.rmem_max = 41943047net.core.wmem_default = 2621448net.core.wmem_max = 10485769[root@node ~]#sysctl –p关闭防火墙1[root@node ~]# systemctl status firewalld.service 2[root@node ~]# systemctl stop firewalld.service3[root@node ~]# systemctl disable firewalld.service关闭selinux1sed ‐i 's/SELINUX=enforcing/SELINUX=disabled/g' /etc/selinux/config安装系统包1mkdir ‐p /media/cdrom2mount /dev/sr0 /media/cdrom3cat > /etc/yum.repos.d/dvd.repo <<END4[dvd]5name=install dvd6baseurl=file:///media/cdrom7enabled=18gpgcheck=09END1yum源安装2yum ‐y install tigervnc‐server tigervnc vnc vnc‐server3yum ‐y install compat‐libcap1‐1.10‐7.el7.x86_64.rpm4yum ‐y install libstdc++‐devel‐4.8.5‐28.el7.x86_64.rpm5yum ‐y install gcc‐c++‐4.8.5‐28.el7.x86_64.rpm6yum ‐y install ksh‐20120801‐137.el7.x86_64.rpm7yum ‐y install glibc‐devel‐2.17‐222.el7.x86_64.rpm8yum ‐y install libaio‐devel‐0.3.109‐13.el7.x86_64.rpm9yum ‐y install compat‐libstdc++‐33‐3.2.3‐72.el7.x86_64.rpm安装rlwrap1yum install ‐y gcc2yum install ‐y libtermcap‐devel3yum install ‐y readline4yum install ‐y readline‐devel1mkdir /soft2上传rlwrap‐0.37到/soft下3tar ‐zxvf rlwrap‐0.37.tar.gz4cd rlwrap‐0.375./configure; make install6ldconfig修改配置到/home/oracle/.bash_profile文件1alias sqlplus='rlwrap sqlplus'2alias rman='rlwrap rman'3alias asmcmd='rlwrap asmcm'1编辑profile文件2vim /etc/profile3# for oracle setting 在文档内加入以下内容4if [ $USER = "oracle" ]; then5 if [ $SHELL = "/bin/ksh" ]; then6 ulimit ‐p 163847 ulimit ‐n 655368 else9 ulimit ‐u 16384 ‐n 6553610 fi11fi12配置oracle环境变量vim /home/oracle/.bash_profile1umask 0222export ORACLE_BASE=/u01/app/oracle3export ORACLE_HOME=$ORACLE_BASE/product/19.2.0/db4export ORACLE_SID=orcldb5export ORACLE_TERM=xterm6export ORACLE_OWNER=oracle7export TNS_ADMIN=$ORACLE_HOME/network/admin8export ORA_NLS33=$ORACLE_HOME/ocommon/nls/admin/data9export NLS_LANG="AMERICAN_AMERICA.ZHS16GBK"10export LD_LIBRARY_PATH=$ORACLE_HOME/lib:$ORACLE_HOME/network/lib:/lib:/u sr/lib:/usr/local/lib11exportLIBPATH=$ORACLE_HOME/lib:$ORACLE_HOME/network/lib:/lib:/usr/lib:/usr/local/l ib12exportPATH=$PATH:/sbin:/usr/lbin:/usr/sbin:$JAVA_HOME/bin:$ORACLE_HOME/bin:$ORACL E_HOME/lib:$HOME/bin:$ORACLE_HOME/OPatch:.1314alias sqlplus='rlwrap sqlplus'15alias rman='rlwrap rman'16alias asmcmd='rlwrap asmcmd'17alias sas='sqlplus / as sysdba'上传Oracle19C安装包(oracle身份)1以oracle用户身份通过FTP方式上传安装包至Linux主机目录:cd $ORACLE_HOME (即orac le用户的home主目录下)2cd $ORACLE_HOME3/u01/app/oracle/product/19.2.0/db4unzip /u01/app/oracle/product/19.2.0/db/V981623‐01 db 19.2.0.0.0.zip 图形化的安装界面。
linux安装oracle图形界面乱码问题

/colleage/blog/item/818e5cb333cf01b6d8335abf.html /tiantangmenren/blog/item/c384983d053bacd7d4622555 .html/u/20100204/01/298edd81-60cd-4b29-ba23-bb272ee37 f2c.html[转]SUSE Linux Enterprise 10 安装 Oracle 10g (图形界面)2010年12月04日星期六 23:28Oracle10G 最低系统要求:内存:推荐1G,,在虚拟机中为768MSwap分区:1G,设为内存的2倍/tmp磁盘空间:400MB以上磁盘空间:软件3.5G 数据1.2G所需软件:SUSE Linux Enterprise 10 for x86,以下简称SLESOracle database 10gR2 for linux32/archives/2008/06/10gr2_download_link.htmlOrarun-1.8-XXX.XX.i586.rpm软件包(这个在sles中软件安装oracle 数据库有,也可以从/partners/oracle/sels-9去下载安装步骤:1、安装SUSE操作系统,并确保安装“C/C++Compiler and Tools”软件包。
在开发栏目中2、安装所需软件包,安装orarun软件包,就是软件安装是的oracle 数据库包,省去很多设置。
在数据库栏目中3、Oracle用户设置当orarun软件包安装时,会自动建立名为oracle的用户,和一个oinstall组。
我们只需要将该用户设置为enable,把shell从/bin/false改为/bin/bash。
而且orarun软件包将ORACLE_HOME文件夹自动生成,减少了很多麻烦。
4、设置Oracle环境变量修改/ect/profile.d/oracle.sh文件,ORACLE_HOME、ORACLE_SID等环境变量可以根据需要自行修改。
在WINDOWS上安装ORACLERAC的注意事项

在WINDOWS上安装ORACLERAC的注意事项
1、检查硬件规格:首先要检查服务器上的硬件规格是否满足ORACLERAC的要求,服务器的CPU、内存及网络设备等都必须满足ORACLERAC的安装要求;
2、检查操作系统:服务器上的操作系统必须是WINDOWS,并且要满足ORACLERAC的安装要求,比如WINDOWS Server 2024 R2/ 2024/ 2024/ 2024等;
3、检查软件依赖:在安装ORACLERAC之前要检查各节点上是否已正确安装了操作系统、管理软件、数据库软件及驱动等所需的软件;
4、安装ORACLERAC:使用ORACLERAC的安装程序安装ORACLERAC的服务器端及客户端软件;
5、创建集群:确定ORACLERAC各节点服务器上的网络类型、网络名称及网络地址,然后利用ORACLERAC的集群管理软件组建一个ORACLERAC 集群;
6、配置集群:通过配置各节点服务器的网络参数及服务器上的管理软件,使之能够正常地连接ORACLERAC的集群;
7、开启集群服务:完成ORACLERAC的集群配置后,即可开启ORACLERAC的集群服务,让ORACLERAC可以正常运行;
8、测试ORACLERAC:最后可以对ORACLERAC的集群性能进行测试,以确保ORACLERAC的集群可以正常运行。
9、配置集群参数:可以进行ORACLERAC的集群参数配置,比如设定ORACLERAC的资源池、节点事件及资源类型等;
10、安装集群管理软件:在ORACLERAC的每个节点服务器上。
【OracleRAC】Linux系统Oracle12cRAC安装配置详细记录过程V2.0(。。。
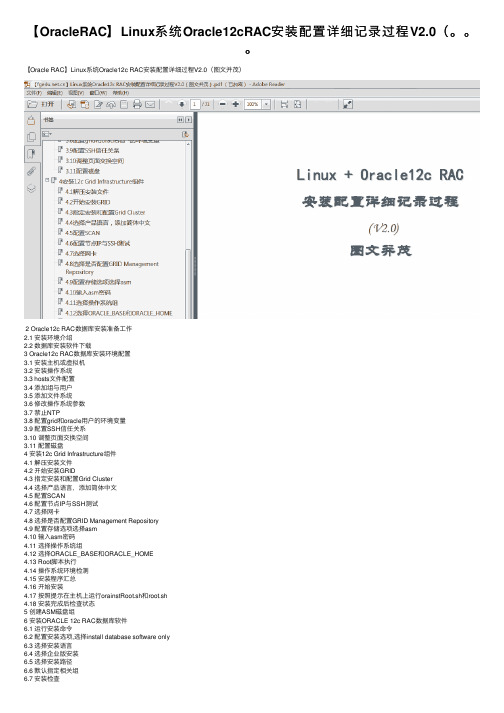
【OracleRAC】Linux系统Oracle12cRAC安装配置详细记录过程V2.0(。
【Oracle RAC】Linux系统Oracle12c RAC安装配置详细过程V2.0(图⽂并茂)2 Oracle12c RAC数据库安装准备⼯作2.1 安装环境介绍2.2 数据库安装软件下载3 Oracle12c RAC数据库安装环境配置3.1 安装主机或虚拟机3.2 安装操作系统3.3 hosts⽂件配置3.4 添加组与⽤户3.5 添加⽂件系统3.6 修改操作系统参数3.7 禁⽌NTP3.8 配置grid和oracle⽤户的环境变量3.9 配置SSH信任关系3.10 调整页⾯交换空间3.11 配置磁盘4 安装12c Grid Infrastructure组件4.1 解压安装⽂件4.2 开始安装GRID4.3 指定安装和配置Grid Cluster4.4 选择产品语⾔,添加简体中⽂4.5 配置SCAN4.6 配置节点IP与SSH测试4.7 选择⽹卡4.8 选择是否配置GRID Management Repository4.9 配置存储选项选择asm4.10 输⼊asm密码4.11 选择操作系统组4.12 选择ORACLE_BASE和ORACLE_HOME4.13 Root脚本执⾏4.14 操作系统环境检测4.15 安装程序汇总4.16 开始安装4.17 按照提⽰在主机上运⾏orainstRoot.sh和root.sh4.18 安装完成后检查状态5 创建ASM磁盘组6 安装ORACLE 12c RAC数据库软件6.1 运⾏安装命令6.2 配置安装选项,选择install database software only6.3 选择安装语⾔6.4 选择企业版安装6.5 选择安装路径6.6 默认指定相关组6.7 安装检查6.8 开始安装6.9 安装完成后,主机运⾏ root.sh⽂件7 创建Oracle 12c RAC数据库实例7.1 运⾏dbca创建数据库实例7.2 选择“Cluster database”7.3 选择“Create database”7.4 选择Advanced Mode7.5 选择⾃定义数据库7.6 输⼊“Global Database Name”和“Sid Prefix”7.7 选择集群节点7.8 配置EM7.9 选择“Use the Same Password for all Accounts”7.10 选择“Automatic Storage Management (ASM)”7.11 配置数据库选项7.12 配置数据库参数7.13 数据库创建选项建议7.14 开始创建数据库7.15 数据库创建完成7.16 查看资源组状态Oracle12c RAC集群安装配置详细⽂档下载地址(百度⽹盘):已推出的Oracle RAC视频学习地址(最新版本)Oracle数据库教程06:⽣产环境Linux7+Oracle 11gR2 RAC安装配置与管理维护Oracle数据库教程07:⽣产环境OracleLinux6+OracleRAC 11gR2集群安装维护-3节点Oracle数据库教程09:⽣产环境Linux+Oracle12c RAC集群安装配置与管理⼊门Oracle数据库教程10:⽣产环境Windows+Oracle 11gR2 RAC安装配置与管理维护Oracle12c RAC集群数据库教程05:Linux系统Oracle12.2 RAC集群实施维护---------------------。
WindowsServer2016虚拟机安装Oracle12c-RAC

WindowsServer2016虚拟机安装Oracle12c-RAC 简介在 Windows Server 2016 虚拟机上安装 Oracle 12c RAC 环境需要注意很多细节,本文将会详细介绍安装 Oracle 12c RAC 的步骤和注意事项。
安装前准备在开始安装 Oracle 12c RAC 之前,需要进行以下准备工作:1. 虚拟机环境本文假设已经在 Windows Server 2016 上安装好了 VMware Workstation,创建了虚拟机。
2. Oracle 12c RAC 安装文件请确认已经下载了 Oracle 12c RAC 的安装文件,建议下载最新版本。
3. 虚拟机网络设置在 VMware Workstation 中设置虚拟机的网络,建议使用桥接模式或者 NAT 模式。
安装步骤以下是安装 Oracle 12c RAC 的具体步骤:1. 安装准备1.确认虚拟机满足 Oracle 12c RAC 的硬件要求,建议至少 2 个虚拟 CPU、4GB 内存和 40GB 硬盘空间。
2.安装 Windows Server 2016,以管理员身份运行,关闭 UAC(用户账户控制),并将防火墙关闭。
3.安装 Microsoft Loopback Adapter。
2. 安装 Oracle Grid Infrastructure1.解压下载的 Oracle 12c RAC 安装文件。
2.运行setup.exe,选择“Install and Configure Grid Infrastructure for aCluster”。
3.勾选“Create New Cluster”。
4.选择“Advanced Installation”。
5.填写 Cluster 名称,选择“Standalone Cluster”,并填写节点名称。
6.填写其他必要信息,如 ASM 存储、SCAN、VIP IP 等。
- 1、下载文档前请自行甄别文档内容的完整性,平台不提供额外的编辑、内容补充、找答案等附加服务。
- 2、"仅部分预览"的文档,不可在线预览部分如存在完整性等问题,可反馈申请退款(可完整预览的文档不适用该条件!)。
- 3、如文档侵犯您的权益,请联系客服反馈,我们会尽快为您处理(人工客服工作时间:9:00-18:30)。
Oracle rac dbca 图形界面创建数据库手册
oracle一般都是用dbca来创建数据库,创建的方式分为两种,一种是用图形界面来创建数据库,这种方法比较简单,和在windows上安装应用程序类似,按照提示点击“next”即可;另一种是创建应答文件,在命令行采用静默的方式来创建。
我们现在用图形界面来创建数据库--dbca
一、确认图形界面是否可以启动
首先确认图形界面是否可以启动,用xclock或者dbca命令看看能否弹出图形界面,如果不能,用下面命令:
a)先启动XManager的Passive(我用的是Xshell工具)
b)export DISPLAY=本机IP:0.0(将图形界面拉到当前windows系统上)
再执行xclock或者dbca命令就会弹出图形界面,执行dbca命令就会弹出配置oracle数据库的界面,根据需要选择创建或者删除数据库,按照提示到组后即完成数据库的创建。
二、创建数据库
Xshell 工具连接数据库服务器:172.22.1.16 进入oracle用户下:
输入dbca命令弹出可视化界面。
加载。
弹出创建数据库界面:
1.第一项为创建RAC数据库
2.第二项为创建RAC单一节点的数据库
3.创建单实例数据库
选择第一个创建RAC数据库点击Next
第一项:创建一个数据库第二项:配置数据库选项第三项:删除一个数据库第四项:创建一个数据库模板第五项:实例管理
选择创建一个数据库NEXT
第一项:通用事物处理第二项:定制数据库第三项:数据仓库选择第一项NEXT
填写全局数据库名称Global Database Name : test
唯一身份编码SID : test
选择双节点select All
选择NEXT
把configure Enterprise Manger 去掉企业管理器NEXT
设置用户名和密码:
上面的为把sys system 设置为不同密码
下面为把sys system 设置为相同密码
NEXT
提示是否配置监听。
这里可以选择NO运行NETCA 配置监听也可以选择YES 继续。
存储类型选择ASM
路径选择+data
Next
去掉special fast recovery area 选项Next
NEXT
字符类型设置选择:国标中文简体NEXT
弹出选项选择finsh 数据库就创建完成了。
