LinkStar RCST操作手册(中文终版)
LinkStar室内单元硬件驱动软件程序使用说明

一、软降运行环境:WindowsXP系统,关闭杀毒软件和防火墙软件,保证计算机网卡为开启状态(笔记本则需关闭无线网卡),电脑与RCST网线直连(台式机网线应为交叉网线)。
二、将“pcl-3.0.0005.rar”拷贝至计算机硬盘,解压缩。
运行软件安装程序“pcdsetup.bat”安装软件。
三、进入windows系统“dos”窗口,输入“cdX:\pcl-3.0.0005”,进入软件目录下,保证计算机与RCST 之间网线连接,运行“rload -s2a –L0 -a -f rcst6.17060308L.xilinx.dat 00.a0.94.xx.xx:xx(RCST ETH Addr)”软件正常运行显示如下信息Resetting destination processor 00.a0.94.03.06.c7 Destination processor reset.Sending flash write code file (flwr_rcst_acm.abs) to destination...Success -- file completely sent (238928 bytes)Sending rcst6.17060308L.xilinx.dat to destination... Success -- file completely sent (481182 bytes)Starting code to write into flash...Erasing flash at offset 0x37fc00 length 0x7579e... flashcmd: erase unit= 00.a0.94.03.06.c7 offset= 37fc00 len= 7579eCommand completed successfullyWriting flash at offset 0x37fc00 length 0x7579e... flashcmd: write unit= 00.a0.94.03.06.c7 memaddr= 100000 offset= 37fc00 len= 7579eCommand completed successfully软件运行完毕后,RCST正常启动。
瑞得Ruide_RTS860系列(862_865_R)全站仪说明书操作手册V1.2
m
/Q
Hale Waihona Puke 3.1 操作键 ........................................................................................................ 19
Q
:25 00 5
80
33 2
5.2 坐标数据 .................................................................................................... 29 5.3 编码数据 .................................................................................................... 30 5.4 数据图形 .................................................................................................... 30 六、计算程序 ........................................................................................................ 32 6.1 计算器 ........................................................................................................ 32 6.2 坐标正算 .................................................................................................... 33 6.3 坐标反算 .................................................................................................... 33 6.4 面积周长 .................................................................................................... 34 6.6 两点计算交点............................................................................................. 36 6.7 四点计算交点............................................................................................. 37 6.9 单位转换 .................................................................................................... 39 七、设置 ................................................................................................................ 40 7.1 单位设置 .................................................................................................... 41 7.3 距离相关设置............................................................................................. 41 7.5 RS232 通讯设置 ......................................................................................... 43 7.6 蓝牙通讯设置............................................................................................. 43 7.7 电源设置 .................................................................................................... 43 7.8 其它设置 .................................................................................................... 44 7.9 固件升级 .................................................................................................... 45 7.10 格式化存储器 格式化存储器........................................................................................... 46 7.11 恢复出厂设置........................................................................................... 46 八、仪器校准 ........................................................................................................ 47 8.1 补偿器校正................................................................................................. 47 8.2 垂直角基准校正......................................................................................... 47
RCST_Install_Guide-a
重要警告:
注意下面的预防措施用来防止破坏RCST或它的电源。
RXIFL电缆与RCST和LNB连接好之前,不得开启RCST电源!
如果RCST背面RX IN接头的中心脚对地短路,将烧坏RCST的印刷电路板,使该RCST无法运行。
RX同步建立之前,不得连接TXIFL电缆到BUC!
如果到BUC的发射电缆错误的连接到RCST RX IN接头,过多的电流将立即冲击设备,可能会损坏RCST电源。
鱼鳞式包装带(Fish tape),100英尺
拖绳,1/2英寸,200英尺,聚酯材料。
电缆拖拉把手,直径0.37-0.49英寸电缆用
管道扳手,18英寸
测试设备
模拟或数字伏特-欧姆表
2路分配器/1路直流通过
转接头:
F阴转N阳
F阴转BNC阳
BNC阴转N阳
两根3英尺测试用同轴电缆,RG6阳/阳
频谱分析仪950-1750兆赫或峰值测量仪
例:
MAC=OE.00.01.01.72.bd
缺省的IP=10.0.114.189
这里72(hex)=114(dec)并且bd(hex)=189(dec)
网络IP地址
NOC提供或作为远程站安装资料清单的一部分。
表6IP地址
缺省的IP地址只有在RCST成为请求传输状态之前是有效的。一旦RCST成为TX同步,它就从RNCC接收它的网络IP地址同时缺省的IP地址不再有效。要重新建立缺省的IP地址,必须断开该终端背面的TX/RX电缆,这样,它就会自动复位为缺省的IP地址。
100 - 200英尺
RG-6类型
F头
Yes
RG-8类型
N头
No
200-400英尺
CC-Link空间光纤中继器操作手册说明书

Rated output level: 30VDC, 50mA max.
Electric connections
For CC-Link signals: 4-pin connector terminal block (PHOENIX
MSTB 2,5/4-GF-5,08)
For power supply and auxiliary outputs: 5-pin connector terminal
Shows red during faulty CC-Link communication.
(7) Sent data to cable indicator (SD1):
Shows red when data is transmitted to the cable.
(8) Sent data to optical unit indicator (SD2):
Receiver element
Photo diode
Auxiliary outputs
CDO: On when data is received.
ALM: Off when the reception level is low.
A photo-coupler insulated, NPN open collector output
2. Outline
The SOT-MS102/202 is a high-speed space optical transmitter using infrared rays. (1) It optically transmits CC-Link data.
Silk Central 16.5 用户指南说明书

帮助Borland Software Corporation700 King Farm Blvd, Suite 400Rockville, MD 20850Copyright © Micro Focus 2015. All rights reserved. Portions Copyright © 2004-2009 BorlandSoftware Corporation (a Micro Focus company).MICRO FOCUS, the Micro Focus logo, and Micro Focus product names are trademarks orregistered trademarks of Micro Focus IP Development Limited or its subsidiaries or affiliatedcompanies in the United States, United Kingdom, and other countries.BORLAND, the Borland logo, and Borland product names are trademarks or registeredtrademarks of Borland Software Corporation or its subsidiaries or affiliated companies in theUnited States, United Kingdom, and other countries.All other marks are the property of their respective owners.2015-09-24ii内容Silk Central 16.5 (6)Silk Central 16.5 的新增功能 (6)对 Microsoft Windows 10 以及新的 Internet 浏览器 Edge 的支持 (6)关键字驱动的测试增强功能 (6)手动测试增强功能 (7)用户界面改进 (8)Silk Performer 性能趋势仪表板面板 (8)包括自动用户帐户创建在内的 LDAP 改进 (8)自动删除结果和结果文件 (8)导出和更新共享步骤对象 (8)集成增强功能 (9)可用性增强 (9)技术更新 (10)开始 (10)UI 教程 (10)安装和许可 Silk Central (13)Issue Manager (13)浏览器设置 (13)登录和注销 (13)使用 Silk Performer 项目 (14)使用 Silk Performance Explorer (15)Silk Central 体系结构 (15)Silk Central、基于风险的测试和质量目标 (17)快速启动任务 (19)仪表板 (40)将面板添加到仪表板 (41)仪表板面板 (41)仪表板面板权限 (43)向仪表板面板添加报告 (44)需求 (44)管理需求 (44)需求工具栏功能 (46)需求树 (47)需求文档视图 (48)需求属性 (48)需求附件 (50)使用测试 (52)覆盖率 (55)需求历史记录 (56)需求更改通知 (57)需求报告 (57)标记 (59)需求导入 (61)外部需求管理工具 (65)测试 (76)测试文档视图 (77)使用测试树 (77)测试工具栏功能 (82)测试报告 (83)成功条件 (86)测试容器 (87)内容 | 3测试文件夹 (88)测试包 (89)测试历史记录 (92)测试 (93)库 (131)Windows 脚本宿主测试 (142)测试导出、更新和导入 (146)将 Silk Central 集成到 Rally (149)屏幕捕获 (150)视频捕获 (151)执行计划 (151)执行计划工具栏功能 (152)执行计划属性页面 (153)执行计划文档视图 (153)手动执行计划 (154)配置测试 (167)使用执行计划树 (170)管理执行计划、文件夹和配置套件 (173)执行分配至执行计划的测试 (191)手动测试 (192)分析测试运行 (199)当前运行页面 (206)使用 Silk Performer 项目 (208)Silk Test Classic 测试 (212)跟踪 (213)活动 (213)项目概述报告 (219)质量目标 (220)问题 (221)创建新问题 (221)以文档视图查看问题统计信息 (222)问题文档视图 (222)以详细信息视图查看问题统计信息 (222)问题页面 (222)分配现有问题 (222)更新问题状态 (223)删除问题(问题引用) (223)Issue Manager (223)报告 (272)报告数据集市 (272)报告区域 (286)代码分析 (302)默认报告 (321)项目 (341)内部版本信息 (341)比较项目与基线 (342)选择项目 (342)项目列表 (342)切换到最近访问的项目 (343)设置配置 (343)筛选 (395)管理 (399)开始 (399)配置系统 (401)配置应用程序 (407)配置高级设置 (458)4 | 内容系统管理 (472)系统管理员 (473)数据库 (473)客户端 (477)基础结构 (480)系统诊断 (483)集成 (484)代码分析工具集成 (484)问题跟踪配置文件集成 (484)外部需求管理工具 (495)源代码管理配置文件集成 (506)测试自动化工具 (519)其他集成 (539)通过 SSL 与外部系统通信 (540)内容 | 5Silk Central 16.5Silk Central 是一款功能强大且全面的软件测试管理工具。
linkstar使用手册

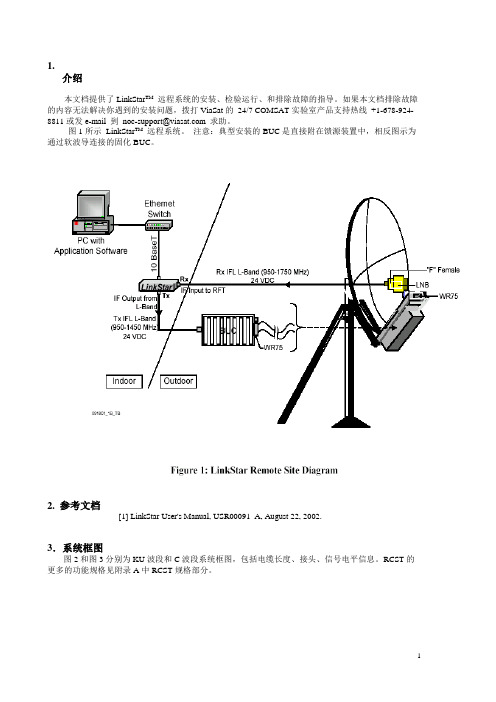
LinkStar™RCST安装维护手册目录1.小站安装使用快速参考 (3)2. 小站系统简介 (5)3. 系统框图 (6)4. LinkStar远端站组件 (6)5. 安装工具及测试设备 (8)6. IFL电缆要求 (9)7. 安装步骤 (10)8. IFL 安装 (10)9. 天线对星 (11)10. RCST安装 (13)11.检验RCST运行状态 (16)11.1. TDM 误码率 (16)11.2. TDMA误码率 (16)11.3. IP Ping (17)12.交叉极化 (18)13.故障排除 (19)13.1. 排除故障所需设备 (19)13.2. 确定问题 (19)13.3. RCST无法加电 (20)13.4. 无卫星信标信号 (20)13.5.接收同步 (21)13.5.1. 接收TDM信号 (21)13.5.2. LNB (23)13.5.3. 接收电缆 (24)13.5.4. 天线 (24)13.5.5 TDM频率和符号率 (25)13.6. 接收TDM误码率 (25)13.7.发射同步 (26)13.7.1. RCST 发射 (28)13.7.2. RCST 启动参数 (29)13.7.3. PCR分配 (30)13.7.4. TDMA发射电平 (30)13.8. RCST发射误码率 (33)13.9. IP 测试 (33)13.9.1. 带宽分配 (33)13.9.2. 分配CIR (34)13.9.3. IP 状态 (35)附录A: RCST设备规格指标 (36)附录B: RCST LED 显示 (37)附录C: Telnetting到RCST (38)附录D: RCST 有关安装的启动参数 (39)1.小站安装使用快速参考本节作为小站安装使用的快速参考,如果需要查找更详细的信息或者排除故障,请参考详细的操作手册。
1.1正确安装BUC、LNB设备到天线上。
天线精确对星。
锐捷RSR10(20)系列路由器用户安装手册V1.81-10.3(5)

¾ 网络管理员
3
本书约定
1、通用格式约定 宋体:正文采用 5 号宋体。 楷体:警告、说明等提示等内容一律用楷体,并且在内容前后增加线条与正文隔离。
Terminal Display 格式:自定义的 Terminal Display 格式,英文 Courier New ,中文宋体,文字大 小 8.5 ,表示屏幕输出信息此外屏幕输出。信息中夹杂的用户从终端输入的信息,采用加粗字体表示。
锐捷网络客户服务中心可以为所有的客户提供所需要的技术帮助:产品、技术 和解决方案。对于客户遇到的产品的安装,软件的配置问题,以及其它的网络性能 的问题,客户服务中心都将提供迅速的技术支持。 ¾ 技术支持网站: ¾ 技术支持信箱:service@ ¾ 呼叫中心热线: 4008-111-000 ¾ 客户服务投诉热线:0591-83057315
®
锐捷 RSR10/RSR20 系列路由器 用户安装手册
V1.81
版权声明
福建星网锐捷网络有限公司©2000-2010
版权所有,保留一切权利。
本手册所有权益由福建星网锐捷网络有限公司独家拥有。没有
经过本公司书面许可,任何单位和个人不得擅自摘抄、复制本
书内容的部分或者全部,并且不得以任何形式传播。
福建星网锐捷网络有限公司保留以后对本手册描述的产品和手
建议: 建议由熟悉电气环境、线缆连接以及有实际安装和配置路由器经验的专业技术人员进 行安装和配置。
这份手册包括以下章节: z 第一章 产品介绍 介绍了锐捷 RSR10/RSR20 系列路由器的产品介绍以及系统特性。 z 第二章 安装路由器前的准备 描述了安装锐捷 RSR10/RSR20 系列路由器的环境要求、安装前和安装过程中需要注意的 事项、安装所需工具。 z 第三章 路由器的安装 介绍锐捷 RSR10/RSR20 系列路由器的机械安装方法、电源连接方法、备份口线缆连接方 法以及配置口线缆连接方法。 z 第四章 启动和配置路由器 介绍路由器初始启动信息及路由器进行的初始配置。 z 第五章 安装故障处理 介绍了如何处理安装过程中可能出现的问题及故障处理。 z 第六章 线缆使用说明 介绍了路由器常见配套线缆使用方法。
raritan cc-sg v1快速设置指南说明书
CommandCenter SecureGateway V1 機型快速設定指南感謝您購買CommandCenter Secure Gateway™,力登管理軟體平台的設計,可將IP 裝置的安全存取和控制功能合而為一。
此快速設定指南說明如何安裝和設定CommandCenter Secure Gateway。
如需任何CommandCenter Secure Gateway 觀點的相關資訊,請參閱可從CommandCenter Secure Gateway 存取的隨附線上說明或PDF 格式的CommandCenter Secure Gateway 說明,您可以從力登網站的「Firmware and Documentation」(韌體與說明文件) 區塊中下載(/support/firmware-and-documentation/)。
I. 拆開包裝,取出CC-SG隨貨應該收到下列物品:(1) CommandCenter Secure Gateway V1 裝置(1) CommandCenter Secure Gateway V1 前擋板(1) 機架組(1) 電源線(1) CAT 5 網路纜線(1) 快速設定指南(印刷本)(1) 登錄註冊和保固書決定機架位置在乾淨、無塵、通風的場所,決定機架中裝設CC-SG 的位置。
避免裝設在會產生高溫、電雜訊及電磁磁場的場所,本裝置應置於接近接地電源插座處。
II.將CC-SG 安裝到機架上識別導軌部分機架組包含兩個機架導軌組件。
每個組件由兩個部分組成:一個內部固定式機殼導軌(A) 用於固定於裝置,一個外部固定式機架導軌(B) 用於固定於導軌托架。
夾在兩個導軌之間的滑軌應該保持固定於外部固定式機架導軌。
A 和 B 導軌必須彼此拆離,以便安裝。
若要拆除內部固定式機殼導軌(A),請盡量將它拉出到底,直到聽到喀一聲,鎖扣從導軌組件內側凸出來,並鎖定內導軌。
壓下鎖扣,將內導軌完全拉出。
新普特双行滑轮线性平台说明书
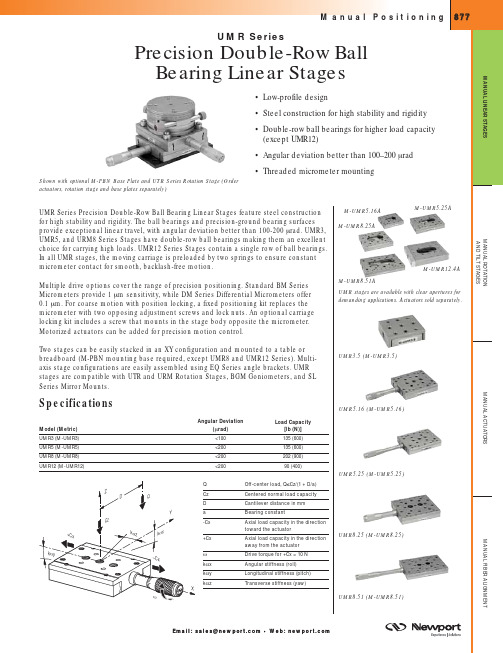
UMR SeriesPrecision Double-Row BallBearing Linear StagesShown with optional M-PBN Base Plate and UTR Series Rotation Stage (Orderactuators, rotation stage and base plates separately)UMR Series Precision Double-Row Ball Bearing Linear Stages feature steel constructionfor high stability and rigidity. The ball bearings and precision-ground bearing surfaces provide exceptional linear travel, with angular deviation better than 100-200µrad. UMR3,UMR5, and URM8 Series Stages have double-row ball bearings making them an excellent choice for carrying high loads. UMR12 Series Stages contain a single row of ball bearings.In all UMR stages, the moving carriage is preloaded by two springs to ensure constant micrometer contact for smooth, backlash-free motion.Multiple drive options cover the range of precision positioning. Standard BM Series Micrometers provide 1 µm sensitivity, while DM Series Differential Micrometers offer 0.1 µm. For coarse motion with position locking, a fixed positioning kit replaces the micrometer with two opposing adjustment screws and lock nuts. An optional carriage locking kit includes a screw that mounts in the stage body opposite the micrometer.Motorized actuators can be added for precision motion control.Two stages can be easily stacked in an XY configuration and mounted to a table or breadboard (M-PBN mounting base required, except UMR8 and UMR12 Series). Multi-axis stage configurations are easily assembled using EQ Series angle brackets. UMR stages are compatible with UTR and URM Rotation Stages, BGM Goniometers, and SL Series Mirror Mounts.M-UMR8.51AM-UMR8.25AM-UMR5.16A •Low-profile design••(except UMR12)•Angular deviation better than 100–200 µ•Threaded micrometer mountingSpecificationsModel (Metric)Angular Deviation(µrad)Load Capacity [lb (N)]UMR3 (M-UMR3)<100135 (600)UMR5 (M-UMR5)<200135 (600)UMR8 (M-UMR8)<200202 (900)UMR12 (M-UMR12)<20090 (400)UMR3.5 (M-UMR3.5)UMR5.16 (M-UMR5.16)UMR5.25 (M-UMR5.25)UMR8.25 (M-UMR8.25)UMR8.51 (M-UMR8.51)QOff-center load, Q ≤Cz/(1 + D/a)Cz Centered normal load capacity D Cantilever distance in mm a Bearing constant-Cx Axial load capacity in the direction toward the actuator+Cx Axial load capacity in the direction away from the actuator ωDrive torque for +Cx = 10 N k αx Angular stiffness (roll)k αyLongitudinal stiffness (pitch)k αzTransverse stiffness (yaw)systems (see the (see page 927)(see page 836)Model UMR3.52 HOLES,C’BORED FOR 4-40 (M3) A CLR,UMR5 SeriesE SPACING(UMR 5.5/5.16 ONLY)THD A CLR, .79 (20)ACCESSIBLE AT END OF TRAVELBOTH SIDESThreadDimensions [in. (mm)]Model (Metric)A B C D EF G H UMR5.5 (M-UMR5.5)4-40 (M3)8-32 (M4)1/4-20 (M6)0.500 (12.5) 1.000 (25.0) 2.000 (50.0) 1.77 (45) 2.28 (58)UMR5.16 (M-UMR5.16)4-40 (M3)8-32 (M4)1/4-20 (M6)0.500 (12.5) 1.000 (25.0) 2.000 (50.0) 1.26 (32) 2.28 (58)UMR5.25 (M-UMR5.25)4-40 (M3)8-32 (M4)1/4-20 (M6)0.500 (12.5)1.000 (25.0)2.000 (50.0)1.26 (32)2.68 (68)UMR5A Series2 holes, M3 thd, B spacing.ThreadDimensions [in. (mm)]Model (Metric)A B C D E UMR5.16A (M-UMR5.16A)8-32 (M4) 1.000 (25.0) 2.000 (50.0) 2.283 (58.0) 1.181 (30.0)UMR5.25A (M-UMR5.25A)8-32 (M4)1.000 (25.0)2.000 (50.0)2.677 (68.0)1.535 (39.0)Model ADAPT-BM17-375Model ADAPT-BM25-375M A N U A L R O T A T I O N A N D T I L T S T A G E SM A N U A L F I B E R A L I G N M E N TM A N U A L A C T U A T O R SM A N U A L L I N E A R S T A G E SModel UMR8.4/8.254 HOLES,THD B,C x D SPACING9 HOLES,THD B,C SPACING2 ACCESSHOLES,ø.45 (11.5)C SPACING4 HOLES, THD A CLR,1.34 (34)4 HOLES, THD A, 2.48 (63).71(18).02 (.5)E3.15(80)2.30(58.4)2 HOLES,THD B CLR,C SPACING4 HOLES, THD A, 1.34 (34)4 ACCESS HOLES,ø.30 (7.5), 1.34 (34)(UMR8.4 ONLY).28 (7)(UMR8.4 ONLY)3.62 (92) 2.48(63).002 (.05)M12 x 0.5THD,BOTH SIDESModel UMR8.51ThreadDimensions [in. (mm)]Model (Metric)A B C D E UMR8.4 (M-UMR8.4)8-32 (M4)1/4-20 (M6) 1.000 (25.0) 3.000 (75.0) 2.52 (64)UMR8.25 (M-UMR8.25)8-32 (M4)1/4-20 (M6) 1.000 (25.0) 3.000 (75.0) 2.09 (53)UMR8.51 (M-UMR8.51)8-32 (M4)1/4-20 (M6) 1.000 (25.0)3.000 (75.0)UMR8A Series2.087 (53.0).709(18.0)2.480(63.0).366(9.3)GF2.299(58.4)3.150(80.0)ø .984 (25.0)4 Holes, Thd A, ٗ 1.339 (34.0)Spacing4 Holes, Thd A, C x E Spacing,M-UMR8.51A6 Holes, Thd A, ٗ B Spacing4 Holes, M4 Thd,ٗ 2.480 (63.0) Spacing4 Holes, M4 Clr,ٗ 1.339 (34.0) Spacing4 Holes, Thd A, B x D Spacing M12Each Side1.004(25.5)ThreadDimensions [in. (mm)]Model (Metric)A B C D E F G UMR8.25A(M-UMR8.25A)1/4-20(M6) 1.000 (25.0) 2.000 (50.0) 3.000 (75.0) 4.000(100.0) 3.622 (92.0) 2.087 (53.0)M-UMR8.25AM625.050.075.0100.0118..079.04.72(120)3.03(77) 3 HOLES,THD B CLR, D SPACING4 HOLES, THD A, 1.89 (48)E1.02 (26)(UMR12.80ONLY)F.02 (.5)3.07 (78)17 HOLES,THD B,D SPACING2 ACCESSHOLES,ø.45 (11.5)D SPACING4 HOLES, THD A CLR, 1.89 (48)4 HOLES, THD A, 3.62 (92)THD C (M8 THD,OPPOSITE SIDE)ThreadDimensions [in. (mm)]Model (Metric)A B C D E F UMR12.40 (M-UMR12.40)10-24 (M5)1/4-20 (M6)M18 x 1 1.000 (25.0) 5.61 (142.5)UMR12.63 (M-UMR12.63)10-24 (M5)1/4-20 (M6)M18 x 1 1.000 (25.0) 6.56 (166.5)UMR12.80 (M-UMR12.80)10-24 (M5)1/4-20 (M6)M22 x 11.000 (25.0)8.29 (210.5)1.38 (35)UMR12 SeriesSee our website for CAD filesCADSDS65SDS40M-SDS25M-SDS25 stages in XY assembly on M-B-2C。
升腾终端使用手册

第一篇、注意事项3第二篇、产品介绍 (4)2.1升腾3200系列(立式) (4)2.2升腾3300系列(卧式) (7)2.3升腾3500系列(可立可卧式) (11)2.4升腾5500系列(可立可卧式) (14)2.5升腾3300系列液晶终端 (17)第三篇、升腾3XXX系列使用说明 (20)3.1 连接条目管理 (22)3.2系统设置部分 (24)3.2.1信息 (25)3.2.2显示 (26)3.2.3网络设置 (27)3.2.4键盘 (28)3.2.5安全 (29)3.2.6 ICA设置 (30)3.2.7 RDP设置 (32)3.2.8 PPP设置 (34)3.2.9 PING (39)3.2.10 其他 (41)3.3添加新连接向导 (42)3.3.1添加ICA连接 (42)3.3.2 添加RDP连接 (46)3.3.3 添加Telnet连接 (50)3.3.4 添加TN5250连接 (54)3.4启动菜单简介 (55)3.5输入法的使用 (56)3.6 IC卡的使用 (56)3.7打印机的使用 (56)3.7.1 ICA打印机设置 (56)3.7.2 RDP打印机设置 (57)3.8升腾3XXXD+(双网口)说明 (57)第四篇、升腾5500系列使用说明 (58)4.1系统启动 (58)4.2连接管理的配置 (59)4.2.1 RDP连接配置 (60)4.2.2 ICA连接配置 (61)4.2.3 Telnet连接配置 (62)4.2.4 X-Term连接配置 (63)4.3 系统设置 (64)4.3.1 Ping (66)4.3.2鼠标配置 (67)4.3.3网络配置 (68)4.3.4拨号设置 (69)4.3.5显示设置 (70)4.3.6时间和日期的设置 (71)4.3.7声音和多媒体的设置 (72)4.4输入法功能键的设置 (73)4.5升级程序 (75)4.6桌面管理器 (76)附录:串、并口信号定义 (78)第一篇、注意事项在此列出的安全使用注意事项,请您在使用过程中严格执行,这将有助于更好地使用和维护升腾终端。
Linkstar 对星软件使用手册

LinkStar对星软件使用手册ViaSat Proprietary 1 of 212 of 21ViaSat Proprietary目录1 Installation (安装)..............................................................................................................................3 2 Software Operations (软件操作).......................................................................................................9 3 Pointing Operation (对星操作).. (19)1 Installation (安装)1.1运行安装软件SeekSatellite.msi1.2点击Next 下一步ViaSat Proprietary 3 of 214 of 21ViaSat Proprietary1.3 选择软件安装位置,默认为:C:\Program Files\ViaSat\LinkStar\,并点击Next 下一步1.4确认安装,点击Next 下一步1.5开始安装1.6软件安装完成,点击Close关闭ViaSat Proprietary 5 of 216 of 21ViaSat Proprietary1.7 安装中文发音软件包 SimpChinese Speech Package.msi1.8通过控制面板调整发音速度 1.8.1 打开控制面板,点击“语音”1.8.2点击语音选择“Microsoft Simplified Chinese”1.8.3选择语音速度ViaSat Proprietary 7 of 218 of 21 ViaSat Proprietary1.8.4点击确认2 Software Operations (软件操作)2.1运行LinkStar 对星软件,点击SeekSatellite.exeViaSat Proprietary9 of 2110 of 21 ViaSat Proprietary2.2通过以太网使用对星软件2.2.1点击以太网(Ehternet)工作模式:(如下图)2.2.2点击设置,进行接口参数设置:2.2.3点击Ethernet,进行IP地址设置;并可设置采样周期(Interval),默认为700毫秒;然后点击OK确认:注1:如何确定RCST的缺省IP地址(入网前)地址数值说明MAC 地址___.___.___.___.___.___ 以太网地址标签在RCST背板上缺省地址10. ____.____.____ RCST缺省地址基于MAC地址最后3个字节,其十六进制数的十进制等值数。
丰田锐志使用手册

6丰田锐志车主手册>1、电动后视镜控制开关2、侧通风口3、侧除霜器出风口4、仪表组5、中央通风口6、驾驶模式选择开关7、音响遥控开关8、电动车窗开关9、杂物箱10、门兜11、后控制箱12、后通风口13、后排烟灰盒14、电源插座15、杯架16、自动变速器选档杆17、倾斜和伸缩式转向锁止释放杆>1、前照灯清洁器开关或前照灯光束水平旋钮2、后电动遮阳帘开关3、前照灯、转向信号灯、前雾灯开关和后雾灯开关4、雨刷器和喷洗器开关5、空调。
音响和导航系统控制器(有关导航系统,请参见“导航系统用户手册”。
)6、Plasmacluster(空气电离器)开关7、危险告警灯开关8、后车窗和车外后视镜除雾器开关9.前排乘员座椅安全带提示灯10、辅助储物箱或音响系统控制器(有关音响系统控制器,请参见“导航系统用户手册”。
)11、座椅加热器开关12、点烟器和烟灰盒13、时钟14、“TRCOFF”(牵引力控制系统关闭)开关15、巡航控制开关16、点火开关(发动机开关)17、发动机罩锁定释放杆18、辅助储物箱和卡片盒19、自适应性前照灯系统关闭开关>1、音响遥控开关2、电话按钮(有关细节,请参见“导航系统用户手册”。
)3、外界温度和遥航信息显示器控制开关>>1、前方个人用灯2、前方个人用灯开关3、辅助储物箱4、电动月亮天窗开关5、麦克风(有关细节,请参见“导航系统用户手册”。
)6、“ROOM”(冷光顶灯)开关>1、短距离里程表复位按钮2、车速表3、维修提示指示灯和指示灯4、车门/发动机罩/行李厢开启指示显示器5、自动变速器档位显示器6、外界温度显示器和/或巡航信息显示器7、转速表8、仪表板照明控制按钮9、里程表和双短距离里程表10、发动机冷却液温度表11、燃油表>> >>*1:有关细节,请参见章节1-6的“维修提示指示灯和警告蜂鸣器”。
*2:如果该灯闪烁,则请参见章节1-5的“前照灯和转向信号灯”。
NRX系列电子产品操作指南说明书

Series NRX with PXR - instructions for secondary terminal blocksWARNING(1) ONLY QUALIFIED ELECTRICAL PERSONNEL SHOULD BEPERMITTED TO WORK ON THE EQUIPMENT.(2) ALWAYS DE-ENERGIZE PRIMARY AND SECONDARY CIRCUITS IFA CIRCUIT BREAKER CANNOT BE REMOVED TO A SAFE WORKLOCATION.(3) DRAWOUT CIRCUIT BREAKERS SHOULD BE LEVERED (RACKED)OUT TO THE DISCONNECT POSITION.(4) ALL CIRCUIT BREAKERS SHOULD BE SWITCHED TO THE OFFPOSITION AND MECHANISM SPRINGS DISCHARGED.FAILURE TO FOLLOW THESE STEPS FOR ALL PROCEDURESDESCRIBED IN THIS INSTRUCTION LEAFLET COULD RESULT INDEATH, BODILY INJURY, OR PROPERTY DAMAGE.WARNINGTHE INSTRUCTIONS CONTAINED IN THIS IL AND ON PRODUCTLABELS HAVE TO BE FOLLOWED. OBSERVE THE FIVE SAFETY RULES:– DISCONNECTING– ENSURE THAT DEVICES CANNOT BE ACCIDENTALLY RESTARTED– V ERIFY ISOLATION FROM THE SUPPLY– E ARTHING AND SHORT-CIRCUITING– C OVERING OR PROVIDING BARRIERS TO ADJACENT LIVE PARTSDISCONNECT THE EQUIPMENT FROM THE SUPPLY. USE ONLYAUTHORIZED SPARE PARTS IN THE REPAIR OF THE EQUIPMENT.THE SPECIFIED MAINTENANCE INTERVALS AS WELL AS THEINSTRUCTIONS FOR REPAIR AND EXCHANGE MUST BE STRICTLYADHERED TO PREVENT INJURY TO PERSONNEL AND DAMAGE TOTHE SWITCHBOARD.Instructional Leaflet IL0131093EN Series NRX with PXR - instructions for3Instructional Leaflet IL0131093ENEffective May 2016Series NRX with PXR - instructions for secondary terminal blocks EATON Section 2: Installation and removal of fixed terminal blocksote:N Many illustrations use the NF frame circuit breaker for illustrative pur-poses only. The RF frame circuit breaker is handled in a similar fashion.Proceed with the following eight steps.Step 1: Remove the four screws holding the front cover inplace (two on each side of the cover).Figure 5. Step 1.Step 2: Remove the front cover. Pull down on the charginghandle to simplify removal.Figure 6. Step 2.Step 3: Become familiar with the fixed terminal block mount-ing plate where secondary connections are made.ote:N Secondary connection points have numerical and descriptive laser-etched identifications.Figure 7. Step 3.Step 4: Plug the accessory connector plug into fixed second-ary terminal block.Figure 8. Step 4.Step 5: Identify correct mounting location on fixed terminal block mounting plate for mounting fixed secondary terminal block. First insert the bottom end of the fixed secondary ter-minal block into the proper location on the mounting plate.Figure 9. Step 5.Step 6: Rotate the top end of the terminal block in until it engages the appropriate flexible mounting tab at the top ofthe mounting plate with a clicking sound.4Instructional Leaflet IL0131093ENEffective May 2016Series NRX with PXR - instructions forsecondary terminal blocksEATON Figure 10. Step 6.Step 7: To remove a fixed secondary terminal block, lift up on the small flexible mounting tab at the top of fixed terminal block mounting plate, and rotate the terminal block out in the opposite direction shown in Step 6.CIRCUIT BREAKER, THE APPROPRIATE FIXED SECONDARY TERMINAL BLOCK MUST FIRST BE REMOVED. ONCE THE TERMINAL BLOCK IS REMOVED, THE ACCESSORY CONNECTOR PLUG CAN BE UNPLUGGED FROM THE BOTTOM OF THE TERMINAL BLOCK. REFER TO FIGURE 4 IN SECTION 1 FOR ASSISTANCE WITH THE REMOVAL.Step 8: Once all terminal blocks are securely mounted, replace the front cover and secure it in place with the four mounting screws previously removed in Step 1.Section 3: Installation and removal of drawout terminal blocksIMPORTANTKEEP IN MIND THAT THE SECONDARY TERMINAL BLOCKS ASSOCI-ATED WITH DRAWOUT CIRCUIT BREAKERS ARE MOUNTED ON THE BREAKER’S DRAWOUT CASSETTE (FIGURE 11). ACCESSORY SECOND-ARY PLUGS PLUG INTO A SECONDARY PLUG HOUSING MOUNTED ON THE TOP FRONT OF THE CIRCUIT BREAKER (FIGURE 12). AS SUCH, SECONDARY CONNECTIONS ARE AUTOMATICALLY MADE OR DIS-CONNECTED DURING THE LEVERING (RACKING) PROCESS AS THE SECONDARY PLUG HOUSING ON THE BREAKER ENGAGES OR DIS-ENGAGES THE SECONDARY TERMINAL BLOCKS MOUNTED ON THE DRAWOUT CASSETTE. FOR THIS REASON, ACCESSORY SECONDARY PLUGS DO NOT HAVE TO BE UNPLUGGED TO ADD OR REMOVE TER-MINAL BLOCKS. REFER TO FIGURES 3 AND 4 OF SECTION 1 AND THE ASSOCIATED COPY FOR ASSISTANCE WITH CONNECTING OR DISCON-NECTING ACCESSORY SECONDARY PLUGS.ote:N Many illustrations use the NF frame cassette for illustrative purposes only. The RF frame cassette is handled in a similar fashion.Figure 11. Cassette-mounted terminal blocks NF frame.Figure 11A. Cassette-mounted terminal blocks RF frame.5Instructional Leaflet IL0131093ENEffective May 2016Series NRX with PXR - instructions for secondary terminal blocks EATON Step 1: Become familiar with the drawout terminal block (Figure 1 of Section 1) and the terminal block mounting bracket.ote:N The terminal block mounting locations have numerical and descriptive laser-etched identifications (Figure 14).Drawout terminal block brackets are supplied as part of the cassette and also have etched numerical identifications.All of these identifications match the identifications on the breaker’s secondary plug housing to ensure accurate terminal block placement.In addition, a terminal block alignment bracket is assembled to provide proper alignment and separation of each individual terminal block during the levering (racking) process. Two alignment brackets are used with the RF frame cassette since two cradles are required to accommodate the addi-tional terminal blocks. The bracket’s separation teeth ensure this alignment and separation (Figure 13). Terminal block align-ment brackets must be removed to add or remove terminal blocks.Figure 13. Step 1. Drawout terminal block mounting bracket.Numerical identificationFigure 14. Step 1 (NF frame).Terminal block alignment bracketNumerical/descriptive identificationsFigure 14a. Step 1 (RF frame).Numerical/descriptive identificationsTerminal block alignment bracket6Instructional Leaflet IL0131093ENEffective May 2016Series NRX with PXR - instructions forsecondary terminal blocksEATON Step 2: To remove, grasp the terminal block alignmentbracket on each side and gently pull away from the terminal blocks.Figure 15. Step 2.Step 3: Slide the alignment bracket out from between any mounted terminal blocks, and put it aside for re-installment after new terminal blocks are connected to the mountingbracket.Figure 16. Step 3.Grasp hereStep 4: Connect the bottom part of the terminal block to the lower part of the mounting bracket. Ensure the terminal7Instructional Leaflet IL0131093ENEffective May 2016Series NRX with PXR - instructions for secondary terminal blocks EATON Step 6: Repeat Steps 4 and 5 until all terminal blocks are mounted, and check to ensure they are positioned in the cor-rect locations. A small number terminal blocks would look asshown.blocks.Ensure the alignment bracket is fully seated.Figure 21. Step 8.Step 9: Once the terminal block alignment bracket is in place, inspect it from the bottom to ensure that the teeth on the bracket separate each individual terminal block. Only one installed terminal block only should be visible between twoteeth when the alignment bracket is properly positioned.Steps 2 and 3 in this section.Step 11: Remove any terminal block by inserting a small screwdriver under the mounting plate retainment tab at the top front of the terminal block as shown, and gently pry down to release and remove the block from the mountingbracket.Figure 23. Step 11.Step 12: After all terminal blocks to be removed are removed, perform Steps 7, 8, and 9 in this section to complete the removal process.Eaton1000 Eaton Boulevard Cleveland, OH 44122 United States © 2016 EatonAll Rights ReservedPrinted in USAPublication No. IL0131093EN / TBG001222 Part No. IL0131093ENH02May 2016Eaton is a registered trademark.All other trademarks are propertyof their respective owners.Series NRX with PXR - instructions forsecondary terminal blocksInstructional Leaflet IL0131093ENEffective May 2016Disclaimer of Warranties and Limitation of LiabilityThe information, recommendations, descriptions, and safety nota-tions in this document are based on Eaton’s experience and judg-ment. This instructional literature is published solely for information purposes and should not be considered all-inclusive. If further information is required, you should consult an authorized Eaton sales representative.The sale of the product shown in this literature is subject to the terms and conditions outlined in appropriate Eaton selling policiesor other contractual agreement between the parties. This literature is not intended to and does not enlarge or add to any such contract. The sole source governing the rights and remedies of any purchaser of this equipment is the contract between the purchaser and Eaton. NO WARRANTIES, EXPRESSED OR IMPLIED, INCLUDING WARRANTIES OF FITNESS FOR A PARTICULAR PURPOSE OR MERCHANTABILITY, OR WARRANTIES ARISING FROM COURSE OF DEALING OR USAGE OF TRADE, ARE MADE REGARDING THE INFORMATION, RECOMMENDATIONS, AND DESCRIPTIONS CONTAINED HEREIN.In no event will Eaton be responsible to the purchaser or user in contract, in tort (including negligence), strict liability or otherwisefor any special, indirect, incidental or consequential damage or loss whatsoever, including but not limited to damage or loss of use of equipment, plant or power system, cost of capital, loss of power, additional expenses in the use of existing power facilities, or claims against the purchaser or user by its customers resulting from the use of the information, recommendations and description contained herein.The information contained in this manual is subject to change without notice.。
使用手册-microlinks
使用手冊桌上型數位顯微鏡Version 1.2A目錄1.產品介紹 (2)1.1包裝內容物 (2)1.2顯微鏡安裝 (2)1.3顯微鏡功能 (4)1.4顯微鏡操作 (5)2.產品需知 (7)2.1保養方式 (7)2.2產品規格 (8)2.3安全說明 (9)1. 產品介紹1.1 包裝內容物包裝盒內有主機1台與6個配件如下表。
1.2 顯微鏡安裝(1) 固定與連結將顯微鏡固定至支撐架上○a,如下圖所示,詳細支撐架組裝請參考附件中的「支撐架組裝說明」。
○a(2) 使用USB線連結顯微鏡與電腦○b○b(3) 安裝軟體執行光碟中的○c圖示進行應用程式安裝,詳細安裝請參考光碟中的「顯微鏡安裝說明」。
若安裝光碟遺失或損毀或至下載。
(4) 與電腦連線執行○d圖示。
應用程式開啟後再點選○e圖示即可看到顯微影像,若影像不清晰請調整支撐架高度或光學對焦按鈕。
應用程式的操作請參考光碟中「顯微鏡應用程式操作說明」。
○d○e1.3 顯微鏡功能(1)光學對焦操作放大/縮按鈕進行對焦動作。
放大影像○f ,當影像放的愈大時,對焦距離愈近。
縮小影像○g ,當影像縮的愈小時,對焦距離愈遠。
○h 為鏡頭。
(2)LED 調光對於高倍率需要較大的亮度,反之低倍率需較小的亮度。
使用該功能前,請於電腦軟體中,將曝光度設為手動。
○i 為增亮鈕,○j 為減亮鈕,○k 為較低的對焦高度光源(LED x 4),○l 為中高的對焦高度光源(LED x 2),○m 為較高的對焦高度光源(LED x 2),光源會根據對焦高度自動切換。
(3)USB 埠此埠○n 與電腦連接後可供給顯微鏡電源。
執行應用程式後即可觀測顯微影像。
(4)支撐架固定孔○O○i ○f ○k ○m ○l ○n ○O ○j ○g ○h1.4 顯微鏡操作對焦方式有兩種,可先確定對焦距離,再調整對焦位置。
反之,確定對焦位置後,再來調整對焦距離。
對焦距離:物鏡至觀測物之距離。
對焦位置:影像感應器(Image Sensor)之位置。
Rlinkedin包用户手册说明书
Package‘Rlinkedin’October12,2022Version0.2Title Access to the LinkedIn API via RDescription A series of functions that allow usersto access the'LinkedIn'API to get information about connections,search for people and jobs,share updates with their network,and create group discussions.For more information about usingthe API please visit<https:///>.Author Michael Piccirilli<******************************>Maintainer Michael Piccirilli<******************************>Depends R(>=2.12.0),httr,XML,httpuvImports methodsLicense GPL-2LazyData trueURL https:///mpiccirilli/RlinkedinBugReports https:///mpiccirilli/Rlinkedin/issuesRoxygenNote5.0.1NeedsCompilation noRepository CRANDate/Publication2016-10-3008:58:23R topics documented:Rlinkedin-package (2)getCompany (2)getGroupPosts (3)getGroups (4)getJobs (5)getMyConnections (6)getProfile (7)inOAuth (8)12getCompany searchCompanies (9)searchJobs (10)searchPeople (11)submitGroupPost (13)submitShare (14)Index16 Rlinkedin-package Access to LinkedIn API via RDescriptionThis is an R package that provides a series of functions that allow users to access the LinkedIn API to get information about connections,search for people,search for jobs,share updates with your network,and create group discussions.Author(s)Michael Piccirilli<******************************>See AlsoinOAuth,getProfile,getMyConnections,getGroupPosts,getGroups,getJobs,searchJobs, searchPeople,submitGroupPost,submitShare,getCompany,searchCompaniesgetCompany Retrieve Company Profile InformationDescriptiongetCompany retrieves company profiles using a company Id,a universal name,or an email domain.UsagegetCompany(token,universal_name=NULL,email_domain=NULL,company_id=NULL,partner=0)Argumentstoken Authorization token.universal_name LinkedIn universal company name.This is the exact name seen at the end of the URL on the company page on .email_domain The email domain used by the company.company_id LinkedIn company ID.partner Indicate whether you belong to the Partnership Program.Values:0or1getGroupPosts3DetailsThe’universal name’needs to be the exact name seen at the end of the URL on the company page on .ValueReturns company profile data,such as LinkedIn ID,name,universal-name,email-domains,company-type,ticker,website-url,industries,status,twitter handle,employee-count-range,specialties,loca-tions,description,founded-year,and number of followers.The output when specifying the universal_name or company_id will be in a list,whereas the output when specifying the email_domain will be a dataframe.Author(s)Michael Piccirilli<******************************>See AlsosearchCompaniesExamples##Not run:<-getCompany(token=in.auth,universal_name="Facebook")company.email<-getCompany(token=in.auth,email_domain="")#Main Columbia Name:company.id<-getCompany(token=in.auth,company_id=company.email$company_id[14])##End(Not run)getGroupPosts Extract Posts from your LinkedIn GroupsDescriptiongetGroupPosts will retrieve posts from each LinkedIn group you belong to.UsagegetGroupPosts(token,partner=0)Argumentstoken Authorization token.partner Indicate whether you belong to the Partnership Program.Values:0or14getGroupsValueReturns a dataframe with the10most recent posts from each group you belong to.Author(s)Michael Piccirilli<******************************>See AlsogetGroups submitGroupPostExamples##Not run:my.groups<-getGroupPosts(in.auth)##End(Not run)getGroups Retrieve LinkedIn Group InformationDescriptiongetGroups retrieves information and settings about the LinkedIn groups you belong to.UsagegetGroups(token,details=FALSE,partner=0)Argumentstoken Authorization token.details TRUE or FALSE.If TRUE,it will return group details.FALSE is default.partner Indicate whether you belong to the Partnership Program.Values:0or1DetailsThis function returns information about what groups you belong to,either with or without group details.Group details can be called by setting the option details=TRUE.ValueReturns a dataframe including group profile information.When details=FALSE(default),the function will return information about each group’s settings such as whether it allows messages from members,email frequency,and manager announcements.When details=TRUE,the function will return both a short and long description of the group.getJobs5Author(s)Michael Piccirilli<******************************>See AlsogetGroupPosts submitGroupPostExamples##Not run:my.groups<-getGroups(token=in.auth,details=TRUE)##End(Not run)getJobs Bookmarked and Recommended Jobs on LinkedInDescriptiongetJobs can be used to retrieve your bookmarked and suggested jobs.UsagegetJobs(token,suggestions=NULL,bookmarks=NULL,partner=0)Argumentstoken Authorization token.suggestions TRUE or FALSE.If TRUE,it will return LinkedIn’s job recommendations.bookmarks TRUE or FALSE.If TRUE,it will return jobs you’ve bookmarked on LinkedIn.partner Indicate whether you belong to the Partnership Program.Values:0or1DetailsThis function can return either jobs you’ve bookmarked on LinkedIn,or jobs LinkedIn is recom-mending for you,but not both at the same time.ValueReturns a dataframe of recommended or bookmarked jobs.Author(s)Michael Piccirilli<******************************>6getMyConnectionsSee AlsosearchJobsExamples##Not run:job.suggestions<-getJobs(in.auth,suggestions=TRUE)job.bookmarks<-getJobs(in.auth,bookmarks=TRUE)##Will return NULLjob.fail<-getJobs(in.auth)##End(Not run)getMyConnections Retrieve1st Degree LinkedIn ConnectionsDescriptiongetMyConnections returns information about your1st degree connections who do not have their profile set to private.You cannot"browse connections."That is,you cannot get connections of your connections(2nd degree connections).UsagegetMyConnections(token,partner=0)Argumentstoken Authorization token.partner Indicate whether you belong to the Partnership Program.Values:0or1ValueReturns a dataframe of your1st degree LinkedIn connections.Author(s)Michael Piccirilli<******************************>See AlsogetProfile,searchPeoplegetProfile7Examples##Not run:my.connections<-getMyConnections(in.auth)##End(Not run)getProfile Extract LinkedIn Profile InformationDescriptiongetProfile retrieve’s proflie information about to yourself,your connections,or another individ-ual.UsagegetProfile(token,connections=FALSE,id=NULL,partner=0)Argumentstoken Authorization token.connections TRUE or FALSE.If TRUE,will return profile information of your connections.FALSE is default.id Numeric ID number of a LinkedIn member.partner Indicate whether you belong to the Partnership Program.Values:0or1DetailsThere are three separate calls in getProfile.Thefirst is to return profile information about yourself.The only input into the function under this scenario is the token.The second is to return profile information about all your1st degree connections.You need to supply the token and set the connections=TRUE.The third is to return profile information about an individual based on their id number.This can be found if you search your connections using the getMyConnections function.ValueReturns a list of profile information.Author(s)Michael Piccirilli<******************************>8inOAuthSee AlsosearchPeople,getMyConnectionsExamples##Not run:profiles<-getProfile(in.auth,connections=TRUE)##End(Not run)inOAuth Create OAuth token to LinkedIn R sessionDescriptioninOAuth creates a long-lived OAuth access token that enables R to make authenticated calls to the LinkedIn API.This function relies on the httr package to create the OAuth token.UsageinOAuth(application_name=NULL,consumer_key=NULL,consumer_secret=NULL)Argumentsapplication_nameName of your application.consumer_key Consumer API Key of your application.consumer_secretConsumer Secret Key of your application.DetailsThere are two ways to create an authenticated connection.One is to use the default credentials supplied in the package.The second is to obtain your own credentials and using them as inputs into the function.Examples of both are shown below.Create your own application here:https:///ValueAuthorization token to be used in other functions.Author(s)Michael Piccirilli<******************************>searchCompanies9See AlsogetProfile,getMyConnectionsExamples##Not run:##Default Consumer and Secret Key for the Rlinkedin package:in.auth<-inOAuth()##Use your own Consumer and Secret Key:in.auth<-inOAuth("your_app_name","your_consumer_key","your_consumer_secret")##End(Not run)searchCompanies Search for Companies on LinkedInDescriptionsearchCompanies searches across LinkedIn’s companies pages based on keywords,location,and industry.UsagesearchCompanies(token,keywords,location=NULL,industry=NULL)Argumentstoken Authorization token.keywords A keyword used anywhere in a company’s listing.Multiple words should be separated by a space.location LinkedIn geography code,found here:https:/// docs/reference/geography-codes.industry LinkedIn industry code,found here:https:///docs/ reference/industry-codes.DetailsIn order to narrow the search down by location or industry,you must look up the proper input codes on the linkedin website.The geography codes can be found here:https://developer./docs/reference/geography-codes,and the industry codes can be found here: https:///docs/reference/industry-codes.ValueReturns a list,information includes company id,company name,universal name,website,twitter handle,employee count,founded date,number of followers,and company description.10searchJobsAuthor(s)Michael Piccirilli<******************************>See AlsogetCompany searchJobsExamples##Not run:p<-searchCompanies(in.auth,keywords="LinkedIn")##End(Not run)searchJobs Search for Jobs on LinkedInDescriptionsearchJobs searches across LinkedIn’s job postings.There are several parameters that allow you to conduct either a broad or focused search.In order to use this function,you must create your own appliction and apply for the Vetted API Access here:https:///app/ask/path/api-dvr.You cannot use the default credentials supplied in the Rlinkedin package.UsagesearchJobs(token,keywords=NULL,company_name=NULL,job_title=NULL,country_code=NULL,postal_code=NULL,distance=NULL,partner=0) Argumentstoken Authorization token.keywords A keyword used in the job title or description.Multiple words should be sepa-rated by a space.company_name Company posting the job.job_title Title of the job.country_code Specify the country in which to search.This is the ISO3166country code,and must be in lower case.postal_code Must be combined with the country_code parameter.distance Distance matches jobs within a distance from a central point.This is mea-sured in miles and is best used in conjunction with both country_code andpostal-code.partner Indicate whether you belong to the Partnership Program.Values:0or1DetailsThere are many different search parameters that allow you to make a focused search of a particular job within a certain company some area of the country.Or you can search for all jobs posted based on general keywords.ValueReturns a dataframe of jobs based input parametersAuthor(s)Michael Piccirilli<******************************>See AlsogetJobs searchCompaniesExamples##Not run:search.results<-searchJobs(token=in.auth,keywords="data scientist")##End(Not run)searchPeople Search for People on LinkedInDescriptionsearchPeople allows you to search for connections on LinkedIn.It returns most of what shows up when you do a search for people in the box at the top of the page on .There are a number of parameters that allow you to conduct either a broad or focused search.In order to use this function,you must create your own appliction and apply for the Vetted API Access here:https:///app/ask/path/api-dvr.UsagesearchPeople(token,keywords=NULL,first_name=NULL,last_name=NULL,company_name=NULL,current_company=NULL,title=NULL,current_title=NULL,school_name=NULL,current_school=NULL,country_code=NULL,postal_code=NULL,distance=NULL,partner=0)Argumentstoken Authorization token.keywords A keyword used in a person’s profile.Multiple words should be separated by a space.first_name Search by a user’sfirst name.last_name Search by a user’s last name.company_name The name of a company where someone has as worked.current_companyTRUE or FALSE,can only be used in conjunction with company_name.title A job title someone has heldcurrent_title TRUE or FALSE,can only be used in conjunction with title.school_name The name of a school someone has attended.current_school TRUE or FALSE,can only be used in conjuntion with current_school.country_code Specify the country in which to search.This is the ISO3166country code,and must be in lower case.postal_code Must be combined with the country_code parameter.distance Distance matches members within a distance from a central point.This is mea-sured in miles and and is best used in conjunction with both country_code andpostal-code.partner Indicate whether you belong to the Partnership Program.Values:0or1ValueReturns a dataframe of people based input parametersAuthor(s)Michael Piccirilli<******************************>See AlsogetProfileExamples##Not run:search.results<-searchPeople(token=in.auth,first_name="Michael",last_name="Piccirilli") ##End(Not run)submitGroupPost13 submitGroupPost Create a Group Discussion PostDescriptionsubmitGroupPost will create a group discussion post in one of the groups you belong to,specified by a Group Id.UsagesubmitGroupPost(token,group_id,disc_title=NULL,disc_summary=NULL,content_title=NULL,content_url=NULL,content_img=NULL,content_desc=NULL,partner=0)Argumentstoken Authorization token.group_id Numeric Group ID.disc_title Group discussion title,required.disc_summary Group discussion summary,required.content_title Title for content,required.content_url Url for content,optional.content_img Url for an image,optional.content_desc Description of content,optional.partner Indicate whether you belong to the Partnership Program.Values:0or1DetailsYou must include a minimum of a discussion title,discussion summary,and content title.ValueThere are two possible responses to a successful submittal.One,your post has been created and is visibile immediately.In this case you have most likely posted to an unmoderated group.Two,your post has been accepted by the API but is pending approval by the group moderator,in which case you will not see your post until it has bene approved.Author(s)Michael Piccirilli<******************************>See AlsogetGroups getGroupPostsExamples##Not run:my.groups<-getGroups(in.auth)id<-my.groups$group_id[1]disc.title<-"Test connecting to the LinkedIn API via R"disc.summary<-"Im creating an R package to connect to the LinkedIn API,+this is a test post from R!"url<-"https:///mpiccirilli"content.desc<-"Dev version of access to LinkedIn API via R.+Collaboration is welcomed!"submitGroupPost(in.auth,group_id=id,disc_title=disc.title,disc_summary=disc.summary,content_url=url,content_desc=content.desc)##End(Not run)submitShare Share an update to your network’s activity feedDescriptionsubmitShare will post a network update to the newsfeed of your connections.You can select the visibility of your post to be seen either by’anyone’or’connections-only’.UsagesubmitShare(token,comment=NULL,content_title=NULL,content_desc=NULL,content_url=NULL,content_img=NULL,visibility="anyone")Argumentstoken Authorization token.comment Headline of your post.content_title Title of your post.content_desc Description of your post.content_url Url to content you’d like to share.This is required if you specify either content_title or content_desc.content_img Url to an image you would like to include in your post,optional.visibility Choose the visibility of the post.The choices are’anyone’or’connections-only’.DetailsIf either content_title or content_desc is specified,you must also include a content_url for the post.ValueShares an update to your networks’s activity feed.Author(s)Michael Piccirilli<******************************>See AlsosubmitGroupPostExamples##Not run:comment<-"Test connecting to the LinkedIn API via R"title<-"Im creating an R package to connect to the LinkedIn API,this is a test post from R!"url<-"https:///mpiccirilli"desc<-"Dev version of access to LinkedIn API via R.Collaboration is welcomed!"submitShare(token=in.auth,comment=comment,content_tile=title,content_url=url,content_desc=desc)##End(Not run)IndexgetCompany,2,2,10getGroupPosts,2,3,5,13getGroups,2,4,4,13getJobs,2,5,11getMyConnections,2,6,8,9getProfile,2,6,7,9,12inOAuth,2,8Rlinkedin(Rlinkedin-package),2Rlinkedin-package,2searchCompanies,2,3,9,11searchJobs,2,6,10,10searchPeople,2,6,8,11submitGroupPost,2,4,5,13,15submitShare,2,1416。
瑞中龙对讲机使用说明

瑞中龙对讲机使用说明
准备工作:确保对讲机已经充电并安装好电池,根据需要插入适当的天线。
频道设置:根据需要选择要使用的频道或更改默认频道。
通常对讲机具有多个可选频道,您可以通过按下频道切换按钮来更改频道。
设置亚音(CTCSS)或数字群码(DCS)(可选):如果您希望在通信过程中增加隐私和排除其他信号干扰,您可以设置亚音或数字群码。
两个对讲机之间必须设置相同的亚音或数字群码,以进行有效的通信。
按住对讲键进行通话:在与对方通话之前,需要同时按住对讲键(通常位于对讲机的侧面或前面),并向话筒说话。
释放对讲键时,对讲机将接收来自其他人的消息。
接收和发送信息:确保通信信道和隐私设置都正确后,您可以开始与其他使用同频率和相同设置的对讲机进行双向通话。
记住,在对讲时等待短暂的间隔,以确保其他人有机会回复。
结束通话:完成对话后,释放对讲键,以便听到来自其他人的消息。
如果您不再需要使用对讲机,请关闭电源或将其处于待机模式,以节省电量。
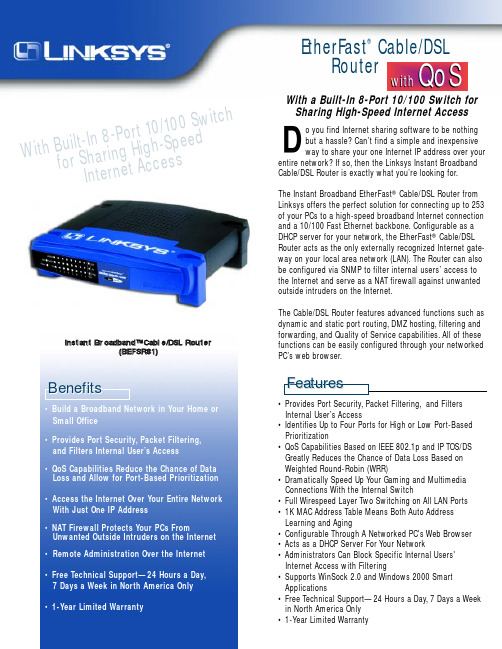
Linksys 快速互联网分享 EtherFast 有线 DSL 路由器说明书
W i t h B u i l t -I n 8-P o r t 10/100 S w i t c h f o r S h a r i n g H i g h -S p e e d I n t e r n e tA c c e s sEtherFast ®Cable/DSL Routero you find Internet sharing software to be nothing but a hassle? Can’t find a simple and inexpensive way to share your one Internet IP address over yourentire network? If so,then the Linksys Instant Broadband Cable/DSL Router is exactly what you’re looking for. The Instant Broadband EtherFast ®Cable/DSL Router from Linksys offers the perfect solution for connecting up to 253of your PCs to a high-speed broadband Internet connection and a 10/100 Fast Ethernet backbone. Configurable as a DHCP server for your network,the EtherFast ®Cable/DSL Router acts as the only externally recognized Internet gate-way on your local area network (LAN). The Router can also be configured via SNMP to filter internal users’ access to the Internet and serve as a NAT firewall against unwanted outside intruders on the Internet.The Cable/DSL Router features advanced functions such as dynamic and static port routing,DMZ hosting,filtering and forwarding,and Quality of Service capabilities. All of these functions can be easily configured through your networked PC’s web browser.• Provides Port Security,Packet Filtering,and Filters Internal User’s Access• Identifies Up to Four Ports for High or Low Port-Based Prioritization• QoS Capabilities Based on IEEE 802.1p and IP TOS/DS Greatly Reduces the Chance of Data Loss Based on Weighted Round-Robin (WRR)• Dramatically Speed Up Your Gaming and Multimedia Connections With the Internal Switch• Full Wirespeed Layer Two Switching on All LAN Ports • 1K MAC Address Table Means Both Auto Address Learning and Aging• Configurable Through A Networked PC's Web Browser • Acts as a DHCP Server For Your Network• Administrators Can Block Specific Internal Users' Internet Access with Filtering• Supports WinSock 2.0 and Windows 2000 Smart Applications• Free Technical Support—24 Hours a Day,7 Days a Week in North America Only • 1-Year Limited Warranty• Build a Broadband Network in Your Home or Small Office• Provides Port Security,Packet Filtering,and Filters Internal User’s Access• QoS Capabilities Reduce the Chance of Data Loss and Allow for Port-Based Prioritization • Access the Internet Over Your Entire Network With Just One IP Address• NAT Firewall Protects Your PCs FromUnwanted Outside Intruders on the Internet •Remote Administration Over the Internet • Free Technical Support—24 Hours a Day,7 Days a Week in North America Only • 1-Year Limited WarrantyI n s t a n t B r o a d b a n d ™ C a b l e /D S L R o u t e r(B E F S R 81)DWith a Built-In 8-Port 10/100 Switch forSharing High-Speed Internet AccessBenefitswithQoSQoSPackage ContentsInstant BroadbandEtherFast ®Cable/DSL Router• One Instant Broadband™ Cable/DSL Router • One AC Adapter and Power Cord• One User Guide and Registration CardModel Number: BEFSR81Linksys17401 Armstrong Ave.Irvine,CA 92614 USAInformation(800) 546-5797Technical Support (800) 326-7114(949) 261-1288Fax(949) 261-8868World Wide Web Email ************************************ChinaTech Support (10) 6432 1920Sales (10) 6432 1923Fax(10) 6437 6891PhilippinesTelephone (632) 638-5580Fax(632) 635-6772JapanTelephone (03) 5259-5139Fax(03) 5259-5117SingaporeTelephone 552-8998Fax552-1024ThailandTelephone 717-0770Fax717-0738United KingdomTech Support ***********Sales 01245 352403Fax***********01023。
- 1、下载文档前请自行甄别文档内容的完整性,平台不提供额外的编辑、内容补充、找答案等附加服务。
- 2、"仅部分预览"的文档,不可在线预览部分如存在完整性等问题,可反馈申请退款(可完整预览的文档不适用该条件!)。
- 3、如文档侵犯您的权益,请联系客服反馈,我们会尽快为您处理(人工客服工作时间:9:00-18:30)。
LinkStar TM RCST 安装手册Version D目录一般性安全须知避免人员遭受电击伤害更换保险须使用相同类型不要从插件终端上断开动力电缆静电放电程序谨防火灾和电击应急抢救使用通过安全核准的设备应急计划附加警告1.绪论2.参考文献3.系统图表4.LinkStar远端站构成5.推荐使用的安装工具和测试设备6.IFL标准7.安装程序8.IFL安装9.天线指向10.RCST安装11.RCST操作检测TDM误码率TDMA误码率IP Ping12.交叉极化13.发现并处理故障为有效发现并处理故障,推荐使用的设备问题识别RCST电源开启失败无卫星信标信号接收同步接收TDM信号LNB接收IFL电缆天线TDM频率和符号率接收TDM误码率信号发送同步RCST传输RCST引导参数PCR分布TDMA传输电平RCST传输误码率IP通信测试分配带宽分配CIRIP状态附录A:RCST特性RCST特性表RCST前面板功能LinkStar调制和解调表附录B:《远端站安装数据资料》表格示范附录C:RCST指示灯显示附录D:远程登陆到RCST默认地址在PC机上设定一个IP地址建立一个远程登录会议网络IP地址附录E:安装RCST使用的引导参数命令格式参数描述附录F:RCST命令一般性安全须知避免人员遭受电击伤害危险:当使用金属工具时应注意避免短路。
某些电路拥有很大的瞬时电流,短路发生时产生的火花有可能灼伤皮肤,或对眼睛造成伤害。
在进行维护、调试及检查并处理故障时,应取下全部的随身饰物,及暴露在身外的一切金属物品。
在进行设备内部维护、调试及检查并处理故障时,请关闭电源,除非该工作有带电进行的必要。
在电源接通情况下请不要移动设备上的任何部件。
在进行设备维护时,可能需要移开机盖并连接交流电源。
在进行上述过程时,必须格外小心!如果操作人员不履行安全守则,将成为死亡或重大伤害的成因。
更换保险须使用相同类型危险:在更换保险时,请选择使用相同等级及类型的保险。
如果使用不同等级及类型的保险,会导致安全事故或火灾的发生。
在更换保险时请关闭电源,否则将导致与电力相关的危险以及人员的伤害。
不要带电从终端上断开电缆危险:不要带电从终端上断开电源线或射频(IF)电缆。
如果可能的话,应首先从最近的断路器上切断电源,然后将插头及电缆一起从机架上移开。
否则将导致与电力相关的危险以及人员的伤害。
静电放电程序当你做好接地处理或其他防范时,只可触摸印刷线路板,以避免释放出的静电对设备造成破坏。
以下标识在需要做静电防护时出现。
谨防火灾和电击警告:为防止火灾及电击的发生:▪请不要将设备暴露在雨中或放置于潮湿的地方▪避免在设备上及设备周围发生液体泄漏▪不要打开设备的上盖▪不要使异物落入设备内部▪维修工作只能由有资质的人员进行。
进行维修请接洽您的运营商应急抢救操作或接触有害化学物品或危险电压的技术人员,须熟知人工呼吸、心脏复苏等应急抢救办法。
使用通过安全认证的设备在清理LinkStar的机架时,只能使用潮湿的抹布或真空吸尘器(对通风口)。
如果需要清理其他部分时,请使用有安全认证的防爆灯、吹风机或其他设备。
确保消防设施完善,处于工作状态。
将清洁剂放置于特殊的聚乙烯瓶中或安全罐中且尽量减少使用量。
请将使用过的抹布丢弃在安全的地方。
应急计划遇有紧急情况要有意外情况的应急计划,确知如何获得急救和消防救助。
良好的工作计划和优良的日常养护,是安全和高效的基础。
附加警告注意:▪保护设备免受闪电,暴风雨雪以及过电压的侵袭。
如果设备长期闲置不用时,应切断电源。
▪断开电源时,不能拉拽电线。
应用手握住插头,将插头拔出。
切勿践踏,掐捏动力线,也不要在线上放置物品。
▪为防止过热,在设备的前后都设有通风口。
为确保可靠的运转,请不要以任何方式或物品,堵塞或遮挡通风口。
▪决不要将设备放置在取暖设备、热量储存设备上或旁边,当使用嵌入式安装,例如安装在机柜内或机架内,该装置应可以提供充分的空气流通。
▪应将此设备放置在稳固的,无震动的平面上,并确保提供必要的面积和承重能力。
1. 绪论这是一份有关LinkStar™端站系统的说明书。
内容包括“安装”、“检测”及“查找并处理故障”三个部分。
如果安装中出现了“查找并处理故障”章节中没有涉及的问题,请拨打设备提供商的电话或发送电子邮件以寻求帮助。
图1列举了一个Link Star™端站系统。
注意在一个典型的安装中,是把安装在臂状支架上的BUC通过软性波导直接连接到馈源。
图中的一台个人电脑及以太网交换机不属于LinkStar远端站的设备,在这里只为举例说明IP的连接方式。
图1 LinkStar 远端站图解2. 参考文献〔1〕LinkStar User′s Manual,USR00091_A,June 21,2002.3.系统图表图2.和图3.列举了一个系统图解。
包括电缆长度、连接头,并分别列举了Ku波段及C 波段的信号电平信息。
关于RCST的更多操作规范可参考附录A中的“RCST特性”详述。
Ku-BandKu-BandAuxODUPowerRCSTRxEthernet RJWR-75(到OMT/馈源)LNB WR-75(来自OMT/馈源)TxF=F型连接头N=N型连接头RJ=RJ45连接头C=开关电路连接头图2.Ku波段系统图表Ku-BandC-BandAuxODUPowerRCSTRxEthernet RJWR-137(到OMT/馈源)LNB WR-137(来自OMT/馈源)TxF=F型连接头N=N型连接头RJ=RJ45连接头C=开关电路连接头图3.C波段系统图表4.LinkStar 远端站组成表1.列出了LinkStar远端站点的组成部分,Comsat实验室所提供的一般使用数量被列在圆括号中,之后是组成部件明细表。
安装人员可在表中“数量”栏中标注每个部件的数量。
5.推荐使用下列安装工具及测试设备表2.所列为安装LinkStar远端终端系统时推荐使用的安装工具及测试设备。
6. IFL 标准这部分指明射频电缆(IFL)电缆类型,推荐使用的电缆长度,并详细说明BUC对外接电源的需求。
所需参数如:表3和表4提供电缆长度参数,电缆类型,及分别用于低功率和高功率BUC所需的外接电源。
外接电源:当IFL电缆需超过100英尺(约30米)、4瓦或5瓦的BUC。
详述●桌上模式,通常输入为90V-264V交流和单一输出24伏直流,最小4安培。
●过载和短路保护●RCST上的直流插座为桶型,2.5毫米内径,中心插头为正极。
注意: 只有在RCST关闭的情况下才可打开外接电源,如果在RCST开启的情况下接通外部电源,RCST将会返回初始状态。
IFL 电缆及连接器(Comsat实验室可提供):RG-6型⏹连接器: F型(阳).⏹电阻:75 欧姆⏹建议使用最长为100英尺(30米)的IFL电缆.⏹使用外接电源以及2WC波段或1W/2W Ku波段的BUC时,最大长度为200英尺(60米)。
⏹使用外接电源以及5WC波段或4W Ku波段的BUC时,最大长度为150英尺(45米)。
RG-11 型⏹连接器: F 型(male).⏹电阻:75 欧姆⏹建议使用长度在100-250英尺(30米-75米)之间的IFL电缆⏹用2WC波段或1W/2WKu波段BUC时最大长度为250英尺(75米)⏹使用外接电源以及5WC波段或4WKu波段的BUC时,最大长度为250英尺(75米)。
RG-8 (75 欧姆) 低衰耗电缆⏹连接器: F 型(male).⏹电阻: 75 欧姆⏹建议使用长度在200-300英尺(60米-90米)之间的IFL电缆用2W C波段或1W/2WKu波段BUC时,最大长度为300英尺(90米)。
⏹使用外接电源以及5W C波段或4W Ku波段的BUC时,最大长度为300英尺(90米)。
表3:2W C波段或1W/2W Ku波段BUC 电缆详述表4:5W C波段或4W Ku波段BUC 电缆详述注意:如果在RCST安装中使用的IFL电缆超长或指标与上面指标中所列不符,电力供给的瞬时电流将超出指定的最大值(内部供给2.25安培,外部供给4安培)在通常安装情况下,电缆的使用应符合Underwrites实验室(UL)以及CL2标准,在建筑物内的安装可以不使用电缆套管。
由于电缆的设计不具备直接埋藏的能力,所以如需埋藏,请选择直径不小于2.5厘米(1英寸)、弯曲半径不小于13厘米(5英寸)的套管,将电缆套装起来,以备埋藏。
电缆的套管工作必须在设备安装之前进行。
7. 安装程序在一个RCST的安装开始以前,核实《远端站安装数据资料》是十分必要的,该资料包含站点信息、户外设备信息以及RCST参数。
(可在附录B中查阅包含安装数据信息的示范表格)一个完善的《远端站安装数据资料》包含安装RCST系统所需信息,以及检测其运行的资料。
此外,和安装有关的笔记也被收录在这个表格中。
8. IFL 安装1. 确保安装所使用的IFL电缆符合相关标准,包括国家电子标准(National ElectricalCode 简称NEC) 和地方性规范。
2. 在拉动IFL电缆时,不要拉其同轴的中心导线。
电缆采用泡沫塑料做电缆绝缘,如果通过拉动中心导线来拉动电缆,将会对其正常工作造成损坏。
所以在拉动电缆时,只可从电缆外部拉拽。
3. 缚设IFL电缆时,采用好的安装经验。
在远离天线立柱的地方留出6米(15-20英尺)的电缆绕成一个环,以备足够的维修空间。
在入户端的尽头,为方便入户及易于对RCST的维修,请预留足够电缆长度。
4. 在室外端,从天线装置立柱的底端到顶端,每间隔20厘米(8英寸)将IFL电缆用束带捆绕固定。
5. 电缆末端处应使用适当的连接装置。
连接装置须与馈源以及RCST上的连接装置相匹配。
用束带(用来将电缆固定位置的塑料线结)把电缆捆绕在支架臂上。
6. 所有的室外接头处均需使用标准的自融性绝缘带以确保防水。
每个接头大约需要3英寸的胶带。
9. 天线指向(对星)确定天线指向的过程需要一个罗盘和一个频谱分析仪。
当频谱分析仪找到信号以后,可以使用一个峰值表去获得卫星信标的信号强度以达到最高点。
如果需要的话,天线包装箱里的说明书,也许在这里可以派上用场。
记录下这个站点的参数,把它填入下面的从《远端站安装数据资料》节选的表5中。
这系统时使用。
个参数同时可以在HUB假设天线已经正确的安装完毕,指向正确的方向,安装人员按照已知信标频率或是卫星特征图标去完成安装工作。
1.建立如图4所示的频谱仪的连接。
确定两路功率分配器阻断直流电压到达频谱仪!!!2.把频谱分析仪调整到信标频率。
3.把天线调整到大致的方位角和仰角,使用指南针调整方位角,使用倾角罗盘调整仰角.将方位设定为磁力方位,将其记录在《远端站安装数据资料》中。
