jacob读取书签
jacob实例
}
private void replaceImage(Dispatch selection, String imagePath) {
Dispatch.call(Dispatch.get(selection, "InLineShapes").toDispatch(),
public void newDoc(String template) throws Exception {
if (new File(template).exists()) {
doc = Dispatch.call(documents, "Add", template).toDispatch();
public class Document {
private Dispatch doc = null;
private Dispatch documents;
private ActiveXComponent
public Document() throws Exception {
.toDispatch();
} else
System.out.println("文件(" + file + ")不存在。");
}
private void close() {
Dispatch.call(doc, "Close", new Variant(false));
"AddPicture", imagePath);
}
// =======================插入表格============================
Java操作word文档使用JACOB和POI操作word,Excel,PPT需要的jar包

Java操作word⽂档使⽤JACOB和POI操作word,Excel,PPT需要的jar包可参考⽂档:下载jar包如上是jacob-1.17-M2.jar对应的jar包和dll⽂件....但是我在maven仓库中并没有发现jacob-1.17版本的.所以如果使⽤maven项⽬的话推荐下载jacob-1.14版本的jar包和dll⽂件.使⽤⽅式:import java.io.File;import java.io.FileInputStream;import java.util.ArrayList;import java.util.Arrays;import com.jacob.activeX.ActiveXComponent;public class WriteDoc2 {public static void main(String[] args) {//在正式批量跑之前,做单个word⽂档的测试.WordUtils util = new WordUtils(true);util.openDocument("C:\\Users\\ABC\\Desktop\\test.docx");util.setSaveOnExit(true);util.insertText("xxx444dddd4x");util.saveAs("C:\\Users\\ABC\\Desktop\\test.docx");util.closeDocument();}}对应WordUtils.java⼯具类,我是使⽤的如下:import com.jacob.activeX.ActiveXComponent;import .Dispatch;import .Variant;public class WordUtils {// word运⾏程序对象private ActiveXComponent word;// 所有word⽂档集合private Dispatch documents;// word⽂档private Dispatch doc;// 选定的范围或插⼊点private Dispatch selection;// 保存退出private boolean saveOnExit;public WordUtils(boolean visible) {word = new ActiveXComponent("Word.Application");word.setProperty("Visible", new Variant(visible));documents = word.getProperty("Documents").toDispatch();}/*** 设置退出时参数** @param saveOnExit* boolean true-退出时保存⽂件,false-退出时不保存⽂件 */public void setSaveOnExit(boolean saveOnExit) {this.saveOnExit = saveOnExit;}/*** 创建⼀个新的word⽂档*/public void createNewDocument() {doc = Dispatch.call(documents, "Add").toDispatch();selection = Dispatch.get(word, "Selection").toDispatch();}/*** 打开⼀个已经存在的word⽂档** @param docPath*/public void openDocument(String docPath) {doc = Dispatch.call(documents, "Open", docPath).toDispatch();selection = Dispatch.get(word, "Selection").toDispatch();}/*** 打开⼀个有密码保护的word⽂档* @param docPath* @param password*/public void openDocument(String docPath, String password) {doc = Dispatch.call(documents, "Open", docPath).toDispatch();unProtect(password);selection = Dispatch.get(word, "Selection").toDispatch();}/*** 去掉密码保护* @param password*/public void unProtect(String password){try{String protectionType = Dispatch.get(doc, "ProtectionType").toString();if(!"-1".equals(protectionType)){Dispatch.call(doc, "Unprotect", password);}}catch(Exception e){e.printStackTrace();}}/*** 添加密码保护* @param password*/public void protect(String password){String protectionType = Dispatch.get(doc, "ProtectionType").toString();if("-1".equals(protectionType)){Dispatch.call(doc, "Protect",new Object[]{new Variant(3), new Variant(true), password});}}/*** 显⽰审阅的最终状态*/public void showFinalState(){Dispatch.call(doc, "AcceptAllRevisionsShown");}/*** 打印预览:*/public void printpreview() {Dispatch.call(doc, "PrintPreView");}/*** 打印*/public void print(){Dispatch.call(doc, "PrintOut");}public void print(String printerName) {word.setProperty("ActivePrinter", new Variant(printerName));print();}/*** 指定打印机名称和打印输出⼯作名称* @param printerName* @param outputName*/public void print(String printerName, String outputName){word.setProperty("ActivePrinter", new Variant(printerName));Dispatch.call(doc, "PrintOut", new Variant[]{new Variant(false), new Variant(false), new Variant(0), new Variant(outputName)}); }/*** 把选定的内容或插⼊点向上移动** @param pos*/public void moveUp(int pos) {move("MoveUp", pos);}/*** 把选定的内容或者插⼊点向下移动** @param pos*/public void moveDown(int pos) {move("MoveDown", pos);}/*** 把选定的内容或者插⼊点向左移动** @param pos*/public void moveLeft(int pos) {move("MoveLeft", pos);}/*** 把选定的内容或者插⼊点向右移动** @param pos*/public void moveRight(int pos) {move("MoveRight", pos);}/*** 把选定的内容或者插⼊点向右移动*/public void moveRight() {Dispatch.call(getSelection(), "MoveRight");}/*** 把选定的内容或者插⼊点向指定的⽅向移动* @param actionName* @param pos*/private void move(String actionName, int pos) {for (int i = 0; i < pos; i++)Dispatch.call(getSelection(), actionName);}/*** 把插⼊点移动到⽂件⾸位置*/public void moveStart(){Dispatch.call(getSelection(), "HomeKey", new Variant(6));}/*** 把插⼊点移动到⽂件末尾位置*/public void moveEnd(){Dispatch.call(getSelection(), "EndKey", new Variant(6));}/*** 插⼊换页符*/public void newPage(){Dispatch.call(getSelection(), "InsertBreak");}public void nextPage(){moveEnd();moveDown(1);}public int getPageCount(){Dispatch selection = Dispatch.get(word, "Selection").toDispatch();return Dispatch.call(selection,"information", new Variant(4)).getInt(); }/*** 获取当前的选定的内容或者插⼊点* @return当前的选定的内容或者插⼊点*/public Dispatch getSelection(){if (selection == null)selection = Dispatch.get(word, "Selection").toDispatch();return selection;}/*** 从选定内容或插⼊点开始查找⽂本* @param findText 要查找的⽂本* @return boolean true-查找到并选中该⽂本,false-未查找到⽂本*/public boolean find(String findText){if(findText == null || findText.equals("")){return false;}// 从selection所在位置开始查询Dispatch find = Dispatch.call(getSelection(), "Find").toDispatch();// 设置要查找的内容Dispatch.put(find, "Text", findText);// 向前查找Dispatch.put(find, "Forward", "True");// 设置格式Dispatch.put(find, "Format", "True");// ⼤⼩写匹配Dispatch.put(find, "MatchCase", "True");// 全字匹配Dispatch.put(find, "MatchWholeWord", "True");// 查找并选中return Dispatch.call(find, "Execute").getBoolean();}/*** 查找并替换⽂字* @param findText* @param newText* @return boolean true-查找到并替换该⽂本,false-未查找到⽂本*/public boolean replaceText(String findText, String newText){moveStart();if (!find(findText))return false;Dispatch.put(getSelection(), "Text", newText);return true;}/*** 进⼊页眉视图*/public void headerView(){//取得活动窗体对象Dispatch ActiveWindow = word.getProperty( "ActiveWindow").toDispatch();//取得活动窗格对象Dispatch ActivePane = Dispatch.get(ActiveWindow, "ActivePane").toDispatch();//取得视窗对象Dispatch view = Dispatch.get(ActivePane, "View").toDispatch();Dispatch.put(view, "SeekView", "9");}/*** 进⼊页脚视图*/public void footerView(){//取得活动窗体对象Dispatch ActiveWindow = word.getProperty( "ActiveWindow").toDispatch();//取得活动窗格对象Dispatch ActivePane = Dispatch.get(ActiveWindow, "ActivePane").toDispatch();//取得视窗对象Dispatch view = Dispatch.get(ActivePane, "View").toDispatch();Dispatch.put(view, "SeekView", "10");}/*** 进⼊普通视图*/public void pageView(){//取得活动窗体对象Dispatch ActiveWindow = word.getProperty( "ActiveWindow").toDispatch();//取得活动窗格对象Dispatch ActivePane = Dispatch.get(ActiveWindow, "ActivePane").toDispatch();//取得视窗对象Dispatch view = Dispatch.get(ActivePane, "View").toDispatch();Dispatch.put(view, "SeekView", new Variant(0));//普通视图}/*** 全局替换⽂本* @param findText* @param newText*/public void replaceAllText(String findText, String newText){int count = getPageCount();for(int i = 0; i < count; i++){headerView();while (find(findText)){Dispatch.put(getSelection(), "Text", newText);moveEnd();}footerView();while (find(findText)){Dispatch.put(getSelection(), "Text", newText);moveStart();}pageView();moveStart();while (find(findText)){Dispatch.put(getSelection(), "Text", newText);moveStart();}nextPage();}}/*** 全局替换⽂本* @param findText* @param newText*/public void replaceAllText(String findText, String newText, String fontName, int size){ /****插⼊页眉页脚*****///取得活动窗体对象Dispatch ActiveWindow = word.getProperty( "ActiveWindow").toDispatch();//取得活动窗格对象Dispatch ActivePane = Dispatch.get(ActiveWindow, "ActivePane").toDispatch();//取得视窗对象Dispatch view = Dispatch.get(ActivePane, "View").toDispatch();/****设置页眉*****/Dispatch.put(view, "SeekView", "9");while (find(findText)){Dispatch.put(getSelection(), "Text", newText);moveStart();}/****设置页脚*****/Dispatch.put(view, "SeekView", "10");while (find(findText)){Dispatch.put(getSelection(), "Text", newText);moveStart();}Dispatch.put(view, "SeekView", new Variant(0));//恢复视图moveStart();while (find(findText)){Dispatch.put(getSelection(), "Text", newText);putFontSize(getSelection(), fontName, size);moveStart();}}/*** 设置选中或当前插⼊点的字体* @param selection* @param fontName* @param size*/public void putFontSize(Dispatch selection, String fontName, int size){Dispatch font = Dispatch.get(selection, "Font").toDispatch();Dispatch.put(font, "Name", new Variant(fontName));Dispatch.put(font, "Size", new Variant(size));}/*** 在当前插⼊点插⼊字符串*/public void insertText(String text){Dispatch.put(getSelection(), "Text", text);}/*** 将指定的⽂本替换成图⽚* @param findText* @param imagePath* @return boolean true-查找到并替换该⽂本,false-未查找到⽂本*/public boolean replaceImage(String findText, String imagePath, int width, int height){moveStart();if (!find(findText))return false;Dispatch picture = Dispatch.call(Dispatch.get(getSelection(), "InLineShapes").toDispatch(), "AddPicture", imagePath).toDispatch(); Dispatch.call(picture, "Select");Dispatch.put(picture, "Width", new Variant(width));Dispatch.put(picture, "Height", new Variant(height));moveRight();return true;}/*** 全局将指定的⽂本替换成图⽚* @param findText* @param imagePath*/public void replaceAllImage(String findText, String imagePath, int width, int height){moveStart();while (find(findText)){Dispatch picture = Dispatch.call(Dispatch.get(getSelection(), "InLineShapes").toDispatch(), "AddPicture", imagePath).toDispatch(); Dispatch.call(picture, "Select");Dispatch.put(picture, "Width", new Variant(width));Dispatch.put(picture, "Height", new Variant(height));moveStart();}}/*** 在当前插⼊点中插⼊图⽚* @param imagePath*/public void insertImage(String imagePath, int width, int height){Dispatch picture = Dispatch.call(Dispatch.get(getSelection(), "InLineShapes").toDispatch(), "AddPicture", imagePath).toDispatch(); Dispatch.call(picture, "Select");Dispatch.put(picture, "Width", new Variant(width));Dispatch.put(picture, "Height", new Variant(height));moveRight();}/*** 在当前插⼊点中插⼊图⽚* @param imagePath*/public void insertImage(String imagePath){Dispatch.call(Dispatch.get(getSelection(), "InLineShapes").toDispatch(), "AddPicture", imagePath);}/*** 获取书签的位置* @param bookmarkName* @return书签的位置*/public Dispatch getBookmark(String bookmarkName){try{Dispatch bookmark = Dispatch.call(this.doc, "Bookmarks", bookmarkName).toDispatch();return Dispatch.get(bookmark, "Range").toDispatch();}catch(Exception e){e.printStackTrace();}return null;}/*** 在指定的书签位置插⼊图⽚* @param bookmarkName* @param imagePath*/public void insertImageAtBookmark(String bookmarkName, String imagePath){Dispatch dispatch = getBookmark(bookmarkName);if(dispatch != null)Dispatch.call(Dispatch.get(dispatch, "InLineShapes").toDispatch(), "AddPicture", imagePath);}/*** 在指定的书签位置插⼊图⽚* @param bookmarkName* @param imagePath* @param width* @param height*/public void insertImageAtBookmark(String bookmarkName, String imagePath, int width, int height){Dispatch dispatch = getBookmark(bookmarkName);if(dispatch != null){Dispatch picture = Dispatch.call(Dispatch.get(dispatch, "InLineShapes").toDispatch(), "AddPicture", imagePath).toDispatch();Dispatch.call(picture, "Select");Dispatch.put(picture, "Width", new Variant(width));Dispatch.put(picture, "Height", new Variant(height));}}/*** 在指定的书签位置插⼊⽂本* @param bookmarkName* @param text*/public void insertAtBookmark(String bookmarkName, String text){Dispatch dispatch = getBookmark(bookmarkName);if(dispatch != null)Dispatch.put(dispatch, "Text", text);}/*** ⽂档另存为* @param savePath*/public void saveAs(String savePath){Dispatch.call(doc, "SaveAs", savePath);}/*** ⽂档另存为PDF* <b><p>注意:此操作要求word是2007版本或以上版本且装有加载项:Microsoft Save as PDF 或 XPS</p></b>* @param savePath*/public void saveAsPdf(String savePath){Dispatch.call(doc, "SaveAs", new Variant(17));}/*** 保存⽂档* @param savePath*/public void save(String savePath){Dispatch.call(Dispatch.call(word, "WordBasic").getDispatch(),"FileSaveAs", savePath);}/*** 关闭word⽂档*/public void closeDocument(){if (doc != null) {Dispatch.call(doc, "Close", new Variant(saveOnExit));doc = null;}}public void exit(){word.invoke("Quit", new Variant[0]);}}具体WordUtils类的使⽤暂时没有看到更多的例⼦,上⾯的util的使⽤是⾃⼰摸索出来的,可能不是最优,最恰当的.//==================================================================================================使⽤Java⼯具POI操作MicroSoft Office套件Word,Excle和PPT使⽤Maven⼯程的话需要在Pom.xml⽂件中引⼊的jar包.⼀开始是想使⽤POI⼯具操作,但是从⽹上找来的代码始终报编译错误,代码中的⼀些类找不到,但是也明明已经引⼊了poi-3.x.jar包⽂件,更换了好⼏个poi版本的jar包仍是⼀样的效果.随后调查,到底需要哪些jar包.....结果如下:<dependency><groupId>org.apache.poi</groupId><artifactId>poi</artifactId><version>3.8</version></dependency><dependency><groupId>org.apache.poi</groupId><artifactId>poi-ooxml</artifactId><version>3.8</version></dependency><dependency><groupId>org.apache.xmlbeans</groupId><artifactId>xmlbeans</artifactId><version>2.3.0</version></dependency><dependency><groupId>org.apache.poi</groupId><artifactId>poi-scratchpad</artifactId><version>3.8</version></dependency>所依赖的全部jar包的截图如果只引⼊⼀个poi-3.x.jar包是会报错的. POI具体操作Word,Excel,和PPT的代码,⾃⾏百度.只要jar包引⼊的正确,运⾏编译代码就没有问题.。
旋风分离器的工艺计算
旋风分离器的工艺计算》:*目录一.前言 ............................................................................................................. 错误!未定义书签。
应用范围及特点....................................................................................... 错误!未定义书签。
分离原理................................................................................................... 错误!未定义书签。
分离方法................................................................................................... 错误!未定义书签。
)性能指标 ................................................................................................. 错误!未定义书签。
二.旋风分离器的工艺计算.............................................................................. 错误!未定义书签。
旋风分离器直径的计算........................................................................... 错误!未定义书签。
由已知求出的直径做验算....................................................................... 错误!未定义书签。
Bosch Video Management System 操作手册说明书

4 在工具栏上单击
。
或 4 按 F1 键获取任意程序窗口或对话框的帮助信息。
查找信息
您可通过数种方法在联机帮助中查找信息。
要在联机帮助中查找信息: 1. 在 帮助 菜单上,单击 帮助。 2. 如果未显示左窗格,请单击显示按钮。 3. 在帮助窗口中执行下列操作:
单击:
操作:
目录
显示联机帮助目录。 单击各章节以显示链接至相关主题的页面,然后单击每个 页面以在右窗格中显示相应的主题内容。
允许您选择所需的图像窗格数。
显示图像窗格。 允许排列图像窗格。 显示摄像机、地图、图像、文档(HTML 文件)。
显示系统生成的所有报警。 允许您接受或清除报警,或者通过向维护人员发送电子邮件 等方式启动工作流。
2013.07 | V1 | Operator Client
操作手册
Bosch Sicherheitssysteme GmbH
Management Server 选项卡不可见。
允许您控制 PTZ 摄像机。
云台控制窗口
11 逻辑树窗口
显示您的用户组有权访问的设备。 允许您选择适当的设备 以将其分配至某一图像窗格。
允许您根据需要组织逻辑树的设备。
收藏夹树窗口
书签窗口
允许管理书签。
显示站点地图。 允许拖动地图以显示此地图的某一特定部
索引 搜索
搜索特定的字词,或从索引关键字列表中进行选择。 双击关键字可以在右窗格 中显示相应的主题。
在主题内容中查找字词。 在文本字段中输入字词,按 ENTER 键,然后从主题列 表中选择您需要的主题。
用户界面上的文本采用粗体格式。 4 箭头表示您可以单击带下划线的文本,或单击应用程序中的项目。
小小书签背后的故事的作文

小小书签背后的故事的作文英文回答:In the world of literature, bookmarks serve as humble yet indispensable companions to readers. They quietly reside within the pages of books, marking the spot where the journey was last left off. Beyond their practical purpose, bookmarks often carry stories of their own, adding a touch of whimsy and intrigue to the pages they inhabit.One such bookmark, small and unassuming, was found tucked away in a dusty old book in a forgotten corner of a library. The bookmark was made of faded yellow paper, and its edges were slightly curled and torn. A closer inspection revealed faint handwriting on its surface, seemingly penned by a child. It read:"Once upon a time, I belonged to a princess. She was kind and beautiful, with long flowing hair and eyes that sparkled like the morning star. We shared many adventurestogether, traveling to distant lands and meeting extraordinary creatures. I was her constant companion, always by her side to mark her progress through herfavorite stories."The bookmark's simple words evoked a vivid image of a young girl, lost in the worlds of her imagination, accompanied by a humble bookmark that held a special place in her heart. It seemed that the bookmark had witnessed countless hours of reading, laughter, and wonder.As the bookmark's tale unfolded, it became clear that it had outlived its original owner. Over time, it had found new homes in various books, becoming a silent observer of countless stories and different lives. It had been a companion to scholars, poets, and dreamers, each adding their own chapter to its unseen history.The bookmark's journey was a testament to the enduring power of words and the transformative nature of stories. It had witnessed the growth of young minds, sparked imaginations, and provided solace in times of need.Although its origins were humble, the bookmark had become an extraordinary object, imbued with a sense of timelessness and wisdom.Like the stories it marked, the bookmark's ownnarrative continued, forever intertwined with the countless lives it had touched. For in the realm of literature, even the smallest of objects can carry profound meaning, leaving an invisible yet indelible mark on the world.中文回答:在那浩瀚的书海之中,小小的书签扮演着不可或缺的角色,它们静悄悄地栖居在书页之间,标记着读者上次离开旅程的地方。
PDF-XChange Editor V9怎么制作书签
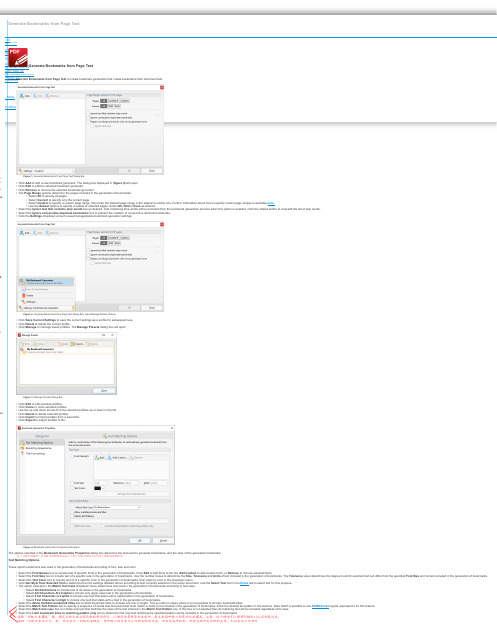
tsEditor/Editor Plus V9Editor/Editor Plus V9Lite V9Standard V9PRO V9istration Guideper ToolsEditor SDK V9Editor Simple SDK V9Core API SDK V9Viewer ActiveX SDK V2.5 Drivers API V9PRO SDK V9ase - FAQ'soducts Official WebsitetsmemmesmMLsualGenerate Bookmarks from Page TextGenerate Bookmarks from Page TextClick Generate Bookmarks from Page Text to create bookmark generators that create bookmarks from document text:Figure 1. Generate Bookmarks From Page Text Dialog Box•Click Add to add a new bookmark generator. The dialog box displayed in (figure 4) will open.•Click Edit to edit the selected bookmark generator.•Click Remove to remove the selected bookmark generator.•The Page Range options determine the pages included in the generation of bookmarks:•Select All to specify all pages.•Select Current to specify only the current page.•Select Custom to specify a custom page range, then enter the desired page range in the adjacent number box. Further information about how to specify custom page ranges is available here.•Use the Subset options to specify a subset of selected pages. Select All, Odd or Even as desired.•Select the Ignore text that contains stop words box as desired. Text containing stop words will be excluded from the bookmark generation process when this option is enabled. Click the ellipsis button to view/edit the list of stop words.•Select the Ignore consecutive duplicate bookmarks box to prevent the creation of consecutive identical bookmarks.•Click the Settings dropdown arrow to save/manage/delete bookmark generator settings:Figure 2. Generate Bookmarks from Page Text Dialog Box, Save/Manage/Delete Options•Click Save Current Settings to save the current settings as a profile for subsequent use.•Click Delete to delete the current profile.•Click Manage to manage saved profiles. The Manage Presets dialog box will open:Figure 3. Manage Presets Dialog Box•Click Edit to edit selected profiles.•Click Clone to clone selected profiles.•Use the up and down arrows to move selected profiles up or down in the list.•Click Delete to delete selected profiles.•Click Import to import profiles from a saved file.•Click Export to export profiles to file.Figure 4. Bookmark Generation Properties Dialog BoxThe options selected in the Bookmark Generation Properties dialog box determine the text used to generate bookmarks, and the style of the generated bookmarks:Text Matching OptionsThese options determine text used in the generation of bookmarks according to font, size and color:•Select the Font Names box to include text of specific fonts in the generation of bookmarks. Click Add to add fonts to the list, Add Custom to add custom fonts, or Remove to remove selected fonts.•Select the Font Size box to include text of a specific size in the generation of bookmarks. Use the number boxes to determine the Size, Tolerance and Units of text included in the generation of bookmarks. The Tolerance value determines the degree to which selected text can differ from the specified Font Size and remain included in the generation of bookmarks.•Select the Text Color box to include text of of a specific color in the generation of bookmarks, then select a color in the dropdown menu.•Click Get Style from Selected Text to determine the font settings detailed above according to text currently selected in the active document. Use the Select Text tool in the Home tab to select text for this purpose.•The option selected in the Match Text Case dropdown menu determines text used in the generation of bookmarks according to text case:•Select No Restrictions to include text of all cases in the generation of bookmarks.•Select All Characters Are Capital to include only upper-case text in the generation of bookmarks.•Select First Character is Capital to include only text that starts with a capital letter in the generation of bookmarks.•Select First Character is Digit to include only text that starts with a digit in the generation of bookmarks.•Select the Allow multiline bookmark titles box to allow bookmark titles to exceed one line in length. This is useful in cases where it is not possible to shorten bookmark titles.•Select the Match Text Pattern box to specify a sequence of words that document text must match in order to be included in the generation of bookmarks. Enter the desired text patten in the text box. Note that it is possible to use ECMAScript regular expressions for this feature.•Select the Match text case box to include only text that matches the case of the text entered in the Match Text Pattern box. If this box is not selected then all matching text will be included regardless of its case.•Select the Limit bookmark titles to matching pattern only box to determine that only text matching the specified pattern will be included in the generation of bookmarks.在“书签生成属性”对话框中选择的选项决定了用于生成书签的文本以及生成的书签的样式:选择“匹配文本模式”框,指定文档文本必须匹配的单词序列,以便包含在书签的生成中。
jcob
java调用com组件操作word使用总结(jacob)java 2008-12-05 20:58:19 阅读599 评论0 字号:大中小订阅 .java调用com组件操作word使用总结(jacob)简单描述在此处输入简单摘要特别声明:使用java-com技术可以完成任何VBA可以完成的office文档操作;一、准备工作先了解一下概念,JACOB 就是 JAVA-COM Bridge的缩写,提供自动化的访问com的功能,也是通过JNI功能访问windows平台下的com组件或者win32系统库的。
这是一个开始于1999年的开源项目的成果,有很多使用者对该项目进行了修改,做出了自己的贡献。
Jacob下载地址:/project/showfiles.php?group_id=109543&package_id=118368我在这里下载了Jacob1.14.3和jacob1.9的版本两个版本这里下载的是目前最新的Jacob1.14.3的Release版。
另外java操作word方式还有(个人认为通过jacob最好,自己可以扩展,网上除poi之外几乎全是java-com技术实现的):(1):Apache POI - Java API To Access Microsoft Format Files(/);对word处理不够强处理Excel功能可以,但是全是通过java完成的,不需要com组件支持;(2):java2word 是一个在java程序中调用 MS Office Word 文档的组件(类库)。
该组件提供了一组简单的接口,以便java程序调用他的服务操作Word 文档。
(好象也是用的java-com技术);(3)web开发语言操作word的功能最好还是用第三方的控件,看看这个SOAOFFICE,还可以使用js 写VBA呢 /soaoffice/doclist.asp二、安装JacobJacob的安装非常的简单,我们解开下载的jacob_1.9.zip,在文件夹中找到jacob.dll和jacob.jar两个文件,如果是Jacob1.14.3则是jacob-1.14.3-x86.dll(32位,机和jacob-1.14.3-x64.dll(64位)和jacob.jar两个文件。
用Java读取Word文档
用Java读取Word文档由于Word的编码方式比较复杂,所以Word文档不可能通过流的方式直接读取;当然如果Word可以转化成TXT文件就可以直接读取了;目前读取Word比较好的开源工具是Poi及Jacob,感觉Poi读取功能要比Jacob略逊一筹,毕竟Jacob可以直接调用Word的COM组件;但是微软产品不开放源码,所以Jacob读取Word文档也只能是摸着石头过河,一点一点破解了。
Jacob读取Word内容,由于Word内容的复杂性,读取也是非常不方便的,目前可以有"按段落读取","按书签读取"及"按照表格读取"等几种形式。
示例讲解(通过Java FileReader,Jacob两种方式读取Word内容)一.通过java流读取Word内容复制代码1.import java.io.BufferedReader;2.import java.io.FileReader;3.import java.io.IOException;4.5.public class ReadWordByStream {6.public static void main(String[] args) throws IOException {7. String rowContent = new String();8. String content = new String();9. BufferedReader in = new BufferedReader(new FileReader("d:\\test3.doc"));10. while ((rowContent = in.readLine()) != null) {11.content = content + rowContent + "\n";12. }13. System.out.println(content.getBytes());14. System.out.println(new String(content.getBytes(),"utf-8"));//因为编码方式不同,不容易解析15. in.close();16.}17.18.}二.通过Jacob读取Word内容复制代码1.import com.jacob.activeX.ActiveXComponent;2.import Thread;3.import .Dispatch;4.import .Variant;5.6.public class WordReader {7.public static void main(String args[]) {8. ComThread.InitSTA();// 初始化com的线程9. ActiveXComponent wordApp = new ActiveXComponent("Word.Application"); // 启动word10. // Set the visible property as required.11. Dispatch.put(wordApp, "Visible", new Variant(true));// //设置word可见12. Dispatch docs = wordApp.getProperty("Documents").toDispatch();//所有文档窗口13.// String inFile = "d:\\test.doc";14.// Dispatch doc = Dispatch.invoke(docs,"Open",Dispatch.Method,15.// new Object[] { inFile, new Variant(false),new Variant(false) },//参数3,false:可写,true:只读16.// new int[1]).toDispatch();//打开文档17.18. Dispatch doc = Dispatch.call(docs, "Add").toDispatch(); //创建一个新文档19. Dispatch wordContent = Dispatch.get(doc, "Content").toDispatch(); //取得word文件的内容20. Dispatch font = Dispatch.get(wordContent, "Font").toDispatch();21. Dispatch.put(font, "Bold", new Variant(true)); // 设置为粗体22.Dispatch.put(font, "Italic", new Variant(true)); // 设置为斜体23.Dispatch.put(font, "Underline", new Variant(true));24.Dispatch.put(font, "Name", new Variant("宋体"));25.Dispatch.put(font, "Size", new Variant(14));26. for(int i=0;i<10;i++){//作为一个段落27.Dispatch.call(wordContent, "InsertAfter", "current paragraph"+i+" ");28. }29. for(int j=0;j<10;j++){//作为十个段落30. Dispatch.call(wordContent, "InsertAfter", "current paragraph"+j+"\r");31.}32. Dispatch paragraphs = Dispatch.get(wordContent, "Paragraphs")33. .toDispatch(); //所有段落34. int paragraphCount = Dispatch.get(paragraphs, "Count").getInt();35. System.out.println("paragraphCount:"+paragraphCount);36.37. for (int i = 1; i <= paragraphCount; i++) {38.Dispatch paragraph = Dispatch.call(paragraphs, "Item",39.new Variant(i)).toDispatch();40.Dispatch paragraphRange = Dispatch.get(paragraph, "Range")41..toDispatch();42.String paragraphContent = Dispatch.get(paragraphRange, "Text")43..toString();44.System.out.println(paragraphContent);45.//Dispatch.call(selection, "MoveDown");46. }47. // WordReader.class.getClass().getResource("/").getPath().substring+"test.doc";48. Dispatch.call(doc, "SaveAs","d:\\wordreader.doc");49. // Close the document without saving changes50. // 0 = wdDoNotSaveChanges51. // -1 = wdSaveChanges52. // -2 = wdPromptToSaveChanges53. ComThread.Release();//释放com线程54. Dispatch.call(docs, "Close", new Variant(0));55. docs = null;56. Dispatch.call(wordApp,"Quit");57. wordApp = null;58.}59.}用Java简单的读取word文档中的数据:第一步:下载tm-extractors-0.4.jar下载地址:/browser/elated-core/trunk/lib/tm-extractors-0.4.jar?rev =46并把它放到你的classpath路径下面。
java jacob 操作word 文档,进行写操作,如生成表格,添加 图片
66.
Dispatch.call(wordContent, "InsertAfter", text);// 插入一个段落到最后
67.
Dispatch paragraphs = Dispatch.get(wordContent, "Paragraphs")
68.
.toDispatch(); // 所有段落
33.
// Find the Documents collection object maintained by Word
34.
// documents 表示 word 的所有文档窗口,(word 是多文档应用程序)
35.
Dispatch documents = Dispatch.get(MsWordApp, "Documents").toDispatch();
Dispatch.call(image, "AddPicture", jpegFilePath);
62.
}
63.
// 段落的处理,插入格式化的文本
64.
public void insertFormatStr(String text) {
65.
Dispatch wordContent = Dispatch.get(document, "Content").toDispatch(); // 取得 word 文件的内容
76.
.toDispatch();
77.
Dispatch font = Dispatch.get(lastParagraphRange, "Font").toDispatch();
Java 添加、更新、获取、删除PDF中的书签(基于Spire.Cloud.SDK for Java)
Java 添加、更新、获取、删除PDF中的书签Spire.Cloud.SDK for Java WebAPI提供了pdfBookmarkApi接口可用于添加书签addBookmark()、更新书签updateBookmark()、获取书签信息getBookmarksInfo()、以及删除书签deleteBookmarks(),下面将通过具体操作步骤和Java代码示例来展示如何实现以上操作要求。
一、导入jar文件创建Maven项目程序,通过maven仓库下载导入。
以IDEA为例,新建Maven项目,在pom.xml文件中配置maven仓库路径,并指定spire.cloud.sdk的依赖,如下:<repositories><repository><id>com.e-iceblue</id><name>cloud</name><url>/repository/maven-public/</url></repository></repositories><dependencies><dependency><groupId> cloud </groupId><artifactId>spire.cloud.sdk</artifactId><version>3.5.0</version></dependency><dependency><groupId> com.google.code.gson</groupId><artifactId>gson</artifactId><version>2.8.1</version></dependency><dependency><groupId> com.squareup.okhttp</groupId><artifactId>logging-interceptor</artifactId><version>2.7.5</version></dependency><dependency><groupId> com.squareup.okhttp </groupId><artifactId>okhttp</artifactId><version>2.7.5</version></dependency><dependency><groupId> com.squareup.okio </groupId><artifactId>okio</artifactId><version>1.6.0</version></dependency><dependency><groupId> io.gsonfire</groupId><artifactId>gson-fire</artifactId><version>1.8.0</version></dependency><dependency><groupId>io.swagger</groupId><artifactId>swagger-annotations</artifactId><version>1.5.18</version></dependency><dependency><groupId> org.threeten </groupId><artifactId>threetenbp</artifactId><version>1.3.5</version></dependency></dependencies>完成配置后,点击“Import Changes” 即可导入所有需要的jar文件。
Jacob操作Word书签
Jacob操作Word书签ActiveXComponent word = new ActiveXComponent("Word.Application");word.setProperty("Visible", new Variant(false));/*************************************************************************** * 删除书签** @param mark 书签名* @param info 可替换* @return*/public boolean deleteBookMark(String markKey, String info) throws Exception{Dispatch activeDocument = word.getProperty("ActiveDocument").toDispatch();Dispatch bookMarks = word.call(activeDocument, "Bookmarks").toDispatch();boolean isExists = word.call(bookMarks, "Exists", markKey).toBoolean();if (isExists) {Dispatch n = Dispatch.call(bookMarks, "Item", markKey).toDispatch();Dispatch.call(n, "Delete");return true;}return false;}/*************************************************************************** * 根据书签插入数据** @param bookMarkKey 书签名* @param info 插入的数据* @return*/public boolean intoValueBookMark(String bookMarkKey, String info) throws Exception{Dispatch activeDocument = word.getProperty("ActiveDocument").toDispatch();Dispatch bookMarks = word.call(activeDocument, "Bookmarks").toDispatch();boolean bookMarkExist = word.call(bookMarks, "Exists", bookMarkKey) .toBoolean();if (bookMarkExist) {Dispatch rangeItem = Dispatch.call(bookMarks, "Item", bookMarkKey) .toDispatch();Dispatch range = Dispatch.call(rangeItem, "Range").toDispatch();Dispatch.put(range, "Text", new Variant(info));return true;}return false;}。
vba书签使用方法
vba书签使用方法(最新版4篇)目录(篇1)1.VBA 书签的定义与作用2.VBA 书签的创建方法3.VBA 书签的应用场景4.VBA 书签的删除与修改5.总结正文(篇1)一、VBA 书签的定义与作用VBA(Visual Basic for Applications)是一种应用于 Microsoft Office 套件(如 Word、Excel 等)的高级编程语言。
VBA 书签是一种在VBA 代码中使用的特殊标记,可以帮助程序员快速定位到特定的代码位置,从而提高编程效率。
二、VBA 书签的创建方法1.在 VBA 编辑器中,选择“插入”菜单,然后点击“书签”。
2.在代码窗口中,按下 F5 键,光标会自动定位到当前代码的位置,此时可以输入书签名称并按 Enter 键确认。
3.手动输入书签的名称,例如:“Sub MySub()”。
这样的书签会自动以代码段的名称作为书签名。
三、VBA 书签的应用场景1.在复杂的代码模块中,使用书签可以快速定位到相关代码,便于阅读和维护。
2.在调试代码时,通过查看书签,可以迅速找到潜在的错误所在。
3.在代码中引用其他模块时,通过书签可以快速定位到相关模块,提高代码的可读性和可维护性。
四、VBA 书签的删除与修改1.要删除书签,只需选中书签,然后按 Delete 键即可。
2.要修改书签的名称,可以选中书签并直接修改其名称。
五、总结VBA 书签作为一种便捷的代码定位工具,对于编写和维护复杂的 VBA 代码具有重要意义。
目录(篇2)1.VBA 书签的定义与作用2.如何创建 VBA 书签3.如何使用 VBA 书签4.VBA 书签的优点正文(篇2)一、VBA 书签的定义与作用VBA(Visual Basic for Applications)是一种为 Microsoft Office 应用程序设计的编程语言。
VBA 书签是 VBA 代码中的一种特殊标签,用于在代码中标记特定的位置,方便程序员快速定位和编辑代码。
程序编辑器中的代码书签使用技巧

程序编辑器中的代码书签使用技巧代码书签是程序编辑器中的一项便捷功能,它可以帮助程序员在编写代码时快速定位和跳转到特定的代码行。
本文将介绍几种常用的代码书签使用技巧,帮助程序员更高效地开发和调试代码。
一、创建代码书签在程序编辑器中创建代码书签非常简单。
只需要将光标定位到想要标记的代码行上,然后使用特定的快捷键或者鼠标操作来创建书签。
通常情况下,使用快捷键Ctrl + Shift + 数字键(或者Ctrl + 数字键)来创建书签比较方便。
例如,将光标定位到代码的第10行,按下Ctrl + Shift + 1,就可以在此行创建一个编号为1的代码书签。
二、跳转到代码书签跳转到代码书签是使用代码书签功能最主要的操作之一。
程序员可以通过快捷键或者菜单命令来实现跳转到已创建的代码书签。
1. 使用快捷键:按下Ctrl + 数字键(或者Ctrl + Shift + 数字键),其中的数字键对应之前创建的代码书签编号。
例如,按下Ctrl + 1,即可快速跳转到编号为1的代码书签处。
2. 使用菜单命令:在程序编辑器的菜单栏中找到相应的跳转命令,通常被命名为“Go to Bookmark”或者类似的选项。
点击此选项后,会弹出一个书签列表供程序员选择,选择相应的代码书签即可跳转到其所在的代码行。
三、添加和删除代码书签除了创建和跳转到代码书签外,程序员还可以根据需要在代码中添加或删除已有的书签。
这样可以帮助他们更好地组织和管理代码。
1. 添加代码书签:在想要添加书签的代码行上,再次按下之前创建书签的快捷键。
例如,按下Ctrl + Shift + 2,即可在当前行创建一个编号为2的代码书签。
2. 删除代码书签:在已经创建的代码行上按下之前创建书签的快捷键,即可删除该代码行上的代码书签。
例如,按下Ctrl + Shift + 1,即可删除编号为1的代码书签。
四、批量跳转代码书签当程序员在代码中设置了多个代码书签时,可以通过批量跳转功能快速地在这些书签之间进行切换。
autobookmark professional使用方法

autobookmark professional使用方法【实用版4篇】目录(篇1)1.Autobookmark Professional 简介2.安装与设置3.基本功能与操作4.高级功能与应用5.常见问题与解决方案正文(篇1)【Autobookmark Professional 简介】Autobookmark Professional 是一款功能强大的书签管理工具,旨在帮助用户轻松管理和组织书签,提高浏览网页的效率。
它可以自动捕捉网页上的书签,并提供多种方式进行分类、存储和查找。
【安装与设置】在安装 Autobookmark Professional 之前,请确保您的系统已安装了谷歌浏览器(Chrome)、火狐(Firefox)或其他支持的书签插件的浏览器。
安装完成后,启动插件,按照提示设置您的偏好设置,例如书签文件夹、标签等。
【基本功能与操作】Autobookmark Professional 具有以下基本功能:1.自动捕捉书签:在您浏览网页时,插件会自动捕捉网页上的书签,并将其添加到您的书签栏。
2.多种分类方式:您可以根据需要创建文件夹、标签等方式对书签进行分类。
3.快速查找:通过搜索框,您可以快速找到所需的书签。
4.云同步:支持云同步功能,您可以在不同设备上轻松管理书签。
操作步骤如下:1.启动插件,自动捕捉书签。
2.点击插件图标,选择所需操作,如创建文件夹、标签等。
3.在书签栏中,您可以对书签进行拖拽排序。
4.使用搜索框查找书签。
5.启用云同步功能,实现多设备书签同步。
【高级功能与应用】Autobookmark Professional 还提供了一些高级功能,以满足不同用户的需求:1.自定义捕捉规则:您可以根据需要自定义捕捉书签的规则,例如指定网址、关键词等。
2.批量操作:支持批量删除、移动、复制等操作,提高工作效率。
3.脚本支持:允许您编写自定义脚本,实现个性化功能。
【常见问题与解决方案】1.问题:安装插件后无法正常使用。
C# 操作Word书签(二)读取、替换书签

C# 操作Word书签(二)——读取、替换Word书签在上一篇文章中介绍了关于C#如何插入Word书签、插入图片或表格到word、删除word 书签等内容,本篇文章将继续介绍C#操作word书签的方法。
下面的示例中将介绍C# 如何读取Word书签C# 如何替换Word书签工具使用Spire.Doc for .NET 6.1Visual Studio示例代码原文档中的书签内容:1. 读取word书签【C#】using Spire.Doc;using Spire.Doc.Documents;using Spire.Doc.Fields;using System;namespace GetTextOfBookmark_Doc{class Program{static void Main(string[] args){//实例化Document类,加载测试文档Document doc = new Document();doc.LoadFromFile("test.docx");//初始化BookmarkNavigator类对象BookmarksNavigator navigator = new BookmarksNavigator(doc);//定位到指定书签位置,获取书签位置的文档内容navigator.MoveToBookmark("bookmark1");TextBodyPart textBodyPart = navigator.GetBookmarkContent();//遍历书签内容中的子项目,并将文本信息提取至string类型变量中string text = null;foreach (var item in textBodyPart.BodyItems){if (item is Paragraph){foreach (var childObject in (item as Paragraph).ChildObjects) {if (childObject is TextRange){text += (childObject as TextRange).Text;}}}}//控制台输出文本Console.WriteLine(text);Console.ReadLine();}}}读取结果如下2. 替换书签内容【C#】using Spire.Doc;using Spire.Doc.Documents;using Spire.Doc.Fields;namespace EditOrReplaceBookmark_Doc{class Program{static void Main(string[] args){//创建Document类实例,加载文档Document document = new Document();document.LoadFromFile("test.docx");Section sec = document.AddSection();//添加sectionsec.AddParagraph().AppendText("Welcome Back, \n My Friend!"); //添加段落到section,并添加字符串内容//获取段落内容ParagraphBase firstReplacementParagraph =sec.Paragraphs[0].Items.FirstItem as ParagraphBase;ParagraphBase lastReplacementParagraph =sec.Paragraphs[sec.Paragraphs.Count - 1]stItem as ParagraphBase;//实例化类TextBodySelection和TextBodyPartTextBodySelection selection = newTextBodySelection(firstReplacementParagraph, lastReplacementParagraph);TextBodyPart part = new TextBodyPart(selection);BookmarksNavigator bookmarkNavigator = newBookmarksNavigator(document);//实例化BookmarksNavigator类bookmarkNavigator.MoveToBookmark("bookmark1", true, true);//定位到书签“bookmark1”所在段落的位置bookmarkNavigator.DeleteBookmarkContent(true);//删除原有书签位置的内容 bookmarkNavigator.ReplaceBookmarkContent(part, true, true);//用新添加段落的内容替换掉原书签的内容并保留格式//移除sectiondocument.Sections.Remove(sec);//保存文档并打开document.SaveToFile("替换书签.docx");System.Diagnostics.Process.Start("替换书签.docx");}}}测试结果:以上是本次关于C# 操作Word 书签功能的补充介绍,如需转载,请注明出处。
使用Jacob向Excel中插入图片

使用Jacob向Excel中插入图片2008-12-15 18:30详细的部署步骤:1、因为本人使用的JDK1.4,所以需要下载Jacob1.11.1版本2、解压该Jacob,导入其jar文件到IDE的lib下,3、拷贝jacob中的x86的dll文件到你使用的JDK的bin目录下import java.io.File;import java.io.FileInputStream;import java.util.ArrayList;import java.util.Properties;import java.util.StringTokenizer;import com.jacob.activeX.ActiveXComponent;import Thread;import .Dispatch;import .Variant;/*** 使用JACOB插件,在不改變模板中任何內容的情況下,向Excel中插入圖片和日期* @author owen.bear* @version v1.0* @date 2008-12-15*/public class SuccessfullyInsertValue {private static ActiveXComponent excel;private static Dispatch workbooks = null;private static Dispatch workbook = null;private static Dispatch sheets = null;private static Dispatch sheet = null;public static void main(String[] args) {SuccessfullyInsertValue insert = new SuccessfullyInsertValue(); String excelFilePath = "C:\\TestExcel\\target\\Test.xls";String sheetName = "FileDetails";String picFilePath = "C:\\TestExcel\\pic\\a.jpg";String proName = "columns";String proFilePath = "C:\\TestExcel\\conf\\columns.properties"; String queryCode = "123456";String signDate = "2008-12-15";insert.OpenExcel(excelFilePath);insert.insertPicture2Excel(excelFilePath, sheetName, picFilePath, proName, proFilePath, queryCode, signDate);insert.CloseExcel();}/*** 向Excel中插入图片和日期* @param excelFilePath 需要插入图片和日期的Excel路径* @param sheetName 当前需要插入图片和日期的Excel表* @param picFilePath 插入图片的路径* @param proName 列列表* @param proFilePath 配置文件路径* @param queryCode 定位的查询依据* @param signDate 当前需要插入的日期*/public void insertPicture2Excel(String excelFilePath, String sheetName, String picFilePath, String proName, String proFilePath, String queryCode, String signDate) {sheets = Dispatch.call(workbook, "Worksheets").toDispatch();sheet = Dispatch.call(sheets, "Item", sheetName).toDispatch();Dispatch.call(sheet, "Select"); //定位需要插入图片的工作表ArrayList list = getColunmsByProperties(proName, proFilePath);int position = getPosition(list, queryCode, excelFilePath, sheetName);String picPosition = "F" + (position -2);String datePosition = "F" + (position -1);//插入图片Dispatch d = Dispatch.invoke(sheet, "Range", Dispatch.Get, new Object[]{ picPosition }, new int[1]).toDispatch();Dispatch.call(d, "Select"); //在工作表中,定位需要插入图片的具体位置Dispatch select = Dispatch.call(sheet, "Pictures").toDispatch(); Dispatch pic=Dispatch.call(select, "Insert",picFilePath).toDispatch();Dispatch.put(pic, "Height", "25"); //图片在Excel中显示的高Dispatch.put(pic, "Width", "75"); //图片在Excel中显示的宽//插入日期Dispatch cell = Dispatch.invoke(sheet, "Range", Dispatch.Get, new Object[] { datePosition }, new int[1]).toDispatch();Dispatch.put(cell, "Value", signDate);Dispatch.call(workbook, "Close", new Variant(true)); //将开启的Excel表保存后关闭}/*** 通过定位查询依据,获取插入图片和时间的行* @param list 列列表的集合* @param queryCode* @param excelFilePath* @param sheetName* @return 插入图片和时间的具体行*/public int getPosition(ArrayList list, String queryCode, String excelFilePath, String sheetName) {int position = 0;boolean flag = true;int m = 1;while(flag) {for(int i = 0; i < list.size(); i++){String columnX = (String)list.get(i);Dispatch cell = Dispatch.invoke(sheet, "Range", Dispatch.Get, new Object[] { columnX + m }, new int[1]).toDispatch();String columnValue = Dispatch.get(cell, "Value").toString();if(columnValue.startsWith(queryCode)){position = m;flag = false;break;}}m++;}System.out.println("position = " + position);return position;}/*** 读取配置文件,获取列列表的集合* @param proName* @param proFilePath* @return 列列表的集合*/public ArrayList getColunmsByProperties(String proName, StringproFilePath){ArrayList list = new ArrayList();try{Properties properties = new Properties();FileInputStream fin = new FileInputStream(new File(proFilePath)); properties.load(fin);String allColunms = properties.getProperty(proName);System.out.println("allColunms = " + allColunms);if(allColunms != null) {StringTokenizer st = new StringTokenizer(allColunms, ",");while(st != null && st.hasMoreElements()) {String temp = (String)st.nextElement();list.add(temp);}}}catch(Exception e){e.printStackTrace();}return list;}/*** 关闭Excel文档* @param file*/private static void OpenExcel(String file) {try {ComThread.InitSTA();excel = new ActiveXComponent("Excel.Application");excel.setProperty("Visible", new Variant(false));workbooks = excel.getProperty("Workbooks").toDispatch();workbook = Dispatch.invoke(workbooks, "Open", Dispatch.Method, new Object[] { file, new Variant(false), new Variant(false) }, newint[1]).toDispatch();} catch (Exception e) {e.printStackTrace();}}/*** 退出Excel,并关闭进程*/private static void CloseExcel() {excel.invoke("Quit", new Variant[] {});ComThread.Release(); //关闭进程}}配置文件内容如下:columns=A,B,C,D,E,F,G,H,I,J,K,L,M,N,O,P,Q,R,S,T,U,V,W,X,Y,Z,AA,AB,AC, AD,AE,AF,AG,AH。
Jacob操作ppt
COM 组件对象ID MS WordWord.Application MS Excel Excel.ApplicationJacob 操作ppt前⼏天使⽤Apache 的POI 操作ppt ,后来发现转成的图⽚出现乱码,⽽且处理了之后,还会有遗留因此决定换⼀种处理⽅式Jacob 是 JAVA-COM Bridge 的缩写,是⼀个中间件,能够提供⾃动化访问MS 系统下COM 组件和Win32 libraries 的功能。
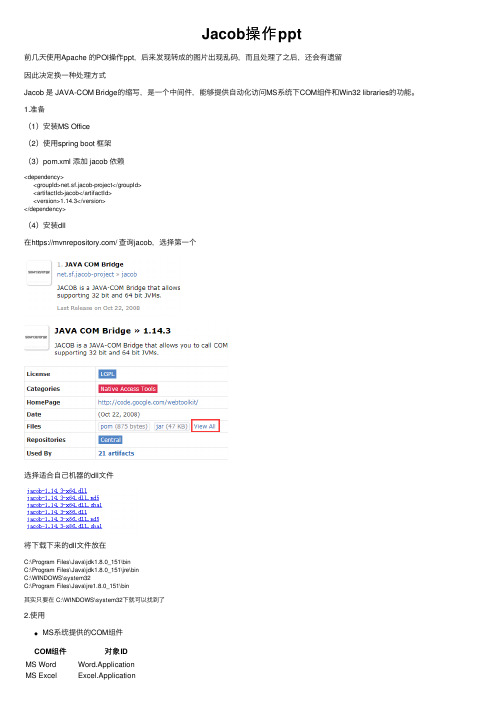
1.准备(1)安装MS Office(2)使⽤spring boot 框架(3)pom.xml 添加 jacob 依赖<dependency><groupId>net.sf.jacob-project</groupId><artifactId>jacob</artifactId><version>1.14.3</version></dependency>(4)安装dll在https:/// 查询jacob,选择第⼀个选择适合⾃⼰机器的dll⽂件将下载下来的dll ⽂件放在C:\Program Files\Java\jdk1.8.0_151\binC:\Program Files\Java\jdk1.8.0_151\jre\binC:\WINDOWS\system32C:\Program Files\Java\jre1.8.0_151\bin其实只要在 C:\WINDOWS\system32下就可以找到了2.使⽤MS 系统提供的COM 组件MS Powerpoint Powerpoint.ApplicationCOM组件对象ID重要的类和⽅法JacobObject:⽤于Java程序MS下的COM进⾏通信,创建标准的API框架ComThread:初始化COM组件线程,释放线程,对线程进⾏管理Dispatch:调度处理类,封装了操作来从⽽操作Office,并表⽰不同MS级别调度对象 Dispatch.get(dispatch, String name);获取对象属性 Dispatch.put(dispatch, String name, Object value);设置对象属性 Dispatch.call(dispatch, String name, Object… args);调⽤对象⽅法ActiveXComponent :创建COM组件Variant :与COM通讯的参数或者返回值可以参考VBA API,使⽤Jacob操作COM组件 https:///en-us/office/vba/api/powerpoint.slides.insertfromfile处理过程 初始化ComThread——》初始化应⽤——》设置应⽤属性——》获取应⽤属性或对象,设置属性参数——》调⽤属性对应的⽅法(1)ppt转pdfpublic BackRS ppt2Pdf(String sourcePath, String destPath,BackRS rs){ActiveXComponent ppt = null;Dispatch presentations = null;try {ComThread.InitMTA(true);ppt = new ActiveXComponent("PowerPoint.application");Dispatch.put(ppt.getObject(), "DisplayAlerts", new Variant(false));presentations = ppt.invokeGetComponent("Presentations").invokeGetComponent("Open", new Variant(sourcePath));Dispatch.invoke(presentations,"SaveAs",Dispatch.Method,new Object[]{destPath, new Variant(32)},new int[1]);rs.setFlag(true);rs.setMsg("pdf successfully converted.");rs.setPath(destPath);rs.setFileName(sourcePath);} catch (Exception e) {rs.setFlag(false);rs.setMsg(e.getMessage());} finally {try {if (ppt != null) {ppt.invoke("Quit");}} catch (Exception e) {rs.setFlag(false);rs.setMsg(e.getMessage());} finally {if (presentations != null)presentations.safeRelease();if (ppt != null)ppt.safeRelease();ComThread.Release();}}return rs;}(2)ppt按页保存图⽚public static final int PPT_SAVEAS_JPG = 17;public BackRS converter(String fileName){BackRS rs = new BackRS();ActiveXComponent ppt = null;Dispatch presentations = null;String source = fileName;File file = new File(source);if (!file.exists()) {rs.setFlag(false);rs.setMsg("转换⽂件不存在");return rs;}String filePath = file.getParent()+File.separator;String dest = filePath + getFileNameNoEx(file.getName())+"_JPG";File destPath = new File(dest);if (!destPath.exists()) {destPath.mkdir();}try {ComThread.InitMTA(true);ppt = new ActiveXComponent("PowerPoint.application");Dispatch.put(ppt.getObject(), "DisplayAlerts", new Variant(false));presentations = ppt.invokeGetComponent("Presentations").invokeGetComponent("Open", new Variant(source)); saveAs(presentations, dest, PPT_SAVEAS_JPG);rs.setFlag(true);rs.setMsg("Image successfully converted.");rs.setPath(dest);rs.setFileName(fileName);} catch (Exception e) {rs.setFlag(false);rs.setMsg(e.getMessage());} finally {try {if (ppt != null) {ppt.invoke("Quit");}} catch (Exception e) {rs.setFlag(false);rs.setMsg(e.getMessage());} finally {if (presentations != null)presentations.safeRelease();if (ppt != null)ppt.safeRelease();ComThread.Release();}}return rs;}public void saveAs(Dispatch presentation, String saveTo,int ppSaveAsFileType)throws Exception {Dispatch.call(presentation, "SaveAs", saveTo, new Variant(ppSaveAsFileType));}(3)ppt合并public void merge(String outPutPPTPath, List<String> mergePPTPathList) {// 启动 office PowerPoint程序ActiveXComponent pptApp = null;Dispatch presentations = null;Dispatch outputPresentation;try {ComThread.InitMTA(true);pptApp = new ActiveXComponent("PowerPoint.Application");Dispatch.put(pptApp, "Visible", new Variant(true));presentations = pptApp.getProperty("Presentations").toDispatch();File file = new File(outPutPPTPath);if (file.exists()) {file.delete();}file.createNewFile();// 打开输出⽂件outputPresentation = Dispatch.call(presentations, "Open", outPutPPTPath, false,false, true).toDispatch();// 循环添加合并⽂件for (String mergeFile : mergePPTPathList) {Dispatch mergePresentation = Dispatch.call(presentations, "Open", mergeFile, false,false, true).toDispatch();Dispatch mergeSildes = Dispatch.get(mergePresentation, "Slides").toDispatch();int mergePageNum = Integer.parseInt(Dispatch.get(mergeSildes, "Count").toString());// 关闭合并⽂件Dispatch.call(mergePresentation, "Close");Dispatch outputSlides = Dispatch.call(outputPresentation, "Slides").toDispatch();int outputPageNum = Integer.parseInt(Dispatch.get(outputSlides, "Count").toString());// 追加待合并⽂件内容到输出⽂件末尾Dispatch.call(outputSlides, "InsertFromFile", mergeFile, outputPageNum, 1, mergePageNum);}// 保存输出⽂件,关闭退出PowerPonit.Dispatch.call(outputPresentation, "Save");Dispatch.call(outputPresentation, "Close");} catch (Exception e) {e.printStackTrace();} finally {try {if (pptApp != null) {pptApp.invoke("Quit");}} catch (Exception e) {e.printStackTrace();} finally {if (presentations != null)presentations.safeRelease();if (pptApp != null)pptApp.safeRelease();ComThread.Release();}}} 将mergePPTPathList 中的⽂件,追加到 outPutPPTPath⽂件中 下⾯的语句Dispatch.call(outputSlides, "InsertFromFile", mergeFile, outputPageNum, 1, mergePageNum);InsertFromFile( _FileName_, _Index_, _SlideStart_, _SlideEnd_ ) 参考这个原型,可以实现追加指定的第umPage页⾯Dispatch.call(outputSlides, "InsertFromFile",mergeFile, outputPageNum, umPage, umPage);说明: (1)出现错误 Can't get object clsid from progid 检查 dll⽂件都在指定位置,但还是报错 后来发现原来参考的其他⼈的⽂章Jacob调⽤WPS将Office⽂件转为PDF⽂件,对象ID不正确 其中 ppt = new ActiveXComponent("KWPP.Application");改为 ppt = new ActiveXComponent("PowerPoint.application"); (2)Can’t load IA 32-bit .dll on a AMD 64-bit platform 出现这个报错是因为使⽤的jacob.dll和系统不匹配,把32位的⽤在了64位的系统上了,⼏位的系统就⽤⼏位jacob.dll (3)如果不想⽤Office想⽤WPS,不能安装极⼩安装包。
《分布式任务调度平台XXLJOB》手册

《散布式任务调动平台 XXL-JOB》手册文档历史记录作者版本日期描绘2018-03-27xuya目录1:简介 ...................................................................................................... 错误 !不决义书签。
2:安装 ...................................................................................................... 错误 !不决义书签。
3:配置 ...................................................................................................... 错误 !不决义书签。
数据库准备............................................................................................错误 !不决义书签。
源码准备 ................................................................................................ 错误 !不决义书签。
部署准备 ................................................................................................ 错误 !不决义书签。
配置部署“调动中心”.................................................................. 错误 !不决义书签。
