ObjectNotificationService(v0.1)
android studio notice用法

android studio notice用法
在Android Studio中,通知(Notification)是一种常用的提醒用户的方式,可以在App运行过程中主动向用户推送消息。
Notification类描述了消息通知的组成内容,包括消息图标、消息标题、消息内容等基本元素,以及附加文本、进度条、计时器等额外元素。
实际推送工作还需要由通知管理器NotificationManager执行。
以下是一个简单的使用Notification的示例:
1. 创建一个Notification对象,并设置其各种属性,如标题、内容、图标等。
2. 创建一个PendingIntent对象,该对象指定了当用户点击通知时应该打开的Activity或执行的操作。
3. 使用NotificationManager来发送Notification。
需要注意的是,由于Android系统版本的更新,Notification的使用方式也在不断变化。
因此,在编写代码时需要考虑到不同版本的兼容性。
同时,对于Android 及以上版本,由于引入了新的通知渠道(Notification Channels)的概念,因此需要在创建通知前先创建一个通知渠道。
通知渠
道用于定义通知的属性和行为,例如声音、振动和优先级等。
此外,为了确保通知能够正常显示,还需要在文件中添加必要的权限和声明。
例如,如果要在后台播放音乐或发送网络请求时显示通知,需要在Manifest中添加相应的权限。
总之,在Android Studio中正确使用Notification需要考虑到多个方面,包括API的调用、权限的声明以及不同版本的兼容性等。
Notification(Notification的通知栏常驻、Notification的各种样式、Notification点击无效、禁止滑动删除

Notification(Notification的通知栏常驻、Notification的各种样式、Notification点击无效、Notification禁止滑动删除)Android的Notification是android系统中很重要的一个机制,产品人员常常利用通知栏的方式,跟用户进行弱沟通。
拥有推送通知的app要比没有此类功能的app活跃率要高很多。
另外类似于墨迹天气,清理大师等app,也会将通知栏常驻,利用自定义的布局,方便用户及时快捷的查看所需的信息和使用快捷的功能。
所以Notification的使用,也在开发当中,使用的越来越频繁。
今天我就来跟大家分享一下Notification的常用事项。
我不了解大家平时怎么使用Notification,我常常看到有些人的代码是这样写的:1.Notification notification=new Notification(notificationIcon, notificationTitle, when);2.3. notification.defaults=Notification.DEFAULT_ALL;4.5. Intent intent=new Intent(MainActivity.this,SecondActivity.class);6. PendingIntent pendingIntent=PendingIntent.getActivity(MainActivity.this, 0, intent, 0);7. notification.setLatestEventInfo(this,"测试展开title", "测试展开内容",pendingIntent);8.。
具体的代码我就不贴全了,因为大家如果注意IDE的提示的话,就会发现,其实这是一种不推荐的用法,API的支持已经过时了。
最新的Notification的用法,是推荐使用V4包下的NotificationCompat.Builder,利用它,进行各种设置,具体的用法先别着急,我们慢慢道来。
AndroidStudioNotification(状态栏通知)详解

AndroidStudioNotification(状态栏通知)详解1.设计⽂档部分解读1)Notification的基本布局上⾯的组成元素依次是:Icon/Photo:⼤图标Title/Name:标题Message:内容信息Timestamp:通知时间,默认是系统发出通知的时间,也可以通过setWhen()来设置Secondary Icon:⼩图标内容⽂字,在⼩图标的左⼿边的⼀个⽂字2)扩展布局在 Jelly Bean 中你可以为通知提供更多事件的细节。
你可以通过扩展布局显⽰消息的前⼏⾏或者图⽚的预览。
这样⽤户可以看多更多的内容 - 有时甚⾄可以看到整个消息。
⽤户可以通过 pinch-zoom 或者双⼿指滑动来打开扩展布局。
Android 为单条消息提供了两种扩展布局 (⽂字和图像) 供你开发应⽤时使⽤。
关于其他⼀些设计的东西,就不⼀⼀提及了,有兴趣的⾃⾏查看上⾯提供的API⽂档,知道下这个Notification在4.x以上的版本可以多种多样就好!我们更多的时候关注的是如何写代码使⽤这个东西,下⾯我们就来学习下Notification的⽤法!2.Notification的基本使⽤流程状态通知栏主要涉及到2个类:Notification 和NotificationManagerNotification:通知信息类,它⾥⾯对应了通知栏的各个属性NotificationManager:是状态栏通知的管理类,负责发通知、清除通知等操作。
使⽤的基本流程:Step 1. 获得NotificationManager对象: NotificationManager mNManager = (NotificationManager)getSystemService(NOTIFICATION_SERVICE);Step 2. 创建⼀个通知栏的Builder构造类: Notification.Builder mBuilder = new Notification.Builder(this);Step 3. 对Builder进⾏相关的设置,⽐如标题,内容,图标,动作等!Step 4.调⽤Builder的build()⽅法为notification赋值Step 5.调⽤NotificationManager的notify()⽅法发送通知!PS:另外我们还可以调⽤NotificationManager的cancel()⽅法取消通知3.设置相关的⼀些⽅法:Notification.Builder mBuilder = new Notification.Builder(this);后再调⽤下述的相关的⽅法进⾏设置:(官⽅API⽂档:) 常⽤的⽅法如下:setContentTitle(CharSequence):设置标题setContentText(CharSequence):设置内容setSubText(CharSequence):设置内容下⾯⼀⼩⾏的⽂字setTicker(CharSequence):设置收到通知时在顶部显⽰的⽂字信息setWhen(long):设置通知时间,⼀般设置的是收到通知时的System.currentTimeMillis()setSmallIcon(int):设置右下⾓的⼩图标,在接收到通知的时候顶部也会显⽰这个⼩图标setLargeIcon(Bitmap):设置左边的⼤图标setAutoCancel(boolean):⽤户点击Notification点击⾯板后是否让通知取消(默认不取消)setDefaults(int):向通知添加声⾳、闪灯和振动效果的最简单、使⽤默认(defaults)属性,可以组合多个属性,Notification.DEFAULT_VIBRATE(添加默认震动提醒);Notification.DEFAULT_SOUND(添加默认声⾳提醒);Notification.DEFAULT_LIGHTS(添加默认三⾊灯提醒)Notification.DEFAULT_ALL(添加默认以上3种全部提醒)setVibrate(long[]):设置振动⽅式,⽐如:setVibrate(new long[] {0,300,500,700});延迟0ms,然后振动300ms,在延迟500ms,接着再振动700ms,关于Vibrate⽤法后⾯会讲解!setLights(int argb, int onMs, int offMs):设置三⾊灯,参数依次是:灯光颜⾊,亮持续时间,暗的时间,不是所有颜⾊都可以,这跟设备有关,有些⼿机还不带三⾊灯;另外,还需要为Notification设置flags为Notification.FLAG_SHOW_LIGHTS 才⽀持三⾊灯提醒!setSound(Uri):设置接收到通知时的铃声,可以⽤系统的,也可以⾃⼰设置,例⼦如下:.setDefaults(Notification.DEFAULT_SOUND) //获取默认铃声.setSound(Uri.parse("file:///sdcard/xx/xx.mp3")) //获取⾃定义铃声.setSound(Uri.withAppendedPath(Audio.Media.INTERNAL_CONTENT_URI, "5")) //获取Android多媒体库内的铃声setOngoing(boolean):设置为ture,表⽰它为⼀个正在进⾏的通知。
金笛短信产品维护手册说明书
金笛短信产品维护手册北京春笛网络信息技术服务有限公司 地址:北京海淀区知春路23号863软件园量子银座九层 邮编:100191电话:************,82356576,82356577金笛短信产品维护手册 产品版本V1.2 修订日期2020.04.01 作者 Zhangwei,s0z0y目录金笛短信产品维护手册 (1)一、VC中间件常见问题 (4)1.VC中间件安装问题 (4)1.1 创建注册表失败。
(4)1.2 安装路径问题。
(6)1.3在64位系统安装VC中间件mysql驱动程序时报缺少sfc.dll文件。
.. 82.VC中间件使用问题 (9)2.1 VC中间件配置好了ODBC源但是VC中间件界面找不到ODBC源名称 (9)2.2 ODBC源连接正常,启动服务异常 (9)2.3 VC中间件如何配置数据库的ODBC源 (11)2.4 VC中间件如何配置MySQL数据库的ODBC 源 (12)2.5 VC中间件如何配置Oracle 数据库的ODBC 源 (13)2.6 点击界面上的自动检测按钮,提示短信猫是否正常连接或短信猫已处于工作状态 (14)2.7 VC中间件单击日志表记录按钮,点击多次未响应 (15)2.8 如何查看VC中间件的运行日志 (15)2.9 VC中间件界面提交短信测试时,报向数据库表T_sendtask表添加记录失败 (16)2.10 5.1.101版本VC中间件日志表记录报cms error 304错误,短信卡住,不发送。
(16)2.11 VC中间件配置好数据库ODBC源后,在待发送列表短信显示是乱码 (16)2.12 一次性提交几百条信息时,VC中间件日志表记录报错误码34 (17)2.13 VC中间件安装,安装后启动服务,关闭界面,服务后台自动运行,如果在运行过程中非正常停止服务,则后台停止运行 (17)2.14 VC服务配置中间件,在提交短信后一直在在待发列表,显示准备发送或正在发送 (17)2.15 VC中间件使用,ODBC数据源配置正常,在VC界面上数据库测试连接正常,但点击“保存退出“时,提示拒绝访问 (18)2.16 查看VC中间件日志表记录时,报cms/cme error 常见错误码 (18)2.17短信猫设备装上之后,VC扫描不到com口 (19)2.18 短信猫设备装上之后,怎样判断检测设备状态是否正常 (20)2.19 短信猫设备装上之后,怎样测试设备能否发送短信 (21)2.20短信猫设备装上之后,检测工具检测AT标识,读卡部分未读卡,信号无信号 (23)2.21 以前老版本VC中间件启动服务时,弹窗提示“没有连接可用的短信设备” (23)2.22 配置mysql的odbc源的时候,列表中没有mysql驱动的选项 (23)2.23 VC中间件可以发,致远OA不能发 (24)2.24 VC中间件发短信看日志都是发送成功了,但是没收到短信 (24)二、WEB中间件常见问题 (25)1.WEB中间件安装问题 (25)2. WEB中间件使用常见问题 (27)2.1 Web中间件中启用设备时,设备状态一直在"启动中" (27)2.2 Web中间件在发送短信页面,点击"提交短信"按钮会弹出对话框提示"访问数据源失败,请确认数据源是否配置正确" (28)2.3 短信猫收到短信后,发现会不断地往数据库中重复插入数据 (28)2.4 web中间件设备配置界面检测不到短信猫 (29)2.5 授权码没注册 (30)2.6 web中间件如果启用/停止设备 (30)2.7 web中间件如何使用手机app (31)2.8 web中间件数据源设置界面连接测试数据库失败 (35)2.9 web中间件如何定时发送短信 (36)2.10 如何查看web中间件日志 (37)2.11 web中间件支持的txt文件格式 (37)2.12 web中间件支持的XLS电子表格文件格式 (38)2.13 web中间件支持的工资条电子表格文件格式 (39)2.14 web中间件服务程序如何重启 (40)2.15 web中间件URL发送短信接口密码在哪设置 (41)2.16 如何从表里删除web中间件的日志发送记录 (42)2.17 linux版web中间件安装后,Mysql启动失败,提示Starting MySQL. ERROR! Manager of pid-file quit without updatingfile! (42)2.18 web中间件运行发送短信一段时间后,短信一直在待发列表中 (43)2.19 web中间件发短信,待发时间和本地时间不一致 (43)三、二次开发包 (44)四、短信盒子 (44)一、VC中间件常见问题1.VC中间件安装问题1.1 创建注册表失败。
rio枚举过程

rio枚举过程以下是标题为"RIO枚举过程"的内容:RIO枚举过程RIO (Remote Insecure Object)枚举是一种针对Java RMI(Remote Method Invocation)服务的攻击方式,它利用Java序列化数据的特性来执行任意代码。
RIO枚举的过程主要分为以下几个步骤:1. 扫描目标主机需要扫描目标主机开放的TCP端口,通常Java RMI服务默认监听在1099端口。
可以使用Nmap等工具进行端口扫描。
2. 获取RMI注册表信息如果1099端口开放,就可以尝试连接RMI注册表并获取注册的服务信息。
可以使用各种工具或自己编写代码连接注册表并列出绑定的服务。
3. 下载RMI stub文件从注册表获取到绑定服务的stub文件路径后,就可以下载stub文件。
stub文件包含了服务的接口定义和远程引用信息。
4. 反编译stub文件下载的stub文件是Java字节码格式,需要使用反编译工具(如javap)将其反编译为可读的Java源代码。
5. 寻找可利用的gadget反编译后的Java代码中可能包含一些可利用的gadget(小工具),这些gadget可以被链接在一起形成利用链,从而实现任意代码执行。
6. 构造利用链根据找到的gadget,构造出可以执行任意代码的利用链。
利用链通常是一系列特殊构造的Java对象序列。
7. 触发利用链将构造好的利用链通过RMI服务传递给远程服务端,从而在服务端触发任意代码执行。
RIO枚举过程利用了Java RMI和序列化的特性,需要一定的Java安全知识和代码审计能力。
成功的RIO攻击可以在目标服务器上执行任意命令,从而控制整个系统。
因此,及时修补Java组件漏洞并限制不必要的RMI服务是防御RIO攻击的关键。
详解Android中IntentService的使用方法
详解Android中IntentService的使⽤⽅法为什么我们需要IntentService ?Android中的IntentService是继承⾃Service类的,在我们讨论IntentService之前,我们先想⼀下Service的特点: Service的回调⽅法(onCreate、onStartCommand、onBind、onDestroy)都是运⾏在主线程中的。
当我们通过startService启动Service之后,我们就需要在Service的onStartCommand⽅法中写代码完成⼯作,但是onStartCommand是运⾏在主线程中的,如果我们需要在此处完成⼀些⽹络请求或IO等耗时操作,这样就会阻塞主线程UI⽆响应,从⽽出现ANR现象。
为了解决这种问题,最好的办法就是在onStartCommand中创建⼀个新的线程,并把耗时代码放到这个新线程中执⾏。
可以参考之前的⽂章,这篇⽂章在onStartCommand中开启了新的线程作为⼯作线程去执⾏⽹络请求,所以这样不会阻塞主线程。
由此看来,创建⼀个带有⼯作线程的Service是⼀种很常见的需求(因为⼯作线程不会阻塞主线程),所以Android为了简化开发带有⼯作线程的Service,Android额外开发了⼀个类——–IntentService。
IntentService的特点IntentService具有以下特点:1. IntentService⾃带⼀个⼯作线程,当我们的Service需要做⼀些可能会阻塞主线程的⼯作的时候可以考虑使⽤IntentService。
2. 我们需要将要做的实际⼯作放⼊到IntentService的onHandleIntent回到⽅法中,当我们通过startService(intent)启动了IntentService之后,最终Android Framework会回调其onHandleIntent⽅法,并将intent传⼊该⽅法,这样我们就可以根据intent去做实际⼯作,并且onHandleIntent运⾏在IntentService所持有的⼯作线程中,⽽⾮主线程。
关于Notification

1.创建一个Notification的对象Notification(icon, tickerText, when)2.setLatestEventInfo(context,ContentTitle,contentText,contentIntent)第一个参数上下文环境第二个参数标题第三个参数内容第四个参数要跳转到的Activity其中的Intent 是PendingIntent类型的3.创建PendingIntent的对象通过PendingIntent contentIntent=PendingIntent.getActivity (context, requestCode, intent, flags);第一个参数上下文环境第二个参数请求号第三个参数intent对象要跳转到的Activity 第四个参数标志位4.激活Notification要通过NotificationManager对象调用notify(id, notification)方法,因此Notification的激活需要使用NotificationManager对象创建NotificationManager对象getSystemService(Context.NOTIFICATION_SERVICE); default属性为Notification设置震动、声音、灯光,取值是Notification中的常量以DEFAULT 开头,如果只想设置其中的两个可以用位或| 符号进行分割;flag属性设置Notification能否被清除,取值是Notification中的常量以FLAG 开头设置震动要加权限uses-permission android:name="android.permission.VIBRATE"一个应用对用着一个ActivityManager的对象,同时对应着一个NotificationManager的对象,管理时只通过ID区分,其他的不能标示NotificationManager可以让我们的Notification消失,cancle(ID),cancleall()。
Android中Notification通知用法详解

Android中Notification通知⽤法详解Notification的作⽤通知(Notification)是Android系统中⽐较有特⾊的⼀个功能。
当某个应⽤程序希望向⽤户发出⼀些提⽰信息,⽽该应⽤程序⼜不在前台运⾏时,就可以⽤通知来实现⽤法⾸先我们需要⼀个NotificationManager来对通知进⾏管理,可以调⽤getSystemService()⽅法得到,⽅法接收⼀个字符串参数⽤于确定获取系统的哪个服务,这⾥我们传⼊NOTIFICATION_SERVICE。
NotificationManager manager=(NotificationManager) getSystemService(NOTIFICATION_SERVICE);接下来⽤⼀个Builder构造器来创建Notification对象Intent intent=new Intent(this,NotificationActivity.class);//⽤intent表现出我们要启动Notification的意图PendingIntent pi=PendingIntent.getActivity(this,0,intent,0);//将Intent对象传⼊PendingIntent对象的getActivity⽅法中NotificationManager manager=(NotificationManager) getSystemService(NOTIFICATION_SERVICE);Notification notification=new NotificationCompat.Builder(this).setContentTitle("This is content title")//设置通知栏中的标题.setContentText("hello world!")//设置通知栏中的内容.setWhen(System.currentTimeMillis())//设置通知出现的时间,此时为事件响应后⽴马出现通知.setSmallIcon(R.mipmap.ic_launcher)//设置通知出现在⼿机顶部的⼩图标.setLargeIcon(BitmapFactory.decodeResource(getResources(),R.mipmap.ic_launcher))//设置通知栏中的⼤图标.setContentIntent(pi)//将PendingIntent对象传⼊该⽅法中,表明点击通知后进⼊到NotificationActivity.class页⾯.setAutoCancel(true)//点击通知后,通知⾃动消失.setDefaults(NotificationCompat.DEFAULT_ALL)//默认选项,根据⼿机当前的环境来决定通知发出时播放的铃声,震动,以及闪光灯.setPriority(NotificationCompat.PRIORITY_MAX)//设置通知的权重.build();manager.notify(1,notification);//⽤于显⽰通知,第⼀个参数为id,每个通知的id都必须不同。
NotiFication 详解
NotiFication 详解下面来谈谈notification,这个notification一般用在电话,短信,邮件,闹钟铃声,在手机的状态栏上就会出现一个小图标,提示用户处理这个快讯,这时手从上方滑动状态栏就可以展开并处理这个快讯。
发现这个功能特别好用,所以我就根据我的理解来谈谈。
摘自帮助文档 : notification类表示一个持久的通知,将提交给用户使用NotificationManager。
已添加的Notification.Builder,使其更容易构建通知。
notification是一种让你的应用程序在没有开启情况下或在后台运行警示用户。
它是看不见的程序组件(Broadcast Receiver,Service和不活跃的Activity)警示用户有需要注意的事件发生的最好途径。
先来区分以下状态栏和状态条的区别:1、状态条就是手机屏幕最上方的一个条形状的区域;在状态条有好多信息量:比如usb连接图标,手机信号图标,电池电量图标,时间图标等等;2、状态栏就是手从状态条滑下来的可以伸缩的view;在状态栏中一般有两类(使用FLAG_标记):(1)正在进行的程序;(2)是通知事件;大概来描述创建一个Notification传送的信息有:1、一个状态条图标;2、在拉伸的状态栏窗口中显示带有大标题,小标题,图标的信息,并且有处理该点击事件:比如调用该程序的入口类;3、闪光,LED,或者震动;快速创建一个Notification的步骤简单可以分为以下四步:第一步:通过getSystemService()方法得到NotificationManager对象;第二步:对Notification的一些属性进行设置比如:内容,图标,标题,相应notification的动作进行处理等等;第三步:通过NotificationManager对象的notify()方法来执行一个notification 的快讯;第四步:通过NotificationManager对象的cancel()方法来取消一个notificatioin 的快讯;下面对Notification类中的一些常量,字段,方法简单介绍一下:常量:DEFAULT_ALL 使用所有默认值,比如声音,震动,闪屏等等 DEFAULT_LIGHTS 使用默认闪光提示DEFAULT_SOUNDS 使用默认提示声音DEFAULT_VIBRATE 使用默认手机震动【说明】:加入手机震动,一定要在manifest.xml中加入权限:<uses-permissionandroid:name="android.permission.VIBRATE" />以上的效果常量可以叠加,即通过mNotifaction.defaults =DEFAULT_SOUND | DEFAULT_VIBRATE ;或mNotifaction.defaults |=DEFAULT_SOUND (最好在真机上测试,震动效果模拟器上没有)//设置flag位FLAG_AUTO_CANCEL 该通知能被状态栏的清除按钮给清除掉FLAG_NO_CLEAR 该通知能被状态栏的清除按钮给清除掉FLAG_ONGOING_EVENT 通知放置在正在运行FLAG_INSISTENT 是否一直进行,比如音乐一直播放,知道用户响应常用字段:contentIntent 设置PendingIntent对象,点击时发送该Intentdefaults 添加默认效果flags 设置flag位,例如FLAG_NO_CLEAR 等icon 设置图标sound 设置声音tickerText 显示在状态栏中的文字when 发送此通知的时间戳Notification.build构造Notification方法介绍:void setLatestEventInfo(Context context ,CharSequencecontentTitle,CharSequence contentText,PendingIntent contentIntent)功能:显示在拉伸状态栏中的Notification属性,点击后将发送PendingIntent 对象参数: context 上下文环境contentTitle 状态栏中的大标题contentText 状态栏中的小标题contentIntent 点击后将发送PendingIntent对象说明:要是在Notification中加入图标,在状态栏和状态条中显示图标一定要用这个方法,否则报错!最后说一下NotificationManager类的常用方法:通过获取系统服务来获取该对象:NotificationManager mNotificationManager = (NotificationManager)getSystemService(Context.NOTIFICATION_SERVICE) ;NotificationManager常用方法介绍:public voidcancelAll() 移除所有通知 (只是针对当前Context下的Notification)public void cancel(intid) 移除标记为id的通知(只是针对当前Context下的所有Notification)public void notify(String tag ,int id, Notification notification) 将通知加入状态栏, 标签为tag,标记为idpublic void notify(int id, Notificationnotification) 将通知加入状态栏,,标记为id下面看一下demo的效果图:图(1)图(2)图(3)图(4)图(5)源码奉上:在NotificationApp工程里面:一、在.notification.daming包下面NotificationMainActivity.java中的代码:package .notification.daming;import android.app.Activity;import android.app.Notification;import android.app.NotificationManager;import android.app.PendingIntent;import android.content.Intent;import android.content.SharedPreferences;import android.media.RingtoneManager;import .Uri;import android.os.Bundle;import android.preference.PreferenceManager;import android.view.View;import android.view.View.OnClickListener;import android.widget.Button;public class NotificationMainActivity extends Activity implements OnClickListener {private Button setNotificationSoundBtn = null;private Button showNotificatioBtn = null;private Button cancelNotificationBtn = null;private Intent mIntent = null;private PendingIntent mPendingIntent = null;private Notification mNotification = null;private NotificationManager mNotificationManager = null;private static final int NOTIFICATION_STATE = 1;private static final int RINGTONE_PICKED = 2;private Uri notifiSounds = null;@Overridepublic void onCreate(Bundle savedInstanceState) {super.onCreate(savedInstanceState);setContentView(yout.main);mNotificationManager =(NotificationManager)getSystemService(NOTIFICATION_SERVICE);setNotificationSoundBtn = (Button)findViewById(R.id.button0);setNotificationSoundBtn.setOnClickListener(this);showNotificatioBtn = (Button)findViewById(R.id.button1);showNotificatioBtn.setOnClickListener(this);cancelNotificationBtn = (Button)findViewById(R.id.button2);cancelNotificationBtn.setOnClickListener(this);mIntent = new Intent(this, ToNotificationActivity.class);mPendingIntent = PendingIntent.getActivity(this, 0, mIntent, 0);mNotification = new Notification();}public void onClick(View v) {// TODO Auto-generated method stubswitch(v.getId()){case R.id.button0:SharedPreferences sharedPreferences =PreferenceManager.getDefaultSharedPreferences(this);Intent intent = newIntent(RingtoneManager.ACTION_RINGTONE_PICKER);// Allow user to pick 'Default'intent.putExtra(RingtoneManager.EXTRA_RINGTONE_SHOW_DEFAULT, true);intent.putExtra(RingtoneManager.EXTRA_RINGTONE_DEFAULT_URI, RingtoneManager.getDefaultUri(RingtoneManager.TYPE_NOTIFICATION));// Show only ringtonesintent.putExtra(RingtoneManager.EXTRA_RINGTONE_TYPE, RingtoneManager.TYPE_NOTIFICATION);// Don't show 'Silent'intent.putExtra(RingtoneManager.EXTRA_RINGTONE_SHOW_SILENT, false);String notifi_sound =sharedPreferences.getString("notification_sounds", null);if(notifi_sound != null){intent.putExtra(RingtoneManager.EXTRA_RINGTONE_EXISTING_UR I, Uri.parse(notifi_sound));}// Launch!startActivityForResult(intent, RINGTONE_PICKED);break;case R.id.button1:mNotification.icon = R.drawable.daming;mNotification.tickerText = "大明ZeroSon Notification";mNotification.sound = notifiSounds;mNotification.defaults = Notification.DEFAULT_VIBRATE | Notification.DEFAULT_LIGHTS;mNotification.flags = Notification.FLAG_INSISTENT ;mNotification.setLatestEventInfo(this, "大明Notification", "This is Daming`s Notification Test!", mPendingIntent);mNotificationManager.notify(NOTIFICATION_STATE, mNotification);break;case R.id.button2:mNotificationManager.cancel(NOTIFICATION_STATE);break;default:break;}}@Overrideprotected void onResume() {super.onResume();}@Overrideprotected void onActivityResult(int requestCode, int resultCode, Intent data) {SharedPreferences sharedPreferences =PreferenceManager.getDefaultSharedPreferences(this);SharedPreferences.Editor editor = sharedPreferences.edit();if (resultCode != RESULT_OK) {return;}switch (requestCode) {case RINGTONE_PICKED: {notifiSounds =data.getParcelableExtra(RingtoneManager.EXTRA_RINGTONE_PICKED_URI);editor.putString("notification_sounds",notifiSounds.toString());mit();break;}default: break;}}}package .notification.daming;import android.app.Activity;import android.app.Notification;import android.app.NotificationManager;import android.app.PendingIntent;import android.content.Intent;import android.content.SharedPreferences;import android.media.RingtoneManager;import .Uri;import android.os.Bundle;import android.preference.PreferenceManager;import android.view.View;import android.view.View.OnClickListener;import android.widget.Button;public class NotificationMainActivity extends Activity implements OnClickListener {private Button setNotificationSoundBtn = null;private Button showNotificatioBtn = null;private Button cancelNotificationBtn = null;private Intent mIntent = null;private PendingIntent mPendingIntent = null;private Notification mNotification = null;private NotificationManager mNotificationManager = null;private static final int NOTIFICATION_STATE = 1;private static final int RINGTONE_PICKED = 2;private Uri notifiSounds = null;@Overridepublic void onCreate(Bundle savedInstanceState) {super.onCreate(savedInstanceState);setContentView(yout.main);mNotificationManager =(NotificationManager)getSystemService(NOTIFICATION_SERVICE);setNotificationSoundBtn = (Button)findViewById(R.id.button0);setNotificationSoundBtn.setOnClickListener(this);showNotificatioBtn = (Button)findViewById(R.id.button1);showNotificatioBtn.setOnClickListener(this);cancelNotificationBtn = (Button)findViewById(R.id.button2);cancelNotificationBtn.setOnClickListener(this);mIntent = new Intent(this, ToNotificationActivity.class);mPendingIntent = PendingIntent.getActivity(this, 0, mIntent, 0);mNotification = new Notification();}public void onClick(View v) {// TODO Auto-generated method stubswitch(v.getId()){case R.id.button0:SharedPreferences sharedPreferences =PreferenceManager.getDefaultSharedPreferences(this);Intent intent = new Intent(RingtoneManager.ACTION_RINGTONE_PICKER);// Allow user to pick 'Default'intent.putExtra(RingtoneManager.EXTRA_RINGTONE_SHOW_DEFAULT, true); intent.putExtra(RingtoneManager.EXTRA_RINGTONE_DEFAULT_URI, RingtoneManager.getDefaultUri(RingtoneManager.TYPE_NOTIFICATION));// Show only ringtonesintent.putExtra(RingtoneManager.EXTRA_RINGTONE_TYPE, RingtoneManager.TYPE_NOTIFICATION);// Don't show 'Silent'intent.putExtra(RingtoneManager.EXTRA_RINGTONE_SHOW_SILENT, false); String notifi_sound =sharedPreferences.getString("notification_sounds", null);if(notifi_sound != null){intent.putExtra(RingtoneManager.EXTRA_RINGTONE_EXISTING_URI,Uri.parse(notifi_sound));}// Launch!startActivityForResult(intent, RINGTONE_PICKED);break;case R.id.button1:mNotification.icon = R.drawable.daming;mNotification.tickerText = "大明ZeroSon Notification";mNotification.sound = notifiSounds;mNotification.defaults = Notification.DEFAULT_VIBRATE |Notification.DEFAULT_LIGHTS;mNotification.flags = Notification.FLAG_INSISTENT ;mNotification.setLatestEventInfo(this, "大明Notification", "This is Daming`s Notification Test!", mPendingIntent);mNotificationManager.notify(NOTIFICATION_STATE, mNotification);break;case R.id.button2:mNotificationManager.cancel(NOTIFICATION_STATE);break;default:break;}}@Overrideprotected void onResume() {super.onResume();}protected void onActivityResult(int requestCode, int resultCode, Intent data) { SharedPreferences sharedPreferences =PreferenceManager.getDefaultSharedPreferences(this);SharedPreferences.Editor editor = sharedPreferences.edit();if (resultCode != RESULT_OK) {return;}switch (requestCode) {case RINGTONE_PICKED: {notifiSounds =data.getParcelableExtra(RingtoneManager.EXTRA_RINGTONE_PICKED_URI);editor.putString("notification_sounds", notifiSounds.toString());mit();break;}default: break;}}}二、在.notification.daming包下面ToNotificationActivity.java中的代码:package .notification.daming;import android.app.Activity;import android.content.SharedPreferences;import android.media.Ringtone;import android.media.RingtoneManager;import .Uri;import android.os.Bundle;import android.preference.PreferenceManager;import android.widget.TextView;public class ToNotificationActivity extends Activity{private TextView textview = null;@Overrideprotected void onCreate(Bundle savedInstanceState) {super.onCreate(savedInstanceState);setContentView(yout.main1);SharedPreferences sharedPreferences =PreferenceManager.getDefaultSharedPreferences(this);textview = (TextView)findViewById(R.id.textview);String notificationsound =sharedPreferences.getString("notification_sounds", null);if(notificationsound == null){textview.setText("默认Notification声音");} else{Ringtone ringtone= RingtoneManager.getRingtone(ToNotificationActivity.this,Uri.parse(notificationsound));String title = ringtone.getTitle(ToNotificationActivity.this);textview.setText(title);}}}package .notification.daming;import android.app.Activity;import android.content.SharedPreferences;import android.media.Ringtone;import android.media.RingtoneManager;import .Uri;import android.os.Bundle;import android.preference.PreferenceManager;import android.widget.TextView;public class ToNotificationActivity extends Activity{private TextView textview = null;@Overrideprotected void onCreate(Bundle savedInstanceState) {super.onCreate(savedInstanceState);setContentView(yout.main1);SharedPreferences sharedPreferences =PreferenceManager.getDefaultSharedPreferences(this);textview = (TextView)findViewById(R.id.textview);String notificationsound = sharedPreferences.getString("notification_sounds", null);if(notificationsound == null){textview.setText("默认Notification声音");} else{Ringtone ringtone = RingtoneManager.getRingtone(ToNotificationActivity.this, Uri.parse(notificationsound));String title = ringtone.getTitle(ToNotificationActivity.this);textview.setText(title);}}}三、在layout下main.xml布局文件的代码<?xml version="1.0" encoding="utf-8"?><LinearLayout xmlns:android="/apk/res/android"android:orientation="vertical"android:layout_width="fill_parent"android:layout_height="fill_parent"><TextViewandroid:layout_width="fill_parent"android:layout_height="wrap_content"android:text="@string/hello"android:gravity="center"android:layout_marginBottom="10dip"/><Buttonandroid:id="@+id/button0"android:layout_width="fill_parent"android:layout_height="wrap_content"android:text="设置Notification的sounds"android:layout_marginBottom="10dip"/><Buttonandroid:id="@+id/button1"android:layout_width="fill_parent"android:layout_height="wrap_content"android:text="发送Notification"android:layout_marginBottom="10dip"/><Buttonandroid:id="@+id/button2"android:layout_width="fill_parent"android:layout_height="wrap_content"android:text="取消Notification"android:layout_marginBottom="10dip"/></LinearLayout><?xml version="1.0" encoding="utf-8"?><LinearLayout xmlns:android="/apk/res/android" android:orientation="vertical"android:layout_width="fill_parent"android:layout_height="fill_parent"><TextViewandroid:layout_width="fill_parent"android:layout_height="wrap_content"android:text="@string/hello"android:gravity="center"android:layout_marginBottom="10dip"/><Buttonandroid:id="@+id/button0"android:layout_width="fill_parent"android:layout_height="wrap_content"android:text="设置Notification的sounds"android:layout_marginBottom="10dip"/><Buttonandroid:id="@+id/button1"android:layout_width="fill_parent"android:layout_height="wrap_content"android:text="发送Notification"android:layout_marginBottom="10dip"/><Buttonandroid:id="@+id/button2"android:layout_width="fill_parent"android:layout_height="wrap_content"android:text="取消Notification"android:layout_marginBottom="10dip"/></LinearLayout>四、在layout下main1.xml布局文件的代码<?xml version="1.0" encoding="utf-8"?><LinearLayout xmlns:android="/apk/res/android" android:orientation="vertical"android:layout_width="fill_parent"android:layout_height="fill_parent"><TextViewandroid:layout_width="fill_parent"android:layout_height="wrap_content"android:gravity="center"android:textSize="10pt"android:text="大明原创"android:layout_marginTop="10dip"android:layout_marginBottom="10dip"/><TextViewandroid:id="@+id/textview"android:layout_width="fill_parent"android:layout_height="wrap_content"android:gravity="center"android:textSize="10pt"android:layout_marginTop="10dip"android:layout_marginBottom="10dip"/></LinearLayout><?xml version="1.0" encoding="utf-8"?><LinearLayout xmlns:android="/apk/res/android" android:orientation="vertical"android:layout_width="fill_parent"android:layout_height="fill_parent"><TextViewandroid:layout_width="fill_parent"android:layout_height="wrap_content"android:gravity="center"android:textSize="10pt"android:text="大明原创"android:layout_marginTop="10dip"android:layout_marginBottom="10dip"/><TextViewandroid:id="@+id/textview"android:layout_width="fill_parent"android:layout_height="wrap_content"android:gravity="center"android:textSize="10pt"android:layout_marginTop="10dip"android:layout_marginBottom="10dip"/></LinearLayout>五、manifest.xml中的代码:<?xml version="1.0" encoding="utf-8"?><manifest xmlns:android="/apk/res/android"package=".notification.daming"android:versionCode="1"android:versionName="1.0"><uses-sdk android:minSdkVersion="8" /><uses-permission android:name="android.permission.VIBRATE" /><application android:icon="@drawable/icon"android:label="@string/app_name"><activity android:name=".NotificationMainActivity"android:label="@string/app_name"><intent-filter><action android:name="android.intent.action.MAIN" /><category android:name="UNCHER" /> </intent-filter></activity><activity android:name=".ToNotificationActivity"></activity></application></manifest>。
ICP DAS CAN-2024D设备网络从机设备说明书

Copyright © 2011 is reserved by ICP DAS.
Trademark
The brand name ICP DAS as a trademark is registered, and can be used by other authorized companies.
CAN-2024D User’s Manual (v1.00, March/2011)
4
1.3 Features
z DeviceNet general I/O slave devices. z Comply with DeviceNet specification Volume I, Release 2.0 &
Warning
ICP DAS revises the manual at any time without notice. However, no responsibility is taken by ICP DAS unless infringement act imperils to patents of the third parties.
3 DeviceNet Profile Area .........................................................................13 3.1 DeviceNet Statement of Compliance..........................................13 3.2 Identity Object (Class ID: 0x01) ..................................................14 3.3 Connection Object (Class ID:0x05) ............................................15 3.4 Assembly Object (Class ID: 0x04) ..............................................16 3.5 Application Object1 (Class ID: 0x64)..........................................19 3.6 Application Object2 (Class ID: 0x65)..........................................21
adddevicenotificationex用法

adddevicenotificationex用法addDeviceNotificationEx是一个Windows API函数,它用于向指定的设备添加一个通知。
在本文中,我们将探讨addDeviceNotificationEx的用法及其在Windows编程中的应用。
目录1. addDeviceNotificationEx的参数2. addDeviceNotificationEx的返回值3. addDeviceNotificationEx的示例代码4. addDeviceNotificationEx的应用场景5. 总结1. addDeviceNotificationEx的参数addDeviceNotificationEx函数有三个参数,分别是:- hRecipient: 一个指向接收通知的设备接口的句柄。
- NotificationFilter: 一个指向DEV_BROADCAST_HDR结构的指针,用于指定接收哪种类型的通知。
- Flags: 一个指定通知标志的32位无符号整数。
2. addDeviceNotificationEx的返回值addDeviceNotificationEx函数的返回值是一个用于标识通知的句柄。
如果函数执行成功,则返回一个有效的句柄,如果函数执行失败,则返回NULL。
3. addDeviceNotificationEx的示例代码下面是一个简单的示例代码,演示了如何使用addDeviceNotificationEx函数向设备添加通知:```C++GUID InterfaceClassGuid = ...; // 定义设备接口的GUID HANDLE hRecipient = ...; // 设备接口的句柄PDEV_BROADCAST_DEVICEINTERFACE NotificationFilter = ...; DWORD Flags = ...;HDEVNOTIFY hDevNotify = AddDeviceNotificationEx(hRecipient,NotificationFilter,Flags);if (hDevNotify != NULL) {printf("添加设备通知成功!\n");} else {printf("添加设备通知失败!\n");}```在上面的示例中,我们首先定义了设备接口的GUID、设备接口的句柄、NotificationFilter和Flags等参数,然后调用AddDeviceNotificationEx函数向设备添加通知,并根据返回值判断添加通知的结果。
nsnotificationcenter的removeobserver的两个方法

nsnotificationcenter的removeobserver的两个方法NSNotificationCenter是Foundation框架中的一个重要组件,用于在应用程序的不同部分之间传递通知。
为了管理观察者(即通知的接收者),NSNotificationCenter提供了removeObserver方法来移除观察者。
该方法通常有两组不同的实现,即removeObserver:name:和removeObserver:object:,这两组方法在功能和使用场景上有所不同。
一、removeObserver:name:该方法用于移除特定名称的通知观察者。
它的参数包括要移除的观察者、通知的名称和目标对象(可选)。
使用该方法时,需要确保传递的观察者对象是之前注册过的观察者,并且通知的名称与要移除的通知匹配。
语法:-(void)removeObserver:(id)observername:(NSString*)name;示例:```// 假设有一个名为myNotificationCenter的notification center实例// 注册观察者NSNotificationCenter* notificationCenter = [NSNotificationCenter defaultCenter];[notificationCenter addObserver:selfselector:@selector(myNotificationHandler:)name:@"myNotification" object:nil];// 移除观察者[notificationCenter removeObserver:selfname:@"myNotification"];```在上述示例中,首先通过addObserver方法将当前对象(self)注册为对名为"myNotification"的通知的观察者。
setnotificationsenabledforpackage原理
setNotificationsEnabledForPackage原理概述在A nd ro id系统中,s et No ti fi ca ti on s En ab le dF or Pa cka g e是一个用于控制应用程序是否能够发送通知的方法。
通过调用此方法,可以在应用程序级别上开启或关闭通知功能。
本文将介绍s e tN ot if ic at io nsE n ab le dF or Pa ck age的原理和使用方法。
什么是setN otificatio nsEnabledForPac kage?s e tN ot if ic at io nsE n ab le dF or Pa ck age是An dr oi d系统提供的一个方法,用于控制特定应用程序是否能够发送通知。
通过该方法,用户可以在设置中打开或关闭应用程序的通知功能。
这对于某些用户可能更注重隐私或不喜欢被应用程序频繁打扰的情况非常有用。
使用方法要使用s et No ti fi ca t io ns En ab le dF orP a ck ag e方法,需要使用以下代码示例:N o ti fi ca ti on Ma nag e rn ot if ic at io nMa n ag er=(No ti fi cat i on Ma n a g er)g et Sy st em Ser v ic e(Co nt ex t.NOT I FI CA TI ON_S ER VIC E);n o ti fi ca ti on Ma nag e r.se tN ot if ic ati o ns En ab le dF or Pac k ag e(p a c ka ge Na me,e na ble d);其中,p ac ka ge Na me为要设置的应用程序包名,en ab le d为一个布尔值,表示是否开启通知功能。
如果en ab le d为t ru e,则表示开启通知功能;如果en ab le d为f al se,则表示关闭通知功能。
【Android开发API】用户界面 - 状态通知 - Status Notifications

⼀个Activity或者Service可以初始化⼀个状态通知。
然而,因为⼀个activity只有运行在前台并且它所在的窗⼝获得焦点的时候,它才能执行动作,所以你通常需要用service来创建通知。
当用户正在使用其他应用或者设备待机时,通知可以由后台创建。
为了创建通知,你必须用到两个理通知的形式:或者启动⼀个与应用无关的独立的activity,或者调用⼀个应用的全新的实例。
接下来的场景展示了activity栈应该如何在这两种典型的通知流里面⼯作,首先来操作日历的通知:1. 用户正在日历应用里创建⼀个新的活动。
他们意识到需要复制⼀部分电⼦邮件消息到这个活动中来。
2. 用户选择Home>Email3. 当操作Email应用时,用户收到从日历应用那里收到⼀个即将开始的会议的通知。
4. 用户选择了通知,他们开始关注那个日历应用所展现出来的简要的会议信息。
5. 用户已经确定了他们即将有个会议,所以他们按了返回键。
他们现在返回了Email应用--接到通知的地方。
操作电⼦邮件的通知:1. 目前用户正在电⼦邮件应用里撰写邮件,需要核对⼀下日期。
2. 用户选择Home>Calendar(日历应用)3. 而在日历应用中,他们收到电⼦邮件关于⼀个新的讯息的通知。
4. 用户选择了通知,这使他们回到了电⼦邮件展示详细信息的页面。
这取代了他们以前所做的(写信),但这信件仍然保存在草稿箱中。
5. 用户按下了Back键,来到了信件列表页面,然后按下Back键返回日历应用。
在电⼦邮件那样风格的通知中,按下通知所调出的UI以⼀种形式展示出通知的应用。
例如,当电⼦邮件应用通过通知来到前台展示的时候,他展示出的是⼀个列表还是⼀个具体信件信息要依赖于新邮件的数量,是多封还是⼀封。
为了达到这种效果,我们需要用⼀个新的acitivity栈所展现出的新通知的状态来完全代替当下的任何⼀种状态。
下面的代码举例说明了显示这种通知。
最关键的是makemessageintentstack()方法,这个方法构建了⼀个由intent组成的数组-代表了在这种状态下,应用的新的activity栈(如果你正在使用片段(fragments),你可能需要初始化你的片段和应用的状态,从而按下Back键时UI会返回到前⼀次的状态),其中的核心是Intent.makeRestartActivityTask(),它在栈里构建了根activity,并使用了合适的标志(flag),如Intent.FLAG_ACTIVITY_CLEAR_TASK/* * * This method creates an array of Intent objects representing the * activity stack for the incoming message details state that the * application should be in when launching it from a notification. * / static Intent[] makeMessageIntentStack(Context context, CharSequence from, CharSequence msg) { // A typical convention for notifications is to launch the user deeply // into an application representing the data in the notification; to // accomplish this, we can build an array of intents to insert the back // stack stack history above the item being displayed. Intent[] intents = new Intent[4];}/* * * The notification is the icon and associated expanded entry in the * status bar. * / void showAppNotification() { // look up the notification manager service NotificationManager nm =(NotificationManager)getSystemService(NOTIFICATION_SERVICE);}在日历应用风格的通知中,被通知调用的UI是⼀个专用的activity,而不是应用流程中的⼀部分。
Notification 使用详解(很全).
Notification 使用详解(很全Java & android 2011-01-25 14:23:21当用户有没有接到的电话的时候,Android顶部状态栏里就会出现一个小图标。
提示用户有没有处理的快讯,当拖动状态栏时,可以查看这些快讯。
Android给我们提供了NotificationManager来管理这个状态栏。
可以很轻松的完成。
如果要添加一个Notification,可以按照以下几个步骤1:获取NotificationManager:NotificationManagerm_NotificationManager=(NotificationManagerthis.getSystemService(NOTIFICATI ON_SER VICE;2:定义一个Notification:Notification m_Notification=new Notification(;3:设置Notification的各种属性://设置通知在状态栏显示的图标m_Notification.icon=R.drawable.icon;//当我们点击通知时显示的内容m_Notification.tickerText="Button1 通知内容.....";通知时发出的默认声音m_Notification.defaults=Notification.DEFAULT_SOUND;//设置通知显示的参数Intent m_Intent=new Intent(NotificationDemo.this,DesActivity.class; PendingIntent m_PendingIntent=PendingIntent.getActivity(NotificationDemo.this, 0,m_Intent, 0;m_Notification.setLatestEventInfo(NotificationDemo.this, "Button1", "Button1通知",m_PendingIntent ;//这个可以理解为开始执行这个通知m_NotificationManager.notify(0,m_Notification;4:既然可以增加同样我们也可以删除。
notificationlistenerservice使用 -回复

notificationlistenerservice使用-回复NotificationListenerService是一种Android API,它允许开发者通过注册一个具有特定功能的服务来监听和处理系统上发出的通知。
这个功能强大的服务使开发者能够获取通知的详细信息,并在用户收到通知时做出相应的操作。
在本文中,我们将逐步回答关于NotificationListenerService 的一些问题,帮助读者更好地了解和应用这个功能。
首先,我们需要了解NotificationListenerService的基本概念和作用。
NotificationListenerService是一个继承自Service的抽象类,它的主要功能是监听系统发出的通知,并在这些通知到达时进行相应的处理。
它可以接收通知的内容、标题、图标、发送方应用程序等信息,甚至可以模拟用户的操作,例如滑动通知或清除通知。
这使得开发者可以根据收到的通知内容来触发各种操作,例如自动回复消息、记录通知内容、屏蔽指定通知等。
那么,如何开始使用NotificationListenerService呢?首先,我们需要在AndroidManifest.xml文件中注册我们的服务。
在<application>标签中,添加一个<service>标签,并设置android:name属性为我们自定义的服务类名,如下所示:<serviceandroid:name=".MyNotificationListenerService"android:label="@string/service_label"android:permission="android.permission.BIND_NOTIFICATION_LIS TENER_SERVICE"><intent-filter><actionandroid:name="android.service.notification.NotificationListenerSe rvice" /></intent-filter></service>这里需要注意的是,我们还需要添加"android.permission.BIND_NOTIFICATION_LISTENER_SERVICE"权限,以获取系统通知的访问权限。
netdnativeservice解析
netdnativeservice解析
NetdNativeService是一个在native层注册的服务,其代码实现涉及到Android的底层网络管理。
该服务通过调用interfaceGetList方法获取网络接口列表,并通过start方法启动服务。
在interfaceGetList方法中,它首先获取一个名为InterfaceController的类的单例对象,并调用其getIfaceNames 方法获取网络接口名称列表。
然后,它创建一个新的
std::vector<std::string>对象,将获取到的网络接口名称列表存储到这个vector中,并返回这个vector。
在start方法中,它首先禁用了后台调度,然后尝试注册服务。
如果服务注册成功,它将启动一个线程池并设置线程池的名称。
如果服务注册失败,它将返回错误码。
NetdNativeService的启动过程涉及到Android的Binder机制。
Binder是Android系统中的一种进程间通信(IPC)机制,它允许不同的进程之间进行通信和数据交换。
在NetdNativeService的启动过程中,它通过Binder机制将自己注册到系统服务中,以便其他进程可以通过Binder机制与它进行通信和交互。
总的来说,NetdNativeService是Android系统中负责网络管理的一个重要服务,它通过Binder机制提供接口供其他进程使用,并实现了网络接口列表的获取和服务启动等功能。
notificationclickedactivity

NotificationClickedActivity是Android中的一个活动(Activity),它用于处理在通知中点击的操作。
当一个通知被点击时,系统会自动启动NotificationClickedActivity,并将点击事件传递给该活动。
NotificationClickedActivity的主要作用是处理通知的点击事件,并根据不同的点击操作启动其他的活动或执行相应的操作。
通常情况下,NotificationClickedActivity会包含一个Intent过滤器,用于指定接收哪些类型的通知。
当系统接收到与该过滤器匹配的通知时,就会自动启动NotificationClickedActivity,并将通知中的点击事件传递给该活动。
在NotificationClickedActivity中,可以通过获取Intent中传递的点击事件参数来确定具体的点击操作。
例如,可以使用getIntent().getExtras()方法获取通知的额外信息,包括点击事件的类型、目标URL等信息,然后根据这些信息执行相应的操作。
需要注意的是,NotificationClickedActivity只能在系统级别的通知中使用,而不能在应用程序内部的通知中使用。
如果需要在应用程序内部的通知中执行操作,可以使用其他的通知处理方式,例如使用RemoteView或自定义通知内容。
windows10超级优化,同时解决本地磁盘100%的问题
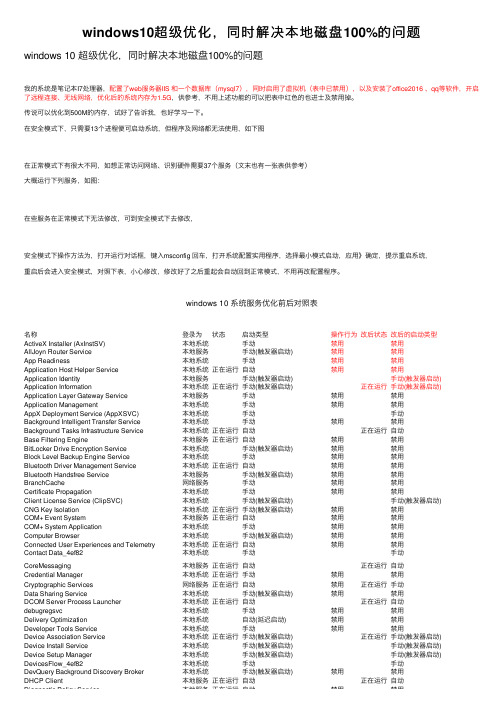
windows10超级优化,同时解决本地磁盘100%的问题windows 10 超级优化,同时解决本地磁盘100%的问题我的系统是笔记本I7处理器,配置了web服务器IIS 和⼀个数据库(mysql7),同时启⽤了虚拟机(表中已禁⽤),以及安装了office2016 、qq等软件,开启了远程连接、⽆线⽹络,优化后的系统内存为1.5G,供参考,不⽤上述功能的可以把表中红⾊的也进⼠及禁⽤掉。
传说可以优化到500M的内存,试好了告诉我,也好学习⼀下。
在安全模式下,只需要13个进程便可启动系统,但程序及⽹络都⽆法使⽤,如下图在正常模式下有很⼤不同,如想正常访问⽹络、识别硬件需要37个服务(⽂末也有⼀张表供参考)⼤概运⾏下列服务,如图:在些服务在正常模式下⽆法修改,可到安全模式下去修改,安全模式下操作⽅法为,打开运⾏对话框,键⼊msconfig 回车,打开系统配置实⽤程序,选择最⼩模式启动,应⽤》确定,提⽰重启系统,重启后会进⼊安全模式,对照下表,⼩⼼修改,修改好了之后重起会⾃动回到正常模式,不⽤再改配置程序。
windows 10 系统服务优化前后对照表名称登录为状态启动类型操作⾏为改后状态改后的启动类型ActiveX Installer (AxInstSV)本地系统⼿动禁⽤禁⽤AllJoyn Router Service本地服务⼿动(触发器启动)禁⽤禁⽤App Readiness本地系统⼿动禁⽤禁⽤Application Host Helper Service本地系统正在运⾏⾃动禁⽤禁⽤Application Identity本地服务⼿动(触发器启动)⼿动(触发器启动) Application Information本地系统正在运⾏⼿动(触发器启动)正在运⾏⼿动(触发器启动) Application Layer Gateway Service本地服务⼿动禁⽤禁⽤Application Management本地系统⼿动禁⽤禁⽤AppX Deployment Service (AppXSVC)本地系统⼿动⼿动Background Intelligent Transfer Service本地系统⼿动禁⽤禁⽤Background Tasks Infrastructure Service本地系统正在运⾏⾃动正在运⾏⾃动Base Filtering Engine本地服务正在运⾏⾃动禁⽤禁⽤BitLocker Drive Encryption Service本地系统⼿动(触发器启动)禁⽤禁⽤Block Level Backup Engine Service本地系统⼿动禁⽤禁⽤Bluetooth Driver Management Service本地系统正在运⾏⾃动禁⽤禁⽤Bluetooth Handsfree Service本地服务⼿动(触发器启动)禁⽤禁⽤BranchCache⽹络服务⼿动禁⽤禁⽤Certificate Propagation本地系统⼿动禁⽤禁⽤Client License Service (ClipSVC)本地系统⼿动(触发器启动)⼿动(触发器启动)CNG Key Isolation本地系统正在运⾏⼿动(触发器启动)禁⽤禁⽤COM+ Event System本地服务正在运⾏⾃动禁⽤禁⽤COM+ System Application本地系统⼿动禁⽤禁⽤Computer Browser本地系统⼿动(触发器启动)禁⽤禁⽤Connected User Experiences and Telemetry本地系统正在运⾏⾃动禁⽤禁⽤Contact Data_4ef82本地系统⼿动⼿动CoreMessaging本地服务正在运⾏⾃动正在运⾏⾃动Credential Manager本地系统正在运⾏⼿动禁⽤禁⽤Cryptographic Services⽹络服务正在运⾏⾃动禁⽤正在运⾏⼿动Data Sharing Service本地系统⼿动(触发器启动)禁⽤禁⽤DCOM Server Process Launcher本地系统正在运⾏⾃动正在运⾏⾃动debugregsvc本地系统⼿动禁⽤禁⽤Delivery Optimization本地系统⾃动(延迟启动)禁⽤禁⽤Developer Tools Service本地系统⼿动禁⽤禁⽤Device Association Service本地系统正在运⾏⼿动(触发器启动)正在运⾏⼿动(触发器启动)Device Install Service本地系统⼿动(触发器启动)⼿动(触发器启动)Device Setup Manager本地系统⼿动(触发器启动)⼿动(触发器启动) DevicesFlow_4ef82本地系统⼿动⼿动DevQuery Background Discovery Broker本地系统⼿动(触发器启动)禁⽤禁⽤DHCP Client本地服务正在运⾏⾃动正在运⾏⾃动Diagnostic Policy Service本地服务正在运⾏⾃动禁⽤禁⽤Diagnostic Policy Service本地服务正在运⾏⾃动禁⽤禁⽤Diagnostic Service Host本地服务正在运⾏⼿动禁⽤禁⽤Diagnostic System Host本地系统正在运⾏⼿动禁⽤禁⽤Distributed Link Tracking Client本地系统正在运⾏⾃动禁⽤禁⽤Distributed Transaction Coordinator⽹络服务⼿动禁⽤禁⽤dmwappushsvc本地系统⼿动(触发器启动)禁⽤禁⽤DNS Client⽹络服务正在运⾏⾃动(触发器启动)禁⽤禁⽤Downloaded Maps Manager⽹络服务⾃动(延迟启动)禁⽤禁⽤Encrypting File System (EFS)本地系统⼿动(触发器启动)禁⽤禁⽤Enterprise App Management Service本地系统⼿动⼿动Extensible Authentication Protocol本地系统⼿动禁⽤禁⽤Fax⽹络服务⼿动禁⽤禁⽤File History Service本地系统⼿动(触发器启动)禁⽤禁⽤Function Discovery Provider Host本地服务⼿动禁⽤禁⽤Function Discovery Resource Publication本地服务⼿动禁⽤禁⽤Geolocation Service本地系统正在运⾏⼿动(触发器启动)禁⽤禁⽤Group Policy Client本地系统正在运⾏⾃动(触发器启动)⾃动(触发器启动) HomeGroup Listener本地系统⼿动禁⽤禁⽤HomeGroup Provider本地服务⼿动(触发器启动)禁⽤禁⽤Human Interface Device Service本地系统正在运⾏⼿动(触发器启动)禁⽤禁⽤HV 主机服务本地系统正在运⾏⼿动(触发器启动)禁⽤禁⽤Hyper-V Data Exchange Service本地系统⼿动(触发器启动)禁⽤禁⽤Hyper-V Guest Service Interface本地系统⼿动(触发器启动)禁⽤禁⽤Hyper-V Guest Shutdown Service本地系统⼿动(触发器启动)禁⽤禁⽤Hyper-V Heartbeat Service本地系统⼿动(触发器启动)禁⽤禁⽤Hyper-V PowerShell Direct Service本地系统⼿动(触发器启动)禁⽤禁⽤Hyper-V Time Synchronization Service本地服务⼿动(触发器启动)禁⽤禁⽤Hyper-V 卷影复制请求程序本地系统⼿动(触发器启动)禁⽤禁⽤Hyper-V 虚拟机管理本地系统正在运⾏⾃动禁⽤禁⽤Hyper-V 远程桌⾯虚拟化服务本地系统⼿动(触发器启动)禁⽤禁⽤Hyper-V 主机计算服务本地系统正在运⾏⼿动(触发器启动)禁⽤禁⽤IKE and AuthIP IPsec Keying Modules本地系统⼿动(触发器启动)禁⽤禁⽤Infrared monitor service本地系统⼿动禁⽤禁⽤Intel(R) Content Protection HECI Service本地系统⼿动禁⽤禁⽤Intel(R) HD Graphics Control Panel Service本地系统正在运⾏⾃动禁⽤禁⽤Interactive Services Detection本地系统⼿动禁⽤禁⽤Internet Connection Sharing (ICS)本地系统⼿动(触发器启动)禁⽤禁⽤IP Helper本地系统正在运⾏⾃动禁⽤禁⽤IP 转换配置服务本地系统⼿动(触发器启动)禁⽤禁⽤IPsec Policy Agent⽹络服务⼿动(触发器启动)禁⽤禁⽤KtmRm for Distributed Transaction Coordinator⽹络服务⼿动(触发器启动)禁⽤禁⽤Link-Layer Topology Discovery Mapper本地服务⼿动禁⽤禁⽤Local Session Manager本地系统正在运⾏⾃动正在运⾏⾃动LPA 服务本地服务⼿动(触发器启动)禁⽤禁⽤LxssManager本地系统⼿动⼿动MessagingService_4ef82本地系统⼿动(触发器启动)⼿动(触发器启动) Microsoft (R) 诊断中⼼标准收集器服务本地系统⼿动⼿动Microsoft Account Sign-in Assistant本地系统正在运⾏⼿动(触发器启动)禁⽤禁⽤Microsoft App-V Client本地系统禁⽤禁⽤Microsoft iSCSI Initiator Service本地系统⼿动禁⽤禁⽤Microsoft Passport本地系统⼿动(触发器启动)⼿动(触发器启动) Microsoft Passport Container本地服务⼿动(触发器启动)⼿动(触发器启动) Microsoft Software Shadow Copy Provider本地系统⼿动禁⽤禁⽤Microsoft Storage Spaces SMP⽹络服务⼿动禁⽤禁⽤Microsoft Windows SMS 路由器服务。
- 1、下载文档前请自行甄别文档内容的完整性,平台不提供额外的编辑、内容补充、找答案等附加服务。
- 2、"仅部分预览"的文档,不可在线预览部分如存在完整性等问题,可反馈申请退款(可完整预览的文档不适用该条件!)。
- 3、如文档侵犯您的权益,请联系客服反馈,我们会尽快为您处理(人工客服工作时间:9:00-18:30)。
2
1
0
If this node has a propagation of 2, any notification originating there will travel up the tree only two levels. This allows a limitation on notifications coming from high-traffic nodes.
2. Object/Notification service (v.0.1)
Frank
Service allows clients (processes that run at a machine and operate on behalf of a user) to receive notifications of changes that occur in the tree Clients lease subscriptions. A subscription says which user to notify and which part of the tree to watch. A subscription is placed on the root of the subtree to watch. Part of the subscription says how far down the tree, away from the node on which the subscription is placed, to watch for changes.
The contract field holds the subscription contract of the connected user or entity being described by this structure. We could do this as either a time to expire at (so, time and date … note this is probably best), or a length of time until expiry (may
Since every node is essentially identical in that each can contain some arbitrary binary data, then also any node can be subscribed to.
Every subscription can only travel down. Ie, in subscribing to a node, one can only receive information from that node and its child nodes and trees; not its parents.
Nodes can also impose “notification blockades” on themselves, such that notifications originating in their childrens’ subtrees will propagate no further than those “notification blockades.”
Assuming the same subscription depth of 2, no notifications from the furthest child nodes will
reach the subscribed node.
5. Object/Notification service (v.0.1) – Subscriptions Part 2
4. Object/Notification service (v.0.1) – Subscriptions Part 1
This is just some basic subscription information for the server. More complicated instances and ideas to follow…
Subscriptions stored as part of the data structure
Some subscribed entity, “user”
Leased Subscriptions: This is most likely a very good idea. Takes checking for living / dead clients out of the hands of the server (in essence, the server would be sending out “are you there?” messages to clients, otherwise). The responsibility of ensuring existence falls to the client subscribing to a particular set of things.
If the subscribed node in the diagram is subscribed to with a depth value of 2, it will receive notifications from a maximum of two
levels beneath it.
No notifications will reach the subscribed node from above (ie, from parent nodes)
Each “user” (this term needs revision and agreement between us) has a contract with the service which must have a time limit specified with it. Before that time contract runs out, it is the responsibility of the subscriber to renew their contract or risk being removed from the subscription list. Each “user” manages their own subscription list, it is not up to the server to manage it, only the connections and notifications.
பைடு நூலகம்
This node has a path-name: \frank\logons\home_pc And has a value of: 184.208.161.5
Each o is a node. Although only leaf nodes are shown here with values (for clarity). Any node may have a value … even non-leaf nodes
Notifications only go as far as the Notification Blockade
A notification blockade won’t let notifications pass through it. So, if an infinite notification node (one whose notifications will propagate all the way to the root of the tree) passes a notification up the tree, it will still not pass the blockade.
ObjectNotificationService(v0.1)
1. Object/Notification service (v.0.1)
Service provides a tree of named nodes. Each node stores a value. Each node has a unique path name.
Hypothetical tree that stores the information about workstations a user is logged in to.
So, the tree is much like an ordinary hierarchical file system with files and folders. One key exception is that folders, like files, can have data (ie, a value) pinned to them. So, there’s no real distinction between leaf nodes (ie, files) and non-leaf nodes (ie, folders) in our tree. For now, think of data that may be stored at a node as arbitrary binary data.
