CE6.0安装方法
wince6.0_开发环境搭建

Window CE6.0开发平台搭建详解2011年08月29日Windows CE6.0的开发无非两大方面:操作系统开发和应用程序开发,操作系统开发包括系统的定制,驱动开发和其他需要完成的底层工作。
应用程序开发主要是与实际应用结合紧密的程序开发。
要搭建这样的开发环境,至少要包括两部分,一个是硬件平台,一个是软件平台,在Windows CE6.0的开发中,微软公司把这些开发软件集成到了vs2005中。
Windows CE6.0开发环境需要安装的软件比较多、比较大,至少要10GB的空间,而且有着严格的安装顺序要求,一旦其中某一个环节出错,都会导致软件运行出现故障,为确保安装顺利,请仔细阅读本文,按照步骤一步一步进行安装。
一、所需安装软件1、Visual Studio 20052、Visual Studio 2005 Service Pack 13、MSDN4、platform builder for Windows Embedded CE6.05、Windows Embedded CE 6.0 Platform Builder Service Pack 16、Windows mobile 6的sdk二、所用磁盘空间在安装之前,请检查电脑的磁盘空间,VS2005和Windows Embedded CE6.0均是比较大的软件,要占硬盘好10G多的空间,建议不要装在C盘,但是我装Windows Embedded CE6.0的时候,发现不能更改安装路径,没办法,只能把Windows Embedded CE6.0装在C盘。
三、安装顺序1.安装Visual Studio 2005最好选择自定义安装方式,把不用的一些组件都删掉,这样会节省不少的磁盘空间。
WINCE6.0的Platform Builder不像WINCE5.0是独立的,而是作为VS2005的插件,以后建立和定制OS、编译调试全部在VS2005里完成。
Wince6.0安装指南
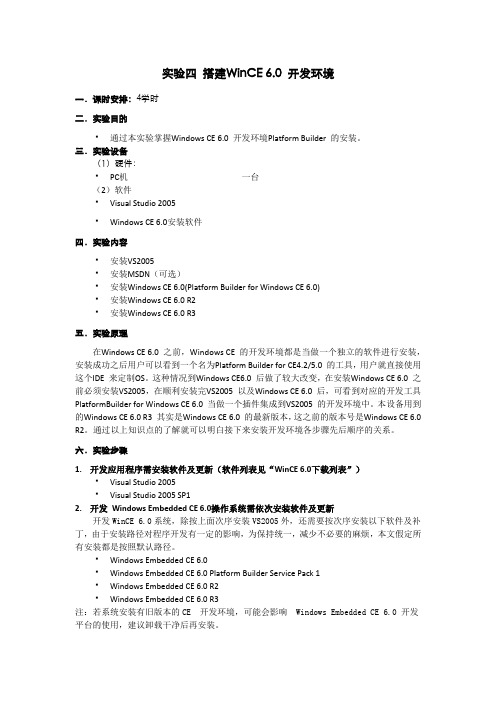
实验四搭建WinCE 6.0 开发环境一.课时安排:4学时二.实验目的通过本实验掌握Windows CE 6.0 开发环境Platform Builder 的安装。
三.实验设备(1)硬件:PC机一台(2)软件Visual Studio 2005Windows CE 6.0安装软件四.实验内容安装VS2005安装MSDN(可选)安装Windows CE 6.0(Platform Builder for Windows CE 6.0)安装Windows CE 6.0 R2安装Windows CE 6.0 R3五.实验原理在Windows CE 6.0 之前,Windows CE 的开发环境都是当做一个独立的软件进行安装,安装成功之后用户可以看到一个名为Platform Builder for CE4.2/5.0 的工具,用户就直接使用这个IDE 来定制OS。
这种情况到Windows CE6.0 后做了较大改变,在安装Windows CE 6.0 之前必须安装VS2005,在顺利安装完VS2005 以及Windows CE 6.0 后,可看到对应的开发工具PlatformBuilder for Windows CE 6.0 当做一个插件集成到VS2005 的开发环境中。
本设备用到的Windows CE 6.0 R3 其实是Windows CE 6.0 的最新版本,这之前的版本号是Windows CE 6.0 R2。
通过以上知识点的了解就可以明白接下来安装开发环境各步骤先后顺序的关系。
六.实验步骤1.开发应用程序需安装软件及更新(软件列表见“WinCE 6.0下载列表”)Visual Studio 2005Visual Studio 2005 SP12.开发Windows Embedded CE 6.0操作系统需依次安装软件及更新开发WinCE 6.0系统,除按上面次序安装VS2005外,还需要按次序安装以下软件及补丁,由于安装路径对程序开发有一定的影响,为保持统一,减少不必要的麻烦,本文假定所有安装都是按照默认路径。
winCE5.0 6.0使用教程

Windows ce6.0模拟器可用于车载导航系统(凯立德导航地图、道道通导航地图、城际通导航地图及其它Windows CE软件模拟测试)。
本次分享的是Wince6.0模拟器,喜欢折腾的朋友抓紧下载了!Windows ce6.0模拟器使用方法:1. 解压下载好的Windows ce6.0程序压缩包。
2. 运行文件夹内“连接加载.bat”注册Windows ce6.0。
3. 按需求运行文件夹内各分辨率“800x480.BAT”“7寸.bat”“4.3寸.bat”运行文件,启动CE6.0模拟器。
480*272 4.3寸 CE6.0模拟器演示480*234 7寸 CE6.0模拟器演示800*480 CE6.0模拟器演示windows ce6.0模拟器运行凯立德导航地图(其他导航系统运行方法一致):1、点击win CE6.0模拟器顶部文件选项>>>配置>>常规>>共享文件夹2、点击共享文件夹"..."后,选择凯立德导航地图文件夹,选择完毕点击确定。
3、点击win CE6.0模拟器桌面上的“我的设备”图标。
4、打开“SDMMC”5、打开“SDMMC”后,运行Navione.exe 运行凯立德导航系统。
windows ce6.0模拟器运行凯立德导航系统全屏设置:1、单击windows ce6.0模拟器开始菜单>>>设置>>>任务栏和开始栏菜单2、在任务栏和开始栏菜单属性>>>常规里勾选自动隐藏,点击OK,凯立德导航地图全屏显示了。
15.jpg(122.8 KB, 下载次数: 5)下载附件设置成功,凯立德导航地图全屏显示2012-11-8 11:23 上传Windows ce6.0模拟器下载:下载地址:本帖隐藏的内容/share/link?shareid=104534&uk=2569674654。
如何安装WinCE6
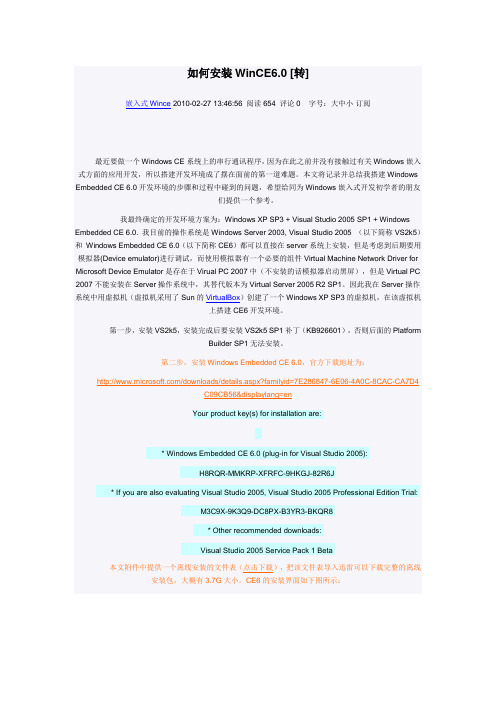
如何安装WinCE6.0 [转]嵌入式Wince 2010-02-27 13:46:56 阅读654 评论0 字号:大中小订阅最近要做一个Windows CE系统上的串行通讯程序,因为在此之前并没有接触过有关Windows嵌入式方面的应用开发,所以搭建开发环境成了摆在面前的第一道难题。
本文将记录并总结我搭建Windows Embedded CE 6.0开发环境的步骤和过程中碰到的问题,希望给同为Windows嵌入式开发初学者的朋友们提供一个参考。
我最终确定的开发环境方案为:Windows XP SP3 + Visual Studio 2005 SP1 + Windows Embedded CE 6.0. 我目前的操作系统是Windows Server 2003, Visual Studio 2005 (以下简称VS2k5)和Windows Embedded CE 6.0(以下简称CE6)都可以直接在server系统上安装,但是考虑到后期要用模拟器(Device emulator)进行调试,而使用模拟器有一个必要的组件Virtual Machine Network Driver for Microsoft Device Emulator是存在于Virual PC 2007中(不安装的话模拟器启动黑屏),但是Virtual PC 2007不能安装在Server操作系统中,其替代版本为Virtual Server 2005 R2 SP1。
因此我在Server操作系统中用虚拟机(虚拟机采用了Sun的VirtualBox)创建了一个Windows XP SP3的虚拟机,在该虚拟机上搭建CE6开发环境。
第一步,安装VS2k5,安装完成后要安装VS2k5 SP1补丁(KB926601),否则后面的PlatformBuilder SP1无法安装。
第二步,安装Windows Embedded CE 6.0,官方下载地址为:/downloads/details.aspx?familyid=7E286847-6E06-4A0C-8CAC-CA7D4C09CB56&displaylang=enYour product key(s) for installation are:* Windows Embedded CE 6.0 (plug-in for Visual Studio 2005):H8RQR-MMKRP-XFRFC-9HKGJ-82R6J* If you are also evaluating Visual Studio 2005, Visual Studio 2005 Professional Edition Trial:M3C9X-9K3Q9-DC8PX-B3YR3-BKQR8* Other recommended downloads:Visual Studio 2005 Service Pack 1 Beta本文附件中提供一个离线安装的文件表(点击下载),把该文件表导入迅雷可以下载完整的离线安装包,大概有3.7G大小。
旗舰版Win7搭建WinCE6.0环境以及第一个Hello Windows CE程序
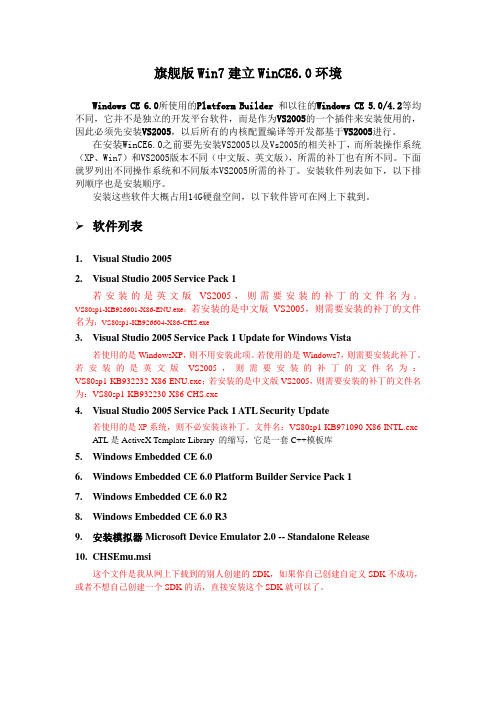
旗舰版Win7建立WinCE6.0环境Windows CE 6.0所使用的Platform Builder 和以往的Windows CE 5.0/4.2等均不同,它并不是独立的开发平台软件,而是作为VS2005的一个插件来安装使用的,因此必须先安装VS2005,以后所有的内核配置编译等开发都基于VS2005进行。
在安装WinCE6.0之前要先安装VS2005以及Vs2005的相关补丁,而所装操作系统(XP、Win7)和VS2005版本不同(中文版、英文版),所需的补丁也有所不同。
下面就罗列出不同操作系统和不同版本VS2005所需的补丁。
安装软件列表如下,以下排列顺序也是安装顺序。
安装这些软件大概占用14G硬盘空间,以下软件皆可在网上下载到。
软件列表1.Visual Studio 20052.Visual Studio 2005 Service Pack 1若安装的是英文版VS2005,则需要安装的补丁的文件名为:VS80sp1-KB926601-X86-ENU.exe;若安装的是中文版VS2005,则需要安装的补丁的文件名为:VS80sp1-KB926604-X86-CHS.exe3.Visual Studio 2005 Service Pack 1 Update for Windows Vista若使用的是WindowsXP,则不用安装此项。
若使用的是Windows7,则需要安装此补丁。
若安装的是英文版VS2005,则需要安装的补丁的文件名为:VS80sp1-KB932232-X86-ENU.exe;若安装的是中文版VS2005,则需要安装的补丁的文件名为:VS80sp1-KB932230-X86-CHS.exe4.Visual Studio 2005 Service Pack 1 ATL Security Update若使用的是XP系统,则不必安装该补丁。
文件名:VS80sp1-KB971090-X86-INTL.exe ATL是ActiveX Template Library 的缩写,它是一套C++模板库5.Windows Embedded CE6.06.Windows Embedded CE 6.0 Platform Builder Service Pack 17.Windows Embedded CE 6.0 R28.Windows Embedded CE 6.0 R39.安装模拟器Microsoft Device Emulator 2.0 -- Standalone Release10.CHSEmu.msi这个文件是我从网上下载到的别人创建的SDK,如果你自己创建自定义SDK不成功,或者不想自己创建一个SDK的话,直接安装这个SDK就可以了。
Centos6.0安装图解
Centos6.0安装图解
一、在Vmware Workstation 7.1.2上面安装的。
首先准备CentOS-6.0-x86_64-bin-DVD1.iso、
CentOS-6.0-x86_64-bin-DVD2.iso镜像文件。
二、安装步骤
1、选择第一个:安装或升级现有的系统
2、因为是cd镜像文件,所以skip,跳过测试
3、点击next
4、语言界面选择中文简体
5、键盘方式选择美式英语式
6、选择基本存储设备
7、设置计算机名(localhost)
8、时区的选择-默认
9、设置root密码(dongping)
10、点击下一步,选择创建自定义布局
11、可以看到硬盘容量,自定义分区
12、点击创建-标准分区-生成
13、分成3个分区,如图大小
14、点击下一步,选择默认
15、选择desktop,桌面安装
16、正在复制文件、安装过程、进度条
17、安装完成、点击重新向导
18、欢迎页面
19、点击前进,许可证信息、我同意许可证协议
20、创建用户(用户名dongping 密码dongping)
21、系统重启、进入登陆界面,安装完成
22、。
Windows CE 6.0 安装顺序 - 操作系统
Windows CE 6.0 安装顺序- 操作系统1、先装Visual Studio 2005, 我拿到的是Professional Edition。
最好别用DEFAULT安装,把组件CUSTOM一下,不然会花很多冤枉的磁盘空间。
WINCE600的Platform Builder不像WINCE500是独立的,而是作为VS2005的插件,以后建立和定制OS、编译调试全部在VS2005里完成2、安装Visual Studio 2005 Service Pack 1, 发布的地址/zh-cn/vstudio/bb265237.aspx 这是必须的装的,Release Note里面提到SP1提供了Windows Embedded 6.0 platform and tools support。
不同的VS2005版本(Standard / Professional / Tem Edition) 会对应到不同的下载上,不过简单点就用这个下载/downloads/details.aspx?familyid =BB4A75AB-E2D4-4C96-B39D-37BAF6B5B1DC&displayl ang=en 430多兆,通吃所有版本。
3、可选,安装Visual Studio 2005 Service Pack 1 Update for Windows Vista。
发布和下载网址/downloads/details.aspx?FamilyI D=90e2942d-3ad1-4873-a2ee-4acc0aace5b6&displaylang =en在SP1的基础上增加对VISTA的支持。
注意一定要先装SP1,再装这个,在System Requirements里强调了Required Software: licensed copy of a Visual Studio 2005 and Visual Studio 2005 Service Pack 1. 我当时以为这个包含了上面SP1,浪费了不少时间4、安装MSDN,从VS2005的安装页里选择。
非常详细的WINCE6.0模拟器使用说明
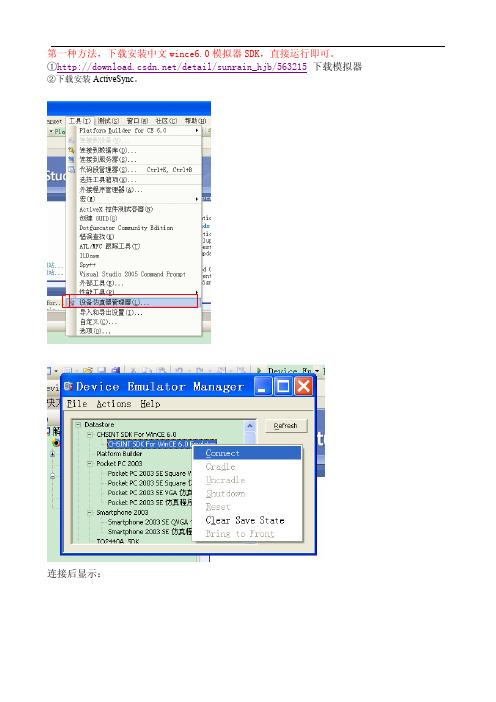
第一种方法,下载安装中文wince6.0模拟器SDK,直接运行即可。
①/detail/sunrain_hjb/563215下载模拟器②下载安装ActiveSync。
连接后显示:与PC机连接:就在wince6里面“开始->设置->网络和拨号连接-》新建连接->我的连接,选项:直接连接->下一步:选择设备 Serial Over DMA-》点完成,回到控制面板-》pc连接-》更改连接-》我的连接,然后插入底座就可以正常连接了。
插入底座:如图,cradle插入设备,更改PC端ActiveSync设置,连接DMA选项。
打开移动设备,即可把文件放入模拟器wince的文件夹中进行测试。
或者打开编写的工程,F5启动调试,即可在模拟器的wince6.0中进行测试。
大功告成!第二种方法,自己创建模拟器文件。
网上下载安装Microsoft Device Emulator 2.0,Virtual Machine Network Driver for Microsoft Device Emulator。
两个文件都不大。
1.新建工程及配置属性1.1创建的工程是基于模拟器的工程,按照WinCE的工程向导,一步步走下去,需要注意的几个点是:1. Available BSPs选择Device Emulator:ARMV4I,2. Design Templates选择 PDA Device,3. Variants选择Mobile Handled;当然,组建的添加和删除也是根据功能需求来进行。
1.2.建立工程完成之后,选择工程类型为Release,1.3配置工程属性会弹出本工程相应的对话框,分别对Configuration Properties下的现象进行配置,对General的配置:(在编译的时候选择Release模式,这样编译的速度会快很多,,而且生成的NK.bin内核文件相对比较小,方便bootload)对Locale的配置如下:(首先进行Clear all,之后选择中文(中国)或英语(美国))对Build Uptions的配置如下:勾去Enable KITL(…)单击确定,完成工程属性配置。
windows CE6.0安装环境的搭建
windows CE6.0安装环境的搭建前些日子同事要做嵌入式开发,所以同事让我帮忙装一下windows ce,刚开始也一头雾水,以前听说过,但是根本就没有去装过windows ce,后来怀着好奇心,就去网上搜索答案。
刚开始装的时候以为很简单,但是感觉什么都需要下载,下东西就浪费了我许多时间,然后加上安装的时间一共用了3天的时间。
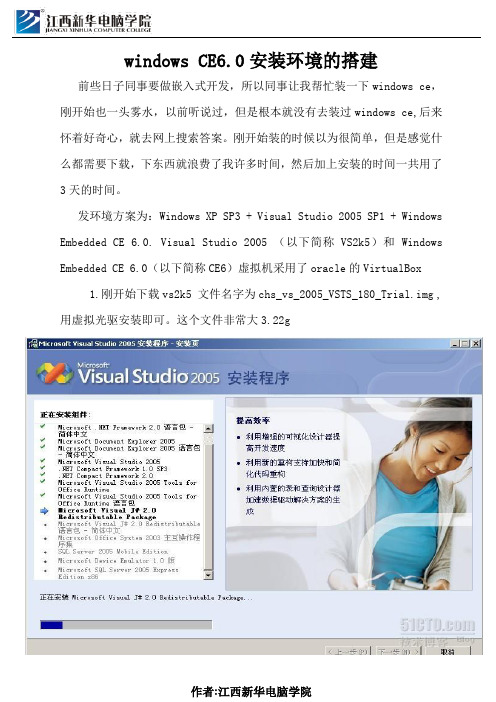
发环境方案为:Windows XP SP3 + Visual Studio 2005 SP1 + Windows Embedded CE 6.0. Visual Studio 2005 (以下简称VS2k5)和 Windows Embedded CE 6.0(以下简称CE6)虚拟机采用了oracle的VirtualBox1.刚开始下载vs2k5 文件名字为chs_vs_2005_VSTS_180_Trial.img ,用虚拟光驱安装即可。
这个文件非常大3.22g2.下载好之后安装vs2k5,安装好之后就是安装VS2k5 SP1补丁(KB926601),否则后面的Platform Builder SP1无法安装大概补丁VS80sp1-KB926604-X86-CHS.exe 大概有400多兆,这个安装速度是最慢的。
3.安装好补丁之后就是安装Windows Embedded CE 6.0,官方下载地址为:/downloads/details.aspx?familyid=7E286847 -6E06-4A0C-8CAC-CA7D4C09CB56&displaylang=en里面的cab包直接用迅雷下载windce6.0.lst,这个在附件中,这个大概下载有3.76g大小,安装的时候选择x86平台4.经过漫长的等待终于安装好了windowce6.0主要程序,但是接下来还有许多事情要做,然后安装Windows Embedded CE 6.0 Platform Builder Service Pack 1,官方下载地址为:/downloads/details.aspx?FamilyId=BF0DC0E3 -8575-4860-A8E3-290ADF242678&displaylang=en。
Windows CE 6.0入门详解(环境搭建系统开发起步)教学文稿
W i n d o w s C E 6.0入门详解(环境搭建系统开发起步)Windows CE 6.0入门详解(环境搭建内核配置和应用开发起步)武汉众嵌科技有限公司修订历史记录A - 增加M - 修订D - 删除一、安装开发环境 (5)A)按下列顺序安装所需软件 (5)B)安装说明 (5)C)装中可能出现的问题及解决方法 (6)二、WINDOWS CE 内核定制 (8)A)基W INDOWS CE产品开发流程大致分为以下几个阶段 (8)1. 硬件设计 (8)2. 选定BSP (8)3. 获得驱动程序 (8)4. 剪裁系统内核 (8)5. 导出SDK (9)B)详细制作流程 (9)1. 新建立一个OS Design工程 (9)2. 建立工程 (10)3. 配置工程 (11)C)配置内核 (13)1. 选择应用程序(Applications-End User) (13)2. Applications and Services Development (13)3. 选择系统核心服务(Core OS Services) (14)4. Communication Services and Networking (15)5. 设备管理(Device Management) (15)6. File System and Data Store (16)7. 选择字体(Fonts): (16)8. 国际化支持(International) (16)9. Internet Client Services (17)10. Graphics and Multimedia Technologies (17)11. Shell and User Interface (17)D)生成系统镜像 (17)E)生成SDK (18)F)安装A CTIVE S YNC 并配置 (18)G)配置模拟器并生成程序 (18)H)配置模拟器 (19)I)应用开发 (21)一、安装开发环境a) 按下列顺序安装所需软件1.Visual studio 20052.Visual studio 2005 server pack 13.Visual studio 2005 service pack 1 update for Windows vista/74.Windows Embedded CE 6.0 (Windows Embedded CE 6.0.iso)5.Windows Embedded CE6.0 service pack 16.Windows Embedded CE 6.0 R27.Windows Embedded CE 6.0 R38.Windows Embedded CE cumulate product update rolluppackage through(12/31/2010)9.VS_emulator.exe(模拟器)b) 安装说明我的系统是Windows 7 旗舰版所以存在一个权限问题我以这样的方式安装所有的程序:c) 装中可能出现的问题及解决方法报错信息:1. ToolsMsmCA(Error): Setup package issue or CoreConDataStore corrupted: DeviceSDKInstComp Add/Remove failed.HR=0x8007005。
Windows CE 6.0入门详解(环境搭建系统开发起步)

Windows CE 6.0入门详解(环境搭建内核配置和应用开发起步)武汉众嵌科技有限公司修订历史记录一、安装开发环境 (3)A)按下列顺序安装所需软件 (3)B)安装说明 (3)C)装中可能出现的问题及解决方法 (4)二、WINDOWS CE 内核定制 (5)A)基W INDOWS CE产品开发流程大致分为以下几个阶段 (5)1.硬件设计 (5)2.选定BSP (5)3.获得驱动程序 (5)4.剪裁系统内核 (5)5.导出SDK (6)B)详细制作流程 (6)1.新建立一个OS Design工程 (6)2.建立工程 (7)3.配置工程 (8)C)配置内核 (10)1.选择应用程序(Applications-End User) (10)2.Applications and Services Development (10)3.选择系统核心服务(Core OS Services) (11)munication Services and Networking (12)5.设备管理(Device Management) (12)6.and Data Store (13)7.选择字体(Fonts): (13)8.国际化支持(International) (13)9.Internet Client Services (14)10.Graphics and Multimedia Technologies (14)11.Shell and User Interface (15)D)生成系统镜像 (15)E)生成SDK (16)F)安装A CTIVE S YNC 并配置 (16)G)配置模拟器并生成程序 (16)H)配置模拟器 (17)I)应用开发 (19)一、安装开发环境a) 按下列顺序安装所需软件1.Visual studio 20052.Visual studio 2005 server pack 13.Visual studio 2005 service pack 1 update for Windows vista/74.Windows Embedded CE 6.0 (Windows Embedded CE6.0.iso)5.Windows Embedded CE6.0 service pack 16.Windows Embedded CE 6.0 R27.Windows Embedded CE 6.0 R38.Windows Embedded CE cumulate product update rolluppackage through(12/31/2010)9.VS_emulator.exe(模拟器)b) 安装说明我的系统是Windows 7 旗舰版所以存在一个权限问题我以这样的方式安装所有的程序:c) 装中可能出现的问题及解决方法报错信息:1. ToolsMsmCA(Error): Setup package issue or CoreConDataStore corrupted: DeviceSDKInstComp Add/Remove failed.HR=0x8007005。
WinCE6.0环境搭建
实验2-1 环境搭建【实验目的:】掌握Windows CE 6.0 嵌入式开发环境搭建过程。
掌握各个软件在安装时候的细节。
掌握各个软件的使用方法。
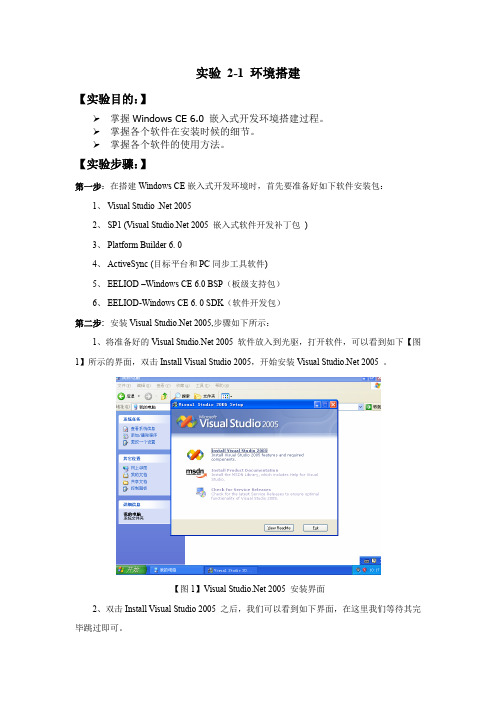
【实验步骤:】第一步:在搭建Windows CE嵌入式开发环境时,首先要准备好如下软件安装包:1、Visual Studio .Net 20052、SP1 (Visual 2005 嵌入式软件开发补丁包)3、Platform Builder 6. 04、ActiveSync (目标平台和PC同步工具软件)5、EELIOD –Windows CE 6.0 BSP(板级支持包)6、EELIOD-Windows CE 6. 0 SDK(软件开发包)第二步:安装Visual 2005,步骤如下所示:1、将准备好的Visual 2005 软件放入到光驱,打开软件,可以看到如下【图1】所示的界面,双击Install Visual Studio 2005,开始安装Visual 2005 。
【图1】Visual 2005 安装界面2、双击Install Visual Studio 2005 之后,我们可以看到如下界面,在这里我们等待其完毕跳过即可。
3、选择I accept the terms of the license Agreement 选项,单击Next 下一步。
4、在如下【图4】当中,选择要Visual 2005 安装的目录。
5、选择完成之后,单击Install ,弹出如下【图5】所示的安装过程界面。
6、安装完成之后,弹出如下【图6】所示的成功界面:【图6】Visual Studio 2005安装(安装完成)第三步:安装SP1.1、点击安装SP1,出现如下【图7】所示的界面,安装SP1 的目的是:给Visual 2005嵌入式开发打上补丁(在这里要安装50分钟左右)。
【图7】SP1安装界面第四步:安装Platform Builder 6.01、点击安装Platform Builder 6.0 软件,在如下【图7】当中输入注册码:【图8】Windows Embedded CE6.0(注册码输入)2、选择TOOLS 工具和开发源文件存放的安装目录,分别如下【图9】和【图10】所示。
自制Windows CE 安装详细图片教程
自制Windows CE 6.0安装详细图片教程强调:本教程是由郭斌和张学良共同完成,图片教程仅是根据自己安装过程制作而成,有错误或者不足之处应以实际情况为准。
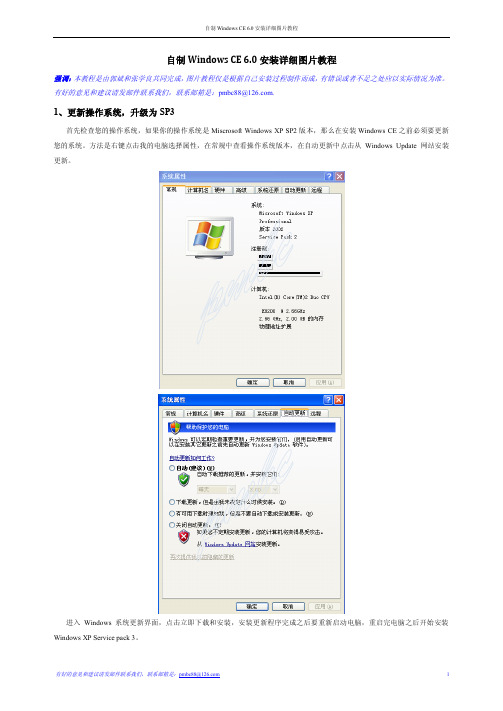
有好的意见和建议请发邮件联系我们,联系邮箱是:pmbc88@.1、更新操作系统,升级为SP3首先检查您的操作系统,如果你的操作系统是Miscrosoft Windows XP SP2版本,那么在安装Windows CE之前必须要更新您的系统。
方法是右键点击我的电脑选择属性,在常规中查看操作系统版本,在自动更新中点击从Windows Update 网站安装更新。
进入Windows 系统更新界面,点击立即下载和安装,安装更新程序完成之后要重新启动电脑,重启完电脑之后开始安装Windows XP Service pack 3。
安装完Windows XP Service pack 3之后,重启电脑,右键单击我的电脑属性,这时候发现Windows系统版本已经成为Miscrosoft Windows XP SP3版本,然后继续点击自动更新,按照上面提到的方法来完成SP3相关的后续更新。
由于更新程序数目很多,速度很慢,为了防止电脑进入待机状态,需要对关闭监视器和屏幕保护程序进行设置,具体设置如下图所示。
2、安装前的一系列准备进入微软中国官方网站(/zh/cn/),可以点击所有产品对微软的产品有所了解,而我们即将要安装的Windows CE 6.0 就属于微软的Windows Embedded产品。
点击Windows Embedded即可进入Windows Embedded界面,在这个界面点击关于就可以了解一下什么是Windows Embedded,点击为什么选择Windows Embedded?就可以对Windows Embedded 系列的产品有所了解,这时候就可以发现Windows Embedded CE。
了解完这些之后,下面就可以在Windows Embedded界面点击下载进入Windows Embedded下载中心。
凯立德WINCE6.0导航安装说明
车载及PD机导航安装步骤(CE版)普清机首先把卡里的资料备份进电脑保存好,以防升级不成功时恢复原样。
然后删除旧卡的上资料。
2、不要改动卡名,每种导航仪都有自己命名卡名的方法,以防找不到卡的现象,如果是新卡请改成和旧卡一样的卡名。
3、下载好后右击压缩包解压至当前文件夹得到一个NaviOne文件夹。
4、把NaviOne文件夹拷到卡里,把卡插回导航仪。
5、打开导航仪进入设置查看GPS路径是不是:卡名\Navione\NaviOne.exe,不是请修改。
有的机器路径可能在文件管理的里面修改,也有的在导航路径修改,掌柜不可能知道所有机器路径设置,请自行找。
6、进入导航点功能—系统—往下翻找到GPS卫星天线点击——点搜索——稍等点确定,这里主要是让导航仪自己找到端口和波特率。
这一步一定要做,不做可能找不到卫星。
800*480的机器可能要修改一个文件才行。
7、把导航仪拿空旷的地方进行首次定位。
看到卫星信号指示条下面有数字说明已找到卫星,稍等即可定位。
注意:没办法知道自己屏幕分辨率、端口、波特率的,请向掌柜要一个名为GPS.EXE的文件,把GPS.EXE放卡里,把卡插回PD或车载机里,然后从机里点系统设置—找程序路径点击—找到GPS.EXE,再回机里的点应用程序—GPS.EXE就会检测到自己屏幕分辨率、端口、波特率(报错不用管它),请记下来哦,这此是修改导航的设置要用的。
有的朋友反映我的导航安装后出现了很多喜字,恭喜您中头奖了,这是一些品牌机为了不让客户在外面安装导航软件而设的一个小把戏。
您只要告诉掌柜您的分辨率,就会给您发回一个小文件替换上即可解决。
高清机下载后解压,把解压后的文件夹NaviOne拷入卡里,再在导航仪上设置导航路便可,如果遇到有端口和波特率和新导航的默认不一样,一般掌柜会在您拍下不久都会帮您设置好并发送给您的,您只要按说明放入相应的文件夹替换便可。
USB设备应用开发套件 для Windows Embedded CE 6.0 用户指南说明书
USB Device Application Kit for WindowsEmbedded CE 6.0User's ManualDigi document reference number: 90000926_A© Digi International Inc. 2008. All Rights Reserved.The Digi logo is a registered trademark of Digi International, Inc.All other trademarks mentioned in this document are the property of their respective owners. Information in this document is subject to change without notice and does not represent a commitment on the part of Digi International.Digi provides this document “as is,” without warranty of any kind, expressed or implied, including, but not limited to, the implied warranties of fitness or merchantability for a particular purpose. Digi may make improvements and/or changes in this manual or in the product(s) and/or the program(s) described in this manual at any time.This product could include technical inaccuracies or typographical errors. Changes are periodically made to the information herein; these changes may be incorporated in new editions of the publication.Digi International Inc.11001 Bren Road EastMinnetonka, MN 55343 (USA)+1 877 912-3444 or +1 952 912-34442Contents1Introduction (6)1.1Features (6)2Requirements (7)2.1BSP requirements (7)2.2Microsoft Windows® CE OS Configuration (7)3Installation (9)4Integration (10)4.1Integration overview (10)4.2Integration process (10)4.3Driver starts (12)5Using the USB Device functionality (13)5.1Serial USB Function Client (13)5.2Mass Storage USB Function Client (17)6Uninstallation (18)3USB Device Application Kit for Windows Embedded CE 6.0 - User's Manual4Conventions used in this manualHere is a list of the typographical conventions used in this manual:StyleNew terms and variables in commands, code, and other input. Style In examples, to show the contents of files, the output fromcommands. In, text the C code.Variables to be replaced with actual values are shown in italics.Style For menu items, dialogs, tabs, buttons, and other controls.In examples, to show the text that you enterMenu name > optionA menu followed by one or more options; for example, File >New.This manual also uses these frames and symbols:This is a warning. It helps solve or avoid common mistakes or problems.This is a hint. It contains useful information about a topic.> This is a host computer session> Bold text indicates what must be entered .> This is a target session > Bold text indicates what must be entered .USB Device Application Kit for Windows Embedded CE 6.0 - User's Manual5AbbreviationsASCIIAmerican Standard Code for Information Interchange CPUCentral Processing Unit ESD Electrostatic DischargeGPIO General Purpose Input/Output OS Operating SystemPC PersonalComputer RAMRandom Access Memory ROOTFSRoot File System TFTPTrivial File Transfer Protocol TTY TeletypewriterUSBUniversal Serial BusUSB Device Application Kit for Windows Embedded CE 6.0 - User's Manual1IntroductionThe USB Device Application Kit is a product that brings the USB Device physical interface to your Digi Development board or JumpStart board.The USB Device Application Kit hardware board connects to the Development or JumpStart board via the USB Application Header and the provided 16-pin flat cable. It basically mounts a USBPHY and USB B female connector.The USB Device Application Kit software contains the driver needed to support the USB DeviceController in a Microsoft Windows® Embedded CE 6.0 OS Design.This User's Manual assumes that the reader is able to create, compile and download a kernel image.1.1FeaturesThe following are the main features of the USB Device Application Kit:•USB 2.0 Full Speed (Low speed not supported)•Board is powered from Development or JumpStart board•Operation modes: serial and mass storage,•±15kV ESD protection6USB Device Application Kit for Windows Embedded CE 6.0 - User's Manual2RequirementsHost System requirementsThe development system has to meet the following requirements:•x86 PC with 500 MHz Pentium III or faster processor; 2 GHz Pentium 4 or equivalent recommended•Microsoft Windows® 2000 Professional with Service Pack 4 or Windows XP Professional with Service Pack 1.•Microsoft Windows® CE 6.0 with Service Pack 1 installed and updates•Serial port•Ethernet network card2.1BSP requirementsDisplay interface support recommended for development purposes, but not required.2.2Microsoft Windows® CE OS Configuration2.2.1Required componentsGo to the Catalog and expand Device Drivers > USB Function > USB Function Clients.Then include this element:USB Function Clients:• Mass Storage• serialWhen using ActiveSync the components from Core OS > CEBASE > Applications – EndUser > ActiveSync must be included into the Windows CE project.Then include this element:ActiveSync:• File SyncFurthermore, the component from Core OS > CEBASE > Communication Services andNetworking > Networking – Wide area Network (WAN) must be included into the Windows CE projectThen include this element:Telephony API (TAPI 2.0):•Unimodem Support7USB Device Application Kit for Windows Embedded CE 6.0 - User's Manual2.2.2Recommended catalog componentsOther recommended networking utilities and services are:Core OS > CEBASE > Communication Services and Networking: • Networking Generalo Network Utilities• Serverso FTP Servero Telnet Server8USB Device Application Kit for Windows Embedded CE 6.0 - User's Manual93 InstallationThis release is installed by executing Setup.exe.The installer wizard will guide you in all required steps.After installation has finished, the following components will be on your PC:%ProgramFiles%\Digi\AppKits\USB_Device_AppKit :• Uninstaller : Executable to uninstall this release.• Release Notes and License Agreements.%_WINCEROOT%\OTHERS\Digi\AppKits\USBFN\src\driver:• Sources of the driver.%ProgramFiles% is an environment variable of your system that provides the path to your Program Files directory (usually C:\Program Files)%_WINCEROOT% is an environment variable of your system that provides thepath to your Microsoft Windows® CE root directory (usually C:\WINCE600).USB Device Application Kit for Windows Embedded CE 6.0 - User's Manual4Integration4.1Integration overviewThe USB Device Application Kit integration described in this chapter assumes that you havealready performed the following steps. These steps are fairly general as they are highly dependant on the customer BSP and the Microsoft Windows® CE version used:Before completing these steps, you will need to have the following applications already installed: •Windows Embedded as described in Chapter 2, and• a BSP corresponding with the hardware that will be used.4.2Integration processThe source code of the driver is also available and can be integrated into a Windows Embedded CE6.0 project as a subproject of it.After you have completely built your Project,it’s time to add a new subproject for theUSB_Device_AppKit Module.Open the Solution Explorer and right-click over the Subprojects. Choose Add ExistingSubproject:Navigate to %_WINCEROOT%\OTHERS\Digi\AppKits\USBFN\src\driver directory and select USBFN.pbpxml:10Now you can see the parameter files and the source files.Right click over USBFN and select Rebuild and then right click over the project and select Make Run-Time Image.The driver build should be rebuilt and included in the final nk.bin image, together with the necessary registry entries.4.3Driver startsVerify that the ns9360_usbfn.dll is inside the new image and that the correct registry entries are placed in the final registry file (reginit.ini).Once the project has been built, download it to the target device and start it up.If you have the USB Device Application Kit connected to the peripheral application header of the target, it should be automatically detected, and you should see a console message similar to thefollowing:[UfnPdd_Init]: Loading USB Device Driver… OK.More information may be shown depending on the debug level established in thedriver.In the console an error message will show up telling that an IOCTL isn’tsupported by the driver. That message can be ignored because that IOCTL onlyreceives some interface information that are not important to the functionality ofthe driver5Using the USB Device functionalityThe USB Device driver provides the functionality upon which the USB function client driverswork. The USB function client drivers implement one or more "functions", each providing adifferent capability to the USB host. In this document we'll see two of these function client drivers: •Serial USB Function Client•Mass Storage USB Function Client5.1Serial USB Function ClientFor both serial profiles standard serial support is necessary within the Windows CE image. Thatcomponent can be found at Core OS > CEBASE > Core OS Services > Serial PortSupport.5.1.1Selecting the ActiveSync profileMake the following change in your USBFN.reg file, you need to uncomment the Serial_Class and comment the rest (“;”).[HKEY_LOCAL_MACHINE\Drivers\USB\FunctionDrivers];"DefaultClientDriver"="Mass_Storage_Class""DefaultClientDriver"="Serial_Class";"DefaultClientDriver"="USBSER_Class"Now you can build the project with the profile selected.Right click over USB_Device_AppKit and select Rebuild and then right click over the project and select Make Run-Time Image.5.1.2Using the profile for ActiveSyncOn the PC side (Host) ActiveSync 4.x or higher must have been installed previously.To use ActiveSync some additional components are necessary. Refer to chapter2.2.1 and include the listed components.If the components have been includedafter building the project a SYSGEN must be done again.After building and deploying successfully the Windows CE image a ActiveSync connection might be necessary to be created on the target side. This is only necessary if more than one serial port is enabled on the target device.Following the steps that are necessary to create on the target side a new direct connection that can be used later by ActiveSync.From the Start menu select Settings -> Network and Dial-up Connections and create a new Direct Connection selecting the Make New Connection option. Select on the next page the serial port that was setup by the system for the USB function interface and close the dialog. The information on the following picture is only an example and that value might be different on other platforms.Now the new connection to use the USB function driver is created. The next step is to use that connection as the default configuration for ActiveSync. Select from the Start menu Settings -> Control Panel and open the PC connection item.Click on the Change button and select the new created direct connection from the list of available connections. Confirm both dialogs with OK and now when connecting the USB function device to the PC ActiveSync should automatically start.5.1.3Selecting the Serial profileMake the following change in your USBFN.reg file, you need to uncomment the Serial_Class and comment the rest (“;”).[HKEY_LOCAL_MACHINE\Drivers\USB\FunctionDrivers];"DefaultClientDriver"="Mass_Storage_Class";"DefaultClientDriver"="Serial_Class""DefaultClientDriver"="USBSER_Class"Now you can build the project with the profile selected.Right click over USB_Device_AppKit and select Rebuild and then right click over the project and select Make Run-Time Image.5.1.4Using the Serial profileWhen using the serial profile no additional components are necessary to expose a serial port to the Host.On the PC side (Host) the standard USB serial driver (usbser.sys) need to be installed. Afterbuilding and deploying successfully the Windows CE image connect the USB cable with the device connector to the target and with the host connector to a PC or Laptop. The first time the host willinstall the corresponding driver and the device will be available for use. In the Device Manager the COM number assigned to the serial port can be found and normal serial communication can beused between the target and the connected PC.5.1.5Installing the USB Serial driver under WindowsIn case the USB serial driver isn’t installed on the used Windows machine the usbser.sys file comes with various versions of Windows. It can be found on Windows XP typically inC:\WINDOWS\Driver Cache\i386\driver.cabWhen the generic serial driver is loaded and the USB device connected to the Windows host with a USB cable, Windows should recognize the generic serial device and ask for a driver. IndicateWindows to find the driver in the folder that contains usbser.inf and usbser.sy s.The usbser.inf is included in the Kit as an example and can be found atC:\Program Files\Digi\AppKits\USB_Device_AppKit\infOn Windows XP, when the generic serial device is first plugged in, the "Found New HardwareWizard" starts up. Select "Install from a list or specific location (Advanced)", on the next screen select "Include this location in the search" and enter the path or browse to the folder containingusbser.inf and usbser.sys.Windows will complain that the Generic Serial driver has not passed Windows Logo testing, but select "Continue anyway" and finish the driver installation. In the "Device Manager" (under"Control Panel", "System", "Hardware") on Windows XP expand the "Ports (COM & LPT)" entry and you should see Generic Serial Port listed as the driver for one of the COM ports.5.1.6Uninstalling the USB Serial driver under WindowsTo uninstall the Windows XP driver for Generic Serial Port, right click on the Generic Serial Port entry in the "Device Manager" and select "Uninstall".5.2Mass Storage USB Function Client5.2.1Selecting the profileMake the following change in your USBFN.reg file that is part of the subproject, you need to uncomment the Mass_Storage_Class and comment the rest (“;”).[HKEY_LOCAL_MACHINE\Drivers\USB\FunctionDrivers]"DefaultClientDriver"="Mass_Storage_Class";"DefaultClientDriver"="Serial_Class";"DefaultClientDriver"="USBSER_Class"Now you can build the project with the profile selected.Right click over USB_Device_AppKit and select Rebuild and then right click over the project and select Make Run-Time Image.5.2.2Using the profileTo use the Mass Storage profile a block device like CF, SD card or USB Memory stick is necessary to make the profile working correctly. Following some examples how some of these block devices need to be added to the Windows CE project.Exposing a USB memory stick from the target to a PC (Host) the components USB Mass Storage Function client, USB Host support and USB Storage class driver are necessary. Using any otherWhen connecting the USB cable to the Host it might take some time till thestorage device is represented .6UninstallationThe USB Device Application Kit can be uninstalled separately using Windows Control Panel.Add or Remove Programs:•USB Device Application Kit for Windows Embedded CE 6.0。
CE6.0安装方法
1、先装Visual Studio 2005, 我拿到的是Professional Edition。
最好别用DEFAULT安装,把组件CUSTOM一下,不然会花很多冤枉的磁盘空间。
WINCE600的Platform Builder不像WINCE500是独立的,而是作为VS2005的插件,以后建立和定制OS、编译调试全部在VS2005里完成2、安装V isual Studio 2005 Service Pack 1, 发布的地址/zh-cn/vstudio/bb265237.aspx这是必须的装的,Release Note里面提到SP1提供了Windows Embedded 6.0 platform and tools support。
不同的VS2005版本(Standard / Professional / Tem Edition) 会对应到不同的下载上,不过简单点就用这个下载/downloads/details.aspx?familyid=BB4A75AB-E2D4-4C96-B39D-37B AF6B5B1DC&displaylang=en 430多兆,通吃所有版本。
3、可选,安装Visual Studio 2005 Service Pack 1 Update for Windows V ista。
发布和下载网址/downloads/details.aspx?FamilyID=90e2942d-3ad1-4873-a2ee-4acc0aa ce5b6&displaylang=en在SP1的基础上增加对VISTA的支持。
注意一定要先装SP1,再装这个,在System Requirements里强调了Required Software: licensed copy of a V isual Studio 2005 and V isual Studio 2005 Service Pack 1. 我当时以为这个包含了上面SP1,浪费了不少时间4、安装MSDN,从VS2005的安装页里选择。
Digi Embedded Windows CE 6.0 快速上手指南说明书
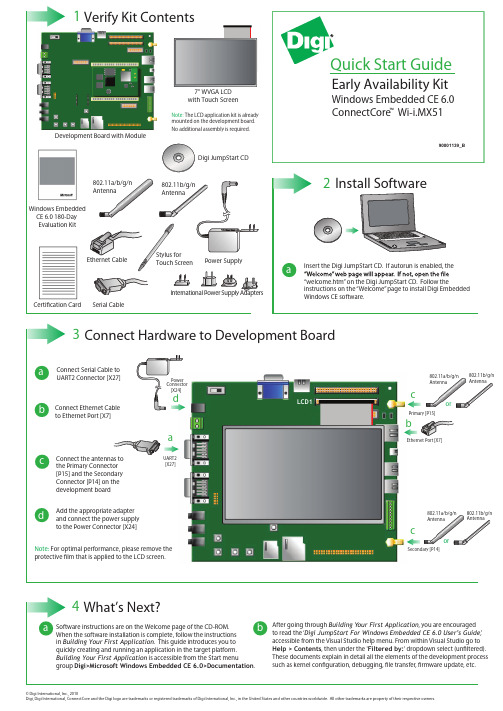
aSoftware instructions are on the Welcome page of the CD-ROM.When the software installation is complete, follow the instructions in Building Your First Application . This guide introduces you to quickly creating and running an application in the target platform.Building Your First Application is accessible from the Start menugroup Digi>Microsoft Windows Embedded CE 6.0>Documentation .4bQuick Start GuideWhat’s Next?© Digi International, Inc., 2010Digi, Digi International, ConnectCore and the Digi logo are trademarks or registered trademarks of Digi International, Inc., in the United States and other countries worldwide. All other trademarks are property of their respective owners.Development Board with Modulea bConnect Ethernet Cable to Ethernet Port [X7]cConnect the antennas to the Primary Connector [P15] and the Secondary Connector [P14] on the development boardConnect Serial Cable to UART2 Connector [X27]3Connect Hardware to Development BoarddAdd the appropriate adapter and connect the power supply to the Power Connector [X24]ac802.11b/g/n Antenna802.11a/b/g/n Antenna cdPower Connector [X24]UART2[X27]Primary [P15]Ethernet Port [X7]Secondary [P14]or802.11b/g/n Antenna802.11a/b/g/n Antenna orbNote: For optimal performance, please remove the protective lm that is applied to the LCD screen.LCD1Early Availability Kit™Windows Embedded CE 6.0ConnectCore Wi-i.MX51After going through Building Your First Application , you are encouraged to read the ‘Digi JumpStart For Windows Embedded CE 6.0 User’s Guide ,’accessible from the Visual Studio help menu. From within Visual Studio go to Help > Contents , then under the 'Filtered by:' dropdown select (un ltered). These documents explain in detail all the elements of the development process such as kernel con guration, debugging, le transfer, rmware update, etc.Windows Embedded CE 6.0 180-Day Evaluation KitCerti cation Card90001139_B。
Scientific Linux 6.0 图形安装教程
Scientific Linux6.0图形安装教程一.准备安装Scientific Linux系统1.Scientific Linux简介Scientific Linux是重新编译的Red Hat Enterprise Linux,由费米国家加速器实验室、欧洲核研究组织以及世界各地的大学和实验室共同开发。
它旨在与Red Hat Enterprise Linux完全兼容,它也提供了上游产品中未收入的额外软件包。
这当中最值得一提的是各种文件系统,包括Cluster Suite和Global File System(GFS)、FUSE、OpenAFS、Squashfs、Unionfs,以及对Intel无线固件的无线网络支持、MadWiFi和NDISwrapper、Sun Java及Java Development Kit(JDK)、轻量级的IceWM窗口管理器、面向统计计算的R语言环境,以及Alpine邮件客户端。
同时它也强调自主方便的定制,用户可以根据自己的需求做相应修改,可以使用脚本或者Anaconda给自己定制最小化的安装模式。
2.获得Scientific Linux发行版官方下载:https:///download网络安装镜像:(引导安装)/linux/scientific/6.0/i386/iso/SL-60-i386-2011-03-03-boot. iso(i386)/linux/scientific/6.0/x86_64/iso/SL-60-x86_64-2011-03-0 3-boot.iso(x86_64)离线用户可以下载第一张DVD:(完整)/Download/scientific/6.0/i386/iso/SL-60-i386-2011-03-03-Install -DVD.iso.torrent(i386)/linux/scientific/6.0/x86_64/iso/SL-60-x86_64-2011-03-0 3-Install-DVD.iso(x86_64)3.硬盘分区方案在计算机上安装Linux系统,对硬盘进行分区是一个非常重要的步骤,下面介绍几个分区方案。
- 1、下载文档前请自行甄别文档内容的完整性,平台不提供额外的编辑、内容补充、找答案等附加服务。
- 2、"仅部分预览"的文档,不可在线预览部分如存在完整性等问题,可反馈申请退款(可完整预览的文档不适用该条件!)。
- 3、如文档侵犯您的权益,请联系客服反馈,我们会尽快为您处理(人工客服工作时间:9:00-18:30)。
1、先装Visual Studio 2005, 我拿到的是Professional Edition。
最好别用DEFAULT安装,把组件CUSTOM一下,不然会花很多冤枉的磁盘空间。
WINCE600的Platform Builder不像WINCE500是独立的,而是作为VS2005的插件,以后建立和定制OS、编译调试全部在VS2005里完成2、安装V isual Studio 2005 Service Pack 1, 发布的地址/zh-cn/vstudio/bb265237.aspx这是必须的装的,Release Note里面提到SP1提供了Windows Embedded 6.0 platform and tools support。
不同的VS2005版本(Standard / Professional / Tem Edition) 会对应到不同的下载上,不过简单点就用这个下载/downloads/details.aspx?familyid=BB4A75AB-E2D4-4C96-B39D-37B AF6B5B1DC&displaylang=en 430多兆,通吃所有版本。
3、可选,安装Visual Studio 2005 Service Pack 1 Update for Windows V ista。
发布和下载网址/downloads/details.aspx?FamilyID=90e2942d-3ad1-4873-a2ee-4acc0aa ce5b6&displaylang=en在SP1的基础上增加对VISTA的支持。
注意一定要先装SP1,再装这个,在System Requirements里强调了Required Software: licensed copy of a V isual Studio 2005 and V isual Studio 2005 Service Pack 1. 我当时以为这个包含了上面SP1,浪费了不少时间4、安装MSDN,从VS2005的安装页里选择。
新版的MSDN界面功能看起来比较酷,但CE6的Product Documentation写得实在潦草,不少细节貌似没写清楚,所以这里建议选上CE5的产品文档留着以后作参考。
5、安装Windows Embedded CE 6.0。
应用开发人员可以不装,在后文会提到可以利用CE6生成的SDK来工作;但是不装的话,恐怕无法在本地MSDN得到CE6的产品文档,另外还有PUBLIC目录下丰富的application sample code了。
几个注意点:(1) 在下图这步才可以改路径。
点选组件后,然后点下面的Browse。
这里不像WINCE500安装时有专门的一步来改路径。
害我狂点next/back几圈才找到。
-欢迎光临DIY部落,点击这里查看更多文章教程【点击打包该文章】[1] [2]'zh' [3]文章出处:/course/3_program/jdkf/200798/70795.html(2) CE6没有专门的一个Emualtor(x86)选项了, 我以为是包含在x86里面, 后来发现x86部分我白装了。
WINCE600和VS2005的模拟器可以直接跑ARM指令,他们管这个叫ARMulator ( 貌似LINUX上先有这个东西, MS抄人家的? )。
这导致了CE5 的基于x86的Emulator无法在VS2005上跑起来,得用个很绕路并且不太好用的方法,等我用顺了再写文章出来。
(2) 注意磁盘空间,我选装了ARMV4I和X86两个,用掉6.5G,比WINCE500还要大些。
6、安装Windows Embedded CE 6.0 Platform Builder Service Pack 1,同样地,应用开发人员可以不装。
发布页/downloads/details.aspx?FamilyId=BF0DC0E3-8575-4860-A8E3-290A DF242678&displaylang=en这份只升级platform builder,并不修改WINCE600目录下的代码--------------------------------如果BSP开发人员不打算用模拟器的话,装到这步就行了。
做应用的继续往下看7、安装Microsoft Device Emulator 2.0。
发布页/downloads/details.aspx?FamilyID=dd567053-f231-4a64-a648-fea5e70 61303&DisplayLang=en注意下载时有32位版本和64位版本。
安装后,emulator程序仍然在C:\Program Files\Microsoft Device Emulator\1.0下面,没有再生成一个叫2.0的目录,我总感觉被微软忽悠了。
8、安装Virtual Machine Network Driver for Microsoft Device Emulator, 发布页/downloads/details.aspx?FamilyID=dc8332d6-565f-4a57-be8c-1d4718d 3af65&DisplayLang=en //该发布页已过时无法找到,我把该文件自己传了一份,请从下面地址下载/Files/walzer/Virtual%20Machine%20Network%20Driver%20for%20Mi crosoft%20Device%20Emulator.rar不装这个的话,模拟器是启动不起来的,黑屏。
如果通过命令行模式让DeviceEmulaotr.exe 加载编译好的,可以看到串口输出窗口显示卡在初始化DMA传输的步骤上。
我在这个问题上卡了近一个通宵,睡一觉起来才运气好翻到这个发布页,终于弄过去的。
CE6模拟器的Download和Transport方式叫"Device Emulator (DMA)",我一开始理解成Direct Memory Access,以为微软为了解决模拟器上单步调试缓慢的问题,让内存和模拟器进程DMA方式传输什么数据呢,类似双端口RAM的方式在内存里直接传了,和ActiveSync,TCP/IP连接就无关了。
后来才发现这个DMA估计是Device Emulator Adaptor,会自动去找模拟器上有什么可用的连接方式,还是TCPIP/ActiveSync/KITL/Manual等几种老方法。
VISTA上没有ActiveSync了,只好用TCP/IP连接,不装这个virtual switch那就当然连不上了。
9、VISTA用户最好安装这个: Windows Mobile Device Center 6,作为ActiveSync的替代品,我预感在以后调试多半得用到32位版:/downloads/details.aspx?FamilyID=83d513ea-9df9-4920-af33-3a0e2e4 e7beb&DisplayLang=en64位版:/downloads/details.aspx?FamilyID=6eb8d0aa-bc6b-4864-8ffe-dc26e1d 9f843&DisplayLang=en我在XP SP2和VISTA BUSINESS上都成功安装了CE6,并且各自新建了DeviceEmulator 项目(现在不叫PBWorkspace了,叫OSDesigns),编译完后用CE6 Attach Device成功启动;然后再编译生成SDK,安装到XP SP2或VISTA上后,再从VS2005里从Emulator SDK新建VC项目,编译并在Emulator上单步调试,现在Emulator就不是从Attach Device连接的了,而是从Device Emulator Manager启动的,也就是说应用开发人员可以完全不用装CE6,只要装VS2005就可以了。
发两张通关靓图, Device Emulator Manager, 和自己定制生成的CE6中文模拟器文章出处:/course/3_program/jdkf/200798/70795_2.htmlMSDN 的全称是Microsoft Developer Network。
这是微软公司面向软件开发者的一种信息服务。
一般情况下,很多人误认为MSDN 为联机帮助文件和技术文献的集合。
但事实上,这两者只占MSDN 庞大计划的一小部分。
MSDN 实际上是一个以Visual Studio 和Windows 平台为核心整合的开发虚拟社区,包括技术文档、在线电子教程、网络虚拟实验室、微软产品下载(几乎全部的操作系统、服务器程序、应用程序和开发程序的正式版和测试版,还包括各种驱动程序开发包和软件开发包)、Blog、BBS、MSDN WebCast、与CMP 合作的MSDN 杂志等等一系列服务。
其中产品下载、在线电子教程、MSDN 杂志和技术紧急电话支援是要付费的,其余基本免费。
当然,MSDN 杂志可以通过微软公司的网站免费观看或者下载(/msdnmag/)MSDN 涵盖了所有的可以被开发扩充的平台和应用程序,因此如微软公司的百科全书Encarta,或者是各种游戏,是不包括在MSDN 之内的,因为这些产品直接面向最终用户,没有进行程序开发的必要。
MSDN Library用户接触到的最多关于MSDN 的信息可能是来自于MSDN Library。
MSDN Library 就是通常人们眼中的MSDN,涵盖了微软全套可开发产品线的技术开发文档和科技文献(部分包括源代码),也包括过刊的MSDN 杂志节选和部分经典书籍的节选章节。
MSDN Library 有1.8 GB 左右,可以通过在线或者MSDN 订阅(需付费)以脱机方式浏览。
在线浏览的链接为/library/default.asp。
每个时期,随着不同版本Visual Studio 发布的时候,都会有对应的MSDN Library 发布,而从最新版的Visual Studio 发布之后,对应旧版本Visual Studio 的MSDN Library 会慢慢停止发布,仅随该Visual Studio 发布的MSDN Library 以及后续的MSDN Library 更新才可以被整合到最新版本的Visual Studio 中。
MSDN Subscription真正意义上的MSDN 指的是MSDN Subscription(MSDN 订阅)。
这是一种付费订阅服务,可以将微软几乎所有可开发软件以开发为目的使用,包括各种操作系统和应用程序,还有各种企业服务器,MSDN Library也是订阅的一部分。
