IBM磁带机操作手册 for linux
IBM TS磁带库操作指南

78
磁带库操作指南-AIX
主机配置-LTO带库与AIX服务器驱动安装
1. 软件要求 AIX 5.3.0.X. AIX 5L Version 5.3 on POWER-based servers 2. 硬件要求 光纤通道卡 3. IBM SAN Switch
79
磁带库操作指南-AIX
LTO+AIX基本配置步骤-安装驱动
75
磁带库操作指南-AIX
76 76
磁带库操作指南-AIX
主机配置-驱动下载
LTO所支持的设备驱动程序:
1. 使用浏览器
ftp:///storage/devdrvr
2. 使用IBM FTP 站点:
FTP 站点:
77
磁带库操作指南-Win
主机配置-LTO带库与win服务器驱动安装
73
磁带库操作指南-Win
主机配置-LTO带库与win服务器驱动安装
install_exclusive.exe: install_exclusive.exe should be used by applications (such as Tivoli Storage Manager) requiring the driver to issue automatic reserves on open and also preventing multiple open handles from a host to a drive to exist at the same time. Note: This option replaces the previous default installation of install.exe
注:smc0 机械臂(磁带库才有) rmt0 驱动器
Linux下磁带机的使用

Linux下磁带机的使用磁带操作命令:1.重新拉紧磁带mt -f /dev/rmt/0 retension2.回绕磁带mt -f /dev/rmt/0 rewind3.显示磁带驱动器状态mt -f /dev/rmt/0 statustar命令:使用tar命令复制文件或者目录树到单个磁带。
优点:在UNIX系统中都可用。
缺点:不知道文件系统的边界,全路径名长不能超过255个字符,不能复制空目录或者设备文件这样的特殊文件,不能用来创建多个磁带卷。
1.复制文件到磁带1)切换到包含有需要复制文件的目录2)在磁带驱动器中插入可以写入的磁带3)输入 tar cvf /dev/rmt/0 filenme filename ...其中, c (复制)选项复制指定的文件,v(详细)选项显示复制文件的信息,f(文件)选项后面跟随的是tar文件写入的磁带设备名。
指定的文件名复制到磁带,覆盖磁带上任何已存在的文件。
注:使用c选项复制文件到磁带将破坏磁带上已有的任何文件。
如果要保留这些文件,用r选项。
可以使用通配符(? *)4)从驱动器中取出磁带,将文件名写在磁带的标签上。
2.列出磁带上的文件1)插入磁带到磁带驱动器。
2)输入 tar tvf /dev/rmt/0其中, t(列表)选项列出指定的文件,vv(详细)选项显示文件的全部信息,f(文件)选项后面跟随的是tar文件写入的磁带设备名。
3.添加文件到磁带1)切换到包含有需要复制文件的目录。
2)在磁带驱动器中插入可以写入的磁带3)输入 tar rvf /dev/rmt/0 filename filename...指定的文件添加到磁带上已有文件的后面。
4)从驱动器中取出磁带,将文件名写在磁带的标签上。
注:如果使用n(不回绕)选项做为磁带设备名的一部分,可以自制多个tar文件集到磁带。
输入 tar cvf /dev/rmt/0n filenae ,当该文件自制完毕时磁带不回绕,下一次使用磁带时,文件在当前文件集的结尾写入。
Linux下磁带库配置步骤
Linux下磁带库配置步骤
1. 查看linux系统下sg和st驱动是否存在
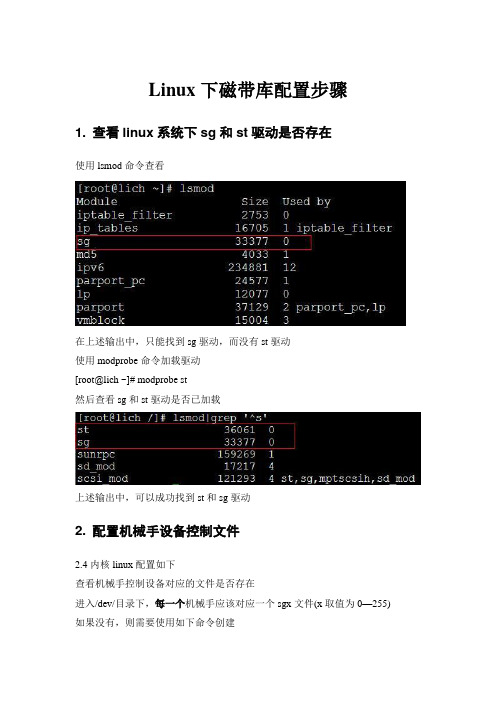
使用lsmod命令查看
在上述输出中,只能找到sg驱动,而没有st驱动
使用modprobe命令加载驱动
[root@lich ~]# modprobe st
然后查看sg和st驱动是否已加载
上述输出中,可以成功找到st和sg驱动
2. 配置机械手设备控制文件
2.4内核linux配置如下
查看机械手控制设备对应的文件是否存在
进入/dev/目录下,每一个机械手应该对应一个sgx文件(x取值为0—255) 如果没有,则需要使用如下命令创建
Mknod /dev/sgx c 21 x [0<x<255]
然后运行/usr/openv/volmgr/bin/make_scsi_dev
2.6内核linux配置如下
2.6内核下系统应该已自动创建/dev/sgx文件
3. 验证设备配置
使用cat /proc/scsi/scsi命令查看当前系统检测到的SCSI设备提升带库性能
在st_option.h文件中将ST_BUFFER_BLOCKS值改为64
根据内存大小适当调整ST_MAX_BUFFERS大小.。
IBM Power Systems LC服务器预装Linux配置指南说明书
Configuring Linux that is preinstalled on IBMPower Systems LC serversVersion 1.0.5IBM®Quick Start Guide for configuring Linux that is preinstalled on an IBM Power Systems LC server.This guide describes a quick and easy way to configure an IBM Power Systems LC server that is preinstalled with Linux.OverviewUse this information to configure Linux on an IBM Power System LC server.1Step 1: Completing the prerequisites and booting yourfirmwareBefore you power on the system, ensure that you have the following items:•Ethernet cable•VGA monitor. The VGA resolution must be set to 1024x768-60Hz.•USB Keyboard•Power cords and outlet for your system.Complete these steps:•If your system belongs in a rack, install your system into that rack. For instructions, see IBM Power Systems information at https:///support/knowledgecenter/.•Connect an Ethernet cable to the embedded Ethernet port next to the serial port on the back of your system.Connect the other end to your network.•Connect your VGA monitor to the VGA port on back of system.•Connect your USB keyboard to an available USB port•Connect the power cords to the system and plug them into the outlets.At this point, your firmware is booting. Wait for the green LED on the power button to start flashing, indicating that it is ready to use. If your system does not have a green LED indicator light, then wait 1 to 2 minutes.2Step 2: Configuring the IP addressTo set up or enable your network connection to the BMC firmware, use the Petitboot bootloader interface. Follow these steps:a.Power on your server using the power button on the front of your system. Your system will power on to thePetitboot bootloader menu. This process takes about 1 - 2 minutes to complete. Do not walk away from your system! When Petitboot loads, your monitor will become active and you will need to push any key in order to interrupt the boot process.b.At the Petitboot bootloader main menu, select Exit to Shell.c.Run ipmitool lan print 1. If this command returns an IP address, verify that is correct and continue. Toset a static IP address, follow these steps:i.Set the mode to static by running this command: ipmitool lan set 1 ipsrc staticii.Set your IP address by running this command: ipmitool lan set 1 ipaddr ip_address where ip_address is the static IP address that you are assigning to this system.iii.Set your netmask by running this command: ipmitool lan set 1 netmask netmask_address where netmask_address is the netmask for the system.iv.Set your gateway server by running this command: ipmitool lan set 1 defgw ipaddr gateway_server where gateway_server is the gateway for this system.v.Confirm the IP address by running the command ipmitool lan print 1 again.Note: This network interface is not active until after you perform the following steps.d.To reset your firmware, run the following command: ipmitool mc reset cold.This command must complete before continuing the process; however, it does not return any information. To verify that this command has completed, ping your system BMC address (the same IP address used in yourIPMItool command). When the ping returns successfully, continue to the next step.Note: If your ping does not return successfully within a reasonable amount of time (2 - 3 minutes), try these additional steps:i.Power your system off with this command: ipmitool power off.ii.Unplug the power cords from the back of the system. Wait 30 seconds and then apply power to boot BMC.3Step 3: Powering on your server with IPMIIntelligent Platform Management Interface (IPMI) is the default console to use when connecting to the OPAL firmware.Use the default values for IPMI:•Default user: ADMIN•Default password: adminNote: After your system powers on, the Petitboot interface loads. If you do not interrupt the boot process bypressing any key within 10 seconds, Petitboot automatically boots the first option.To power on your server from a PC or notebook that is running Linux, follow these steps:a.Open a terminal program on your PC or notebook.b.To power on your server, run the following command:ipmitool -I lanplus -H server_ip_address -P ipmi_password chassis power onwhere server_ip_ipaddress is the IP address of the Power system and ipmi_password is the password set up for IPMI.Note: If your system is already powered on, continue to active your IPMI console.c.Activate your IPMI console by running this command:ipmitool -I lanplus -H server_ip_address -P ipmi_password sol activateNote: Use your keyboard up arrow to display the previous ipmitool command. You can edit previous commands to avoid typing the entire command again. If you need to power off or reboot your system, deactivate theconsole by running this command:ipmitool -I lanplus -H server_ip_address -P ipmi_password sol deactivateTo reboot the system, run this command:ipmitool -I lanplus -H server_ip_address -P ipmi_password chassis power reset4Step 4: Booting LinuxTo boot your Linux distribution, select it in the Petitboot bootloader menu and press Enter.Preinstalled IBM Power systems have default users and passwords set up. This information is included with your system paperwork. In general, the default user names and passwords are as follows:On a system preinstalled with Ubuntu:Default user: ibmDefault user: passw0rd On a system preinstalled with other distributions:Default user: rootDefault user: PASSW0RDNote: Ubuntu 14.04.3 and Red Hat Enterprise Linux 7.2 LE may not contain the latest version of IPMItool. To install the latest version on an Ubuntu system, run the following commands:apt-get updateapt-get install ipmitoolTo upgrade IPMItool on a Red Hat Enterprise Linux system, use IBM Linux on Power tools repository to download and install the latest version.5Step 5: Determine your level of IPMItoolIn order to connect to the Power server, you must be using IPMItool level 1.8.15 or greater on the PC or laptop thatyou are using to connect to the Power system.To determine your current level of IPMItool, run the following command: ipmitool -V. If this command returns a version earlier than 1.8.15, update your IPMItool version. Follow these steps:a.Download the IPMItool file:wget /projects/ipmitool/files/latest/download/ipmitool-1.8.15.tar.bz2 .b.Unzip it by running these commands:bzip2 -d ipmitool-1.8.15.tar.bz2tar xvf ipmitool-1.8.15.tarc.Configure it by running these commands:cd ipmitool-1.8.15./configured.Build it by running this command: makee.Install it by running this command: sudo make installf.Validate the installation by checking the version again: ipmitool -VMore informationFor more information, see the following resources:•IBM Knowledge center at https:///support/knowledgecenter/•The Linux on Power® developer portal at Linux on Power developer portal.© Copyright IBM® Corp. 2015, 2019. US Government Users Restricted Rights - Use, duplication or disclosure restricted by GSA ADP Schedule Contract with IBM Corp. IBM, the IBM logo, and ® are trademarks or registered trademarks of International Business Machines Corp., registered in many jurisdictions worldwide. Other product and service names might be trademarks of IBM or other companies. A current list of IBM trademarks is available on the web at "Copyright and trademark information" (/legal/copytrade.shtml).。
磁带机维护手册

IBM磁带机及磁带库日常工作手册第一章:日常基本问题的处理 (3)磁带卡在磁带机里不能够弹出: (3)磁带有关的故障: (4)磁带机读/写有关的故障: (5)磁带机和主机连接的问题: (5)第二章:磁带机(库)相关的信息: (8)LTO和3592磁带机最新的微码信息: (8)LTO磁带机的数字信息(SCD code) (8)3580磁带机(TS22x0、TS23x0) (9)3581磁带库(L13、H13、L17、H17、L23、L23) (9)3581 2U磁带库(L28、L38、L3H、F28、F38、F3H) (10)3583磁带库 (11)3584磁带库 (12)3573 LTO磁带库(TS3100、TS3200) (13)3576 LTO 磁带库(TS3310) (13)3590 磁带驱动器(Bxx、Exx、Hxx) (14)第三章:相关数据的收集 (17)附录A:LTO和3592磁带机微码详细信息。
(18)附录B:LTO的SCD code详细说明。
(45)第一章:日常基本问题的处理磁带卡在磁带机里不能够弹出:1.在磁带使用之前检查磁带引导针的位置:在新磁带使用之前,应该检查所有LTO或3592磁带的引导针。
确保它在正确的位置。
如果发现其位置不正确,应该将其调整倒正确的位置(如下图)。
可以使用人工卷带工具(P/N LTO=08L9129 3592=18P888)来调整。
具体操作步骤,可以参照《TS2340 3580 L43S43 Setup Operator Service Guide>> GC27-2103中的第4章的:Using Ultrium Media --Repositioning or Reattaching a Leader Pin.。
<=== 正确的位置2.检查是否主机曾经发过“PREVENT MEDIUM REMOV AL”的命令这个命令通常是由主机端的某些应用程序发出的。
IBM PowerLinux操作手册
5.安装telnet测试yum安装源安装成功5:配置网络服务tftp,telnet,nfs学习Linux网络服务的基本概念和配置方法,掌握服务进程的管理操作方法。
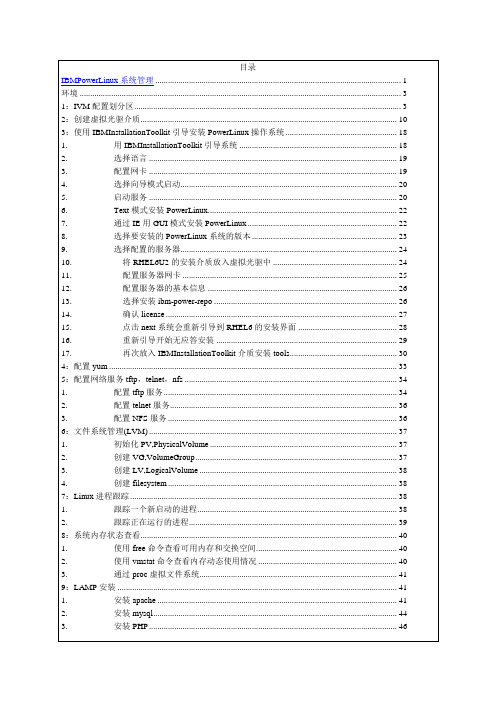
1.配置tftp服务1)安装tftp服务软件包首先用yum命令安装tftp-server。
运行#yuminstalltftp-server若软件包已经安装并且版本不需要更新,则会提示无需安装/更新,请转步骤2。
可以看到,tftp服务软件依赖于xinetd服务包,这是因为在linux系统里,xinetd是一种网络服务进程的“总控进程”,习惯上叫做“超级服务器”,意为其它网络服务进程是在xinetd的调度下运行的。
当然也有不受控于xinetd的独立网络服务程序,如nfs-server。
注意yum可以自动发现软件包之间的关联并自动安装依赖的软件包,这与其它软件安装程序如rpm相比具有很大的便利性。
输入”y”确认,完成安装过程:2)配置tftp服务系统默认状态下tftp服务是disable的。
打开tftp服务的配置文件,将disable=yes改为disable=no3)启动tftp服务前面提到,tftp服务是有xinetd超级服务程序管理的,上面修改的配置文件实际是供xinetd使用的。
因此,为了启动tftp服务,需要通知xinetd,使其重新load配置文件。
首先启动xinetd服务,如果还没启动的话:#servicexinetdstart然后,向xinetd进程发送SIGHUP通知其重新load所以配置文件:可以看到,tftp服务端口已经成功打开,表明tftp服务已经启动。
2.配置telnet服务Linux上的telnet服务与上述的tftp在配置管理上很相似,二者都是由xinetd管理的网络服务。
请参照tftp的配置步骤,完成telnet服务的配置。
3.配置NFS服务。
IBM PowerLinux操作手册

#yuminstalltftp-server
若软件包已经安装并且版本不需要更新,则会提示无需安装/更新,请转步骤2。
可以看到,tftp服务软件依赖于xinetd服务包,这是因为在linux系统里,xinetd是一种网络服务进程的“总控进程”,习惯上叫做“超级服务器”,意为其它网络服务进程是在xinetd的调度下运行的。
当然也有不受控于xinetd的独立网络服务程序,如nfs-server。
注意yum可以自动发现软件包之间的关联并自动安装依赖的软件包,这与其它软件安装程序如rpm相比具有很大的便利性。
输入”y”确认,完成安装过程:
2)配置tftp服务
系统默认状态下tftp服务是disable的。
打开tftp服务的配置文件,将disable=yes改为disable=no
3)启动tftp服务。
DB2V10.5PureScale安装指导书forLinuxandAIX(非infiniband)
DB2V10.5PureScale安装指导书forLinuxandAIX(⾮infiniband)IBM DB2 V10.5 PureScale forLinux and AIX安装指导书1⽬录1⽬录 (1)2⽂档说明 (3)2.1⽂档版本 (3)2.2⽂档类型 (3)2.3⽂档摘要 (3)3准备⼯作 (4)3.1缩写释义 (4)3.2实验安装环境 (4)3.3预安装检查 (4)3.3.1AIX安装要求 (4)3.3.2AIX集群环境配置 (10)3.3.3Linux安装要求 (14)3.3.4Linux集群环境配置 (19)3.4介质准备 (24)3.4.1AIX系统介质准备 (24)3.4.2Linux系统介质准备 (24)3.5核⼼⽂件安装 (26)3.5.1使⽤ db2_install安装 (26)3.5.2GPFS ⽂件系统配置与挂载 (30)3.5.3db2 许可证配置 (32)4DB2实例配置及验证 (34)4.1创建数据库组和⽤户标识 (34)4.1.1⽤户和组命名说明 (34)4.1.2创建组和⽤户 (36)4.2创建实例及版本验证 (37)4.2.1创建实例 (37)4.2.2db2 版本检查 (39)4.3查看实例的集群状态 (40)4.4启动实例 (40)4.5添加member (41)4.6添加CF (42)4.7为实例配置 TCP/IP 通信 (43)4.7.1更新 services ⽂件 (43)4.7.2更新数据库管理器配置 (44)4.8配置 DB2 服务器通信 (44)5数据库创建 (44)5.1实例注册变量设置 (44)5.1.1注册变量设置 (44)5.1.2注册变量检查 (45)5.2创建SAMPLE数据库 (45)2⽂档说明2.1⽂档版本⽂档历史2.2⽂档类型2.3⽂档摘要本⽂档描述数据库产品 DB2 V10.5.0.4 PureScale在Linux 和 Unix平台的安装、配置等内容。
linux下磁带机操作

Linux下磁带机操作一磁带机基本概念及安装基本概念? 磁带是线性存储设备,没有什么分区表的概念,磁头在哪里,就从哪里开始读。
? 磁带机好像只能用root用户操作。
? 磁带上可以划分存储空间,每个存储空间有一个file number,从0开始顺序排列。
? 磁头在存储空间中的位置用block number来表示,0代表开始,大于0的整数代表块,比如39代表磁头在本file number的第39块的位置,而-1则代表磁头位于本file number的结尾。
? 同样一部磁带机,用/dev/st0时是当自动回卷设备使用,每次操作完成之后,磁头都返回file number=0, block number=0, BOT的位置;而用/dev/nst0调用时,操作完成时磁头就停在那个位置,不会回到开头。
? 使用nst非回卷方式,用tar tvf列文件,只有当block number=0时才能出内容,并且列完之后block number为大于0的整数,注意这并不代表本段存储空间的结尾(-1)。
磁带机的安装,具体步骤:首先将磁带机连接在服务器上,IBM的服务器HBA卡的接入PCI插槽,.当磁带机连接之后加电并启动服务器,将HBA卡的驱动放入光驱,这时首先确认系统在RIAD检测时是否发现该HBA卡驱动,如果发现则证明驱动安装成功,如果没有发现则需要检查PCI插槽,HBA卡是否松动。
当进入系统后在命令行提示中输入以下命令:#dmesg | more ,找到是否出现/dev/st0。
如果出现则系统已经识别磁带机,这时可以使用tar 或者cpio进行备份。
Linux系统中磁带机的设备文件的/dev/st0,st1……或者 nst0,nst0…….。
二 Tar 磁带机命令介绍1.列目录操作tar tvf /dev/st0假如磁带上没有任何文件,则列目录会报错,这个错误没有关系,不影响磁带的使用。
[root@ root]# tar tvf /dev/st0tar: /dev/st0: Cannot read: Input/output errortar: At beginning of tape, quitting nowtar: Error isnot recoverable: exiting now[root@ root]#2. 写入数据操作tar cvf /dev/st0 <要写入的文件名>写入数据的方法有两种:不打包直接写入文件和打包压缩后写入文件。
IBM TS4300 磁带库说明说明书
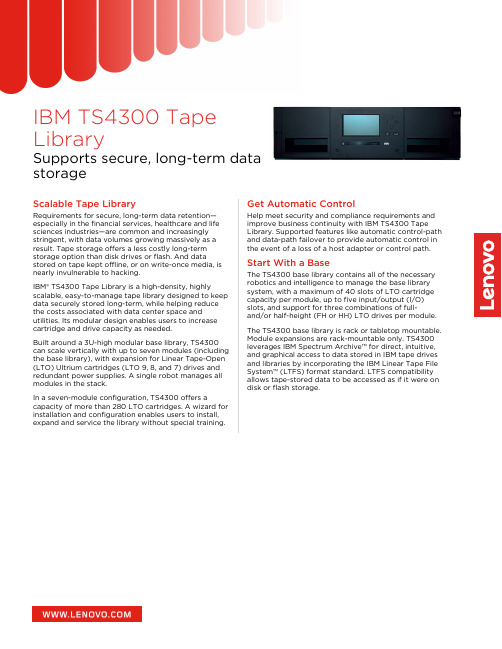
IBM TS4300 Tape LibrarySupports secure, long-term data storageScalable Tape LibraryRequirements for secure, long-term data retention—especially in the financial services, healthcare and life sciences industries—are common and increasingly stringent, with data volumes growing massively as a result. Tape storage offers a less costly long-term storage option than disk drives or flash. And datastored on tape kept offline, or on write-once media, is nearly invulnerable to hacking.IBM® TS4300 Tape Library is a high-density, highlyscalable, easy-to-manage tape library designed to keep data securely stored long-term, while helping reduce the costs associated with data center space andutilities. Its modular design enables users to increase cartridge and drive capacity as needed.Built around a 3U-high modular base library, TS4300can scale vertically with up to seven modules (including the base library), with expansion for Linear Tape-Open (LTO) Ultrium cartridges (LTO 9, 8, and 7) drives and redundant power supplies. A single robot manages all modules in the stack.In a seven-module configuration, TS4300 offers acapacity of more than 280 LTO cartridges. A wizard for installation and configuration enables users to install,expand and service the library without special training.Get Automatic ControlHelp meet security and compliance requirements and improve business continuity with IBM TS4300 Tape Library. Supported features like automatic control-path and data-path failover to provide automatic control in the event of a loss of a host adapter or control path.Start With a BaseThe TS4300 base library contains all of the necessary robotics and intelligence to manage the base library system, with a maximum of 40 slots of LTO cartridge capacity per module, up to five input/output (I/O)slots, and support for three combinations of full-and/or half-height (FH or HH) LTO drives per module.The TS4300 base library is rack or tabletop mountable.Module expansions are rack-mountable only. TS4300leverages IBM Spectrum Archive™ for direct, intuitive,and graphical access to data stored in IBM tape drives and libraries by incorporating the IBM Linear Tape File System™ (LTFS) format standard. LTFS compatibility allows tape-stored data to be accessed as if it were ondisk or flash storage.Simplify Tape StorageTS4300 is based on an embedded, open-source software architecture to help speed deployment and simplify management. Best-in-class error recovery and reporting, library health monitoring and alerting, and auto-recovery features help to speed diagnostics and resolution. An automation drive interface significantly increases drive communication speed for faster code updates and log downloads.IBM offers diverse management software solutions for TS4300 to enhance the use of multipath architecture, as well as the use of a single TS4300 library. The library software includes application programming interface (API) hooks that enable easy integration of IBM software.TS4300 Tape Library configurationsMinimum configuration - Base module Maximum configuration - TS4300 base modulewith 6 expansion modules40280LTO Ultrium cartridgecapacityCartridges for I/O slots535Tape drives 1 FH LTO, 3 HH LTO, or 1 FH and 1 HH LTO7 FH LTO or 21 HH LTOHH/FH drive mixture range 19/1 or 7/7Total physical capacity720TB 5.04PBLogical libraries17© 2023 Lenovo. All rights reserved.Availability : Offers, prices, specifications and availability may change without notice. Lenovo is not responsible for photographic or typographic errors. Warranty : For a copy of applicable warranties, write to: Lenovo Warranty Information, 1009 Think Place, Morrisville, NC, 27560. Lenovo makes no representation or warranty regarding third-party products or services. Trademarks: Lenovo and the Lenovo logo are trademarks or registered trademarks of Lenovo. Linux® is the trademark of Linus Torvalds in the U.S. and other countries. Microsoft® and Windows® aretrademarks of Microsoft Corporation in the United States, other countries, or both. Other company, product, or service names may be trademarks or service marks of others. Document number DS0021, published May 3, 2022. For the latest version, go to /ds0021.About LenovoLenovo (HKSE: 992) (ADR: LNVGY) is a US$62 billion revenue global technology powerhouse, ranked #171 in the Fortune Global 500, employing 77,000 people around the world, and serving millions of customers every day in 180 markets. Focused on a bold vision to deliver smarter technology for all, Lenovo is expanding into new growth areas of infrastructure, mobile, solutions and services. This transformation is building a more inclusive, trustworthy,and sustainable digital society for everyone, everywhere.For More InformationTo learn more about the IBM TS4300 Tape Library,contact your Lenovo representative or Business Partner,or visit: /storage.。
Linux下使用磁带机的常用命令tar
Linux下使⽤磁带机的常⽤命令tar磁带机操作命令:tar命令:使⽤tar命令复制⽂件或者⽬录树到单个磁带。
//注:不能复制空⽬录或者设备⽂件这样的特殊⽂件,不能⽤来创建多个磁带卷。
1.复制⽂件到磁带(1)切换到包含有需要复制⽂件的⽬录(2)在磁带驱动器中插⼊可以写⼊的磁带(3)输⼊ tar cvf /dev/rmt/0 filenme filename ...//注: c选项复制指定的⽂件,v选项显⽰复制⽂件的信息,f选项后⾯跟随的是tar⽂件写⼊的磁带设备名。
指定的⽂件名复制到磁带,覆盖磁带上任何已存在的⽂件。
特别注意:使⽤c选项复制⽂件到磁带将破坏磁带上已有的任何⽂件。
如果要保留这些⽂件,⽤r选项。
2.列出磁带上的⽂件(1)插⼊磁带到磁带驱动器。
(2)输⼊ tar tvf /dev/rmt/0//注: t选项列出指定的⽂件,v选项显⽰⽂件的全部信息,f选项后⾯跟随的是tar⽂件写⼊的磁带设备名。
3.添加⽂件到磁带(1)切换到包含有需要复制⽂件的⽬录。
(2)在磁带驱动器中插⼊可以写⼊的磁带(3)输⼊ tar rvf /dev/rmt/0 filename filename...指定的⽂件添加到磁带上已有⽂件的后⾯。
//注: 如果使⽤n选项做为磁带设备名的⼀部分,可以⾃制多个tar⽂件集到磁带。
输⼊ tar cvf /dev/rmt/0n filenae ,当该⽂件⾃制完毕时磁带不回绕,下⼀次使⽤磁带时,⽂件在当前⽂件集的结尾写⼊。
4.从磁带获取⽂件集的结尾写⼊1)切换到包含有需要复制⽂件的⽬录。
2)在磁带驱动器中插⼊磁带。
3)输⼊ tar xvf /dev/rmt/0指定驱动器中磁带上的所有⽂件复制到当前⽬录中。
从磁带中获取单个⽂件,输⼊ tar xvf /dev/rmt/n filename filename ...从磁带中展开指定的⽂件名,放⼊当前⼯作⽬录。
5.从磁带上递归读取⽬录和⼦⽬录1)更换⽬录到要⾃制⽂件的⽗⽬录tar xvf /dev/rmt/0 filename 将恢复filename到当前⽬录。
- 1、下载文档前请自行甄别文档内容的完整性,平台不提供额外的编辑、内容补充、找答案等附加服务。
- 2、"仅部分预览"的文档,不可在线预览部分如存在完整性等问题,可反馈申请退款(可完整预览的文档不适用该条件!)。
- 3、如文档侵犯您的权益,请联系客服反馈,我们会尽快为您处理(人工客服工作时间:9:00-18:30)。
磁带机操作手册 For Linux作 者: coldrain邮 箱: canly22@创建日期: 2011-2-24目录一 磁带机基本概念及安装 (1)二 Tar 磁带机命令介绍 (1)三 磁带机管理mt命令 (3)四 磁带机dev/st0 和/dev/nst0 的区别 (4)1. 回卷设备/dev/st0 (4)2. 非回卷设备/dev/nst0 (4)五 错误信息 (5)一 磁带机基本概念及安装基本概念∙磁带是线性存储设备,没有什么分区表的概念,磁头在哪里,就从哪里开始读。
∙磁带机好像只能用root用户操作。
∙磁带上可以划分存储空间,每个存储空间有一个file number,从0开始顺序排列。
∙磁头在存储空间中的位置用block number来表示,0代表开始,大于0的整数代表块,比如39代表磁头在本file number的第39块的位置,而-1则代表磁头位于本file number的结尾。
∙同样一部磁带机,用/dev/st0时是当自动回卷设备使用,每次操作完成之后,磁头都返回file number=0, block number=0, BOT的位置;而用/dev/nst0调用时,操作完成时磁头就停在那个位置,不会回到开头。
∙使用nst非回卷方式,用tar tvf列文件,只有当block number=0时才能出内容,并且列完之后block number为大于0的整数,注意这并不代表本段存储空间的结尾(-1)。
磁带机的安装,具体步骤:首先将磁带机连接在服务器上,IBM的服务器HBA卡的接入PCI插槽,.当磁带机连接之后加电并启动服务器,将HBA卡的驱动放入光驱,这时首先确认系统在RIAD检测时是否发现该HBA卡驱动,如果发现则证明驱动安装成功,如果没有发现则需要检查PCI插槽,HBA卡是否松动。
当进入系统后在命令行提示中输入以下命令:#dmesg | more ,找到是否出现/dev/st0。
如果出现则系统已经识别磁带机,这时可以使用tar 或者cpio进行备份。
Linux 系统中磁带机的设备文件的/dev/st0,st1…… 或者 nst0,nst0…….。
二 Tar 磁带机命令介绍1.列目录操作tar tvf /dev/st0假如磁带上没有任何文件,则列目录会报错,这个错误没有关系,不影响磁带的使用。
[root@ root]# tar tvf /dev/st0tar: /dev/st0: Cannot read: Input/output errortar: At beginning of tape, quitting nowtar: Error is not recoverable: exiting now[root@ root]#2. 写入数据操作tar cvf /dev/st0 <要写入的文件名>写入数据的方法有两种:不打包直接写入文件和打包压缩后写入文件。
二者各有优缺点。
不打包直接写入文件的方法,看起来效率低,操作复杂,但是可以提高数据的生存率。
磁带是一种线性存储的设备,所有数据紧挨着顺序写入。
当磁带的某一点损坏的时候,其余位置的磁带还可以继续读取,其中的文件也都能读出。
如果采用了打包压缩后写入的方法,则磁带上存储的只有一个文件。
当磁带有任何一个地方发生了故障无法读取,则这个压缩文件将缺少一些细节,即使是一个bit的错误,也将导致压缩文件报告CRC错误无法解压。
所以,如果是存储大量的数据,建议直接写入。
如果是存取小文件,则最好打包并给文件名加时间标记写入。
例如要将/root/test1.tar.gz写入到磁带并覆盖磁带的内容:tar cvf /dev/st0 test1.tar.gz磁带机的传输速度比较慢,对于不是很大的文件备份,稍等几秒,写入即可完成。
使用参数cvf将覆盖此带上的已有文件。
随后列出磁带上的文件:[root@ root]# tar tvf /dev/st0-rw-r--r-- root/root 320 2011-02-24 09:29:02 test1.tar.gz[root@d root]#可看到数据写入成功。
注意:这个命令只能在磁带是全新的时候写入,在第二次执行的时候,就会覆盖掉磁带上原来的数据。
另外,使用tar命令备份,要求备份文件体积必须小于单盘磁带的容量,即一个文件不能跨越两盘磁带。
如果遇到这种情况,则不能使用tar命令备份,需要换其他备份程序进行操作。
3. 继续写入数据tar rvf /dev/st0 <要写入的文件名>磁带存储是线性存储,所有数据是依次写入的。
为了不覆盖前边的内容,在写入时候,要使用rvf参数写入内容。
tar rvf /dev/st0 test2.tar.gz再执行一次rvf继续写入其他的文件:tar rvf /dev/st0 test3.tar.gz写入完成后,查看磁带上有哪些文件:[root@ root]# tar tvf /dev/st0-rw-r--r-- root/root 320 2011-02-24 09:29:02 test1.tar.gz-rw-r--r-- root/root 320 2011-02-24 09:44:19 test2.tar.gz-rw-r--r-- root/root 320 2011-02-24 09:30:14 test3.tar.gz[root@ root]#可以看到,新写入的文件和原文件都存储在了磁带上。
磁带的线性存储特性,使得磁带上可以写入两次相同的文件。
例如现在test3文件发生了文件大小的变化,再次写入到磁带:tar rvf /dev/st0 test3.tar.gz查看文件列表,可以看到磁带上有如下文件:[root@ root]# tar tvf /dev/st0-rw-r--r-- root/root 320 2011-02-24 09:29:02 test1.tar.gz-rw-r--r-- root/root 320 2011-02-24 09:30:14 test2.tar.gz-rw-r--r-- root/root 320 2011-02-24 09:44:19 test3.tar.gz-rw-r--r-- root/root 67085 2011-02-24 09:44:19 test3.tar.gz[root@ root]#这里可看到,磁带上有两个文件同名的文件写入。
这个文件的两次备份大小和时间可以相同,也可以不相同。
注意:在磁带上如果相同文件写入了多次,在恢复时候会比较麻烦,需要先将磁带卷至文件所存储的地方,而后读取磁带当前位置所存储的文件,操作较为复杂,速度也比较慢。
所以不建议在一盘磁带上写入相同文件名的文件。
备份前,最好将备份文件的文件名上加上时间标记,便于查找备份。
例如要备份的文件名是test-20110224-0930.tar.gz和test-20110224-0945.tar.gz,则写入到一盘磁带上。
如此在执行备份和恢复操作时候,能够更加便利快捷的进行存取操作。
4. 读取数据tar xvf /dev/st0 <要读取的文件名>读取数据前,首先查看磁带上的内容,获取要恢复的文件名。
例如查看后得到如下结果: [root@ root]# tar tvf /dev/st0-rw-r--r-- root/root 320 2011-02-24 09:29:02 test1.tar.gz-rw-r--r-- root/root 320 2011-02-24 09:30:14 test2.tar.gz-rw-r--r-- root/root 320 2011-02-24 09:44:19 test3.tar.gz[root@ root]#现在恢复其中的test3.tar.gz文件,执行如下命令:tar xvf /dev/st0 test3.tar.gz读取数据后。
[root@ ~]# tar xvf /dev/st0 test3.tar.gz test3.tar.gz[root@ ~]#随后可以在当前的路径下找到从磁带中读取出来的文件:[root@ ~]# ls -l test3.tar.gz-rw-r--r-- 1 root root 320 Feb 24 11:12 test3.tar.gz[root@~]#至此恢复操作完成。
通过上文所介绍的tar命令,使用tvf/cvf/rvf/xvf参数,即可实现对磁带的读取、写入操作。
使用预先写好的复制数据脚本,配合上磁带机操作命令,并且放置到/etc/crontab中,即可实现自动备份。
三 磁带机管理mt命令mt的命令格式:mt -f 设备名 操作-f 参数后面跟着一个设备名,就是磁带设备的名字,例如/dev/nst0。
除了设备名这个参数外,mt有一个必须有的参数,就是操作,最常用的操作有: #mt -f /dev/nst0 status 检查磁带机状态#mt -f /dev/nst0 fsf n 前进n个文件#mt -f /dev/nst0 bsf n 后退n个文件#mt -f /dev/nst0 rewind 回卷到磁带开头#mt -f /dev/nst0 eod 定位到磁带中数据文件的结尾下面是几个例子:#mt -f /dev/nst0 rewind(将/dev/nst0回卷到开头)#mt -f /dev/nst0 fsf 1(在/dev/nst0上前进1个归档文件)#mt -f /dev/nst0 bsf 1(在/dev/nst0上后退1个归档文件)#mt -f /dev/nst0 eod (定位到/dev/nst0的数据文件的结尾)四 磁带机dev/st0 和/dev/nst0 的区别在sles(SUSE Linux Enterprise Server)9里,常用磁带机设备有两组/dev/st[0-9]和/dev/nst[0-9],数字表示磁带机的数目,如果只有一个磁带机,那就是 /dev/st0和/dev/nst0。
这个是一个非常重要的概念,只有清晰理解了这些不同名字的设备的区别,才能正确使用相关的命令。
假设我们的系统里面只有一个磁带机设备,那么就有两个设备文件:/dev/st0和/dev/nst0。
这两个设备都是这台磁带机的设备名,/dev /st0是回卷设备,每次操作完成之后,磁带机都会自动回卷到磁带的开头。
这时候如果进行备份操作则会覆盖磁带中的数据信息,而不是将新数据附在磁带数据结束处。
/dev/nst0是非回卷设备,每次操作完成之后,磁带机的磁头都会停留在当前位置,随后的备份操作将被添加到上次备份结束以后的地方。
