企业服务总线Oracle Service Bus的安装和配置过程详解
Oracle公云服务在数据中心的安装与配置指南说明书
Oracle Public Cloud MachineOracle Public Cloud ServicesDelivered in Your Data CenterTushar PanditSenior Director, Product ManagementFebruary 17, 2016A New Era in CloudSafe Harbor StatementThe following is intended to outline our general product direction. It is intended for information purposes only, and may not be incorporated into any contract. It is not a commitment to deliver any material, code, or functionality, and should not be relied upon in making purchasing decisions. The development, release, and timing of any features or functionality described for Oracle’s products remains at the sole discretion of Oracle.Goals For This PresentationEnabling our partners is an important go-to-market channel for Oracle Public Cloud Machine•Goal for today’s presentation is:•Give early overview of Oracle Public Cloud Machine and itscapabilities to our partners•Details on partner engagement model as well as thecommercial model will be shared in a follow-on updatesoon after GA.Agenda1.On premises Cloud2.Oracle On-premises Cloud Strategy3.Oracle Public Cloud Machine Overview4.Oracle Cloud Machine Operations5.Customer References6.Cloud Services Roadmap7.SummarySpeed is the New Competitive Differentiator Existing technology and practices are not keeping upInfrastructure Compute, Networking, StorageCloud (*-as-a-Service) is Key to InnovationCloud changes everything – business/technology/finance/operations Start consuming resources as a servicePlatforms Java EE, Java SE, Node, etc.Building BlocksDatabase, NoSQL, Messaging, etcPublic CloudOn Premises75% of enterpriseworkloads are stillon premisesBut What if I Can’t Consume Public Cloud Services? Genuine constraints prevent the consumption of public cloudIntegrated Infrastructure Virtualization on top of pre-assembled hardware; no vertical integration Commodity Hardware + Hypervisor Virtualization software with somemanagement capabilitiesIntegrated Platforms Hardware + software, with limited vertical integration between hardware and software Current On-Premises Cloud Offerings Doesn’t solve all today’s challenges of speed and automation Y o u B u i l d , M a n a g e , O p e r a t eWhat is an ideal On-Premises Cloud Strategy?•Portability of workload across on-premises and public •Some software across on-premises and public cloud • Same behavior of application on-premises or public •What you test on public, is the same on-premises•Guaranteed behavior•Single point of accountability•Faster SLAs, deep and optimized integration, lower risk •Delivered and consumed as a service even on-premises •Service Operated by experts•Subscription based pricing•Portability of spend across on-premises and cloudOracle Cloud On-Premises StrategyOn-premises Oracle Cloud PlatformSame Software, Compatible APIs, Seamless Workload PortabilitySame operational modelAddresses Business or Regulatory RequirementsCompute •Storage•Integration•MobileDeveloper •MessagingIaaS IaaSOracle Public Cloud Machine A fundamentally new way of consuming cloud on premisesCaching Database Integration Java EE Java SE NodeMessaging NetworkStorageComputeOn Premises(Oracle Cloud Machine)Off Premises(Oracle Cloud)Same Cloud, On/Off PremisesEnables application development on PaaS and IaaS, with fully API-driven operations and DevOps integration Identical PaaS and IaaS software between Oracle Cloud and Oracle Cloud Machine enables plug-and-play workload portabilitySame cost-effective subscription-based pricing as Oracle Cloud, operated automatically for you by OracleBenefit #2: Drive innovation by building cloud-native applications D evelop, deploy, and manage all of your existing Oracle and non-Oracle workloadsFocus on your core application. We’ll take care ofthe rest. •Feature innovation at cloud speed: Consume the latest innovations of the public cloud delivered rapidly to the Oracle Cloud Machine•Run cloud-native and any existing Oracle and non-Oracle workloads in your data center•Modernize and extend your business-critical applications with Oracle Cloud-only innovations and advanced PaaS and IaaS capabilitiesPut it behind your firewall, in the facility of your choiceUse our best-in-the-industry security practices and technologyControl over where your data and systems physically reside and who gets accessBenefit #3: Retain full control over your data and softwareConform to all regulatory, privacy and legal frameworks by running cloud on your premisesIt’s your data – you choose where it livesWhat Does Oracle Cloud Machine Enable? InnovationStorage JAVA CLOUD SERVICEComputeIntegration Cloud ServiceAutomated Backup/Recovery Simple ProvisioningAny Language Advanced Security Local and RemoteConsume Services as Building Blocks for Your Application Unless you’re building a messaging app, you’re not going to differentiate on messagingCachingDatabase Integration Messaging coming soon....Consume the building blocks of your application as a serviceOracle Cloud Machine OperationsOracle Cloud OperationsInstallationInstall & ConfigINSTALLATION & CONFIGURATIONIncident ManagementTechnical Account ManagementUpgrade & PatchingChange Management Lifecycle Management CLOUD OPERATIONS & SUPPORTSecurity HardeningBackup & RestoreTemplate ManagementEMCCCLOUDADMINISTRATIONMonitor Create & Manage IaaS Guest VMsSELF SERVICE TENANTCase Studies–CTO, Mid-sized European Bank“For us the biggest advantage of this newproduct from Oracle is full flexibility of a public Cloud, on premise, under our control. That's everything we can dream of – combining flexibility, availability and scalability of public Cloud, with security we can provide on premise.”“The Java Cloud Service user interface is very easy to use to deploy, backup and patch WebLogic applications. It is a one stop shop that simplifies the Java development lifecycle. I am impressed with this new feature.”–Technical Manager, Large US City Public Sector ITDepartment–Head of IT, Large Chinese Education Bureau“The new release allows the co-existence of private cloud and public cloud so that 100% of resources can be utilized for applications as well as for testing. With using Oracle Enterprise Manager 13c, we can easily move our applications and workload across privatecloud and public cloud.“Oracle Cloud Machine OperationsFeb-Mar 2016•Java Cloud •Integration Cloud Service •Oracle Compute IaaS•Application Container Cloud•Messaging Cloud•Developer Cloud•Mobile Cloud•Process Cloud•Sites Cloud•Identity Cloud•No SQL Cloud•BI Cloud •Database Cloud ServiceCY16+Mar-Apr 2016SummaryWhat to expect next?•We will be launching this service offering in the next few weeks.•Details on the partner engagement model as well as commercials will be shared around GA timeframe.•Collateral will be available at GA.。
Oracle Service Bus SB Transport用户指南10g Release 3 (

Oracle® Service Bus SB Transport User Guide 10g Release 3 (10.3)October 2008Oracle Service Bus SB Transport User Guide, 10g Release 3 (10.3)Copyright © 2007, 2008, Oracle and/or its affiliates. All rights reserved.This software and related documentation are provided under a license agreement containing restrictions on use and disclosure and are protected by intellectual property laws. Except as expressly permitted in your license agreement or allowed by law, you may not use, copy, reproduce, translate, broadcast, modify, license, transmit, distribute, exhibit, perform, publish, or display any part, in any form, or by any means. Reverse engineering, disassembly, or decompilation of this software, unless required by law for interoperability, is prohibited.The information contained herein is subject to change without notice and is not warranted to be error-free. If you find any errors, please report them to us in writing.If this software or related documentation is delivered to the U.S. Government or anyone licensing it on behalf of the U.S. Government, the following notice is applicable:U.S. GOVERNMENT RIGHTS Programs, software, databases, and related documentation and technical data delivered to U.S. Government customers are "commercial computer software" or "commercial technical data" pursuant to the applicable Federal Acquisition Regulation and agency-specific supplemental regulations. As such, the use, duplication, disclosure, modification, and adaptation shall be subject to the restrictions and license terms set forth in the applicable Government contract, and, to the extent applicable by the terms of the Government contract, the additional rights set forth in FAR 52.227-19, Commercial Computer Software License (December 2007). Oracle USA, Inc., 500 Oracle Parkway, Redwood City, CA 94065.This software is developed for general use in a variety of information management applications. It is not developed or intended for use in any inherently dangerous applications, including applications which may create a risk of personal injury. If you use this software in dangerous applications, then you shall be responsible to take all appropriate fail-safe, backup, redundancy, and other measures to ensure the safe use of this software. Oracle Corporation and its affiliates disclaim any liability for any damages caused by use of this software in dangerous applications.Oracle is a registered trademark of Oracle Corporation and/or its affiliates. Other names may be trademarks of their respective owners.This software and documentation may provide access to or information on content, products and services from third parties. Oracle Corporation and its affiliates are not responsible for and expressly disclaim all warranties of any kind with respect to third-party content, products, and services. Oracle Corporation and its affiliates will not be responsible for any loss, costs, or damages incurred due to your access to or use of third-party content, products, or services.ContentsSB TransportEnvironmental Values . . . . . . . . . . . . . . . . . . . . . . . . . . . . . . . . . . . . . . . . . . . . . . . . . . . . . .3Configuring Proxy Services to Use the SB Transport. . . . . . . . . . . . . . . . . . . . . . . . . . . . . .3Configuring Business Services to Use the SB Transport. . . . . . . . . . . . . . . . . . . . . . . . . . . .5 JNDI Provider. . . . . . . . . . . . . . . . . . . . . . . . . . . . . . . . . . . . . . . . . . . . . . . . . . . . . . . . .6 Handling Errors . . . . . . . . . . . . . . . . . . . . . . . . . . . . . . . . . . . . . . . . . . . . . . . . . . . . . . . . . . .7UDDI . . . . . . . . . . . . . . . . . . . . . . . . . . . . . . . . . . . . . . . . . . . . . . . . . . . . . . . . . . . . . . . . . . .8 Publishing a Service . . . . . . . . . . . . . . . . . . . . . . . . . . . . . . . . . . . . . . . . . . . . . . . . . . . .8Importing a Service. . . . . . . . . . . . . . . . . . . . . . . . . . . . . . . . . . . . . . . . . . . . . . . . . . . . .8Oracle Service Bus SB Transport User Guide iiiiv Oracle Service Bus SB Transport User GuideSB TransportThe SB transport allows Oracle products to synchronously invoke an Oracle Service Bus proxy service using RMI. The inbound transport allows clients to access SB proxy services using RMI.The outbound transport allows the invocation of SB proxy services using RMI. By default,accessing all services using T3 protocol, IIOP, HTTP, T3s, IIOPS, or HTTPS depends on the configuration of the target server. For more information, see Configure Default NetworkConnections.The SB transport supports:z Propagation of the transaction context. The transaction originated in the client OracleService Bus servers can optionally be propagated to the SB proxy service.Propagation of the security context. By default, the security context associated with the SBclient thread is used to invoke the SB proxy services. This may require enabling domaintrust between domains. See Important Information Regarding Cross-Domain SecuritySupport in Securing WebLogic Server.z Invocation of SB proxy services, with custom identities, by the outbound endpoint using aservice account.z Specification of time out value for non-transactional invocations. The client request returns when Oracle Service Bus does not respond to the request within the specified interval.z Association of a dispatch-policy for both request and response connections. For moreinformation, see Using Work Managers to Optimize Scheduled Work and Create WorkManager in WebLogic Server Administration Console Online Help.Oracle Service Bus SB Transport User Guide1SB Transport2Oracle Service Bus SB Transport User Guidez Optimization of RMI call and call-by-reference when routing to a SB business servicewithout a JNDI provider.zThe following service types:–WSDL service–Any SOAP service–Any XML service z The following messaging patterns:–Request (one-way) and request-response for the inbound transport.For an Oracle Service Bus client the by default the messaging pattern is inherited fromthe pipeline of the SB outbound transport.For a non-Oracle Service Bus client by default messaging pattern is request-response.–Request and request-response for the outbound transport Environment Values. For moreinformation on the environment values the SB supports, see Environmental Values .z The following default values for the Quality of Service (QoS):–Exactly-Once for non-Oracle Service Bus clients–Best-Effort for Oracle Service Bus clientsYou can also set the QoS of a service using routing options in the message flow. For moreinformation, see “Quality of Service” in Modeling Message Flow in Oracle Service Bus inOracle Service Bus User Guide.This document provides information about:zEnvironmental Values zConfiguring Proxy Services to Use the SB Transport zConfiguring Business Services to Use the SB Transport zHandling Errors z UDDIEnvironmental ValuesEnvironmental ValuesTable 1-1 describes the environment values the SB Transport supports.Table 1-1 Environment ValuesEnvironment Value Use this value to …Timeout (category: operational)Override the time out value set for the business service.Service account (category: security)Update the user credentials associated with the businessservice.Use SSL (category: security)Enable or disable the option of exposing a service using asecure protocol for a proxy service.Configuring Proxy Services to Use the SB TransportA client Oracle Service Bus server connects with the Oracle Service Bus server using the JNDIcontext and the proxy service URI. The security context of the client is used to invoke the proxy service. The default QoS is Exactly-once. Optionally, the client can change the QoS, set a request time out value and specify a desired messaging pattern. The message is received by the inbound SB transport and processed through the message flow.To create a proxy service from the Oracle Service Bus Console:1.Enter the general configuration details for the service in the General Configuration page. Formore information, see General Configuration page in Using the Oracle Service Bus Console.2.In the Transport Configuration page, select the transport protocol as sb. Specify the endpointURI as <proxy service name>. This proxy service name is the unique identifier associated with the proxy service that is to be invoked by the client. For more information, see Transport Configuration page in Using the Oracle Service Bus Console.3.In the SB Transport Configuration page, specify the values as described in Table 1-2.Oracle Service Bus SB Transport User Guide3SB TransportTable 1-2 Fields for Configuring SB Transport for Proxy ServicesField DescriptionDispatch Policy You can use the default dispatch policy or configure a work manager for theinbound request. Dispatch policy refers to the instance of WLS Work Manager thatyou want to use for the service endpoint. For more information, see Using WorkManagers to Optimize Scheduled Work and Create Work Manager in WebLogicServer Administration Console Online Help.Use SSL To expose the service through a secure protocol, choose the Use SSL option.Although this implies that the client should use the SSL protocol to access the SBproxy service, this does not prevent the client from accessing the service throughunsecure protocols. In addition, the endpoint URI associated with the servicewould be sbs instead of sb:•When you export a secure service through UDDI and preserve security andpolicy configuration details during import.•In the effective WSDL.Note: A proxy service is not bound to any particular protocol. It is theresponsibility of the WLS administrator to enable SSL, IIOP, or HTTPtunneling whenever it is necessary.This flag only affects the URI scheme of the service when it is exported or theJNDI provider selection for the business service URI when it is imported fromUDDI. It does not prevent a client from accessing the service using a non-securedprotocol.For more information, see SB Transport Configuring page and Proxy Services: Creating and Managing in Using the Oracle Service Bus Console.4Oracle Service Bus SB Transport User GuideConfiguring Business Services to Use the SB TransportConfiguring Business Services to Use the SB Transport The SB business service can send messages only to other SB proxy services. A JNDI provider, which is specified in the endpoint URI of the business service, performs a JNDI lookup on the remote Oracle Service Bus server. The client user credentials or the user credentials defined in the service account associated with the business service are used to invoke the proxy service.Optionally, a time out value and a custom dispatch policy can be associated with the business service. The QoS of the service can also be set by using the routing options.To create a business service from Oracle Service Bus Console:1.Enter the general configuration details for the service in the General Configuration page. Formore information, see General Configuration page in Using the Oracle Service Bus Console.2.In the Transport Configuration page, select the transport protocol as sb and specify theendpoint URI in the following format:sb://<jndi_provider_name>/<service_name>where,–<jndi_provider_name> is the name of the JNDI provider, which points to thecorresponding Oracle Service Bus JNDI provider. Optional. When omitted, the defaultcontext is used. This implies that the service and the Oracle Service Bus server arelocated on the same machine. When the call is co-located, serialization is skippedduring service invokation. For more information, see JNDI Provider.–<service name> is a target service and corresponds to the remote proxy service URI.For more information see, Transport Configuration page in Using the Oracle Service BusConsole.3.In the SB transport configuration page, specify the values as described in Table 1-3.Oracle Service Bus SB Transport User Guide5SB TransportTable 1-3 Fields for Configuring SB Transport for Business ServicesField DescriptionDispatch Policy Select the instance of WebLogic Server Work Manager that you want to use as the dispatch policy for this service endpoint. The default Work Manager is used if no other WorkManager exists. For more information, see Using Work Managers to Optimize ScheduledWork and Create Work Manager in WebLogic Server Administration Console Online Help. Time out The duration, in seconds, after which the business service times out and business service returns a run time error when a timeout occurs.The specified time out value is not applied when:•QoS of the service endpoint is Exactly-Once.•The specified value is a negative value.•The time out value is overridden in the optional Timeout custom header of the outboundrequest in the message flow. For information about Adding Transport Header Actions inUsing the Oracle Service Bus Console.Service Account Specify the user credentials that should be used for invoking the remote proxy service. If no service account is specified, the user credentials of the inbound proxy service (the inboundclient) of this business service are used for security context propagation. For moreinformation, see Service Accounts in Using the Oracle Service Bus Console.For more information, see SB Transport Configuration Page and Business Services: Creating and Managing in Using the Oracle Service Bus Console.JNDI ProviderA JNDI provider points to the Oracle Service Bus server where the service is deployed to retrievethe RMI stubs corresponding to the SB proxy service. The JNDI provider has a high performance caching mechanism for remote connections and EJB stubs. T3, IIOP, HTTP, T3s, IIOPS, orHTTPS transport protocols can be used by JNDI provider. The preferred communication protocol from Oracle Service Bus to a WLS domain is T3 or T3S. If messages need to go through a fire wall, you can use HTTP tunneling by using an HTTP provider url in the context and by enabling HTTP tunneling on the WLS server.Note:It is the responsibility of the administrator to ensure that the protocol supported by the JNDI provider is on the remote Oracle Service Bus server.6Oracle Service Bus SB Transport User GuideHandling Errors When you create a business service, you can associate it with a JNDI provider. For moreinformation, see Configuring Business Services to Use the SB Transport and Adding JNDIProviders in Using the Oracle Service Bus Console.Handling ErrorsYou can configure the SB transport business services to handle communications errors. You can configure business service URIs to be taken offline when communication errors occur. When you configure the operational settings for the business service, you can enable the business service endpoint URIs to be taken offline after the specified retry interval.For more information, see Configuring Operational Settings for Business Services and Viewing Business Services Endpoint URIs Metrics in Monitoring in Using the Oracle Service BusConsole.When a connection error occurs while invoking a SB proxy service, the SB transport provider generates the BEA-380002 error code.A connection error can occur due to any of the following reasons:z The target proxy service does not existz The JNDI provider settings are incorrectz Any remote or naming exception occurs during RMI invocationNote:Naming Exception of type javax.naming.NamingSecurityException typically occurs when the identity used during the invocation is not recognized by the target server.When this occurs, the request returns a generic runtime error, which is not treated as aconnection error.SOAP faults returned by SB Proxies are treated as application errors.SB TransportUDDIYou can import and publish services to the UDDI registry. For more information, see UDDI in Using the Oracle Service Bus Console and UDDI in Oracle Service Bus User Guide.Publishing a ServiceWhen you publish a proxy service to a UDDI register, the URI associated with the published service has the following format:sb://host:port/service_namewhere, host:port refers to the host name and listening port of the Oracle Service Bus serverhosting the proxy service that is being published.If the Use SSL option is enabled for the proxy service that is being published, the URI associated with the published service has the following format:sbs://host:port/service_namewhere, host:port refers to the host name and the SSL listening port of the Oracle Service Bus server hosting the proxy service.If the proxy service that is being published is running on a cluster, host:port is the Cluster Address setting in the Cluster section of the config.xml file. This value can either be a single host name and port number that is used to connect to any WLS in the cluster or it can be acomma-separated list of the host name and listener ports of the managed servers in the Oracle Service Bus cluster. For more information, see WebLogic JNDI.For more information, see Publishing Proxy Services to a UDDI Registry in Using the Oracle Service Bus Console.Importing a ServiceWhen you import a service from the UDDI registry, the SB transport provider matches thesbscheme and host:port information from the service URI property with a JNDI providerregistered on the Oracle Service Bus server using the appropriate protocol based on sbscheme.Sbscheme is the URI scheme of the SB transport-based service and can be either sb or sbs.If sbscheme is sb, the transport provider looks for the JNDI provider using T3, T3S, IIOP, IIOPS, HTTP, or HTTPS protocol (in this order). If sbscheme is sbs, the transport provider looks for the JNDI provider using T3S protocol, IIOPS, then HTTPS (in this order). The JNDI provider that matches the service URI property is used to generate the endpoint URI of the business serviceUDDIthat is imported to Oracle Service Bus.If there is no matching JNDI provider, the import fails unless the imported URI is a local URI and the scheme is not sb, the default context is used. This implies that there is no JNDI provider specified for the service and it is considered co-located with the server.For example, if the service URI property value is:sbs://remote_oracle_service_bus_host:7002/myservicethe generated URI of the business service imported to Oracle Service Bus would be:sb://my_jndi_provider/myservicewhere, my_jndi_provider is a JNDI provider resource registered on the Oracle Service Bus server with a t3s:// remote_oracle_service_bus_host:7002 URL.For more information, see Importing Business Services From a UDDI Registry in Using the Oracle Service Bus Console.SB Transport。
企业服务总线Oracle_Service_Bus白皮书

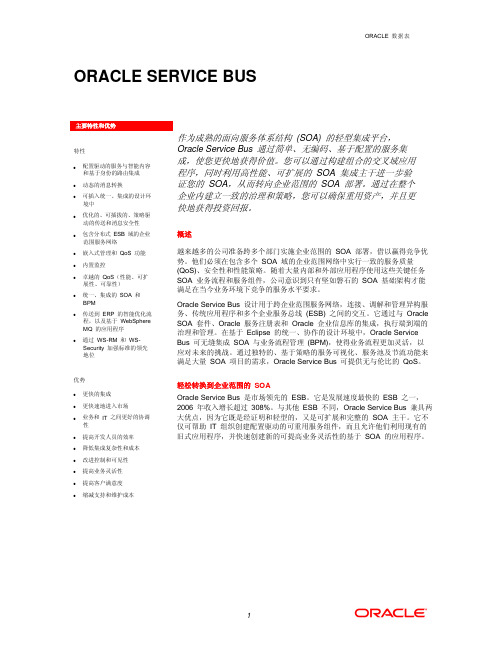
Oracle Service Bus™构建SOA的IT捷径目录IT必须通过实施SOA来提高敏捷性 (4)SOA的含义 (4)Oracle Service Bus:敏捷的 SOA基础架构 (6)不可或缺的易管理性 (6)服务总线:SOA服务生命期的关键元素 (6)保护投资:Oracle Service Bus将传统的消息传递与SOA融为一体 (8)实例:一家金融服务公司增加了收益机会 (9)IT必须通过实施SOA来提高敏捷性今天,很多公司都试图采用“服务驱动”的方式来提高敏捷性和响应能力,这不仅表现在与客户和合作伙伴的交互上,也表现在IT基础架构的设计和创建上。
“服务驱动”要求IT实施面向服务的架构(SOA),将企业应用中的分散功能组合成基于标准、可互操作的“服务”,并快速组合和重用这些服务来满足业务需求。
SOA的中心是服务,而不是应用。
通过实施SOA,公司能提高效率,更快地推出服务,并提高敏捷性,以响应不断变化的业务需求。
为了优化IT基础架构以交付服务,并将SOA从理想转化为现实,IT需要一个“智能化”的基础架构,以促进和简化服务的重用,并在当今典型的IT环境(各种技术、协议和应用并存)中可靠地集成服务。
IT正在实施一个抽象层,以简化基础架构,隐藏底层多种不同应用和技术造成的复杂性。
在几年前,这意味着提供一个用于定制企业应用的平台。
而到了今天,抽象层则基于服务,将企业流程表示为服务(由松耦合的业务逻辑片断组装而成),供其他服务和最终用户使用。
在简单高效的SOA基础架构的支持下,IT将可以实现“服务驱动”的愿景,快速推出新服务,在几乎不中断IT基础架构的情况下重用有价值的业务功能;使IT与业务需求保持一致,响应业务流程的更改,并为用户提供更卓越的服务。
SOA的含义SOA并不是一个新名词,较早的中间件方案也出现了组件重用和分布式计算,提出将客户端和服务器服务分开,进行松耦合交互的原理。
20世纪90年代初期的技术方案(如分布式计算环境)曾试图在分布式基础架构中重用IT组件或“服务”。
Oracle Service Bus服务总线
轻松转换到企业 SOA Oracle Service Bus 特性和优势
z 采用无代码服务集成,可更快集成、快速推向市场,并提高开
配置驱动的服务与智能内容和 发人员的效率
基于身份的路由集成
z 根据市场规则的变化,通过快速配置路由规则来迅速响应市场需求
基于 XQuery 或 XSLT 的动态 消 息 转 换 ( 支 持 XML 和 非 z
Oracle Service Bus 整体构建为支持 SOA 的基础架构,加强了易用性和互 操作性。它仍然全面支持 SOA、Java 2 平台企业版 (J2EE) 和 J2EE 连 接器体系结构标准。通过 WS-Reliable 消息传递 (WS-RM) 以及最新的 WS-Security 更新,Oracle Service Bus 增强了此类行业标准支持。
相关产品 z Oracle SOA 套件 z Oracle 事件驱动的体系结构套件 z Oracle 数据集成套件 z Oracle 的 SOA 治理解决方案
平台和要求 Oracle Service Bus 可在以下平台上运行:
平台和要求 支持的标准 协议和连接 平台(OS 版) 数据库 浏览器
z SOAP 1.1、SOAP 1.2、WSDL 1.1 和针对 SOAP 1.2 的 WSDL 1.1 绑定扩展
主要优势
Oracle SOA 套件实现了 SOA 所承诺的可见性、灵活性和速 度。每一个组件都使用了同类最 佳的工具,提供了行业领先的功 能。紧密集成的综合套件降低了 总拥有成本。 Oracle SOA 套件的“热插拔” 体系结构支持将其无缝集成到现 有的 IT 环境中。因为可逐步采 用 Oracle SOA 套件中同类最 佳的组件,所以它们可用于解决 已发现的业务问题,并扩展到企 业部署。
Oracle+Service+Bus安装、配置、操作详解
Oracle Service Bus安装、配置、操作详解安装Oracle Service Bus1:下载Oracle Service Bus你可以在/alservicebus/上下载,或者直接访问。
建议尽量下载最新版本的。
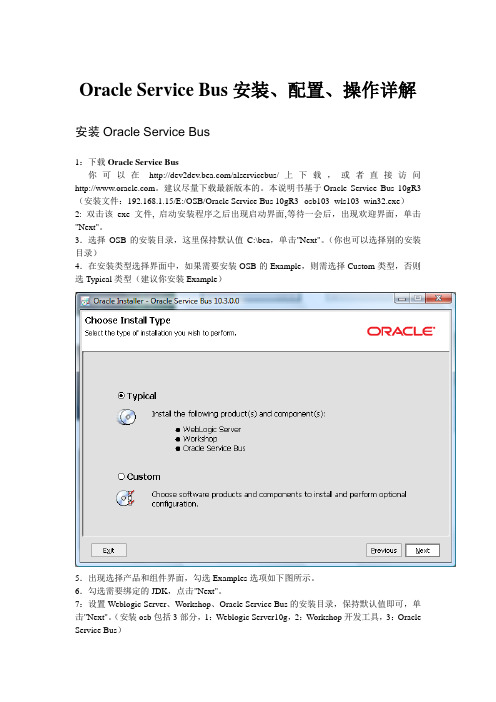
本说明书基于Oracle Service Bus 10gR3(安装文件:192.168.1.15/E:/OSB/Oracle Service Bus 10gR3--osb103_wls103_win32.exe)2: 双击该exe文件, 启动安装程序之后出现启动界面,等待一会后,出现欢迎界面,单击"Next"。
3.选择OSB的安装目录,这里保持默认值C:\bea,单击"Next"。
(你也可以选择别的安装目录)4.在安装类型选择界面中,如果需要安装OSB的Example,则需选择Custom类型,否则选Typical类型(建议你安装Example)5.出现选择产品和组件界面,勾选Examples选项如下图所示。
6.勾选需要绑定的JDK,点击"Next"。
7:设置Weblogic Server、Workshop、Oracle Service Bus的安装目录,保持默认值即可,单击"Next"。
(安装osb包括3部分,1:Weblogic Server10g,2:Workshop开发工具,3:Oracle Service Bus)10.接下来都保持默认值,单击"Next"即可。
(安装过程大有微软产品之风,相当easy,基本上一路next就ok)配置Oracle Service Bus(创建OSB的Domain)1:启动“Configuration Wizard”创建新域。
Configuration Wizard 位于<OSB 主目录>/wlserver_10.3/common/bin目录中。
oracle安装配置教程

oracle安装配置教程新中大Oracle数据库安装配置教程本教程旨在提供一个通用的简洁明了的安装教程,有经验的读者可根据自己的实际需要进行相关调整。
本教程所使用数据库版本为Oracle11G,安装步骤可能与读者所使用的安装程序有所不同,请读者根据自己的安装程序进行调整。
重要内容已用红色进行标注。
因为排版原因可能导致图片略小,若读者想要看清图片,可以放大页面查看。
1Oracle数据库服务端安装: (2)2服务端配置数据库监听程序 (4)3Oracle客户端安装程序(同时安装64位和32位客户端) (5) 4客户端配置TNSName (6)5PL/SQL Developer的基本使用 (7)6数据库表空间和用户的建立以及用户的权限赋予脚本 (9)7数据库备份与恢复 (10)1Oracle数据库服务端安装:1.1点击下一步1.2选择创建和配置数据库,下一步1.3选择服务器类1.4选择单实例数据库1.5选择高级安装,下一步1.6根据需要选择语言1.7选择企业版1.8根据需要自行选择位置1.9选择一般用途/事务处理1.10根据自己的需求填写数据库信息一般Oracle服务标识符(SID)和全局数据库名都为orcl1.11字符集如图选择简体中文ZHS16GBK,其余选项按自己需求选择,下一步1.12选择使用Database Control管理数据库1.13按需求选择存储位置1.14不启用自动备份,下一步1.15根据需求填写口令1.16下一步(如果有不满足先决条件的在确认没有问题后点击忽略)1.17点击完成进行安装。
2服务端配置数据库监听程序配置监听程序可以使用Oracle提供的UI界面进行配置,也可以直接修改listener.ora,在此介绍如何使用Net Manager程序进行配置。
2.1打开数据库服务器上的Net Manager。
如图:2.2选中Oracle Net本地配置→本地→监听程序,点击左上角加号2.3根据实际需求输入监听程序名,点击确定2.4选中刚才添加的监听程序,点击添加地址2.5协议选择TCP/IP,主机选择127.0.0.1或者localhost,端口根据需要选择,默认端口为15212.6点击左上角文件→保存网络配置3Oracle客户端安装程序(同时安装64位和32位客户端)由于产品需求,在安装DBCNT的机子上需要安装32位和64位客户端。
Oracle Service Bus产品介绍

Business Services
Service
• 动态的路由
• 路由可以基于SOAP报文头,传输报文 的头,JMS用户定义的属性,MQ的报 文头,文件目录,E-mail,消息内容 (XML数据和格式化的非XML数据)
$header
$body
Web Service
$attachment
$fault
数据服务:服务调用方式
交换平台还应当提供服务调用活动,为更复杂的消息流带来更大的灵活性。这个活 动通常用于复杂的动态路由情况,此时很难决定将消息发送到何处,或要执行消息 扩展。在路由阶段使用服务调用活动时,可请求在交换平台内注册的另一个服务在 消息上执行某种活动。该服务将向消息流返回响应。 对外调用 发布 路由
WS-Security
Console Security
Policy
• 控制台安全 • 策略
• 支持Web单点登录 • 基于角色访问 • 提升WS-Security & WS-Policy
Common Security Services
Authentication Authorization XACML 3rd Party Credential Mappers Default PKI SAML 3rd Party Audit Default 3rd Party
Messaging
Transport SDK
• 传统消息
• JMS, MQ, EJB/RMI, Tuxedo, FTP, SFTP, SMTP, File, Email, Socket • EJB converter JAR • EJB/RMI on WebSphere • Native Database Lookup
(售后服务)入门级O G服务器安装步骤及过程(附图解)优质优质

(售后服务)入门级O G 服务器安装步骤及过程(附图解)新手入门Oracle10G服务器安装步骤及过程(附图解)Oracle应用服务器10g是集成的、基于标准的软件平台,OracleApplicationServer10g是继Oracle9iApplicationServer(Oracle9iAS)Release2.0version9.0.2和version9.0.3之后的最新版本Oracle应用服务器。
下面我们就来和大家一起来了解OracleApplicationServer10g安装过程。
首先我们要去oracle网站上下载windows版的Oracle应用服务器10g软件(图1)。
图1点击看大图下载后是一个打包文件,解压为disk1文件夹,双击文件夹中的文件,就会跳出一个DOS 字符窗口(图2)。
图2点击看大图然后就出现OracleUniversalInstaller的欢迎使用界面,OracleUniversalInstaller安装软件将指导我们完成Oracle产品的安装与配置,安装过程中,单击“下一步”按钮,就可以向前一步;单击“上一步”按钮,就可以后退一步;单击“已安装产品(P)…”,就可以查看所有已安装的产品;单击“关于OracleUniversalInstaller(O)…”,则可以查看该安装软件的使用说明;单击“帮助”,则可以查看一些Oracle安装过程需要提供的帮助信息;“安装”和“取消”按钮则表示安装Oracle应用服务器10g和取消安装;如果已经安装好Oracle 应用服务器10g,需要卸载服务器软件,则按“卸装产品(D)…”按照相应步骤操作即可;如图3所示。
图3点击看大图接着出现“指定文件位置”画面,源输入表示要安装的产品的文件的完整路径为系统默认的D:\ggg目录下;目标则要输入或选择所安装产品的名称,以及安装产品的完整路径,名称为oracleas1;路径为D:\OraHome_1;当然在这里我们可以修改目标的名称和路径名(图4)。
Oracle Service Bus 简介
In this demo, we use osb103_wls103_win32.exe:
OSB Quick Start
Create OSB domain:
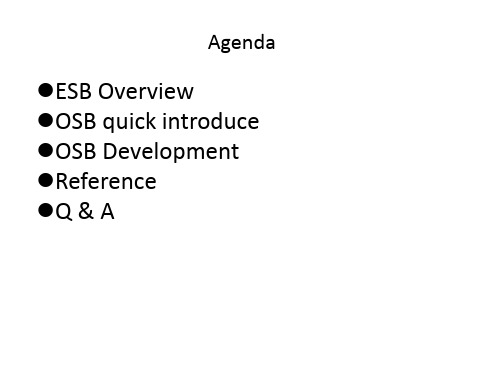
ESB Overview
Enterprise Service Bus in Oracle’s SOA conceptual architeture:
Source: Oracle ESB documentation
ESB Overview
Why ESB?
Traditional: Point2Point
Web service/XML brief introduction:
/tag/Service/
Q/A
(Not the full list)
Commercial ESB Oracle ESB IBM Webshpere ESB Sonic Progress IONA Artrix ESB SAP XI ……
Open source ESB Apache: ServiceMix Mule ESB Jboss ESB ……
OSB documentation:
/technetwork/middleware/servicebus/documentation/index.html
W3C standard quick learning
All W3C standard are here for quick reference: English Site: /default.asp Chinese Site:
OSB console: Http://localhost:7201/sbconsole
oracle数据服务总线OSB
Oracle 白皮书 ---Oracle Service Bus
关于本白皮书
本白皮书从技术角度描述Oracle Service Bus™。分析Oracle Service Bus(Oracle服务总 线)提供的ESB(Enterprise Service Bus,企业服务总线)和运行服务管理功能,这些功能 拥有企业级的可靠性和扩展性,可用来集成和管理企业内部和企业之间的服务交互。
Oracle 白皮书 ---Oracle Service Bus
Oracle 白皮书
Oracle Service Bus™
从技术角度论述 Oracle Service Bus 及其服务集成和acle Service Bus
目录
关于本白皮书 .....................................................................................................................................................3 读者对象................................................................................................................................................ 3 ORACLE SERVICE BUS 简介 .....................................................................................................................................3 SOA 服务总线组件 ..............................................................................................................................................4 服务总线的重要作用 ........................................................................................................................... 5 服务总线和服务生命期 ....................................................................................................................... 7 主要架构概念 .....................................................................................................................................................8 代理服务和基于代理的路由............................................................................................................... 9 服务总线的消息流定义 ..................................................................................................................... 10 服务总线的部署方式 .........................................................................................................................11 ORACLE SERVICE BUS 的特性 .............................................................................................................................. 11 服务供应 .............................................................................................................................................. 11
OSB(Oracle Service Bus)安装配置手册

Oracle Service Bus 安装配置手册目录1Oracle Service Bus 安装32Oracle Service Bus域配置103开发环境准备143.1Server配置143.2建立Oracle Service Bus 配置项目及项目153.3建立记Log的Java项目183.4配置WebLogic Server的连接池(记Log要用)203.5配置Queue(对帐交易中用到)213.6建立对Socket Transport的支持273.7电子支付平台与码头接口配置314接口说明394.1接口需求文档394.2Oracle Service Bus接口描述395服务配置过程及测试405.1工行实时扣费及划帐服务配置(ICBCServices)405.2工行对帐服务配置(BatchServices)575.3电子支付平台到码头服务配置(SCTService)606使用和对接661Oracle Service Bus 安装点击osb103_weblogic103_win32.exe建立BEA Home选择Custom方式,并选择所有选择安装JDK2Oracle Service Bus域配置启动配置向导configuration wizard(program->Oracle WebLogic->WebLogic Server 10gr3->Tools->Configuration Wizard)选择Create a new WebLogic domain,然后Next选择Workshop for WebLogic10.3和Oracle Service Bus,然后Next输入WebLogic管理控制台用户名密码(weblogic/weblogic),然后Next选择域的运行模式,缺省开发模式,然后选择相应的JDK,然后Next选择Next输入域名称和所在目录,选择Create,直到完成,选择DoneOracle Service Bus的域配置完成.3开发环境准备3.1Server配置打开workshop(Program -> Oracle WebLogic -> Workshop for WebLogic 10gr3),在Servers的视图中选择新建选择Oracle WebLogic Server v10.3,然后Next配置域路径直到出现配置server过程完成3.2建立Oracle Service Bus 配置项目及项目选择File->New->Oracle Service Bus Configuration Project输入项目名,比如EPSProject1选择EPSProject1,右键建立Oracle Service Bus项目输入项目名称,然后Finish在新建立的Oracle Service Bus项目下如图建立以下目录(Folder),分别是BusinessServices,ProxyServices,ServiceAccount,Tranformation,WSDL,Jar分别作为以下用途BusinesssServices:用于存放定义的Business Services,接入后端服务ProxyServices:用于定义Proxy Services,提供前端调用接口ServiceAccount:用于定义ftp的访问需要的用户名密码Transformation:用于存放和定义在过程中发生的数据转换WSDL:用于存放WSDL文件Jar:用于Java Callout,主要是通过Java Callout方式来记日志3.3建立记Log的Java项目Create table osblog(Transno varchar(20),Message varchar(200),Transdate date);在WebLogic console中建立到数据库的连接池,JNDI设置为XE建立Java Project,注意在build路径下加入weblogic.jarpackage osbutility;import java.sql.Connection;import java.sql.SQLException;import java.sql.Statement;import java.util.*;import javax.naming.Context;import javax.naming.InitialContext;public class OsbLogMessage {/***@param args*//*public static void main(String[] args) {// TODO Auto-generated method stub}*/public static boolean log(String transno,String mess) {Connection con = null;Statement stmt = null;int val = 1;try {Context ctx = null;Hashtable<String,String> ht = new Hashtable<String,String>();ht.put(Context.INITIAL_CONTEXT_FACTORY,"weblogic.jndi.WLInitialContextFactory");ht.put(Context.PROVIDER_URL,"t3://localhost:7001");ht.put(Context.SECURITY_PRINCIPAL, "weblogic");ht.put(Context.SECURITY_CREDENTIALS, "weblogic");ctx = new InitialContext(ht);javax.sql.DataSource ds= (javax.sql.DataSource) ctx.lookup("XE");con = ds.getConnection();String sql = "insert into osblog values('"+transno+"','"+mess+"',sysdate)";System.out.println(sql);stmt = con.createStatement();val = stmt.executeUpdate(sql);}catch (Exception e) {3.4配置WebLogic Server的连接池(记Log 要用)打开WebLogic Server管理控制台http://localhost:7001/console新建Services->JDBC->DataSource其他选择缺省设置,并且设置用户名密码,测试通过部署到AdminServer就可3.5配置Queue(对帐交易中用到)1)选择Services->Messaging->JMS Modules,建立CHModule选择部署到AdminServer2)新建JMS Servers同时部署到AdminServer3)在CHModule中建立ConnectionFactory4)然后新建Queue5)选择新建Subdeployment如图完成3.6建立对Socket Transport的支持1)先在cmd下转到需要部署的Oracle Service Bus domain目录(如E:\bea\user_projects\domains\CH_domain\bin),运行SetDomainEnv.cmd2)在cmd下转到相应的Socket Transport的安装目录(如E:\bea\osb_10.3\samples\servicebus\sample-transport),修改在E:\bea\osb_10.3\samples\servicebus\sample-transport\src\com\bea\alsb\trpublic boolean isServiceTypeSupported(BindingTypeInfo bindingType) {return true;/*try {BindingTypeInfo.BindingTypeEnum type = bindingType.getType();if (type.equals(BindingTypeInfo.BindingTypeEnum.MIXED)) {BindingTypeInfo.MessageTypeEnum responseMessageType =bindingType.getResponseMessageType();if (responseMessageType != null) {if (!(BindingTypeInfo.MessageTypeEnum.TEXT.equals(responseMessageType) || BindingTypeInfo.MessageTypeEnum.XML.equals(responseMessageType))) {return false;}}BindingTypeInfo.MessageTypeEnum requestMessageType =bindingType.getRequestMessageType();if (requestMessageType != null) {returnBindingTypeInfo.MessageTypeEnum.TEXT.equals(requestMessageType) || BindingTypeInfo.MessageTypeEnum.XML.equals(requestMessageType); } else {return false;}}return type.equals(BindingTypeInfo.BindingTypeEnum.ABSTRACT_XML)|| type.equals(BindingTypeInfo.BindingTypeEnum.XML);} catch (TransportException e) {SocketTransportUtil.logger.error(e.getLocalizedMessage(), e);return false;}*/}3)修改SocketOutBoundMessageContext.javaRun方法主要决定如何处理从后端系统的返回,修改的部分如蓝色}String resEnc = getResponseEncoding();responseMetadata = new SocketResponseMetaData(resEnc);InetAddress inetAddress = clientSocket.getInetAddress();responseMetadata.setEndPointHost(inetAddress.getHostName());responseMetadata.setEndPointIP(inetAddress.getHostAddress());// Reading the response from the external service.InputStream inputStream = clientSocket.getInputStream();InputStreamReader inputStreamReader =new InputStreamReader(inputStream, resEnc);int i = -1;StringBuilder sb = new StringBuilder();char[] buff = new char[512];while (true) {i = inputStreamReader.read(buff);if (i == -1) {break;}sb.append(buff, 0, i);/** if it ends with double CRLF, come out. We can read the content * after \r\n\r\n becuase we are expecting only one message per * connection i.e we are closing the connection after processing a * single message.*/if ((i = sb.indexOf(SocketTransportUtil.FIN_FLAG)) != -1) {break;}}if (i != -1) {// strip \r\n\r\n from the message.String msg = sb.substring(0, i+2);responseIS = new ByteArrayInputStream(msg.getBytes(resEnc));listener.onReceiveResponse(SocketOutboundMessageContext.this);} else {// Message format is wrong, it should end with \r\n\r\nlistener.onError(SocketOutboundMessageContext.this,TransportManager.TRANSPORT_ERROR_GENERIC,SocketTransportMessagesLogger.invalidMessage());}} catch (IOException e) {SocketTransportUtil.logger.error(e.getLocalizedMessage(), e);listener.onError(SocketOutboundMessageContext.this,4)Send则决定如何把信息从OSB发给后端系统,改动部分如蓝色:public void send(final TransportSendListener listener)throws TransportException {String address = options.getURI().toString();try {String host = null;int port = 0;try {URI uri = new URI(address);host = uri.getHost();port = uri.getPort();} catch (URISyntaxException e) {new TransportException(e.getMessage(), e);}SocketTransportMessagesLogger.ipAddress(host, port);final Socket clientSocket = new Socket(host, port);SocketEndpointConfiguration socketEndpointConfiguration =SocketTransportUtil.getConfig(config);SocketOutboundPropertiesType outboundProperties =socketEndpointConfiguration.getOutboundProperties();clientSocket.setTcpNoDelay(!outboundProperties.getEnableNagleAlgorithm());clientSocket.setSoTimeout(outboundProperties.getTimeout());String reqEnc = socketEndpointConfiguration.getRequestEncoding();if (reqEnc == null) {reqEnc = "utf-8";}// Send the message to the external service.OutputStream outputStream = clientSocket.getOutputStream();TransformOptions transformOptions = new TransformOptions();transformOptions.setCharacterEncoding(reqEnc);sender.getPayload().writeTo(outputStream, transformOptions);//outputStream.write(SocketTransportUtil.D_CRLF.getBytes(reqEnc));outputStream.flush();SocketTransportMessagesLogger.flushed();PipelineAcknowledgementTask task =new PipelineAcknowledgementTask(listener, clientSocket,socketEndpointConfiguration);TransportManagerHelper.schedule(task, socketEndpointConfiguration.getDispatchPolicy());} catch (UnknownHostException e) {SocketTransportUtil.logger.error(e.getLocalizedMessage());throw new TransportException(e.getMessage(), e);} catch (IOException e) {SocketTransportUtil.logger.error(e.getLocalizedMessage());throw new TransportException(e.getMessage(), e);} catch (TransformException e) {SocketTransportUtil.logger.error(e.getLocalizedMessage());throw new TransportException(e.getMessage(), e);} catch (TransportException e) {SocketTransportUtil.logger.error(e.getLocalizedMessage());throw e;}}5)转到相应的Socket Transport的安装目录(如E:\bea\osb_10.3\samples\servicebus\sample-transport),运行ant clean6)运行ant build-jar7)运行ant deploy3.7电子支付平台与码头接口配置i.在Weblogic Workshop中创建一个支持XMLBean的Web Service Projectii.在项目底下的“Schema”文件夹中新建一个Schema:iii.编辑该Schema文件,将接口中需要用到的数据结构定义在该Schema文件中:<?xml version="1.0" encoding="UTF-8" ?><schema xmlns="/2001/XMLSchema" targetNamespace="/ServiceIntegrateSchema"xmlns:tns="/ServiceIntegrateSchema"elementFormDefault="qualified"><complexType name="PaySuccessInfoList"><sequence><element name="PaySuccessInfoElm"type="tns:PaySuccessInfoType"minOccurs="0"maxOccurs="unbounded" /></sequence></complexType><complexType name="PaySuccessInfoType"><sequence><element name="CUSTOMS_SHIP_NO" type="string" /><element name="VOY_NO" type="string" /><element name="BILL_NO" type="string" /><element name="TOTAL_MONEY" type="string" /><element name="T_NUM" type="string" /><element name="F_NUM" type="string" /><element name="PAY_DATE" type="string" /><element name="FEE_TYPE" type="string" /><element name="PAY_TYPE" type="string" /><element name="IO_TYPE" type="string" /><element name="RELEASE_STATUS" type="string" /><element name="PAYER" type="string" /><element name="PAY_DATETIME" type="string" /><element name="BROKER" type="string" /><element name="CNTR_NO_LIST"type="tns:CNTR_NO_LISTTYPE" /></sequence></complexType><complexType name="CNTR_NO_LISTTYPE"><sequence><element name="CNTR_NO"type="string"minOccurs="0"maxOccurs="unbounded" /></sequence></complexType><element name="PaySuccessInfo"type="tns:PaySuccessInfoList"/><complexType name="DayTotalMoneyType"><sequence><element name="dayTotalMoney" type="long" /></sequence></complexType><element name="DayTotalMoney"type="tns:DayTotalMoneyType" /><complexType name="BillPayStatusInputList"><sequence><element name="BillPayStatusElm"type="tns:BillPayStatusInputType"minOccurs="0"maxOccurs="unbounded" /></sequence></complexType><complexType name="BillPayStatusInputType"><sequence><element name="CUSTOMS_SHIP_NO" type="string" /><element name="VOY_NO" type="string" /><element name="BILL_NO" type="string" /><element name="CNTR_NO_LIST"type="tns:CNTR_NO_LISTTYPE" /></sequence></complexType><element name="BillPayStatusInput" type="tns:BillPayStatusInputList" /><complexType name="BillPayStatusReturnType"><sequence><element name="BILL_NO" type="string" /><element name="BillPayStatus" type="string" /> </sequence></complexType><element name="BillPayStatusReturn" type="tns:BillPayStatusReturnType" /><complexType name="TurntoTerminalList"><sequence><element name="TurntoTerminalElm"type="tns:TurntoTerminalType" maxOccurs="unbounded" /> </sequence></complexType><complexType name="TurntoTerminalType"><sequence><element name="bankid" type="string" /><element name="totalmoney" type="long" /></sequence></complexType><element name="TurntoTerminalList"type="tns:TurntoTerminalList" /></schema>iv.在“src”文件夹下创建包及Web Service:v.在”InterfaceSCT.java”文件中实现与码头的接口:package ;import javax.jws.*;import org.example.serviceIntegrateSchema.*;@WebServicepublic class InterfaceSCT {//接口A paySuccessInfo@WebMethodp ublic void paySuccessInfo(String bankId,String feebillNo,PaySuccessInfoDocument bill_list) {PaySuccessInfoList psil = bill_list.getPaySuccessInfo();int len = psil.getPaySuccessInfoElmList().size();for(int i = 0;i<len;i++){PaySuccessInfoType ps = psil.getPaySuccessInfoElmList().get(i);System.out.println("this is broker"+i+":"+ps.getBROKER());System.out.println("this is length of containernos: "+ps.getCNTRNOLIST().sizeOfCNTRNOArray());}}//接口B dayAccount@WebMethodp ublic DayTotalMoneyDocument dayAccount(long startdate,long enddate) {DayTotalMoneyDocument dtm = DayTotalMoneyDocument.Factory.newInstance();DayTotalMoneyType dtmt = dtm.addNewDayTotalMoney();dtmt.setDayTotalMoney(1000000);return dtm;}//接口C BillPayStatus@WebMethodp ublic BillPayStatusReturnDocument getBillPayStatus(BillPayStatusInputDocument bill_list,String iotype) {BillPayStatusReturnDocument bpsr = BillPayStatusReturnDocument.Factory.newInstance();BillPayStatusInputList bp = bill_list.getBillPayStatusInput();int len = bp.getBillPayStatusElmList().size();for(int i = 0;i<len;i++){BillPayStatusInputType bps =bp.getBillPayStatusElmList().get(i);System.out.println(bps.getBILLNO());}return bpsr;}//接口D turntoTerminal@WebMethodp ublic void turntoTerminal(TurntoTerminalListDocument turnto_list) {TurntoTerminalList ttl = turnto_list.getTurntoTerminalList();int len = ttl.getTurntoTerminalElmList().size();for(int i = 0;i<len;i++){TurntoTerminalType ttt = ttl.getTurntoTerminalElmList().get(i);System.out.println(ttt.getBankid()+":"+ttt.getTotalmoney());}return;}}vi.生成WSDL文件:4接口说明4.1接口需求文档参见<<电子渠道接口说明.doc>>4.2Oracle Service Bus接口描述工行接口ICBCServicesdoTrans2CH工行扣费操作(wsdl参见192.168.78.140机器上的E:\CH_OSBWorkspace\WSDL\ ICBCServicesService.wsdl)doTrans2Har工行划账操作(wsdl参见192.168.78.140机器上的E:\CH_OSBWorkspace\WSDL\ ICBCServicesService.wsdl)码头接口InterfaceSCTServiceturntoTerminal分帐信息接口getBillPayStatus核对是否收费dayAccount对帐paySuccessInfo收费成功5服务配置过程及测试5.1工行实时扣费及划帐服务配置(ICBCServices)1添加Business Services ICBCBusinessServices,用于和ICBC提供的Socket Server进行信息交换配置如下:2在WSDL目录中新建ICBCServiceService.wsdl,将前端的需要的wsdl格式倒入<?xml version='1.0' encoding='UTF-8'?><s0:definitions name="ICBCServicesServiceDefinitions" targetNamespace="http://bank" xmlns="" xmlns:s0="/wsdl/" xmlns:s1="http://bank"xmlns:s2="/wsdl/soap/"><s0:types><schema elementFormDefault="qualified"targetNamespace="/onlineTrans2CH"xmlns="/2001/XMLSchema" xmlns:tns="/onlineTrans2CH"> <element name="transferobject"><complexType><sequence><element name="Transcode" type="string"/><element name="Transno" type="string"/><element name="PaymentCardno" type="string"/><element name="Accountname" type="string"/><element name="Paymentmoney" type="string"/><element name="Type" type="string"/><element name="Memo" type="string"/></sequence></complexType></element><element name="transferresult"><complexType><sequence><element name="Transstatus" type="string"/><element name="Transresult" type="string"/><element name="Message" type="string"/><element name="Memo1" type="string"/><element name="Memo2" type="string"/></sequence></complexType></element></schema><xs:schema attributeFormDefault="unqualified" elementFormDefault="qualified" targetNamespace="http://bank" xmlns:xs="/2001/XMLSchema"> <xs:import namespace="/onlineTrans2CH"/><xs:element name="doTrans2Har"><xs:complexType><xs:sequence><xs:element ref="onl:transferobject"xmlns:onl="/onlineTrans2CH"/></xs:sequence></xs:complexType></xs:element><xs:element name="doTrans2HarResponse"><xs:complexType><xs:sequence><xs:element ref="onl:transferresult"xmlns:onl="/onlineTrans2CH"/></xs:sequence></xs:complexType></xs:element><xs:element name="doTrans2CH"><xs:complexType><xs:sequence><xs:element ref="onl:transferobject"xmlns:onl="/onlineTrans2CH"/></xs:sequence></xs:complexType></xs:element><xs:element name="doTrans2CHResponse"><xs:complexType><xs:sequence><xs:element ref="onl:transferresult"xmlns:onl="/onlineTrans2CH"/></xs:sequence></xs:complexType></xs:element></xs:schema></s0:types><s0:message name="doTrans2Har"><s0:part element="s1:doTrans2Har" name="parameters"/></s0:message><s0:message name="doTrans2HarResponse"><s0:part element="s1:doTrans2HarResponse" name="parameters"/></s0:message><s0:message name="doTrans2CH"><s0:part element="s1:doTrans2CH" name="parameters"/></s0:message><s0:message name="doTrans2CHResponse"><s0:part element="s1:doTrans2CHResponse" name="parameters"/></s0:message><s0:portType name="ICBCServices"><s0:operation name="doTrans2Har" parameterOrder="parameters"><s0:input message="s1:doTrans2Har"/><s0:output message="s1:doTrans2HarResponse"/></s0:operation><s0:operation name="doTrans2CH" parameterOrder="parameters"><s0:input message="s1:doTrans2CH"/><s0:output message="s1:doTrans2CHResponse"/></s0:operation></s0:portType><s0:binding name="ICBCServicesServiceSoapBinding" type="s1:ICBCServices"> <s2:binding style="document" transport="/soap/http"/> <s0:operation name="doTrans2Har"><s2:operation style="document"/><s0:input><s2:body parts="parameters" use="literal"/></s0:input><s0:output><s2:body parts="parameters" use="literal"/></s0:output></s0:operation><s0:operation name="doTrans2CH"><s2:operation style="document"/><s0:input><s2:body parts="parameters" use="literal"/></s0:input><s0:output><s2:body parts="parameters" use="literal"/></s0:output></s0:operation></s0:binding><s0:service name="ICBCServicesService"><s0:port binding="s1:ICBCServicesServiceSoapBinding" name="ICBCServicesSoapPort"> <s2:address location="http://localhost:7001/testwithbank/ICBCServices"/> </s0:port></s0:service></s0:definitions>3在ProxyServices目录下建立Proxy Services:ICBCProxyServices,配置如下:4新建MFL Transformation在Transformation目录下建立两个MFL,ICBCInputDataTrans.mfl和ICBCOutputDataTrans.mfl,前者在调用后端的服务之前调用,而后者用于针对从工行返回的信息.以建立ICBCInputDataTrans.mfl为例,在FormatBuilder中打开,通过Tools->Import->XML Schema Importer倒入XML Schema文件展开tranferobject后针对每一项修改value(s)为|(分隔符),注意最后一个字段的分隔符为|^对ICBCOutputDataTrans.mfl的建立过程类似,但字段不同5建立XQuery Transformation主要用于通过mfl对返回字符进行处理后,并不包含命名空间,因此通过XQuery Transformation和返回的XML Schema对应5.1针对扣费服务,通过ICBCRespTrans.xq进行转换5.2针对划帐服务,通过ICBCResp2HarTrans.xq进行转换以ICBCRespTrans.xq为例说明建立过程从Source Type中选择Non-xml,选择相应的mfl文件中的tranferresult在Target Type中选择XML,然后选择doTrans2CHResponse建立对应关系,然后保存6在ICBCProxyServices中建立消息流,整体如图:6.1先建立一个Operation Branch,通过Operation Branch将Service 中的不同操作分成不同的消息流程来处理,其中doTran2CH是指扣费过程,而doTran2Har是指转帐过程6.2在转帐过程中加入Pipleline Pair,在Request Pipeline中加入Stage。
Oracle+Service+Bus安装、配置、操作详解
Oracle Service Bus安装、配置、操作详解安装Oracle Service Bus1:下载Oracle Service Bus你可以在/alservicebus/上下载,或者直接访问。
建议尽量下载最新版本的。
本说明书基于Oracle Service Bus 10gR3(安装文件:192.168.1.15/E:/OSB/Oracle Service Bus 10gR3--osb103_wls103_win32.exe)2: 双击该exe文件, 启动安装程序之后出现启动界面,等待一会后,出现欢迎界面,单击"Next"。
3.选择OSB的安装目录,这里保持默认值C:\bea,单击"Next"。
(你也可以选择别的安装目录)4.在安装类型选择界面中,如果需要安装OSB的Example,则需选择Custom类型,否则选Typical类型(建议你安装Example)5.出现选择产品和组件界面,勾选Examples选项如下图所示。
6.勾选需要绑定的JDK,点击"Next"。
7:设置Weblogic Server、Workshop、Oracle Service Bus的安装目录,保持默认值即可,单击"Next"。
(安装osb包括3部分,1:Weblogic Server10g,2:Workshop开发工具,3:Oracle Service Bus)10.接下来都保持默认值,单击"Next"即可。
(安装过程大有微软产品之风,相当easy,基本上一路next就ok)配置Oracle Service Bus(创建OSB的Domain)1:启动“Configuration Wizard”创建新域。
Configuration Wizard 位于<OSB 主目录>/wlserver_10.3/common/bin目录中。
ORACLEOSB消息总线原理、作用、功能技术方案

ORACLE OSB消息总线原理、作用、功能技术方案一、概述消息交换总线技术是为了实现企业数据共享和应用集成,提供一种基于企业服务总线(ESB)的信息共享交换平台。
该技术采用面向服务体系结构(SOA)的设计思想,以信息共享为目标,具有松散耦合的特点,实现了"集中式管理、分布式运行"的工作模式。
通过设计标准的适配器组件,实现各种数据库和应用系统之间的数据共享与交换,能有效实现企业中信息共享,并具有良好的可扩展性和可靠性。
ORACLE的OSB总线包括ESB(Enterprise Service Bus)和 WSM(Web Service Management)两大部分,是ORACLE公司的消息交换总线产品。
ESB包括MOM, ORBs, RPCs, WebServices功能的新型、综合类型中间件,通过配置集成;WSM包括服务管理,消息跟踪两个部分。
使用OSB可以很容易的将企业已有的对外功能集成进来,并且能够集成和开发出来新的功能。
OSB的下载、安装、使用、实验、培训课件请参考以下附件:二、服务总线使用OSB服务总线,可以实现以下功能:1、SOA中的服务中介高速中介一次连接松散耦合动态扩展交易处理可视化敏捷架构企业范围内的可重用集中化管理控制风险改善总所有成本(TCO)2、服务的代理支持多种协议格式Web Services 的处理完全支持相应的Web Services (WSDL, SOAP包) 和non-SOAP包的消息多种通讯方式请求/响应(同步/异步),异步消息队列,一对多的发布组合方式(例如: sync-to-async 桥)3、支持消息类型OSB支持下列消息类型:JMS with headersEmail (无论是否带有附件)MFL (Message Format Language)Raw dataTextSOAP( 无论是否带有附件)XML (无论是否带有附件)4、访问目标透明(Location Transparency)OSB可以将服务与位置变化隔离。
Oracle Service Bus (OSB) 10.3.1–ESB使用及普通服务配置说明V1.0

ESB使用及普通服务配置说明2011-5-5更改记录目录1.环境准备 (4)2.OSB概要介绍 (7)3.服务的开发及OSB配置_同步返回 (8)3.1开发W EBSERVICE服务(服务提供者工作) (8)3.1.1 第一步: 创建WebService项目 (8)3.1.2 第二步: 创建WebLogic Web Service (10)3.1.3 第三步: 生成WSDL文件 (15)3.1.4 第四步: 在服务器发布WebService项目 (17)3.2配置W EBSERVICE(应用集成组工作) (19)3.2.1 第一步: 创建Project (19)3.2.2 第二步: 创建WSDL资源 (21)3.2.3 第三步: 创建Business Service业务服务 (23)3.2.4 第四步: 创建Proxy Service代理服务 (26)3.3开发W EBSERVICE客户端代码(服务调用者工作) (30)4.服务的开发及OSB配置_异步无返回 (31)4.1开发W EBSERVICE服务(服务提供者工作) (31)4.2创建与配置JMS(应用集成组工作) (31)4.2.1 第一步: 创建JMS服务器 (31)4.2.2 第二步: 创建JMS连接工厂和队列或主题 (32)4.3配置W EBSERVICE(应用集成组工作) (36)4.3.1 第一步: 创建Project (36)4.3.2 第二步: 创建WSDL资源 (36)4.3.3 第三步: 创建Business Service业务服务 (37)4.3.4 第四步: 创建Proxy Service代理服务 (37)4.4开发W EBSERVICE客户端代码(服务调用者工作) (42)1.环境准备1.安装Oracle Service Bus (OSB) 10.3.1。
2.安装Oracle Service Bus (OSB)自带的WorkShop开发环境。
Oracle SOA Suite Enterprise Service Bus部署指南说明书
See Deployment Guide 3.1.18
4) Configuring JNDIs for Topic/Connection Factory
See Deployment Guide 3.1.19
Slide 7
Configuring the Cluster of ESB RT Instances
• SOA Suite Installer
– Install OC4J + OHS on DT Host2 – Install OC4J + OHS on RT Host3 – Install OC4J + OHS on RT Host4
• ESB Standalone Mid Tier Installer
– Esb_config.ini, JNDI Metadata, Slide, JNDI Topic/Factories
• Alternative Topologies • Checklist: Tool, Action, Target, Status • Appendix: Scripts, validation, optimization, links
Slide 5
SOA Suite Install Screen
Install Only the J2EE Server and Web Server
Slide 6
ESB Cluster Configuration Steps
All of these steps are documented in Section 3 of the
• Install other SOA components into RT JVM
– Use standalone mid tier installs: BPEL, OWSM …
WebLogic和Oracle Service Bus集成开发的自动化部署指南说明书
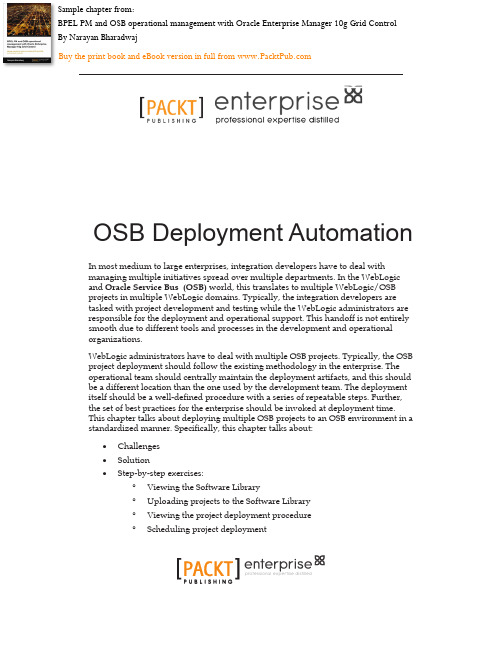
professional expertise distilled OSB Deployment Automation In most medium to large enterprises, integration developers have to deal with managing multiple initiatives spread over multiple departments. In the WebLogic and Oracle Service Bus (OSB) world, this translates to multiple WebLogic/OSB projects in multiple WebLogic domains. Typically, the integration developers are tasked with project development and testing while the WebLogic administrators are responsible for the deployment and operational support. This handoff is not entirely smooth due to different tools and processes in the development and operational organizations.WebLogic administrators have to deal with multiple OSB projects. Typically, the OSB project deployment should follow the existing methodology in the enterprise. The operational team should centrally maintain the deployment artifacts, and this should be a different location than the one used by the development team. The deployment itself should be a well-defined procedure with a series of repeatable steps. Further, the set of best practices for the enterprise should be invoked at deployment time. This chapter talks about deploying multiple OSB projects to an OSB environment in a standardized manner. Specifically, this chapter talks about:•Challenges •Solution • Step-by-step exercises:°Viewing the Software Library°Uploading projects to the Software Library°Viewing the project deployment procedure °Scheduling project deploymentSample chapte r from:BPEL PM and OSB operational management with Oracle Enterprise Manager 10g Grid Control By Narayan BharadwajBuy the print book and eBook version in full from OSB Deployment Automationprofessional expertise distilled ChallengesDeploying applications in production environments is a challenge. The SOA application developers build new projects, or new versions of existing projects, and throw them "over the wall" to the operations team. Administrators have to deploy multiple application files to multiple targets, in a fixed time window. This processis repeated when moving from test to stage to production. This consumes time and requires expertise on these applications. Controlling the WebLogic projects centrally is the first challenge, where administrators have to track the project versions to comply with change and release management guidelines. Next the deployment itself is a challenge, considering the administrator needs to deploy the projects with specific customizations and honor the scheduled maintenance window. All in all, the administrator has too many manual tasks to deal with, given the constraints of the operational environment.SolutionWith Grid Control, administrators can deploy multiple OSB projects to a domain deployment procedure framework. A five-step interview process lets the user pick the source projects, pick the target OSB server and domain, set the credentials, specify configurations and the customization file, and schedule a future deployment using the job system.• Store OSB deployment artifacts in an enterprise Software Library• Export OSB deployment artifacts from a live OSB server• Track maturity of OSB deployment artifacts and usage• Deploy OSB projects from test to stage to production• Deploy in a future maintenance windowStep-by-step exerciseThis set of step-by-step exercises will walkthrough managing the deploymentof OSB projects.Viewing the Software LibraryThe first step is to view the operational store or the Software Library in Grid Control. This is the starting point for administrators to look at the inventory, add items, or change existing items.OSB Deployment Automationprofessional expertise distilled1. From the Grid Control home page, click on the Deployments tab.2. Click the Provisioningsub-tab.The Software Library contains several objects such as operatingsystem images, Oracle homes for database and application server,and deployment artifacts for BPEL, OSB, and so on. The Libraryis used to track the maturity of these components as they are usedon various monitored targets.3. Expand Components to reveal the component types.Uploading projects to the Software Library In this particular scenario, the administrator has been handed a copy of the OSB project, and needs to deploy it. Before deployment, the administrator needs to upload the projects to the Grid Control Software Library for tracking, operational version control, and to enable deployment:1. Upload OSB Projects to Software Library2. Select the radio button for Oracle Components.OSB Deployment Automationprofessional expertise distilled3. Click on the Create Component button.4. Enter the following values in the Describe step, as shown in thenext screenshot:°Select Type as Generic Component.°Name as OSB projects.°Leave the other fields blank.°Click on Next.5. In the Customize step, leave the defaults and click on Next.OSB Deployment Automationprofessional expertise distilled6. In the Upload File step:°Select Upload from Agent Machine.°Click on the Select Target button.°Select theHost Name as .°Click on the Select File button.°Select the location of the sbconfig.jar from a pre-existingproject from an OSB server, which was zipped up and storedon the local machine; for instance: /u01/homes/osb_wls/projects/sbconfig.jar.Note that you can directly export projects from a live OSB server duringthe deployment process. This will be the most common usage of thedeployment procedure. Here, for this workshop though, the export jar hasalready been created in advance. This export jar contains several projectsextracted from another OSB server.°Click onNext.7. On the Set Directives step, click on Next.8. On the Review step, note the details, and click on Finish.9. Note the confirmation message, and the new OSB Project genericcomponent that has been added.OSB Deployment Automationprofessional expertise distilled10. Activate the OSB projects for use:°Select the radio button for OSB Projects.°Click on Activate,as shown in the following screenshot:Viewing the project deployment procedure Grid Control comes with out-of-the-box procedures to deploy Oracle components including OSB projects. These procedures simplify the administrator's life by automating manual steps, thereby saving time, and reducing human error.1. View the Oracle Service Bus Resource Provisioning deployment procedure:°From the Grid Control home page, click on the Deploymentstab.°Scroll down to locate the Deployment Procedure Managersection and click on the Deployment Procedures link.OSB Deployment Automationprofessional expertise distilledA deployment procedure is a series of logical steps that automate key administrative tasks related to Oracle products. Most of these complex administrative tasks are listed in the "Enterprise Deployment Guide". Note the various deployment procedures available out of the box—database provisioning, RAC extend, application server provisioning, andmany more. These deployment procedures can be customized as well.°Search for "service" to locate the OSB deployment procedure. °Click on the Oracle Service Bus Resource Provisioning link.°Note the steps underlying the procedure and theorchestration of the steps.Note that you can customize this procedure by adding steps at any point. You can do this by using the Create Like button.OSB Deployment Automationprofessional expertise distilled Scheduling project deploymentNow that we are familiar with the OSB project deployment procedure, the next step is to kick off the deployment. This can be done through a simple interview process:1. Schedule the OSB project deployment.2. Continuing from the previous step, click the Schedule Deployment button.3. On the Select Source step, follow these steps:°Select the Oracle Software Library radio button.°Click the Component flashlight to locate the jar filefrom library.°Locate the OSB projects that were uploaded previously.°Click on Selectto select source suitcase bundles.These bundles are stored in the Grid Control Software Librarybefore actual deployment.°Leave the pass phrase field blank.°Click on Next to continue.4. On the Select Target step:°Select the relevant WebLogic domain from the flashlight.°Specify the BEA home directory, for example: /u01/homes/osb_wls.OSB Deployment Automationprofessional expertise distilled°Leave the Advanced Options section as it is.°Leave the Customization Fileoption as it is.You can specify advanced options, as well as upload customization files,during deployment. The customization files could be uploaded to theSoftware Library and reused for deployments to development, stage, test,and production.°Click on Next to proceed, as shown in the followingscreenshot:5. In the Set Credentials step:°Provide the credentials for OSB Domain. If you checked theStore Preferred Credentials box during target discovery,then the Username and Password fields are auto-populatedfor you.°Provide the credentials for the host. If you checked theStore Preferred Credentials box during target discovery,then the Username and Password fields are againauto-populated for you.OSB Deployment Automationprofessional expertise distilled°Click on Next to proceed, as shown in the followingscreenshot:6. In the Schedule step, follow these steps:°Select One Time (Immediately).°Leave Grace Period as Indefinite.°Leave the default name OSB ResourceProvisioning_1235085922548 for the Instance Name field, orspecify a new name°Click on Next to proceed, as shown in the followingscreenshot:Deployment can be scheduled immediately or for a future time, typicallyduring a customer maintenance window. The Grid Control job systemtakes care of the job scheduling and management.OSB Deployment Automationprofessional expertise distilled7. In the Reviewstep:°Review all the information before submitting adeployment job.°Click on Finish when you're ready.8. View the status of the scheduled deployment:°Continuing from the previous step, click on the deploymentjob from the confirmation screen.°The job status page shows the details of the scheduled job,including elapsed time and error messages if any.°Use the Refresh button on the top right to see the progress.OSB Deployment Automationprofessional expertise distilled °Wait for the job to finish successfully.°Note the Status and Completed Date values.9. View the deployed projects in Grid Control:°Navigate to the OSB target home page.°Click on the OSB Services tab.°Click the Refresh button on the top right.°Note the newly deployed projects in the list.OSB Deployment Automationprofessional expertise distilledSummaryDeployment is a critical task for WebLogic administrators. With Grid Control Software Library and deployment procedure capabilities, administrators can manage WebLogic and OSB projects, and schedule and automate deployment.In this chapter, we covered the various administrative challenges dealing with application code deployments such as OSB project deployments. Grid Control automates the deployment process for the administrator, thereby saving time and reducing human errors. First we took a look at the Grid Control Software Library, then we uploaded the new OSB projects to this library, and then we kicked off the actual deployment procedure. Finally, we looked at the execution of the deployment procedure job, and validated the completion and successful deployment via the OSB console.The next few chapters will walkthrough managing other areas in OSB such as monitoring services, managing configurations, and service levels.。
Oracle服务总线简介

<Insert Picture Here>Oracle Service Bus简介一些例子…•端点的问题 – 使用Web 服务的时候Service ServiceServiceServiceApplicationApplicationApplicationService ServiceDatabaseEJBSAPHost One 例子:位置透明New Hire ProcessInitialize BenefitsServiceInitialize BenefitsServiceHost Two Service BusRoute toHost Two•与服务地点的改变隔离After MoveBefore例子: 向后兼容性Service BusProcess Order ServiceCustomer PortalTransform Message<2.0><1.0>CSR App<2.0>•与服务合同/接口的改变隔离<2.0><1.0>Oracle Service Bus为企业SOA带来带来敏捷和扩展•适应变化•服务虚拟化•协议转换•路由和转换•错误处理,策略执行•多维尺度•1000多个服务•数百万交易处理能力•缓存,并行处理,节流•通过重用降低成本•一次连接服务•轻松配置集成服务•资产/服务生命周期的单一视图•管理风险•嵌入式服务水平管理•故障隔离和自动恢复•应用警告和服务水平协议•审计和报告Oracle Service BusAdaptersServiceRepositoryIntegration ServicesBusiness Logic Business Logic BPMB2B & BPMBPMPortal服务基础架构Business RulesMediatorPolicy ManagerOptimized bindingBPELHuman WorkflowCEPOracle Service BusService/Event Delivery API应用架构•服务组合 •转换 •过滤SOA 11g 统一服务平台SOA SOA 业务•服务虚拟化 •共享服务网关 •监测端至端的SOA 生命周期治理JCAOracle Service Bus企业服务总线的关键成份Unified SecurityFTPMQAdaptive MessagingSMTPMetadataReportingSLA AlertsContent Based RoutingTransformation Import / ExportValidation Service ManagementService VirtualizationConfiguration FrameworkHTTP/SJCAJMSFileChange Center MonitoringWSRM TuxEJBService ChainingRESTAuthentication AuthorizationIdentitySign/Encrypt自适应消息不仅仅是 Web Services Web Services……Unified SecurityFTPMQAdaptive MessagingSMTPMetadataReportingSLA AlertsContent Based RoutingTransformation Import / ExportValidation Service ManagementService VirtualizationConfigurationFrameworkHTTP/SJCAJMSFileChange Center MonitoringWSRM TuxEJBService ChainingRESTAuthentication AuthorizationIdentitySign/EncryptApplication Client Service ClientsOracle Service BusEnterprise ServicesServiceApplication Client Application Client Application Client HTTP/SOAPJMSFTP REST FileApplication ClientWS-RMTUXMQEJBJCAServiceServiceServiceServiceRequest / ResponseService Messaging•多重通讯模式•请求/响应•同步和异步•一对多,多对一•发布/订阅•混交 (e.g. sync-to-async)Synch / AsynchSplit / Join Publish / Subscribe自适应消息…•Any to Any 协议•Any to Any 载体•XML•non-XML •Binary•不需要WSDLAdaptive Messaging统一安全优化,可插入的,灵活的策略Unified SecurityFTPMQAdaptive MessagingSMTPMetadataReportingSLA AlertsContent Based RoutingTransformation Import / ExportValidation Service ManagementService VirtualizationConfiguration FrameworkHTTP/SJCAJMSFileChange Center MonitoringWSRM TuxEJBService ChainingRESTAuthentication AuthorizationIdentitySign/Encrypt统一安全•传输安全•SSL/基础认证•定制的安全证书•消息安全•WS-Policy/WS-Security•SAML, UserID/Password, X509•签名 & 加密•定制的安全证书•控制台安全•支持Web Single-Sign-On•基于角色的访问•基于策略的安全•利用 WS-Security &WS-Policy•Oracle Web Services Manager Authentication Authorization CredentialCredential MappersMappers Audit Common Security ServicesDefault DefaultPKISAMLXACML Default 3rd Party3rd Party3rd Party3rd PartySupports built-in securitycomponents and plug-in 3rd-partycomponentsUnifiedSecurity服务虚拟化带来企业敏捷性Unified SecurityFTPMQAdaptive MessagingSMTPMetadataReportingSLA AlertsContent Based RoutingTransformation Import / ExportValidation Service ManagementService VirtualizationConfiguration FrameworkHTTP/SJCAJMSFileChange Center MonitoringWSRM TuxEJBService ChainingRESTAuthentication AuthorizationIdentitySign/Encrypt先进的集成模式并行处理的分割和联合•传入的有效载荷被分割成多个服务调用•多个服务响应聚合成单个有效载荷•并行处理带来显著的性能提升SplitForEachProcessOrderOracle Service BusJoinProcessOrder15Order 1Order 2Order 3SPLITResponse 1Response 2Response3JOINRequest PayloadResponse PayloadService Virtualization服务管理嵌入式可视化与控制Unified SecurityFTPMQAdaptive MessagingSMTPMetadataReportingSLA AlertsContent Based RoutingTransformation Import / ExportValidation Service ManagementService VirtualizationConfiguration FrameworkHTTP/SJCAJMSFileChange Center MonitoringWSRM TuxEJBService ChainingRESTAuthentication AuthorizationIdentitySign/Encrypt嵌入式可视化服务管理•端点 URI 管理•增长和收缩端点URI池的API•仪表盘•故障和性能指标•对聚合ESB的摘要•监控•在单节点或整个ESB服务器监视器警报•SLA 基于应用的报警•警报操作指标•从消息管道报警•报表•开箱即用报告提供商•定制报告提供者•开放接口•JMX 监控接口•SNMP 报警•定制业务•智能操作控制台:业务定制单一屏幕•高级搜索功能•与企业管理全面整合内置的性能优化和监控确保质量与服务配置框架强大的服务部署到生产环境Unified SecurityFTPMQAdaptive MessagingSMTPMetadataReportingSLA AlertsContent Based RoutingTransformation Import / ExportValidation Service ManagementService VirtualizationConfiguration FrameworkHTTP/SJCAJMSFileChange Center MonitoringWSRM TuxEJBService ChainingRESTAuthentication AuthorizationIdentitySign/Encrypt配置框架强大的服务部署到生产环境•变更中心•部件的语义完整性•查看和解决冲突•撤消,重做任务•审计变更•导入/导出•定制文件•完全脚本,整合OER/SR•测试控制台•验证变更。
- 1、下载文档前请自行甄别文档内容的完整性,平台不提供额外的编辑、内容补充、找答案等附加服务。
- 2、"仅部分预览"的文档,不可在线预览部分如存在完整性等问题,可反馈申请退款(可完整预览的文档不适用该条件!)。
- 3、如文档侵犯您的权益,请联系客服反馈,我们会尽快为您处理(人工客服工作时间:9:00-18:30)。
Oracle Service Bus安装和配置过程详解安装Oracle Service Bus
1:下载Oracle Service Bus
你可以在/alservicebus/上下载,或者直接访问。
建议尽量下载最新版本的。
本说明书基于Oracle Service Bus 10gR3(安装文件:192.168.1.15/E:/OSB/Oracle Service Bus 10gR3--osb103_wls103_win32.exe)2: 双击该exe文件, 启动安装程序之后出现启动界面,等待一会后,出现欢迎界面,单击"Next"。
3.选择OSB的安装目录,这里保持默认值C:\bea,单击"Next"。
(你也可以选择别的安装目录)
4.在安装类型选择界面中,如果需要安装OSB的Example,则需选择Custom类型,否则选Typical类型(建议你安装Example)
5.出现选择产品和组件界面,勾选Examples选项如下图所示。
6.勾选需要绑定的JDK,点击"Next"。
7:设置Weblogic Server、Workshop、Oracle Service Bus的安装目录,保持默认值即可,单击"Next"。
(安装osb包括3部分,1:Weblogic Server10g,2:Workshop开发工具,3:Oracle Service Bus)
10.接下来都保持默认值,单击"Next"即可。
(安装过程大有微软产品之风,相当easy,基本上一路next就ok)
配置Oracle Service Bus(创建OSB的Domain)
1:启动“Configuration Wizard”创建新域。
Configuration Wizard 位于<OSB 主目录>/wlserver_10.3/common/bin目录中。
运行config.exe(Windows 平台)
2.弹出Oracle WebLogic的配置欢迎界面,点选"Create",单击"Next"。
3.如下图所示,在"选择Domain Source"界面中勾选"Workshop"和"OSB",单击"Next"。
wls的用户密码,也是osb的用户密码),单击"Next"。
6:保留“Customize Environment and Services Settings”的默认设置,单击“Next”。
7:输入你的域名,然后单击“Create”。
8:现在将创建你输入的域了。
直到100%后点击done就完成了
9:运行位于<OSB 主目录>/user_projects/domains/waai中的startWebLogic.cmd (Windows 平台)启动新建的域。
Oracle Service Bus控制台使用简介
wls启动后,输入http://host:port/sbconsole。
输入刚才建域时输入的用户、密码登录后,您将能看到osb控制台
Osb控制台分为6大部分,下面分别简要说明
1:change center
主要功能:管理osb session(创建、删除、查看session)
主要功能:监控(包括服务器、服务、消息、错误、警告、提示等)
3: Resource Browser
主要功能:对服务(proxy service,business service ,splits service , joins service)、接口(wsdls
等)、转换(包括xquery转换和xslt转化)等的管理
主要功能:创建project管理资源(说明:这一部分也可以由oracle workshop管理)
输入工程名
选中刚才创建的工程,创建文件夹,一般分为wsdl、proxy service、business service
在不同的包下创建相应的资源
4:修改proxy service message flow 见红色部分
点击后出现如下界面:
在这你可以定义message flow(这是osb的重点部分)5:生成session
点击change center 下的activate 按钮
见红色部分
点击后弹出测试界面,在这你可以测试你的service是否部署成功
5: Security Configuration
主要功能:安全配置(不同的用户反问相应的资源)6: System Administration
主要功能:系统管理
常见poc
1:简单的soap调用,不需要转换协议。
只需要proxy service即可
2:sap idoc—>soap协议转换需要定义proxy service 、business service,并且需要定义proxy service 调用business service的转换规则(具体在message flow中进行)
3:MQ-> soap协议转换需要定义proxy service 、business service,并且需要定义proxy service
调用business service的转换规则(具体在message flow中进行)。