userguide
Dell U2713HM 平面顯示器 使用指南(User Guide)说明书

Dell™ U2713HM 平面顯示器使用指南(User Guide)將顯示解析度設定為 2560 X 1440(最大).此文件中的資訊如有變更,恕不另行通知。
© 2013 Dell Inc. All rights reserved.嚴格禁止在未獲得Dell Inc.書面同意的情況下以任何方式重製任何部分。
本文中使用的商标:Dell 和DELL 標誌是 Dell Inc. 的商標;Microsoft 和Windows 是 Microsoft Corporation 在美國及/或其他國家的商標或注冊商標;Intel 是 Intel Corporation 在美國及其他國家的注冊商標;ATI 是Advanced Micro Devices, Inc. 的商標; ENERGY STAR 是美國環保署的注冊商標。
作為 ENERGY STAR 合作夥伴,Dell Inc. 認定本產品符合 ENERGY STAR 能效方面的標準。
此文件中可能會使用其他商標與商品名稱來參照聲稱的標誌與名稱或其產品的實體。
Dell Inc.放棄除了其自己的商標與商品名稱以外的任何商標與商品名稱的所有利益。
型號 U2713HMt2013 年 10 月版本 A04Dell™ U2713HM 平面顯示器使用指南關於您的顯示器設定顯示器操作顯示器Dell Display Manager 使用者指南疑難排解附錄注意、通知與小心訊息注意:"注意"會指出可幫助您更妥善使用電腦的重要資訊的注意事項。
小心:小心標誌意指可能會損害硬體或造成資料遺失,並告知您如何避免發生這些問題的標誌。
警告: 警告標誌意指可能會造成財產損害、人體傷害或導致死亡的標誌。
此文件中的資訊如有變更,恕不另行通知。
© 2013 Dell Inc. All rights reserved.嚴格禁止在未獲得Dell Inc.書面同意的情況下以任何方式重製任何部分。
UpToDate使用指南
User Guide使用说明目次一、临床问题P.1二、主画面说明P.2三、New Search P.3四、Topic Review全文数据显示P.5五、检索结果输出P.8六、Lexi-Comp 药物交互作用P.9七、Evidence Grading 证据等级P.11八、Patient Information卫教资料P.12九、Calculators 电子表格P.13十、ECG Test心电图自我测验P.1495 Sawyer Road.Waltham, MA 02453-3471 USAPhone: (800) 998-6374.(781) 392-2000Fax: Sales (781) 642-8840.Editorial (781) 642-8867一、以临床问题为例说明:How effective is long-term warfarin at preventing recurrent pulmonary embolism?长期使用 Warfarin在预防肺栓塞的复发有多大的效果?二、 主画面说明进入UpToDate 即进入UpToDate 的主画面,如(图一)所示:(图一)◎以下之說明對應於(圖一)所標示之號碼(1) New Search :检索画面,亦为回到主画面之选项(2) Patient Information :UpToDate 提供了超过700+ Patient information 亦可于检索区输入欲查询之 Patient information 例如:patient info hypertension(3) What’s New :每次新版更新时,主编们会摘选最重要的数据并以最简要的方式呈现 (4) Calculators :目前提供125种电子表格(5) New Search :指令栏/检索区,可输入单一关键词、词句或问题 (6) Search :执行检索(7) Drug Interactions :Lexi-Comp 药物交互作用模块 (8) Feedback :将您宝贵的意见email 给UpToDate (9) 其它选项News from UpToDate :UpToDate 的新讯以及新知 Contact us :UpToDate 联络数据About UpToDate :UpToDate 内容说明 Help :在线求助◎ New Search 指令栏/检索区说明 :(1) 可输入:病名(diseases)、症状(symptoms )、程序(procedures )、药名(drugs )、实验室异常(laboratory abnormalities )(2) UpToDate 可辨识同义字(synonyms)、缩写(abbreviations or acronyms)以及字根(word roots)(3) UpToDate 会自动做拼字检查(4) 可加入适当的关键词,以缩小检索结果在特定的年龄层,例如:in adults, inchildren 或 in pregnancy(5) Gracph searcah 图片检索:亦可以直接搜索UpToDate 里的图片(3)(5)(7)(8)(6)(1) (2)(4)三、New Search:开始检索(1) New Search:输入关键词a.可直接输入单一关键词、多个关键词、词句或问题,如(图二)所示。
gradle-user-guide-(中文版)

Table of Contents1. 介绍2. 概述i. 特点ii. 为什么用 Groovy?3. 教程i. 入门4. 安装Gradlei. 先决条件ii. 下载iii. 解压缩iv. 环境变量v. 运行并测试您的安装vi. JVM选项5. 排除故障i. 解决遇到的问题ii. 获得帮助6. 构建脚本基础知识i. Projects 和 tasksii. Hello worldiii. 快捷的任务定义iv. 构建脚本代码v. 任务依赖vi. 动态任务vii. 使用已经存在的任务viii. 快捷注释ix. 附加的 task 属性x. 使用 Ant 任务xi. 使用方法xii. 默认任务xiii. 通过 DAG 配置7. Java 快速入门i. Java 插件ii. 一个基础的 Java 项目i. 建立项目ii. 外部的依赖iii. 定制项目iv. 发布 JAR 文件v. 创建 Eclipse 项目vi. 总结iii. 多项目的 Java 构建i. 定义一个多项目构建ii. 通用配置iii. 项目之间的依赖iv. 创建一个发行版本8. 依赖管理的基础知识i. 什么是依赖管理ii. 声明你的依赖iii. 依赖配置iv. 外部的依赖v. 仓库vi. 发布 artifacts9. Groovy 快速入门i. 一个基本的 Groovy 项目ii. 总结10. 网页应用快速入门i. 构建一个 WAR 文件ii. 运行 Web 应用iii. 总结11. 使用 Gradle 命令行i. 多任务调用ii. 排除任务iii. 失败后继续执行构建iv. 简化任务名v. 选择文件构建vi. 获取构建信息i. 项目列表ii. 任务列表iii. 获取任务具体信息iv. 获取依赖列表v. 查看特定依赖vi. 获取项目属性列表vii. Profiling a build12. Using the Gradle Graphical User Interface13. Writing Build Scripts14. Tutorial - 'This and That'15. More about Tasks16. Working With Filesi. Locating filesii. File collectionsGradle User Guide 中文版Gradle User Guide 中文版 正在翻译当中 欢迎大家一起加入 因为水平有限 也请大家指正翻译错误的地方https:///DONGChuan/GradleUserGuide Github地址/docs/current/userguide/userguide_single.html#N1012C 原文地址我会开放权限给每一个加入的伙伴,请提前邮箱联系 dongchuan55@特点为什么用 Groovy?这里简述下 Gradle 的特点.1. 声明式构建和合约构建Gradle 的核心是基于 Groovy 的 领域特定语言 (DSL), 具有十分优秀的扩展性. Gradle 通过提供可以随意集成的声明式语言元素将声明性构建推到了一个新的高度. 这些元素还提供了对 Java, Groovy, OSGi, 网络和Scala 等项目的支持. 而且, 基于这种声明式语言的可扩展性. 你可以添加自己的语言元素或加强现有的语言元素, 从而提供简洁, 易于维护和易于理解的构建.2. 基于依赖的编程语言声明式语言位于通用任务图 ( general purpose task graph ) 的顶端,它可以被充分利用在你的构建中. 它具有强大的灵活性,可以满足使用者对 Gradle 的一些特别的需求.3. 让构建结构化Gradle 的易适应性和丰富性可让你在构建里直接套用通用的设计原则. 例如, 你可以非常容易容易的使用一些可重用的组件来构成你的构建. Inline stuff where unnecessary indirections would be inappropriate. 不要强行分离已经结合在一起的部分 (例如, 在你的项目层次结构中). 避免使构建难以维护. 总之, 你可以创建一个结构良好,易于维护, 易于理解的构建.4. API深化你会非常乐意在整个构建执行的生命周期中使用 Gradle, 因为Gradle 允许你管理和定制它的配置和执行行为.5. Gradle scalesGradle scales very well. 不管是简单的独立项目还是大型的多项目构建, 它都能显著的提高效率. 它不仅可以提供最先进的构建功能,还可以解决许多大公司碰到的构建 性能低下的问题.6. 多项目构建Gradle 对多项目的支持是非常出色的. 它允许你模拟在多项目构建中项目的关系,这正是你所要关注的地方. Gradle 遵从你的布局而是去违反它.Gradle 提供了局部构建的功能. 如果你构建一个单独的子项目, Gradle 会构建这个子项目依赖的所有子项目. 你也可以选择依赖于另一个特别的子项目重新构建这些子项目. 这样在一些大型项目里就可以节省非常多的时间.7. 多种方式来管理你的依赖不同的团队有不同的管理外部依赖的方法. Gradle 对于任何管理策略都提供了合适的支持. 从远程 Maven 和 Ivy 库的依赖管理到本地文件系统的 jars 或者 dirs.8. Gradle 是第一个构建整合工具Ant tasks are first class citizens. Even more interesting, Ant projects are first class citizens as well. Gradle provides a deep import for any Ant project, turning Ant targets into native Gradle tasks at runtime. You can depend on them from Gradle, you can enhance them from Gradle, you can even declare dependencies on Gradle tasks in your build.xml. The same integration is provided for properties, paths, etc ...Gradle fully supports your existing Maven or Ivy repository infrastructure for publishing and retrieving dependencies. Gradle also provides a converter for turning a Maven pom.xml into a Gradle script. Runtime imports of Maven projects will come soon.9. 易于迁移Gradle can adapt to any structure you have. Therefore you can always develop your Gradle build in the same branchwhere your production build lives and both can evolve in parallel. We usually recommend to write tests that make sure that the produced artifacts are similar. That way migration is as less disruptive and as reliable as possible. This is following the best-practices for refactoring by applying baby steps.10. GroovyGradle's build scripts are written in Groovy, not XML. But unlike other approaches this is not for simply exposing the raw scripting power of a dynamic language. That would just lead to a very difficult to maintain build. The whole design of Gradle is oriented towards being used as a language, not as a rigid framework. And Groovy is our glue that allows you to tell your individual story with the abstractions Gradle (or you) provide. Gradle provides some standard stories but they are not privileged in any form. This is for us a major distinguishing features compared to other declarative build systems. Our Groovy support is also not just some simple coating sugar layer. The whole Gradle API is fully groovynized. Only by that using Groovy is the fun and productivity gain it can be.10. The Gradle wrapperThe Gradle Wrapper allows you to execute Gradle builds on machines where Gradle is not installed. This is useful for example for some continuous integration servers. It is also useful for an open source project to keep the barrier low for building it. The wrapper is also very interesting for the enterprise. It is a zero administration approach for the client machines. It also enforces the usage of a particular Gradle version thus minimizing support issues.11. 免费和开源Gradle 是一个开源项目, 遵循 ASL 许可.为什么用 Groovy?我们认为在脚本构建时,内部基于XML的DSL(基于一个动态语言)优势是巨大的. 有许多动态语言在那里, 我们为什么选择Groovy? 答案在于 Gradle 的运行环境. 虽然 Gradle 是以一个多用途的构建工具为核心,它的重点是Java项目. 在这样的项目中, 显然团队每个成员都了解Java. 我们认为构建应尽可能对所有团队成员都是透明的, 所以选择了 Groovy.你可能会说,为什么不直接使用 Java 作为构建脚本的语言. 我们认为这是一个有效性的问题. 对于你的团队, 它要有最高的透明度和最低的学习曲线, 也就是说容易掌握. 但由于 Java 的限制, 这样的构建语言不会那么完美和强大. 如 Python,Groovy 或 Ruby 语言都可以有更高的效率. 我们选择了 Groovy 是因为它给 Java 开发人员提供了迄今为止最大的透明度. 其基本的符号和类型与 Java 是一样的,其封装结构和许多其他的地方也是如此.对于那些同样分享 Python 或 Ruby 知识的 Java 团队将会很乐意学习它. Gradle 的设计非常适合在 JRuby 和 Jython 中创建另一个构建脚本引擎. 它只是目前开发的优先级里. 我们十分支持任何人来做贡献, 创建额外的构建脚本引擎.入门接下来的教程讲先介绍Gradle的基础知识Chapter 3, 安装 Gradle描述如何安装 Gradle.Chapter 5, 脚本构建基础介绍脚本构建的基础元素: projects 和 tasks. Chapter 6, Java 快速入门展示如何开始使用 Gradle 的合约构建来构建 Java 项目. Chapter 7, 依赖管理基础展示如何开始使用 Gradle 的依赖管理.Chapter 8, Groovy 快速入门使用 Gradle 的合约构建来构建 Groovy 项目. Chapter 9, 网页应用快速入门使用 Gradle 的合约构建来构建网页应用项目.安装 Gradle先决条件下载解压缩环境变量运行并测试您的安装JVM选项先决条件Gradle 需要安装一个 Java JDK 或者 JRE. Java 版本必须至少是6以上. Gradle 自带 Groovy 库, 所以没必要安装 Groovy. 任何已经安装的 Groovy 会被 Gradle 忽略.Gradle使用任何存在在你的路径中的JDK (可以通过 java -version检查). 或者, 你可以设置 JAVA_HOME 环境参数来指定希望使用的JDK的安装目录.下载你可以从Gradle网站下载任意一个已经发布的版本解压缩Gradle发布的版本为ZIP格式. 所有文件包含:Gradle 二进制文件.用户指南 (HTML 和 PDF).DSL参考指南.API文档 (Javadoc和 Groovydoc).扩展的例子,包括用户指南中引用的实例,以及一些完整的以及更复杂的build来帮助用户构建自己的build.二进制源码.此代码仅供参考.如果你想要构建Gradle你需要下载发布的源代码或者提取代码库中的源代码. 请参考官方网站获得具体的信息.环境变量为了运行Gradle, 添加 GRADLE_HOME/bin 到您的 PATH 环境变量中. 通常, 这样已经足够运行Gradle了.这里的 GRADLE_HOME 是 Gradle 的安装路径.运行并测试您的安装您可以通过 gradle 命令来运行Gradle. 通过 gradle -v 命令来检测Gradle是否已经正确安装. 如果正确安装,会输出Gradle版本信息以及本地的配置环境 ( groovy 和 JVM 版本等). 显示的版本信息应该与您所下载的gradle版本信息相匹配.JVM 选项JVM 选项可以通过设置环境变量来更改. 您可以使用 GRADLE_OPTS 或者 JAVA_OPTS. 根据惯例, JAVA_OPTS 是一个用于 JAVA 应用的环境变量. 一个典型的用例是在 JAVA_OPTS 里设置HTTP代理服务器(proxy) , 在 GRADLE_OPTS 这是内存选项. 这些变量也可以在 gradle 的一开始就设置或者通过 gradlew 脚本.排除故障当使用 Gradle 时, 你肯定会碰到许多问题. 你也许不知道如果使用一个特别的功能, 或者你碰到了一个 BUG. 或者, 你只是有一些关于使用y Gradle 的问题.这一章给出了一些简单的建议并解释了如何解决你的问题.解决遇到的问题如果你碰到了问题, 首先要确定你使用的是最新版本的 Gradle. 我们会经常发布新版本, 解决一些 bug 并加入新的功能. 所以你遇到的问题可能就在新版本里解决了.如果你正在使用 Gradle Daemon, 先暂时关闭 daemon (你可以使用 switch --no-daemon 命令). 在第19章我们可以了解到更多关于 daemon 的信息.获得帮助可以去 获得相关的帮助. 在 Gradle 论坛里, 你可以提交问题, 当然也可以回答其他 Gradle 开发人员和使用者的问题.如果你碰到不能解决的问题, 请在论坛里报告或者提出这个问题, 通常这是解决问题最快的方法. 您也可以提出建议或者一些新的想法. 开发团队会经常性的发布新的东西或者发布通知, 通过论坛, 您可以获得 Gradle 最新的开发信息.构建脚本基础知识Projects 和 tasksHello world快捷的任务定义构建脚本代码任务依赖动态任务使用已经存在的任务快捷注释附加的 task 属性使用 Ant 任务使用方法默认的任务通过 DAG 配置Projects 和 tasksGradle 里的任何东西都是基于这两个基础概念: projects(项目) 和 tasks(任务).每一个 Gradle 构建都是由一个或多个projects 构成的. 一个 project 到底代表什么依赖于你想用 Gradle 做什么. 举个例子, 一个 project 也许代表一个 JAR 或者一个网页应用. 它也可能代表一个发布的 ZIP 压缩包, 这个 ZIP 可能是由许多其他项目的JARs 构成的. 一个 project 不必要代表要被构建的某个东西. 它可以代表一件要做的事, 比如布署你的应用. 不要担心现在这些说明看上去有一点模糊. Gradle 的合约构建的支持加入了一个更加具体的关于 project 的定义.每一个 project 是由一个或多个 tasks 构成的. 一个 task 代表一些更加细化的构建. 可能是编译一些 classes, 创建一个 JAR,生成 javadoc, 或者生成莫个目录的压缩文件.目前, 我们将关注定义构建里的一些简单的 tasks . 以后的章节会关注与多项目构建以及如果通过projects 和 tasks 工作.Hello world您通过 gradle 命令运行一个 Gradle 构建. gradle 命令会在当前目录查找一个叫 build.gradle 的文件. 我们称 这个build.gradle 文件为一个构建脚本 (build script), 虽然严格来说它是一个构建配置脚本 (build configuration script). 这个脚本定义了一个 project 和它的 tasks.让我们来试一试,创建一个名为build.gradle的构建脚本.Example 6.1. 第一个构建脚本build.gradletask hello {doLast {println 'Hello world!'}}在命令行里, 进入包含的文件夹然后通过 gradle -q hello 执行构建脚本:gradle -q hello 的输出> gradle -q helloHello world!这里发生了什么? 这个构建脚本定义了一个单独的 task, 叫做 hello, 并且加入了一个 action. 当你运行 gradle hello, Gradle 执行叫做 hello 的 task, 也就是执行了你所提供的 action . 这个 action 是一个包含一些 Groovy 代码的闭包(closure 这个概念不清楚的同学好好谷歌下).如果你认为这些看上去和 Ant 的 targets 很想象, 好吧, 你是对的. Gradle tasks 和 Ant 的 targets 是对等的. 但是你也会看到,他们是更加强力的. 我们使用一个不同于 Ant 的术语 task , 看上去比 target 更加能直白. 不幸的是这个带来了一个术语冲突,因为 Ant 称它的命令, 比如 javac 或者 copy, 叫 tasks. 所以当我们谈论 tasks, 是指 Gradle 的 tasks. 如果我们能讨论 Ant 的tasks (Ant 命令), 我们会直接称呼 ant task.补充一点命令里的 -q 是干什么的?这个指南里绝大多说的例子会在命令里加入 -q. 它取缔了 Gradle 的日志信息 (log messages), 所以用户只能看到 tasks 的输出. 它例子的输出更加清晰. 你并不一定需要加入这个选项. 参考第 18 章, 日志的 Gradle 影响输出的详细信息.快捷的任务定义有一种比我们之前定义的 hello 任务更简明的方法*Example 6.3. 快捷的任务定义build.gradle*task hello << {println 'Hello world!'}再一次, 它定义一个叫做 hello 的任务, 这个任务是一个可以执行的闭包. 我们将使用这种方式来定义这本指南里所有的任务.构建脚本代码Gradle 的构建脚本展示给你 Groovy 的所有能力. 作为开胃菜, 来看看这个: Example 6.4. 在 Gradle 任务里使用 Groovybuild.gradletask upper << {String someString = 'mY_nAmE'println "Original: " + someStringprintln "Upper case: " + someString.toUpperCase()}gradle -q upper 命令的输出> gradle -q upperOriginal: mY_nAmEUpper case: MY_NAME或者Example 6.5. 在 Gradle 任务里使用 Groovybuild.gradletask count << {4.times { print "$it " }}gradle -q count 命令的输出> gradle -q count0 1 2 3任务依赖就像你所猜想的那样, 你可以申明任务之间的依赖关系.Example 6.6. 申明任务之间的依赖关系build.gradletask hello << {println 'Hello world!'}task intro(dependsOn: hello) << {println "I'm Gradle"}gradle -q intro 命令的输出> gradle -q introHello world!I'm Gradle再加入一个依赖之前, 这个依赖的任务不需要提前定义了,来看下面的例子.Example 6.7. Lazy dependsOn - 其他的任务还没有存在build.gradletask taskX(dependsOn: 'taskY') << {println 'taskX'}task taskY << {println 'taskY'}gradle -q taskX 命令的输出> gradle -q taskXtaskYtaskXtaskX 到 taskY 的依赖在 taskY 被定义之前就已经申明了. 对于我们之后讲到的多任务构建是非常重要的. 任务依赖将会在14.4 具体讨论.请注意你不能使用快捷注释 (参考 5.8, “快捷注释”) 当所关联的任务还没有被定义.动态任务Groovy 不仅仅被用来定义一个任务可以做什么. 举个例子, 你可以使用它来动态的创建任务. Example 6.8. 动态的创建一个任务build.gradle4.times { counter ->task "task$counter" << {println "I'm task number $counter"}}gradle -q task1 命令的输出> gradle -q task1I'm task number 1使用已经存在的任务当任务创建之后, 它可以通过API来访问. 这个和 Ant 不一样. 举个例子, 你可以创建额外的依赖.Example 6.9. 通过API访问一个任务 - 加入一个依赖build.gradle4.times { counter ->task "task$counter" << {println "I'm task number $counter"}}task0.dependsOn task2, task3gradle -q task0 命令的输出> gradle -q task0I'm task number 2I'm task number 3I'm task number 0或者你可以给一个已经存在的任务加入行为.Example 6.10. 通过API访问一个任务 - 加入行为build.gradletask hello << {println 'Hello Earth'}hello.doFirst {println 'Hello Venus'}hello.doLast {println 'Hello Mars'}hello << {println 'Hello Jupiter'}gradle -q hello 命令的输出> gradle -q helloHello VenusHello EarthHello MarsHello JupiterdoFirst 和 doLast 可以被执行许多次. 他们可以在任务动作列表的开始和结束加入动作. 当任务执行的时候, 在动作列表里的动作将被按顺序执行. << 操作符是 doLast 的简单别称.快捷注释正如同你已经在之前的示例里看到的, 有一个方便的注释可以访问一个存在的任务. 每个任务可以作为构建脚本的属性: Example 6.11. 当成构建脚本的属性来访问一个任务build.gradletask hello << {println 'Hello world!'}hello.doLast {println "Greetings from the $ task."}gradle -q hello 命令的输出> gradle -q helloHello world!Greetings from the hello task.这里的name是任务的默认属性, 代表当前任务的名字, 这里是 hello这使得代码易于读取,特别是当使用了由插件(如编译)提供的任务时尤其如此.附加的 task 属性你可以给任务加入你自己的属性. 为了加入一个 myProperty 属性, 设置一个初始值给 ext.myProperty. 从这一点上来说,该属性可以读取和设置像一个预定义的任务属性.Example 6.12. 给任务加入额外的属性build.gradletask myTask {ext.myProperty = "myValue"}task printTaskProperties << {println myTask.myProperty}gradle -q printTaskProperties 命令的输出> gradle -q printTaskPropertiesmyValue给任务加额外的属性是没有限制的. 你可以在 13.4.2, “额外属性” 里获得更多的信息.使用 Ant 任务Ant 任务是 Gradle 的一等公民. Gradle 通过 Groovy 出色的集成了 Ant 任务. Groovy 和 AntBuilder 装在在一起. 相比于使用Ant任务从一个build.xml文件, 在 Gradle 里使用 Ant 任务是为方便和强大. 从下面的例子中,你可以学习如何执行 Ant 任务以及如何访问 ant 属性:Example 6.13. 使用 AntBuilder 来执行 ant.loadfile 任务build.gradletask loadfile << {def files = file('../antLoadfileResources').listFiles().sort()files.each { File file ->if (file.isFile()) {ant.loadfile(srcFile: file, property: )println " *** $ ***"println "${ant.properties[]}"}}}gradle -q loadfile 命令的输出> gradle -q loadfile*** agile.manifesto.txt ***Individuals and interactions over processes and toolsWorking software over comprehensive documentationCustomer collaboration over contract negotiationResponding to change over following a plan*** gradle.manifesto.txt ***使不可能成为可能, 使可能更加简单,使简单更加优雅.使用方法Gradle 能很好地衡量你规划构建逻辑的能力. 首先衡量的是如何提取一个方法.*Example 6.14. 使用方法规划你的构建逻辑build.gradle*task checksum << {fileList('../antLoadfileResources').each {File file ->ant.checksum(file: file, property: "cs_$")println "$ Checksum: ${ant.properties["cs_$"]}"}}task loadfile << {fileList('../antLoadfileResources').each {File file ->ant.loadfile(srcFile: file, property: )println "I'm fond of $"}}File[] fileList(String dir) {file(dir).listFiles({file -> file.isFile() } as FileFilter).sort()}adle -q loadfile 命令的输出> gradle -q loadfileI'm fond of agile.manifesto.txtI'm fond of gradle.manifesto.txt稍后你看到,这种方法可以在多项目构建的子项目之间共享. 如果你的构建逻辑变得更加复杂,Gradle 为你提供了其他非常方便的方法. 请参见第59章,组织构建逻辑。
乐高机器人用户手册NXTUserGuide

超声波传感器
通过超声波测量距离,常用于 避障、定位等场景。
触碰传感器
检测物体的接触或按压,常用 于触发特定动作或反应。
声音传感器
检测声音信号,可用于声控操 作或实现声音交互功能。
温度传感器
检测环境温度,可用于温度控 制或环境感知。
传感器连接与配置方法
连接步骤
将传感器线缆插入NXT主控器对 应的传感器端口,确保连接稳固。
组装前准备工作
01
02
03
04
仔细阅读说明书
了解套件内容、组装步骤和注 意事项。
准备工具
需要一把小十字螺丝刀和一把 平口螺丝刀,用于拧紧螺丝和
拆卸部件。
安排工作空间
确保组装过程中有足够的空间 摆放零件和工具,并保持整洁。
检查电源
确认电池盒已安装好电池,并 确保电池极性正确。
逐步组装指南
构建机器人底盘
乐高机器人用户手册 NXTUserGuide
目录
• 开箱与组装 • 编程与软件安装 • 传感器与输入设备应用 • 马达与输出设备控制 • 常见问题排查与解决方案 • 进阶技巧与拓展应用
01
开箱与组装
NXT乐高机器人套件内容
NXT智能砖
控制机器人的大脑,具备强大的计算能力和多 种传感器接口。
伺服马达
创意项目设计思路展示
自动寻迹小车
利用光线传感器和电机控制,实现小车自动寻迹 行驶。
智能搬运机器人
通过编程和传感器控制,实现机器人自动搬运物 品和避障功能。
人形机器人
利用NXT机器人的灵活性和可编程性,设计人形 机器人,实现各种动作和语音交互功能。
参加比赛和展示活动建议
了解比赛规则和评分标准 在参加比赛前,需要了解比赛规则和评
英语guide
英语guide"Guide" 是一个英文单词,它有多种意思和用法。
在大部分情况下,"guide" 可以作为名词或动词使用。
作为名词 (noun),"guide" 的意思是:指导者,导游,向导:这是一个人,他或她的工作是带领人们去某个地方,或者解释某个地方的信息。
例如,在旅行团中,负责带领游客的通常被称为 "tour guide"(导游)。
手册,指南,引导:这是一种文档或书籍,提供了关于如何做某事或在哪里找到特定信息的建议或说明。
例如,“用户指南”(user guide)就是帮助用户理解和使用产品或服务的说明书。
作为动词 (verb),"guide" 的意思是:引导,指导,带领:这是指通过提供信息或建议来帮助某人完成某事或达到某个目标。
例如,老师可能会 "guide" 学生完成他们的作业。
操作,控制:这是指使用某种方法或技术来影响或控制某个过程或结果。
例如,飞行员需要 "guide" 飞机降落。
以上就是 "guide" 这个单词的基本含义和用法。
here are a few examples using the word "guide" in sentences:As a noun:1.Our guide through the jungle was very knowledgeableabout the local wildlife.2.I bought a travel guide to plan my trip to Paris.3.The instructor provided a step-by-step guide on how touse the new software.4.The mountain climbers relied on their experiencedguide to lead them to the summit safely.5.She kept the tourist guidebook by her side during herjourney across Europe.As a verb:1.He guided the tourists through the city's historicdistrict, pointing out important landmarks.2.The counselor will guide you through the collegeapplication process.3.Can you guide me on how to operate this new smart TV?4.The coach guides the athletes to improve theirperformance.5.The dolphin seemed to be guiding the lost swimmer backto the shore.These sentences showcase the different uses of "guide" both as a noun, referring to a person or document that provides information or assistance, and as a verb, illustrating the action of leading or directing someone or something.。
User_Guide

企业客户分类规则挖掘系统使用说明(1)启动customer_classify.exe文件,首先弹出图1所示的“企业客户分类规则挖掘系统”的说明窗口,片刻后,系统自动弹出系统主界面,如图2所示。
(2)如图2所示,在系统主界面中有菜单和企业客户分类规则挖掘系统的功能简介。
菜单包括企业客户分类规则挖掘、查看数据、系统原理、使用说明和退出。
(3)请点击“查看数据”,系统将弹出“企业客户数据”窗口显示客户的原始数据,如图3所示。
(4)请点击“系统原理”菜单查看该系统的原理。
(5)请点击“使用说明”菜单查看如何使用该系统。
(6)请点击“企业客户分类规则挖掘”菜单,弹出图4所示的“企业客户分类规则挖掘”窗口。
图1 “企业客户分类规则挖掘系统”的说明窗口图2 系统主界面图3 企业客户数据窗口(7)在参数设置中已经输入各参数值,如种群大小为50,最大迭代数目为40,最小支持度阈值ms 为0.2,最小置信度阈值mc 为0.6,交叉概率为80%,变异概率为5%。
如图5所示。
用户可以自己修改各参数值。
(8)点击遗传运算操作中的“编码”,右侧出现编码,运算状态显示为“请选择筛选种群的运算!”,如图6、7所示。
(9)点击遗传运算操作中的“筛选种群”,右侧将把不符合置信度和支持度的编码用“***”表示出来,运算状态显示为“当前尚未达到最大迭代次数,请继续进行交叉运算!”,如图8、9所示。
图4 “企业客户分类规则挖掘”窗口 图5 参数设置图6 编码操作的结果 图7 编码操作的运算状态(10)依次点击遗传运算操作中的“交叉”和“变异”,运算状态中分别显示“当前尚未达到最大迭代次数,请继续进行变异运算!”和“当前尚未达到最大迭代次数,遗传算法可以继续进行!”,如图10、11所示。
此时,“算法继续运行”按钮变为可用。
(11)点击“算法继续运行”按钮,出现如图12所示的对话框,点击“确定”按钮,运算状态中显示“算法运行大概需要2-3分钟,请耐心等候”,直到2-3分钟后“输出最优规则集”按钮变为可用。
user_guide

《同一发网络传真系统使用指南》目录1.同一发传真服务平台功能概述: (3)2.同一发普通用户(虚拟管理员)使用指南: (3)2.1登录系统: (4)2.2发送传真: (4)2.3地址本管理及使用: (8)2.4取消待发任务或作业: (9)2.5查询及统计: (9)2.6归档查询: (11)2.7用户管理: (11)2.8用户设置: (13)3.同一发传真群发系统使用过程中,常见问题解答(FAQ): (14)1.同一发传真服务平台功能概述:同一发传真服务平台是一款智能化的传真服务平台,自推出市场以来,立即受到各类用户的欢迎,已主要用于物流,旅游,外贸等行业的各类企业。
本使用指南主要讲述使用同一发传真服务平台的普通用户的操作指南。
同一发采用目前业界最新的CTI(计算机电话集成)技术,Internet 网络技术,图像处理技术专业打造的增值业务平台。
使用同一发传真服务平台,可让各企事业单位及个人通过互联网WEB浏览器来访问同一发,用户无需打印,便可通过Internet网来收发传真,并且一次可同时递交上万份传真,每份传真都可以有一个清晰的结果,从而使申请了同一发服务的用户可象收发Email一样方便地收发传真,可在网络能通的任何地方,任何时间收发传真,极大地提高了企业的运营成本,工作效率。
同一发在使用界面上采用了OALLtLook收件箱、发件箱等思想,用户在客户端无需安装任何软件,便可通过IE浏览器使用同一发。
在界面上基本使用户沿用收发Email的习惯,用户可方便地象收发Email一样来收发传真。
为方便起见,本使用指南只讲述同一发的传真收发使用。
同一发传真服务平台普通用户分为两类: 1。
虚拟管理员(企业管理员):为了使申请同一发服务的企业能很好地管理其下面的员工使用同一发,防止员工滥用公司资源去使用同一发, 同一发传真服务平台具有虚拟管理员的功能,具有虚拟管理员角色的企业,可对下面的员工再分配子帐号,虚拟管理员可以通过对子帐号查询来清楚地了解各员工使用系统的情况;2。
Userguide
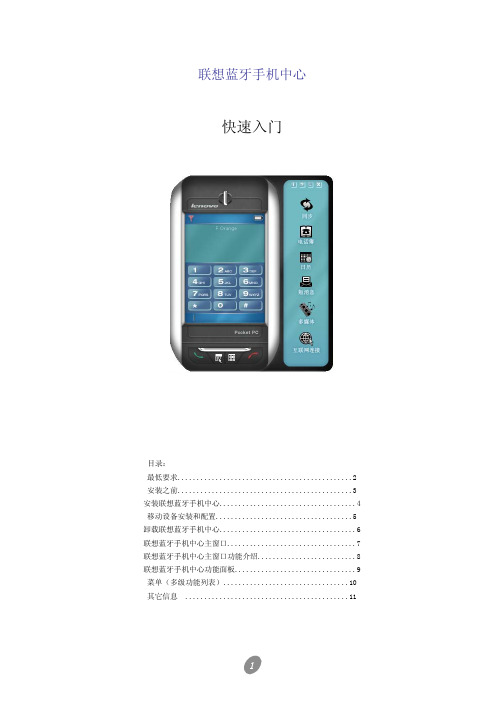
联想蓝牙手机中心快速入门目录:最低要求 (2)安装之前 (3)安装联想蓝牙手机中心 (4)移动设备安装和配置 (5)卸载联想蓝牙手机中心 (6)联想蓝牙手机中心主窗口 (7)联想蓝牙手机中心主窗口功能介绍 (8)联想蓝牙手机中心功能面板 (9)菜单(多级功能列表) (10)其它信息 (11)最低要求联想蓝牙手机中心需要使用 Windows 2000,XP或 Vista。
如需关于其它操作系统以及与升级有关的任何信息,请与联想公司。
为使联想蓝牙手机中心正确运行,请检查下列事项:♦ 一台配备Pentium(R)II 233MHz的计算机,并且已经连接到您的手机设备。
♦ 一个可用的USB端口。
♦ 拥有20MB可用空间的本地硬盘驱动器。
♦ 与联想蓝牙手机中心兼容的设备。
♦ 与您的手机设备运营商的服务合约中包含高速数据网络选项(以便网络上使用高速电子邮件和 Internet 浏览);数据服务是与网络和服务合约有关的特性,并不是在所有地区都能使用。
有关的详细信息,请与您的无线服务提供商联系。
♦ 最低活动内存:在 Windows(R) 2000 和 XP 下最少 64MB 的 RAM。
安装之前屏幕快照本指南中的屏幕快照基于在Windows(R)XP环境下使用联想蓝牙手机中心。
在其它Windows(R) 操作系统下运行此应用程序时,屏幕内容可能会有变化。
这并不影响软件的功能性。
联机帮助联想蓝牙手机中心提供上下文关联的联机帮助,单击“帮助”按钮或按键盘上的F1可以访问联机帮助。
帮助文件中包含有关如何使用联想蓝牙手机中心的完整信息。
安装联想蓝牙手机中心重要事项 !您需要先安装软件,然后再将设备连接到计算机。
要将联想蓝牙手机中心安装到硬盘驱动器上,请将包含程序的CD- ROM插入相应的驱动器中。
从CD-ROM安装联想蓝牙手机中心时,安装过程会自动启动。
如果安装程序未启动,请执行下列步骤:1. 在任务栏的开始菜单中,选择运行命令。
guide的用法及固定搭配
guide的用法及固定搭配1. Guide作为名词使用:- 旅游/导游:tour guide(导游),guidebook(旅游手册)- 指导手册/指南:instruction guide(操作指南),style guide(风格指南) - 指导者/导师:mentor,coach,tutor(辅导员,导师)- 地图上的标志:marker,pointer2. Guide作为动词使用:- 引导/指引:guide someone/something(引导某人/某事物)- 指导/教导:guide someone(指导某人)- 影响/主导:guide someone's actions(影响某人的行为)- 控制/调整:guide something(调整某事物)固定搭配:- Rough guide(概览指南):A rough guide to New York City.- Step-by-step guide(分步指南):A step-by-step guide to baking a cake.- User's guide(用户手册):Please refer to the user's guide for instructions.- Safety guide(安全指南):Follow the safety guide to avoid accidents.- Guide someone through (a process)(引导某人完成某过程):She guided me through the process of applying for a visa.- Guide someone to (a place)(将某人引领到某地):He guided us to the hidden treasure.。
Premier 412 816 832 User Guide

THANK YOU FOR VOTING TEXECOMUSER GUIDE Security Control PanelsOperating Your Alarm SystemThis document covers the everyday operation of your alarm system, for details on more advanced operation and system programming, please refer to the Premier 412/816/832 Master User Manual.Away Arming the SystemEnter your Access code followed by the "/# key. The Armed light will flash and the exit sounder will sound for the duration of the exit time. Stay Arming the SystemEnter your Access code followed by the $ key. The system will normally arm immediately, the Armed light will flash slowly indicating that the system is Stay armed.Disarming During EntryEnter the premises via the designated entry point. The entry tone will sound, proceed directly to the remote keypad and enter your Access code .Disarming When Not in EntryProceed directly to the remote keypad and enter your Access code followed by the %/& key. Note:If your system consists of only one partition you will not have to press the %/& key.Bypassing ZonesEnter your Access code followed by the ' key. Enter the zone or zones to be bypassed e.g. 02, 04 etc. When all required zones have been selected, press:"/# to Away arm the system with the selected zones bypassed$ to Stay arm the system with the selected zones bypassed( to return to the normal disarmed state with the selected zones bypassedReset Alarms/FaultsEnter your Access code , then enter () or press *.Last Alarm LogEnter your Access code , and then enter (+. The remote keypad will display the zones that caused an alarm when the system was last armed. Press ( to return to the normal disarmed state.Acknowledging a New Service FaultShould the Service light start flashing, enter your Access code , and then enter (,. The remote keypad will display all S ervice Faults (see Service Faults Table on back page). Press ( or *-to acknowledge the fault and return to the normal disarmed state.Toggle Chime On and OffEnter your Access code , and then enter (. or /.Change User Access CodeEnter your existing Access code , and then enter (0. Enter your new Access code followed by the "/# key. Now re-enter your new Access code for confirmation.Abort CommunicationsEnter your Access code , and then enter (1.Operating Your Alarm System with Quick Commands If your Installer has programmed the Quick Commands the following procedures can be used:Away Arming the SystemPress the "/# key. The Armed light will flash and the exit sounder will sound for the duration of the exit time.Stay Arming the SystemPress the $ key. The system will normally arm immediately, the Armed light will flash slowly indicating that the system is Stay armed.Bypassing ZonesPress the ' key. Enter the zone or zones to be bypassed e.g. 02, 04 etc. When all required zones have been selected, press:"/# to Away arm the system with the selected zones bypassed$ to Stay arm the system with the selected zones bypassed( to return to the normal disarmed state with the selected zones bypassedLight Fault Condition 1 ACFail2 Telephone Line Fault3 2-Wire Smoke Alarm4 Box Tamper & Auxiliary Input:Press. to view type, lights 1 - 5 indicate: Light 1 = Box TamperLight 2 = Auxiliary TamperLight 3 = Auxiliary PALight 4 = Auxiliary Tamper (UK Bell Module) Light 5 = Bell Tamper (UK Bell Module)5 Date or Time Lost6 Zone Tamper/TroublePress2 to view zone number7 Keypad Tamper/Removed Press1 to view keypad number8 Equipment FaultsPress3 to view fault type:Light 1 = Output 1 FaultLight 2 = Output 2 FaultLight 3 = Siren/Bell FaultLight 4 = 2-Wire Smoke Sensor FaultLight 5 = Auxiliary Fuse FailedLight 6 = Battery FaultLight 7 = Service Timer/Zone Soak Test Failed Light 8 = Communication Fault© Texecom Ltd. 2000 - 2003。
Premier Elite 24 48 88 168 640 User Guide

User Guide Premier Elite 24/48/88/168/640INS221-4Premier Elite Series User GuideIntroductionUsers of the alarm system will be assigned a unique 4, 5 or 6 digit User code, and may be assigned a Proximity Tag. User codes are used to arm and disarm the system. Some User codes can also access additional options such as, system tests and omitting zones.Keypads will be installed throughout the premises, usually one at each entry/exit door. The keypads are used to perform all of the system operations i.e. Arming, Disarming etc. Most User codes can be used at any keypad on the system. However, Local Users will only be able to use certain keypads on the system.The Emergency KeysIn case of emergency, the alarm system can provide three immediate emergency alarms by pressing and holding two specific keys for two seconds.The emergency keys can be enabled/disabled for each keypad on the system. ThePanic alarm can be programmed for either audible or silent operation. The Panicalarm can be programmed for either instant or delayed operationThe Quick Arm KeysThe ‘Quick Arm’ keys allow the system to be armed without having to enter a User code first.The ‘Quick Arm’ keys will only work if the keypad has been programmed to allow arming in this way.To FULL arm the system, press .To PART arm the system,press , or followed by .Keypad LockThe keys on the keypad can be locked to prevent unwanted access to the system.The Emergency keys will NOT operate with the keys locked.To Lock the keys press and together. To Unlock the keys, press and together again. LED IndicatorsFive LED indicators have been provided to indicate the status of the system.Premier Elite Series User Guide Zone Faults During ArmingBefore attempting to arm the system, ensure that the premises are secure (all doors and windows closed etc.) and the Ready light is on.If an attempt is made to arm the system with any zones active (e.g. door ajar, open window, etc.) the internal sounders will bleep repeatedly (fault tone) and the display will show the zones that are active.The fault tone will stop and the exit tone will resume when all zones are secure. If it is necessary to leave a zone open then it must be omitted (see page 6 for details).If an active zone cannot be secured then it may be ‘in fault’, in this case contact the alarm company immediately.Arm Fail - Failing to ArmIf the exit procedure is started and zones are still ‘Active’ at the end of the exit procedure, an Internal alarm will occur (internal sounders only) and the strobe light on the external sounder will flash.If this occurs the arm fail must be cleared and the zone in fault identified before the system can be armed (see page 4 for details on clearing an Arm Fail).The Ready LEDTo help prevent faults during arming a Ready light has been provided, see table above for details on how the Ready LED operates.To FULL Arm the SystemThe system is FULL Armed when ALL zones are ON (not omitted).Your Installer may have programmed the system so that it can be set by just pressing , if this is the case then there is no need to enter the User code below.1. Ensure that the premises are secure (all doors and windows closed etc.) and the Ready light is on2. Enter a valid User code3. Press to arm. The exit tone will sound4. Leave the premises When the system has armed the exit tone will stopTo PART Arm the SystemThe system is P ART Armed, when ONE OR M ORE zones have been left OFF (omitted) i.e. the landing or a bedroom.The system is only Part Armed when zones are omitted using the ‘Part Arm’ procedure (omitting zones manually (see page 6 for details) is not classed as Part Arming).The bottom line of the display is programmable for each Part Arm.Your Installer may have programmed the system so that it can be Part Armed by just pressing , or followed by , if this is the case then there is no need to enter the User code below.1. Ensure that the premises are secure (all windows and doors not being omitted are closed) and the Ready lightis on2. Enter a valid User code3. Press4. Use keys - to select the required Part Arm5. Press to arm normally or press to arm silently The exit tone will sound (if silent arm has not been selected)6. Leave the protected area When the system has armed, the exit tone (if sounding) will stopPremier Elite Series User GuideTo ARM Individual AreasIf the system has been split up into separate areas of protection i.e. Area 1 = House, Area 2 = Garage, Area 3 = Shed etc. These areas can be individually selected for FULL or PART arming as required.Areas are selected by using keys - (the key can also be used to select an area followed by or ).On the 640 there are 4 Area groups, each with 16 Areas, these can be selected by pressing the - key to select an Area Group (1-4)Only areas that exist on the system can be selected. (A ‘Star’ means the area can be selected and a ‘Dot’ means the area cannot be selected).Pressing will select/deselect all areas, pressing will toggle between the first 8 areas and the second 8 areas (where applicable).1. Ensure that the premises are secure (all windows and doors not being omitted are closed) and the Ready lightis on2. Enter a valid User code3. Press4. Use keys - to select the required areas5. Press or to FULL arm the areas Or on the 640 press5. Press , or followed by or (24/48/88/168) or (640)to PART arm the areas The exit tone will sound (if silent arm has not been selected)6. Leave the premises When the system has armed, the exit tone (if sounding) will stopTo DISARM the SystemThe entry time is divided into two sections, the Entry time and the 2nd Entry time. If the Entry time expires, an Internal alarm will occur and the 2nd Entry time will start. If the 2nd Entry time expires, an Intruder alarm will occur (all internal and external sounders).It is perfectly normal for the 2nd Entry time to be programmed as zero, in which case, an Intruder alarm will occur as soon as the Entry time expires.1. Enter the premises via the designated entry point The entry tone will start2. Enter a valid User code The entry tone will stopTo DISARM the System When Not in Entry1. Enter a valid User code2. PressTo CANCEL the Exit ModeOnce the exit mode has been started you should leave the premises immediately, however, if for some reason you decide not to leave, the exit mode must be cancelled.1. Enter a valid User code2. Press The exit tone will stop.Premier Elite Series User Guide To CLEAR an Arm FailWhen the system tries to arm with zones active (open), the internal sounders will sound and the external strobe will be flashing to indicate a problem. For details on preventing an Arm Fail condition, please refer to page 3.If you were not present when the Arm Fail occurred or you do not clear the Arm Fail, the internal sounders will continue to sound and the external strobe will continue to flash.1. Enter a valid User code The internal and external sounders will stop, the external strobe will continue to flash and the number of the zone that caused the Arm Fail will be displayed.2. Enter a valid User code and pressTo SILENCE an AlarmWhen an alarm occurs on the system, the internal and external sounders will normally sound for a pre-programmed time (normally 15 minutes).If you were not present when the alarm activated, the internal and external sounders may have already stopped but the external strobe will still be flashing.When alarm information is being displayed, pressing the SCROLL key will slow down the display and also allow manual scrolling through the events.1. Enter a valid User code The internal and external sounders will stop and the number of the zone that caused the alarm will be displayed. The alarm now needs to be reset.To DISPLAY the cause(s) of System Alerts (Alarms)When silencing an alarm or unsetting the system after an alarm, the number of the zone(s) will be displayed on the keypad. If several zones were triggered, the display will scroll through each in turn.After noting the cause of the alarm, the system can be reset as described in ‘RESET After an Alarm’ below. System AlertsWhen the system has faults to display, or has not been reset after an alarm condition, the display may show‘SYSTEM ALERTS’.Enter a valid User codeAny alarms or faults will be displayed. If several fault or alarm conditions have been triggered, the display will scroll through each in turn.After noting the cause of the alarm or fault, the system can be reset as described in ‘RESET After an Alarm’ below. Some action may be required to clear the cause of the alarm or fault in order to successfully reset the panel.To RESET After an AlarmIf the display shows ‘SYSTEM ALERTS’, follow the steps described in ‘To DISPLAY the causes of System Alerts’ above, before attempting to reset.USER ResetOnce the alarm has been silenced (see page 5 for details), the system will need to be reset.If the system has been programmed, to be reset by an Engineer, pressing will not return the display to normal, if this is the case see ENGINEER Reset for details.The system may have been programmed to be reset by Anti-code, if this is the case, see ANTI-CODE Reset for details.1. Enter a valid User code2. Press The external strobe will stop, the system will chime and the display will return to normal.Premier Elite Series User GuideENGINEER ResetIf the system has been programmed to be reset by an Engineer following an alarm activation, you will still be able to silence the alarm by entering a valid User code (see page 5 for details).The system cannot be armed again until the alarm has been reset.1. Contact the telephone number on the display (if programmed) or the telephone number on the last page ofthis User GuideANTI-CODE ResetIf the system has been programmed to be reset using an Anti-Code following an alarm activation, you will still be able to silence the alarm by entering a valid User code (see page 5 for details).The system cannot be armed again until the alarm has been reset.1. Enter a valid User code2. Press The display will show a random code number i.e. 4281.3. Contact the telephone number on the display (if programmed) or the telephone number on the last page ofthis User Guide and quote the random code number You will be given a 4-digit Anti-Code i.e. 5624.4. Enter the Anti-code that has been given to you5. Press If the Anti-code is correct, the keypad will bleep to indicate that the system has been reset and the display will return to normal.To OMIT ZonesIt is possible to exclude (omit) individual zones when arming i.e. if a zone is ‘in fault’. Users with access to this function can only omit zones that have been programmed as ‘Omittable’.If the zone can be omitted, there will be a ‘Star’ to the right of the zone number. Only zones that have the ‘Omit’ attribute assigned to them can be omitted.A ‘Star’ will appear to the left of the zone number to indicate that the zone has been selected for omitting.All omitted zones will be automatically reinstated the next time the system is disarmed, unless programmed otherwise.To re-instate zones manually, simply follow the instructions again. However, when the key is pressed on this occasion, the zones will be re-instated.1. Enter a valid User code and press2. Enter the zone number3. Press to omit the selected zone Repeat for other zones if required.4. Press when finished Continue to arm the system as normal.Premier Elite Series User Guide The Turn CHIME On and OffThe system can be set up so that activating (opening) certain zones will cause the internal sounders to chime. This would normally be used on a front door, exit button etc.Zones will only cause the internal sounders to chime if they are selected for chime (see page Master User Guide for details on selecting which zones chime).Once a zone has been selected for chime, the Chime facility can be manually turned on and off as required.The system can also be programmed to automatically turn chime on and off under certain conditions i.e. certain times of the day, door left open etc.If no zones have been programmed for Chime, then turning Chime on and off will have no effect.To turn CHIME On To turn CHIME Off1. Press 1. PressThe Chime tone will sound. The Error tone will sound.To CHANGE Your User CodeUsers with access to this option can change their own User codes. User codes are unique to each user and can be 4, 5 or 6 digits long.Only the User code that is entered to access the change code menu will be changed.Before changing your code, it is vital that you memorise or write down the new code you are about to program. Failure to remember your code will require an engineer visit to re-program a new code for you. This may incur a call-out charge.1. Enter the User code that requires changing2. Press3. Press4. Press5. Press6. Enter a new 4, 5 or 6-digit User code7. Press to accept the new code8. Press to exit the menu The display will return to normal.General Operation1. A Proximity TAG must be held over the PROX symbol on the keypad.2. A Proximity TAG will normally work at distances of up to 4cm, however it should be noted that distances canand do vary.3.Presenting a Proximity TAG to the keypad is NO different to entering a code except that it is a SINGLE action asopposed to a MULTIPLE action.4.The control panel will log which User/TAG has been presented.Programming Proximity TAGSProgramming a Proximity TAG will depend on which type of control panel and what version of software is installed (Your Installation Company can advise if it is possible to use Tag’s on your system).OperationPremier Elite Series User GuideDetermine your Panel TypeFrom Day M ode press followed by 4, the keypad will display the M odel and software version. Note which Model you have and proceed as follows:-ProgrammingTo assign a Proximity TAG to a User, proceed as follows:1.Program the User code as normal, this new option will now appear at the end :- ‘Do you want to Add TAG toUser?’2.Press3.Present the Proximity TAG to the keypad within 10 seconds4. A confirmation tone will be heard, the TAG is now programmed.ArmingTo Arm the Control Panel, proceed as follows:1.Present the TAG to the keypad, the display will show ‘Do You Want To Arm System?2.Present the TAG again (or hold it in place) and the exit will start, leave the buildingIf Quickarm is enabled the system will start the exit time immediately.DisarmingTo Disarm the Control Panel, proceed as follows:1.Enter the building Via the designated Entry point (the entry tone will sound)2.Present the TAG to the keypad, the entry tone will stop, the alarm is now disarmedPremier Elite Series User GuideInstallation Engineer: Installation Company: Address:Telephone Number: Installation Date:© TEXECOM LTD. 2012Premier Elite Series User Guide NotesINS221-4 11。
guide的用法和搭配
guide的用法和搭配guide是名词,指的是一个人、一本书或一件事物,提供指引或引导他人的信息或方向。
它也可以作为动词使用,表示引导、指导或辅助。
以下是guide的常见用法和搭配:1. as a noun:- tour guide:导游- travel guide:旅行指南- user guide:用户指南- study guide:学习指南- guidebook:指南书- guide dog:导盲犬2. as a verb:- guide someone/something:引导某人/某物- guide someone through something:为某人指引一件事- guide someone to/through somewhere:引领某人去某地3. 搭配表达:- be guided by:按照...来引导或决定- guide someone along:引导某人前进- guide someone’s steps:引导某人的脚步- guide someone’s decision:指导某人的决策- guide s omeone’s way:引领某人的道路- guide someone in doing something:指导某人做某事例如:- The tour guide showed us around the historic city.(导游带领我们参观了这座历史名城。
)- I used a travel guide to plan my trip to Japan.(我使用了一本旅行指南来计划我的日本之行。
)- The teacher guided the students through the difficult math problems.(老师引导学生们解决了这些困难的数学题。
)- The company's mission statement guides their decision-making process.(公司的使命宣言指导着他们的决策过程。
Suunto_D4i_UserGuide_使用说明书

5
警告 您必须仔细阅读潜水电脑的纸质快速指南和在线用户指南,否 则可能会导致使用不当、严重人身伤害甚或死亡。 警告 即使遵守潜水表或潜水电脑所规定的潜水计划,任何潜水模式 也都始终存在减压病 (DCS) 的风险。没有任何操作程序、潜水电脑或潜 水表可以预防减压病或氧中毒的风险!个体生理结构可能每天都有所不 同。潜水电脑无法将这些变化考虑在内。强烈建议妥善保持在本设备提 供的暴露限值范围内,以尽可能降低减压病的风险。作为一项额外的安 全预防措施,潜水前应向医生咨询您的健康状况。 警告 如果佩戴起搏器,建议不要参加水肺潜水活动。水肺潜水会令 身体受到物理压力,这可能对起搏器不利。 警告 如果佩戴起搏器,请先咨询医生意见,再决定是否使用本设 备。本设备使用的感应频率可能会干扰起搏器。 警告 尽管我们的产品均符合行业标准,但本产品与皮肤接触可能会 产生过敏反应或皮肤刺激。若发生这种情况,请立即停止使用并咨询医 生。 警告 不适合专业用途!Suunto 潜水电脑仅供休闲使用。商业或专业 潜水的要求可能会使潜水员暴露在会增加减压病 (DCS) 风险的深度和状 况下。因此,Suunto 强烈建议不要使用本设备进行任何商业或专业潜水 活动。
潜水之前
确保完全了解潜水设备的用法、显示和局限性。如对本手册或潜水电脑 有任何疑问,请先联系咨询 Suunto 经销商,然后再使用潜水电脑进行 潜水活动。始终牢记:您应对自己的安全负责!
安全预防措施
警告 只有受过培训的潜水员方可使用潜水电脑!对于包括自由潜水 在内的各类潜水,培训不足可能导致潜水员操作失误,例如混合气体使 用错误或减压不当,进而可能造成严重人身伤害甚或死亡。
6
பைடு நூலகம்
警告 使用备用设备!无论何时使用潜水电脑进行潜水,都务必确保 使用深度计、水中压力计、定时器、腕表等备用设备,且能够随时查看 减压表。 警告 出于安全考虑,严禁独自潜水。请与指定潜伴一起潜水。此外 潜水之后,应与其他人一起呆上一段时间,因为地面活动可能会推迟或 诱发潜在减压病的发作。 警告 执行事前检查!潜水之前,请始终检查确保潜水电脑工作正 常、设置正确。检查确保显示屏正常工作、电池电量充足等安全条件。 警告 潜水期间,请定期检查潜水电脑。如发现任何明显故障,应立 即中止潜水,安全地返回地面。 警告 潜水电脑处于使用状态时,不应用于交易或在用户间共用!如 果有人未在整个潜水或一系列重复潜水过程中佩戴它,其信息将不适 用。其潜水模式必须与该用户的档案相匹配。如果在任何一次潜水过程 中,将潜水电脑留在了陆地上,则它为后续潜水活动提供不准确的的信 息 。没有潜水电脑有能力将未使用该电脑的潜水活动计算在内。因此, 初次使用电脑之前,最长四天内的任何潜水活动都可能产生误导信息, 必须予以避免。 警告 严禁将潜水电脑的任何部分暴露在任何含氧量高于 40% 的混合 气体中!如果富氧气体的含氧量较高,将具有火灾、爆炸、严重人身伤 害或死亡的风险。
UserGuide

6. 插入网线
7. 在PC端开启tftp服务器, 并且将MLO, u-boot.img, uImage, ubi.img拷贝到tftp根目录下
8. 在u-boot中运行以下命令:
-----
MLO:|
-----
nandecc hw 2
mw.b 0x82000000 0xff 0x20000 # 用0xff填充从0x82000000开始的0x20000个字节, 内存的物理启始地址为0x80000000
dhcp 0x82000000 192.168.16.188:MLO # 将192.168.1.102这个tftp服务器上的MLO文件下载到0x82000000其实的内存空间
nand write 0x82000000 0x280000 0x500000
mw.b 0x82000000 0xff 0x2800000
dhcp 0x82000000 192.168.16.188:ubi.img
nand write 0x82000000 0x780000 0x2800000
mw.b 0x82000000 0xff 0x2800000
nand erase 0x2f80000 0x2800000
dhcp 0x82000000 192.168.16.188:ubi.img
nand write 0x82000000 0x2f80000 0x2800000
-----
nand write 0x82000000 0x00000 0x20000
使用指南的英文单词
使用指南的英文单词英文回答:The term “user guide” can refer to a wide range of documents that provide instructions on how to use a particular product or service. User guides can be found for everything from software applications to household appliances to complex machinery.The purpose of a user guide is to help users understand how to operate a product or service safely and effectively. User guides typically include step-by-step instructions, diagrams, and troubleshooting tips. They may also provide information on the product's features, specifications, and warranty.User guides can be written in a variety of styles, depending on the intended audience. Some user guides are written in a technical style, while others are written in a more informal style. The length and complexity of a userguide will also vary depending on the product or service being described.User guides are an important resource for users of all types of products and services. By providing clear and concise instructions, user guides can help users get the most out of their products and avoid costly mistakes.中文回答:“使用指南”一词可以指各种提供如何使用特定产品或服务的说明的文件。
CM510_user_guide
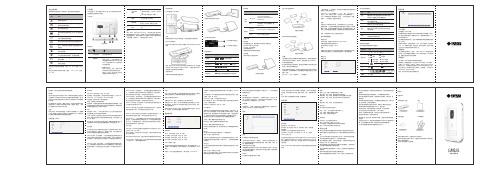
建议您在此环境下使用该设备:温度:0℃-35℃。湿度:10%- 90%。
建议您在此环境下保存该设备:温度:-10℃-55℃。湿度: 5%-95%。
产品概述
本产品定位为一款LTE高速4G热点产品。可以方便地为多台终端 设备提供安全的网络共享服务。
WEP 128位开放:安全性较低。一些旧的路由器会选择使用这种方 式。只有在设备不支持WPA或WPA2时才推荐使用。开放式密码一 般只用于加密而不用于授权。HEX格式密码长度26位。
WPA个人TKIP加密:安全性较高。大部分无线设备均支持这种方式。 ASCII格式密码长度8 到63 位。
WPA2个人AES加密: 安全性很高。较新的安全加密方式,只有比较 新的无线设备才支持。ASCII格式密码长度8 到63 位。
在WiFi功能开启状态下长按(3秒以上)
3
WPS/WIFI 按键
激活WPS短按(小于2秒)开启/关 闭。
WiFi功能(需要进行二次确认)。
4
(U)SIM卡 插槽
用于用户插入(U)SIM卡
5
复位按键
短按(小于 2 秒)设备重启, 长按(大于5秒)恢复出厂设置
6
Micro USB 接口
用于设备充电,连接PC机或便携式电 脑
安全设置:
这个部分您可以进行无线网络安全设置。在下面列表中选择一种加 密方式并设置密码。若选择“无”禁用这个功能,任何无线客户端 都可以不用密码直接连接到您的无线网络。
WEP 64位共享:安全性最低。一些旧的路由器会选择使用这种方式。 只有在设备不支持WPA或WPA2时才推荐使用。共享方式加密和授 权使用同一个密码安全性比开放式更低。HEX格式密码长度10位。
UserGuide
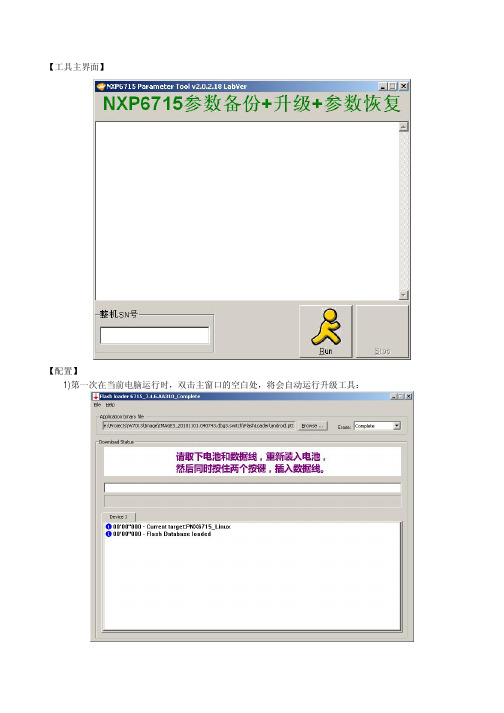
【工具主界面】
【配置】
1)第一次在当前电脑运行时,双击主窗口的空白处,将会自动运行升级工具:
2)点击Browse按钮,选择需要升级的手机软件包中的ptt文件:
3)配置完毕,关闭升级工具即可;
【操作步骤】
1)用扫枪扫描整机的SN号条码,点击Run按钮,开始备份;
2)此时将电池装入手机,插入USB数据线,工具将会自动检测手机连接;
3)待手机进入测试模式后,将备份锁网、射频、电池、SN号、蓝牙地址、IMEI号等参数;备份完毕,升级工具将自动运行;
4)如果该SN号对应的手机以前已经成功进行过备份,那么工具会跳过备份操作,直接开始升级过程;
5)请按照提示进行操作:拔下数据线和电池,重新装好电池,同时按住两个按键,插入数据线;
6)升级成功后,手机将会自动开机,并开始参数恢复过程:。
UOB INFINITY User Guide

UOB INFINITY User GuideUOB Group l UOB Infinity User Manual User ID ActivationWhat Do You Need to LoginLogin Page (Default View)UOB Infinity Login1Before you login to UOB Infinity for the first time,please ensurethat you have received the two items listed below:1) User ID2)Digital/Physical Token*(required for login to UOB Infinity and toapprove transactions)You can activate your UOB Infinity access online via the login pageupon receipt of your User ID and Security Token.*The physical token will only be issued to users with Global View, Trade subscription and Token Sharing scenario. For other users, you will be able to use our digital token called Infinity Secure. Steps to register and activate Infinity Secure can be found in the “Infinity Secure User Guide”.Self Service Functionsvia Web Browser You can perform the following functions via the UOB Infinity loginpage (applies to both browser/desktop and mobile app):A.Activate your new user ID*B.Recover your password 243A. Activate your new User ID1.You may activate using Infinity mobile app (tap on “ActivateAccount”icon at the bottom right corner of the login screen)orusing desktop browser (click on “Want to activate your newaccount?”).If you do not have a physical token,it is recommended toactivate using Infinity mobile app because you will be ableto setup the digital token upon first time login via Infinitymobile app after the activation is completed.2.Input your Organisation ID and User ID.3.Tick the checkbox to accept Terms and conditions for youruser ID activation.4.Click on the “Next”button.1* Required if you are logging in to UOB Infinity for the first time . 1via Mobile AppActivate using Email and SMS 5.Choose“Use Email and SMS”.Click“Next”.6.Enter the6-digit code sent to the email address registered inyour Infinity user profile.Click“Next”.7.Enter the6-digit code sent to the mobile number registered inyour Infinity user profile.Click“Submit”.8.Set your new passwords and click“Next”to complete thesetup.9.Confirmation message will be displayed on the screen.5678Upon completion of the user activation,if you do not have a physical/digital token,you may log in onto UOB Infinity mobile app using your Organisation ID,User ID and the newly created password.Upon tapping on the“Log In”button,you will be prompted by a message to setup a digital token.Please refer to this user guide to setup your digital token: https:///secure/forms/business/pdfs /infinity-guide-infinity-secure.pdfActivate using Token or Infinity Secure5.Choose “Use Token or Infinity Secure”.Click “Next”.6.Follow the on-screen instructions to generate token responseand input the response to the screen.Click “Next”.7.Set your new passwords and click “Next”.8.Confirmation message will be displayed on the top banner andyou can login into UOB Infinity.5786Login Page (Default View)Account Activation screen (Default View)243B. Recover your password1.Please click on “Have trouble logging in?”2.Input your Organisation ID and user ID.3.Tick the checkbox to accept terms and conditions for your userID activation.4.Click on “Next”button.The subsequent steps will be similar tothe user activation step (refer to page 6and 7).1FeaturesLogin Page (Default View) Note:If you are logging in to UOB Infinity for the first time,youneed to activate your user ID.1.Enter Organisation ID and User ID(you will receive a letter toinform you about your user credentials).2.Input valid password.The“eye”icon enables you to see thepassword that you enter.3.Tick the“Remember Me”checkbox to save Organisation IDand User ID so that,in your subsequent login,you only needto key in your password.4.Upon clicking the“Log In”button:a)If you are logging in for the first time without physical ordigital token,you will be prompted by a message to setupa digital tokenb)If you are logging in using Infinity Secure(digital token),you will see a notice that a push notification is sent toyour mobile phone.c)If you are logging in using a physical token,you will seean on-screen instructions to generate the token response.5.This option will help you to recover your password if you haveforgotten it.nguages available are English,Simplified Chinese or yourlocal language.123456Quick Guide to Login Page。
Hive用户指南(Hive_user_guide)_中文版

Hive 用户指南v1.0目录1. HIVE结构 (5)1.1HIVE架构 (5)1.2Hive 和Hadoop 关系 (6)1.3Hive 和普通关系数据库的异同 (7)1.4HIVE元数据库 (8)1.4.1 DERBY (8)1.4.2 Mysql (9)1.5HIVE的数据存储 (10)1.6其它HIVE操作 (10)2. HIVE 基本操作 (11)2.1create table (11)2.1.1总述 (11)2.1.2语法 (11)2.1.3基本例子 (13)2.1.4创建分区 (14)2.1.5其它例子 (15)2.2Alter Table (16)2.2.1Add Partitions (16)2.2.2Drop Partitions (16)2.2.3Rename Table (16)2.2.4Change Column (17)2.2.5Add/Replace Columns (17)2.3Create View (17)2.4Show (18)2.5Load (18)2.6Insert (20)2.6.1Inserting data into Hive Tables from queries (20)2.6.2Writing data into filesystem from queries (21)2.7Cli (22)2.7.1Hive Command line Options (22)2.7.2Hive interactive Shell Command (23)2.7.3Hive Resources (24)2.7.4调用python、shell等语言 (25)2.8DROP (26)2.9其它 (26)2.9.1Limit (26)2.9.2Top k (26)2.9.3REGEX Column Specification (26)3. Hive Select (27)3.1Group By (27)3.2Order /Sort By (28)4. Hive Join (28)5. HIVE参数设置 (31)6. HIVE UDF (32)6.1基本函数 (32)6.1.1 关系操作符 (32)6.1.2 代数操作符 (34)6.1.3 逻辑操作符 (35)6.1.4 复杂类型操作符 (35)6.1.5 内建函数 (35)6.1.6 数学函数 (35)6.1.7 集合函数 (35)6.1.8 类型转换 (35)6.1.9 日期函数 (35)6.1.10 条件函数 (36)6.1.11 字符串函数 (36)6.2UDTF (38)6.2.1Explode (39)7. HIVE 的MAP/REDUCE (40)7.1JOIN (40)7.2GROUP BY (41)7.3DISTINCT (41)8. 使用HIVE注意点 (42)8.1字符集 (42)8.2压缩 (42)8.3count(distinct) (42)8.4JOIN (42)8.5DML操作 (43)8.6HAVING (43)8.7子查询 (43)8.8Join中处理null值的语义区别 (43)9. 优化与技巧 (46)9.1全排序 (46)9.1.1 例1 (47)9.1.2 例2 (50)9.2怎样做笛卡尔积 (53)9.3怎样写exist/in子句 (53)9.4怎样决定reducer个数 (54)9.5合并MapReduce操作 (54)9.6Bucket 与sampling (55)9.7Partition (56)9.8JOIN (57)9.8.1 JOIN原则 (57)9.8.2 Map Join (57)9.8.3 大表Join的数据偏斜 (59)9.9合并小文件 (61)9.10Group By (61)10. HIVE FAQ: (61)1.HIVE结构Hive 是建立在 Hadoop 上的数据仓库基础构架。
- 1、下载文档前请自行甄别文档内容的完整性,平台不提供额外的编辑、内容补充、找答案等附加服务。
- 2、"仅部分预览"的文档,不可在线预览部分如存在完整性等问题,可反馈申请退款(可完整预览的文档不适用该条件!)。
- 3、如文档侵犯您的权益,请联系客服反馈,我们会尽快为您处理(人工客服工作时间:9:00-18:30)。
若程序无法运行,请检查软件是否安装,或在界面输入GUIDE TBG,如图
如果退出程序时显示如下提示,第一行为系统生成,第二行已经在程序内考虑,不影响运行
使用方法
在对话框中由用户填入:
1)计算必需的物理量(注意与给定的单位相符)
2)选择模型类别
3)选择简单力类型(注意为单选框)
4)在选择简单力类型(轴力、分布力、集中力、集中力偶、扭矩)中给出
力的大小、作用点(注意有正负区分,具体见下图)
5)选择是否在原有图形上叠加(此法可用于多个力作用于梁上的计算)
6)检查输入无误后按确定。
左侧图中显示轴力、剪力、弯矩、扭矩、端截
面转角、挠度等二维图形及杆件能量E。
7)在编辑菜单中退出程序或选择重复程序继续运行。
8)图面控件功能:六个图显示为轴力、剪力、扭矩、弯矩、端截面转角、
挠度,FILE菜单中有帮助help、重启reset、示例数据data(六组)、版权、背景音乐backgroudmuisc(3首肖邦原曲)、退出exit等功能
谢谢使用
------041810203
赵颖颖。
