小程序里修改Button样式
微信小程序修改按钮button样式:去边框、圆角及文字居左对齐、修改按钮高度
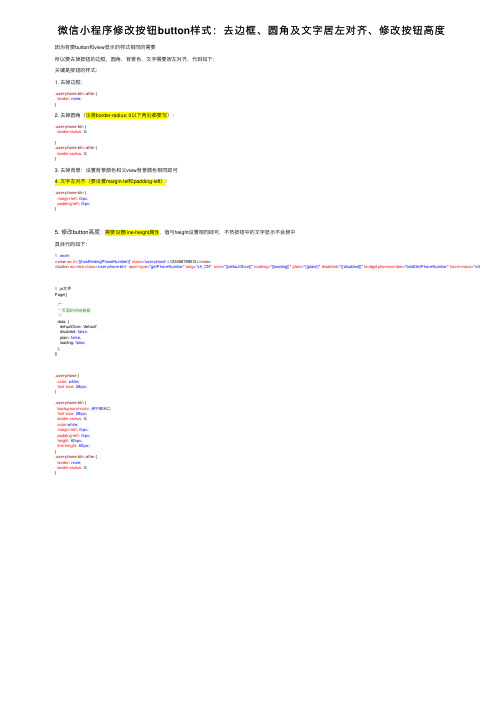
微信⼩程序修改按钮button样式:去边框、圆⾓及⽂字居左对齐、修改按钮⾼度因为有要button和view显⽰的样式相同的需要所以要去掉按钮的边框,圆⾓,背景⾊,⽂字需要居左对齐,代码如下:关键是按钮的样式:1. 去掉边框:.user-phone-btn::after {border: none;}2. 去掉圆⾓(注意border-radius: 0以下两处都要写):.user-phone-btn {border-radius: 0;}.user-phone-btn::after {border-radius: 0;}3. 去掉背景:设置背景颜⾊和⽗view背景颜⾊相同即可4. ⽂字左对齐(要设置margin-lef和padding-left):.user-phone-btn {margin-left: 0rpx;padding-left: 0rpx;}5. 修改button⾼度:需要设置line-height属性,值与height设置相同即可,不然按钮中的⽂字显⽰不会居中具体代码如下:// .wxml<view wx:if='{{hasBindingPhoneNumber}}' class='user-phone'>123456789012</view><button wx:else class='user-phone-btn' open-type="getPhoneNumber" lang="zh_CN" size="{{defaultSize}}" loading="{{loading}}" plain="{{plain}}" disabled="{{disabled}}" bindgetphonenumber="bindGetPhoneNumber" hover-class="other-button-hov // .js⽂件Page({/*** 页⾯的初始数据*/data: {defaultSize: 'default',disabled: false,plain: false,loading: false,},}).user-phone {color: white;font-size: 28rpx;}.user-phone-btn {background-color: #FF8EAC;font-size: 28rpx;border-radius: 0;color:white;margin-left: 0rpx;padding-left: 0rpx;height: 60rpx;line-height: 60rpx;}.user-phone-btn::after {border: none;border-radius: 0;}。
Button的设置及各种属性

Button的设置及各种属性(1)UIButton类继承⾃UIControl,⽽UIControl继承⾃UIView,因为UIView就是个矩形区域,所以UIButton实例化的对象其实都是⼀个矩形,虽然有各种圆⾓、增加联系⼈、信息按钮等等,给它们加个背景它们就现形成矩形了,⽽且它们有个frame属性,这就是设置位置和矩形框的。
(2)UIButton创建⼀个按钮不⽤实例化,也就是不⽤alloc和init,⽽是直接调⽤内置的⼏个⼯⼚⽅法即可,这⼀点和UILabel *label1= [[UILabel alloc]init]不同,⽽且这些类型⾥⾯最常⽤的时Custom类型,因为我们可以⾃定义图⽚,以及图⽚和⽂字的位置。
(3)按钮有很多状态,正常状态Normal、被点击时状态Highlighted等等,所以可以分别对不同状态设置属性。
(4)其实按钮最重要的不是上⾯那些设置属性,⽽是按钮关联的操作是什么?即点击后发⽣什么,这需要⼀个addtarget操作函数,如果多个按钮⽤到同⼀个函数,则需要tag属性来区别是哪个按钮。
(5)要⾃定义按钮,⼀种⽅式是我们先⾃定义⼀个继承UIButton的类,然后对这个类进⾏重写函数,相当于定制,最后⽤这个类去创建按钮,这些按钮也就具有⾃定义的样式(这种⽅法只针对⾃定义按钮类型有效)。
1 - (void)viewDidLoad {2//⽣成⼀个btn1对象,不需要alloc和init,⽽是直接⽤内置的⼯⼚⽅法,有很多可CMD+点击查看3 UIButton *btn1=[UIButton buttonWithType:UIButtonTypeRoundedRect];4//设置位置和宽⾼5 btn1.frame=CGRectMake(30, 30, 300, 30);6//设置按钮的⽂字,状态有好⼏种常⽤的时Normal和Highlighted(点击时状态),可CMD+点击查看7 [btn1 setTitle:@"点我啊!" forState:UIControlStateNormal];8//设置点击时的⽂本9 [btn1 setTitle:@"我被点了!" forState:UIControlStateHighlighted];10//设置⽂字颜⾊11 [btn1 setTitleColor:[UIColor greenColor] forState:UIControlStateNormal];12 [btn1 setTitleColor:[UIColor yellowColor] forState:UIControlStateHighlighted];13//设置点击时按钮背景颜⾊,呃,完全不起作⽤,即⽆效果14 [btn1 setTintColor:[UIColor purpleColor]];15//点击时按钮发光,就是在按钮中间发亮光,这个有效果16 btn1.showsTouchWhenHighlighted=YES;17//设置tag标签,唯⼀标记⽤,可⽤于分辨是哪个按钮控件18 btn1.tag=1;19//设置背景颜⾊20 btn1.backgroundColor=[UIColor redColor];21//现在⾼版本的iOS⾥这个⽅法会让⼈抓狂,因为我们发现,不设置背景时,圆⾓按钮没有边框,所以上⾯设置frame其实意义不⼤22//设置了背景或者图⽚后,背景是矩形,说好的圆⾓呢?坑爹呢!23//所以现在⼤多数开发都是⽤UIButtonTypeCustom,⽽不是UIButtonTypeRoundedRect2425//最重要的添加触发事件⽤户交互26//self是指调⽤哪个对象的⽅法27//btnClick:是调⽤的⽅法,btnClick和btnClick:不⼀样,后者表⽰有参数28//UIControlEventTouchUpInside是触发事件,有很多,可以CMD+点击查看29//这⾥三个参数都可以随意更换,⽐如新建⼀个类Hi,在类⾥定义⼀个⽅法-(void)report;30//然后在此⽂件引⼊Hi.h头⽂件,在这⾥实例化⼀个对象hi1,然后就可以⽤hi1代替self,⽤report代替btnClick31//意思就是点击后调⽤的是hi1对象⾥⾯的report⽅法32 [btn1 addTarget:self action:@selector(btnClick:) forControlEvents:UIControlEventTouchUpInside];3334//再增加⼀个按钮35 UIButton *btn2=[UIButton buttonWithType:UIButtonTypeContactAdd];36 btn2.frame=CGRectMake(30, 80, 300, 30);37//这个增加联系⼈按钮其实也是⼀个矩形,和上⾯的⼀样,都是继承⾃UIControl,⽽后者⼜继承⾃UIView,所以是矩形38//虽然按钮就⼀点点⼤,但点击整个矩形区域都是相当于点击按钮39 btn2.backgroundColor=[UIColor greenColor];40//设置标签41 btn2.tag=2;42//增加事件:和btn1调⽤同⼀个⽅法,但问题是我们如果需要区分是哪个按钮的话,就需要⽤到tag,并且把控件作为参数传递给btnClick43 [btn2 addTarget:self action:@selector(btnClick:) forControlEvents:UIControlEventTouchUpInside];4445//再增加⼀个最常⽤的Custom按钮,其他按钮⾃⼰尝试46 UIButton *btn3=[UIButton buttonWithType:UIButtonTypeCustom];47 btn3.frame=CGRectMake(30 , 150 , 300, 90);48 btn3.backgroundColor=[UIColor redColor];49 btn3.tag=3;50 [btn3 addTarget:self action:@selector(btnClick:) forControlEvents:UIControlEventTouchUpInside];51//设置图⽚背景被点击时变暗(但没有图⽚背景时则⽆效果)52 btn3.adjustsImageWhenHighlighted=YES;53//所以,增加图⽚⽅式之⼀是增加背景图⽚,这个图⽚如⼩会被放⼤充满整个背景54 [btn3 setBackgroundImage:[UIImage imageNamed:@"logo.png"] forState:UIControlStateNormal];55//还有⼀种增加图⽚的⽅式,是在按钮上⾯加⽽不是背景,这种⽅式不会缩放图⽚,⽽且会居中56 [btn3 setImage:[UIImage imageNamed:@"logo.png"] forState:UIControlStateNormal];57//设置按钮⽂字,增加的⽂字会和setImage图⽚⼀并居中,图⽚在左边,⽂字紧随其后58 [btn3 setTitle:@"⾃定义按钮" forState:UIControlStateNormal];59//如果需要重新排版这个图⽚和按钮⽂字的位置,则需要重写UIButton类⾥⾯的两个函数,点击UIButton可查看60//- (CGRect)titleRectForContentRect:(CGRect)contentRect;⽂字相对于按钮的位置61//- (CGRect)imageRectForContentRect:(CGRect)contentRect;图⽚相对于按钮的位置62//第⼀步:可以重新定义⼀个UIButton类叫myButton,在.m⾥重写如下函数63//- (CGRect)titleRectForContentRect:(CGRect)contentRect{64// return CGRectMake(50, 25, 100, 40);65//}66//- (CGRect)imageRectForContentRect:(CGRect)contentRect{67// return CGRectMake(150, 25, 40, 40);68//}69//第⼆步,在这个⽂件中引⼊myButton.h头⽂件,然后实例化btn3的时候,⽤myButton,⽽不⽤原始的UIButton 70//myButton相当于稍微定制了⼀下原⽣的UIButton,所以前者实例出得对象也就具有定制效果71//这种⽅式仅对UIButtonTypeCustom有效,其他⽆效7273//把三个按钮显⽰出来74 [self.view addSubview:btn1];75 [self.view addSubview:btn2];76 [self.view addSubview:btn3];77 [super viewDidLoad];78// Do any additional setup after loading the view, typically from a nib.79 }80//增加⼀个参数,即由原先的-(void)btnClick{}变成如下81//因为我们知道这⾥都是按钮对象,所以可以⽤(UIButton *)sender,但通常我们⽤通⽤指针id82 -(void)btnClick:(id)sender{83//把传递过来的控件参数转化成按钮84 UIButton *btn=(UIButton *)sender;85//把btn.tag转化成整型86 NSLog(@"OMG,it is %i",(int)btn.tag);87 }。
WPF自定义控件与样式-自定义按钮(Button)

WPF⾃定义控件与样式-⾃定义按钮(Button)⼀、前⾔程序界⾯上的按钮多种多样,常⽤的就这⼏种:普通按钮、图标按钮、⽂字按钮、图⽚⽂字混合按钮。
本⽂章记录了不同样式类型的按钮实现⽅法。
⼆、固定样式的按钮固定样式的按钮⼀般在临时使⽤时或程序的样式⽐较固定时才会使⽤,按钮整体样式不需要做⼤的改动。
2.1 普通按钮-扁平化风格先看效果:定义Button的样式,详见代码:<Style x:Key="BtnInfoStyle" TargetType="Button"><Setter Property="Width" Value="70"/><Setter Property="Height" Value="25"/><Setter Property="Foreground" Value="White"/><Setter Property="BorderThickness" Value="0"/><Setter Property="Background" Value="#43a9c7"/><Setter Property="Template"><Setter.Value><ControlTemplate TargetType="Button"><Border x:Name="border" Background="{TemplateBinding Background}" BorderBrush="{TemplateBinding BorderBrush}" BorderThickness="{TemplateBinding BorderThickness}" SnapsToDevicePixels <TextBlock Text="{TemplateBinding Content}" Foreground="{TemplateBinding Foreground}" VerticalAlignment="Center" HorizontalAlignment="Center"/></Border><ControlTemplate.Triggers><Trigger Property="IsMouseOver" Value="True"><Setter TargetName="border" Property="Background" Value="#2f96b4"/></Trigger><Trigger Property="IsPressed" Value="True"><Setter TargetName="border" Property="Background" Value="#2a89a4"/></Trigger></ControlTemplate.Triggers></ControlTemplate></Setter.Value></Setter></Style>引⽤⽅法:<Grid Background="White"><StackPanel Orientation="Horizontal" Margin="10" VerticalAlignment="Top"><Button Style="{StaticResource BtnInfoStyle}" Content="信息" Margin="5 0"/></Grid>上述代码实现了Button按钮的扁平化样式,如果你想调整颜⾊风格,通过修改Background的值可实现默认颜⾊,⿏标经过颜⾊以及⿏标按下颜⾊。
微信小程序动态设定背景样式、滚动至顶部、简单动画的实例
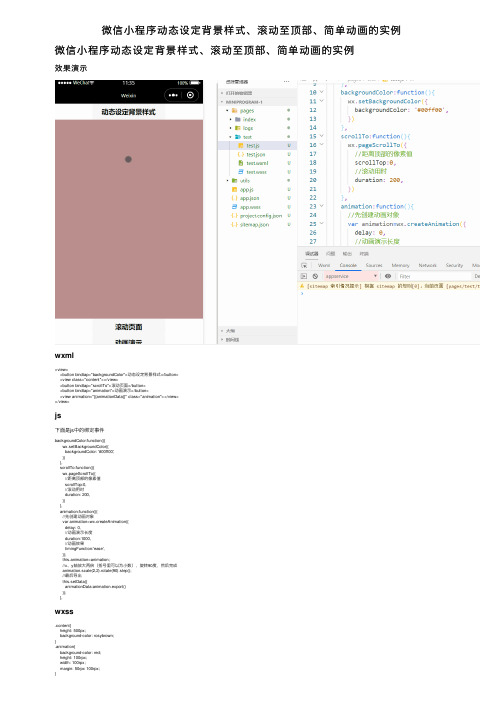
微信⼩程序动态设定背景样式、滚动⾄顶部、简单动画的实例微信⼩程序动态设定背景样式、滚动⾄顶部、简单动画的实例效果演⽰wxml<view><button bindtap="backgroundColor">动态设定背景样式</button><view class="content"></view><button bindtap="scrollTo">滚动页⾯</button><button bindtap="animation">动画演⽰</button><view animation="{{animationData}}" class="animation"></view></view>js下⾯是js中的绑定事件backgroundColor:function(){wx.setBackgroundColor({backgroundColor: '#00ff00',})},scrollTo:function(){wx.pageScrollTo({//距离顶部的像素值scrollTop:0,//滚动⽤时duration: 200,})},animation:function(){//先创建动画对象var animation=wx.createAnimation({delay: 0,//动画演⽰长度duration:1000,//动画效果timingFunction:'ease',});this.animation=animation;//x、y轴放⼤两倍(括号⾥可以为⼩数),旋转90度,然后完成animation.scale(2,2).rotate(90).step();//最后导出this.setData({animationData:animation.export()});},wxss.content{height: 500px;background-color: rosybrown;}.animation{background-color: red;height: 100rpx;width: 100rpx;margin: 50rpx 100rpx;}。
WPF设置ComboBox、Button圆角样式
WPF设置ComboBox、Button圆⾓样式设置 ComboBox圆⾓样式1 <Style TargetType="{x:Type ComboBox}">2 <Setter Property="Width" Value="120"></Setter>3 <Setter Property="HorizontalAlignment" Value="Stretch"></Setter>4 <Setter Property="Template">5 <Setter.Value>6 <ControlTemplate TargetType="{x:Type ComboBox}">7 <Border BorderBrush="Gray" BorderThickness="1" CornerRadius="5" Background="Transparent">8 <Grid>9 <!--下拉箭头-->10 <ToggleButton ClickMode="Press" Focusable="False" IsChecked="{Binding IsDropDownOpen, Mode=TwoWay, RelativeSource={RelativeSource TemplatedParent}}" Margin="2" MinWidth="0" MinHeight="0"11 <ToggleButton.Style>12 <Style TargetType="{x:Type ToggleButton}">13 <Setter Property="MinWidth" Value="0"/>14 <Setter Property="MinHeight" Value="0"/>15 <Setter Property="Width" Value="Auto"/>16 <Setter Property="Height" Value="Auto"/>17 <Setter Property="Background" Value="Transparent"/>18 <Setter Property="BorderBrush" Value="#00000000"/>19 <Setter Property="BorderThickness" Value="2"/>20 <Setter Property="Template">21 <Setter.Value>22 <ControlTemplate TargetType="{x:Type ToggleButton}">23 <DockPanel Background="{TemplateBinding Background}" LastChildFill="False" SnapsToDevicePixels="True">24 <Border x:Name="Border" BorderBrush="{TemplateBinding BorderBrush}" BorderThickness="{TemplateBinding BorderThickness}" DockPanel.Dock="Right" >25 <Path Data="M0,0L3.5,4 7,0z" Fill="{TemplateBinding Foreground}" HorizontalAlignment="Center" VerticalAlignment="Center"/>26 </Border>27 </DockPanel>28 <ControlTemplate.Triggers>29 <Trigger Property="IsChecked" Value="True">3031 </Trigger>32 </ControlTemplate.Triggers>33 </ControlTemplate>34 </Setter.Value>35 </Setter>36 <Style.Triggers>37 <Trigger Property="IsEnabled" Value="False">38 <Setter Property="Foreground" Value="{DynamicResource {x:Static SystemColors.ControlDarkBrushKey}}"/>39 </Trigger>40 </Style.Triggers>41 </Style>42 </ToggleButton.Style>43 </ToggleButton>44 <!--项内容-->45 <ContentPresenter IsHitTestVisible="False" Content="{TemplateBinding SelectionBoxItem}" ContentTemplate="{TemplateBinding SelectionBoxItemTemplate}" ContentTemplateSelector="{TemplateBinding ItemTemplate46 <TextBox x:Name="PART_EditableTextBox" HorizontalAlignment="Stretch" Focusable="True" Visibility="Collapsed" IsReadOnly="False"/>47 <!--下拉显⽰⾯板HorizontalOffset:设置下拉⾯板的相对位置-->48 <Popup HorizontalOffset="-1" Width="{TemplateBinding ActualWidth}"49 IsOpen="{TemplateBinding IsDropDownOpen}" Focusable="False" PopupAnimation="Slide">50 <Grid SnapsToDevicePixels="True" HorizontalAlignment="Stretch">51 <Border BorderThickness="1,1,1,1" BorderBrush="Gray" HorizontalAlignment="Stretch" CornerRadius="5">52 <Border.Background>53 <SolidColorBrush Color="White" />54 </Border.Background>55 </Border>56 <ScrollViewer SnapsToDevicePixels="True" HorizontalAlignment="Stretch" >57 <StackPanel IsItemsHost="True" KeyboardNavigation.DirectionalNavigation="Contained" HorizontalAlignment="Stretch" />58 </ScrollViewer>59 </Grid>60 </Popup>61 </Grid>62 </Border>63 </ControlTemplate>64 </Setter.Value>65 </Setter>66 </Style>View Code设置 Button圆⾓样式1 <ControlTemplate x:Key="ButtonTemplate" TargetType="{x:Type Button}">2 <Border x:Name="Border" BorderThickness="2" CornerRadius="5" Background="#1A3F7B" TextBlock.Foreground="White">3 <!--设置控件的边框,圆⾓,背景⾊,字体颜⾊-->4 <ContentPresenter Margin="{TemplateBinding Padding}" HorizontalAlignment="Center" VerticalAlignment="Center">5 <!--显⽰控件的内容-->6 </ContentPresenter>7 </Border>8 </ControlTemplate>View Code。
微信小程序自定义navigationBar顶部导航栏适配所有机型(附完整案例)
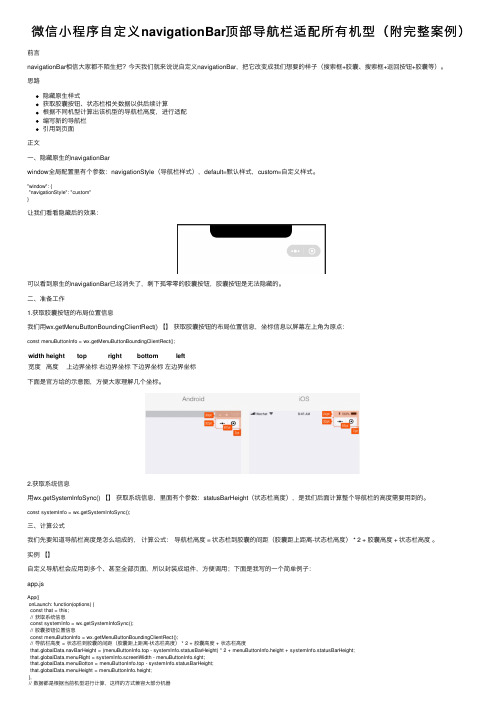
微信⼩程序⾃定义navigationBar顶部导航栏适配所有机型(附完整案例)前⾔navigationBar相信⼤家都不陌⽣把?今天我们就来说说⾃定义navigationBar,把它改变成我们想要的样⼦(搜索框+胶囊、搜索框+返回按钮+胶囊等)。
思路隐藏原⽣样式获取胶囊按钮、状态栏相关数据以供后续计算根据不同机型计算出该机型的导航栏⾼度,进⾏适配编写新的导航栏引⽤到页⾯正⽂⼀、隐藏原⽣的navigationBarwindow全局配置⾥有个参数:navigationStyle(导航栏样式),default=默认样式,custom=⾃定义样式。
"window": {"navigationStyle": "custom"}让我们看看隐藏后的效果:可以看到原⽣的navigationBar已经消失了,剩下孤零零的胶囊按钮,胶囊按钮是⽆法隐藏的。
⼆、准备⼯作1.获取胶囊按钮的布局位置信息我们⽤wx.getMenuButtonBoundingClientRect() 【】获取胶囊按钮的布局位置信息,坐标信息以屏幕左上⾓为原点:const menuButtonInfo = wx.getMenuButtonBoundingClientRect();width height top right bottom left宽度⾼度上边界坐标右边界坐标下边界坐标左边界坐标下⾯是官⽅给的⽰意图,⽅便⼤家理解⼏个坐标。
2.获取系统信息⽤wx.getSystemInfoSync() 【】获取系统信息,⾥⾯有个参数:statusBarHeight(状态栏⾼度),是我们后⾯计算整个导航栏的⾼度需要⽤到的。
const systemInfo = wx.getSystemInfoSync();三、计算公式我们先要知道导航栏⾼度是怎么组成的,计算公式:导航栏⾼度 = 状态栏到胶囊的间距(胶囊距上距离-状态栏⾼度) * 2 + 胶囊⾼度 + 状态栏⾼度。
swift语言button用法

swift语言button用法Button类型Swift中提供两种主要的button类型:UIButton:标准button控件,提供各种自定义选项,如标题、背景色和边框。
UIBarButtonItem:主要用于导航栏中的按钮,其大小和外观更紧凑。
初始化Button创建button有两种主要方法:代码初始化:使用`init()`方法,传入适当的类型参数和配置项。
Interface Builder:使用Interface Builder工具,通过可视化界面创建和配置button。
Button属性Button具有许多属性,用于自定义其外观和行为,包括:titleLabel:显示button标题的UILabel对象。
tintColor:button中控件(如标题和背景)的颜色。
backgroundColor:button的背景色。
isEnabled:指示button是否可交互。
isHidden:指示button是否可见。
Button事件可以为button添加事件处理程序,以响应用户交互,例如点击或触摸。
最常用的事件处理程序是:addTarget(action:for:):将一个动作(通常是一个方法)附加到一个指定的事件上。
removeTarget(_:action:for:):从button中删除一个动作。
Button样式Button可以通过外观样式进行自定义,包括:Standard:标准矩形button。
System:系统提供的预定义button样式,例如圆角或边框。
Custom:使用代码或Interface Builder创建的自定义button样式。
UIBarButtonItemUIBarButtonItem是一种特殊类型的button,主要用于导航栏。
它具有以下特点:紧凑大小:设计为适合导航栏的紧凑空间。
自定义视图:可以包含自定义视图,例如图像或UILabel。
目标-动作处理:与UIButton类似,可以使用`target-action`机制处理事件。
repositoryitembuttonedit 样式

repositoryitembuttonedit 样式RepositoryItemButtonEdit是DevExpress WinForms控件库中的一个控件,它是一个可编辑的按钮控件,可以用于显示和编辑文本或图像。
它可以用于各种场景,例如在表格中编辑单元格、在表单中编辑数据、在工具栏中添加按钮等等。
在使用RepositoryItemButtonEdit时,我们可以通过设置其属性和样式来满足我们的需求。
一、RepositoryItemButtonEdit的属性1. ButtonClick事件:当用户单击按钮时触发的事件。
2. ButtonPressed事件:当用户按下按钮时触发的事件。
3. Buttons:按钮集合,可以通过此属性添加或删除按钮。
4. EditValue:编辑器的值,可以是任何类型的值。
5. Mask:掩码,可以用于限制用户输入的字符。
6. MaskType:掩码类型,可以是数字、日期、时间等。
7. NullText:当编辑器的值为空时显示的文本。
8. ReadOnly:指示编辑器是否只读。
9. TextEditStyle:指示编辑器的样式,可以是普通文本框、下拉框、密码框等。
二、RepositoryItemButtonEdit的样式1. 按钮样式我们可以通过设置RepositoryItemButtonEdit.Buttons属性来添加或删除按钮,并设置按钮的样式。
例如,我们可以设置按钮的图标、文本、背景色、前景色等。
下面是一个示例:RepositoryItemButtonEdit buttonEdit = new RepositoryItemButtonEdit(); ButtonEdit.Buttons.Clear();ButtonEdit.Buttons.AddRange(newDevExpress.XtraEditors.Controls.EditorButton[] {newDevExpress.XtraEditors.Controls.EditorButton(DevExpress.XtraEditors.Co ntrols.ButtonPredefines.Glyph, "保存", -1, true, true, false, DevExpress.XtraEditors.ImageLocation.MiddleCenter, null, newDevExpress.Utils.KeyShortcut(System.Windows.Forms.Keys.None), "保存", null, null, true)});ButtonEdit.ButtonClick += newDevExpress.XtraEditors.Controls.ButtonPressedEventHandler(this.Button Edit_ButtonClick);2. 文本样式我们可以通过设置RepositoryItemButtonEdit.Appearance属性来设置编辑器的文本样式。
微信小程序自定义左上角胶囊样式

微信⼩程序⾃定义左上⾓胶囊样式1、将app.js 中的 window 对象属性navigationStyle 改为⾃定义"window": {"navigationStyle": "custom"},改完之后的效果:2、获取右上⾓胶囊的定位信息设置调⽤ wx.getMenuButtonBoundingClientRect() 函数得到右上⾓胶囊定位信息,将定位信息赋值到全局变量中完整 app.js//app.jsApp({onLaunch: function () {// 获取右上⾓胶囊定位信息let dwObj = wx.getMenuButtonBoundingClientRect()let height_ = (20 + dwObj.height + dwObj.top)(dwObj)this.appHead.navHeight = height_this.appHead.capsuleTop = dwObj.top// 展⽰本地存储能⼒var logs = wx.getStorageSync('logs') || []logs.unshift(Date.now())wx.setStorageSync('logs', logs)// 登录wx.login({success: res => {// 发送 res.code 到后台换取 openId, sessionKey, unionId}})// 获取⽤户信息wx.getSetting({success: res => {if (res.authSetting['erInfo']) {// 已经授权,可以直接调⽤ getUserInfo 获取头像昵称,不会弹框wx.getUserInfo({success: res => {// 可以将 res 发送给后台解码出 unionIderInfo = erInfo// 由于 getUserInfo 是⽹络请求,可能会在 Page.onLoad 之后才返回// 所以此处加⼊ callback 以防⽌这种情况if (erInfoReadyCallback) {erInfoReadyCallback(res)}}})}}})},appHead:{navHeight: 0,capsuleTop: 0}})所需要的属性有: top,height属性,⽤于计算⾃定义左上⾓胶囊定位的位置在页⾯中 拿到全局变量中的 右上⾓胶囊 top和height 计算好的定位数据:在 页⾯ data函数中声明⼀个导航栏⾼度属性,和⼀个 胶囊具体定位的top属性:赋值导航栏的⾼度 数据:// pages/testQ/index.jslet app = getApp()Page({/*** 页⾯的初始数据*/data: {navHeight : app.appHead.navHeight,capsuleTop: app.appHead.capsuleTop},/*** ⽣命周期函数--监听页⾯加载*/onLoad: function (options) {},/*** ⽣命周期函数--监听页⾯初次渲染完成*/onReady: function () {},/*** ⽣命周期函数--监听页⾯显⽰*/onShow: function () {},/*** ⽣命周期函数--监听页⾯隐藏*/onHide: function () {},/*** ⽣命周期函数--监听页⾯卸载*/onUnload: function () {},/*** 页⾯相关事件处理函数--监听⽤户下拉动作*/onPullDownRefresh: function () {},/*** 页⾯上拉触底事件的处理函数*/onReachBottom: function () {},/*** ⽤户点击右上⾓分享*/onShareAppMessage: function () {}})在 wxml 中定义 导航栏:<!--pages/testQ/index.wxml--><!-- 左上⾓胶囊开始--><!--left-capsule 是最上层,可以设置背景--><view class="left-capsule"><!--left-capsule-nav 是⽤于定位左上⾓的位置--><view class="left-capsule-nav" style="height:{{navHeight}}px;"><!--left-capsule-nav-content 是胶囊主要内容--><view style="position:relative;top:{{capsuleTop}}px;" class="left-capsule-nav-content"> <!--back 胶囊返回按钮--><view class="back"><!-- 我这个图标引⼊的是 vant库的icon,如果不是使⽤vant的话得⾃定义⼀个icon--> <van-icon name="arrow-left" color="white" size="20"/></view><!-- line 胶囊中间线条--><view class="line"></view><!-- home 胶囊返回⾸页按钮--><view class="home"><!-- 我这个图标引⼊的是 vant库的icon,如果不是使⽤vant的话得⾃定义⼀个icon--> <van-icon name="wap-home-o" color="white" size="20"/></view></view></view><!-- 以上可以封装成⾃定义组件,在引⼊,这个地⽅是胶囊外的内容--><view class="main-content" style="top:{{navHeight}}px;">我是测试左上⾓胶囊</view><!-- 左上⾓胶囊结束--></view>wxss内容:/* 导航栏css开始*/.left-capsule{width: 100vh;height: 100vh;background-color: black;}.left-capsule .left-capsule-nav{width: 100%;position: fixed;z-index: 2;}.left-capsule-nav .left-capsule-nav-content{width: 85px;text-align: center;border-radius: 50px;position: relative;top: 26px;left: 20px;box-shadow:0px 0px 1px 0.2px white;background-color: #1d19195c;height: 30px;}.left-capsule-nav-content view{display: inline;width: 35px;position: relative;}.left-capsule-nav-content .back{top: 4px;left: -5px;}.left-capsule-nav-content .line{top: 3px;width: 1px;border-left: solid #cac3c3 thin;height: 17px;display: inline-block;}.left-capsule-nav-content .home{top: 4px;}/* 导航栏css结束*//* 内容*/.main-content{background-color: red;position: absolute;width: 100%;z-index: 1;}效果图:如果觉得红⾊地⽅太挨得进的话 top 在加⼤⼀点。
微信小程序wxss设置样式
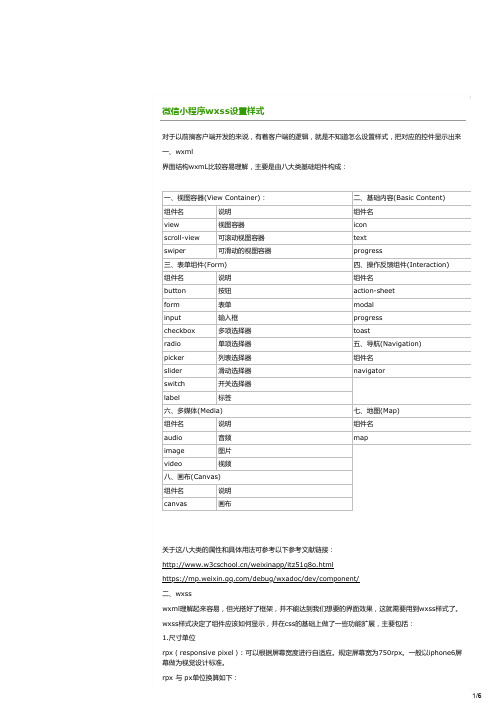
微信小程序wxss设置样式对于以前搞客户端开发的来说,有着客户端的逻辑,就是不知道怎么设置样式,把对应的控件显示出来一、wxml界面结构wxmL比较容易理解,主要是由八大类基础组件构成:一、视图容器(View Container):二、基础内容(Basic Content)组件名说明组件名view视图容器iconscroll-view可滚动视图容器textswiper可滑动的视图容器progress三、表单组件(Form)四、操作反馈组件(Interaction)组件名说明组件名button按钮action-sheetform表单modalinput输入框progresscheckbox多项选择器toastradio单项选择器五、导航(Navigation)picker列表选择器组件名slider滑动选择器navigatorswitch开关选择器label标签六、多媒体(Media)七、地图(Map)组件名说明组件名audio音频mapimage图片video视频八、画布(Canvas)组件名说明canvas画布关于这八大类的属性和具体用法可参考以下参考文献链接:/weixinapp/itz51q8o.htmlhttps:///debug/wxadoc/dev/component/二、wxsswxml理解起来容易,但光搭好了框架,并不能达到我们想要的界面效果,这就需要用到wxss样式了。
wxss样式决定了组件应该如何显示,并在css的基础上做了一些功能扩展,主要包括:1.尺寸单位rpx(responsive pixel): 可以根据屏幕宽度进行自适应。
规定屏幕宽为750rpx。
一般以iphone6屏幕做为视觉设计标准。
rpx 与 px单位换算如下:设备rpx换算px (屏幕宽度/750)px换算rpx (750/屏幕宽度)iPhone51rpx = 0.42px1px = 2.34rpxiPhone61rpx = 0.5px1px = 2rpxiPhone6s1rpx = 0.552px1px = 1.81rpx2.样式导入可以使用@import语句来导入外联样式表,其后面跟需要导入外联样式表的相对路径,并以分号结束。
button用法

button用法Button用法Button是一个非常常用的UI控件,它通常被用来触发特定的操作或者事件。
使用Button可以使应用程序看起来更加交互和易用。
Button的基本用法很简单。
我们可以使用XML或Java代码来创建Button实例,然后将其添加到界面上。
下面是一个简单的例子:XML代码:```<Buttonandroid:id="@+id/my_button"android:layout_width="wrap_content"android:layout_height="wrap_content"android:text="Click me" />```Java代码:```Button myButton = (Button) findViewById(R.id.my_button); myButton.setOnClickListener(new View.OnClickListener() {@Overridepublic void onClick(View v) {// Do something when the button is clicked}});```在这个例子中,我们首先在XML文件中定义了一个Button实例,设置了它的ID、宽度、高度和文本。
然后我们在Java代码中获取了这个Button实例,并为它添加了一个ClickListener,当用户点击这个Button时会触发这个ClickListener,并执行相应的操作。
除了基本用法,Button还有许多高级使用方式。
下面是一些常见的用法:1. 设置Button的样式我们可以通过设置Button的样式来改变它的外观和行为。
Button的样式通常有以下几种:- 普通样式:这是Button的默认样式。
它有一个背景颜色和文本颜色,并且可以被点击。
uni 修改组件样式的方法
uni 修改组件样式的方法uni-app是一种跨平台的开发框架,可以使用vue方式进行组件开发。
以下是一些修改组件样式的方法:1. 使用内联样式:在组件中使用style属性来设置样式。
例如:```vue<template><div style="color: red;">Hello, World!</div></template>```2. 使用组件类名和全局样式:为组件设置class属性,并在全局的样式文件中定义对应的样式。
例如:```vue<template><div class="my-component">Hello, World!</div></template><style>.my-component {color: red;}</style>```3. 使用scoped样式:在组件的样式标签中添加scoped属性,可以将样式限制在组件中。
例如:```vue<template><div class="my-component">Hello, World!</div></template><style scoped>.my-component {color: red;}</style>```4. 使用样式变量:在组件中定义样式变量,并在模板中使用。
例如:```vue<template><div class="my-component" :style="{ color: textColor }">Hello, World!</div></template><script>export default {data() {return {textColor: 'red',}}}</script>```5. 使用计算属性:使用计算属性根据组件的状态来动态计算样式。
使用uni-app给一个按钮点击后修改样式,实现样式切换

使⽤uni-app给⼀个按钮点击后修改样式,实现样式切换<template> <view class="box"> <view class="loginBox"> <view class="popup"> <view class="loginMode"> <view class="account" @click="isAccount" :class="!isshowAccount ? 'isAccMax': 'isAccMin'">账号登录</view> // isshowAccount :通过判断它的值来显⽰对应的样式 <view class="verification" @click="isVerification" :class="!isshowVerification ? 'isVerMin': 'isVerMax'">验证码登录</view> </view> <!-- 账号密码登录 --> <view v-show="isshowAccount" class="isshowBox"> // v-show 来控制输⼊框的显⽰与隐藏 <view class="inputBox"> <u-field v-model="mobile" label="⼿机号" placeholder="请输⼊⼿机号" > </u-field> <u-field v-model="code" label="密码" placeholder="请输⼊密码" > </u-field> </view> <u-button type="primary" @click="viewProtocol" class="denglu">登录</u-button> </view> <!-- 验证码登录 --> <view v-show="isshowVerification" class="isshowBox" > <view class="inputBox"> <u-field v-model="mobile" label="⼿机号" placeholder="请输⼊⼿机号" > </u-field> <u-field v-model="code" label="验证码" placeholder="请输⼊验证码" > <u-button size="mini" slot="right" @click="getCode">{{codeText}}</u-button> </u-field> <u-verification-code ref="uCode" @change="codeChange"></u-verification-code> </view> <u-button type="primary" @click="viewProtocol" class="denglu">登录</u-button> </view> </view> </view> </view></template><script>export default { data() { return { mobile: '', // ⼿机号 code: '', // 密码 codeText:'' ,// 模拟获取验证码 isshowAccount:true, // 默认显⽰账号密码登录 isshowVerification:false, // 隐藏验证码登录 } }, methods: { // 点击验证码 isVerification(){ this.isshowAccount = false // 隐藏账号登录 this.isshowVerification = true // 显⽰验证码登录 }, // 点击账号 isAccount() { this.isshowVerification = false // 隐藏验证码登录 this.isshowAccount = true // 显⽰账号登录 }, // 模拟获取验证码 codeChange(text) { this.codeText = text; }, getCode() { if(this.$refs.uCode.canGetCode) { // 模拟向后端请求验证码 uni.showLoading({ title: '正在获取验证码' }) setTimeout(() => { uni.hideLoading(); // 通知验证码组件内部开始倒计时 this.$refs.uCode.start(); }, 1000); }else { this.$u.toast('倒计时结束后再发送'); } }, // 点击登录后进⾏页⾯的跳转 viewProtocol() { uni.navigateTo({ url: '/pages/index/list' }) }, } }</script><style lang="scss">.box { width: 100%; height: 100%; position: relative; >.loginBox { width: 100%; height: 100%; background-color: #409EFF; position: fixed; top: 0px; left: 0px; >.popup { width: 315px; height: 324px; background-color: #FFFFFF; position: absolute; top: 50%; left: 50%; padding-left: 26px; padding-right: 26px; transform: translate(-50%,-50%); border-radius: 10px; >.loginMode { width: 263px; height: 31px; margin-top: 36px; margin-bottom: 20px; border-bottom: 1px solid #F8F8F8; // 控制切换登录时的样式 >.isAccMax { font-size: 15px; margin-top: 6px; color: #D3D3D3; } >.isAccMin { font-size: 18px; font-weight: 600; margin-top: 3px; border-right: 1px solid #F8F8F8; } >.isVerMin { font-size: 15px; margin-top: 6px; color: #D3D3D3; } >.isVerMax { font-size: 18px; font-weight: 600; margin-top: 3px; border-left: 1px solid #F8F8F8; } >.account, .verification{ width: 131px; height: 33px; display: inline-block; text-align: center; } } .denglu { margin-top: 36px; } } } }</style>最终实现效果:注意哦:我使⽤的是uni-app + uView 写的,记得引⼊⼀下uView,刚⽤不久uni-app + uView 写代码,写的不好的请多多指教,这⾥只是给⾃⼰做了个笔记,写的不好的地⽅请见谅,谢谢。
微信小程序分享功能onShareAppMessage(options)用法分析

微信⼩程序分享功能onShareAppMessage(options)⽤法分析本⽂实例讲述了微信⼩程序分享功能onShareAppMessage(options)⽤法。
分享给⼤家供⼤家参考,具体如下:在页⾯的js⽂件中定义了 onShareAppMessage 函数时,页⾯可以表⽰改页⾯可以转发。
可以在函数中设置页⾯转发的信息。
1. 只有定义了该函数,⼩程序右上⾓的菜单中才会有转发按钮2. ⽤户点击转发按钮的时候回调⽤该函数3. 该函数内需要 return ⼀个 Object,Object中包含转发的信息(可⾃定义转发的内容)页⾯中有可以触发转发时间的地⽅有两个: ⼀个是右上⾓菜单中的转发按钮 另⼀个是页⾯中具有属性open-type且其值为share的button。
(注:必须是button组件,其他组件中设置open-type="share"⽆效) 即:<button data-name="shareBtn" open-type="share">转发</button> 注意:实际开发中会发现这个 button ⾃带有样式,当背景颜⾊设置为⽩⾊的时候还有⼀个⿊⾊的边框,刚开始那个边框怎么都去不掉,后来给button加了⼀个样式属性plain="true"以后,再在样式⽂件中控制样式button[plain]{ border:0 },就可以⽐较随便的⾃定义样式了,⽐如说将分享按钮做成⼀个图标等触发分享事件后调⽤的函数:onShareAppMessage: function( options ){var that = this;// 设置菜单中的转发按钮触发转发事件时的转发内容var shareObj = {title: "转发的标题", // 默认是⼩程序的名称(可以写slogan等)path: '/pages/share/share', // 默认是当前页⾯,必须是以‘/'开头的完整路径imageUrl: '', //⾃定义图⽚路径,可以是本地⽂件路径、代码包⽂件路径或者⽹络图⽚路径,⽀持PNG及JPG,不传⼊ imageUrl 则使⽤默认截图。
微信小程序button选中改样式-实现单选多选

微信⼩程序button选中改样式-实现单选多选⼩程序实现多button单选/多选红⾊为选中状态单选多选①wxss/* pages/button-select/button-select.wxss */.button_container{display: flex;flex-direction: row;justify-content: space-around}/* 按钮未选中 */.normal_button{background: greenyellow}/* 按钮选中 */.checked_button{background: red;color: white}②wxm样式选中改变是通过三元运算符实现的<!--pages/button-select/button-select.wxml--><view class='button_container'><block wx:for="{{buttons}}" wx:key="buttons"><button class='{{item.checked?"checked_button":"normal_button"}}' data-id='{{item.id}}' bindtap='radioButtonTap'>{{}}</button> </block></view><text>{{msg}}</text>③js在Page({...})中填充按钮数据data: {buttons: [{ id: 1, name: '银⾊' }, { id: 2, name: '⽩⾊' }, { id: 3, name: '⿊⾊' }],msg:'',},默认使第⼀个按钮被选中Page({...})onLoad: function (options) {this.data.buttons[0].checked = true;this.setData({buttons: this.data.buttons,})},在Page({...})中添加事件监听⽅法(单选)/*** 事件监听,实现单选效果* e是获取e.currentTarget.dataset.id所以是必备的,跟前端的data-id获取的⽅式差不多*/radioButtonTap: function (e) {console.log(e)let id = e.currentTarget.dataset.idconsole.log(id)for (let i = 0; i < this.data.buttons.length; i++) {if (this.data.buttons[i].id == id) {//当前点击的位置为true即选中this.data.buttons[i].checked = true;}else {//其他的位置为falsethis.data.buttons[i].checked = false;}}this.setData({buttons: this.data.buttons,msg: "id:"+id})},在Page({...})中添加事件监听⽅法(多选)记得在wxml中修改绑定⽅法bindtap='radioButtonTap'checkButtonTap:function(e){console.log(e)let id = e.currentTarget.dataset.idconsole.log(id)for (let i = 0; i < this.data.buttons.length; i++) {if (this.data.buttons[i].id == id) {if (this.data.buttons[i].checked == true) {this.data.buttons[i].checked = false;} else {this.data.buttons[i].checked = true; }}}this.setData({buttons: this.data.buttons,msg: "id:"+id})},。
微信小程序常用样式

微信⼩程序常⽤样式1.设置全局字体样式app.wxss:text{font-family:MicroSoft yahei;}2.设置弹性盒⼦模型:.container{/*弹性模型*/display:flex;/*垂直⽅向列⽅向排布*/flex-direction:column;/*居中*/align-items:center;/*要从整体解决排布的问题是最好的⽅案*/}3.设置页⾯全屏样式及背景⾊:page{height:100%;background:#b3d4db;}4.全局设置导航条颜⾊app.json:"window": {"navigationBarBackgroundColor": "#405f80"}5.页⾯设置导航条颜⾊和标题*.json:{"navigationBarBackgroundColor": "#405f80","navigationBarTitleText":"⽂与字"}6.设置字体属性:.user-name{font-size:32rpx;font-weight:bold;}7.创建圆⾓矩形边框:.moto-container{border:1px solid #405f80;width:200rpx;height:80rpx;border-radius:5rpx;text-align:center;}8.外边距设置:margin-top:20rpx;margin-bottom:40rpx;9.内边距设置:padding-bottom:20rpx;10.上、下边线设置:border-bottom:1px solid #ededed;border-top:1px solid #ededed;11.⽂字间距设置:letter-spacing:2rpx;12.垂直居中(此元素放置在⽗元素的中部):vertical-align: middle;13.设置⼦元素Image样式:.circle-img image{width:90rpx;height: 90rpx}14.最底层垂直居中横线样式:.horizon{width:660rpx;height: 2rpx;background-color: #e5e5e5;vertical-align: middle;position:relative;top:46rpx;margin: 0 auto;z-index: -99}15.图⽚居中覆盖:.audio{width:102rpx;height:110rpx;position: absolute;left: 50%;margin-left: -51rpx;//经典⽔平居中⽅式 top:180rpx;margin-top: 20rpx;opacity:0.6;//透明度}。
color ui用法

Color UI用法1. 简介Color UI是一套基于微信小程序的UI组件库,提供了丰富的样式和组件,帮助开发者快速构建漂亮且易用的小程序界面。
它包含了各种常用的UI组件,如按钮、输入框、列表等,并且支持自定义主题色和样式。
Color UI的用法非常简单,只需引入相应的组件和样式,即可直接在小程序中使用。
本文将详细介绍Color UI的使用方法,包括安装、引入、样式修改和常用组件的使用。
2. 安装和引入Color UI的安装非常简单,只需在小程序项目中的app.json文件中添加Color UI 的依赖即可。
在app.json文件的dependencies字段中添加如下代码:"dependencies": {"colorui": "colorui/colorui"}然后在小程序的页面文件中引入所需的组件和样式。
例如,在index.wxss文件中引入按钮组件和样式:@import "colorui/main.wxss";@import "colorui/button.wxss";3. 样式修改Color UI提供了丰富的样式变量,可以直接在项目中修改主题色和样式。
在app.wxss文件中,可以通过修改全局样式变量来改变整个小程序的样式。
例如,要修改主题色为红色,可以添加如下代码::root {--theme-color: #ff0000;}此外,Color UI还提供了一些常用样式类,可以直接在组件上添加类名来改变其样式。
例如,要修改按钮的背景色为蓝色,可以在按钮上添加cu-btn-primary类:<button class="cu-btn cu-btn-primary">按钮</button>4. 常用组件Color UI提供了丰富的常用组件,包括按钮、输入框、列表、卡片等。
