吉他效果器 ax100g中文说明
雅马哈100数字效果器使用说明
雅马哈100数字效果器使用说明YAMAHA REV 100 中文说明书YAMAHA REV 100 数字混响器REV100为高质量、低价格、便于使用的立体声混响器。
可用于进行室内录音及扩声。
具有两个输入、输出立体声接口。
可产生高质量的立体声混响效果的同时,还可以产生加延迟效果和调制效果的混响效果声。
16数字的模数和数模转换器保证了高质量的音质大频率响应范围。
具有44.1kHz的采样速率。
REV100通过转动钮可控制设置参数并编辑所需的效果。
MIDI IN接口可以使效果程序通过MIDI信息来进行选择。
前盘:1、输入电平控制INPUT LEVEL:为转动钮,可设置输入电平。
设置电平时,应使峰值PEAK显示灯偶而闪亮为适。
2、峰值左右显示灯PEAK:为发光二极管,当本机接收的信号电平产生峰信号时会亮。
3、直达声/效果声混合平衡控制DRY/WETMIX BALANCE:转动钮,用来控制直达声和效果声信号的各占比例。
4、发光二极管七段显示器:在程序方式时可显示目前的程序号:在编辑方式时显示出参数值:在MIDI方式时显示MIDI号;当选择了MIDI程序改变表时,MIDI显示灯亮;当您选择内部程序时,INT内部显示灯亮。
5、程序键PROGRAM(上下箭头键,MIDI键,STORE储存键):这些键可用来选择不同的程序编辑MIDI程序改变表,以及储存所调整的程序。
6、编辑控制EDIT(延迟DELAY,DECAY衰减,LEVEL电平):为转动控制钮,可控制目前所选择的效果的参数数值。
当所编辑后的参数值与这个程序以前所储存的参数值相同时,左面的显示灯将会亮。
详见“程序编辑”一节。
7、电源形状:按下开关电源接通,再按下时即电源断开。
后盘:1、直流12V输入口DC12V IN:接入交流变压器的电源输出端,为本机供电。
2、接口MIDI IN:使本机接收MIDI数据信号。
3、输出接口QUTPUT:为1/4in拾音接口,可输出本机处理的音频信号,如果使用单声时,只需接入一个该接口即可。
效果器的使用方法

调音台与效果器的连接1.调音台利用每路上的INS插孔,单独对该路上的声信号进行调音台效果处理,从INS插孔将该路的声信号引入效果器,经效果机处理后,声音信号由效果器出来,再从这个插孔送回调音台,这种接法适合于大型乐团对各类乐音和演唱声的效果处理。
2.利用辅助送出(AUX SEND),将声音信号送入效果器的输入端,从效果机输出接到调音台的辅助返回端(AUX RTN),对需要处理的声音信号,将该路上相应的辅助旋钮打开,对不需要处理的声音信号,则把该路上相应的辅助旋钮关闭。
这种连接可由一个效果机处理多个同类声源(比如:多个人演唱)。
3.利用辅助送出(AUX SEND),将声音信号送入调音台与效果器的输入端,从效果机输出接到调音台的某一路的线路输入端(Line)。
这时,把这路当做效果的再加工处理(放大、均衡、声像、混合比例等),并且用该路的推子作效果混合比例调节,比较方便。
但这路上所有的辅助旋钮必须关闭。
否则,会出现扩声系统啸叫,或在辅助母线上出现效果声。
在我的前几篇文章里,先后简单介绍了调音台、均衡器、压限器、电子分频器、反馈抑制器的使用技巧,这次我同大家简单交流一下关于数字效果器的使用技巧。
效果器是处理、制造各种声场效果的音响周边器材,一般用于对人声进行处理,在大多数音响系统中,如果人声没有经过效果器处理就会变得没有丰满度和亮度,形象来说就是:干瘪没有水分。
现在最新的效果器都使用了数字微处理器,所以我们也称其为:数字效果器了,要了解效果器的原理我们有必要先了解一些声学原理:一、相关声学原理一个室内声场大体可分为三种声音:第一是直达声;第二是早期反射声;第三是混响声。
1、直达声:我们人耳直接听到的声音就是直达声,这个很好理解,必须是我们所在的位置靠近发声源,才可能尽可能多的听到直达声。
在传播过程中,直达声不受室内反射界面的影响,现在我们在声场设计上要求尽可能多的利用音箱发出的直达声,合理控制反射声,以达到完美的效果。
YAMAHA REV100效果器使用说明

YAMAHA REV100效果器使用说明一、正确安装和连接YAMAHA--- REV100。
"如使用单声道可只接左声道。
INPUTLEVEL:输入电平旋钮,调节此旋钮使峰值指示灯在正常工作时偶尔闪亮。
一直闪亮表示信号过强,声音会削波,过弱又会发生音质下降,因此调节适当的电平输入是使用好效果器的第一步,也是很重要的一步。
MIX BALANCE:效果混合旋钮,用来调节效果声和原声之间的比例。
PROGRAM:用来选择不同的程序,编辑程序存储。
二、改变效果程序:YAMAHA—REV100共有99种效果程序,用上下光标键选择。
程序名类型说明01 Vocal rev1人声适用于人声混响02 Vocal rev2大厅3号程序的前期延长,混响时间短03 Vocal rev3人声04 Room ambience1盘子04-08这些效果适用于鼓和打击乐音色,可作用于整个鼓组或某个鼓音色05 Room ambience2盘子06 Room ambience3盘子.07 Wood booth1人声08 Wood booth2人声09 Acoustic piano plate用于钢琴的混响音响技术超级论坛10 Club piano大厅用于钢琴的混响11 Booming kick1大厅用于底鼓的混响,强调低频12 Booming kick2房间用于底鼓的混响,强调低频13 Loud snare房间用于军鼓的混响14 Acoustec steel guitar1盘子钢弦原声吉它的混响15 Acoustec steel guitar2盘子钢弦原声吉它的混响16 String plate盘子弦乐的混响音响技术超级论坛17 Acoustec gut guitar1人声尼龙弦原声吉它混响18 Acoustec gut guitar2人声尼龙弦原声吉它混响19 Btass room1房间铜管乐器的混响20 Btass room房间铜管乐器的混响21 Large hall1大厅Stage比hall的混响更明亮22 Large hall2大厅Stage比hall的混响更明亮23 Stage1大厅Stage比hall的混响更明亮24 Stage2大厅Stage比hall的混响更明亮25 Chamger1人声模拟大房间,高顶的混响26 Chamger2大厅模拟大房间,高顶的混响27 Church1房间模拟大房间,高顶的混响28 Church2大厅模拟大房间,高顶的混响29 Old gunnel大厅模拟长通道中的混响,30 New tunnel人声31 Large room1房间混响,32比31低频更多32 Large room2房间33 Slide reverb房间混响的声像在右34 Huge room1房间比房间混响更有力的混响35 Huge room2房间比房间混响更有力的混响'W%D/r,Y f#t/W36 Bathroom盘子短立体声的混响37 String ensemble盘子用于弦乐的大混响38 Rude reverb1人声粗混响39 Rude reverb2人声粗混响音响技术超级论坛40 Comcert grand piano人声用于原钢琴的混响41 Small ambience1大厅小房间反射混响,42比41的低频少42 Small ambience2大厅音响技术超级论坛43 Tight poom1房间比上面两种效果更小的混响44 Tight poom大厅比上面两种效果更小的混响45 Gate reverb1盘子各种门混响46 Gate reverb2人声各种门混响47 Gate reverb3大厅各种门混响48 Gate reverb4大厅各种门混响49 Stone room房间石头房间混响50 Big curve人声最长的门混响51 Analog delay1软延迟52 Ping pong delay声像左右变化的延迟53 Eighth note triplet像8分三连音符的延迟54 Karaoke用于卡拉OK的回声效果55 Short delay doubler一次短的延迟56 Stereo long delay左右声道同长的立体声延迟57 Sgereo medium delay左右声道不等长的立体声延迟58 Stereo long delay左右声道同长的短延迟59 Mono long delay单声道输出的重复延迟60 Mono short delay单声道输出的重复延迟61 Electric piano延迟+大厅常用于钢琴62 String pad延迟大厅常用于背景音乐63 Synth延迟人声用于弦乐背景64 Vocal164、"65是用短延迟的长混响,适用于人声65 Vocal2延迟大厅64、"65是用短延迟的长混响,适用于人声66 Vocal3延迟房间66是强调延迟的短混响67 Btinght vocal延迟盘子有小延迟的亮混响68 Chorus延迟+盘子一半混响,一半延迟69 Drum kit1延迟+房间用于鼓和打击乐的混响70 Drum kit2延迟盘子用于鼓和打击乐的混响71Softflange1大厅+飘忽此效果结合了混响和小音高变化的飘忽,常用于合成音色背景音乐72Softflange2大厅+飘忽此效果结合了混响和小音高变化的飘忽,常用于合成音色背景音乐73 Amgience flange1房间飘忽短混响加飘忽74 Amgience flange2房间飘忽短混响加飘忽78 Symphonic reverb1大厅+交响以混响为主的精致效果79 Symphonic reverb2人声+交响以混响为主的精致效果80 Flange room1房间+飘忽为鼓和打击乐加特效81 Flange room2房间+飘忽为鼓和打击乐加特效82 Rolling flange1盘子+飘忽为鼓和打击乐加特效83 Rolling flange2盘子+飘忽84 Big flange人声飘忽喷气机效果85 Chorus rerb1大厅+合唱85,86是普通的混响+合唱,用途很广如用于钢琴86 Chorus reverb2盘子+合唱87 Chorus reverb3大厅+和唱88 Chorus reverb4人声+合唱89 Tremolo reverb1大厅+震音+混响的各种变化效果"90 Tremolo reverb2大厅震音+混响的各种变化效果91 Tremolo reverb3盘子+震音+混响的各种变化效果92 Tremolo reverb4人声+震音+混响的各种变化效果93 Tremolo reverb5人声+震音+混响的各种变化效果6k-W'p$?!k94 Tremolo reverb6大厅+震音+混响的各种变化效果95 Tremolo reverb7大厅+震音+混响的各种变化效果96 Ambient slow pan1大厅+震音左右声像变化和短混响97 Ambient slow pan2房间+震音左右声像变化和短混响98 Sequence pan1房间+震音根据乐曲速度而定的声像变化效果99 Sequence pan2房间+震音根据乐曲速度而定的声像变化效果REV100的每个效果都具有多个参数,3个主要参数可通过面板上的旋钮控制。
(叉烧投稿)Line6 AMPLIFI FX100效果器、AMPLIFi 75和AMPLIFi150吉他音箱使用说明书

使用说明书- 1 -AMPLIFi主要特点:声明:AMPLIFi FX100吉他效果器与AMPLIFi75/150吉他音箱APP操作一致1.蓝牙连接功能AMPLIFi FX100可以直接连接你的蓝牙设备,无论电脑和手机,只要有蓝牙功能就可以连接AMPLIFi FX100并播放音乐。
你就可以一边弹吉他,一边与你的“虚拟乐队”排练了!(兼容iOS、Android、Mac 与 PC)2.云端音色共享社区借助全球的音色共享社区(cloud)功能,可上传、下载、储存与共享音色,并给别人的音色打分。
最重要的是它支持中文命名的音色,使你可在中国找到大师的音色,甚至找到全球的音色并下载给自己用。
想想你之前很久都调不出来的音色,现在它已难不倒你了!3.音色搜索功能一旦播放音乐库上的歌曲,AMPLIFi APP就会自动进行相关音色搜索;或者输入你想要搜索的歌曲名称,系统将会自动识别与歌曲最接近的吉他音色。
甚至输入大师的名字,系统将会为您全球搜索。
AMPLIFi能让你与大师更近一些,搜索后音色可直接下载并保存使用,这非常有利于吉他音色模仿学习。
你甚至可以在原音色基础上再进行调节,使它转变为自己喜欢的音色。
4.AMPLIFi Remote APP控制(在App Store免费下载)安装AMPLIFi APP后,注册后便可直接在APP上进行音色调节。
支持iOS 7系统连接设备包括iPod touch (5代), iPhone 5s, iPhone 5c, iPhone 4s, iPhone 4, iPad Air, iPad (2、3、4代)、iPad mini和iPad mini 2。
AMPLIFi APP拥有漂亮的画面、强大的 DSP,它可以同时运行8个效果器,并且可细调每个参数。
5.融合英美经典吉他箱音色APP软件支持8个效果器同时使用,并且随时可以调换效果器的连接顺序!它带有200个功放箱体,单块和周边效果器。
它融合了20世纪到21世纪,从晶体管到电子管,从英国到美国、融汇全球最经典的吉他箱体。
迪莫克斯迪-可移植吉他效果器说明书

Precautions Preset Selection Tone Setting Tone Saving Quick Recall Buttons Tap Tempo Rhythm Setting TunerAUX INSystem SettingMain Features Panel layoutOperational GuidanceConnections BatteriesEffects Explanation Specifications Troubleshooting Patch List01010204040506070708080909111213151516*Please read carefully before proceeding*Power Supply:Please connect the designated AC adapter to an AC outlet of the correct voltage. Please be sure to use only an AC adapter which supplies 9V DC(±10%), , 300mA,center negative. Unplug the AC power adapter when not in use or during electrical storms.Connections:Always turn off the power and all other equipment before connecting or disconnecting.This will help prevent malfunction and damage to any of the devices. Make sure to unplug all connection cables and power cords before moving this unit. Location:To avoid deformation, discoloration, or other serious damage, do not expose Direct sunlightMagnetic fieldsExcessively dusty or dirty locationStrong vibration or shockInterference with other electrical devices and Cleaning:Radios and televisions placed nearby may experience reception interference. Operate this unit at a suitable distance from radios and televisions.Clean only with a soft, dry cloth.FCC certificationThis device complies with Part 15 of the FCC Rules. Operation is subjectto the following two conditions:This device may not cause harmful interference.This device must accept any interference received, including interferencethat may cause undesired operation.99 Factory presets and 99 user presets2 Auto wah effects10 Overdrive and distortion effects7 Amp models11 Modulation effects5 Different delays4 Reverb types40 Drums patterns and 10 metronomesTap tempo functionality02 0304 05 06 0708 09MODE:Control for scrolling through the various pages in the menu LCD Display: Displays the User Interface and provides all informationfor presets and parametersVALUE:Control for adjusting various parameters and selections within the User Interface.SAVE: Press to enter preset saving pageRHYTHM:Press to access Drum machine and MetronomeTUNER: Press to access guitar tunerEFFECTS CHAIN:Indicates the operational status of the differenteffect blocks and the currently selected page within the User Interface Quick Recall buttons:Quickly recalls 4 of your favorite presetsTAP:Tap tempo control for use with the drum machine, metronome and delay effects0110 11 12 13 1415 16INPUT:1/4” mono audio jack for connecting instrumentOUTPUT:Audio output 1/4” mono audio jackAUX IN:Stereo line in for connection to external devices such as mp3 player for audio playback.HEADPHONES: Stereo line out for connecting to a headset or other external audio equipmentDC IN:Connects to the supplied power adaptor(DC 9V, 300mA, )Master Volume: Adjusts the master output volume of the device Battery hatch: Insert 2 x AAA batteries for battery operationPowerMaster of Guitar Volume02Preset name Preset number 12Drum speed4Battery capacity301(9V, 300mA Preset Selection03Rotate the MODE control until "PL " is highlighted brightly on the "EFFECTS CHAIN' panel. The LCD Display will indicate the information of the current preset(P or U) . P stands for factory preset, U stands for user Preset. Rotating the Value control whilst on the Preset page will scroll through the various presets.Adjust the master output volumeMore details will be listed on page 16.Effect ChainRotate the 'MODE' control to scroll through the Edit pages of the various Effect blocks within the 'Effect Chain’Effect editing Effect On/Off010203Note:The effects chain display panel will illuminate to indicate which effects blocks are currently active within the selected presetThere are 6 effect blocks containing 39 types of effects in PE100's effect Chain. Each effect block provides a different kind of effect.PL = Preset Mode SY = System settingsAfter selecting the effect block you wish to edit using the MODE control, the LCD screen will display the effect model, the on/off status, all of the various settings and parameters of that effect.While on an effect blocks edit page, press the D quick recall button to switch that effect block on or off within the preset.Rotate the VALUE control to select your desired model.Press the VALUE control to scroll through the parameters.After selecting the parameter you wish to edit, rotate the VALUE control to adjust it's value. WAH = Wah Wah effectsREV = Reverb effects AMP = Amplifier Simulation models R.S = Rhythm(Drum machine and Metronomes)MOD = Modulation effects DS = Overdrive and Distortion effects DLY = Delay effectsThe tone can be saved as a User preset01 0203 04 05Press the SAVE buttonRotate the VALUE knob to select which preset number you wish to save your tone in. You can save your tone in any user preset U01 to U99. When you have selected your desired preset slot press the VALUE control to continue.Once you have finished entering the preset name press the SAVE button again to save the preset.Now you can edit the name of the preset. Rotate the VALUE control toscroll through the characters. Press the VALUE control to select acharacter and move onto the next character in the preset name.If you wish to cancel the saving procedure at any time during this process, simply rotate the MODE control to exit the saving page.Notes: P01 to P99 are for factory presets only and can not be used to store customuser presets. You can only save custom tones in U01-U99.TAP TEMPOTap Tempo has 2 operationsNotes: If the screen shows UNSAVED in PL mode, the quick recall button can notsave the tone.0102The QUICK RECALL buttons A,B,C,D provide an easy way to instantly store and recall 4 of your favorite presets.To store a preset in a quick recall slot make sure that PL is highlighted using the MODE control.Navigate to the preset you wish to store in the quick recall slot using the VALUE controlHold the quick recall button (A,B,C,D) where you wish to save the preset, for more than 1 second.The quick recall button will flash 3 times to confirm you have successfully stored the preset within that slot.To quickly recall that preset at any time just press the corresponding "quick recall button" whilst PL is highlighted on the EFFECTS CHAIN display.While you are using the RHYTHM function TAP is highlighted blue. Pressing theTAP button two or more times will synchronize the drum patterns and metronomes speed with your inputted tempoWhile you are not using the RHYTHM function TAP is highlighted red. Pressing theTAP button two or more times will synchronize the Delay time with your inputted tempo.Tuner010*********The PE100 contains 40 drum patterns and 10 metronomes .Pressing the RHYTHM button at any time will start or stop the drum patternsand metronomes.Rotate the MODE control until R.S is highlightedRotate the VALUE control to choose the DRUM or METRONOME.Press the VALUE control to highlight the rhythm parameter and rotate theVALUE knob to choose which rhythm you want.Press the VALUE control again and rotate it to edit the speed, the range isBPM40 to BPM260.Press the VALUE control once more and rotate it to edit the playback volume ofthe rhythm.Press the TUNER button at any time to access the tuning function page. The tuner is set to A=440Hz as stock, rotate the VALUE control to change this calibration.Press the VALUE control to highlight the bypass/mute parameter, rotate the VALUE control to switch between muted tuning and bypassed tuning.Pressing the TUNER button again will return you to the same page you were in whenyou first accessed the tuning function page.Select OUTPUT using the VALUE control, you can choose line out or ampout depending on what equipment you wish to connect your PE100 to.01Connect the output of your favorite external audio device, such as mp3 player, to this input using a mini stereo jack.Rotate the MODE control until SY is selected. The system settings include theOUTPUT type, LCD B (brightness), LCD M (invert colors), RESET (factory RESET).To perform a full factory reset of the PE100 rotate the VALUE control to highlight RESET and press it. Next you will be asked "are you sure to restore factory setting" select “YES” to perform a factory reset. Select “No” to cancel and return to the system settings page.04 Rotate the VALUE control to LCD M, press it. Rotate the VALUE control to invert the LCD display screens colors.03 Rotate the VALUE control to LCD B, press it. Rotate the VALUE control to edit the brightness of the LCD display screen.02Equip two AAA size batteries and close the battery compartment.Turn off PE100 and open the battery compartment.010203input JackThe PE100 will power on using batteries when something is connected to theWAH01NameSpecificationsTOUCH WAH FUNKY MONKEY A dynamically responsive autowah effect Time based Auto Wah effect.*NOTES: All product name called their company, here is only used in this product simulation effect of tone types.DLY05REV06DIGITAL ANALOG DYNAMIC ECHO TAPE ECHO NameSpecificationsRepeats the signal with no special processing, creates the most clean delay sound.Simulates analog delay equipment, produces a warm and vintage delay sound.The delay sound is low while playing, but increases when playing stops.Simulates the sound of a real Echo, authentic and natural delay sound.Simulates a vintage Tape Echo machineROOM HALL CHURCH PLATENameSpecificationsSimulates the acoustics of a room Simulates the acoustics of a concert hall.Simulates the acoustics of a big church.Simulates Plate reverberation.No. of Effect Modules: 6 modulesNo. of Effect Types: 39 Effect typesPreset Patch Memory:99 patchesUser’s Preset Patch Memory:99 patchesInput Jack:1/4” mono audio jackOutput Jack:1/4” mono audio jackHeadphone out:1/8” stereo audio jackAUX IN: 1/8” stereo audio jackPower requirements:AC adapter 9V DC,300mA,Dimensions:137mmX81mmX32mmWeight:230gAccessories:Owner’s Manual,AC adapter 9V DC.Can not power on:Check power connection——Make sure the power is connected correctly. Check the adapter——Make sure the adapter’s type is DC 9V/300mA/No sound or low volume:Check connection of cables——Make sure all the cables are connected firmly. Check the on/off switch and the volume setting of amp——Make sure each equipment’s volume is set to an appropriate level.High noise:Check the adapter——Make sure the adapter’s type is DC 9V/300mA/Check the cables——Make sure the cables are connected firmly and have no quality problemP01 P02 P03 P04 P05 P06 P07 P08 P09 P10 P11 P12 P13 P14 P15 P16 P17 P18 P19 P20 P21 P22 P23 P24 P25DS CLEANGREENBLACKOC FUZZFL FUZZPH FUZZLOST FUZZLOST 1LOST 2SLOW DANCECLASSIC PURPLEGLASSBIG HAIRBLUE SPRINGOLD BRIT METALCHORUS ORGANSENSUOUSSUMMER 6969 LEADTUMBLEWEEDCOWBOY LEADVOCAL INDUSTRWALK IN THE WOCOCK ROCKBREATHEP26P27P28P29P30P31P32P33P34P35P36P37P38P39P40P41P42P43P44P45P46P47P48P49P50DAVE FLAVORSURFING RHYTHMSURFING LEADRANDYAGGRESSIVEAMANI RHYTHMAMANI SOLOGARY TRACKNO HESITATETRUE LOVEGOLDEN AGE RHYTHMGOLDEN AGE SOLOLOVEROCEAN SKYBRITISH METAL of preset of presetJTM45JTM45 SOLOJTM45 ELECTRONJTM45 WAHBRITISHBRITISH ODBRITISH DELAYBRITISH CHBRITISH SOLOBSMP51 P52 P53 P54 P55 P56 P57 P58 P59 P60 P61 P62 P63 P64 P65 P66 P67 P68 P69 P70 P71 P72 P73 P74 P75P76P77P78P79P80P81P82P83P84P85P86P87P88P89P90P91P92P93P94P95P96P97P98P99JC CHORUSTWIN REV1TWIN REV2TWIN REV3TWIN REV4REVERB ONLYCH CLEANFINECONFUSIONPH CLEANBP REVERBHOT WAHELANGER WAHLASER WAHCICADAFLUTTERINGAURORAELECTRICPOP CLEANVOODOO CHILDHAPPY BLUESHAIR METALJUST PUNKROTATING WINDROCK MONKEYJAZZ CLUBROCK SOUNDJST FIGHTERMEMORYCRUNCHERNARROWCOLLAPSEMID-NIGHTDREAM STREAMSWEET TALKINGCLOCK TOWER of preset of preset BSM SOLOBSM SOLO2BSM WAHBSM CRUNCHBSM ODBSM VIBBSM RHYTHMJC SOLOJC ODJC POSTJC CLEANTWIN REV SOLOJC METALMOOER AUDIO CO.,LTD Shenzhen, China。
吉他效果器说明书
效果器常用英文单词一览AMPLIFIER(AMP)放大器、扩音机 CHORUS 合唱效果器ANALOG DELAY 模拟延时器 CLEAN 清彻音ATTACK 打进声 CONTROL 控制AUTO 自动 CRUNCH 嘎吱音BALANCINC 平衡 DECAY 衰减BAND 波段 DELAY 延时效果器BANK 组合 DEPTH 深度BEAT 拍、拍子 DIGITAL 数字、数字式BLEND 混合 DISPLAY 显示BOOST 提升 DISTORTION(DIST)失真效果器BRIGHT 明亮 DIRECT OUT 直接信号输出BUTTONS 按钮 DRIVE 驱动CALIBRATION 校音器 ECHO 回声CANCEL 消除 EDIT 编辑CENT 音分 EFFECTORS 效果器COLOR 色彩 EFFECT 效果COMPARE 比较 ELEC.CUTTAR 电吉他COMPRESSOR 压缩效果器 EQUALIZER(EQ)均衡器CHANNEL 通道 FRET 音品CHECK INDICATOR 核对指示灯 FEEDBACK 反馈 CHORD 和弦 FLANGER 弗兰格效果器FOOT SW 脚踏开关 PLAY 弹(放)FOOT VOLUNE 脚踏音量控制器 POWER 电源、功率FREQUENCY 频率 POLARITY 极性(指电源)GAIN 增益 PULL 开关HARD 硬(指声音) PROGRAM 程序HIGH 高(指声音的高调) RATE 比率HEAVY METAL 硬摇滚、重金属乐 RECALL 恢复INPUT 输入插孔 RECORD 录、录音INSTRUMENT 乐器(插孔) REECHO 回响JACK 插梢(或指插孔) REPEAT 反复KNOB 旋钮 RESET 重放LAMP 指示灯 REVERB 混响(效果器)LEAD 超载音 RELEASER 解除、释放LIGHT 指示灯 PHYTHM 节奏LEFT 左(声道) RIGHT 右(声道)LEVEL 电平 SEND 发送LOW 低(指音量) SELECTOR 选择钮LONG 长(指持续音) LENSITIVITY 灵敏度LINE OUT 线路输出 STRING 弦线MASTER VOL 总音量 SHORT 短(指持续音)MIDDLE 中音 SHARP 尖锐(指声音)NOISE GATE 噪声闸(效果器的一种)SIGNAL 信号NUT 琴马 SOUND 音响OVER DRIVE 驱动器(效果器的一种)SOFT 柔和(指声音)OUTPUT 输出插孔 SPEED 速度PARAMETRIC EQ 参数均衡器 SPEAKERS 扬声器PHASER 移相(效果器) STAGE TUNER 弦乐校音仪PHONES 耳机 START 启动PICKUPS 拾音器 STOP 停止PITCH 音准 SUSTAIN 持续音(延音)TIME 时间 SWITCH(SW)开关TIMITER 限幅器 SYNTHESIZER 合成器TONE 音调 TEMPO 拍子速度BOOSTER 提升 VOICES 声音TREBLE 高音 VOLUME 音量TUNER 校音 VOLUME PEDAL音量踏板TUBE MANIA 管爆(失真器果的一种)WAW 哇音WRITE 存储(写入)BOSSGT-5 中文说明书第一章:入门一、构造(以GT-3为例,从左到右、由上而下顺序说明)上面板:1、液晶显示屏2、 *** 118;alues调节旋钮(数值轮)3、BANK踏板:GT-3有两个,GT-5一个,用来变换音色组4、脚踏(大踏板、表情踏板、音量踏板)5、设置按钮(多个)6、小踏板:GT-3有4个、GT-5有5个变换小踏板,用来变换某组内的音色号,最右边为1个控制踏板(C踏板)背面板:1、INPUT:输入插孔,接电吉他2、LEVEL:输出音量(电平)调节旋钮3、OUTPUT R:右声道输出插孔,接音箱等设备4、OUTPUT L(MONO):左声道输出插孔,若非立体声输出,使用此插孔接音箱等设备5、PHONES:耳机插孔,此插孔为3.5mm立体声输出小插孔,也可以利用此插孔接调音台6、SEND:外部效果器(效果设备)输出插孔,接外部效果器(效果设备)的输入插孔7、RETURN:外部效果器(效果设备)输入插孔,接外部效果器(效果设备)的输出插孔8、SUB EXP PEDAL:外部表情踏板接入插孔9、MIDI IN:MIDI输入插孔10、MIDI OUT:MIDI输出插孔11、POWER:GT电源开关按钮12、AC IN 14V:14V直流变压器电源输入插孔=====================================================================二、连接将GT与吉他、音箱等设备连接好后,接通电源。
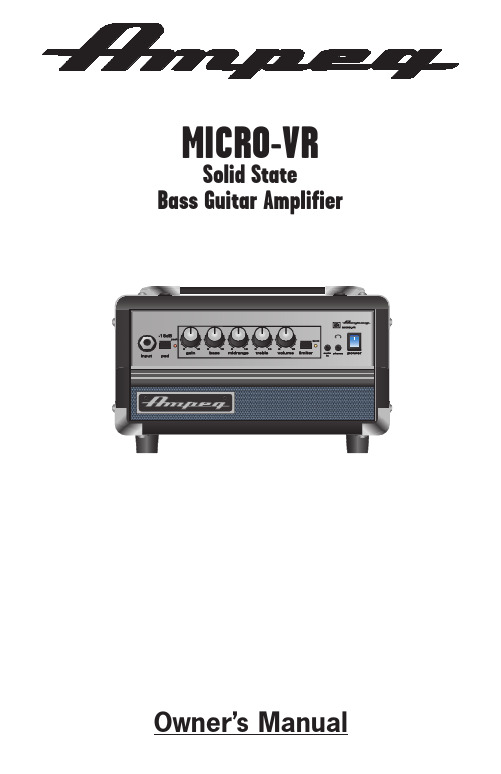
Micro-VR Bass Guitar Amplifier 产品说明书
PRECAUCION
RIESGO DE CORRIENTAZO NO ABRA
PRECAUCION: PARA REDUCIR EL RIESGO DE INCENDIOS O DESCARGAS ELECTRICAS, NO PERMITA QUE ESTE APARATO QUEDE EXPUESTO A LA LLUVIA O LA HUMEDAD. PARA DISMINUOIR EL RIESGO DE CORRIENTAZO. NO ABRA LA CUBIERTA. NO HAY PIEZAS ADENTRO QUE EL USARIO PUEDO REPARAR DEJE TODO MANTENIMIENTO A LOS TECHNICOS CALIFICADOS.
"REFERREZ-VOUS AU MANUAL D'UTILISATION"
NOTE: This equipment has been tested and found to comply with the limits for a Class B digital device, pursuant to part 15 of the FCC Rules. These limits are designed to provide reasonable protection against harmful interference in a residential installation. This equipment generates, uses, and can radiate radio frequency energy and, if not installed and used in accordance with the instructions, may cause harmful interference to radio communications. However, there is no guarantee that interference will not occur in a particular installation. If this equipment does cause harmful interference to radio or television reception, which can be determined by turning the equipment off and on, the user is encouraged to try to correct the interference by one or more of the following measures:
吉他效果器 ax100g中文说明

此效果器具有很多功能。
包括立体声输出, 实时调音, 外部控制接口, 音量控制接口, MIDI 输入输出接口. 当然最重要的还是它的效果器输出音质, 我们将详细讨论一下它的每一个效果器极其参数调节意义和范围.一. Compressor [COMPRESSOR] 压缩COMPRESSOR能对输入信号进行压缩处理,使系统输出一个保持不变的电平信号这个效果器有两个基本效果:1. 当吉他有信号输入效果器时,它可改变声音的触发时间(ATTACK TIME),详情见下表2. 可使吉他声音衰减速度变慢.SEN(SENSITIVITY)0 -15压缩效果器的开关电平,如果输入电平小于此值则无输出ATTACK 0-7 从信号发生到信号到达最大值所需时间,如为0则声音缓慢发出,如为7则正常发音LEVEL 0-15 效果器处理后的输出音量二. Distortion/Overdrive [DIST/OD] 失真/激励,此功能对输入的声音进行失真处理。
1.MODE:取值范围(1-7)值为1: TUBE OD ,真空管激励此模式是真空管放大器独有的自然失真音色值为2: CLASSIC OD ,模拟TUBE OD, 但有较多的直接触发声( DIRECTATTACK SOUND)值为3: SUPER OD ,此模式使中频段的频谱成峰型,即大量提升中频段值为4: DIST ,失真此模式在高增益(GAIN 可理解为输入)情况下产生一个光滑的失真音色值为5: SUPER DIST,大量提升中频段, 但失真效果远大于SUPER OD值为6: STUCK WAH DIST,产生一个类似于WAH 踏板不完全踩下时的音色值为7: METAL DIST,年轻的摇滚狂热份子所最中意的音色,HEAVY METAL令人激动是烦躁的音色2.GAIN:取值范围(0-15)调节失真度的总量3.TONE:取值范围(0-7)用来调节音色,此值越大,音色越亮4.EQ LATCH:取值范围(0,1)当DIST/OD 效果器开关时,控制3 BAND EQ 效果器的开关值为0: 对3 BAND EQ 无效值为1: 当DIST/OD 开/关时,3 BAND EQ 也随之开/关5.LEVEL:取值范围(0-15)效果器处理后输出音量三. Pitch和Delay在效果器的面板上有两行菜单:“PITCH SHIFT”,“DELAY”。
Korg AX100G 快速引导说明书
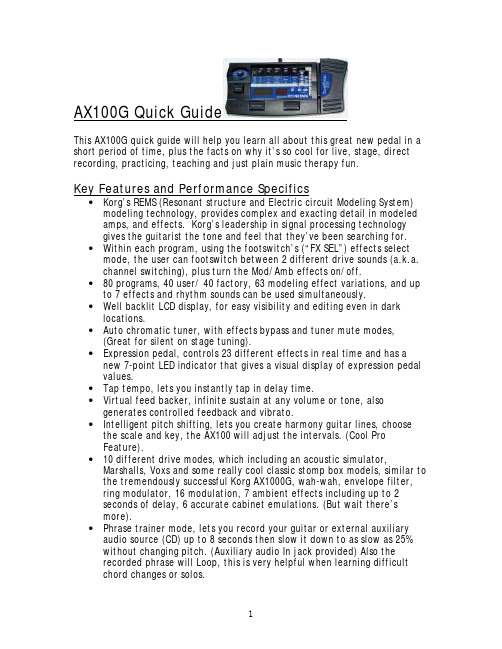
AX100G Quick GuideThis AX100G quick guide will help you learn all about this great new pedal in a short period of time, plus the facts on why it’s so cool for live, stage, direct recording, practicing, teaching and just plain music therapy fun.Key Features and Performance Specifics•Korg’s REMS (R esonant structure and E lectric circuit Modeling S ystem) modeling technology, provides complex and exacting detail in modeledamps, and effects. Korg’s leadership in signal processing technologygives the guitarist the tone and feel that they’ve been searching for.•Within each program, using the footswitch’s (“FX SEL”) effects select mode, the user can footswitch between 2 different drive sounds (a.k.a.channel switching), plus turn the Mod/Amb effects on/off.•80 programs, 40 user/ 40 factory, 63 modeling effect variations, and up to 7 effects and rhythm sounds can be used simultaneously.•Well backlit LCD display, for easy visibility and editing even in dark locations.•Auto chromatic tuner, with effects bypass and tuner mute modes, (Great for silent on stage tuning).•Expression pedal, controls 23 different effects in real time and has a new 7-point LED indicator that gives a visual display of expression pedal values.•Tap tempo, lets you instantly tap in delay time.•Virtual feed backer, infinite sustain at any volume or tone, also generates controlled feedback and vibrato.•Intelligent pitch shifting, lets you create harmony guitar lines, choose the scale and key, the AX100 will adjust the intervals. (Cool ProFeature).•10 different drive modes, which including an acoustic simulator, Marshalls, Voxs and some really cool classic stomp box models, similar to the tremendously successful Korg AX1000G, wah-wah, envelope filter,ring modulator, 16 modulation, 7 ambient effects including up to 2seconds of delay, 6 accurate cabinet emulations. (But wait there’smore).•Phrase trainer mode, lets you record your guitar or external auxiliary audio source (CD) up to 8 seconds then slow it down to as slow as 25%without changing pitch. (Auxiliary audio In jack provided) Also therecorded phrase will Loop, this is very helpful when learning difficultchord changes or solos.•Sample & Play, lets you use the expression pedal to control your own loops and samples in real-time with up to 6 seconds of phrase sampling.•Slow Attack, automatic volume swells, controlled by how hard you pick the strings.•50 high quality PCM sample rhythm patterns. (Makes practicing a lot more fun)•10’s hold, lets you lock into a bank so you can scroll through you favorite4 programs without accidentally recalling an unwanted program.(Excellent for Live use)•Cable guide, helps keeps your cable out of your expression controller.Getting Started1.Route guitar cable under AX100 through cable guide2.Set input level (H= hum bucking, L= single coil),3.Plugging guitar in will turn AX100 on and off if you are using batteries, ifusing a power supply unit will stay on (9volt DC, 500 ma).4.Master volume is located next to output jack, for instant rotary access.5.Change programs Up and Down, using program up and down buttons, orpress and hold “FX SELECT” switch down for 2 seconds to enter the bank select mode.6.Programs are organized in 10 banks (0-9) with 4 programs in each bank.User banks are indicated by a period in bottom left of screen. (A periodbetween the bank # and program # indicates the 10’s hold feature is onand may be turned ON/OFF by pressing both the “Exit” and “Tap”buttons simultaneously).Bypass Tuner Mode1.Press and Hold down the program “Up” and “Down” switchessimultaneously for 1 second, this will bypass the effects and turnon the tuner.2.Hold the “Up” and Down” switches simultaneously for 2 secondsto turn on the Tuner Mute Mode. (Great for silent tuning onstage).3.To return to program play, press either switch Up, Down or both.FX Select ModeEach program has 2 drive channels and an effect that may be turned on/off.1.Tap the smaller third footswitch labeled “PROG/FX SELECT” (left side)2.The LCD display now reads “FX SEL” in this mode the program downbutton will toggle your drive channels between “GREEN” and “RED”, the program up switch will turn ON/ OFF, Modulation, Ambient or bothModulation and Ambient effects.3. Tap the “PROG/FX SELECT” switch to return to program play modeEdit Mode1.You may adjust your gain and tone settings instantly, by simply adjustingthe labeled knobs; (L-R) Drive Amp (knob is set aside, to preventunintentional editing), Gain, Treble, Middle, Bass, Level (these 5 knobswill serve as our data controls as well)2.You can tap in the delay tempo instantly any time (if the program hasdelay)!For an example lets use an existing program, and make some edits to it (at this point you should turn unit on), #01 “STATIC” lets change thereverb into a delay,1.Reverb and Delay are ambient effects, so press the edit button to theleft of AMB on control panel (just left of the expression pedal).2.“ROOM 2” is displayed, directly below it- the EDIT light is flashing, tothe right above master an envelope reads -ORIG (for original) this means this program has the 2nd room reverb variation already programmed in. If you want to know the mix level of effect, turn the reverb mix knob(LEVEL) till the “ORIG” light comes on (6.0).3.“GAIN” knob will now adjust the ambient type (turn it, yes both ways),find delay (full counterclockwise)4.Take this time to look at the control panel, reading from left to rightfind the line labeled AMB (same line with the flashing red light) TYPE= fx variation, TIME= length of delay, TONE= EQ of delay effect, FEEDBACK=number of delays, MIX= adjusts the level of effect.5.Now, if you don’t like the delay tempo, you can tap in the rhythm on thetap button or you can readjust it on the 2nd (Treble) knob.Go up 2 lines and experiment with the “MOD” or modulation line. Remember to press the MOD edit button.Expression Pedal1.The expression pedal has an ON/OFF button located on the toe end.2.If the selected program has an expression-controlled effect it may beturned ON/OFF with this button.3.If the toe button is in the off position when you call up the nextprogram, you will need to turn the toe switch back on for effect.4.To edit the effect of the Expression Pedal, please push the Pedal buttonlocated on the editing control panel (to the left of the pedal). Phrase Trainer1.Press the phrase trainer edit button2.Choose aux in for external audio, (first data knob “GAIN”).3.Audio signal will pass through.4.Press the FX SELECT button to begin recording, if less than 8 secondspress the same button and your music will now loop, otherwise it willstart looping automatically when 8 seconds is reached.5.Slow down the track by using your second data knob (treble).6.Start and stop track by using down switch.7.Hold a note or pitch by using the up switch.8.Reverse or back-up by using both up and down at the same timeSample and Play1.Program #642.Press expression pedal forward till pedal indicator LED begins flashing3.Play for 6 seconds, (LED should stop flashing and turn red while itrecords).4.After recording is done, move pedal forwards- sample plays5.Move pedal back, sample plays in reverseSample Loop1.Program #632.Repeat the above steps 2 & 33.Now your phrase is looping and you can control the loop volume.Rhythm patterns1.Push the Rhythm button on panel.2.Knob 1 does the rhythm patterns.3.Knob 2 adjusts tempo.4.Knob 5 adjusts rhythm pattern volume.Virtual Feed backerGo to program #54- Play a single note for best results.1.Pedal in full down position adds vibrato to sustaining note.2.Back off half way for infinite sustain.3.Back off more to control the effect mix level. DEMONSTRATIONTurn on the rhythm patterns and jam along.Examples; 16shuffl2 @104 tempo, play Stevie Wonder’s “Superstition”Motown @122 tempo,Diana Ross’ “Stop in the Name of Love”.Choose from Blues, Rock, Thrash, Reggae, Country, etc.There is a cool assortment of artist programs as well.#02 “Filter” the green channel is the acoustic simulator-red channel is a fat distortion.#24 Satch is 2 wicked distortions with delay and wah (turn wah on/off with toe).#31 demonstrates real time tape echo FX (use expression pedal to change tape speed.).#32 whip out a Santana lick (auto-wah, ON/OFF in “FX SEL” mode).#34 Ring Modulator (program on an echo, show how easy it is to edit).#43 “Surf” tremolo (speed controlled by pedal).#51, 52, 53 (really fine straight ahead amp and reverb tones).#54 Feed backer#61, 62, Intelligent Pitch Shifter#63 Loop (Phrase Looping)#64 Fwd/Bk (forward & reverse phrase sampling)#70’s & 80’s highlight individual FXReset Factory Programs1.Disconnect power supply (Warning: turn amp volume down first)2.Simultaneously hold the “FX SEL” and “EXIT” buttons down, and thenplug in the power supply or last Battery.3.LCD reads “RELOAD”4.Press “WRITE” to reset factory programs, all edited user programs willbe erased, or press “EXIT” to abort Reset.。
效果器中文说明书大全
效果器中文说明书大全在这里我将为大家搜集各种常用的效果器中文说明书以后会不断的补充新的说明书POD 2.0中文说明,音色列表,以及相关所有资料Line 6 POD 2.0 控制与连接中文简易说明 1 开关- 在POD 2.0右侧。
按下它可以开启你的POD2.0。
2 输入- 在POD 2.0右下侧。
把你的吉他连接在这里。
3 耳机接口- 在POD 2.0的左下侧。
连接你的耳机以做静音练习。
音量由OUTPUT控制。
其耳机放大器可供所有型号的耳机使用。
4 输出- 在POD 2.0面板的最左边(OUTPUT)。
控制主输出音量。
当储存音色时,这一值是不被记录的。
改变主音量并不改变音色。
《注:在主输出音量开到最大时,POD 2.0会给您最佳的信噪比。
相反,当主音量开得较小时,会出现嘶噪。
所以当您录音时,尽量将您的OUTPUT开到最大。
请确定您所连接的设备的输入口属于“线输入”(LINE LEVEL), 而不是麦克风/吉他输入。
线输入可以允许POD 2.0的总输出开到最大(或接近最大)从而得到最佳的音色。
如果您的设备的输入类型为麦克风或吉他,请把输入放到较低,把POD 2.0的输出放到较大。
》 5 左右输出- 在POD 2.0的左上侧。
在左右输出的中间有DIRECT/AMP字样,输出时将你的调音台/录音设备连接到左输出(DIRECT),吉他音箱/监听音箱连接到右输出(AMP) 6 A.I.R Mode拨档- 在POD 2.0的左右输出中间,A. I. R.定向录音输出属Line6独有,专门为直路录音设计,将A.I.R Mode拨档调到左输出(DIRECT)一边即可。
7 踏板接口- 在POD 2.0上方,可与LINE6 Floor Board/FB连接。
POD 2.0不支持LINE6 FBV4. 8 MIDI输入与输出- 在POD 2.0右上方。
通过MIDI线与MIDI设备间接9 Drive- 其控制您所选择的放大器(Amp)的Drive。
富了么 FX100+ 吉他效果器中文说明书
/CLEAR功能; 08 PLAY:切换回主界面; 09 SAVE:保存当前音色; 10 EXP:踏板模块; 11 RHYTHM:鼓机模块; 12 TAP:TAPTEMPO打点设速; 13 SYSTEM:系统设置,可调节INPUTLEVEL(输入音量)、SCREEN(屏幕亮度)、CABSIMTHRU
04
01 02
03
04
05 06 07 08
OUTPUT
9V 300mA
01 AUXIN:1/8'立体声音频输入接口,可通过外置音频输入进行同步练习; 02 INPUT:1/4'单声道输入接口,连接至吉他或其他效果器的输出口; 03 LEFT/MONO:1/4'单声道(左)输出接口,连接至音箱、声卡、调音台等音频设备或其他效果器
www.fl深圳市富了么电子科技有限公司
02
面板描述
01
04 03 02 05
14
08 09 10 11 12 13
06
07
www.fl深圳市富了么电子科技有限公司
www.fl深圳市富了么电子科技有限公司
07
音色编辑
FX100共有9个效果模块,FX、DS、AMP、CAB、NS、EQ、MOD、DELAY、REVERB,共包括151个效果类型, 支持9个效果模块同时使用,每个效果模块支持选择使用一种类型。
安全注意事项: 1.请仔细阅读本说明书 2.请保存好本说明书 3.注意所有警告事项 4.遵循说明书指示 5.请勿将设备靠近水源或湿度大的环境 6.用干毛巾擦拭清洁 7.请确保使用时远离收音机和电视机或者其他有磁场产生的设备,以免造成干扰 8.请勿暴力使用开关及控制元件 9.请勿让纸屑、金属制品及其他物体落入机内 10.请勿摔落以及让本机受到冲击和过度按压
Guitar_Rig_5_中文模块使用手册

1 介绍这本手册会对Guitar Rig 5中的每个效果模块进行更加深入地介绍,会帮助您更好地对声音进行塑形,以及当作是对每个模块每个旋钮参数的工具手册,在以下章节中,将对Guitar Rig 5中的所有放大器、效果器、以及工具模块进行介绍,顺序与在Guitar Rig 5的模块浏览器中的顺序是相同的。
要学习Guitar Rig 5的基础操作,我们推荐您先从Getting Started(快速开始)手册开始,然后可以阅读Application Reference(软件使用手册)来对Guitar Rig本身的操作功能有更深入地了解。
您可以通过Guitar Rig软件界面的Help(帮助)> Open Manual(打开手册)命令来打开各个英文使用手册。
2 Amplifiers(放大器)除了乐器本身以外,对吉他和贝斯的音色调节通常都是从放大器开始(俗称箱头)。
Guitar Rig 5精挑细选了一些1950年到现在的经典放大器模块。
就像真实的放大器一样,不同的放大器和参数设置会直接影响到其他模块处理后的声音,所以使用放大器来作为探索声音效果的最开始是非常必要的,另外,在每个放大器模块中都有一部分额外的扩展参数,这些参数可以模拟真实世界的各种因素对音色的影响,这些额外的参数在几乎所有的放大器上都是相同的,下一章节会先对这些额外的控制功能进行介绍。
2.1 额外控制功能点击模块界面右上角的三角标志按钮可以展开额外控制面板,这里提供了绝大多数放大器都具有的相同控制功能:·POWER SUPPLY(电源设置)可以将放大器的电源在50Hz和60Hz之间进行切换,用于对放大器电源内部的DC电压进行校正,不正确的电压可以对声音产生一点微妙的调制效果。
·V ARIAC(变压器)会尽力模拟一种AC电源中的可调变压器效果,从而实现可变电压的特点(著名的‘brown sound’效果),或者是超过正常电压值(可以让声音显得更加‘凶猛’)。
ilyaefimovnylonguitar中文使用手册p
7
【需要完整版手册请联系】
7.1 和弦模式中的自动选择琴弦功能
【需要完整版手册请联系】
7.1.1
【需要完整版手册请联系】
7.1.2
【需要完整版手册请联系】
7.1.3
· 重复键功能。
· 多种不同的效果样本与噪音样本。
这套音色库并不能通过Kontakt音色库浏览器中的Add Library方式添加为音色库来使用。【译者注:但您可以通过我们()开发的“Kontakt 4音色库添加工具”软件来将这套音色库添加到Kontakt音色库标签界面中。】
请在Kontakt浏览器的文件标签界面中浏览并找到您安装这套音色库的目录,加载目录中的Ilya Efimov Nylon Guitar.nki文件。
【需要完整版手册请联系】
11.3 Equalizer(均衡效果器)
【需要完整版手册请联系】
11.4 Compressor(压缩效果器)
【需要完整版手册请联系】
12
【需要完整版手册请联系】
13
【需要完整版手册请联系】
13.1 控制器分配
【需要完整版手册请联系】
13.2 分配Keyswitch(键位切换功能)键位
如果您选择了一个琴弦并演奏了一个在这个琴弦上不存在的音高音符,那么这个音符将自动被改在其他琴弦上演奏。
保持选择琴弦功能键位的触发状态时连续演奏音符,可以让这些音符在同一根琴弦上演奏。
6.2 选择把位
您可以通过指定演奏把位功能键(E5到G#6)来随时指定演奏把位。在Kontakt虚拟键盘面板中,这些键位显示为绿色。这些键位相当于低音E弦上的每个品位。
KORGAX1500G电吉他效果器中文使用说明书[整理]
![KORGAX1500G电吉他效果器中文使用说明书[整理]](https://img.taocdn.com/s3/m/4a9c3416d5bbfd0a78567335.png)
KORG AX1500G电吉他效果器中文使用说明书[整理] KORG AX1500G电吉他效果器中文使用说明书使用恢复原厂设置功能在插上电源的同时按下“EXIT”和“BANK”键,显示器上会显示“RELOAD,”,如果不想重置的话,按“EXIT”退出。
按下“”WRITE“键,这时显示器上显示”RELOAD”,完成重置后显示器显示“COMPLT”,几秒之后,进入使用状态。
使用较音器较音器的使用分为两种模式:旁通模式:踩下任一个音色踏板持续一秒以上,效果器旁路(相当于不通过效果器材直接进音箱),较音器打开。
静音模式踩下任一个音色踏板持续两秒以上,较音器打开,但这时没有输出,音箱不会响。
这种模式比较适合在舞台上进行调音工作。
音色旋钮上的五个发光灯将显示调音的状态,在“TREBLE”上的发光灯表示中心位置。
音色选择在AX 1500G中你有40种用户音色和40种预置音色可选择,预置的共10组音色库,每组四个音色。
踩下音色踏板1~4选择你想要的音色。
踩下“BANK”踏板选择你想要的音色组(0~9依次上升)。
踩下“BANK”踏板再踩下“4”音色踏板,音色组按9~0依次下降。
在音色组显示数字的右下脚的小数点亮时,表示为用户组音色库。
使用音色编辑功能AX1500G有两种简单的编辑模式。
旋转任何一个编辑旋钮即可进入音色编辑模式,这时显示器上面将显示所调节参数的名称,下端数字显示参数的值。
如果某个参数的值和原本音色的值相同的话,显示器上的“ORIG”的图标即亮起。
,在你调乱效果器音色的时候,这个功能可以让你很方便的找到原来的设置。
另外你也可以用显示器下面的几个菜单箭头按钮进行音色的编辑。
储存音色当你编辑好一个音色后,按下“WRITE”键后,显示器会显示“*WRITE*”字样,同时表示组数的数字也会闪烁。
这时你可以通过使用旋钮5(BASS)以及菜单箭头按钮来选择你想要储存的位置。
再次按下“WRITE”键后,显示器显示“COMPLT”表示完成储存。
Atlona AT-PA100-G2 低抗性双通道 单通道音频放大器说明书

IntroductionThe Atlona AT-PA100-G2 is a compact power amplifier designed for low impedance applications. A mode selector switch allows the PA100-G2 to deliver two channels of 20 watts each into 4 ohms, or a single, bridged channelof 40 watts at 8 ohms. This Class D amplifier is energy efficient and convection cooled. The PA100-G2 features a balanced mic/line level audio input with selectable 48 volt phantom power, as well as unbalanced stereo audio input through RCA or 3.5 mm connections. It can deliver stereo or mono output, and provides mixing for the balanced and unbalanced audio inputs, each with independent gain and mute control. In addition to the amplified speaker output, a line level audio output allows the incoming audio to be fed into an additional amplifier or audio system.The PA100-G2 is controllable via RS-232, or through IR with the optional AT-PA1-IR-G2 remote control kit. Applications• Meeting rooms, huddle rooms, and classroomsThe PA100-G2 can receive audio from an AV switcher or DSP, and then feed the audio to program speakers.• Residential and light commercial installationsThis amplifier can receive the audio output from an HDBaseT or AV over IP endpoint, delivering audio tospeakers in a room or any other designated listening zone.1 A T-P A100-G2Key Features• Selectable stereo, dual mono, and bridged output modes.• 2 x 20 watts @ 4 ohms (stereo or dual L+R mono).• 1 x 40 watts @ 8 ohms (bridged L+R mono).• Balanced mic/line level input with selectable 48 phantom power.• Unbalanced stereo line level input available through RCA or 3.5 mm connectors.• Microphone and line level audio mixing.• Unbalanced line level output for pass-through to an additional amplifier or audio system.• Class D efficient amplifier design.• Convection cooled – no need for fans.• Automatic standby mode to minimize power consumption.• Bass and treble tone controls.• Independent gain and mute control for balanced and unbalanced inputs.• RS-232 and IR control of volume level, muting, input selection, and tone controls.• IR control available with optional AT-PA1-IR-G2 remote control kit.• Top panel button controls for input selection, mute, mic and line volume, and tone controls.• Front panel signal status LEDs for input selection, mute, and user controls.• Compact, surface-mountable enclosure.• Includes user manual and external universal power supply.• Award-winning 10 year limited product warranty.2Specifications3 A T-P A100-G2 • 408.962.0515 • 877.536.3976AccessoriesCopyright, T rademark, and Registration© 2021 Atlona Inc. All rights reserved. “Atlona” and the Atlona logo are registered trademarks of Atlona Inc. Pricing, specifications and availability subject to change without notice. Actual products, product images, and online product images may vary from images shown here.All other trademark(s), copyright(s), and registered technologies mentioned in this document are the properties of their respective owner(s).20215-R25。
效果器及音箱常用术语解释
效果器及音箱常用术语解释cable:连线,过线,以上是常规的翻译,意思就是连接一个输出到另一个输入,但根据信号的不同,cable分的很细的种类.instrument cable:乐器线,在电声领域特指高阻抗低电流的信号过线,必须有完善的屏蔽结构及坚固的外壳,大家常用的并不是这种线,由于这种线的要求太高,价格也非常贵.signal cable:信号线,大家通常用来连接吉他的是这种线,一般这种线是用做低阻信号的传输.speaker cable;音箱线,在吉他领域经常被忽视的一种线材,在功率放大信号和喇叭之间传递信号的就是音箱线.最常用的地方就是音箱头到箱体之间的连接线,此线是不能带屏蔽的(不然烧了放大器).是传输大电流的线材,质量一定要好!power cable:电源线,这个一般都是玩hifi音响的人才去烧的线材,吉他领域一般不会去更换电源线.effect:直接翻译是效果的意思,而这个词在国内的意义有很大的歧义,广义的来说,只要不是琴和音箱,其他的设备都叫做效果器,而在国外的定义中,是分的很细的,下面会提到.在标准的乐器界,效果这个词一般是指合唱,飘忽,延时,混响等空间效果,而不包括失真,均衡,压缩等preset:预设,这个词几乎被音色而取代,国内几乎没有人说预设这个词,而都说是音色,所以之前提到的音色这个词在乐器领域是有很多误解的.所谓预设,就是你把你所有相关的参数都调节好,固定不动,这整个系统参数就称为预设.在合成效果器中,这个词特指把所有参数都调节好后储存在某个位置,方便实时调用的一个文件.foot switch:脚踏开关,这个有时候被乱翻译成踏板,控制某个参数或者预设的开关或者调用的装置.比如合成效果器中对库的选择,对库中预设的选择都是由脚踏开关来完成的.pedal:踏板,这个才是真正被称为踏板的东西,只要是可以前后踩的都称为踏板,包括音量踏板,蛙音踏板,表情踏板等,在高档合成中几乎所有参数都可以用踏板来控制,需要设置对所要控制参数的最小值和最大值.用可变电阻控制来工作,但由于可变电阻会劳损,所以过一段时间就需要对踏板的最小最大值进行重新设置.bank:库 . 在某些高档效果器中,预设是按照库来储存的,也就是整个效果器可以储存若干个库,一个库可以储存若干个音色.方便的是在转换库的时候演奏的音色还是保持上一个预设,切换到别的库再选择预设的时候,演奏的音色才转换过去.也就是说你在演奏的同时可以任意选择效果器中每一个预设作为下一个切换音色.wah wah:蛙音,对特定频段的电平进行抬高和降低,来制造类似小孩哭的效果,一般结合踏板使用.level:电平,很多人误解成音量,在某个放大电路中电平可以理解成音量,而在效果中,电平就是效果使用程度的表述,也是原始信号和效果信号混合的程度,所以也有用mix来表示的,电平是对处理后信号的增减gain:增益,失真度,在一个非失真电路中,gain表示对输入此级别的原始信号进行增大或衰减的控制.在一个失真电路中,原理和之前说的是一样,但在表述方面就是失真度,因为失真电路本来就是至少两个级别的放大,而失真的多少就看之前一级的放大率问题,所以gain的多少也就是失真度的多少了!增益是对原始信号的增减(相对于电平来说) drive:字面理解是驱动的意思,但在过载电路中就类似于失真度.overdrive:过载,一种弱性的失真,温暖,平滑distortion:失真,特指烈性失真,刺耳,失真幅度教大.crunch:一般意义上介于过载与失真之间的音色,特别在英式音色中常出现,tone:音色,在失真电路中特指音色的明暗,软/硬.一般常见于过载.channel:通道,一般是说音箱,但现在很多效果器其实都在模拟音箱,所以在效果器中也能见到这个词,通道特指一组对信号进行处理的组合(里面一般包括gain eq level )在效果器中通道其实就是对一种失真类型或者清音类型的模拟.一般都是用通道调节好要的音色再进行其他效果的处理.在音箱中就是指一组前级处理,或清音,或失真。
3B Scientific FG 100 Funktionsgenerator 产品说明书
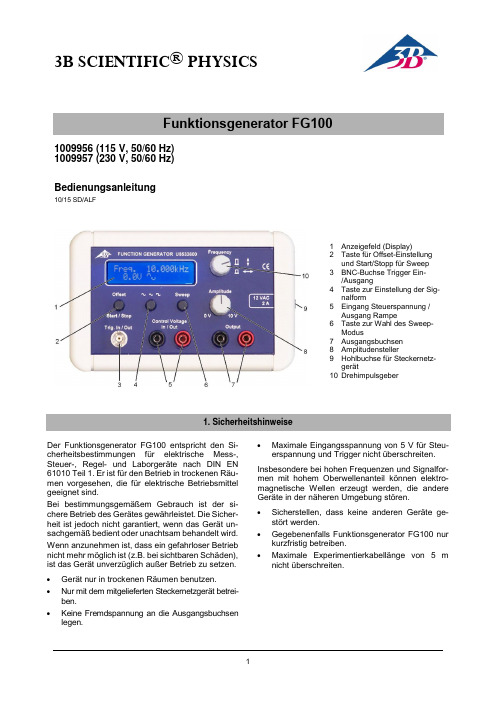
3B SCIENTIFIC® PHYSICS1009956 (115 V, 50/60 Hz)1009957 (230 V, 50/60 Hz)Bedienungsanleitung10/15 SD/ALF1 Anzeigefeld (Display)2 Taste für Offset-Einstellungund Start/Stopp für Sweep3 BNC-Buchse Trigger Ein-/Ausgang4 Taste zur Einstellung der Sig-nalform5 Eingang Steuerspannung /Ausgang Rampe6 Taste zur Wahl des Sweep-Modus7 Ausgangsbuchsen8 Amplitudensteller9 Hohlbuchse für Steckernetz-gerät10 DrehimpulsgeberDer Funktionsgenerator FG100 entspricht den Si-cherheitsbestimmungen für elektrische Mess-, Steuer-, Regel- und Laborgeräte nach DIN EN 61010 Teil 1. Er ist für den Betrieb in trockenen Räu-men vorgesehen, die für elektrische Betriebsmittel geeignet sind.Bei bestimmungsgemäßem Gebrauch ist der si-chere Betrieb des Gerätes gewährleistet. Die Sicher-heit ist jedoch nicht garantiert, wenn das Gerät un-sachgemäß bedient oder unachtsam behandelt wird. Wenn anzunehmen ist, dass ein gefahrloser Betrieb nicht mehr möglich ist (z.B. bei sichtbaren Schäden), ist das Gerät unverzüglich außer Betrieb zu setzen. ∙Gerät nur in trockenen Räumen benutzen.∙Nur mit dem mitgelieferten Steckernetzgerät betrei-ben.∙Keine Fremdspannung an die Ausgangsbuchsen legen. ∙Maximale Eingangsspannung von 5 V für Steu-erspannung und Trigger nicht überschreiten. Insbesondere bei hohen Frequenzen und Signalfor-men mit hohem Oberwellenanteil können elektro-magnetische Wellen erzeugt werden, die andere Geräte in der näheren Umgebung stören.∙Sicherstellen, dass keine anderen Geräte ge-stört werden.∙Gegebenenfalls Funktionsgenerator FG100 nur kurzfristig betreiben.∙Maximale Experimentierkabellänge von 5 m nicht überschreiten.Der Funktionsgenerator FG100 ist ein extern wob-belbarer Funktionsgenerator mit Leistungsverstär-ker für den Einsatz in Schüler- und Praktikumsexpe-rimenten zur Durchführung von Experimenten in der Schwingungslehre, zum Wechselstrom und zur In-duktion.Das Gerät liefert sinus-, dreieck- und rechteckför-mige Spannungen einstellbarer Amplitude und Fre-quenz. Der eingebaute Leistungsverstärker ermög-licht es Ströme bis 1 A zu entnehmen. Betriebsarten im Sweep-Modus:Extern-Modus: Der Sweep ist proportional zu den eingestellten Frequenzen und direkt von der exter-nen Steuerspannung 0 - 5 V abhängig. Dies ermög-licht eine Frequenzmodulation bis zu einer Modulati-onsfrequenz von 200 Hz.Intern-Continous: Bei Start und jedem Nulldurch-gang wird an der Buchse TRIG IN/OUT ein 5 V Puls ausgegeben. An den Buchsen C.V. IN/OUT wird eine vom Sweep proportionale Spannung 0 - 5 V ausgegeben.Intern-Single: Bei Start wird an der Buchse TRIG IN/OUT ein 5 V Puls ausgegeben. Der Sweep kann auch durch einen an der Buchse TRIG IN/OUT an-gelegten 5 V-Puls gestartet werden. An den Buch-sen C.V. IN/OUT wird eine vom Sweep proportionale Spannung 0-5 V ausgegeben. Nach einmaligem Durchlauf stoppt der Sweep und wartet wieder mit der Start-Frequenz auf den Startimpuls (Taster oder Trigger).Die letzte Einstellung im Sweep-Modus, wird im Funktionsgenerator gespeichert.Der Ausgang ist kurzschlussfest und gegen Indukti-onsspannungen und Funkenentladungen geschützt. Das Gerät ist mit ausklappbaren Standfüßen ausge-stattet.Die Stromversorgung erfolgt über ein Steckernetzgerät 12 V AC.Der Funktionsgenerator FG100 mit der Artikelnum-mer 1009956 ist für eine Netzspannung von 115 V (±10 %) ausgelegt, der Funktionsgenerator mit der Artikelnummer 1009957 für 230 V (±10 %).Signale:Frequenzbereich: 0,001 Hz bis 100 kHz Klirrfaktor: <1 %Signalformen: Sinus, Dreieck, Rechteck Offset 0 bis ± 5 V , in 0,1 V SchritteneinstellbarAusgang:Ausgangsamplitude: 0 bis 10 V, stufenlos einstell-barAusgangsleistung: 10 W permanent Ausgangsstrom: 1 A; 2,0 A max.Sweep:Sweep-Modus: extern, intern kontinuierlich,intern einzeln Frequenzbereich: 1 Hz bis 100 kHz FrequenzverhältnisStopp/Start: max. 1000:1; z.B. 2 Hz bismax. 2 kHzZeitspanne: 0,04 s bis 1000 sExterner Sweep: Start durch Triggerimpuls o-der durch Anlegen einerSteuerspannung 0 bis 5 V;max. Modulationsfrequenz:200 HzKont. bzw.einzelner Sweep: Starten/Anhalten mit derTaste Start/Stop; Ausgabeeines Triggerimpulses proDurchlauf sowie einer pro-portionalen Spannung Allgemeine Daten:Stromversorgung: 12 V AC, 2 A Steckernetzge-rätAbmessungen: 170x105x40 mm³Masse: 0,5 kg4.1 Inbetriebnahme∙Steckernetzgerät mit dem Netz verbinden und am Funktionsgenerator anstecken.Hiermit ist das Gerät eingeschaltet und betriebsbereit. In der oberen Zeile des Anzeigefelds erscheint die aktuelle Frequenz und in der unteren Zeile der DC-Offset sowie die Signalform.4.2 Frequenzeinstellung∙Mittels des Drehimpulsgeber die gewünschte Frequenz einstellen.∙Durch Drücken und Drehen des Drehimpulsgebers die zu ändernde Stelle in der Frequenzanzeige auswählen und durch Drehen den gewünschten Wert einstellen.Im Display wird die aktivierte Stelle in der Frequenz-anzeige durch einen blinkenden Unterstrich ange-zeigt.4.3 Einstellung des Offsets∙Taste Offset (2) drücken, um die Offset-Einstel-lung zu aktivieren.∙Durch Drehen des Drehimpulsgebers den ge-wünschten Wert 0,1 V Schritten einstellen. Durch Drücken des Frequenzstellers wird der Wert auf Null gesetzt.∙Wenn der gewünschte Wert eingestellt ist, er-neut die Taste Offset drücken.4.4 Wahl der Signalform∙Taste zur Einstellung der Signalform drücken, bis die benötigte Signalform im Anzeigefeld er-scheint.Sinus-, dreieck- und rechteckförmige Signale kön-nen gewählt werden. 4.5 Sweep∙Taste Sweep drücken und so den Sweep-Modus ak-tivieren.In der oberen Zeile des Displays erscheint die Start-frequenz, in der unteren Zeile der DC-Offset, die Sig-nalform und "START".∙Durch Drehen des Drehimpulsgebers die ge-wünschte Startfrequenz einstellen. Dazu wie un-ter 4.2 beschrieben verfahren.∙Zur Einstellung der Stoppfrequenz Taste Sweep erneut drücken.∙In der unteren Zeile des Displays erscheint "STOP".∙Durch Drehen des Drehimpulsgebers die ge-wünschte Stoppfrequenz einstellen.Durch weiteres Drücken der Taste Sweep gelangt man zum Sweep-Modus. Die Modi Extern, Intern Continous oder Intern Single werden in der oberen Zeile des Displays angezeigt.∙Durch Drehen des Drehimpulsgebers den ge-wünschten Sweep-Modus wählen.∙Taste Sweep erneut drücken.Im Display erscheint, wenn zuvor der Extern-Modus gewählt wurde, in der unteren Zeile rechts "EXT", wenn zuvor der Intern-Modus gewählt wurde, "TIME".∙Sweep-Zeit durch Drehen des Drehimpulsge-bers einstellen und noch mal die Taste Sweep drücken.Im Display erscheint die Startfrequenz und in der un-teren Zeile rechts "READY".∙Taste Offset/Start/Stop drücken und so den Sweep starten.Im laufenden Sweep-Modus wird in der oberen Zeile des Displays die aktuelle Frequenz und in der unte-ren Zeile der DC-Offset, die Signalform und "RUN" angezeigt. Der Sweep kann durch Drücken der Taste Offset/Start/Stop angehalten und durch erneu-tes Drücken fortgesetzt werden. Im Display er-scheint die Anzeige "BREAK".∙Zum Verlassen des Sweep-Modus die Taste Sweep erneut drücken.Um Werte zu ändern, muss der Sweep-Modus ver-lassen und wieder neu aufgerufen werden. Zu be-achten ist, dass der DC-Offset nicht geändert wer-den kann.∙Vor der Reinigung Gerät von der Stromversor-gung trennen.∙Zur Reinigung keine aggressiven Reiniger oder Lösungsmittel verwenden.∙Zum Reinigen ein weiches, feuchtes Tuch be-nutzen.∙Die Verpackung ist bei den örtlichen Recyc-lingstellen zu entsorgen.7.1 Demonstration stehender Transversalwellenan einem Gummiseil und Untersuchung ih-rer Wellenlänge in Abhängigkeit der Fre-quenz und der SpannkraftZur Durchführung der Experimente sind folgende Geräte zusätzlich erforderlich:1 Zubehör Seilwellen 1008540 1 Kraftmesser, 5 N 1003106 1 Vibrationsgenerator 1000701 Experimentierkabel∙Gerät Zubehör Seilwellen gemäß Bedienungs-anleitung aufbauen.∙Kraftmesser an den Halter hängen. Gegebenen-falls vorher Nullpunktkalibrierung durchführen. ∙Funktionsgenerator und Vibrationsgenerator miteinander verbinden.∙Gummiseil am Vibrationsgenerator befestigen, unter der Umlenkvorrichtung nach oben führen und am Kraftmesser einhängen. Dabei darauf achten, dass es möglichst parallel zur Tisch-platte verläuft.∙Seil mittels des Kraftmessers spannen.∙Signal form …Sinus“ wählen.∙Frequenz so einstellen, dass sich 4 Schwin-gungsbäuche ausbilden.Die Wellenlänge beträgt nun die halbe Seillänge.∙Kraftmesser am Stativstab nach oben verschie-ben, bis die Seilspannung viermal so groß ist. Am Seil bilden sich nun 2 Schwingungsbäuche aus. Die Wellenlänge ist gleich der Seillänge. Folgende Parameter liefern gute Ergebnisse:Seillänge (= Abstand Schwingungserreger –Um-lenkvorrichtung): 60 cm, Frequenz ca. 44 Hz, an-fängliche Seilspannung 0,5 NSeillänge: 70 cm, Frequenz ca. 38 Hz, anfängliche Seilspannung 0,5 N7.2 LC-ParallelschwingkreisZur Durchführung der Experimente sind folgende Geräte zusätzlich erforderlich:1 Grundlagen Experimentierboard@230V 1000573@115V 1000572 1 Funktionsgenerator FG 100@230V 1009957@115V 1009956 1 Satz 15 Experimentierkabel,1 mm², 75 cm 1002840 1 VinciLab 1021477 1 Coach 7, Lizenz 1021522 1 Spannungssensor 10 V, 1021680differentiell1 Stromsensor 500 mA 1021679 Aufbau und Durchführung des Experiments gemäß Anweisung (8000652, UE3050400).∙Sofern das Gerätselbst verschrottet wer-den soll, so gehört die-ses nicht in den norma-len Hausmüll. Es sinddie lokalen Vorschriftenzur Entsorgung vonElektroschrott einzu-halten.3B Scientific GmbH ▪ Ludwig -Erhard-Str. 20 ▪ 20459 Hamburg ▪ Deutschland ▪ Fig. 1Versuchsaufbau zur Demonstration stehender TransversalwellenFig. 2Versuchsaufbau zum LC-Parallelschwingkreis。
(叉烧投稿)Line6 AMPLIFI FX100效果器、AMPLIFi 75和AMPLIFi150吉他音箱使用说明书
使用说明书- 1 -AMPLIFi主要特点:声明:AMPLIFi FX100吉他效果器与AMPLIFi75/150吉他音箱APP操作一致1.蓝牙连接功能AMPLIFi FX100可以直接连接你的蓝牙设备,无论电脑和手机,只要有蓝牙功能就可以连接AMPLIFi FX100并播放音乐。
你就可以一边弹吉他,一边与你的“虚拟乐队”排练了!(兼容iOS、Android、Mac 与 PC)2.云端音色共享社区借助全球的音色共享社区(cloud)功能,可上传、下载、储存与共享音色,并给别人的音色打分。
最重要的是它支持中文命名的音色,使你可在中国找到大师的音色,甚至找到全球的音色并下载给自己用。
想想你之前很久都调不出来的音色,现在它已难不倒你了!3.音色搜索功能一旦播放音乐库上的歌曲,AMPLIFi APP就会自动进行相关音色搜索;或者输入你想要搜索的歌曲名称,系统将会自动识别与歌曲最接近的吉他音色。
甚至输入大师的名字,系统将会为您全球搜索。
AMPLIFi能让你与大师更近一些,搜索后音色可直接下载并保存使用,这非常有利于吉他音色模仿学习。
你甚至可以在原音色基础上再进行调节,使它转变为自己喜欢的音色。
4.AMPLIFi Remote APP控制(在App Store免费下载)安装AMPLIFi APP后,注册后便可直接在APP上进行音色调节。
支持iOS 7系统连接设备包括iPod touch (5代), iPhone 5s, iPhone 5c, iPhone 4s, iPhone 4, iPad Air, iPad (2、3、4代)、iPad mini和iPad mini 2。
AMPLIFi APP拥有漂亮的画面、强大的 DSP,它可以同时运行8个效果器,并且可细调每个参数。
5.融合英美经典吉他箱音色APP软件支持8个效果器同时使用,并且随时可以调换效果器的连接顺序!它带有200个功放箱体,单块和周边效果器。
它融合了20世纪到21世纪,从晶体管到电子管,从英国到美国、融汇全球最经典的吉他箱体。
- 1、下载文档前请自行甄别文档内容的完整性,平台不提供额外的编辑、内容补充、找答案等附加服务。
- 2、"仅部分预览"的文档,不可在线预览部分如存在完整性等问题,可反馈申请退款(可完整预览的文档不适用该条件!)。
- 3、如文档侵犯您的权益,请联系客服反馈,我们会尽快为您处理(人工客服工作时间:9:00-18:30)。
此效果器具有很多功能。
包括立体声输出, 实时调音, 外部控制接口, 音量控制接口, MIDI 输入输出接口. 当然最重要的还是它的效果器输出音质, 我们将详细讨论一下它的每一个效果器极其参数调节意义和范围.
一. Compressor [COMPRESSOR] 压缩
COMPRESSOR能对输入信号进行压缩处理,使系统输出一个保持不变的电平信号这个效果器有两个基本效果:
1. 当吉他有信号输入效果器时,它可改变声音的触发时间(ATTACK TIME),详情见下表
2. 可使吉他声音衰减速度变慢.
SEN(SENSITIVITY)
0 -15
压缩效果器的开关电平,如果输入电平小于此值则无输出
ATTACK 0-7 从信号发生到信号到达最大值所需时间,如为0则声音缓慢发出,如为7则正常发音
LEVEL 0-15 效果器处理后的输出音量
二. Distortion/Overdrive [DIST/OD] 失真/激励,此功能对输入的声音进行失真处理。
1.MODE:取值范围(1-7)
值为1: TUBE OD ,真空管激励此模式是真空管放大器独有的自然失真音色
值为2: CLASSIC OD ,模拟TUBE OD, 但有较多的直接触发声( DIRECTATTACK SOUND)
值为3: SUPER OD ,此模式使中频段的频谱成峰型,即大量提升中频段
值为4: DIST ,失真此模式在高增益(GAIN 可理解为输入)情况下产生一个光滑的失真音色值为5: SUPER DIST,大量提升中频段, 但失真效果远大于SUPER OD
值为6: STUCK WAH DIST,产生一个类似于WAH 踏板不完全踩下时的音色
值为7: METAL DIST,年轻的摇滚狂热份子所最中意的音色,HEAVY METAL令人激动是烦躁的音色
2.GAIN:取值范围(0-15)调节失真度的总量
3.TONE:取值范围(0-7)用来调节音色,此值越大,音色越亮
4.EQ LATCH:取值范围(0,1)当DIST/OD 效果器开关时,控制3 BAND EQ 效果器的开关值为0: 对3 BAND EQ 无效值为1: 当DIST/OD 开/关时,3 BAND EQ 也随之开/关
5.LEVEL:取值范围(0-15)效果器处理后输出音量
三. Pitch和Delay
在效果器的面板上有两行菜单:“PITCH SHIFT”,“DELAY”。
先来看看“PITCH SHIFT” ,它是一个音高移位效果。
它可把输入的音高升高或降低一个或几个半音,然后与原音一起发出。
“DELAY” 它在发完输入的音以后,延时一段时间再发该音。
这两个效果器可以单独使用,也可以联合使用,创造出特殊的音色。
下面先来看看它们单独使用时,面板上参数的意义及其调整后的结果:
一. PITCH SHIFT 参数行
MODE:取值范围(1、2 )此参数用来选择下面两个功能:1. “PITCH SHIFT”,“DELAY”各自独立使用。
2. 将“PITCH SHIFT” 并入“DELAY”,使“PITCH SHIFT” 在“DELAY”反馈(FEEDBACK)的循环(LOOP)中起作用。
(详见“附录”)
PITCH:取值范围(-12--- +12)改变音高的值,取正值为升高,取负值为降低,数值改变“ 1”,即改变一个半音。
FINE:取值范围(0--98)音高的微调,数值改变“1”,音高改变一音分。
使用“PITCH”,“FINE”可使移位的音高保持标准。
PITCH HIGH CUT:取值范围(0--7)高频截止滤波器。
该数值越大,移位后的音色越暗。
PITCH MIX:取值范围(0--30)设置原音与移位后音的输出比例。
当值为“ 0”,只有原音,当值为“30”只有移位音。
注:该参数在“MODE 2 ”无效。
二. DELAY 参数行
DELAY TIME:取值范围(0--9)延迟时间。
数值改变“1 ”,延迟时间即改变100毫秒。
DELAY TIME:取值范围(0--9)延迟时间。
数值改变“1 ”,延迟时间即改变10毫秒。
DELAY TIME:取值范围(0--9)延迟时间。
数值改变“1 ”,延迟时间即改变1毫秒。
延迟时间的总数为以上三个数值的总和。
FEEDBACK:取值范围(-15--15)控制反馈深度(通俗地说就是重复多少遍)。
该值无确定对应量。
该值越大反馈深度越大。
当负值时产生的反馈将会改变相位。
HIGH DAMP:取值范围(0--7)高频衰减。
反馈产生时,对每一遍的重复进行高频段的递减。
该值越大,递减越快。
DELAY MIX:取值范围(0--30)设置原音与延迟音的输出比例。
当值为“ 0”,只有原音,当值为“30”只延迟音。
注:如果你想单独使用“PITCH SHIFT”:选择“MODE 1”,将“DELAY MIX”设置为“0”。
如果你想单独使用“DELAY”:选择“MODE 1”,请将“PITCH MIX”设置为“0”。
附录
了解了它们单独使用的情况后,再来看看它们综合使用的情况。
综合使用有两种状态:
MODE 1:“PITCH + DELAY ”;MODE 2:“SWEEP DELAY” 功能选择在PITCH SHIFT 参数行的MODE 参数。
MODE 1 反馈不通过“PITCH SHIFT”,反馈音高不变。
如果“PITCH SHIFT”的“PITCH MIX”不为“0”,你将会听见两个声部及它们的反馈。
MODE 2 反馈通过“PITCH SHIFT”,反馈音高变化。
下面是“PITCH MIX”与“DELAY MIX”的设置与效果的关系:
DELAY MIX PITCH MIX 产生的效果
不为0
无任何效果
不为0
只有DELAY效果
不为0
不为0
有DELAY效果,如果PITCH SHIFT的PITCH参数为正值,反馈音不断向上改变。
如PITCH SHIFT 的PITCH 参数为负值,反馈音则不断向下改变,每次反馈的改变量由PITCH参数的数值决定
四. CHROUS和FLANGER
CHROUS/FLANGER效果是由周期性地调节音高变化而产生的。
下面我们先来看看CHROUS,FLANGER 单独使用需调整的参数。
CHROUS 单独使用:
1.在CHROUS/ FLANGE 行选择MODE 1。
2.将DELAY TIME 设置在10 毫秒以上。
3.将FEEDBACK 设置为0。
FLANGE 单独使用:
1.在CHROUS/ FLANGE 行选择MODE 2。
2.将DELAY TIME 设置在5 毫秒以下。
在FLANGER 状态下,DELAY TIME数值越小,调制后的音高越高。
3.将FEEDBACK 设置为“ 7”或更高(“-7”或更低[ 负值= 相位转换] )FEEDBACK 设置越高,调制后的效果越厉害。
接下来我们来看看每个参数的具体意义。
MODE:取值范围(1---3)
该值取“ 1”,立体声CHROUS/FLANGER 输出。
用低频发生器(LFO)产生的三角形波进行调制。
该值取“ 2”,立体声CHROUS/FLANGER 输出。
用低频发生器(LFO)产生的正弦波进行调制。
该值取“ 3”,用低频发生器(LFO)产生的三角形波进行调制。
将CHROUS / FLANGER 效果从左声道输出。
将原声从右声道出。
DELAY TIME:取值范围(0.0--75 毫秒)设置效果音延迟原音的时间。
当该值与FEEDBACK 同时使用,将控制效果谐振的频率。
SPEED:取值范围(1 -- 16)设置效果调制的速度。
DEPTH:取值范围(0 -- 15)设置效果调制的深度。
FEEDBACK:取值范围(-15 -- 15)设置反馈的深度。
负值为相位转换。
9V 600mA。