JS实现的多张图片轮流播放幻灯片效果.
用JS实现图片轮播效果代码(一)
font-weight: bold;
opacity: .5;
font-size: 40px;
z-index: 3;
}
.carousel-control:hover{
color:fff;
text-decoration: none;
opacity: .9;
outline: none;
imgs[i].style.display = 'block';
lis[i].style.fontSize = '26px';
lis[i].style.color = '#fff';
}
//自动播放的事件处理
function autobofang(){
if(pic_index >= lis.length){
<div class="item "><img src="./img/lunbo1.jpg" alt="第一张图片"></div>
<div class="item"><img src="./img/lunbo2.jpg" alt="第二张图片"></div>
var imgs = lunbo.getElementsByTagName('img');
var uls = lunbo.getElementsByTagName('ul');
基于javascript实现样式清新图片轮播特效
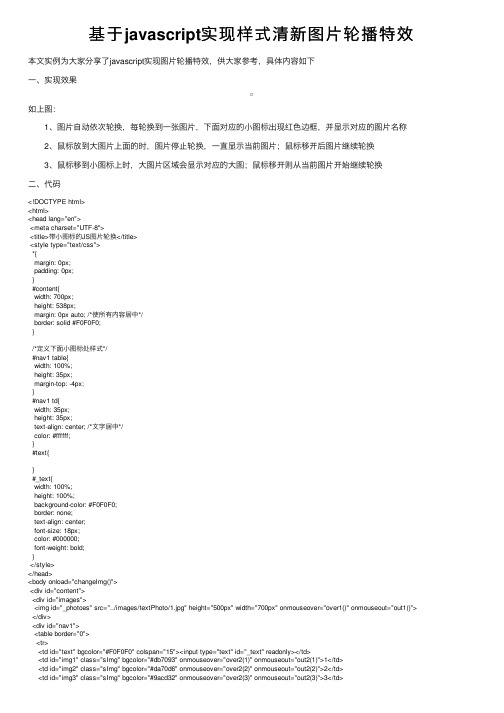
基于javascript实现样式清新图⽚轮播特效本⽂实例为⼤家分享了javascript实现图⽚轮播特效,供⼤家参考,具体内容如下⼀、实现效果如上图: 1、图⽚⾃动依次轮换,每轮换到⼀张图⽚,下⾯对应的⼩图标出现红⾊边框,并显⽰对应的图⽚名称 2、⿏标放到⼤图⽚上⾯的时,图⽚停⽌轮换,⼀直显⽰当前图⽚;⿏标移开后图⽚继续轮换 3、⿏标移到⼩图标上时,⼤图⽚区域会显⽰对应的⼤图;⿏标移开则从当前图⽚开始继续轮换⼆、代码<!DOCTYPE html><html><head lang="en"><meta charset="UTF-8"><title>带⼩图标的JS图⽚轮换</title><style type="text/css">*{margin: 0px;padding: 0px;}#content{width: 700px;height: 538px;margin: 0px auto; /*使所有内容居中*/border: solid #F0F0F0;}/*定义下⾯⼩图标处样式*/#nav1 table{width: 100%;height: 35px;margin-top: -4px;}#nav1 td{width: 35px;height: 35px;text-align: center; /*⽂字居中*/color: #ffffff;}#text{}#_text{width: 100%;height: 100%;background-color: #F0F0F0;border: none;text-align: center;font-size: 18px;color: #000000;font-weight: bold;}</style></head><body onload="changeImg()"><div id="content"><div id="images"><img id="_photoes" src="../images/textPhoto/1.jpg" height="500px" width="700px" onmouseover="over1()" onmouseout="out1()"> </div><div id="nav1"><table border="0"><tr><td id="text" bgcolor="#F0F0F0" colspan="15"><input type="text" id="_text" readonly></td><td id="img1" class="sImg" bgcolor="#db7093" onmouseover="over2(1)" onmouseout="out2(1)">1</td><td id="img2" class="sImg" bgcolor="#da70d6" onmouseover="over2(2)" onmouseout="out2(2)">2</td><td id="img3" class="sImg" bgcolor="#9acd32" onmouseover="over2(3)" onmouseout="out2(3)">3</td><td id="img4" class="sImg" bgcolor="#adff2f" onmouseover="over2(4)" onmouseout="out2(4)">4</td><td id="img5" class="sImg" bgcolor="#00bfff" onmouseover="over2(5)" onmouseout="out2(5)">5</td></tr></table></div></div><script type="text/javascript">//将轮换的⼤图⽚放⼊数组中var arr = new Array();arr[0] = "../images/textPhoto/1.jpg";arr[1] = "../images/textPhoto/2.jpg";arr[2] = "../images/textPhoto/3.jpg";arr[3] = "../images/textPhoto/4.jpg";arr[4] = "../images/textPhoto/5.jpg";//将input区域变换的⽂字放在数组⾥var text = new Array();text[0] = "焦点图1";text[1] = "焦点图2";text[2] = "焦点图3";text[3] = "焦点图4";text[4] = "焦点图5";var smallImg = document.getElementsByClassName("sImg"); //将页⾯上所有⼩图⽚存放在⼀个数组var num = 0;function changeImg() {document.getElementById("_photoes").src = arr[num];document.getElementById("_text").value = text[num];//当前⼩图标增加边框样式for(var i=0;i<arr.length;i++) {if(i==num) smallImg[num].style.border = "red solid"; //⼤图标对应的⼩图标增加边框样式else smallImg[i].style.border = "none";}if (num == arr.length - 1) num = 0; //如果显⽰的是最后⼀张图⽚,则图⽚序号变为第⼀张的序号else num += 1; //图⽚序号加⼀}var setID = setInterval("changeImg()",1000); //这样写任然会不断调⽤changeImg()函数/*当⿏标滑到⼤图标上时*/function over1() {clearInterval(setID); //图⽚停⽌轮换// smallImg[n-1].style.border = "red solid";}/*当⿏标离开⼤图标时*/function out1() {setID = setInterval("changeImg()",1000); //图⽚继续轮换// smallImg[n-1].style.border = "none"; //⼤图标对应的⼩图标边框样式取消}/*当⿏标滑到⼩图标上时*/function over2(n) {document.getElementById("_photoes").src = arr[n-1]; //只要⿏标滑到⼩图标上,⼤图区域就显⽰对应的图⽚ document.getElementById("_text").value = text[n-1];clearInterval(setID); //图⽚停⽌轮换//当前⼩图标增加边框样式for(var i=0;i<arr.length;i++) {if(i==n-1) smallImg[n-1].style.border = "red solid";else smallImg[i].style.border = "none";}}/*当⿏标离开⼩图标时*/function out2(n) {if(n!=arr.length)num = n; //从当前图⽚开始轮换else num = 0;setID = setInterval("changeImg()",1000); //图⽚继续轮换// smallImg[n-1].style.border = "none"; //⼩图标边框样式取消}</script></body></html>三、多张图⽚轮换调试笔记js源代码://实现⼏张图⽚的轮换var num = 0; //显⽰的图⽚序号,刚开始时是第⼀张图⽚function changeImg1() {var arr = new Array();arr[0]="../images/hao123/7.jpg";arr[1]="../images/hao123/8.jpg";arr[2]="../images/hao123/9.jpg";var photo = document.getElementById("topPhoto");if (num == arr.length - 1) num = 0; //如果显⽰的是最后⼀张图⽚,则图⽚序号变为第⼀张的序号else num += 1; //图⽚序号加⼀photo.src = arr[num];}setInterval("changeImg1()",5000); //每隔5000毫秒调⽤⼀次changImg1()函数HTML代码:<img src="../images/hao123/7.jpg" id="topPhoto">在使⽤的时候最好定义⼀下图⽚的样式,把图⽚的长宽都统⼀,这样图⽚动态显⽰的效果会更好⼀些。
用javaScript实现轮播图效果包括自动变换,按钮控制,上一张下一张切换

⽤javaScript实现轮播图效果包括⾃动变换,按钮控制,上⼀张下⼀张切换javaScript实现轮播图效果(逆战总结)1.HTML代码<div id="wrap"><img src="images/1.jpg" alt="" class="on"><img src="images/2.jpg" alt=""><img src="images/3.jpg" alt=""><img src="images/4.jpg" alt=""><div class="btn"><span class="active"></span><span></span><span></span><span></span></div><i class="left" id="prev"></i><i class="right" id="next"></i></div>2.css代码#wrap{position: relative;width:590px;height: 470px;}#wrap img{position: absolute;top: 0;left: 0;/*display: none;*/opacity: 0;}#wrap .on{/*display: block;*/transition: 2s;opacity: 1;}.btn {position: absolute;bottom: 20px;left: 50%;margin-left: -44px;}.btn span{float: left;width: 8px;height: 8px;border:2px solid rgba(255,255,255,0.4);border-radius: 5px;margin-right: 10px;}.btn .active{background: white;cursor: pointer;}.left,.right{display: block;width: 37px;height: 53px;position: absolute;top: 50%;margin-top: -27px;cursor: pointer;}.left{background: url("images/arrow.png") left top;}.right{background: url("images/arrow.png") left -53px;right: 0;}3.js代码window.onload = function () {var oWrap = document.getElementById('wrap');var aImg = oWrap.getElementsByTagName('img');var aBtn = oWrap.getElementsByTagName('span');var oPrev = document.getElementById('prev');var oNext = document.getElementById('next');var iNow =0;function tab(){for (var i =0;i<aBtn.length;i++){//清空所有按钮选中样式以及图⽚显⽰样式aBtn[i].className='';aImg[i].className='';}aBtn[iNow].className='active';//设置当前按钮选中样式以及当前图⽚透明度aImg[iNow].className='on';}setInterval( function () {//每两秒循环变换下⼀张图⽚iNow++;if (iNow==aBtn.length)iNow=0;tab();},2000);for (var i =0;i<aBtn.length;i++){aBtn[i].index=i;//为按钮添加⾃定义属性(索引)⽬的是使图⽚和按钮相对应//按钮aBtn[i].οnmοuseοver= function () {iNow=this.index; //是按钮所控制显⽰的图⽚与左右箭头控制显⽰的图⽚相对应tab();}//下⼀个箭头oNext.onclick = function () {iNow++;if (iNow==aImg.length)iNow=0;tab();}//上⼀个箭头oPrev.onclick = function () {iNow--;if (iNow==-1)iNow=aImg.length-1;tab();}}}。
JS实现自动轮播图效果(js案例)
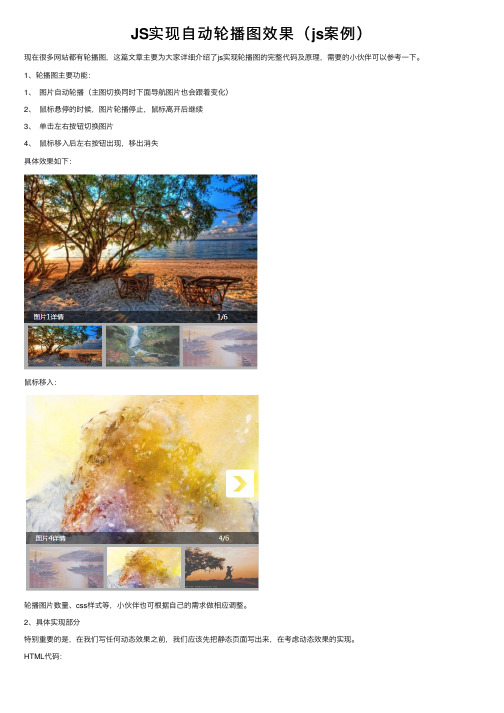
JS实现⾃动轮播图效果(js案例)现在很多⽹站都有轮播图,这篇⽂章主要为⼤家详细介绍了js实现轮播图的完整代码及原理,需要的⼩伙伴可以参考⼀下。
1、轮播图主要功能:1、图⽚⾃动轮播(主图切换同时下⾯导航图⽚也会跟着变化)2、⿏标悬停的时候,图⽚轮播停⽌,⿏标离开后继续3、单击左右按钮切换图⽚4、⿏标移⼊后左右按钮出现,移出消失具体效果如下:⿏标移⼊:轮播图⽚数量、css样式等,⼩伙伴也可根据⾃⼰的需求做相应调整。
2、具体实现部分特别重要的是,在我们写任何动态效果之前,我们应该先把静态页⾯写出来,在考虑动态效果的实现。
HTML代码:<ul class="big_pic"><div class="prev"><a class="mark_left" href="#"></a></div><div class="next"><a class="mark_right" href="#"></a></div><div class="text">图⽚1详情</div><div class="length">1/6</div><li style="z-index: 1"><img src="images/flash_1.jpg" /></li> <li><img src="images/flash_2.jpg" /></li><li><img src="images/flash_3.jpg" /></li><li><img src="images/flash_4.jpg" /></li><li><img src="images/flash_5.jpg" /></li><li><img src="images/flash_6.jpg" /></li></ul><ul class="small_pic" ><li><img src="images/flash_1.jpg" /></li><li><img src="images/flash_2.jpg" /></li><li><img src="images/flash_3.jpg" /></li><li><img src="images/flash_4.jpg" /></li><li><img src="images/flash_5.jpg" /></li><li><img src="images/flash_6.jpg" /></li></ul></div>Css样式:@charset "utf-8";* {margin: 0;padding: 0;list-style: none;}#div1 {width: 500px;height: 420px;margin: 100px auto;position: relative;cursor: pointer;overflow: hidden;}#div1 ul.big_pic {position: relative;height: 320px;}#div1 ul.big_pic div.prev {opacity: 0;-webkit-transition: all .3s linear;transition: all .3s linear;position: absolute;left: 0;top: 0;bottom: 0;right: 50%;z-index: 100;}#div1 ul.big_pic div.prev a.mark_left {position: absolute;width: 60px;height: 60px;top: 50%;left: 10px;background: url("../images/btn.gif");}#div1 ul.big_pic div.next {opacity: 0;-webkit-transition: all .5s linear;transition: all .5s linear;position: absolute;left: 50%;top: 0;bottom: 0;right: 0;z-index: 100;}#div1 ul.big_pic div.next a.mark_right {position: absolute;height: 60px;top: 50%;right: 10px;background: url("../images/btn.gif") left -60px;}#div1 ul.big_pic div.text {position: absolute;bottom: 0;left: 0;line-height: 26px;color: white;background-color: rgba(0, 0, 0, 0.51);width: 70%;height: 26px;z-index: 200;font-size: 14px;padding-left: 20px;-webkit-box-sizing: border-box;box-sizing: border-box;}#div1 ul.big_pic div.length {position: absolute;bottom: 0;right: 0;line-height: 26px;color: white;background-color: rgba(0, 0, 0, 0.51);width: 30%;height: 26px;z-index: 200;font-size: 14px;text-align: center;}#div1 ul.big_pic li {position: absolute;top: 0;left: 0;width: 500px;height: 320px;overflow: hidden;}#div1 ul.big_pic li img {width: 100%;height: 320px;}#div1 ul.small_pic {display: -webkit-box;display: -ms-flexbox;display: flex;background-color: #b0b0b0;height: 100px;padding: 6px 5px 6px 8px;-webkit-box-sizing: border-box;box-sizing: border-box;position: absolute;}#div1 ul.small_pic li {width: calc(500px / 3);}#div1 ul.small_pic li img {width: calc(488px / 3);height: 100%;}#div1 ul.small_pic li:not(:last-child) img {padding-right: 4px;-webkit-box-sizing: border-box;box-sizing: border-box;}接下来是最重要的js代码:var oDiv=document.getElementById('div1');var oPrv=oDiv.querySelector('div.prev');var oNext=oDiv.querySelector('div.next');var oBtnPrev=oPrv.querySelector('a.mark_left'); var oBtnNext=oNext.querySelector('a.mark_right'); var oText=oDiv.querySelector('div.text');var oLength=oDiv.querySelector('div.length');var aUl=oDiv.querySelectorAll('ul');var aBigLi=aUl[0].querySelectorAll('li');var aSmallLi=aUl[1].querySelectorAll('li'); //获取标签var zIndex=1,now=0;//zIndex:主图Z轴层级,now:下⾯导航图⽚的下标(从0开始)oBtnNext.onclick=function () {now++;if(now===aSmallLi.length) now=0;//当now等于⼩导航图⽚的长度时,把主图⽚换成第⼀张opublic();};oBtnPrev.onclick=function () {now--;if(now===-1) now=aSmallLi.length-1;//当now等于-1,把主图⽚换成最后opublic();};for (var i=0;i<aSmallLi.length;i++){aSmallLi[i].style.opacity=.6;//统⼀设置下⾯导航图⽚透明度为0.6aSmallLi[0].style.opacity=1;//初始化第⼀个导航图⽚透明度为1aSmallLi[i].index=i;//为每⼀个导航图加⼀个index的⾃定义属性aSmallLi[i].onclick=function () {//添加单击事件now=this.index;//当单击图⽚后,主图切换为对应图⽚opublic();};}function opublic(){//公共部分aBigLi[now].style.zIndex=zIndex++;//图⽚切换改变Z轴层级aBigLi[now].style.height=0;startMove(aBigLi[now],'height',320);//图⽚⾼度从0->360,实现图⽚动态叠加效果oText.innerHTML='图⽚'+(now+1)+'详情';oLength.innerHTML=(now+1)+'/'+aBigLi.length;for(var i=0;i<aSmallLi.length;i++){startMove(aSmallLi[i], 'opacity', 60);}startMove(aSmallLi[now], 'opacity', 100);if(now===0){startMove(aUl[1], 'left', 0);}else if(now===aSmallLi.length-1){//当当前导航图⽚为最后⼀张时,固定最后⼀张图⽚位置startMove(aUl[1], 'left', -(now-2)*aSmallLi[0].offsetWidth);}else{//下⾯导航图⽚的轮播效果startMove(aUl[1], 'left', -(now-1)*aSmallLi[0].offsetWidth);}}oPrv.onmouseover=oNext.onmouseover=function () {//⿏标移⼊左右按钮出现this.style.opacity=1;};oPrv.onmouseout=oNext.onmouseout=function () {//⿏标移出左右按钮消失this.style.opacity=0;};var timer=setInterval(oBtnNext.onclick, 3000);//设置⼀个定时器,每3秒钟模拟⼀次右边按钮的单击事件 oDiv.onmouseenter=function () {//⿏标移⼊后,定时器取消clearInterval(timer);};oDiv.onmouseleave=function () {//⿏标离开后开启定时器timer=setInterval(oBtnNext.onclick, 3000);}function startMove(obj, attr, iTarget)//运动框架,// obj:运动的对象,attr:运动的属性,iTarget:⽬标值{clearInterval(obj.timer);obj.timer=setInterval(function (){var cur=0;if(attr==='opacity'){cur=Math.round(parseFloat(getStyle(obj, attr))*100);}else{cur=parseInt(getStyle(obj, attr));}var speed=(iTarget-cur)/10;speed=speed>0?Math.ceil(speed):Math.floor(speed);if(cur==iTarget){clearInterval(obj.timer);}else{if(attr=='opacity'){obj.style.filter='alpha(opacity:'+(cur+speed)+')'; obj.style.opacity=(cur+speed)/100;}else{obj.style[attr]=cur+speed+'px';}}}, 30);}。
js实现网页图片轮换播放

2、 实 现 功 能 :
(1)点击左右箭头之后,下面显示的图片会换成对应的上一张或下一张图片
(2)点击导航的某一张图片时,下面的就会显示对应的图片,而且再次点击上一张或者下一张时会显示对应的图片
(3)图片的地址可以来自网络上,也可以是自己的服务器发送过来的字符串数组。
(4)showPic.js的代码内容如下:
//showPic.js var href = new Array("image/1.jpg","image/2.jpg","image/3.jpg","image/4.jpg") ; var index = 0 ;
function clickTurnLeft() { if (index == 0) { index = href.length - 1 ; } else { index = --index % href.length ; }
</li> <li> <a href="#" title="右箭头" οnclick="clickTurnRight();"> <img src="image/right_aim.jpg" id="rightAim"alt="向右轮换"> </a> </li>
</ul> </div> </body> </html>
#leftAim{ width:100px; height:100px; } #smallPic{ width:180px; height:120px; border:2px solid black; } #rightAim{ width:100px; height:100px; } #picture{ display:block; width:800px; height:600px; margin:0 auto; }
JavaScript实现图像轮播特效教程
JavaScript实现图像轮播特效教程章节一:引言在现代网页设计中,图像轮播特效是非常常见的元素之一。
通过图像轮播特效,可以使网页更加动态、吸引人,提升用户体验。
本教程将介绍如何使用JavaScript实现图像轮播特效,并提供详细的步骤和示例代码。
章节二:基本结构首先,我们需要准备好轮播图的基本结构。
在HTML文件中,创建一个容器元素,用于包裹轮播图的图片和导航按钮。
然后,给容器元素添加一个唯一的ID,方便在JavaScript中进行操作。
章节三:样式设计接下来,我们需要为轮播图的容器元素和其中的图片设置样式。
使用CSS,可以设置容器元素的宽度和高度,以及图片的显示方式和过渡效果。
通过设置适当的样式,可以使轮播图在页面中居中显示,并可以根据需要进行自定义的设计。
章节四:添加JavaScript代码再接下来,我们需要使用JavaScript编写轮播图的逻辑代码。
首先,使用DOM操作获取到容器元素和其中的图片元素。
然后,使用数组或者类数组对象保存每张图片的路径或地址。
接下来,定义一个变量来存储当前显示的图片的索引。
然后,编写一个函数来实现图像切换的效果。
在函数中,通过改变图片元素的样式或属性,实现图片的切换。
同时,更新当前显示的图片的索引,以便进行下一次切换。
章节五:自动轮播功能除了手动切换图片,我们还可以添加自动轮播的功能。
使用JavaScript的定时器函数,可以定期触发图片切换的函数。
通过设置合适的时间间隔,可以实现自动轮播的效果。
同时,需要添加鼠标移入和移出事件,以便在用户鼠标悬停在图片上时停止轮播,鼠标离开时继续轮播。
章节六:导航按钮如果希望用户可以通过导航按钮来手动控制轮播图的切换,我们还需要添加导航按钮的功能。
在HTML文件中,创建相应数量的导航按钮,并为每个按钮设置一个特定的类名或索引属性。
在JavaScript中,使用事件委托的方式,监听导航按钮的点击事件。
当用户点击某个导航按钮时,获取该按钮的索引,然后调用图片切换函数,显示对应索引的图片。
如何使用JavaScript实现轮播图功能

如何使用JavaScript实现轮播图功能使用JavaScript实现轮播图功能随着Web技术的不断发展,轮播图成为了Web设计中常见的功能之一。
无论是展示产品、介绍公司或者分享照片,轮播图都可以很好地帮助我们展示信息。
那么,如何使用JavaScript实现轮播图功能呢?1. 创建HTML结构首先,我们需要在HTML中创建轮播图的基本结构。
通常情况下,轮播图由一个父容器和若干个子容器组成。
父容器用来包裹子容器,并设置宽度和高度,以及必要的样式。
子容器则用来显示具体的内容,例如图片、文字等。
2. 添加CSS样式然后,为轮播图添加CSS样式,使其呈现出我们期望的效果。
可以设置轮播图的宽度、高度、背景颜色等。
通过CSS样式,我们可以控制轮播图的外观,使其更符合我们的设计需求。
3. 设定轮播时间间隔在JavaScript中,我们可以使用定时器(setInterval)来设定轮播图的时间间隔。
例如,我们可以每隔3秒钟切换到下一张图片。
当然,你也可以根据需求自定义时间间隔。
通过设置定时器,我们可以实现轮播图的自动切换效果。
4. 实现图片切换当设定好轮播时间间隔后,我们需要编写JavaScript代码来实现图片的切换效果。
一种常见的实现方法是通过改变子容器的left或者marginLeft属性,使其在水平方向上产生位移。
通过改变位移值,我们可以实现图片的切换效果。
5. 添加导航按钮通常情况下,轮播图还会添加导航按钮,用来手动切换图片。
导航按钮可以是圆点、箭头或者其他形式。
当用户点击导航按钮时,我们需要调用JavaScript函数,使图片切换到相应位置。
6. 实现自动播放和停止功能为了增强用户体验,我们可以添加自动播放和停止功能。
当用户鼠标悬停在轮播图上时,轮播图停止自动播放;当用户鼠标移出轮播图时,轮播图继续自动播放。
这样可以让用户自由控制图片的切换。
7. 添加过渡效果为了使轮播图更加平滑流畅,我们可以为图片切换添加过渡效果。
如何使用JavaScript实现无缝滚动自动播放轮播图效果
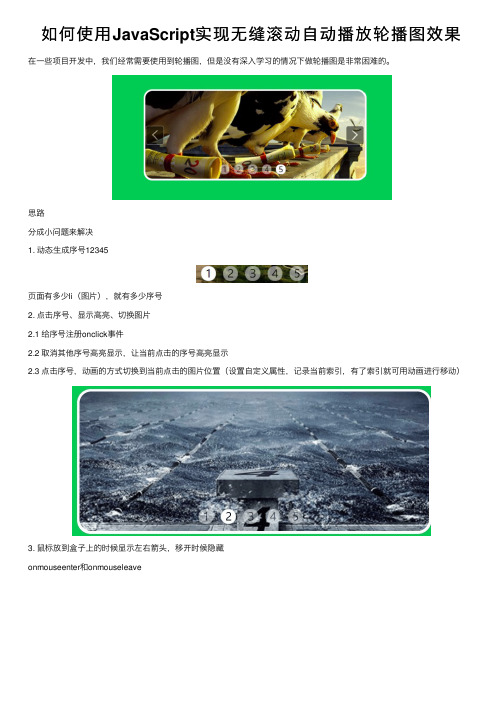
如何使⽤JavaScript实现⽆缝滚动⾃动播放轮播图效果在⼀些项⽬开发中,我们经常需要使⽤到轮播图,但是没有深⼊学习的情况下做轮播图是⾮常困难的。
思路分成⼩问题来解决1. 动态⽣成序号12345页⾯有多少li(图⽚),就有多少序号2. 点击序号、显⽰⾼亮、切换图⽚2.1 给序号注册onclick事件2.2 取消其他序号⾼亮显⽰,让当前点击的序号⾼亮显⽰2.3 点击序号,动画的⽅式切换到当前点击的图⽚位置(设置⾃定义属性,记录当前索引,有了索引就可⽤动画进⾏移动)3. ⿏标放到盒⼦上的时候显⽰左右箭头,移开时候隐藏onmouseenter和onmouseleave4. 实现左右箭头播放上⼀张下⼀张(⽆缝滚动)5. 隔多少时间⾃动播放setInterval和element1..click()联合即可实现代码: index.html:<!DOCTYPE html><html lang="en"><head><meta charset="UTF-8"><title></title><style type="text/css">* {padding: 0;margin: 0;list-style: none;border: 0;}body {margin: 0;background-color: rgb(55, 190, 89);}.all {width: 500px;height: 200px;padding: 4px;margin: 100px auto;position: relative;background-color: #fff;border-radius: 20px; }.screen {width: 500px;height: 200px;border-radius: 17px; overflow: hidden;position: relative;}.screen li {width: 500px;height: 200px;overflow: hidden;float: left;}.screen ul {position: absolute;left: 0;top: 0px;width: 3000px;}.all ol {position: absolute;right: 180px;bottom: 10px;line-height: 20px;text-align: center;}.all ol li {float: left;width: 20px;height: 20px;background: #fff;border-radius: 10px; border: 1px solid #ccc; margin-left: 10px;cursor: pointer;opacity: 0.5;/* 透明度 */}.all ol li.current {opacity: 1.0;}#arr {display: none;z-index: 1000;}#arr span {width: 40px;height: 40px;position: absolute;left: 5px;top: 50%;margin-top: -20px;background: #000;cursor: pointer;line-height: 40px;text-align: center;font-weight: bold;font-family: '⿊体';font-size: 30px;color: #fff;opacity: 0.5;border: 1px solid #fff; border-radius: 5px;}#arr #right {right: 5px;left: auto;}</style></head><body><div class="all" id='box'><div class="screen"><ul><li><img src="images/wf1.jpg" width="500" height="200" /></li><li><img src="images/wf2.jpg" width="500" height="200" /></li><li><img src="images/wf3.jpg" width="500" height="200" /></li><li><img src="images/wf4.jpg" width="500" height="200" /></li><li><img src="images/wf5.jpg" width="500" height="200" /></li></ul><ol></ol></div><div id="arr"><span id="left"><</span><span id="right">></span></div></div><script src="common.js"></script><script src="animate.js"></script><script src="index.js"></script></body></html>index.js//获取元素var box = my$('box');var screen = box.children[0];var ul = screen.children[0];var ol = screen.children[1]//获取箭头var arr = my$('arr');var arrLeft = my$('left');var arrRight = my$('right');var count = ul.children.length; /* 获取图⽚数量还没有放cloneLi,所以数值是5*/var imgWidth = screen.offsetWidth; /* 获取的图⽚(盒⼦)的宽⾼ *///1.动态⽣成序号for (i = 0; i < count; i++) {// 在ol内创建livar li = document.createElement('li');ol.appendChild(li);// li内赋予数值setInnerText(li, i + 1);li.onclick = liClick;// 设置标签的⾃定义属性(创建索引)li.setAttribute('index', i);}// 2.点击序号,切换,显⽰⾼亮function liClick() {// 取消其他的li的⾼亮,显⽰当前li⾼亮for (i = 0; i < ol.children.length; i++) {var li = ol.children[i];li.className = '';this.className = 'current';}// 获取的⾃定义属性是字符串类型,要转成整数var liIndex = parseInt(this.getAttribute('index'));animate(ul, -liIndex * imgWidth);//使得后⾯定义的全局变量index等于li的属性liIndexindex = liIndex;}//ol内的第⼀个li显⽰⾼亮⾊ol.children[0].className = 'current';//3.⿏标放上去的时候显⽰箭头// onmouseover和onmouseout会触发事件冒泡;onmouseleave和onmouseenter不会触发事件冒泡box.onmouseenter = function () {arr.style.display = 'block';clearInterval(timeId);}box.onmouseleave = function () {arr.style.display = 'none';timeId = setInterval(function () {arrRight.click();}, 2500)}// 4.实现上⼀张,下⼀张的功能var index = 0; //第⼀张图⽚的索引arrRight.onclick = function () {// 判断是否是克隆的第⼀张图⽚,如果是克隆的第⼀张图⽚,此时修改ul的坐标,显⽰真正的第⼀张图⽚ if (index === count) {ul.style.left = '0px';index = 0;}// 如果是最后⼀张图⽚,不让index++index++;// 有5张图⽚,但是还有⼀张克隆的图⽚,克隆图⽚索引是5if (index < count) {//获取图⽚对应的序号,让序号进⾏点击ol.children[index].click();} else {animate(ul, -index * imgWidth);// 取消所有的⾼亮现实,让第⼀个序号⾼亮显⽰for (var i = 0; i < ol.children.length; i++) {var li = ol.children[i];li.className = '';}ol.children[0].className = 'current';}//}arrLeft.onclick = function () {if (index === 0) {index = count;ul.style.left = -index * imgWidth + 'px';}index--;ol.children[index].click();}// ⽆缝滚动var firstLi = ul.children[0];// 克隆li//cloneNode() 复制节点:参数 true 复制节点中的内容 ;false 只复制当前节点,不复制⾥⾯的内容var cloneLi = firstLi.cloneNode(true);ul.appendChild(cloneLi)// 5.⾃动播放var timeId = setInterval(function () {// 切换到下⼀张图⽚arrRight.click();}, 2500)common.jsfunction my$(id) {return document.getElementById(id);}// 处理浏览器兼容性// 获取第⼀个⼦元素function getFirstElementChild(element) {var node, nodes = element.childNodes, i = 0;while (node = nodes[i++]) {if (node.nodeType === 1) {return node;}}return null;}// 处理浏览器兼容性// 获取下⼀个兄弟元素function getNextElementSibling(element) {var el = element;while (el = el.nextSibling) {if (el.nodeType === 1) {return el;}}return null;}// 处理innerText和textContent的兼容性问题// 设置标签之间的内容function setInnerText(element, content) {// 判断当前浏览器是否⽀持 innerTextif (typeof element.innerText === 'string') {element.innerText = content;} else {element.textContent = content;}}// 处理注册事件的兼容性问题// eventName, 不带on, click mouseover mouseoutfunction addEventListener(element, eventName, fn) {// 判断当前浏览器是否⽀持addEventListener ⽅法if (element.addEventListener) {element.addEventListener(eventName, fn); // 第三个参数默认是false} else if (element.attachEvent) {element.attachEvent('on' + eventName, fn);} else {// 相当于 element.onclick = fn;element['on' + eventName] = fn;}}// 处理移除事件的兼容性处理function removeEventListener(element, eventName, fn) {if (element.removeEventListener) {element.removeEventListener(eventName, fn);} else if (element.detachEvent) {element.detachEvent('on' + eventName, fn);} else {element['on' + eventName] = null;}}// 获取页⾯滚动距离的浏览器兼容性问题// 获取页⾯滚动出去的距离function getScroll() {var scrollLeft = document.body.scrollLeft || document.documentElement.scrollLeft; var scrollTop = document.body.scrollTop || document.documentElement.scrollTop; return {scrollLeft: scrollLeft,scrollTop: scrollTop}}// 获取⿏标在页⾯的位置,处理浏览器兼容性function getPage(e) {var pageX = e.pageX || e.clientX + getScroll().scrollLeft;var pageY = e.pageY || e.clientY + getScroll().scrollTop;return {pageX: pageX,pageY: pageY}}//格式化⽇期对象,返回yyyy-MM-dd HH:mm:ss的形式function formatDate(date) {// 判断参数date是否是⽇期对象// instanceof instance 实例(对象) of 的// console.log(date instanceof Date);if (!(date instanceof Date)) {console.error('date不是⽇期对象')return;}var year = date.getFullYear(),month = date.getMonth() + 1,day = date.getDate(),hour = date.getHours(),minute = date.getMinutes(),second = date.getSeconds();month = month < 10 ? '0' + month : month;day = day < 10 ? '0' + day : day;hour = hour < 10 ? '0' + hour : hour;minute = minute < 10 ? '0' + minute : minute;second = second < 10 ? '0' + second : second;return year + '-' + month + '-' + day + ' ' + hour + ':' + minute + ':' + second; }// 获取两个⽇期的时间差function getInterval(start, end) {// 两个⽇期对象,相差的毫秒数var interval = end - start;// 求相差的天数/⼩时数/分钟数/秒数var day, hour, minute, second;// 两个⽇期对象,相差的秒数// interval = interval / 1000;interval /= 1000;day = Math.round(interval / 60 / 60 / 24);hour = Math.round(interval / 60 / 60 % 24);minute = Math.round(interval / 60 % 60);second = Math.round(interval % 60);return {day: day,hour: hour,minute: minute,second: second}}animage.js// var timerId = null;// 封装动画的函数function animate(element, target) {// 通过判断,保证页⾯上只有⼀个定时器在执⾏动画if (element.timerId) {clearInterval(element.timerId);element.timerId = null;}element.timerId = setInterval(function () {// 步进每次移动的距离var step = 10;// 盒⼦当前的位置var current = element.offsetLeft;// 当从400 到 800 执⾏动画// 当从800 到 400 不执⾏动画// 判断如果当前位置 > ⽬标位置此时的step 要⼩于0if (current > target) {step = - Math.abs(step);}// Math.abs(current - target) <= Math.abs(step)if (Math.abs(current - target) <= Math.abs(step)) {// 让定时器停⽌clearInterval(element.timerId);// 让盒⼦到target的位置element.style.left = target + 'px';return;}// 移动盒⼦current += step;element.style.left = current + 'px';}, 5);}总结到此这篇关于如何使⽤JavaScript实现⽆缝滚动⾃动播放轮播图效果的⽂章就介绍到这了,更多相关js⽆缝滚动⾃动播放内容请搜索以前的⽂章或继续浏览下⾯的相关⽂章希望⼤家以后多多⽀持!。
基于JavaScript实现轮播图效果
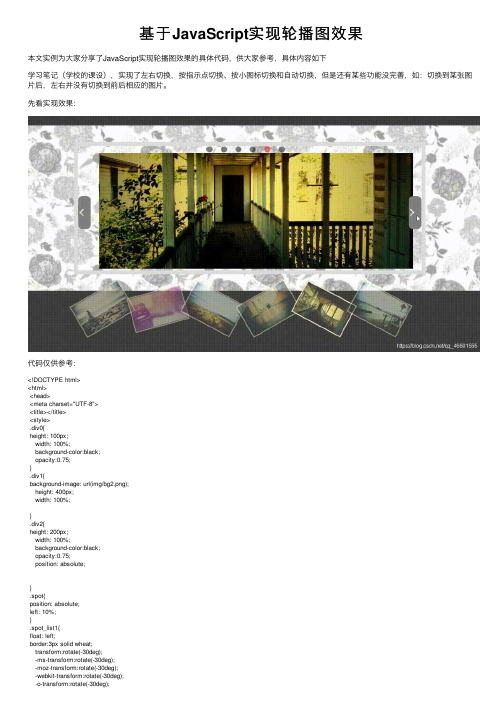
基于JavaScript实现轮播图效果本⽂实例为⼤家分享了JavaScript实现轮播图效果的具体代码,供⼤家参考,具体内容如下学习笔记(学校的课设),实现了左右切换,按指⽰点切换、按⼩图标切换和⾃动切换,但是还有某些功能没完善,如:切换到某张图⽚后,左右并没有切换到前后相应的图⽚。
先看实现效果:代码仅供参考:<!DOCTYPE html><html><head><meta charset="UTF-8"><title></title><style>.div0{height: 100px;width: 100%;background-color:black;opacity:0.75;}.div1{background-image: url(img/bg2.png);height: 400px;width: 100%;}.div2{height: 200px;width: 100%;background-color:black;opacity:0.75;position: absolute;}.spot{position: absolute;left: 10%;}.spot_list1{float: left;border:3px solid wheat;transform:rotate(-30deg);-ms-transform:rotate(-30deg);opacity:0.5;}.spot_list2{float: left;border:3px solid wheat;transform:rotate(-15deg);-ms-transform:rotate(-15deg);-moz-transform:rotate(-15deg); -webkit-transform:rotate(-15deg); -o-transform:rotate(-15deg);opacity:0.5;}.spot_list3{float: left;border:3px solid wheat;transform:rotate(28deg);-ms-transform:rotate(28deg);-moz-transform:rotate(28deg); -webkit-transform:rotate(28deg); -o-transform:rotate(28deg);opacity:0.5;}.div1_1{border: 10px solid gainsboro;width: 830px;height: 300px;left: 10%;top: 10%;position: relative;overflow: hidden;}.btn {width: 100%;height: 80px;position: absolute;margin: 0 auto;top: 120px;}.box_big {position: absolute;height: 400px;vertical-align: middle}#imgList{list-style: none;position: absolute;}#imgList li{float: left;margin: 0 10px;}.left_btn, .right_btn {width: 30px;height: 80px;background:gray;line-height: 90px;border-radius: 10px;}.left_btn {float: left;}.right_btn {float: right;}#navDiv{position: absolute;left: 300px;}#navDiv a{float: left;width: 15px;height: 15px;border-radius:50%;background-color: black;margin: 0 10px;opacity: 0.5;#navDiv a:hover{background-color: red;}</style></head><body><div class="div0"></div><div class="div1"><div class="div1_1"><div id="navDiv"><a href="javascript:;" ></a><a href="javascript:;" ></a><a href="javascript:;" ></a><a href="javascript:;" ></a><a href="javascript:;" ></a><a href="javascript:;" ></a></div><div class="box_big"><ul id="imgList"><li><img src="img/1.jpg" id="1" ></li><li><img src="img/2.jpg" id="2></li><li><img src="img/3.jpg" id="3"/></li><li><img src="img/4.jpg" id="4"/></li><li><img src="img/5.jpg" id="5"/></li><li><img src="img/6.jpg" id="6"/></li></ul></div><div class="btn"><div class="left_btn"><img src="img/prev.png"></div><div class="right_btn"><img src="img/next.png"></div></div></div></div><!--⼩标图⽚--><div class="div2" onmouseleave="m1()"><div class="spot"><img src="img/thumbs/1.jpg" class="spot_list1" id="spot_list1" onmouseover="mouseover(1)" onmouseout="mouseout(1)"> <img src="img/thumbs/2.jpg" class="spot_list2" id="spot_list2" onmouseover="mouseover(2)" onmouseout="mouseout(2)"> <img src="img/thumbs/3.jpg" class="spot_list3" id="spot_list3" onmouseover="mouseover(3)" onmouseout="mouseout(3)"> <img src="img/thumbs/4.jpg" class="spot_list1" id="spot_list4" onmouseover="mouseover(4)" onmouseout="mouseout(4)"> <img src="img/thumbs/5.jpg" class="spot_list2" id="spot_list5" onmouseover="mouseover(5)" onmouseout="mouseout(5)"> <img src="img/thumbs/6.jpg" class="spot_list3" id="spot_list6" onmouseover="mouseover(6)" onmouseout="mouseout(6)"> </div></div></body><script>var box=document.getElementById("1");//var spot = document.getElementsByClassName("spot_list");var left_btn=document.getElementsByClassName("left_btn")[0];var right_btn=document.getElementsByClassName("right_btn")[0];var time = null;var count = 0;var ids=document.getElementsByTagName("a");ids[0].style.backgroundColor="red";var spot_list1=document.getElementById("spot_list1");spot_list1.setAttribute("class","spot_list3");spot_list1.style.opacity="0.98";//左按钮left_btn.onclick=function(){count--;if(count<1){count=6}box.src="img/" + count + ".jpg";for(var i=0;i<ids.length;i++){ids[i].style.backgroundColor="black";}ids[count - 1].style.backgroundColor="red";for(var i=1;i<=6;i++){var img=document.getElementById("spot_list"+i);if(img.id=="spot_list1" || img.id=="spot_list4"){img.setAttribute("class","spot_list1");img.style.opacity="0.5";}else if(img.id=="spot_list2" || img.id=="spot_list5"){img.setAttribute("class","spot_list2");}else if(img.id=="spot_list3" || img.id=="spot_list6"){ img.setAttribute("class","spot_list3");img.style.opacity="0.5";}}var img=document.getElementById("spot_list"+count); if(img.id=="spot_list1" || img.id=="spot_list4"){img.setAttribute("class","spot_list3");img.style.opacity="0.98";}else if(img.id=="spot_list2" || img.id=="spot_list5"){ img.setAttribute("class","spot_list3");img.style.opacity="0.98";}else if(img.id=="spot_list3" || img.id=="spot_list6"){ img.setAttribute("class","spot_list1");img.style.opacity="0.98";}}//右按钮right_btn.onclick=function(){changeImg();}//var x=1;var changeImg = function(){x++;if(x > 6){x = 1;}box.src = "img/" + x + ".jpg";for(var i=0;i<ids.length;i++){ids[i].style.backgroundColor="black";}ids[x - 1].style.backgroundColor="red";for(var i=1;i<=6;i++){var img=document.getElementById("spot_list"+i);if(img.id=="spot_list1" || img.id=="spot_list4"){img.setAttribute("class","spot_list1");img.style.opacity="0.5";}else if(img.id=="spot_list2" || img.id=="spot_list5"){ img.setAttribute("class","spot_list2");img.style.opacity="0.5";}else if(img.id=="spot_list3" || img.id=="spot_list6"){ img.setAttribute("class","spot_list3");img.style.opacity="0.5";}}var img=document.getElementById("spot_list"+x);if(img.id=="spot_list1" || img.id=="spot_list4"){img.setAttribute("class","spot_list3");img.style.opacity="0.98";}else if(img.id=="spot_list2" || img.id=="spot_list5"){ img.setAttribute("class","spot_list3");img.style.opacity="0.98";}else if(img.id=="spot_list3" || img.id=="spot_list6"){ img.setAttribute("class","spot_list1");img.style.opacity="0.98";}}//设置计时器var show;show=setInterval(changeImg, 3000);//图⽚切换function mouseover(n){clearInterval(show);var img=document.getElementById("spot_list"+n);if(img.id=="spot_list1" || img.id=="spot_list4"){img.setAttribute("class","spot_list3");img.style.opacity="0.98";}else if(img.id=="spot_list2" || img.id=="spot_list5"){ img.setAttribute("class","spot_list3");img.style.opacity="0.98";}else if(img.id=="spot_list3" || img.id=="spot_list6"){}box.src="img/"+n+".jpg";for(var i=0;i<ids.length;i++){ids[i].style.backgroundColor="black";}ids[n-1].style.backgroundColor="red";}for(let i=0;i<ids.length;i++){ids[i].onclick=function(){clearInterval(show);for(var n=0;n<ids.length;n++){ids[n].style.backgroundColor="black";}box.src="img/"+(i+1)+".jpg";ids[i].style.backgroundColor="red";}}//离开⼩图标时function mouseout(n){var img=document.getElementById("spot_list"+n);ids[n-1].style.backgroundColor="black";if(img.id=="spot_list1" || img.id=="spot_list4"){img.setAttribute("class","spot_list1");img.style.opacity="0.5";}else if(img.id=="spot_list2" || img.id=="spot_list5"){img.setAttribute("class","spot_list2");img.style.opacity="0.5";}else if(img.id=="spot_list3" || img.id=="spot_list6"){img.setAttribute("class","spot_list3");img.style.opacity="0.5";}}function m1(){//启动计时器show=setInterval(changeImg, 3000);}</script></html>以上就是本⽂的全部内容,希望对⼤家的学习有所帮助,也希望⼤家多多⽀持。
原生JS实现轮播图(3种方法)
原生JS实现轮播图(3种方法)原创HaiJun_Aion 最后发布于2019-01-26 21:49:38 阅读数7842 收藏展开最近在巩固JS基础知识,顺手敲了个轮播图,它有3种换图方法。
自动换图 (设置定时器每隔2s换一张图)点击左右箭头换图点击小圆点换图代码如下<!DOCTYPE html><html lang="en"><head><meta charset="UTF-8"><meta name="viewport" content="width=device-width, initial-scale=1.0"><meta http-equiv="X-UA-Compatible" content="ie=edge"> <link rel="stylesheet" href="font.css"><title>Document</title><style>*{margin: 0;padding: 0;list-style-type: none;text-decoration: none;}#fade{width: 500px;height: 500px;margin: 0 auto;position: relative;}.now-left{position: absolute;top: 45%}.now-right{position: absolute;top: 45%;left:93%;}.ul_dian{position: absolute;top: 90%;left: 38%;}.ul_dian li{float: left;}</style></head><body><center><h2>轮播图</h2></center><div id="fade"><img src="img/1.jpg" width="100%" height="100%" id="lunbo"><i class='iconfont icon-jiantouzuo now-left' id="left"></i><i class='iconfont icon-jiantouyou now-right' id="right"></i><ul class="ul_dian"><li class='iconfont icon-yuandianzhong '></li> <li class='iconfont icon-yuandianzhong '></li> <li class='iconfont icon-yuandianzhong '></li> <li class='iconfont icon-yuandianzhong'></li> </ul></div><script>var lb = document.getElementById("lunbo") var num=1;// 自动换图setInterval(function(){num++;if(num == 5){num = 1;}lb.src="img/"+num+".jpg"// console.log(num)},3000)var left = document.getElementById("left")var right = document.getElementById("right")// 点击左箭头换图left.onclick=function(){num--;if(num == 0){num = 1;}lb.src="img/"+num+".jpg"// 点击右键换箭头right.onclick=function(){num++;if(num == 5){num = 4;}lb.src="img/"+num+".jpg"}// 点击圆点换图var allLi = document.getElementsByTagName('ul')[0].getElementsByTagNa me("li");for(var i = 0 ; i < allLi.length ; i++){// 给每个li元素赋值,每循环一次,i+1;allLi[i].index = i;allLi[i].onclick=function(){// li的索引是从0开始的,所以要+1var num = this.index+1;lb.src="img/"+num+".jpg"}}</script></body></html>效果图————————————————版权声明:本文为CSDN博主「HaiJun_Aion」的原创文章,遵循 CC 4.0 BY-SA 版权协议,转载请附上原文出处链接及本声明。
用js实现轮播图效果
⽤js实现轮播图效果今天来说⼀下利⽤js实现轮播图效果,供⼤家参考,具体内容如下思路1.⾸先我们要把需要⽤到的元素获取过来<div class="all" id='box'><div class="screen"><!-- ⽆序列表 --><ul><li><img src="./wf1.jpg" width="500" height="200" /></li><li><img src="./wf2.jpg" width="500" height="200" /></li><li><img src="./wf3.jpg" width="500" height="200" /></li><li><img src="./wf4.jpg" width="500" height="200" /></li><li><img src="./wf5.jpg" width="500" height="200" /></li></ul><!-- 有序列表 --><ol></ol></div><div id="arr"><span id="left"><</span><span id="right">></span></div></div>2.我们要让轮播图点到哪⾥执⾏到哪⾥,且颜⾊发⽣变化3.给轮播图添加左右⽅向键,可以上下切换4.让轮播图⾃⼰动起来操作1.先获取到元素,和需要⽤到的轮播图效果1.先把需要⽤到的ul(照⽚),ol(点击框),nth(左右的按键)获取过来var ul=document.querySelector('ul')var ol=document.querySelector('ol')var nth=document.querySelector('#arr')var box=document.querySelector('#box')var left=document.querySelector('#left')var right=document.querySelector('#right')2.封装⼀下动画效果,⼀会要⽤到// 进⾏位置动画封装调⽤function animate(element,offset,setp,times){// 判断为true则删除,防⽌多个触发if(element.jsq){clearInterval(element.jsq)}// 获取当前offsetvar position=ul.offsetLeft// 判定如果移动位置⼩于现在的位置,则步长为负数if(offset<position){setp=-setp}// 开启间隙定时器if(Math.abs(position-offset)>Math.abs(setp)){element.jsq=setInterval(() => {position+=setpelement.style.left=position+'px'// 判断要是现在的位值和预订的位置相差不超过⼀步长,则停⽌计时器if(Math.abs(position-offset)<Math.abs(setp)){clearInterval(element.jsq)element.style.left=offset+'px'}}, times);}}动画的步骤:1.传⼊时,查看是否有计时器的存在,如果有则清空,防⽌多个计时器并存的效果2.判断⼀下,要移动到的位置是否⼤于原来的位置,⼤于则setp则加,⼩于则每次减去步长3.开始计时器,进⾏移动4.当现在的位置,和预定位置,距离相差⼩于步长则结束计时器,并把位置定到预定的位置上去,防⽌反复横跳2.ol添加内容,加点击事件,图⽚移动,按钮变⾊for(var i=0;i<ul.children.length;i++){var li=document.createElement('li')li.innerHTML=i+1// 给每⼀个li设置上⾃定义属性li.setAttribute('a',i)ol.appendChild(li)// 给ol下⾯每⼀个li设置点击事件ol.children[i].onclick=function(){// 循环所以li进⾏排他思想for(var i=0;i<ol.children.length;i++){ol.children[i].className=''}// 给当前点击的元素添加上class属性this.className='current'// 获取到当前点击li的⾃定属性的值看看是点击到第⼏张var index=this.getAttribute('a')console.log(index)// 查看照⽚每⼀张的宽度var imgwidth=ul.children[0].offsetWidth// 根据宽度乘上第⼏张得出该移动多少offset=index*-imgwidth// 调⽤动画函数animate(ul,offset,50,30)1.根据照⽚的数量去⽤for循环创建相同数量的按钮,⽤setAttriubre(‘a',i)创建新⾃定义属性后添加到ol中,后边要⽤到for(var i=0;i<ul.children.length;i++){var li=document.createElement('li')li.innerHTML=i+1// 给每⼀个li设置上⾃定义属性li.setAttribute('a',i)ol.appendChild(li)}2.在这个循环中给所有的按钮添加绑定事件,让当前的按钮变颜⾊,其他的没有颜⾊,排他思想,在每⼀次点击的时候,当前的有,其他的全部清空for(var i=0;i<ul.children.length;i++){var li=document.createElement('li')li.innerHTML=i+1// 给每⼀个li设置上⾃定义属性li.setAttribute('a',i)ol.appendChild(li)//新// 给ol下⾯每⼀个li设置点击事件ol.children[i].onclick=function(){// 循环所以li进⾏排他思想for(var i=0;i<ol.children.length;i++){ol.children[i].className=''}// 给当前点击的元素添加上class属性this.className='current'3.获取到当前点击的元素,的⾃定义属性的值,保存起来,⽤来设置页⾯的偏移量当前点击的值和每个照⽚相乘得出 ul的偏移量,记得加负号,应为是ul往左⾛,⽽不是视⼝往左⾛,然后调⽤之前我们写的动画函数for(var i=0;i<ul.children.length;i++){var li=document.createElement('li')li.innerHTML=i+1// 给每⼀个li设置上⾃定义属性li.setAttribute('a',i)ol.appendChild(li)// 给ol下⾯每⼀个li设置点击事件ol.children[i].onclick=function(){// 循环所以li进⾏排他思想for(var i=0;i<ol.children.length;i++){ol.children[i].className=''}// 给当前点击的元素添加上class属性this.className='current'//新// 获取到当前点击li的⾃定属性的值看看是点击到第⼏张var index=this.getAttribute('a')console.log(index)// 查看照⽚每⼀张的宽度var imgwidth=ul.children[0].offsetWidth// 根据宽度乘上第⼏张得出该移动多少offset=index*-imgwidth// 调⽤动画函数animate(ul,offset,50,30)得出效果3.给轮播图添加上⼀张,下⼀张按钮(这⾥就不写css的样式了,最后会给到,先脑补。
JS实现的多张图片轮流播放幻灯片效果
本文实例讲述了JS实现的多张图片轮流播放幻灯片效果。
分享给大家供大家参考,具体如下:<body style="width: 715px; height: 95px;"><script language="javascript" type="text/javascript"><!--/**************************************************名称: 图片轮播类创建时间: 2010-07-11 zhangty示例: 页面中已经存在名为imgPlayer(或者别的ID也行)的节点. PImgPlayer.addItem( "test", "", "/static/samesong/images/logo5.jpg"); PImgPlayer.addItem( "test2", "", "/static/samesong/images/logo4.jpg"); PImgPlayer.addItem( "test3", "", "/static/samesong/images/logo3.jpg"); PImgPlayer.init( "imgPlayer", 200, 230 );备注: 适用于一个页面只有一个图片轮播的地方.***************************************************/var PImgPlayer = { _timer : null, _items : [], _container : null, _index : 0, _imgs : [], intervalTime : 5000, //轮播间隔时间 init : function( objID, w, h, time ){ this.intervalTime = time || this.intervalTime; this._container = document.getElementById( objID ); this._container.style.display = "block"; this._container.style.width = w + "px"; this._container.style.height = h + "px"; this._container.style.position = "relative"; this._container.style.overflow = "hidden"; //this._container.style.border = "1px solid #fff"; var linkStyle = "display: block; TEXT-DECORATION: none;"; if( document.all ){ linkStyle += "FILTER:"; linkStyle += "progid:DXImageTransform.Microsoft.Barn(duration=0.5, motion='out', orientation='vertical') "; linkStyle += "progid:DXImageTransform.Microsoft.Barn ( duration=0.5,motion='out',orientation='horizontal') "; linkStyle += "progid:DXImageTransform.Microsoft.Blinds ( duration=0.5,bands=10,Direction='down' )"; linkStyle += "progid:DXImageTransform.Microsoft.CheckerBoard()"; linkStyle += "progid:DXImageTransform.Microsoft.Fade(duration=0.5,overlap=0)"; linkStyle += "progid:DXImageTransform.Microsoft.GradientWipe ( duration=1,gradientSize=1.0,motion='reverse' )"; linkStyle += "progid:DXImageTransform.Microsoft.Inset ()"; linkStyle += "progid:DXImageTransform.Microsoft.Iris ( duration=1,irisStyle=PLUS,motion=out )"; linkStyle += "progid:DXImageTransform.Microsoft.Iris ( duration=1,irisStyle=PLUS,motion=in )"; linkStyle += "progid:DXImageTransform.Microsoft.Iris ( duration=1,irisStyle=DIAMOND,motion=in )"; linkStyle += "progid:DXImageTransform.Microsoft.Iris ( duration=1,irisStyle=SQUARE,motion=in )"; linkStyle += "progid:DXImageTransform.Microsoft.Iris ( duration=0.5,irisStyle=STAR,motion=in )"; linkStyle += "progid:DXImageTransform.Microsoft.RadialWipe ( duration=0.5,wipeStyle=CLOCK )"; linkStyle += "progid:DXImageTransform.Microsoft.RadialWipe ( duration=0.5,wipeStyle=WEDGE )"; linkStyle += "progid:DXImageTransform.Microsoft.RandomBars ( duration=0.5,orientation=horizontal )"; linkStyle += "progid:DXImageTransform.Microsoft.RandomBars ( duration=0.5,orientation=vertical )"; linkStyle += "progid:DXImageTransform.Microsoft.RandomDissolve ()"; linkStyle += "progid:DXImageTransform.Microsoft.Spiral ( duration=0.5,gridSizeX=16,gridSizeY=16 )"; linkStyle += "progid:DXImageTransform.Microsoft.Stretch ( duration=0.5,stretchStyle=PUSH )"; linkStyle += "progid:DXImageTransform.Microsoft.Strips ( duration=0.5,motion=rightdown )"; linkStyle += "progid:DXImageTransform.Microsoft.Wheel ( duration=0.5,spokes=8 )"; linkStyle += "progid:DXImageTransform.Microsoft.Zigzag ( duration=0.5,gridSizeX=4,gridSizeY=40 ); width: 100%; height: 100%"; } // var ulStyle ="margin:0;width:"+w+"px;position:absolute;z-index:999;right:5px;FILTER:Alpha(Opacity=30,Fi nishOpacity=90, Style=1);overflow: hidden;bottom:-1px;height:16px; border-right:1px solid #fff;"; // var liStyle = "margin:0;list-style-type: none; margin:0;padding:0; float:right;"; // var baseSpacStyle = "clear:both; display:block; width:23px;line-height:18px; font-size:12px; FONT-FAMIL Y:'宋体';opacity: 0.6;"; baseSpacStyle += "border:1px solid #fff;border-right:0;border-bottom:0;"; baseSpacStyle += "color:#fff;text-align:center; cursor:pointer; "; // var ulHTML = ""; for(var i = this._items.length -1; i >= 0; i--){ var spanStyle = ""; if( i==this._index ){ spanStyle = baseSpacStyle + "background:#ff0000;"; //初始化底部数字的颜色 } else { spanStyle = baseSpacStyle + "background:#c0c0c0;"; //初始化底部数字的背景颜色 } ulHTML += "<li style=\""+liStyle+"\">"; ulHTML += "<span onmouseover=\"PImgPlayer.mouseOver(this);\" onmouseout=\"PImgPlayer.mouseOut(this);\" style=\""+spanStyle+"\" onclick=\"PImgPlayer.play("+i+");return false;\" herf=\"javascript:;\" title=\"" + this._items[i].title + "\">" + (i+1) + "</span>"; ulHTML += "</li>"; } // var html = "<a href=\""+this._items[this._index].link+"\" title=\""+this._items[this._index].title+"\" target=\"_blank\" style=\""+linkStyle+"\"></a><ul style=\""+ulStyle+"\">"+ulHTML+"</ul>"; this._container.innerHTML = html; var link = this._container.getElementsByTagName("A")[0]; link.style.width = w + "px"; link.style.height = h + "px"; link.style.background = 'url(' + this._items[0].img + ') no-repeat center center'; // this._timer = setInterval( "PImgPlayer.play()", this.intervalTime ); }, addItem : function( _title, _link, _imgURL ){ this._items.push ( {title:_title, link:_link, img:_imgURL } ); var img = new Image(); img.src = _imgURL; this._imgs.push( img ); }, play : function( index ){ if( index!=null ){ this._index = index; clearInterval( this._timer ); this._timer = setInterval( "PImgPlayer.play()", this.intervalTime ); } else { this._index = this._index<this._items.length-1 ? this._index+1 : 0; } var link = this._container.getElementsByTagName("A")[0]; if(link.filters){ var ren = Math.floor(Math.random()*(link.filters.length)); link.filters[ren].Apply(); link.filters[ren].play(); } link.href = this._items[this._index].link; link.title = this._items[this._index].title; link.style.background = 'url(' + this._items[this._index].img + ') no-repeat center center'; // var liStyle = "margin:0;list-style-type: none; margin:0;padding:0; float:right;"; var baseSpacStyle = "clear:both; display:block; width:23px;line-height:18px; font-size:12px; FONT-FAMIL Y:'宋体'; opacity: 0.6;"; baseSpacStyle += "border:1px solid #fff;border-right:0;border-bottom:0;"; baseSpacStyle += "color:#fff;text-align:center; cursor:pointer; "; var ulHTML = ""; for(var i = this._items.length -1; i >= 0; i--){ var spanStyle = ""; if( i==this._index ){ spanStyle = baseSpacStyle + "background:#ff0000;"; //数字的颜色 } else { spanStyle = baseSpacStyle + "background:#c0c0c0;"; //数字的背景颜色 } ulHTML += "<li style=\""+liStyle+"\">"; ulHTML += "<span onmouseover=\"PImgPlayer.mouseOver(this);\" onmouseout=\"PImgPlayer.mouseOut(this);\" style=\""+spanStyle+"\" onclick=\"PImgPlayer.play("+i+");return false;\" herf=\"javascript:;\" title=\"" + this._items[i].title + "\">" + (i+1) + "</span>"; ulHTML += "</li>"; } this._container.getElementsByTagName("UL")[0].innerHTML = ulHTML; }, mouseOver : function(obj){ var i = parseInt( obj.innerHTML ); if( this._index!=i-1){ obj.style.color = "#ff0000"; } }, mouseOut : function(obj){ obj.style.color = "#fff"; }}--></script><div id="imgADPlayer"></div><script> PImgPlayer.addItem( "拉手网", "/", "./images/1001.jpg"); PImgPlayer.addItem( "糯米网", "/", "./images/1002.jpg"); PImgPlayer.addItem( "美团网", "/", "./images/1003.jpg"); PImgPlayer.init( "imgADPlayer", 715, 95 );</script></body>希望本文所述对大家JavaScript程序设计有所帮助。
使用JS实现图片轮播滚动跑马灯效果

使⽤JS实现图⽚轮播滚动跑马灯效果 我的第⼀篇⽂章、哈哈、有点⼩鸡冻。
之前在百度搜索“图⽚轮播”、“图⽚滚动”,结果都是那种可以左右切换的。
也是我们最常见的那种。
可能是搜索关键字的问题吧。
如图:教程效果图:教程开始:HTML代码:1<body>2<div id="div1">3<div id="div4">4<div id="div2">5<img src="img/1.jpg" alt="图⽚1"/>6<img src="img/2.jpg" alt="图⽚2"/>7<img src="img/3.jpg" alt="图⽚3"/>8<img src="img/4.jpg" alt="图⽚4"/>9</div>10<div id="div3"></div><!--这个容器是⽤来防⽌图⽚滚动时会出现空⽩的区域-->11</div>12</div>13</body>CSS代码:1<style type="text/css">2 div,img{3 margin:0;4 padding:0;5 }6 img{7 float:left;8 height:100px;9 width:150px;10 }11 #div1{12 width:500px;13 height:100px;14 overflow: hidden;15 border:solid blue 2px;16 }17 #div2,#div3{18 float:left;19 }23 #div4{24 width:500%;/*这个属性很重要让容器有⾜够的宽度实现滚动*/25 float:left;26 }27 </style>JavaScript代码:1 <script type="text/javascript">2 window.onload=function(){3var v1=document.getElementById('div1');4var v2=document.getElementById('div2');5var v3=document.getElementById('div3');67 v3.innerHTML= v2.innerHTML;//将v2容器⾥⾯的图⽚插⼊到v3容器⾥⾯使其空⽩区域被遮住。
JS实现轮播图效果的3种简单方法
JS实现轮播图效果的3种简单⽅法本⽂实例为⼤家分享了3种⽅法实现JS轮播图效果的具体代码,供⼤家参考,具体内容如下Js实现轮播图01实现思路这可能是轮播图最简单点的实现之⼀,通过更改图⽚的src来实现该效果,⾸先需要将图⽚命名格式统⼀⽐如pic01.jpg,pic02.jpg…,再通过js使⽤定时器去改变img标签⾥⾯的src图⽚链接的名字来实现切换效果。
代码如下:实现效果<!DOCTYPE html><html><head><meta charset="utf-8"><title>轮播图实现01</title><style type="text/css">.lunbo{width: 900px;height: 400px;margin:100px auto;}.lunbo img{width: 100%;height:100%;}</style></head><body><!--轮播图模块 --><div class="lunbo"><img id="lunbo_img" src="./pic/img3.jpeg" ></div><!-- Js代码 --><script>var index = 1;function lunbo(){index ++ ;//判断index是否⼤于3if(index > 3){index = 1;}//获取img对象var img = document.getElementById("lunbo_img");img.src = "./pic/img"+index+".jpeg";}//2.定义定时器setInterval(lunbo,2000);/*切记定时器⾥调⽤lunbo⽅法不能加(),setInterval(lunbo,2000);如果加()会执⾏lunbo()⽅法,⽽导致定时器没⽤。
js实现轮播图效果

js实现轮播图效果原理: 将⼀些图⽚在⼀⾏中平铺,然后计算偏移量再利⽤定时器实现定时轮播。
步骤⼀:建⽴html基本布局如下所⽰:<!DOCTYPE html><html><head><meta charset="UTF-8"><title>轮播图</title></head><body><div class="container"><div class="wrap" style="left:-600px;"><img src="./img/5.jpg" alt=""><img src="./img/1.jpg" alt=""><img src="./img/2.jpg" alt=""><img src="./img/3.jpg" alt=""><img src="./img/4.jpg" alt=""><img src="./img/5.jpg" alt=""><img src="./img/1.jpg" alt=""></div><div class="buttons"><span>1</span><span>2</span><span>3</span><span>4</span><span>5</span></div><a href="javascript:;" class="arrow arrow_left"><</a><a href="javascript:;" class="arrow arrow_right">></a></div></body></html> 只有五张图⽚,却使⽤7张来轮播,这是为了实现⽆缝轮播,后⾯会详细介绍。
JS实现简易图片轮播效果的方法
JS实现简易图⽚轮播效果的⽅法本⽂实例讲述了JS实现简易图⽚轮播效果的⽅法。
分享给⼤家供⼤家参考。
具体如下:这⾥使⽤JS制作简易图⽚轮播效果:制作⽐较粗糙,使⽤的图⽚是width:660ppx,height:550px;效果图如下:代码部分如下:<!DOCTYPE html><html lang="en"><head><meta http-equiv="Content-Type" content="text/html; charset=utf-8" /><title>JS幻灯代码</title><script type="text/javascript">window.onload = function () {flag = 0;obj1 = document.getElementById("slider");obj2 = document.getElementsByTagName("li");obj2[0].style.backgroundColor = "#666666";//默认被选中颜⾊time = setInterval("turn();", 5000);obj1.onmouseover = function () {clearInterval(time);}obj1.onmouseout = function () {time = setInterval("turn();", 6000);}for (var num = 0; num < obj2.length; num++) {obj2[num].onmouseover = function () {turn(this.innerHTML);clearInterval(time);}obj2[num].onmouseout = function () {time = setInterval("turn();", 6000);}}//延迟加载图⽚,演⽰的时候,使⽤本地图⽚//上线后请改为⼆级域名提供的图⽚地址document.getElementById("second").src = "images/2.png";//使⽤图⽚宽660,⾼550document.getElementById("third").src = "images/3.png";document.getElementById("four").src = "images/4.png";}function turn(value) {if (value != null) {flag = value - 2;}if (flag < obj2.length - 1)flag++;elseflag = 0;obj1.style.top = flag * (-550) + "px";for (var j = 0; j < obj2.length; j++) {obj2[j].style.backgroundColor = "#ffffff";}obj2[flag].style.backgroundColor = "#666666";}</script><style type="text/css">#wrap{height: 550px;width: 660px;overflow: hidden;position: relative;overflow: hidden;}#wrap ul{list-style: none;position: absolute;top: 500px;left: 450px;}#wrap li{margin-left:2px;opacity: .3;filter: alpha(opacity=30);text-align: center;line-height: 30px;font-size: 20px;height: 30px;width: 30px;background-color: #fff;float: left;border-radius:3px;cursor:pointer;}#slider{position: absolute;top: 0px;left: 0px;}#slider img{float: left;border: none;}</style></head><body><div id="wrap"><div id="slider"><a target="_blank" href="#"><img src="images/1.png" /></a> <a target="_blank" href="#"><img id="second" /></a><a target="_blank" href="#"><img id="third" /></a><a target="_blank" href="#"><img id="four" /></a></div><ul><li>1</li><li>2</li><li>3</li><li>4</li></ul></div></body></html>希望本⽂所述对⼤家的javascript程序设计有所帮助。
js通过循环多张图片实现动画效果

js通过循环多张图⽚实现动画效果本⽂实例为⼤家分享了js通过循环多张图⽚实现动画展⽰的具体代码,供⼤家参考,具体内容如下以⼩鱼摇尾巴和眨眼睛为例动画思路:1.将图⽚资源放在数组⾥⾯2.通过计时器来设定间隔时间3.通过计数器来取相应的图⽚第⼀步:基本框架,鱼⾝体<body><canvas id="canvas1" width="800" height="600"></canvas></body>document.body.onload = game;var can1,ctx1,canWidth,canHeight,lastTime = Date.now(),deltaTime = 0,body = new Image();function game() {init();gameloop();}function init() {can1 = document.getElementById("canvas1"); //fonr--fishes, UI, circles, dustctx1 = can1.getContext("2d");canWidth = can1.width;canHeight = can1.height;body.src = './src/baby.png';}function bodyDraw(){ctx1.drawImage( body, -body.width * 0.5, -body.height * 0.5);}function gameloop() {requestAnimFrame(gameloop);//时间帧间隔var now = Date.now();deltaTime = now - lastTime;lastTime = now;ctx1.clearRect(0, 0, canWidth, canHeight);bodyDraw();}window.requestAnimFrame = (function() {return window.requestAnimationFrame || window.webkitRequestAnimationFrame || window.mozRequestAnimationFrame || window.oRequestAnimationFrame || window.msRequestAnimationFrame || function( /* function FrameRequestCallback */ callback, /* DOMElement Element */ element) {return window.setTimeout(callback, 1000 / 60);};})();第⼆步:摇动尾巴1.图⽚资源有8张,从tail0.png ~ tail7.png2.尾巴是匀速的运动,间隔时间为固定值var bTailTimer, //计时器bTailCount, //计数器babyTail = []; //图⽚数组function init() {//尾巴初始化bTailTimer = 0; 8 bTailCount = 0; 9 for (var i = 0; i < 8; i++) {babyTail[i] = new Image();babyTail[i].src = './src/tail' + i +'.png';}}function tailDraw(){bTailTimer += deltaTime;if(bTailTimer > 50){bTailCount = (bTailCount + 1)% 8;bTailTimer %= 50; //初始化计数器}ctx1.drawImage( babyTail[bTailCount], -babyTail[bTailCount].width * 0.5, -babyTail[bTailCount].height * 0.5); }function gameloop() {ctx1.clearRect(0, 0, canWidth, canHeight);bodyDraw();tailDraw();}第三步:眨眼睛1.图⽚资源有2张,从eye0.png ~ eye7.png2.眼睛睁开时间不定时,闭上时间固定值var bEyeTimer,bEyeCount,bEyeInterval, //时间间隔变量babyEye = [];function init() {//眼睛初始化bEyeTimer = 0;bEyeCount = 0;bEyeInterval = 1000; //间隔时间for (var i = 0; i < 2; i++) {babyEye[i] = new Image();babyEye[i].src = './src/Eye' + i + '.png';}}function eyeDraw() {bEyeTimer += deltaTime;if (bEyeTimer > bEyeInterval){bEyeCount = (bEyeCount + 1)% 2;bEyeTimer %= bEyeInterval;if (bEyeCount == 0){//眼睛睁开保持的时间随机bEyeInterval = Math.random() * 1500 + 2000; //[2000,3500)} else{//眼睛闭上保持时间固定为100msbEyeInterval = 100;}}}function gameloop() {eyeDraw();}以上就是本⽂的全部内容,希望对⼤家的学习有所帮助,也希望⼤家多多⽀持。
原生js实现简单轮播图效果

原⽣js实现简单轮播图效果本⽂实例为⼤家分享了js实现简单轮播图效果的具体代码,供⼤家参考,具体内容如下效果如下:分析:分析效果:分析实现:1、通过 document.querySelector('.类名') 的形式获取到装轮播图的⼤盒⼦(.carousel)、装轮播图左右按钮的标签的⽗元素(.chevron)、获取左右按钮(.chevron-left 、.chevron-right)、获取放轮播图图⽚的⽗元素ul(.carousel-body)【注:这⾥获取ul⽽不是回去li,是因为移动轮播图的时候是整个ul⼀起移动的】、最后还要获取装轮播图图⽚的li(.indicators li)//装轮播图的⼤盒⼦let oCarousel = document.querySelector('.carousel')//装轮播图左右按钮的标签的⽗元素let oChevron = document.querySelector('.chevron')//左按钮let oLeft = document.querySelector('.chevron-left')//右按钮let oRight = document.querySelector('.chevron-right')//获取放轮播图图⽚的⽗元素ullet oUl = document.querySelector('.carousel-body')//获取装轮播图图⽚的lilet oActives = document.querySelectorAll('.indicators li')2、实现通过点击左右按钮使轮播图实现上⼀张、下⼀张的效果:先封装⼀个animation()函数,便于多次调⽤function animation(obj,target){// 清除定时器clearInterval(obj.timer)obj.timer=setInterval(()=>{// 读取元素当前位置let curX=obj.offsetLeft//定义⼀个步长let step=10// 判断将要移动的⽅向(⽐较⽬标位置与当前位置的⼤⼩)if(target<curX){step=-10}// 根据当前位置与⽬标位置,以及步长的关系判断// 只要⽬标位置与当前位置之间的距离 < 步长,就直接将元素的位置设置为⽬标为位置即可if(Math.abs(target-curX)<Math.abs(step)){obj.style.left=target+'px'clearInterval(obj.timer)}else{// 计算下⼀步的位置let nextX=curX+step// 将下⼀步的位置赋值给obj.style.leftobj.style.left=nextX+'px'}},10)}①由于⿏标移⼊轮播图的时候前,轮播图中的左右箭头是隐藏的,当⿏标移⼊时显⽰;因此需要为装轮播图的⼤盒⼦(.carousel)绑定⿏标移⼊(onmouseover)和⿏标移出事件(onmouseout)oCarousel.onmouseover = function () {oChevron.style.display = "block"}oCarousel.onmouseout = function () {oChevron.style.display = "none"}②为左右按钮绑定点击事件,定义⼀个计数器全局变量n,代表轮播图中图⽚的位置,因为这⾥⼀个li的⼤⼩为500px,所以设置⼀个全局变量步长step为500(步长作为每次移动轮播图中ul的距离)let n = 0let step = 500oLeft.onclick = function () {if (n == -1) {//当移到第⼀张(n=0),再次点击时(n=-1),将n设置为4,跳转到最后⼀张图⽚的位置//装轮播图图⽚的ul的位置改为最后⼀张图⽚的位置(因为⼀张图⽚width为500px,所以最后⼀张在5*500=2500的位置)oUl.style.left = -2500 + 'px'n = 4}//target为移动距离,即:第n张图⽚ * 每张图⽚的widthlet target = -n * stepanimation(oUl, target)}oRight.onclick = function () {n++if (n == 6) {//当移到第最后⼀张(n=5),再次点击时(n=6),将n设置为1,跳转到第⼀张图⽚的位置oUl.style.left = 0 + 'px'n = 1}let target = -n * stepanimation(oUl, target)}3、通过点击下⾯的数字来实现轮播图切换//因为上⾯通过document.querySelectorAll('.indicators li') 获取到的li是通过伪数组的形式返回的,使⽤需要遍历该伪数组为每个li绑定点击事件for (let i = 0; i < oActives.length; i++) {oActives[i].onclick = function () {//为被点击的第i个设置样式为⾼亮setActive(i)//并且把i的值赋值给n(相当于记录当前应该显⽰第i张图⽚)n = i//设置移动的距离let target = -n * stepanimation(oUl, target)}}// 封装⼀个函数,实现li的⾼亮function setActive(ind) {//使⽤排他思想:清除全部,然后在单独设置类名for (let j = 0; j < oActives.length; j++) {oActives[j].className = ''}oActives[ind].className = 'active'}修改第2步中点击左右箭头滑动轮播图下⾯页⾯⾼亮不变的情况oLeft.onclick = function () {n--if (n == -1) {oUl.style.left = -2500 + 'px'n = 4}//调⽤setActive()函数,修改第n张图⽚页码的⾼亮状态setActive(n)let target = -n * stepanimation(oUl, target)}oRight.onclick = function () {n++if (n == 6) {oUl.style.left = 0 + 'px'n = 1}//如果n为5时,表⽰已经到了第6张图⽚(⽽第六张图⽚是和第1张⼀样的,只是⽤来滑动过渡,防⽌瞬间跳转的效果)所以需要设置页码为0(即第⼀张图⽚)的⾼亮状态 //这⾥使⽤了三元表达式,如果n为5,则设置第1张图⽚为⾼亮,否则设置第n张为⾼亮n == 5 ? setActive(0) : setActive(n)let target = -n * stepanimation(oUl, target)}4、设置定时器,在移⼊轮播图时清除定时器,移出时开启定时器(实现移⼊时停⽌⾃动播放,移出时开启⾃动播放)//在加载页⾯时应该先开启定时器,否则轮播图不能⾃动播放,需要等待⼀次移⼊且移出事件才会开启定时器timer = setInterval(function () {//调⽤右侧按钮绑定的点击事件oRight.onclick()}, 2000)oChevron.style.display = "block"clearInterval(timer)}//⿏标移出时,隐藏左右箭头,并且开启定时器 oCarousel.onmouseout = function () {oChevron.style.display = "none"timer = setInterval(function () {oRight.onclick()}, 2000)}完整代码如下:CSS样式如下:* {margin: 0;padding: 0;}.carousel {width: 500px;height: 200px;border: 1px solid red;margin: 100px auto;position: relative;overflow: hidden;}.carousel li {list-style: none;}/* 轮播内容 */.carousel-body {width: 3000px;height: 200px;position: absolute;}.carousel-body li {list-style: none;float: left;width: 500px;height: 200px;}.carousel-body li img {width: 100%;height: 100%;}/* 左右焦点按钮 */.carousel .chevron {position: absolute;top: 50%;height: 40px;width: 100%;transform: translateY(-50%);display: none;}.carousel .chevron-left,.carousel .chevron-right {width: 40px;height: 40px;background: #000;cursor: pointer;text-align: center;line-height: 40px;font-size: 30px;font-weight: bold;color: #fff;opacity: .3;border: 1px solid #fff;}.carousel .chevron-left {float: left;margin-left: 10px;}.carousel .chevron-right {margin-right: 10px;}/* 5.2 轮播指⽰器结构 */.carousel .indicators {position: absolute;right: 30px;bottom: 20px;}.carousel .indicators li {float: left;width: 20px;height: 20px;margin-right: 10px;background: rgba(255, 255, 255, .8);text-align: center;line-height: 20px;cursor: pointer;color: rgba(0, 0, 0, .5);}.carousel .indicators li.active {background: #09f;color: red;}HTML如下:<div class="carousel"><!-- 轮播内容 --><ul class="carousel-body"><li><a href="#"><img src="./images/1.jpg" alt=""></a></li><li><a href="#"><img src="./images/2.jpg" alt=""></a></li><li><a href="#"><img src="./images/3.jpg" alt=""></a></li><li><a href="#"><img src="./images/4.jpg" alt=""></a></li><li><a href="#"><img src="./images/5.jpg" alt=""></a></li><li><a href="#"><img src="./images/1.jpg" alt=""></a></li><!-- a3.1 新增1个li与第1张相同 --><!-- <li><a href="#"><img src="./images/1.jpg" alt=""></a></li> --> </ul><!-- 左右焦点按钮 --><div class="chevron"><div class="chevron-left">«</div><div class="chevron-right">»</div></div><!-- 5.1 轮播指⽰器结构 --><ol class="indicators"><li class="active">1</li><li>2</li><li>3</li><li>4</li><li>5</li></ol></div>js如下:let oCarousel = document.querySelector('.carousel')let oChevron = document.querySelector('.chevron')let oLeft = document.querySelector('.chevron-left')let oRight = document.querySelector('.chevron-right')let oUl = document.querySelector('.carousel-body')let oActives = document.querySelectorAll('.indicators li')let n = 0let step = 500let timertimer = setInterval(function () {oRight.onclick()}, 2000)oCarousel.onmouseover = function () {oChevron.style.display = "block"clearInterval(timer)}oCarousel.onmouseout = function () {oChevron.style.display = "none"timer = setInterval(function () {oRight.onclick()}, 2000)}oLeft.onclick = function () {n--oUl.style.left = -2500 + 'px'n = 4}setActive(n)let target = -n * stepanimation(oUl, target)}oRight.onclick = function () {n++if (n == 6) {oUl.style.left = 0 + 'px'n = 1}n == 5 ? setActive(0) : setActive(n)let target = -n * stepanimation(oUl, target)}for (let i = 0; i < oActives.length; i++) {oActives[i].onclick = function () {setActive(i)n = ilet target = -n * stepanimation(oUl, target)}}// 封装⼀个函数,实现li的⾼亮function setActive(ind) {for (let j = 0; j < oActives.length; j++) {oActives[j].className = ''}oActives[ind].className = 'active'}function animation(obj,target){// 清除定时器clearInterval(obj.timer)obj.timer=setInterval(()=>{// 读取元素当前位置let curX=obj.offsetLeft//定义⼀个步长let step=10// 判断将要移动的⽅向(⽐较⽬标位置与当前位置的⼤⼩)if(target<curX){step=-10}// 根据当前位置与⽬标位置,以及步长的关系判断// 只要⽬标位置与当前位置之间的距离 < 步长,就直接将元素的位置设置为⽬标为位置即可 if(Math.abs(target-curX)<Math.abs(step)){obj.style.left=target+'px'clearInterval(obj.timer)}else{// 计算下⼀步的位置let nextX=curX+step// 将下⼀步的位置赋值给obj.style.leftobj.style.left=nextX+'px'}},10)}以上就是本⽂的全部内容,希望对⼤家的学习有所帮助,也希望⼤家多多⽀持。
原生JavaScript实现轮播图效果

原⽣JavaScript实现轮播图效果本⽂实例为⼤家分享了JavaScript实现轮播图效果的具体代码,供⼤家参考,具体内容如下⼀、功能:1、每隔2.5s⾃动切换下⼀张轮播图;2、底部按钮切换对应轮播图;3、⿏标移⼊暂停⾃动切换,移出开始;4、⿏标移⼊,左右切换按钮出现,并可左右切换轮播图。
⼆、效果(GIF):三、代码:结构层(HTML)<div class="box"><img src="./image/banner1.jpg" /><div class="arrows left"><img src="./image/left.png" /></div><div class="arrows right"><img src="./image/right.png" /></div><ul class="buttom"></ul></div>表现层(CSS).box {width: 300px;height: 200px;background: #333;border-radius: 5px;overflow: hidden;margin: 0 auto;font-size: 0;position: relative;display: flex;align-items: center;}.box:hover .arrows{display: block;}.box img{width: 100%;}.arrows {width: 20px;text-align: center;position: absolute;top: 50%;transform: translateY(-50%);z-index: 9;font-size: 30px;display: none;}.left{left: 10px;}right: 10px;}.buttom{list-style: none;margin: 0;padding: 0;display: flex;justify-content: center;position: absolute;bottom: 10px;left: 50%;transform: translateX(-50%);}.buttom li {width: 20px;height: 5px;border-radius: 1px;background: #fff;margin: 0 2px;}.active {background: red !important;}⾏为层(JavaScript)let count = 0 // 创建当前轮播图下标// 获取DOM元素let box = document.querySelector('.box')let img = document.querySelector('img')let left = document.querySelector('.left')let right = document.querySelector('.right')let ul = document.querySelector('ul')// 轮播图⽚数组let imgArr = ['./image/banner1.jpg','./image/banner2.jpg','./image/banner3.jpg','./image/banner4.jpg']// 遍历图⽚数组添加对应底部切换li标签imgArr.forEach(() => {let li = document.createElement('li')ul.appendChild(li)})let lis = document.querySelectorAll('li') // 获取所有li标签lis[0].className = 'active' // 给第⼀个li标签添加选中状态// 执⾏切换轮播图function switchImg (type) {return function() {if(type == 1) {if(count - 1 < 0) {count = imgArr.length - 1} else {count += -1}} else {if(count + 1 >= imgArr.length) {count = 0} else {count += 1}}img.src = imgArr[count]lis.forEach((v,i) => {lis[i].className = ''if(i == count) {lis[i].className = 'active'})}}left.addEventListener('click', switchImg(1)) // 上⼀张轮播图right.addEventListener('click', switchImg(2)) // 下⼀张轮播图// 点击底部li标签切换轮播图lis.forEach((value,index) => {lis[index].addEventListener('click', () => {lis.forEach((v,i) => {lis[i].className = ''})count = indeximg.src = imgArr[count]lis[count].className = 'active'})})// 创建定时器每隔2.5s⾃动切换下⼀张轮播图let swiper = setInterval(() => {right.click()},2500)// ⿏标移⼊暂停⾃动切换box.onmouseenter = () => {clearInterval(swiper)}// ⿏标移出开始⾃动切换box.onmouseleave = () => {swiper = setInterval(() => {right.click()},1500)}以上就是本⽂的全部内容,希望对⼤家的学习有所帮助,也希望⼤家多多⽀持。
