救生艇说明书
救生艇操作规程

长荣门
文件编号:
GD5/D21
救生艇操作规程
页码:第1页共1页
一.放艇步骤
1.取下救生艇的艇罩
2.拔去保险插销,打开保险
3.两位艇员登艇,解去固艇索和塞艇底塞
4.抬起吊艇刹车手柄或者艇员手拉遥控拉手使吊艇臂倒出放艇
5.当艇到达船边,刹住吊艇机,带上首缆
6.放艇并启动艇机,将艇降至水面,解脱救生艇吊钩,
7.其他人员利用软梯或救生索登艇
8.解脱艇首缆,迅速驶离用合适的绳子带牢,停艇机
2.松够艇钢丝索挂钩,当前后不能同时挂钩时,先挂前钩,检查确保艇钢丝索顺直不扭
3.起动马达将艇收回到船边,人员下艇
4.继续收艇,在艇正确落位后,系牢有关绳索并旋开艇底塞
责任人:三副
救生艇中文说明书

LifeBoat(救生艇)中文规则游戏人数:4-6游戏概述:一艘孤独的救生艇漂泊在海上,船上载着你和你爱的人、你恨的人以及其他一些心怀鬼胎的家伙。
每一回合,你可以采取一次行动(划船、换座位、抢劫、特殊行动或者什么都不做)。
每一回合的最后,都会有一张航行卡被执行,它将会使一些人落水,使一些人感到口渴。
如果航行卡上有一只鸟的图案,那表示你们正在靠近陆地。
当你们翻出第四只鸟的时候游戏立刻结束。
游戏组件:90张卡牌,包括1) 42张补给卡(Provision),包括16张Water水壶6张Bundle of Cash现金3张Jewels珠宝3张Painting(2张3分,1张2分)美术品3张Medical Kit医疗包6张Weapon武器卡:2张Oar船桨,1张Blackjack短棍,1张Knife小刀,1张Gaffing Hook铁钩,1张Flare Gun信号枪 2张Buckets of chum死鱼1张Life Preserver救生圈1张Compass指南针1张Parasol遮阳伞2) 24张航行卡(Navigation)3) 6张角色卡(Character)4) 6张位置卡(Placeholder)5) 6张憎恨卡(HATE)6) 6张爱恋卡(LOVE)游戏还需要若干标记物(6个划船标记、6个争斗标记、3个飞鸟标记、40个伤害标记)6个角色: Lady Lauren 劳伦夫人Sir Stephen 斯蒂芬先生The Captain 船长First Mate 大副Frenchy 水手The Kid 小孩角色的属性:Size体型分数Survival Value生存分数游戏进程:所有的标记物都放在桌子中央待用。
将角色卡洗混后,每人抽取一张,正面向上放在自己面前。
整个游戏过程中,角色卡始终公开。
将憎恨卡和爱恋卡分类,分别洗牌,每人各抽取一张憎恨卡和爱恋卡,背面向上放在自己面前,必须保密。
爱恋卡上的就是你所爱的人,憎恨卡上的就是你所恨的人。
BH-E670全封闭救生艇说明书
BH-E670全封闭救生艇说明书
1、检查确认艇底塞已塞好。
2、检查快速遥控脱钩装置均处于正确的锁闭状态,保险功能有效。
3、确认救生艇上遥控释放拉绳的末端在艇内,并确保遥控绳在艇内部分无绳结。
4、断开充电线,电瓶开关至于BOTH供电位置。
5、检查燃油和冷却水液位,燃油截止阀应在“开”位置。
6、放艇操作前先确认艇、绞车和吊架周围,以及检查降放区海面是否有存在可能伤及乘员与艇的障碍物,加以排除或避免。
7、确认艇首缆与艇首部快速释放装置连接,一端连接于母船甲板上。
船舶救生设备操作规程

船舶救生设备操作规程1.救生(助)艇及其降落设备操作规程本船左右舷各配备一艘救生艇,救生艇生产厂家为船艇制造有限公司,型号为22TECB。
定员28人,尺寸为L6.5m X B 2.3m X D 1.2m.其中左舷的2号救生艇兼做救助艇。
1.1救生艇释放操作方法如下(正常释放):1)拔出充电插头。
2)拔出索紧销(刹车销)。
3)带好艇艏缆。
4)松开艇架夹箍。
5)人员登艇。
6)拉遥控拉索,下降艇身至水面(注意在旋出本艇时,不可以做细微调整。
)7)启动艇机(在落水之前启动艇机)。
8)拉下自动脱钩装置脱钩。
9)脱掉艇艏缆,驶离大船。
1.2救生艇自动脱钩操作方法:1)救生艇降至水面后通过防护罩“A”观察,确认旋纽“C”处于打开位置;2)从释放手柄上拔出安全销“B”;3)将释放手柄从“D”位置向后拉至位置“E”,吊钩被自动释放。
1.3如果救生艇不能到达水面,驾驶员可以进行应急操作,操作方法如下:1)驾驶员下发进行释放指示;2)警告乘员必须扶好和抓牢;3)从释放手柄上拔出安全销“B”;4)除去防护罩“A”,在紧急状态下打破玻璃罩;5)用左手将旋纽“C”逆时针方向旋转至开启,右手将释放手柄从“D”位置向后拉至位置“E”,吊钩被释放。
1.4救生艇吊钩复位方法如下:1)将前后钩头转动至关闭位置,可通过前后挂钩锁紧指示指针观察确认锁紧;2)将旋纽“C”顺时针方向旋转只关闭位置;3)将释放手柄从“E”位置向后拉至“D”位置;4)插上安全销“B”;5)前后艇员用力拨动钩头确认已吊钩已复位。
1.5救生艇回收方法如下;1)乘员转动吊钩钩头到完全关闭的位置,使钩头完全复位2)驾驶员根据“吊钩复位说明”进行复位。
3)驾驶员检查释放手柄在锁紧位置并且安全销已经插好。
4)驾驶员发出信号,缓慢提升救生艇。
5)当救生艇被刚好离开水面时,驾驶员发出信号停止提升。
6)驾驶员检查确认拉杆已经复位,乘员检查确认每个吊钩尾端与半圆柱销正确贴和。
7)如果一切正常,驾驶员发出信号将救生艇提升至安放位置绑牢。
救生艇与救助艇操作管理指导手册
救生艇与救助艇操作管理实验指导书周文烈 编写船艺实验室1救生艇筏操纵工作程序1.1救生艇的吊放和固定(重力式艇架)1)艇长站在艇舷边指挥,先取下艇罩;接着两人登艇,解开救生索,塞牢艇底塞,检查稳艇索是否解开,带好首尾缆绳,送出止荡索,拔去安全销,解脱安全钩,检查短拉索是否系牢,卸下梁木。
2)听到艇长口气后,副艇长提起艇机制动杆,将艇降至登艇甲板,艇员登艇。
3)人员登艇完毕后,松掉止荡索和短拉索,将艇继续降至水面,保持吊艇索有一定的受力,艇上人员向上拉起联动脱钩操纵环,使艇脱钩。
4)放艇人员利用绳梯或救生索下艇。
5)装上舵柄,解脱首尾缆,撑开并迅速划离大船约1/4里处待援。
6)机动艇降落水面之前即应把艇机发动好,以便艇落水后即可动车驶离。
1.2吊艇及固定1)吊艇前,艇上除留2名技术熟练的挂钩艇员外,其余人员从舷锑或绳梯登上大船。
2)由大船调整好艇首尾缆使艇处于吊艇滑车的下方,尽量做到既易于挂钩又勿使吊艇索挂钩过于松驰。
3)前后吊艇钩一旦挂上后,应立即将艇吊离水面。
横摇时应选择大船自另一舷回变到正浮位置时迅速挂钩,然后尽可能在大船向另一舷横倾时将艇吊离水面。
4)将艇吊至艇甲板时暂停,装上短拉索,收进艇的首尾缆绳并盘好,打开艇底塞放净积水,将止荡索滑车组收进艇内,最后两名挂钩艇员离艇。
5)继续吊艇至存放位置,然后将稳艇索系牢。
插好安全销,切断艇机电源,艇长检查确认妥当后宣布解散艇员。
2气胀式救生筏的投放2.1检查充气拉索是否牢固系结于筏架上,解去存放筒上系绳。
2.2拔去筏架上的保险插销,板动投放手柄,气胀式筏存放筒则靠自重滚出舷外。
2.3气胀筏充气后将其拉靠大船舷边。
2.4人员从绳梯或舷梯处登筏,如高度不超过4.5米,可直接从船上跳人筏内,如筏倾覆,应先予以扶正。
;3救生艇艇机操纵工作程序3.1操作规程1)检查燃油箱燃油是否足够,检查机油量。
2)将调速操纵杆手柄放在 "慢"与"快"的中间,离合器操纵杆应处于"停车" 位置。
救生艇释放步骤

团队合作请记住自己床头卡的职责一人释放救生艇操作详细步骤1.穿戴救生衣,携带保温服,双向无线电话,SART及抛绳器(在驾驶台),如有可能请携带航海日志,轮机日志等重要文件;2.放置登乘梯(如因船舶倾斜或者艇机,钩头等设备出现问题无法释放,悬于半空等情况出现,可从登乘梯爬回来,放救生筏或想其他逃生方法);3.打开前后保险杠,拔去救生艇充电插头,将艇首缆挂好;4.进入救生艇,艇内前部地板上打开黑色盖子,舱底有艇底塞,艇底塞为螺纹杆,逆时针上紧;5.系好安全带,启动艇机:(1)打开电源(在救生艇驾驶台座位膝盖位置有两个红色开关,一号电瓶,二号电瓶,任意选择一个打开);(2)启动艇机马达(在艇内驾驶台操纵面板上插着一把钥匙,顺时针旋转到底不要松手,直至听见马达启动的声音,如天冷打不着火,逆时针旋转钥匙,松手,放置30秒左右后,再次启动艇机马达);6.释放救生艇(成功启动艇机后,用力下拉左手处的细钢丝绳,直至救生艇降落至水面);7.打开辅助释放保险装置(在右脚位置侧面的红色杆,向前推到底);8.释放救生艇吊艇钩(在右胸前橘黄色把手E/F,脱开把手前拔掉把手上的保险销A,在把手右侧面,如果救生艇没有降落至水面,把手是无法打开的,因为没有触动艇底的浸水压力释放器,此时需要拉起橘黄色把手上面有机玻璃盖子B下面的应急释放装置C,向上拎起来,然后脱开橘黄色把手,注意!!!在做这个动作前确保救生艇离水面的高度不足以把自己摔死,如果太高或者还有其他逃生的可能请离开救生艇通过登乘梯爬回母船);9.成功脱钩以后,释放艇首缆(在橘黄色脱钩把手的下面,右手处红色把手);10.推动操车杆,尽快驶离大船,在离大船足够安全的距离后,可以发出求救信号,开启SART,雷达反射器及双向无线电话进行呼叫联系,白天橙色烟雾信号,晚上降落伞信号,近距离有船只经过晚上可用手持红光火焰信号及白天可用日光镜(反光镜)等。
一人手动释放救生筏操作步骤救生筏在水下2-4米水深会自动释放,如需要手动释放,准备工作同释放救生艇:穿戴,携带,放置登乘梯等解除救生筏保护链条,打开静水压力释放器上的扣环,拔去救生筏架下面的红色拉杆让救生筏滑入水中,如滑不下去,请推一把,入水后,筏首缆会拉动筏内气瓶自动充气,如没翻正需扶正。
救生艇发动机说明书_中文(09)

船用柴油机组使用维修说明书江苏科技大学镇江四洋柴油机制造有限公司目录1.注意事项 (1)2.前言 (2)图380J-3船用柴油机组外型安装图 (4)3.机组主要技术参数 (6)4.机组分类 (7)4.1按救生艇释放形式分类 (7)4.2、按冷起动辅助装置分类 (7)5.机组主要结构 (8)5.1燃油系统 (8)5.2润滑系统 (7)5.3冷却系统 (9)5.4电器系统 (10)5.5齿轮箱 (10)5.6电器线路图 (11)5.6.1、常规配置电器系统(配进气火焰预热器) (11)5.6.1.1、电器系统图及仪表板 (11)5.6.1.2、电器系统部件说明 (13)5.6.2、特殊配置电器系统 (13)5.6.2.1、电器系统图及仪表板 (13)5.6.2.2、电器系统部件说明 (16)5.7起动前注意事项 (17)6.机组基本操作 (17)6.1起动 (17)6.1.1弹簧起动器起动(若用户选配) (19)6.1.2手摇起动(若用户选配) (20)6.2运行 (20)6.3停车 (21)7.机组日常维护保养 (21)7.1基本注意事项 (21)7.2常规保养时间 (22)7.3润滑油规格 (22)7.4齿轮箱润滑油规格 (23)7.5主要零部件拧紧力矩 (23)7.6气缸盖螺栓拧紧顺序图 (23)7.7润滑油位检查 (24)7.8更换润滑油 (24)7.9充电发电机皮带张紧 (24)7.10更换齿轮箱润滑油 (24)7.11燃油系统放气 (24)7.12放冷却液 (25)7.13更换柴油滤芯 (25)7.14气门间隙调整 (25)7.15装在吊艇架或自由抛三落救生艇的柴油机组的起动与运行 (25)7.16电器系统的注意事项 (25)7.17机组贮存 (26)8.常见故障及处理方法 (27)8.1柴油机机起动困难 (27)8.2机组输出功率不足 (27)8.3柴油机排气冒黑烟 (28)8.4柴油机机油压力太低(油压报警) (28)8.5柴油机敲缸 (28)8.6柴油机过热 (29)8.7柴油机过速或飞车 (29)附录1:380J-3机组交货清单 (30)附录2:380J-3机组随机工具清单 (30)附录3:380J-3机组随机备件清单 (31)欢迎您选择四洋牌船用柴油机组1、注意事项1)确保正确地安装柴油机组。
救生艇说明书

6.1 电池和充电 救生艇必须采用矿用隔爆型蓄电池(小时定额为 15Ah),为了达到更好的 效果,每次使用后请立即对所有电池进行充电;必须专用的 48V 电池充电器。 6.2 48V 电池的电气连接 必须使用经过认证的电源箱、蓄电池;蓄电池必须通过快速连接器与推进
PDF 文件使用 "pdfFactory Pro" 试用版本创建
救生艇说明书kbt矿井抢险防爆动力皮划艇产品执行标准mtt15422000山西防爆电机集团有限公司二零一零年十一月出版pdf文件使用pdffactorypro试用版本创建概述矿井抢险防爆动力皮划艇使用在煤矿井下含有甲烷等爆炸性气体混合物的场所以下简称救生艇
KBT 矿井抢险防爆动力皮划艇 使用说明书
(产品执行标准 MT/T154.2-2000)
5
艇宽
1500mm
6
艇高
350mm
7
气室
7个
8 螺旋浆叶
3片
9
行程
1—1.2m/s
10 满载行程
1km
11 正常放电
3h
12 充电时间
4h
13 运行长度
12960m
PDF 文件使用 "pdfFactory Pro" 试用版本创建
3、锂离子电池充电注意事项: ①. 对锂离子电池充电,应使用专用的锂离子电池充电器。 ②. 锂离子电池充电采用“恒流/恒压”方式。 ③. 充电温度:电池应在 0°C—45°C 范围内进行充电。 ④. 电池应该每一个月对其充电一次。 ⑤. 电池前三次充电不小于 10 个小时。 ⑥. 电池放电截止电压 45V。
电机 电源
控制器
显示面板 操作杆
图 1 救生艇电气原理框图
救生艇机操作说明
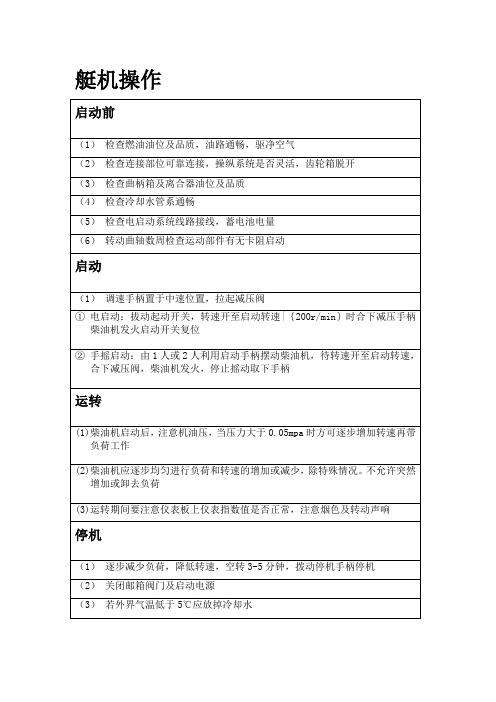
启动前
(1)检查燃油油位及品质,油路通畅,驱净空气
(2)检查连接部位可靠连接,操纵系统是否灵活,齿轮箱脱开
(3)检查曲柄箱及离合器油位及品质
(4)检查冷却水管系通畅
(5)检查电启动系统线路接线,蓄电池电量
(6)转动曲轴数周检查运动部件有无卡阻启动
启动
(1)调速手柄置于中速位置,拉起减压阀
1电启动:拔动起动开关,转速开至启动转速|{200r/min}时合下减压手柄柴油机发火启动开关复位
2手摇启动:由1人或2人利用启动手柄摆动柴油机,待转速开至启动转速,合下减压阀,柴油当压力大于0.05mpa时方可逐步增加转速再带负荷工作
(2)柴油机应逐步均匀进行负荷和转速的增加或减少,除特殊情况。不允许突然增加或卸去负荷
(3)运转期间要注意仪表板上仪表指数值是否正常,注意烟色及转动声响
停机
(1)逐步减少负荷,降低转速,空转3-5分钟,拨动停机手柄停机
(2)关闭邮箱阀门及启动电源
(3)若外界气温低于5℃应放掉冷却水
救生艇简易说明书

LifeBoat(救生艇)说明书游戏概述:一艘孤独的救生艇漂泊在海上,船上载着你和你爱的人、你恨的人以及其他一些心怀鬼胎的家伙。
每一回合,你可以采取一次行动(划船、换座、抢劫、使用一张特殊卡或者什么都不做)。
每一回合的最后,都会有一张航行卡(Navigation)执行,它将使一些人落水,使一些人感到口渴。
如果航行卡上有一只鸟的图标,那表示你们正在靠近陆地。
当你们翻出第四只鸟的时候游戏立刻结束。
游戏人数:4-7人。
游戏组成:一).42张补给卡(Provision):16张水壶(Water),6张现金(Bundle of Cash),3张珠宝(Jewels),3张美术品(Painting)( 2张3分1张2分),3张医疗包(Medical Kit),6张武器卡(Weapon),2张鱼桶卡(Buckets of chum),1张救生圈(Life Preserver),1张指南针(Compass),1张遮阳伞(Parasol) 二).24张航行卡(Navigation) 三).6张人物卡(Character) 四).6张位置卡(Placeholder) 五).6张憎恨卡(HTAE) 六).6张爱恋卡(LOVE)。
游戏还需要若干标记物(6个绿色划船标记,6个黄色争斗标记,3个蓝色飞鸟标记,40个红色伤害标记)游戏准备:洗牌后先每人抽取一张人物卡,将憎恨卡和爱恋卡背朝上洗牌后每人抽取一张(这两张卡片必须保密)。
将补给卡背朝上洗牌后,每人抽取一张。
将剩下的补给卡(Provision)背朝上放在桌子左面代表船头的位置。
将6张位置卡排成一行,然后按照正确的顺序从左至右放置6张人物卡:劳伦夫人(Lady Lauren),富豪斯蒂芬(Sir Stephen),船长(The Captain),大副(First Mate),水手(Frenchy),小孩(The Kid)。
每次的起始位置都是这样。
将航行卡(Navigation)洗牌后,背朝上放在小孩的右边(代表船尾)。
In_【企业管理手册】救生艇与救助艇操作管理指导手册

救生艇与救助艇操作管理实验指导书周文烈 编写船艺实验室1救生艇筏操纵工作程序1.1救生艇的吊放和固定(重力式艇架)1)艇长站在艇舷边指挥,先取下艇罩;接着两人登艇,解开救生索,塞牢艇底塞,检查稳艇索是否解开,带好首尾缆绳,送出止荡索,拔去安全销,解脱安全钩,检查短拉索是否系牢,卸下梁木。
2)听到艇长口气后,副艇长提起艇机制动杆,将艇降至登艇甲板,艇员登艇。
3)人员登艇完毕后,松掉止荡索和短拉索,将艇继续降至水面,保持吊艇索有一定的受力,艇上人员向上拉起联动脱钩操纵环,使艇脱钩。
4)放艇人员利用绳梯或救生索下艇。
5)装上舵柄,解脱首尾缆,撑开并迅速划离大船约1/4里处待援。
6)机动艇降落水面之前即应把艇机发动好,以便艇落水后即可动车驶离。
1.2吊艇及固定1)吊艇前,艇上除留2名技术熟练的挂钩艇员外,其余人员从舷锑或绳梯登上大船。
2)由大船调整好艇首尾缆使艇处于吊艇滑车的下方,尽量做到既易于挂钩又勿使吊艇索挂钩过于松驰。
3)前后吊艇钩一旦挂上后,应立即将艇吊离水面。
横摇时应选择大船自另一舷回变到正浮位置时迅速挂钩,然后尽可能在大船向另一舷横倾时将艇吊离水面。
4)将艇吊至艇甲板时暂停,装上短拉索,收进艇的首尾缆绳并盘好,打开艇底塞放净积水,将止荡索滑车组收进艇内,最后两名挂钩艇员离艇。
5)继续吊艇至存放位置,然后将稳艇索系牢。
插好安全销,切断艇机电源,艇长检查确认妥当后宣布解散艇员。
2气胀式救生筏的投放2.1检查充气拉索是否牢固系结于筏架上,解去存放筒上系绳。
2.2拔去筏架上的保险插销,板动投放手柄,气胀式筏存放筒则靠自重滚出舷外。
2.3气胀筏充气后将其拉靠大船舷边。
2.4人员从绳梯或舷梯处登筏,如高度不超过4.5米,可直接从船上跳人筏内,如筏倾覆,应先予以扶正。
;3救生艇艇机操纵工作程序3.1操作规程1)检查燃油箱燃油是否足够,检查机油量。
2)将调速操纵杆手柄放在 "慢"与"快"的中间,离合器操纵杆应处于"停车" 位置。
自由降落救生艇技术规格书
一、自由降落救生艇技 术 规 格 书1.性能1.1 自由降落救生艇,应根据国际海事组织 < IMO 第66 届海安会通过的 SOLAS 公约修正案及国际救生设备规则(LSA CODE)> 及 < IMO救生设备试验 海安 会决议MSC.81(70)>的要求设计建造。
1.2自由降落救生艇的设计能使其在海浪中具有足够的稳性并能自行扶正,在发 生淹覆时,能自动保持一个可为其乘员提供水面以上逃生口的状态。
1.3自由降落救生艇的特殊设计,能使其减小降落入水时的冲击加速度,且艇入 水后能产生积极的前冲运动。
1.4 带有底线部分仅适用于耐火型(油轮型)自由降落救生艇。
1.5对于耐火型(油轮型)自由降落救生艇,当艇在被油类引起的大火持续包围 不少于8 分钟时,可保护其乘员不受伤害。
2.主要参数型长:5.80m 型宽:2.50m 型高:3.00m 型深:1.10m重量:油轮型 3375kg(空艇) 5250kg(满载)滑道长度:5.80 m ~6.40m 滑道角度:35°最大乘员人数:253.材料及结构3.1结构材料:阻燃性玻璃纤维增强塑料。
树脂:阻燃性不饱和聚脂树脂。
玻璃 纤维:E级。
浮力材料:PL 充填泡沫。
金属材料:不锈钢,船用铝,铜,镀锌钢。
3.2结构:艇下外壳,下内壳,上外壳,上内壳分别采用整体模具成型;下外壳 与下内壳,上外壳与上内壳之间充以浮力材料,这种设计提供了很好的绝热性 能并能在艇外壳破损时阻止海水进入艇内。
3. 3 结构强度:艇体结构按规范要求进行设计,保证具有足够的强度以承受自由降 落、拖带以及在恶劣海况下使用时可能遭受的载荷。
4.自由降放及回收系统、推进系统、电气设备、标志、固定设备、属具等符合国际海事组织 < IMO第66届海安会通过的SOLAS公约修正案及国际救 生设备规则(LSA CODE)> 及 < IMO 救生设备试验 海安会决议MSC.81(70)>的要求5.操舵系统导管舵采用玻璃钢材料制成,由手动液压操舵装置驱动;导管舵可以保护螺 旋桨不与漂浮物相碰撞。
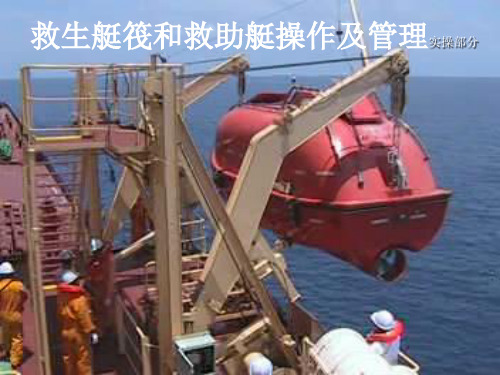
救生艇筏和救助艇操作及管理实操部分
• 4.救生艇吊钩复位操作 • ⑴首先负责脱钩手柄操作的艇
• •
•
员,将脱钩手柄向上推回大约 30°位置,如图2-1-11中手柄 A的移动方向和位置。 ⑵负责挂钩的首、尾艇员,用 手将吊钩推至吊升时的位置, 立即通知艇内负责脱钩手柄复 位操作的人员。 ⑶艇内操作人员将脱钩手柄再 向上推至大约60°(如图示21-11),恢复到脱钩前的位置。 如果复位前是应急释放,事先 应该将脱钩手柄的保险锁钮打 开松放归位。 ⑷向上扳动预备脱钩手柄恢复 到释放前的位置,将其保险锁 钮琐定(如图2-1-11)。
• (7)放艇人员操作控制吊臂的液压手柄,使吊艇臂慢慢
• • • •
被顶推至舷外,救生艇随吊艇的移动也被缓缓送出舷外一 定距离。 (8)操作控制吊艇索的液压手柄,慢慢松放吊艇索使救 生艇下降入水。 (9)艇内人员打开救生艇艇门并固定好。 (10)在艇尾座位上的两名艇员,穿好救生衣,走出艇外, 将救生艇左右两侧吊环从吊钩上脱下,并存放在吊环座盒 内固定好。 (11)艇长启动机器并操纵救生艇靠近大船,放艇人员借 助软梯登艇。 (12)全部人员登艇后操纵救生艇离开船舶进行海上求生。
救生艇筏和救助艇操作及管理实操部分
天津海员学校
陈玉鹏
第二篇
实操部分
• 第一章 救生艇的操作
第一节 救生艇的降放操作
• 一、重力式吊艇架的降放操作 • 在船上,当全体船员听到警报信号后,立即确认警报性
质(弃船求生警报信号是七短一长),做好海上求生的 必要准备,执行应变部署中各自的任务,迅速地到集结 场所集合,根据艇长的指挥做好放艇前的准备工作。船 长应该操纵船舶将放艇一舷为下风舷。 1.降放艇时的主要准备工作 (1)由一人将吊艇机手摇柄插入吊艇机专门的孔内, 顺时针摇动使救生艇重量集中在吊艇索上(注意事后将 手摇柄从艇机上取下)。 (2)将登艇软梯送至水面并固定好,以备登艇时使用。 (3)两个随艇下的人员(部分封闭式艇),登入艇内 分别将吊艇架横张索上两根救生索松放下来;将艇底塞 固定好;送出艇首、尾缆;确认限位索牢固。 (4)打开固定救生艇的稳索。 (5)打开固定吊艇架的安全栓。 指挥放艇人员确认准备工作完毕后,立即发出降放救生
自由降落救生艇模拟操作说明
自由降落救生艇模拟释放操作说明Operation instruction for simulative release of free fall lifeboat 警告!Warning!在模拟释放操作之前,请仔细阅读本操作说明,不正确的操作可能会导致严重的伤害事故,甚至死亡!Please read the following operation instruction carefully before simulate to release operate. The wrong operation could result the serious accident and even death.释放(见附图)Release(please see attached drawing)1.把艇架上的挂艇钢丝绳与救生艇尾部的挂艇装置相连。
Connect the wire rope of davit with the hanging plate of end of lifeboat.2.将艇架吊艇钩与救生艇吊环相连,回收钢丝绳至将要受力的状态。
Connect the hook of davit with flying ring of lifeboat, then recover the hook until the wire rope approach to endure the force.3.操作人员带好安全帽,穿好救生衣进艇,坐于操作位置并系好安全带。
Operator should wear the motorcycle safety helmet,put on the life jacket, sit at operation seat and fasten the safety belts4.根据艇释放操作说明中的释放步骤,把艇释放。
According to the hook release instruction to release the boat.注意:(Note)救生艇在模拟释放之前应检查所有设备运行良好。
海盗救生艇 Marina 用户指南说明书
Instructions for useMarina6100 2300, 6100 2305, 6100 2310, 6100 2320, 6100 2330, 6100 2345 (Hydraulic). 6100 2350, 6100 2355, 6100 2360, 6100 2370, 6100 2380, 6100 2385 (Elektrical).Shower stretcherContents1. Introduction (29)1.1. Introduction (29)1.2. Safety (30)1.3. Warranty (31)2. Use (33)2.1. First use (33)2.2. Activating (only for electrically adjustable versions) (33)2.3. Working with the Marina (33)3. Operation (34)3.1. Wheel blocking (34)3.2. Side-bars (35)3.3. Moving upwards / downwards (36)3.4. Tilting (37)3.5. Water drainage (37)3.6. Charging batteries (only for electrically adjustable versions) (37)4. Safety functions (39)4.1. Lock button (only for electrically adjustable versions) (39)4.2. Sleep setting (only for electrically adjustable versions) (39)4.3. Emergency lowering (only for electrically adjustable versions) (39)4.4. On / Off switch (only for electrically adjustable versions) (40)5. Cleaning and maintenance (40)6. Storage and transport (41)7. Removal of parts (42)8. Technical Specifications (42)8.1. Structure (42)8.2. Drive (43)8.3. Dimensions (43)9. Checklist for technical problems (45)10. Relationship with other supports (46)11. Electromagnetic compatibility (47)28 | Instructions for use | Marina Shower stretcher1. Introduction1.1. IntroductionThe Marina shower stretcher is a medical device for caring for and washing clients in an ergonomically responsible manner. Comfort is the primary consideration for both the client and the carer.The Marina comprises a mobile base frame and a height-adjustable supportingsurface with a soft mattress. The stretcher is also mobile. These functions are essential performances of the stretcher. The Marina is multi-functional in use and corresponds to the use of other devices such as beds, wheelchairs and shower chairs, hoisting equipment and sliders such as the EasySlide.The average life-cycle of the Marina is 10 years, assuming it is cleaned daily and regularly maintained according to the maintenance schedule supplied (See: Chapter 5 Cleaning and Maintenance).The Marina is a product with CE-marking. This marking corresponds with directive 93/42/ EC and the revised directive 2007/47/EC for medical devices of 21 March 2010. The Marina has been tested for electro-magnetic radiation according to the norm 60601-1-2.The Marina is available in the following hydraulic adjustable versions:• 6100 2300 – Standard.• 6100 2305 – Wide.• 6100 2310 – Central braking.• 6100 2320 – Short.• 6100 2330 – Long.• 6100 2345 – Wide and long.The Marina is available in the following electric adjustable versions:• 6100 2350 – Standard.• 6100 2355 – Wide.• 6100 2360 – Central braking.• 6100 2370 – Short.• 6100 2380 – Long.• 6100 2385 – Wide and long.Marina Shower stretcher | Instructions for use | 291.2. SafetyA failure to comply with the following safety points and the further definitions in Arraythese instructions for use could lead to hazardous working situations. Please read carefully before use.Use• Before you start work with the Marina, check that it has been disconnected from the charger (For electric adjustable Marina).• Make sure that the Marina brake is applied before transferring clients.• Notify the client before moving the Marina.• Be aware of obstacles when moving upwards and downwards.• Only relocate and move the Marina in the lower position.• When moving the Marina, do not adjust upwards or downwards.• Always try to move backwards over obstacles (rather than forwards).• It is not permitted to charge the Marina with more than 180 kg.• The Marina may not be used to transport loads other than people.• Only use original parts, supplied by Lopital.• Use the Marina in a clean and tidy working environment.• The Marina may only be operated by an authorised person.• T he use of components (chargers, cables, actuators, batteries, etc.) that have not been supplied by Lopital may result in increased emissions or decreased immunity of the Marina (For electric adjustable Marina).• Charge batteries in a well-ventilated, dry space.• Swimming pool locations are not considered to be ‘normal conditions’ and will substantially shorten the lifespan of certain components.• The Marina may not be raised by the upper surface.• During use of the Marina, the water temperature may not exceed 43°C.• P ortable and mobile RF communication equipment can affect medical devices.• M edical electrical devices involve special EMC precautions and must be used as per the EMC information outlined in the instructions for use.• The stretcher must not be used adjacent to or stacked on other products. However,should that be necessitated, it must be checked whether the stretcher functionsnormally in this configuration too.30 | Instructions for use | Marina Shower stretcher32 | Instructions for use | Marina Shower stretcherDrainage hoseSwivel wheel Ø12,5 cm Double brakingPillowBumperMattress Collapsible side-barHandcontrol Figure 1 Activating.Charger (Electrical Marina).FrameLever tiltingFoot pedalLocking side-bar2. Use2.1. First useBefore you use the Marina, you must check to ensure the components on page 32 are present. These components can be replaced by authorised individuals in the event of damage.These components are the applied parts of the Marina. These components may come into contact with the user(s) while the Marina is in use.2.2. Activating (only for electrically adjustable versions)The Marina must be activated before use, which can be done by pressing any button on the hand control for 2 seconds (See figure 1).2.3. Working with the MarinaStep 1Disconnect the Marina from the charger if necessary.Step 2Activate the Marina (See paragraph 2.2 Activating).Step 3Always apply the brake on the Marina when transferring clients(See paragraph 3.1. Wheel blocking).Transfer from bedStep 4Place the Marina alongside the bed with the head-end aligned with the head-side of the client.Step 5Lower the side-bars of the Marina (See paragraph 3.2. Side-bars).Step 6Move the bed base on the Marina to just above the bed mattress and collapse theside-bars downwards.Marina Shower stretcher | Instructions for use | 3334 | Instructions for use | Marina Shower stretcherStep 7Slide the Marina between the head and foot-end so that it protrudes as far as possible over the bed.Step 8Block the wheels on the Marina (See paragraph 3.1. Wheel blocking).Step 9Go to the other end of the bed and place the EasySlide between the client and the Marina.Step 10Use the EasySlide to slide the client from the bed to the Marina.Step 11Raise the horizontal surface of the Marina a few centimetres and close the side-bars.Step 12Take the brake off the Marina and remove the easy-slide (See paragraph 3.1. Wheel blocking).During this transfer, the side of the mattress can be either turned inside or out. Turning it out is beneficial as the person being transferred is protected from the rail on the side-bar.Make sure that the shower stretcher mattress does not get jammed between the horizontal surface of the Marina and the bed.3. Operation3.1. Wheel blocking• The brake can be applied on the Marina by pushing the blue lip (1) on the wheel downwards (See figure 2). • In order to take the Marina off the brake, the same lip on the wheel must be moved upwards by tapping the upper side of the lip (2) (See figure 2).Figure 2 Wheel blocking.protruding lip inwards and raising the side-bar with your other hand (1) (See figure 4)Figure 4 Locking side-bar.Figure 3 Semi-central brakingand moving forward.2113.3. Moving upwards / downwardsElectrically adjustable versionsMoving upwards• If the client is lying on the shower stretcher, first put the brake on thewheels and then move the stretcher upwards.• Move the stretcher upwards by pressing the button that shows an ‘up’arrow. The stretcher will then immediately move upwards(See figure 5).• You can stop the movement whenever you like by taking your finger offthe button.• During the upward movement, maintain contact with the client.• If the remote control is not being used, it can be hung on the side-bar or on the push-bar.• Ensure that the curly cable on the operating device does not get jammed.Moving downwards• Move the stretcher downwards by pressing the button that shows a‘down’ arrow. The stretcher will immediately move downwards(See figure 6).• You can stop the movement whenever you like by taking your finger offthe button.• During the downward movement, maintain contact with the client.Before moving the stretcher upwards, check to ensure there are no persons or objects in the vicinity of the stretcher.Hydraulically adjustable versionsMoving upwards• If the client is lying on the shower stretcher, first put thebrake on the wheels and then move the stretcher upwards.• The stretcher is moved upwards by depressing the long partof the foot pedal slowly and evenly (See figure 7).• During use of the pedal, the carer will stand by the longedge of the Marina so that the carer cannot twist theirupper body away from their feet.•During the upward movement, maintain contact with the client.Figure 6Moving downwards.Figure 7 Moving upwards.Figure 5Moving upwards.Figure 8 Moving downwards.Figure 9 Tilting.Figure 10 Charging point.If the LED is on continuous red, the batteries must be charged immediately.Make sure that you push the plug into the correct position in the charging point.Only the original charger for the Marina may be used. If you use another charger, Lopital cannot be held liable for any consequences, such as damage to the electronics.Once the charger is connected to the Marina, the controls will go into ‘sleep’ setting (all functions are switched off).The charger that must be used for the Marina is the ‘Mascot 2241’.• When the indicator light on the charger goes green, the batteries are charged. The charger can remain connected even when the batteries are completely charged. Leaving it connected will not cause any damage.• Disconnect the Marina from the charger.• Once activated, the Marina is now ready for use (See paragraph 2.2 Activating).LEDs not on:Stretcher is in ‘sleep’ setting and cannot be used or the on / off switch is off.Green light is on: Stretcher is ready for use.Orange light blinks: L ock button has beenactivated.Orange LED is on:B atteries need charging or batteries are partially charged.Red light blinks:B atteries must be charged (Stretcher can still be used).Red LED on:B atteries are completely empty and must be charged immediately.Charge batteries in a well-ventilated, dry space.After using the stretcher, connect it to the charger to maintain the batteries.Charge the stretcher at least once a week!Figure 11 Battery indication on handcontrol.Figure 12Lock button.21Figuur 13Emergency lowering button.4.4. O n / Off switch(only for electrically adjustable versions)In the centre of the undercarriage, there is an on / off switch. If the shower stretcher is not used for an extended period, you are advised5. Cleaning and maintenanceThe Marina must be cleaned after every use, with water and regular household cleaning agents. Remove excess soapresidues. Do not use any abrasive or other aggressive cleaning products (e.g. chlorine bleach). Practical experience has shown that regular household cleaning agents with limited alcohol content (max. 5%) are most suitable for this purpose.The product Neoquat combi ® is recommended for disinfection purposes (on the basis of long-term testing). For the best and most efficient cleaning of the mattress and the bed base, the mattress can be lifted up and removed. Dry the plate on which the mattress lies.Check the wheels regularly for hairs and dust and remove when necessary. Maintenance and repairs to the Marina may only be carried out by authorised personnel.Figure 14 On / off switch.6. Storage and transport7. Removal of partsAll parts that are replaced or removed can be sent back to Lopital BV. You may also offer the parts to the engineer for destruction. We will ensure that all parts are processed in an environmentally-friendly manner.If you take care of disposal of the product yourself, you must take account of the fact that batteries and chargers must be disposed of as small chemical waste.8. Technical SpecificationsThe Marina Shower stretcher belongs to category ‘BF’.The Marina Shower stretcher is a class 2 product.The Marina is splash-proof; this means that the Reflex can be used under the shower. This is given with instruction IPX4.8.1. StructureBase: aluminium + 2 layer powder coatingUpper frame: aluminium + 2 layer powder coatingSide-bars: aluminium + 2 layer powder coatingHinges: aluminium + 2 layer powder coatingWheels: plastic Ø 12.5 cm, double blocked,with semi-central brake Ø15 cmBath + covers: ABS with PMMA coatingMattress film: PVCAttachment components: stainless steel + galvanised steelWeight6100 2300 68 kg6100 2305 74 kg6100 2310 75 kg6100 2320 70 kg6100 2330 76 kg6100 2345 76 kg6100 2350 75 kg6100 2355 78 kg6100 2360 79 kg6100 2370 74 kg6100 2380 80 kg6100 2385 80 kgMaximum load: 180 kg8.2. DriveHigh-low drive: Hydraulic or electric, push-onlyControl box: 24 VDC, max. 250WBattery: 2 x 12V, 7AhBattery charger: 110-240 AC, 50/60 Hz, Max 0,35 A, Cable lenght 2,8 m 8.3. DimensionsExternal dimensions:6100 2300 209 x 80 x 62 / 116 cm (l x w x h).6100 2305 209 x 80 x 62 / 116 cm (l x w x h).6100 2310 209 x 80 x 62 / 116 cm (l x w x h).6100 2320 189 x 80 x 62 / 116 cm (l x w x h).6100 2330 225 x 80 x 62 / 116 cm (l x w x h).6100 2345 225 x 90 x 62 / 116 cm (l x w x h).6100 2350 209 x 80 x 62 / 116 cm (l x w x h).6100 2355 209 x 90 x 62 / 116 cm (l x w x h).6100 2360 209 x 80 x 62 / 116 cm (l x w x h).6100 2370 189 x 80 x 62 / 116 cm (l x w x h).6100 2380 225 x 80 x 62 / 116 cm (l x w x h).6100 2385 225 x 90 x 62 / 116 cm (l x w x h).Net lying space:6100 2300 ca. 195 x 65 cm (l x w).6100 2305 ca. 195 x 75 cm (l x w).6100 2310 ca. 195 x 65 cm (l x w).6100 2320 ca. 170 x 65 cm (l x w).6100 2330 ca. 206 x 65 cm (l x w).6100 2345 ca. 206 x 75 cm (l x w).6100 2350 ca. 190 x 65 cm (l x w).6100 2355 ca. 190 x 75 cm (l x w).6100 2360 ca. 190 x 65 cm (l x w).6100 2370 ca. 170 x 65 cm (l x w).6100 2380 ca. 206 x 65 cm (l x w).6100 2385 ca. 206 x 65 cm (l x w).Mattress edge height: ca. 20 cmBed base height: minimum 45 cm, maximum 99 cm Water drainage hose: Internal Ø 4 cmWheel base: 140 cmTrack width: 63 cmUndercarriage height: 13 cm10. Relationship with other supportsEasySlideThe EasySlide is the ideal device for transferring from bed to stretcher and vice versa. The physical burden and time required when using the EasySlide is minimal. The EasySlide is suitable for most bed and chair transfers from and to the Marina.HoistThe Marina has been designed for use with a hoist. The shower stretcher has an undercarriage height of 13 cm from a bed height of 65 cm.WheelchairIn lower settings of 50-55 cm, clients can be transferred from shower stretcher to wheelchair and vice versa. An ideal device to be used during this operation is the small EasySlide (and possibly a sliding board).BedThe Marina is primarily used to wash clients while lying down. Less able persons can be moved, using the EasySlide, from any (high or low) bed to the Marina in a lying position. The Marina must be brought to the same height as the bed to carry out this process.46 | Instructions for use | Marina Shower stretcher48 | Instructions for use | Marina Shower stretcherUser2300 12-2015。
自由降落救生艇技术规格书

一、自由降落救生艇技 术 规 格 书1.性能1.1 自由降落救生艇,应根据国际海事组织 < IMO 第66 届海安会通过的 SOLAS 公约修正案及国际救生设备规则(LSA CODE)> 及 < IMO救生设备试验 海安 会决议MSC.81(70)>的要求设计建造。
1.2自由降落救生艇的设计能使其在海浪中具有足够的稳性并能自行扶正,在发 生淹覆时,能自动保持一个可为其乘员提供水面以上逃生口的状态。
1.3自由降落救生艇的特殊设计,能使其减小降落入水时的冲击加速度,且艇入 水后能产生积极的前冲运动。
1.4 带有底线部分仅适用于耐火型(油轮型)自由降落救生艇。
1.5对于耐火型(油轮型)自由降落救生艇,当艇在被油类引起的大火持续包围 不少于8 分钟时,可保护其乘员不受伤害。
2.主要参数型长:5.80m 型宽:2.50m 型高:3.00m 型深:1.10m重量:油轮型 3375kg(空艇) 5250kg(满载)滑道长度:5.80 m ~6.40m 滑道角度:35°最大乘员人数:253.材料及结构3.1结构材料:阻燃性玻璃纤维增强塑料。
树脂:阻燃性不饱和聚脂树脂。
玻璃 纤维:E级。
浮力材料:PL 充填泡沫。
金属材料:不锈钢,船用铝,铜,镀锌钢。
3.2结构:艇下外壳,下内壳,上外壳,上内壳分别采用整体模具成型;下外壳 与下内壳,上外壳与上内壳之间充以浮力材料,这种设计提供了很好的绝热性 能并能在艇外壳破损时阻止海水进入艇内。
3. 3 结构强度:艇体结构按规范要求进行设计,保证具有足够的强度以承受自由降 落、拖带以及在恶劣海况下使用时可能遭受的载荷。
4.自由降放及回收系统、推进系统、电气设备、标志、固定设备、属具等符合国际海事组织 < IMO第66届海安会通过的SOLAS公约修正案及国际救 生设备规则(LSA CODE)> 及 < IMO 救生设备试验 海安会决议MSC.81(70)>的要求5.操舵系统导管舵采用玻璃钢材料制成,由手动液压操舵装置驱动;导管舵可以保护螺 旋桨不与漂浮物相碰撞。
救生艇操作规程张贴
救生艇操作规程张贴救生艇是船舶上的紧急逃生工具,对保护船舶人员的安全至关重要。
在船舶上张贴救生艇操作规程可以帮助船员熟悉紧急逃生流程,提高应对突发事件的能力。
以下为一份救生艇操作规程的范例,共计1200字。
救生艇操作规程第一章:救生艇基本知识1.1 救生艇的种类和数量1.1.1 根据船舶的类型和载重量,救生艇分为气囊救生艇和非气囊救生艇。
1.1.2 根据船舶的要求和规模,救生艇的数量应符合国际海事组织(IMO)的要求。
1.2 救生艇的构造和装备1.2.1 救生艇应具备耐火、防水、浮力和稳定性等基本特点。
1.2.2 救生艇应配备相应的救生用具,如绳索、浮标、救生衣、急救箱等。
1.3 救生艇的位置和操作要点1.3.1 救生艇应位于船舶便于发射和使用的位置。
1.3.2 救生艇操作员应熟悉船舶上的救生艇位置,并了解操作要点和紧急逃生流程。
第二章:救生艇的准备和发射2.1 救生艇的准备2.1.1 在紧急情况下,救生艇应随时保持可随时使用的状态。
2.1.2 救生艇上的气囊和配备物品应定期检查并保持完好。
2.2 救生艇的操作说明2.2.1 在发射救生艇前,操作员应穿戴好救生衣和其他救生装备。
2.2.2 确保所有救生艇成员了解紧急逃生的程序和顺序。
2.2.3 确保救生艇操作员了解救生艇的操纵和发射装置。
2.2.4 操作员应确保救生艇在紧急情况下能够迅速发射并稳定下水。
第三章:救生艇的应急操作3.1 逃生前的准备3.1.1 在救生艇发射前,每位成员应穿戴好救生衣和其他救生装备。
3.1.2 确保救生艇内部和外部的装备齐全,并随时准备就绪。
3.2 紧急逃生程序3.2.1 操作员应使用合适的手势或声音指示救生艇成员按照指定的顺序登上救生艇。
3.2.2 救生艇成员应按照指示迅速、有序地登上救生艇。
3.2.3 紧急逃生时,救生艇应迅速驶离船舶,并确保救生艇周围的安全。
第四章:救生艇的维护和保养4.1 每日例行检查4.1.1 每天都应对救生艇的结构和设备进行检查。
救生艇操作说明

救生艇操作说明救生艇操作说明Operation manual for lifeboat一.救生艇释放操作规程LAUNCH PROCEDURE OF LIFE BOAT1.解开救生艇的捆绑钢丝,拔掉充电电源Remove lashings and electrical supply.2.人员登艇Embarkation.3.坐好位置,系好安全带Take seated positions and secure seat belt.4.确保救生艇内没有松动的物品Ensure no loose or movable objects in boat.5.关闭救生艇门窗Secure hatches.6.去掉安全栓的保险插销,向上拉开安全栓再向前推Remove red safety pin on safety lever, and lift safety lever up and forward.7.启动引擎Start engine.8.确定救生艇下方水面无障碍物Ensure clear landing area.9.逆时针操作主释放装置盘,直到救生艇脱钩.Turn main release anti-clockwise ,until hook is open and boat is released.10.驶离大船。
Steer away.二 .使用吊臂放艇步骤Procedure for launch life boat by davit.首先按下液压电源,启动动力装置。
Switch on the power of hydraulic pump.1.解开小艇顶部及尾部的绑扎绳。
Remove the lashes and secures.2.用LEVER A控制杆控制横向吊钩,使之与小艇的吊环连接,然后絞紧Operate lever A, connect the hook and the ring of life boat, make it tight.3.用LEVER A控制杆使小艇沿着滑道下滑,直到小艇的前部超过滑道的末端。
救助艇操作和保养手册
救助艇操作和保养⼿册救助艇操作和保养⼿册OPERATION AND MAINTENANCE MANUAL FOR A RESCUEBOATM/V:⼤连丰顺国际海运有限公司DALIAN FENGSHUN INTERNATIONAL SHIPPING CO., LTD⽬录Content1.总则general2.总布置图general arrangement3.属具清单 equipment list4.正确的关闭释放装置的检查⽅法Method of checking proper closure of release hooks5.释放操作程序Launching operation5.1 释放前准备Preparation before launching5.2 调整艇⾸缆Setting painter5.3 拔出绞车⼿刹车⼿柄安全销Release of safety pin for winch hand brake lever5.4 释放吊艇架臂制动器Release of davit arm stop5.5 登救助艇Boarding the rescue boat5.6 释放程序Launching procedure5.7 脱钩操作Release gear operation5.8释放艇⾸缆和救助艇操作Painter release and rescue boat operation6. 收艇操作Recovery operation6.1释放装置复位程序Resetting procedure of release hook6.2收艇程序 Recovery procedure6.3 固定程序Stowage procedure7.检查和保养 Inspection and maintenance1总则General救助艇存放在船舷边。
当情况紧急时船员可以从其存放位置直接登救助艇实施救助⾏动。
The rescue boats are stored on the boat davits on sides of the ship. In case of emergency, the crew can board the rescue boat and carried out rescue action with the rescue boat directly from its stowage position.吊艇架上应有释放装置(吊架臂,框架,登承台,吊艇钢丝,滑车和固定索)和艇绞车(减速齿轮,⼿动刹车和离⼼式刹车)。
- 1、下载文档前请自行甄别文档内容的完整性,平台不提供额外的编辑、内容补充、找答案等附加服务。
- 2、"仅部分预览"的文档,不可在线预览部分如存在完整性等问题,可反馈申请退款(可完整预览的文档不适用该条件!)。
- 3、如文档侵犯您的权益,请联系客服反馈,我们会尽快为您处理(人工客服工作时间:9:00-18:30)。
