明电舍卷绕机专用变频器VT634说明书C2-1
德力西 CDV2s电动机断路器 使用说明书

CDV2sX-32旋钮式电动机断路器CDV2sX-32旋转式电动机断路器1-脱扣测试孔2-透明盖3-整定电流范围4-整定旋钮5-进线端6-顶辅助触头保护盖7-旋钮8-闭锁装置.1.16I>>TEST0.1-0.16A9-指示窗10-出线端11-螺钉拧紧扭矩12-额定绝缘电压Ui、 冲击耐受电压Uimp13-产品规格14-技术参数15-认证标识及符合标准CDV2sX-32CDV2sX-32表3 辅助触头基本参数名称型号额定绝缘电压U i V额定冲击耐受电压Uimp kV 约定自由空气发热电流Ith使用类别额定工作电压Ue V 额定工作电流Ie A 正装 辅助触头组25042.5AC-1524248 1.2511012300.5DC-13241480.3侧装 辅助触头组69066AC-15486110 4.5230 3.3380 2.2DC-132464852200.5产品附件辅助触头基本参数见表3,其他参数见表4。
表4 辅助触头其他参数与性能序号内容参数1外壳防护等级IP202配用熔断器型号gG 、RT36-003配用熔断器额定电流(A ): 4: 104额定限制短路电流Iq(kA)15导线(导线/导电排)插入端子之前应剥掉绝缘长度(mm )86导线(导线/导电排)截面积mm20.75~0.257允许夹入导体(导线/导电排)的最大根数28接线端紧固螺钉(或螺栓)大小M 3.59接线端紧固螺钉拧紧力矩(N·m )1.2最大安装数量12AEV2s11AEV2s20ANV2s11ANV2s20AEV2s AUV2s断路器瞬时电磁脱扣动作特性应符合表7的规定。
表7瞬时脱扣特性序号试验电流起始状态规定时间预期结果10.8Ii冷态t≥0.2s不脱扣2 1.2Ii冷态t<0.2s脱扣启动时间-电流特性曲线。
20 °C 时,设定电流倍数对应的平均动作时间时间(s)x 设定电流 (Ir)1从冷态开始,3 极2从冷态开始,2 极3从热态开始,3 极内部电气原理示意图23.845.331.589.5max13.513.517.49.49.418.437.4 ANV2s11, ANV2s20AUV2s,ASV2s断路器工作原理保护与协调短路电流小于或等于断路器的额定极限短路分断能力时,应由断路器承担保护;当短路电流大于断路器的额定极限分断能力时,则由熔断器或断路器进行保护。
SAMCO-VM05系列变频器中文操作说明书

由衷地感謝您購買日本サンケン(S A N K E N )牌32位元R I S C 架構、具有V /F 控制模式與Se n s o r l e s s �或稱速度推算式、無速度傳感式�向量控制模式可供選擇的S A M C O -v m 05系列雙重額定、高性能、靜音型汎用變頻器。
裝設這部變頻器之後�您的三相感應馬達立刻具有無段變速的機能。
由於32位元R I S C 演算速度快、程式容量大�因此具備多機能、操作容易的特點。
為了讓您充分地享用這部變頻器的特性與機能�務必詳閱這本操作說明書。
當您使用中發現任何疑難時�請立刻就近向士林電機的F A 產品經銷商洽詢�或撥電話�03�597-0921轉231~233通知士林電機自動化營業部營業三課�我們的專業人員隨時都等待著為您做熱誠地服務。
在此我們再度深切地期望您永遠愛顧 的優良產品。
台灣總代理�士林電機廠股份有限公司安全通告●為了要預先防範您以及第三者因採用本產品而導致對人體危害或財產損失�因此在這本操作說明書上明確地登載著各種警告與禁制事項�請務必遵守。
使用本產品以前請務必詳閱這本操作說明書�並請依照正確的方式使用。
●這本操作說明書務必放置在設備、機台的旁邊或是便於取閱的地方�以便使用者查閱。
●對於安全注意事項等級�在說明書內分為「危險」、「注意」兩級。
操作人員如果不理會而誤操作時�可能會造成人體傷害或對財物造成損失的事項。
注意操作人員如果不理會而誤操作時�可能會對人體造成傷亡事件的事項。
危險※還有�即使是「注意」所記載內容都是屬於必需遵守的重要事項�不予理會時亦可能會引發不可臆測的後果。
標誌之後所敘述的是具體的強制內容。
強制�不可不為�標誌標誌之後所敘述的是具體的禁止內容。
禁止�不可為�標誌標誌之後所敘述的是具體的注意內容。
注意標誌標誌之後所敘述的是具體的危險內容。
危險標誌標誌解說安全注意事項1.請採用3-2-(1)所指定的螺絲�將變頻器牢牢地固定在平整的水泥或金屬板類的牆面上�並加以適當地屏蔽。
MOTEC α系列伺服使用手册v1.1
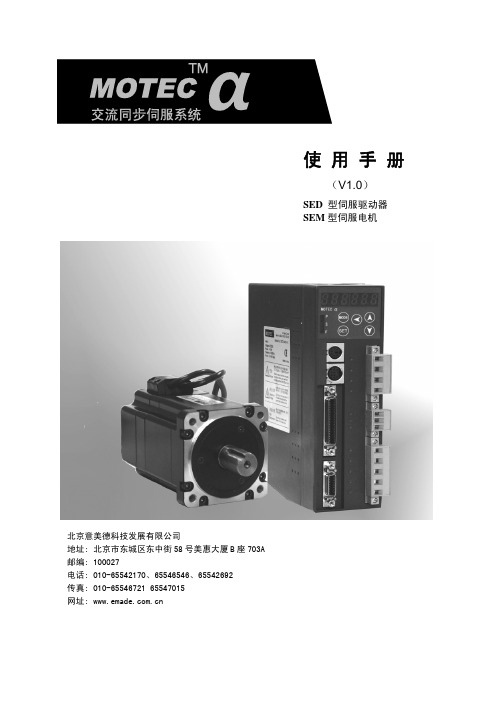
使用手册
(V1.0)
SED 型伺服驱动器 SEM 型伺服电机
北京意美德科技发展有限公司 地址: 北京市东城区东中街 58 号美惠大厦 B 座 703A 邮编: 100027 电话: 010-65542170、65546546、65542692 传真: 010-65546721 65547015 网址:
α系列伺服电机系统使用手册
章 节:
第 1 章. 伺服电机与驱动器型号 第 2 章. 安装和配线 第 3 章. 驱动器 JP2 接口(I/O 控制信号)功能说明 第 4 章. 面板操作操作说明 第 5 章. 性能调整功能说明 第 6 章. 控制模式 第 7 章. 监视项 第 8 章. 伺服驱动器工作时序图 第 9 章.驱动器 JP3/JP4(通信端口)定义、接线及通信协议 附录 1: 驱动器参数列表 附录 2:故障信息、故障原因及处理措施 附录 3:SEM 电机电气参数
1. 伺服电机与驱动器型号 ................................................................. 5 1.1 伺服电机型号定义 ................................................................. 5 1.2 伺服驱动器型号定义 ............................................................... 6 1.3 α系列驱动器与电机组合 ........................................................... 6 1.4 α系列驱动器外形及安装尺寸图 ..................................................... 8
电镁 MP-4000 电机保护多功能电机保护设备说明书

MP-4000motor protectionMulti-function motor protectionIntroducing Eaton’s MP-4000 motor protection relayEaton’s MP-4000 motor protective relay combines all the featuresyou need to ensure medium voltage motor protection, faultdiagnostics, power metering, and communication versatility intoone unique, cost-effective package. There’s no need for additionalrelays or unnecessary meters when you invest in the MP-4000.The MP-4000 expands upon industry-leading protection, controland diagnostics found in the MP-3000 by adding voltage inputsfrom voltage transformers (VTs). The VT inputs enable additionalprotection functions and metering such as under/overvoltage,negative sequence voltage, power factor and frequency. Otherupgraded features include new metering capabilities and newcommunication options such as Modbus T RTU and DeviceNet.EReliable construction, flexible features and user-friendly operationmake the MP-4000 an industry-leading motor protectionrelay powerhouse.2EATON CORPORATION MP-4000LED IndicatorsDetermineat a glancethe statusof MP-4000relay, trip andalarm targets Restricted AccessFunctions areprotected bysecurity coverwith meter sealProgram Button For inputting settings EmergencyOverride ButtonAllow motor to startin emergency situationsHelp ButtonComprehensivehelp featureright at thedeviceDisplay Mode andNavigation ButtonsQuickly access real-time information,relay settings andhistorical data, withminimal keystrokesThe Emergency Override default status is “disabled.” If enabled by the user, it will allowemergency starting by resetting the thermal bucket, start-inhibiting timers and counters.3EATON CORPORATION MP-4000Intel-I-T rip overload protection: precision and easeOnly the MP-4000 motor protection relay features the Intel-I-Trip, an algorithm created by Eaton to develop customer trip curves for both maximum protection and capacity use of your motor. The Intel-I-Trip overloadprotection algorithm provides adaptive trip characteristics based on motor temperature when motor RTDs are connected through an optional URTD module.Is developing a custom trip curve a difficult task? Not for the MP-4000. Simply enter the motor manufacturer’s data into the device, and it will provide you with the optimal curve for that specific motor. And, should you require assistance, the “Help” menu provides true user-friendly operational assistance.No programming technician or engineer needed. Simply let the MP-4000 do all the work.The MP-4000 offers complete metering and protection functionsin accordance with the IEEE device numbers listed in this diagramPowerful featuresLeading-edge voltage sag resistanceUnfortunately, power quality disturbances have become a way of life for modern plants and factories. The good news is that, with the right equipment, voltage sags do not have to disrupt protection for your equipment. The MP -4000 provides the industry-leading voltage sag ride-through (SRT) at 20 cycles and can easily withstand most power quality events. The MP-4000 will also withstand a typical utility reclosure, which lasts 15 to 20 cycles, without resetting. Now, a “light flicker” doesn’t mean your motor will stop running.4EATON CORPORATION MP-4000UL 1053 certifiedWhen it comes tomicroprocessor relays, safety should always come first. Eaton’s MP-4000 conforms to the UL T 1053 ground fault protection standard, thereby eliminating the need for a separate ground relay—saving you wiring, space, time and money.Conformal coating: standard protectionHarsh weather or environmental conditions are no reasons for your motor relay to malfunction. Eaton is the only company offering a protective, dielectric conformal coating, standard on the MP-4000, allowing the relay to stand up to the harshest of elements.Bottom line protection If you’ve been looking for a cost-effective solution that eliminates the need for redundant relays while simultaneously providinguser-friendly, flexible operational capabilities, you’ve now come to the end of your search. Eaton has built the MP-4000 on a foundation of stability, flexibility and reliability to provide you with the highest quality motor protection relay available.Armed/Disarmed:Maintenance without worry Periodic testing, settings changes and other maintenance tasks should not produce concerns about tripping the motor. The MP-4000’s Armed/Disarmed feature solves this typical relay problem. Arm the relay, and the motor remains protected. Disarm the relay, and it will indicate a trip condition without actually tripping the motor.Motor Start Profile intelligent controlThe MP-4000’s Motor Start Profile E provides start logic control to protect the motor against excessive starts or starting the motor before it has sufficiently cooled for both linestarters and reduced voltage starters. This feature can also be used to develop protection settings on old motors where data is not available.Better troubleshooting with advanced data logsAs the old saying goes, “Y ou don’t know where you’re going unless you know where you’ve been.” With the MP-4000, you can plan for the future because of its advanced event logging and activity monitoring systems. Motor currents, temperatures and conditions are consistently monitored and displayed either locally or remotely on your PC via optional Power Xpert T Server Core Software. The MP-4000’s event log provides motor operating records for the twenty most recent trips or alarm events, the one hundred most recent motor events, and the last four starts with accurate time and date stamping.The MP-4000 reduces downtime by taking the guesswork out of troubleshooting.5EATON CORPORATION MP-4000Optimizing your powersystemPower Xpert Architecture Eaton looks at your power system as a strategic asset— an approach we call PowerChain E solutions. We help you manage your power system for peak performance by integrating and optimizing the elements of your power system and ensuring that they align with your business goals. Eaton’s Power Xpert Architecture is the backbone of Eaton’s PowerChain Management. Power Xpert Architecture can transform your power system into an integrated, agile systemthat you can monitor, control and manage effectively andefficiently. The MP-4000 provides the information you need to assess how efficiently your motor is running and, in the event of a trip, to get it back online as quickly as possible. Power Xpert Server Core Software turns simple data into valuable information, empowering you to make informed operating and predictive maintenance decisions, troubleshoot, and increase reliability and uptime.Power Xpert Architecture lets you decide how much of your power system you want to integrate, and theappropriate integration method. Start small by monitoring one or two MP-4000s through a basic Web interface using a Power Xpert Gateway. Or easily connect the MP-4000 to the rest of your power management system—integrate it into a process control, facility management or enterprise- wide information system with the Power Xpert Server Core Software.Drawout case:Replacement without interruption With the MP-4000, evenreplacements do not have to slow down your operations. The optional quick-release drawout case allows you to pull out the relay for periodic testing or retrofits with no disruption to the process.6EATON CORPORATION MP-4000Cost-effective MD-3000 optionTired of buying all those relayswith protective functions thatyou seldom use? Eaton knowsthat and offers you a cost-effective package with just whatyou need. With the MP-4000,you have no worries abouthaving to map your protectionsto specific outputs or having toknow Boolean logic to controlyour motor. The MP-4000 is easyto use and configure. On theother hand, if you require specialprotections such as a motordifferential protection, weoffer you our MD-3000 relay,designed in conjunction withthe MP-4000, to protect yourlarge motors.7 EATON CORPORATION MP-4000Eaton’s Electrical Sector isa global leader in power distribution, power quality, control and automation, and monitoring products. When combined with Eaton’s full-scale engineering services, these products provide customer- driven PowerChain E solutions to serve the power system needs of the data center, industrial, institutional, public sector, utility, commercial, residential, IT, mission critical, alternative energy and OEM markets worldwide. PowerChain solutions help enterprises achieve sustainable and competitive advantages through proactive management of the power system as a strategic, integrated asset throughout its life cycle, resulting in enhanced safety, greater reliability and energy efficiency. For more information, visit /electrical.Eaton Corporation Electrical Sector1111 Superior Ave. Cleveland, OH 44114United States877-ETN-CARE (877-386-2273) © 2010 Eaton CorporationAll Rights ReservedPrinted in USAPublication No. BR02602001E / Z10383 December 2010PowerChain Management is a registered trademark of Eaton Corporation.All other trademarks are property of theirrespective owners.。
明电舍品牌变频器的VT240EL系列故障代码详表 六

明电舍品牌变频器的VT240EL系列故障代码详表六明电舍品牌变频器的VT240EL系列故障代码详表故障代码故障现象/类型故障原因解决对策EMS 表示顺控指令EMS 为ON当设置C00-4=2(紧急停止故障输出)时,顺控指令EMS 输入时,该故障发生采取针对EMS 原因的对策,关闭EMS 输入PM-1 停止时,功率模块故障①主电路元件可能损坏②可能发生负载的短路③可能由于干扰发生误动作①请更换主回路元件②请确认电机接线的安全③请改善接地方法?接线距离等针对干扰的设置环境PM-2 恒速运行时,功率模块故障①主电路元件可能损坏②可能发生负载的短路③可能由于干扰发生误动作①请更换主回路元件②请确认电机接线的安全③请改善接地方法?接线距离等针对干扰的设置环境PM-3 加速时,:功率模块故障①主电路元件可能损坏②可能发生负载的短路③可能由于干扰发生误动作①请更换主回路元件②请确认电机接线的安全③请改善接地方法?接线距离等针对干扰的设置环境PM-4 减速时,功率模块故障①主电路元件可能损坏②可能发生负载的短路③可能由于干扰发生误动作①请更换主回路元件②请确认电机接线的安全③请改善接地方法?接线距离等针对干扰的设置环境PM-5 制动时,功率模块故障主电路元件可能损坏②可能发生负载的短路③可能由于干扰发生误动作①请更换主回路元件②请确认电机接线的安全③请改善接地方法?接线距离等针对干扰的设置环境PM-6 ACR调节时,功率模块故障主电路元件可能损坏②可能发生负载的短路③可能由于干扰发生误动作①请更换主回路元件②请确认电机接线的安全③请改善接地方法?接线距离等针对干扰的设置环境PM-7 励磁时,功率模块故障①主电路元件可能损坏②可能发生负载的短路③可能由于干扰发生误动作①请更换主回路元件②请确认电机接线的安全③请改善接地方法?接线距离等针对干扰的设置环境PM-9 自动调整时,功率模块故障①主电路元件可能损坏②可能发生负载的短路③可能由于干扰发生误动作①请更换主回路元件②请确认电机接线的安全③请改善接地方法?接线距离等针对干扰的设置环境OC-1 停止时,输出过流①主电路元件可能损坏②可能由于干扰发生误动作①请更换主回路元件②请改善接地方法?接线距离等针对噪声的设置环境OC-2 恒速运行时,输出过流①可能发生负载的突变(轿厢的振动)②可能发生了电源电压降低的情况③可能由于干扰发生误动作④可能进行磁极位置推定时,设定值不恰当①请进行ASR的调整,抑制轿厢的振动②请确认电源是否正常③请改善接地方法?接线距离等针对干扰的设置环境④请进行以下参数的调整降低B39-1,2 的设定值降低B39-4 的设定值增加B39-5 的设定值OC-3 加速时,输出过流①可能加速过快②可能ACR 控制的设定不恰当①请降低加速度设定值②请调整ACR 增益(A20-0)、时间常数(A20-1)OC-4 减速时,输出过流①可能减速过快①请降低减速度设定值OC-5 制动时,输出过流①可能发生了负载的突变?短路OC-6 ACR调节时,输出过流①可能发生了负载的突变?短路①请确认电机的接线和负载状态OC-7 励磁时①可能发生了负载的突变?短路①请确认电机的接线和负载状态OC-9 自动调整时,输出过流①可能设定值不恰当①请降低B19-1,2 的设定值②进行PM 自动调整时,请降低B39-1,2 的设定值OV-1 停止时,主回路直流电压的瞬间值超过规定值①可能发生了电源电压升高的情况①请把电源电压降低到额定范围内OV-2 恒速运行时,主回路直流电压的瞬间值超过规定值①可能发生了电源电压升高的情况②可能出现了运转速度和负载突变的情况①请把电源电压降低到额定范围内OV-4 减速时,主回路直流电压的瞬间值超过规定值①可能发生了电源电压升高的情况②可能出现了运转速度和负载突变的情况③可能直流再生(DB)功能没有充分动作④可能发生了电源电压升高的情况①请把电源电压降低到额定范围内②请确认电机的接线和负载状态③请确认直流再生(DB)回路的接线状态另外,请确认制动电阻(DBR)的电阻值是否过大④请把电源电压降低到额定范围内故障代码故障现象/类型故障原因解决对策OV-5 制动中,主回路直流电压的瞬间值超过规定值①可能发生了电源电压升高的情况①请把电源电压降低到额定范围内OV-6 ACR调节时,主回路直流电压的瞬间值超过规定值①可能发生了电源电压升高的情况①请把电源电压降低到额定范围内OV-7 预激磁时,主回路直流电压的瞬间值超过规定值①可能发生了电源电压升高的情况①请把电源电压降低到额定范围内OV-9 自动调整时,主回路直流电压的瞬间值超过规定值①可能发生了电源电压升高的情况①请把电源电压降低到额定范围内UV-1 停止时,运行中主回路的直流电压低于65(%)规定值可能发生了电源电压的降低、输入缺相、瞬间电压降低以及瞬间停电的情况UPS运行时,如果顺控输入[UPS-MSK:UPS 运行]为ON,本故障不发生检查和修复电源系统UV-2 恒速运行时,运行中主回路的直流电压低于65(%)规定值可能发生了电源电压的降低、输入缺相、瞬间电压降低以及瞬间停电的情况UPS运行时,如果顺控输入[UPS-MSK:UPS 运行]为ON,本故障不发生检查和修复电源系统UV-3 加速时,运行中主回路的直流电压低于65(%)规定值可能发生了电源电压的降低、输入缺相、瞬间电压降低以及瞬间停电的情况UPS运行时,如果顺控输入[UPS-MSK:UPS 运行]为ON,本故障不发生检查和修复电源系统UV-4 减速时,行中主回路的直流电压低于65(%)规定值可能发生了电源电压的降低、输入缺相、瞬间电压降低以及瞬间停电的情况UPS运行时,如果顺控输入[UPS-MSK:UPS 运行]为ON,本故障不发生检查和修复电源系统UV-5 制动时,行中主回路的直流电压低于65(%)规定值可能发生了电源电压的降低、输入缺相、瞬间电压降低以及瞬间停电的情况UPS运行时,如果顺控输入[UPS-MSK:UPS 运行]为ON,本故障不发生检查和修复电源系统UV-6 ACR调节时,行中主回路的直流电压低于65(%)规定值可能发生了电源电压的降低、输入缺相、瞬间电压降低以及瞬间停电的情况UPS运行时,如果顺控输入[UPS-MSK:UPS 运行]为ON,本故障不发生检查和修复电源系统UV-7 励磁时,行中主回路的直流电压低于65(%)规定值可能发生了电源电压的降低、输入缺相、瞬间电压降低以及瞬间停电的情况UPS运行时,如果顺控输入[UPS-MSK:UPS 运行]为ON,本故障不发生检查和修复电源系统UV-9 UV-9 自动调整时,行中主回路的直流电压低于65(%)规定值可能发生了电源电压的降低、输入缺相、瞬间电压降低以及瞬间停电的情况UPS运行时,如果顺控输入[UPS-MSK:UPS 运行]为ON,本故障不发生检查和修复电源系统PHL.1 输入缺相①可能交流输入电源缺相②可能交流输入的接线脱落③存在负载的转矩脉动过大的可能性可由【C22-7:缺相检测功能选择】设定故障检测的有无①请检查交流输入电源排除故障原因②请确认交流输入接线的紧固状态和端子区周边情况③请进行ASR 的调整UOH1 过热①可能装置的冷却风扇存在错误②可能周围温度升高③可能装置的通风口和散热片堵塞如果在运行过程中发生,运行停止后故障停止①如果存在错误,请更换风扇②请在周围温度低于50℃的环境中使用③请排除通风口周围的异物SP-1 过速①存在设定值错误的可能性②可能电机速度因负载而上升①过速水平通过C24-0 设定请确认设定值②请确认负载侧没有异常SP-2 速度检测异常①存在设定值错误的可能性②可能发生了编码器的断线故障通过【C24-1:速度检测错误检测选择】进行故障输出设定①错误水平通过C24-2 设定,请确认设定值②请确认编码器没有异常SP-3 速度偏差异常①存在设定值错误的可能性②存在由于转矩不足发生速度跟随延迟的可能性③存在发生轿厢错误振动的可能性④可能使用防反转功能时,编码器断线可能向负载牵引的方向运行时,轿厢发生激烈的振动可能速度指令值与实际速度的差过大通过【C24-4:故障输出转换】进行故障输出设定①异常电平通过C24-5,6 设定,请确认设定值②a)请确认负载是否过大b)请确认转矩限幅设定值A10-3,4、A11-2,3 以及过流限制值B18-0 的设定值是否过小注)如果过分增加这些设定值,超出装置额定,产生过流等,会缩短产品使用寿命,所以请在额定范围内使用③请进行ASR 的调整④请确认编码器是否有错误SP-5 编码器初始化异常①UVWABZ 类型,当UVW 信号的错误状态持续2秒时②串行ABZ,当正常的串行信号不能在2 秒内检测出来时③省接线类型,端子3的信号为"000"或者"111"的状态持续2 秒时④SIN?COS 类型,SIN?COS 信号的错误状态持续2 秒时①、②请确认C51-0 的设定是否与使用的编码器相配③、④a)请确认到速度检测选件的接线是否正确b) 请确认编码器是否有错误SP-6 编码器异常①串行ABZ,接收数据错误持续2 秒②省接线类型,启动时UVW 信号计测失败③SIN?COS 类型,运行中SIN?COS 信号断线检测,故障输出停止后①请确认到速度检测选件的接线是否正确②、③请确认编码器是否有错误ATT-1 设定错误①可能电机没有正确连接②可能电机额定参数B00,B01 没有正确设定③当为PM 电机自动调整(B19-0=6)时,可能电机运转时没有检测到Z 相信号①请确认电机接线②请确认电机参数B00,B01 的设定值③a)请确认Z 相信号线是否断线b)请确认编码器脉冲数设定B01-8 是否与使用的编码器相配故障代码故障现象/类型故障原因解决对策ATT-2 运算出错可能电机额定参数B00,B01 没有正确设定请确认电机参数B00,B01 的设定值ATT-3 运行出错可能在电机运转的自动调整模式下,负载没有被分开请把负载分开或者减轻负载ATT-4 负载出错可能在电机运转的自动调整模式下,负载没有被分开请把负载分开或者减轻负载ATT-5 完成处理出错可能电机额定参数B00,B01 没有正确设定请确认电机参数B00,B01 的设定值ATT-6 收敛运算出错可能电机额定参数B00,B01 没有正确设定请确认电机参数B00,B01 的设定值ATT-8 电压稳定出错存在ACR 响应低的可能性①自动调整时,请以每级100(%)增加B19-1,2②磁极位置检测时,请调整ACR 设定B39-4,5③共通,请增加B39-3ATT-9 重试错误计测结果D16-0,1 不在基准值内请增加B39-1,2,使D16-0,1 在基准值内OL-1 装置额定过载负载过大运行中,当输出电流超出装置过载基准时发生过载基准:超过180(%)5 秒、170(%)30 秒的反时限特性请确认装置容量是否恰当OL-2 DB 电阻过载①可能减速过快②可能DB 电阻值太大③可能【C22-4:DB 过载】的设定值不恰当表示由于再生电力DB 电阻过载了使用VT240EL 时,请将C22-4 的值设定为[ =0.0 ],利用热敏继电器等外部回路保护DB电阻①请降低加速度设定②请选定与装置匹配的电阻值③请确认C22-4 的设定值,设定一个合适的值OL-3 电机额定过载①可能电机过载②存在【C22-8,9:电机过载基准电流、时间】的设定值不恰当的可能性①请确认电机功率是否恰当②请确认C22-8,9 的设定值,设置一个合适的值IO-1 门关断回路错误①可能由于外部干扰等发生了误动作②可能运行指令输入后立刻(6ms 以内)发生了OC,OV,GRD,PM 的故障①请查找装置周边的干扰信号来源,并排除②请确认故障历史D20-0,查找原因IO-2 2 A/D 转换错误可能由于外部干扰等发生了误动作请查找装置周边的干扰信号来源,并排除IO-3 IO-3 电流检测错误①可能电流检测用连结器错误接线②可能电流检测器发生错误①请正确连接连结器②如有错误请更换IO-C 外部抱闸IDET 错误①存在着【C15-1:IDET 电平】的设定不恰当的可能性②存在着由于电机接线错误不产生励磁电流的可能性外部抱闸打开时,输出电流没有达到IDET 水平(C15-1)设定B46-0 f1 =1(出厂值)时不动作①请确认C15-1 的设定值,设置一个恰当的值②请确认电机接线是否正确IO-D D RUN-OFF 错误①存在着B46-6 的设定值不恰当的可能性②可能RUN 信号顺序发生错误①请根据控制器的设定,设置恰当的值②请确认控制器的设定和顺控输入是否有误IO-E 外部抱闸反馈错误①可能来自外部抱闸的反馈信号没有被输入当外部抱闸打开指令MBRK 和外部抱闸反馈输入MBRK_ans 与【B46-7:抱闸反馈出断时间】的设定时间不一致时动作当设定B46-7=0.00 时不动作请确认抱闸反馈信号[MBRK_ans]的输入状态IO-F 温度检测错误当检测出错误的温度或者温度检测器发生错误时动作请确认温度检测器是否有误,如果有误请更换GRD.1 停止时,接地①可能动力线、电机内发生了接地故障②存在着由于噪声发生误动作的可能性可通过【C31-1:接地检测功能】进行故障输出的设定①请修复接地处②请改善接地方法、接线距离等针对干扰的接地环境GRD.2 恒速运行时,接地①可能动力线、电机内发生了接地故障②存在着由于噪声发生误动作的可能性可通过【C31-1:接地检测功能】进行故障输出的设定①请修复接地处②请改善接地方法、接线距离等针对干扰的接地环境GRD.3 加速时,接地①可能动力线、电机内发生了接地故障②存在着由于噪声发生误动作的可能性可通过【C31-1:接地检测功能】进行故障输出的设定①请修复接地处②请改善接地方法、接线距离等针对干扰的接地环境故障代码故障现象/类型故障原因解决对策GRD.4 减速时,接地①可能动力线、电机内发生了接地故障②存在着由于噪声发生误动作的可能性可通过【C31-1:接地检测功能】进行故障输出的设定①请修复接地处②请改善接地方法、接线距离等针对干扰的接地环境GRD.5 制动时,接地①可能动力线、电机内发生了接地故障②存在着由于噪声发生误动作的可能性可通过【C31-1:接地检测功能】进行故障输出的设定①请修复接地处②请改善接地方法、接线距离等针对干扰的接地环境GRD.6 ACR调节时,接地①可能动力线、电机内发生了接地故障②存在着由于噪声发生误动作的可能性可通过【C31-1:接地检测功能】进行故障输出的设定①请修复接地处②请改善接地方法、接线距离等针对干扰的接地环境GRD.7 励磁时,接地①可能动力线、电机内发生了接地故障②存在着由于噪声发生误动作的可能性可通过【C31-1:接地检测功能】进行故障输出的设定①请修复接地处②请改善接地方法、接线距离等针对干扰的接地环境GRD.9 自动调整时,接地①可能动力线、电机内发生了接地故障②存在着由于噪声发生误动作的可能性可通过【C31-1:接地检测功能】进行故障输出的设定①请修复接地处②请改善接地方法、接线距离等针对干扰的接地环境CPU.1 VT240EL 可能由于外部干扰等发生误动作CPU.1表示CPU 的动作滞塞这在通常运行中也能被检测到CPU.8这个只是显示,不进行门关断和FLT 的输出CPU1~6,7,8 为特定故障输出功能,无法输出请查找装置周边的干扰信号来源,并排除请关闭电源再打开一次CPU.2 CPU 运算动作出错CPU.1表示CPU 的动作滞塞这在通常运行中也能被检测到CPU.8这个只是显示,不进行门关断和FLT 的输出CPU1~6,7,8 为特定故障输出功能,无法输出请查找装置周边的干扰信号来源,并排除请关闭电源再打开一次CPU.3 CPU 内置RAM 出错可能由于外部干扰等发生误动作CPU.1表示CPU 的动作滞塞这在通常运行中也能被检测到CPU.8这个只是显示,不进行门关断和FLT 的输出CPU1~6,7,8 为特定故障输出功能,无法输出请查找装置周边的干扰信号来源,并排除请关闭电源再打开一次CPU.4 外部RAM 出错CPU.1表示CPU 的动作滞塞这在通常运行中也能被检测到CPU.8这个只是显示,不进行门关断和FLT 的输出CPU1~6,7,8 为特定故障输出功能,无法输出请查找装置周边的干扰信号来源,并排除请关闭电源再打开一次CPU.5 E2PROM 校验和出错可能由于外部干扰等发生误动作CPU.1表示CPU 的动作滞塞这在通常运行中也能被检测到CPU.8这个只是显示,不进行门关断和FLT 的输出CPU1~6,7,8 为特定故障输出功能,无法输出请查找装置周边的干扰信号来源,并排除请关闭电源再打开一次CPU.7 E2PROM 读取出错可能由于外部干扰等发生误动作CPU.1表示CPU 的动作滞塞这在通常运行中也能被检测到CPU.8这个只是显示,不进行门关断和FLT 的输出CPU1~6,7,8 为特定故障输出功能,无法输出请查找装置周边的干扰信号来源,并排除请关闭电源再打开一次CPU.8 E2PROM 写入出错可能由于外部干扰等发生误动作CPU.1表示CPU 的动作滞塞这在通常运行中也能被检测到CPU.8这个只是显示,不进行门关断和FLT 的输出CPU1~6,7,8 为特定故障输出功能,无法输出请查找装置周边的干扰信号来源,并排除请关闭电源再打开一次CPU.A 栈溢出可能由于外部干扰等发生误动作CPU.1表示CPU 的动作滞塞这在通常运行中也能被检测到CPU.8这个只是显示,不进行门关断和FLT 的输出CPU1~6,7,8 为特定故障输出功能,无法输出请查找装置周边的干扰信号来源,并排除请关闭电源再打开一次CPU.B 内置PLC 过载可能由于外部干扰等发生误动作CPU.1表示CPU 的动作滞塞这在通常运行中也能被检测到CPU.8这个只是显示,不进行门关断和FLT 的输出CPU1~6,7,8 为特定故障输出功能,无法输出请查找装置周边的干扰信号来源,并排除请关闭电源再打开一次E.FLT 外部故障①可能顺控输入出错②存在C05-8~F 的设定值不恰当的可能性①请排除EXFLT 发送源的错误另外,请确认顺控输入线是否有错误②请恰当地设置C05-8~FDER E2PROM 数据错误表示储存在E2PROM 中的各种数据发生了错误(注意)如果这个显示发生在起动时,该内容并不能储存在内部正常起动后,并不能在故障历史(D20-0)中读取该内容请进入D20-2 修改数据进行所有参数(包括维修)的出厂值存入时,请按C09-7=2409、C09-7=2407的顺序设定EL-1 电机锁定出错①可能电机的机械抱闸没打开②可能编码器的AB 相序反了(速度不反?br />?br /> ③可能编码器接线断了(速度不反?br />?br /> ①请确认机械抱闸没有出错,正常打开②a)请确认编码器接线是否有错b)请恰当地设定C50-2③请确认编码器接线是否有错EL-2 反转出错①反转过大,使用负载传感器的反馈功能时,可能转矩偏置方向反了(B16-6 不恰当)②可能转矩偏置设定不恰当,(使用模拟量时B16-7~B,使用数字量时B16-1~5、C05-0~2)③可能反馈输入端(使用模拟量时为负载传感器反馈端、使用数字量时为顺控输入端)出错④使用防反转功能时,该控制参数不恰当①请根据轿厢的移动方向和电机的运转方向,恰当地设置B16-6 的值②请恰当地设置这些参数③请确认输入线是否有错④请调整控制参数(B4B-0~3)EL-3 停止时的位置变动出错停止时,可能电机没有被机械抱闸锁定停止时,电机的轿厢超过设定值移动时发生错误设定C27-4=0.0 时不进行错误监测设定C27-5=1 时,不进行故障输出请确认电机的机械抱闸没有错误,闭合时电机被锁定。
明电舍DSF1(CN)_E ST-3656

2-1 3-1 3-1 3-2 3-2 3-5 3-7 3-8 3-9 3-9 3-10 3-10 3-12 3-14 3-19 4-1 4-1 4-1 4-9 4-15 4-18 4-24 4-25 5-1 5-1 5-2 5-4 5-4 5-5 5-5 5-5 6-1 7-1 7-1 7-3 履历-1
如果不遵守以下几点,就有可能导致变频器损坏且无法修复。 (1) 请在变频器规格范围内使用。请勿用于其他用途。 (2) 输入输出端子请连接适当的电线。 (3) 请让变频器的散热器、主体能够充分散热。周边请勿放置妨碍散热的物品。 (4) 请严格遵守本使用说明书中所述注意事项的规定。
本变频器及采用变频器驱动的电动机,有时会产生电磁噪声,成为周围环境的噪声源。安装前请 先研讨电源系统和安装场所及接线方法。特别是请从物理上和电气上都远离医疗器械等使用微弱 信号的设备,并且采取必要措施以应对噪声干扰。
3-2-1 继电器输入功能 ·················· 3-2-2 继电器输出功能 ·················· 3-2-3 速度传感器输入功能················· 3-2-4 通信用连接器/端子座 ················ 3-2-5 电源用端子座 ··················· 3-2-6 复位按钮 ····················· 3-3 络筒动作 ························ 3-3-1 继电器输入输出与 BH 动作 ·············· 3-3-2 继电器输入输出与 TR、CR 动作 ············ 3-3-3 挂丝时的动作 ··················· 3-3-4 TR 相关参数变更及变更时间 ············· 第4章 控制功能及参数设置 ··················· 4-1 参数一览 ························ 4-1-1 监控参数 ····················· 4-1-2 参数A ······················ 4-1-3 参数B ······················ 4-1-4 参数C ······················ 4-1-5 参数U ······················ 4-2 功能介绍 ························ 第5章 操作面板(选购件) ··················· 5-1 操作面板的连接 ····················· 5-2 操作面板的功能 ····················· 5-3 参数 ·························· 5-3-1 参数模式 ····················· 5-3-2 变更模式内参数编号显示 ··············· 5-3-3 监控模式 ····················· 5-3-4 参数的设置变更 ·················· 第6章 规格一览 ························· 第7章 故障一览表 ······················· 7-1 故障一览表 ······················· 7-2 分段LED显示的含义 ·················· 故障履历 ····························
维科特机电 AM322042H 产品说明书

AM322042H产品说明书在86及110、130混合式步进电机的应用中(主要需求点为900RPM以内,高转矩、高响应、高性价比的定位控制,或者变频调速控制),三相混合式步进电机应用最为广泛。
AM322042H以各行业客户对高压型3相步进电机驱动器的需求为目标(主要针对86及110的电机驱动应用),以行业应用经验为基础,以为客户提供高性价比、高稳定性的产品为宗旨。
整套控制方案在充分吸收和掌握国外先进技术的基础上进行深入优化和提炼而成。
硬件设计上充分考虑强弱电隔离、输入信号兼容、关键物料选用国际知名厂家经典、成熟的元器件;软件上采用改进型的矢量控制技术及其快速算法,并具备自测试运行、单双脉冲模式设置、多重保护等功能。
特点Ø单电源输入,电压范围:交流AC110-240V;Ø驱动电流从有效值1.2A/相到4.2A/相分16档可调;Ø16档细分配置,最高分辨率60000步/转;细分配置小于等于2000步/转时采用微细分控制方式;Ø最高响应频率可达200KHz;Ø相位记忆功能:断电时能自动记忆电机转子位置;Ø保护功能:过热保护/过流保护、相间短路保护、断线保护、过压保护;Ø自动半流:输入脉冲脉冲停止超过100ms时,电流自动减半,减少电机发热;Ø全隔离:信号输入输出隔离;强弱电隔离(pwm控制信号及电流采样均隔离);Ø5V/24V信号输入兼容设计;Ø控制模式可选:脉冲/方向模式;或者双脉冲输入模式;Ø自测试功能:无需外界脉冲信号即可驱动电机以30转/分钟的速度转动;Ø体积为178*109*68 (mm^3),推荐安装空间至少为200*160*90 (mm^3);净重:1kg(加包装箱1.3kg);颜色:白色;Ø采用工业级芯片设计,运行环境温度:-25゜~+60゜(0゜以下不结冰);Ø采用矢量控制及微细分控制技术,在运行平稳性、噪音、震动、发热等方面较传统驱动器均有较大的提升;电流设定驱动器工作电流有效值IM(以下简称IM)由D1-D4拨码开关设定(注:工作电流为正常运行时的电流有效值给定,抱轴时的电流则为对应工作电流的50%,简称自动半流。
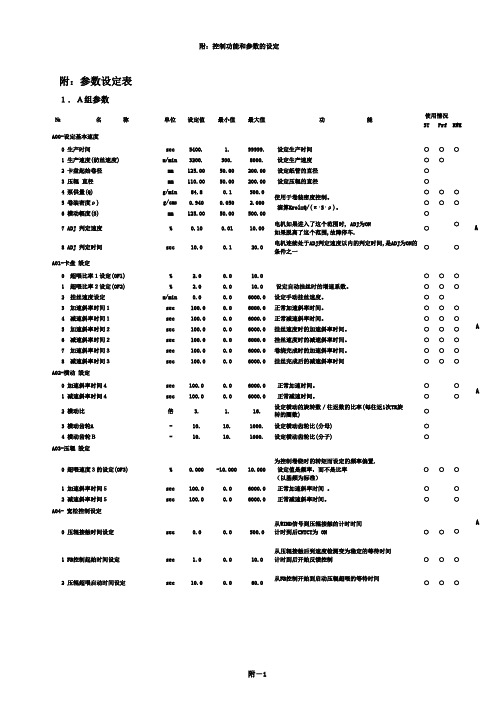
明电舍卷绕机专用变频器VT634说明书C2-1
附:参数设定表1.A组参数№名称单位设定值最小值最大值功能使用情况ST Prf RWEA00-设定基本速度0 生产时间1 生产速度(纺丝速度)2 卡盘起始卷径3 压辊直径4 泵供量(Q)5 卷装密度ρ)6 横动幅度(S)7 ADJ 判定速度8 ADJ 判定时间A01-卡盘設定0 超喂比率1设定(OF1)1 超喂比率2设定(OF2)2 挂丝速度设定3 加速斜率时间14 减速斜率时间15 加速斜率时间26 减速斜率时间27 加速斜率时间38 减速斜率时间3A02-横动設定0 加速斜率时间41 减速斜率时间42 横动比3 横动齿轮A4 横动齿轮BA03-压辊設定0 超喂速度3的设定(OF3)1 加速斜率时间52 减速斜率时间5A04- 宽松控制设定0 压辊接触时间设定sec0.00.0500.0从WIND信号到压辊接触的计时时间计时到后CNTCT为 ON ○从压辊接触后到速度检测变为稳定的等待时间计时到后开始反馈控制○从FB控制开始到启动压辊超喂的等待时间○○○%sec sec 0.000100.0100.0-10.0000.00.0为控制卷绕时的转矩而设定的频率偏置.10.000 设定值是频率,而不是比率○(以基频为标准)6000.0 正常加速斜率时间。
6000.0 正常减速斜率时间。
○○○○○○sec sec 倍--100.0100.03.10.10.0.00.01.10.10.6000.0 正常加速时间。
6000.0 正常减速时间。
16.1000.1000.○○○○%% m/min sec sec sec sec sec sec2.02.00.0100.0100.0100.0100.0100.0100.00.00.00.00.00.00.00.00.00.010.010.0设定自动挂丝时的增速系数。
○○○○○○○○○○○○○○○○○○○○○○○○○○sec m/min mm mm g/min g/cm3 mm% sec5400.3200.125.00110.0084.80.940125.000.1010.01.500.50.0050.000.10.05050.000.010.199999. 设定生产时间8000.设定生产速度200.00 设定纸管的直径200.00 设定压辊的直径500.02.000500.0010.0020.0使用于卷装密度控制。
纳美电机产品简介说明书
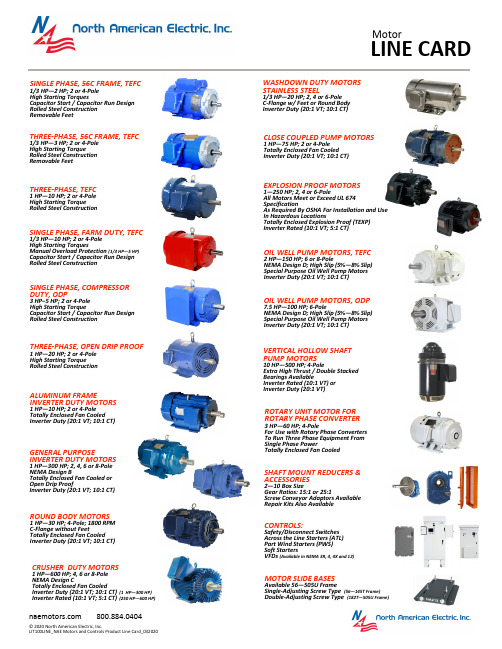
SINGLE PHASE, 56C FRAME, TEFC1/3 HP—2 HP; 2 or 4-Pole High Starting TorquesCapacitor Start / Capacitor Run Design Rolled Steel Construction Removable FeetSINGLE PHASE, COMPRESSOR DUTY, ODP3 HP–5 HP; 2 or 4-Pole High Starting TorqueCapacitor Start / Capacitor Run Design Rolled Steel ConstructionTHREE -PHASE, 56C FRAME, TEFC1/3 HP—3 HP; 2 or 4-Pole High Starting Torque Rolled Steel Construction Removable FeetTHREE -PHASE, TEFC1 HP—10 HP;2 or 4-Pole High Starting Torque Rolled Steel ConstructionTHREE -PHASE, OPEN DRIP PROOF1 HP—20 HP;2 or 4-Pole High Starting Torque Rolled Steel ConstructionWASHDOWN DUTY MOTORS STAINLESS STEEL1/3 HP—20 HP; 2, 4 or 6-Pole C -Flange w/ Feet or Round Body Inverter Duty (20:1 VT; 10:1 CT)CLOSE COUPLED PUMP MOTORS1 HP—75 HP;2 or 4-Pole Totally Enclosed Fan Cooled Inverter Duty (20:1 VT; 10:1 CT)EXPLOSION PROOF MOTORS1—250 HP; 2, 4 or 6-PoleAll Motors Meet or Exceed UL 674 SpecificationAs Required By OSHA For Installation and Use In Hazardous LocationsTotally Enclosed Explosion Proof (TEXP) Inverter Rated (10:1 VT; 5:1 CT)OIL WELL PUMP MOTORS, TEFC2 HP—150 HP; 6 or 8-PoleNEMA Design D; High Slip (5%—8% Slip) Special Purpose Oil Well Pump Motors Inverter Duty (20:1 VT; 10:1 CT)OIL WELL PUMP MOTORS, ODP7.5 HP—100 HP; 6-PoleNEMA Design D; High Slip (5%—8% Slip) Special Purpose Oil Well Pump Motors Inverter Duty (20:1 VT; 10:1 CT)VERTICAL HOLLOW SHAFT PUMP MOTORS10 HP—500 HP; 4-PoleExtra High Thrust / Double Stacked Bearings AvailableInverter Rated (10:1 VT) or Inverter Duty (20:1 VT)ROTARY UNIT MOTOR FOR ROTARY PHASE CONVERTER3 HP—60 HP; 4-PoleFor Use with Rotary Phase Converters To Run Three Phase Equipment From Single Phase PowerTotally Enclosed Fan CooledSHAFT MOUNT REDUCERS & ACCESSORIES2—10 Box SizeGear Ratios: 15:1 or 25:1Screw Conveyor Adaptors Available Repair Kits Also AvailableCONTROLS:Safety/Disconnect Switches Across the Line Starters (ATL) Part Wind Starters (PWS) Soft StartersVFDs (Available in NEMA 3R, 4, 4X and 12)MOTOR SLIDE BASESAvailable 56—505U FrameSingle -Adjusting Screw Type (56—145T Frame) Double -Adjusting Screw Type (182T—505U Frame)GENERAL PURPOSEINVERTER DUTY MOTORS1 HP—300 HP; 2, 4, 6 or 8-Pole NEMA Design BTotally Enclosed Fan Cooled or Open Drip ProofInverter Duty (20:1 VT; 10:1 CT)ALUMINUM FRAMEINVERTER DUTY MOTORS1 HP—10 HP;2 or 4-Pole Totally Enclosed Fan Cooled Inverter Duty (20:1 VT; 10:1 CT)SINGLE PHASE, FARM DUTY, TEFC1/3 HP—10 HP; 2 or 4-Pole High Starting TorquesManual Overload Protection (1/3 HP—5 HP) Capacitor Start / Capacitor Run Design Rolled Steel ConstructionCRUSHER DUTY MOTORS1 HP—600 HP; 4, 6 or 8-Pole NEMA Design CTotally Enclosed Fan CooledInverter Duty (20:1 VT; 10:1 CT) (1 HP—300 HP) Inverter Rated (10:1 VT; 5:1 CT) (250 HP—600 HP)ROUND BODY MOTORS1 HP—30 HP; 4-Pole; 1800 RPM C -Flange without FeetTotally Enclosed Fan Cooled Inverter Duty (20:1 VT; 10:1 CT)SAFETY SWITCHES – HEAVY DUTY30 AMP—1200 AMP 480 VAC / 600 VAC3-Pole / 3-Wire / Non -Fused or Fused NEMA 3R EnclosureVFD–ECONOMY1 HP—800 HP Variable Torque ½ HP—600 HP Constant Torque Siemens Series DriveNon -Combo, Circuit Breaker or Fused NEMA 3R, 4, 4X or 12 EnclosureSOFT STARTERS–CRUSHER/ULTRA20 HP—800 HPSAF MS6 Series DevicesUltra Heavy Duty (500% FLA for 30 Seconds) Full Start -Rated ContactorCircuit Breaker w/ Through Door NEMA 3R or 4/12 EnclosureSOFT STARTERS15 HP—300 HPSiemens 3RW40 Series Device Normal Duty or Heavy Duty Non -Combo or Circuit Breaker NEMA 3R, 4X or 4/12 EnclosurePART WIND STARTERS10 HP—200 HPIEC Rated Contactors Circuit Breaker or Fused NEMA 3R EnclosureACROSS THE LINE START-ERSNEMA 1—NEMA 5NEMA Full Rated ContactorCircuit Breaker or Fused w/ FlangedVFD–STANDARD1 HP—800 HP Variable Torque ½ HP—600 HP Constant Torque Siemens Series Drive Circuit Breaker or FusedNEMA 3R, 4, 4X or 12 EnclosureVFD–POSITIVE DISPLACEMENT PUMP3 HP—600 HPSiemens Series Drive Constant TorqueCircuit Breaker w/ Flanged NEMA 3R EnclosureVFD–IRRIGATION1 HP—800 HPSiemens Series Drive24/7 Programmable & 0—10 Backspin Timer Variable TorqueCircuit Breaker or Fused NEMA 3R EnclosureVFD–SUBMERSIBLE½ HP—200 HPSiemens Series Drive24/7 Programmable & 0—10 Backspin Timer Variable TorqueCircuit Breaker or Fused NEMA 3R EnclosureVFD–WASHDOWN/STAINLESS1 HP—200 HP Variable Torque ½ HP—150 HP Constant Torque Siemens Series Drive Circuit Breaker or Fused NEMA 4X EnclosureVFD–BEAM PUMP1 HP—200 HPSiemens Series Drive ReGen Avoidance Design Constant TorqueCircuit Breaker w/ Flanged NEMA 3R EnclosureCUSTOM PANELSMotor Controls Panel Customization Made EasyNAE Motor Controls offers customers the ability to custom configure and order their control panel to meet their specific needs and have it shipped quickly. All NAE packaged panels are backed by our 2 year warranty and eligible for up to 6 years of protection with the “NO Hassle ” Chassis Exchange program.NO Hassel Bumper to Bumper Chassis Exchange ProgramOptional three (3) year Warranty with Lightning & Surge Protection including NAE ’s “No Hassel ” Chassis Exchange program.Scan or visit our website at to learn more.。
变频器VM600G-2SR75 VM600G-2S1R5产品说明书

产品说明书V061产品选型表型号额定功率(kW)输入电压范围额定输出电流(A)VM600G-2SR750.75AC 220V±15%4VM600G-2S1R5 1.57VM600G-2S2R2 2.29.6VM600G-4TR750.75AC 380V±15%2.5VM600G-4T1R5 1.53.8VM600G-4T2R2 2.2 5.1VM600G-4T00449VM600G-4T5R5 5.513VM600G-4T7R57.5172技术规范表输入频率范围50/60Hz,波动范围±5%输出电压范围AC 0~输入电压输出频率范围0~1000Hz 控制方式V/F过载能力150%额定电流60s,180%额定电流1s防护等级IP20海拔高度低于1000m 正常使用,高于1000m 每升高100m 降额1%,最高3000m环境温度-10℃~+50℃(环境温度在40℃~50℃,请降额使用)湿度小于95%RH ,无水珠凝结震动小于5.9m/s2(0.6g)存储温度-25℃~60℃3结构尺寸(mm)型号外型尺寸安装尺寸开孔HWDH1W1dVM600G-2SR7514272116130595VM600G-2S1R5VM600G-2S2R2VM600G-4TR75VM600G-4T1R5VM600G-4T2R2VM600G-4T0041969513217979 5.5VM600G-4T5R5225115154208995.5VM600G-4T7R54键盘操作类别名称功能指示灯LED指示灯RUN:亮/运行,灭/停止REMOTE:亮/端子控制,灭/键盘控制,闪/通讯控制FWD/REV:亮/正转,灭/反转,闪/正反切换ALARM:闪烁/故障,灭/正常按键PRG 编程键菜单进入或退出ENT 确认键逐级进入菜单画面、设定参数确认△递增键数据或功能码的递增▽递减键数据或功能码的递减>>移位键在参数设置时,选择参数的修改位在停机/运行监控时,可循环选择显示参数RUN/STOP 启/停键在键盘操作模式下,控制运行与停止控制在故障模报警时,可用于故障复位电位器调速电位器在键盘操作模式下,可调整输出频率5端子操作端子符号名称说明R/L、S、T/N电源输入接变频器的输入电源U、V、W变频器输出接电机接地端子接大地10V/GND 10V 电源最大输出电流:20mA 24V/COM 24V 电源最大输出电流:150mAAI/GND 模拟量输入输入:DC 0V ~10V 或者0-20mA,参数F5.41控制AO/GND 模拟量输出0-10VDI1/DI2DI3/DI4数字输入外部数字量信号输入RA/RB/RC 继电器输出RA/RC 常开,RA/RB 常闭S+/S-RS485通讯S+:差分信号正端,S-:差分信号负端RJ45网口如上图所示;1脚与S+相连,2脚与S-相连6F 组功能参数表○——表示该参数的设定值在变频器处于停机、运行状态中,均可更改;●——表示该参数的设定值在变频器处于运行状态时,不可更改;◎——表示该参数的数值是实际检测记录值,不能更改;参数名称设定范围出厂值属性RAM F0.00应用宏0:默认参数宏1-8:保留宏9:压瓦机应用宏0●0000F0.01运行命令通道0:键盘控制1:端子控制2:RS485通讯控制0●0001F0.02运行时UP/DOWN 基准保留1●0002F0.03主频率源X 选择0:键盘数字给定频率1:键盘电位器给定2:AI1给定3:保留4:端子UP/DW 5:保留6:多段速指令7:程序控制(PLC)给定端子8:PID 控制给定9:RS485通讯给定(包含外引键盘电位器给定)1●0003F0.04辅助频率源Y 选择同F0.030●0004F0.05叠加时辅助频率源Y 范围选择0:相对于最大频率F0.101:相对于频率源X0○0005F0.06叠加时辅助频率源Y 范围0%~150%100%○0006F0.07主辅通道组合方式LED 个位:频率源选择0:主频率源1:主辅运算结果2:主辅切换3:主频率源与运算结果切换4:辅助频率源与运算结果切换LED 十位:组合方式选择0:主+辅1:主-辅2:MAX{主,辅}3:MIN{主,辅}4:主×辅LED 百位:频率控制方向选择0:频率控制方向无效1:频率控制方向有效0○0007F0.08键盘数字设定频率0.00~上限频率F0.1250.00Hz ○0008F0.09旋转方向选择0:方向不变1:方向取反2:反向禁止0○0009F0.10最大频率0.00~320.00Hz 50.00Hz●000AF0.11上限频率源选择0:上限频率数字给定1:AI12:保留3:保留4:保留5:RS485通讯给定6:保留7:键盘电位器给定0●000BF0.12上限频率数字设定下限频率~最大输出频率F0.1050.00Hz ○000C F0.13保留(上限频率偏置)0.00~最大输出频率F0.100.00Hz ○000D F0.14下限频率0.00~上限频率F0.120.00Hz ○000E F0.15下限频率运行模式0:停止1:按下限频率运行2:零速运行1○000FF0.16载波频率0.6~15.0kHz机型设定●0010参数名称设定范围出厂值属性RAMF0.17载波PWM 波特性选择LED 个位:载波与温度关联0:与温度无关1:与温度有关,>75,1.0Khz LED 十位:载波与输出频率关联0:与输出频率无关1:与输出频率有关LED 百位:随机PWM 深度0:关闭1-8:开启,调节深度LED 千位:过调制选项0:关闭1:开启1001●0011F0.18加速时间10.01~650.00s 机型设定○0012F0.19减速时间10.01~650.00s机型设定○0013F0.20参数初始化0:不动作1:恢复出厂值(不恢复电机参数)2:清除故障记录3:恢复出厂值(恢复电机参数)0●0014F0.21功能码修改属性0:可修改1:不可修改0○0015F0.23加减速时间单位0:1Sec 1:0.1Sec 2:0.01Sec 2●0017F0.24加减速时间基准频率0:最大频率F0.101:设定频率2:100Hz0●0018F0.25风扇控制个位:启停控制0:变频器上电后风扇运转1:停机与温度相关,运行即运转2:停机风扇停止,运行与温度相关十位:使能调速功能01○0019F0.26频率指令小数点1:1位小数点2:2位小数点2●001AF1.00启动运行方式LED 个位:启动方式0:由启动频率启动1:先直流制动再从启动频率启动2:转速跟踪及方向判断后再启动LED 十位:转速追踪方向0:与停机方向一至1:与启动方向一至2:自动搜索0●0100F1.01保留(转速追踪方式)0●0101F1.02转速追踪时间0.01~60.00s 0.50s ○0102F1.03启动频率0.00~60.00Hz 0.50Hz ○0103F1.04启动频率持续时间0.0~50.0s 0.0s ●0104F1.05启动前制动电流0.0~150.0%60.0%●0105F1.06启动前制动时间0.0~60.0s 1.0s ●0106F1.07加减速选择0:直线1:S 曲线00●0107F1.08S 曲线起始加速速率20.0%~100.0%50.0%●0108F1.09S 曲线起始减速速率20.0%~100.0%50.0%●0109F1.10停机方式0:减速停机1:自由停机0○010A F1.11停机直流制动开始频率0.00~50.00Hz 1.00Hz ○010B F1.12停机直流制动等待时间0.0~60.0s 0.0s ○010D F1.13停机直流制动电流0.0~150.0%60.0%○010C F1.14停机直流制动持续时间0.0~60.0s 0.0s ○010E F1.15停机频率0.00~60.00Hz0.50Hz ○010F F1.16零速保持力矩时间0.0~6000.0sec设为6000.0s 时,一直保持,不受时间限制0●0110F1.17零速保持力矩0.0~150.0%机型设定●0111W W1d DHH17D组监视参数组8E组故障记录组9主要故障代码及处理10RS485通讯寄存器11通讯地址说明功能码表内列出的通讯地址为写RAM方式,变频器断电后数据不保存,在通讯时,对于写命令“06H”,如参数需掉电存储,应采用写EEPROM的方式,将原来RAM地址最高位的“0”改为“F”,转变成对应的EEPROM地址,如:“0XXX”改为“FXXX”,地址转换举例:上限频率F012,写RAM的通讯地址为:000C,对应EEPROM的地址为:F00C。
40 安培 交流 直流 電流探測鉗 PA-699 使用 說 明 書说明书
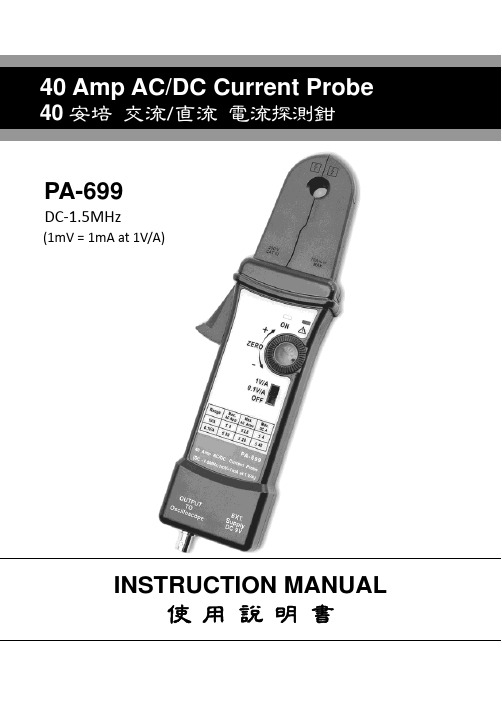
DC ‐1.5MHz(1mV = 1mA at 1V/A)INSTRUCTION MANUAL使 用 說 明 書PA-699TABLE OF CONTENTSGeneral Safety Instructions-------------------------------------------------4 Safety Terms and Symbols--------------------------------------------------5 Getting Started------------------------------------------------------------------6 Basic Operation-----------------------------------------------------------------8 Maintenance--------------------------------------------------------------------10 Specifications------------------------------------------------------------------13 Replaceable Parts-------------------------------------------------------------19 Accessories---------------------------------------------------------------------37目 次一般安全概述-----------------------------------------------------------------21 安全聲明及標誌--------------------------------------------------------------22準備啟動------------------------------------------------------------------------23 基本操作------------------------------------------------------------------------25 保養-------------------------------------------------------------------------------28規格-------------------------------------------------------------------------------30可更換的零件-----------------------------------------------------------------36附件-------------------------------------------------------------------------------37PA-69940 Amp AC/DC Current ProbeGeneral Safety Instructions:Read the following safety instructions to avoid injury and prevent damage to this product or any products connected to it. Use this product only as specified.Only qualified personnel should perform service procedures.To Avoid Fire or Personal InjuryConnect and Disconnect Properly. Connect the probe output to the measurement instrument before connecting the probe to the circuit under test. Disconnect the probe input and the probe ground from the circuit under test before disconnecting the probe from the measurement instrument.Observe All Terminal Ratings. To avoid fire or shock hazard, observe all rating and markings on the product. Consult the instruction manual for further ratings information before making connections to the product. Replace Batteries Properly. Replace batteries only with the proper type and rating specified.Do Not Operate Without Covers. Do not operate this product without the covers or panels.Avoid Exposed Circuitry. Do not touch exposed connections and components when power is present.Do Not Operate With Suspected Failures. If you suspect there is damage to this product, have it inspected by qualified service personnel. Do Not Operate in Wet/Damp Conditions.Do Not Operate in an Explosive Atmosphere.Keep Product Surfaces Clean and Dry.Safety Terms and Symbols:▪Terms in This Manual. These terms may appear in this manual:WARNING. Warning statements identify conditions or practicesthat could result in injury or loss of life.CAUTION.Caution statements identify conditions or practicesthat could result in damage to this product or other property.▪Terms on the Product. These terms may appear on the product: DANGER indicates an injury hazard immediately accessible as you read the marking.WARNING indicates an injury hazard not immediately accessible as you read the marking.CAUTION indicates a hazard to property including the product.▪Symbols on the Product. These symbols may appear on the product:Attention refer to operation Instructions.This instrument has double insulation.Getting Started:The PA-699 current probe enables a general purpose oscilloscope to display AC and DC current signals up to 80 amps Peak (28A RMS). The PA-699 current probe can also make AC and DC measurements with a multimeter by using the recommended accessory MT-246N(BNC-to-banana) plug adapter.Figure 1: shows the controls and indicators on the PA-699 current probe.Press Button Battery Inside (suggested outdoor using) Max. 10.3WireDC Zero OffsetRange Selection (Power On/Off) Output Into BP-250AC Adaptor InputTable 1: PA-699 controls and indicatorsControl/Indicator DescriptionCurrent flow symbol. The arrow shows the probe’spolarity convention for measuring current flowingfrom positive to negative.Zero adjustment. Rotate to adjust the probe outputto zero when there is no current present. It may alsobe used to offset a DC signal component. Zeroing isnot needed for AC measurements unless yourinstrument cannot isolate a DC component (ifpresent).OFF/Range switch. Slide the switch from OFF toeither the 0.1V/A or 1V/A range. When either range isselected, the probe is turned on, and the greenbattery indicator lights. If the indicator does not light,see Battery Notes and Battery Installation on page11.Battery indicator. The green battery indicator lightswhen the probe is turned on. For more information,see Battery Notes and Battery Installation on page11.Overload indicator. The red overload indicator lightsif the measured signal is greater than the selectedrange capacity. Switch the probe to 50 mV/A ifpossible, or remove the probe from the circuit.Basic Operation:Before using the probe, the batteries or specified power adaptor must be installed. See the battery installation instructions on page11.WARNING!Do not clamp the probe onto circuits with voltages greater than 600 VAC. Personal injury or damage to the probe may result.Always connect the PA-699 current probe output to the instrument before clamping onto the circuit under test.1. First connect the current probe BNC connector to BP-250 (double BNC connection cable) then connect to oscilloscope input. Start by setting the oscilloscope voltage input channel to DC volts, and the voltage sensitivity scale to 0.1 V/div.2. Move the OFF/ Range switch to the 0.1V/A or 1V/A position to turn on the probe.(※The PA-699 current probe has a green LED power/battery indicator. If the LED does not light, replace the battery or use specified power adaptor.)3. Use the ZERO adjustment to zero or offset the probe output detection of residual magnetic DC charges.4. Connect the probe to the circuit by opening the jaws and clamping around the conductor. See Figure 2.NOTE.Clamping around both the “hot” and neutral wires may give you a zero reading.(Remember to unclamp the probe from the conductor before disconnecting it from your meter or instrument).Figure 2: Connecting the PA-699 current probe.5. Adjust the probe channel and oscilloscope’s time base as necessary to get a clear and stable view of the signal. Set the oscilloscope input to DC volts to see both the AC and DC currents; set the channel to AC to see the AC current only.The current drawn by different devices look much different than that of others. While the RMS current can only be used in low frequency current, the momentary peaks may be quite high. Figure 3 shows the difference between the line current drawn by a resistive load and a motor controller.Figure 3: Typical current waveforms Congratulations on your purchase of the PA-699, a multifunctional current probe. When connecting to a digital meter, use the recommendedMT-246N (BNC-to-banana adapter). Connect the black lead to the meter COM (black letters on the meter), and the red lead to the VΩ input (red letters on the meter).To measure only AC current, set the meter to measure AC volts.To measure DC current, set the meter to measure DC volts. Note the current convention arrow on the probe to get the proper polarity reading. To increase the measurement sensitivity of the PA-699 current probe, loop additional turns of the wire under test through the jaws. See Figure 4. The sensitivity of the PA-699 current probe is multiplied times the number of loops in the jaws. For example: 1V/A X 4 turns = 4V/A.Figure 4: Increasing the sensitivityMaintenance:Use the information in this section to properly maintain the operation of your PA-699 AC/DC Current Probe.1. Notes on Battery and Power Converter:The PA-699 current probe uses a single square 9 V battery. This machine is a high power product. Please use the specified alkaline battery.As the battery in the PA-699 current probe is drained, significant gain errors may occur. The green LED will continue to light until a low battery voltage of 6.5 V is reached.If probe gain errors are detected, replace the battery with a fresh one.As an alternative, an AC power converter can be used to avoid gain error due to poor battery durability. Switch to a square 9V battery only when there is no AC power supply available outdoors.When using an AC power converter for an extended time, we suggest you remove the battery from the compartment. This is because heating will result in battery leakage, and battery electrolyte will rust the circuit board, thus creating major damage. Furthermore, batteries are high pollution products and therefore by reducing their usage, we will in turn protect the environment.PA-699 has in its design a priority external power circuit therefore it is safe to simultaneously install the battery and the external power supply. During usage, removing the external power supply will not produce waveform anomaly or any damage. However when external power is used for an extended time (more than 1 week), removal of battery is recommended. This will avoid leakage of battery since the quality of the batteries is something that is out of our control.2. Battery Installation:(1) Remove the probe from the circuit.(2) Please push and open battery lid slightly from back of probe.(3) While observing polarity, attach the new alkaline battery to the batteryconnector buttons and place the battery in the specified area.(4) Please close battery lid properly.Figure 5: PA-699 Battery Installation3. Cleaning:To clean the probe exterior, use a soft cloth dampened in a solution of mild detergent and water. To clean the core, open the jaw and clean the exposed core surfaces with a cotton swap dampened with isopropyl alcohol (isopropanol). Lubricate the jaws mating surfaces with light oil.Do not clean with solvents or abrasives. Do not immerse the probe.4. Preparation for ShipmentOur company has designed a special box to be used for PA-699, convenient for storage and shipment. Please do not discard it.If the original packaging is unfit for use or not available, use the following packaging guidelines:(1) Use a sturdy shipping carton having inside dimensions at least one inchgreater than the probe dimensions.(2) Put the probe into a plastic bag or wrap to protect it from dampness.(3) Place the probe into the box and stabilize it with light packagingmaterial.(4) Seal the carton with shipping tape.Specifications:These characteristics apply to an adjusted PA-699 AC/DC Current Probe installed on an oscilloscope of any brand. The oscilloscope must be warmed up for at least 20 minutes and be in an environment with the temperature at 10℃~30℃ and the humidity at 0~80.Table 2: Electrical CharacteristicsCurrent Ranges 0.1V/A; 1V/ADC Accuracy, typical ±3% ±10 mA at 1V/A(10 mA to 8 A peak range)±4% ±100 mA at 0.1V/A(100 mA to 80 A peak range) Gain versus frequency, typical See Figure 6Maximum Working Current See Table 3Maximum Working Voltage See Table 3Maximum Float Voltage See Table 3Frequency Range DC to 1.5MHz (-3 dB)Rise Time 0.23 S (Typ.)Battery Type and Life, typical 9V NEDA 1604A, IEC 6LR614 hours minimum (1 each)DC signal linearity, typical See Figure 8Phase shift, typical See Figure 9Table 3: Voltage and current ratingsRating Maximum workingcurrent (A)MaximumWorkingvoltage (V)Maximumfloatingvoltage (V) Range0.1V/ARange1V/ADC 40* 4 600 600 DC + peak AC 40* 4 600 600 ACpeak40 4 600 600 AC peak-peak 80 8 1200 -RMSCATIII28 2.8 600 600 RMSCATII28 2.8 600 600 RMSCATI28 2.8 600 600 *See Figure 7 for frequency derating.Table 4: Physical CharacteristicsDimensions 262 mm x 81mm x 36 mm(10.3 x 3.2 x 1.4 inch)Maximum Conductor Size 10.3 mm (0.4 inch)Cable Length 100 cm( 3.3 feet)Weight 310 g (11 oz) (without battery)Table 5: Environmental Characteristics TemperatureWorking Storage 0°C to +50°C (+32°F to +122°F)-20°C to +80°C (-4°F to +176°F)Humidity 0°C to 40°C, 95% humidity40°C to 50°C, 45% humidityPollution Degree 2Figure 6: Gain versus frequency at 1 A peak, typicalFigure 7: Maximum current versus frequencyFigure 8: DC signal linearity in the 0.1V/A range, typicalTable 6: Certifications and compliancesEC Declaration ofConformity – Low Voltage Compliance was demonstrated to the following specification as listed in the Official Journal of the European Union:Low Voltage Directive 73/23/EEC, as amended by 93/68/EECEN 61010-1/A2:1995Safety requirements for electrical equipment for measurement, control, and laboratory use.EN 61010-2-032:1995Particular requirements for hand-held current clamps for electrical measurement and test equipment.Additional Compliance IEC61010-1/A2:1995Safety requirements for electrical equipment for measurement, control, and laboratory use.IEC61010-2-032:1994Particular requirements for hand-held current clamps for electrical measurement and test equipment.Figure 9:Phase versusfrequency at 1 Apeak, typicalTable 6: Certifications and compliances (cont.)Installation (Overvoltage) Category Terminals on this product may have different installation (overvoltage) category designations. The installation categories are:CAT IIIDistribution-level mains (usually permanently connected).Equipment at this level is typically in a fixed industrial location.CAT IILocal-level mains (wall sockets). Equipment at this level includes appliances, portable tools, and similar products. Equipment is usuallycord-connected.CAT ISecondary (signal level) or battery operated circuits of electronic equipment.Pollution Degree A measure of the contaminates that could occur inthe environment around and within a product.Typically the internal environment inside a productis considered to be the same as the external.Products should be used only in the environmentfor which they are rated.Pollution Degree 1No pollution or only dry, nonconductive pollutionoccurs. Products in this category are generallyencapsulated, hermetically sealed, or located inclean rooms.Pollution Degree 2Normally only dry, nonconductive pollution occurs.Occasionally a temporary conductivity that iscaused by condensation must be expected. Thislocation is a typical office/home environment.Temporary condensation occurs only when theproduct is out of service.Replaceable Parts:The PA-699 AC/DC Current Probe is shipped with the following items: One instruction manualEnglish and Chinese versionsOne BNC TO BNC Coaxial Cable LineProduct number BP-250, length 100cmOne AC power converterWhen purchasing, choose from the following models. Socket shapes and voltage systems are different for every country.ADP-100V-JS: Used in Japan.ADP-110V-UL: Used in United States or countries with America power application.ADP-220V-VDE: Used in Germany or Germany or countries with German power application.ADP-230V-AS: Used in Australia or New Zealand.ADP-240V-BS: Used in Great Britain or countries with G.B. power application.Recommended accessory for use with digital meter:One BNC to banana plug adapterProduct number MT-246N. Designed with color fool proof design to avoid polarity mistake when connecting to digital meter.The PA-699 does not have any user repairable assemblies. If you should have trouble with your probe, contact your local Service Center or representative for help.PA-69940安培 交流/直流 電流探測鉗一般安全概述:請仔細閱讀以下的安全防範措施以避免損傷並防止損壞這個產品或任何連接到它的產品。
明电舍vt230se-presentation

性能特点(1)
真正的一机多能变频器(內含有五種控制模式) • 无传感器矢量控制 • 有传感器高性能矢量控制 • PM 电 机 节 能 驱 动 • V/F 恒 转 矩 控 制 (最大转矩提升) • V/F 变 转 矩 控 制
性能特点(2)
操作简单
* 極易操作的旋鈕模式 * 电机参数自整定矢量控制 * 支援電腦應用的驅動軟件
解决方案
采 用 IGBT 提高载波频率
CT/VT - 负 载 特 性 的 选 择
• CT - 恒 转 矩 • C30-0 = 1
• VT - 变 转 矩 • C30-0 = 2
V
380V
V
380V
50Hz F
典型例子: 带式输送机
50Hz
F
典型例子: 离心式风机 水泵
全全球球标标准准
* 符合CE標準 (EN618003,EN50178)
•电流相位突变
控制输出频率 B18-4(电流稳定增益)
•过流跳闸
将抑制电压反馈给频率指令 B18-5(过流停车防止增益) B18-6(过流停车防止时间增益)
完善的补偿修正
• 铁损补偿 • ASR 死 区 补 偿 • 温升补偿 • 电压饱和补偿 • 励磁电感波动补
偿 • 多种高通滤波器
AUTO TUNING
预 置 ASD 常 数
如 手 册 所 示 , 执 行 ASR 调 制
完 成
AUTO TUNING
可省去大量烦人的电机参数 仅需输入基 本 参 数 包 括 输 入 电 压, kW, 最 大 转 速 等
自动调整电机参数
最大转矩提升
转矩 200% 175% 150%
• 良好的低速特性
0
0 200 400 600 800 1200 1600 2000rpm
SIMOTRAS调试最简式参数及调试说明书
SIEMENSSIMOTRAS HD6SG70系列数字式三相定子调压调速控制装置用于起重机的转子绕线式滑环电动机控制最简式参数及调试说明书1. 调回出厂时设定参数1.1 调回确省(出厂时设定)参数值为了重新执行一个完全新的驱动系统,而对已设定好的基本参数的装置可执行一个“调回确省参数值”的功能重新设置参数。
注释:当执行“调回确省参数值”功能时,所有已设定好的专用参数会被设置为确省值。
在执行该命令之前也可通过SIMOVIS软件将该专用参数存贮在PC机或编程器中。
“调回确省参数值”功能必须是重新用于新驱动系统时采用,否则装置考虑到安全性会发出“未准备好”报警信号。
1.2 功能的执行1.2.1 设置参数P051=211.2.2 传输参数值到可读写寄存器中参数值被存贮在可读写寄存器(EEPROM)中,因此既使装置断电之后该参数仍然不会丢失。
执行该功能至少需要5秒钟(但也有可能是几分钟),在执行过程中当前被处理的参数值会显示在PMU指示器上,在执行该功能时装置供电电源必须保持有电。
2. 在接通电源之前必须阅读下述注意事项:2.1 危险性:在起动装置工作之前必须保证传动系统是安全的,即周围无人,机构无卡阻或危及其它物体的可能。
同时也包括执行不正确功能的可能性。
不正确的功能或故障发生会使机械振动,造成接触器继电器接线松动,因此发生故障时应仔细检查柜内外的接线及功能设定是否正确。
频繁发生不正确功能和故障是由不正确的参数设置及启动过程不小心而引起的,通常都是由一些少数因素引发一个不正确的功能。
2.2 在第一次启动该装置之前应首先完成如下工作内容2.2.1 SIMOTRAS HD 装置任何端子上均不带电。
2.2.2 检查接线、保护及接地等是否齐全正确。
2.2.3 检查主回路电源(最大交流500V)。
2.2.4 检查控制回路电源(最大交流250V)。
2.2.5 连接并设定电动机保护元件(电动机保护开关,电动机保护继电器),如果连接有PTC,请检查温度检测元件。
明电全数字交流调速装置 THYFREC-VT240S 说明书

———————— 提示 ————————1. 在使用VT240S 前,必须仔细阅读使用说明书,阅读完后,请妥善保管以备参考。
2. 使用说明书应提供给最终用户。
株式会社 明电舍明电全数字交流调速装置THYFREC-VT240S200V 级别 0.75~90kW 400V 级别 0.75~475kW使用说明书2009年8月ST-3450目录前言 ........................................................................... i ii 安全注意事项 ................................................................... iv <各部分名称> ................................................................... v iii第一章 运输和贮存 .............................................................. 1-1 1-1 运输和贮存 .............................................................. 1-1 1-2 铭牌内容和显示方法 ...................................................... 1-1第二章 安装和配线 .............................................................. 2-1 2-1 安装环境 ................................................................ 2-1 2-2 安装和接线方法 .......................................................... 2-3 2-3 电源和电机接线注意事项 .................................................. 2-5 2-4 控制信号接线注意事项 .................................................... 2-13第三章 试运行和调整 ............................................................ 3-1 3-1 试运行流程 .............................................................. 3-1 3-2 上电前的准备 ............................................................ 3-1 3-3 控制模式 ................................................................ 3-2 3-4 自整定和试运行 .......................................................... 3-3第四章 操作面板 ................................................................ 4-1 4-1 操作面板类型和功能概要 .................................................. 4-1 4-2 连接LCD面板时的各种操作和显示 ........................................... 4-4 4-3 连接LED面板时的各种操作和显示 ........................................... 4-11 4-4 自定义B, C 组参数 ........................................................ 4-15第五章 输入/输出控制 ........................................................... 5-1 5-1 输入/输出端子功能 ....................................................... 5-1 5-2 输入/输出控制电路 ....................................................... 5-2 5-3 编程继电器输入功能(PSI) ................................................. 5-3 5-4 编程继电器输出功能(PSO) ................................................. 5-85-5 继电器输入逻辑 ..........................................................5-9 5-6 端子功能的改变 .......................................................... 5-10 5-7 编程输入功能(PI) ........................................................ 5-125-8 编程输出功能(P0) ........................................................ 5-16 5-9 数据设定的选择 .......................................................... 5-18第六章 控制功能和参数设定 ...................................................... 6-1 6-1 监测参数 ................................................................ 6-1 6-2 A组参数 ................................................................. 6-7 6-3 B组参数 ................................................................. 6-106-4 C组参数 ................................................................. 6-42 6-5 U组参数 ................................................................. 6-60 6-6 功能解释 ................................................................ 6-766-7 设定过载模式 ............................................................ 6-1676-8 调节与IM矢量控制转速有关的参数 .......................................... 6-1696-9 调节PM电机控制系统参数 .................................................. 6-174=== 2-6=== 2-17=== 5-17=== 5-19=== 6-34=== 6-46=== 6-61==== 6-127==== 6-129==== 6-1326-10 操作辅驱动电机 .......................................................... 6-1826-11 内置PLC功能 ............................................................. 6-1856-12 标准的串行通信和Modbus通信解释 .......................................... 6-192第七章 选件 .................................................................... 7-1 7-1 选件概况 ................................................................ 7-1 7-2 内置PCB选件 ............................................................. 7-5 7-3 动态制动(DB)选件 ........................................................ 7-7第八章 维护和检查 .............................................................. 8-1 8-1 检查项目 ................................................................ 8-1 8-2 测量仪器 ................................................................ 8-4 8-3 保护功能 ................................................................ 8-5 8-4 排除有故障显示的故障 .................................................... 8-6 8-5 排除无故障显示的故障 .................................................... 8-15附录1 系统型号描述 ............................................................. A-1附录2 外形尺寸图 ............................................................... A -10 附录3. 故障码 .................................................................. A -12 附录4. 显示信息 ................................................................ A -14附录5. 7段LED显示 .............................................................. A -15==== 6-138==== 6-140==== 6-149=== A-7=== A-9=== A-11=== A-12前言万分感谢您购买明电公司的THYFREC-VT240S交流速度控制装置。
Eaton PDG23M0225E2WL 电源防御模式下的筛选电流断路器商品说明说明书

Eaton PDG23M0225E2WLEaton Power Defense molded case circuit breaker, Globally Rated, Frame 2, Three Pole, 225A, 65kA/480V, PXR20 LSI w/ Modbus RTU, ZSI and Relays, Standard Terminals Load Only (PDG2X3TA225)Eaton Power Defense molded case circuit breakerPDG23M0225E2WL 78667992939188.9 mm 152.4 mm 104.6 mm 1.82 kg Eaton Selling Policy 25-000, one (1) year from the date of installation of theProduct or eighteen (18) months from thedate of shipment of the Product,whichever occurs first.RoHS Compliant CSAUL 489IEC 60947-2CCC MarkedProduct NameCatalog Number UPCProduct Length/Depth Product Height Product Width Product Weight WarrantyCompliancesCertifications225 AComplete breaker 2Three-polePD2 Global Class A PXR 20 LSIModbus RTU600 Vac600 VStandard Terminals Load Only65 kAIC at 480 Vac 70 kAIC Icu/ 53 kAIC Ics/ 154 kAIC Icm @380-415V (IEC) 50 kAIC Icu/ 30 kAIC Ics/ 105 kAIC Icm @480V Brazil (IEC) 22 kAIC Icu @250 Vdc 65 kAIC @480V (UL) 22 kAIC Icu @125 Vdc10 kAIC Icu/ 5 kAIC Ics/ 21 kAIC Icm @690V (IEC) 100 kAIC @240V (UL) 35 kAIC @600V (UL/CSA)50 kAIC Icu/ 40 kAIC Ics/ 105 kAIC Icm @440V (IEC) 100 kAIC Icu/ 100 kAIC Ics/ 220 kAIC Icm @240V (IEC) 30/25 kAIC Icu/ 15/13 kAIC Ics @525V South Africa (IEC) 25 kAIC @600V (UL/CSA)225 AAmperage Rating Circuit breaker frame type Frame Number of poles Circuit breaker type Class Trip Type Communication Voltage rating Voltage rating - max TerminalsInterrupt rating Interrupt rating rangeTrip rating3D CAD drawing packageEaton Power Defense PDG23M0225E2WL 3D drawingApplication notesConsulting application guide - molded case circuit breakersPower Xpert Protection Manager x32Power Xpert Protection Manager x64BrochuresPower Defense technical selling bookletPower Defense brochurePower Defense molded case circuit breaker selection posterPower Defense molded case circuit breakers - Frame 2 product aid CatalogsPower Xpert Release trip units for Power Defense molded case circuit breakersMolded case circuit breakers catalogCertification reportsPDG2 CB reportPower Defense Declaration concerning California’s Proposition 65EU Declaration of Conformity - Power Defense molded case circuit breakersPDG4 CB reportPDG4 CCC certificationInstallation instructionsPower Defense Frame 2 global terminal shield, 3 pole - IL012330EN Power Defense Frame 2 tunnel terminal kits - PDG2X1TA225K instructions- IL012239EN H01Power Defense Frame 2 tunnel terminal (aluminum), 50A, 3 pole instructions - IL012236EN H03Power Defense Frame 1 IEC and Frame 2 Rotary Mechanism with NFPA Handle Attachment Instructions (IL012260EN).pdfPower Defense Frame 2/3/4/5/6 voltage neutral sensor module wiring instructions – IL012316ENPower Defense Frame 2 terminal kit - PDG2X3(2)(4)TA150RF instructions - IL012244EN H01Power Defense Frame 2 box terminal (steel), 100A, 3 pole instructions - IL012234EN H03Power Defense Frame 2 tunnel terminal (aluminum), 100A, 3 pole instructions - IL012237EN H03Power Defense Frame 2 box terminal (aluminum), 225A, 3 pole instructions - IL012235EN H03Power Defense Frame 2 multi wire connector kit -PDG2X3(2)(4)TA2256W instructions - IL012242EN H01Power Defense Frame 2 PDG2 and PDC(E)9 breaker instructions -IL012106ENPower Defense Frame 2 Direct Rotary Handle Assy With Interlock Version Instructions (IL012138EN).pdfPower Defense Frame 2 screw terminal_end cap kit, 225A, 3 pole instructions - IL012258EN H01Power Defense Frame 2 Bell Alarm Switch Instructions (IL012154EN).pdf Power Defense Frame 2 bell alarm switch instructions - IL012154EN Power Defense Frame 2 terminal kit - PDG2X3(2)(4)TA225RF instructions - IL012245EN H01Power Defense Frame 2 multi wire connector kit -PDG2X3(2)(4)TA2253W instructions - IL012243EN H01Power Defense Frame 2 shunt trip UVR instructions - IL012130EN Power Defense Frame 2 clamp terminal (steel), 20A, 3 pole instructions - IL012246EN H03Power Defense Frame 2 tunnel terminal (aluminum), 150A, 3 pole instructions - IL012238EN H03Power Defense Frame 2 motor circuit protector (HMCP) - IL012326EN Power Defense Frame 2 handle mech variable depth rotary handle instructions - IL012136ENPower Defense Frame 2 handle mech direct rotary handle instructions - IL012134ENPower Defense Frame 2 locking devices and handle block instructions - IL012149ENPower Defense Frame 1-2-3-4 IP door barrier assembly instructions -IL012278ENInstallation videosPower Defense Frame 2 Handle Mech Variable Depth Rotary Handle Animated Instructions.rhPower Defense Frame 2 TMTU Aux, Alarm, ST and UVR Animated Instructions.rhPower Defense Frame 2 Locking Devices and Handle Block Animated Instructions.pdf.rhPower Defense Frame 2 Bell Alarm with PXR Animated Instructions.pdf.rh Power Defense Frame 2 withTMTU, Shunt Trip_UVR Animated Instructions.rhMultimediaPower Defense Frame 2 Aux, Alarm, Shunt Trip, and UVR How-To VideoEaton Corporation plc Eaton House30 Pembroke Road Dublin 4, Ireland © 2023 Eaton. All Rights Reserved. Eaton is a registered trademark.All other trademarks areproperty of their respectiveowners./socialmediaPower Defense Frame 2 Direct Rotary Handle Mechanism Installation How-To VideoPower Defense Frame 3 Variable Depth Rotary Handle Mechanism Installation How-To VideoPower Defense Frame 2 Variable Depth Rotary Handle Mechanism Installation How-To VideoPower Defense molded case circuit breakers Eaton Power Defense for superior arc flash safety Power Defense Frame 6 Trip Unit How-To Video Power Defense BreakersPower Defense Frame 5 Trip Unit How-To Video Eaton Specification Sheet - PDG23M0225E2WL Power Defense time current curves MCP Motor Circuit Protection – PD1, PD2, PD3Power Defense time current curve Frame 2 - PD2Making a better machineMolded case and low-voltage power circuit breaker health Single and double break MCCB performance revisited Intelligent circuit protection yields space savings Intelligent power starts with accurate, actionable data Safer by design: arc energy reduction techniques Molded case and low-voltage breaker healthSpecifications and datasheetsTime/current curvesWhite papers。
电动机保护断路器手册说明书
電動機保護斷路器MANUAL MOTOR STARTER2021.10 版工廠驗證結構緊湊符合標準安全性M3~MR-32S MR-32R 接觸器電動機orMR-65R2MMS允許操作環境溫度:-25 ~ 55℃允許儲存環境溫度:-50 ~ 80℃海拔高度:安裝地點海拔高度不能超過2000m污染等級:抗污染等級為3,可在IEC60947標準中定義三級污染環境中運行安裝條件:(1). 安裝面與垂直面傾斜角不能超過30°(2). 採用標準導軌安裝(3). 應安裝和使用在無明顯晃動、沖擊及震盪的地方◆◆◆◆◆額定工作電流:0.16~32A(32AF),13~65(65AF)系列號:S -按鈕式(32AF)、R-旋轉式(32/65AF)框架等級:32,65電動機保護斷路器正常工作條件及安裝條件額定工作電流過載脫扣設定範圍磁脫扣電流產品型號In (A)In (A)Id ±20% (A)按鈕式0.160.1-0.161.92MR-32S-0.160.250.16-0.253MR-32S-0.250.40.25-0.44.8MR-32S-0.40.630.4-0.637.56MR-32S-0.6310.63-112MR-32S-11.61-1.619.2MR-32S-1.62.5 1.6-2.530MR-32S-2.54 2.5-448MR-32S-46.34-6.375.6MR-32S-6.3106-10120MR-32S-10149-14168MR-32S-14LTI >2.5~4A100/100100/100100/10080/804~6.3A100/100100/10050/5050/506~10A100/100100/10015/1510/109~14A100/10015/7.58/46/4.513~18A100/10015/7.58/46/4.517~23A50/5015/66/34/320~25A50/5015/66/34/324~32A50/5010/56/34/3自動●IP20100,000100,000允許操作環境溫度-25 ~ 55℃允許儲存環境溫度-50 ~ 80℃MR-65R3PUi (V)690額定耐受衝擊電壓 Uimp (kV)650/60 Hz4MMSMR-AUMR-AM-11MR-AD-0110MR-AD-0101MR-AD-1010MR-AD-10011NO+1NC D2D1URearm RESET060508>>C2C1附件齊全側裝輔助接點組(MR-AN)短路信號接點組(MR-AM)上裝輔助接點組(MR-AE)電壓跳脫裝置(MR-AS)欠電壓跳脫裝置(MR-AU)or MR-32S MR-32R 故障信號接點組(MR-AD)MR-65Roror or or電 動 機 保 護 斷 路器5MMS 應用例圖【範例一】【範例二】ororororAPS-11N S-P ○○N *MEU-11N MPU-11N S-P ○○NML-01NAP-4NAP-2NorAPS-11N S-P ○○NL MEU-11N MPU-11N S-P ○○NLMR-65R-○○WKM-65NLML-01NAP-4NAP-2NWKX-65NL註1.註6MMS特性曲線圖MMS 接線模組名稱MMS+MC 接線模組正逆轉接線模組圖示接線模組型號WKM-18N WKM-38N WKMD-18N WKMD-38N WKM-65NL WKX-18N WKX-38N WKX-65NL MMS 適用型號MR-32S MR-32R MR-65RMR-32S MR-32RMR-65R接觸器適用型號S-P9N S-P9N3S-P9N4S-P12N S-P12N3S-P12N4S-P18N S-P18N3S-P18N4S-P25N S-P25N3S-P32N S-P32N3S-P38N S-P38N3SD-P9N SD-P12N SD-P18N SD-P25N SD-P32N SD-P38N S-P40NL S-P50NL S-P65NLS-P9N S-P9N4S-P12N S-P12N4S-P18N S-P18N4SD-P9N SD-P12N SD-P18NS-P25N S-P32N S-P38N SD-P25N SD-P32N SD-P38NS-P40NL S-P50NL S-P65NL36007200300120060060120301050.5120.20.10.050.010.02144001.201.05504030201234567811.216.8Tripping characteristicMR-65R(倍)X rated current t (s )Multiple of setting value × In (A)Tripping characteristicMR-32S/R1.201.0550403020123456789.614.4(倍)X rated current 36007200300120060060120301050.5120.20.10.050.010.0214400t (s )Multiple of setting value × In (A)65.512.9TEST 1L12L13L25L34L26L3144544.614.3267514MR-32R-Y13.613.6168MMS◆ 側裝輔助接點組重量:0.10kg37.6458749.66618短路信號接點組4587◆ 側裝輔助接點組◆ 電壓/欠電壓跳脫裝置重量:0.10kg 37.6458749.66618◆ 側裝輔助接點組◆ 電壓/欠電壓跳脫裝置重量:0.10kg 37.6458749.66618◆ 短路信號接點組4587短路信號接點組◆ 側裝輔助接點組重量:0.10kg 37.6458749.66618◆ 短路信號接點組4587◆ 故障信號接點組2110.1,000.mms01-8www本公司保留變更修改機種、規格之權利,恕不另行通知。
明电变频器系统在纺织行业粗纱机电气控制系统应用分析
明电变频器系统在纺织行业粗纱机电气控制系统应用分析1 引言粗纱机是纺纱体系中不可缺少的工序。
对于粗纱机纺纱性能等方面的技术进步,国内外做了许多研究,并取得巨大进展,尤其在20世纪后期,由于电子计算机技术、传感技术特别是变频调速技术在粗纱机上的应用,以及粗纱机牵伸、加压、卷绕成形等纺纱技术在不断改进,当代新型粗纱机已发展成高速度、高质量、高产、高效的现代化粗纱机。
随着新型变频器的不断推陈出新,变频调速技术日新月异,为满足粗纱机的负载特性及工艺要求提供了良好条件,变频器理想的控制功能再加上电脑的配合也简化了粗纱机的机械结构,为实现多电机控制提供了条件,为实现粗纱机的高速化和机电一体化开辟了道路。
2 粗纱机介绍及相关功能需求润发集团公司下属纺织分厂引进了天津纺织机械厂生产的TJFA458A型粗纱机30台,该机型性能之优,被国内外用户所公认。
该机型在功能操作方面具有独特的优势,设备集编程控制、交流变频调速、伺服跟踪控制等先进技术于一体,自使用以来,电气控制系统运行良好,故障率低,易于维护。
电气控制系统由PLC可编程控制器、变频器、换向控制、电磁离合器、红外光电探测器组成。
该控制系统分别由电缆进行连接通信,对设备的换向、运转、落纱部分进行控制,完成机器的正常动作程序。
主机采用日本明电变频器,具有操作显示、频率修改、查看功能码、功能码重新设定、功能码设定、故障显示等功能。
新型TJFA458A粗纱机,以这种高性能为基础,不断改进,确立了国内领先的稳固地位。
特别是高质量明电变频器在该机型上的应用,达到了追求粗纱质量的提高,降低单锭成本的要求。
该机型采用新型封闭式高速锭翼,机电结合式成形结构,采用可编程序控制器和变频器控制。
慢速启动,满纱自动控制,实现定长、定位、定向停车。
PV4液晶显示,品种适应性强,适纺纯棉、纯涤、纯粘及其混纺。
纤维长度22-65毫米。
额定功率低,主电机为8.6kW,全机14.2kW(含巡回式清洁器)。
三垦力达电气 SAMCO-e 高性能迷你型变频器 说明书
10. 保养和检查 .................................................. 129
10-1 保养和检查时的注意事项 ................................................. 129 10-2 检查项目 ............................................................... 129 10-3 兆欧表测试 ............................................................. 132 10-4 零部件的更换 ........................................................... 132 10-5 主电路功率的测定 ....................................................... 134
7. 功能设定 ...................................................... 42
7-1 设定方法(功能代码显示模式) .............................................. 4 2 7-2 功能码一览表 .............................................................. 4 9 7-3 功能说明 .................................................................. 5 7 7-4 串行通讯功能 .............................................................. 9 3
明电舍电梯用电机产品

2020年7月16日星期四
1.公司介绍
•(1)公司概要
•创业 •创立 •代表者 •总部事务所 •资本金 •销售额 •员工数量
1897年12月22日 1917年 6月1日 社长 稲村純三 東京都品川区大崎2-1-1 170亿7000万日元(2009年3月31日現在) 1987亿9700万日元(2009年3月31日現在) 7133名
•VT240EL
•L× D× H=1197× 688× 602mm
•※可用于200V及
400V设备
• 地坑式/轴重5吨级别
•订单型ELEVATOR
•PM :3T/薄型3T •PM :5T
•VT240EL
•Load (kg)
① 地坑式设备
• 适用电梯 : 1600kg-1.00m/s
• 最大升降距离 : 30m
• 输入电源 220V/50,60Hz
: 200-
• 最大电流
: 81A
• 额定输出
: 9.8kW
• 曳引轮
: 500mm
•IPM的大容量
•IGBT大容量
•正弦波PWM •矢量控制 •CPU演算制御 •DSP全数M字化控制 •高化性能防震控 •粘接/嵌入型PM控制
•PWM顺序转换
•速度观制察 •Tandem控制 •初期磁極位置推
•IM:40kW-250rpm/69kW-
•linear:9.6kW-1.75m/s •IM:245kW-153rpm •PM:11kW-13定9rpm •69kW-176rpm
• •
•【沿革】
・交流电机控制用变频器 ・交流调速装置
•2005年12月 会社设立获批
2007年 2月 取得ISO9001认证
- 1、下载文档前请自行甄别文档内容的完整性,平台不提供额外的编辑、内容补充、找答案等附加服务。
- 2、"仅部分预览"的文档,不可在线预览部分如存在完整性等问题,可反馈申请退款(可完整预览的文档不适用该条件!)。
- 3、如文档侵犯您的权益,请联系客服反馈,我们会尽快为您处理(人工客服工作时间:9:00-18:30)。
附:参数设定表1.A组参数№名称单位设定值最小值最大值功能使用情况ST Prf RWEA00-设定基本速度0 生产时间1 生产速度(纺丝速度)2 卡盘起始卷径3 压辊直径4 泵供量(Q)5 卷装密度ρ)6 横动幅度(S)7 ADJ 判定速度8 ADJ 判定时间A01-卡盘設定0 超喂比率1设定(OF1)1 超喂比率2设定(OF2)2 挂丝速度设定3 加速斜率时间14 减速斜率时间15 加速斜率时间26 减速斜率时间27 加速斜率时间38 减速斜率时间3A02-横动設定0 加速斜率时间41 减速斜率时间42 横动比3 横动齿轮A4 横动齿轮BA03-压辊設定0 超喂速度3的设定(OF3)1 加速斜率时间52 减速斜率时间5A04- 宽松控制设定0 压辊接触时间设定sec0.00.0500.0从WIND信号到压辊接触的计时时间计时到后CNTCT为ON ○从压辊接触后到速度检测变为稳定的等待时间计时到后开始反馈控制○从FB控制开始到启动压辊超喂的等待时间○○○%sec sec 0.000100.0100.0-10.0000.00.0为控制卷绕时的转矩而设定的频率偏置.10.000 设定值是频率,而不是比率○(以基频为标准)6000.0 正常加速斜率时间。
6000.0 正常减速斜率时间。
○○○○○○sec sec倍--100.0100.03.10.10.0.00.01.10.10.6000.0 正常加速时间。
6000.0 正常减速时间。
16.1000.1000.○○○○% % m/min sec sec sec sec sec sec 2.02.00.0100.0100.0100.0100.0100.0100.00.00.00.00.00.00.00.00.00.010.010.0设定自动挂丝时的增速系数。
○○○○○○○○○○○○○○○○○○○○○○○○○○sec m/min mm mm g/min g/cm3 mm% sec 5400.3200.125.00110.0084.80.940125.000.1010.01.500.50.0050.000.10.05050.000.010.199999. 设定生产时间8000.设定生产速度200.00 设定纸管的直径200.00 设定压辊的直径500.02.000500.0010.0020.0使用于卷装密度控制。
演算Krol=Q/(π・S・ρ)。
○○○○○○○○○○○○○○○○电机如果进入了这个范围时, ADJ为ON○如果脱离了这个范围,故障停车.电机连续处于ADJ判定速度以内的判定时间,是ADJ为ON的○条件之一A6000.0 设定手动挂丝速度。
6000.0 正常加速斜率时间。
6000.0 正常减速斜率时间。
6000.0 挂丝速度时的加速斜率时间。
6000.0 挂丝速度时的减速斜率时间。
6000.0 卷绕完成时的加速斜率时间。
6000.0 挂丝完成后的减速斜率时间AA设定横动的旋转数/往返数的比率(每往返1次TR旋转的圈数)○设定横动齿轮比(分母)设定横动齿轮比(分子)○○A1 FB控制起始时间设定2 压辊超喂启动时间设定secsec1.010.00.00.010.060.0○○○○A组参数№名称单位设定值最小值最大值功能適用ST Prf RWEA10-卡盘频率补偿控制(基于压辊转速度反馈的卡盘速度控制)0 比例增益1 积分时间常数2 卷取前机械时间常数3 巻取後机械时间常数4 卡盘完卷直径5 补偿限制器A11-横动滑差补偿控制0 比例增益1 积分时间常数2 横动機械時常数3 补偿限制器A12-压辊滑差补偿控制0 比例增益1 积分时间常数2 压辊机械时间常数3 补偿限制器A20-摆频设定0 中心速度(FH)1 振幅2 突降3 加速时间4 减速时间(A)(D)(B)(C)%%%secsec20.0010.00.010.010.05.000.10.00.50.5100.00 设摆频的中心频率。
(B01-3为100%)20.050.060.060.0(A/FH)×100 。
(D/A)×100。
摆频的加速斜率时间。
摆频的减速斜率时间。
○○○○○○○○○○○○○○○-secsec%1.000.101.050.00.000.000.11.010.0010.0010.050.0设定比例增益。
设定积分时间常数。
设定压辊机械时间常数。
○○○○○○○-secsec%1.000.101.050.00.000.000.11.010.0010.0010.050.0设定比例增益。
设定积分时间常数。
设定横动机械常数。
○○○○○○○-secsecsecmm%1.000.101.010.0400.50.00.000.000.10.1100.1.010.0010.0010.0设定比例增益。
设定积分时间常数。
比例增益的计算。
○○○○○○○○○○○○○6000.0 获得卷取前和完卷后的惯量性比率,1000. 再基于卡盘直径进行计算50.0补偿控制时频率补偿比例的最大值.如速度超过限值则故障停车补偿控制时频率补偿比例的最大值.如速度超过限值则故障停车补偿控制时频率补偿比例的最大值.如速度超过限值则故障停车A21-MJP基本设定分段卷绕基准的控制方式=1:自动设定(A21-1,2 自动演算)=2:手动设定(A32∼A35 手动直接设定)1 梭角设定2 卷幅设定degmm6.52.05.00.015.010.0设定MJP运行时的梭角。
适用于A21-0自动设定.○设定卷取时丝线的脱离值幅度。
○适用于A21-0自动设定。
○○○○0 MJP设定选择- 1. 2. 1.○○○A组参数№名称单位设定值最小值最大值功能使用情况ST Prf RWE A30-MJP设定卡盘直径基准表1 卡盘直径12 卡盘直径23 卡盘直径34 卡盘直径45 卡盘直径56 卡盘直径67 卡盘直径78 卡盘直径89 卡盘直径9A 卡盘直径10B 卡盘直径11C 卡盘直径12A31-MJP设定最小梭角基准表1 梭角12 梭角23 梭角34 梭角45 梭角56 梭角67 梭角78 梭角89 梭角9A 梭角10B 梭角11C 梭角12degdegdegdegdegdegdegdegdegdegdegdeg6.506.506.506.506.506.506.506.506.506.506.506.501.001.001.001.001.001.001.001.001.001.001.001.0020.0020.0020.0020.0020.0020.0020.0020.0020.0020.0020.0020.00对应于A30(卡盘直径基准)的最小梭角控制卷绕表基数使卡盘直径变化时棱角不小于此值○○○mmmmmmmmmmmmmmmmmmmmmmmm130.140.150.160.170.180.190.200.210.220.230.240.50.50.50.50.50.50.50.50.50.50.50.50.1000.1000.1000.1000.1000.1000.1000.1000.1000.1000.1000.1000.设定进行MJP控制时的卡盘直径基准。
○○○A32-MJP设定卷绕比基数表11 WN值12 WN值23 WN值34 WN值45 WN值56 WN值67 WN值78 WN值89 WN值9A WN值10B WN值11C WN值12------------10.00010.00010.00010.00010.00010.00010.00010.00010.00010.00010.00010.0000.8000.8000.8000.8000.8000.8000.8000.8000.8000.8000.8000.80025.000.25.000.25.000.25.000.25.000. 设定MJP控制的卷绕比基数(=BH[rpm]/TR[cpm])25.000.25.000. 随着BH直径的变化,如果小于最小棱角值,卷绕比基数表将依次变化25.000.25.000.25.000.25.000.25.000.○○○A组参数№名称单位设定值最小值最大值功能使用情况ST Prf RWEA33-MJP设定卷绕比基准21 WN值132 WN值143 WN值154 WN值165 WN值176 WN值187 WN值198 WN值209 WN值21A WN值22B WN值23C WN值24------------10.00010.00010.00010.00010.00010.00010.00010.00010.00010.00010.00010.0000.8000.8000.8000.8000.8000.8000.8000.8000.8000.8000.8000.80025.000.25.000.25.000.25.000.25.000. 设定MJP控制的卷绕比基数(=BH[rpm]/TR[cpm])25.000.25.000. 根据卡盘直径变化,在最小梭角以下时卷绕比基数表将依次变化25.000.25.000.25.000.25.000.25.000.○○A34-MJP设定卷绕比基准31 WN值252 WN值263 WN值274 WN值285 WN值296 WN值307 WN值318 WN值329 WN值33A WN值34B WN值35C WN值36------------10.00010.00010.00010.00010.00010.00010.00010.00010.00010.00010.00010.0000.8000.8000.8000.8000.8000.8000.8000.8000.8000.8000.8000.80025.000.25.000.25.000.25.000.25.000. 设定MJP控制的卷绕比基数(=BH[rpm]/TR[cpm])25.000.25.000. 根据卡盘直径变化,在最小梭角以下时卷绕比基数表将依次变化25.000.25.000.25.000.25.000.25.000.○○A35-MJP设定卷绕比基准41 WN值372 WN值383 WN值394 WN值405 WN值416 WN值427 WN值438 WN值449 WN值45A WN值46B WN值47C WN值48------------10.00010.00010.00010.00010.00010.00010.00010.00010.00010.00010.00010.0000.8000.8000.8000.8000.8000.8000.8000.8000.8000.8000.8000.80025.000.25.000.25.000.25.000.25.000. 设定MJP控制的卷绕比基数(=BH[rpm]/TR[cpm])25.000.25.000. 根据卡盘直径变化,在最小梭角以下时卷绕比基数表将依次变化25.000.25.000.25.000.25.000.25.000.○○4−1−3№名称B组参数单位设定值最小值最大值功能使用情况ST Prf RWEB00-卡盘基本设定设定输入电压。
