MEMRSECG心电网络系统使用说明书
心电网络管理系统项目说明书0

心电网络管理系统项目说明书一、项目概况随着医院各种心电设备数量的增加,应用逐步普及深入,医院的信息处理量不断增加,信息之间的相互关系也不断复杂化。
在传统的心电工作中,心电图存储的主要介质是通过热敏纸打印,存储、检索、调阅存在诸多问题,且保存时间短。
会引发医疗纠纷时,无据可查,工作非常被动。
因此,传统的单机管理方法已经无法适应现代化医院中对如此大量和大范围医学心电信息管理的要求。
采用数字化心电信息综合管理方法来解决这些问题成为医院迫切的需求。
心电网络管理系统是指将医院内、医院外描记的心电图、监护心电图、动态心电图和运动心电图等通过各种网络技术传输到心电管理系统,经过编辑和修改,出具心电报告,为临床医疗、科研、教学、保健和学科建设提供信息。
在病房安装床旁手持心电检查仪后,由护理站的护士或者医生进行心电图采集,通过无线或者有线的传输的模式,直接将心电图传回心电图室进行诊断,心电图专业医生只需在心电图室心电网络系统上接收图形和发送诊断报告。
这样无论各个临床科室有多少心电图检查的需要,都可以在第一时间内给出准确的图文报告。
建立心电网络系统后,临床医生立刻经网络得到患者的波形信息图文一体的诊断报告,及时做出诊断,从而极大限度地缩短了临床医生得到心电报告的时间和患者的就诊时间,提高了整个医院的运转效率。
心电网络管理系统还可以实现心脏病患者所有影像资料统计存储和分类管理,疑难患者资料的储备,对于心脏病患者可以建立病历档案,在以后住院时可以调阅病史资料。
对于科研教学分析有重大意义。
心电网络管理系统能够有效的连接到电子病历系统,将全部心电图检查的基本信息有效的融入电子病历系统,为实现医院全面数字化解决实际问题。
二、政策依据我院2017年工作计划三、资金需求动态心电图系统大约需要资金39万元。
其中由软件和硬件两大部分组成,其中软件系统投资约为29万元,硬件投资约为10万元。
软件部分分为:操作系统(服务器1台,2CPU):约5万数据库管理系统(SQL Server企业版):约15万动态心电图管理系统:约9万硬件部分:服务器一台;约10万(二)新增资产:资产名称为计算机服务器,属于固定资产价值,一台,约10万。
心电信息管理系统-解决方案

第1章心电心功能信息系统1.心电网络系统模块组成介绍MEMRS-ECG心电网络信息系统由以下几部分组成:1.1.服务器、系统接口服务器:设立在医院信息中心,长期存储心电数据。
提供全医院电脑临床浏览。
以SQL server2008 DBMS作为基础的服务器模块,有各种数据库表格。
服务器软件运行于Windows 2003 Server或Windows2008 Server操作系统之上,可根据医院需求配置。
以美国FDA所制定的XML格式为架构心电图传输标准,系统支持检查病人基本信息的HIS自动获取,和院方的HIS、LIS、PACS、EMR、体检等系统完整集成,提供所需要的心电图数据资料,支持HL7标准的集成技术,中间数据库的集成技术,DICOM标准的集成技术。
HIS接口:实现与HIS系统的双向通讯,共享患者信息,并实现在HIS医生工作站上直接调用心电图的功能。
具有多种接口方式,包括HL7、主动数据接口、被动数据接口、中间表、共享数据库。
根据医生实际情况可灵活选择接口类型。
1.2.预约登记预约心电图、动态心电、运动心电的待检查患者,并实现分诊。
完成患者信息的录入工作。
对于住院检查,在检查申请提交后,就应将相关信息传入本系统,并针对需要进行预约安排的检查申请,按照预约处理策略可返回预约结果,可打印出预约单。
对于门诊检查,患者交费后可前往相关检查科室进行预约,系统提取检查项目,按相应策略处理并可打印出预约单。
预约单含有患者姓名、ID、检查项目、预约时间等信息,以及识别条码。
功能要点:通过HIS接口与HIS系统通讯,直接获取待检查患者的信息,并且返回心电图检查的注意事项。
(1)系统支持检查病人基本信息的HIS自动获取,和院方的HIS、LIS、PACS、EMR、体检等系统完整集成。
支持HL7标准的集成技术,中间数据库的集成技术,DICOM标准的集成技术。
(2)登记新病人资料,根据登记先后顺序自动排队,并在大屏幕显示已登记患者名称,分配患者进入检查房间或床号。
MEMRSECG心电网络系统使用说明书

M E M R S E C G心电网络系统使用说明书集团标准化工作小组 #Q8QGGQT-GX8G08Q8-GNQGJ8-MHHGN#MEMRS-ECG型心电图网络系统使用说明书北京麦迪克斯科技有限公司目录前言MEMRS-ECG型心电网络系统软件是一套功能完善、技术先进的心电信号分析系统。
为了正确的使用本仪器,充分发挥它的各项功能,请仔细阅读本说明书。
如果有任何疑问,请与麦迪克斯公司或分销商联系。
本说明书旨在介绍如何正确使用MEMRS-ECG心电网络系统。
麦迪克斯公司执行的是不断发展的政策,因此麦迪克斯公司保留在没有事先通知的情况下,对本手册说明中的产品进行修改变动的权利。
本说明书的修改、解释权属于麦迪克斯公司。
MEMRS-ECG心电网络系统为高技术、高质量的设计实体。
在正确的操作和使用环境下,一般无须过多维护。
如果您在使用中有什么问题,请与麦迪克斯公司直接联系,或与您所购买MEMRS-ECG心电网络系统的销售商联系。
我们将竭诚为您服务!联系方式:北京麦迪克斯科技有限公司地址:北京市海淀区安宁庄西路9号金泰富地大厦1005室邮编:100085 维修热线:400 8100 559Website:E-mail:第一章概述MEMRS-ECG心电网络系统是一套功能完善、技术先进的心电图分析管理系统,为医院心电检查建立数字化工作平台,实现心电图检查的数字化、流程化管理过程。
临床医生直接采集心电图,实时传输到心电诊断中心。
1.操作医生权限管理:心电网络管理系统为了明确操作医生责任,具有权限登陆功能,按照使用医生的姓名与登陆密码操作本系统,负责分析、诊断、打印、发送心电,实现数据的本地存储将保留操作医生信息。
2.提供心电图处理电子测量功能:本系统提供强大的心电图波形显示、电子标尺测量、新旧病历对比功能、幅值调整、单页多页显示、心拍自动分析、心拍特征点自动识别、患者数据全数字导入导出功能,心拍特征点手动微调、走纸速度调整、波形放大等功能,可以摆脱原始的分规手动测量的方式。
ECG系统说明书
D8
C3高字节
第9字节
0
D9
C3低字节
第10字节
0
D10
C4高字节
第11字节
0
D11
C4低字节
第12字节
0
D12
C5高字节
第13字节
0
D13
C5低字节
第14字节
0
D14
C6高字节
第15字节
0
D15
C6低字节
心电模块向主机的数据帧由16个字节组成(Frank导联)
高2位
低6位
第0字节
SEL
X1高字节
ECG说明书
一.ECG系统概述
ECG系统是提供在嵌入式系统下采集心电信号数据的专用系统。ECG系统将信号发生器感应的数据通过导联线传递到系统中,因此整个ECG系统会被集成一个整体。
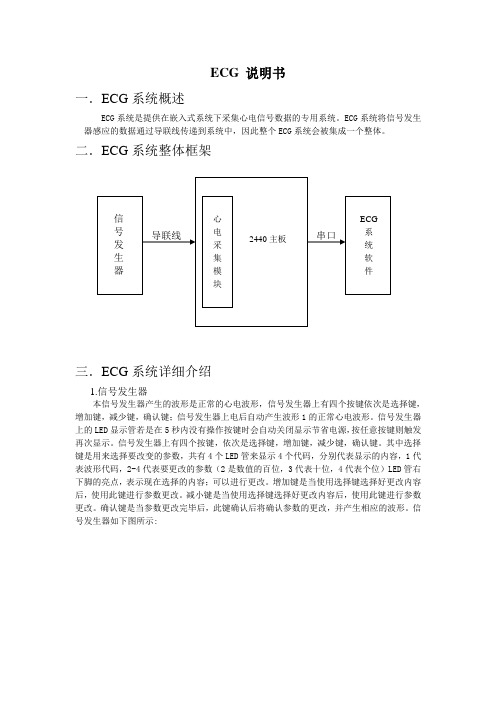
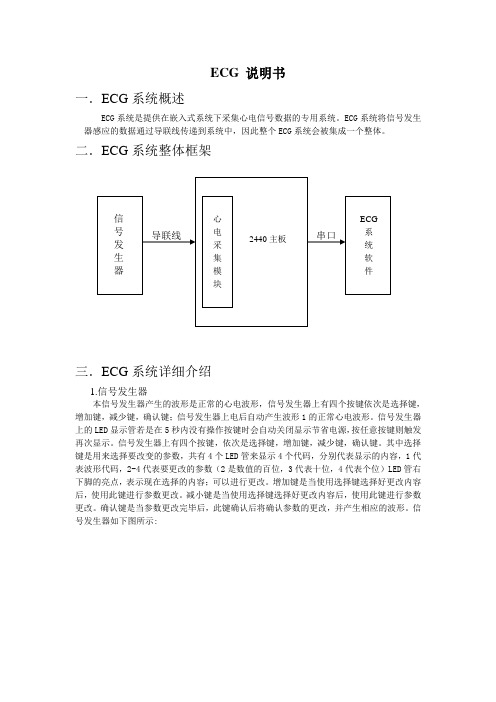
二.ECG系统整体框架
导联线串口
三.ECG系统详细介绍
1.信号发生器
本信号发生器产生的波形是正常的心电波形,信号发生器上有四个按键依次是选择键,增加键,减少键,确认键;信号发生器上电后自动产生波形1的正常心电波形。信号发生器上的LED显示管若是在5秒内没有操作按键时会自动关闭显示节省电源,按任意按键则触发再次显示。信号发生器上有四个按键,依次是选择键,增加键,减少键,确认键。其中选择键是用来选择要改变的参数,共有4个LED管来显示4个代码,分别代表显示的内容,1代表波形代码,2-4代表要更改的参数(2是数值的百位,3代表十位,4代表个位)LED管右下脚的亮点,表示现在选择的内容;可以进行更改。增加键是当使用选择键选择好更改内容后,使用此键进行参数更改。减小键是当使用选择键选择好更改内容后,使用此键进行参数更改。确认键是当参数更改完毕后,此键确认后将确认参数的更改,并产生相应的波形。信号发生器如下图所示:
MEMRSECG心电网络系统使用说明书

M E M R S E C G心电网络系统使用说明书The pony was revised in January 2021MEMRS-ECG型心电图网络系统使用说明书北京麦迪克斯科技有限公司目录前言.............................................................. 第一章概述........................................................ 第二章软件功能..................................................... 第一节预约........................................................ 第二节登记........................................................ 第三节分诊......................................... 错误!未定义书签。
第四节心电图设备连接匹配.......................................... 第五节电生理设备连接匹配.......................................... 第六节心电图报告分析系统..........................................第一小节报告系统登录 ........................................第二小节回放分析12导心电图 .................................第三小节诊断及报告 ..........................................第四小节打印 ................................................第五小节病历导入导出 ........................................ 第七节电生理系统报告工作站........................................第一小节报告系统登录 ........................................第二小节编写报告 ............................................第三小节测量波形 ............................................第四小节诊断 ................................. 错误!未定义书签。
Maxim MAX-ECG-MONITOR使用手册说明书

MAX-ECG-MONITORUser GuideUG6732; Rev 0; 5/18AbstractThis user guide provides an introduction to and overview of the Maxim MAX-ECG-MONITOR. The document details the major functions of the device, useful features, and how to use it in conjunction with an Android device and the Movesense Showcase app.Table of ContentsSafety (4)Meaning of Symbols (4)Safety Precautions (4)Introduction (5)Operating the ECG Monitor (5)Power On/Off (5)Wearing the ECG Monitor (5)Movesense Showcase App (6)Installing the App (6)Connecting to an ECG Monitor (7)Using the App (8)Sensor Measurements (8)Enabling and Disabling Measurements (10)Firmware (12)Firmware Update (12)Firmware Development (13)Care and Support (14)Handling Guidelines (14)Software Updates (14)Battery (14)Reference (15)Technical Specifications (15)FCC Compliance (15)Patent (16)Disposal of Device (16)Trademarks (17)List of FiguresFigure 1. Complete list of sensor measurements. (8)List of TablesTable 1: Sensor Measurement Descriptions (9)SafetyMeaning of SymbolsWARNING: is used in connection with a procedure or situation that may result in serious injury or deathCAUTION: is used in connection with a procedure or situation that will result in damage to the deviceNOTE: is used to emphasize important informationTIP: is used for extra tips on how to utilize the features and functions of the device.Safety PrecautionsWARNING: Only for recreational use.WARNING: Always consult your doctor before beginning an exercise program. Overexertion may cause serious injury.CAUTION: Do not apply solvent of any kind to the product, as it may damage the surface.CAUTION: Do not apply insect repellent on the product, as it may damage the surface.CAUTION: Do not knock or drop the product, as it may get damaged.NOTE: These products and services are intended for recreational use only and are not meant for medical purposes of any kind.IntroductionThe MAX-ECG-MONITOR is targeted toward users interested in evaluating the new MAX30003 electrocardiogram (ECG) device. The wearable chest-strapped device (developed jointly with Suunto®) allows an immediate evaluation of the MAX30003 by providing ECG waveform, heart-rate detection, accelerometer, and other motion-sensing data that can be exported to storable files. The device runs on Suunto’s Movesense® open development environment and allows users to customize their motion-sensing solutions to meet the needs of their unique fitness applications.Operating the ECG MonitorPower On/OffThe MAX-ECG-MONITOR turns on automatically when it detects a heartbeat through the electrodes.A red LED flashes on the top of the monitor to indicate that it is on.The monitor automatically powers off when no heartbeat is detected across the electrodes (e.g., when the device is not worn).Wearing the ECG MonitorTo put on the ECG monitor:1.Snap the monitor into the chest strap connector.2.Moisten the strap electrode areas with water or electrode gel.3.Adjust the strap length to fit tightly but comfortably around your chest below the chestmuscles with the Maxim logo facing out.4.Ensure the moist electrode areas are firmly pressed against your skin.5.For applications where more secured mounting is desired, use the adhesive electrodes (red)instead of the chest strap.Detach the monitor and rinse the chest strap under running water after every use. Dry the strap and electrodes. Sweat and moisture left on the electrodes can keep the device on unnecessarilyand reduce battery life.The adhesive electrodes are for single-time use and may be left on the skin up to a few days.More supplies can be ordered from .Movesense Showcase AppThe MAX-ECG-MONITOR can be paired with an Android®-based device, such as a phone or tablet, for viewing and logging data through the Movesense Showcase app. This section describes how to install the app, how to connect the ECG monitor to the Android device, and how to use it.Installing the App1.Save the provided .apk file to a location that you can access by phone (for example, to thephone memory if you have a file browser or to Dropbox®).2.Open the file, which prompts the user to install the Movesense Showcase app. The mainscreen of the app is as shown below. The version of Movesense Showcase is shown at the bottom left of the screen.Connecting to an ECG MonitorTo connect to a device:1. Select the Movesense icon in the app—devices available for connection are then displayed(see figure below).2.Select the appropriate device to connect. The connection can take 10 seconds to 30 seconds toestablish.Using the AppSensor MeasurementsAfter a successful connection, a list appears to show all available measurement applications. The list does not fit on one screen, so scroll down to reveal the complete list (see screenshots below, result split in two images).Figure 1. Complete list of sensor measurements.A high-level description of each sensor measurement is summarized in the table below.Table 1: Sensor Measurement DescriptionsMeasurement DescriptionConnected Device Serial number and firmware version of Movesense deviceApp Info Name, version, and company provider for software application inside the Movesense device Linear Acceleration Acceleration force in m/s2 (meters per second squared) along the x, y, and z axes, excluding theforce of gravityLed Turn indicator LED on/offTemperature Temperature (in Kelvin) read by sensor inside MovesenseHeart Rate Heart rate in (beats per minute)Angular Velocity Rate of rotation in (radian/s) around the x, y, and z-axes.Magnetic Field Magnetic field in (micro Tesla) along the x, y, and z-axes.Multi Subscription Three subscriptions to three measurement sensors simultaneously (Linear Acc + Magnetic Field+ Angular Velocity); three sensors in 3 subscriptionsECG Measures and displays ECG chart; reported values are in units of count, which is proportional to avoltageBattery Displays status of battery usageImu Single subscription to multiple measurement sensors simultaneouslyIMU6: 2 sensors (Linear Acc + Angular Velocity) in 1 subscriptionIMU9: 3 sensors (Linear Acc + Angular Velocity + Magnetic field) in 1 subscriptionMemory Diagnostic Diagnose memory by showing free stacks in memory for threadsEnabling and Disabling MeasurementsThis section describes how to enable and disable sensor measurements. The examples are specifically for ECG and Linear Acceleration, but the other sensor measurements use the same procedure.To enable/disable a measurement:1.Select any of the sensor measurements described in the previous section. Below are examplesof a selected ECG measurement window (left) and a selected Linear Acceleration measurement window (right).2.Slide the Subscribe radio button from left to right to activate the measurement application andstart data collection. The button turns blue. Data is displayed at the bottom graph of the screen. Below are examples of an enabled ECG measurement window (left) and an enabled Linear Acceleration measurement window (right).The data is also logged in a *.csv file in the local \Movesense folder. The formats of the .csv files for the ECG (left) and Linear Acceleration (right) examples are shown below:3.To stop data collection, slide the radio button to the left. The button turns grey.If an error message regarding poor connection is displayed during measurement, check if thesensor has good contact with the skin.For ECG measurement, Maxim recommends a sampling rate of 128Hz or lower to ensure stable data streaming. A higher sampling rate can cause the app to fail for certain phone models.Choose different sampling rates by selecting the Rate button in the ECG measurement window.FirmwareFirmware UpdateThe MAX-ECG-MONITOR has pre-installed firmware (v1.1.0).To upgrade to a newer firmware version:1.Download the latest firmware version from .2.Save the new bootloader file (*.zip) in the local storage of the phone.3.Select the DFU icon in the main screen (see Figure 1). The following window appears:4.Choose Select File to select the .zip file from step 1.5.Click Select Device to connect to the monitor to be upgraded. The following screen appears.6.Select Proceed to upload firmware.Firmware DevelopmentMovesense is an open development environment for motion sensing and allows users to customize the application inside the Movesense device by accessing a library repository.For further information on customizing the application inside the Movesense monitor, refer to the following links:https:///suunto/movesense-docs/wiki/Homehttps:///suunto/movesense-device-lib/src/master/samples/bin/debug/Care and SupportHandling GuidelinesDo not pull the sensor module straight off the connector. This can damage the belt connectors.Unsnap one side at a time.The belt should be machine washed in 40°C after every two or three exercises. See the belt tagfor further washing instructions. Sweat and moisture left on the electrodes can keep the device on unnecessarily and reduce battery life.Do not machine wash the sensor module. Machine washing damages the module.The adhesive electrodes are for single-time use and may be left on the skin up to a few days.More supplies can be ordered.Software UpdatesMovesense Showcase App: Distributed as .apk file. The current release is v1.9.The Movesense firmware can be updated over Bluetooth (DFU). The current release is v1.6.0. See to the Firmware Update section for instructions.BatteryThe MAX-ECG-MONITOR uses a 3V lithium cell (CR 2025).To replace the battery:1.Remove the MAX-ECG-MONITOR from the connectors on the strap.2.Open the battery cover.3.Replace the battery.4.Firmly close the battery cover.ReferenceTechnical Specifications•Weight: 9.4g/0.33oz (battery included)•Diameter: 36.5mm/1.44in•Thickness: 8mm/0.32in•Operating temperature: -20°C to +60°C/-5°F to +140°F•Storage temperature: -30°C to +60° C/-22°F to +140°F•Water resistance: 30m/98ft (according to ISO 6425)•Battery type: CR2025•Transmission frequency: 2.4GHz (Bluetooth Smart)•Manufacturer: Suunto Oy, Tammiston kauppatie 7 A, FI-01510 Vantaa FINLANDFCC ComplianceFCC identifier: RYP2458Name of Grantee: Suunto OyEquipment class: Digital Transmission SystemNotes: Multipurpose sensor moduleFCC Rule Parts: 15CFrequency Range (MHz): 2402.0-2480.0Output Watts: 0.00071This device complies with part 15C of the FCC Rules.This device is approved for portable use with respect to RF exposure compliance.Multi-transmitter, supporting simultaneous transmission configurations, have not been evaluated and shall be evaluated according to KDB Publication 447498 and §2.947(f), §15.31(h) and §15.31(k) composite system and §2.1 end product terms and concepts.PatentThis product is protected by pending patent applications and their corresponding national rights. Disposal of DeviceDispose of the device in an appropriate way, treating it as electronic waste. Do not throw it in the garbage.TrademarksCopyright © Suunto Oy. All rights reserved. Suunto, Suunto product names, their logos and other Suunto brand trademarks and names are registered or unregistered trademarks of Suunto Oy. Suunto is a registered trademark of Suunto Oy.Movesense is a registered trademark of Suunto Oy.Android is a registered trademark of Google Inc.Dropbox is a registered service mark of Dropbox, Inc.©2018 by Maxim Integrated Products, Inc. All rights reserved. Information in this publication concerning the devices, applications, or technology described is intended to suggest possible uses and may be superseded. MAXIM INTEGRATED PRODUCTS, INC. DOES NOT ASSUME LIABILITY FOR OR PROVIDE A REPRESENTATION OF ACCURACY OF THE INFORMATION, DEVICES, OR TECHNOLOGY DESCRIBED IN THIS DOCUMENT. MAXIM ALSO DOES NOT ASSUME LIABILITY FOR INTELLECTUAL PROPERTY INFRINGEMENT RELATED IN ANY MANNER TO USE OF INFORMATION, DEVICES, OR TECHNOLOGY DESCRIBED HEREIN OR OTHERWISE. The information contained within this document has been verified according to the general principles of electrical and mechanical engineering or registered trademarks of Maxim Integrated Products, Inc. All other product or service names are the property of their respective owners.。
ECG 电心电图设备说明书

FLUTTER ATRIALE
L’attività atriale è riconoscibile Le onde P assumono un aspetto a denti di sega Il nodo AV limita il passaggio dei segnali Il ritmo è regolare
3 - Attività Atriale
L’onda P non c’è, l’atrio è spento L’onda P ha un aspetto diverso dal normale NB! Cura il paziente, non il monitor
3 - Attività Atriale
Blocco AV di 2° grado - Tipo 2
Mobitz 2
Blocco AV di 3° grado
Nodo AV
STOP
Blocco AV di 3° grado
Blocco AV di 3° grado
•…Nessuna correlazione - dissociazione atrioventricolare
4 - Rapporto P - QRS
tratto P-QRS
max 0,20 sec (5 quadretti)
NB! Cura il paziente, non il monitor
Blocco AV di 1° grado
Nodo AV
Blocco AV di 1° grado
Blocco AV di 2° grado - Tipo 1
Gli elettrodi
Dove piazzare gli elettrodi adesivi • su una superficie ossea • dove la cute è glabra • dove la cute è meno sudata
心络芯-远程心电智能诊断平台说明书

心络芯-远程心电智能诊断平台说明书V2-20201230目录1.安装与卸载客户端 (2)1.1.下载客户端 (2)1.2.安装客户端 (2)1.3.卸载客户端 (5)1.4.更新客户端 (6)1.5.安装及更新心络芯分析软件 (6)2.登录与退出客户端 (8)2.1.登录客户端 (8)2.2.退出客户端 (9)3.管理设置 (9)3.1.成员管理 (9)3.2.切换用户 (11)3.3.版本查询 (11)4.检查医生端的使用 (11)4.1.检查管理 (11)4.2.新建检查 (13)4.3.上传数据 (14)4.4.删除检查 (16)4.5.获取报告 (16)5.诊断审核医生端的使用 (17)5.1.审核管理 (17)5.2.接收检查 (19)5.3.诊断 (19)5.4.提交审核 (20)5.5.审核 (20)5.6.取消诊断 (21)6.消息中心 (22)7.帮助中心 (23)1.安装与卸载客户端1.1.下载客户端打开“心络科技官网”,点击【应用下载】;或点击下载链接:/,点击【下载安装】下载最新版客户端安装程序。
图11.2.安装客户端左键双击心络芯安装包执行安装程序,安装过程中部分电脑会出现如下图所示弹窗,均点击【是】。
图2按照提示步骤依次进行安装,图3如需修改安装目录,点击【浏览】选择安装目录。
图4选择安装目录后,点击【下一步】进入准备安装。
图5点击【安装】执行安装程序,点击【取消】则会关闭窗口,取消安装。
图61.3.卸载客户端进入Windows系统控制面板选择【卸载程序】,选中【心络芯】软件,鼠标右键,点击【卸载】按钮即可卸载软件。
图7点击【是】卸载程序。
点击【否】取消卸载。
1.4.更新客户端心络芯客户端默认在网络连接稳定状态下,检测到有新版本发布,登录时将自动强制更新到最新版本。
更新流程的安装过程同1.2安装流程一致。
1.5.安装及更新心络芯分析软件心络芯分析软件会更具用户的账号权限去判断是否具备安装权限,仅具备“诊断、审核、终审”三种权限任意一种即可使用分析软件。
心电图(ECG)监测设备操作指南说明书

Types of ECG artifact Motion artifact
Reducing the upper cutoff frequency filter from 150 to 40 Hz reduces muscle artifact
Muscle tremor: High frequency (20-150 Hz) and/or medium frequency (3-5 Hz) If shivering, cover with a blanket Move limb electrode elsewhere on limb to avoid culprit muscle Abrade skin if there is motion artifact
Check for dried gel Abrade skin Have patient lie still
and stop talking
Transport: Medium frequency (3–15 Hz)
Check for dried gel Abrade skin Stop ambulance to get
Caused by dried gel, excessive hair, poor adhesion or when breaks in connectivity occur anywhere between the electrode and the monitor
MEMRSECG心电网络系统使用说明书

MEMRS-ECG型心电图网络系统使用说明书北京麦迪克斯科技有限公司目录前言MEMRS-ECG型心电网络系统软件是一套功能完善、技术先进的心电信号分析系统。
为了正确的使用本仪器,充分发挥它的各项功能,请仔细阅读本说明书。
如果有任何疑问,请与麦迪克斯公司或分销商联系。
本说明书旨在介绍如何正确使用MEMRS-ECG心电网络系统。
麦迪克斯公司执行的是不断发展的政策,因此麦迪克斯公司保留在没有事先通知的情况下,对本手册说明中的产品进行修改变动的权利。
本说明书的修改、解释权属于麦迪克斯公司。
MEMRS-ECG心电网络系统为高技术、高质量的设计实体。
在正确的操作和使用环境下,一般无须过多维护。
如果您在使用中有什么问题,请与麦迪克斯公司直接联系,或与您所购买MEMRS-ECG 心电网络系统的销售商联系。
我们将竭诚为您服务!联系方式:北京麦迪克斯科技有限公司地址:北京市海淀区安宁庄西路9号金泰富地大厦1005室邮编:100085维修热线:400 8100 559Website:E-mail:第一章概述MEMRS-ECG心电网络系统是一套功能完善、技术先进的心电图分析管理系统,为医院心电检查建立数字化工作平台,实现心电图检查的数字化、流程化管理过程。
临床医生直接采集心电图,实时传输到心电诊断中心。
1.操作医生权限管理:心电网络管理系统为了明确操作医生责任,具有权限登陆功能,按照使用医生的姓名与登陆密码操作本系统,负责分析、诊断、打印、发送心电,实现数据的本地存储将保留操作医生信息。
2.提供心电图处理电子测量功能:本系统提供强大的心电图波形显示、电子标尺测量、新旧病历对比功能、幅值调整、单页多页显示、心拍自动分析、心拍特征点自动识别、患者数据全数字导入导出功能,心拍特征点手动微调、走纸速度调整、波形放大等功能,可以摆脱原始的分规手动测量的方式。
3.自动诊断技术:本系统提供患者心电图数据自动分析技术,采用国际先进的心电图数据库资料,可针对多种复杂的心电图信息进行自动分析,并且提供国际与国内标准的诊断用语,患者测量参数异常值、诊断异常特殊颜色显示,分析界面截屏打印,心电图多种颜色设置,有12导心电图叠加分析,复合波功能,协助医生快速诊断。
ECG系统说明书
ECG说明书一. ECG 系统概述ECG系统是提供在嵌入式系统下采集心电信号数据的专用系统。
ECG系统将信号发生器感应的数据通过导联线传递到系统中,因此整个 ECG系统会被集成一个整体。
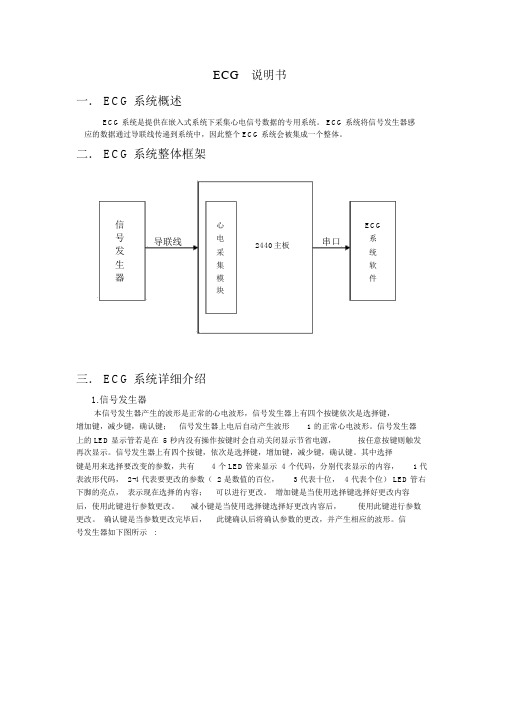
二. ECG 系统整体框架信心ECG号导联线电2440主板串口系发采统生集软器模件块三. ECG 系统详细介绍1.信号发生器本信号发生器产生的波形是正常的心电波形,信号发生器上有四个按键依次是选择键,增加键,减少键,确认键;信号发生器上电后自动产生波形 1 的正常心电波形。
信号发生器上的 LED显示管若是在 5 秒内没有操作按键时会自动关闭显示节省电源,按任意按键则触发再次显示。
信号发生器上有四个按键,依次是选择键,增加键,减少键,确认键。
其中选择键是用来选择要改变的参数,共有 4 个 LED管来显示 4 个代码,分别代表显示的内容, 1 代表波形代码, 2-4 代表要更改的参数( 2 是数值的百位, 3 代表十位, 4 代表个位) LED管右下脚的亮点,表示现在选择的内容;可以进行更改。
增加键是当使用选择键选择好更改内容后,使用此键进行参数更改。
减小键是当使用选择键选择好更改内容后,使用此键进行参数更改。
确认键是当参数更改完毕后,此键确认后将确认参数的更改,并产生相应的波形。
信号发生器如下图所示 :2.导联线导联线是用来将信号发生器产生的数据传送到主板上,由于心电噪声背景比较强, 测量条件比较复杂,因此选择导联线的精度要求较高。
导联线如下图所示:3.心电采集模块采样模块是专门为采样心电图而设计的,它有八个差分信号输入通道,由于模拟输入端具有高达 100M的输入阻抗,所以它可以直接连接高阻信号源,模块以串行方式输出采样的数据。
具体实际参数设置可参见附录。
4.ECG 系统软件4.1 硬件环境运行环境 : 2440开发板(接入电源是12 伏 )运行操作系统 : wince5.0存储位置 : 2G SD卡4.2 软件编程环境Visual Studio 2008专业版4.3 软件编程语言VC++4.4 ECG 系统软件简单介绍其中”Type”下拉列表中是有12 组心电图的波形对应的名称,分别是I,II,III,avR,avL,avF,V1,V2,V3,V4,V5,V6,您在测量显示波形时必须要选择您想看到的波形的名称。
心电网络信息系统his_emr接口说明文档

心电网络信息系统his/emr接口设计说明文档内容目录一. 更新记录 (3)二. 接口目标 (3)2.1.一般工作流程图 (3)2.2.一般工作流程描述 (3)2.3.相关术语约定 (4)三.his 接口设计 (4)3.1.具体功能 (4)3.2.数据描述 (4)3.3.一般实现方式推荐 (5)3.3.1.数据库视图 (5)3.3.2.api (5)四.emr 接口设计 (5)4.1.目标 (5)4.2.设计实现 (5)五. 体检系统接口设计 (6)5.1.基本功能描述 (6)5.2.病人基础信息数据定义 (6)5.3.结果返回 (6)一.更新记录二.接口目标本文档旨在描述心电图系统与医院常见的信息系统进行数据信息整合的说明,包括一般工作流程和实现设计参考。
面向的读者对象为医院信息系统管理、维护人员和信息系统厂商开发、运维人员。
文档描述了一般的常见的工作流程和针对his,emr,pacs系统的信息整合的参考设计。
2.1.一般工作流程图图2.1.心电网络信息系统一般工作流程2.2.一般工作流程描述1.his系统中医生工作站开具检查申请。
2.病人持就诊卡医技科室开始检查,住院病区,则为相关执行者去给病人做检查。
3.执行检查的医务人员,在心电图采集工作站终端上,通过门诊号(或就诊卡号)等查询号中的一种,从his系统中查询获取检查的详细信息:姓名、所在科室、临床诊断等等内容。
4.心电图医技科室完成检查,把最终报告发布不出来,供his/emr医生工作站调阅。
5.His/emr的医生工作站,在所辖病人的病历下查找到开具的心电图检查,打开查看发布的报告。
2.3.相关术语约定根据各部分功能,如下定义his接口:主要功能是从his系统中,获取已经登记了的病人的基础信息。
以免心电图信息系统中重复录入,方便医生,提高效率。
emr接口:主要功能是最终的报告调阅功能的实现,虽然这个功能可能是his工作站去实现,按一般习惯,也叫成了emr接口。
ECG-1000 心电管理系统用户手册(单机版)

注意 您应当了解的在使用过程中,软件使用设备或其他设备可能遭受的损害,如设备故障、失灵或损坏等。
MEMRS-ECG心电网络系统使用说明书
MEMRS-ECG型心电图网络系统使用说明书麦迪克斯科技目录前言 (1)第一章概述 (2)第二章软件功能 (3)第一节预约 (3)第二节登记 (6)第三节分诊 (8)第四节心电图设备连接匹配 (11)第五节电生理设备连接匹配 (14)第六节心电图报告分析系统 (17)第一小节报告系统登录 (17)第二小节回放分析12导心电图 (18)第三小节诊断及报告 (22)第四小节打印 (23)第五小节病历导入导出 (24)第七节电生理系统报告工作站 (25)第一小节报告系统登录 (25)第二小节编写报告 (26)第三小节测量波形 (27)第四小节诊断 (27)第五小节打印 (29)第八节合并病历 (32)第九节查询功能 (34)第三章使用环境和注意事项 (36)前言MEMRS-ECG型心电网络系统软件是一套功能完善、技术先进的心电信号分析系统。
为了正确的使用本仪器,充分发挥它的各项功能,请仔细阅读本说明书。
如果有任何疑问,请与麦迪克斯公司或分销商联系。
本说明书旨在介绍如何正确使用MEMRS-ECG心电网络系统。
麦迪克斯公司执行的是不断发展的政策,因此麦迪克斯公司保留在没有事先通知的情况下,对本手册说明中的产品进行修改变动的权利。
本说明书的修改、解释权属于麦迪克斯公司。
MEMRS-ECG心电网络系统为高技术、高质量的设计实体。
在正确的操作和使用环境下,一般无须过多维护。
如果您在使用中有什么问题,请与麦迪克斯公司直接联系,或与您所购买MEMRS-ECG 心电网络系统的销售商联系。
我们将竭诚为您服务!联系方式:麦迪克斯科技地址:市海淀区安宁庄西路9号金泰富地大厦1005室邮编:100085:(010)62974855传真:(010)62978861维修热线:400 8100 559Website: .medextech.E-mail: supportmedextech.第一章概述MEMRS-ECG心电网络系统是一套功能完善、技术先进的心电图分析管理系统,为医院心电检查建立数字化工作平台,实现心电图检查的数字化、流程化管理过程。
ECG系统说明书
心电图采样模块的供电应该在下表范围内,否则可能引起永久性损坏。除非另外说明,下列参数的测试条件为:常温、+5V供电、屏蔽驱动和右腿驱动均使用。
参数
条件
最小 典型 最大
单位
模拟通道
8
采样频率
每个通道
2400
Dot
数据输出速率
每个通道、不同导联体系
500/1000
Dot
数据输出位数
每个通道
12
Bit
电源电压
4.85 5 5.15
V
电源电流
57
mA
工频数字滤波器在50Hz和高频数字滤波器滤波器在截止频率45Hz下的模拟结果如下图所示,低频滤波器的测试方法符合GB1139的要求,在此不重复叙述。
50Hz下的工频数字滤波器ft=45Hz时候的高频数字滤波器滤波器
可以看出:工频数字滤波器在凹口频率点的衰减接近∞,在强工频干扰下,对噪声信号有很好的抑制作用,下图说明了实际心电图的滤波效果,其中上图为带有工频干扰的心电图波形,下图为滤波后的波形。
屏蔽层接模块提供的屏蔽驱动信号,这样可以得到最佳效果。
2、电源
心电图采样模块内含精密放大器和高精度AD变换器,虽然在电路设计的时候,考虑了对电源的滤波,并且采用对电源噪声不敏感的电路结构,可对电源仍然有较高的要求,请注意以下几点:
0
D8
C3高字节
第9字节
0
D9
C3低字节
第10字节
0
D10
C4高字节
第11字节
0
D11
C4低字节
第12字节
0
D12
C5高字节
第13字节
0
D13
C5低字节
MEMRS-ECG心电网络系统使用说明书
MEMRS-ECG型心电图网络系统使用说明书麦迪克斯科技目录前言 (1)第一章概述 (2)第二章软件功能 (3)第一节预约 (3)第二节登记 (6)第三节分诊 (8)第四节心电图设备连接匹配 (11)第五节电生理设备连接匹配 (14)第六节心电图报告分析系统 (17)第一小节报告系统登录 (17)第二小节回放分析12导心电图 (18)第三小节诊断及报告 (22)第四小节打印 (23)第五小节病历导入导出 (24)第七节电生理系统报告工作站 (25)第一小节报告系统登录 (25)第二小节编写报告 (26)第三小节测量波形 (27)第四小节诊断 (27)第五小节打印 (29)第八节合并病历 (32)第九节查询功能 (34)第三章使用环境和注意事项 (36)前言MEMRS-ECG型心电网络系统软件是一套功能完善、技术先进的心电信号分析系统。
为了正确的使用本仪器,充分发挥它的各项功能,请仔细阅读本说明书。
如果有任何疑问,请与麦迪克斯公司或分销商联系。
本说明书旨在介绍如何正确使用MEMRS-ECG心电网络系统。
麦迪克斯公司执行的是不断发展的政策,因此麦迪克斯公司保留在没有事先通知的情况下,对本手册说明中的产品进行修改变动的权利。
本说明书的修改、解释权属于麦迪克斯公司。
MEMRS-ECG心电网络系统为高技术、高质量的设计实体。
在正确的操作和使用环境下,一般无须过多维护。
如果您在使用中有什么问题,请与麦迪克斯公司直接联系,或与您所购买MEMRS-ECG 心电网络系统的销售商联系。
我们将竭诚为您服务!联系方式:麦迪克斯科技地址:市海淀区安宁庄西路9号金泰富地大厦1005室邮编:100085:(010)62974855传真:(010)62978861维修热线:400 8100 559Website: .medextech.E-mail: supportmedextech.第一章概述MEMRS-ECG心电网络系统是一套功能完善、技术先进的心电图分析管理系统,为医院心电检查建立数字化工作平台,实现心电图检查的数字化、流程化管理过程。
动态心电操作手册

说明和技术手册Lifecard CFLifecard 12Firmware Version 7手册Part No. 18-6073内容I. 导言关于本手册 . . . . . . . . . . . . . . . . . . . . . . . . . . . . . . . . . . . . . . . . . . . . . . . . . . . .1免责声明 . . . . . . . . . . . . . . . . . . . . . . . . . . . . . . . . . . . . . . . . . . . . . . . . . . . . . . . . . .1 2. 安全和限制设备描述 . . . . . . . . . . . . . . . . . . . . . . . . . . . . . . . . . . . . . . . . . . . . . . . . . . .3提示和定制使用 . . . . . . . . . . . . . . . . . . . . . . . . . . . . . . . . . . . . . . . . .7禁忌症 . . . . . . . . . . . . . . . . . . . . . . . . . . . . . . . . . . . . . . . . . . . . . . . . . . . . .7预防 . . . . . . . . . . . . . . . . . . . . . . . . . . . . . . . . . . . . . . . . . . . . . . . . . . . . . . . . .7警告 . . . . . . . . . . . . . . . . . . . . . . . . . . . . . . . . . . . . . . . . . . . . . . . . . . . . . . . . . . . .7不良反映 . . . . . . . . . . . . . . . . . . . . . . . . . . . . . . . . . . . . . . . . . . . . . . . . . . .8注意事项 . . . . . . . . . . . . . . . . . . . . . . . . . . . . . . . . . . . . . . . . . . . . . . . . . . . . . . . . . . . .8 统一的标准 . . . . . . . . . . . . . . . . . . . . . . . . . . . . . . . . . . . . . . . . . . . . .9调整,部件更换, 保养和维修 . . . . . . . . . . . . . . . . . . . .9缺陷和不正常的压力 . . . . . . . . . . . . . . . . . . . . . . . . . . . . . . . . . . . . . . . . .10更正 . . . . . . . . . . . . . . . . . . . . . . . . . . . . . . . . . . . . . . . . . . . . . . . . . . . . . . .10一致声明. . . . . . . . . . . . . . . . . . . . . . . . . . . . . . . . . . . . . . . . . . . . .10商标解释 . . . . . . . . . . . . . . . . . . . . . . . . . . . . . . . . . . . . . . . . . . . . . .11担保 . . . . . . . . . . . . . . . . . . . . . . . . . . . . . . . . . . . . . . . . . . . . . . . . . . . . . . . . . .12制造商 . . . . . . . . . . . . . . . . . . . . . . . . . . . . . . . . . . . . . . . . . . . . . . . . . . . . . . .133. LIFECARD CF 操作指导记录程序流程图 . . . . . . . . . . . . . . . . . . . . . . . . . . . . . . .15记录患者详细资料 . . . . . . . . . . . . . . . . . . . . . . . . . . . . . . . . . . . . . . . . . . . . .16A.初始化闪光卡 . . . . . . . . . . . . . . . . . . . . . . . . . . . . . . . . . . . . . . . . . .16B. 进行语音记录 . . . . . . . . . . . . . . . . . . . . . . . . . . . . . . . . . . . . . .21C. 在 CF卡上书写详细信息 . . . . . . . . . . . . . . . . . . . . . . . . . . . . . . . .22准备记录器 . . . . . . . . . . . . . . . . . . . . . . . . . . . . . . . . . . . . . . . . . . . . . . .23打开记录器 . . . . . . . . . . . . . . . . . . . . . . . . . . . . . . . . . . . . . . . . . . . . . . .23插入电池 . . . . . . . . . . . . . . . . . . . . . . . . . . . . . . . . . . . . . . . . . . . . . . . . .24患者的准备 . . . . . . . . . . . . . . . . . . . . . . . . . . . . . . . . . . . . . . . . . . . . . . . . .27准备皮肤 . . . . . . . . . . . . . . . . . . . . . . . . . . . . . . . . . . . . . . . . . . . . . . . . .27粘贴电极片 . . . . . . . . . . . . . . . . . . . . . . . . . . . . . . . . . . . . . . . . . . . . . .27使用 3, 4 和 6 电极病人电缆的程序 . . . . . . . . . . . . . . . . . . . . . .283电极病人电缆 . . . . . . . . . . . . . . . . . . . . . . . . . . . . . . . . . . . . . . .284电极病人电缆 . . . . . . . . . . . . . . . . . . . . . . . . . . . . . . . . . . . . . . . .296电极病人电缆. . . . . . . . . . . . . . . . . . . . . . . . . . . . . . . . . . . . . . . . .30关于患者. . . . . . . . . . . . . . . . . . . . . . . . . . . . . . . . . . . . . . . . . . . . . .31病人电缆的保护. . . . . . . . . . . . . . . . . . . . . . . . . . . . . . . . . . . . . . . . .32标准记录模式 - “开始” 菜单选项. . . . . . . . . . . . . . . . . . . .33延长记录模式 - “周记录” 菜单选项 . . . . . . . . . . . . . .33开始记录 . . . . . . . . . . . . . . . . . . . . . . . . . . . . . . . . . . . . . . . . . . . . . . . . . .34使用10电极病人电缆进行12-导联记录的程序 . . . . . . . . . . . . . . . . . . . .35使用电极片 . . . . . . . . . . . . . . . . . . . . . . . . . . . . . . . . . . . . . . . . . . . . . .36装配记录器 . . . . . . . . . . . . . . . . . . . . . . . . . . . . . . . . . . . . . . . . . . .38连接病人电缆 . . . . . . . . . . . . . . . . . . . . . . . . . . . . . . . . . . . . . . . . .38使用 Mason-Likar 系统进行ECG变更 . . . . . . . . . . . . . . . . . . . . . . . . .38调整背带 . . . . . . . . . . . . . . . . . . . . . . . . . . . . . . . . . . . . . . . . . . . . .39导联线的保护 . . . . . . . . . . . . . . . . . . . . . . . . . . . . . . . . . . . . . . . . . . . .4012-导联记录Recording Behaviour with Lead Off . . . . . . . . . . . . . . . . . . . . . . . . . . .40 全部程序- 开始记录 . . . . . . . . . . . . . . . . . . . . . . . . . . . . . . . . . . . .41设置起搏器探测选项 . . . . . . . . . . . . . . . . . . . . . . . . . . . . . . . . . . . . .41选择开始... 或周记录.. . . . . . . . . . . . . . . . . . . . . . . . . . . . . . . . . . . . . . .41确认患者ID . . . . . . . . . . . . . . . . . . . . . . . . . . . . . . . . . . . . . . . . . . . .41进行语音记录 . . . . . . . . . . . . . . . . . . . . . . . . . . . . . . . . . . . . . . . . . .42监视 ECG条图 – 检查 ECG 条图质量. . . . . . . . . . . . . . . . . . . . . . . . . . . .43患者的指导 . . . . . . . . . . . . . . . . . . . . . . . . . . . . . . . . . . . . . . . . . . . . . . . . .47在记录时. . . . . . . . . . . . . . . . . . . . . . . . . . . . . . . . . . . . . . . . . . . . . . . .48患者返回之后 . . . . . . . . . . . . . . . . . . . . . . . . . . . . . . . . . . . . . . . . . . . . . . .501. 断开和清理记录器 . . . . . . . . . . . . . . . . . . . . . . . . . . . . . . .502.打开Lifecard . . . . . . . . . . . . . . . . . . . . . . . . . . . . . . . . . . . . . . . . . . . . . .503. 拆下电池 . . . . . . . . . . . . . . . . . . . . . . . . . . . . . . . . . . . . . . . . . . . .50下载记录. . . . . . . . . . . . . . . . . . . . . . . . . . . . . . . . . . . . . . . . . . .51使用 CardioNavigator 软件. . . . . . . . . . . . . . . . . . . . . . . . . . . . . . . . . . . . . . . . . . . .51 4a. 把记录数据下载到CardioNavigator . . . . . . . . . . . . . . . . . . . .514b.立即从 CF 卡上下载记录数据 . . . . . . . . . . . . . . . .515a. 把数据下载到报告管理器 . . . . . . . . . . . . . . . . . . . .525b. 立即从 CF 卡上下载记录数据 . . . . . . . . . . . . . . . .52Lifecard CF 显示 . . . . . . . . . . . . . . . . . . . . . . . . . . . . . . . . . . . . . . . . . . . . . .54 Lifecard CF 菜单选项 . . . . . . . . . . . . . . . . . . . . . . . . . . . . . . . . . . . . . . . . . . . .55主菜单选项 . . . . . . . . . . . . . . . . . . . . . . . . . . . . . . . . . . . . . . . . . . . . . .55设置菜单选项 . . . . . . . . . . . . . . . . . . . . . . . . . . . . . . . . . . . . . . . . . . . . .56Lifecard CF 声音 . . . . . . . . . . . . . . . . . . . . . . . . . . . . . . . . . . . . . . . . . . . . . . . . . .59 错误和报警显示. . . . . . . . . . . . . . . . . . . . . . . . . . . . . . . . . . . . . . . . . . . .604. 保养闪光卡的保护 . . . . . . . . . . . . . . . . . . . . . . . . . . . . . . . . . . . . . . . . . . . . . . . . . .63读闪光卡的困难 . . . . . . . . . . . . . . . . . . . . . . . . . . . . . . . . . . . . . . . .64清洁和消毒 Lifecard CF记录器] . . . . . . . . . . . . . . . . . . . . . . . . . .65清洁记录器袋子和系索 . . . . . . . . . . . . . . . . . . . . . . . . . . . . . . . . . . . .66体液对记录器的污染 . . . . . . . . . . . . . . . . . . . . . . . . . . . . . . . . . . . . . .66Lifecard CF 附件 . . . . . . . . . . . . . . . . . . . . . . . . . . . . . . . . . . . . . . . . . . . . . .675. LIFECARD CF 技术手册Lifecard CF 的技术规范. . . . . . . . . . . . . . . . . . . . . . . . . . . . . . . . . . . . .69标准记录模式 - ECG 输入 . . . . . . . . . . . . . . . . . . . . . . . . . . . . . .69标准记录模式] – 起搏器脉冲探测. . . . . . . . . . . . . . . . . . .69标准记录模式] – 数据存储 . . . . . . . . . . . . . . . . . . . . . . . . . . . .70人机界面 . . . . . . . . . . . . . . . . . . . . . . . . . . . . . . . . . . . . . . . . . . . . . . . . . . .70 电源要求. . . . . . . . . . . . . . . . . . . . . . . . . . . . . . . . . . . . . . . . . . . . .70延长记录模式 . . . . . . . . . . . . . . . . . . . . . . . . . . . . . . . . . . . . . . . . .7112-导联模式附加规范 . . . . . . . . . . . . . . . . . . . . . . . . . . . .71物理和环境特性 . . . . . . . . . . . . . . . . . . . . . . . . . . .72电磁兼容性 . . . . . . . . . . . . . . . . . . . . . . . . . . . . . . . . . . . . . .72净化 . . . . . . . . . . . . . . . . . . . . . . . . . . . . . . . . . . . . . . . . . . . . . . . . .73 Lifecard CF 记录器纵览 . . . . . . . . . . . . . . . . . . . . . . . . . . . . . . . .74病人电缆 . . . . . . . . . . . . . . . . . . . . . . . . . . . . . . . . . . . . . . . . . . . . . . . . . . .74 检查病人电缆 . . . . . . . . . . . . . . . . . . . . . . . . . . . . . . . . . . . . . . . .75电池 . . . . . . . . . . . . . . . . . . . . . . . . . . . . . . . . . . . . . . . . . . . . . . . . . . . . . . . .75 紧凑型闪光卡 . . . . . . . . . . . . . . . . . . . . . . . . . . . . . . . . . . . . . . . . . . . . . .76功能检测 . . . . . . . . . . . . . . . . . . . . . . . . . . . . . . . . . . . . . . .76每年维修提醒. . . . . . . . . . . . . . . . . . . . . . . . . . . . . . . . . . . . . . . . . .777: 索引I. 导言关于本手册本手册包含了关于Lifecard CF记录器和12-导联 Lifecard 12 的详细操作指南。
MDE ECG测量单元说明书
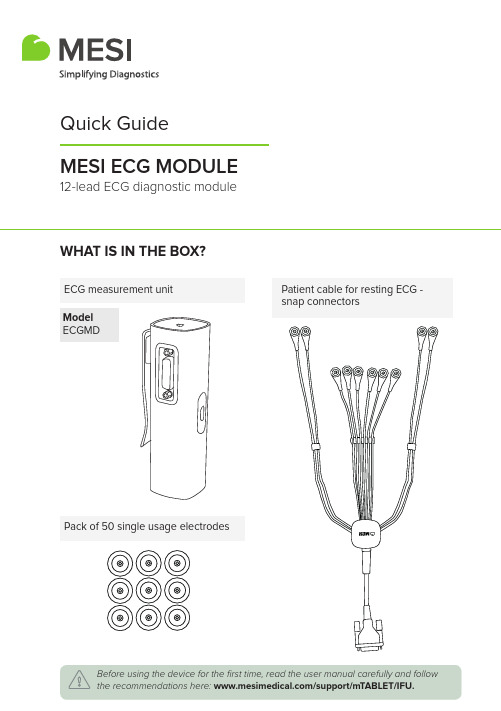
Quick Guide MESI ECG MODULEWHAT IS IN THE BOX?12-lead ECG diagnostic moduleModel ECGMDECG measurement unit Pack of 50 single usage electrodesPatient cable for resting ECG - snap connectorsFIRST USE1. Connect patient cable with module2. Prepare patientThe patient needs to expose the skin and lie down on examination bed in a supine position. Make sure the patient is comfortable and relaxed and does not feel cold. The individual should lie back on a suitably large examination bed with arms and hands extended along the sides of the body: this will minimize the likelihood of the ECG trace being affected by muscle tremor.Step 1Thoroughly clean the areas of the skin where the electrodes will be placed. In some cases, it may be necessary to shave the hair to provide better electrical contact with the surface.Step 2Place electrodes on the patient cable.Step 33. Add/select patientOn your MESI mTABLET UNIT, select existing patient (1) or add a new one (2).12Use only accessories and other parts recommended or supplied by MESI. Use of other thanrecommended or supplied parts may result in injury, inaccurate information and/or damage to theunit. This product is not designed for sterile use.After selecting the patient, please select the ECG measurement in the application menu.ECGSYS - 2/54. Choose the measurementAfter selecting the patient, please select the ECG measurement in the application menu.5. Place the electrodes and startPlace electrodes on the patient’s body according to the instructions on the screen. Press start to begin the recording process.When the ECG signal is stable you can begin the recording process by pressing AUTO for automatic 10s signal acquisition (1) or MANUAL for up to 5 minutes of ECG signal capture (2).6. Perform the measurementIf necessary, it is possible to activate filters capable of improving the legibility of the signal without modifying its morphology. Activation of the filters has an effect on both the displayed and the printed signal. T o guarantee a correct and accurate analysis, any automatic interpretation of the trace is performed always and only on the non-filtered ECG signal.ECGSYS - 3/57. ResultNavigation area ElectrocardiogramInterpretationParametersPatient’s recording historyComment Navigation area Go to: previous/next result Send for consultation Discard resultGo to: Application screen Adjust ECG speedand sensitivityHeart rateV1.0/08-2018 | ENGECGSYS WARNINGSDo not place the electrodes on wounds, as this may cause additional injury.It must be ensured that neither the patient nor the electrodes (including the neutral electrode) come into contact with other persons or conducting objects (even if these are earthed).The MESI mTABLET ECG users must be adequately trained to use the device. Before the first use of the device, users must carefully read the entire instructions for use and follow the instructions for use of the connected equipment.Do not use this unit in areas where there is any danger of explosion or the presence of flammable gases such as anaesthetic agents.Protect the device from moisture and liquids and extremely high/low temperatures. Also, protect the device from mechanical stress and do not expose it to direct sunlight, as this can cause the device to not function properly.MESI mTABLET ECG module must not be used in an oxygen-rich environment.The ECG measurement unit is not intended for use in conjunction with high frequency surgical equipment.Portable RF communications equipment including peripherals such as antenna cables and external antennas should be used no closer than 30 cm (12 inches) to any part of the device including cables specifed by the manufacturer. Otherwise degradation of the performance of this equipment couldresult.。
- 1、下载文档前请自行甄别文档内容的完整性,平台不提供额外的编辑、内容补充、找答案等附加服务。
- 2、"仅部分预览"的文档,不可在线预览部分如存在完整性等问题,可反馈申请退款(可完整预览的文档不适用该条件!)。
- 3、如文档侵犯您的权益,请联系客服反馈,我们会尽快为您处理(人工客服工作时间:9:00-18:30)。
M E M R S E C G心电网络系统使用说明书 SANY标准化小组 #QS8QHH-HHGX8Q8-GNHHJ8-HHMHGN#MEMRS-ECG型心电图网络系统使用说明书北京麦迪克斯科技有限公司目录前言MEMRS-ECG型心电网络系统软件是一套功能完善、技术先进的心电信号分析系统。
为了正确的使用本仪器,充分发挥它的各项功能,请仔细阅读本说明书。
如果有任何疑问,请与麦迪克斯公司或分销商联系。
本说明书旨在介绍如何正确使用MEMRS-ECG心电网络系统。
麦迪克斯公司执行的是不断发展的政策,因此麦迪克斯公司保留在没有事先通知的情况下,对本手册说明中的产品进行修改变动的权利。
本说明书的修改、解释权属于麦迪克斯公司。
MEMRS-ECG心电网络系统为高技术、高质量的设计实体。
在正确的操作和使用环境下,一般无须过多维护。
如果您在使用中有什么问题,请与麦迪克斯公司直接联系,或与您所购买MEMRS-ECG心电网络系统的销售商联系。
我们将竭诚为您服务!联系方式:北京麦迪克斯科技有限公司地址:北京市海淀区安宁庄西路9号金泰富地大厦1005室邮编:100085 维修热线:400 8100 559Website:E-mail:第一章概述MEMRS-ECG心电网络系统是一套功能完善、技术先进的心电图分析管理系统,为医院心电检查建立数字化工作平台,实现心电图检查的数字化、流程化管理过程。
临床医生直接采集心电图,实时传输到心电诊断中心。
1.操作医生权限管理:心电网络管理系统为了明确操作医生责任,具有权限登陆功能,按照使用医生的姓名与登陆密码操作本系统,负责分析、诊断、打印、发送心电,实现数据的本地存储将保留操作医生信息。
2.提供心电图处理电子测量功能:本系统提供强大的心电图波形显示、电子标尺测量、新旧病历对比功能、幅值调整、单页多页显示、心拍自动分析、心拍特征点自动识别、患者数据全数字导入导出功能,心拍特征点手动微调、走纸速度调整、波形放大等功能,可以摆脱原始的分规手动测量的方式。
3.自动诊断技术:本系统提供患者心电图数据自动分析技术,采用国际先进的心电图数据库资料,可针对多种复杂的心电图信息进行自动分析,并且提供国际与国内标准的诊断用语,患者测量参数异常值、诊断异常特殊颜色显示,分析界面截屏打印,心电图多种颜色设置,有12导心电图叠加分析,复合波功能,协助医生快速诊断。
4.科室主任管理功能:可根据患者姓名、检查号、检查时间、工作量、审核医生统计、按心电图分析值统计、按诊断结论统计、也支持模糊查询及组合查询。
日期等多种查询条件的组合形式查询,方便医生针对各种条件下获得资料的工作;患者数据的随时导入、导出功能。
5.彩色图文报告输出技术:具有多种彩色图报告输出功能,经过医生诊断后的心电图数据可形成多种报告摸版,在诊断报告摸版上提供患者信息、图文一体诊断报告、彩色心电轴示意图、彩色心电图测量参数、彩色心电图诊断描述、彩色心电图报告诊断、异常心电图特殊颜色显示,支持长导联任意选择,支持A4纸与B5纸或专用的心电图纸打印,支持图文心电图参数与心电图数据双面打印。
本系统具有远程病历到达提醒功能,当有新病历传输过来时,可以声音的方式发出提醒;方便值班医生做出应急反映。
第二章软件功能本章将按照工作流程进行软件操作与功能的详细讲解。
第一节预约在门诊心电图室,打开预约软件,界面如下。
在申请列表中,将会自动显示HIS过来的当天日期的待检查病人列表。
可以更改申请日期查询以前的待检查病人。
双击申请列表中的病历,直接从HIS方提取病人的基本信息和检查信息显示在界面上。
录入检查房间、检查项目、检查时间等信息后即可点击“预约”按钮进行预约。
当然,也可以新建病历进行预约。
点击“预约”按钮,弹出提示信息,病人的信息入库,并显示在预约列表中。
若想修改预约,还可在预约列表中双击该病人到上方界面中,修改完成后点击“提交修改”按钮进行改约。
此外,选中病人后点击右键可以取消预约,删除该病人的信息。
第二节登记当预约好的病人来做检查时,要先在登记工作站上进行登记,此时患者自动进入排队队列,等待检查。
不过,对当天进行检查的病人可以不用预约,直接登记就可以。
双击已预约的病历,病人的基本信息和检查信息显示在界面上。
点击“登记”按钮即可进行登记。
点击“登记”按钮,弹出提示信息,病人的状态由预约改成登记,自动进入排队队列,并且病人从预约列表消失,在登记列表中显示。
若想修改登记,还可在登记列表中双击该病人到上方界面中,修改完成后点击“提交修改”按钮进行修改。
此外,选中病人后点击右键可以取消登记,病人的状态转成预约,进入预约列表。
已登记的病人可以在排队情况中看到,如下图所示。
第三节分诊登记时要对当天进行检查的病人报到进行确认、分诊,即选择相应的检查房间,为检查室提供工作队列任务列表信息。
登记之后,病人会自动进入相应的排队队列,在排队情况列表中显示。
如下图所示,登记的病人会在所登记的检查房间下方进行排队,在排队情况列表中会显示不同颜色来区分患者当前的状态,其中,白色为未呼叫未检查,黄色为已呼叫未开始检查。
医生可以根据检查房间检查完成情况以及候诊队列,及时召唤等待病人进入检查房间。
在排队情况列表中,也可以通过右键进行呼叫病人。
进行分诊后,在对应的检查房间中,打开分诊呼叫软件,只显示了当前检查房间的登记病人,方便查看及操作,选中病人点击“呼叫”按钮即可进行呼叫。
第四节心电图设备连接匹配在心电图机工作站上,若要接收心电图机传输过来的数据,必须先启动心电图机接收程序,界面如下。
在心电图机匹配主页面中,点击“检索”按钮可以查询HIS过来的当天日期的病人列表,可以更改上面的申请日期查询以前预约病人,且已经报告的病人不再显示。
当医生将心电图机的数据传输成功后,心电图机接收程序检查到有接收文件时,界面右上角弹出提示“成功接收心电图数据”。
成功接收到心电图机的数据后,选中一条病历,病人信息在病历信息区显示,或者不选择,手动输入病人信息也可以。
点击“提交”按钮,保存病历信息和图像信息,匹配图像到所选的病历上,界面右上角会依次弹出提示“正在上传数据…”、“XX数据接收完成”,然后自动清空等待下一次匹配。
之后就可以到心电工作站上进行查看心电图、写报告等操作。
第五节电生理设备连接匹配在电生理工作站上,首先必须先启动信息匹配程序,登陆界面如下。
选择检查科室和用户名后输入密码,或者选择检查科室输入工号和密码点击“登录”按钮即可登录,桌面右下角会出现软件的小图标,此时信息匹配程序已启动。
注意工号的优先级别大于用户名,一旦输入工号软件将不识别用户名。
密码可以为空。
当医生使用电生理工作站操作完成后进行打印,必须选择pdfFactory Pro打印机,然后点击确定。
打印完成后,信息匹配程序检查到待接收数据,在右下角滑动弹出提示信息,以便医生确认PDF入库是否正确,且每打印一次就会弹出一次。
提示信息中包括姓名、性别、年龄,点击“病历列表”进入信息匹配主页面。
在信息匹配主页面中,将会自动显示HIS过来的未报告的当天日期的病人列表。
可以更改上面的申请日期查询以前预约病人。
在预约列表中,黑色字体表示该病人无数据,红色字体表示该病人有数据但未报告,且打印过的病人不再显示。
选中一条病历,病人信息在病历信息区显示,或者不选择,手动输入病人信息也可以,然后点击“提交”按钮,保存病历信息和图像信息,匹配图像到所选的病历上。
之后就可以到多功能报告系统工作站上进行查看、编辑等操作。
注:打印完成后进行匹配时,同一个病人可匹配多幅PDF图像。
第六节 心电图报告分析系统第一小节 报告系统登录双击桌面上的“MECG-200多功能心电分析系统”图标,弹出登录界面。
选择检查科室和用户名后输入密码,或者选择检查科室输入工号和密码点登录按钮即可登录软件界面。
注意工号的优先级别大于用户名,一旦输入工号软件将不识别用户名。
密码可以为空。
然后,进入心电报告分析系统。
系统主界面如下图,选择全部病历,这样心电所做的全部已传输的心电检查将显示在病历列表中。
在病历列表中,选中任何一个病历,该病历的患者信息,心电分析值及诊断结论将显示在界面下方,为医生快速处理报告提供方便。
第二小节 回放分析12导心电图在病历列表中双击12导心电病历或者点击按钮后进入回放分析界面,系统将分析计算波形的各项参数,可以查看心房率、心室率、QT/QTd 间期等参数。
系统默认打开显示复合波的参数,单个心拍参数根据系统自动识别的当前心拍特征点计算得出,复合波又是根据每个心拍平均叠加算出来的。
心拍带有标志的为当前被选中分析的心拍;带有标志的为未被选中分析的心拍,选中一个心拍,当为复合波时心电分析数据不会变化,只有切换为当前心拍数据才会变化。
分析窗口如下图:患者信功能按钮病历列表窗口分析值 病历查询区 工具按钮区诊断结点击切换为当前心拍,此时心电分析数据变换为当前心拍的分析数据。
不论是在当前心拍还是复合波,心电分析数据中的心房率、心室率、P 波宽度、QRS 宽度、P-R 间期、电轴值均能用鼠标双击修改,在输入框后双击鼠标即保存,如图: 点击按钮弹出滤波设置窗口,如下图。
勾上前面复选框选择滤波项目,从下拉框中选择低通滤波器频率。
软件发布时已经为用户设置好滤波项目和低通滤波器频率,一般情况不需改变,如果遇到干扰较大的图像可以将低通滤波器频率设置低一些。
点击按钮进入全屏界面,如下图。
全屏显示心电方式可显示更长时间更清晰的图形,点击“恢复”按钮回到原来分析回放界面,保证医生在诊断过程中更清晰、全面的浏览患者的心电图数据。
点击图形左下角的按钮,可以选择心电图显示方式。
选择12×1方式即进入回放分析界面时显示的方式,还可选择6×2_C 或6×2_S 方式显示,也可选择3×4+1、3×4+2或3×4+3方式显示,其中3×4+N 中的N 是长导联,且可以切换显示成其他长导联。
心电分析工作站还可进行如下操作: 病历基本信心电分析数波形显示窗功能按报告助手窗1、波形不同电压显示(半电压、双倍电压调整)由于每个人的心电波形各不相同,因而相应的电压也可以不同。
根据特殊病人的电压高、低不同,医生可以根据自己的要求对电压进行调整,自动的6导一组(肢导一组,胸导一组)。
操作如下:将鼠标光标移至选中一组中的任意一导心电的电压显示方波处,点击鼠标右键即可。
最多可有5种电压调整模式,此功能只对12×1显示方式有效。
2、测量波形点击图形左下角的按钮。
将鼠标光标移动到所要测量波形的起始点,按下左键拖动鼠标移动到所要测量的结束位置松开鼠标,测量数据的窗口弹出,显示出时间差、幅值差等测量数据。
再次测量会显示此次测量和上次测量相关的一些测量结果。
