真空离心浓缩仪使用说明书
离心浓缩仪操作说明

离心浓缩仪操作说明-CAL-FENGHAI.-(YICAI)-Company One1CentriVap 型离心浓缩仪操作说明1、使用前注意查看冷阱,是否已经化霜完全,并用软布或纸巾擦拭干净。
2、查看泵后废液瓶是否已满,倒空后使用(注意:是废液瓶不是储油瓶)。
3、查看油箱窗口,真空油液面是否在max和min之间(看不清楚时可略晃动泵观察液面),真空油是否仍然透明清澈,及时添油或换油。
4、冷阱指示灯全亮后才能启动离心机。
5、离心机启动时注意查看真空泵是否工作正常,油嘴是否往外喷油,或往储油瓶吸油,如有以上异常,请用力盖紧离心机盖和冷阱盖;如果仍有异常,立即停机。
6、含有大量有机溶剂的液体不允许直接使用离心浓缩仪,用旋蒸或在通风橱内加热处理至有机溶剂含量较低时才能使用离心浓缩仪。
注:千万不要在转子转动时试图打开盖。
千万不要去损坏盖锁的机械结构。
在盖有裂缝或其它损坏迹象时,不能使用。
在运行时,千万不能倾斜CentriVap离心浓缩仪。
1、打开冷阱“ON”开关,当它达到操作温度时,“READY”指示灯亮起。
2、选择一个程序或设置设置点参数3、根据需要预热样品室4、如果CentriVap离心浓缩仪配置了“HEAT BOOST”加热器,并需要附加加热的话,打开“HEAT BOOST”加热器。
5、把样品放入样品管中,正常情况下,不得高于一半高度,把样品管放入转子中。
6、把上好样的转子放入样品室中。
7、关闭盖。
8、按“RUN”,如果显示的是设置点参数,它将变换至显示实际参数,再按一次“RUN”。
显示屏中的“S”(STOP)变换成“R”(RUN),并与程序号交替显示。
如果想要运行程序1、2或3,简单地按“PROG 1”、“PROG 2”或“PROG 3”快速启动CentriVap离心浓缩仪。
转子启动,当转子达到操作速度,真空阀关闭,真空泵运行。
9、在运行的任何时间可更改设置点的参数,先用“SELECT”键选择参数,并用增加或减少键修改。
德国Christ RVC 2-18 真空离心浓缩仪
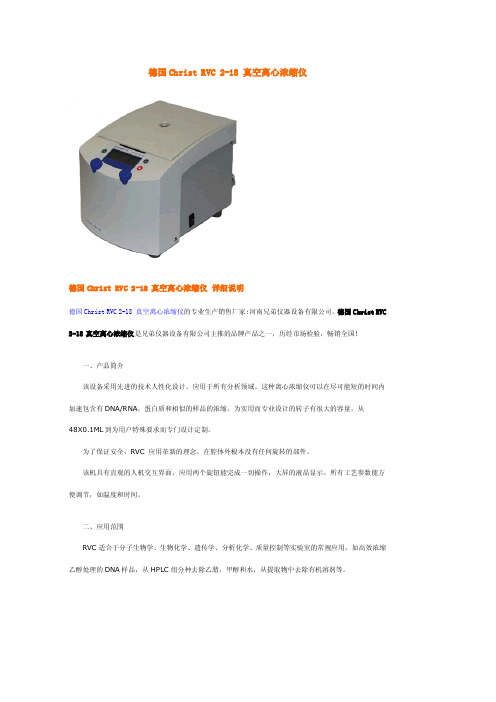
德国Christ RVC2-18真空离心浓缩仪德国Christ RVC2-18真空离心浓缩仪详细说明德国Christ RVC2-18真空离心浓缩仪的专业生产销售厂家:河南兄弟仪器设备有限公司。
德国Christ RVC 2-18真空离心浓缩仪是兄弟仪器设备有限公司主推的品牌产品之一,历经市场检验,畅销全国!一、产品简介该设备采用先进的技术人性化设计。
应用于所有分析领域。
这种离心浓缩仪可以在尽可能短的时间内加速包含有DNA/RNA,蛋白质和相似的样品的浓缩。
为实用而专业设计的转子有很大的容量。
从48X0.1ML到为用户特殊要求而专门设计定制。
为了保证安全,RVC应用革新的理念,在腔体外根本没有任何旋转的部件。
该机具有直观的人机交互界面,应用两个旋钮能完成一切操作,大屏的液晶显示。
所有工艺参数能方便调节,如温度和时间。
二、应用范围RVC适合于分子生物学、生物化学、遗传学、分析化学、质量控制等实验室的常规应用,如高效浓缩乙醇处理的DNA样品,从HPLC组分种去除乙腈,甲醇和水,从提取物中去除有机溶剂等。
三、产品特点1.操作简单的双键控制系统,可设定过程时间和加热,数字显示,所有过程参数一览无遗2.自动进气和转子终止功能3.样品容量大,多种转子可供选择4.最佳蒸汽流,防止压力增加,优化蒸汽传输过程,减少蒸发时间5.磁力驱动,电子锁盖系统,保证安全操作6.使用无油隔膜防腐泵,适合于任何有机溶剂7.可与冻干系统配合使用四、技术参数电源230V AC,50Hz驱动功率500W转速1,500RPM,磁力驱动最大离心力210g转子容量90×0.5ml,72×1.5ml,18×4/7ml,12×10/15ml,24×1.5ml定时5分钟至12小时外观尺寸:高x宽x深240x240x325mm无附件重量14Kg温度控制+30℃~+60℃环境温度+15℃~+25℃最大噪声<40[dB(A)]电流 2.0A抗干扰EN55011/B河南兄弟仪器设备有限公司依靠自身强大的社会资源、品牌优势、经营优势,以优于市场的德国Christ RVC2-18真空离心浓缩仪的价格向广大新老顾客朋友提供价格实惠、品质优良的该仪器设备;河南兄弟仪器设备公司拥有最齐全的德国Christ RVC2-18真空离心浓缩仪的型号,欢迎新老顾客朋友订购。
离心浓缩仪操作说明

离心浓缩仪操作说明一、概述离心浓缩仪是一种常用的实验室仪器,用于将液体样品进行浓缩。
本文将为您介绍离心浓缩仪的操作步骤和注意事项,帮助您正确使用离心浓缩仪进行实验。
二、操作步骤1. 准备工作在开始操作之前,确保离心浓缩仪处于稳定的工作状态。
检查离心浓缩仪的电源线是否连接良好,仪器表面是否干净,并保持仪器周围环境整洁。
2. 样品准备根据实验的需要,准备好待浓缩的样品。
注意,样品的性质应与离心浓缩仪的规格和要求相适应。
确保样品容器干净无污染,并尽可能避免气泡的存在。
3. 样品装载将待浓缩的样品装入离心浓缩仪的离心管中。
在装入样品之前,确保离心管的盖子和容器密封良好,以防止样品泄漏。
4. 参数设置在启动离心浓缩仪之前,按照实验需要设置相关参数,如转速、温度和时间等。
根据样品的浓缩要求,合理选择参数,并确保参数的设置符合离心浓缩仪的工作范围。
5. 启动离心浓缩仪仔细检查离心浓缩仪的操作面板,确认参数设置正确后,轻按启动按钮开始离心浓缩。
在离心过程中,确保操作平稳,避免对仪器造成不必要的震动和倾斜。
6. 离心过程中的注意事项在离心过程中,请注意以下事项:- 严禁随意打开离心仪盖或干扰离心仪的正常运行。
- 确保离心仪周围环境通风良好,避免堵塞和维持温度稳定。
- 注意离心管的安全操作,严禁敲击或摇晃离心管。
- 若离心过程中出现异常,如离心机发生故障或有异常噪音,请立即停止操作。
7. 浓缩完成离心浓缩仪运行时间结束后,离心管中的样品已经完成浓缩。
注意在取出样品之前,确保离心仪内部和周围环境已恢复正常温度。
三、安全操作注意事项1. 离心浓缩仪属于实验室设备,请确保操作人员具备相关的安全意识和操作技能。
2. 在操作离心浓缩仪时,操作人员应穿戴实验室服、手套和护目镜等个人防护用品,以确保人员和样品的安全。
3. 仔细阅读并遵守仪器的操作手册和相关安全规程,以确保设备的正常运行和使用安全。
四、维护保养1. 使用后及时清理离心浓缩仪的工作台和离心管,避免残余物污染仪器。
真空浓缩仪操作流程步骤
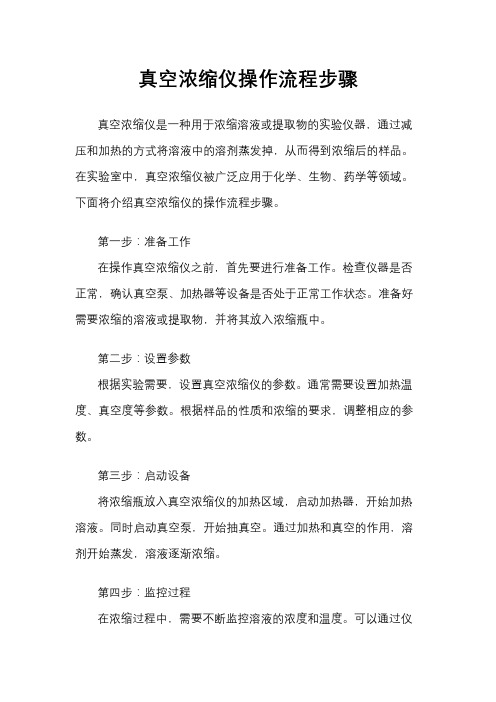
真空浓缩仪操作流程步骤
真空浓缩仪是一种用于浓缩溶液或提取物的实验仪器,通过减压和加热的方式将溶液中的溶剂蒸发掉,从而得到浓缩后的样品。
在实验室中,真空浓缩仪被广泛应用于化学、生物、药学等领域。
下面将介绍真空浓缩仪的操作流程步骤。
第一步:准备工作
在操作真空浓缩仪之前,首先要进行准备工作。
检查仪器是否正常,确认真空泵、加热器等设备是否处于正常工作状态。
准备好需要浓缩的溶液或提取物,并将其放入浓缩瓶中。
第二步:设置参数
根据实验需要,设置真空浓缩仪的参数。
通常需要设置加热温度、真空度等参数。
根据样品的性质和浓缩的要求,调整相应的参数。
第三步:启动设备
将浓缩瓶放入真空浓缩仪的加热区域,启动加热器,开始加热溶液。
同时启动真空泵,开始抽真空。
通过加热和真空的作用,溶剂开始蒸发,溶液逐渐浓缩。
第四步:监控过程
在浓缩过程中,需要不断监控溶液的浓度和温度。
可以通过仪
器上的显示屏或监控器来观察实时数据。
根据需要,可以适时调整加热温度和真空度,以控制浓缩的速度和效果。
第五步:结束操作
当溶液浓缩到预定的浓度时,停止加热和真空泵,关闭设备。
取出浓缩后的样品,进行后续的实验或分析。
总结:真空浓缩仪的操作流程相对简单,但需要注意操作规范和安全。
在操作过程中,要注意保持设备清洁,避免溶液溢出或设备故障。
同时,根据实验要求和样品性质,合理设置参数,控制浓缩的速度和效果。
通过正确操作真空浓缩仪,可以快速、高效地浓缩溶液或提取物,为实验研究提供便利。
德国 Christ RVC 2-25 CD plus 真空离心浓缩仪
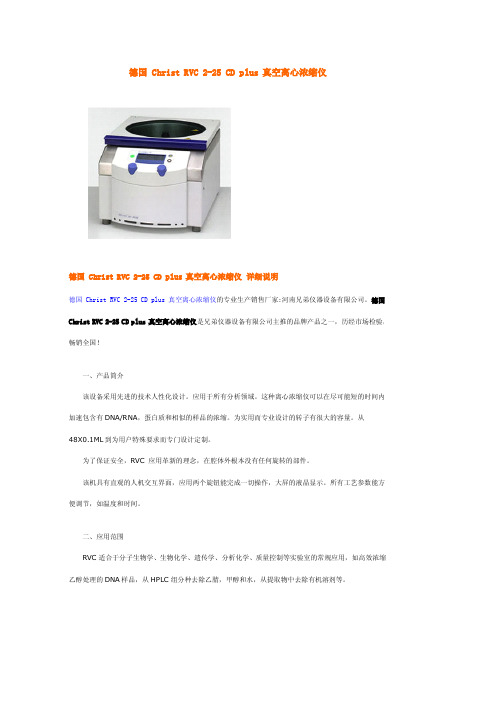
德国Christ RVC2-25CD plus真空离心浓缩仪德国Christ RVC2-25CD plus真空离心浓缩仪详细说明德国Christ RVC2-25CD plus真空离心浓缩仪的专业生产销售厂家:河南兄弟仪器设备有限公司。
德国Christ RVC2-25CD plus真空离心浓缩仪是兄弟仪器设备有限公司主推的品牌产品之一,历经市场检验,畅销全国!一、产品简介该设备采用先进的技术人性化设计。
应用于所有分析领域。
这种离心浓缩仪可以在尽可能短的时间内加速包含有DNA/RNA,蛋白质和相似的样品的浓缩。
为实用而专业设计的转子有很大的容量。
从48X0.1ML到为用户特殊要求而专门设计定制。
为了保证安全,RVC应用革新的理念,在腔体外根本没有任何旋转的部件。
该机具有直观的人机交互界面,应用两个旋钮能完成一切操作,大屏的液晶显示。
所有工艺参数能方便调节,如温度和时间。
二、应用范围RVC适合于分子生物学、生物化学、遗传学、分析化学、质量控制等实验室的常规应用,如高效浓缩乙醇处理的DNA样品,从HPLC组分种去除乙腈,甲醇和水,从提取物中去除有机溶剂等。
三、产品特点1.操作简单的双键控制系统,可设定过程时间和加热,数字显示,所有过程参数一览无遗2.自动进气和转子终止功能3.样品容量大,多种转子可供选择4.最佳蒸汽流,防止压力增加,优化蒸汽传输过程,减少蒸发时间5.磁力驱动,电子锁盖系统,保证安全操作6.使用无油隔膜防腐泵,适合于任何有机溶剂7.可与冻干系统配合使用四、技术参数电源230V AC,50Hz驱动功率847W转速1,500RPM,磁力驱动最大离心力235g转子容量105×1.5ml,48×5-7ml,36×8-10ml,24×10-15ml,12×30ml,8×50ml,6×100ml,2×酶标板转子定时5分钟至12小时外观尺寸:高x宽x深260x315x460mm无附件重量21Kg温度控制+30℃~+60℃环境温度+15℃~+25℃最大噪声<40[dB(A)]电流 3.5A抗干扰EN55011/B河南兄弟仪器设备有限公司依靠自身强大的社会资源、品牌优势、经营优势,以优于市场的德国Christ RVC2-25CD plus真空离心浓缩仪的价格向广大新老顾客朋友提供价格实惠、品质优良的该仪器设备;河南兄弟仪器设备公司拥有最齐全的德国Christ RVC2-25CD plus真空离心浓缩仪的型号,欢迎新老顾客朋友订购。
Thermo离心浓缩系统使用说明
离心浓缩系统使用说明1、先打开冷阱电源开关,在进行样品离心浓缩前至少开机45分钟,使冷阱温度达到-104℃,再打开真空泵电源。
2、用“SELECT”键和“DOWN/UP”键设置温度在45℃—80℃之间或者“NO”(不加热)。
3、用“SELECT”键和“DOWN/UP”键设置加热时间在0.01—9.59小时或者“CCC”(连续加热)。
4、用“SELECT”键和“DOWN/UP”键设置运行时间。
(选择手动运行时此项无效)。
5、设置真空度控制,按下“VACUUM SET”键到“LEVEL”,用DOWN/UP键设置真空度。
6、设置梯度升降速率,按下“VACUUM SET”键到“RAMP”,用DOWN/UP键设置梯度升降速率。
(5=highest, 1=lowest)。
7、放置样品管到转头,注意负载要平衡,把盖子关好。
8、这时可选择“Pre-heat”预热,使腔内温度达到45℃。
9、按下“MANUAL RUN”键或“AUTO RUN”键,盖子将被锁住并且转头开始运行,运行时间开始计时,温度升高到设置点,加热时间开始计时,真空度开始下降。
(如果盖子未盖好,将显示“LID”运行将不开始)。
10、按下“R/C”键可进行辐射加热腔内,随时可开关。
(注意:此键只在加热时间设置时间内有效)。
11、按下“STOP”键来结束“MANUAL RUN”,“AUTO RUN”将自动停止。
12、面板显示“END”,打开盖子,移走样品。
13、清理仪器表面,擦干泠阱表面的水和霜,检查废液高度是否超过整个瓶子的1/4,如超过,清理废液,最好每天清理一次。
检查热交换液液面高度,如低于整个瓶子的1/2,请及时添加。
离心浓缩机操作说明书

离心浓缩机操作说明书一、引言离心浓缩机是一种常用于液态物质浓缩的设备,其操作简单高效。
本操作说明书旨在向用户提供关于离心浓缩机的正确使用方法和操作注意事项,以确保设备能够安全、稳定地运行。
二、设备概述离心浓缩机由以下主要部件组成:1. 浓缩室:用于接收待浓缩液体的容器。
2. 叶片:通过旋转产生离心力,加速溶液的分离和浓缩。
3. 电机:提供动力,驱动浓缩室和叶片旋转。
4. 控制面板:用于设定和监控设备运行参数。
三、操作步骤在操作离心浓缩机之前,请确保已经详细阅读本操作说明书并理解了以下步骤:1. 准备工作:a. 将设备放置在平稳的工作台上,并确保周围环境通风良好。
b. 检查电源线是否连接稳固,插头是否接地良好。
c. 检查浓缩室是否清洁,并确保无异物存在。
d. 准备好待浓缩的液体,并按照实验要求确定浓缩量。
2. 设置参数:a. 打开设备电源,控制面板上的电源指示灯将亮起。
b. 根据待浓缩液体的特性,在控制面板上设置旋转速度和浓缩时间。
c. 确保设备设置完毕后,按下启动按钮,离心浓缩机将开始工作。
3. 监控操作:a. 在设备运行期间,保持对操作环境的观察,及时发现任何异常情况。
b. 检查离心浓缩机运转是否平稳,如有异常震动或噪音,请立即停止设备并检修。
c. 定期观察浓缩室内液体的浓缩程度,并根据需要调整参数。
4. 停止操作:a. 当浓缩时间到达设定值后,按下停止按钮,离心浓缩机将停止运行。
b. 关闭设备电源,将设备从电源插座中拔出。
c. 清洁设备各部件,包括浓缩室、叶片等。
四、安全注意事项在操作离心浓缩机时,请务必注意以下事项,以保证操作安全:1. 禁止将手指或其他物体靠近旋转部件,以防发生伤害。
2. 使用前要仔细检查设备是否有损坏或松动的部件,如发现问题请勿使用设备,需进行修理。
3. 离心浓缩机使用时需避免强烈震动和外力碰撞,以免损坏设备或造成事故。
4. 使用完成后及时清洁设备,避免液体残留造成污染或腐蚀。
真空离心浓缩仪使用方法
真空离心浓缩仪使用方法真空离心浓缩仪是一种常用的实验仪器,用于将溶液中的溶质通过离心作用浓缩。
下面将介绍真空离心浓缩仪的使用方法及相关注意事项。
首先,准备工作非常重要。
确保仪器处于良好的工作状态,检查离心浓缩仪的各个部件是否完整,并清洁仪器表面和离心室。
确认溶剂和样品的浓度,以及需要浓缩的目标量。
接下来,将样品加入离心室。
在加样过程中要小心,避免溅出或者污染其他部件。
将离心室盖好,确保密封良好。
然后,将离心室放置在离心仪中。
根据实验需要,选择合适的离心参数,如转速和离心时间。
注意,不同的样品可能需要不同的参数设置,需要根据实验要求进行调整。
启动真空泵,建立真空环境。
通过打开真空泵的开关,可以在离心过程中减少空气阻力,加快样品的浓缩速度。
确保真空度达到所需的要求。
离心过程中,需要定时观察样品的浓缩情况。
如果需要,可以随时调整离心参数以达到最佳浓缩效果。
一般来说,离心结束后,样品会在离心管底部形成浓缩物。
离心结束后,关闭真空泵,停止离心仪的运转。
小心取出离心室,注意避免触碰离心管底部的浓缩物。
最后,将浓缩物转移到其他容器中进行后续实验或储存。
注意,浓缩物可能具有较高的浓度,可能需要进一步稀释才能得到所需的溶液浓度。
在使用真空离心浓缩仪时,还需要注意以下几点:1. 严格遵守实验室安全操作规范,佩戴正确的实验室个人防护装备,如实验手套和防护眼镜。
2. 注意离心室的最大装样量,不要超过其承载能力,以避免破裂或离心不均匀。
3. 真空泵需要定期维护和清洁,以确保其正常工作。
4. 在使用过程中,如果发现任何异常情况,如离心室渗漏、噪音过大等,应立即停止操作并寻求专业人员的帮助。
总之,真空离心浓缩仪是一种非常实用的实验仪器,掌握其正确的使用方法和注意事项,可以帮助实验室进行高效的样品浓缩操作。
赫西真空离心浓缩仪安全操作及保养规程

赫西真空离心浓缩仪安全操作及保养规程前言赫西真空离心浓缩仪是一种科研实验室常用的离心浓缩设备。
本文主要介绍如何正确、安全地操作赫西真空离心浓缩仪,并在保养过程中注意哪些事项,以确保设备的长期稳定运转,最大程度地保护用户的安全。
一、设备安全操作规程1. 设备的正确使用顺序正确使用赫西真空离心浓缩仪的顺序如下:1.将样品放入离心浓缩管。
2.关闭离心浓缩管,并接好相应的管盖。
3.打开真空泵,直到设备观察窗暗淡。
4.打开离心机。
5.调整转速、温度和压力参数。
6.在使用过程中,需要时常监控转速、温度和压力参数的变化情况,以确保设备正常工作。
7.实验结束后,先关闭离心机,随后关闭真空泵。
2. 设备的安全防护装置赫西真空离心浓缩仪的安全防护装置主要包括以下几点:1.加热板自动断电保护:当加热板温度达到设定值时,设备自动停止加热,避免出现过热现象。
2.防止温度过高:当离心浓缩管内的温度超过设定值时,设备会自动停止加热。
3.防止溢出:设备配备了重量传感器,当重量达到设定值时会自动停止离心,以防溢出。
3. 设备的使用安全措施为了确保设备使用的安全,建议用户在使用赫西真空离心浓缩仪时,需要注意以下事项:1.禁止打开离心机的罩门和透明盖板,否则会带来很大的安全隐患;2.在设备运作过程中,尽可能减少人员接近设备的机会,以免受到飞溅的危险物品损伤;3.不要将手指或其他物品插入离心浓缩管内部,以避免伤害;4.使用设备时,应正确设置参数,并在使用过程中及时监控和调整,确保设备正常工作。
二、设备保养规程1. 日常保养日常保养主要包括设备清洗和检查以及零部件更换等方面。
1.设备清洗:设备运转前,需要将离心浓缩管和盖子清洗干净;2.转子清洗:需要每隔三个月将转子拆卸下来,清洗干净;3.真空泵清洗:需要每隔一个月将真空泵清洗干净;4.CO2泵保养:需要每隔一个月检查一次CO2泵是否磨损,如有问题需要更换。
2. 定期保养定期保养主要是对设备进行例行检修、维护以及更换易损耗设备等方面。
系列真空离心浓缩仪安全操作及保养规程

系列真空离心浓缩仪安全操作及保养规程1. 引言本文档旨在向用户提供关于系列真空离心浓缩仪的安全操作和保养规程的相关信息。
系列真空离心浓缩仪广泛应用于化学、生物制药、环境等领域的实验室中。
正确的操作和维护可以保证设备的正常运行和延长使用寿命。
2. 安全操作规程2.1 操作前的准备工作在操作系列真空离心浓缩仪之前,您应当完成以下准备工作:•确保设备所需的电源正常连接,并确认电压符合设备要求。
•检查设备是否处于稳定水平的台面上,在使用过程中避免发生倾斜。
•确保设备的工作区域具有良好的通风条件,避免有害气体积聚。
•确认使用的离心管和离心转子与设备兼容,并正确安装。
2.2 操作步骤遵循以下步骤,正确操作系列真空离心浓缩仪:1.打开设备电源,并确认仪器的显示屏显示正常。
2.根据具体实验需求,调整离心转速和离心时间。
3.将待浓缩的溶液倒入离心管中。
注意,离心管的容量不得超过离心转子的最大容量。
4.确保离心管盖紧,避免溶液泄漏。
5.将离心管放置在离心转子上,并确保转子锁紧。
6.关闭设备的罩盖,并启动离心仪。
7.在离心过程中,禁止打开罩盖,以免发生意外伤害。
8.等待离心过程结束后,关闭离心仪。
9.将离心管从转子中取出,小心操作以避免伤害。
10.清洁离心管和离心转子,并妥善保存。
2.3 注意事项在操作系列真空离心浓缩仪时,请注意以下事项:•禁止在离心转子中超过额定容量及转速的情况下进行浓缩。
•禁止将离心仪安装在不稳定的平台上。
•在离心过程中,禁止打开罩盖或触摸旋转部件,以免发生伤害。
•避免操作离心仪时戴首饰或长发等松散物品。
•禁止在离心仪上放置易燃、易爆等危险物品。
•禁止未经授权的人员操作离心仪。
3. 保养规程3.1 日常清洁和维护为了保持系列真空离心浓缩仪的性能和寿命,建议进行下列常规清洁和维护工作:•每次使用完成后,请将离心仪关机,并拔掉电源线。
•用干燥软布或纸巾擦拭设备表面,并定期清洁转子和离心管。
•定期检查设备的电源线和插头是否损坏,如有损坏应立即更换。
真空离心浓缩仪说明书

真空离心浓缩仪说明书真空离心浓缩仪是一种高效、易用的实验室设备,用于样品的浓缩和提纯。
以下是真空离心浓缩仪的说明书,包括使用说明、工作原理、维护保养等内容。
一、使用说明1. 安装:在安装真空离心浓缩仪之前,请先认真阅读说明书,并确保仪器的安装位置符合要求。
请按照说明书中的说明,将仪器安装到合适的位置上。
2. 操作:使用真空离心浓缩仪时,请先仔细阅读说明书,并熟悉仪器的操作步骤。
在操作过程中,请注意安全,保持耐心,尽量按照说明书中的操作步骤进行。
3. 维护:真空离心浓缩仪是一种高科技设备,需要定期维护。
请按照说明书中的说明,定期进行仪器的清洗和保养。
如果发现仪器出现故障,请及时联系售后服务人员,进行维修和更换。
二、工作原理真空离心浓缩仪的工作原理是基于离心力和真空技术的相互作用。
当样品在离心力的作用下被甩出时,会受到真空泵的负压吸引,使得样品在特定的范围内被浓缩和提纯。
真空离心浓缩仪通过调整负压和转速等因素,可以实现不同样品的浓缩和提纯效果。
三、维护保养1. 清洗:在使用真空离心浓缩仪之前,请先进行清洗。
清洗时,请使用柔软的布或海绵,蘸取适量的清洁剂,轻轻擦拭仪器的表面和内部。
请勿使用高强度的清洁剂或硬质物品进行清洗,以免损坏仪器的表面和内部。
2. 保养:定期对真空离心浓缩仪进行保养。
保养时,请打开仪器的外壳,清理内部的尘埃和污垢,同时检查仪器的零件和部件是否松动或损坏。
如果发现问题,请及时联系售后服务人员,进行维修和更换。
以上是真空离心浓缩仪的说明书,希望对您有所帮助。
如果有任何疑问,请随时联系我们的售后服务人员。
真空离心浓缩仪使用手册
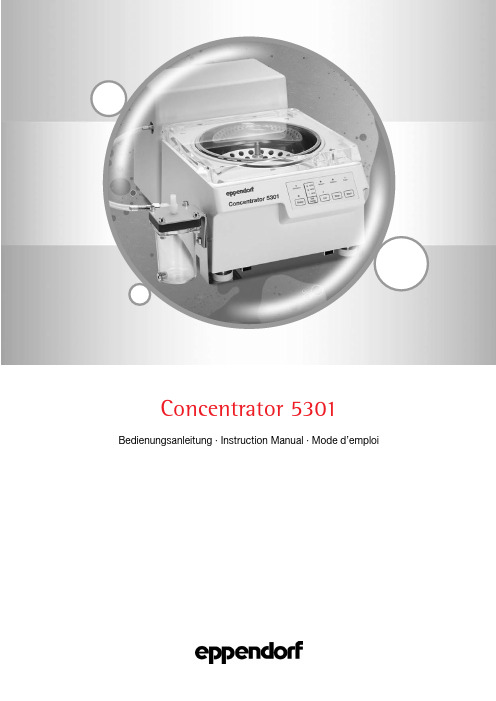
1.21.11.81.71.61.51.31.42.22.3 2.1Fig. 1Fig. 2Fig. 31.9161Introduction . . . . . . . . . . . . . . . . . . . . . . . . . . . . . . . . . . . . . . . . . . . . . . . . . . . . . . . . . . . . . . . . . . . . . . . . . . . . . .171.1Safety precautions . . . . . . . . . . . . . . . . . . . . . . . . . . . . . . . . . . . . . . . . . . . . . . . . . . . . . . . . . . . . . . . . . . . . . . . . .171.2Installing the device. . . . . . . . . . . . . . . . . . . . . . . . . . . . . . . . . . . . . . . . . . . . . . . . . . . . . . . . . . . . . . . . . . . . . . . . .191.3Delivery package. . . . . . . . . . . . . . . . . . . . . . . . . . . . . . . . . . . . . . . . . . . . . . . . . . . . . . . . . . . . . . . . . . . . . . . . . . .192Operating controls . . . . . . . . . . . . . . . . . . . . . . . . . . . . . . . . . . . . . . . . . . . . . . . . . . . . . . . . . . . . . . . . . . . . . . . .203Operation . . . . . . . . . . . . . . . . . . . . . . . . . . . . . . . . . . . . . . . . . . . . . . . . . . . . . . . . . . . . . . . . . . . . . . . . . . . . . . . .213.1Mounting / Dismounting the rotor. . . . . . . . . . . . . . . . . . . . . . . . . . . . . . . . . . . . . . . . . . . . . . . . . . . . . . . . . . . . . .213.2Loading the rotor. . . . . . . . . . . . . . . . . . . . . . . . . . . . . . . . . . . . . . . . . . . . . . . . . . . . . . . . . . . . . . . . . . . . . . . . . . .213.3Evaporation without heating . . . . . . . . . . . . . . . . . . . . . . . . . . . . . . . . . . . . . . . . . . . . . . . . . . . . . . . . . . . . . . . . . .213.4Evaporation with heating. . . . . . . . . . . . . . . . . . . . . . . . . . . . . . . . . . . . . . . . . . . . . . . . . . . . . . . . . . . . . . . . . . . . .213.5Centrifugation with braked deceleration. . . . . . . . . . . . . . . . . . . . . . . . . . . . . . . . . . . . . . . . . . . . . . . . . . . . . . . . .223.6Special functions. . . . . . . . . . . . . . . . . . . . . . . . . . . . . . . . . . . . . . . . . . . . . . . . . . . . . . . . . . . . . . . . . . . . . . . . . . .223.7Opening the device in the case of a power failure . . . . . . . . . . . . . . . . . . . . . . . . . . . . . . . . . . . . . . . . . . . . . . . . .223.8Exchanging the main power fuse . . . . . . . . . . . . . . . . . . . . . . . . . . . . . . . . . . . . . . . . . . . . . . . . . . . . . . . . . . . . . .223.9Gel dryer connection. . . . . . . . . . . . . . . . . . . . . . . . . . . . . . . . . . . . . . . . . . . . . . . . . . . . . . . . . . . . . . . . . . . . . . . .224Cleaning and maintenance of the device . . . . . . . . . . . . . . . . . . . . . . . . . . . . . . . . . . . . . . . . . . . . . . . . . . . . . .235Troubleshooting table. . . . . . . . . . . . . . . . . . . . . . . . . . . . . . . . . . . . . . . . . . . . . . . . . . . . . . . . . . . . . . . . . . . . . .246Technical data . . . . . . . . . . . . . . . . . . . . . . . . . . . . . . . . . . . . . . . . . . . . . . . . . . . . . . . . . . . . . . . . . . . . . . . . . . . .257Ordering information. . . . . . . . . . . . . . . . . . . . . . . . . . . . . . . . . . . . . . . . . . . . . . . . . . . . . . . . . . . . . . . . . . . . . . .26C o nt en ts Contents17Dear Customer,The Concentrator 5301 is designed for the evaporation of liquid samples in micro test tubes:–for 1.5 and 2.0 ml micro test tubes in a 48-place rotor,–for 0.5 ml micro test tubes in a 72-place rotor,–for 1.5 and 2.0 ml micro test tubes in a 70-place rotor.The device is available in two versions:–Concentrator 5301 Complete System with built-in diaphragm vacuum pump and– A Basic Concentrator 5301 without pump.The second version can be connected to an external vacuum system.Each device without a pump can be upgraded to a Concentrator Complete System by an Eppendorf service technician.The following important practical functions of the Concentrator 5301 have been optimized:–Three temperature levels can be set (30, 45, 60 ˚C) or evacuation can take place without temperature regulation.–Three functions are available for liquid evaporation: in addition to pure evacuation, aqueous or alcoholic solutions can be concentrated rapidly with two special functions.–The Concentrator 5301 may also be operated as a desiccator only.–The chemical-resistant pump in the Concentrator 5301 Complete System makes a variety of applications possible.A solvent trap can be connected to the device behind the pump.The device is suitable for use in laboratories in the life sciences, clinical chemistry, medicine and industrial research. Its space-saving design eases installation directly on the bench top. The device is easy and convenient to operate.Before using the Concentrator 5301 for the first time, please read the manual. The latest version of the manual and the safety instructions in your language can be found on the Internet at .The device must not be operated in a hazardous or flammable environment and must not be used to evaporate/centrifuge self-inflammable substances.Before plugging in the device, compare your power supply with the electrical requirements listed on the identification plate (see Fig. 1 and 2 on the fold-back cover at the front of this manual: identification plates on the right-hand panel of the Concentrator 5301 Complete System and on the rear panel of the Concentrator 5301).The rotor must be properly mounted. It should be loaded symmetrically.Repairs must only be performed by an Eppendorf authorized service technician. Only use original rotors and spare parts recommended by Eppendorf.Do not expose body parts to the vacuum under any circumstances.Continuous pumping of liquids is not permitted.Please note the maximum permissible pressures and pressure differences listed under "Technical Data". Excesspressure in the pipes caused by closed taps or blocked pipes can result in bursting. Therefore, be sure to always keep the exhaust fumes pipe free and to use sufficiently wide pipes.When evaporating poisonous liquids or liquids which contain pathogenic bacteria, a suitable chemical or cooling trap must be used to ensure the required condensation and separation of the vapor. The corresponding safety precautions must be observed (hood, lab with appropriate safety class).Please avoid releasing poisonous, health-damaging or corrosive substances. When handling poisonous, health-damaging or corrosive substances or pathogenic germs of risk group II (see World Health Organization: "Laboratory Biosafety Manual"), the appropriate national regulations are to be observed.Before evaporating, all the tubes should be subjected to a visual inspection for material damage. Damaged tubes must not be centrifuged, as if tubes break, there may be further damage to the Concentrator and its accessories in addition to loss of the sample.1.1 Safety precautionsIntroduction 118Declaration concerning the ATEX directive (94/9/EC)The present design and ambient conditions inside Eppendorf centrifuges mean that they are not suitable for use in a potentially explosive atmosphere. The centrifuges must therefore only be used in a safe environment such as the open environment of a ventilated laboratory or a fully-extracted fume hood. The use of substances which may contribute to a potentially explosive atmosphere is not permitted. The final decision on the risks in connection with the use of such substances is the responsibility of the user of the centrifuge.TransferIf the device is passed on to someone else, please include the instruction manual.Disposal In case the product is to be disposed of, the relevant legal regulations are to be rmation on the disposal of electrical and electronic devices in the European Community The disposal of electrical devices is regulated within the European Community by nationalregulations based on EU Directive 2002/96/EC on waste electrical and electronic equipment (WEEE).According to these regulations, any devices supplied after 13.08.05 in the business-to-business sphere, to which this product is assigned, may no longer be disposed of in municipal or domestic waste. They are marked with the following symbol to indicate this.As disposal regulations within the EU may vary from country to country, please contact your supplier if necessary.I n t r o d u c t i o n 119Concentrator 5301 Complete System: After unpacking the device, unscrew the two thumbscrews at the rear of the base plate (transport safety device of the vacuum pump).Place the device onto a level, horizontal surface. To ensure sufficient ventilation, there should be 10 cm clearance at both sides of the device and 30 cm at the back of the device.Connect the emission condensator to the nozzle on the left side of the pump housing (see Fig. 3 on the fold-back cover at the front of this manual) using the solvent-resistant tube included in the accessories (8 mm inner diameter).Connect the device with the power cable to the main power supply. The main power socket is on the bottom right of the housing of the vacuum pump next to the main power switch. When the device is switched on, the lid can be opened as long as the control lamp Lid lights up.Before commissioning the Concentrator with integrated vacuum pump, please be sure that the ambient temperature during operation is between 15 °C and a maximum of 35 °C. Measures according to DIN VDE 0530 are to be taken when setting up the device at an elevation greater than 1,000 m above sea level.Concentrator 5301: As for Concentrator Complete System, however, the removal of the transport safety device for the vacuum pump is not applicable.The main power switch on the rear panel of the device is next to the socket for direct connection of a vacuum pump (see Fig. 2 on the fold-back cover at the front of this manual).A vacuum pump can be connected to the main power supply via the Concentrator with a special connector (see Sec. 7, Ordering information).The power consumption of a vacuum pump which is connected directly to the Concentrator is max. 400 W.The normal program sequence can also be performed with a vacuum pump connected to the power supply indepen-dently of the Concentrator or with a central vacuum system when a solenoid valve is switched between the vacuum pump and the Concentrator. For additional information, please contact an Eppendorf service technician.If a solenoid valve is not used, the vacuum system can be disconnected from the Concentrator as required before the evaporation run is ended by manually closing a correctly positioned valve (e.g., cock with ground-in stopper).Every pump used should be able to hold a maximum ultimate pressure of 20 mbar.Condensate separator: Depending on the type of pump used, an emission condensator can be switched between the devices or behind the pump. The solvent-resistant pump of the Concentrator Complete System enables installation of the emission condensator behind the pump.Note: When attaching a filter to the outlet of the condensator, the excess pressure at the pump outlet of the Concen-trator Complete System must not exceed 1 bar.When evaporating chemically aggressive liquids or liquids with volatile, chemically aggressive or biologically hazardous components, an appropriately effective cooling trap or chemical trap must be used instead of a condensate separator.Concentrator 5301 complete system with gel dryer connection (Order no. 5301 000.326): In order to be able to connect a gel dryer to the Concentrator 5301, please use the accompanying tube connection. Screw the tubeconnection into the free thread of the stop valve on the left side of the Concentrator. The size of the connection thread for the gel dryer connection is G1/4".1 Concentrator 5301 / Concentrator 5301 Complete System /Concentrator 5301 complete system with gel dryer connection without rotor1 Rotor F 45-48-11 with 6 feet for rotors F 45-48-11 and F 45-72-81Main power cable 1Instruction manual for Concentrator / Concentrator 5301 Complete System 1Emission condensator (only for Concentrator Complete System)1Tube for connecting the emission condensator / Concentrator Complete System 1Set of main power fuses 1.2 Installing the device1.3 Delivery packageIntroduction121Mount the rotor onto the drive axle making sure it is seated onto the spindle. To dismount, pull rotor off the drive axle. The rotor does not have to be tightened.A spacer is available (order no. 5301 316.005) for sandwich use of 2 rotors (with rotors F 45-48-11 and F 45-72-8 in any order, not with rotor F 45-70-11).The delivery package of the device contains feet which can be screwed into the appropriate bores of the rotorsF 45-48-11 and F 45-72-11. The feet make sure that the tubes are not pushed out of the bores when the rotor is placed onto the bench.The rotor should be loaded symmetrically with open tubes. Maximum unsymmetrical load for one run ≤ 1 hour: difference of 6 x 2.0 ml tubes between 2 rotor sides.The temperature selected can be changed during the run and is regulated accordingly. After switch-on, the device is set to operation without heating.Following evaporation, ensure that heating is switched off again. To do so, press Set temp repeatedly until the three temperature displays go out.Note: When heating selected, the behavior of the samples at the desired temperature must be compatible.Caution:Avoid touching the wall of the rotor chamber after evaporation at 60 ˚C. This could have a temperature in excess of 65 °C.When switching from a higher to a lower temperature, a rapid blinking of the control lamp after a brief waiting period shows that the rotor chamber temperature deviates from the selected temperature.Close the lid.Press Start :The rotor starts up. The Rotation control lamp lights up (green). As soon as the lid haslocked automatically, the Lid control lamp (green) goes out.At 1,000 rpm, the vacuum pump is switched on. The Vacuum control lamp lights up andthe ventilation valve closes. The Ventilation control lamp flashes.The rotor accelerates to its final speed of 1,400 rpm.If Start is pressed during the run, the ventilation valve is opened, air streams in andrinses the pump and the tubing system.We recommend that you press Start for a few seconds at the end of the last run of theday (see Sec. 3.3) to remove remaining condensate from the pump.Press Stop :The rotor chamber is ventilated. After 2 s, the vacuum pump is switched off.The Vacuum control lamp goes out.The rotor decelerates without braking (see Sec. 3.5).When the rotor is at a standstill: The Rotation control lamp goes out.The Lid control lamp lights up when the lid can be opened.Press Set temp :30 ˚C display flashes until the temperature in the rotor chamber is reached(30 ˚C display constant).If Set temp is pressed repeatedly, the display switches to 45 ˚C , then to 60 ˚C andthen the heating is switched off.3.1 Mounting / Dismounting the rotor3.2 Loading the rotor3.3 Evaporation without heating3.4 Evaporation with heating3 OperationOperation322To switch on gentle braking, press Brake . The Brake control lamp lights up (red).It is possible to switch over between deceleration with soft braking/without braking at any time.For optimal evaporation of samples, 3 different functions are available:Function 1:This function is especially suitable for the evaporation of alcoholic solutions and is set as a default when the device is switched on.Function 2:For evaporation of solvents with a particularly high vapor pressure.Function 3:This function is especially suitable for the evaporation of aqueous solutions.These functions are switched on by pressing Brake and Set temp simultaneously. To indicate that the device has recognized that these two keys have been pressed, the control lamp Ventilation flashes briefly three times. When both keys are pressed, the different functions are selected in succession.When the device is at a standstill or in operation, the function selected is indicated as follows by the control lamps Ventilation and Vacuum :Desiccator function:The Concentrator 5301 can also be operated as a desiccator only. The rotor chamber is evacuated normally, although the rotor does not move.This function can be called up and ended as follows:–Hold down the STOP key. After one second, press START as well. The run is carried out with the set parameters (F1, F2, F3, selected temperature) without the rotor moving. Function 2 is recommended for this.–Press the STOP key to end the desiccator function.In the event of a power failure, the ventilation valve opens. Before the rotor comes to a standstill, standard pressure is restored in the rotor chamber. The lid can be unlocked when the rotor is at a standstill by inserting a sharp object (paper clip) into the opening in the right panel of the housing under the lid. The lid can then be opened.The fuses are located under the flap in the housing of the main power switch.The Concentrator 5301 complete system is available under the order no. 5301 000.326 with gel dryer connection. The gel dryer can be operated parallel to the evaporation or on its own. When using parallel to the evaporation, the stop valve is opened, meaning that the knob is parallel to the flow direction.The drying of the gel and the evaporation begin with the switching on of the internal vacuum pump.If simultaneous evaporation is not desired, please use the Exsiccator function (see Ch. 3.6).Before the device is started, the enclosed tube connector must be screwed into the stop valve.Please close the stop valve when the gel dryer is no longer required.Ventilation control lampVacuum control lamp Function 1during run in standstill flashes flasheslights up constantly offFunction 2during run in standstill offlights up constantly lights up constantly off Function 3during run in standstillofflights up constantlyflashes flashes3.5 Centrifugation with braked deceleration3.6 Special functions3.7 Opening the device in the case of a power failure3.8 Exchanging the main power fuse3.9 Gel dryer connectionO p e r a t i o n3 Operation323When cleaning and disinfecting the device on the outside and inside (rotor chamber), only use neutral detergents (e.g. Extran ® neutral) and disinfectants containing alcohol. Disconnect the main power plug before starting cleaning.For the frequent evaporation of corrosive liquids (e.g. buffers containing HCl), apply a thin coating of Vaseline to the rotor and rotor chamber (see "Ordering information").The rotors can be autoclaved at 121 ˚C for 20 minutes. They can be cleaned with the same solutions as the device. Do not allow saline aqueous solutions to dry. Do not allow acids or alkaline solutions to soak into the material (aluminum).The chemical-resistant pump of the Concentrator 5301 Complete System does not require maintenance. The pump and tubing system can be blown through by pressing Start during the run (see Sec. 3.3).Valves and diaphragms are subject to natural wear and should be renewed by an authorized Service technician, at the latest when the pressure values begin to decrease. A permanent conveyance of liquids can damage diaphragms and valves. Please regularly remove the condensation from the pump as described above. This measure prolongs the service life of the parts subject to wear and tear.Glass breakageWhen concentrating from glass tubes, be aware that the risk of glass breakage increases during centrifugation. Please observe manufacturers’ information about maximum loading of centrifuge tubes.In case of glass breakage, carefully remove all splinters from the rotor and the centrifugal chamber immediately.Otherwise fine glass splinters will scratch the surface of the rotors, reducing their resistance to chemicals. Air vortices will result in very fine black abraded metal in the centrifugal chamber; in addition to damaging the centrifugal chamber and rotor, this material will also cause samples to become contaminated.Returning devicesWhen returning the Concentrator 5301, please ensure that the device is completely decontaminated so it does not present any kind of health hazard to our Service staff.You will find additional information and a blank of the decontamination confirmation at . Do also consult your laboratory safety officer about a suitable decontamination method.Please fill out the decontamination confirmation and place it together with the device when it is to be sent back to Eppendorf.4 Cleaning and maintenanceCleaning and maintenance424If the suggested measure repeatedly fails to eliminate the fault, please contact Service.Error CauseSolutionNo display.No main power connection.Power failure.Check power supply cable.Check main power fuse at the device (see Sec. 3.8) and in the laboratory.Concentrator does not start up (Display "Lid" flashes).Lid not closed.Lid switch defective.Close lid.⇒ SERVICE.Concentrator does not start up or switches off during run(Rotation control lamp flashes.)Mechanical stiffness.Electronics error in drive.Move rotor by hand.Remove any obstruction and restart.⇒ SERVICE.No noticeable evaporation.Sealing ring in lid of device damaged.Mount new sealing ring(see "Ordering information").All 3 temperature displays flash.Heating or temperature sensor defective.⇒ SERVICE.All displays flash.Electronics error.⇒ SERVICE.Pump does not start up.Thermal switch atconnecting box of pump initiated.Pump overload,leave to cool, restart.⇒ SERVICE.One of the heating displays flashes (1x per second).Heating at least 5 °C above nominal value.Allow heat from previous run to cool.One of the heating displays flashes rapidly (2x per second).Heating at least 10 °C above nominal value.Switch off external heat source (e.g. halogen lamp).No conveyance capacity.Long, narrow pipe?Condensation in the pump?Use short pipes that are wide enough.Allow pump to run for a few minutes with the intake connector open.T r o u b l e s h o o t i n g t a b l e5 Troubleshooting table5Power supply:see identification platePower consumption: max. 500 W(with largest external pump permitted) Max. rotational speed:1,400 rpmMax. centrifugal force:240 x gMax. load:96 x 2.0 ml micro test tubesMax. density of material to be centrifuged: 1.2 g/mlPermitted ambient temperaturefor operating the device:15–35 °CPermitted max. average annual relative air humidity:75 %Dimensions (H x W x D)Concentrator 5301:230 x 320 x 369 mm Concentrator 5301 Complete System:298 x 320 x 530 mm WeightConcentrator 5301:17 kgConcentrator 5301 Complete System:31 kgMain power fuse 230 V: 4.0 A time-lagMain power fuse 115 V: 6.25 A time-lagMax. excess pressure at pump outlet ofConcentrator 5301 Complete System: 1 barTechnical data of the diaphragm vacuum pumpMax. power / motor capacity of the diaphragm vacuum pump120 V 2.9 A / 220 W230 V 1.6 A / 220 WMax. power input of the diaphragm vacuum pump120 V350 VA230 V345 VAMotor protection Thermal cutout Protection degree according to IEC 529IP 54Maximum output 50 / 60 Hz 1.7 / 2.0 m3/hAttainable ultimate pressure (absolute)9 mbarMaximum permissible pressure at outlet (absolute) 2 barMaximum pressure difference between inlet and outlet 2 barNominal rotational speed of the pump at 50 / 60 Hz1500 min-1 / 1800 min-1 Materials of the diaphragm vacuum pump surfaces coming into contact with media Housing cover insert PTFE carbon reinforced Head cover, diaphragm clamping disc,inlet / outlet / fittings ETFEValve FFKMDiaphragm PTFE-NBRHose PTFETechnical specifications subject to change!Technical data6 Technical data62526Important note:Please use the original accessories recommended by Eppendorf. Using spare parts or disposables which we have not recommended can reduce the precision, accuracy and life of this instrument. We do not honor any warranty or accept any responsibility for damage resulting from such action.Concentrator 5301, incl. 48 x 1.5 / 2.0 ml fixed-angle rotor 230 V , 50/60 Hz,Other versions available on request!5301 000.016Concentrator 5301 complete system, incl. 48 x 1.5 / 2.0 ml fixed-angle rotor 230 V , 50/60 Hz,Other versions available on request!5301 000.210Concentrator 5301 complete system, w/o rotor5301 000.610Concentrator 5301 complete system with gel dryer connection, w/o rotor 230 V / 50 – 60 Hz5301 000.326Pump upgrade kit for the Concentrator 5301 to create the complete system (with separator and tube)230 V , 50/60 Hz, Other versions available on request!5399 000.167Rotor F-45-48-11 für 48 Safe-Lock Microcentrifuge Tubes 1,5 und 2,0 ml 5490 030.001Rotor F-45-70-11 für 70 Safe-Lock Microcentrifuge Tubes 1,5 und 2,0 ml 5490 032.004Rotor F-45-72-8 für 72 Safe-Lock Microcentrifuge Tubes 0,5 ml 5490 034.007Rotor A-2-VC for MTP or PCR plates with a maximum height of 15 mm5490 045.009Rotor F-45-24-12 for 24 round bottom tubes of up to 6 ml (tube measurement 12 mm ø, 67 – 100 mm in length)5490 036.000Rotor F-50-8-16 for 8 round bottom tubes of up to 15 ml (tube measurement 16 mm ø, 97 – 120 mm in length)5490 041.003Rotor F-50-8-18 for 8 round bottom tubes of up to 16 ml (tube measurement 18 mm ø, 105 – 128 mm in length)5490 042.000Rotor F-45-8-17 for 8 Falcons ® of up to 15 ml (tube measurements 17 mm ø, 120 mm in length)5490 038.002Rotor F-40-36-12 for 36 x 1.5 ml flasks(tube measurements 12 mm ø, 32 mm in length)5490 040.007Rotor F-45-36-15 for 36 x 6 ml flasks(tube measurements 15 mm ø, 48 mm in length)5490 035.003Rotor F-45-16-20 for 16 x 6.5 – 10 ml flasks(tube measurements 20 mm ø, 42 – 55 mm in length)5490 043.006Rotor F-40-18-19 for 18 x 10 ml flasks(tube measurements 19 mm ø, 66 mm in length)5490 037.006Rotor F-45-12-31 for 12 x 20 ml flasks(tube measurements 31 mm ø, 55 mm in length)5490 044.002Rotor F-35-8-24 für 8 x 25 ml flasks(tube measurements 24 mm ø, 86 mm in length)5490 039.009Spacer for sandwich use of 2 rotors 5301 316.005Emission condensator (w/o tube)5301 330.008Tube for emission condensator5301 337.002Special connector for external pump (only for Germany, for other countries on request)5301 010.003Solenoid valve for external vacuum connection, 230 V 50/60 Hz Other versions available on request!5301 030.004Sealing ring for lid 5301 160.005Grease for pivots5810 350.050O r d e r i n g i n f o r m a t i o n7 Ordering information716.09.200289/336/EWG, EN 55011, EN 61000-6-1, EN 61000-3-2, EN 61000-3-373/23/EWG, EN 61010-1, EN 61010-2-20Vakuumkonzentrator / VacuumconcentratorConcentrator 53015301 900.300-03EG-Konformitätserklärung EC Conformity DeclarationDas bezeichnete Produkt entspricht den einschlägigen grundlegenden Anforderungen der aufgeführten EG-Richtlinien und Normen. Bei einer nicht mit uns abgestimmten Änderung des Produktes oder einer nicht bestimmungsgemäßen Anwendung verliert diese Erklärung ihre Gültigkeit. The product named below fulfills the relevant fundamental requirements ofthe EC directives and standards listed. In the case of unauthorized modifications to the productor an unintended use this declaration becomes invalid.Produktbezeichnung, Product name:Produkttyp, Product type:Einschlägige EG-Richtlinien/Normen, Relevant EC directives/standards:Vorstand, Board of Management: Projektmanagement, Project Management:Hamburg, Date:Eppendorf AG · Barkhausenweg 1 · 22339 Hamburg · Germany0015 033.509-02。
离心浓缩仪使用说明书

离心浓缩仪使用说明书一、产品介绍离心浓缩仪是一种常用的实验室工具,用于浓缩溶液和分离样品中的溶剂。
它具有高效、快速的特点,广泛应用于生化、分子生物学、制药等领域。
本说明书将详细介绍离心浓缩仪的使用方法和操作注意事项。
二、安全须知1. 在操作离心浓缩仪之前,请确保已经熟悉仪器的结构和功能,避免误操作造成意外伤害。
2. 使用离心浓缩仪时,务必佩戴防护眼镜、实验手套和实验室外套,确保个人安全。
3. 离心浓缩仪应该在通风良好的环境下使用,避免有毒或挥发性物质对实验产生影响。
4. 在开启离心浓缩仪之前,确保设备处于稳定平衡状态,避免在运行过程中发生意外震动。
三、仪器操作流程1. 准备工作a. 检查离心管是否完好无缺,不能有破损或裂缝。
b. 将需要浓缩的溶液注入离心管,注意不要超过标记线。
c. 将离心管放置在离心仪转盘上,确保平衡。
2. 设置离心参数a. 打开离心仪的电源开关。
b. 根据实验需要,设置转速和离心时间。
c. 确认参数设置无误后,按下启动按钮。
3. 离心浓缩a. 当离心仪开始转动后,注意观察仪器运行情况,确保运行平稳。
b. 根据实验需要,可以选择开启加热功能,加快溶液的浓缩速度。
c. 在离心完成后,停止运行并关闭离心仪的电源开关。
4. 取出浓缩样品a. 慎用手直接接触离心管口,以免造成污染或意外伤害。
b. 使用吸管或移液器等工具,将浓缩样品移至所需容器中。
四、操作注意事项1. 在操作离心浓缩仪之前,务必熟悉仪器的使用说明和操作步骤。
2. 严禁将有毒、挥发性或易燃物质置于离心浓缩仪中。
3. 在设定离心参数时,需根据样品特点和实验要求进行合理调整。
4. 确保离心仪处于平稳水平的位置,避免运行过程中产生震动。
5. 使用前务必检查离心管是否完好,避免破裂造成样品溢出或仪器损坏。
五、故障排除1. 若离心浓缩仪在运行过程中出现异常震动,请立即停止操作并检查设备是否放置平稳。
2. 如果离心浓缩仪运行时出现异常噪音或异味,请立即停止使用并联系售后服务人员处理。
真空离心机的使用
西南大学药学实验教学中心
ZLS-1真空离心浓缩机操作规程仪器编号:
使用方法:
1.使用前准备
1)在离心机、干冰筒密封圈上均匀涂上少许硅脂。
2)用真空管及玻璃三通将离心机与干燥筒、真空泵连接起来,并在个连接口出涂上真空脂。
3)在干冰冷器中加入干冰,加入少许甲醇拌成糊状,盖上冷凝器盖,容量以盖子适合即可。
2.操作顺序
1)放置样品;
2)接入电源,按电源开关主机通电,按运转离心机启动,按加热开关加热开始工作,开动恒定在55℃左右,若不加热,关闭加热开关;
3)启动真空泵(抽气)应注意玻璃三通开关;
4)结束工作:首先关闭真空泵,离心机放气平衡,关闭离心机运转电源。
3.注意事项
1)放置样品,必须对称均匀,以减少仪器的振动,当离心机速度到达最高时再开启真空泵。
2)所有玻璃仪器与软管连接小心装拆,避免破碎。
3)玻璃三通内塞要经常涂上真空脂,以便能自由旋转,否则受真空负压影响,不能旋转,离心机放气平衡,应把三通旋转180度。
4)中途需度样品进行观察,必须按结束工作进行。
5)真空泵系统要定期更换。
离心浓缩仪使用方法

真空离心浓缩仪使用方法
真空离心浓缩仪/真空离心干燥仪的使用方法和操作步骤:
1、将真空离心浓缩仪主机放置在平台上,用手轻轻摇放一下,检查仪器是否放置平稳。
2、插上电源插座,按下电源总开关。
3、直接打开门盖,将转子轻轻放到电机轴上,拧紧螺母使转子与电机轴紧紧连接在一起,然后将试管装入,完毕轻轻旋转一下转子体,转子应转动灵活,试管在转子上应倾斜自如,无阻滞和擦碰现象。
4、关上门盖,注意一定用手检查门盖是否关紧。
5、设置温度、时间、转速。
6、打开冷阱系统,然后启动真空离心浓缩仪主机,转子开始转动,设定转速后真空泵会自动开始启动。
7、运行过程中可以通过离心成像功能看样品浓缩状态,无需停机。
8、停机:按停机键,仪器会自动先关闭真空泵和主机,在关闭冷阱,打开门盖拿出样品就需要进行后续实验了。
离心浓缩仪操作指南说明书

离心浓缩仪操作指南说明书一、介绍离心浓缩仪是一种常见的实验室设备,用于在化学或生物学实验中,将液体样品浓缩和纯化。
本操作指南旨在提供对离心浓缩仪正确操作的指导,以确保实验的准确性和安全性。
二、安全须知在操作离心浓缩仪前,请务必阅读并遵守以下安全须知:1. 保持操作区域整洁,并确保离心浓缩仪放置在稳定的平台上。
2. 戴上适当的个人防护设备,包括实验室外套、眼镜和手套。
3. 仔细阅读设备操作手册,了解离心浓缩仪的特点和使用方法。
4. 避免超负荷操作。
离心浓缩仪应按照规定的容量操作。
5. 严禁操作过程中离开实验室或无人看管。
三、操作步骤以下是离心浓缩仪的操作步骤:1. 准备样品及离心管:选择合适规格的离心管,并将待浓缩的样品装入离心管中。
务必确保离心管的封闭性和完整性。
2. 调整离心仪参数:根据实验要求,设置离心浓缩仪的参数,如转速和时间等。
可通过旋钮或面板上的操作界面进行调整。
3. 装载离心管:小心将装有样品的离心管放入离心仪。
确保离心管平衡且安全地固定在离心仪容器中。
4. 启动离心仪:按下启动按钮或开关,启动离心浓缩仪。
根据设定参数,离心仪会开始工作,并在设定的时间内完成浓缩。
5. 停止离心仪:浓缩完成后,及时停止离心仪的运行。
关闭电源,并等待离心管完全停止旋转后再取出。
6. 取出离心管:使用小夹子或其他工具小心取出离心管,避免触碰到热表面或释放的蒸汽。
7. 检查浓缩样品:在离心管中检查浓缩样品的质量和纯度,确保结果符合预期。
四、维护保养离心浓缩仪的维护保养对于设备的性能和寿命至关重要。
请按照以下建议进行维护:1. 定期清洁:使用适当的清洁剂和软布擦拭离心仪的外表面和内部零件,确保无灰尘或杂质。
注意不得使用腐蚀性溶剂。
2. 校准与校验:根据设备说明书的要求,定期对离心浓缩仪进行校准和校验,确保其工作准确。
3. 零件更换:如有需要,及时更换离心仪的消耗性零件,如离心管和密封圈等。
4. 防止过载:严格遵守离心浓缩仪的使用容量,避免超负荷工作。
真空离心浓缩仪使用说明书
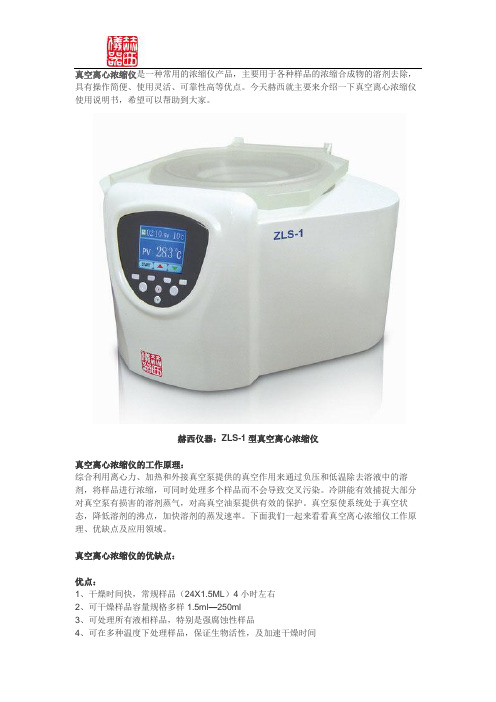
真空离心浓缩仪是一种常用的浓缩仪产品,主要用于各种样品的浓缩合成物的溶剂去除,具有操作简便、使用灵活、可靠性高等优点。
今天赫西就主要来介绍一下真空离心浓缩仪使用说明书,希望可以帮助到大家。
赫西仪器:ZLS-1型真空离心浓缩仪真空离心浓缩仪的工作原理:综合利用离心力、加热和外接真空泵提供的真空作用来通过负压和低温除去溶液中的溶剂,将样品进行浓缩,可同时处理多个样品而不会导致交叉污染。
冷阱能有效捕捉大部分对真空泵有损害的溶剂蒸气,对高真空油泵提供有效的保护。
真空泵使系统处于真空状态,降低溶剂的沸点,加快溶剂的蒸发速率。
下面我们一起来看看真空离心浓缩仪工作原理、优缺点及应用领域。
真空离心浓缩仪的优缺点:优点:1、干燥时间快,常规样品(24X1.5ML)4小时左右2、可干燥样品容量规格多样1.5ml—250ml3、可处理所有液相样品,特别是强腐蚀性样品4、可在多种温度下处理样品,保证生物活性,及加速干燥时间5、混合物样品可分别回收,以便进一步利用,或方便处理缺点:1、无法处理固相样品2、样品无法彻底干燥3、最大单个样品体积较小(250ML)4、单次最大可处理样品体积小(2L)赫西真空浓缩仪+冷阱+真空泵真空离心浓缩仪应用领域真空离心浓缩仪应用于DNA/RNA、核苷、蛋白、药物、代谢物、酶或类似样品的浓缩合成物的溶剂去除,具有浓缩效率高,样品活性留存高的特点。
1、DNA/RNA的浓缩;2、药物、代谢物的浓缩;3、液相色谱的前后处理;4、免疫球蛋白的浓缩等;ZLS系列真空离心浓缩仪主要特点分别适用于小容量、较大容量、大容量样品的真空离心浓缩。
1、防腐内腔设计,有机玻璃窗口,便于观察。
2、微电脑控制系统,显示温度、时间、开/关盖、转速等重要过程和系统参数。
4、采用TFT真彩4.3寸屏,触摸按键双控系统,智能化的微处理器控制以及简单直接的操作界面。
5、延迟启动。
在达到固定转速后,启动真空,避免样品混合。
6、干燥室采用合金铝制造,干燥腔内部有涂层防腐处理。
真空离心机使用说明书

真空离心机使用说明书1. 引言真空离心机是一种高效、可靠的实验仪器,广泛应用于化学、制药、生物科学等领域。
本使用说明书旨在为用户提供详细的操作指导,确保用户正确、安全地使用真空离心机。
2. 产品概述2.1 产品名称:真空离心机2.2 产品型号:XXX (根据实际情况填写)2.3 产品特点:高效、低噪音、易于使用、稳定性好等3. 安全须知3.1 使用前,请仔细阅读本使用说明书,并确保理解所有的操作步骤和安全须知。
3.2 在操作真空离心机之前,确保设备通风良好,并确保工作区域干净整洁。
3.3 请勿在没有经验指导或专业人员监督的情况下操作真空离心机。
3.4 在操作真空离心机时,务必戴上适当的个人防护装备,如手套、护目镜等。
4. 设备准备4.1 确保真空离心机连接电源,并保证电源线路无损坏。
4.2 检查离心机内部的中心轴是否安装正确,并确保离心机内部没有异物。
4.3 检查离心机盖及其密封圈是否完好,确保密封性良好。
4.4 检查离心机控制面板的各个按钮、开关是否正常工作。
4.5 检查离心机内的转子是否安装良好,并确保放置样品的离心管正确安装。
5. 操作步骤5.1 打开真空离心机的电源开关,并设置所需的转速和离心时间。
5.2 将待离心的样品放置在离心管中,并确保各离心管的样品量相同、相对平衡。
5.3 将装有样品的离心管放入离心机转子槽内,并确保安装牢固。
5.4 关闭离心机盖,并确保盖子密封良好。
5.5 在控制面板上设置所需的真空度,并启动真空泵进行真空抽取。
5.6 开始离心机的工作,等待离心过程完成。
5.7 离心完成后,关闭离心机电源开关,并等待离心机完全停止旋转。
5.8 打开离心机盖,取出离心管,并进行后续实验操作或样品收集。
6. 注意事项6.1 在操作离心机过程中,严禁将手或其他物体伸入离心机转子内部。
6.2 在离心过程中,禁止随意移动离心机或触摸离心机部件。
6.3 在使用过程中,严禁将有挥发性或易燃物质放置在真空离心机附近。
- 1、下载文档前请自行甄别文档内容的完整性,平台不提供额外的编辑、内容补充、找答案等附加服务。
- 2、"仅部分预览"的文档,不可在线预览部分如存在完整性等问题,可反馈申请退款(可完整预览的文档不适用该条件!)。
- 3、如文档侵犯您的权益,请联系客服反馈,我们会尽快为您处理(人工客服工作时间:9:00-18:30)。
真空离心浓缩仪是一种常用的浓缩仪产品,主要用于各种样品的浓缩合成物的溶剂去除,具有操作简便、使用灵活、可靠性高等优点。
今天赫西就主要来介绍一下真空离心浓缩仪使用说明书,希望可以帮助到大家。
赫西仪器:ZLS-1型真空离心浓缩仪
真空离心浓缩仪的工作原理:
综合利用离心力、加热和外接真空泵提供的真空作用来通过负压和低温除去溶液中的溶剂,将样品进行浓缩,可同时处理多个样品而不会导致交叉污染。
冷阱能有效捕捉大部分对真空泵有损害的溶剂蒸气,对高真空油泵提供有效的保护。
真空泵使系统处于真空状态,降低溶剂的沸点,加快溶剂的蒸发速率。
下面我们一起来看看真空离心浓缩仪工作原理、优缺点及应用领域。
真空离心浓缩仪的优缺点:
优点:
1、干燥时间快,常规样品(24X1.5ML)4小时左右
2、可干燥样品容量规格多样1.5ml—250ml
3、可处理所有液相样品,特别是强腐蚀性样品
4、可在多种温度下处理样品,保证生物活性,及加速干燥时间
5、混合物样品可分别回收,以便进一步利用,或方便处理
缺点:
1、无法处理固相样品
2、样品无法彻底干燥
3、最大单个样品体积较小(250ML)
4、单次最大可处理样品体积小(2L)
赫西真空浓缩仪+冷阱+真空泵
真空离心浓缩仪应用领域
真空离心浓缩仪应用于DNA/RNA、核苷、蛋白、药物、代谢物、酶或类似样品的浓缩合成物的溶剂去除,具有浓缩效率高,样品活性留存高的特点。
1、DNA/RNA的浓缩;
2、药物、代谢物的浓缩;
3、液相色谱的前后处理;
4、免疫球蛋白的浓缩等;
ZLS系列真空离心浓缩仪主要特点
分别适用于小容量、较大容量、大容量样品的真空离心浓缩。
1、防腐内腔设计,有机玻璃窗口,便于观察。
2、微电脑控制系统,显示温度、时间、开/关盖、转速等重要过程和系统参数。
4、采用TFT真彩4.3寸屏,触摸按键双控系统,智能化的微处理器控制以及简单直接的操作界面。
5、延迟启动。
在达到固定转速后,启动真空,避免样品混合。
6、干燥室采用合金铝制造,干燥腔内部有涂层防腐处理。
7、免维护非接触式驱动旋转系统
8、多种转头配套使用。
透明的盖板,便于观察进展情况
9、浓缩时间:0~99h59min 可与冷阱连用。
10、可与冷阱联合使用。
真空离心浓缩仪系统组成:
一个完整的离心浓缩系统由:真空离心浓缩仪、浓缩仪转子、冷阱、真空泵、冷凝瓶等部分组成。
这款旋片式真空泵是配合赫西真空离心浓缩仪和冷阱最佳伙伴之一。
真空离心浓缩仪浓缩干燥样品的原理即是通过制造真空环境来降低溶剂沸点、使得溶剂变得容易蒸发,所以,真空泵的选择是第一位的,选择合适的真空泵对实验效率、样品活性、经费都是一个很大的影响。
