DW3030快速参照说明书(中文版)
施乐DW3030驱动安装步骤

富士施乐工程打印机DW3030驱动程序安装步骤一、添加端口1.点击开始->设置->打印机,进入打印机安装窗口。
2.点击下拉菜单文件->服务器属性,进入打印服务器属性窗口。
3.点击端口标签,点击添加端口按钮,进行新端口的添加。
4.选中标准TCP/IP 端口后,点击新端口按钮。
5.点击下一步输入打印机的IP 地址后,并标识端口为硫酸纸打印。
按下一步进行端口的设置。
6.在添加标准TCP/IP向导中,选自定义按钮,对端口进行详细定义。
7.设定打印协议为LPR 协议。
在LPR 队列名称里输入plt02,并启动LPR 字节计数功能。
8.一路下一步,结束端口的安装。
执行完以上步骤,我们就完成了对端口plt02的安装。
二、添加打印机驱动添加打印机——选择连接到本地的打印机——选择端口时,选择第一步中添加的端口——从磁盘安装——浏览——选择驱动程序——选择机型 DW3030然后一路下一步,结束驱动的安装三、设置驱动默认值打开打印机的属性->高级->Printing Default,在这里将设置打印首选项的默认设置,如下图:原稿尺寸:长尺寸特A0 纸卷(880mm)图像区域:打勾输出用纸尺寸里选择同原稿尺寸,将同步切纸里的输入任意长度定义为15000mm,然后再改为自动决定长度选项。
最后将输出用纸尺寸里选择根据打印的设定。
四、在AutoCAD 里面生成plt文件1、选择打印机2、设置纸张原稿尺寸选择对应关系:选择对应关系:长尺寸E-Arch纸卷(36“)880mm长尺寸长尺寸长尺寸A-Arch纸卷(12“)297mm。
数控钻床3030用户手册20080909

版本号:1.0STR-2100数控钻床使用说明书地址:邮编:联系电话:传真:目录特别注意事项 (1)第一章仪器简介 (1)1.1 产品概述 (1)1.2 功能介绍 (1)1.3 主要功能 (1)1.4 仪器主要结构和部件 (1)1.5 规格和技术参数 (3)第二章仪器安装 (4)2.1 运输和储存条件 (4)2.2 环境要求 (4)2.3 仪器包装和拆封 (4)2.4 硬件安装 (4)2.5 连接电脑 (4)2.6 电源要求 (4)2.7 使用期限和服务承诺 (4)2.8 软件安装 (4)第三章刻制机的使用 (5)3.1生成加工文件 (5)3.1.1Protel DXP 2004环境 (5)3.1.2Protel99 SE环境 (9)3.2 雕刻前的准备操作 (12)3.2.1固定电路板 (12)3.2.2安装刀具 (12)3.2.3开启电源 (13)3.3 软件功能说明 (13)3.3.1打开 (13)3.3.2菜单 (14)3.3.3向导 (16)3.4 控制面板按钮使用说明 (18)3.5 钻孔操作步骤 (19)3.6 线路板孔金属化操作步骤............................................................ 错误!未定义书签。
3.7 线路板割边操作步骤 (19)3.8 线路板表面处理.......................................................................... 错误!未定义书签。
使用技巧及注意事项. (19)特别注意事项1.运输过程中为防止机械部件意外损坏,主轴电机被固定在支架上,在通电之前请拆除主轴固定物,直到主轴可以自由移动。
2.本机配备的PCB雕刻刀大小从0.1mm到0.8mm,钻头从0.4mm到3.0mm,如果用户有其它规格的需要,请联系各经销商另行配备购买。
DC3030快速参照说明书

图2
如图2所示: 如图2 : ①纸 ① 路 选 择:自动 ②用 ② 纸 类 型:普通纸 或 硫酸纸(注:次处请一定要设置)
③分面[套图]:不选择 ③
可将以上设置设为打印机默认值。
CAD其它打印设置如下 其它打印设置如下:
如(图1):请选择 长尺寸特A0纸卷(880mm)。 如(图2):请设置尺寸单位为 “毫米”。
图1 图4
如(图3):点按 窗口 可选择打印区域。 如(图4):图为横向时请设为纵向, 图为纵向时请设为横向, 一切请以节省纸张为标准。
图2
图
(注:DC3030无自动拼版功能)。 如(图5):可以设置打印 比例, 如 1:150 ,594:89100等。
图3
如(图6):此为CAD的打印预览。 [在局部打印预览中,还可以
DC3030
快速参照说明书
图1
DC3030打印详细设置如下:
图1
如图1所示: 1 : ①原稿尺寸设置为:长尺寸特A0纸卷(880mm) ②图 像 区 域: 打√ ③输 出 用纸尺寸: 适合国图像区域尺寸 ④同 步 切 纸: 自动决定长度 ⑤原 稿 的 方 向: 纵向 ⑥原 稿 1800 旋转: 根据打印机的设定
图 6
看出打印图纸的尺寸, 如(图7)所示]。
图7
Nokia 3030 说明书

Nokia 3030 用户手册第 1.0 版目录安全事项4开始使用5按键和组成部分5使用全键盘输入文字5插入 SIM 卡和电池6插入存储卡8为电池充电9连接腕带10开机或关机10天线位置11基本操作11密码功能11锁定按键和屏幕 12触摸屏操作12指示符号14从旧手机中复制联系人或图片14调节通话、歌曲或视频的音量15通话15拨打电话15呼叫最近拨打过的电话号码15查看未接来电15名片夹16储存姓名和电话号码16使用单键拨号16输入文字17输入法功能17中文输入法17信息19发送信息19信息键20收听语音信息20发送声音信息 21对手机进行个性化选择21关于主屏幕21个性化主屏幕21对您的手机铃声进行个性化设置22时间管理23更改时间和日期23设置闹钟23增加约会23农历24连接功能 24连接安全24蓝牙24USB 数据线25连接到 WLAN26音乐和音频28调频收音机28媒体播放器30媒体键30图片和视频30拍摄图片30录制视频31发送图片或视频31网络 32关于网络浏览器32浏览网络32清除浏览历史记录32电子邮件 33关于邮件33发送邮件332目录目录3阅读和回复邮件33诺基亚服务33诺基亚服务的提供情况及价格33访问诺基亚服务33查找帮助34支持34订阅“提示和建议”服务34随时更新您的手机34保护环境36节约能源36回收37诺基亚原厂配件37有关配件使用的一些注意事项38为什么使用原厂配件?38电池39产品及安全信息39索引64安全事项请阅读以下简明的规则。
不遵守这些规则可能会导致危险或触犯法律。
有关更详细信息,请阅读完整的用户指南。
在禁止使用手机的区域应关机当禁止使用手机或手机的使用会引起干扰或危险时 (例如,在飞机上,在医院中或医疗设备、燃料、化学制品或爆破地点附近),请关机。
请遵守受限制区域中的所有规定。
首先要注意交通安全请遵守当地的所有相关法律法规。
请尽量使用双手驾驶汽车。
诺蒂菲尔3030用户手册火灾报警控制器

火灾报警控制器NFS-3030/E操作维修手册火灾报警系统的局限火灾报警系统可以降低保险费用,但并不能代替火灾保险!自动火灾报警系统——典型组成包括感烟探测器、感温探测器、手动报警按钮、音响警报装置和具有远程告警能力的火灾报警控制——可以对发生的火灾提供早期警报。
然而,这种系统并不能保证由于火灾造成的财产损失和人员伤亡。
制造商推荐感烟和感温探测器在保护场所的设置应遵循“国家火灾防护协会通用版72号标准”(NFPA72)的建议、制造商的建议、国家和地方法规以及《正确使用系统感烟探测器指南》中的建议。
该指南对所有安装经销商免费提供。
据联邦紧急事件处理机构(美国政府机构)研究指出,感烟探测器在多达35%的火灾中没有起作用。
当火灾报警系统为早期火灾提供报警时,它们不保证对火灾的报警和防护。
由于以下各种原因,火灾报警系统可能不能提供及时准确的警报,甚至不能动作:感烟探测器在烟到达不了探测器的地方将不能探测到火灾,例如在烟囱里,在墙的里面或后面,在屋顶,或在关闭门的另一侧。
在建筑物的另一级或另一层的感烟探测器也不能探测到火灾,例如,第二层的探测器不能探测到的一层或地下室的火灾。
燃烧的粒子或“烟”在发展中的火灾中的燃烧粒子或“烟”将有可能不能到达感烟探测器的探测室,这是由于:●像关闭或部分关闭的门、墙或烟囱等障碍物阻挡了粒子或烟的流动。
●烟粒子变“冷”凝结不能扩散到安装探测器的屋顶或墙上面。
●烟粒子被空气出口吹离探测器。
●烟雾在到达探测器前被拉回到空气中。
“烟”的数量不足以使感烟探测器报警。
感烟探测器被设计为依据烟的浓度不同等级报警。
如果在探测器的位置发生火灾产生的烟达不到该浓度等级,探测器将不报警。
感烟探测器,即使工作正常,也有探测限制。
具有光电探测室的探测器善于探测阴燃的火灾而不善于探测很少有可见烟的明火。
具有离子型探测室的探测器善于探测快速燃烧的火灾而不善于探测阴燃火灾。
由于火灾以不同方式发展,而且它们的蔓延经常不可预知,两种探测器都不能最好地配置,一种给定点探测器将不能提供适当的火灾报警。
hp3030说明书

hp3030说明书hp3030说明书篇一:HP LaserJet 3050说明书当显示 Memry is l. ( 内存不足 ) Press ( 按下 ) 时,说明多功能一体机内存几乎完全用尽。
这样的面板信息一般发生在传真的时候,此时可以清除内存中的传真。
删除内存中的传真:1. 在多功能一体机控制面板上,按下菜单。
2. 按下按钮一次,显示 Fax functins ( 传真功能 ) ,然后按下3. 使用或按钮选择 Clear saved faxes ( 清除保存的传真 ) ,然后按下4. 按下以确认删除如果清除传真缓存不能解决问题,可以将一体机恢复出厂设置。
恢复出厂默认设置:1. 在多功能一体机控制面板上,按下菜单。
2. 使用或按钮选择 Service ( 服务 ) ,然后按下3. 使用或按钮选择 Restre defaults ( 恢复默认设置 ) ,然后按两下。
多功能一体机自动重新启动。
注意:恢复出厂设置将所有的设置全部恢复成工厂默认的状态,比如传真接收模式会变成自动接收 2 声应答,设置在机器里面的快速拨号、群组传真等等也将会被清掉。
可以传真机内存清零呀,设置--传真设置--接收设置--里面有“内存”,提示是否清零--是--确定即可。
这是一般传真机这么操作,现在市场上的传真机操作比较多,具体要看何种型号了不明白你说联网的意思,那就按我的理解说一下吧。
安装传真机只需要一条可以正常通话的电话线,不需要跟电脑连接(当然也就不需要什么驱动了),也不需要连接Internet网。
HP激光打印机、多功能一体机恢复出厂设置 admin / 201X-09-27 HP激光打印、HP多功能一体机在使用过程中由于操作不当或者设置不当导致打印机不能正常工作,需要将其设置恢复到出厂设置,那么需要如何操作呢?下面清零方法适用于:HP LaserJet 3015 、 HP LaserJet 3020 、 HP LaserJet 3030 、HP LaserJet 3200 、 HP LaserJet 3300 、 HP LaserJet 3330 、 HP LaserJet 3380 、HP LaserJet3050、 HPLaserJet3052、HP LaserJet3055、 HP LaserJet3090、HP LaserJet3092 、 HP Clr LaserJet 2820 、HP Clr LaserJet 2840 具体方法如下:1、按下“ menu/enter ”键2、按下“”或“”键找到:Service ,按“ menu/enter ”键3、按下“”或“”键找到:Restre defaults ,连续按两次“ menu/enter ”键4、液晶面板上出现:Restre defaults please ait ,等待打印机重新启动即可注:操作之前请备份好数据,此操作将会清空打印机内全部数据,恢复到出厂设置。
3030RGB红绿蓝黄橙紫贴片灯珠规格书

3030RGB红绿蓝黄橙紫贴片灯珠规格书3030RGB red green blue SMD beads Specifications
描述Description
3030RGB在于性能稳定,性价比高.市面上用03030RGB灯珠主要用于亮化灯具,室内灯具广告
3030RGB支架同时可以做成红、绿、蓝、黄、橙、紫等单色光及白色复合光
1.产品具有亮度高,寿命长的优点,6000小时0光衰
2.该产品采用铜支架, 金线(99.999%)进行生产,质量有保证
3.我司从订单到发货最快1天内出货,无现货或定制产品,6个工作日内发货.
CUSTOMER SIGNATURE:
(Units : mm)
静电 Static Electricity
触摸 LED 时,推荐使用防静电手腕带或防静电手套.
It is recommended that a wrist band or an anti-electrostatic glove be used when handling the LEDs.
所有装置、设备、机器均应接地.
All devices, equipment and machinery must be properly grounded.
正向电压变低或在低电流时死灯.标准: IF=0.5mA 时, VF >
2.0V Damaged LEDs will show some unusual characteristics such as the forward voltage becomes
lower, or the LEDs do not light at the low current. Criteria : (VF > 2.0V at IF=0.5mA)。
3030主机操作说明

3030主机操作说明
一、确认,静音,复位
1、火警事件确认:当有火警事件发生时,单击与屏幕上闪烁的“确认”相对应的软键进行火警确认,并立即去现场确认是否有火情发生。
2、故障、监管确认:当有故障和监管事件发生时,单击与屏幕上闪烁的“确认”相对应的软键进行火警确认,并告之维保人员。
3、静音:当现场有声响设备动作时,可按下SIGNAL SILENCE按钮对现场声响设备进行静音(在确定没有火情之前,不要进行静音操作)。
4、复位:按下SYSTEM RESET按钮可对本机火警、故障及监管事件进行复位。
二、事件及历史记录的查看
1、查看火警事件:按下FIRE ALARM按钮可以翻看已确认的火警事件。
2、查看故障事件:按下TROUBLE按钮可以翻看已确认故障事件。
3、查看监管事件:按下SUPERVISORY按纽可以翻看监管事件。
4、读取状态:按下读取状态按钮,选择相应的点(+/-号切换设备类型)按下接受按钮,即可读取该点状态。
5、查看记录:在“记录显示”菜单下选择“所有事件”,按下“前一事件/后一事件”进行翻阅记录。
6、查看火警事件记录:在“记录显示”菜单下选择“报警事件”,按下“前一报警/后一报警”进行翻阅火警记录。
7、查看故障事件记录:在“记录显示”菜单下选择“故障事件”,按下“前一事件/后一事件”进行翻阅故障记录。
8、查看监管事件记录:在“记录显示”菜单下选择“监管事件”,按下“前一事件/后一事件”进行翻阅监管记录。
1/ 1。
广东鸿彩3030彩印机使用说明书
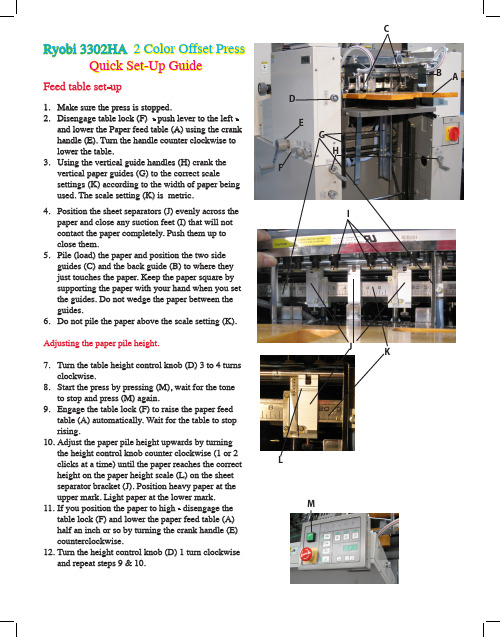
Feed table set-upMake sure the press is stopped.1.Disengage table lock (F) - push lever to the left - 2.and lower the Paper feed table (A) using the crank handle (E). Turn the handle counter clockwise to lower the table.Using the vertical guide handles (H)3. crank the vertical paper guides (G) to the correct scale settings (K) according to the width of paper being used. The scale setting (K) is metric. Position the sheet separators (J) evenly across the4.paper and close any suction feet (I) that will not contact the paper completely. Push them up to close them.Pile (load) the paper and position the two side 5.guides (C) and the back guide (B) to where they just touches the paper. Keep the paper square by supporting the paper with your hand when you set the guides. Do not wedge the paper between the guides.Do not pile the paper above the scale setting (K).6.Adjusting the paper pile height.Turn the table height control knob (D) 3 to 4 turns 7.clockwise.Start the press by pressing (M), wait for the tone 8.to stop and press (M) again.Engage the table lock (F) to raise the paper feed 9.table (A) automatically. Wait for the table to stop rising.Adjust the paper pile height upwards by turning 10.the height control knob counter clockwise (1 or 2 clicks at a time) until the paper reaches the correct height on the paper height scale (L) on the sheet separator bracket (J). Position heavy paper at the upper mark. Light paper at the lower mark.If you position the paper to high - disengage the 11.table lock (F) and lower the paper feed table (A) half an inch or so by turning the crank handle (E) counterclockwise.Turn the height control knob (D) 1 turn clockwise 12.and repeat steps 9 & 10.CDEGHFB AJIMLKRyobi 3302HA 2 Color Offset Press Quick Set-Up GuideCompletion of Feed table set-up and setting the Guide.Loosen, back of and re-tighten the two fixing 1. screws on the guide mechanism (G & H) and set the indicator on the push side guide adjustment dial (F) to zero.Start the press (A) and turn on the air (B). 2. Adjust air control knob (D) until 5 or 6 sheets of paper are separated from the pile with the top sheet touching the copper sheet separator (I) located on the sheet separator bracket (J).Turn off the air (B).3. Turn the vacuum control knob (E)4. counterclockwise 3 or 4 turns.Press (C) - the air comes on automatically - and 5. adjust the vacuum control knob (E) clockwise until one sheet of paper is picked up and drawn into the feeder board by the machine. The paper will stop before it enters the printing unit. You are now ready to set the guide.The push side guide aligns the paper laterally (registers the paper before it enters the press). The jogger guide pushes the paper against 2 springs.Support the paper with you hand. If the paper 6. moves, remove it, start the press (A) and repeat step 5.Loosen the fixing screw on the guide bracket 7. that has the two springs (H) and slide thebracket until the springs are approximately 1mm from the edge of the paper. Tighten bracket.Loosen the jogger guide fixing screw. Position 8. the jogger guide (G) and re-tighten it 1mm from the edge of the paper. Turn the side guide adjustment dial (F) until the jogger guide (G) pushes the paper approximately 1mm into the springs.BE AWARE THAT THE GUIDE MECHANISM CAN FUNCTION FROM THE OPERATION OR THE NON-OPERATION SIDE OF THE MACHINE.Congratulations. You have just set up the feed and the guide sections.Next.......the delivery section.A CB I JGHFDEThe Delivery Section.When the feed table and guide have been set: Start the press (A).1. Press (D) to deliver the paper from the feed2. board to the delivery section for set-up. The paper will hang from the grippers of the press in the delivery section.Loosen the knob (E) a quarter turn coun-3. terclockwise and set the delivery side guide (F) 2-3mm away from the side of the sheet of paper. Tighten knob (E).Engage the crawl on/off button (L). It will 4. light up pink.Push the forward crawl button (M) and stop 5. when the side jogger (J) and back guide (I) are closest to the paper.Loosen the knob (G) a quarter turn coun-6. terclockwise and move the side jogger (J) to lightly contact the paper. Tighten knob (G).Loosen and turn the back guide set knob 7. (N) until the paper lightly contacts the front guide (H). Tighten knob (N).ADEGI JMLNHFCheck to make sure that the feed table, guide and delivery sections are set-up properly by feeding 20/25 sheets of paper through the machine with no press stoppage. Adjust the air, vacuum and feed table height accordingly until there is an uninterrupted feed.Start the press (A).1. Press (B) to activate the air.2. Press (C) to activate the vacuum.3. The paper will start to feed, register and4.deliver.C B To stop the paper feed:Press (C) to turn off the vacuum.1. When all the paper has been delivered press2. (B) to turn off the air.Stop the press by pushing the crawl on/off 3. button (L).USE THE EMERGENCY STOP BUTTON (C) ONLY IN AN EMERGENCYKMounting the PlatePunch the lead edge of the plate using the 1. plate puncher (A). The image on the plate is usually closer to the lead edge of the plate.Bend the plate tail edge using the polyester 2. plate bender (B).Press the plate load button (F). After the 3. starting buzzer sounds press the plate load button (F) again. The press will start to crawl and stop automatically at the plate mounting position. The buzzer will sound again.When the buzzer 4. STOPS open the safety cover and insert the plate into the positioning pins on the leading edge of the clamp (G).Support the plate.5. Press the plate load button (F). The leading6. edge clamp will snap closed.Close the safety cover and press the plate 7. load button (F) again. The press will start to crawl and load the plate automatically. When the plate is mounted the buzzer will sound continuously.The set button (E) will be green if the plate 8. mounts properly.Stop the buzzer by pressing the crawl on/off 9. button (C).Removing the PlatePress the plate remove button (D). After the 1. buzzer sounds press the plate remove button (D) again. The press will start to crawl.When the press stops (there will be no 2. buzzer) press the plate remove button (D) again and the press will crawl and stopautomatically at the plate tail edge removing position.Open the safety cover and remove the tail 3. edge of the plate from the clamp.Apply a very slight pulling pressure to the 4. plate and press the plate remove button (D). The press will crawl in reverse enabling you to remove the plate. Keep applying the slight pulling pressure to make sure the plate does not get caught by the rollers in the press.CDEFGABPrinting unit set-up.The dampening system:Wearing goggles and gloves, mix fountain 1. solution to specifications 1 gallon at a time in a 1 gallon container. Pour the fountain solution into the container after you add the distilled water.Pour the mixed solution into the circulation 2. tank until the level is about .5” from the bottom of the refrigeration coils.Check the conductivity and Ph.3. Turn on the circulation pump (B).4. When the temperature reads below 55ºF start5. circulating the solution through the press (A)Engage ink and dampening from rollers (D).6. Shift the metering roller (C) to the on7. position so that it contacts the water fountain roller.Set the Dampening Solution volume control 8. dial (L) to 3.The Inking system:Turn on the printing unit(s) being used (J).1. Close the ink fountain(s) and add only 2. enough ink that you think you will use. Open the ink keys (E) for each unit being 3. used to 10 and set the ink fountain roller volume control (F) to 10. You will be adjusting these settings as needed (large numbers for more, smaller numbers for less) to achieve the correct ink density.Set the ink ductor button to manual (K).4. Start the press (G).5. Apply (duct) an even bead of ink to the6. rollers. Approximately 20 seconds.There is no hard and fast rule as to how much ink to apply (duct) to ensure that sufficient ink is placed on the rollers. If the ink looks matt and dull on the roll-ers, you probably need to add more. Printers listen for the ink to “sing” or “sizzle.” At any rate, keep in mind that it is easier to add ink than to remove it.7. When there is sufficient ink on the rollers press the automatic production button (I). Keep in mind that his action will switch the ink ductor button to automatic.8. When 5 or 6 sheets of paper have been delivered, press (H) to stop production.9. Wait for all the paper to be delivered before stopping the press (M).10. Examine the printed sheet and make any ink adjustments to obtain the proper density.BACDF EG J KLMH IImage PositioningIf the image is positioned properly on the paper (it is centered and straight) and the ink is close to the required density you are ready to start the press run.Start the press (A).1. Press the automatic production button (B).2. Monitor ink density and promptly make any3. need adjustments. THE PRESS DOES NOT MAKE THE ADJUSTMENTS BY ITSELF.Keep pulling and checking sheets until (and4. after) the required density is achieved.BA If the image in not properly positioned on the paper you need to position it properly (make it centered and/or straight). Make sure the press is stopped.To make a lateral image adjustment (to move the image closer to one side of the paper):Turn the plate cylinder micro adjustment 1. dial (C). Use the schematic beside the dial to determine which way you need to turn it. Turning the adjustment dial by one scale moves the image .1mm (.004”).CD EFGTo make a vertical image adjustment (to move the image up or down on the paper):Push and hold the clutch (E) down.1. Push and hold the vertical image adjustment2. dial (D) in.Release the clutch (E).3. Use the schematic beside the dial to determine which way you need to turn it. Turning the adjustment dial one scale moves the image .25mm (.0098”).To make a diagonal image adjustment (the image is crooked on the paper):Press the automatic plate tension/release 1. button (F). It’s the middle button. When the buzzer stops, press (F) again. The press will release the plate tension and stop automatically at the diagonal image adjustment knob (G) turning position.Open the safety cover and pull the dial (G) 2. towards you to move the operation side of the image towards the leading edge of the paper.Push the dial away from you to move the 3. non operation side of the image towards the leading edge.Operation side of pressNon-Operation side of pressHClose the safety cover.4. Press the plate tension/release button (F). The5. buzzer will sound and the press will crawl and re-tension the plate.When the press stops crawling stop the 6. buzzer sound by pressing the crawl on/off button (H).。
hp3030说明书(范本)

hp3030说明书h p3030说明书篇一:HP LaserJet3050说明书当显示 Memry is l. ( 内存不足 ) Press (按下 ) 时,说明多功能一体机内存几乎完全用尽。
这样的面板信息一般发生在传真的时候,此时可以清除内存中的传真。
删除内存中的传真: 1. 在多功能一体机控制面板上,按下菜单。
2. 按下按钮一次,显示 Fax fun ctins ( 传真功能 ) ,然后按下3. 使用或按钮选择 Cl ear savedfaxes ( 清除保存的传真 ) ,然后按下4.按下以确认删除如果清除传真缓存不能解决问题,可以将一体机恢复出厂设置。
恢复出厂默认设置:1. 在多功能一体机控制面板上,按下菜单。
2. 使用或按钮选择 Service ( 服务 ) ,然后按下3.使用或按钮选择 Restre de faults ( 恢复默认设置 ) ,然后按两下。
多功能一体机自动重新启动。
注意:恢复出厂设置将所有的设置全部恢复成工厂默认的状态,比如传真接收模式会变成自动接收2声应答,设置在机器里面的快速拨号、群组传真等等也将会被清掉。
可以传真机内存清零呀,设置--传真设置--接收设置--里面有“内存”,提示是否清零--是--确定即可。
这是一般传真机这么操作,现在市场上的传真机操作比较多,具体要看何种型号了不明白你说联网的意思,那就按我的理解说一下吧。
安装传真机只需要一条可以正常通话的电话线,不需要跟电脑连接(当然也就不需要什么驱动了),也不需要连接Int ernet网。
HP激光打印机、多功能一体机恢复出厂设置a dmin / 201X-09-27 HP 激光打印、HP多功能一体机在使用过程中由于操作不当或者设置不当导致打印机不能正常工作,需要将其设置恢复到出厂设置,那么需要如何操作呢?下面清零方法适用于: HP Lase rJet 3015、 HP Laser Jet 3020 、 HP LaserJ et 3030 、HP LaserJe t 3200 、H P LaserJet 3300 、 HP LaserJet3330 、HPLaserJet 3380 、HP La serJet3050、 HPLaserJ et3052、HP LaserJe t3055、HP LaserJe t3090、HP L aserJet3092 、 HP Clr LaserJet2820 、HPClr LaserJ et 2840 具体方法如下:1、按下“ menu/enter ”键2、按下“”或“”键找到:Servic e ,按“ menu/enter ”键3、按下“”或“”键找到:Restre defaults,连续按两次“m enu/enter”键4、液晶面板上出现: Restre d efaults pl ease ait ,等待打印机重新启动即可注:操作之前请备份好数据,此操作将会清空打印机内全部数据,恢复到出厂设置。
DW3030打印指南

b. 我们的驱动程序会自动根据边框判断正确的图纸尺寸,这个就是着墨区打印的先进理 念,通过这个理念,给用户最大的好处就是不需要再自定义纸张了。
如何在AUTOCAD中使用驱动程序生成打印文件( PLT)
5. 确认打印,并存储打印文件,会弹出如下打印预览对话框
打印按钮 该打印预览窗为富士施乐驱动 程序提供的预览窗,设计人员 可利用此功能确认打印尺寸和 范围是否正确,确认无误后, 选择打印按钮,生成PLT文 件。
•如何实现服务器驱动程序在客户端的发布 •如何在AUTOCAD中使用驱动程序生成打印文件( PLT)
•如何对富士施乐驱动程序生成的打印文件进行浏览 •Microstation 软件的注意事项
如何安装服务器打印驱动程序
如何安装服务器打印驱动程序
将打印机共享,例如: 共享名为:plt文件打印 按顺序完成安装
•如何对富士施乐驱动程序生成的打印文件进行浏览
选择生成plt文件的目录,并输入*.* 找到该文件,打开文件。
打印文件的提前浏览可以帮助设计人员自我审图,确保输出文件的准确性,通过自我审图, 可以: 1. 确保输出文件的准确性,减少图纸输出浪费 2. 提升设计人员的设计效率,减少奔波于设计工位和CAD输出中心 3. 可以清晰判断设计人员和CAD输出中心人员的工作职责,职能清晰化
AutoCAD打印的正常 操作要看下面几个选 项: 1.打印到文件 2. 打印区域(窗选) 3. 打印比例 4. 打印样式表 5. 居中打印(可选 项),确保窗选范围 在定义的打印范围 内。
如何在AUTOCAD中使用驱动程序生成打印文件( PLT)
4. 确认打印预览结果:
a.因为我们给大家选定的打印范围为880mmX 5000mm, 此为最大绘图空间,请大家确保 窗选图像完全在打印预览范围内。
施乐复印机3030维修手册(中文):第5章零件表

施乐复印机3030维修⼿册(中⽂):第5章零件表第5章零件表⽬录5.1 前⾔ (2)5.1.1 零件表的⽤法 (2)5.1.2 使⽤需知 (2)5.1.3 板的构成 (2)5.1.4 术语/符号的说明 (2)5.2 PARTS LIST (4)PL 1 DRIVE (4)PL1.1 Drive-Paper (4)PL1.2 Drive-Deve. Xero (5)PL 2 PAPER Hand (6)PL2.1 Paper Hand Component (6)PL2.2 Lower Baffle Component (7)PL2.3 Manual Feed Baffle-3, Vertical Front Baffle Component (8)PL2.4 Horizontal Lower Baffle Component (9)PL2.5 Horizontal Lower Baffle Component (10)PL 3 IIT (11)PL 3.1 IIT Document Transport (11)PL3.2 IIT-Electrical (12)PL3.3 Upper Document Transport (13)PL 4 LPH (14)PL4.1 LPH Accessory (14)PL 5 DEVE (15)PL5.1 Developer Assembly Accessory (15)PL5.2 Developer Assembly Component (16)PL 6 XERO (17)PL6.1 XERO Accessory (17)PL6.2 Xero Module Component (18)PL6.3 BTR Housing Component (19)PL6.4 Xero Housing Component (20)PL 7 Fuser (21)PL7.1 Fuser Assembly Accessory (21)PL7.2 Fuser Assembly Component-Roll (22)PL7.3 Fuser Assembly Component-Chute (23)PL7.4 Upper Exit Baffle Component (24)PL7.5 Thermistor Plate Component (25)PL 8 ELEC (26)PL8.1 Electrical-Rear 1 (26)PL8.2 Electrical-Rear 2 (27)PL8.3 Electrical-Right Lower (28)PL8.4 Electrical-Right Upper (29)PL8.5 Electrical-Left (30)PL8.6 Consol Component (31)PL9 Cover (32)PL9.1 Cover-Front, Right, Top (32)PL9.2 Cover-Rear, Left (33)PL9.3 Document Shelf Component (34)PL9.4 Document Shelf Component (35)PL 10 RFC (36)PL10.1 2-RFC Type Accessory (36)PL10.2 1-RFC Type Accessory (37)PL10.3 RFC A-Type Accessory (38)PL10.4 RFC B-Type Accessory (39)PL10.5 RFC Component-Paper Feed (40)PL10.6 RFC Component-Latch , Roll Paper Tube Support (41)PL10.7 Paper Heater / Paper Size Sensor Housing Component (42)PL10.8 Take Away Baffle Component (43)PL 11 Frame (44)PL 11.1 Swing Frame Latch Accessory (44)PL11.2 Swing Frame Latch Component (45)5.3 Adjustment/Consumables Area Code (47)第5章零件表5.1 前⾔ 5-25.1 前⾔5.1.1 零件表的⽤法零件表包含关于备⽤零件的信息。
Acer宏碁投影仪D303使用说明书

• 电源线或插头损坏或磨损 • 液体溅入产品中 • 产品受到雨淋或溅水 • 产品曾经掉落,或机壳已经损坏 • 产品性能有明显的改变,表明需要进行维修 • 遵照使用说明进行操作,但产品工作不正常
注意:只应调整操作说明中介绍的那些控制,因为其它控制调整不当可能会导致 损坏,而且经常会需要合格的专业技师去多做许多额外的工作才能将产品恢复至 正常状态。
注意:接地插片还提供良好的保护,防止附近其它电气设备产生的意外噪音干扰 本产品的运行。
• 本产品只应使用随机附带的电源线套件。如需更换电源线套件,应确保新电源
线符合下列要求:可分离类型, UL 列表 /CSA 认证, VDE 核准或与其相同等 级,最大长度 4.6 米 (15 英尺)。
v
产品维修
在打开或卸下机盖时存在危险电压或其它风险,因此请勿自行维修本产品。委托专业 服务人员进行维修。
节能环保认证
viii
重要事项
使用注意事项
务必:
• 在清洁之前关闭产品电源。 • 使用蘸有中性洗涤剂的软布擦拭主机外壳。 • 如果本产品长期不用,应从交流插座中拔下电源插头。
切勿:
• 阻塞设备上用于通风的狭缝和开口。 • 使用擦洗剂、石蜡或者溶剂擦拭设备。 • 在如下条件下使用:
• 极端炎热、寒冷或者潮湿的环境。 • 易受大量灰尘和泥土侵袭的区域。 • 任何产生强磁场的设备附近。 • 阳光直接照射的地方。
本出版物的内容将定期变动,恕不另行通知。更改的内容将会补充到本出版物,且会在本手册发行 新版本时予以付梓印刷。本公司不做任何明示或默许担保,包括本手册内容的适售性或符合特定使 用目的。 在下列预留的空白处,记录下型号、序列号、购买日期及购买地点。型号及序列号可以在投影机的 标签上找到。与投影机相关的资料应包括序列号、型号及购买信息。 未经本公司书面同意,不得对本出版物的任何部分以任何方式 (电子的、机械的、影印的、翻录的 或其它的方式)进行复制、保存入检索系统或传播。
3030操作手册
第1章操作1.1简介NFS2-3030是一个具有多种功能的智能火灾报警控制系统(控制器)。
CPU2-3030还可以配带一个显示/键盘选件,在控制器上,通过它可以编程和浏览。
NFS2-3030有两个基本配置选项。
它的配置如下:▪配带一个显示/键盘单元,通过它可以编程和浏览。
▪没有显示/键盘。
本手册讲述显示/键盘的使用方法。
无显示模式在NFS2-3030系统上没有安装键盘/显示单元时,这个控制器通过远程告警器控制,需要VeriFire TM编程软件。
这个无显示控制器在电路板上有四个按钮,主要用于本地操作。
▪ACK:确认按钮▪SIGSIL:消音按钮▪SYSRST:系统复位按钮▪LAMP TEST:灯检按钮这些按钮主要是安装者使用,如果可能,操作员将利用一个远程告警器来实现这些功能。
电路板上的LED状态指示灯和显示/键盘单元上的一样(参见手册的“显示/键盘”)。
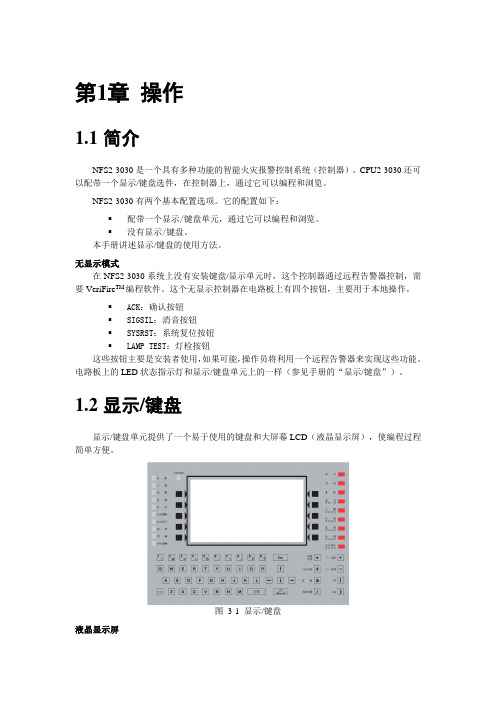
1.2显示/键盘显示/键盘单元提供了一个易于使用的键盘和大屏幕LCD(液晶显示屏),使编程过程简单方便。
图3-1 显示/键盘液晶显示屏这个液晶显示屏每行有20个中文字符,共8行,可以显示所有的编程、事件、历史记录、器件等信息。
用键盘可以输入或者改变信息,还可以执行命令。
键盘键盘由几种类型的键组成:数字字符键、特殊功能键、软键、固定功能键。
注:按键功能描述写在键的下边。
本地控制选项被关闭时,控制器上的信号消音、系统复位和演习等固定功能键或者信号消音、系统复位和确认软键都不能本地操作。
如果需要实现这些功能,必须通过一个远程编程设备来完成。
按键键盘的数字字符键部分是标准QWERTY格式,当系统需要输入时,这些键起作用,其它情况下,按这些鍵不产生任何输入。
软键在显示屏的左右两边共有10个软按键,这些按键可以执行显示在屏幕上的命令。
每一屏幕有不同的信息,这些键的功能与屏幕上的显示内容对应。
在本手册中,每一显示屏幕下面,有各软键的功能描述。
固定功能键在键盘/显示屏右边的9个红色按键是固定功能键。
Eaton EHD3030VL产品说明说明书
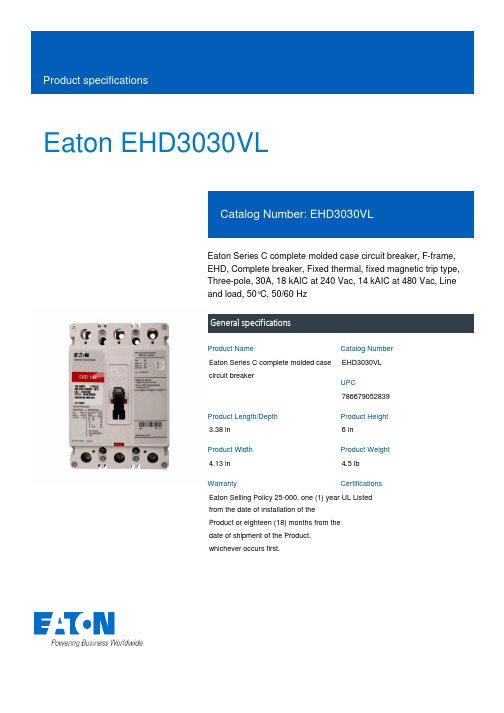
Eaton EHD3030VLEaton Series C complete molded case circuit breaker, F-frame, EHD, Complete breaker, Fixed thermal, fixed magnetic trip type, Three-pole, 30A, 18 kAIC at 240 Vac, 14 kAIC at 480 Vac, Line and load, 50°C, 50/60 HzGeneral specificationsEaton Series C complete molded case circuit breakerEHD3030VL 7866790528393.38 in 6 in4.13 in 4.5 lb Eaton Selling Policy 25-000, one (1) year from the date of installation of the Product or eighteen (18) months from the date of shipment of the Product, whichever occurs first.UL Listed Product NameCatalog Number UPCProduct Length/Depth Product Height Product Width Product Weight WarrantyCertificationsSeries C14 kAIC at 480 Vac18 kAIC at 240 VacFEHD50/60 HzComplete breakerLine and load50°C30 AFixed thermal, fixed magnetic Three-pole Application of Multi-Wire Terminals for Molded Case Circuit Breakers Application of Tap Rules to Molded Case Breaker TerminalsUL listed 100%-rated molded case circuit breakersPower metering and monitoring with Modbus RTU product aid StrandAble terminals product aidMulti-wire lugs product aidMOEM MCCB Product Selection GuideCircuit breaker motor operators product aidCurrent limiting Series C molded case circuit breakers product aidPlug-in adapters for molded case circuit breakers product aidMotor protection circuit breakers product aidCounterfeit and Gray Market Awareness GuideBreaker service centersMolded case circuit breakers catalogEaton's Volume 4—Circuit ProtectionEHD3 3D InventorEHD3 3D Model XchangeEHD3 AutoCAD 2D Footprint (mm)Time Current Curves for Series C® F-Frame Circuit BreakersInstallation Instructions for EHD, EDB, EDS, ED, EDH, EDC, FDB, FD, HFD, FDC, HFDDC Circuit Breakers and Molded Case SwitchesCircuit breakers explainedCircuit Breakers ExplainedSeries C F-Frame molded case circuit breakersSeries C J-Frame molded case circuit breakers time current curvesEaton Specification Sheet - EHD3030VLSeries C G-Frame molded case circuit breakers time current curves MOEM MCCB product selection guideSeriesInterrupt ratingFrameCircuit breaker type Frequency ratingCircuit breaker frame type TerminalsCalibrationAmperage RatingTrip TypeNumber of poles Application notesBrochuresCatalogsDrawingsInstallation instructions MultimediaSpecifications and datasheetsEaton Corporation plc Eaton House30 Pembroke Road Dublin 4, Ireland © 2023 Eaton. All Rights Reserved. Eaton is a registered trademark.All other trademarks areproperty of their respectiveowners./socialmedia。
DCAP3030T-V20D01-使用说明书-CH-20150528

DCAP-3030T自动准同期装置使用说明书(V20D01-CH-20150528)紫光测控有限公司Unisplendour M&C Co. , Ltd.目录1概述 (1)2装置主要功能配置 (1)3装置硬件资源配置 (1)4主要技术指标 (2)4.1 额定参数 (2)4.2 环境条件 (2)4.3 功率消耗 (2)4.4 热稳定性 (2)4.5 测控技术指标 (2)4.6 保护技术指标 (3)4.7 触点容量 (4)4.8 绝缘性能 (4)4.9 抗干扰能力 (4)5装置原理 (5)5.1 装置的构成 (5)5.2 保护原理说明 (5)6菜单及数据表格说明 (7)6.1 实时数据表 (7)6.2保护参数表 (7)6.3 通信数据表格 (8)6.4系统参数表 (11)6.5模拟量校准表 (11)7操作方法 (12)8装置结构及尺寸 (12)9装置典型接线图 (13)10箱后端子接线图 (14)11 概述DCAP-3030T 采用插件式结构,提供八路自动准同期,能自动检测系统侧、对象侧电压、相角、频率。
每路具有自动测量导前时间;自动调节压差、角差、频差;具有无压选择和低电压及PT 断线闭锁功能;具有装置内部故障告警并闭锁保护功能;可做为智能数字同期表使用。
2 装置主要功能配置3 装置硬件资源配置24 主要技术指标4.1 额定参数交流电压额定值(Un):线电压:100V,380V;相电压:57.7V,220V交流量频率额定值:50Hz装置供电电源额定参数:装置电源额定值:DC/AC220V,DC110V装置交流电源频率额定值:50Hz4.2 环境条件环境温度:工作:温度范围 -25~+55℃。
贮存:温度范围 -40~+70℃,在极限值下不施加激励量,装置不出现不可逆变化,温度恢复后,装置应能正常工作。
大气压力:70~106kPa(相对海拔高度3km及以下)相对湿度:最湿月的月平均最大相对湿度为90%,同时该月的月平均最低温度为25℃,且表面无凝露。
Eaton FDB3030L产品说明说明书
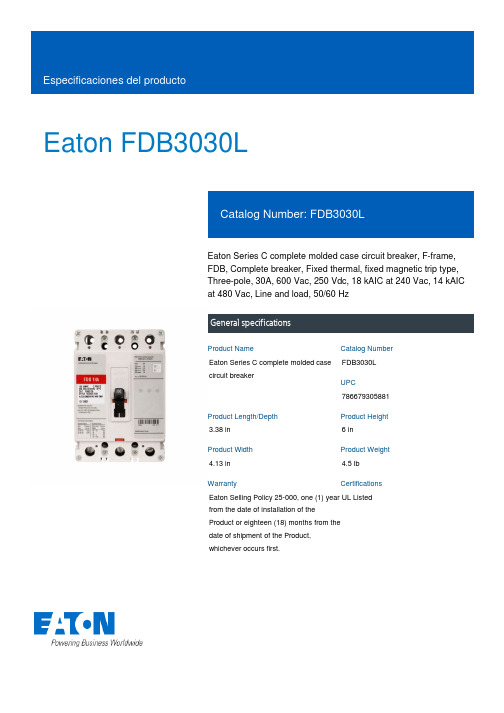
Eaton FDB3030LEaton Series C complete molded case circuit breaker, F-frame, FDB, Complete breaker, Fixed thermal, fixed magnetic trip type, Three-pole, 30A, 600 Vac, 250 Vdc, 18 kAIC at 240 Vac, 14 kAIC at 480 Vac, Line and load, 50/60 HzGeneral specificationsEaton Series C complete molded case circuit breakerFDB3030L 7866793058813.38 in 6 in4.13 in 4.5 lb Eaton Selling Policy 25-000, one (1) year from the date of installation of the Product or eighteen (18) months from the date of shipment of the Product, whichever occurs first.UL Listed Product NameCatalog Number UPCProduct Length/Depth Product Height Product Width Product Weight WarrantyCertificationsEaton Corporation plc Eaton House30 Pembroke Road Dublin 4, Ireland © 2023 Eaton. Todos los derechos reservados. Eaton is a registered trademark.All other trademarks areproperty of their respective owners./socialmediaSeries C 18 kAIC at 240 Vac 14 kAIC at 480 Vac FFDB50/60 HzComplete breaker Line and load 600 Vac, 250 Vdc 30 A Fixed thermal, fixed magnetic Three-poleEaton's Volume 4—Circuit Protection Time Current Curves for Series C® F-Frame Circuit Breakers FDB3 AutoCAD 2D Footprint (mm)MOEM MCCB Product Selection Guide Counterfeit and Gray Market Awareness Guide Breaker service centersEaton Specification Sheet - FDB3030L Installation Instructions for EHD, EDB, EDS, ED, EDH, EDC, FDB, FD, HFD, FDC, HFDDC Circuit Breakers and Molded Case SwitchesSeries Interrupt rating Frame Circuit breaker type Frequency rating Circuit breaker frame type Terminals Voltage rating Amperage Rating Trip TypeNumber of poles CatálogosDibujosFolletosGuías de especificaciones de producto Instrucciones de instalación。
Dytran 3030C1 高温微型加速度计使用手册说明书

D y n a m i c T r a n s d u c e r s a n d S y s t e m s21592M a r i l l a S t.•C h a t s w o r t h,C A91311•P h o n e818-700-7818w w w.d y t r a n.c o m•e-m a i l:i n f o@d y t r a n.c o mOG3030C1.DOCREV A, ECN -, 3-5-99REV B, ECN 11822, 3-11-15OPERATING GUIDEMODEL 3030C1MINIATURE HIGH TEMPERATURE ACCELEROMETER,HERMETICALLY SEALEDNOTE:MINIATURETEMPERATUREHIGHAISMODEL3030C1FORDESIGNEDUSEACCELEROMETERCHARGEMODECHAMBERS.THERMALINESSTHIS MANUAL INCLUDES:3030C11)MODELGUIDE,OPERATING127-3030C1DWG,2)OUTLINE/INSTALLATION3030C1MODELSPECIFICATION,3)CHARGEMODETO4)GUIDEGENERALACCELEROMETEROPERATING INSTRUCTIONS, MODEL 3030C1MINIATURE HIGH TEMPERATURE ACCELEROMETERINTRODUCTIONModel 3030C1 is a rugged miniature accelerometer designed to function in Environmental Stress Screening (ESS) chambers. This charge mode accelerometer can function at up to +500°F under extreme environmental conditions.Utilizing ultra high temperature piezoceramic crystals, this miniature accelerometer features top mounted 10-32 connector and integral 10-32 mounting stud.This charge mode accelerometer is designed to work with in-line charge amplifiers such as the Dytran 4705 series. The charge sensitivity of Model 3030C1 is 0.4 pC/g.DESCRIPTIONRefer to figure 1 below.Figure 1 Representative cross section model 3030C1Model 3030C1 uses the inverted element design principle to minimize the effects of base strain on the output signal. The element is suspended from a center support which provides isolation from strain at the mounting base, which can add spurious signals to the vibration information.The seismic element type used in this design is laminar compression, the most rugged configuration for accelerometers which will be subjected to very high levels of multi-axis vibration under extremes of temperature.INSTALLATIONTo install Model 3030C1, it is necessary to drill and tap a 10-32 mounting hole at the center of a .350 diameter flat surface. Follow the instructions on the Outline/Installation drawing 127-3031C1 supplied with this manual.Make sure that the surface is flat to .001 TIR and is free of chips and other debris. Place a small amount of silicone grease on the mating surfaces and torque the instrument into the mounting port with 10 lb.-inches of torque.The silicone grease will ensure that the mating surfaces give the best high frequency transfer of vibration motion into the accelerometer base.Connect the 3030C1 to the charge amplifier using low noise high temperature coaxial cable only. Make sure that the cable lock nut is tight.Before connecting the cable from the accel. to the charge amplifier, short the end of the cable with a metallic object to discharge any static charge buildup which may exist across the crystals and which may damage the static sensitive input stage of the charge amplifier.MAINTENANCE AND REPAIRDue to the sealed construction, no maintenance is possible aside from keeping the connector free from contamination. Wipe the end of the connector with alcohol or other solvents (not acetone) and allow to dry.Should you perceive a problem with the 3030C1, contact the factory for a Returned material Authorization RMA number and for instructions onreturning the unit for evaluation.REV B, ECN 11822, 3-11-152。
- 1、下载文档前请自行甄别文档内容的完整性,平台不提供额外的编辑、内容补充、找答案等附加服务。
- 2、"仅部分预览"的文档,不可在线预览部分如存在完整性等问题,可反馈申请退款(可完整预览的文档不适用该条件!)。
- 3、如文档侵犯您的权益,请联系客服反馈,我们会尽快为您处理(人工客服工作时间:9:00-18:30)。
1 从应用软件的 [ 文件 ] 菜单中选择 [ 打印 ]。 从 [ 名称 ] 窗格选择 [FX DocuWide 3030],再点击 [ 属性 ]。
2 点击[纸盘/输出]选项卡,从[ 纸路选择]窗 格选择 [ 手送纸 ],再点击 [ 确定 ]。
3 在 [ 打印 ] 对话框内,点击 [ 确定 ]。
4 根据显示在机器上的指令在手送纸道设定 纸张。 (1) 向前打开手送纸道。 (2) 将纸张的右侧对准尺寸指示灯,并插入纸张的引导边, 直到其停止。 设置纸张时,打印开始。
3 通过数字键输入复印的份数 (1 到 99)。
4 纵向设定原稿。 将原稿面朝下,与导向槽对齐。 原稿将被自动复印。 补充 标准尺寸的原稿可以横向放置。
补充 按
停止复印。
4
使图像适合固定的复印尺寸
● 选择所需的复印尺寸,可以在缩放比例下容易地复印。
复印
1 选择 [ 复印 ]。
2 在[缩放]中选择[自动%]并且在[纸路选择] 中选择所需的标准尺寸。 当所需的标准尺寸没有列出来时,选择 [ 其它用纸 ...]。
[ 分页输出 ]
[ 不分页输出 ]
(1) (4)
1 显示用于复印的 [ 分页 ] 画面。 (1) 选择 [ 复印 ]。
(2)
(2) 在 [ 复印 ] 画面上选择 [ 其它功能 ] 选项卡。
(3) 选择 [2]。
(4) 选择 [ 分页 ]。
(3)
2 选择 [ 分页输出 ],再选择 关闭 。 根据要求从每个选项卡选择功能。
9
使用 BT-PlotAssistant 打印
● 可以使用打印机驱动程序旁边的 BT-PlotAssistant 打印。 ● BT-PlotAssistant 必须安装在电脑里。
关于安装方法,请参照 BT-PlotAssistant 用户指南。
1 按一下 [ 启动 ] > [ 程序 ] > [Fuji Xerox] > [BT-PlotAssistant] > [BT-PlotAssistant]。
当从 [Web Access] 中选择 [ 作业和履历 ] 时, 可以确认作业状态。
如果用 [ 作业设定 ] 存储设置 , 可以登记输出选择。这 在重复打印相同的原稿很有用。
10
查看机器状态和作业状态
1 启动浏览器,在浏览器地址字段中输入装 置的 IP 地址。 显示机器状态。
2 点击 [ 作业和履历 ]。
● 以下说明使用 Docuworks 将扫描的文档从机器的信箱导入到电脑中的方法。 有关 Docuworks 的信息,请参照 Docuworks 在线帮助。
1 按一下 [ 启动 ] > [ 程序 ] > [Fuji Xerox] > [DocuWorks] > [DocuWorks Desk]。
2 选择一个扫描仪。 (1) 从 [ 文件 ] 菜单中选择 [ 选择扫描仪 ] 。 (2) 选择 [Wide Format Network TWAIN Source], 再点击 [ 选定 ]。 补充 如果不更改扫描仪,可省略此步骤。
(2)
(3) (4)
2 选择信箱。 (1) 在 [ 扫描 ] 画面选择 [ 信箱 ]。 (2) 选择存储扫描文件的信箱。 (3) 输入密码。 (4) 选择 确认 。
(5) 选择 关闭 。
3 选择功能,如[输出文件格式]和[扫描分辩 率 ]。
4 设定原稿。
• 在 [ 输出文件格式 ] 中选择 [ 单页 TIFF] 时 ( 当将单份原稿保存为一个文件时 )
参见
BT-PlotAssistant 在线帮助
● 查看机器状态和作业状态
可以运用这个功能通过网络浏览器在 电脑上查看机器状态和作业状态。
参见 网络打印服务在线帮助
3
复印 0.
以原稿相同大小的尺寸进行复印
● 通过设置一个原稿和按 〈启动〉按钮,可以容易地复印。
1 选择 [ 复印 ]。
2 确认在 [ 缩放 ] 中选择 [100.0%] ,在 [ 纸路 选择 ] 中选择 [ 自动选择 ]。
参见 扫描仪驱动程序在线帮助
可以从应用程序打印。也可以设定不同 的打印设置,例如在打印时检查图像尺 寸,以便有效地使用 DocuWide 3030。
参见 打印机驱动程序在线帮助
● 使用 BT-PlotAssistant 打印
TIFF PDF HP-GL
可以运用这个功能在同时打印包含不 同输出文件格式的多份文件。
根据原稿类型选择最适当的图像质量。 使用这个功能更清晰地扫描设计图、描图纸。 使用说明书 P.60
边框消除
删除原稿图像的边框。 这个对于删除图画边框很有用。 使用说明书 P.63
复印浓度
调整复印浓度。
使用说明书 P.60
扫描起始位置
跳过不需要的部分,例如位于原稿上边框的页眉。
使用说明书 P.64
复印
扫描前 (3) 在 Wide Format Scan Service 上添加一个信箱
● 以下说明 Wide Format Scan Service 扫描的准备作业。
扫描
1 按一下 [ 启动 ] > [ 程序 ] > [Fuji Xerox] > [Wide Format Scan Service] > [Wide Format Scan Service]。
8
打印长文档
1 从应用软件的 [ 文件 ] 菜单中选择 [ 打印 ]。 从 [ 名称 ] 窗格选择 [FX DocuWide 3030],再点击 [ 属性 ]。
使用手送纸道打印
2 从 [ 原稿尺寸 ] 菜单中选择所需的尺寸, 再从 [ 同步切纸 ] 菜单中选择切纸方式,
点击 [ 确定 ]。
打印
3 在 [ 打印 ] 对话框内,点击 [ 确定 ]。
3 选择打印设置,再点击 [ 确定 ]。 点击 [ 属性 ] 再设置诸如 [ 原稿尺寸 ]、 [ 用纸类型 ]。
补充 点击 [ 帮助 ] 查看关于这个主题的说明。
4 点击 [ 确定 ]。 补充
根据 DocuWorks 里的用纸尺寸打印,查看 [ 按 打印纸张缩放 ]。
补充 在机器里停止打印作业,按
停止复印。
2 从 [ 打印机主机名 ] 窗格选择打印机。 3 拖放所要打印的文件至打印文件列表框。
补充 有关 BT-PlotAssistant 支持的输出文件格式的 详情,请参照 BT-PlotAssistant 用户指南。
4 双击打印文件列表中的 [ 份数 ],然后输入 复印份数,从 1 到 99。 选择 [ 打印 ]。
3 通过数字键输入设定份数。
4 设定原稿的第 1 页。 设定连续扫描下一幅原稿。 扫描完所有原稿后,选择 原稿结束 。 补充 [ 更改设置 ] 变更诸如缩小 / 放大和用纸类型等设定。 [ 删除前一个图像 ] 删除最近扫描的原稿图像。
5 确认设定份数,再按 〈启动〉按钮。 复印自动开始。
6
原稿类型
去除背景
删除原稿不均匀的底色。
使用说明书 P.61
上下边距
使用上下边距进行复印。
使用说明书 P.64
对比度
调整原稿对比度。 使用这个功能可以复印照片或海报。
使用说明书 P.61
镜像 反转图像进行复印,如同在镜子里看到的。
使用说明书 P.65
图像位置
移动图像的复印位置。 当复印原稿边缘的字符或穿孔时使用这个功能。
DocuWide 3030 功能 0.
● 可以用 DocuWide 3030 MF 进行复印、扫描和打印。
● 可以用 DocuWide 3030 EC 进行复印。
● 可以用 DocuWide 3030 进 行打印。
2
.
C
使用触摸面板,可以以相同的和不同的倍 率容易地复印。
参见
使用说明书 P.46
可以用扫描功能把扫描数据从 DocuWide 3030 导入电脑。
使用说明书 P.62
反转图像
复印时,将原稿图像的黑白色颠倒。
使用说明书 P.66
7
打印 0.
使用打印机驱动程序进行打印
● 打印机驱动程序必须用提供的 CD-ROM 安装在电脑里。
1 从应用软件的 [ 文件 ] 菜单中选择 [ 打印 ]。
2 从 [ 名称 ] 窗格选择 [FX DocuWide 3030]。
扫描完成,显示 [ 扫描 ] 画面。
,
补充
按
停止扫描。
扫描 (2)-1 使用 Wide Format Scan Service 导入
1 按一下 [ 启动 ] > [ 程序 ] > [Fuji Xerox] > [Wide Format Scan Service] > [Wide Format Scan Service]。
3 打开一个信箱。 (1) 从 [ 文件 ] 菜单中选择 [ 开始扫描 ]。 (2) 点击 [DocuWide 3030],再点击 [ 下一步 ]。 (3) 从 [ 信箱列表 ] 中选择信箱,并在 [ 密码 ] 中输入一 个密码。 (4) 点击 [ 下一步 ]。
4 导入文档。 (1) 从列表上选择要导入的文档,接着按一下 [ 导入 ]。 (2) 如果再没有文档需要导入,点击 。 (3) 当确认信息出现时,点击 [ 确定 ]。
扫描
(2) 从信箱中把扫描的文档导入您的电脑。
扫描前 (1) 在机器上建立一个信箱
1 选择 [ 创建 / 删除 ]。
.
2 选择 [ 信箱 ]。 补充 有关信箱的详情,请参照使用说明书 (P.69)。
3 选择一个未使用的信箱,再选择 存储 。
12
4 输入密码,再选择 关闭 。 5 选择要设定的项目。
显示未完成的作业清单。