Type3后处理器的设置方法-Autodeskforums
type3安装设置参数

如何安装type3一.装type31.放入光盘于光驱中2.打开“我的电脑”,选择光盘并双击3.双击“TYPE3V4200”4.双击“SETUP”5.双击“NEXT”6.双击“YES”7.双击“NEXT”8.双击“NEXT”9.双击“NEXT”10.双击“NEXT”11.双击“NEXT”12.双击“NEXT”,此时电脑会自动安装,可以休息一会儿13.单击“FINISH”,电脑重新启动二.解压1.打开“我的电脑”,选择光盘并双击2.双击“TYPE3V4200”3.双击“crack1”4.单击“APPLY”5.单击“确定”6.双击“crack2”7.单击“APPLY”8.单击“确定”,此时解压已经完成三.改“后处理器”1.回到桌面,双击type3图标2.点“加入机器”前面的加号“+”3.点“CNC机器”前面的加号“+”4.选择“Fanuc 16M/Fanuc 0M”,使其成为绿色底5.单击右下角的“加入”6.单击任一“确认”7.单击右边的“后处理器……”8.把滚动条往下拉,将Nmax=999999中的6个“9”改为10个“9”9.把滚动条往下拉,将HeadpcrSz0=p中的“p”改为大写“/ROC/0”HeadpcrSz1=G91。
G28HeadpcrSz2=t 等于号“=”HeadpcrSz3=M6 后面删除.10. 将EndpcrSz0=M17中的“17”改为“05”11.单击右上角的“确认”12.将最小X最大最小Y最大Y最小最大13.单击“确认”14.单击“退出”(此时会自动弹出type3界面)四.更改可雕刻页及选项以“RS-1208”为例(根据自己的机型设置,深度都一样)按F10,需改以下参数a.通用取消步数:10改为30自动保存:20改为3单击“声音”:将勾号去掉b.显示单击“显示浮雕”:将勾号去掉c.可雕刻页宽度改为“1200mm”(L)左留边:0mm(R)右留边:0mm高度改为“800mm”(B)底留边:0mm(T)顶留边:0mm深度改为“150mm”顶边:0mm底边:0mmd.计算参数:单击“人工”,使其选中,0p1改为“2”。
法国type3详细教程

CAM模块发送物体去加工送去加工点击图标CAM模块,把物体送入CAM (演示)模块,屏幕转变成蓝色。
注释当没有成分被选中时,Type3 将发送缺省时的整个画面图形(所有层中,开放的和封闭的轮廓线形式)。
当选中一个或多个成分时,Type3 仅发送这些成分。
优化刀具路径计算计算参数这个功能能优化您的软件:适当的参数将产生理想的结果! 您可以按F10功能键得到这些参数。
按此键将显示选项对话框(或者在编辑菜单中选择选项…)。
在这个对话框中,选择计算参数。
路径走向Type 3通过设定缺省值来减少雕刻的时间。
对于某些工作,例如切割,您可以选定第二个选项来修改路径走向的顺序。
雕刻顺序人工当路径走向在人工模式中时,指定的起始点和路径顺序的选择(创建)与在CAD模块中选定的将保持一致。
最小距离缺省模式:为了最小化刀具路径的时间,将通过雕刻邻近区域的顺序来实现(X最小到X最大)。
面积最小到最大在这个模式中,将首先雕刻最小的表面(例如在字母的内部)。
注意:当您选择二维或三维切割时,Type3将自动选择这个模式。
面积最大到最小将首先雕刻较大的表面。
无警示无任一类型选项可作。
缺省模式Op1 = 0首先雕刻最小的表面。
如果选择路径走向的缺省模式不能优化您的刀具路径,您可以在您的操作中附加选项来改进雕刻的时间。
在Op1区域中,根据想要的切割类型选择数值1或2(如下所示)。
刻字Opt1 = 1所有的物体都是独立的,并且将刻好一个字,接着刻下一个字(在每种情形下内框将优先于外框先刻)。
快速计算轨线,如果刀具操作有冲突时,软件将不执行此功能,但不检查字之间的交错,所以应注意物体之间的空间以避免冲突。
刻词Op1 = 2在CAD 模式中选择的顺序保持不变。
执行的切割操作,将是一个接着一个的雕刻(在每种情形下内框将优先于外框先刻)以避免操作冲突。
对于物体之间不要求完全切割的部件,推荐使用此选项。
拉角脚按F10功能键或在编辑菜单中选择选项…,在屏幕上显示的选项对话框中点击计算参数栏。
TYPE3操作使用手册
TYPE3软件使用说明目录软件安装与设置 (01)TYPE3 CAD模块 (XX)界面的定制 (XX)工具的使用 (XX)画图工具 (XX)选取工具与放大镜 (XX)对齐工具 (XX)变形工具 (XX)特效工具 (XX)复制工具 (XX)文本工具 (XX)节点工具 (XX)图层 (XX)测量工具 (XX)F2,F3,F10快捷键 (XX)TYPE3 CAM模块 (XX)创建刀具路径 (XX)刀具路径目录 (XX)TYPE3与其它软件的并用 (XX)软件的安装与设置安装将光盘放入光驱,双击X:\type3\type3v4200\setup.exe.依提示安装,重新启动电脑.默认的安装目录是c:\vision.双击桌面上的TYPE3图标,初次运行会出现加入机器的界面,入下图。
点击“+”,指向CNC机器下的AXYZ G-CODE TPWIN,点加入,进入接口设置,点击前一个确认即可。
进入设置机器的窗口,点“确认”。
再点击下一界面的“退出”。
这时我们将伴着节奏音乐进入TYPE3的世界。
设置按键盘上的F10或者点击菜单栏的“编辑”里“选项”,点击“可雕刻页”标签,依下图设置。
点“确定”退出。
点击菜单栏里“更改”下的“可雕刻页”,如下图设置。
点“确定”退出。
用画图工具里的矩形在页面上画适当大小的矩形,进入CAM模块。
用扫描计算刀具路径,在刀具库中选择一把锥刀,在扫描的经过参数里将覆盖率改为40%,点“确认”。
这时在刀具路径根目录下的层次1里出现“扫描”,右键单击,如下图。
点击“机器工作”,出现“机床工作”界面。
如下图。
选择第二个。
选择第一个点份额,将初始位置与结束位置中的Z改为5mm。
点“确认”退出。
点击“文件”,再点“更改”,如下图。
将c:\vision\draws\ 改成e:\daolu,点“确认”注意:一般我们将TYPE3产生的刀具路径文件集中放在一个文件夹里,所以先在其它驱动器里创建一个文件夹,比方说e:\daolu。
中望3D如何高效修改后处理
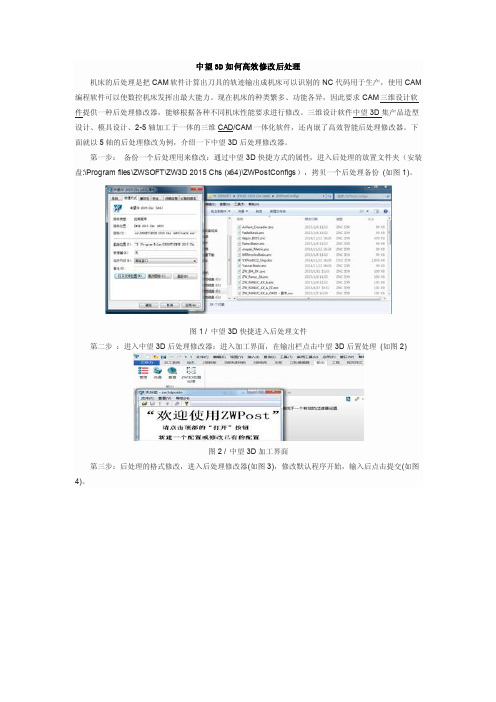
中望3D如何高效修改后处理机床的后处理是把CAM软件计算出刀具的轨迹输出成机床可以识别的NC代码用于生产,使用CAM 编程软件可以使数控机床发挥出最大能力。
现在机床的种类繁多、功能各异,因此要求CAM三维设计软件提供一种后处理修改器,能够根据各种不同机床性能要求进行修改。
三维设计软件中望3D集产品造型设计、模具设计、2-5轴加工于一体的三维CAD/CAM一体化软件,还内嵌了高效智能后处理修改器。
下面就以5轴的后处理修改为例,介绍一下中望3D后处理修改器。
第一步:备份一个后处理用来修改:通过中望3D快捷方式的属性,进入后处理的放置文件夹(安装盘:\Program files\ZWSOFT\ZW3D 2015 Chs (x64)\ZWPostConfigs),拷贝一个后处理备份(如图1)。
图1 / 中望3D快捷进入后处理文件第二步:进入中望3D后处理修改器:进入加工界面,在输出栏点击中望3D后置处理(如图2)图2 / 中望3D加工界面第三步:后处理的格式修改,进入后处理修改器(如图3),修改默认程序开始,输入后点击提交(如图4)。
图3 / 后处理修改器图4 / 修改默认程序第(CAD打印jpg图纸时不清晰怎么办/jishushequ/zwcadwenti/1312.html)四步:后处理的运动范围与参数,修改A轴B轴的运动范围(如图5),修改点公差和面公差提交(如图6)。
图5 / 修改轴运动范围图6 / 修改点公差和面公差第五步:保存修改好的后处理,点击保存即完成修改(如图7)。
图7 / 保存通过以上的操作可以看出,中望3D后处理修改器简单高效的,非常容易上手。
此外,中望3D2015的CAM模块还拥满足CAM加工数字化的其它功能应用。
后处理修改
后处理修改MasterCAM后处理修改特殊技巧一.1 MasterCAM后处理修改特殊技巧:Scrollex EDIT另外:输出字母的大小写修改方式不知如何更改。
注:若要修改下述相应功能则直接查找红色下划线语句即可。
①、 MasterCAM后处理输出文件格式设置sextnc MIN #NC Program Extension for Okuma上述语句表示输出格式为MIN格式。
若没有可以新建。
“.Trun”格式表示车床专用。
需要的格式修改MIN即可,如MPF,NC,H,TXT等这样就不必每次为输出什么样的格式费神了。
我就经常用MPF 和NC、H几种格式,为每种格式编制一个后处理或通用一个均比较方便。
②、“Arcoutput”控制语句控制圆弧输出格式,设置值若为“0”表示输出为“IJK”格式;若设置值为“1”则输出圆弧格式为“R”。
“arctype”控制输出圆弧类型,若为“1”则表示由圆心确定;若为“2”则表示由起点(Start)指向圆心(Center),2=St-Ctr;若为“3”表示由圆心指向起点,3=Ctr-St;若为“4”表示非增量。
arcoutput : 0 #0 = IJK, 1 = R no sign, 2 = R signed neg. over 180arctype : 1 #Arc center 1=abs, 2=St-Ctr, 3=Ctr-St ,4=unsigned inc.③、“Omitseq”控制语句控制序列号输出,若设置值为“Yes”则忽略序列号,不输出,若设置值为“No”则不忽略即输出序列号。
④、“Spaces”控制语句控制空格输出,若设置值为“0”表示不输出空格即紧凑输出,若设置值为“1”表示输出空格即在每个“X,Y,R,F”等控制语句前加一空格。
⑤、若要查找每一条输出语句的作用及位置则在输出语句后加上标语句即可。
一般输出语句的格式为:pbld, n, "M6", e(其中pbld为输出开头,n为序列号,“”引号内为直接输出字符,e为结束语句。
type3使用教程
(type3使用教程)如何安装type32013-05-23 作者:佚名来源:本站整理浏览:3245 评论:0Type3能精确计算三维刀具路径,优化机器加工轨迹,并最终产生数控加工机器轨迹,并最终产生数控加工机器代码。
可以自由地选择锥型、球型、圆柱型等各种刀具和钻头,进行雕刻加工。
type3下载点此进入一.装type31.放入光盘于光驱中2.打开“我的电脑”,选择光盘并双击3.双击“TYPE3V4200”4.双击“SETUP”5.双击“NEXT”6.双击“YES”7.双击“NEXT”8.双击“NEXT”9.双击“NEXT”10.双击“NEXT”11.双击“NEXT”12.双击“NEXT”,此时电脑会自动安装,可以休息一会儿13.单击“FINISH”,电脑重新启动二.解压1.打开“我的电脑”,选择光盘并双击2.双击“TYPE3V4200”3.双击“crack1”4.单击“APPLY”5.单击“确定”6.双击“crack2”7.单击“APPLY”8.单击“确定”,此时解压已经完成三.改“后处理器”1.回到桌面,双击type3图标2.点“加入机器”前面的加号“+”3.点“CNC机器”前面的加号“+”4.选择“Fanuc 16M/Fanuc 0M”,使其成为绿色底5.单击右下角的“加入”6.单击任一“确认”7.单击右边的“后处理器……”8.把滚动条往下拉,将Nmax=999999中的6个“9”改为10个“9”9.把滚动条往下拉,将HeadpcrSz0=p中的“p”改为大写“/ROC/0”HeadpcrSz1=G91。
G28HeadpcrSz2=t 等于号“=”HeadpcrSz3=M6 后面删除.10. 将EndpcrSz0=M17中的“17”改为“05”11.单击右上角的“确认”12.将最小X:-200.000mm 最大:200.000mm改为:-2000.00mm 改为:2000.00mm最小Y:-200.000mm 最大Y:200.000mm改为:-2000.00mm 改为:2000.00mm最小:-100.000mm 最大:100.000mm改为:-50.00mm 改为:50.00mm 13.单击“确认”14.单击“退出” (此时会自动弹出type3界面)四.更改可雕刻页及选项以“RS-1208”为例(根据自己的机型设置,深度都一样)按F10,需改以下参数a.通用取消步数:10改为30自动保存:20改为3单击“声音”:将勾号去掉b.显示单击“显示浮雕”:将勾号去掉c.可雕刻页宽度改为“1200mm” (L)左留边:0mm(R)右留边:0mm高度改为“800mm” (B)底留边:0mm(T)顶留边:0mm深度改为“150mm” 顶边:0mm底边:0mmd.计算参数:单击“人工”,使其选中,0p1改为“2”。
TYPE3安装方法

TYPE3安装方法TYPE3是一种用于CAD/CAM软件的插件,可以帮助用户在设计和加工过程中实现更高的精度和效率。
安装TYPE3插件可能对一些用户来说是一项挑战,但只要按照正确的步骤进行操作,就可以顺利完成安装。
本文将介绍TYPE3插件的安装方法,帮助用户顺利使用这一强大的工具。
1. 下载安装程序。
首先,用户需要从官方网站或授权的渠道下载TYPE3的安装程序。
确保下载的安装程序是最新版本,以便获得最新的功能和修复bug。
一旦下载完成,用户可以双击安装程序来开始安装过程。
2. 安装向导。
安装程序会启动一个安装向导,用户需要按照向导的指示逐步进行操作。
首先,用户需要选择安装语言,然后点击“下一步”继续。
接下来,用户需要阅读并接受许可协议,然后点击“下一步”。
3. 选择安装位置。
在安装向导的下一步中,用户需要选择TYPE3插件的安装位置。
通常情况下,安装程序会默认选择一个合适的位置,用户可以选择接受默认设置,也可以点击“浏览”来选择其他位置。
一旦选择好安装位置,用户可以点击“下一步”继续。
4. 完成安装。
安装向导会显示一个安装概要,用户需要确认所选择的安装选项是否正确,然后点击“安装”按钮开始安装过程。
安装程序会自动将文件复制到所选择的安装位置,并创建必要的快捷方式和注册表项。
一旦安装完成,用户可以点击“完成”按钮退出安装向导。
5. 激活插件。
安装完成后,用户需要激活TYPE3插件才能开始使用。
通常情况下,用户会收到一封包含激活码的电子邮件,用户需要将激活码输入到插件中进行激活。
如果用户没有收到激活码,可以联系官方客服进行获取。
6. 配置CAD/CAM软件。
安装完成并激活插件后,用户需要将TYPE3插件与所使用的CAD/CAM软件进行配置。
这通常需要在软件的插件管理界面中添加TYPE3插件,并设置相关参数。
具体的配置步骤可能会因软件版本而异,用户可以参考官方文档或向厂商咨询。
7. 测试和调试。
最后,用户需要对安装的TYPE3插件进行测试和调试,确保插件可以正常工作。
车床后处理器的操作1
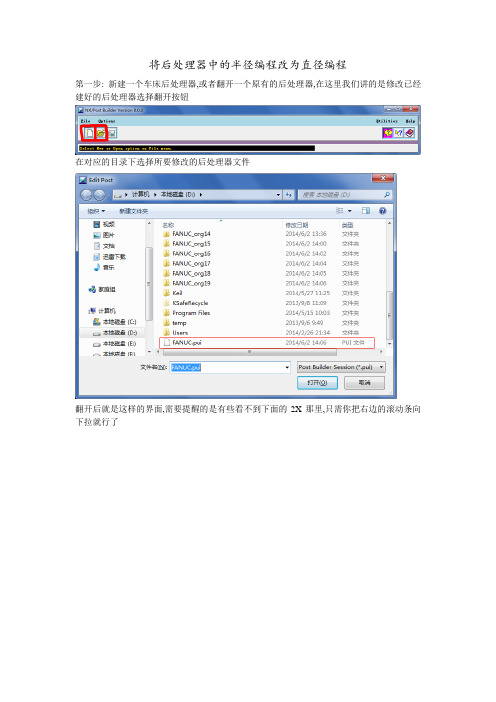
将后处理器中的半径编程改为直径编程第一步: 新建一个车床后处理器,或者翻开一个原有的后处理器,在这里我们讲的是修改已经建好的后处理器选择翻开按钮在对应的目录下选择所要修改的后处理器文件翻开后就是这样的界面,需要提醒的是有些看不到下面的2X那里,只需你把右边的滚动条向下拉就行了OK这里我们就修改好了直径编程,但是如果你生成一个G代码文件的话那么你会发现里面的圆弧插补全部是用的I、J、K坐标编程的,这样不方便我们人工阅读,那么我们能不能把他改成半径R的模式编程呢,答案是没有问题的接下来的操作就是翻开N/C Data这个目录选中这里然后将I K拖到右上角的垃圾筒里面〔鼠标左键按住不放,然后拖动〕然后按下面的步骤选择,将R-Arc选中然后将Add Word点住不放,拖到F前面再在R上点右键选择第一个修改选中NO然后点OK这里的No是什么意思呢,相当于就是模态指令,中选择yes过后那么后边出现的R将会被省略掉,举个简单的列子,当你用直线插补的时候前面输了一个G01后面的即便你没有写G01默认的就全部是G01了,直到G00出现才会被认为是G00那么这里我们是不需要这样的,为了防止出错,我们每一处该加R的地方都加上。
然后这样编出来的就是R的圆弧插补了,这里还需要改一下,因为西门子和法拉克的系统每分进给和每转进给的G代码不同把它改成法拉克能识别的代码这里就把最重要的几个个地方修改了,其实还有一些地方需要修改,但是重要性没这么重要,例如这里编出来的程序开头的地方有G28回原点,也有G92 G90这些代码,但是这些只是在开头的地方有,我们只需将程序里面的修改就行了,具体的在这后处理器里面怎么修改就不一一介绍了,你们自己去摸索吧。
这里是小弟自己总结出来的,如果有哪里不够完美的话望多多指教,另外编出来的程序自己都要先看看对不对然后才能上机床上试验的,这里是切记的。
Type3软件安装及操作
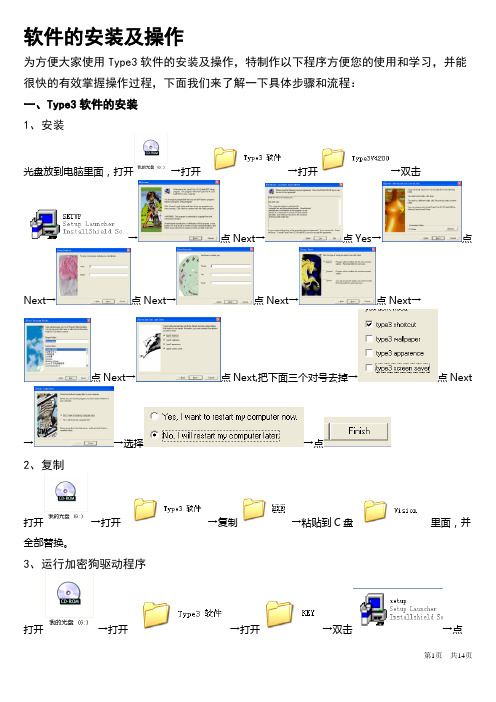
软件的安装及操作为方便大家使用Type3软件的安装及操作,特制作以下程序方便您的使用和学习,并能很快的有效掌握操作过程,下面我们来了解一下具体步骤和流程:一、Type3软件的安装1、安装光盘放到电脑里面,打开→打开→打开→双击→点Next→点Yes→点Next→点Next→点Next→点Next→点Next→点Next,把下面三个对号去掉→点Next→→选择→点2、复制打开→打开→复制→粘贴到C盘里面,并全部替换。
3、运行加密狗驱动程序打开→打开→打开→双击→点Next→点Next→点Next→点Install→点(注:KEY运行两遍)4、type3设置打开桌面上会出现“设置机器”→点开“加入机器”→点开“雕刻机”→选中“HPGL3D_001”→点“加入”→点“确定”→输入此数值根据机器外形尺寸大小确定,最大为正数,最小为负数。
(例如机器外形尺寸为3000X10000,那么最小X:-3000 最大:3000最小Y:-10000 最大Y:10000)→点“确认”→点“退出”→→点“编辑”→点“选项”→→→点“显示”→把每步移动:改为“1”→点“确定”→把左边的工具栏全点开,拖到上面→上面显示为→把鼠标移到上面,点→按F2→随便设置个长宽,如长100,宽100→点→再按空格键→右击我们画的图形,直到我们能看清楚为止→拖动图形上的线,不松手并按F2→选上面的→把X,Y,Z全改为0→点→点→点前面的加号→点前面的加号→双击“绘图”→点“确定”→把文件保存在你所使用的文件夹内→点→→右击空白处→点“增加刀具”(割缝的设置:根据切割钢材的厚度,使用割嘴的大小,速度的快慢及压力大小等情况来确定割缝大小,一般3-20mm板厚的割缝在2mm左右,其他情况根据试割的缝隙大小来确定割缝大小,这样才能精确的控制尺寸)→按此填写选择此刀具设置割缝的大小→点“确定”→→点“确定”→再点“确定”→→→右击→点“机器工作”→→把“测试”改为“文件”→点→→点“继续”→点“继续”→点“取消”→Type3设置好了,可以把软件关掉了二、Type3软件操作首先我们来介绍一下软件的使用说明,因为大家对CAD画图比较熟悉,所以先从导入图形入手进行讲解。
Type3解密安装说明书
Type3解密安装说明书运行TYPE3V4200文件夹里的setup.exe文件开始安装。
安装过程一直点击下一步即可。
安装完成点击重新启动计算机重起完毕打开解密文件CRACK1.EXE 按Apply进行解压解压到安装目录的/exe文件夹下解压完成退出继续打开 CRACK2.EXE 按Apply进行解压解压到安装目录下解压完成退出(安装时推荐默认目录即可)注意:Crack解密文件安装目录要与Type3软件安装目录下面安装完成后,打开桌面的Type3 (4.2.0.0)首次打开跳出 < 设置机器 >对话框点击加入机器前面的+号、点击所有类型机器前面的+号选者Fanuc16M/fanuc OM (键盘上按8下F键即可到达)点击加入跳出 <设置接口>(接口默认为:无)直接点第一个确认跳出设置机器画面:首先点击:后处理器设置后处理器对话框——在右边滚动条下面点击2次 (滑块和最下面的↓按扭之间)点2下以后可以看到把Nmax=999999 (原6个9该为:Nmax=999999999 (该为9个9↑此为输入文件的最大容量再继续点下滚动条下3下:显示HeadPcrNb=7HeadPcrSz0=pHeadPcrSz1=G91 G28 Y0 Z0HeadPcrSz2=tHeadPcrSz3=M6HeadPcrSz4=sHeadPcrSz5=G0 G90 G54xyHeadPcrSz6=G43dz M8EndPcrNb=3EndPcrSz0=M17EndPcrSz1=M30EndPcrSz2=p0修改后显示HeadPcrNb=7HeadPcrSz0=p ____广告机:广告机DSP系统或ARM系统用户修改0=/ROC/0HeadPcrSz1=HeadPcrSz2=HeadPcrSz3=HeadPcrSz4=sHeadPcrSz5=G0 G90 G54xyHeadPcrSz6=G01dz M8EndPcrNb=3EndPcrSz0=M05EndPcrSz1=M30EndPcrSz2=修改分析:修改前和修改后的区分是o=p不改,____广告机:广告机DSP系统或ARM系统用户修改0=/ROC/01、2、3=后面的数字是删掉。
MastercamX3软件后处理文件的更新与设置分析
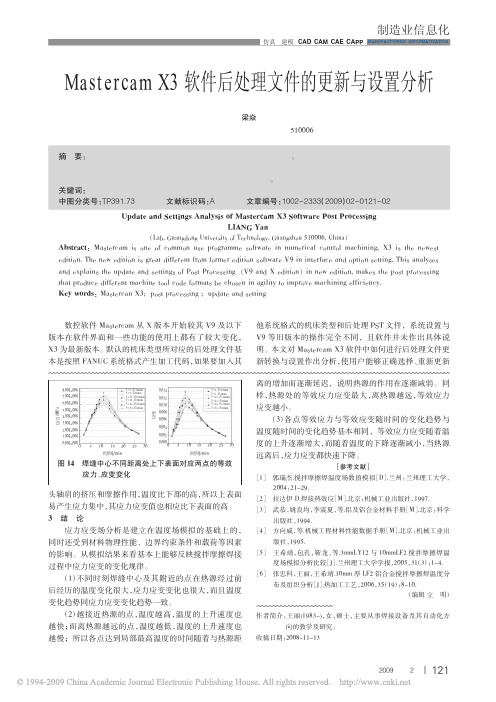
(2)越接近热源的点,温度越高,温度的上升速度也 越快;而离热源越远的点,温度越低,温度的上升速度也 越慢;所以各点达到局部最高温度的时间随着与热源距
2004:21-29. [2] 拉达伊 D.焊接热效应[M].北京:机械工业出版社,1997. [3] 武恭,姚良均,李震夏,等.铝及铝合金材料手册[M].北京:科学
西门子数控系统与 FANUC 数控系统有较大区别,必
须根据数控机床的结构、控制系统的编程原理和通信接
口的要求进行修改,一般可通过修改 C:\Mcam9\Mill\Posts
中的 Mpfan.pst 得到适合于西门子数控系统格式要求的
后处理文件,改名后保存。
启动 Mill 进入软件界面后,可
直接使用 [C 绘图]、[M 修整]、[X
图 2 添加机床类型
通过更新后处 理文件,在[M 机床 类型]、[铣床] 选项 中除默认项和 22 个
原机床类型外增加了第 23 个 SIEMENS.MMD(图 2)。使用
软件编程时直接选择SIEMENS.MMD,此时[刀具路径管理
器]显示机床属性:依照 Updatepost.dll 创建机床定义,其
版进行更新,同样可以建立新的机床类型文件 MMD 并按
照对应的后处理格式产生加工代码。
需要注意的是 V9 版 PST 文件与 X 版后的 PST 文件
在其格式上已有区别,以下是修改过的 SIEMENS.pst 可
产生西门子程序头代码格式的部分编译文件。
V9 格式: "%_N_",progname,"_MPF",e "; SPATH=/_N_MPF_DIR",e "G54 G00 G90 G64",e ……
Type3 安装及参数修改
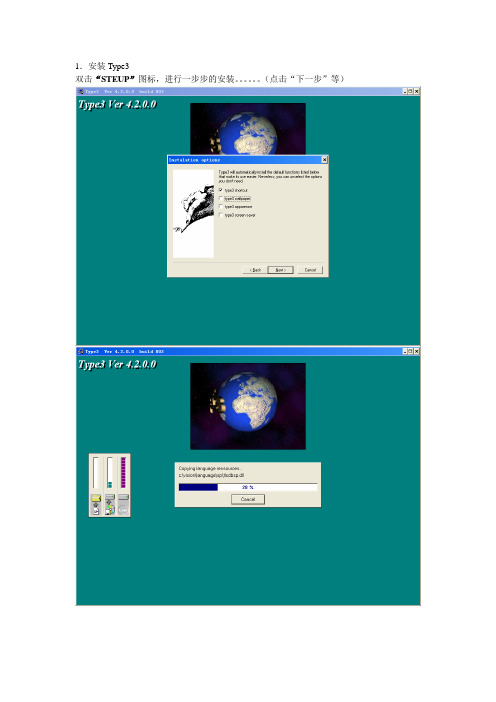
1.安装Type3
双击“STEUP”图标,进行一步步的安装。
(点击“下一步”等)
最后一步:点击“No,I will restart computer later”安装结束!
2.对Type3进行解密:
运行光盘上:type3\crack\crac1.exe文件进行升级
运行光盘上:type3\crack\crac2.exe文件进行升级
拷贝光盘上文件:type3\crack\config.dtk到安装目录vision\datakit中
拷贝光盘上文件:type3\crack\SD3025S.mac到安装目录vision\postpro中
3.Type3后处理器的设置:
双击桌面上的Type3图表,自动弹出“设置机器”的窗口:(如果没弹出直接进入Ttpe3,就点击“操作机器”下的“加入机器”)
然后我们点击“加入机器”
点击“所有类型机器”
将滚动条拉到最后:选中“同心SD3025S/D”
点击“加入”,选择“无”点击“确认”
修改机器的“总尺寸”(以SD-3025为例),其它保持不变
修改后为:然后点击“确认”,“退出”
修改可雕刻页:选择菜单栏的“更改”,“可雕刻页”
弹出“可雕刻页”菜单,进行修改(以SD-3025为例)
修改后为:点击“确认”
选择菜单栏的“编辑”“选项”
弹出窗口“选项”:
修改(以SD-3025为例)后为:点击“确认”
随意画个图形:
进入“CAM”模块,将图形进行“绘图”,计算刀具路径
将路径“机器工作”后,“Z细分”选择“无”
将“份额”中的“Z”进行修改:
修改后为:点击“确认”
将锁打开后,点击“文件”然后“执行”,检查生成的文件代码,正确即可!。
Type3安装说明
自动熔化--打勾
拉角脚--打勾
OP0--17
1 install Tຫໍສະໝຸດ pe3 4200 2 复制“crack” 里面的所有文件,粘贴覆盖 type3的已安装文件夹里面
3 安装完成后,运行程序,按以下步骤进行参数设置:
加入机器---选择 CNC机器---选择 Fanuc16M/Fanuc OM
设置机器---后处理器---Nmax= 加3个9以上
留边 0
制作字模后,选择CAM模块--二维刀具选择一个(一般为0.3、0.5的刀)--机器工作---份额---曲线化
刀具通常设定为(0.3、15、3.25) 内切割、调整刀具、深度 1mm
HeadPcrSz0、1、2、3 等号以后的字符除去(注意:仅去除4个等号后的几个字符,不是3=以后的所有字符)--确定
总尺寸: X设后 正负2000以上
Y 正负2000以上
最小 正负1000以上
按F10 选择 “选项” 设定:1、计算参数
OP1--2
2、可雕刻页: 宽度 650
高度 900
深度 110
Type3-雕刻机设置
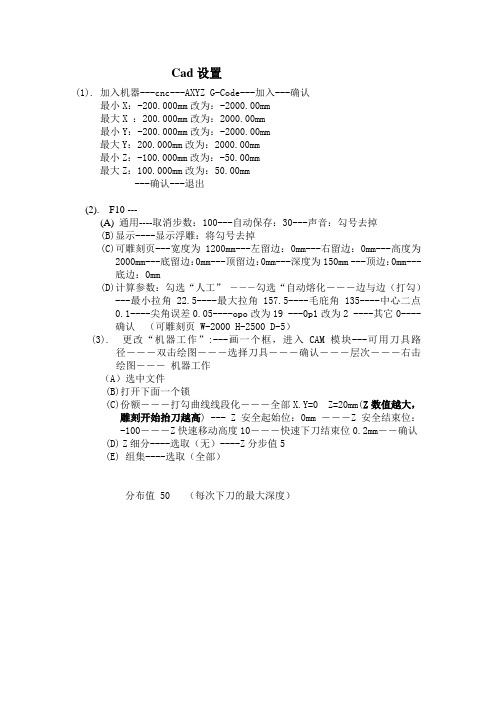
Cad设置(1). 加入机器---cnc---AXYZ G-Code---加入---确认最小X:-200.000mm改为:-2000.00mm最大X :200.000mm改为:2000.00mm最小Y:-200.000mm改为:-2000.00mm最大Y:200.000mm改为:2000.00mm最小Z:-100.000mm改为:-50.00mm最大Z:100.000mm改为:50.00mm---确认---退出(2). F10 ---(A) 通用----取消步数:100---自动保存:30---声音:勾号去掉(B)显示----显示浮雕:将勾号去掉(C)可雕刻页---宽度为1200mm---左留边:0mm---右留边:0mm---高度为2000mm---底留边:0mm---顶留边:0mm---深度为150mm ---顶边:0mm---底边:0mm(D)计算参数:勾选“人工”―――勾选“自动熔化―――边与边(打勾)---最小拉角22.5----最大拉角157.5----毛庇角135----中心二点0.1----尖角误差0.05----opo改为19 ---0p1改为2 ----其它0----确认(可雕刻页 W-2000 H-2500 D-5)(3). 更改“机器工作”:---画一个框,进入CAM模块---可用刀具路径―――双击绘图―――选择刀具―――确认―――层次―――右击绘图―――机器工作(A)选中文件(B)打开下面一个锁(C)份额―――打勾曲线线段化―――全部X.Y=0 Z=20mm(Z数值越大,雕刻开始抬刀越高) --- Z安全起始位:0mm ―――Z安全结束位:-100―――Z快速移动高度10―――快速下刀结束位0.2mm――确认(D)Z细分----选取(无)----Z分步值5(E) 组集----选取(全部)分布值 50 (每次下刀的最大深度)雕刻机设置---1 Ncstydio加工参数手底 10000手高 10000空 10000加 10000打勾使用缺……打勾使用缺……打勾速度自……空 IJK……打勾使用Z向下……300mm/分钟打勾优画Z…….打勾空程(G00)……打勾暂停或…..空X 空Y换刀位空使用换刀位X:0 Y:0 Z:0退刀点设为20mm文件输入二维2 抬高5PTL 40打勾Z反向厂商参数起X 0 终X 1300Y 0 Y 2500Z -150 Z 0对刀块12mm电机参数X 0.0098175 起跳100Y 0.0098175Z 0.0098175 Z速5000加速度单200弯500主参数主高24000主启6000雕刻机设置---2 Ncstydio加工参数手底 6000手高 8000空 800加 600打勾使用缺……打勾使用缺……打勾速度自……空 IJK……(工厂)打勾使用Z向下……300mm/分钟打勾优画Z…….打勾空程(G00)……打勾暂停或…..空X 空Y换刀位空使用换刀位X:0 Y:0 Z:0退刀点设为10m文件输入二维2 抬高5PTL 40打勾Z反向厂商参数起X 0 终X 1300Y 0 Y 2500Z -150 Z 0对刀块12mm电机参数X 0.0098175 起跳100Y 0.0098175Z 0.0098175 Z速5000加速度设定单200设定弯500主参数主高24000主启6000。
Type3软件操作方法
Type3软件操作方法Type3软件操作方法1.双击打开type3(或者右击——打开),如下图。
2.单击文件——输入,如下图。
3.然后选择已经做好的文件路径,文件名,文件格式等(注:本type3只支持文件类型下的所有格式,最多的是EPS,DXF,PLT等)如下图。
4.单击打开。
这个时候文件已经在type3里面了。
5.然后选择工具箱中的选取工具。
如下图。
6.然后把途中的文件移动到页面的左下角,(移动的方法有两个①移动的同时按F2,在跳出来的窗口如图一中单击相对原点移动,然后把方向改为左下角,然后把X,Y,Z坐标改为0,如图二图一图二②在软件的最下面有一个锁,并且把它锁上如下图,然后用选取工具拖动就可以了,如下图。
)7.然后单击CAM模块进去编导程序,如下图。
8.单击创建刀具路径进去编刀路径列表中如下图。
9.在弹出来的窗口中双击二维切割,如下图。
10.接着会跳出来一个提示框,单击确定如下图。
11.单击好确定以后会跳出来一个保存文件对话框,直接单击保存就可以,这个是做个备份使用的,如下图。
12.在跳出来的窗口中选择刀具参数和切割深度如下图。
13.单击右侧的刀具参数进入刀具编辑,如下图。
14.输入刀的刀的名称,直径,及长度如图一和图二。
图一刀的名称及直径图二,刀的长度15. 然后再设置刀切割深度,如下图。
16. 单击刀具路径一览表,如下图。
下图。
18.单击文件后面的更改如下图。
19.输入文件名,然后单击确认,如下图。
20.然后再单击执行,如下图。
21.在弹出来的提示框中单击继续,如下图。
22.然后软件会自动执行,接着把窗口关掉就可以了。
Type3后处理器的设置方法-Autodeskforums
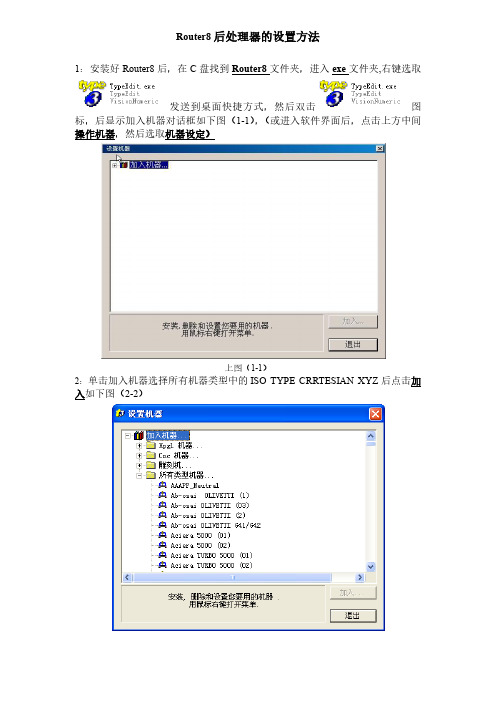
Router8后处理器的设置方法1:安装好Router8后,在C盘找到Router8文件夹,进入exe文件夹,右键选取发送到桌面快捷方式,然后双击图标,后显示加入机器对话框如下图(1-1),(或进入软件界面后,点击上方中间操作机器,然后选取机器设定)上图(1-1)2:单击加入机器选择所有机器类型中的ISO TYPE CRRTESIAN XYZ后点击加入如下图(2-2)上图(2-2)3:点击机器设置中的后处理器如下图(3-3)上图(3-3)4:在机器设置的滚动条空白处单击两下将Nmax=9999改为Nmax=99999999如下图(4-4)修改前上图(4-4-1)5:点击下滚动条将HeadPcrSz0=%p改为HeadPcrSz0=O1(大写欧1),将HeadPcrSz1=(AXE XYZ),HeadPcrSz2=t M6,等号后的值删除。
如下图(5-5)修改前上图(5-5-1)6:点击下滚动条将EndPcrNb=2改为EndPcrNb=3,将EndPcrSz0=M2改为EndPcrSz0=M05,将EndPcrSz1=p0改为EndPcrSz1=M30,将EndPcrSz2=改为EndPcrSz2=%如下图(6-6)。
修改完成后点击确认,然后保存。
修改前上图(6-6-1)7:将设置机器总尺寸最小(X,Y,Z),最大(X,Y,Z)中的值后面加上3-4个零, 名称中可设置成相应的机器类型后点击确定后退出修改前图(7-7-1)8:确认退出保存后,会自动进入Router8界面,然后点击右上角编辑、进入选项上图8-1进入选项后,把通用中数值,改为如图8-2加黑框处数据:通用上图8-2修改可雕刻页中数值,如图8-3加黑框处。
(图中数据只作为参照,修改时请按照当前使用机床的型号和加工行程修改)可雕刻页上图8-3把通用计算参数中设置,改为如图8-4加黑框处设置通用计算参数上图8-4把特别计算参数中设置,改为如图8-5加黑框处设置特别计算参数上图8-5以上修改完成后,点击确定保存设置。
- 1、下载文档前请自行甄别文档内容的完整性,平台不提供额外的编辑、内容补充、找答案等附加服务。
- 2、"仅部分预览"的文档,不可在线预览部分如存在完整性等问题,可反馈申请退款(可完整预览的文档不适用该条件!)。
- 3、如文档侵犯您的权益,请联系客服反馈,我们会尽快为您处理(人工客服工作时间:9:00-18:30)。
Router8后处理器的设置方法1:安装好Router8后,在C盘找到Router8文件夹,进入exe文件夹,右键选取发送到桌面快捷方式,然后双击图标,后显示加入机器对话框如下图(1-1),(或进入软件界面后,点击上方中间操作机器,然后选取机器设定)上图(1-1)2:单击加入机器选择所有机器类型中的ISO TYPE CRRTESIAN XYZ后点击加入如下图(2-2)上图(2-2)3:点击机器设置中的后处理器如下图(3-3)上图(3-3)4:在机器设置的滚动条空白处单击两下将Nmax=9999改为Nmax=99999999如下图(4-4)修改前上图(4-4-1)5:点击下滚动条将HeadPcrSz0=%p改为HeadPcrSz0=O1(大写欧1),将HeadPcrSz1=(AXE XYZ),HeadPcrSz2=t M6,等号后的值删除。
如下图(5-5)修改前上图(5-5-1)6:点击下滚动条将EndPcrNb=2改为EndPcrNb=3,将EndPcrSz0=M2改为EndPcrSz0=M05,将EndPcrSz1=p0改为EndPcrSz1=M30,将EndPcrSz2=改为EndPcrSz2=%如下图(6-6)。
修改完成后点击确认,然后保存。
修改前上图(6-6-1)7:将设置机器总尺寸最小(X,Y,Z),最大(X,Y,Z)中的值后面加上3-4个零, 名称中可设置成相应的机器类型后点击确定后退出修改前图(7-7-1)8:确认退出保存后,会自动进入Router8界面,然后点击右上角编辑、进入选项上图8-1进入选项后,把通用中数值,改为如图8-2加黑框处数据:通用上图8-2修改可雕刻页中数值,如图8-3加黑框处。
(图中数据只作为参照,修改时请按照当前使用机床的型号和加工行程修改)可雕刻页上图8-3把通用计算参数中设置,改为如图8-4加黑框处设置通用计算参数上图8-4把特别计算参数中设置,改为如图8-5加黑框处设置特别计算参数上图8-5以上修改完成后,点击确定保存设置。
9:任意画一个图形,进入雕刻加工页面(CAM模块),选取图形任意计算一个路径,然后进入机器工作界面,如图9-1黑框处进入机器工作界面后,按照如图9-2加黑框处设置上图9-2设置完成后,点击右上角份额,进入份额界面如图9-3-1,然后按照入图9-3-2加黑框处设置上图9-3-1上图9-3-2以上操作完成后,点击确认,退出份额界面,在机器工作界面,点击确认,然后点击执行,后处理器设置完成。
如图9-4上图9-4Router8 post processor setting method1: After installing Router8, find the Router8 folder on the C drive, enter the exe folder, right-click to send the shortcut to the desktop, and then double-click the icon, then display the dialog box for joining the machine as shown below (1-1), (or enter the software After the interface, click on the upper middle to operate the machine, then select the machine settings)Above (1-1)2: Click Join Machine to select ISO TYPE CRRTESIAN XYZ in all machine types and click to add as shown below (2-2)Above (2-2)3: Click on the post processor in the machine settings as shown below (3-3)Above (3-3)4: Click twice in the blank space of the scroll bar set by the machine to change Nmax=9999 to Nmax=99999999 as shown below (4-4)Before modification, above (4-4-1)After modification, the above picture (4-4-2)5: Click the scroll bar to change HeadPcrSz0=%p to HeadPcrSz0=O1 (uppercased Euro 1), and remove HeadPcrSz1=(AXE XYZ), HeadPcrSz2=t M6, and the value after the equal sign. As shown below (5-5)Before modification (5-5-1)After modification, the above picture (5-5-2)6: Click the scroll bar to change EndPcrNb=2 to EndPcrNb=3, EndPcrSz0=M2 toEndPcrSz0=M05, EndPcrSz1=p0 to EndPcrSz1=M30, EndPcrSz2= to EndPcrSz2=% as shown below (6-6 ). Click OK when the modification is complete, then save.Before modification (6-6-1)After modification, the above picture (6-6-2)7: Set the total machine size to the minimum (X, Y, Z), and add 3-4 zeros to the value in the maximum (X, Y, Z).Name can be set to the corresponding machine type, click OK to exitBefore modification (7-7-1)Modified Figure (7-7-2)8: After confirming to exit the save, it will automatically enter the Router8 interface, then click onthe upper right corner to edit and enter the option.Figure 8-1 aboveAfter entering the option, change the value in the common to the data in the black box as shown in Figure 8-2:General purposeFigure 8-2 aboveModify the value in the engratable page, as shown in Figure 8-3. (The data in the figure is only for reference. Please modify it according to the model and processing stroke of the current machine tool.)Engravable pageFigure 8-3 aboveSet the general calculation parameters to be changed to the black box as shown in Figure 8-4.General calculation parametersFigure 8-4 aboveSet the special calculation parameters to be changed as shown in Figure 8-5 and black box.Special calculation parametersFigure 8-5 aboveAfter the above changes are completed, click OK to save the settings.9: Arbitrarily draw a graphic, enter the engraving processing page (CAM module), select the graphic to calculate a path arbitrarily, and then enter the machine working interface, as shown in Figure 9-1.Figure 9-1 aboveAfter entering the machine working interface, set it as black as shown in Figure 9-2.Figure 9-2 aboveAfter the setting is completed, click the share in the upper right corner, enter the share interface as shown in Figure 9-3-1, and then set it in the black box according to Figure 9-3-2.Figure 9-3-1 aboveFigure 9-3-2 aboveAfter the above operation is completed, click Confirm to exit the share interface. In the machine work interface, click Confirm, then click Execute, and the post processor setting is completed. As shown in Figure 9-4Figure 9-4 above。
